Agent quickstart
This quickstart guide walks you through setting up and running the TEN Agent to experiment with different AI models, speech services, and communication tools. Using the interactive TEN Agent playground you can test and configure AI agents to:
- Experiment with different AI models, TTS/STT systems, and real-time communication
- Test agent behavior in a controlled environment
- Configure extensions and modules through a visual interface
Prerequisites
Before starting, ensure you have:
-
Agora credentials from Agora Console
-
API keys for your chosen services
- LLM service like OpenAI or Google Gemini
- STT service such as Azure
- TTS service like ElevenLabs or Azure TTS
-
Development environment
Install one of the following:- Docker and Docker Compose (recommended)
- Node.js(LTS) v18
-
System requirements
- CPU: Dual-core processor or higher
- Memory: 4 GB RAM minimum
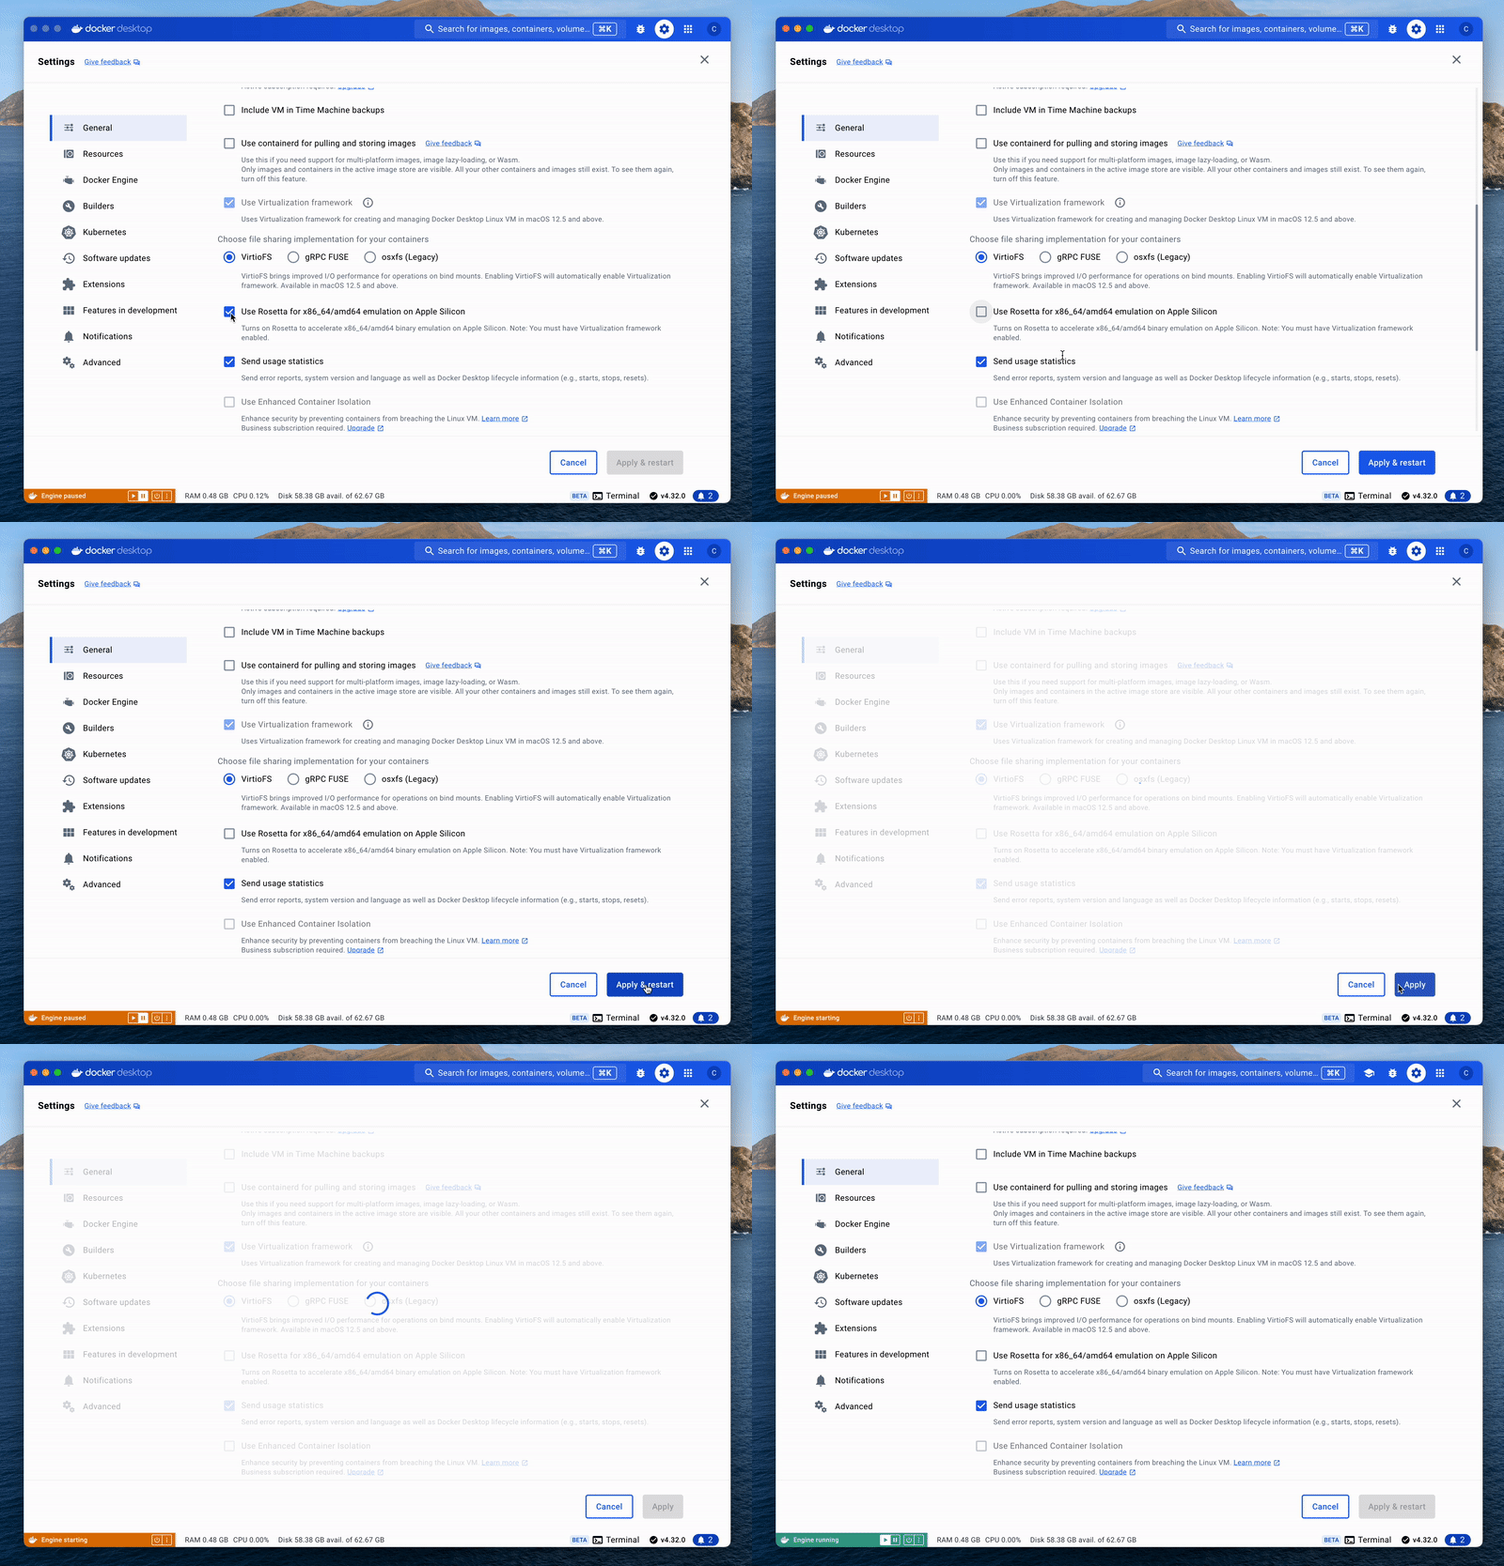
If you are using an Apple Silicon Mac, uncheck the Use Rosetta for x86/amd64 emulation checkbox in Docker Desktop settings. While this may slow ARM builds, it ensures proper performance on x64 deployment servers.

Set up the project
Start by getting the code and configuring the basic environment with your credentials.
Clone the repository
Configure environment
-
Switch to the project directory and create a
.envfile from the template: -
Open
.envand add your Agora credentials: -
Add API keys and other configuration parameters to the
.envfile for the LLM, STT, and TTS extensions you want to test. Following are some commonly used parameters:infoYou can also configure these API keys later through the playground interface.
Start Docker containers
Run the docker command to compose containers:
Build and run
Follow these steps to build and run TEN Agent:
-
Enter the development container
-
Build the agent
Use the following command to build the agent:
-
Start the web server
Configure your agent
The playground interface allows you to test different configurations and see results in real-time. Each graph type supports specific extensions and capabilities - Voice Agent for speech interactions, Realtime Agent for low-latency communication.
To get started:
-
Open the playground at
http://localhost:3000 -
Configure your agent:
-
Select a graph type (Voice Agent or Realtime Agent) from the dropdown.
-
Click the module configuration button. Select extension modules such as STT, TTS, and LLM from the panel. The system saves settings to
property.jsonwhen you click Save changes. For further details, see Configure modules. -
Click the settings button to configure extensions with required API keys and parameters. For further details, see Configure properties.
-
To configure STT and TTS languages, see Configure languages.
-

Modify the code directly
You can edit the configuration files directly if you prefer manual control. Open agents/property.json, locate the graph you want to modify, and update any values.
After saving your changes, refresh the playground page and reconnect to the agent. Your changes take effect immediately.
Reference
This section contains content that completes the information on this page, or points you to documentation that explains other aspects to this product.