# Recipes (/en/api-reference/recipes)
# SDKs (/en/api-reference/sdks)
## SDK catalog
The catalog below lists the latest available SDK release for each supported platform.
### TypeScript
#### Agora Agents SDK
SDK for: Conversational AI — build and run server-side voice agents
- Current release: Version 2.3.1 (Latest)
- Install with npm: `npm i agora-agents@2.3.1`
- Package manager: [Open package](https://www.npmjs.com/package/agora-agents/v/2.3.1)
### Python
#### Agora Agents SDK
SDK for: Conversational AI — build and run server-side voice agents
- Current release: Version 2.3.0 (Latest)
- Install with pip: `pip install agora-agents`
- Package manager: [Open package](https://pypi.org/project/agora-agents/)
### Go
#### Agora Agents SDK
SDK for: Conversational AI — build and run server-side voice agents
- Current release: Version 2.3.1 (Latest)
- Install with Go: `go get github.com/AgoraIO/agora-agents-go/v2@v2.3.1`
- Package manager: [Open package](https://pkg.go.dev/github.com/AgoraIO/agora-agents-go/v2@v2.3.1)
### Android
#### RTC Voice SDK
Voice only SDK for Calling, Interactive Live Streaming, and Broadcast Streaming
- Current release: Version 4.6.4 (Latest)
- Install with Gradle: `implementation 'io.agora.rtc:voice-sdk:4.6.4'`
- Package manager: [Open package](https://central.sonatype.com/artifact/io.agora.rtc/voice-sdk/4.6.4/aar)
- Download: [Download SDK](https://download.agora.io/sdk/release/Agora_Native_SDK_for_Android_v4.6.4_VOICE.zip)
#### RTC SDK
SDK for Video Calling, Interactive Live Streaming, and Broadcast Streaming
- Current release: Version 4.6.4 (Latest)
- Install with Gradle: `implementation 'io.agora.rtc:full-sdk:4.6.4'`
- Package manager: [Open package](https://central.sonatype.com/artifact/io.agora.rtc/full-sdk/4.6.4/aar)
- Download: [Download SDK](https://download.agora.io/sdk/release/Agora_Native_SDK_for_Android_v4.6.4_FULL.zip)
- Current release: Version 4.6.4 Lite (Latest)
- Install with Gradle: `implementation 'io.agora.rtc:lite-sdk:4.6.4'`
- Package manager: [Open package](https://central.sonatype.com/artifact/io.agora.rtc/lite-sdk/4.6.4/aar)
- Download: [Download SDK](https://download.agora.io/sdk/release/Agora_Native_SDK_for_Android_v4.6.4_LITE.zip)
#### Signaling SDK
SDK for Signaling
- Current release: Version 2.3.0 (Latest)
- Install with Gradle: `implementation 'io.agora.rtm:rtm-sdk:2.3.0'`
- Package manager: [Open package](https://central.sonatype.com/artifact/io.agora.rtm/rtm-sdk/2.3.0)
- Download: [Download SDK](https://download.agora.io/rtm2/release/Agora_RTM_JAVA_SDK_for_Android_v2.3.0.zip)
#### Chat SDK
SDK for Chat
- Current release: Version 1.4.0 (Latest)
- Install with Gradle: `implementation 'io.agora.rtc:chat-sdk:1.4.0'`
- Package manager: [Open package](https://search.maven.org/artifact/io.agora.rtc/chat-sdk/1.4.0/aar)
- Download: [Download SDK](https://download.agora.io/sdk/release/Agora_CHAT_SDK_for_Android_v1_4_0.zip)
#### IoT SDK
SDK for Embedded Devices
- Current release: Version 1.8.0 (no longer updated)
- Download: [Download SDK](https://download.agora.io/rtsasdk/release/Agora-RTSALite-LJAutRmAcAjCP-Android-v1.8.0-20230421_161341-262178.tgz)
#### Interactive Whiteboard SDK
SDK for Interactive Whiteboard
- Current release: Version 2.16.100 (Latest)
- Package manager: [Open package](https://github.com/netless-io/whiteboard-android/releases/tag/2.16.100)
#### Interactive Whiteboard Fastboard
SDK for: Interactive Whiteboard Fastboard
- Current release: Version 1.7.2 (Latest)
- Package manager: [Open package](https://github.com/netless-io/fastboard-android/releases/tag/1.7.2)
### iOS
#### RTC Voice SDK
SDK for Voice Calling, Interactive Live Streaming (voice only), and Broadcast Streaming (voice only)
- Current release: Version 4.6.4 (Latest)
- Install with Swift Package Manager: `https://github.com/AgoraIO/AgoraAudio_iOS`
- Package manager: [Open package](https://swiftpackageindex.com/AgoraIO/AgoraAudio_iOS)
- Download: [Download SDK](https://download.agora.io/sdk/release/Agora_Native_SDK_for_iOS_v4.6.4_VOICE.zip)
#### RTC SDK
SDK for Video Calling, Interactive Live Streaming, and Broadcast Streaming
- Current release: Version 4.6.4 (Latest)
- Install with Swift Package Manager: `https://github.com/AgoraIO/AgoraRtcEngine_iOS`
- Package manager: [Open package](https://swiftpackageindex.com/AgoraIO/AgoraRtcEngine_iOS)
- Download: [Download SDK](https://download.agora.io/sdk/release/Agora_Native_SDK_for_iOS_v4.6.4_FULL.zip)
- Current release: Version 4.6.4 Lite (Latest)
- Install with Swift Package Manager: `https://github.com/AgoraIO/AgoraLite_iOS`
- Package manager: [Open package](https://swiftpackageindex.com/AgoraIO/AgoraLite_iOS)
- Download: [Download SDK](https://download.agora.io/sdk/release/Agora_Native_SDK_for_iOS_v4.6.4_LITE.zip)
#### Signaling SDK
SDK for Signaling
- Current release: Version 2.3.0 (Latest)
- Package manager: [Open package](https://github.com/AgoraIO/AgoraRTM_iOS/tree/2.3.0)
- Download: [Download SDK](https://download.agora.io/rtm2/release/Agora_RTM_OC_SDK_v2.3.0.zip)
#### Chat SDK
SDK for Chat
- Current release: Version 1.4.0 (Latest)
- Package manager: [Open package](https://github.com/AgoraIO/AgoraChat_iOS.git)
- Download: [Download SDK](https://download.agora.io/sdk/release/AgoraChat1_4_0.zip)
#### Interactive Whiteboard SDK
SDK for Interactive Whiteboard
- Current release: Version 2.16.112 (Latest)
- Package manager: [Open package](https://github.com/netless-io/Whiteboard-iOS/releases/tag/2.16.112)
#### Interactive Whiteboard Fastboard
SDK for: Interactive Whiteboard Fastboard
- Current release: Version 1.4.2 (Latest)
- Package manager: [Open package](https://github.com/netless-io/fastboard-iOS/releases/tag/1.4.2)
### Web
#### RTC SDK
SDK for: Video Calling, Interactive Live Streaming, and Broadcast Streaming
- Current release: Version 4.24.8 (Latest)
- Install with npm: `npm i agora-rtc-sdk-ng@4.24.8`
- Package manager: [Open package](https://www.npmjs.com/package/agora-rtc-sdk-ng/v/4.24.8)
- Download: [Download SDK](https://download.agora.io/sdk/release/Agora_Web_SDK_v4_24_8_FULL.zip)
#### Signaling SDK
SDK for: Signaling
- Current release: Version 2.3.0 (Latest)
- Install with npm: `npm i agora-rtm-sdk@2.3.0`
- Package manager: [Open package](https://www.npmjs.com/package/agora-rtm-sdk/v/2.3.0)
- Download: [Download SDK](https://download.agora.io/rtm2/release/Agora_RTM_JavaScript_SDK_for_Web_v2.3.0.zip)
#### Chat SDK
SDK for: Chat
- Current release: Version 1.4.0 (Latest)
- Install with npm: `npm i agora-chat`
- Package manager: [Open package](https://www.npmjs.com/package/agora-chat)
- Download: [Download SDK](https://download.agora.io/sdk/release/agora-chat-1.4.0.zip)
#### Interactive Whiteboard SDK
SDK for: Interactive Whiteboard
- Current release: Version 2.16.53 (Latest)
- Install with npm: `npm i white-web-sdk@2.16.53`
- Package manager: [Open package](https://www.npmjs.com/package/white-web-sdk/v/2.16.53)
#### Interactive Whiteboard Fastboard
SDK for: Interactive Whiteboard Fastboard
- Current release: Version 1.1.0 (Latest)
- Install with npm: `npm i @netless/fastboard@1.1.0`
- Package manager: [Open package](https://www.npmjs.com/package/@netless/fastboard/v/1.1.0)
### macOS
#### RTC SDK
SDK for: Video Calling, Interactive Live Streaming, and Broadcast Streaming
- Current release: Version 4.6.2 (Latest)
- Install with Swift Package Manager: `https://github.com/AgoraIO/AgoraRtcEngine_macOS`
- Package manager: [Open package](https://swiftpackageindex.com/AgoraIO/AgoraRtcEngine_macOS)
- Download: [Download SDK](https://download.agora.io/sdk/release/Agora_Native_SDK_for_Mac_v4.6.2_FULL.zip)
#### Signaling SDK
SDK for: Signaling
- Current release: Version 2.3.0 (Latest)
- Package manager: [Open package](https://github.com/AgoraIO/AgoraRTM_macOS/tree/2.3.0)
- Download: [Download SDK](https://download.agora.io/rtm2/release/Agora_RTM_OC_SDK_v2.3.0.zip)
#### Interactive Whiteboard SDK
SDK for: Interactive Whiteboard
- Current release: Version 2.16.46 (Latest)
- Package manager: [Open package](https://github.com/netless-io/whiteboard-ios)
### React Native
#### RTC SDK
SDK for: Video Calling, Interactive Live Streaming, and Broadcast Streaming
- Current release: Version 4.6.4 (Latest)
- Install with npm: `npm i react-native-agora@4.6.4`
- Package manager: [Open package](https://www.npmjs.com/package/react-native-agora/v/4.6.4)
#### Signaling SDK
SDK for: Signaling
- Current release: Version 2.2.4 (Latest)
- Install with npm: `npm i agora-react-native-rtm`
- Package manager: [Open package](https://www.npmjs.com/package/agora-react-native-rtm)
#### Chat SDK
SDK for: Chat
- Current release: Version 1.4.0 (Latest)
- Install with npm: `npm i react-native-agora-chat@1.4.0`
- Package manager: [Open package](https://www.npmjs.com/package/react-native-agora-chat/v/1.4.0)
### ReactJS
#### RTC SDK
SDK for: Video Calling, Interactive Live Streaming, and Broadcast Streaming
- Current release: Version 2.5.1 (Latest)
- Install with npm: `npm i agora-rtc-react@2.5.1`
- Package manager: [Open package](https://www.npmjs.com/package/agora-rtc-react/v/2.5.1)
- Download: [Download SDK](https://download.agora.io/sdk/release/agora-rtc-react.2.5.1.js)
### Windows
#### RTC SDK
SDK for: Video Calling, Interactive Live Streaming, and Broadcast Streaming
- Current release: Version 4.6.2 (Latest)
- Download: [Download SDK](https://download.agora.io/sdk/release/Agora_Native_SDK_for_Windows_v4.6.2_FULL.zip)
#### Signaling SDK
SDK for: Signaling
- Current release: Version 2.3.0 (Latest)
- Download: [Download SDK](https://download.agora.io/rtm2/release/Agora_RTM_C%2B%2B_SDK_for_Windows_v2.3.0.zip)
#### Chat SDK
SDK for: Chat
- Current release: Version 1.4.0 (Latest)
- Download: [Download SDK](https://download.agora.io/sdk/release/agora_chat_sdk.1.4.0.nupkg)
### Flutter
#### RTC SDK
SDK for: Video Calling, Interactive Live Streaming, and Broadcast Streaming
- Current release: Version 6.6.4 (Latest)
- Install with Flutter: `flutter pub add agora_rtc_engine:6.6.4`
- Package manager: [Open package](https://pub.dev/packages/agora_rtc_engine/versions/6.6.4)
#### Chat SDK
SDK for: Chat
- Current release: Version 1.4.0 (Latest)
- Install with Flutter: `flutter pub add agora_chat_sdk`
- Package manager: [Open package](https://pub.dev/packages/agora_chat_sdk)
#### Signaling SDK
SDK for: Signaling
- Current release: Version 2.2.6 (Latest)
- Install with Flutter: `flutter pub add agora_rtm:2.2.6`
- Package manager: [Open package](https://pub.dev/packages/agora_rtm/versions/2.2.6)
### Linux
#### IoT SDK
SDK for: Embedded Devices
- Current release: x86_64-linux-gnu Version 1.9.7 (Latest)
- Download: [Download SDK](https://download.agora.io/rtsasdk/release/Agora-RTSALite-RmRdRcAcAjCF-x86_64-linux-gnu-v1.9.7-20251127_103054-992914.tgz)
- Current release: aarch64-linux-gnu Version 1.9.7 (Latest)
- Download: [Download SDK](https://download.agora.io/rtsasdk/release/Agora-RTSALite-RmRdRcAcAjCF-aarch64-linux-gnu-v1.9.7-20251127_103054-992914.tgz)
- Current release: aarch64-linux-musl Version 1.9.7 (Latest)
- Download: [Download SDK](https://download.agora.io/rtsasdk/release/Agora-RTSALite-RmRdRcAcAjCF-aarch64-linux-musl-v1.9.7-20251127_103054-992914.tgz)
- Current release: armv7a-linux-gnueabihf Version 1.9.7 (Latest)
- Download: [Download SDK](https://download.agora.io/rtsasdk/release/Agora-RTSALite-RmRdRcAcAjCF-arm-linux-gnueabihf-v1.9.7-20251127_103054-992914.tgz)
- Current release: armv7a-linux-gnueabi Version 1.9.7 (Latest)
- Download: [Download SDK](https://download.agora.io/rtsasdk/release/Agora-RTSALite-RmRdRcAcAjCF-arm-linux-gnueabi-v1.9.7-20251127_103054-992914.tgz)
- Current release: armv7a-linux-uclibceabihf Version 1.9.7 (Latest)
- Download: [Download SDK](https://download.agora.io/rtsasdk/release/Agora-RTSALite-RmRdRcAcAjCF-arm-linux-uclibceabihf-v1.9.7-20251127_103054-992914.tgz)
- Current release: armv7a-linux-uclibceabi Version 1.9.7 (Latest)
- Download: [Download SDK](https://download.agora.io/rtsasdk/release/Agora-RTSALite-RmRdRcAcAjCF-arm-linux-uclibceabi-v1.9.7-20251127_103054-992914.tgz)
- Current release: armv7a-linux-musleabihf Version 1.9.7 (Latest)
- Download: [Download SDK](https://download.agora.io/rtsasdk/release/Agora-RTSALite-RmRdRcAcAjCF-arm-linux-musleabihf-v1.9.7-20251127_103054-992914.tgz)
- Current release: armv7a-linux-musleabi Version 1.9.7 (Latest)
- Download: [Download SDK](https://download.agora.io/rtsasdk/release/Agora-RTSALite-RmRdRcAcAjCF-arm-linux-musleabi-v1.9.7-20251127_103054-992914.tgz)
- Current release: armv6-linux-gnueabihf Version 1.9.7 (Latest)
- Download: [Download SDK](https://download.agora.io/rtsasdk/release/Agora-RTSALite-RmRdRcAcAjCF-armv6-linux-gnueabihf-v1.9.7-20251127_103054-992914.tgz)
- Current release: armv6-linux-uclibceabi Version 1.9.7 (Latest)
- Download: [Download SDK](https://download.agora.io/rtsasdk/release/Agora-RTSALite-RmRdRcAcAjCF-armv6-linux-uclibceabi-v1.9.7-20251127_103054-992914.tgz)
- Current release: armv5-linux-gnueabi Version 1.9.7 (Latest)
- Download: [Download SDK](https://download.agora.io/rtsasdk/release/Agora-RTSALite-RmRdRcAcAjCF-armv5-linux-gnueabi-v1.9.7-20251127_103054-992914.tgz)
- Current release: armv5-linux-uclibceabi Version 1.9.7 (Latest)
- Download: [Download SDK](https://download.agora.io/rtsasdk/release/Agora-RTSALite-RmRdRcAcAjCF-armv5-linux-uclibceabi-v1.9.7-20251127_103054-992914.tgz)
- Current release: mipsel-linux-gnueabihf Version 1.9.7 (Latest)
- Download: [Download SDK](https://download.agora.io/rtsasdk/release/Agora-RTSALite-RmRdRcAcAjCF-mipsel-linux-gnueabihf-v1.9.7-20251127_103054-992914.tgz)
- Current release: mipsel-linux-uclibceabihf Version 1.9.7 (Latest)
- Download: [Download SDK](https://download.agora.io/rtsasdk/release/Agora-RTSALite-RmRdRcAcAjCF-mipsel-linux-uclibceabihf-v1.9.7-20251127_103054-992914.tgz)
- Current release: mipsel-linux-uclibceabi Version 1.9.7 (Latest)
- Download: [Download SDK](https://download.agora.io/rtsasdk/release/Agora-RTSALite-RmRdRcAcAjCF-mipsel-linux-uclibceabi-v1.9.7-20251127_103054-992914.tgz)
- Current release: arm-liteos-eabi Version 1.9.7 (Latest)
- Download: [Download SDK](https://download.agora.io/rtsasdk/release/Agora-RTSALite-RmRdRcAcAjCF-arm-liteos-eabi-v1.9.7-20251127_103054-992914.tgz)
- Current release: armv7a-harmony-eabi Version 1.9.7 (Latest)
- Download: [Download SDK](https://download.agora.io/rtsasdk/release/Agora-RTSALite-RmRdRcAcAjCF-arm-harmony-eabi-v1.9.7-20251127_103054-992914.tgz)
#### Agora On-Premise Recording SDK
Compatible with: Voice Calling, Video Calling, or Interactive Live Streaming
- Current release: x86_64 Version 4.4.151 for C++ (Latest)
- Download: [Download SDK](https://download.agora.io/rtsasdk/release/Agora-RTC-x86_64-linux-gnu-v4.4.151-20250919_101833-891308.tgz)
- Current release: arm64 Version 4.4.151 for C++ (Latest)
- Download: [Download SDK](https://download.agora.io/rtsasdk/release/Agora-RTC-aarch64-linux-gnu-v4.4.151-20250919_102817-891319.tgz)
- Current release: x86_64 Version 4.4.151 for Java (Latest)
- Download: [Download SDK](https://download.agora.io/sdk/release/Agora-Linux-Recording-Java-SDK-v4.4.151.1-x86_64-891308-28c706d74a-20250919_142050.zip)
- Current release: arm64 Version 4.4.151 for Java (Latest)
- Download: [Download SDK](https://download.agora.io/sdk/release/Agora-Linux-Recording-Java-SDK-v4.4.151-aarch64-891319-952e64402b-20250919_140753.zip)
#### Server Gateway SDK
Compatible with: Voice Calling, Video Calling, or Interactive Live Streaming
- Current release: Version 4.4.32 for Java (Latest)
- Download: [Download SDK](https://download.agora.io/sdk/release/Agora-Linux-Java-SDK-v4.4.32-x86_64-675656-ccd9be501d-20250526_180235.zip)
- Current release: Version 4.4.32 aarch64 for C++ (Latest)
- Download: [Download SDK](https://download.agora.io/rtsasdk/release/Agora-RTC-aarch64-linux-gnu-v4.4.32-20250425_150503-675674.tgz)
- Current release: Version 4.4.32 x86_64 for C++ (Latest)
- Download: [Download SDK](https://download.agora.io/rtsasdk/release/Agora-RTC-x86_64-linux-gnu-v4.4.32-20250425_144419-675648.tgz)
- Current release: Version 2.2.8 for Go (Latest)
- Download: [Download SDK](https://github.com/AgoraIO-Extensions/Agora-Golang-Server-SDK/tree/release/2.2.8)
- Current release: Version 2.2.4 for Python (Latest)
- Install with pip: `pip install agora-python-server-sdk`
- Package manager: [Open package](https://pypi.org/project/agora-python-server-sdk/)
- Download: [Download SDK](https://github.com/AgoraIO-Extensions/Agora-Python-Server-SDK/tree/release/2.2.4)
### Linux C++
#### Signaling SDK
SDK for: Real-Time Messaging
- Current release: Version 2.3.0 (Latest)
- Download: [Download SDK](https://download.agora.io/rtm2/release/Agora_RTM_C%2B%2B_SDK_for_Linux_v2.3.0.zip)
### Linux Java
#### Signaling SDK
SDK for: Real-Time Messaging
- Current release: Version 2.3.0 for aarch64 (Latest)
- Install with Gradle: `implementation 'io.agora:rtm-java-aarch64:2.3.0'`
- Package manager: [Open package](https://central.sonatype.com/artifact/io.agora/rtm-java-aarch64/2.3.0)
- Download: [Download SDK](https://download.agora.io/rtm2/release/Agora_RTM_JAVA_SDK_for_Linux_aarch64_v2.3.0.zip)
### Unity
#### RTC SDK
SDK for: Video Calling, Interactive Live Streaming, and Broadcast Streaming
- Current release: Version 4.6.2 (Latest)
- Download: [Download SDK](https://download.agora.io/sdk/release/Agora_Unity_RTC_SDK_FULL_20260212_633_4.6.2-build.1.zip)
#### Signaling SDK
SDK for: Signaling
- Current release: Version 2.1.9 (Latest)
- Download: [Download SDK](https://download.agora.io/sdk/release/Agora_Unity_RTM_SDK_v2.1.9.zip)
#### Chat SDK
SDK for: Chat
- Current release: Version 1.4.0 (Latest)
- Download: [Download SDK](https://download.agora.io/sdk/release/agora_chat_unity_sdk1.4.0.unitypackage)
### Electron
#### RTC SDK
SDK for: Video Calling, Interactive Live Streaming, and Broadcast Streaming
- Current release: Version 4.6.2 (Latest)
- Install with npm: `npm i agora-electron-sdk@4.6.2`
- Package manager: [Open package](https://www.npmjs.com/package/agora-electron-sdk/v/4.6.2)
### Unreal Engine
#### RTC SDK
SDK for Video Calling, Interactive Live Streaming, and Broadcast Streaming
- Current release: Version 4.5.1 (Latest)
- Download: [Download SDK](https://download.agora.io/sdk/release/Agora_RTC_FULL_SDK_4.5.1_Unreal.zip)
# Contribute an ASR Extension (/en/ai/create_asr_extension)
This page has moved to [Contribute an ASR extension](./reference/ten-agent/create-asr-extension).
# Contribute a TTS Extension (/en/ai/create_tts_extension)
This page has moved to [Contribute a TTS extension](./reference/ten-agent/create-tts-extension).
# Voice Agent overview (/en/ai)
A Voice Agent is a real-time system that listens to a user, reasons over the conversation, and responds with speech. On Agora, that experience is built from a shared foundation: real-time transport, an agent runtime, AI models, and the endpoint where the conversation is delivered.
Agora supports two Voice Agent paths: **in apps** and **on dedicated devices**. Choose **In apps** if your agent lives in a web, mobile, desktop, or backend-assisted app experience. Choose **On dedicated devices** if your endpoint is embedded or hardware-first, such as a toy, wearable, kiosk, or companion. Use the quickstart that matches your endpoint to jump directly into the right implementation path.
## Capabilities
No matter where you ship it, a Voice Agent usually has the same core layers:
* **Real-time transport**: moves audio, events, and conversation state between the user and the agent with low latency.
* **Agent runtime**: manages the session lifecycle, turn taking, interruptions, memory, and tool orchestration.
* **Models**: provide ASR, LLM, TTS, and optional multimodal capabilities.
* **Endpoint**: presents the experience to the user, either through an app or a dedicated device.
The first three layers stay conceptually similar across the docs. The main split in the sidebar happens at the **endpoint** layer, because app teams and device teams need different implementation workflows.
## How this section is organized
The AI sidebar is structured in two paths:
* **In apps**: for web, mobile, desktop, and backend-assisted app experiences.
* **On dedicated devices**: for embedded or hardware-first endpoints such as toys, wearables, kiosks, and companions.
Both paths share the same Voice Agent idea, but they differ in what teams need to build next. App teams usually care first about session orchestration, UI, model behavior, and runtime events. Device teams usually care first about bring-up, networking, firmware, controls, and hardware integration.
# Release notes (/en/ai/release-notes)
This document tracks notable changes and improvements to the Conversational AI Engine.
## Releases
### v2.12
Released on September 10, 2026.
#### New features
Included in this release:
* **Call custom tools**
You can now declare custom tools for the LLM to call during a conversation, directly through the RESTful API. Set `advanced_features.enable_tools` and declare a tool's name, description, parameters, and a synchronous `GET` or `POST` HTTPS endpoint using the `llm.tools` parameter. The LLM selects a tool and generates its parameters based on the conversation. The Conversational AI Engine then calls your endpoint and returns the result to the LLM to continue generating a response. For details, see [Call custom tools](build/custom-model-integration/custom-tools).
* **Generated filler words**
`filler_words.content` now supports a `generated` mode that produces a context-relevant filler phrase instead of a fixed phrase list, directly through the RESTful API. If a generated phrase isn't ready in time, the agent falls back to your configured static phrases. Generation is Agora-hosted, so no additional model, endpoint, or credentials are required. For details, see [Talking while waiting](build/shape-the-conversation/filler-words).
* **Defer custom instructions with the `append` action**
The `think` API's state actions now support `append`. Setting `on_listening_action`, `on_thinking_action`, or `on_speaking_action` to `append` doesn't interrupt the current interaction. Instead, the custom instruction is appended as a separate user message once the current turn's LLM output finishes, then starts a new turn. Available through the [**Send custom instructions**](/en/api-reference/api-ref/conversational-ai/think) endpoint.
* **Client component support for direct speech and instruction injection**
The [Android](/en/api-reference/api-ref/conversational-ai/client-toolkit/android), [iOS](/en/api-reference/api-ref/conversational-ai/client-toolkit/ios), and [Web](/en/api-reference/api-ref/conversational-ai/client-toolkit/web) client toolkits add `speak` and `think` methods. Use `speak` to bypass the LLM and make the agent speak text directly, or `think` to inject text as user input for the LLM to process. Both methods send messages over RTM and support message priority, interruption behavior, and per-state Think actions.
* **MCP tool-use for MLLM agents**
MLLM agents now support MCP tool-use, in addition to cascading LLM agents. Configure [`mllm.mcp_servers`](/en/api-reference/api-ref/conversational-ai/join#request-body-properties-mllm-mcp-servers) and set `advanced_features.enable_tools` to `true`, the same switch used for cascading LLM agents. Available directly through the RESTful API. For details, see [Use MCP tools](build/mcp-tools).
* **New ASR provider**
* [Gemini](models/asr/gemini)
#### API changes
This release introduces the following changes for custom tool calling, generated filler words, MCP tool-use for MLLM agents, and the `think` API's `append` action.
* Changes to [**Start a conversational AI agent**](/en/api-reference/api-ref/conversational-ai/join)
* **New parameters**
* [`llm.tools`](/en/api-reference/api-ref/conversational-ai/join#request-body-properties-llm-tools): Custom tool definitions the LLM can call. Requires `advanced_features.enable_tools`.
* [`filler_words.content.generated_config`](/en/api-reference/api-ref/conversational-ai/join#request-body-properties-filler-words-content-generated-config): Prompt and fallback strategy for generated filler words. Used when `filler_words.content.mode` is `generated`.
* [`mllm.mcp_servers`](/en/api-reference/api-ref/conversational-ai/join#request-body-properties-mllm-mcp-servers): MCP server connections for MLLM agents. Requires `advanced_features.enable_tools`.
* **Updated parameters**
* [`advanced_features.enable_tools`](/en/api-reference/api-ref/conversational-ai/join#request-body-properties-advanced-features-enable-tools): Now also enables custom tools declared in `llm.tools` and MCP tools declared in `mllm.mcp_servers`, in addition to MCP tools configured in `llm.mcp_servers`.
* [`filler_words.content.mode`](/en/api-reference/api-ref/conversational-ai/join#request-body-properties-filler-words-content-mode) value `generated`: Generate a filler phrase from the current context, with `filler_words.content.static_config` used as a fallback.
* [`filler_words.content.static_config`](/en/api-reference/api-ref/conversational-ai/join#request-body-properties-filler-words-content-static-config): Now a named sibling property of `content` instead of the `"{mode}_config"` key.
* Changes to [**Send custom instructions**](/en/api-reference/api-ref/conversational-ai/think)
* **Updated parameters**
* [`on_listening_action`](/en/api-reference/api-ref/conversational-ai/think#request-body-properties-on-listening-action), [`on_thinking_action`](/en/api-reference/api-ref/conversational-ai/think#request-body-properties-on-thinking-action), and [`on_speaking_action`](/en/api-reference/api-ref/conversational-ai/think#request-body-properties-on-speaking-action) value `append`: Don't interrupt the current interaction; append the instruction as a separate user message once the current turn's LLM output finishes.
#### Toolkit API
This release adds `speak` and `think` methods to the client toolkit, so you can bypass the LLM to play text directly or inject text as user input:
Android
iOS
Web
* [`speak`](/en/api-reference/api-ref/conversational-ai/client-toolkit/android#speak)
* [`think`](/en/api-reference/api-ref/conversational-ai/client-toolkit/android#think)
* `SpeakMessage`, `ThinkMessage`, `ThinkListeningAction`, `ThinkThinkingAction`, `ThinkSpeakingAction`
* [`speak`](/en/api-reference/api-ref/conversational-ai/client-toolkit/ios#speak)
* [`think`](/en/api-reference/api-ref/conversational-ai/client-toolkit/ios#think)
* `SpeakMessage`, `ThinkMessage`, `ThinkListeningAction`, `ThinkThinkingAction`, `ThinkSpeakingAction`
* [`speak`](/en/api-reference/api-ref/conversational-ai/client-toolkit/web#speak)
* [`think`](/en/api-reference/api-ref/conversational-ai/client-toolkit/web#think)
* `SpeakMessage`, `ThinkMessage`, `EThinkListeningAction`, `EThinkThinkingAction`, `EThinkSpeakingAction`
#### Deprecation notice
Important
These changes may affect your existing integration. Review each change and update your integration as needed.
* **`asr.params` becomes required for non-default ASR vendors in v2.13.** Starting in v2.13, a request that sets [`asr.vendor`](/en/api-reference/api-ref/conversational-ai/join#request-body-properties-asr-vendor) to a vendor other than `ares` and omits [`asr.params`](/en/api-reference/api-ref/conversational-ai/join#request-body-properties-asr-params) fails. Configure `asr.params` for your vendor, or omit `asr.vendor` to keep the default `ares` vendor.
* **Legacy `turn_detection` fields and the `keywords`/`disabled` start-of-speech modes lose their support guarantee in a future release.** Migrate to [`turn_detection.config`](/en/api-reference/api-ref/conversational-ai/join#request-body-properties-turn-detection-config) and [`interruption`](/en/api-reference/api-ref/conversational-ai/join#request-body-properties-interruption), introduced in v2.6.
* **`advanced_features.enable_mllm` loses its support guarantee in a future release.** The MLLM switch may stop working. Migrate to [`mllm.enable`](/en/api-reference/api-ref/conversational-ai/join#request-body-properties-mllm-enable), introduced in v2.6.
### v2.11
Released on August 11, 2026.
#### New features
Included in this release:
* **ASR keywords**
You can now configure keywords to improve ARES's recognition accuracy for specific terms, such as brand names, product names, or industry jargon. Configure keywords using the `AresSTT` vendor in the Agora Agents SDKs, or the `keywords` parameter within the `asr` block directly through the RESTful API. For details, see [Improve ASR accuracy with keywords](build/shape-the-conversation/asr-keywords).
* **New TTS provider**
* [Typecast](models/tts/typecast)
* **New MLLM provider**
* [Azure OpenAI Realtime API](models/mllm/azure)
#### Improvements
This release includes the following enhancement.
* **Improved stability for long audio replies**
This release improves resource protection and error-recovery logic for long streaming audio replies, reducing the likelihood of an abnormal disconnect or failed recovery. As a result, service stability improves for long replies and free-form conversation scenarios.
#### API changes
This release introduces the following changes for ASR keywords and the new TTS and MLLM providers.
Python SDK
TypeScript SDK
Go SDK
REST API
* [`AresSTT`](/en/api-reference/api-ref/server-sdk/python#aresstt): New `keywords` parameter.
* [`TypecastTTS`](/en/api-reference/api-ref/server-sdk/python#typecasttts): New TTS vendor class.
* [`AzureOpenAIRealtime`](/en/api-reference/api-ref/server-sdk/python#azureopenairealtime): New MLLM vendor class.
* [`AresSTT`](/en/api-reference/api-ref/server-sdk/typescript#other-stt-vendors): New `keywords` option.
* [`TypecastTTS`](/en/api-reference/api-ref/server-sdk/typescript#other-tts-vendors): New TTS vendor class.
* [`AzureOpenAIRealtime`](/en/api-reference/api-ref/server-sdk/typescript#azureopenairealtime): New MLLM vendor class.
* [`NewAresSTT`](/en/api-reference/api-ref/server-sdk/go#newaresstt): New `Keywords` field.
* [`NewTypecastTTS`](/en/api-reference/api-ref/server-sdk/go#newtypecasttts): New TTS vendor constructor.
* [`NewAzureOpenAIRealtime`](/en/api-reference/api-ref/server-sdk/go#newazureopenairealtime): New MLLM vendor constructor.
* Changes to [**Start a conversational AI agent**](/en/api-reference/api-ref/conversational-ai/join)
* **New parameters**
* [`asr.keywords`](/en/api-reference/api-ref/conversational-ai/join#request-body-properties-asr-keywords): ASR keywords used to improve recognition accuracy for specific terms. Only available when `asr.vendor` is not set or `ares`.
* **Updated parameters**
* [`tts.vendor`](/en/api-reference/api-ref/conversational-ai/join#request-body-properties-tts-vendor) value `typecast`: Use Typecast as the TTS provider. See [Typecast](/en/ai/models/tts/typecast).
* [`mllm.vendor`](/en/api-reference/api-ref/conversational-ai/join#request-body-properties-mllm-vendor) value `azure`: Use Azure OpenAI Realtime API as the MLLM provider. See [Azure OpenAI Realtime API](/en/ai/models/mllm/azure).
### v2.10
Released on July 30, 2026.
#### New features
Included in this release:
* **Connect custom TTS services using the OpenAI protocol**
You can now use a self-built, privately deployed, or third-party TTS service that implements the OpenAI TTS protocol as your agent's speech synthesis module. Configure it using the `GenericTTS` vendor in the Agora Agents SDKs (Go and TypeScript v2.4.0 or later, Python v2.4.1 or later), or the `generic_http` TTS vendor directly through the RESTful API. For details, see [Connect your own TTS service](/en/ai/build/custom-model-integration/custom-tts) and [Generic TTS](/en/ai/models/tts/generic-http).
* **Client toolkit support for manual turn control**
The Android, iOS, and Web client toolkits now provide dedicated APIs for manual Start of Speech (SoS) and End of Speech (EoS) control, so you no longer need to construct raw Signaling (RTM) messages by hand. Call `manualSOS`/`manualEOS` to send requests, and register the new result callbacks to handle the server's response. This capability is suitable for scenarios that require explicit control of the user turn boundary from the client side, such as AI interviews, interactive quizzes, and walkie-talkie apps. For details, see [Manually control start and end of speech](/en/ai/best-practices/manual-turn-control).
* **New TTS providers**
* [Gradium](models/tts/gradium)
* [Mistral](models/tts/mistral)
* **New Avatar provider**
* [LemonSlice](models/avatar/lemonslice)
#### Toolkit API
This release adds the following APIs to the client toolkit for manual turn control:
Android
iOS
Web
* [`manualSOS`](/en/api-reference/api-ref/conversational-ai/client-toolkit/android#manualsos)
* [`manualEOS`](/en/api-reference/api-ref/conversational-ai/client-toolkit/android#manualeos)
* [`onUserManualSosEvent`](/en/api-reference/api-ref/conversational-ai/client-toolkit/android#onusermanualsosevent)
* [`onUserManualEosEvent`](/en/api-reference/api-ref/conversational-ai/client-toolkit/android#onusermanualeosevent)
* [`onAgentManualEosEvent`](/en/api-reference/api-ref/conversational-ai/client-toolkit/android#onagentmanualeosevent)
* `UserManualEventPayload`, `UserManualSosEvent`, `UserManualEosEvent`, `AgentManualEosPayload`, `AgentManualEosEvent`
* [`manualSOS`](/en/api-reference/api-ref/conversational-ai/client-toolkit/ios#manualsos)
* [`manualEOS`](/en/api-reference/api-ref/conversational-ai/client-toolkit/ios#manualeos)
* [`onUserManualSosEvent`](/en/api-reference/api-ref/conversational-ai/client-toolkit/ios#onusermanualsosevent)
* [`onUserManualEosEvent`](/en/api-reference/api-ref/conversational-ai/client-toolkit/ios#onusermanualeosevent)
* [`onAgentManualEosEvent`](/en/api-reference/api-ref/conversational-ai/client-toolkit/ios#onagentmanualeosevent)
* `UserManualEventPayload`, `UserManualSosEvent`, `UserManualEosEvent`, `AgentManualEosPayload`, `AgentManualEosEvent`
* [`manualSOS`](/en/api-reference/api-ref/conversational-ai/client-toolkit/web#manualsos)
* [`manualEOS`](/en/api-reference/api-ref/conversational-ai/client-toolkit/web#manualeos)
* [`EConversationalAIAPIEvents`](/en/api-reference/api-ref/conversational-ai/client-toolkit/web#econversationalaiapievents) values `USER_MANUAL_SOS_RESULT`, `USER_MANUAL_EOS_RESULT`, and `AGENT_MANUAL_EOS_RESULT`
* `TUserManualEventPayload`, `TUserManualSosEvent`, `TUserManualEosEvent`, `TAgentManualEosPayload`, `TAgentManualEosEvent`
#### API changes
This release introduces the following changes for connecting TTS services.
Python SDK
TypeScript SDK
Go SDK
REST API
This release adds the following TTS vendor classes:
* [`GenericTTS`](/en/api-reference/api-ref/server-sdk/python#generictts): Connect a custom TTS service using the OpenAI TTS protocol.
* [`GradiumTTS`](/en/api-reference/api-ref/server-sdk/python#gradiumtts)
* [`MistralTTS`](/en/api-reference/api-ref/server-sdk/python#mistraltts)
This release adds the following TTS vendor classes:
* [`GenericTTS`](/en/api-reference/api-ref/server-sdk/typescript#generictts): Connect a custom TTS service using the OpenAI TTS protocol.
* [`GradiumTTS` and `MistralTTS`](/en/api-reference/api-ref/server-sdk/typescript#other-tts-vendors)
This release adds the following TTS vendor constructors:
* [`NewGenericTTS`](/en/api-reference/api-ref/server-sdk/go#newgenerictts): Connect a custom TTS service using the OpenAI TTS protocol.
* [`NewGradiumTTS`](/en/api-reference/api-ref/server-sdk/go#newgradiumtts)
* [`NewMistralTTS`](/en/api-reference/api-ref/server-sdk/go#newmistraltts)
* Changes to [**Start a conversational AI agent**](/en/api-reference/api-ref/conversational-ai/join)
* **New parameters**
* [`tts.url`](/en/api-reference/api-ref/conversational-ai/join#request-body-properties-tts-url): The OpenAI TTS protocol compatible service endpoint. Required only when `tts.vendor` is `generic_http`.
* [`tts.headers`](/en/api-reference/api-ref/conversational-ai/join#request-body-properties-tts-headers): Custom request headers to include in requests to the TTS service. Required only when `tts.vendor` is `generic_http`.
* **Updated parameters**
* [`tts.vendor`](/en/api-reference/api-ref/conversational-ai/join#request-body-properties-tts-vendor) value `generic_http`: Integrate a custom TTS service using the OpenAI TTS protocol. See [Generic TTS](/en/ai/models/tts/generic-http).
* [`tts.vendor`](/en/api-reference/api-ref/conversational-ai/join#request-body-properties-tts-vendor) value `gradium`: Use Gradium as the TTS provider. See [Gradium](/en/ai/models/tts/gradium).
* [`tts.vendor`](/en/api-reference/api-ref/conversational-ai/join#request-body-properties-tts-vendor) value `mistral`: Use Mistral as the TTS provider. See [Mistral](/en/ai/models/tts/mistral).
* [`tts.params`](/en/api-reference/api-ref/conversational-ai/join#request-body-properties-tts-params): Now required when `tts.vendor` is `generic_http`.
### v2.9
Released on July 1, 2026.
#### New features
Included in this release:
* **Manual turn control**
You can now explicitly control when a user's speech starts and ends by sending manual Start of Speech (SoS) and End of Speech (EoS) requests over Signaling (RTM), instead of relying on automatic detection. This supports scenarios with strict turn-boundary requirements, such as AI interviews, interactive quizzes, or push-to-talk. Set [`start_of_speech.mode`](/en/api-reference/api-ref/conversational-ai/join#request-body-properties-turn-detection-config-start-of-speech-mode) and [`end_of_speech.mode`](/en/api-reference/api-ref/conversational-ai/join#request-body-properties-turn-detection-config-end-of-speech-mode) to `manual` when starting the agent. For details, see [Manually control start and end of speech](/en/ai/best-practices/manual-turn-control).
* **Agent state notifications over RTM Message**
You can now track agent state changes in real time using Signaling (RTM) Message events. The agent pushes `state.listening`, `state.thinking`, and `state.speaking` events as individual RTM messages, making it easier to record state change timestamps, process events sequentially, or consume state events alongside other RTM Message events. For details, see [Get agent state](/en/ai/best-practices/get-agent-state).
* **Pre-recorded greeting audio**
You can now play a pre-recorded audio file as the agent's greeting instead of synthesizing it with TTS. Set [`properties.llm.greeting_audio_url`](/en/api-reference/api-ref/conversational-ai/join#request-body-properties-llm-greeting-audio-url) to the URL of an `mp3`, `wav`, or `pcm` file when starting the agent. If the audio fails to download, decode, or is in an unsupported format, the agent automatically falls back to TTS synthesis using `greeting_message`.
* **Managed mode**
You can now use supported ASR, LLM, and TTS providers with Agora-managed credentials, without supplying your own API keys. Set [`credential_mode`](/en/api-reference/api-ref/conversational-ai/join#request-body-properties-asr-credential-mode) to `"managed"` within the `asr`, `llm`, or `tts` block when starting an agent. Managed mode replaces the deprecated `preset` parameter. For details, see [Use managed mode](/en/ai/build/custom-model-integration/managed-mode).
#### Improvements
This release includes the following enhancements.
* **Speech captured during an uninterruptible greeting**
When [`properties.llm.greeting_configs.interruptable`](/en/api-reference/api-ref/conversational-ai/join#request-body-properties-llm-greeting-configs-interruptable) is set to `false`, the agent now silently collects the user's ASR results while the greeting plays. After the greeting ends, the system concatenates the collected speech segments into a single user message and sends it to the LLM for a unified response, instead of discarding speech that occurs during playback.
#### API changes
This release introduces the following changes to the RESTful API.
* Changes to [**Start a conversational AI agent**](/en/api-reference/api-ref/conversational-ai/join)
* **New parameters**
* [`properties.llm.greeting_audio_url`](/en/api-reference/api-ref/conversational-ai/join#request-body-properties-llm-greeting-audio-url): The URL of a pre-recorded audio file (`mp3`, `wav`, or `pcm`) to play as the agent's greeting instead of synthesizing it with TTS.
* [`properties.llm.greeting_configs.audio_download_timeout_ms`](/en/api-reference/api-ref/conversational-ai/join#request-body-properties-llm-greeting-configs-audio-download-timeout-ms): The timeout in milliseconds for downloading the greeting audio file. Defaults to `1000`.
* [`properties.llm.greeting_configs.audio_pcm_sample_rate`](/en/api-reference/api-ref/conversational-ai/join#request-body-properties-llm-greeting-configs-audio-pcm-sample-rate): The sample rate in Hz of the greeting audio file when the format is PCM. Defaults to `16000`.
* [`properties.asr.credential_mode`](/en/api-reference/api-ref/conversational-ai/join#request-body-properties-asr-credential-mode), [`properties.llm.credential_mode`](/en/api-reference/api-ref/conversational-ai/join#request-body-properties-llm-credential-mode), and [`properties.tts.credential_mode`](/en/api-reference/api-ref/conversational-ai/join#request-body-properties-tts-credential-mode): Set to `"managed"` to use Agora-managed credentials for the provider without supplying your own API key.
* **Updated parameters**
* [`properties.turn_detection.config.start_of_speech.mode`](/en/api-reference/api-ref/conversational-ai/join#request-body-properties-turn-detection-config-start-of-speech-mode): Now accepts `manual`, which disables automatic start-of-speech detection so the client can explicitly signal the start of user speech over RTM.
* [`properties.turn_detection.config.end_of_speech.mode`](/en/api-reference/api-ref/conversational-ai/join#request-body-properties-turn-detection-config-end-of-speech-mode): Now accepts `manual`, which disables automatic end-of-speech detection so the client can explicitly signal the end of user speech over RTM.
* [`properties.llm.greeting_message`](/en/api-reference/api-ref/conversational-ai/join#request-body-properties-llm-greeting-message): In addition to serving as a standalone greeting, this field is now required as a fallback when `greeting_audio_url` is configured, and is used to maintain conversation context when an audio greeting is interrupted.
* **Deprecated parameters**
* [`preset`](/en/api-reference/api-ref/conversational-ai/join#preset): Deprecated in favor of setting `credential_mode` to `"managed"` within the `asr`, `llm`, or `tts` block. See [Use managed mode](/en/ai/build/custom-model-integration/managed-mode).
* Changes to [**Notification event types**](/en/ai/reference/event-types)
* **Updated events**
* [`110 agent error`](/en/ai/reference/event-types#110-agent-error): Now reports greeting audio URL errors when the greeting audio file fails to download, times out, is in an unsupported format, or fails to decode. The agent automatically falls back to TTS synthesis using `greeting_message`. When `parameters.enable_error_message` is `true`, these errors are also delivered to the client via the `onMessageError` RTM callback.
### v2.8
Released on June 11, 2026.
#### New features
Included in this release:
* **Session data retention control**
By default, session interaction text and audio are temporarily retained for the minimum necessary period to support service operation, agent optimization, and troubleshooting. To disable data retention for a session, set [`properties.parameters.opt_out`](/en/api-reference/api-ref/conversational-ai/join#request-body-properties-parameters-opt-out) to `true` when starting an agent.
* **RTC token expiry warning**
A new [`104 agent expire`](reference/event-types#104-agent-expire) event is triggered when the agent's RTC token is about to expire. Upon receiving this event, call the [Update agent](/en/api-reference/api-ref/conversational-ai/update) API with a new token to refresh it. The agent does not exit the channel or interrupt the session when this event is triggered.
* **New ASR provider**
* [xAI](models/asr/xai)
* **New LLM provider**
* [xAI Grok](models/llm/xai)
* **New TTS provider**
* [xAI](models/tts/xai)
#### Improvements
This release includes the following enhancements.
Important
These changes may affect your existing integration. Review each change and update your integration as needed.
* **Idle timeout behavior change**
Setting `properties.idle_timeout` to `0` no longer means the agent runs indefinitely. From this release, `0` only disables the channel idle timeout. Regardless of the `idle_timeout` value, the maximum running time for a single session is 72 hours, after which the agent automatically exits.
If your integration previously relied on `idle_timeout = 0` to keep an agent running until manually stopped, update your task scheduling and lifecycle management logic to account for the 72-hour limit.
#### API changes
This release introduces the following changes to the RESTful API.
* Changes to [**Start a conversational AI agent**](/en/api-reference/api-ref/conversational-ai/join)
* **New parameters**
* [`properties.parameters.opt_out`](/en/api-reference/api-ref/conversational-ai/join#request-body-properties-parameters-opt-out): Set to `true` to disable data retention for the current session.
* **Updated parameters**
* [`properties.idle_timeout`](/en/api-reference/api-ref/conversational-ai/join#request-body-properties-idle-timeout): Valid range is now `0` to `259200` seconds (72 hours). Regardless of the value set, the maximum running time for a single session is 72 hours.
* Changes to [**Retrieve agent history**](/en/api-reference/api-ref/conversational-ai/history)
* **New response fields**
* [`contents[].speech_start_ms`](/en/api-reference/api-ref/conversational-ai/history#contents-speech-start-ms): Unix timestamp in milliseconds indicating when the user started speaking or the agent started TTS playback. Only returned when `llm.vendor` is `custom`.
* [`contents[].speech_end_ms`](/en/api-reference/api-ref/conversational-ai/history#contents-speech-end-ms): Unix timestamp in milliseconds indicating when the user stopped speaking, or when TTS playback completed or was interrupted. Only returned when `llm.vendor` is `custom`.
* [`contents[].speech_algorithmic_delay`](/en/api-reference/api-ref/conversational-ai/history#contents-speech-algorithmic-delay): The total delay in milliseconds introduced by audio processing algorithms after audio is captured from the user's microphone. Only returned when `llm.vendor` is `custom`, `contents[].role` is `user`, and actual voice input is present.
* Changes to [**Notification event types**](reference/event-types)
* **New events**
* [`104 agent expire`](reference/event-types#104-agent-expire): Triggered when the agent's RTC token is about to expire. Call the Update agent API with a new token upon receiving this event.
* **Updated events**
* [`102 agent left`](reference/event-types#102-agent-left): Added `Task lifetime limit exceeded` as a new exit reason when the 72-hour session limit is reached.
* [`103 agent history`](reference/event-types#103-agent-history): Added `contents[].speech_start_ms`, `contents[].speech_end_ms`, and `contents[].speech_algorithmic_delay`. Only returned when `llm.vendor` is `custom`.
* Changes to [**Retrieve a list of agents**](/en/api-reference/api-ref/conversational-ai/list)
* **Updated parameters**
* `state`: Now accepts a comma-separated list of values to filter by multiple agent states in a single request. For example, `state=0,1,2`.
### v2.7
Released on May 20, 2026.
#### New features
Included in this release:
* **New MLLM provider**
* [xAI Grok](models/mllm/xai)
* **New Avatar providers**
* [Generic avatar (Beta)](models/avatar/generic)
* **Greeting interruption control**
The `properties.llm.greeting_configs` object in the [Start a conversational AI agent](/en/api-reference/api-ref/conversational-ai/join) API now supports an `interruptable` parameter, which controls whether user speech can interrupt a greeting during playback.
#### Improvements
This release includes the following enhancements:
Important
These changes may affect your existing integration. Review each change and update your integration as needed.
* **Response status codes updated**
This release adjusts the HTTP response status codes and `reason` values returned by the RESTful API. New status codes `401`, `429`, and `500` are added. New `reason` values `ServiceNotEnabled`, `AccountSuspended`, and `ResourceAllocationFailed` are introduced. The existing `InvalidRequest` reason is replaced by `InvalidRequestBody`, `MissingRequiredField`, and `InvalidFieldValue`. For details, see [Status codes and error messages](/en/api-reference/api-ref/conversational-ai/status-codes).
If your integration relies on `reason` values for error handling, retry logic, or alerting, update your logic to handle the new values accordingly.
* **Query conversation turns API now returns paginated results**
The [Query conversation turn information](/en/api-reference/api-ref/conversational-ai/turns) API no longer returns all turns in a single response. Results are now paginated, defaulting to page 1 with up to 50 turns per page.
This affects sessions with more than 50 conversation turns. Update your integration to handle the new `total_turn_count` and `pagination` fields in the response, and retrieve subsequent pages as needed.
This release also adds the [112 turns finished](reference/event-types#112-turns-finished) notification event, which delivers conversation turn data in batches after a session ends as an alternative way to retrieve turn data.
* **`on_listening_action` default behavior change**
The default value of `on_listening_action` in the [Send a custom instruction](/en/api-reference/api-ref/conversational-ai/think) API has changed from `inject` to `interrupt`. When set to `interrupt`, the API immediately interrupts the current flow and initiates a new round of dialogue. If you rely on the previous default behavior, explicitly set `on_listening_action` to `inject` in your requests.
#### API changes
This release introduces the following changes to the RESTful API.
* Changes to [**Start a conversational AI agent**](/en/api-reference/api-ref/conversational-ai/join)
* **New parameters**
* [`properties.llm.greeting_configs.interruptable`](/en/api-reference/api-ref/conversational-ai/join#request-body-properties-llm-greeting-configs-interruptable): Controls whether user speech can interrupt a greeting during playback.
* Changes to [**Query conversation turn information**](/en/api-reference/api-ref/conversational-ai/turns)
* **New query parameters**
Adds `page_index` and `page_size` fields to [query parameters](/en/api-reference/api-ref/conversational-ai/turns#query-parameters).
* **New response parameters**
The [response](/en/api-reference/api-ref/conversational-ai/turns#response) now includes additional top-level fields:
* `agent_id`: The unique identifier of the agent.
* `name`: The name of the agent.
* `channel`: The name of the RTC channel the agent joined.
* `total_turn_count`: The total number of dialogue turns in the session.
* `pagination`: Pagination details for the response, including `page_index`, `total_pages`, and `is_last_page`.
* Changes to [**Send a custom instruction**](/en/api-reference/api-ref/conversational-ai/think)
* **Behavior changes**
* [`on_listening_action`](/en/api-reference/api-ref/conversational-ai/think#on-listening-action): The default value has changed from `inject` to `interrupt`. When set to `interrupt`, the API immediately interrupts the current flow and initiates a new round of dialogue.
* Changes to [**Notification event types**](reference/event-types)
* **New events**
* `112 turns finished`: Triggered after a session ends, delivering conversation turn data in batches for post-session analysis and processing.
### v2.6
Released on April 22, 2026.
#### New features
Included in this release:
* **New TTS provider**
* [Deepgram](models/tts/deepgram)
* **New endpoint: Send a custom instruction**
Adds a new endpoint to inject a custom text instruction into the agent's current conversation pipeline. The instruction is processed as user input, enabling scenarios such as implicit instruction injection, client-side event triggering, and voice and text collaboration. For details, see [Send a custom instruction](/en/api-reference/api-ref/conversational-ai/think).
* **MLLM turn detection refactoring**
Introduces a new [`mllm.turn_detection`](/en/api-reference/api-ref/conversational-ai/join#request-body-properties-mllm-turn-detection) object for configuring turn detection when using MLLM. When defined, this overrides the top-level `turn_detection` object. Supported modes vary by vendor:
* OpenAI Realtime API: `agora_vad`, `server_vad`, `semantic_vad`
* Google Gemini Live: `agora_vad`, `server_vad`
* **Interruption control**
Adds a new top-level [`interruption`](/en/api-reference/api-ref/conversational-ai/join#request-body-properties-interruption) object for unified management of agent interruption behavior. Supports `start_of_speech` and `keywords` trigger modes, and configurable handling strategies when interruption is disabled.
#### Improvements
This release includes the following enhancements:
* **New agent state callbacks**
Adds three callbacks to the [Android](/en/api-reference/api-ref/conversational-ai/client-toolkit/android#onagentlisteningchanged), [iOS](/en/api-reference/api-ref/conversational-ai/client-toolkit/ios#onagentlisteningchanged), and [web](/en/api-reference/api-ref/conversational-ai/client-toolkit/web#econversationalaiapievents) Toolkit event handler interface:
* `onAgentListeningChanged`: Listen for changes in the agent's listening state to monitor when the agent starts or stops listening to user input.
* `onAgentThinkingChanged`: Listen for changes in the agent's thinking state to monitor when the agent starts or stops processing a request.
* `onAgentSpeakingChanged`: Listen for changes in the agent's speaking state to monitor when the agent starts or stops playing back speech.
* **Added `name` field to all [NCS event](reference/event-types) payloads**
Returns the agent name provided when starting the agent.
#### API changes
This release introduces the following changes to the RESTful API.
* **New endpoint**
* [Send a custom instruction](/en/api-reference/api-ref/conversational-ai/think): `POST /v2/projects/{appid}/agents/{agentId}/think`
* Changes to [**Start a conversational AI agent**](/en/api-reference/api-ref/conversational-ai/join)
* **New parameters**
* [`interruption`](/en/api-reference/api-ref/conversational-ai/join#request-body-properties-interruption): Unified interruption control configuration. Supports `start_of_speech` and `keywords` trigger modes, and configurable handling strategies when interruption is disabled.
* [`greeting_configs.delay_ms`](/en/api-reference/api-ref/conversational-ai/join#request-body-properties-llm-greeting-configs-delay-ms): Specifies the delay in milliseconds before the agent plays the greeting message after the user joins the channel.
* [`llm.headers`](/en/api-reference/api-ref/conversational-ai/join#request-body-properties-llm-headers): Lets you pass custom headers in LLM requests, such as business-specific fields or tenant identifiers.
* [`mllm.enable`](/en/api-reference/api-ref/conversational-ai/join#request-body-properties-mllm-enable): Enables the MLLM module. Replaces the deprecated `advanced_features.enable_mllm`.
* [`mllm.turn_detection`](/en/api-reference/api-ref/conversational-ai/join#request-body-properties-mllm-turn-detection): Turn detection configuration for the MLLM module. When defined, overrides the top-level `turn_detection` object.
* [`mllm.turn_detection.server_vad_config.idle_timeout_ms`](/en/api-reference/api-ref/conversational-ai/join#request-body-properties-mllm-turn-detection-server-vad-config-idle-timeout-ms): Idle timeout in milliseconds for server VAD mode. Applicable to OpenAI Realtime API only.
* [`mllm.vendor`](/en/api-reference/api-ref/conversational-ai/join#request-body-properties-mllm-vendor) value `gemini`: Enables Google Gemini Live integration using the Gemini Developer API.
* **Behavior changes**
* `turn_detection` now handles SoS and EoS detection only. Interruption handling strategies have moved to the new top-level `interruption` field.
* `turn_detection.config.start_of_speech.mode` values `keywords` and `disabled` are deprecated. Use the new `interruption` field instead.
* When `turn_detection.end_of_speech.mode` is set to `semantic`, EOS detection supports English and Chinese only. For unsupported languages, the engine automatically falls back to VAD.
* **Deprecated fields**
* `advanced_features.enable_mllm`: Use `mllm.enable` instead.
* `turn_detection.config.start_of_speech.mode` value `keywords`: Use `interruption.mode = "keywords"` instead.
* `turn_detection.config.start_of_speech.mode` value `disabled`: Use `interruption.enable = false` with `interruption.disabled_config.strategy` instead.
* **Removed fields**
* `mllm.style`
* `mllm.create_response` and `mllm.interrupt_response` for OpenAI Realtime API.
* Changes to [**Notification event types**](reference/event-types)
* **New fields**
* Added `name` to all [NCS event payloads](reference/event-types). Returns the agent name provided when starting the agent.
### v2.5
Released on March 31, 2026.
#### New features
Included in this release:
* **Preset model configurations**
Adds a [`preset`](/en/api-reference/api-ref/conversational-ai/join#preset) parameter to the Join API. Pass a comma-separated list of preset names to apply predefined configurations for ASR, LLM, and TTS providers. When you use a preset, you do not need to provide the endpoint URL, API key, or model for the preset provider. Use the `asr`, `llm`, and `tts` fields to configure additional settings. When you use a preset, the corresponding ASR, LLM, or TTS service is provided through Agora-managed accounts. For details, see the [pricing](reference/pricing) page.
Available presets:
* ASR: `deepgram_nova_2`, `deepgram_nova_3`
* LLM: `openai_gpt_4o_mini`, `openai_gpt_4_1_mini`, `openai_gpt_5_nano`, `openai_gpt_5_mini`
* TTS: `minimax_speech_2_6_turbo`, `minimax_speech_2_8_turbo`, `openai_tts_1`
* **Pause state detection**
When enabled, the agent uses semantic understanding to detect when a user intends to pause the conversation. For example, if the user says "hold on" or "just a moment", the agent waits for further input instead of forwarding the utterance to the LLM. Controlled by the new [`pause_state_enabled`](/en/api-reference/api-ref/conversational-ai/join#request-body-properties-turn-detection-config-end-of-speech--mode-config-pause-state-enabled) parameter.
* **Conversation turn insights**
You can now query per-turn start, end, and latency metrics for completed agent sessions. See [Query conversation turn information](/en/api-reference/api-ref/conversational-ai/turns).
* **Real-time TTS parameter updates with custom LLM**
In scenarios with a custom LLM integrated, this release adds support for real-time TTS parameter updates during conversations, enabling a more natural conversational experience. This feature applies to the following use cases:
* The custom LLM detects a user request for the agent to change its voice or speaking style.
* The custom LLM identifies a user's positive emotion and adjusts TTS volume, pitch, speech rate, and other parameters in real time to better match the user's mood.
For implementation details, refer to [Real-time TTS parameter updates](build/custom-model-integration/custom-llm#update-tts-parameters-in-real-time).
* **New TTS provider**
* [Murf (Beta)](models/tts/murf)
* **New Avatar provider**
* [Anam (Beta)](models/avatar/anam)
#### Improvements
This release includes the following enhancements:
* **Migration from HeyGen API to LiveAvatar (Beta) API**
Updates the HeyGen avatar model configuration to use the [LiveAvatar (Beta)](models/avatar/heygen) API.
#### API changes
This release introduces the following changes to the RESTful API.
* **New endpoint: Query conversation turns**
Adds a new GET endpoint to query conversation turn information for an agent session. After a conversation ends, use this endpoint to retrieve the start event, end event, and latency metrics for each turn within the session. For details, see [Query conversation turn information](/en/api-reference/api-ref/conversational-ai/turns).
* Changes to [**Start a conversational AI agent**](/en/api-reference/api-ref/conversational-ai/join)
* **New parameters added**
* [`preset`](/en/api-reference/api-ref/conversational-ai/join#preset)
* [`pause_state_enabled`](/en/api-reference/api-ref/conversational-ai/join#request-body-properties-turn-detection-config-end-of-speech--mode-config-pause-state-enabled)
* **Deprecated fields deleted**
The following deprecated fields are deleted:
* `properties.silence_timeout`
* `properties.advanced_features.enable_aivad`
* `properties.llm.silence_message`
### v2.4
Released on February 2, 2026.
#### New features
Included in this release:
* **MCP integration**
Adds a [`llm.mcp_servers`](/en/api-reference/api-ref/conversational-ai/join#request-body-properties-llm-mcp-servers) field to the [Start a conversational AI agent](/en/api-reference/api-ref/conversational-ai/join) API to connect the LLM to an MCP (Model Context Protocol) server. Set [`advanced_features.enable_tools`](/en/api-reference/api-ref/conversational-ai/join#request-body-properties-advanced-features-enable-tools) to `true` to enable tool calls. This allows the agent to call tools provided by external services to extend functionality. For details, see [Use MCP tools](build/mcp-tools).
* **Filler phrases**
Adds a [`properties.filler_words`](/en/api-reference/api-ref/conversational-ai/join#request-body-properties-filler-words) field to insert pre-set or LLM-generated filler phrases during conversations to fill periods of silence while waiting for LLM output. This feature smooths dialogue flow, reduces user anxiety, and makes agent speech sound more natural.
#### Improvements
This release includes the following enhancements:
* **Turn detection configuration optimization**
The `turn_detection` parameter structure has been updated to provide more flexible conversation turn detection. The new structure uses a `mode` + `config` pattern with separate Start of Speech (SoS) and End of Speech (EoS) detection configurations.
**Basic configuration**
* `mode`: Conversation turn detection mode (currently supports `default`)
* `config.speech_threshold`: Voice activity detection sensitivity
**Start of Speech (SoS) detection**
Detects when the user begins speaking. When SoS is detected while the agent is speaking, an interruption occurs.
The [`config.start_of_speech`](/en/api-reference/api-ref/conversational-ai/join#request-body-properties-turn-detection-config-start-of-speech) parameter supports three detection modes:
* **VAD mode** (`vad`): Triggered by voice activity detection. Supports configuration of interruption threshold, prefix padding, and ignore word list.
* **Keyword mode (Beta)** (`keywords`): Based on keyword triggering. The agent begins conversation after detecting a specified keyword.
* **Disabled mode** (`disabled`): Disables interruption. Supports append or ignore strategies.
**End of Speech (EoS) detection**
Detects when the user finishes speaking. When EoS is detected, the agent generates a response.
The [`config.end_of_speech`](/en/api-reference/api-ref/conversational-ai/join#request-body-properties-turn-detection-config-end-of-speech) parameter supports two detection modes:
* **VAD mode** (`vad`): Determines conversation end based on silence duration.
* **Semantic mode** (`semantic`): Determines conversation end based on semantic understanding. Supports configurable maximum wait time.
#### API changes
This release introduces the following changes to the RESTful API.
* Changes to [**Start a conversational AI agent**](/en/api-reference/api-ref/conversational-ai/join)
* **[`turn_detection`](/en/api-reference/api-ref/conversational-ai/join#request-body-properties-turn-detection) has a revamped structure**
All previous fields under `turn_detection` have been deprecated and replaced with a new data structure.
* Deprecated
* `turn_detection.interrupt_mode`
* `turn_detection.interrupt_keywords`
* `turn_detection.interrupt_duration_ms`
* `turn_detection.prefix_padding_ms`
* `turn_detection.silence_duration_ms`
* `turn_detection.threshold`
* **AIVAD activation**
The `advanced_features.enable_aivad` field is now deprecated; to configure AIVAD activation use [`turn_detection.config.end_of_speech.mode = "semantic"`](/en/api-reference/api-ref/conversational-ai/join#request-body-properties-turn-detection-config-end-of-speech-mode).
* **New parameters added**
* [`advanced_features.enable_tools`](/en/api-reference/api-ref/conversational-ai/join#request-body-properties-advanced-features-enable-tools)
* [`llm.mcp_servers`](/en/api-reference/api-ref/conversational-ai/join#request-body-properties-llm-mcp-servers)
* [`properties.filler_words`](/en/api-reference/api-ref/conversational-ai/join#request-body-properties-filler-words)
* [`turn_detection.mode`](/en/api-reference/api-ref/conversational-ai/join#request-body-properties-turn-detection-mode)
* [`turn_detection.config`](/en/api-reference/api-ref/conversational-ai/join#request-body-properties-turn-detection-config)
### v2.3
Released on January 7, 2026.
#### New features
Included in this release:
* **Control LLM response interruption in custom LLM scenarios**
Adds a `metadata.interruptable` field in the first chunk of the `chat.completion.custom_metadata` object to control whether user speech can interrupt the agent's TTS output when using custom LLMs with streaming response (SSE). Use this to prevent interruptions when delivering critical information such as regulations, policies, or pricing. For more information, see [Configure LLM response interruption](build/custom-model-integration/custom-llm#configure-llm-response-interruption).
* **RTC media content encryption**
Adds an `rtc` parameter to the [Start a conversational AI agent](/en/api-reference/api-ref/conversational-ai/join) API for configuring RTC encryption.
* **New ASR provider**
* [Sarvam (Beta)](models/asr/sarvam)
#### Improvements
This release includes the following enhancements:
* **ElevenLabs TTS compatibility optimization**
Supports SSML parsing and forwarding to ensure ElevenLabs TTS correctly renders intended speech effects such as pauses, emphasis, and pronunciation.
* **Latency optimization best practices**
Adds a guide to [Optimize conversation latency](best-practices/optimize-latency).
* **Cloud Recording best practices**
Adds a guide to [Record conversations with Cloud Recording](best-practices/record-agent-conversation).
#### API changes
This release introduces the following changes to the RESTful API.
* **Stop agent API is now asynchronous**
The [Stop a conversational AI agent](/en/api-reference/api-ref/conversational-ai/leave) API now responds immediately after request parameters are validated. The request is processed asynchronously after the API returns.
* Changes to [**Start a conversational AI agent**](/en/api-reference/api-ref/conversational-ai/join)
* **New parameters added**
* `properties.rtc`
### v2.2
Released on December 15, 2025.
#### New features
Included in this release:
* **Geofencing**
Use `geofence` configuration when you [Start a conversational AI agent](/en/api-reference/api-ref/conversational-ai/join) to limit which Agora servers the Conversational AI Engine can access based on geographic regions. See [Restrict agent zones](best-practices/regional-restrictions) for details.
* **Agent greeting mode**
Adds a field `llm.greeting_configs.mode` to the [Start a conversational AI agent](/en/api-reference/api-ref/conversational-ai/join) request to set the agent's greeting broadcast mode. The following modes are supported:
* `single_every` (Default): The agent broadcasts a greeting every time a user joins a channel where there are no other users.
* `single_first`: The agent broadcasts a greeting only when the first user joins a channel.
* **New TTS providers**
* [Sarvam (Beta)](models/tts/sarvam)
#### Improvements
This release includes the following enhancements:
* **TTS parameter update**
Adds `base_url` field to the TTS parameters for [OpenAI](models/tts/openai) and [ElevenLabs](models/tts/elevenlabs). This field specifies the endpoint URL for the TTS service.
#### API changes
This release introduces the following changes to the RESTful API.
* Changes to [**Start a conversational AI agent**](/en/api-reference/api-ref/conversational-ai/join)
* **New parameters added**
* `properties.geofence`
* `llm.greeting_configs.mode`
### v2.1
Released on December 5, 2025.
#### New features
Included in this release:
* **Template variables**
This version adds the `llm.template_variables` field to the [Start a conversational AI agent](/en/api-reference/api-ref/conversational-ai/join) API, used to insert variables into the agent's `system_messages`, `greeting_message`, `failure_message`, and `parameters.silence_config.content` text. By configuring these variables, the Conversational AI engine automatically replaces them with the corresponding values defined in `llm.template_variables`. Template variables, combined with prompt customization and SIP outbound calling functionality, enable you to dynamically inject content to automate processes such as automatic hang-up, voicemail recognition, automatic message leaving, and call transfer.
* **Custom labels**
This version adds a `labels` field to the [Start a conversational AI agent](/en/api-reference/api-ref/conversational-ai/join) API, enabling agents to carry custom labels. These labels are bound to the agent and returned in the `payload` field of all message notification callbacks from the Conversational AI engine, allowing you to implement custom business logic, such as tagging activity IDs, customer groups, and business scenarios.
In SIP outbound call scenarios, you can pass a custom label in the `properties.labels` field when calling the outbound call interface to mark the call.
#### API changes
This release introduces the following changes to the RESTful API.
* Changes to [**Start a conversational AI agent**](/en/api-reference/api-ref/conversational-ai/join)
* **New parameters added**
* `properties.labels`
* `llm.template_variables`
### v2.0
Released on November 15, 2025.
#### New features
Included in this release:
* **Telephony (Beta)**
This version adds an outbound calling feature that enables the conversational AI agent to initiate an outbound call to a specified number through a POST API. After the call is answered, the agent can engage in real-time dialogue with the callee. This feature supports a wide range of outbound AI call scenarios.
A set of phone number management APIs is also added for handling numbers connected to Conversational AI Engine. Refer to the API changes section for details.
Telephony pricing
The telephony feature is currently in **Beta** and is provided free of charge. Pricing terms may change upon official release.
* **Selective attention locking (Beta)**
This version adds the selective attention lock feature. Register voiceprints to enable the agent to identify specific speakers and suppress background voices and environmental noise, ensuring clearer, more focused conversations.
* **Graceful exit**
This version adds a new `farewell_config` field to [Start a conversational AI agent](/en/api-reference/api-ref/conversational-ai/join) API to configure the graceful exit feature. When enabled, calling the [Stop a Conversational Agent](/en/api-reference/api-ref/conversational-ai/leave) API causes the agent to enter an `IDLE` state before leaving the channel.
* **Keyword interruption mode**
This release adds a new option to the `turn_detection.interrupt_mode` field in the [Start a conversational AI agent](/en/api-reference/api-ref/conversational-ai/join) API. Set this field to `"keyword"` to enable keyword interruption mode.
When this mode is enabled, the agent stops its current behavior after detecting any of the keywords specified in the `turn_detection.interrupt_keywords` field.
* **Adaptive interruption mode**
This release adds a new option to the `turn_detection.interrupt_mode` field in the [Start a conversational AI agent](/en/api-reference/api-ref/conversational-ai/join) API. Set this field to `"adaptive"` to enable adaptive interruption mode.
When this mode is enabled, the agent dynamically increases the voice continuity threshold while speaking to reduce accidental interruptions.
* **New ASR, LLM, MLLM, and TTS providers**
* ASR
* [OpenAI (Beta)](models/asr/openai)
* [Speechmatics](models/asr/speechmatics)
* [Google (Beta)](models/asr/google)
* Amazon Transcribe (Beta)
* [AssemblyAI (Beta)](models/asr/assembly-ai)
* LLM
* [Groq](models/llm/groq)
* [Amazon Bedrock](models/llm/amazon)
* MLLM
* [Google Gemini Live](models/mllm/gemini)
* TTS
* [Rime (Beta)](models/tts/rime)
* [Fish Audio (Beta)](models/tts/fish-audio)
* [Google (Beta)](models/tts/google)
* [Amazon Polly (Beta)](models/tts/amazon)
* **New webhook notification events**
This release adds three new webhook notification event types to support metrics reporting and call-state monitoring:
* `111`: [agent metrics](reference/event-types#111-agent-metrics)
Notifies real-time performance metrics for each dialogue turn, including ASR, LLM, and TTS latency measurements.
* `201`: [inbound call state](reference/event-types#201-inbound-call-state)
Reports state changes for incoming calls, such as when a call starts, is answered, transferred, or hung up.
* `202`: [outbound call state](reference/event-types#202-outbound-call-state)
Reports state changes for outbound calls initiated by the agent, including call start, dialing, ringing, answer, and hang-up events.
#### Improvements
This release includes the following enhancements:
* **Support for avatars with MLLMs**
Added support for using avatars with MLLMs.
#### API changes
This release introduces the following changes to the RESTful API.
* Changes to [**Start a conversational AI agent**](/en/api-reference/api-ref/conversational-ai/join)
* **New parameters added**
* `properties.parameters.farewell_config`
* `properties.advanced_features.enable_sal`
* `properties.sal`
* `properties.sal.sal_mode`
* `properties.sal.sample_urls`
* `properties.turn_detection.interrupt_mode` (supports `adaptive` and `keyword` values)
* `properties.turn_detection.interrupt_keywords`
* `properties.turn_detection.interrupt_duration_ms` (migrated from `vad.interrupt_duration_ms`)
* `properties.turn_detection.prefix_padding_ms` (migrated from `vad.prefix_padding_ms`)
* `properties.turn_detection.silence_duration_ms` (migrated from `vad.silence_duration_ms`)
* `properties.turn_detection.threshold` (migrated from `vad.threshold`)
* **Deprecated**
* The `vad` interface is deprecated. All configuration items have been moved to the `turn_detection` field.
* **New APIs**
* Telephony (Beta)
* Initiate an outbound call
* Retrieve call records
* Hang-up a call
* Retrieve call status
* Phone number management (Beta)
* Retrieve list of numbers
* Import number
* Retrieve number information
* Update number configuration
* Delete number
#### Toolkit API
This release renames all APIs and parameters containing the word `transcription` in the client-side subtitle API to use `transcript`, as shown below:
#### Android
* `onTranscriptionUpdated` renamed to `onTranscriptUpdated`
* `TranscriptionRenderMode` renamed to `TranscriptRenderMode`
* `TranscriptionType` renamed to `TranscriptType`
* `TranscriptionStatus` renamed to `TranscriptStatus`
* `Transcription` renamed to `Transcript`
#### iOS
* `onTranscriptionUpdated` renamed to `onTranscriptUpdated`
* `TranscriptionRenderMode` renamed to `TranscriptRenderMode`
* `TranscriptionType` renamed to `TranscriptType`
* `TranscriptionStatus` renamed to `TranscriptStatus`
* `Transcription` renamed to `Transcript`
#### Web
* `TRANSCRIPTION_UPDATED` renamed to `TRANSCRIPT_UPDATED`
### v1.7
Released on July 31, 2025.
#### New features
* **AI avatars**
Create visual avatar representations for your conversational agents using third-party avatar providers. AI avatars provide a visual presence during voice interactions, making conversations feel more natural and engaging. Enable AI avatars by setting `avatar.enable` to `true` and configuring the `avatar.vendor` and `avatar.params` fields when calling [Start a conversational AI agent](/en/api-reference/api-ref/conversational-ai/join) to create your agent.
Info
AI avatars require video streaming and incur additional charges. See [video calling pricing](/en/realtime-media/rtc/reference/pricing) for details.
* **Selective attention locking (Beta)**
This version introduces the selective attention locking feature, which uses voiceprint recognition technology to identify and filter out the speaker while suppressing background noise. This enhances the efficiency of conversational AI, particularly improving speech recognition accuracy. To experience this feature, contact [technical support](mailto\:support@agora.io).
* **Send picture messages (Beta)**
The toolkit now includes an API for [sending picture messages](build/send-multimodal-messages). You can send image URLs to the main model, which automatically references the image in future interactions to generate more relevant responses. A new callback is available to receive image message receipt details after successful transmission.
Info
* The picture messaging feature is currently in Beta and free for a limited time.
* Image processing depends on the capabilities of the integrated LLM. Ensure the LLM you connect to the Conversational AI Engine supports image input.
#### API changes
This release introduces the following modifications to the RESTful API.
* [Start a conversational AI agent](/en/api-reference/api-ref/conversational-ai/join)
* **New parameters added**
* `avatar.enable`
* `avatar.vendor`
* `avatar.params`
##### Toolkit API
* Android:
* `chat`
* `ImageMessage`
* `onMessageReceiptUpdated`
* `MessageReceipt`
* iOS:
* `chat`
* `ChatMessage`
* `ChatMessageType`
* `ImageMessage`
* `onMessageReceiptUpdated`
* `MessageReceipt`
* Web:
* `chat`
* `TMessageReceipt`
* `EChatMessagePriority`
* `EChatMessageType`
* `IChatMessageBase`
* `IChatMessageImage`
### v1.6
Released on July 15, 2025.
#### New features
* **Support for OpenAI Realtime API**
Integrate Multimodal Large Language Models (MLLMs) with Conversational AI Engine to enable end-to-end real-time audio and text interactions. See [OpenAI Realtime API](models/mllm/openai) for integration details.
* **Support for more TTS vendors**
Conversational AI Engine now supports the following additional TTS vendors:
* [Cartesia](models/tts/cartesia)
* [OpenAI](models/tts/openai)
* **Custom ASR provider support**
To improve flexibility in configuring conversational agents, this release allows you to select a custom automatic speech recognition (ASR) provider. The [Start a conversational AI agent](/en/api-reference/api-ref/conversational-ai/join) API now includes the following new parameters:
* `asr.vendor`: Specify the ASR provider
* `asr.params`: Configure ASR parameters
The following ASR providers are supported:
* **ARES** (default)
* **Microsoft Azure**
* **Deepgram**
**Billing update:**
In earlier versions, the service fee included the cost of the Ares ASR provider. Starting in v1.6, the pricing is restructured as follows:
* If you use **ARES ASR**, the total price remains unchanged:
***Total cost = Conversational AI Engine Audio Basic Task + ARES ASR Task***
* If you use **a different ASR provider**, you are charged **only** the new **Conversational AI Engine Audio Basic Task** fee.
For further details, see [Pricing](reference/pricing).
* **Multi-platform toolkit**
Agora now offers a toolkit to help you quickly build conversational agent apps. The toolkit is available for [**iOS**](/en/api-reference/api-ref/conversational-ai/client-toolkit/ios), [**Android**](/en/api-reference/api-ref/conversational-ai/client-toolkit/android), and [**Web**](/en/api-reference/api-ref/conversational-ai/client-toolkit/web), and includes APIs for common scenarios. Call these APIs to combine the capabilities of the Agora Voice SDK and Signaling SDK to achieve the following functions:
* [**Display live transcript**](build/transcripts)
Display real-time text output of user-agent conversations. The transcript component is now more robust, with better error handling, session management, and extensibility.
* [**Interrupt the agent**](build/shape-the-conversation/interrupt-agent)
Stop the agent from speaking or thinking mid-conversation.
* [**Client-side events**](build/handle-runtime-events/event-notifications)
Track changes in conversation state, performance metrics, and error events.
* [**Optimize audio settings**](best-practices/audio-setup)
Quickly apply best-practice audio configurations to improve agent responsiveness and clarity.
#### API changes
##### REST API
This release introduces several important modifications to the RESTful API.
* [Start a conversational AI agent](/en/api-reference/api-ref/conversational-ai/join)
* **New parameters added**
* `asr.vendor`
* `asr.params`
* `advanced_features.enable_mllm`
* `properties.mllm`
* `turn_detection.type`
* `turn_detection.interrupt_duration_ms`
* `turn_detection.prefix_padding_ms`
* `turn_detection.silence_duration_ms`
* `turn_detection.threshold`
* `turn_detection.create_response`
* `turn_detection.interrupt_response`
* `turn_detection.eagerness`
* `parameters.enable_metrics`
* `parameters.data_channel`
* `parameters.enable_error_message`
##### Toolkit APIs
* [Android SDK](/en/api-reference/api-ref/conversational-ai/client-toolkit/android)
* [iOS SDK](/en/api-reference/api-ref/conversational-ai/client-toolkit/ios)
* [Web SDK](/en/api-reference/api-ref/conversational-ai/client-toolkit/web)
### v1.5
Released on June 9, 2025.
#### New features
* **Voice interruption mode**
This release adds the `turn_detection.interrupt_mode` parameter to the [Start a conversational AI agent](/en/api-reference/api-ref/conversational-ai/join) API, allowing you to control how the agent handles human voice interruptions. The following modes are supported:
* **`interrupt`**: (Default) The human voice immediately interrupts the agent. The agent terminates the current interaction and processes the new human voice input.
* **`append`**: The human voice does not interrupt the agent. The agent processes the newly received human voice request after the current interaction ends.
* **`ignore`**: The agent ignores human voice requests received during speaking or thinking. These requests are discarded and not stored in the context.
* **TTS filtering**
This release adds the `tts.skip_patterns` parameter to the [Start a conversational AI agent](/en/api-reference/api-ref/conversational-ai/join) API. This parameter controls whether the TTS module skips bracketed content when reading LLM response text. This prevents the agent from vocalizing structural prompt information like tone indicators, action descriptions, and system prompts, creating a more natural and immersive listening experience.
#### API changes
This release introduces several important modifications to the RESTful API.
* [Start a conversational AI agent](/en/api-reference/api-ref/conversational-ai/join)
* **New parameters added**
* `turn_detection.interrupt_mode`
* `parameters.silence_config`
* `tts.skip_patterns`
### v1.4
Released on May 29, 2025.
#### New features
* **Metadata support for LLM requests**
This release adds the `llm.vendor` parameter to the [Start a conversational AI agent](/en/api-reference/api-ref/conversational-ai/join) API. When set to `"custom"`, the agent includes additional metadata when calling the LLM, such as `turn_id` and `timestamp`.
* **Support for Anthropic**
Conversational AI Engine now supports `anthropic` as a request style for chat completion. Refer to the `llm.style` parameter in [Start a conversational AI agent](/en/api-reference/api-ref/conversational-ai/join).
#### Improvements
This release includes the following enhancements:
* **Advanced LLM configuration**: The [Update agent configuration](/en/api-reference/api-ref/conversational-ai/update) API now supports:
* `llm.system_messages` for updating system prompts
* `llm.params` for modifying configuration parameters used when calling the large language model
#### API changes
This release introduces several important modifications to the RESTful API.
* [Start a conversational AI agent](/en/api-reference/api-ref/conversational-ai/join)
* **New parameters added**
* `llm.vendor`
* **Removed parameters:**
* `agent_rtm_uid`
* [Update agent configuration](/en/api-reference/api-ref/conversational-ai/update)
* **New parameters added**
* `llm.system_messages`
* `llm.params`
### v1.3
Released on April 16, 2025.
#### New features
* **Agent conversation history**: This version adds two methods to retrieve an agent's history. The history includes messages exchanged between the user and the agent and timestamps of agent creation and exit.
* Call the RESTful API `history` endpoint to [Retrieve agent history](/en/api-reference/api-ref/conversational-ai/history).
* Subscribe to the [agent history event](reference/event-types#103-agent-history) through the [Agora message notification service](build/handle-runtime-events/webhooks). When the agent stops, Agora automatically sends the agent's history to your business server through a Webhook callback.
#### Improvements
* **Customize the priority of broadcast information**: This version upgrades the [Broadcast a message using TTS](/en/api-reference/api-ref/conversational-ai/speak) interface and adds two new configuration parameters related to broadcast interruption logic:
* `priority`: Sets the priority of the message broadcast. Supports setting the following priorities:
* `INTERRUPT` High priority
* `APPEND`: Medium priority
* `IGNORE`: Low priority
* `interruptable`: Configure whether to allow human voice to interrupt the agent's broadcast.
#### API changes
* Adds the [Retrieve agent history](/en/api-reference/api-ref/conversational-ai/history) method.
* Adds `priority` and `interruptable` parameters to the [Broadcast a message using TTS](/en/api-reference/api-ref/conversational-ai/speak) method.
### v1.2
Released on April 10, 2025.
#### New features
* **Broadcast a message using TTS**: A new message broadcast interface enables a specified agent to deliver a custom message. When interacting with an agent, calling this interface interrupts the agent's speech and thinking process, allowing the TTS module to immediately broadcast the custom message.
* **Interrupt the agent**: The interrupt agent endpoint lets you stop the specified agent's speech and thinking process.
#### API changes
This version adds the following APIs:
* [Broadcast a message using TTS](/en/api-reference/api-ref/conversational-ai/speak)
* [Interrupt the agent](/en/api-reference/api-ref/conversational-ai/interrupt)
### v1.1
Released on March 27, 2025.
#### New features
The [Start a conversational agent](/en/api-reference/api-ref/conversational-ai/join) API adds the `enable_rtm` and `agent_rtm_uid` parameters to enable Signaling integration with the conversational AI agent. When this feature is enabled, the agent can leverage the Signaling SDK to obtain a user's custom context information such as speaking status, selected text, signature, and score, and pass this data to the agent to generate more relevant content. For details, see [Transmit custom information](build/shape-the-conversation/custom-information).
#### Improvements
To help you quickly integrate a custom large language model (LLM), this version adds documentation for [Custom LLMs](build/custom-model-integration/custom-llm). Refer to the sample code in the documentation to integrate your custom model into the Conversational AI Engine and enable advanced capabilities such as Retrieval-Augmented Generation (RAG), multi-modal processing, and tool invocation.
#### API changes
The `POST` method to [Start a conversational AI agent](/en/api-reference/api-ref/conversational-ai/join) now includes the `enable_rtm` and `agent_rtm_uid` parameters.
### v1.0 (Public Beta)
This version, released on March 4, 2025, adds pricing information for the Agora Conversational AI Engine. For more information, see [Pricing](reference/pricing).
#### Integration guide
To achieve the best conversation experience, use Agora Conversational AI Engine with the following Agora SDKs:
* Agora RTC Native SDK, v4.5.1 or later.
* Agora RTC Web SDK, version 4.23.2 or later.
#### New features
* **Live transcripts**: Supports real-time text output of conversations between users and the AI agent for transcript display in your app's UI. Agora provides an open-source transcript processing module. Integrate the module and call its API to implement live transcript. For details, see [Display live transcripts](build/transcripts).
* **Message Notification Service**: Introduces a new Conversational AI Engine message notification service. Configure it in the Agora console and subscribe to agent creation, stop, and error events. When a subscribed event occurs, Agora sends the details to your specified callback address. See [Receive event notifications](build/handle-runtime-events/webhooks).
* **Keywords**: Enhances recognition accuracy of Conversational AI Engine for proprietary words by adding keywords. This feature is currently in Beta stage. For details, [contact technical support](https://agoraio.zendesk.com/hc/en-us).
### v1.0 (Private Beta)
Released on February 18, 2025. The first beta release of the Conversational AI Engine brings natural, smooth, low-latency, and highly reliable real-time voice conversations with AI agents to Agora channels. It enables you to efficiently build intelligent and immersive interactive experiences. See [Product overview](/en/ai) for details.
#### Core features
* **Real-time voice conversation**
Supports natural and smooth real-time voice conversations with AI. It delivers a low-latency, ultra-responsive interactive experience as if the user is communicating with a real person.
* **Intelligent noise suppression**
Intelligently identifies and suppresses background noise, ensuring clear sound transmission even in noisy environments to provide users with a high-quality audio experience.
* **Background human voice suppression**
Suppresses background voices and noise while accurately preserving the primary speaker's voice. This ensures a clear and focused interactive experience in multi-speaker environments.
* **Intelligent interruption handling**
Allows users to interrupt AI at any time to ensure quick and natural responses. This feature enables smooth transitions and avoids mechanical interactions.
* **Intelligent transmission**
An AI-optimized transmission algorithm ensures stable voice data delivery even in weak network conditions where packet loss reaches 80%. This guarantees conversation continuity and reliability across diverse network environments.
* **Flexible arrangement**
Supports multiple Large Language Model (LLM) and Text-to-Speech (TTS) providers, enabling flexible orchestration to meet diverse business needs and deliver highly customizable AI dialogue solutions.
* **Multi-platform support**
Compatible with iOS, Android, Web, and various embedded hardware platforms, providing a seamless and consistent cross-platform experience.
#### Integration guide
* For the best conversational experience, Agora recommends using Conversational AI Engine with specific Agora Video/Voice SDK versions. For details, [contact technical support](mailto\:support@agora.io).
* The number of Peak Concurrent Users (PCU) allowed to call the server API under a single App ID is limited to 20. If you need to increase this limit, [contact technical support](mailto\:support@agora.io).
# About Agora (/en/introduction/about-agora)
## What Agora is
Agora is a real-time platform for products where people, devices, services, and AI systems need to stay connected inside the same live session.
Instead of treating voice, video, messaging, AI orchestration, and media processing as separate stacks, Agora gives you a shared real-time foundation you can build on. You can start with one immediate use case, such as voice calling or an AI agent, and then extend the same session architecture into messaging, cloud processing, analytics, and production operations.
Think in live sessions, not isolated features
Agora is easiest to understand when you treat it as a shared real-time layer for interaction, coordination, AI participation, and media workflows.
## What problems it solves
Teams usually come to Agora when they need to solve more than one live-product problem at the same time:
* Keep voice and video interactions usable under real-world network conditions.
* Coordinate room state, presence, events, and messaging alongside live media.
* Add voice AI into a live session instead of bolting AI onto a disconnected backend flow.
* Record, transcribe, translate, transform, or distribute media after the session starts.
* Operate production systems with the credentials, security, monitoring, and governance live products require.
In practice, this means Agora is most useful when your product is not just sending a message or making a single API call, but managing an ongoing real-time experience.
## Product families
Agora's docs are easier to navigate when you group the platform into four product families instead of reading it as a list of unrelated SKUs.
Build voice agents, assistants, tutors, support flows, and multimodal AI experiences that participate in a live real-time session.
Build calling, meetings, classrooms, livestream interaction, smart-device media flows, and other low-latency communication products.
Keep users, devices, and room state synchronized with chat, presence, metadata, signaling, and collaboration surfaces.
Extend live sessions with recording, speech-to-text, translation, push and pull workflows, transcoding, and distribution tooling.
## How these products fit together
The most useful mental model is to think in layers of responsibility:
1. **Projects and credentials** define access, billing scope, and service boundaries.
2. **Real-time sessions** connect users, devices, and agents inside a shared live context.
3. **Voice, video, and messaging** carry interaction, room state, and events through that context.
4. **AI and server-side control** add orchestration, automation, callbacks, and business logic.
5. **Cloud media services** capture, transform, translate, distribute, and observe the live session.
You do not need every layer on day one. The value of the platform is that these layers can be added over time without forcing you to replace the underlying session model.
## Common solution patterns
Most implementations start from a small number of repeatable patterns:
Start with live voice or video when the main requirement is low-latency communication between participants.
Add room messaging, presence, and coordination when participants also need shared state, chat, or event-driven flows.
Add a voice agent when an AI system needs to join the session as a live participant instead of a separate backend service.
Extend a live session with archive, compliance, captions, transcripts, translation, or post-session processing.
Build smart-device or embedded experiences where microphones, speakers, sensors, and agents operate through the same real-time path.
These patterns are helpful because they let you choose a narrow first milestone while keeping a clear path to the rest of the platform.
## Where to start
Choose the next page based on the first problem you need to solve:
* Start with [Start with AI](/en/introduction/start-with-ai) if you want an AI-assisted path using Skills, MCP, and agent-friendly docs.
* Go to [Conversational AI](/en/introduction/conversational-ai) if your main product is a voice agent, assistant, tutor, or spoken AI experience.
* Go to [Real-Time Voice & Video](/en/introduction/realtime-audio-video) if your first milestone is calling, meetings, classrooms, livestream interaction, or device media transport.
* Go to [Messaging & Presence](/en/introduction/messaging-presence) if chat, presence, signaling, or shared room state is your main coordination problem.
* Go to [Cloud Media Services](/en/introduction/cloud-media-services) if you need recording, transcription, translation, media routing, or stream transformation around a live session.
* Read [Core Concepts](/en/introduction/core-concepts) if you want the platform primitives before choosing a build path.
When you move from prototype to production, continue with [Projects](/en/introduction/projects), [Console setup](/en/introduction/console-setup), [Billing](/en/introduction/billing), and [Security and privacy](/en/introduction/security-privacy).
# Account (/en/introduction/account)
This page shows you how to sign up for an Agora account, create a new project, and get the App ID and App Certificate to generate a temporary token.
## Get started with Agora
Use [Agora Console](https://console.agora.io) to create and configure projects, and manage your Agora account. Each project provides the credentials your app needs to integrate Agora products.
### Sign up for an Agora account
To use Agora products and services, you need an Agora account. Go to the [Agora sign-up page](https://sso2.agora.io/en/signup) and sign up with an email address, or with a Google or GitHub account.
After you sign up, you are logged in automatically. For later visits, log in to [Agora Console](https://console.agora.io) with your email address or linked third-party account.
### Your first Agora project
When you create a new account, Agora creates a default project and opens it for you when you log in.
To create a new project:
1. In [Agora Console](https://console.agora.io), expand the **Projects** dropdown at the top of the page.
2. Select **Create project**.
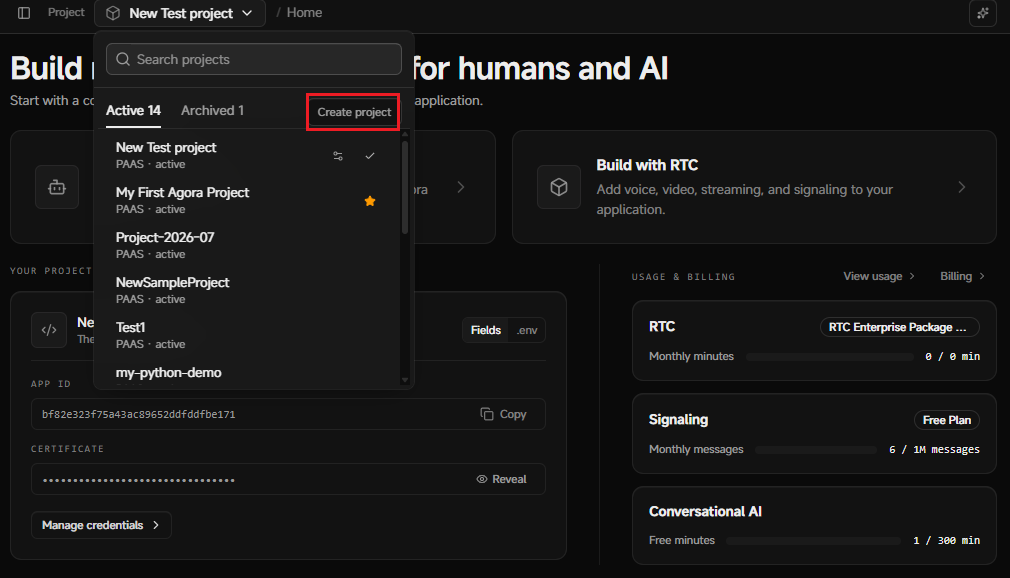
3. Enter a **Project Name**. Agora creates the project with a default setup: App ID and token authentication enabled, and Conversational AI with Signaling (RTM) enabled.
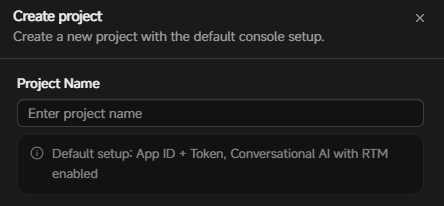
4. Click **Create Project**. You see the new project selected in the **Project** dropdown.
### Get the App ID and App Certificate
Agora automatically assigns a unique identifier to each project, called an App ID. To generate authentication tokens on your app server, you also need the project's App Certificate.
To get the App ID and App Certificate for a project:
1. On the **Home** page, select **Manage credentials** on the project card.
2. Use the copy buttons next to **App ID** and **Primary certificate** to get your App ID and App Certificate, respectively.
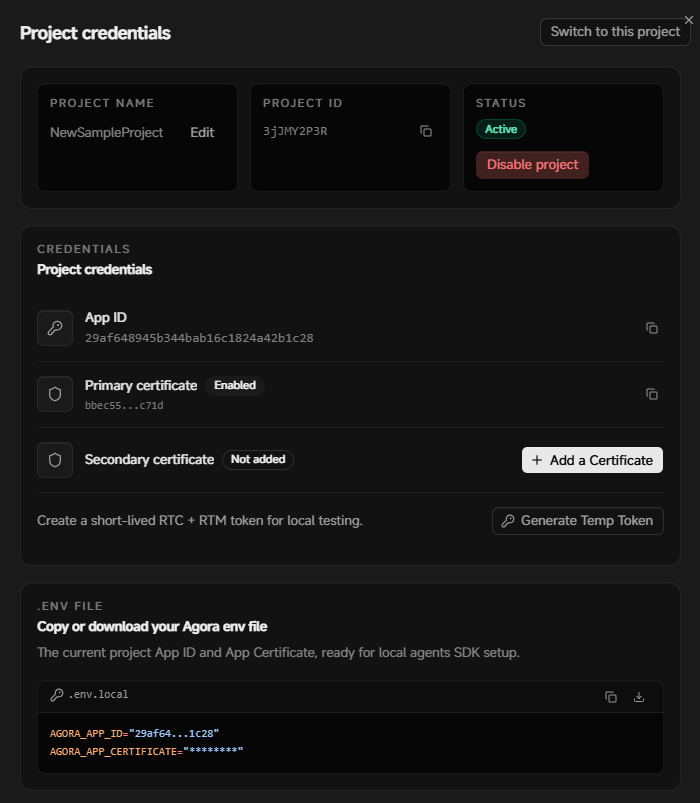
For full App Certificate management details, see [Projects](/en/introduction/projects#manage-app-certificates).
### Generate temporary tokens
To ensure communication security, best practice is to use tokens to authenticate users who log in from your client app.
To generate a temporary RTC + RTM token for your project:
1. On the **Home** page, select **Manage credentials** on the project card.
2. Select **Generate Temp Token**.
3. Enter a **Channel** name and **RTC UID** in the pop-up box and select **Generate token**.
4. Copy the generated token.
For more information on managing other aspects of your Agora account, see [Console setup](/en/introduction/console-setup).
# Agora CLI (/en/introduction/agora-cli)
Install the Agora CLI when you want the shortest path to a working Agora starter. Use it to log in, initialize an official starter, write environment values, switch projects, and diagnose setup problems from the terminal.
If you want to get a demo running before you fine-tune prompts or architecture, start here. After the starter works, add [Agora MCP](/en/introduction/agora-mcp) or [Agora Skills](/en/introduction/agora-skills) if you want your assistant to stay grounded in current docs and Agora-specific workflows.
## Install the Agora CLI
macOS and Linux
Windows (PowerShell)
```bash
curl -fsSL https://dl.agora.io/cli/install.sh | sh
agora --help
```
```powershell
irm https://dl.agora.io/cli/install.ps1 | iex
agora --help
```
## Quick start
Follow this path if you want to get an official starter running as quickly as possible.
TypeScript
Python
Go
```bash
agora login
agora init my-nextjs-demo --template nextjs
cd my-nextjs-demo
pnpm install
pnpm dev
```
```bash
agora login
agora init my-python-demo --template python
cd my-python-demo
bun install
bun run dev
```
```bash
agora login
agora init my-go-demo --template go
cd my-go-demo
make setup
make dev
```
### What happens in this flow
1. `agora login` authenticates your machine.
2. `agora init` clones an official starter, binds it to your Agora project, and writes the environment you need locally.
3. The runtime-specific install and dev commands start the application.
If the starter runs, move on to application-specific work. If not, troubleshoot in the same order you experienced the setup below.
## If something fails
### The `agora` command is not available
If `agora --help` does not work after installation, rerun the installer first. On macOS and Linux, make sure you used the install command with `--add-to-path`.
If PowerShell blocks the Windows install script, download `install.ps1` and run:
```text
powershell -ExecutionPolicy Bypass -File .\install.ps1
```
### Login or starter setup fails
Run the setup path again in order:
```bash
agora login
agora init my-demo --template nextjs
```
This covers the two most common first-run failures: the machine is not authenticated, or the starter was not initialized correctly.
### The starter runs incorrectly
Use the CLI to check readiness, credentials, and feature enablement:
```bash
agora project doctor
```
### Project settings or credentials look wrong
Inspect the current environment values that the CLI exported for your active project:
```bash
agora project env --shell
```
This is the right check when the local app starts but the agent does not join, transcripts do not appear, or the active project looks wrong.
## Build from scratch instead
If you are not using an official starter, create or switch projects first, then export credentials into the local environment.
TypeScript
Python
Go
```bash
agora login
agora project create conv-ai-tutorial
agora project use conv-ai-tutorial
agora project env --shell
```
```bash
agora login
agora project create conv-ai-tutorial
agora project use conv-ai-tutorial
agora project env --shell
```
```bash
agora login
agora project create conv-ai-tutorial
agora project use conv-ai-tutorial
agora project env --shell
```
You can also switch the active project later or create a new one explicitly:
```bash
agora project create my-project
agora project use my-project
```
The CLI gives your assistant reproducible local steps it can execute and verify, especially during starter bootstrapping, project binding, environment generation, and first-line diagnosis.
# Agora MCP (/en/introduction/agora-mcp)
Install Agora MCP when you want your assistant to check the latest Agora docs before it writes or changes code. Use it to confirm current SDK methods, parameters, quickstarts, and product or platform differences while you build or debug.
This is most useful when documentation freshness is the risky part of the task. If you also want help choosing the right Agora workflow or starter, add [Agora Skills](/en/introduction/agora-skills).
## Install the MCP server
`Agora MCP` is included when you install [Agora Skills](/en/introduction/agora-skills), but you can also install the MCP server on its own:
```text
https://mcp.agora.io
```
Agora MCP is available only in coding tools where you install or configure it. A regular browser-based chat session does not connect to this server automatically.
Cursor
Claude Code
Codex
Gemini CLI
Manual installation
Add the following JSON to your MCP configuration:
```json
{
"mcpServers": {
"agora-docs": {
"url": "https://mcp.agora.io"
}
}
}
```
```bash
claude mcp add --transport http agora-docs https://mcp.agora.io
```
```bash
codex mcp add --url https://mcp.agora.io agora-docs
```
```bash
gemini mcp add --transport http agora-docs https://mcp.agora.io
```
Add `https://mcp.agora.io` to your MCP client and use `http` or `Streamable HTTP` transport if the client asks for a transport type.
## Start with a prompt
Install the server in your coding tool, then ask your assistant to search Agora docs before it writes code. Include the Agora product, the target platform, and the task type in the same prompt.
```text
Use Agora MCP to find the current web quickstart for Conversational AI and explain the minimum setup for a browser voice demo.
```
## Make docs lookup part of the workflow
If your repository includes `AGENTS.md` or similar instructions, tell your assistant to prefer Agora MCP for product-specific lookups. That turns docs checks into a normal part of the workflow instead of an optional extra step.
If your MCP client is not available, these fallback resources still help:
* Use `https://docs.agora.io/llms.txt` as the lightweight documentation index. Its entries link directly to Markdown pages.
* Append `.md` to a documentation URL to read that page as Markdown. For example, use `https://docs.agora.io/en/ai/get-started/quickstart.md`.
* Use `https://docs.agora.io/llms-full.txt` only for offline indexing or bulk processing. It is too large to use as the default context for an interactive assistant.
# Agora Skills (/en/introduction/agora-skills)
Install Agora Skills when you want your assistant to choose the right Agora workflow before it starts coding. Skills helps you pick the right product path, starter, and setup sequence, so your assistant can follow official Agora patterns instead of guessing.
Use Skills when docs lookup alone is not enough and the harder part is deciding what to build first or which official path to follow. If you also want fresh documentation while your assistant works, pair Skills with [Agora MCP](/en/introduction/agora-mcp).
## Install Agora Skills
Skills CLI
Manual installation
```bash
npx skills add AgoraIO/skills
```
Skills activate automatically when the agent detects a relevant Agora task.
Clone the repository and point your coding assistant to the Agora skill files:
```bash
git clone https://github.com/AgoraIO/skills.git ~/agora-skills
```
Use `skills/agora/` as the directory entry point, or load `SKILL.md` directly if your tool expects a single root file.
If you install Skills manually, place the files where your assistant already looks for local instructions:
Claude Code
Cursor
Windsurf
GitHub Copilot
Other tools
Run the following commands inside Claude Code:
* **User-level** (available across all your projects)
```bash
/plugin marketplace add AgoraIO/skills
/plugin install agora
```
* **Project-level** (shared with your team via version control)
```bash
/plugin marketplace add AgoraIO/skills
/plugin install agora --scope project
```
Copy or symlink `skills/agora/` into `.cursor/rules/`.
Add `skills/agora/` to Cascade context.
Reference the files with `@workspace` or add them to Copilot instructions.
Point the tool at `skills/agora/` or the top-level `SKILL.md`.
## Start with a prompt
Install Skills, then ask your assistant to choose the correct Agora path before it starts scaffolding or editing code.
```text
Use Agora Skills and Agora MCP to help me build a web-based conversational AI demo.
Check the official docs first, choose the right starter, and use the Agora CLI for setup.
```
From there, let your assistant choose the starter and setup path before it edits code.
# Cloud Media Services (/en/introduction/cloud-media-services)
Cloud Media Services is the capability layer for products that need to do more with live media than simply transport it between participants. This category covers the cloud-side workflows that capture, transform, route, translate, and extend live sessions.
Agora's product map for this layer includes:
* **Recording** in cloud or local-server form
* **Media Push / Pull** and Media Gateway workflows
* **Speech-to-Text / Translation**
* **Transcoding / Compositing**
* **Extensions / Analytics** and adjacent cloud-side operational services
## What this category is good for
This category is the right entry point when you need:
* recording for archive, replay, compliance, or review
* pushing or pulling media between Agora and external streaming systems
* speech transcription or live translation as a cloud-side service
* stream composition, transcoding, and output shaping
* analytics, extensions, and post-session media workflows
The shared requirement is that the media session must continue to create value after, around, or beyond the primary live interaction.
## Capability map
Capture live sessions into replayable and reviewable assets through cloud-managed or self-managed recording paths.
Move media between Agora and external live-streaming or online media systems through push, pull, and gateway workflows.
Turn live speech into text and translated text for accessibility, AI preprocessing, records, and multilingual products.
Reshape streams into layouts, output formats, and distribution-friendly media workflows for playback and broadcast.
Extend product behavior and add production observation, diagnosis, and ecosystem integrations around the media path.
## Start here
## Key characteristics
Handle what happens to live media before, during, and after the user-facing session.
Connect live interaction with storage, broadcast delivery, analytics, moderation, and external streaming workflows.
Work with recordings, transformed streams, transcripts, translations, and playback-oriented outputs as one service layer.
Add capabilities that teams usually need once a live experience moves beyond prototype stage.
Reuse the same cloud media services whether the upstream source is RTC, AI interaction, or host-audience live streaming.
## What to read next
* [Media processing and distribution](/en/realtime-media/media-processing-and-distribution)
* [Cloud Recording](/en/realtime-media/cloud-recording)
* [Media Gateway](/en/realtime-media/rtmp-gateway)
* [Transcoding](/en/realtime-media/transcoding)
* [Real-time Transcription and Translation](/en/realtime-media/speech-to-text)
# Community Resources (/en/introduction/community-resources)
Agora Console is the unified portal for configuring, purchasing, and managing Agora products and services.
## Dashboard overview
After logging in to Console, the overview dashboard provides quick access to:
* projects
* billing
* usage
* members and roles
* documentation
* code samples
* support
* Agora Analytics
* Extensions Marketplace
## Additional resources
* [Support](/en/introduction/support)
* [Release Notes](/en/ai/release-notes)
* [Usage Analytics](/en/introduction/usage-analytics)
* [AI best practices](/en/ai/best-practices)
* [AI product map](/en/ai/domain-overview)
## Status and operations
Use the Agora Status Page and the Support Center to monitor service health, track incidents, and follow maintenance events.
# Console overview (/en/introduction/console-setup)
Use Agora Console to manage your projects and account settings. Console settings are organized into two groups:
* **Project-level settings**: Apply to a specific project.
* **Account settings**: Apply across your entire Agora account.
## Project-level view
When you log in to Agora Console, you land on the **Home** page for the selected project. Use the **Project** dropdown at the top of the page to switch between projects. Agora creates a default project for you when you create a new account.
Use the sidebar to switch between project-level pages.
### Home
The **Home** page is the landing page for a project in Agora Console. It shows quick links to start building an AI agent, RTC services, your project's App ID and certificate, and a summary of your usage and billing across RTC, Signaling, and Conversational AI.
### Credentials
Select **Manage credentials** on the project card, on the **Home** page, to open the **Project credentials** panel. This panel shows the basic identity, security configuration, and credentials for the selected project.
* **Project Name**: An editable, human-readable name for the project. Select **Edit** to rename the project.
* **Project ID**: An internal ID for your project. This is **not** the App ID.
* **Status**: The status of your Agora project. Select **Disable project** to disable it.
* **App ID**: A unique, non-editable identifier for the project. Select the copy icon to copy the ID to your clipboard.
* **Primary certificate**: The project's primary server-side secret, used to generate authentication tokens. Enabling the primary certificate (default) secures the project and requires clients to authenticate with a token. Treat the primary certificate like a database password.
* **Secondary certificate**: An optional fallback certificate used during certificate rotation. Enable it using the **Enable Secondary** button. You can't delete a secondary certificate while it is enabled; disable it first before deleting.
You can copy your **App ID** and **Primary certificate** individually, generate a temporary token, or download your Agora `.env` file for use in your projects.

**Rotate certificates**
If you suspect your primary certificate has been compromised, rotate it using the secondary certificate. Replacing the primary certificate may impact your live business, so only rotate certificates when necessary.
1. Select **Add a Certificate** to enable the secondary certificate.
2. Select **Make Primary** against the secondary certificate to swap the primary and secondary certificates.
3. Select **Disable Secondary** to disable the secondary certificate (the original primary certificate).
4. Once your users have switched to the new certificate, select **Delete Secondary** to delete it.
Once deleted, a certificate can't be restored. Before deleting it, confirm that users have switched to the new certificate. Deleting a certificate immediately invalidates all tokens generated with it, and users already connected can't renew their tokens using it.
### RTC Services
Select **RTC Services** in the sidebar to view and configure the Agora products and services available for the current project. Services are grouped into the following categories:
* **Intelligence**: Conversational AI Engine, Real-Time Speech-to-Text.
* **Media**: Cloud Recording, Media Push, Video Screenshot Upload, Media Gateway, Media Pull.
* **Messaging and Signaling**: Signaling, Chat.
* **Collaboration**: Whiteboard, Flexible Classroom.
* **Infrastructure**: Cloud Proxy, Co-Host Authentication.
Use the toggle on each product panel to enable or disable it for the project. Select the settings icon to open its configuration panel. For an overview of the available configuration options, refer to the specific product documentation.
### Webhooks
A webhook is a callback over HTTPS that allows your app or back-end system to receive notifications. Agora calls your webhook endpoint from its servers to send notifications when selected events occur.
Select **Webhooks** in the sidebar to view and manage webhooks for the current project.
To configure webhooks:
1. In [Agora Console](https://console.agora.io), select **Webhooks** in the sidebar.
2. Select **New Webhook** to open the webhook configuration panel.
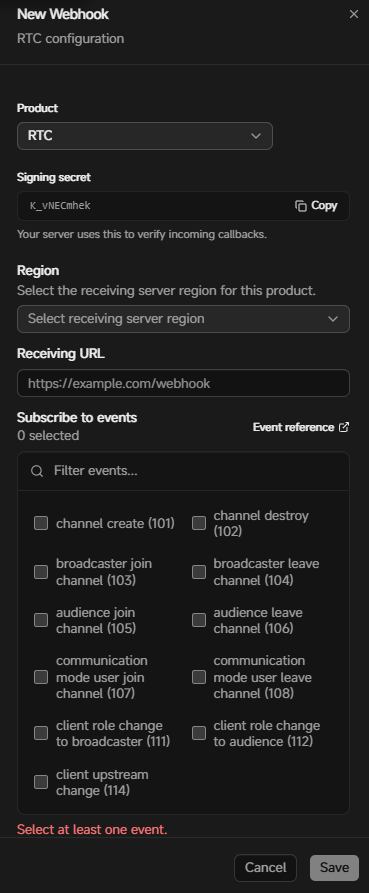
3. From the **Product** dropdown, select the product for which you want to set up Webhook notifications.
4. Copy the **Signing secret**. Use this secret to add signature verification.
5. Fill in the following:
* **Region**: Select the region where your notifications receiving server is located. Agora connects to the nearest Agora node server based on your selection.
* **Receiving URL**: The `HTTPS` public address of your server that receives the notifications, for example `https://1111-123-456-789-99.ap.ngrok.io/ncsNotify`. Only `HTTPS` endpoints are supported.
* **Subscribe to events**: Select all the events for which you want to receive notifications.
If the selected events generate a high number of queries per second (QPS), ensure that your server has sufficient processing capacity.
* **IP whitelist**: If your server is behind a firewall, enable this option, then call the [IP address query API](/en/api-reference/api-ref/rtc/query-ip-address) to get the IP addresses of the Agora Notifications server and add them to the firewall's allowed IP list.
To reduce the delay in notification delivery, best practice is to activate `HTTP` persistent connection (also called `HTTP` keep-alive) on your server with the following settings:
* `MaxKeepAliveRequests`: 100 or more
* `KeepAliveTimeout`: 10 seconds or more
6. Select **Run health check**. Agora performs a health test for your configuration as follows:
1. The health test generates test events that correspond to your subscribed events, and sends callbacks to your server.
In test event callbacks, the channelName is `test_webhook`, and the uid is `12121212`.
2. After receiving each test callback, your server must respond within 10 seconds with a status code of `200`. The response body must be in JSON format.
7. When the health check succeeds, select **Save**.
If the health check fails, follow the prompt in Agora Console to troubleshoot the error. Common errors include the following:
| Status code | Error | Description |
| ----------- | ----------------------- | ----------------------------------------------------------------------------------------------------------------------------------------------------------------------------------------------------------------------------------------------------------------------------------------------------------------------- |
| `590` | Request timeout | Your server does not return the status code `200` within 10 seconds. Check whether your server responds to the request properly. If your server responds to the request properly, contact Agora Technical Support to check if the network connection between the Agora Notifications server and your server is working. |
| `591` | Domain name unreachable | The domain name is invalid and cannot be resolved to the target IP address. Check whether your server is properly deployed. |
| `592` | Certificate error | The Agora Notifications server fails to verify the SSL certificates returned by your server. Check if the SSL certificates of your server are valid. If your server is behind a firewall, check whether you have added all IP addresses of the Agora Notifications server to the firewall's allowed IP list. |
| Other | Other response errors | Your server returns a response with a status code other than `200`. See the prompt in Agora Console for the specific status code and error messages. |
### Agora analytics
Select **Agora Analytics** in the sidebar to open analytics in a new tab. Use it to track and analyze usage and quality data for RTC and Chat. For details, see [Agora Analytics overview](/en/realtime-media/agora-analytics/product-overview).
## Account settings
Account settings apply across your entire Agora account, not to a single project. **Usage**, **Projects**, and **Billing** are available directly in the sidebar. Access other options by clicking the username at the bottom of the sidebar.
The popup menu shows your current workspace and gives access to **Profile**, **Subscriptions**, **Extensions**, **RESTful API Keys**, and **Settings**. It also gives you access to developer and support resources, including documentation, support tickets, and community links (**Get Support**), as well as account-wide actions like switching the theme (**Theme**), reverting to the legacy Console (**Back to classic console**), and signing out (**Sign out**).
### Profile
Use the profile page to update your personal and security details such as your name, email, and phone number. You can also reset your password or connect a Google or GitHub account to enable alternate sign-in methods.
### Usage
Select **Usage** in the sidebar. The **Usage** page shows your account's usage for the current billing cycle.
* **Total Usage**: A summary of RTC minutes, agent minutes, and Signaling messages used in the current billing cycle.
* **Detailed Usage**: A breakdown of usage by product, filterable by project and date range. Select **View Breakdown** to chart usage over time, and export the data using the download icon.
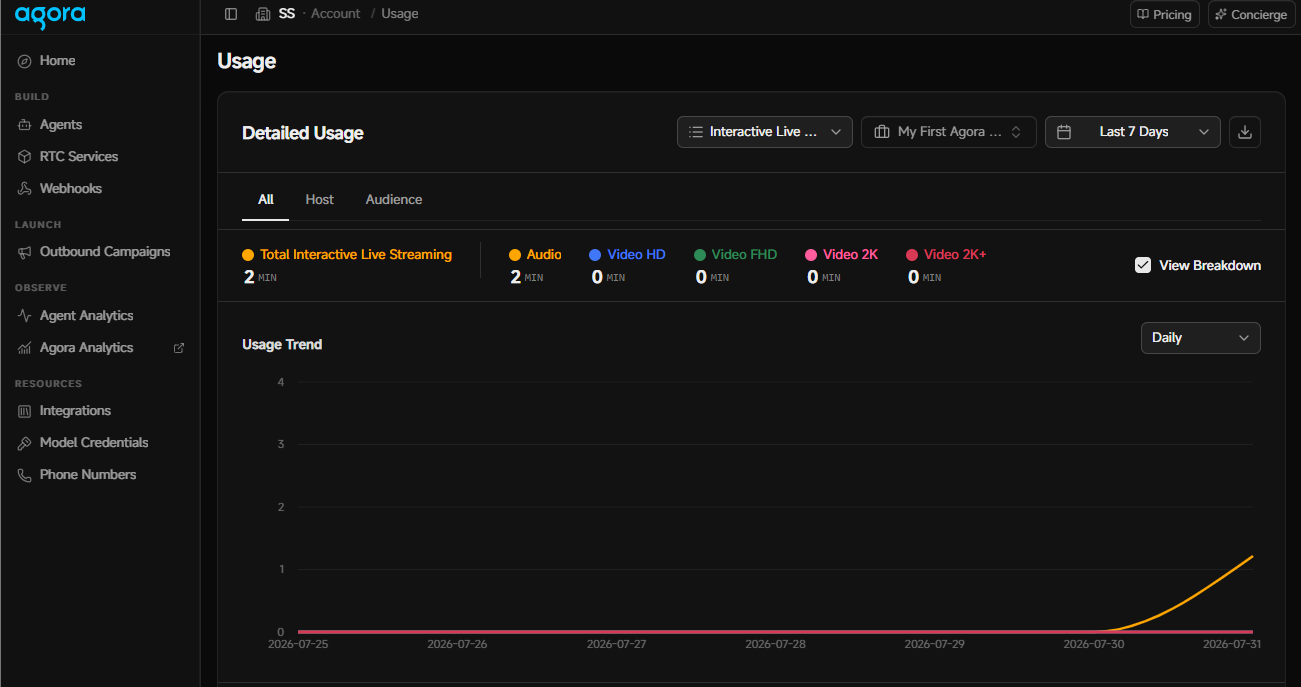
For deeper usage insights, use [Agora Analytics](/en/realtime-media/agora-analytics/product-overview).
### Projects
Select **Projects** in the sidebar to view and manage all projects in your account.
* Search projects by name or App ID.
* Select **Create project** to create a new project.
* Click the **Actions** menu next to a project to open its **Credentials** panel, or perform other project actions.
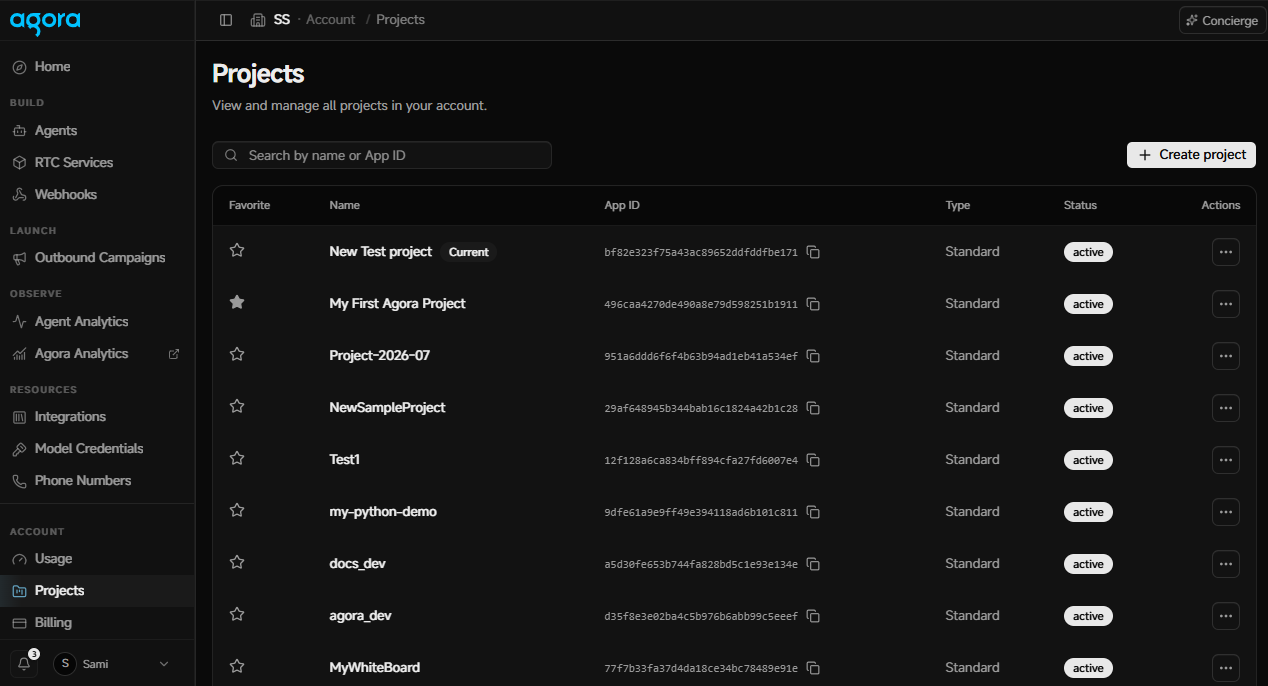
### Subscriptions
The **Subscriptions** page shows available monthly subscription plans and top-up packs for Agora products. You can view your current subscription, compare included features between various plans, and upgrade or downgrade your subscription. You can also view your purchase history on this page.
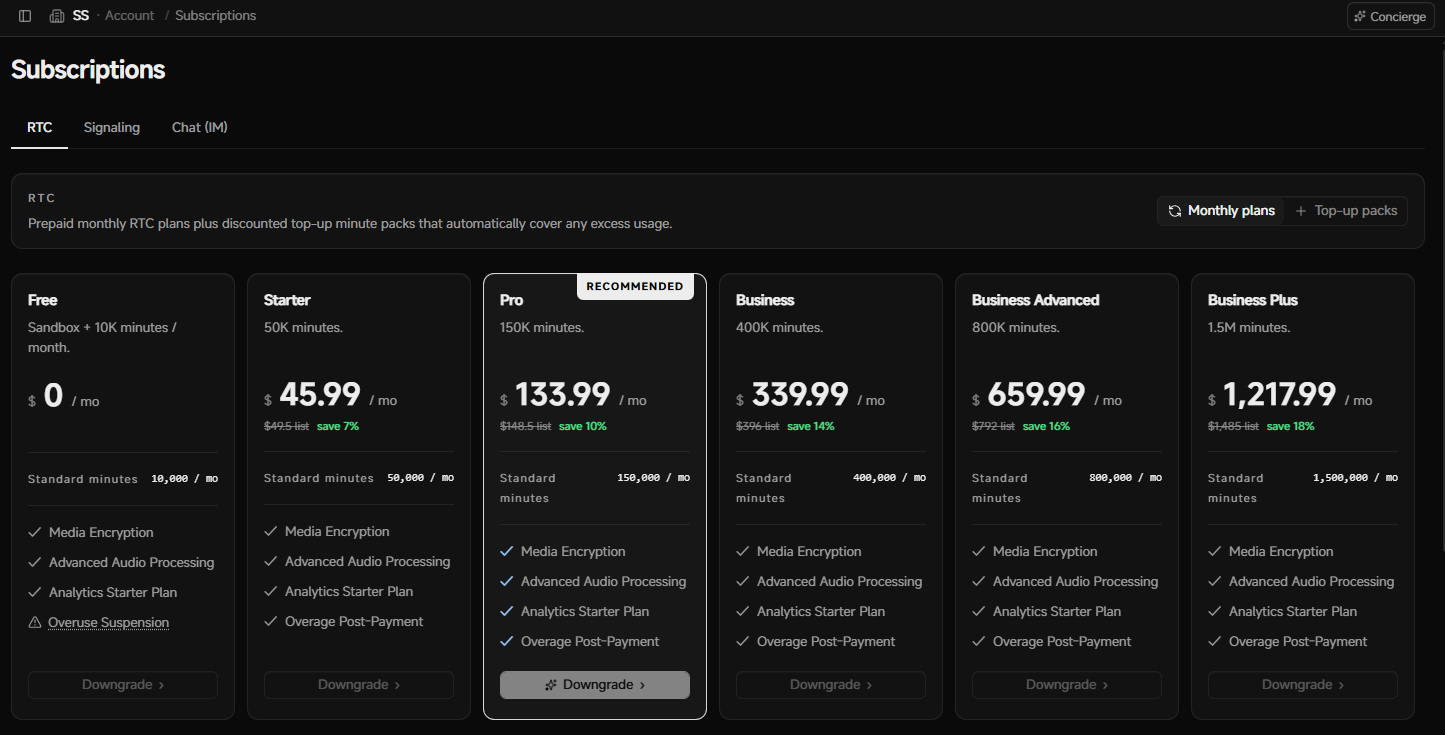
For detailed pricing for a specific product, see the product's pricing page.
### Billing
Select **Billing** in the sidebar. The **Billing** page shows your available and reserved balance, invoices, transactions, payment methods, and billing information.
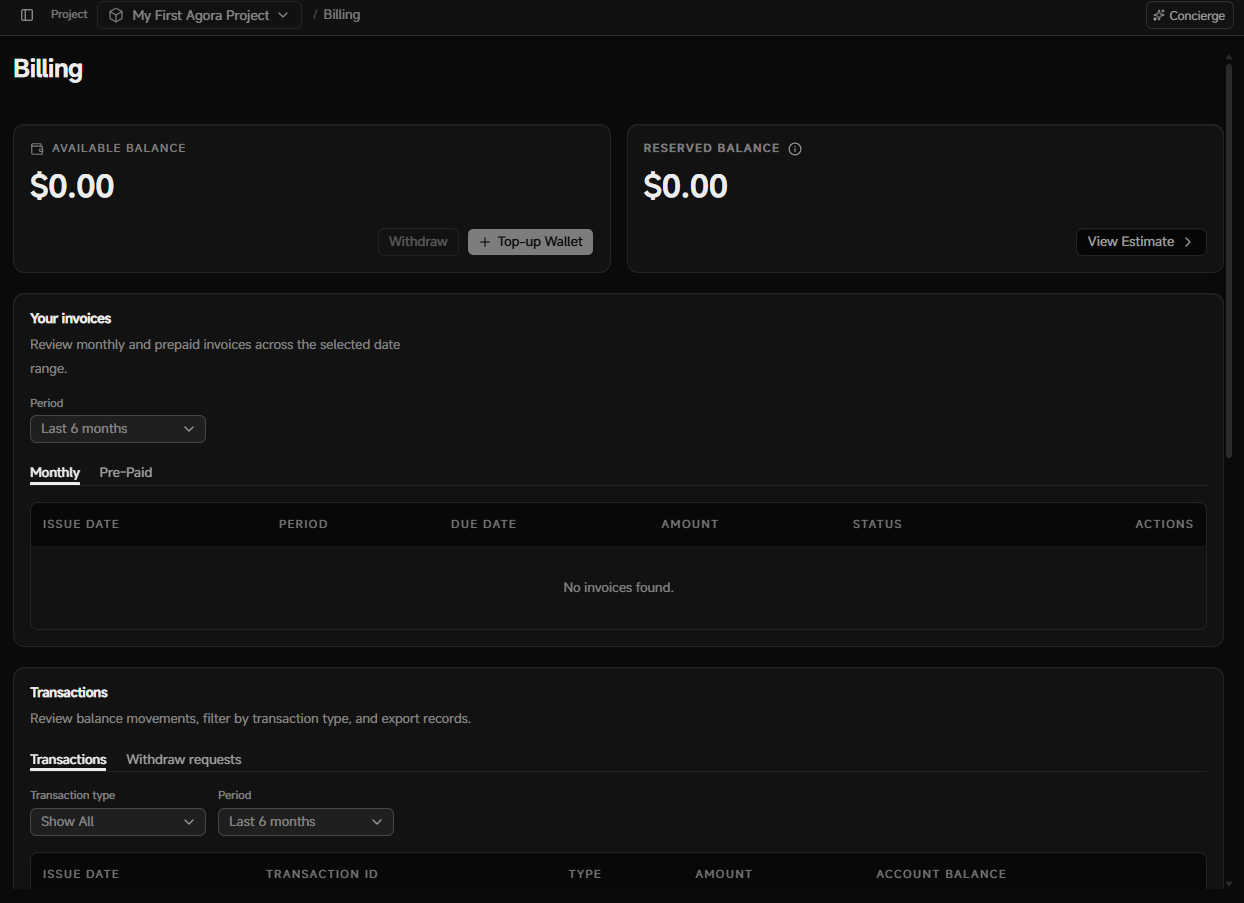
* **Account Balance**: Your available balance, with options to top up your wallet or withdraw funds once a payment method is on file.
* **Reserved Balance**: Funds reserved against estimated usage. Select **View Estimate** to see the breakdown.
* **Your Invoices**: Monthly and pre-paid invoices, filterable by date range.
* **Transactions**: A log of balance movements, filterable by type, plus a separate tab for withdraw requests.
* **Payment Methods**: Saved cards and bank transfer details used for billing.
* **Cards**: Select **Add New Card** to save a credit card for billing and invoice settlement. Provide the card number, name on card, expiration date, and CVC. Optionally set the card as the default for future payments.
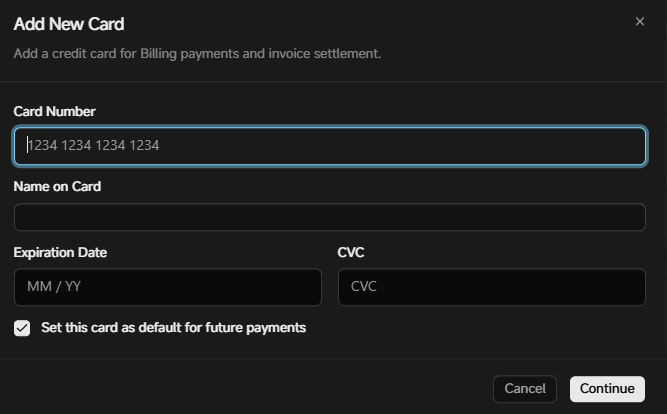
* **Bank Transfer**: Switch to the **Bank Transfer** tab for wire transfer instructions, including the beneficiary's name, account number, bank, SWIFT code, and bank address. Include the provided note (your Company ID) in the transfer's notes field.
Transfers made without the provided note can't be matched to your account and will be disregarded.
* **Billing Information**: The name and address associated with your billing card.
* **Billing FAQ**: Information about billing, such as schedule, account suspension policy, payment orders, and refunds.
### Extensions
Use the **Extensions** page to browse and manage extensions that add features to your app on top of Agora SDKs.
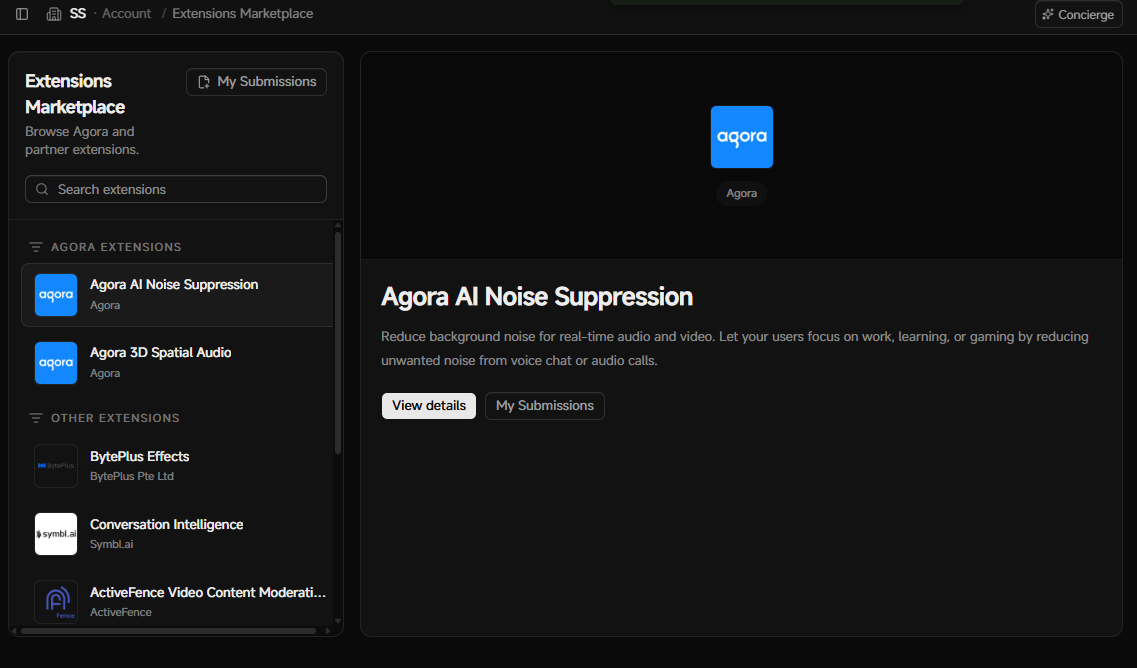
Select an extension from the list, then click **View details** to open the configuration page.
### RESTful API keys
This page lists your RESTful API keys, used to authenticate with Agora's RESTful API.
Each key consists of a Customer ID and Customer Secret. Select **Create API Key** to generate a new key. You can download the Customer Secret only once, so save it somewhere secure. Add a note to a key to help identify it. Select the trash icon to delete a key. You can have a maximum of 10 keys per account.
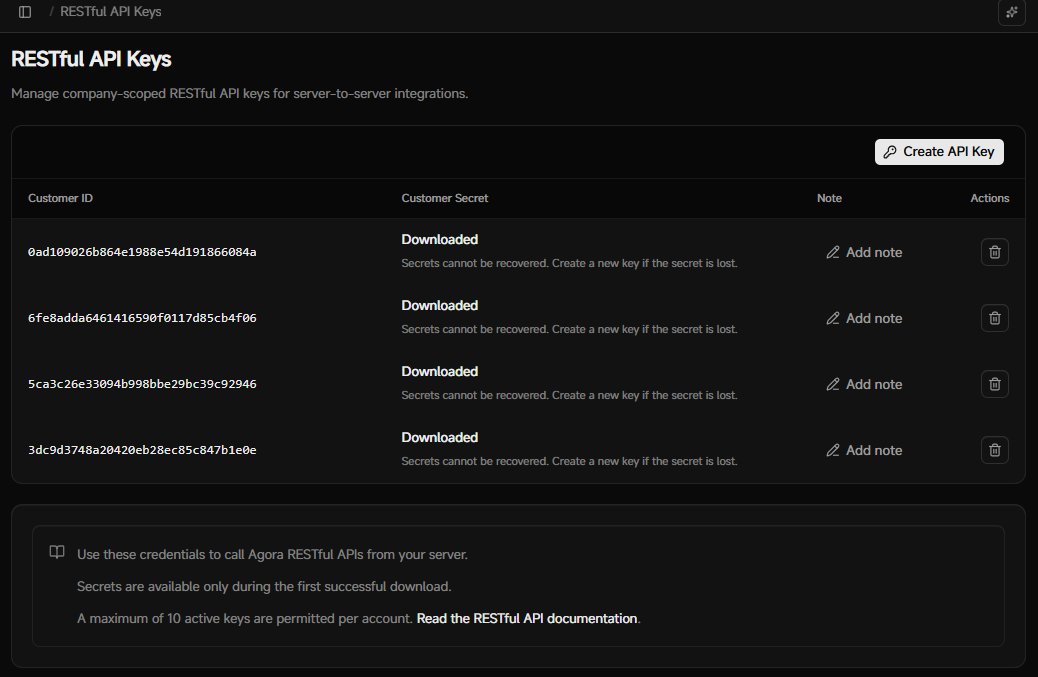
### Settings
The **Settings** page lets you manage your account information, team members, SSO integration, and notification settings.
#### Account
Use the **Account** tab to see your organization name, obtain your company ID, or change your account email. Toggle **Two-factor authentication** to enable or disable enhanced authentication for sensitive account actions. You can also use this tab to allow Agora customer support to operate your Console for the next 24 hours.
#### Teams and members
The **Teams and Members** tab lets you manage who has access to your account.
* **Members**: Lists each member, their role, status, and any remarks. Select **Invite Member** to add a new member.
* **Roles**: Lists each role, its permissions, and the projects it applies to. Permissions cover Usage, Finance, Teams & Members, Projects, XLA, and Agora Analytics access. Agora provides five built-in roles: **Finance**, **Engineer**, **CS & Maintenance**, **Product & Operation**, and **Admin**. Built-in roles are locked and can't be edited.
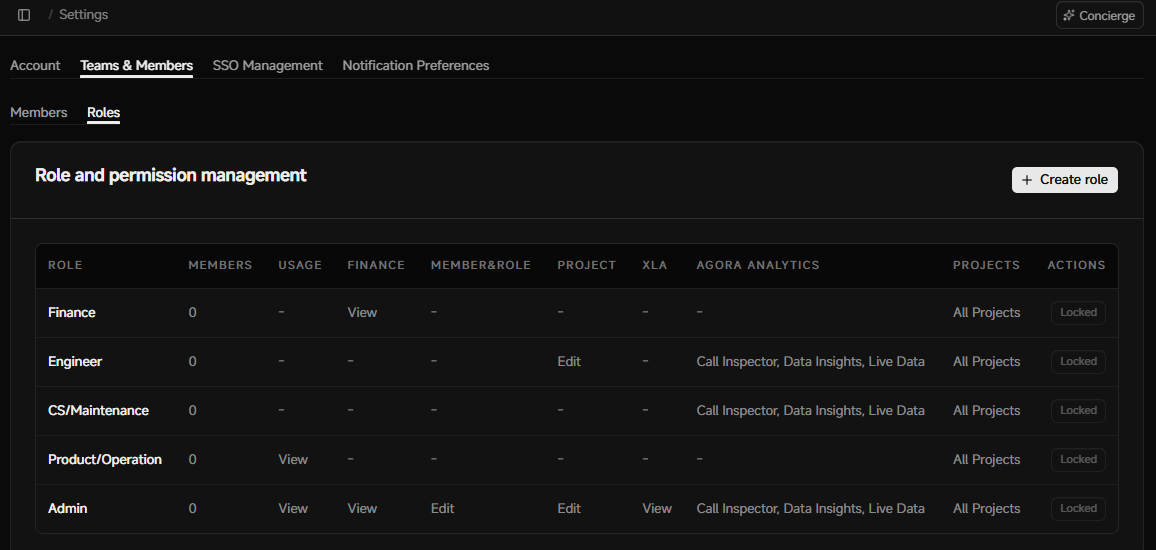
Select **Create Role** to define a custom role. When creating a role, set:
* **Role name**: A name for the role.
* **Permissions**: Access level (**None**, **View**, or **Edit**, depending on the module) for Usage, Finance, Teams & Members, Projects, and XLA.
* **Agora Analytics**: Access to Call Inspector, Data Insights, and Live Data.
* **Data**: The projects the role applies to. Select **All Projects**, or choose specific projects from the list.
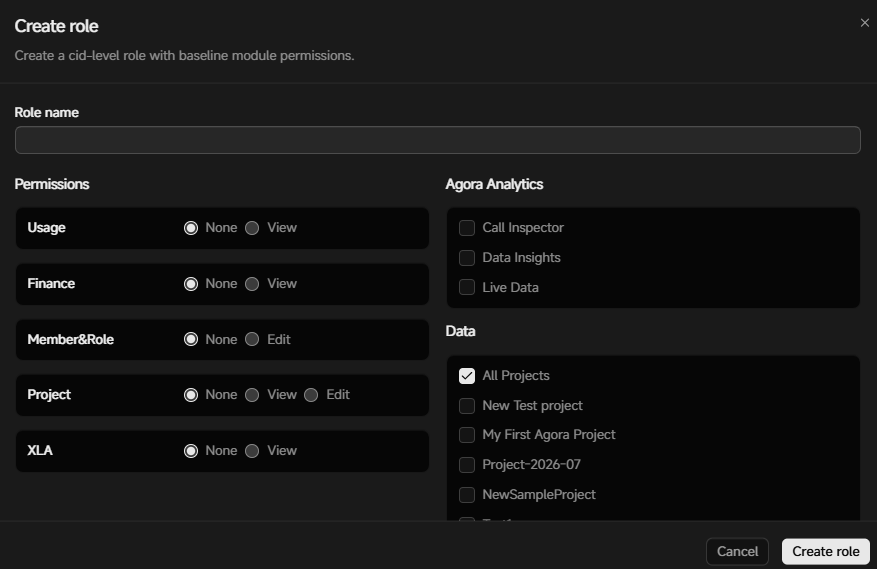
#### SSO management
The **SSO Management** tab lets you integrate Agora Console with Okta as your identity provider, so your team can log in using their Okta SSO credentials. This integration manages access using SAML and SCIM, and requires an active Premium or Enterprise Support Plan. Select **Request** to request the integration.
#### Notification preferences
Use the **Notification Preferences** tab to configure whether you want to receive notifications from Agora by email or text messages. You can set fine-grained preferences for each type of alert.
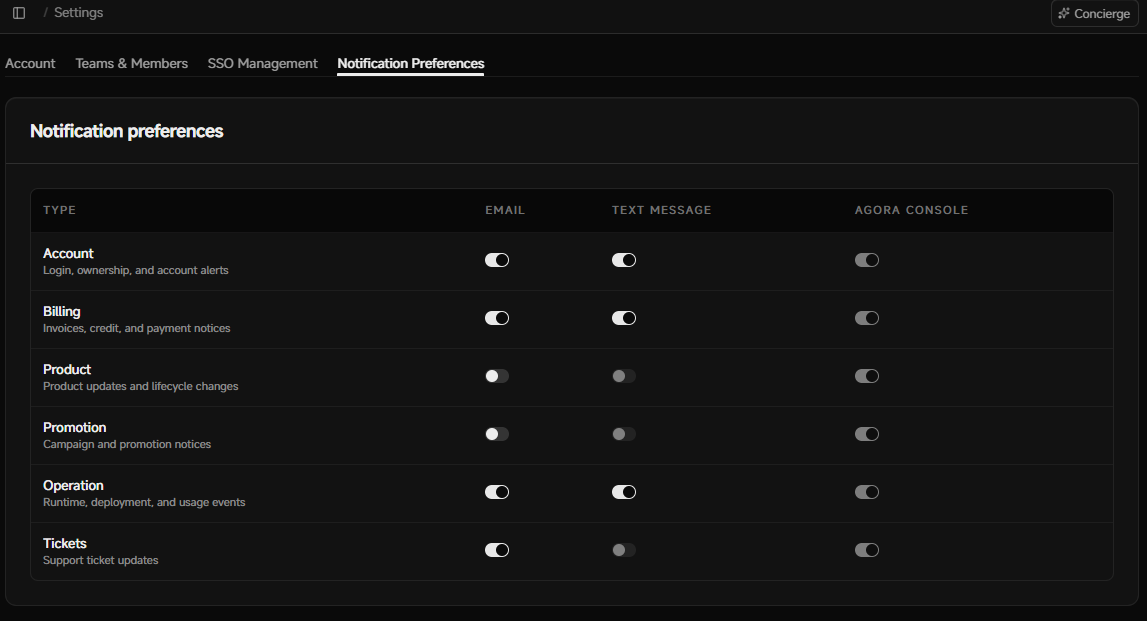
To view your notifications press the bell icon next to your username to open the **Notifications** page. The page lists notifications related to your Agora account. Filter by category using **All**, **Unread**, **Account**, **Billing**, **Product**, or **System**. Select a notification to read its full content.
### Get support
The **Get support** sub-menu provides useful links to Agora documentation, sales, support tickets, and the community platform.
# Conversational AI (/en/introduction/conversational-ai)
Conversational AI is the capability layer for products where the primary interface is a live conversation with an AI system. In this category, voice is not just an input channel. It is the product experience itself.
Agora groups several related surfaces under this layer:
* **Conversational AI Engine** for production voice-agent workflows
* **AI developer toolkits** for client and server integration
* **OpenAI Realtime integration** for teams that want to combine Agora transport with OpenAI Realtime-style model interaction
## What this category is good for
This category is the right entry point when you need:
* voice-first AI assistants and copilots
* customer service and sales agents
* tutors, role-play systems, and spoken learning experiences
* AI-powered smart devices and hardware endpoints
* multimodal products where an agent participates in a live session
The common requirement is natural turn-taking, low response latency, interruption handling, and a live connection between the user and the AI system.
## Products and paths in this category
The main product path for building real-time voice agents with managed speech, reasoning, interruption handling, and agent lifecycle control.
Client and server integration surfaces for web, mobile, and backend teams that need to build custom AI experiences on top of Agora.
A guided path for teams that want to connect Agora real-time transport with OpenAI Realtime-style voice interaction flows.
## Start here
## Key characteristics
Keep spoken interaction responsive enough for natural back-and-forth conversation rather than turn-based chatbot behavior.
Combine real-time audio transport with ASR, LLM, TTS, interruption handling, and agent lifecycle control in one interaction model.
Start from Agora-managed paths or integrate custom LLM, ASR, and TTS combinations depending on control and quality requirements.
Build across web, mobile, backend, and device surfaces with a shared mental model for sessions, events, and agent behavior.
Add custom data, event subscriptions, server-side orchestration, and downstream analytics without redesigning the whole interaction loop.
Reuse Agora's voice path and session model so AI can participate as part of a live system, not only as a detached API call.
## What to read next
* [Conversational AI](/en/ai)
* [AI quickstart](/en/ai/get-started/quickstart)
* [OpenAI Realtime](/en/ai/reference/openai-realtime-integration)
* [API Reference](/en/api-reference/conversational-ai)
# Core concepts (/en/introduction/core-concepts)
Voice Agents are real-time AI experiences where users speak naturally with an AI system. On Agora, voice agents listen, reason over the conversation, and respond with low-latency speech inside a live session.
RTC (Real-Time Communication) technology allows almost instant exchange of audio, video, and other media data between the sender and the receiver.
Agora Signaling, formerly known as RTM, provides real-time delivery of messages, presence, metadata, transcripts, state updates, and control events. In many voice agent experiences, RTC carries the live audio path, while Signaling carries the events and data that coordinate the experience.
Agora SDKs provide real-time audio, video, and messaging interaction services, with multi-platform and multi-device support. This includes high-definition video calls, voice-only calls, interactive live streaming, real-time messaging, as well as one-on-one and multi-group chats.
This article introduces the key processes and concepts you need to know to use Agora SDKs.
## Before you start
Most quickstarts and guides ask for the same values:
| Value | What it identifies |
| ----------------------------------- | ------------------------------------------------------------------- |
| [App ID](#app-id) | The Agora project that your app belongs to. |
| [App Certificate](#app-certificate) | The secret used to enable token authentication. |
| [Token](#token) | A dynamic key that grants a user permission to access a channel. |
| [Channel](#channel) | The live space, identified by a channel name, where users interact. |
| [UID](#user-id-uid) | The unique user identity of one participant in a channel. |
## Set up your Agora project
To use Agora SDKs, first create a project in Agora Console. See [Agora account management](/en/introduction/account) for details.
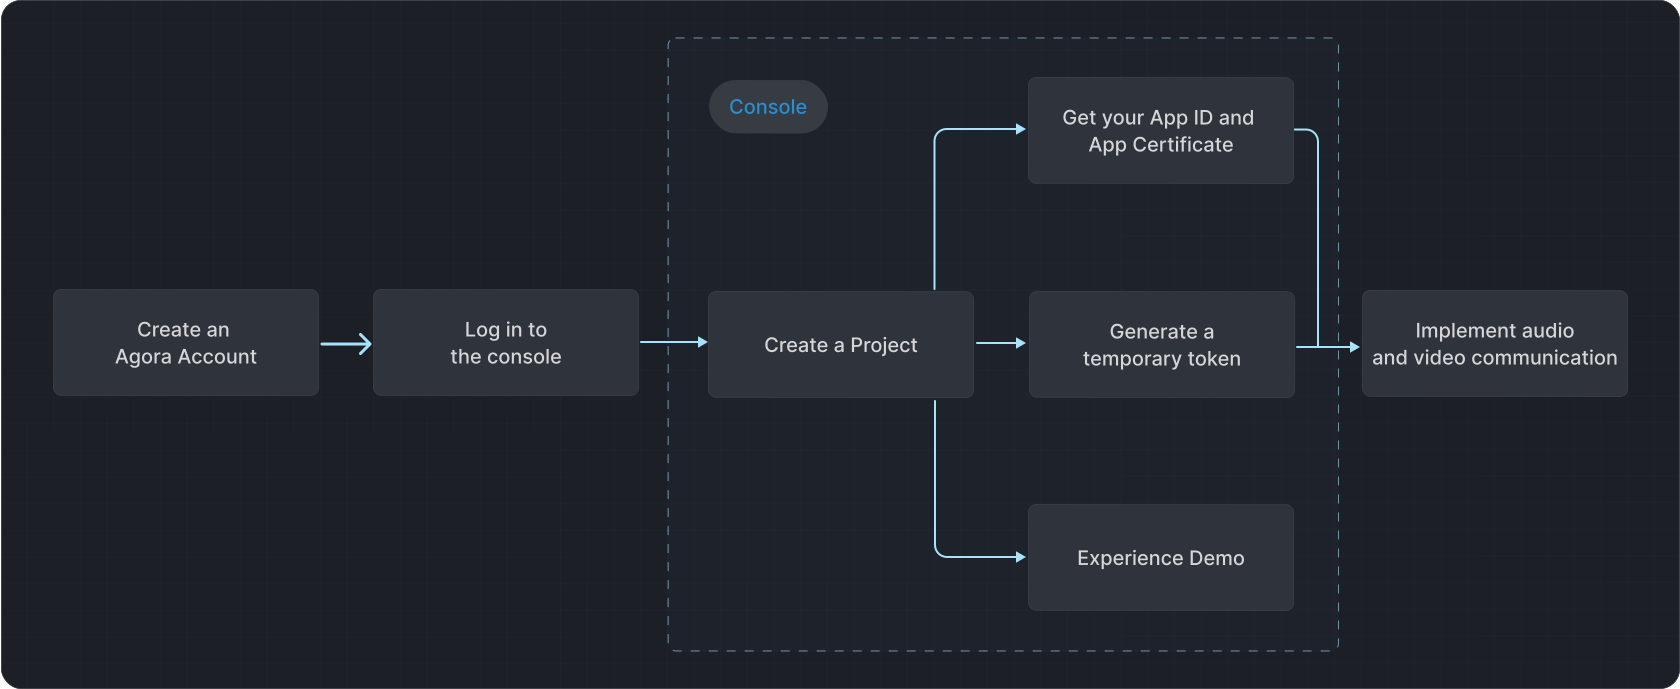
[Agora Console](https://console.agora.io/) is the main dashboard where you manage your Agora projects and services. After registering an [Agora account](https://console.agora.io/), use Agora Console to:
* Manage the account
* Create and configure Agora projects and services
* Get an App ID
* Manage members and roles
* Check call quality and usage
* Check bills and make payments
* Access product resources
Agora also provides REST APIs for tasks such as creating projects and retrieving usage data programmatically.
## General concepts
Agora uses the following basic concepts across its SDKs and cloud services:
### App ID
The App ID is a string generated in [Agora Console](https://console.agora.io) when you create a project. Each project has a unique App ID. Pass it when you initialize an Agora SDK, and use it when generating the authentication tokens that control access to a channel. You can [retrieve your App ID](https://console.agora.io/projects) in Agora Console.
Agora uses the App ID to identify your project and associate usage and billing data with it.
For production environments, use the **App ID + token** authentication mechanism. Without a token, anyone with access to your App ID can join your channels.
### App Certificate
An App Certificate is a secret generated by Agora Console to enable token authentication. It is required when generating RTC or Signaling tokens.
To use your App Certificate to set up a token server, see [Deploy a token server](/en/realtime-media/rtc/build/authenticate-users/deploy-token-server).
### Token
A token is a dynamic key that is used by the Agora authentication server to check user permissions. A token is usually scoped to a channel, a UID, a product capability, and an expiration time. You use Agora Console to generate a temporary token for testing purposes during the development process. In a production environment, you implement a token server in your security infrastructure to control access to your channels.
After obtaining the App ID, App Certificate, and token in Agora Console, you can start implementing basic audio and video communication in your app.
### Channel
Agora uses the *channel name* to identify a channel. Users who specify the same *channel name* join a common channel and interact with each other. A channel is created when the first user joins. It ceases to exist when the last user leaves.
You create a channel by calling the methods for transmitting real-time data. Agora uses different channels to transmit different types of data. The RTC SDK channel transmits audio or video data, while the Signaling channel transmits messaging or signaling data. The RTC SDK and Signaling channels are independent of each other.
Additional components provided by Agora, such as On-Premise Recording and Cloud Recording, join the RTC SDK channel and provide real-time recording, transmission acceleration, media playback, and content moderation.
### Channel profile
The SDK applies different optimization methods according to the selected channel profile. Agora supports the following channel profiles:
| Channel profile | Description |
| ------------------- | -------------------------------------------------------------------------------------------------------------------------------------------------------------------------------------------------------------------- |
| `COMMUNICATION` | This profile is suitable for one-on-one or group calls, where all users in the channel talk freely. |
| `LIVE_BROADCASTING` | In a live streaming channel, users have two client roles: *host* and *audience*. The *host* sends and receives audio or video, while the *audience* only receives audio or video with the sending function disabled. |
### Stream
A stream is a sequence of digitally-encoded coherent signals that contains audio or video data. Users in a channel [publish](#publish) local streams and [subscribe](#subscribe) to remote streams from other users.
### Publish
Publishing is the act of sending a user's audio or video data to the channel. Usually, the published stream is created by the audio data sampled from a microphone or the video data captured by a camera. You can also publish media streams from other sources, such as an online music file or the user's screen.
After successfully publishing a stream, the SDK continues sending media data to other users in the channel. By publishing the local stream and subscribing to remote streams, users communicate with each other in real time.
### Subscribe
Subscribing is the act of receiving media streams published by remote users in the channel. A user receives audio and video data from other users by subscribing to one or more of their streams. You either directly play the subscribed streams or process incoming data for other purposes such as recording or capturing screenshots.
### User ID (UID)
A User ID (UID) uniquely identifies a user within an Agora service. Both RTC and Signaling (formerly RTM) use UIDs, but the UID format, identity scope, and session behavior differ between the two services.
In RTC, the UID is an integer that uniquely identifies a user within a channel. When joining a channel, you can assign a specific UID or let Agora generate one automatically by passing `0` or, where supported, `null`. Each user in the same channel must have a unique UID. If multiple users join the same channel with the same UID, unexpected behavior may occur. Agora services and components use the UID to identify and manage the user within that channel.
In Signaling, the UID is a unique string supplied with the App ID when initializing the SDK. It identifies the user when logging in to Signaling and throughout the session, including for billing and online status notifications. Because the UID is associated with the user during initialization, the user only needs to provide the channel name when joining a channel. The same UID cannot be logged in to Signaling from multiple devices at the same time. If another client logs in with an active UID, the previously connected client is disconnected and receives a notification.
### User role
A user role is used to define whether users in the channel have permission to publish streams. There are two user roles:
* Host: A user who can publish streams in a channel.
* Audience: A user who cannot publish streams in a channel. Users with this role can only subscribe to remote audio and video streams.
### Connection (RtcConnection)
A connection is the link between the SDK and the channel. When you need to publish or receive multiple streams in multiple channels, use a connection to specify the target channel.
### Agora SDRTN®
Agora's core engagement services are powered by its Software-Defined Real-Time Network (SDRTN®) that is accessible and available anytime, anywhere around the world. The software-defined network isn't confined by device, phone numbers, or a telecommunication provider's coverage area like traditional networks. Agora SDRTN® has data centers globally that cover over 200+ countries and regions. The network delivers sub-second latency and high availability of real-time video and audio anywhere on the globe. With Agora SDRTN®, Agora can deliver live user engagement experiences in the form of real-time communication (RTC) with the following advantages:
* Unmatched quality of service
* High availability and accessibility
* True scalability
* Low Cost
# Firewall requirements (/en/introduction/firewall)
To allow you to use Agora products in environments with restricted network access, Agora provides the following solutions: the firewall whitelist and the Agora cloud proxy.
The following table lists the support of Agora products for the two solutions:
| Agora Products | Firewall Whitelist | Agora Cloud Proxy |
| ---------------------------------------- | :----------------: | :---------------: |
| RTC SDK (Native, third-party frameworks) | ✘ | ✔ |
| RTC SDK (Web) | ✔ | ✔ |
| Signaling SDK (Native) | ✔ | ✘ |
| Signaling SDK (Web) | ✔ | ✔ |
| On-Premise Recording SDK | ✘ | ✔ |
* When using the firewall whitelist, add the domains and ports to the firewall whitelist, and do not set restrictions on IP addresses.
* When using Agora cloud proxy, refer to [Connect to Agora through a restricted network](/en/realtime-media/rtc/build/manage-connection-and-quality/cloud-proxy)
### RTC SDK (Web)
Add the following destination domains and the corresponding ports to your firewall whitelist.
#### Domains
```text
.agora.io
.edge.agora.io
.sd-rtn.com
.edge.sd-rtn.com
.ap.sd-rtn.com
.statscollector.sd-rtn.com
.webrtc-cloud-proxy.sd-rtn.com
.rtnsvc.com
.edge.rtnsvc.com
.rtesvc.com
.edge.rtesvc.com
```
To improve connectivity over public networks, we recommend adding the domains listed above to your firewall allowlist.
#### Ports
| Destination ports | Port type | Operation |
| -------------------------------------------------------------------------------------------------------- | --------- | --------- |
| 80; 443; 3433; 3478; 4700 - 5000; 5668; 5669; 6080; 6443; 8667; 9667; 30011 - 30013 (for RTMP converter) | TCP | Allow |
| 3478; 4700 - 5000 (2.9.0 or later); 10000 - 65535 (before 2.9.0) | UDP | Allow |
### Signaling SDK (Web)
#### Message channel
For a message channel, you need to add the following content to the firewall whitelist:
* **Domains**:
```text
.edge.agora.io
.edge.sd-rtn.com
web-1.ap.sd-rtn.com
web-2.ap.sd-rtn.com
web-3.ap.sd-rtn.com
web-4.ap.sd-rtn.com
ap-web-1.agora.io
ap-web-2.agora.io
ap-web-3.agora.io
ap-web-4.agora.io
webcollector-rtm.agora.io
logservice-rtm.agora.io
rtm.statscollector.sd-rtn.com
rtm.logservice.sd-rtn.com
```
* **Ports**:
| **Destination port** | **Protocol** | **Operate** |
| ---------------------- | ------------ | ----------- |
| 443; 9591; 9593; 27387 | TCP | Allow |
Info
If you are using Signaling 1.x, also add port 9601.
#### Stream channel
For a stream channel, you need to add the following to your firewall whitelist:
* **Domains**:
```text
.agora.io
.edge.agora.io
.sd-rtn.com
.edge.sd-rtn.com
```
* **Ports**:
| **Destination port** | **Protocol** | **Operate** |
| --------------------------------------------------------- | ------------ | ----------- |
| 80; 3433; 4700 - 5000; 5668; 5669; 6080; 6443; 8667; 9667 | TCP | Allow |
| 3478; 4700 - 5000 | UDP | Allow |
### Signaling SDK (Native)
#### Message channel
For a message channel, you need to add the following content to the firewall whitelist:
* **Domains**:
```text
.agora.io
```
* **Ports**:
| **Destination port** | **Protocol** | **Operate** |
| ----------------------------------------------------- | ------------ | ----------- |
| 443; 7384; 8443; 9130; 9131; 9136; 9137; 9140; 9141 | TCP | Allow |
| 1080; 3000; 8000; 8130; 8443; 9120; 9121; 9700; 25000 | UDP | Allow |
#### Stream channel
For a stream channel, you need to add the following to your firewall whitelist:
* **Ports**:
| **Destination port** | **Protocol** | **Operate** |
| -------------------- | ------------ | ----------- |
| 4001 - 4150 | UDP | Allow |
Info
The target ports listed in this section may be adjusted according to actual conditions. If you encounter any issues, contact [rtm@agora.io](mailto\:rtm@agora.io).
# Glossary (/en/introduction/glossary)
## A
### Agora Analytics
Agora Analytics is a site for developers to track and analyze the usage and quality of calls.
### Agora Cloud Backup
Agora Cloud Backup is a backup cloud storage service used in cloud recording. If the recording service cannot upload the recorded files to the specified third-party cloud storage, then the service automatically and temporarily stores them in the backup cloud.
### Agora Console
Agora Console is a site for developers to manage Agora projects and services.
### App ID
An app ID is a randomly generated string provided by Agora and is the unique identifier of an app.
### App certificate
An app certificate is a randomly generated string provided by Agora for enabling token authentication. It is one of the required arguments for generating a token.
### Audience
Audience are users who do not have streaming permissions in a channel. An audience user can subscribe to remote audio and video streams, but cannot publish audio and video streams. For more information, see [user role](#user-role).
### Audience (becoming)
Becoming an audience describes a use-case within an Interactive Live Streaming channel (the channel profile is Live-Broadcast) when a host switches the user role and becomes an audience.
### Audio mixing
Audio mixing means combining multiple audio streams into one.
### Audio profile
An audio profile includes the sample rate, encoding scheme, number of channels, and bitrate for encoded audio data.
### Audio route
The audio route is the pathway audio data takes through audio hardware components during playback.
## C
### Callee
A callee is a Signaling user who receives a [call invitation](#call-invitation).
### Caller
A caller is a Signaling user who sends a [call invitation](#call-invitation).
### Call invitation
Call invitation is a communication protocol based on the peer-to-peer messaging functionality of the Agora Signaling SDK. Call invitation supports starting, ending, accepting, and refusing calls.
### Channel
In Agora's platform, a channel is a way of grouping users together and is identified by a unique channel name. Users who connect to the same channel can communicate with each other. A channel is created when the first user joins and ceases to exist when the last user leaves.
### Channel attribute
Channel attributes are tags added to Signaling channels, including the property name, property value, the ID of the last Signaling user who updated the attribute, and the time of the last update.
### Channel message
A channel message is a message that a Signaling user sends to all Signaling users in a channel.
### Channel profile
The channel profile is a configuration that Agora uses to apply optimized algorithms for different real-time use-cases.
### Cloud proxy
Cloud proxy is a proxy service that enables users to connect to Agora services through a firewall by using fixed IP addresses.
### CREC
CREC is a component provided by Agora for recording and saving voice and video calls and interactive streaming on a third-party cloud storage through RESTful APIs.
### Co-hosting
Co-hosting describes a use-case with more than one host.
### Composite recording mode
Composite recording mode generates a single mixed audio and video file for all UIDs in a channel.
### Custom rendering
Custom rendering is the process where developers collect raw data from the SDK and process it according to specific needs.
### Custom source
Custom source is the process where an app captures raw data by itself.
## D
### Delay
In real-time audio and video communication, delay refers to the time elapsed from when the data is sent to when it is received.
### Dual-stream mode
In the dual-stream mode, the RTC SDK simultaneously transmits a higher-resolution video stream along with an additional low-resolution, low bitrate video stream.
## F
### Freeze
Freeze refers to choppy audio or video playback caused by a poor network connection or limited device performance during real-time audio and video communication.
## H
### High-quality video stream
In dual-stream mode, the SDK transmits two video streams of differing quality at the same time. See [dual stream mode](#dual-stream-mode) for details.
### Host
The host refers to a user who has streaming permissions in a channel. A host can publish audio and video. A host may also subscribe to audio and video published by other hosts.
### Host (becoming)
Becoming a host describes a use-case within an Interactive Live Streaming channel (the channel profile is Live-Broadcast) when an audience switches the user role and becomes a host.
## I
### Individual recording mode
Individual recording mode records audio and video of each UID as separate files.
### Inject online media stream
Inject online media stream refers to injecting an online media stream in an Interactive Live Streaming channel to share the stream with all users in the channel. The Agora RTC SDK provides a method for developers to inject an online mixed audio and video stream or an audio only stream to a channel.
### Interactive Live Streaming
Enabled by either Agora’s RTC SDK or Voice SDK, Interactive Live Streaming gives you full control over the streaming experience from a standard one-to-many stream to a highly-interactive live event.
## J
### Jitter
In real-time audio and video communication, jitter is the variation in the delay of data packets transmitted continuously on the network.
## L
### Last mile
The last mile refers to the network between the Agora edge server and the end user's device.
### Loopback test
A loopback test sends a signal from a communication device and is then returned (looped back) to it. It is often used to determine whether a device is working properly.
### Low-quality video stream
In dual-stream mode, the SDK transmits two video streams of differing quality at the same time. The low-quality video stream has a lower resolution and bitrate than the high-quality video stream. See [dual stream mode](#dual-stream-mode) for details.
## M
### MediaPlayer kit
The mediaplayer kit is a plug-in of the RTC SDK to play local and online media resources and publish the media streams to other users in an Interactive Live Streaming channel.
### Media stream
A media stream is an object that contains media data.
### MPUSH
MPUSH enables you to upload audio and video streams from Agora channels and upload them to a Content Delivery Network (CDN) to reach a larger audience.
### Mirror
Mirroring is an effect that a video image renders.
## O
### Offline
Offline describes the status of a Signaling user who has successfully logged out of Signaling.
### Offline message
An offline message is a peer-to-peer message that an online Signaling user sends to an offline Signaling user.
### Online
Online describes the status of a user who has successfully logged in to the Agora Signaling system or stays disconnected from the Agora Signaling system for more than 30 seconds.
### OPREC
OPREC is a component provided by Agora for recording and saving voice and video calls and interactive streaming on a Linux server.
## P
### Packet loss
Packet loss refers to the data packets transmitted on the network failing to arrive at their intended destination.
### Peer-to-peer message
A peer-to-peer message is a message that an online Signaling user sends to an online or offline user.
### Publish
Publishing is the action of sending the user's audio and/or video data to the channel.
## R
### Raw data
Raw data, including raw audio data and raw video data, is the unprocessed data which developers can collect during real-time communication.
### Render the first video frame
Rendering the first video frame is the action of rendering the first video frame on the local device.
## S
### Agora SDRTN®
Software-Defined Real-Time Network (SDRTN®) is a real-time transmission network built by Agora and is the only network infrastructure specifically designed for real-time communications in the world.
### Signaling SDK
You use the Signaling SDK to implement real-time messaging use-cases that require low latency and high concurrency for a global audience.
### Slice
Slicing means cutting recorded audio or video into separate files according to specific rules. During an Agora CREC, the recording service cuts the streams and generates multiple slice files (TS or WebM files) and M3U8 files that serve as a playlist of the slice files.
### Sound localization
Sound localization means determining the distance to and direction of a sound through hearing the difference of volume, time, and timbre between users' ears.
### Stream fallback
In use-cases where multiple users engage in real-time audio and video communication, user experience can be impaired if the network condition is too poor to guarantee both audio and video at the same time.
### Stream mixing
Stream mixing means combining multiple media streams into one. It may include the mixing of video streams (video mixing) and audio streams (audio mixing).
### Subscribe
In the Agora RTC SDK, subscribing is the action of receiving media streams published to the channel. In the Agora Signaling SDK, subscribing is the action of monitoring the online status of one or multiple Signaling users.
## T
### TCP
TCP (Transmission Control Protocol) is a connection-oriented and reliable transport layer communication protocol.
### Token
A token, also known as a dynamic key, is used for authentication when an app user joins a channel or logs onto the Agora Signaling.
### Transcoding
Transcoding is the process of decoding audio and video data and then re-encoding them into the target conversion output or format.
## U
### UDP
UDP (User Datagram Protocol) is a connectionless-oriented and unreliable transport layer communication protocol.
### User attribute
User attributes are tags added to Signaling users, including property names and property values.
### User ID (uid)
In the Agora RTC SDK, a user ID identifies a user in the channel. The user ID is a 32-bit signed integer, with a value range from -231 to 231-1, that you can specify yourself. If you specify `0` for the user ID when joining a channel, the SDK generates a random number and returns the value in the join channel success callback.
In the Agora Signaling SDK, a user ID identifies a user in Signaling.
The user ID in the Agora RTC SDK and the Agora Signaling SDK are independent of each other.
### User role
The type of user role determines whether the user in the channel has streaming permissions.
## V
### Video layout
Video layout arranges the display of users when multiple users are mixed into one stream, such as in Media Push or a composite recording.
### Video mixing
Video mixing means combining multiple video streams into one.
### Video profile
The video profile refers to a set of video attributes, such as resolution, bitrate, and frame rate.
### RTC SDK
An SDK developed by Agora to enable developers to add real-time audio interaction to their projects.
### Voice SDK
Agora provides the Voice SDK to enable real-time audio communication.
## W
### Web page recording mode
In web page recording mode, the content and audio of a specified web page are recorded in a single file.
# Agora Documentation (/en/introduction)
## Build a Voice Agent
## Build Real-Time Applications
## Start with AI Tools
## Real-time use cases
## SDKs and APIs
## Get Help
# Members & Roles (/en/introduction/members-roles)
## Manage members and teams
Once you add members to your Agora account, you are assigned to the **Admin** team and can add these members to different teams with specified permissions.
### Add a member
1. Log in to Agora Console, click your account name in the top-right corner, and click **Settings**.
2. In the left navigation panel, click **Teams and members**, then select the **Members** tab.
3. Click **Add New Member**, fill in the email address of the new member, and choose a team from the dropdown.
4. Click **OK**.
5. Agora sends a confirmation email to this address. The new member must follow the instructions in the email to finish joining the project.
### Manage members
On the **Teams and members** page, **Members** tab, you can do the following:
* Change the team that a member belongs to.
* Delete a member.
Only the main account can delete a member account. Member accounts assigned to the **Admin** team cannot delete a member account.
### Manage teams and permissions
On the **Teams and members** page, **Teams** tab, you can view the permissions assigned to teams. Agora predefines the following teams:
* **Admin**: full access to all projects; can view usage data and finance information, manage members and teams, manage projects, and view Analytics reports.
* **Finance**: can view finance information for all projects.
* **Product/Operation**: can view usage data for all projects.
* **CS/Maintenance**: can view Analytics reports for all projects.
* **Engineer**: can manage projects and view Analytics reports for all projects.
### Add a custom team
1. On the **Teams and Members** page, **Teams** tab, click **Add New Team**.
2. Fill in the team name.
3. Select the permissions of this team in the **Usage**, **Finance**, **Teams and Members**, **Project**, **Analytics**, and **Data** columns.
4. Click **OK**.
# Messaging & Presence (/en/introduction/messaging-presence)
Messaging & Presence is the capability layer for products that need more than media. This category covers human messaging, participant presence, room state, and shared collaboration surfaces that keep live systems coordinated.
Agora's product map for this layer includes:
* **IM / Chat**
* **RTM / Signaling**
* **Interactive Whiteboard**
## What this category is good for
This category is the right entry point when you need:
* in-room chat and social messaging
* user presence and online state
* metadata synchronization and coordination signals
* collaborative session control and shared state
* whiteboard-backed visual collaboration inside a live product
The shared requirement is that participants must stay aligned with each other and with the state of the session in real time.
## Capability map
IM-oriented communication for user conversation, room interaction, and product workflows that depend on message exchange.
RTM-oriented channels, topics, presence, metadata, and coordination events that support real-time systems.
Shared visual state for drawing, annotation, presentation, and collaborative interaction around content.
## Start here
## Key characteristics
Support both user-facing communication and the metadata flows that keep live products synchronized.
Track who is online, what state they are in, and how session behavior should react as users and devices change status.
Extend from text and events into shared whiteboard or content collaboration when the product needs a richer interaction layer.
Combine easily with RTC sessions and AI agents when messages and events need to travel alongside audio and video.
Choose between IM-style user communication and RTM-style signaling depending on whether the main problem is conversation, coordination, or both.
Keep users, agents, and session tools operating against the same live room state instead of fragmenting the product experience.
## What to read next
* [Real-time Messaging RTM](/en/realtime-media/rtm)
* [Instant Messaging IM](/en/realtime-media/im)
* [Interactive Whiteboard](/en/realtime-media/whiteboard)
# Projects (/en/introduction/projects)
## Why this page matters
In Agora, a project is the operational boundary for a product environment. It holds the App ID, certificate configuration, enabled services, and billing context that the rest of your integration depends on.
If your project setup is wrong, the rest of the docs may still be correct but your implementation will fail later through missing credentials, disabled services, or the wrong security mode.
## What you do here
Use the **Projects** page in Agora Console to:
* create a new project for a product or environment
* choose the authentication mode for that project
* copy the App ID used by clients and services
* manage App Certificates for token-based access
* check whether the project is configured the way your integration expects
## Recommended setup
For most teams:
* create separate projects for development, testing, and production
* use **App ID + Token** instead of App ID only
* keep certificate management on the server side
* confirm the correct project is being used before debugging client or backend code
## Create a project
1. Open the **Projects** page in Agora Console.
2. Click **Create New**.
3. Enter a project name and use case.
4. Select **App ID + Token (Recommended)** as the authentication mechanism.
5. Click **Submit**.
## What to check in project details
On the project details page, confirm that you can:
* copy the App ID used by your application
* view whether token-based security is enabled
* access the App Certificate when your backend needs token generation
* verify that the project is the one your current environment should use
## Service access
To access most Agora products you need:
* An App ID.
* An App Certificate if your backend generates tokens.
* A project with the required service enabled.
For production, use token-based authentication instead of App ID only.
## What to verify before launch
Before moving beyond a prototype, confirm:
* the required service is enabled for the correct project
* the authentication mode matches your intended production design
* the billing unit makes sense for your usage pattern
* the right people on your team can access billing and financial records
## Manage App Certificates
Agora provides two certificate roles:
* **Primary Certificate** for normal token generation
* **Secondary Certificate** for production rotation and controlled cutovers
If you suspect a certificate is compromised:
1. Enable the Secondary Certificate.
2. Swap the certificates.
3. Disable the old secondary certificate.
4. Delete the original primary certificate after clients and services have moved over.
Deleting a certificate invalidates all tokens generated with that certificate.
## Restrictions
* If your account has multiple members, only those assigned to the **Admin**, **Engineer**, or an authorized custom team can access the **Projects** page.
* Each Agora account can create up to 20 projects. If you need to create more projects, submit a support ticket.
## Where to go next
* Open [Console setup](/en/introduction/console-setup) to understand the first-time console workflow around credentials and service activation.
* Read [Billing](/en/introduction/billing) to understand free allowances, settlement, and package options before launch.
* Read [Security and privacy](/en/introduction/security-privacy) before production rollout.
# Real-Time Voice & Video (/en/introduction/realtime-audio-video)
Real-Time Audio & Video is the capability layer for products where live media is the primary user experience. This category covers two-way voice and video interaction, host-audience live experiences, large-scale broadcast delivery, and device-oriented real-time connectivity.
Agora's product map for this layer includes:
* **Voice Calling**
* **Video Calling**
* **Interactive Live Streaming**
* **Fusion CDN broadcast delivery**
* **IoT / RTSA edge-device connectivity**
## What this category is good for
This category is the right entry point when you need:
* one-to-one or group voice and video calling
* meetings, classrooms, and telehealth sessions
* creator-led or host-audience live interaction
* broadcast-style delivery to larger audiences
* smart-device, camera, or edge-terminal media connectivity
The shared requirement is stable, low-latency media transport with clear session behavior across networks, devices, and participant roles.
## Capability map
Low-latency voice interaction for calling, social audio, customer communication, and lightweight live sessions.
Real-time face-to-face interaction for meetings, classrooms, telehealth, and collaboration products.
Host-audience interaction for creator events, live communities, and interactive broadcast-style products.
Fusion CDN-based distribution for larger viewer populations and playback-oriented live delivery.
RTSA-based device connectivity for smart cameras, displays, embedded endpoints, and IoT-oriented real-time media.
## Start here
## Key characteristics
Use the same real-time transport model across calling, live interaction, broadcast expansion, and device connectivity.
Support peer-to-peer, group, host-audience, and device-oriented topologies without switching to a different conceptual model.
Start from interactive sessions, then extend into larger audience delivery or downstream cloud media services.
Reach web, mobile, desktop, and edge-device products with consistent session and media semantics.
Combine media transport with messaging, AI, transcription, recording, and analytics as product requirements grow.
Keep the live experience usable under real-world packet loss, geography, and device constraints.
## What to read next
* [RTC](/en/realtime-media/rtc)
* [Fusion CDN](/en/realtime-media/fusion-cdn)
* [RTSA](/en/realtime-media/rtsa)
# Security & Privacy (/en/introduction/security-privacy)
## Information security policy
This section provides information security policy for Agora services.
Agora services provide built-in encryption and customized encryption. You can use either of them to implement encryption. The following diagram describes the encrypted data transmission process:
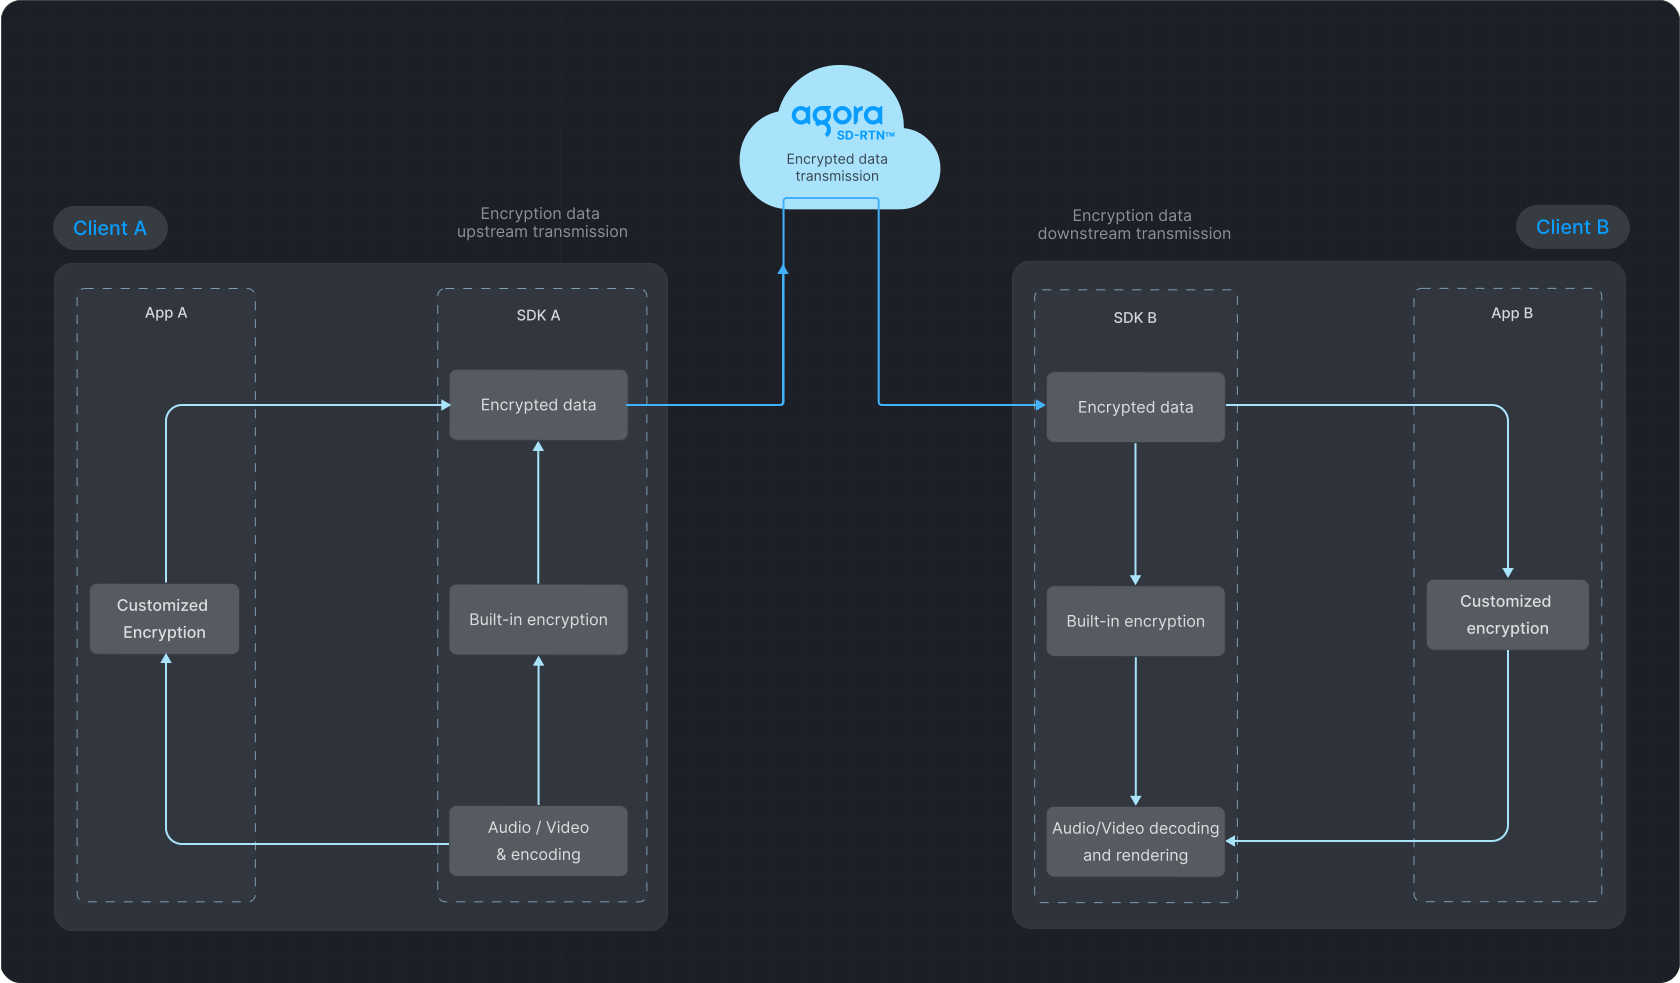
#### Purpose
Agora is committed to safeguarding the confidentiality, integrity, and availability of all users' physical and electronic information assets.
* Confidentiality against unauthorized access and eavesdropping
* Integrity against tampering and forgery
* Availability of data transmission through the Agora SDRTN®
#### Scope
This article describes how Agora protects customer data with security controls.
### Data classification
All customer data, in all formats or media types, is classified according to the following categories and protected accordingly.
| Category | Description |
| --------------------- | ----------------------------------------------------------------------------------------------------------------------------------------------------------------------------------------------------------------------------------------------------------------------------------------------------------------------------------------------------------------------------------------------- |
| Customer Account Data | Information related to the customers' Agora accounts, including customer ID, customer IP, network type, operating system, email address, telephone, product interest, programming platform, UTM information, identity, company name, company URL, billing information, trade information, purchased package information, project status, ticket, member information and console access records. |
| End User Data | Information collected by customers related to end users' personal devices and network, including microphone and camera information, CPU status, memory status, battery status, system version, phone model, phone signal level, received signal strength indicator (RSSI), network type, user attributes and channel attributes. |
| Call Content | Audio and video data of the user during a call. |
| Log | Media server logs generated by the Agora servers when accessing the Agora SDRTN®. Media server logs do not contain text messages or personal information. |
### Data security
The communication between the user and the Agora server is protected by transmission protocols, such as the Agora private transmission protocol, Transport Layer Security (TLS) and WebSocket Secure (WSS). You can also use Advanced Encryption Standard (AES) or a customized encryption algorithm for the encryption of audio and video data.
During data transmission, the Agora SDRTN® does not transmit any encryption key information. Call content information can only be decrypted on the terminal device (such as the client app and the customer's on-premise recording server) through the client authorization key.
### Data availability
* Large and distributed data centers: Agora has multiple data centers providing services globally, and any attack on one data center cannot affect others.
* Rapid recovery: When a data center is subjected to malicious attacks that are difficult to prevent, such as a distributed denial-of-service (DDoS) attack, Agora will automatically isolate the data center and avoid affecting users' services.
* DDoS attack prevention: Agora has deployed anti-DDoS firewalls in each core cloud data center. Agora has more than two hundred distributed data centers around the world, which guarantees sufficient capabilities and resources to control the risk of DDoS attacks.
### Data storage
Agora provides customers with the Agora On-Premise Recording SDK and Agora Cloud Recording, enabling customers to record part or all of the call contents. When using the recording services, all recorded video or audio files are stored on the storage server provided by the customer.
### Access authorization
End users can access the Agora SDRTN® using a dynamic key. For details, see [Secure authentication with tokens](/en/realtime-media/rtc/build/authenticate-users/authentication-workflow).
### Electronic access controls
Agora strictly controls the data access on all internal systems. All users have independent internal accounts and authorization systems, and must pass two-step verification. All access records are recorded.
All servers involving user data are strictly audited and protected. Agora employees will only access the production server when necessary, and only by obtaining temporary authorization. Operation records are kept for the whole process.
### Physical access controls
All operating servers are hosted in computer rooms that meet ISO 27001 or above information security management certification standards, and all computer rooms protect information security in accordance with the escrow agreement or the Data Protection Association (DPA). Both third-party hosting providers and Agora employees must be approved before they can access servers and equipment.
### Roles and responsibilities
Agora sets the responsibilities for its own staff and customers. See the following sections for more information.
### Roles and responsibilities within Agora
Security roles and responsibilities within Agora are categorized as follows:
| Role | Responsibilities |
| ---------------------------------- | -------------------------------------------------------------------------------------------------------------------------------------------------------------------------------------------------------------------------------------------------------------------------------------------------------------------------------- |
| Information Security Sub-Committee | The Information Security Sub-committee (ISSC) is responsible for the development and implementation of policies and procedures. The ISSC monitors company adherence, and conducts regular technical and non-technical evaluations of Agora security policies. The ISSC also designates which employees are authorized employees. |
| Authorized Employee | An authorized employee has access to the production machines required for the support and maintenance of the Agora service as determined by the ISSC. |
| All Other Staff | All other staff are required to maintain confidentiality as required by their terms of employment and are required to immediately report any security breach. |
### Shared responsibilities
When evaluating the Agora SDRTN®, it is important for customers to understand and distinguish the following security measures:
* The security measures that Agora implements and operates.
* The security measures that customers implement and operate to ensure the security of call content information and applications when using the Agora SDRTN® services.
Customers retain control of the security measures they choose to protect their personal information, platform, applications, systems, and networks. Agora customers should be responsible for all information they collect from users and themselves, such as application logins, identities, passwords, payment information, names, and addresses.
Agora recommends adding obvious prompts before accessing the users' personal information. For example, add an Enable/Disable button with which the user can agree or disagree to share personal information.
### Security training
Agora conducts information protection, security, and compliance training for all new employees. Agora also ensures that all employees receive information confidentiality training at least once a year. All authorized employees (employees who have access to the production machines) will receive additional training.
### Non-compliance
Employees must comply with confidentiality agreements and internal security systems. If a non-compliant situation occurs, Agora will take the corresponding measures depending on the severity of the situation, including but not limited to having conversations with the at-fault employees, strengthening training and education, dissolving labor agreements, and pursuing other legal liabilities.
### Reporting potential security risks
Please report any potential risks of Agora services that you may notice to [security@agora.io](mailto\:security@agora.io). Please use our PGP public key (Key ID: 2F4553BE) to encrypt your report, as potential security risks are usually sensitive. We assure you that our security experts will handle the issue immediately once they receive your report.
To facilitate troubleshooting and verification, please include the following information in your email:
* Your contact information.
* The version of the impacted SDK or solution.
* Description of the potential risks.
* Miscellaneous technical details, such as your system configurations, methods or steps for reproducing the issue.
To better protect our system and customers, Agora also invites security researchers to report any bugs or vulnerabilities they discover to us. Click [Bug Bounty](#agora-bug-bounty-program) to learn more.
### Security FAQ
To ensure the security of transmitted data, Agora services provide encryption for audio and video data. Customers can use AES-128/AES-256 or other algorithms preset by Agora, or use customized encryption algorithms. For details, see [Channel Encryption](/en/realtime-media/rtc/build/secure-and-protect-channels/media-stream-encryption). The encryption key is completely generated and distributed by the customer. Agora recommends that customers use separate keys for each channel to achieve the highest level of data security.
For network protocol encryption, Agora SDKs use AES-128 mode to encrypt network payloads.
For channel encryption, Agora SDKs support AES-128/AES-256 mode to encrypt audio and video. For those who have higher requirements for content security, Agora recommends using our customized encryption. Note that the On-Premise Recording SDK and Cloud Recording do not support customized encryption. For details, please send an email to [support@agora.io](mailto\:support@agora.io).
Yes.
Agora regularly scans core network nodes to check and clear possible security holes. Agora also configures anti-DDoS firewalls in each core cloud data center to protect them from attacks. Agora has more than two hundred distributed data centers around the world, which provides sufficient capabilities and resources to control the risk of DDoS attacks.
When using Agora services, the audio and video data are transmitted through the Agora servers. Agora servers cache the audio and video data for 10 seconds during the transmission and release all audio and video data immediately after the call.
## Whitepaper
People engage longer when they see, hear, and interact with each other. The future of meaningful human connections is made possible now with Agora’s Real-Time Engagement Platform. People rely on Agora’s Real-Time Engagement Platform to exchange millions of calls and messages, with vivid voice and video embedded in any application, on any device, anywhere.
Agora, Inc. is proud to offer a professional Real-Time Engagement Platform as a Service (RTE PaaS) with Compliance, Safety, Security, and Trust. Our commitment to compliance, data and information security, and privacy protection is part of the core values of our company. From our Software-Defined Real-Time Network (SDRTN®) architecture to our day-to-day business operations, Agora continually invests in innovations and business processes that build trust with our customers, investors, and developer community. Agora works to high standards to follow the best security practices and comply with strict privacy regulations and standards as we respect the privacy of all our customers.
The information contained in this document is intended to provide transparency in relation to Agora’s security stance and processes. If you think you may have found a security vulnerability within any of Agora’s services, please contact our security team directly at [security@agora.io](mailto\:security@agora.io).
Agora strives to incorporate security into all our products and services and integrates the best security practices into everyday business operations. To meet these primary goals and improve the overall information security posture in an efficient and effective manner, Agora has built its security framework against the ISO/IEC 27001 Information Security Management Standard.
As threats to information security continue to evolve, having dedicated security resources is essential. Agora’s Executive Security Committee meets regularly to address security concerns and coordinate company-wide security initiatives. The Agora Strategic Security Program Roadmap has been developed and approved by the committee to guide the implementation of our security programs. Our dedicated security team, led by the Chief Information Security Officer, has the responsibility for building and enforcing information security programs.
Agora is always looking to better protect its systems and customers. Therefore, we continuously monitor and improve our information security programs by implementing the following:
* Agora conducts an internal audit of its information security management system at least once a year to ensure effectiveness;
* Agora follows industry best practice software development lifecycle management processes and conducts internal security reviews and testing before deployment into production systems;
* Agora engages third-party security experts to carry out regular penetration tests;
* Through our Bug Bounty Program, Agora works with security researchers to keep our customers' data more secure by identifying and reporting vulnerabilities in our products and services.
Agora adheres to regional and international information security standards as well as industry requirements and is committed to using international best practices. We engage with independent third parties to verify the compliance of Agora. Certified by various reputable agencies across the globe, we are recognized by industry and security organizations for excellence.
**ISO/IEC 27001 Information Security Management Standard**
Agora is certified to ISO/IEC 27001:2022 by DNV GL, demonstrating our information security maturity level. Our security team implements the Information Security Management System in partnership with Ernst & Young. Security is a top priority at Agora, and this achievement demonstrates our commitment and continuous efforts to improve the efficiency of information security controls.
Download the certificate: [ISO/IEC 27001:2022](/files/Agora_ISO_27001.pdf)
**ISO/IEC 27018 Information Technology – Security techniques – Code of practice for protection of personally identifiable information (PII) in public clouds acting as PII processors**
Agora is certified to ISO/IEC 27018 by DNV GL. This standard is a Code of Practice for protecting personal data in the cloud environment. Agora continuously strives to protect our customers' sensitive data.
Download the certificate: [ISO/IEC 27018:2019](/files/Agora_ISO_27018.pdf)
**SOC 2 Report**
Agora is confident in our security practices, and we continue to engage independent third parties to perform strict SOC 2 audits on our internal processes, security controls, and the design of Agora products. We meet the audit requirements set by the American Institute of Certified Public Accountants (AICPA) standards for security, availability, and confidentiality, and have obtained a SOC 2 report.
**PCI DSS**
Agora prioritizes the security and privacy of its customers. Since we are neither a merchant nor a service provider as defined by the PCI Security Standards Council, we do not need to conduct an annual PCI assessment. However, Agora ensures that all transactions and customer data are handled with the highest level of security, in alignment with industry best practices. Should you have any questions or require further information regarding our security measures, please feel free to contact us at [security@agora.io](mailto\:security@agora.io).
**General Data Protection Regulation - GDPR**
Agora is aligned with GDPR and we are committed to providing GDPR-compliant products and services to our customers in the EU region or with our customers who conduct business within the EU.
**Health Insurance Portability and Accountability Act - HIPAA**
Agora is aware of the sensitivity of transmitting and processing health information and we have invested in both the creation and ongoing maintenance of a HIPAA compliance program.
**California Consumer Privacy Act - CCPA**
The CCPA is the first comprehensive privacy law in the United States that aims to provide a variety of privacy rights to California consumers. As a service provider, Agora is aligned with CCPA through the implementation of our security programs.
**Children’s Online Privacy Protection Act - COPPA**
The COPPA regulates the privacy protection requirements for children under the age of thirteen. Agora has engaged privacy experts in meeting the requirements of COPPA.
Agora strongly believes in the principles of Secure by Design and Defense in Depth. Therefore, Agora adopts industry-recognized security standards and best security practices at every layer, from infrastructure to application, to perfect our products and environment and to secure the organization and our customers.
Securing access to your environment starts with identity and access controls. Agora provides you with a solution to ensure that only authorized people can access your services and resources. The Agora Console is a role-based access control tool that you use to restrict access based on the "need-to-know" principle. The console is an interactive interface where you can easily create accounts, remove members, and assign roles and permissions. This tool can help you enforce your security policies.
Furthermore, Agora provides static key, dynamic key, and hybrid authentication methods to secure the communication channels in different use cases.
At Agora, you choose how your content is secured. We offer you various options for your content in transit and provide you with full control of your own encryption keys. These features include:
* Agora Software Development Kits (SDKs) provide built-in encryption algorithms, including AES-128 and AES-256, to protect all data transmitted between the end users and Agora services.
* We also provide you with the choice to use your own encryption algorithm to protect users’ media streams during real-time engagement. The encryption key is completely under your control.
* The communication between the end users and Agora network (that is, Agora SDRTN®) is protected by encrypted transmission protocols such as the Agora Private Transmission Protocol, Transport Layer Security (TLS) and WebSocket Secure (WSS).
Agora offers our customers the ability to record real-time communication with Agora On-Premise Recording SDK and Agora Cloud Recording SDK. The recording files can be stored on users’ local devices or in a designated cloud storage service chosen by our customers. The local recordings or cloud recordings can be further encrypted through any encryption form of your choosing.
Agora does not store any streaming data or user data except for caching for transmission purposes. The cached streaming data of users will be immediately released after the service.
Data centers hosting Agora services are maintained by certified and industry-leading cloud service providers, offering state-of-the-art physical protection for the servers and infrastructure that comprise the Agora environment.
The production environment, where all our customers' data and functional servers reside, is completely separated from our internal organization network, including the development and testing environments. This guarantees that all our customers' data will stay in the production environment and never be used for development or testing purposes.
Access to the Agora production and non-production network is minimized to the greatest extent. Agora also implements network segmentation in the production network based on various factors, such as the type of business, the criticality of data, and potential risks, to secure sensitive customer data.
**DDoS prevention**
Agora regularly scans our core network nodes in the production environment to check and clear potential security vulnerabilities. Anti-DDoS firewalls are configured in each core cloud data center for protection. With more than two hundred distributed data centers around the world, Agora can provide sufficient capabilities and resources to minimize the impact of DDoS attacks and ensure high availability of real-time video and audio anywhere around the globe.
**Monitoring, logging and analysis**
Agora continuously monitors and analyzes log events to gain a comprehensive view of the security state of our production environment. The logging covers both successful and unsuccessful security events, with an emphasis on the event data of critical infrastructure.
To provide customers with better visibility and security insights, Agora Analytics is made available to consumers as a tracking and analysis tool. This tool enables customers to efficiently locate quality issues and identify root causes for a better end user experience.
The tool contains the Real-Time Alarm function, which enables you to monitor call quality and informs you in real time when the user’s communication experience is below expectation. With Real-Time Alarm, you can undertake the following actions in real time:
* Monitor users who are having a poor communication experience.
* Identify abnormalities, analyze quality factors, and locate the source of an abnormal issue.
**Network geo-fencing**
Agora has embedded Network Geo-Fencing in Real-Time Voice, Video and Messaging SDKs to ensure your data is protected against rising concerns about network security and privacy breaches. Agora Network Geo-Fencing establishes a virtual boundary within Agora SDRTN®, and you have the choice to restrict your network traffic to one or more designated regions.
**Network redundancy**
Agora has more than 200 data center POPs (Points of Presence) across the world, covering the United States, Europe, China, Japan, India, the Asia-Pacific region, and other areas. The POPs in the SDRTN® network adopt the full mesh topology with superior routing capabilities. This ensures that the network services are not interrupted due to a single point of failure. The POPs build fault tolerance and disaster recovery capabilities for Agora services across regions.
POPs also measure the performance of every possible path through the global network to find the “optimized” paths to ensure high data packet delivery success rate within the smallest time window.
Agora provides expert guidance to our customers on how to leverage our security features and embed best practices into every layer of your application.
Agora is continuously monitoring, auditing, and improving the design and operating effectiveness of our security controls. These activities are regularly performed by both third-party credentialed assessors and Agora’s internal risk and compliance team. Audit results are shared with senior management and all findings are tracked to resolution in a timely manner.
In addition to third-party security compliance audits, Agora engages Trustwave SpiderLabs to conduct network penetration tests at least annually. Results of the penetration testing are shared with senior management and are triaged, prioritized, and remediated in a timely manner. Agora customers may receive executive summaries of these activities by requesting them from their account managers.
Data security and user privacy are the top priorities of Agora. Agora is committed to building a professional RTE PaaS with Compliance, Safety, Security, and Trust. It is a critical responsibility for Agora to help ensure the confidentiality, integrity, and availability of systems and data, and Agora continues to work hard to maintain that trust. If you have any questions or concerns, please contact our security team or account managers.
## ISO certifications
Security and compliance are basic requirements for real-time interaction. Agora complies with the compliance requirements of different countries and industries to create safe and reliable cloud services.
The ISO certification of Agora has passed the supervision and accreditation of three different certification organizations: IFA CNAS (China National Accreditation Service for Conformity Assessment), UKAS (United Kingdom Accreditation Service), and DNV (Det Norske Veritas). Agora builds cloud service technology worldwide in accordance with internationally recognized standards to ensure the information security of global customers.
#### ISO/IEC 27001:2022
ISO/IEC 27001:2022 is the most authoritative, widely accepted, and applied system certification standard in the field of information security. This system covers information security management during the global operation and maintenance of Agora's cloud platform for real-time engagement.
Download the certificate: [ISO/IEC 27001:2022](/files/Agora_ISO_27001.pdf)
#### ISO/IEC 27017:2015
ISO/IEC 27017:2015 is a supplementary standard to ISO 27001, which provides information security implementation specifications for cloud service providers.
Download the certificate: [ISO/IEC 27017:2015](/files/Agora_ISO_27017.pdf)
#### ISO/IEC 27018:2019
ISO/IEC 27018:2019 is a supplementary standard to ISO 27001, which provides implementation specifications for the protection of personal information for cloud service providers.
Download the certificate: [ISO/IEC 27018:2019](/files/Agora_ISO_27018.pdf)
#### ISO/IEC 27701:2019
ISO/IEC 27701:2019 is a privacy extension to ISO/IEC 27001 information security management and ISO/IEC 27002 security controls. It is an international management system standard that provides guidance on the protection of personal privacy, including how organizations should manage personal information.
Download the certificate: [ISO/IEC 27701:2019](/files/Agora_ISO_27701.pdf)
#### ISO/IEC 42001:2023
ISO/IEC 42001:2023 is the first international management system standard for artificial intelligence. It provides requirements for establishing, implementing, maintaining, and continually improving an AI management system within organizations that develop, provide, or use AI-based products or services.
Agora's certification covers the full life cycle of the Agora Conversational AI Platform and AI interactive systems, spanning the organizational roles of AI producer, provider, and user, in accordance with Statement of Applicability version 1.0.
Download the certificate: [ISO/IEC 42001:2023](/files/Agora_ISO_42001.pdf)
## Security best practices
Security and compliance are essential for real-time engagements through technology. In order to provide safe and reliable cloud services, Agora adheres to the compliance requirements of different countries, regions, and industries, in addition to being certified to ISO/IEC 27001. For more information, see [ISO certifications](#iso-certifications).
Agora products and services are designed and built with multiple protection measures against attacks commonly seen in the real-time engagement industry. This article describes some of the security best practices that Agora has adopted, as well as security tools it provides for developers, as follows:
| Protection measures | Applied by default | Recommended use cases |
| -------------------------- | ------------------ | ---------------------------------------------------------------------------------------------------------- |
| Channel separation | Yes | All real-time use cases. |
| Token-based authentication | No | All real-time apps in a production environment should use Token-based end-user authentication. |
| Encryption | No | Real-time use cases that require confidentiality. |
| Network geofencing | No | Real-time use cases where customers wish to restrict access to Agora servers to within a specified region. |
### Level 1 - Channel separation
The channel architecture is the first built-in layer of protection. Agora creates an independent and isolated channel for each audio, video, or messaging data transmission. All channels are logically separated, and only authenticated users from the same App ID can join the same channel.
### Level 2 - Token-based authentication
The second layer of protection is the authentication layer. This is implemented through dynamic Token-based authentication. The Token is a short-lived access key that is generated by the app backend and allows users to access the Agora platform after the user has been properly validated by the app.
A Token is generated with important information such as App ID, user ID (`uid`), channel name, and expiration date.
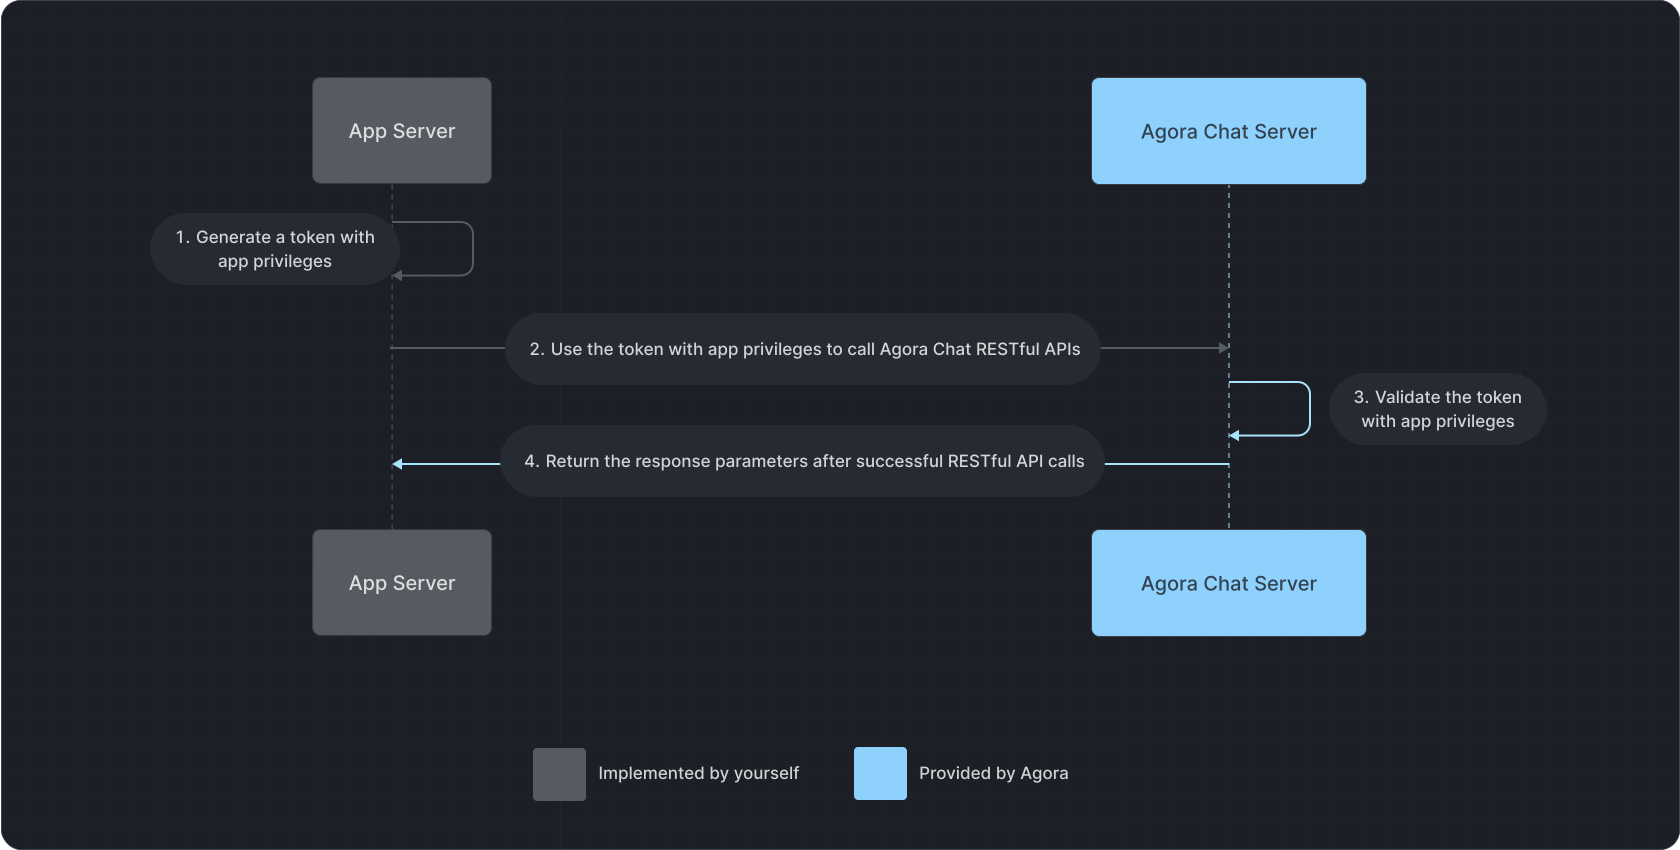
The app developer can enable Token-based authentication (App Certificate) on [Agora Console](https://console.agora.io/). When enabled, all users' requests to join a channel must use a valid Token.
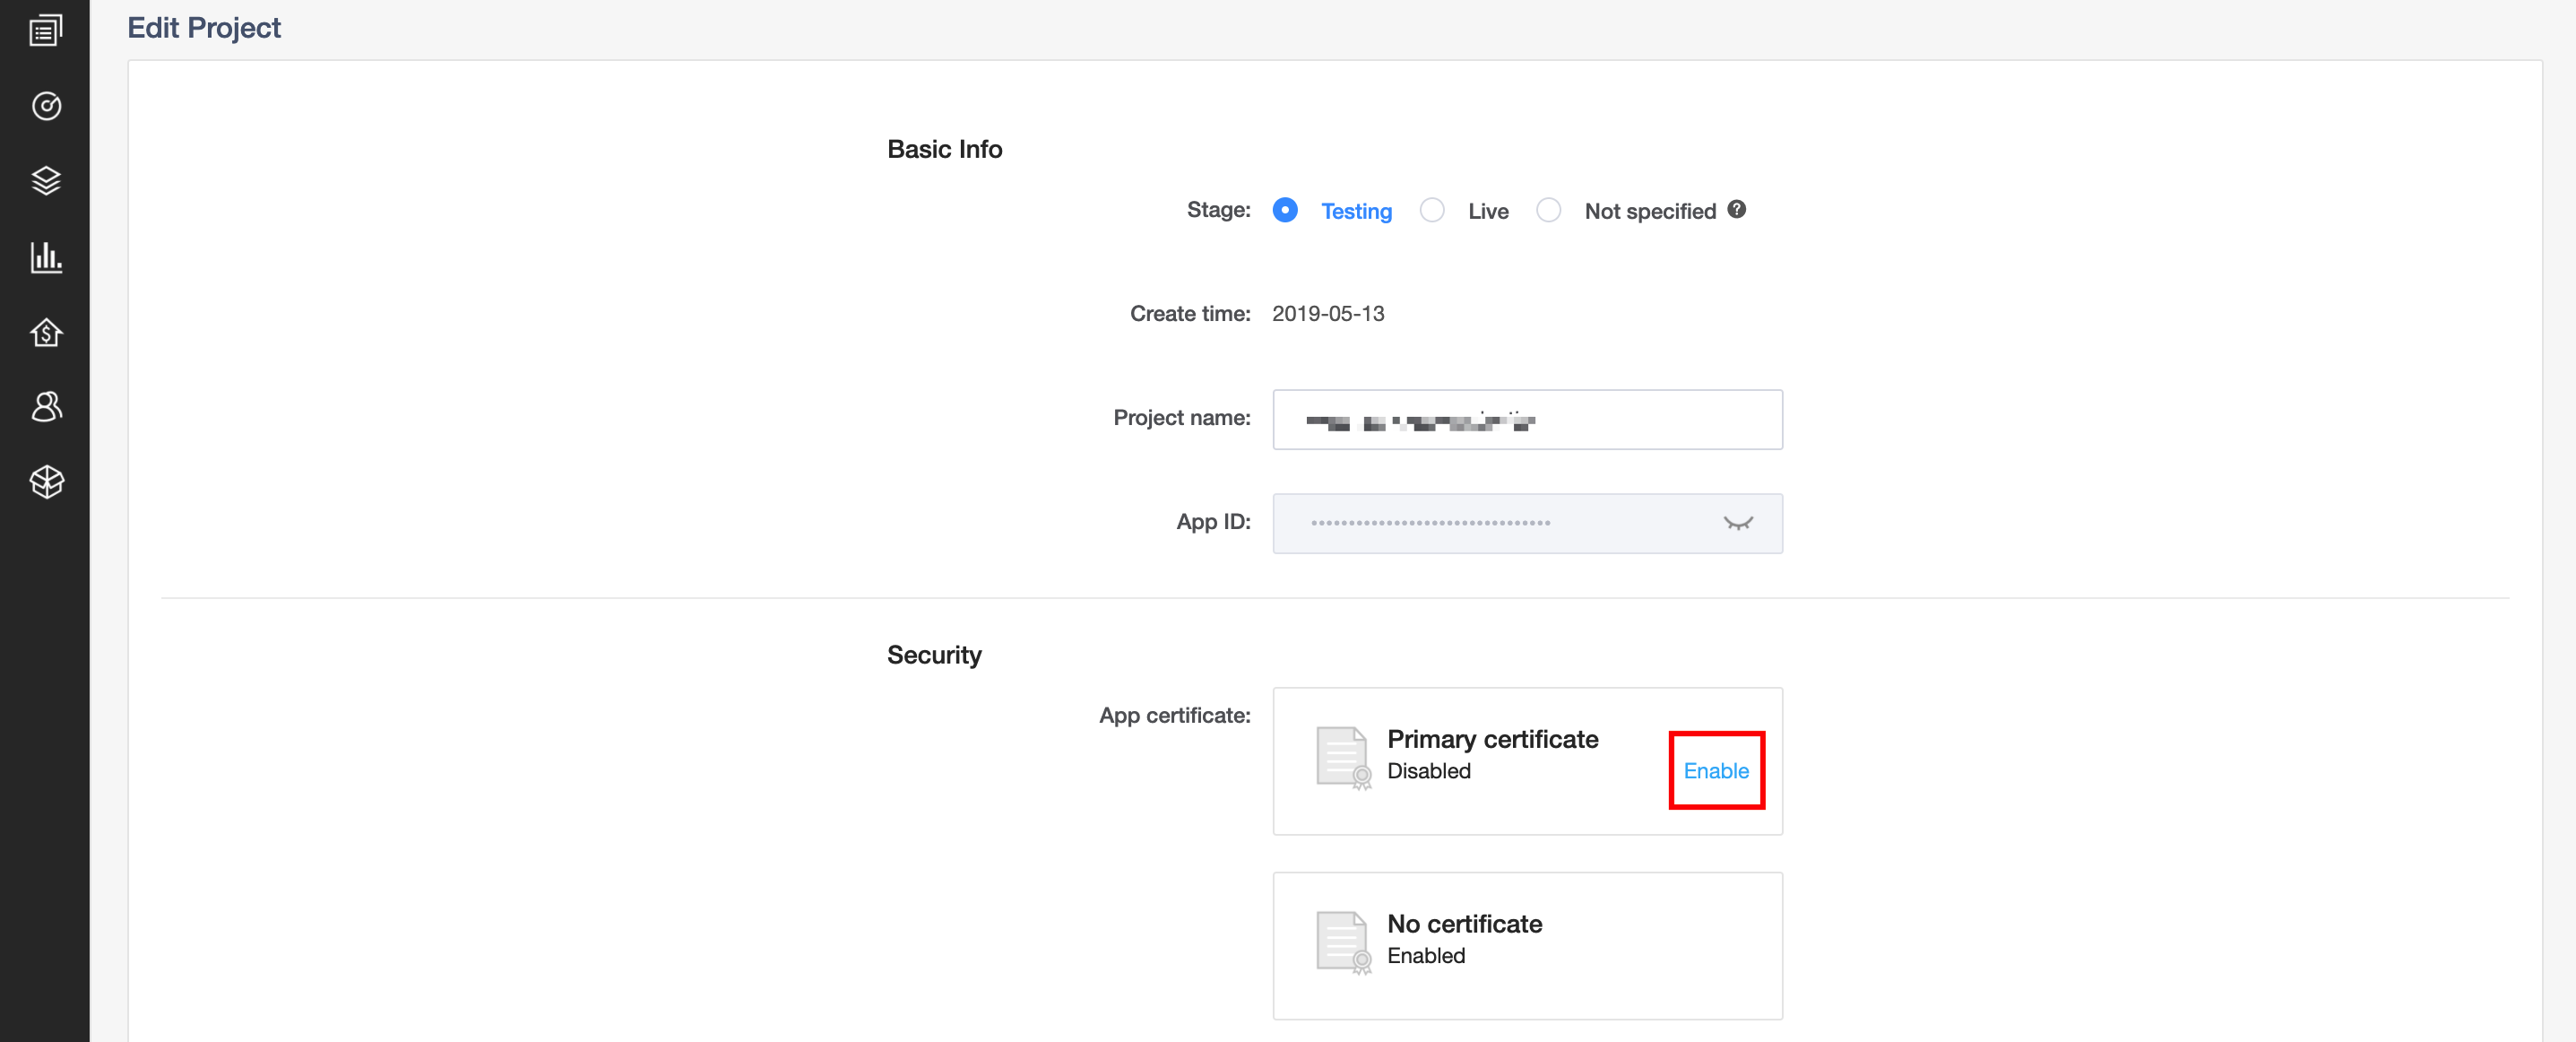
As a security best practice, set the Token expiration time (24 hours by default). A Token has three expiration timestamps:
* Token expiration: How long a Token is valid for, that is, how long a user can stay in a channel.
* Privilege expiration:
* Join a channel: How long a Token can be used to join a channel.
* Streaming privilege: Whether a user can send audio, video, or messaging to the channel, or join as an audience member. This privilege is not enabled by default.
### Level 3 - Encryption
The next layer of security in the Agora platform is encryption. Agora supports transmission encryption and data encryption.
To guarantee data confidentiality during transmission, Agora uses the AUT (Agora Universal Transport) encryption protocol, Agora's proprietary secured transport layer.
Data encryption encrypts all the audio and video streams with a symmetric key and encryption controlled by the app developer. At this level, the app provides a symmetric encryption key to the local SDK libraries.
The SDK encrypts all the captured media using the key and the configured AES-128/256 encryption. The data is sent encrypted to Agora SDRTN® and from there to the other endpoints in the channel. The receiving endpoint uses the key provided by the app layer to decrypt the media streams and send them to the renderers. With this method, only the application knows the keys. In the Native SDK (iOS, Android, macOS, Windows), the keys are not sent to Agora servers.
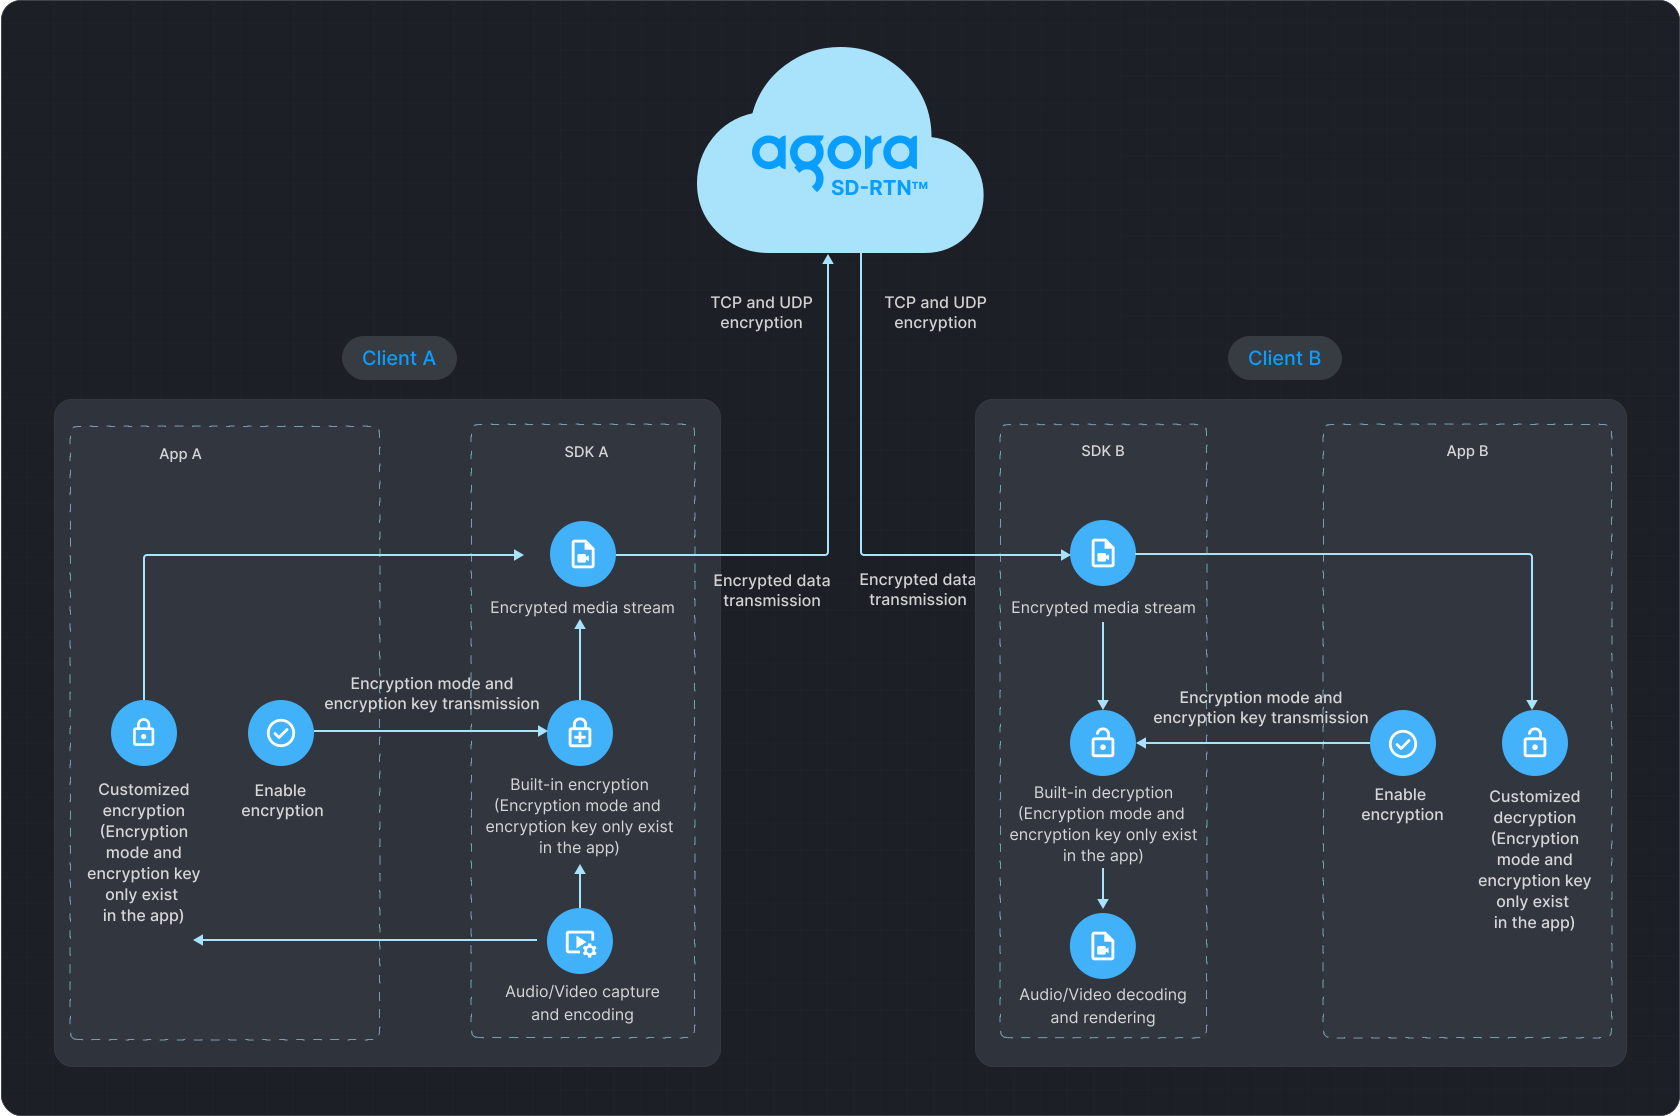
When using other Agora services like Web SDK, Cloud Recording, Content Moderation, and Transcoding, encryption is done a bit differently and it is not end-to-end. In this case, media is still encrypted, but the Agora service needs to be aware of the key to be able to connect to the channel and provide the service. For example, in Web SDK, user/browser protection is provided through web server protection (HTTPS) as well as WebRTC standard security practices, such as encryption and key management. More information on WebRTC security can be found [here](https://webrtc-security.github.io/).
Media encryption in Web SDK is based on the WebRTC standard, but interoperability with Agora is handled using Agora’s encryption engine, and the encryption key is passed securely to the Web SDK servers through APIs. The key is required because the Agora edge server converts from WebRTC protocols to Agora’s protocol and allows interoperability with Native SDK. A similar situation occurs with Cloud Recording, Content Moderation, and other services, where RESTful APIs are used to securely pass the key for the channel.
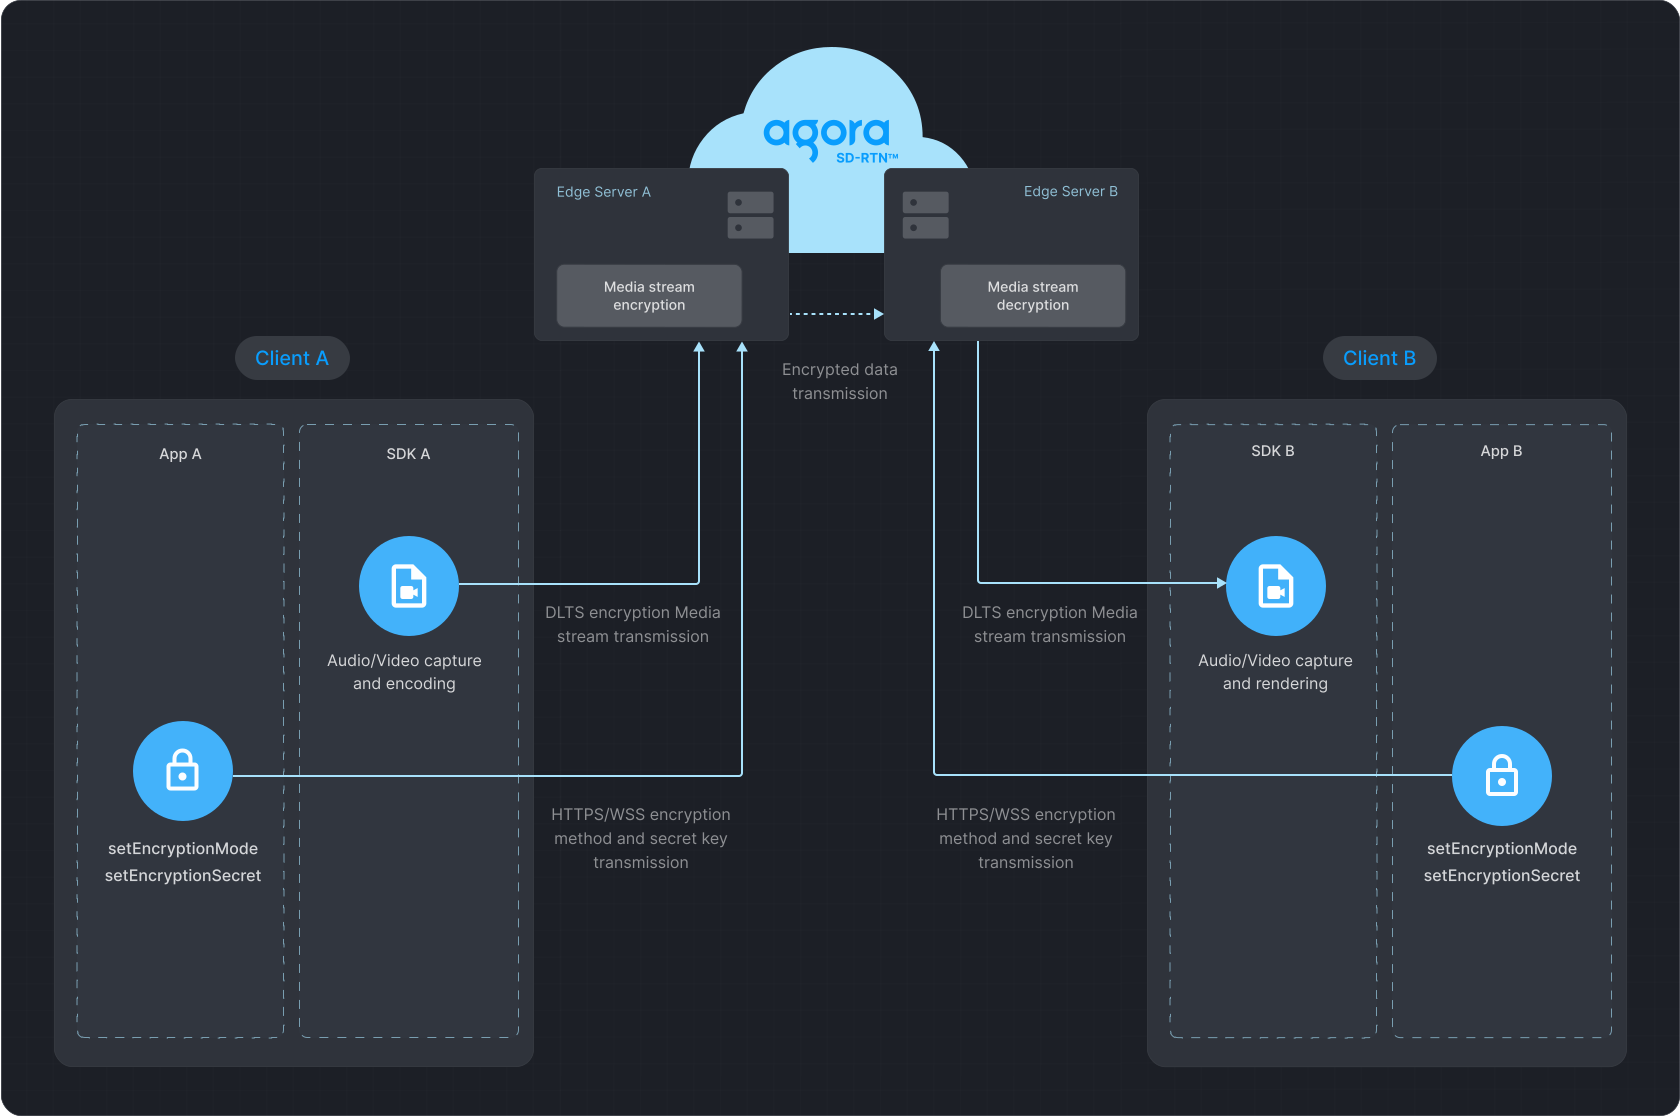
### Level 4 - Network geofencing
To conform to the laws and regulations of different countries and regions, the Agora RTC SDK and the Signaling SDK support network geofencing, which limits the transmission of data to within a specified region.
These SDKs support network geofencing in the following regions: global (default), North America, Europe, Asia (excluding Mainland China), Japan, India, and Mainland China. Once a customer specifies a region using geofencing, no audio, video, or message can access Agora servers outside that region.
### Security best practice checklist
Use this list to quickly check what measures you have or have not taken to best protect the security of your app and users:
1. [Enable Token-based authentication](/en/introduction/projects#manage-app-certificates) on [Agora Console](https://console.agora.io/).
2. Disable *No certificate* in your project management page. Once this is done, your app authenticates users with Tokens only.
3. [Deploy a Token server](/en/realtime-media/rtc/build/authenticate-users/deploy-token-server) in your backend services.
4. Protect the Token server and only allow the app backend server to connect to the Token server.
5. Set the Token expiration time to a reasonable value. See [Deploy a Token server](/en/realtime-media/rtc/build/authenticate-users/deploy-token-server).
6. If needed, contact [support@agora.io](mailto\:support@agora.io) to enable Token privilege and set Token per role.
7. For additional security, work with the Agora SA team if needed to customize the Token server and modify the Token join privilege to a short time, such as 5 minutes. This is more advanced and recommended after app development is completed.
8. Channel encryption key management: Generate a random key (secret) per channel at the time of creating the channel; do not reuse encryption keys.
9. Pass the channel encryption key (secret) securely outside the Agora engine to authenticated endpoints that are allowed to join the channel.
10. For additional security, you can also do the following:
1. Set the “Agora channel name” to a one-time random string managed by your app.
2. Set the Agora `uid` to a one-time numeric ID that is mapped to the user on the app level. Do not use users' real IDs in your app as the Agora `uid`.
## Agora bug bounty program
Agora is always looking to better protect our system and customers. Therefore, we invite security researchers to report any bugs or vulnerabilities they discover to us.
Once we receive notice of a bug or vulnerability, Agora customer service and security teams will respond quickly to address the issue.
In addition to our gratitude, those who report a vulnerability may be eligible for a monetary “bounty” based on the risk associated with the vulnerability and the importance of the affected system.
### System importance classifications
The following table shows system importance classifications (in descending order), along with some example Agora assets:
| Classification | Asset Examples |
| -------------- | ------------------------------------------------------------------------------------------------------------------------------------------------------------- |
| Core system | Agora SDRTN®, the mail system, and official websites such as [www.agora.io](http://www.agora.io/), [sso2.agora.io](http://sso2.agora.io/), and `api.agora.io` |
| General system | Forums and the Developer Portal ([docs.agora.io](https://docs.agora.io/)) |
| Fringe system | Test sites |
### Vulnerability severity classifications
The following list outlines detailed examples of how various vulnerabilities would be classified:
**Critical**
1. Unauthorized system privileges
Examples include command injection (execution), code injection (execution), web shell execution, SQL injection, and buffer overflow that gains system privileges on the core system.
2. Direct denial of service
Examples include actions that make service unavailable, reduce service quality, and so on.
3. Sensitive information leakage
Examples include SQL injection of the core database (identity, order), unauthorized disclosure of sensitive information relating to a user, product order, or payment method, and so on.
4. Serious logic design flaws and process defects
Examples include the ability to send batches of fraudulent messages, account consumption through a business interface, and large-scale modification of account passwords, and so on.
**High**
1. Sensitive information leakage
Examples include unauthorized disclosure of sensitive information relating to source code, hardcoded passwords, and so on.
2. Unauthorized access to sensitive information
Examples include bypassing authentication or backend password checks, leading to unauthorized access to sensitive intranet information.
3. Unauthorized sensitive operations
Examples include manipulating important information without authorization, such as orders, major business configurations, and so on.
**Medium**
1. Vulnerabilities that require interaction and affect users
Examples include stored XSS (cross-site scripting).
2. General unauthorized operations
Examples include incorrect direct object references, unauthorized access to orders, unauthorized access to user information, and so on.
3. General information leakage
Examples include client-side stored plaintext passwords, system path traversal, and so on.
4. General logic design flaws and process defects
**Low**
1. Local denial of service vulnerabilities, CSRF (cross-site request forgery), reflected XSS, and so on.
2. Minor information leakage, such as path information, SVN information, exception information, the local SQL injection of a client-side application (limited to database name, field name, log print), and so on.
3. Vulnerabilities that are difficult to exploit but still have security implications, such as plaintext transmission of passwords.
**Info**
1. Exposure of software banners, internal IP addresses, some public email addresses or phone numbers, and so on.
2. Using outdated versions of a system, supporting outdated versions of encryption protocols, such as SSL (Secure Sockets Layer) or TLS (Transport Layer Security) 1.0, supporting low-strength encryption algorithms, and so on.
### Bug Bounties
Please report any potential risks of Agora services that you may notice to [security@agora.io](mailto\:security@agora.io). Any bounties awarded will conform roughly to the following ranges (based on the severity and system location of the bug or vulnerability, payable in USD):
* Critical: $300 to $5000
* High: $200 to $2000
* Medium: $150
* Low: $50
* Info: $0
Note: Agora reserves the sole right to determine any reward amount given.
# Start with AI (/en/introduction/start-with-ai)
Use this page when you want your coding assistant to help you get started without guessing. The steps are simple: install the CLI, add the Agora skill, then give the assistant a prompt with the product, platform, language, and goal.
If you also want live docs lookup while the assistant works, pair [Agora Skills](/en/introduction/agora-skills) with [Agora MCP](/en/introduction/agora-mcp). Skills handles workflow guidance, and MCP handles current documentation.
## Quick start
### 1. Install CLI
macOS and Linux
Windows (PowerShell)
```bash
curl -fsSL https://dl.agora.io/cli/install.sh | sh
agora --help
```
```powershell
irm https://dl.agora.io/cli/install.ps1 | iex
agora --help
```
If your execution policy blocks inline scripts, download `install.ps1` and run:
```powershell
powershell -ExecutionPolicy Bypass -File .\install.ps1
```
After installation, confirm `agora --help` works in the same shell.
### 2. Add skill
Install [Agora Skills](/en/introduction/agora-skills) so your assistant can choose the right Agora workflow, starter, and setup sequence before it edits code.
Skills CLI
Manual installation
```bash
npx skills add AgoraIO/skills
```
Clone the repository and point your coding assistant to the Agora skill files:
```bash
git clone https://github.com/AgoraIO/skills.git ~/agora-skills
```
Use `skills/agora/` as the directory entry point, or load `SKILL.md` directly if your tool expects a single root file.
If your tool prefers local instruction files, point it at `skills/agora/` or the top-level `SKILL.md`.
If you only want docs lookup and not workflow guidance, install [Agora MCP](/en/introduction/agora-mcp) instead. Many teams use both.
### 3. Prompt
Now tell the assistant what you want it to build and how to approach the setup. A strong prompt includes the Agora product, the target platform, the language or starter preference, and the end goal.
```text
Use Agora Skills to help me build a web-based conversational AI demo in Python.
```
From there, let the assistant choose the starter, run `agora login`, initialize the project, and explain any environment values it writes locally.
## What success looks like
You are on the right path when the assistant can:
* choose an official starter instead of inventing one
* explain why that starter matches your product and platform
* use the Agora CLI for setup instead of ad hoc manual steps
* stay grounded in current Agora docs when platform details matter
# Support (/en/introduction/support)
## Submit a ticket
To ask Agora Support a question:
1. Log in to Agora Console.
2. Click **Get Support** > **Create Support Ticket**.
3. Type your question or keywords to see whether the issue has already been answered.
4. If you cannot find an answer, select a category and submit a ticket to customer support.
You can track ticket status under **Tickets**.
## Status page
Agora Status Page provides up-to-date information about product and service status, including:
* historical service stability for the past 90 days
* real-time quality data for the past 24 hours
* maintenance events and disruptions
* RSS event subscriptions
You can access the status page directly at [status.agora.io](https://status.agora.io/).
The status dashboard currently provides status information for:
* Real-Time Communication
* Cloud Recording
* Agora Chat
* Interactive Whiteboard
# Usage Analytics (/en/introduction/usage-analytics)
Agora Analytics tracks and analyzes the usage, quality, and performance of real-time voice, video, live streaming, chat, and other Agora products.
## Features
* **Call Inspector**: identify, analyze, and respond to performance quality issues with detailed call and user metrics.
* **Data Insights**: periodic call usage and quality statistics.
* **Real Time Monitoring**: visualized data for multiple call metrics in real time.
* **Alert notifications**: alerts when abnormal metrics or events are detected.
* **RESTful APIs**: retrieve call statistics and quality metrics for your own application or DataOps workflow.
* **Embedding**: embed Analytics pages in internal web portals using a low-code approach.
## Console usage page
The Console **Usage** page lets you check usage for the past 12 months.
You can:
* Select a time frame and data granularity.
* Filter by all projects or a specific project.
* Select a product.
* Turn on **View Breakdown**.
Only **Admin**, **Product/Operation**, and authorized custom teams can access the **Usage** page.
# Foundational real-time capabilities (/en/realtime-media/foundation-realtime)
## RTC
Owns audio, video, and channel sessions as the real-time base for calling, live streaming, meetings, and classrooms.
## RTM
Provides low-latency, reliable messaging plus state synchronization for channel messages, presence, and workflow coordination.
## Instant Messaging IM
Fits broader cloud-chat workloads where a full messaging service is needed beyond lightweight real-time coordination.
## Real-time Transcription & Translation
Provides ultra-low-latency, high-accuracy speech transcription and translation for captions, multilingual communication, and content understanding.
## RTSA
Provides real-time media-stream and signaling transport for device-oriented and terminal-style workloads.
# Overview (/en/realtime-media)
Realtime & Media is the capability domain for products that need something to happen live. Use this section when you are deciding how people, devices, backend services, and media streams should connect, stay in sync, and keep working while a session is in progress.
Instead of organizing docs around a single product story, this tab is organized around the functional layers most teams assemble when building a real-time experience: live interaction, session intelligence, media routing, large-scale delivery, and device or server participation.
## What you can build from this section
### Create live interaction surfaces
Use these docs when you are defining how users join a session, exchange media, coordinate actions, or collaborate in the same live space.
* [Voice & Video](/en/realtime-media/rtc): calls, meetings, co-hosting, interactive live rooms, and media quality control
* [Signaling](/en/realtime-media/rtm): channel messaging, presence, state sync, and real-time coordination
* [Chat](/en/realtime-media/im): persistent and full-featured messaging systems beyond lightweight room coordination
* [Whiteboard](/en/realtime-media/whiteboard): shared visual collaboration inside live sessions
### Understand, capture, and transform session content
Use these docs when media inside the session needs to become text, records, composites, or downstream assets.
* [Transcription & Translation](/en/realtime-media/speech-to-text): captions, speech understanding, and multilingual live experiences
* [Cloud Recording](/en/realtime-media/cloud-recording): archive, replay, compliance, QA, and post-session review workflows
* [Transcoding](/en/realtime-media/transcoding): mixing, layout composition, and output transformation
### Bridge real-time sessions with external media systems
Use these docs when your product must ingest outside streams, publish session media to other systems, or interoperate with existing streaming infrastructure.
* [Media Push](/en/realtime-media/media-push): send RTC channel media to CDN pipelines or downstream media systems
* [Media Pull](/en/realtime-media/media-pull): bring online media streams into an interactive real-time session
* [Media Gateway](/en/realtime-media/rtmp-gateway): connect RTMP-based devices and systems to Agora
### Deliver playback to larger audiences
Use these docs when interactive participation and large-scale viewing are separate concerns in your architecture.
* [Fusion CDN](/en/realtime-media/fusion-cdn): multi-CDN distribution for live playback at audience scale
### Extend the session to devices and backend services
Use these docs when participants are not just mobile or web clients, but also embedded devices, operator consoles, or server-side workers.
* [IoT & Edge](/en/realtime-media/rtsa): device and edge connectivity for cameras, terminals, and embedded endpoints
* [Server Gateway](/en/realtime-media/rtc-server-sdk): backend participation in media send, receive, subscribe, and control flows
## How to navigate this tab
* Start with [Voice & Video](/en/realtime-media/rtc), [Signaling](/en/realtime-media/rtm), [Chat](/en/realtime-media/im), or [Whiteboard](/en/realtime-media/whiteboard) when your main question is how users interact inside a live session.
* Start with [Transcription & Translation](/en/realtime-media/speech-to-text), [Cloud Recording](/en/realtime-media/cloud-recording), or [Transcoding](/en/realtime-media/transcoding) when your main question is what should happen to the media during or after the session.
* Start with [Media Push](/en/realtime-media/media-push), [Media Pull](/en/realtime-media/media-pull), [Media Gateway](/en/realtime-media/rtmp-gateway), or [Fusion CDN](/en/realtime-media/fusion-cdn) when your main question is how to move media across systems or out to larger audiences.
* Start with [IoT & Edge](/en/realtime-media/rtsa) or [Server Gateway](/en/realtime-media/rtc-server-sdk) when your main question is how devices or backend services participate in the real-time workflow.
## Common reading paths
* Interactive live streaming with large audience playback: [Voice & Video](/en/realtime-media/rtc) -> [Media Push](/en/realtime-media/media-push) -> [Fusion CDN](/en/realtime-media/fusion-cdn)
* Meeting archive and searchable records: [Voice & Video](/en/realtime-media/rtc) -> [Cloud Recording](/en/realtime-media/cloud-recording) -> [Transcription & Translation](/en/realtime-media/speech-to-text)
* External stream into an interactive session: [Media Pull](/en/realtime-media/media-pull) or [Media Gateway](/en/realtime-media/rtmp-gateway) -> [Voice & Video](/en/realtime-media/rtc)
* Smart device connectivity with backend media control: [IoT & Edge](/en/realtime-media/rtsa) -> [Server Gateway](/en/realtime-media/rtc-server-sdk)
# Media processing and distribution (/en/realtime-media/media-processing-and-distribution)
## Recording
Recording captures live interaction content into your storage flow for archive, replay, review, and compliance-oriented workflows.
### Cloud Recording
Fits teams that want a managed recording path from Agora.
### Local Server Recording
Fits teams that need self-managed recording servers and finer-grained control over the recording workflow.
## Media Push
Pushes interactive channel content into CDN or broadcast-style distribution paths.
## Media Pull
Brings external online media streams into an existing real-time scenario.
## Transcoding
Transcoding handles media transformation and composition for live streaming and multi-layout output scenarios.
### Cloud Transcoding
Fits teams that need hosted stream composition and output transformation.
## Media Gateway
Bridges standard live protocol flows with real-time interaction systems.
## Fusion CDN Live Streaming
Optimizes end-to-end playback through multi-CDN scheduling and distribution.
Additional note: the broader Agora content system also includes PPT Conversion. For this IA pass, it can stay as an extension of transcoding rather than a first-class left-nav item.
# RTC overview (/en/realtime-media/overview)
## Build live interaction
## Extend live interaction
## Process session content
## Connect external media
## Deliver to audiences
# Server-side and extensions (/en/realtime-media/server-and-extensions)
## Server Gateway
Lets the backend participate directly in RTC media send, receive, and control flows.
## SDK extension plugins
Support capability enhancement and customized audio-video effects on top of the existing SDK stack.
## Marketplace
Provides a faster path to selecting, purchasing, and connecting external real-time modules into your product.
# Set up service and credentials (/en/realtime-media/setup-service-and-credentials)
## Why this always comes first
No matter whether you end up building AI, RTC, RTM, recording, or transcoding, the first step is rarely "write code." It is usually confirming Console access, project state, App ID, credentials, and authentication.
## What you should prepare
* project and App ID
* customer ID and customer secret
* token generation strategy
* service enablement status
* the boundary between test and production environments
## Recommended practice
Prepare the control plane and credential flow first, then move into product-specific docs. That prevents expensive rework when permissions, quotas, or auth assumptions diverge later.
# FAQ (/en/api-reference/faq)
# API reference (/en/api-reference/api-ref)
# Channel Management REST API (/en/api-reference/api-ref/iot-channel-management-rest-api)
In addition to the SDK that you integrate into the app client, Agora provides server-side RESTful APIs to manage real-time channels.
The IoT Channel Management REST API uses the shared RTC REST API reference. Use these APIs to query channel information, manage user privileges, and query Agora Notifications service IP addresses.
## REST API reference
* [RTC REST API overview](/en/api-reference/api-ref/rtc)
* [How to call RESTful APIs](/en/api-reference/api-ref/rtc/how-to-call-api)
* [RESTful authentication](/en/api-reference/api-ref/rtc/authentication)
* [Response status codes](/en/api-reference/api-ref/rtc/response-status-codes)
## Endpoints
**Channel information**
* [Query the channel list](/en/api-reference/api-ref/rtc/query-channel-list)
* [Query the user list](/en/api-reference/api-ref/rtc/query-user-list)
* [Query the host list](/en/api-reference/api-ref/rtc/query-host-list)
* [Query the user status](/en/api-reference/api-ref/rtc/query-user-status)
**User privilege banning**
* [Create a banning rule](/en/api-reference/api-ref/rtc/create-ban-rule)
* [Delete a banning rule](/en/api-reference/api-ref/rtc/delete-ban-rule)
* [Get the banning rule list](/en/api-reference/api-ref/rtc/get-ban-rule-list)
* [Update the banning rule expiration](/en/api-reference/api-ref/rtc/update-ban-expiration)
**Message notification service**
* [Query the IP address](/en/api-reference/api-ref/rtc/query-ip-address)
## Supporting topics
* [Ban user privileges best practices](/en/api-reference/api-ref/rtc/ban-user-privileges-best-practices)
* [Ensure service reliability](/en/api-reference/api-ref/rtc/ensure-service-reliability)
* [Channel event types](/en/api-reference/api-ref/rtc/channel-event-types)
# Fastboard API (/en/api-reference/api-ref/uikit-sdk)
This page provides the API reference for the Fastboard SDK.
## Reference
## FastboardView class
### getFastboard
```java
public Fastboard getFastboard()
```
Get the `Fastboard` object.
The Fastboard SDK does not support initializing a `Fastboard` instance directly. To get the `Fastboard` object, you need to add the `FastboardView` object to the app's layout, and then call the `getFastboard` method.
**Note**
Call this method to obtain the `Fastboard` object before calling other APIs.
**Returns**
The `Fastboard` object is returned when the method call is successful.
## Fastboard class
The Fastboard class provides methods for creating `FastRoom` objects.
### createFastRoom
```java
public FastRoom createFastRoom(FastRoomOptions roomOptions)
```
Create a `FastRoom` object.
**Note**
Call this method after obtaining the `Fastboard` object.
**Parameters**
* `roomOptions`: Configuration options for the whiteboard room. See [FastRoomOptions](#roomoptions) for details.
**Returns**
A `FastRoom` object is returned when the method call is successful.
### preloadWhiteboardView
```java
public static void preloadWhiteboardView() {
WhiteboardViewManager.get().preload();
}
```
Preload the whiteboard view.
This method only takes effect when `autoPreload` in [`FastboardConfig`](#fastboardconfig) is set to `false`. Successfully calling this method will consume memory to perform one whiteboard view preload, improving the speed of joining rooms next time.
### destroy
```java
public void destroy()
```
Destroy the room and release resources.
### setConfig
```java
public static void setConfig(FastboardConfig config)
```
Modifies the auxiliary configuration of the `Fastboard` object.
**Parameters**
* `config`: The auxiliary configuration of the `Fastboard` object. See [FastboardConfig](#fastboardconfig).
### FastRoomOptions
Whiteboard room configuration options.
```java
public class FastRoomOptions {
private final String appId;
private final String uuid;
private final String token;
private final String uid;
private final boolean writable;
private final FastRegion fastRegion;
private Float containerSizeRatio;
private FastUserPayload userPayload;
public FastRoomOptions(String appId, String uuid, String token, String uid, FastRegion fastRegion) {
this(appId, uuid, token, uid, fastRegion, true);
}
public FastRoomOptions(String appId, String uuid, String token, String uid, FastRegion fastRegion, boolean writable) {
this.appId = appId;
this.uuid = uuid;
this.token = token;
this.uid = uid;
this.fastRegion = fastRegion;
this.writable = writable;
}
}
```
The `FastRoomOptions` class contains the following properties:
* `appId`: String. App Identifier for the interactive whiteboard project. For details, see [Get security credentials for your whiteboard project](/en/realtime-media/whiteboard/build/set-up-and-build-your-first-app/enable-whiteboard#get-security-credentials-for-your-whiteboard-project).
* `uuid`: String. The UUID of the room, which is the unique identifier of the room. For details, see [Create a room (POST)](/en/api-reference/api-ref/whiteboard/room-management#create-a-room-post) for the value of the `uuid` parameter in the response package body after the request is successful.
* `token`: String. Room Token of the room, used for user authentication when joining the room. It can be obtained in the following ways:
* Call the [Generate a room token (POST)](/en/realtime-media/whiteboard/build/authenticate-users/generate-token-rest#generate-a-room-token-post) RESTful API.
* Build a token generator at your app server. See [Generate a token at app server](/en/realtime-media/whiteboard/build/authenticate-users/generate-token-app-server).
* `uid`: String. The unique identifier of a user in string format. The maximum length is 1,024 bytes. Ensure that the `uid` of each user in the same room is unique.
* `writable`: boolean. Whether the user joins the whiteboard room in interactive mode:
* `true`: Join the whiteboard room in interactive mode, that is, with read and write permissions.
* `false`: Join the whiteboard room in subscription mode, that is, with read-only permission.
* `fastRegion`: The data center, which must be the same as the data center you chose when [creating the whiteboard room](/en/api-reference/api-ref/whiteboard/room-management#create-a-room-post). See [FastRegion](#fastregion).
* `containerSizeRatio`: Float. In the local display window, the aspect ratio of the content is `0.56` by default, which is `9:16`.
* `userPayload`: User information displayed by the user's cursor, including the user's nickname and avatar. See [`FastUserPayload`](#fastuserpayload) for details.
### FastRegion
Data center, containing the following enumeration values:
* `CN_HZ`: Hangzhou, China, the service area covers East Asia, Southeast Asia, and other areas not covered by the data center.
* `US_SV`: Silicon Valley, USA, the service area covers North America and South America.
* `SG`: Singapore, the service area covers Singapore, East Asia, and Southeast Asia.
* `IN_MUM`: Mumbai, India, the service area covers India.
* `EU`: London, UK, the service area covers Europe.
### FastUserPayload
```java
public class FastUserPayload {
private final String nickName;
private final String avatar;
public FastUserPayload(String nickName) {
this(nickName, null);
}
public FastUserPayload(String nickName, String avatar) {
this.nickName = nickName;
this.avatar = avatar;
}
}
```
`FastUserPayload` object, used to store the user information displayed on the cursor, contains the following member variables:
* `nickName`: String. The user's nickname displayed on the user's cursor.
* `avatar`: String. (Optional) The user avatar displayed on the user cursor, the URL address corresponding to the avatar should be passed in.
### FastboardConfig
```java
public class FastboardConfig {
private final boolean enablePreload;
private final int preloadCount;
private final boolean autoPreload;
}
```
The auxiliary configuration class of the `Fastboard` object, including the following attributes:
* `enablePreload`: Boolean. Whether to enable whiteboard preloading:
* `true`: Enable whiteboard preloading.
* `false`: (Default) Disable whiteboard preloading.
* `preloadCount`: Integer. The number of WebViews to preload, defaults to `0`. The actual effect of this attribute is limited by the memory capacity. You need to adjust the settings appropriately according to the actual situation.
* `autoPreload`: Boolean. This property only takes effect when `enablePreload` is `true`. Whether to enable automatic preloading:
* `true`: (Default) Enable automatic preloading. After enabling, whiteboard views will be automatically preloaded to improve loading speed, but will occupy additional memory.
* `false`: Disable automatic preloading. After disabling, you can call [`preloadWhiteboardView`](#preloadwhiteboardview) to manually perform preloading.
## FastRoom class
The `FastRoom` class provides methods for managing interactive whiteboard real-time rooms.
### join \[1/2]
```java
public void join()
```
Join a whiteboard room.
**Note**
This method needs to be called after the `FastRoom` object is successfully created.
### join \[2/2]
```java
public void join(@Nullable OnRoomReadyCallback onRoomReadyCallback)
```
Join a whiteboard room.
**Note**
This method needs to be called after the `FastRoom` object is successfully created.
**Parameters**
* `onRoomReadyCallback`: [OnRoomReadyCallback](#roomready) interface instance. Passing in `null` means not to register the interface.
### OnRoomReadyCallback
The `OnRoomReadyCallback` interface is used to send room event notifications to the app and includes the following member methods:
```java
void onRoomReady(FastRoom fastRoom);
```
Room ready callback.
**Parameters**
* `fastRoom`: `FastRoom` object.
### isReady
```java
public boolean isReady()
```
Get whether the room is ready.
After calling the `join` method, you need to call this method to get whether the room is ready. After the room is ready, other methods in the `FastRoom` class can be called to operate the whiteboard.
**Returns**
Is the room ready?
* `true`: ready.
* `false`: Not ready yet.
### isWritable
```java
public boolean isWritable()
```
Get whether the local user's current interactive whiteboard real-time room is in interactive mode.
**Returns**
Get whether the local user is in interactive mode:
* `true`: interactive mode, that is, with read and write permissions.
* `false`: Subscription mode, that is, with read-only permissions.
### redo
```java
public void redo()
```
Redo, that is, roll back the undo operation.
### setWritable \[1/2]
```java
public void setWritable(boolean writable)
```
Set whether the user is in interactive mode in the room.
**Note**
This method needs to be called after the room is ready.
**Parameters**
* `writable`: whether the user is in interactive mode in the room:
* `true`: interactive mode, that is, with read and write permissions.
* `false`: Subscription mode, that is, with read-only permissions.
### setWritable \[2/2]
```java
public void setWritable(boolean writable, FastResult result)
```
Set whether the user is in interactive mode in the room.
**Note**
This method needs to be called after the room is ready.
**Parameters**
* `writable`: whether the user is in interactive mode in the room:
* `true`: interactive mode, that is, with read and write permissions.
* `false`: Subscription mode, that is, with read-only permissions.
* `result`: The result of the `setWritable` method call. See [FastResult](#result) for details. Passing in the `FastResult` instance, the SDK will trigger the callback implemented in the `FastResult` interface and report whether the `setWritable` method call is successful; passing in `null` means not to listen to the callback.
### registerApp
Registers a third-party window application to the whiteboard room.
```java
public void registerApp(FastRegisterAppParams params, FastResult result)
```
This method allows you to register external applications that can run as independent windows within the whiteboard.
Registration supports two methods:
1. **Local script registration**: Uses local JavaScript code (recommended for its high reliability)
2. **Remote package registration**: Uses a remote URL (may fail due to network issues)
Caution
* You must complete the registration before joining the room to ensure the application loads correctly.
* Ensure that all clients use the same version of the application to avoid runtime issues.
* Register the application before joining the room.
* Registered applications can be added to the room using `getRoom().addApp()`.
**Parameters**
* `params`: Registration parameters, including app configurations. See [FastRegisterAppParams](#fastregisterappparams) for details.
* `result`: The result of the `registerApp` method call. See [FastResult](#result) for details. If you pass a `FastResult` instance, the SDK triggers the callback implemented in the `FastResult` interface to report whether the `registerApp` method call was successful. Passing `null` means the callback is not listened to.
### FastRegisterAppParams
A configuration class for registering third-party window app parameters.
```java
public class FastRegisterAppParams {
private String javascriptString;
private String kind;
private String url;
private Map appOptions;
private String variable;
public FastRegisterAppParams(String javascriptString, String kind, String variable, Map appOptions) {
this.javascriptString = javascriptString;
this.kind = kind;
this.appOptions = appOptions;
this.variable = variable;
}
public FastRegisterAppParams(String url, String kind, Map appOptions) {
this.url = url;
this.kind = kind;
this.appOptions = appOptions;
}
public String getJavascriptString() {
return javascriptString;
}
public String getKind() {
return kind;
}
public String getUrl() {
return url;
}
public Map getAppOptions() {
return appOptions;
}
public String getVariable() {
return variable;
}
}
```
The `FastRegisterAppParams` class provides two registration methods:
1. **Local script registration**: Registers using a local JavaScript string (recommended for its high reliability)
* Use the `FastRegisterAppParams(String javascriptString, String kind, String variable, Map appOptions)` constructor
2. **Remote package registration**: Registers using a published package's URL (may fail due to network issues)
* Use the `FastRegisterAppParams(String url, String kind, Map appOptions)` constructor
The `FastRegisterAppParams` class includes the following properties:
* `javascriptString`: String. Local JavaScript script code for local script registration.
* `kind`: String. The name of the registered app, representing the type name of the app.
* `url`: String. The URL address of the remote registration package for remote package registration.
* `appOptions`: Map\. Parameters passed during the initialization of the app instance. This configuration is not synchronized to other clients and is considered a local setting, often used to toggle debug mode.
* `variable`: String. The variable name mounted on the window, appearing as `window.variable` after mounting.
### undo
```java
public void undo()
```
Undo the previous operation.
### setStrokeColor
```java
public void setStrokeColor(@ColorInt int color)
```
Set the line color.
**Parameters**
* `color`: Integer. Line color, RGB format, for example `0x0000FF` means blue
### setAppliance
```java
public void setAppliance(FastAppliance fastAppliance)
```
Set the currently used whiteboard tool.
**Parameters**
* `fastAppliance`: Whiteboard tool. See [FastAppliance](#appliance) for details.
### FastAppliance
Whiteboard tool, containing the following enumeration values:
* `CLICKER(Appliance.CLICKER)`: Click tool. Currently mainly used for clicking content on HTML5 files.
* `SELECTOR(Appliance.SELECTOR)`: Select tool.
* `HAND(Appliance.HAND)`: Grab tool, used to move the view.
* `PENCIL(Appliance.PENCIL)`: Pencil.
* `RECTANGLE(Appliance.RECTANGLE)`: Rectangle tool.
* `ELLIPSE(Appliance.ELLIPSE)`: Ellipse tool.
* `TEXT(Appliance.TEXT)`: text tool.
* `ERASER(Appliance.ERASER)`: Eraser tool.
* `PENCIL_ERASER(Appliance.PENCIL_ERASER)`: Pencil eraser tool, used to erase local pencil strokes.
* `LASER_POINTER(Appliance.LASER_POINTER)`: Laser pointer.
* `ARROW(Appliance.ARROW)`: Arrow.
* `STRAIGHT(Appliance.STRAIGHT)`: Straight line.
* `PENTAGRAM(Appliance.SHAPE, ShapeType.Pentagram)`: Pentagram.
* `RHOMBUS(Appliance.SHAPE, ShapeType.Rhombus)`: rhombus.
* `TRIANGLE(Appliance.SHAPE, ShapeType.Triangle)`: triangle.
* `BUBBLE(Appliance.SHAPE, ShapeType.SpeechBalloon)`: Speech bubble.
* `OTHER_CLEAR()`: Clear the whiteboard content.
### setStrokeWidth
```java
public void setStrokeWidth(int width)
```
Set the width of the line.
**Parameters**
* `width`: Integer. Line width (px).
### cleanScene
```java
public void cleanScene()
```
Clear the whiteboard content.
### setWritable
```java
public void setWritable(boolean writable)
```
Set whether the user is in interactive mode in the room.
**Parameters**
* `writable`: boolean. Whether the user is in interactive mode:
* `true`: interactive mode, that is, with read and write permissions.
* `false`: Subscription mode, that is, with read-only permissions.
### insertImage
```java
public void insertImage(String url, int width, int height)
```
Insert picture.
This method can insert and display the specified network image onto the current whiteboard page.
**Parameters**
* `url`: String. The URL address of the image. Please ensure that the app client can access the URL, otherwise the image will not be displayed properly.
* `width`: Integer. The width of the image (px).
* `height`: Integer. The height of the image (px).
### insertVideo
```java
public void insertVideo(String url, String title)
```
Insert and play audio and video in the whiteboard sub-window.
**Parameters**
* `url`: URL address of audio and video files. Please ensure that the app client can access the URL, otherwise the audio and video files cannot be loaded normally.
* `title`: window title.
### insertStaticDoc
```java
public void insertStaticDoc(DocPage[] pages, String title, FastResult result)
```
Inserts a static document into a whiteboard subwindow.
**Parameters**
* `pages`: DocPage array. The page settings for the inserted document. See [DocPage](#docpage).
* `title`: String. The title of the subwindow.
* `result`: An object that implements the `FastResult` interface, used to handle the result of the method call. The SDK will use this object to report the result of the operation. If you do not need to listen to the callback, please pass in `null`.
### DocPage
```java
public class DocPage {
private String src;
private String preview;
private Double width;
private Double height;
}
```
A class for configuring the page settings for inserting documents. Includes the following attributes
* `src`: String. The address of the image or dynamic PPT page.
* Image: URL address, which can be generated by yourself or by the document conversion function. You can get the address from the image field returned by the query conversion task progress. Make sure the App client can access the URL, otherwise the image cannot be loaded normally.
* Dynamic PPT page: URI address generated by the document conversion function.
* `preview`: String. (Optional) URL address of the image or dynamic PPT preview image. The URL address of the dynamic PPT preview image can be obtained from the preview field returned by the query document conversion progress. After passing in, the preview image will be displayed on the left side of the App. Make sure the App client can access the URL, otherwise the preview image cannot be loaded normally.
* `width`: Integer. The width of the inserted document in the whiteboard (px).
* `height`: Integer. The height of the inserted document in the whiteboard (px).
### insertPptx
```java
public void insertPptx(String taskUuid, String prefixUrl, String title, FastResult result)
```
Insert a dynamic document in a whiteboard sub-window.
This method can insert dynamic HTML web pages converted by the document conversion function.
**Parameters**
* `taskUUID`: String. The Task UUID of the document conversion task, which is the value of the `uuid` field in the response body when the initiate document conversion task request is successful.
* `prefixUrl`: String. The prefix path of the converted result file address, which is the value of the `prefix` field in the response body when the query document conversion progress request is successful.
* `title`: String. The title of the sub-window.
* `result`: An object that implements the `FastResult` interface, used to handle the result of the method call. The SDK will use this object to report the result of the operation. If you do not need to listen to the callback, please pass in `null`.
### insertDocs
```java
public void insertDocs(FastInsertDocParams params, FastResult result)
```
**Note**
This method is deprecated since v1.6.0. Use [insertStaticDoc](#insertstaticdoc) or [insertPptx](#insertpptx) instead.
Insert and display documents in the whiteboard subwindow.
After successfully initiating the [document conversion task](/en/api-reference/api-ref/whiteboard/file-conversion), you can call this method and pass in the relevant parameters of the converted document. The SDK will automatically create a sub-window, insert and display the converted document in pages.
**Parameters**
* `params`: Insert the parameter settings of the document. See [FastInsertDocParams](#docparams) for details.
* `result`: `insertDocs` method call result. See [FastResult](#result) for details. Passing in the `FastResult` instance, the SDK will trigger the callback implemented in the `FastResult` interface and report whether the `insertDocs` method call is successful; passing in `null` means not to listen to the callback.
### FastInsertDocParams
Document parameter settings.
```java
public class FastInsertDocParams {
private String taskUUID;
private String taskToken;
private FastRegion region;
private ConverterType converterType;
private String fileType;
private Boolean dynamicDoc;
private String title;
}
```
The `FastInsertDocParams` class contains the following properties:
* `taskUUID`: String. Task UUID of the document conversion task, that is, [Initiate document conversion task API](/en/api-reference/api-ref/whiteboard/file-conversion). When the request is successful, the uuid parameter in the response package body value.
* `taskToken`: String. The Task Token of the document conversion task must be consistent with the Task Token passed in when [Initiate document conversion task](/en/api-reference/api-ref/whiteboard/file-conversion).
* `converterType`: enumeration. The version of the document conversion service, the values are as follows:
* `Projector`: new version. For details, see [New version of document conversion service](/en/realtime-media/whiteboard/build/display-files-and-manage-scenes/file-conversion-overview).
* `WhiteboardConverter`: legacy (default). For details, see [Old version of the document conversion service](/en/realtime-media/whiteboard/reference/file-conversion-overview-deprecated).
* `fileType`: String. Document type:
* `pdf`: static document.
* `pptx`: dynamic document.
* `dynamicDoc`: boolean. Whether the document conversion task type is a dynamic conversion task.
* `title`: String. Window title.
### setFastStyle
```java
public void setFastStyle(FastStyle style)
```
Style the whiteboard user interface.
**Parameters**
* `style`: The style of the whiteboard user interface. See [FastStyle](#faststyle) for details.
### FastStyle
Whiteboard user interface style.
```java
public class FastStyle {
private int mainColor;
private boolean darkMode;
public FastStyle() {
}
public int getMainColor() {
return mainColor;
}
public void setMainColor(@ColorInt int color) {
this.mainColor = color;
}
public boolean isDarkMode() {
return darkMode;
}
public void setDarkMode(boolean darkMode) {
this.darkMode = darkMode;
}
public FastStyle copy() {
FastStyle style = new FastStyle();
style.mainColor = mainColor;
style.darkMode = darkMode;
return style;
}
}
```
The `FastStyle` class contains the following member methods:
**getMainColor**
Gets the theme color of the whiteboard user interface.
**Returns**
The theme color for the whiteboard user interface.
**setMainColor**
Set the theme color of the whiteboard user interface.
This method can set the color of some button borders and prompt text when the whiteboard is loaded.
**Parameters**
* `color`: The theme color of the whiteboard user interface, RGB format, for example `0x0000FF` means blue.
**isDarkMode**
Gets whether the whiteboard user interface is in dark mode.
**Returns**
* `true`: Whiteboard user interface is in dark mode.
* `false`: The whiteboard user interface is in light mode.
**setDarkMode**
Set the whiteboard user interface to dark mode.
**Parameters**
* `darkMode`: whether to use dark mode:
* `true`: dark mode.
* `false`: light mode.
### setResource
```java
public void setResource(FastResource fastResource)
```
Set resources related to whiteboard color.
**Parameters**
* `fastResource`: Whiteboard color-related resources. See [FastResource](#fastresource) for details.
### FastResource
Resources related to whiteboard colors.
```java
public class FastResource {
@ColorInt
public int getBackgroundColor(boolean darkMode) {
return color(darkMode
? R.color.fast_dark_mode_bg
: R.color.fast_light_mode_bg
);
}
@ColorInt
public int getBoardBackgroundColor(boolean darkMode) {
return getBackgroundColor(darkMode);
}
}
```
Contains the following member methods, all of which can be overridden to customize colors:
**getBackgroundColor**
Get the background color of the whiteboard control.
**Parameters**
* `darkMode`: boolean. Whether the background color of the whiteboard control is dark mode:
* `true`: dark mode.
* `false`: light mode.
**Returns**
Hexadecimal color value.
**getBoardBackgroundColor**
Get the whiteboard background color.
**Note**
If you do not override this method, `getBackgroundColor` will be called by default.
**Parameters**
* `darkMode`: boolean. Whether the whiteboard background color is dark mode:
* `true`: dark mode.
* `false`: light mode.
**Returns**
Hexadecimal color value.
## FastUiSettings class
The `FastUiSettings` class provides methods for setting up the whiteboard user interface.
### showRoomController
```java
public void showRoomController(ControllerId... ids)
```
Demonstrates controls on a whiteboard user interface.
**Parameters**
* `ids`: The identifier of the control. See [ControllerId](#controllerId) for details.
### hideRoomController
```java
public void hideRoomController(ControllerId... ids)
```
Hides controls on the whiteboard user interface.
**Parameters**
* `ids`: The identifier of the control. See [ControllerId](#controllerId) for details.
### ControllerId
Controls on the whiteboard user interface, including the following enumeration values:
* `RedoUndo`: redo and undo buttons.
* `ToolBox`: Toolbar.
* `PageIndicator`: Page indicator.
### setToolsExpandAppliances
```java
public static void setToolsExpandAppliances(List> toolsExpandAppliances)
```
Sets the tool set included in the toolbar in expanded mode.
If the default toolbar provided by Fastboard SDK cannot meet your needs, you can call this method to customize the tools contained in the toolbar and set the toolbar to expand mode. You can pass in a secondary tool list in this method. The elements in the primary list will be expanded and displayed on the toolbar, and the elements in the secondary list will be collapsed.
After successfully calling the `setToolsExpandAppliances` method, if you need to switch the toolbar to collapsed mode, you can call [setToolboxExpand](#settoolboxexpand).
**Note**
This method needs to be called before joining the whiteboard room.
**Parameters**
* `toolsExpandAppliances`: Tools included in the toolbar in expanded mode. See [FastAppliance](#appliance) for details.
**Example**
```java
ArrayList> config = new ArrayList<>();
config.add(Arrays.asList(
FastAppliance.CLICKER,
FastAppliance.PENCIL,
FastAppliance.TEXT,
FastAppliance.SELECTOR,
FastAppliance.ERASER
));
config.add(Arrays.asList(FastAppliance.SELECTOR));
config.add(Arrays.asList(FastAppliance.PENCIL));
config.add(Arrays.asList(FastAppliance.TEXT));
config.add(Arrays.asList(FastAppliance.ERASER));
config.add(Arrays.asList(
FastAppliance.STRAIGHT,
FastAppliance.ARROW,
FastAppliance.RECTANGLE,
FastAppliance.ELLIPSE,
FastAppliance.PENTAGRAM,
FastAppliance.RHOMBUS,
FastAppliance.BUBBLE,
FastAppliance.TRIANGLE
));
config.add(Arrays.asList(FastAppliance.OTHER_CLEAR));
FastUiSettings.setToolsExpandAppliances(config);
```
### setToolsCollapseAppliances
```java
public static void setToolsCollapseAppliances(List toolsCollapseAppliances)
```
Sets the tool set included in the toolbar in collapsed mode.
If the default toolbar provided by Fastboard SDK cannot meet your needs, you can call this method to customize the tools included in the toolbar and set the toolbar to fold mode. You can pass in a first-level tool list in this method, and the elements in the list will be collapsed on the toolbar by default.
After successfully calling the `setToolsCollapseAppliances` method, if you need to switch the toolbar to expanded mode, you can call [setToolboxExpand](#settoolboxexpand).
**Note**
This method needs to be called before joining the whiteboard room.
**Parameters**
* `toolsCollapseAppliances`: Tools included in the whiteboard toolbar. See [FastAppliance](#appliance) for details.
**Example**
```java
ArrayList collapseAppliances = new ArrayList<>();
collapseAppliances.add(FastAppliance.PENCIL);
collapseAppliances.add(FastAppliance.ERASER);
collapseAppliances.add(FastAppliance.ARROW);
collapseAppliances.add(FastAppliance.SELECTOR);
collapseAppliances.add(FastAppliance.TEXT);
collapseAppliances.add(FastAppliance.OTHER_CLEAR);
FastUiSettings.setToolsCollapseAppliances(collapseAppliances);
```
### setToolsColors
```java
public static void setToolsColors(List toolsColors)
```
Set the color used by the whiteboard tool.
This method sets the color of graphics, lines, or text drawn using the whiteboard tool.
**Note**
This method needs to be called before joining the whiteboard room.
**Parameters**
* `toolsColors`: Color of whiteboard tools, RGB format, for example `0x0000FF` means blue.
### setStrokeRange
```java
public void setStrokeRange(int min, int max)
```
Sets the range for the line width slider in the toolbox.
This method configures the minimum and maximum values of the line width slider in the toolbox extension panel. Users can adjust the line width within this range when using drawing tools like pencils, rectangles, circles, etc. The default range is \[1, 24].
Caution
* The line width slider will be restricted to the specified range.
* If the current line width exceeds the new range, it will be constrained within the new range.
* This setting affects all drawing tools that support line width adjustments.
**Parameters**
* `min`: int. The minimum value for the line width (inclusive).
* `max`: int. The maximum value for the line width (inclusive).
### setToolboxEdgeMargin
```java
public void setToolboxEdgeMargin(int margin)
```
Set the margins between the whiteboard toolbar and the sides.
The definition of the margin is determined by the toolbar position set in `setToolboxGravity`:
* The toolbar is located on the left side of the whiteboard: the margin refers to the distance between the left side of the toolbar and the left side of the whiteboard.
* The toolbar is located on the right side of the whiteboard: the margin refers to the distance between the right side of the toolbar and the right side of the whiteboard.
**Parameters**
* `margin`: Integer. The distance between the toolbar and the side of the whiteboard, in `px`.
### setToolboxGravity
```java
public void setToolboxGravity(int gravity)
```
Set the position of the toolbar on the whiteboard.
**Parameters**
* `gravity`: The position of the toolbar on the whiteboard:
* `Gravity.LEFT`: left.
* `Gravity.RIGHT`: Right.
### setToolboxExpand
```java
public void setToolboxExpand(boolean expand)
```
Set whether to expand the toolbar.
The default display state of the toolbar is related to the device. It is expanded by default on tablets and collapsed by default on mobile phones. You can call this method to modify the display state of the toolbar.
**Parameters**
* `expand`: Whether to expand the toolbar:
* `true`: expand.
* `false`: fold.
## FastLogger Class
The `FastLogger` class provides a flexible whiteboard runtime log recording tool that can easily record four different levels of log information: `debug`, `info`, `warn`, and `error`. The `FastLogger` class uses a `Logger` interface and provides a default implementation `DefaultLogger` to use the system's `Log` class.
### setLogger
```java
public static void setLogger(Logger logger)
```
Set custom logger.
**Parameters**
* `logger`: The logger instance. If you need to customize the logger, you need to pass in an implementation class of the `Logger` interface, see [`Logger`](#logger); passing in `null` will result in using the system default logger.
### Logger
Logger specification, including recording methods for all log levels.
### debug
```java
static void debug(String msg)
```
Records a debug log.
**Parameters**
* `msg`: String. Log message.
### info
```java
static void info(String msg)
```
Records an info log.
**Parameters**
* `msg`: String. Log message.
### warn
```java
static void warn(String msg)
```
Records a warn log.
**Parameters**
* `msg`: String. Log message.
### error
```java
static void error(String msg)
```
Records an error.
**Parameters**
* `msg`: String. Log message.
## FastResult
The result of the method call.
```java
public interface FastResult {
void onSuccess(T value);
void onError(Exception exception);
}
```
The `FastResult` interface reports the results of method calls and includes the following callback methods:
* `onSuccess`: callback when the method call is successful.
* `onError`: callback when an error occurs.
## Platform-specific versions
- [Android](/en/api-reference/api-ref/uikit-sdk/android.md)
- [iOS](/en/api-reference/api-ref/uikit-sdk/ios.md)
- [Web](/en/api-reference/api-ref/uikit-sdk/web.md)
# Optimize audio quality (/en/ai/best-practices/audio-setup)
In real-time audio interactions, the rhythm, continuity, and intonation of conversations between humans and AI often differ from those between humans. To improve the AI–human conversation experience, it's important to optimize audio settings.
When using the Android, iOS, or Web RTC SDK with the Conversational AI Engine, follow the best practices in this guide to improve conversation fluency and reliability, especially in complex network environments.
## Server configuration
When calling the server API to create a conversational AI agent, use the default values for audio-related parameters to ensure the best audio experience.
## Client configuration
To configure the client app, implement the following:
### Integrate the required dynamic libraries
For the best Conversational AI Engine audio experience, integrate and load the following dynamic libraries in your project:
Android
iOS
Web
* AI noise suppression plugin: `libagora_ai_noise_suppression_extension.so`
* AI echo cancellation plug-in: `libagora_ai_echo_cancellation_extension.so`
For integration details, refer to [App size optimization](/en/realtime-media/rtc/build/optimize-and-operate/app-size-optimization/android).
* AI noise suppression plugin: `AgoraAiNoiseSuppressionExtension.xcframework`
* AI echo cancellation plug-in: `AgoraAiEchoCancellationExtension.xcframework`
For integration details, refer to [App size optimization](/en/realtime-media/rtc/build/optimize-and-operate/app-size-optimization/ios).
* Integrate the `agora-extension-ai-denoiser` extension. Refer to [AI Noise Suppression](/en/realtime-media/rtc/build/enhance-the-audio-experience/ai-noise-suppression/web).
Info
Optimizing audio uses AI Noise Suppression, which is a paid feature.
## Optimize audio for optimal performance
You can optimize audio settings in the following ways:
* **(Recommended) Use the Toolkit APIs**
Supported in Video/Voice SDK version 4.5.1 and above.
* **Use the Video/Voice SDK APIs directly**
Supported in SDK version 4.3.1 and above.
### Use the toolkit APIs
In this solution, you use the toolkit APIs to optimize audio settings.
Android
iOS
Web
1. **Integrate the toolkit**
Add the toolkit to your project using Maven or source code. See [Install the Android toolkit](/en/api-reference/api-ref/conversational-ai/client-toolkit/android#installation).
2. **Create a toolkit instance**
```kotlin
val config = ConversationalAIAPIConfig(
rtcEngine = rtcEngine,
rtmClient = rtmClient,
renderMode = TranscriptRenderMode.Word,
enableLog = true,
enableRenderModeFallback = true
)
val api = ConversationalAIAPIImpl(config)
```
3. **Set optimal audio settings**
Before joining the RTC channel, call `loadAudioSettings()` to apply the optimal audio parameters.
```kotlin
api.loadAudioSettings()
rtcEngine.joinChannel(token, channelName, null, userId)
```
4. **Release resources**
```kotlin
api.destroy()
```
1. **Integrate the toolkit**
Add the toolkit to your project using CocoaPods, Swift Package Manager, or source code. See [Install the iOS toolkit](/en/api-reference/api-ref/conversational-ai/client-toolkit/ios#installation).
2. **Create a toolkit instance**
```swift
let config = ConversationalAIAPIConfig(
rtcEngine: rtcEngine,
rtmEngine: rtmEngine,
renderMode: .words,
enableLog: true,
enableRenderModeFallback: true
)
convoAIAPI = ConversationalAIAPIImpl(config: config)
```
3. **Set optimal audio settings**
Before joining the RTC channel, call `loadAudioSettings()` to apply the optimal audio parameters.
```swift
convoAIAPI.loadAudioSettings()
rtcEngine.joinChannel(rtcToken: token, channelName: channelName, uid: uid, isIndependent: independent)
```
4. **Release resources**
```swift
convoAIAPI.destroy()
```
* **Integrate the transcript processing toolkit**
Add the toolkit to your project using a package manager or source code. See [Install the Web toolkit](/en/api-reference/api-ref/conversational-ai/client-toolkit/web#installation). Refer to [Folder structure](#folder-structure) to understand the role of each file.
### Use the SDK APIs
In this solution, you use the RTC SDK to optimize audio settings.
#### Set audio parameters
The settings in this section apply to Video/Voice SDK versions 4.3.1 and above. If you are using an earlier version, upgrade to version 4.5.1 or above or [Contact Technical Support](mailto\:support@agora.io).
Android
iOS
Web
For the best conversational AI audio experience, apply the following settings:
1. **Set the audio scenario**: When initializing the engine, set the audio scenario to the AI client scenario. You can also set the scenario before joining a channel by calling the `setAudioScenario` method.
2. **Configure audio parameters**: Call `setParameters` before joining a channel and whenever the `onAudioRouteChanged` callback is triggered. This configuration sets audio 3A plug-ins (acoustic echo cancellation, noise suppression, and automatic gain control), the audio sampling rate, the audio processing mode, and other settings. For recommended parameter values, refer to the sample code.
Info
Since Video/Voice SDK versions 4.3.1 to 4.5.0 do not support the AI client audio scenario, set the scenario to `AUDIO_SCENARIO_CHORUS` to improve the audio experience. However, the audio experience cannot be aligned with versions 4.5.1 and above. To get the best audio experience, upgrade the SDK to version 4.5.1 or higher.
The following sample code defines a `setAudioConfigParameters` function to configure audio parameters. Call this function before joining a channel and whenever the audio route changes.
```kotlin
private var rtcEngine: RtcEngineEx? = null
private var mAudioRouting = Constants.AUDIO_ROUTE_DEFAULT
// highlight-start
// Set audio configuration parameters
private fun setAudioConfigParameters(routing: Int) {
mAudioRouting = routing
rtcEngine?.apply {
setParameters("{\"che.audio.aec.split_srate_for_48k\":16000}")
setParameters("{\"che.audio.sf.enabled\":true}")
setParameters("{\"che.audio.sf.stftType\":6}")
setParameters("{\"che.audio.sf.ainlpLowLatencyFlag\":1}")
setParameters("{\"che.audio.sf.ainsLowLatencyFlag\":1}")
setParameters("{\"che.audio.sf.procChainMode\":1}")
setParameters("{\"che.audio.sf.nlpDynamicMode\":1}")
if (routing == Constants.AUDIO_ROUTE_HEADSET // 0
|| routing == Constants.AUDIO_ROUTE_EARPIECE // 1
|| routing == Constants.AUDIO_ROUTE_HEADSETNOMIC // 2
|| routing == Constants.AUDIO_ROUTE_BLUETOOTH_DEVICE_HFP // 5
|| routing == Constants.AUDIO_ROUTE_BLUETOOTH_DEVICE_A2DP) { // 10
setParameters("{\"che.audio.sf.nlpAlgRoute\":0}")
} else {
setParameters("{\"che.audio.sf.nlpAlgRoute\":1}")
}
setParameters("{\"che.audio.sf.ainlpModelPref\":10}")
setParameters("{\"che.audio.sf.nsngAlgRoute\":12}")
setParameters("{\"che.audio.sf.ainsModelPref\":10}")
setParameters("{\"che.audio.sf.nsngPredefAgg\":11}")
setParameters("{\"che.audio.agc.enable\":false}")
}
}
// highlight-end
// Create and initialize the RTC engine
fun createRtcEngine(rtcCallback: IRtcEngineEventHandler): RtcEngineEx {
val config = RtcEngineConfig()
config.mContext = AgentApp.instance()
config.mAppId = ServerConfig.rtcAppId
config.mChannelProfile = Constants.CHANNEL_PROFILE_LIVE_BROADCASTING
// highlight-start
// Set the audio scene to AI dialogue scene (supported by 4.5.1 and above)
// Version 4.3.1 ~ 4.5.0 is set to chorus scene AUDIO_SCENARIO_CHORUS
config.mAudioScenario = Constants.AUDIO_SCENARIO_AI_CLIENT
// Register audio route change callback
config.mEventHandler = object : IRtcEngineEventHandler() {
override fun onAudioRouteChanged(routing: Int) {
super.onAudioRouteChanged(routing)
// Set audio related parameters
setAudioConfigParameters(routing)
}
}
// highlight-end
try {
rtcEngine = (RtcEngine.create(config) as RtcEngineEx).apply {
// highlight-start
// Load the audio plugin
loadExtensionProvider("ai_echo_cancellation_extension")
loadExtensionProvider("ai_noise_suppression_extension")
// highlight-end
}
} catch (e: Exception) {
Log.e("CovAgoraManager", "createRtcEngine error: $e")
}
return rtcEngine!!
}
// Join the channel
fun joinChannel(rtcToken: String, channelName: String, uid: Int, isIndependent: Boolean = false) {
// highlight-start
// Initialize audio configuration parameters
setAudioConfigParameters(mAudioRouting)
// highlight-end
// Configure channel options and join the channel
val options = ChannelMediaOptions()
options.clientRoleType = CLIENT_ROLE_BROADCASTER
options.publishMicrophoneTrack = true
options.publishCameraTrack = false
options.autoSubscribeAudio = true
options.autoSubscribeVideo = false
val ret = rtcEngine?.joinChannel(rtcToken, channelName, uid, options)
}
```
For the best conversational AI audio experience, apply the following settings:
1. **Set the audio scenario**: When initializing the engine, set the audio scenario to the AI client scenario. You can also set the scenario before joining a channel by calling the `setAudioScenario` method.
2. **Configure audio parameters**: Call `setParameters` before joining a channel and whenever the `rtcEngine:didAudioRouteChanged:` callback is triggered. This configuration sets audio 3A plug-ins (acoustic echo cancellation, noise suppression, and automatic gain control), the audio sampling rate, the audio processing mode, and other settings. For recommended parameter values, refer to the sample code.
Info
Since Video/Voice SDK versions 4.3.1 to 4.5.0 do not support the AI client audio scenario, set the scenario to `AgoraAudioScenarioChorus` to improve the audio experience. However, the audio experience cannot be aligned with versions 4.5.1 and above. To get the best audio experience, upgrade the SDK to version 4.5.1 or higher.
The following sample code defines a `setAudioConfigParameters` function to configure audio parameters. Call this function before joining a channel and whenever the audio route changes.
```swift
class RTCManager: NSObject {
private var rtcEngine: AgoraRtcEngineKit!
private var audioDumpEnabled: Bool = false
private var audioRouting = AgoraAudioOutputRouting.default
// highlight-start
// Set audio related parameters
private func setAudioConfigParameters(routing: AgoraAudioOutputRouting) {
audioRouting = routing
rtcEngine.setParameters("{\"che.audio.aec.split_srate_for_48k\":16000}")
rtcEngine.setParameters("{\"che.audio.sf.enabled\":true}")
rtcEngine.setParameters("{\"che.audio.sf.stftType\":6}")
rtcEngine.setParameters("{\"che.audio.sf.ainlpLowLatencyFlag\":1}")
rtcEngine.setParameters("{\"che.audio.sf.ainsLowLatencyFlag\":1}")
rtcEngine.setParameters("{\"che.audio.sf.procChainMode\":1}")
rtcEngine.setParameters("{\"che.audio.sf.nlpDynamicMode\":1}")
if routing == .headset ||
routing == .earpiece ||
routing == .headsetNoMic ||
routing == .bluetoothDeviceHfp ||
routing == .bluetoothDeviceA2dp {
rtcEngine.setParameters("{\"che.audio.sf.nlpAlgRoute\":0}")
} else {
rtcEngine.setParameters("{\"che.audio.sf.nlpAlgRoute\":1}")
}
rtcEngine.setParameters("{\"che.audio.sf.ainlpModelPref\":10}")
rtcEngine.setParameters("{\"che.audio.sf.nsngAlgRoute\":12}")
rtcEngine.setParameters("{\"che.audio.sf.ainsModelPref\":10}")
rtcEngine.setParameters("{\"che.audio.sf.nsngPredefAgg\":11}")
rtcEngine.setParameters("{\"che.audio.agc.enable\":false}")
}
// highlight-end
}
extension RTCManager: RTCManagerProtocol {
func createRtcEngine(delegate: AgoraRtcEngineDelegate) -> AgoraRtcEngineKit {
let config = AgoraRtcEngineConfig()
config.appId = AppContext.shared.appId
config.channelProfile = .liveBroadcasting
// highlight-start
// Set the audio scene to AI dialogue scene (supported by 4.5.1 and above)
// Versions 4.3.1 ~ 4.5.0 support chorus scenes .chorus
config.audioScenario = .aiClient
rtcEngine = AgoraRtcEngineKit.sharedEngine(with: config, delegate: delegate)
// Register audio route change callback
rtcEngine.addDelegate(self)
// highlight-end
return rtcEngine
}
func joinChannel(rtcToken: String, channelName: String, uid: String) {
// highlight-start
// Initialize audio configuration parameters
setAudioConfigParameters(routing: audioRouting)
// highlight-end
// Configure channel options and join the channel
let options = AgoraRtcChannelMediaOptions()
options.clientRoleType = .broadcaster
options.publishMicrophoneTrack = true
options.publishCameraTrack = false
options.autoSubscribeAudio = true
options.autoSubscribeVideo = false
let ret = rtcEngine.joinChannel(byToken: rtcToken, channelId: channelName, uid: UInt(uid) ?? 0, mediaOptions: options)
}
}
// highlight-start
// Implement the AgoraRtcEngineDelegate interface to handle audio route change callbacks
extension RTCManager: AgoraRtcEngineDelegate {
public func rtcEngine(_ engine: AgoraRtcEngineKit, didAudioRouteChanged routing: AgoraAudioOutputRouting) {
setAudioConfigParameters(routing: routing)
}
}
// highlight-end
```
Integrate the `agora-extension-ai-denoiser` extension. Refer to [AI Noise Suppression](/en/realtime-media/rtc/build/enhance-the-audio-experience/ai-noise-suppression/web).
Info
Use Web SDK version 4.15.0 or later.
## Reference
This section contains content that completes the information on this page, or points you to documentation that explains other aspects to this product.
### Sample project
Refer to the following open-source sample code to set audio-related parameters.
Android
iOS
* [`CovRtcManager.kt`](https://github.com/AgoraIO-Community/Conversational-AI-Demo/blob/main/Android/scenes/convoai/src/main/java/io/agora/scene/convoai/rtc/CovRtcManager.kt)
* [`RTCManager.swift`](https://github.com/AgoraIO-Community/Conversational-AI-Demo/blob/main/iOS/Scenes/ConvoAI/ConvoAI/ConvoAI/Classes/Manager/RTCManager.swift)
### Folder structure
Android
iOS
Web
* `IConversationalAIAPI.kt`: API interface and related data structures and enumerations
* `ConversationalAIAPIImpl.kt`: ConversationalAI API main implementation logic
* `ConversationalAIUtils.kt`: Tool functions and event callback management
* `subRender/`
* `v3/`: Transcript module
* `TranscriptionController.kt`: Transcript Controller
* `MessageParser.kt`: Message Parser
* `ConversationalAIAPI.swift`: API interface and related data structures and enumerations
* `ConversationalAIAPIImpl.swift`: ConversationalAI API main implementation logic
* `Transcription/`
* `TranscriptionController.swift`: Transcript Controller
* `index.ts`: API Class
* `type.ts`: API interface and related data structures and enumerations
* `utils/`
* `index.ts`: API utility functions
* `events.ts`: Event management class, which can be extended to easily implement event monitoring and broadcasting
* `sub-render.ts`: Transcript module
### API reference
Android
iOS
* SDK
* `setAudioScenario`
* `setParameters`
* `onAudioRouteChanged`
* Toolkit
* [`loadAudioSettings`](/en/api-reference/api-ref/conversational-ai/client-toolkit/android#loadaudiosettings)
* [`destroy`](/en/api-reference/api-ref/conversational-ai/client-toolkit/android#destroy)
* SDK
* `setAudioScenario`
* `setParameters`
* `rtcEngine:didAudioRouteChanged:`
* Toolkit
* [`loadAudioSettings`](/en/api-reference/api-ref/conversational-ai/client-toolkit/ios#loadaudiosettings12)
* [`destroy`](/en/api-reference/api-ref/conversational-ai/client-toolkit/ios#destroy)
* Toolkit
* [`IConversationalAIAPIEventHandlers interface`](/en/api-reference/api-ref/conversational-ai/client-toolkit/web#iconversationalaiapieventhandlers-interface)
* [`EConversationalAIAPIEvents`](/en/api-reference/api-ref/conversational-ai/client-toolkit/web#econversationalaiapievents)
* [`subscribeMessage`](/en/api-reference/api-ref/conversational-ai/client-toolkit/web#subscribemessage)
* [`unsubscribeMessage`](/en/api-reference/api-ref/conversational-ai/client-toolkit/web#unsubscribe)
* [`destroy`](/en/api-reference/api-ref/conversational-ai/client-toolkit/web#destroy)
# Get agent state (/en/ai/best-practices/get-agent-state)
If you need to track agent state changes in your client app, you can use either Signaling (RTM) Message or RTM Presence. This guide explains how to get agent state using RTM Message and describes [how the two approaches differ](#rtm-message-vs-rtm-presence).
Info
* To monitor state changes using client components, see [Listen to agent events](/en/ai/build/handle-runtime-events/webhooks).
* To get agent state through RTM Presence, continue using your existing Presence implementation.
## Understand the tech
The Conversational AI Engine pushes agent state change events to the client as individual RTM messages through the `onMessageEvent` callback. Unlike RTM Presence, which synchronizes state as key-value pairs, RTM Message wraps each state change in a separate event message. This makes it easier to record state change timestamps, process events sequentially, or consume state events together with other RTM Message events.
The inner `message` field of each RTM message is a JSON string that requires a second parse to access the state event data. Use the `event_type` field in the inner message to identify the event type.
The following agent states are pushed through RTM Message:
* `state.listening`
* `state.thinking`
* `state.speaking`
The flow works as follows:
```text
Agent state change
├─ listening -> true / false
├─ thinking -> true / false
└─ speaking -> true / false
↓
RTM Message
↓
Client parses inner payload and identifies event by event_type
```
### State event types
The Conversational AI Engine sends an RTM Message each time the agent state changes. Each message corresponds to a single state change event.
| `event_type` | Description |
| :---------------- | :-------------------------------------------------- |
| `state.listening` | The agent starts or stops listening for user input. |
| `state.thinking` | The agent starts or stops processing user input. |
| `state.speaking` | The agent starts or stops speaking. |
### Message structure
The inner `message` field is a JSON string. After deserialization, the structure is as follows:
```json
{
"event_id": "xxxx",
"event_type": "state.listening",
"event_ms": 1611566412672,
"payload": {
"value": true,
"timestamp": 1611566412600
}
}
```
| Field | Type | Description |
| :------------------ | :------ | :-------------------------------------------------------------------------------------- |
| `event_id` | string | Unique event ID. |
| `event_type` | string | State event type. One of `state.listening`, `state.thinking`, or `state.speaking`. |
| `event_ms` | integer | Timestamp when the event was sent, in milliseconds. |
| `payload.value` | boolean | Current state value. `true` means the agent entered the state; `false` means it exited. |
| `payload.timestamp` | integer | Timestamp when the state change actually occurred, in milliseconds. |
## Prerequisites
Before you begin, ensure that you have:
* Completed the basic agent integration. See [Quickstart](/en/ai/get-started/quickstart).
* Integrated the RTM SDK and implemented message listener logic. See [RTM quickstart](https://docs.agora.io/en/signaling/get-started/sdk-quickstart).
* Enabled the RTM service and set `data_channel` to `rtm` when starting the agent.
## Implementation
### Enable RTM when starting the agent
When calling [Start a conversational AI agent](/en/api-reference/api-ref/conversational-ai/join), include the following configuration:
```json
{
"properties": {
"advanced_features": {
"enable_rtm": true
},
"parameters": {
"data_channel": "rtm"
}
}
}
```
### Listen for and parse state messages
After logging in to RTM and subscribing to the channel with the same name as the agent, parse state messages in the RTM message callback. The handling logic consists of the following steps:
1. Deserialize the RTM `message` field into a state event object.
2. Check that the deserialized result contains `event_type` and `payload`.
3. Dispatch handling based on `event_type`, and use `payload.value` to update your app state.
In the following examples:
* The inner `message` field is a JSON string and must be deserialized again to obtain `event_type` and `payload`.
* `event_type` identifies the specific state type.
* `payload.value` indicates whether the agent is entering (`true`) or exiting (`false`) the state.
* `payload.timestamp` can be used for precise ordering or logging.
Android
iOS
Web
```kotlin
val rtmConfig = RtmConfig()
rtmConfig.eventListener = object : RtmEventListener {
override fun onMessageEvent(event: MessageEvent) {
// 1. Deserialize the inner message (JSON string)
val payload = JSONObject(event.message.data)
if (!payload.has("event_type") || !payload.has("payload")) {
return
}
val eventType = payload.getString("event_type")
val statePayload = payload.getJSONObject("payload")
val value = statePayload.getBoolean("value")
val timestamp = statePayload.getLong("timestamp")
// 2. Dispatch based on event_type
when (eventType) {
"state.listening" -> handleListeningChanged(value, timestamp)
"state.thinking" -> handleThinkingChanged(value, timestamp)
"state.speaking" -> handleSpeakingChanged(value, timestamp)
}
}
}
mRtmClient = RtmClient.create(rtmConfig)
```
```swift
func rtmKit(_ rtmKit: AgoraRtmClientKit, didReceiveMessageEvent event: AgoraRtmMessageEvent) {
// 1. Deserialize the inner message (JSON string)
guard let jsonString = event.message.stringData,
let data = jsonString.data(using: .utf8),
let payload = try? JSONSerialization.jsonObject(with: data) as? [String: Any],
let eventType = payload["event_type"] as? String,
let statePayload = payload["payload"] as? [String: Any] else {
return
}
let value = statePayload["value"] as? Bool ?? false
let timestamp = statePayload["timestamp"] as? Int ?? 0
// 2. Dispatch based on event_type
switch eventType {
case "state.listening":
handleListeningChanged(value, timestamp)
case "state.thinking":
handleThinkingChanged(value, timestamp)
case "state.speaking":
handleSpeakingChanged(value, timestamp)
default:
break
}
}
```
```typescript
rtm.addEventListener("message", (event) => {
// 1. Deserialize the inner message (JSON string)
const payload = JSON.parse(event.message as string);
if (!payload.event_type || !payload.payload) {
return;
}
const { event_type, payload: statePayload } = payload;
// 2. Dispatch based on event_type
switch (event_type) {
case "state.listening":
handleListeningChanged(statePayload.value, statePayload.timestamp);
break;
case "state.thinking":
handleThinkingChanged(statePayload.value, statePayload.timestamp);
break;
case "state.speaking":
handleSpeakingChanged(statePayload.value, statePayload.timestamp);
break;
}
});
```
### Update app state
Use the received events to update your UI or internal state machine. For example:
* When `state.listening` with `payload.value = true` is received, display "Listening".
* When `state.thinking` with `payload.value = true` is received, display "Thinking".
* When `state.speaking` with `payload.value = true` is received, display "Speaking".
## RTM Message vs RTM Presence
The Conversational AI Engine supports getting agent state through both RTM Message and RTM Presence. The key differences are:
| | RTM Presence | RTM Message |
| :---------- | :------------------------------- | :------------------------------------------------------- |
| Return form | State key-value pairs | State event messages |
| Granularity | Better for reading current state | Better for handling each state change |
| Timing info | Relies on message arrival time | Includes explicit `event_ms` and `payload.timestamp` |
| Use case | Simple UI state display | Event-driven logic, logging, unified message consumption |
Choose based on your needs:
* If you only need to update the UI based on whether the agent is currently `listening`, `thinking`, or `speaking`, RTM Presence is simpler to integrate.
* If you want to process state changes together with captions, interruptions, or performance metrics in a unified RTM Message handler, use RTM Message.
* If you need to record the timestamp of each state change or analyze state transitions in sequence, use RTM Message.
## Considerations
Keep the following in mind when implementing this feature:
* **Double deserialization**: The inner `message` field is a JSON string and must be deserialized a second time to access `event_type` and `payload`.
* **Avoid duplicate UI updates**: If you are already driving UI state through RTM Presence, avoid having both implementations update the same UI state simultaneously, as this can cause redundant updates or state flickering.
* **`state.speaking` end timing**: A `state.speaking` value of `false` does not guarantee that the client has finished playing audio. The server estimates the speaking end time based on TTS audio length, so there may be a delay between the state switching to `false` and the client completing playback.
* **Scope of state messages**: State messages cover only `listening`, `thinking`, and `speaking` agent state events. Manual SoS and EoS signals and their callbacks are not included.
# Manually control start and end of speech (/en/ai/best-practices/manual-turn-control)
When your business scenario isn't a good fit for letting the server automatically determine when a user starts or stops speaking, use manual Start of Speech (SoS) and End of Speech (EoS) to have the client explicitly declare the user's turn boundaries. This is useful for AI interviews, interactive quizzes, walkie-talkie style push-to-talk, and other "press to start, tap to submit" interactions. This guide explains how to implement manual control over user speech boundaries by configuring the agent and using the client toolkit.
## Understand the tech
Manual turn control consists of two independent capabilities:
* **Manual SoS**: The client explicitly declares that the user has started speaking.
* **Manual EoS**: The client explicitly declares that the user has finished speaking.
`start_of_speech.mode` and `end_of_speech.mode` are independent settings. Choose which boundary needs manual control based on your use case:
| Business scenario | `start_of_speech.mode` | `end_of_speech.mode` | Client call |
| --------------------------------------------------------------------------------------------- | ---------------------- | -------------------- | ---------------------------------------- |
| The user can start speaking freely, but must tap "submit answer" | `vad` | `manual` | Call only `manualEOS` |
| The user taps or holds a button to start speaking, and the server determines when speech ends | `manual` | `vad` | Call only `manualSOS` |
| Press-and-hold to talk, release to send (walkie-talkie mode) | `manual` | `manual` | Call `manualSOS` first, then `manualEOS` |
* If only `end_of_speech.mode` is `manual`, the server still uses VAD to automatically detect when the user starts speaking. Your app only needs to call `manualEOS` when the user taps submit.
* If only `start_of_speech.mode` is `manual`, the server starts accepting audio for the current turn only after your app calls `manualSOS`. End of speech is still detected automatically by VAD, so your app does not need to call `manualEOS`.
* If both `start_of_speech.mode` and `end_of_speech.mode` are `manual`, the server starts accepting audio for the current turn only after your app calls `manualSOS`, and submits the turn only after your app calls `manualEOS`.
## Prerequisites
Before you begin, ensure that you have:
* Completed the basic steps for interacting with an agent. See [Quickstart](/en/ai/get-started/quickstart).
* Integrated Video SDK v4.5.1 or later and followed the [Quickstart](../../realtime-media/video/quickstart) guide to implement basic real-time audio and video features.
* Enabled Signaling for your project in the Agora Console and followed the [Signaling Quickstart](/en/realtime-media/rtm/quickstart) to implement real-time messaging.
* Made sure the RTC engine instance is initialized and the app is logged in to Signaling. The client toolkit does not handle initialization, lifecycle management, authentication, or login for Video SDK or Signaling.
## Implement manual control
Manual turn control requires configuring both the agent and the client toolkit:
1. Configure manual mode when you start the agent.
2. Initialize the client toolkit and subscribe to channel messages.
3. Register handlers for the manual SoS/EoS result events.
4. Call `manualSOS`/`manualEOS` when the user taps start or submit.
### Enable manual turn control when starting the agent
When calling [Start a conversational AI agent](/en/api-reference/api-ref/conversational-ai/join), use the following parameter settings:
* `advanced_features.enable_rtm: true`: Start Signaling (Required)
* `parameters.data_channel: "rtm"`: Enable the RTM data transmission channel (Required)
* `parameters.enable_metrics: true`: Receive agent performance data (Enable on demand)
* `parameters.enable_error_message: true`: Receive agent error events (Enable on demand)
Then set the boundary or boundaries you want to control manually to `"manual"`.
The following `curl` examples show three common configurations:
Manual EoS only
Manual SoS only
Manual SoS + EoS
If you only need to manually control end of speech, keep automatic SoS and set only `end_of_speech.mode` to `manual`.
```shell
curl --request POST \
--url https://api.agora.io/api/conversational-ai-agent/v2/projects//join \
--header 'Authorization: agora token="007abcxxxxxxx123"' \
--data '
{
"name": "manual-eos-agent",
"properties": {
"channel": "channel_name",
"token": "token",
"agent_rtc_uid": "0",
"remote_rtc_uids": [
"123"
],
"advanced_features": {
"enable_rtm": true
},
"asr": {
"language": "en-US"
},
"llm": {
"url": "https://api.xxxx/v1/xxxx",
"api_key": "xxx",
"system_messages": [
{
"role": "system",
"content": "You are a helpful chatbot."
}
],
"greeting_message": "Hello, how can I help you?",
"failure_message": "Sorry, I am unable to answer that question.",
"max_history": 10,
"params": {
"model": "xxxx"
}
},
"tts": {
"vendor": "minimax",
"params": {
"key": "your-minimax-key",
"model": "speech-01-turbo",
"voice_setting": {
"voice_id": "female-shaonv",
"speed": 1,
"vol": 1,
"pitch": 0,
"emotion": "happy"
},
"audio_setting": {
"sample_rate": 16000
}
}
},
"turn_detection": {
"mode": "default",
"config": {
"start_of_speech": {
"mode": "vad",
"vad_config": {
"interrupt_duration_ms": 160,
"speaking_interrupt_duration_ms": 320,
"prefix_padding_ms": 800
}
},
"end_of_speech": {
"mode": "manual"
}
}
},
"parameters": {
"data_channel": "rtm"
}
}
}
'
```
If you only need to manually control start of speech, set `start_of_speech.mode` to `manual` and keep automatic EoS.
```shell
curl --request POST \
--url https://api.agora.io/api/conversational-ai-agent/v2/projects//join \
--header 'Authorization: agora token="007abcxxxxxxx123"' \
--data '
{
"name": "manual-sos-agent",
"properties": {
"channel": "channel_name",
"token": "token",
"agent_rtc_uid": "0",
"remote_rtc_uids": [
"123"
],
"advanced_features": {
"enable_rtm": true
},
"asr": {
"language": "en-US"
},
"llm": {
"url": "https://api.xxxx/v1/xxxx",
"api_key": "xxx",
"system_messages": [
{
"role": "system",
"content": "You are a helpful chatbot."
}
],
"greeting_message": "Hello, how can I help you?",
"failure_message": "Sorry, I am unable to answer that question.",
"max_history": 10,
"params": {
"model": "xxxx"
}
},
"tts": {
"vendor": "minimax",
"params": {
"key": "your-minimax-key",
"model": "speech-01-turbo",
"voice_setting": {
"voice_id": "female-shaonv",
"speed": 1,
"vol": 1,
"pitch": 0,
"emotion": "happy"
},
"audio_setting": {
"sample_rate": 16000
}
}
},
"turn_detection": {
"mode": "default",
"config": {
"start_of_speech": {
"mode": "manual"
},
"end_of_speech": {
"mode": "vad",
"vad_config": {
"silence_duration_ms": 480
}
}
}
},
"parameters": {
"data_channel": "rtm"
}
}
}
'
```
If you need a complete push-to-talk experience, set both `start_of_speech.mode` and `end_of_speech.mode` to `manual`.
```shell
curl --request POST \
--url https://api.agora.io/api/conversational-ai-agent/v2/projects//join \
--header 'Authorization: agora token="007abcxxxxxxx123"' \
--data '
{
"name": "manual-sos-eos-agent",
"properties": {
"channel": "channel_name",
"token": "token",
"agent_rtc_uid": "0",
"remote_rtc_uids": [
"123"
],
"advanced_features": {
"enable_rtm": true
},
"asr": {
"language": "en-US"
},
"llm": {
"url": "https://api.xxxx/v1/xxxx",
"api_key": "xxx",
"system_messages": [
{
"role": "system",
"content": "You are a helpful chatbot."
}
],
"greeting_message": "Hello, how can I help you?",
"failure_message": "Sorry, I am unable to answer that question.",
"max_history": 10,
"params": {
"model": "xxxx"
}
},
"tts": {
"vendor": "minimax",
"params": {
"key": "your-minimax-key",
"model": "speech-01-turbo",
"voice_setting": {
"voice_id": "female-shaonv",
"speed": 1,
"vol": 1,
"pitch": 0,
"emotion": "happy"
},
"audio_setting": {
"sample_rate": 16000
}
}
},
"turn_detection": {
"mode": "default",
"config": {
"start_of_speech": {
"mode": "manual"
},
"end_of_speech": {
"mode": "manual"
}
}
},
"parameters": {
"data_channel": "rtm"
}
}
}
'
```
After a successful response, the agent joins the specified RTC channel and is ready to interact with the user.
### Integrate and initialize the client toolkit
Android
iOS
Web
1. Add the toolkit to your project using Maven or source code. See [Install the Android toolkit](/en/api-reference/api-ref/conversational-ai/client-toolkit/android#installation). Refer to the [component structure](#component-structure) to understand the role of each file.
2. Create a configuration object for the RTC engine and Signaling client instances, then use it to initialize the component instance.
```kotlin
val config = ConversationalAIAPIConfig(
rtcEngine = rtcEngine,
rtmClient = rtmClient,
renderMode = TranscriptRenderMode.Word,
enableLog = true,
enableRenderModeFallback = true
)
val api = ConversationalAIAPIImpl(config)
```
3. Register a handler for the manual SoS/EoS result events, then subscribe to the agent's channel.
```kotlin
api.addHandler(object : IConversationalAIAPIEventHandler {
override fun onUserManualSosEvent(agentUserId: String, event: UserManualSosEvent) {
// Handle the manual SoS result. event.payload.success indicates whether the server accepted it.
}
override fun onUserManualEosEvent(agentUserId: String, event: UserManualEosEvent) {
// Handle the manual EoS result.
}
override fun onAgentManualEosEvent(agentUserId: String, event: AgentManualEosEvent) {
// Handle the server-triggered automatic EoS notification.
}
})
api.subscribeMessage("channelName") { error ->
if (error != null) {
// Handle subscription failure.
}
}
```
1. Add the toolkit to your project using CocoaPods, Swift Package Manager, or source code. See [Install the iOS toolkit](/en/api-reference/api-ref/conversational-ai/client-toolkit/ios#installation). Refer to the [component structure](#component-structure) to understand the role of each file.
2. Create a configuration object for the RTC engine and Signaling client instances, then use it to initialize the component instance.
```swift
let config = ConversationalAIAPIConfig(
rtcEngine: rtcEngine,
rtmEngine: rtmEngine,
renderMode: .words,
enableLog: true,
enableRenderModeFallback: true
)
convoAIAPI = ConversationalAIAPIImpl(config: config)
```
3. Register a handler for the manual SoS/EoS result events, then subscribe to the agent's channel.
```swift
convoAIAPI.addHandler(handler: self)
func onUserManualSosEvent(agentUserId: String, event: UserManualSosEvent) {
// Handle the manual SoS result. event.payload.success indicates whether the server accepted it.
}
func onUserManualEosEvent(agentUserId: String, event: UserManualEosEvent) {
// Handle the manual EoS result.
}
func onAgentManualEosEvent(agentUserId: String, event: AgentManualEosEvent) {
// Handle the server-triggered automatic EoS notification.
}
convoAIAPI.subscribeMessage(channelName: channelName) { error in
if let error = error {
// Handle subscription failure.
}
}
```
1. Add the toolkit to your project using a package manager or source code. See [Install the Web toolkit](/en/api-reference/api-ref/conversational-ai/client-toolkit/web#installation). Refer to the [component structure](#component-structure) to understand the role of each file.
2. Create a configuration object for the RTC engine and Signaling client instances, then use it to initialize the component instance.
```ts
const config: IConversationalAIAPIConfig = {
rtcEngine,
rtmEngine,
renderMode: ETranscriptHelperMode.WORD,
enableLog: true,
enableRenderModeFallback: true,
}
const conversationalAIAPI = await ConversationalAIAPI.init(config)
```
3. Register a handler for the manual SoS/EoS result events, then subscribe to the agent's channel.
```ts
conversationalAIAPI.on(EConversationalAIAPIEvents.USER_MANUAL_SOS_RESULT, (agentUserId, event) => {
// Handle the manual SoS result. event.payload.success indicates whether the server accepted it.
})
conversationalAIAPI.on(EConversationalAIAPIEvents.USER_MANUAL_EOS_RESULT, (agentUserId, event) => {
// Handle the manual EoS result.
})
conversationalAIAPI.on(EConversationalAIAPIEvents.AGENT_MANUAL_EOS_RESULT, (agentUserId, event) => {
// Handle the server-triggered automatic EoS notification.
})
conversationalAIAPI.subscribeMessage(channelName)
```
Info
These handlers receive the server's processing result for your manual SoS/EoS requests. Use the `event`, `requestId`, and error information to implement your own business logic. See the [client toolkit API reference](#toolkit) for details.
### Send manual SoS when the user starts speaking
Call `manualSOS` only when `start_of_speech.mode` is `"manual"`. If you use automatic SoS through VAD, skip this step.
Android
iOS
Web
```kotlin
api.manualSOS(agentUserId = "agentUserId") { requestId, error ->
if (error != null) {
Log.e("ManualSOS", "Send failed: ${error.errorMessage}, requestId=$requestId")
} else {
Log.i("ManualSOS", "SoS sent, requestId=$requestId")
}
}
```
```swift
convoAIAPI.manualSOS(agentUserId: agentUid) { requestId, error in
if let error = error {
print("Send failed: \(error.message), requestId=\(requestId)")
} else {
print("SoS sent, requestId=\(requestId)")
}
}
```
```ts
const requestId = await conversationalAIAPI.manualSOS(agentUserId)
```
Once manual SoS takes effect, the server starts counting subsequent audio toward the current user turn. Audio that arrives before this point is not counted.
### Send manual EoS when the user finishes speaking
Call `manualEOS` only when `end_of_speech.mode` is `"manual"`. If you use automatic EoS through VAD, skip this step.
Android
iOS
Web
```kotlin
api.manualEOS(agentUserId = "agentUserId") { requestId, error ->
if (error != null) {
Log.e("ManualEOS", "Send failed: ${error.errorMessage}, requestId=$requestId")
} else {
Log.i("ManualEOS", "EoS sent, requestId=$requestId")
}
}
```
```swift
convoAIAPI.manualEOS(agentUserId: agentUid) { requestId, error in
if let error = error {
print("Send failed: \(error.message), requestId=\(requestId)")
} else {
print("EoS sent, requestId=\(requestId)")
}
}
```
```ts
const requestId = await conversationalAIAPI.manualEOS(agentUserId)
```
Once manual EoS takes effect, the agent submits the turn for ASR and LLM inference as usual. This signal only marks the end of the user's current speech segment — it does not immediately end the entire turn.
### Destroy the component instance
When the agent interaction ends, destroy the component instance to release all resources.
Android
iOS
Web
```kotlin
api.destroy()
```
```swift
convoAIAPI.destroy()
```
```ts
conversationalAIAPI.destroy()
```
## Reference
### API reference
#### RESTful API
* [Start a conversational AI agent](/en/api-reference/api-ref/conversational-ai/join)
#### Toolkit
Android
iOS
Web
* [`addHandler`](/en/api-reference/api-ref/conversational-ai/client-toolkit/android#addhandler)
* [`subscribeMessage`](/en/api-reference/api-ref/conversational-ai/client-toolkit/android#subscribemessage)
* [`manualSOS`](/en/api-reference/api-ref/conversational-ai/client-toolkit/android#manualsos)
* [`manualEOS`](/en/api-reference/api-ref/conversational-ai/client-toolkit/android#manualeos)
* [`destroy`](/en/api-reference/api-ref/conversational-ai/client-toolkit/android#destroy)
* [`onUserManualSosEvent`](/en/api-reference/api-ref/conversational-ai/client-toolkit/android#onusermanualsosevent)
* [`onUserManualEosEvent`](/en/api-reference/api-ref/conversational-ai/client-toolkit/android#onusermanualeosevent)
* [`onAgentManualEosEvent`](/en/api-reference/api-ref/conversational-ai/client-toolkit/android#onagentmanualeosevent)
* [`addHandler`](/en/api-reference/api-ref/conversational-ai/client-toolkit/ios#addhandler)
* [`subscribeMessage`](/en/api-reference/api-ref/conversational-ai/client-toolkit/ios#subscribemessage)
* [`manualSOS`](/en/api-reference/api-ref/conversational-ai/client-toolkit/ios#manualsos)
* [`manualEOS`](/en/api-reference/api-ref/conversational-ai/client-toolkit/ios#manualeos)
* [`destroy`](/en/api-reference/api-ref/conversational-ai/client-toolkit/ios#destroy)
* [`onUserManualSosEvent`](/en/api-reference/api-ref/conversational-ai/client-toolkit/ios#onusermanualsosevent)
* [`onUserManualEosEvent`](/en/api-reference/api-ref/conversational-ai/client-toolkit/ios#onusermanualeosevent)
* [`onAgentManualEosEvent`](/en/api-reference/api-ref/conversational-ai/client-toolkit/ios#onagentmanualeosevent)
* [`subscribeMessage`](/en/api-reference/api-ref/conversational-ai/client-toolkit/web#subscribemessage)
* [`manualSOS`](/en/api-reference/api-ref/conversational-ai/client-toolkit/web#manualsos)
* [`manualEOS`](/en/api-reference/api-ref/conversational-ai/client-toolkit/web#manualeos)
* [`destroy`](/en/api-reference/api-ref/conversational-ai/client-toolkit/web#destroy)
* [`EConversationalAIAPIEvents`](/en/api-reference/api-ref/conversational-ai/client-toolkit/web#econversationalaiapievents)
# Optimize latency (/en/ai/best-practices/optimize-latency)
Latency is a key factor affecting user experience in conversational AI agent scenarios. This guide helps you understand and optimize conversation latency to improve user experience.
## How latency works
Understanding latency composition helps you identify optimization opportunities.
### Cascaded architecture latency
When using the cascaded architecture with ASR, LLM, and TTS components, end-to-end latency consists of the following:
```text
End-to-end latency = RTC latency
+ Algorithm preprocessing latency
+ ASR latency
+ LLM latency
+ TTS latency
(+ Avatar latency)
```
### Latency for each component
The following table shows typical latency ranges for each component based on actual test data:
| Component | Latency metric | Description | Typical latency range (ms) |
| ----------------------- | ----------------------- | ------------------------------------------------------------------------------------------------------------------------------------------------------------------- | -------------------------- |
| RTC | Audio and video latency | Includes audio capture, encoding, network transmission, decoding, and playback | 150-300 |
| Algorithm preprocessing | Preprocessing latency | Includes VAD (Voice Activity Detection), intelligent interruption handling (AIVAD), and other algorithm processing time | 720-940\* |
| ASR | `asr_ttlw` | Time To Last Word. The latency from when the user stops speaking to when ASR outputs the last word. | 400-700 |
| LLM | `llm_ttfb` / `llm_ttfs` | TTFB: Time To First Byte, the first byte latency. TTFS: Time To First Sentence, the first sentence latency. | 250-1000 |
| TTS | `tts_ttfb` | Time To First Byte. The response latency from when the TTS request starts to when the first byte is received. | 100-350 |
| Avatar rendering | Rendering latency | The latency from when the avatar module receives the first frame of TTS audio to when it generates and synchronizes the first frame of audio and video (if enabled) | 50-200 |
\* Algorithm preprocessing latency is based on `silence_duration_ms` set to 640 ms. Adjusting this parameter affects preprocessing latency.
Info
Test data shows that LLM typically contributes the most to overall latency. Optimizing LLM selection and configuration is key to reducing end-to-end latency.
### Real-world latency example
The following example shows latency data from three conversation turns in an actual conversation. This data comes from the [`111 agent metrics`](../reference/event-types#111-agent-metrics) event in Agora's [message notification service](../build/handle-runtime-events/webhooks):
```json
{
"metrics": [
{
"turn_id": 1,
"tts_ttfb": 61
},
{
"turn_id": 2,
"asr_ttlw": 141,
"llm_ttfb": 270,
"llm_ttfs": 482,
"tts_ttfb": 90
},
{
"turn_id": 3,
"asr_ttlw": 103,
"llm_ttfb": 306,
"llm_ttfs": 948,
"tts_ttfb": 106
}
]
}
```
{/* ### MLLM architecture latency
When using MLLM (Multimodal Large Language Model), the model processes audio input directly and generates audio output without separate ASR, LLM, and TTS components. This results in simpler latency composition:
```text
End-to-end latency = RTC latency
+ Algorithm preprocessing latency
+ MLLM latency
```
You can obtain the `mllm_ttfb` metric by listening to the `111 agent metrics` event. This metric represents the response latency from when the MLLM request starts to when the first byte is received.
:::info[Info]
* MLLM architecture typically achieves lower end-to-end latency by reducing data conversion and transmission between components.
* When MLLM is enabled, the graceful interruption (AIVAD) feature is disabled, which reduces algorithm preprocessing latency.
:::
*/}
## Monitor latency metrics
The Conversational AI engine provides two ways to monitor latency metrics for each conversation turn:
### Use client components
If you use client components (Android, iOS, or Web), you can listen to agent performance metrics in real time by registering the `onAgentMetrics` callback.
Android
iOS
Web
```kotlin
api.addHandler(object : IConversationalAIAPIEventHandler {
override fun onAgentMetrics(agentUserId: String, metric: Metric) {
when (metric.type) {
ModuleType.ASR -> {
Log.d("Metrics", "ASR TTLW: \${metric.value}ms")
}
ModuleType.LLM -> {
// metric.name can be "ttfb" or "ttfs"
Log.d("Metrics", "LLM \${metric.name}: \${metric.value}ms")
}
ModuleType.TTS -> {
Log.d("Metrics", "TTS TTFB: \${metric.value}ms")
}
ModuleType.TOTAL -> {
Log.d("Metrics", "Total Delay: \${metric.value}ms")
}
else -> {
Log.d("Metrics", "\${metric.type}: \${metric.name} = \${metric.value}ms")
}
}
}
})
```
```swift
func onAgentMetrics(agentUserId: String, metrics: Metric) {
switch metrics.type {
case .asr:
print("ASR TTLW: \(metrics.value)ms")
case .llm:
print("LLM \(metrics.name): \(metrics.value)ms")
case .tts:
print("TTS TTFB: \(metrics.value)ms")
case .total:
print("Total Delay: \(metrics.value)ms")
case .unknown:
print("Unknown metric: \(metrics.name) = \(metrics.value)ms")
}
}
```
```ts
conversationalAIAPI.on(
EConversationalAIAPIEvents.AGENT_METRICS,
(agentUserId: string, metrics: Metric) => {
console.log(`[\${metrics.type}] \${metrics.name}: \${metrics.value}ms`);
if (metrics.type === 'TOTAL') {
console.log(`Total delay for turn: \${metrics.value}ms`);
}
}
);
```
For detailed integration steps and API reference, see [Webhooks](../build/handle-runtime-events/webhooks).
### Use Message Notification Service
If you have enabled Agora's Message Notification Service, you can obtain agent performance metrics by receiving the `agent metrics` event where `eventType` is `111`.
**Event callback example**
```json
{
"noticeId": "2000001428:4330:107",
"productId": 17,
"eventType": 111,
"notifyMs": 1611566412672,
"payload": {
"agent_id": "A42AC47Hxxxxxxxx4PK27ND25E",
"start_ts": 1000,
"stop_ts": 1672531200,
"channel": "test-channel",
"metrics": [
{
"turn_id": 1,
"tts_ttfb": 61
},
{
"turn_id": 2,
"asr_ttlw": 141,
"llm_ttfb": 270,
"llm_ttfs": 482,
"tts_ttfb": 90,
}
]
}
}
```
For detailed event field descriptions, see [Notification event 111 agent metrics](../reference/event-types#111-agent-metrics).
## Optimize cascaded architecture latency
To reduce latency in cascaded architecture, focus on optimizing individual components, geographic deployment, and RTC settings.
### Optimize LLM, ASR, and TTS components
LLM is typically the component that contributes the most to latency. Optimizing LLM can significantly reduce overall latency.
**Choose low-latency vendors**
LLM, ASR, and TTS vendors and models vary significantly in response speed. Refer to the [Conversational AI Performance Lab](https://www.agora.io/en/conversational-ai-performance-lab) to compare performance metrics across vendors.
**Optimize parameter configuration**
When creating an agent, read the vendor documentation for ASR, LLM, and TTS to understand available parameters and tune them for your use case. The following are general optimization approaches:
* **LLM**
* **Choose smaller models**: Models such as `gpt-4o-mini` and `gemini-2.5-flash` typically respond faster than larger models.
* **Limit `max_tokens`**: Reducing the maximum number of tokens generated can lower TTFS (first sentence latency).
* **Enable streaming response**: Ensure `stream: true` so the agent can start speaking as soon as possible.
* **ASR**
* **Use vendor-recommended sampling rate**: Use the sampling rate recommended by the vendor, such as 16 kHz, to avoid unnecessary resampling.
* **Limit language model**: Use the `phrases` or `context` parameter to provide domain-specific vocabulary and improve recognition speed.
* **Disable non-essential features**: Some ASR vendors provide advanced parameters such as punctuation and tone output. You can disable these based on your use case to improve response speed.
* **TTS**
* **Choose faster modes**: Some TTS providers offer modes such as turbo or low-latency, which typically respond faster than default mode.
* **Choose simpler voices**: Some TTS providers offer voices with varying complexity. Choosing less complex voices can reduce generation time.
* **Disable non-essential features**: Some TTS vendors provide advanced parameters such as profanity\_filter, punctuation\_filter, and diarization. You can disable these based on your use case to improve response speed.
The following example shows how to optimize LLM parameters:
```json
{
"properties": {
"llm": {
"url": "https://api.openai.com/v1/chat/completions",
"api_key": "your_api_key",
"params": {
"model": "gpt-4o-mini", // Select the faster-responding model
"temperature": 0.7,
"max_tokens": 150, // Limit the generation length to reduce latency
"stream": true // Enable streaming response
}
}
}
}
```
{/* ### Optimize geographic deployment
**Understand the default location selection strategy**
When regional access restrictions are not enabled or when using the `GLOBAL` region, the Conversational AI engine automatically selects the nearest server to deploy the agent based on the IP address of the configured LLM URL. The system includes the following capabilities:
1. **Smart deployment**: The system deploys the Conversational AI engine service in the region that corresponds to the IP address of the LLM URL.
2. **Proximity selection**: If no servers are available in the corresponding region, the system selects the nearest available region.
3. **Failover**: When the service in a region becomes unavailable, the system switches to another available region.
**Optimize deployment region**
To minimize network latency, Agora recommends:
1. **Deploy ASR, LLM, and TTS in the same region**: Choose vendors that support the same region to reduce cross-region network latency.
2. **Use regional access restrictions**: If your users are concentrated in a specific region, use the `geofence` parameter to restrict the Conversational AI engine to servers in that region:
```json
{
"properties": {
"geofence": {
"area": "NORTH_AMERICA" // Or EUROPE, ASIA, etc.
},
"llm": {
"url": "https://api.openai.com/v1/chat/completions" // Use LLM endpoint in North America region
},
"tts": {
"url": "wss://api.elevenlabs.io/v1/text-to-speech/{voice_id}/stream-input" // Use TTS endpoint in North America region
}
}
}
```
For detailed regional access restriction configuration, see [Restrict agent zones](regional-restrictions). */}
### Optimize RTC latency
RTC latency includes audio capture, encoding, network transmission, decoding, and playback. To optimize RTC latency, configure audio settings on the client side.
**Use AI conversation scenario**
Agora RTC SDK 4.5.1 and later supports the AI conversation scenario (`AUDIO_SCENARIO_AI_CLIENT`), which is specifically optimized for AI conversations and includes:
* Optimized audio 3A algorithms (echo cancellation, noise reduction, and gain control)
* Lower audio capture and playback latency
* Audio processing tailored to AI voice characteristics
Android
iOS
**Use the client-side component API (recommended)**
```kotlin
val config = ConversationalAIAPIConfig(
rtcEngine = rtcEngine,
rtmClient = rtmClient,
renderMode = TranscriptRenderMode.Word,
enableLog = true,
enableRenderModeFallback = true
)
val api = ConversationalAIAPIImpl(config)
// Load optimal audio settings
api.loadAudioSettings()
```
**Configure the RTC SDK directly**
```kotlin
val config = RtcEngineConfig()
config.mAudioScenario = Constants.AUDIO_SCENARIO_AI_CLIENT
rtcEngine = RtcEngine.create(config)
```
**Use the client-side component API (recommended)**
```swift
let config = ConversationalAIAPIConfig(
rtcEngine: rtcEngine,
rtmEngine: rtmEngine,
renderMode: .words,
enableLog: true,
enableRenderModeFallback: true
)
convoAIAPI = ConversationalAIAPIImpl(config: config)
// Load optimal audio settings
convoAIAPI.loadAudioSettings()
```
**Configure the RTC SDK directly**
```swift
let config = AgoraRtcEngineConfig()
config.audioScenario = .aiClient
rtcEngine = AgoraRtcEngineKit.sharedEngine(with: config, delegate: delegate)
```
For detailed audio setting optimization, see [Optimize audio](audio-setup).
{/* ## Optimize MLLM architecture latency
If you use an MLLM (Multimodal Large Language Model) architecture, optimizing latency primarily relies on choosing low-latency MLLM vendors.
MLLM vendors vary in real-time performance. The Conversational AI engine currently supports:
* OpenAI Realtime API: Provides low-latency real-time audio processing capabilities
* Google Gemini Live: Supports multimodal real-time interaction
For detailed MLLM integration guides, see the MLLM provider pages under `AI > Models > MLLM`. */}
## Latency optimization checklist
Use the following checklist to systematically optimize your conversational AI agent latency:
### Server-side optimization
* **Choose low-latency LLM models**: Refer to [Conversational AI Performance Lab](https://www.agora.io/en/conversational-ai-performance-lab) to select models with excellent TTFT and throughput performance.
* **Enable streaming response**: Ensure `stream: true`.
* **Choose low-latency ASR and TTS vendors**: Enable low-latency or turbo modes when available. Refer to [Conversational AI Performance Lab](https://www.agora.io/en/conversational-ai-performance-lab) to select models with low latency and high throughput performance.
* **Optimize geographic deployment**: Deploy ASR, LLM, and TTS in the same region.
### Client-side optimization
* **Use AI conversation scenario**: Set `AUDIO_SCENARIO_AI_CLIENT` (RTC SDK 4.5.1 and later).
* **Load optimal audio settings**: Call the `loadAudioSettings()` method of the client component.
* **Integrate required audio plugins**: Ensure integration of AI noise reduction and AI echo cancellation plugins.
* **Optimize network conditions**: Ensure stable user network connection and consider using SD-RTN™ to optimize network transmission.
### Monitoring and analysis
* **Monitor latency metrics in real time**: Obtain latency data for each conversation turn through client components or NCS.
* **Identify latency bottlenecks**: Analyze which component contributes the most to latency.
* **Continuously optimize**: Adjust configuration based on actual data and conduct A/B testing.
## Balance latency and quality
When optimizing latency, find a balance between response speed and conversation quality:
| Optimization strategy | Latency impact | Quality impact | Recommended scenario |
| ---------------------------- | ----------------------- | -------------------------- | ---------------------------------------------------------------- |
| Use smaller LLM models | ✅ Significantly reduces | ⚠️ May reduce | Latency-sensitive scenarios with relatively simple conversations |
| Limit `max_tokens` | ✅ Moderately reduces | ⚠️ May affect completeness | Scenarios requiring short responses |
| Regional access restrictions | ✅ Moderately reduces | No impact | Users concentrated in a specific region |
| Optimize RTC settings | ✅ Moderately reduces | No impact | All scenarios |
Tip
Monitor latency metrics to identify bottlenecks, then optimize the highest-contributing component rather than pursuing minimal latency across all components.
## References
Refer to the following resources for further details.
* [Webhooks](../build/handle-runtime-events/webhooks)
* [Optimize audio](audio-setup)
* [Notification event types](../reference/event-types)
* [Conversational AI Performance Lab](https://www.agora.io/en/conversational-ai-performance-lab)
{/* * MLLM provider pages under `AI > Models > MLLM` */}
# Record agent conversations (/en/ai/best-practices/record-agent-conversation)
This guide explains how to configure Agora [Cloud Recording](/en/api-reference/api-ref/cloud-recording) for Voice Agent conversations and avoid audio-scene conflicts when recording starts.
## Why this needs special handling
When you run a Voice Agent and Cloud Recording in the same channel, recording startup can briefly interrupt audio. The issue is usually caused by the agent audio scene falling back to a default mode when Cloud Recording joins the channel.
To keep audio stable, set the agent `audio_scenario` to `"chorus"` when you start the agent.
## Configure the agent
Set the agent's RTC audio scenario to `chorus` when you configure the agent:
Python SDK
TypeScript SDK
Go SDK
REST API
```python
from agora_agent import Agent
# client is your configured Agora client
agent = (
Agent(client)
.with_stt(...) # configure your STT vendor
.with_llm(...) # configure your LLM vendor
.with_tts(...) # configure your TTS vendor
.with_audio_scenario('chorus')
)
```
```typescript
import { Agent } from 'agora-agents';
// client is your configured Agora client
const agent = new Agent({ client })
.withStt(/* configure your STT vendor */)
.withLlm(/* configure your LLM vendor */)
.withTts(/* configure your TTS vendor */)
.withAudioScenario('chorus');
```
```go
import "github.com/AgoraIO/agora-agents-go/v2/agentkit"
// client is your configured *agentkit.AgoraClient
agent := agentkit.NewAgent(client).
WithStt(/* configure your STT vendor */).
WithLlm(/* configure your LLM vendor */).
WithTts(/* configure your TTS vendor */).
WithAudioScenario(agentkit.AudioScenarioChorus)
```
Add or modify the `audio_scenario` field in the agent startup parameters:
```json
{
"properties": {
"parameters": {
"audio_scenario": "chorus"
}
}
}
```
## Complete example
The following example shows an agent launch request with the recommended recording-safe configuration:
```json
{
"name": "TestConvoAgent",
"properties": {
"channel": "{{AccessChannel}}",
"token": "{{token}}",
"agent_rtc_uid": "0",
"remote_rtc_uids": [
"*"
],
"idle_timeout": 30,
"advanced_features": {
"enable_bhvs": true
},
"llm": {
"url": "https://api.openai.com/v1/chat/completions",
"api_key": "",
"system_messages": [
{
"role": "system",
"content": "You are a helpful chatbot."
}
],
"greeting_message": "Hello, how can I help you?",
"failure_message": "Sorry, I don't know how to answer this question.",
"max_history": 10,
"params": {
"model": "gpt-4o-mini"
}
},
"tts": {
"vendor": "microsoft",
"params": {
"key": "",
"region": "eastus",
"voice_name": "en-US-AndrewMultilingualNeural"
}
},
"turn_detection": {
"silence_duration_ms": 640
},
"parameters": {
"enable_dump": true,
"enable_error_message": true,
"audio_scenario": "chorus",
"enable_delay": true
}
}
}
```
## Start recording
After the agent is running, call the [Start Cloud Recording API](/en/api-reference/api-ref/cloud-recording/start) to begin recording.
Example Cloud Recording request body:
```json
{
"cname": "{{AccessChannel}}",
"uid": "{{RecordingUID}}",
"clientRequest": {
"token": "{{token}}",
"recordingConfig": {
"maxIdleTime": 120,
"streamTypes": 0,
"audioProfile": 1,
"channelType": 1
},
"recordingFileConfig": {
"avFileType": [
"hls",
"mp4"
]
},
"storageConfig": {
"vendor": "{{Vendor}}",
"region": "{{Region}}",
"bucket": "{{Bucket}}",
"accessKey": "{{AccessKey}}",
"secretKey": "{{SecretKey}}"
}
}
}
```
## Related pages
* [Start and stop an agent](../build/start-stop-agent)
* [Cloud Recording API reference](/en/api-reference/api-ref/cloud-recording)
# Restrict where agent can run (/en/ai/best-practices/regional-restrictions)
import { Parameter, ParameterList } from '@/components/mdx';
To comply with laws and regulations in different countries and regions, the Conversational AI Engine supports regional access restrictions. When you enable regional access restrictions, the Conversational AI Engine only accesses Agora servers in the designated region, regardless of the user's location.
For example, if you specify North America as the access region, two users who initiate calls from North America and Singapore have different experiences:
| Specified access region | User location | Actual access region | User experience |
|:-------|:-------|:-------|:-------|
| North America | North America | North America | Normal quality. |
| North America | Singapore | North America | Quality may be significantly impacted. Cross-regional public internet connections between the designated region and the user's location can result in poor network quality. If all servers in the specified region are unavailable, the service returns an error. |
## Understand the tech
When regional access restrictions are disabled, the Conversational AI Engine automatically selects the nearest server to deploy the agent based on the IP address of the LLM URL and supports failover:
1. **Intelligent deployment**: The system automatically deploys the Conversational AI Engine service in the region that corresponds to the IP address of the configured LLM URL.
1. **Nearest available region**: If no server is available in the corresponding region, the system automatically selects the nearest available region.
1. **Failover**: When a service becomes unavailable in a region, the system automatically switches to another available region.
:::caution[Caution]
When you enable regional access restrictions, the system strictly limits access to the specified region and does not perform cross-regional failover.
:::
## Implementation
### Configure regional access
To configure region access restrictions, set `properties.geofence` when you [Start a conversational AI agent](/en/api-reference/api-ref/conversational-ai/join).
The allowed region for server access.
The excluded region. Only available when `area` is set to `GLOBAL`.
### Configuration examples
Refer to the following examples to understand `geofence` configuration.
#### Restrict access to North America only
Python SDKTypeScript SDKGo SDKREST API
```python
from agora_agent import Agent
from agora_agent.agentkit import GeofenceConfig
# client is your configured Agora client
agent = (
Agent(client)
.with_llm(...) # configure your LLM vendor
.with_tts(...) # configure your TTS vendor
.with_geofence(GeofenceConfig(
area='NORTH_AMERICA',
))
)
```
```typescript
import { Agent } from 'agora-agents';
// client is your configured Agora client
const agent = new Agent({ client })
.withLlm(/* configure your LLM vendor */)
.withTts(/* configure your TTS vendor */)
.withGeofence({
area: 'NORTH_AMERICA',
});
```
```go
import "github.com/AgoraIO/agora-agents-go/v2/agentkit"
// client is your configured *agentkit.AgoraClient
agent := agentkit.NewAgent(client).
WithLlm(/* configure your LLM vendor */).
WithTts(/* configure your TTS vendor */).
WithGeofence(&agentkit.GeofenceConfig{
Area: agentkit.GeofenceAreaNorthAmerica,
})
```
Use the following request body when you [Start a conversational AI agent](/en/api-reference/api-ref/conversational-ai/join):
```json
{
"name": "customer_service",
"properties": {
"channel": "test_channel",
"token": "your_rtc_token",
"agent_rtc_uid": "123",
"remote_rtc_uids": ["456"],
"geofence": {
"area": "NORTH_AMERICA"
},
"llm": {
// ... LLM configuration
},
"tts": {
// ... TTS configuration
}
}
}
```
#### Allow global access but exclude India
Python SDKTypeScript SDKGo SDKREST API
```python
from agora_agent import Agent
from agora_agent.agentkit import GeofenceConfig
# client is your configured Agora client
agent = (
Agent(client)
.with_llm(...) # configure your LLM vendor
.with_tts(...) # configure your TTS vendor
.with_geofence(GeofenceConfig(
area='GLOBAL',
exclude_area='INDIA',
))
)
```
```typescript
import { Agent } from 'agora-agents';
// client is your configured Agora client
const agent = new Agent({ client })
.withLlm(/* configure your LLM vendor */)
.withTts(/* configure your TTS vendor */)
.withGeofence({
area: 'GLOBAL',
exclude_area: 'INDIA',
});
```
```go
import "github.com/AgoraIO/agora-agents-go/v2/agentkit"
// client is your configured *agentkit.AgoraClient
agent := agentkit.NewAgent(client).
WithLlm(/* configure your LLM vendor */).
WithTts(/* configure your TTS vendor */).
WithGeofence(&agentkit.GeofenceConfig{
Area: agentkit.GeofenceAreaGlobal,
ExcludeArea: agentkit.GeofenceExcludeAreaIndia.Ptr(),
})
```
Use the following request body when you [Start a conversational AI agent](/en/api-reference/api-ref/conversational-ai/join):
```json
{
"name": "customer_service",
"properties": {
"channel": "test_channel",
"token": "your_rtc_token",
"agent_rtc_uid": "123",
"remote_rtc_uids": ["456"],
"geofence": {
"area": "GLOBAL",
"exclude_area": "INDIA"
},
"llm": {
// ... LLM configuration
},
"tts": {
// ... TTS configuration
}
}
}
```
### Configure RTC regional access
The Conversational AI Engine and Agora RTC services are independent, and their regional access restriction configurations are separate. To implement complete end-to-end regional access restrictions and ensure that the entire call chain with the agent is confined to a specified region, you must also configure RTC regional access restrictions. For more information, see [Restrict media zones](../../realtime-media/rtc/build/manage-connection-and-quality/geofencing).
## Data residency
In addition to configuring regional access restrictions for the Conversational AI Engine, some LLM, TTS, and ASR vendors offer data residency services in different regions. You can ensure that data is not transferred across regions by configuring the URLs used by the LLM, TTS, and ASR modules.
For example, ElevenLabs supports selecting data processing regions through different URL endpoints. For more information, see the [ElevenLabs documentation](https://elevenlabs.io/docs/overview/administration/data-residency).
The following example shows how to configure the ElevenLabs TTS service using a URL endpoint for the European region:
```json
{
"properties": {
"tts": {
"vendor": {
"name": "elevenlabs"
},
"url": "wss://api.eu.elevenlabs.io/v1/text-to-speech/{voice_id}/stream-input"
}
}
}
```
## Best practices
To ensure that data remains entirely within the designated region, follow these recommendations:
1. **Configure regional restrictions for the Conversational AI Engine**: Use the `geofence` object to restrict server access regions.
2. **Configure RTC regional restrictions**: Configure the corresponding regional access restrictions in the RTC SDK.
3. **Select regional AI services**: When configuring LLM, TTS, and ASR services, select a provider that supports regional data residency and use the corresponding regional URL endpoint.
4. **Verify the configuration**: Before deploying to production, thoroughly test that regional access restrictions work correctly and that data is not transferred across regions.
## Considerations
Keep the following in mind when implementing regional access restrictions:
- **Performance impact**: Regional access restrictions may affect user experience. If a user's location is far from the designated region, network latency may increase.
- **Service availability**: When regional access restrictions are enabled and the server in the specified region is unavailable or lacks sufficient resources, the service returns an error and does not automatically switch to another region.
- **Configuration consistency**: Ensure that the regional configurations of the Conversational AI Engine, RTC SDK, and LLM, TTS, and ASR services are consistent to prevent data transfer across regions.
- **Compliance requirements**: Before configuring regional access restrictions, understand the legal and regulatory requirements of the target region to ensure that the configuration complies with local data protection and privacy regulations.
# Architecture (/en/ai/build/architecture)
The TEN framework uses a graph structure of interconnected nodes to define data flow between extensions. Subgraphs extend this architecture by providing a powerful reuse mechanism that allows you to break down complex graph structures into modular, reusable components.
Subgraphs improve code organization and maintainability by enabling you to create self-contained graph modules that can be shared across different applications or used multiple times within the same application. This modular approach simplifies the development of complex systems while maintaining the same runtime performance characteristics as regular graphs.
## Understand the tech
Subgraphs preserve the fundamental principle of TEN graphs: defining how data flows between extensions. Rather than introducing new runtime complexity, subgraphs act as a development-time abstraction that gets flattened into the larger graph structure during deployment.
This design approach provides the organizational benefits of modularity while using the same graph execution mechanism that powers all TEN applications.
### Design principles
Subgraphs are built on the following foundational principles that ensure they integrate seamlessly with the TEN framework while providing meaningful development benefits:
* **Independence**: Every subgraph is a complete, self-contained graph that can run independently or be embedded as a component within larger graphs. This independence means you can develop, test, and validate subgraphs in isolation before integrating them into complex applications.
* **Tool-friendly design**: Subgraphs provide structured metadata through `exposed_messages` and `exposed_properties` that development tools can use to offer intelligent suggestions, validation, and debugging capabilities. This enhanced tooling support improves the development experience without adding runtime overhead.
* **Flattening mechanism**: At deployment time, subgraphs are flattened into standard graph structures, ensuring that runtime performance remains identical to regular graphs. This approach provides development-time modularity benefits while maintaining the proven performance characteristics of the core TEN graph engine.
* **Simplicity**: Subgraph design prioritizes simplicity. Rather than providing patching mechanisms or complex configuration options at reference points, subgraphs use straightforward mapping and exposure patterns. If a subgraph needs modification, you modify the original definition directly, avoiding complexity cascades and maintenance overhead.
This design approach allows you to treat subgraphs as black boxes. You can use them without understanding their internal complexity, while the framework handles the technical details of integration and execution.
### Key features
Subgraphs provide four essential features that enable modular graph development and seamless integration within TEN applications:
* **Message exposure**: Subgraphs declare their external interfaces through the `exposed_messages` field, specifying which message types (commands, data, audio, video) can be sent to or received from the subgraph. This exposure mechanism allows development tools to provide intelligent autocomplete and validation while hiding internal implementation details from external consumers.
* **Property exposure**: Through the `exposed_properties` field, subgraphs can selectively expose internal extension properties to external configuration. This controlled exposure enables customization of subgraph behavior without revealing the entire internal structure, maintaining encapsulation while providing necessary flexibility.
* **Namespace management**: Each referenced subgraph creates its own namespace, preventing naming conflicts between elements in different subgraphs. When you reference a subgraph with name `subgraph_1`, all internal elements become accessible through the namespace syntax (e.g., `subgraph_1:ext_name`), ensuring global uniqueness across complex graph hierarchies.
* **Cross-graph connections**: Subgraphs enable sophisticated connection patterns that span multiple graph boundaries. You can connect directly to subgraph interfaces, connect to specific elements within subgraphs, or even establish connections between elements in different subgraphs. This flexibility supports complex data flow architectures while maintaining clear organizational boundaries.
These features work together to provide a powerful abstraction layer that simplifies complex graph development without sacrificing the flexibility and performance that TEN applications require.
## Creating subgraphs
### Subgraph definition
A subgraph is defined in a standard JSON file that contains the same basic structure as any TEN graph, with additional metadata for external interfaces. Here's a basic example:
```json
{
"nodes": [
{
"type": "extension",
"name": "audio_processor",
"addon": "audio_enhancement"
},
{
"type": "extension",
"name": "audio_filter",
"addon": "noise_reduction"
}
],
"connections": [
{
"extension": "audio_processor",
"audio_frame": [
{
"name": "processed_audio",
"dest": [
{
"extension": "audio_filter"
}
]
}
]
}
],
"exposed_messages": [
{
"extension": "audio_processor",
"type": "audio_frame_in",
"name": "raw_audio"
},
{
"extension": "audio_filter",
"type": "audio_frame_out",
"name": "clean_audio"
}
],
"exposed_properties": [
{
"extension": "audio_processor",
"name": "sample_rate",
"alias": "input_sample_rate"
},
{
"extension": "audio_filter",
"name": "noise_threshold",
"alias": "filter_sensitivity"
}
]
}
```
Following is the structure breakdown:
* **Nodes section**: Defines the extensions that make up the subgraph, just like in a regular graph. Each extension specifies its type, name, and addon identifier.
* **Connections section**: Establishes data flow between extensions within the subgraph. These internal connections define how the subgraph processes data internally.
* **Exposed messages section**: Declares which message interfaces are available for external connections. This acts as the subgraph's public API, allowing other graphs to send data to or receive data from the subgraph without knowing its internal structure.
* **Exposed properties section**: Specifies which extension properties can be configured externally. The `alias` field provides user-friendly names for external configuration, abstracting away internal implementation details.
This sample subgraph can function as a standalone audio processing pipeline or be embedded within larger applications that need audio enhancement capabilities.
### Exposed interfaces
Subgraphs use two interface types to control what external graphs can access and configure. These interfaces act as the subgraph's public API, providing controlled access while maintaining internal encapsulation.
#### exposed\_messages
The `exposed_messages` field defines which message interfaces are available for external connections. This allows other graphs to interact with your subgraph without needing to understand its internal structure.
**Message exposure structure:**
```json
{
"exposed_messages": [
{
"extension": "internal_extension_name",
"type": "message_direction_and_type",
"name": "message_name"
}
]
}
```
**Message types:**
* `cmd_in` / `cmd_out`: Command messages for control and responses
* `data_in` / `data_out`: General data messages
* `audio_frame_in` / `audio_frame_out`: Audio stream data
* `video_frame_in` / `video_frame_out`: Video stream data
**Example:**
```json
{
"exposed_messages": [
{
"extension": "speech_recognizer",
"type": "audio_frame_in",
"name": "audio_input"
},
{
"extension": "text_processor",
"type": "data_out",
"name": "transcribed_text"
},
{
"extension": "speech_recognizer",
"type": "cmd_in",
"name": "configure_language"
}
]
}
```
This example exposes an audio input, text output, and configuration command, allowing external graphs to send audio data and receive transcribed text while configuring the recognition language.
#### exposed\_properties
The `exposed_properties` field specifies which internal extension properties can be configured from outside the subgraph. This enables customization without exposing the entire internal configuration.
**Property exposure structure:**
```json
{
"exposed_properties": [
{
"extension": "internal_extension_name",
"name": "internal_property_name",
"alias": "external_property_name"
}
]
}
```
* `extension`: The internal extension that owns the property
* `name`: The actual property name within the extension
* `alias`: The external name used when referencing the subgraph (optional)
**Example:**
```json
{
"exposed_properties": [
{
"extension": "video_encoder",
"name": "bitrate_kbps",
"alias": "output_quality"
},
{
"extension": "frame_buffer",
"name": "max_buffer_size",
"alias": "buffer_limit"
},
{
"extension": "video_encoder",
"name": "codec_type"
}
]
}
```
In this example, external graphs can configure video quality through the `output_quality` alias, set buffer limits through `buffer_limit`, and specify codec type directly. The aliases provide user-friendly names while hiding implementation details. Exposed interfaces provide the following benefits:
* **Encapsulation**: Hide internal complexity while providing clean external APIs
* **Selective exposure**: Allow control over which interfaces and properties can be accessed externally
* **Interface documentation**: Serve as documentation for subgraph capabilities
## Using subgraphs
### Referencing subgraphs
To use a subgraph in your main graph, reference it as a node with type `subgraph`. The subgraph becomes part of your graph's namespace and can be connected like any other component.
**Basic subgraph reference:**
```json
{
"nodes": [
{
"type": "extension",
"name": "input_source",
"addon": "audio_input"
},
{
"type": "extension",
"name": "output_sink",
"addon": "audio_output"
},
{
"type": "subgraph",
"name": "audio_pipeline",
"source_uri": "./ten_packages/extension/audio_processing/subgraph.json"
}
],
"connections": [
{
"extension": "input_source",
"audio_frame": [
{
"name": "raw_audio",
"dest": [
{
"subgraph": "audio_pipeline"
}
]
}
]
},
{
"subgraph": "audio_pipeline",
"audio_frame": [
{
"name": "processed_audio",
"dest": [
{
"extension": "output_sink"
}
]
}
]
}
]
}
```
**Subgraph with properties:**
You can configure exposed properties when referencing a subgraph:
```json
{
"type": "subgraph",
"name": "video_processor",
"source_uri": "./subgraphs/video_enhancement.json",
"property": {
"output_quality": "high",
"buffer_limit": 1024,
"codec_type": "h264"
}
}
```
The properties you specify must exist in the subgraph's `exposed_properties` field, otherwise the configuration is rejected.
### Connection patterns
Subgraphs support multiple connection patterns that provide flexibility in how you route data between components.
#### Direct connections to subgraphs
Connect directly to a subgraph using its name when the subgraph exposes the appropriate message interface:
```json
{
"connections": [
{
"extension": "data_source",
"cmd": [
{
"name": "process_data",
"dest": [
{
"subgraph": "data_processor"
}
]
}
]
}
]
}
```
This pattern works when `data_processor` exposes a `cmd_in` interface for `process_data`. The connection is clean and hides the subgraph's internal structure.
#### Connections to elements within subgraphs
For more granular control, connect directly to specific extensions within a subgraph using namespace syntax:
```json
{
"connections": [
{
"extension": "external_source",
"data": [
{
"name": "raw_input",
"dest": [
{
"extension": "video_pipeline:frame_buffer"
}
]
}
]
},
{
"extension": "video_pipeline:encoder",
"video_frame": [
{
"name": "encoded_output",
"dest": [
{
"extension": "external_sink"
}
]
}
]
}
]
}
```
The `subgraph_name:extension_name` syntax allows you to bypass the subgraph's exposed interfaces and connect directly to internal elements. Use this pattern when you need fine-grained control over data flow.
#### Advanced connection syntax
You can mix different connection patterns within the same graph to create sophisticated data flow architectures:
```json
{
"connections": [
{
"extension": "input_hub",
"data": [
{
"name": "sensor_data",
"dest": [
{
"subgraph": "processing_pipeline"
},
{
"extension": "backup_pipeline:data_logger"
},
{
"extension": "monitoring_extension"
}
]
}
]
},
{
"subgraph": "processing_pipeline",
"cmd": [
{
"name": "status_update",
"dest": [
{
"extension": "monitoring_extension"
},
{
"subgraph": "alert_system"
}
]
}
]
}
]
}
```
**Connection pattern guidelines:**
* **Use direct subgraph connections** when working with well-defined interfaces
* **Use namespace syntax** when you need to access specific internal functionality
* **Mix patterns** when building complex data flow architectures
* **Prefer exposed interfaces** for maintainability and clarity
These patterns give you the flexibility to build everything from simple linear pipelines to complex multi-path processing architectures while maintaining clear organizational boundaries.
## Flattening process
### How flattening works
Before your application runs, the TEN framework automatically flattens all subgraph references into a single, standard graph structure. This flattening process converts the modular development structure into the standard graph format that the TEN runtime executes.
**Flattening transformations:**
1. **Namespace resolution**: Subgraph references are resolved and internal elements are prefixed with the subgraph name to ensure global uniqueness.
2. **Node expansion**: Subgraph nodes are replaced with their constituent extension nodes, maintaining all original properties and configurations.
3. **Connection mapping**: References using namespace syntax (`subgraph:extension`) are converted to direct extension names, and subgraph-level connections are mapped to specific internal extensions.
4. **Property inheritance**: Properties specified when referencing a subgraph are applied to the appropriate internal extensions based on the `exposed_properties` mapping.
5. **Interface removal**: The `exposed_messages` and `exposed_properties` metadata is removed since it's only needed during graph composition.
**Naming convention:**
The colon (`:`) is replaced with an underscore (`_`) to create valid extension names in the flattened structure.
* Original: `subgraph_name:extension_name`
* Flattened: `subgraph_name_extension_name`
### Flattened graph example
Following is a complete example that shows how a graph with subgraphs transforms during the flattening process:
**Before flattening:**
```json
{
"nodes": [
{
"type": "extension",
"name": "input_source",
"addon": "microphone_input"
},
{
"type": "extension",
"name": "output_sink",
"addon": "speaker_output"
},
{
"type": "subgraph",
"name": "audio_pipeline",
"source_uri": "./subgraphs/audio_processing.json",
"property": {
"sample_rate": 48000,
"noise_threshold": 0.3
}
},
{
"type": "subgraph",
"name": "effects_chain",
"source_uri": "./subgraphs/audio_effects.json"
}
],
"connections": [
{
"extension": "input_source",
"audio_frame": [
{
"name": "raw_audio",
"dest": [
{
"subgraph": "audio_pipeline"
}
]
}
]
},
{
"extension": "audio_pipeline:processor",
"audio_frame": [
{
"name": "clean_audio",
"dest": [
{
"extension": "effects_chain:reverb"
}
]
}
]
},
{
"subgraph": "effects_chain",
"audio_frame": [
{
"name": "final_audio",
"dest": [
{
"extension": "output_sink"
}
]
}
]
}
]
}
```
**After flattening:**
```json
{
"nodes": [
{
"type": "extension",
"name": "input_source",
"addon": "microphone_input"
},
{
"type": "extension",
"name": "output_sink",
"addon": "speaker_output"
},
{
"type": "extension",
"name": "audio_pipeline_enhancer",
"addon": "audio_enhancement",
"property": {
"sample_rate": 48000
}
},
{
"type": "extension",
"name": "audio_pipeline_processor",
"addon": "noise_reduction",
"property": {
"noise_threshold": 0.3
}
},
{
"type": "extension",
"name": "effects_chain_reverb",
"addon": "reverb_effect"
},
{
"type": "extension",
"name": "effects_chain_compressor",
"addon": "dynamic_compressor"
}
],
"connections": [
{
"extension": "input_source",
"audio_frame": [
{
"name": "raw_audio",
"dest": [
{
"extension": "audio_pipeline_enhancer"
}
]
}
]
},
{
"extension": "audio_pipeline_enhancer",
"audio_frame": [
{
"name": "enhanced_audio",
"dest": [
{
"extension": "audio_pipeline_processor"
}
]
}
]
},
{
"extension": "audio_pipeline_processor",
"audio_frame": [
{
"name": "clean_audio",
"dest": [
{
"extension": "effects_chain_reverb"
}
]
}
]
},
{
"extension": "effects_chain_reverb",
"audio_frame": [
{
"name": "reverb_audio",
"dest": [
{
"extension": "effects_chain_compressor"
}
]
}
]
},
{
"extension": "effects_chain_compressor",
"audio_frame": [
{
"name": "final_audio",
"dest": [
{
"extension": "output_sink"
}
]
}
]
}
]
}
```
**Key changes during flattening:**
* **Subgraph nodes removed**: `audio_pipeline` and `effects_chain` subgraph nodes are replaced with their constituent extensions
* **Names prefixed**: Internal extensions get prefixed names (`audio_pipeline_processor`, `effects_chain_reverb`)
* **Properties distributed**: Subgraph properties are applied to the correct internal extensions
* **Connections resolved**: All namespace references and subgraph connections are converted to direct extension connections
* **Internal connections preserved**: Connections that existed within the original subgraphs are included in the flattened result
The flattened graph contains only standard extensions and direct connections, maintaining the organizational benefits you gained during development while using the standard TEN graph execution model.
## Advanced features
### Message conversion with subgraphs
Subgraphs support the TEN framework's message conversion mechanism, allowing you to transform message formats when routing data between components.
**Message conversion syntax:**
You can apply message conversion rules when connecting to subgraphs, internal subgraph elements, or when subgraphs connect to external components:
```json
{
"connections": [
{
"extension": "data_source",
"cmd": [
{
"name": "user_request",
"dest": [
{
"subgraph": "ai_processor",
"msg_conversion": {
"type": "per_property",
"rules": [
{
"path": "request_type",
"conversion_mode": "fixed_value",
"value": "chat_completion"
},
{
"path": "model_config.temperature",
"conversion_mode": "from_original",
"original_path": "settings.creativity"
}
],
"keep_original": true
}
},
{
"extension": "nlp_pipeline:tokenizer",
"msg_conversion": {
"type": "per_property",
"rules": [
{
"path": "input_text",
"conversion_mode": "from_original",
"original_path": "user_message"
}
],
"keep_original": false
}
}
]
}
]
}
]
}
```
**Conversion during flattening:**
Message conversion rules are preserved during the flattening process, ensuring that your data transformations work correctly at runtime:
```json
{
"connections": [
{
"extension": "data_source",
"cmd": [
{
"name": "user_request",
"dest": [
{
"extension": "ai_processor_chat_handler",
"msg_conversion": {
"type": "per_property",
"rules": [
{
"path": "request_type",
"conversion_mode": "fixed_value",
"value": "chat_completion"
}
],
"keep_original": true
}
},
{
"extension": "nlp_pipeline_tokenizer",
"msg_conversion": {
"type": "per_property",
"rules": [
{
"path": "input_text",
"conversion_mode": "from_original",
"original_path": "user_message"
}
],
"keep_original": false
}
}
]
}
]
}
]
}
```
### Multi-graph connections
Beyond subgraphs, TEN supports connections between separate graphs running in the same application or across different applications. This enables sophisticated distributed architectures.
#### Connecting to predefined graphs
You can reference and connect to other predefined graphs within the same TEN application:
```json
{
"nodes": [
{
"type": "extension",
"name": "local_processor",
"addon": "data_processor"
},
{
"type": "graph",
"graph_name": "analytics_pipeline",
"singleton": true
},
{
"type": "graph",
"graph_name": "monitoring_system",
"singleton": false
}
],
"connections": [
{
"extension": "local_processor",
"data": [
{
"name": "processed_data",
"dest": [
{
"extension": "analytics_pipeline:data_ingester"
},
{
"graph": "monitoring_system"
}
]
}
]
},
{
"graph": "analytics_pipeline",
"cmd": [
{
"name": "analysis_complete",
"dest": [
{
"extension": "local_processor"
}
]
}
]
}
]
}
```
#### Remote graph connections
Connect to graphs running in different TEN applications across the network:
```json
{
"nodes": [
{
"type": "extension",
"name": "local_service",
"addon": "api_handler"
},
{
"type": "graph",
"graph_name": "ml_inference",
"singleton": true,
"app": "msgpack://ml-server.example.com:8002/"
},
{
"type": "graph",
"graph_name": "data_warehouse",
"singleton": false,
"app": "msgpack://data-cluster.example.com:8003/"
}
],
"connections": [
{
"extension": "local_service",
"cmd": [
{
"name": "inference_request",
"dest": [
{
"graph": "ml_inference"
}
]
}
]
},
{
"graph": "ml_inference",
"data": [
{
"name": "inference_result",
"dest": [
{
"extension": "local_service"
},
{
"graph": "data_warehouse"
}
]
}
]
}
]
}
```
#### Graph node types
TEN supports three types of graph nodes for different connection scenarios:
**Subgraph nodes:**
```json
{
"type": "subgraph",
"name": "processing_module",
"source_uri": "./subgraphs/data_processing.json",
"property": {
"batch_size": 100
}
}
```
**Local graph nodes:**
```json
{
"type": "graph",
"graph_name": "background_service",
"singleton": true
}
```
```json
{
"type": "graph",
"graph_name": "worker_pool",
"singleton": false
}
```
**Remote graph nodes:**
```json
{
"type": "graph",
"graph_name": "external_api",
"singleton": true,
"app": "msgpack://api.service.com:8001/"
}
```
```json
{
"type": "graph",
"graph_name": "distributed_cache",
"singleton": false,
"app": "msgpack://cache-cluster.internal:8004/"
}
```
**Graph node properties:**
* **graph\_name**: Identifies the target graph within its application
* **singleton**: Controls whether multiple instances can exist (`true` = single instance, `false` = multiple instances allowed)
* **app**: Specifies the target application URL for remote connections (omit for local graphs)
These advanced features enable you to build sophisticated distributed systems where subgraphs, local graphs, and remote services work together seamlessly while maintaining clear architectural boundaries.
## Reference
### Graph node types
TEN graphs support three types of node references that enable different architectural patterns and connection scopes.
#### Subgraph nodes
Reference external graph files as reusable components within your graph:
**Basic subgraph node:**
```json
{
"type": "subgraph",
"name": "unique_subgraph_name",
"source_uri": "path/to/subgraph.json"
}
```
**Subgraph node with properties:**
```json
{
"type": "subgraph",
"name": "configurable_module",
"source_uri": "./ten_packages/extension/module/subgraph.json",
"property": {
"param1": "value1",
"param2": 42,
"nested_config": {
"enabled": true,
"threshold": 0.85
}
}
}
```
**Remote subgraph node:**
```json
{
"type": "subgraph",
"name": "shared_component",
"source_uri": "https://cdn.example.com/subgraphs/v1.2/nlp_pipeline.json"
}
```
**Required fields:**
* `type`: Must be `"subgraph"`
* `name`: Unique identifier within the current graph (serves as namespace)
* `source_uri`: Path or URL to the subgraph definition file
**Optional fields:**
* `property`: Configuration values for exposed properties
#### Local graph nodes
Reference other predefined graphs within the same TEN application:
**Singleton local graph:**
```json
{
"type": "graph",
"graph_name": "predefined_graph_id",
"singleton": true
}
```
**Multi-instance local graph:**
```json
{
"type": "graph",
"graph_name": "worker_template",
"singleton": false
}
```
**Required fields:**
* `type`: Must be `"graph"`
* `graph_name`: Identifier of the predefined graph in the same application
* `singleton`: Boolean controlling instance multiplicity
**Singleton behavior:**
* `true`: Only one instance of the graph exists, shared across references
* `false`: Each reference creates a separate graph instance
#### Remote graph nodes
Reference graphs running in different TEN applications across the network:
**Singleton remote graph:**
```json
{
"type": "graph",
"graph_name": "ml_service",
"singleton": true,
"app": "msgpack://ml-cluster.internal:8002/"
}
```
**Multi-instance remote graph:**
```json
{
"type": "graph",
"graph_name": "data_processor",
"singleton": false,
"app": "msgpack://processing-farm.example.com:8003/"
}
```
**Required fields:**
* `type`: Must be `"graph"`
* `graph_name`: Identifier of the target graph in the remote application
* `singleton`: Boolean controlling instance behavior
* `app`: Network address of the target TEN application
**Supported protocols:**
* `msgpack://host:port/`: MessagePack-based communication
* Additional protocols may be supported in future versions
### Connection syntax reference
TEN provides flexible syntax for establishing connections between different types of graph nodes and their internal elements.
#### subgraph\_name:element_name
Access specific elements within subgraphs using namespace syntax:
**Extension within subgraph:**
```json
{
"extension": "audio_pipeline:noise_filter",
"audio_frame": [
{
"name": "filtered_audio",
"dest": [
{
"extension": "output_device"
}
]
}
]
}
```
**Connecting to subgraph element:**
```json
{
"extension": "microphone",
"audio_frame": [
{
"name": "raw_audio",
"dest": [
{
"extension": "processing_chain:input_buffer"
}
]
}
]
}
```
**Syntax rules:**
* Format: `subgraph_name:extension_name`
* The colon (`:`) separates namespace from element name
* Element name must exist within the referenced subgraph
* Bypasses subgraph's exposed interface constraints
#### Graph references
Connect to graphs using their identifiers:
**Direct graph connection:**
```json
{
"subgraph": "local_processor",
"cmd": [
{
"name": "process_complete",
"dest": [
{
"graph": "analytics_engine"
}
]
}
]
}
```
**Graph element connection:**
```json
{
"graph": "background_service",
"data": [
{
"name": "status_update",
"dest": [
{
"extension": "monitor:logger"
}
]
}
]
}
```
**Local graph with namespace:**
```json
{
"extension": "coordinator",
"cmd": [
{
"name": "task_assignment",
"dest": [
{
"extension": "worker_pool:task_manager"
}
]
}
]
}
```
#### Advanced patterns
Combine multiple connection types for sophisticated data flow architectures:
**Multi-destination routing:**
```json
{
"extension": "data_ingester",
"data": [
{
"name": "incoming_data",
"dest": [
{
"subgraph": "validation_pipeline"
},
{
"extension": "processing_farm:load_balancer"
},
{
"graph": "audit_logger"
},
{
"extension": "backup_storage"
}
]
}
]
}
```
**Cross-application message flow:**
```json
{
"graph": "local_analytics",
"cmd": [
{
"name": "analysis_request",
"dest": [
{
"extension": "ml_cluster:inference_engine"
}
]
}
]
}
```
**Conditional routing with message conversion:**
```json
{
"extension": "request_router",
"cmd": [
{
"name": "user_request",
"dest": [
{
"subgraph": "fast_processing",
"msg_conversion": {
"type": "per_property",
"rules": [
{
"path": "priority",
"conversion_mode": "fixed_value",
"value": "high"
}
]
}
},
{
"extension": "slow_processing:queue_manager",
"msg_conversion": {
"type": "per_property",
"rules": [
{
"path": "priority",
"conversion_mode": "fixed_value",
"value": "normal"
}
]
}
}
]
}
]
}
```
**Connection target types:**
* `extension`: Direct extension name
* `subgraph`: Subgraph name (uses exposed interfaces)
* `graph`: Graph name (uses exposed interfaces)
* `extension` with namespace: `namespace:extension_name`
**Best practices:**
* Use exposed interfaces when possible for better encapsulation
* Use namespace syntax only when you need direct access to internal elements
* Prefer subgraphs over direct graph references for reusable components
* Document complex connection patterns for maintainability
# Use MCP tools (/en/ai/build/mcp-tools)
MCP is an open protocol for connecting LLMs to external tools and data sources. When you attach an MCP server to a Conversational AI agent and enable tool calling, the LLM can invoke the tools that the server exposes, such as looking up account data, running a search, or triggering an action in another system, and use the results to generate its response.
This page explains how to attach an MCP server to an agent using the REST API and Agent SDKs.
Info
Building a no-code agent in the Agora Console? See [Manage integrations](../studio/build/integrations#mcp-servers).
## Understand the tech
During a conversation, the LLM decides when a tool call is useful, the engine forwards that call to the configured MCP server over HTTP, and the server's response is fed back to the LLM as context for its next reply. Agora's Conversational AI Engine acts as the MCP client.
To configure MCP tool-use:
* **Specify an array of MCP servers**: Each entry defines the server's endpoint, transport, and which of its tools the agent can call.
* **Enable tool invocation**: This allows the agent to call the available tools on the specified servers.
## Prerequisites
* Implemented the basic logic for interacting with a conversational AI agent. See the [quickstart](../get-started/quickstart).
* An MCP server reachable over HTTP or HTTPS.
## Implementation
Take the following steps to give your agent access to an MCP server.
### Attach an MCP server and enable tool calling
Add one or more servers then enable tool calling.
MLLM agents currently support MCP tool-use, through the RESTful API only. The Agent SDKs don't yet expose an equivalent field on their MLLM vendor classes. For an MLLM agent, add `mcp_servers` under `mllm` instead of `llm`.
Python SDK
TypeScript SDK
Go SDK
REST API
```python
from agora_agent import OpenAI
# ... other agent configuration ...
.with_llm(OpenAI(
api_key='your-llm-api-key',
model='gpt-4o-mini',
mcp_servers=[
{
'name': 'deepwiki',
'endpoint': 'https://mcp.deepwiki.com/mcp', # Replace with your own MCP server
'transport': 'streamable_http',
'allowed_tools': ['ask_question'], # Replace with your server's tool names
'timeout_ms': 10000,
},
],
))
.with_tools(True)
# ... continue with .with_tts() and .create_session() ...
```
```typescript
import { OpenAI } from 'agora-agents';
// ... other agent configuration ...
.withLlm(new OpenAI({
apiKey: 'your-llm-api-key',
model: 'gpt-4o-mini',
mcpServers: [
{
name: 'deepwiki',
endpoint: 'https://mcp.deepwiki.com/mcp', // Replace with your own MCP server
transport: 'streamable_http',
allowed_tools: ['ask_question'], // Replace with your server's tool names
timeout_ms: 10000,
},
],
}))
.withTools(true)
// ... continue with .withTts() and .createSession() ...
```
```go
// ... other agent configuration ...
.WithLlm(
vendors.NewOpenAI(vendors.OpenAIOptions{
APIKey: "your-llm-api-key",
Model: "gpt-4o-mini",
McpServers: []map[string]interface{}{
{
"name": "deepwiki",
"endpoint": "https://mcp.deepwiki.com/mcp", // Replace with your own MCP server
"transport": "streamable_http",
"allowed_tools": []string{"ask_question"}, // Replace with your server's tool names
"timeout_ms": 10000,
},
},
}),
)
.WithTools(true)
// ... continue with .WithTts() and .CreateSession() ...
```
```json
{
"llm": {
"url": "https://api.openai.com/v1/chat/completions",
"api_key": "your-llm-api-key",
"params": {
"model": "gpt-4o-mini"
},
"mcp_servers": [
{
"name": "deepwiki",
"endpoint": "https://mcp.deepwiki.com/mcp",
"transport": "streamable_http",
"allowed_tools": ["ask_question"],
"timeout_ms": 10000
}
]
},
"advanced_features": {
"enable_tools": true
}
}
```
Update `endpoint` with your own MCP server's URL, and `allowed_tools` with the MCP tool names you want your agent to use.
Attaching MCP servers and enabling tool invocation are independent settings. If you configure servers without enabling tool invocation, the LLM never calls any tools, with no error to signal the mismatch.
### Configure an MCP server
Each item in the MCP servers array accepts the following fields.
A unique identifier for the MCP server. Maximum 48 characters. Accepts only English letters and numbers.
The MCP server's endpoint address.
Transport protocol. Currently only `streamable_http` is supported.
HTTP headers to send with requests to the MCP server. If your MCP server requires authentication, use it to pass credentials. For example:
```json
{
"Authorization": "Bearer your-mcp-server-token"
}
```
The tools the agent is allowed to call:
* Omit `allowed_tools`, or set it to `["*"]`: all tools on the server are enabled.
* Set `allowed_tools` to a list of tool names, for example `["search_docs", "get_weather"]`: only those tools are enabled.
Strings in `allowed_tools` must match the tool names the MCP server actually registers, not names from another integration's docs or a client config file. An empty array or a name that doesn't match any real tool doesn't fail cleanly: the agent can hang mid-response with no error, rather than answering or falling back. Confirm the exact names by calling the server's `tools/list` method directly, for example:
```bash
curl --request POST \
--url https://your-mcp-server.example.com/mcp \
--header 'Content-Type: application/json' \
--header 'Accept: application/json, text/event-stream' \
--data '{"jsonrpc": "2.0", "id": 1, "method": "tools/list", "params": {}}'
```
Request timeout for the MCP server. After the timeout, the agent stops waiting for a response and continues with subsequent logic.
To connect multiple MCP servers, add multiple entries to the MCP servers array. Each server must have a unique `name`.
Filler words during tool calls
Tool calls add latency while the MCP server processes the request. Configure [filler words](shape-the-conversation/filler-words) so the agent acknowledges the user's request while it waits for a tool result.
## Reference
* [`llm.mcp_servers`](/en/api-reference/api-ref/conversational-ai/join#request-body-properties-llm-mcp-servers)
* [`mllm.mcp_servers`](/en/api-reference/api-ref/conversational-ai/join#request-body-properties-mllm-mcp-servers)
* [`advanced_features.enable_tools`](/en/api-reference/api-ref/conversational-ai/join#request-body-properties-advanced-features-enable-tools)
* [`with_tools()` / `withTools()` / `WithTools()`](/en/api-reference/api-ref/server-sdk/python#other-builder-methods)
# Send images to the agent (/en/ai/build/send-multimodal-messages)
When interacting with an agent, you may need to upload images or send image messages from the client to help the agent better understand the user's intent. This page describes how to use the Conversational AI Engine toolkit to send image messages to the large language model from your app. The LLM can then automatically reference the image content in subsequent conversations and generate more relevant responses.
## Understand the tech
Agora provides a flexible, scalable, and standardized conversational AI engine toolkit. The toolkit supports **iOS**, **Android**, and **Web** platforms, and encapsulates scenario-based APIs. You can use these APIs to integrate the capabilities of the [Agora Signaling SDK](/en/realtime-media/rtm) and [Agora RTC SDK](../../realtime-media/rtc/get-started-sdk) to enable the following features:
* [Interrupt agents](shape-the-conversation/interrupt-agent)
* [Display live transcripts](transcripts)
* [Client-side events](handle-runtime-events/event-notifications)
* [Set optimal audio parameters](../best-practices/audio-setup) for iOS and Android
* [Send picture messages](send-multimodal-messages)
Call the toolkit's `chat` API to send a picture message, and listen to `onMessageReceiptUpdated` to receive the picture message receipt.
## Prerequisites
Before you begin, ensure the following:
* You have implemented the Conversational AI Engine [quickstart](../get-started/quickstart).
* Your app integrates Agora RTC SDK v4.5.1 or later and includes the [RTC SDK quickstart](../../realtime-media/rtc/get-started-sdk).
* You have enabled Signaling in the Agora Console and completed the [Signaling quickstart](/en/realtime-media/rtm/quickstart) for basic messaging.
* You maintain active and authenticated RTC and Signaling instances that persist beyond the component lifecycle. The toolkit does not manage RTC or Signaling initialization, lifecycle, or authentication.
Info
* Picture messaging is currently in beta and free for a limited time.
* Image processing depends on the capabilities of the integrated LLM. Make sure the LLM you connect to Conversational AI Engine supports image input.
## Implementation
This section explains how to send a picture message from your app.
Android
iOS
Web
1. **Integrate the toolkit**
Add the toolkit to your project using Maven or source code. See [Install the Android toolkit](/en/api-reference/api-ref/conversational-ai/client-toolkit/android#installation). Refer to [Folder structure](#reference) to understand the role of each file.
2. **Create a toolkit instance**
Create a configuration object with the RTC SDK and Signaling engine instances. Use the configuration to create a toolkit instance.
```kotlin
// Create configuration objects for the RTC and RTM instances
val config = ConversationalAIAPIConfig(
rtcEngine = rtcEngine,
rtmClient = rtmClient,
renderMode = TranscriptRenderMode.Word,
enableLog = true,
enableRenderModeFallback = true
)
// Create component instance
val api = ConversationalAIAPIImpl(config)
```
3. **Register callback**
```kotlin
api.addHandler(covEventHandler)
```
4. **Subscribe to the channel**
Agent-related events are delivered through Signaling channel messages. To receive these events, call `subscribeMessage` before starting the agent session.
```kotlin
api.subscribeMessage("channelName") { error ->
if (error != null) {
// Handle error
}
}
```
5. **Add a conversational AI agent to the channel**
To [start a conversational AI agent](/en/api-reference/api-ref/conversational-ai/join), configure the following parameters in your `POST` request:
| Parameter | Description | Required |
| --------------------------------------- | -------------------------------------------------- | -------- |
| `advanced_features.enable_rtm: true` | Starts the Signaling service | Yes |
| `parameters.data_channel: "rtm"` | Enables Signaling as the data transmission channel | Yes |
| `parameters.enable_metrics: true` | Enables agent performance data collection | Optional |
| `parameters.enable_error_message: true` | Enables reporting of agent error events | Optional |
After a successful response, the agent joins the specified RTC channel and is ready to interact with the user.
6. **Send an image**
```kotlin
val uuid = "unique-image-id-123"
val imageUrl = "https://example.com/image.jpg"
api.chat("agentUserId", ImageMessage(uuid = uuid, imageUrl = imageUrl)) { error ->
if (error != null) {
Log.e("Chat", "Failed to send image: ${error.errorMessage}")
} else {
Log.d("Chat", "Image send request successful")
}
}
```
Info
The `chat` completion callback only indicates whether the sending request is successful, and does not reflect the actual processing status of the message.
7. **Handle image sending status**
Image send success is confirmed by `onMessageReceiptUpdated`. If sending fails, `onMessageError` is triggered. Use the `uuid` value in the callback to identify the uploaded picture.
Image sent successfully:
```kotlin
override fun onMessageReceiptUpdated(agentUserId: String, receipt: MessageReceipt) {
if (receipt.chatMessageType == ChatMessageType.Image) {
try {
val json = JSONObject(receipt.message)
if (json.has("uuid")) {
val receivedUuid = json.getString("uuid")
if (receivedUuid == "your-sent-uuid") {
Log.d("ImageSend", "Image sent successfully: $receivedUuid")
}
}
} catch (e: Exception) {
Log.e("ImageSend", "Failed to parse message receipt: ${e.message}")
}
}
}
```
Image sending failed:
```kotlin
override fun onMessageError(agentUserId: String, error: MessageError) {
if (error.chatMessageType == ChatMessageType.Image) {
try {
val json = JSONObject(error.message)
if (json.has("uuid")) {
val failedUuid = json.getString("uuid")
if (failedUuid == "your-sent-uuid") {
Log.e("ImageSend", "Image send failed: $failedUuid")
}
}
} catch (e: Exception) {
Log.e("ImageSend", "Failed to parse error message: ${e.message}")
}
}
}
```
8. **Unsubscribe from the channel**
```kotlin
api.unsubscribeMessage("channelName") { error ->
if (error != null) {
// Handle the error
}
}
```
9. **Release resources**
```kotlin
api.destroy()
```
1. **Integrate the toolkit**
Add the toolkit to your project using CocoaPods, Swift Package Manager, or source code. See [Install the iOS toolkit](/en/api-reference/api-ref/conversational-ai/client-toolkit/ios#installation). Refer to [Folder structure](#reference) to understand the role of each file.
2. **Create a toolkit instance**
Create a configuration object with the RTC SDK and Signaling engine instances, then use the configuration to create a toolkit instance.
```swift
let config = ConversationalAIAPIConfig(
rtcEngine: rtcEngine,
rtmEngine: rtmEngine,
renderMode: .words,
enableLog: true,
enableRenderModeFallback: true
)
convoAIAPI = ConversationalAIAPIImpl(config: config)
```
3. **Subscribe to the channel**
Agent-related events are delivered through Signaling channel messages. To receive these events, call `subscribeMessage` before starting the agent session.
```swift
convoAIAPI.subscribeMessage(channelName: channelName) { error in
if let error = error {
print("Subscription failed: \(error.message)")
} else {
print("Subscription successful")
}
}
```
4. **Register callback**
```swift
convoAIAPI.addHandler(handler: self)
```
5. **Add a conversational AI agent to the channel**
To [start a conversational AI agent](/en/api-reference/api-ref/conversational-ai/join), configure the following parameters in your `POST` request:
| Parameter | Description | Required |
| --------------------------------------- | -------------------------------------------------- | -------- |
| `advanced_features.enable_rtm: true` | Starts the Signaling service | Yes |
| `parameters.data_channel: "rtm"` | Enables Signaling as the data transmission channel | Yes |
| `parameters.enable_metrics: true` | Enables agent performance data collection | Optional |
| `parameters.enable_error_message: true` | Enables reporting of agent error events | Optional |
6. **Send an image**
```swift
let uuid = UUID().uuidString
let imageUrl = "https://example.com/image.jpg"
let message = ImageMessage(uuid: uuid, url: imageUrl)
self.convoAIAPI.chat(agentUserId: "\(agentUid)", message: message) { [weak self] error in
if let error = error {
print("send image failed, error: \(error.message)")
} else {
print("send image success")
}
}
```
Info
The `chat` completion callback only indicates whether the sending request is successful, and does not reflect the actual processing status of the message.
7. **Receive image sending response**
Success is confirmed by `onMessageReceiptUpdated`. If sending fails, `onMessageError` is triggered.
Image sent successfully:
```swift
struct PictureInfo: Codable {
let uuid: String
}
public func onMessageReceiptUpdated(agentUserId: String, messageReceipt: MessageReceipt) {
if messageReceipt.type == .context {
guard let messageData = messageReceipt.message.data(using: .utf8) else {
return
}
do {
let imageInfo = try JSONDecoder().decode(PictureInfo.self, from: messageData)
self.messageView.viewModel.updateImageMessage(uuid: imageInfo.uuid, state: .success)
} catch {
print("Failed to decode PictureInfo: \(error)")
}
}
}
```
Image sending failed:
```swift
struct ImageUploadError: Codable {
let code: Int
let message: String
}
struct ImageUploadErrorResponse: Codable {
let uuid: String
let success: Bool
let error: ImageUploadError?
}
public func onMessageError(agentUserId: String, error: MessageError) {
if let messageData = error.message.data(using: .utf8) {
do {
let errorResponse = try JSONDecoder().decode(ImageUploadErrorResponse.self, from: messageData)
if !errorResponse.success {
DispatchQueue.main.async { [weak self] in
self?.messageView.viewModel.updateImageMessage(uuid: errorResponse.uuid, state: .failed)
}
}
} catch {
addLog("Failed to parse error message JSON: \(error)")
}
}
}
```
8. **Unsubscribe from the channel**
```swift
convoAIAPI.unsubscribeMessage(channelName: channelName) { error in
if let error = error {
print("Unsubscription failed: \(error.message)")
} else {
print("Unsubscribed successfully")
}
}
```
9. **Release resources**
```swift
convoAIAPI.destroy()
```
1. **Integrate the toolkit**
Add the toolkit to your project using a package manager or source code. See [Install the Web toolkit](/en/api-reference/api-ref/conversational-ai/client-toolkit/web#installation). Refer to [Folder structure](#reference) to understand the role of each file.
2. **Create a toolkit instance**
Before joining an RTC channel, create RTC SDK and Signaling engine instances and pass them into the toolkit instance.
```ts
const config: IConversationalAIAPIConfig = {
rtcEngine,
rtmEngine,
renderMode: ETranscriptHelperMode.WORD,
enableLog: true,
enableRenderModeFallback: true,
}
const conversationalAIAPI = await ConversationalAIAPI.init(config)
```
3. **Subscribe to the channel**
Agent-related events are delivered through Signaling messages. Before starting an agent session, call `subscribeMessage` to receive these events.
```ts
conversationalAIAPI.subscribeMessage(channel_name)
```
4. **Register callbacks**
```ts
conversationalAIAPI.on(EConversationalAIAPIEvents.MESSAGE_RECEIPT_UPDATED, handleMessageReceiptUpdated)
conversationalAIAPI.on(EConversationalAIAPIEvents.MESSAGE_ERROR, onAgentError)
```
5. **Add a conversational AI agent to the channel**
To [start a conversational AI agent](/en/api-reference/api-ref/conversational-ai/join), configure the following parameters in your `POST` request:
| Parameter | Description | Required |
| --------------------------------------- | -------------------------------------------------- | -------- |
| `advanced_features.enable_rtm: true` | Starts the Signaling service | Yes |
| `parameters.data_channel: "rtm"` | Enables Signaling as the data transmission channel | Yes |
| `parameters.enable_metrics: true` | Enables agent performance data collection | Optional |
| `parameters.enable_error_message: true` | Enables reporting of agent error events | Optional |
6. **Send an image**
```ts
import { EChatMessageType } from '@/conversational-ai-api/type'
await conversationalAIAPI.chat(`${agent_rtc_uid}`, {
messageType: EChatMessageType.IMAGE,
url: 'https://example.com/image.jpg',
uuid: genUUID()
})
```
Info
The `chat` completion callback only indicates whether the sending request is successful, and does not reflect the actual processing status of the message.
7. **Receive image sending response**
Image sent successfully:
```ts
conversationalAIAPI.on(EConversationalAIAPIEvents.MESSAGE_RECEIPT_UPDATED, (agentUserId: string, messageReceipt: TMessageReceipt) => {
if (messageReceipt.moduleType !== EModuleType.CONTEXT) {
return
}
try {
const receiptMessage = JSON.parse(messageReceipt.message)
const uuid = receiptMessage.uuid
if (!uuid) return
console.log(`Message sent successfully, UUID: ${uuid}`)
} catch (error) {
console.error('Failed to parse message:', error)
}
})
```
Image sending failed:
```ts
conversationalAIAPI.on(EConversationalAIAPIEvents.MESSAGE_ERROR, (agentUserId, error) => {
console.error(`Message error for agent ${agentUserId}:`, error)
if (error.type === EChatMessageType.IMAGE) {
try {
const errorData = JSON.parse(error.message)
if (errorData?.uuid) {
console.warn(`Image error for agent ${agentUserId} with UUID: ${errorData.uuid}`)
}
} catch (e) {
console.error(`Failed to handle image error for agent ${agentUserId}:`, e)
}
}
})
```
8. **Unsubscribe from the channel**
```ts
conversationalAIAPI.unsubscribeMessage(channel_name)
```
9. **Release resources**
```ts
conversationalAIAPI.destroy()
```
## Reference
This section contains supporting information that completes the guidance on this page.
Android
iOS
Web
**Folder structure**
* `IConversationalAIAPI.kt`: API interface, related data structures, and enumerations
* `ConversationalAIAPIImpl.kt`: main implementation logic
* `ConversationalAIUtils.kt`: utility functions and callback management
* `v3/`
* `TranscriptionController.kt`: transcript rendering and synchronization
* `MessageParser.kt`: transcription and message parsing
**API reference**
* [`addHandler`](/en/api-reference/api-ref/conversational-ai/client-toolkit/android#addhandler)
* [`subscribeMessage`](/en/api-reference/api-ref/conversational-ai/client-toolkit/android#subscribemessage)
* [`unsubscribeMessage`](/en/api-reference/api-ref/conversational-ai/client-toolkit/android#unsubscribemessage)
* [`destroy`](/en/api-reference/api-ref/conversational-ai/client-toolkit/android#destroy)
* [`onMessageReceiptUpdated`](/en/api-reference/api-ref/conversational-ai/client-toolkit/android#onmessagereceiptupdated)
* [`onMessageError`](/en/api-reference/api-ref/conversational-ai/client-toolkit/android#onmessageerror)
* [`chat`](/en/api-reference/api-ref/conversational-ai/client-toolkit/android#chat)
**Folder structure**
* `ConversationalAIAPI.swift`: API interface, data structures, and enumerations
* `ConversationalAIAPIImpl.swift`: main implementation logic
* `Transcription/`
* `TranscriptionController.swift`: transcript rendering and transcription control
**API reference**
* [`addHandler`](/en/api-reference/api-ref/conversational-ai/client-toolkit/ios#addhandler)
* [`subscribeMessage`](/en/api-reference/api-ref/conversational-ai/client-toolkit/ios#subscribemessage)
* [`unsubscribeMessage`](/en/api-reference/api-ref/conversational-ai/client-toolkit/ios#unsubscribemessage)
* [`destroy`](/en/api-reference/api-ref/conversational-ai/client-toolkit/ios#destroy)
* [`onMessageReceiptUpdated`](/en/api-reference/api-ref/conversational-ai/client-toolkit/ios#onmessagereceiptupdated)
* [`onMessageError`](/en/api-reference/api-ref/conversational-ai/client-toolkit/ios#onmessageerror)
* [`chat`](/en/api-reference/api-ref/conversational-ai/client-toolkit/ios#chat)
**Folder structure**
* `index.ts`: main API class
* `type.ts`: API interfaces, data structures, and enumerations
* `utils/`
* `index.ts`: general utility functions
* `events.ts`: event management
* `sub-render.ts`: transcript rendering module
**API reference**
* [`IConversationalAIAPIEventHandler`](/en/api-reference/api-ref/conversational-ai/client-toolkit/web#iconversationalaiapieventhandlers-interface)
* [`EConversationalAIAPIEvents`](/en/api-reference/api-ref/conversational-ai/client-toolkit/web#econversationalaiapievents)
* [`subscribeMessage`](/en/api-reference/api-ref/conversational-ai/client-toolkit/web#subscribemessage)
* [`unsubscribeMessage`](/en/api-reference/api-ref/conversational-ai/client-toolkit/web#unsubscribe)
* [`destroy`](/en/api-reference/api-ref/conversational-ai/client-toolkit/web#destroy)
* [`chat`](/en/api-reference/api-ref/conversational-ai/client-toolkit/web#chat)
# Start and stop an agent (/en/ai/build/start-stop-agent)
This page describes how to call the Conversational AI Engine APIs to start and stop an AI agent.
## Understand the tech
A user joins a channel and triggers your business server to start an agent via the Conversational AI Engine API. The agent joins the same channel and communicates with the user through voice, using the specified LLM, TTS service, and Agora’s low-latency Software-Defined Real-Time Network (SDRTN®). When the conversation ends, the business server stops the agent and the user leaves the channel.
Conversational AI Engine workflow
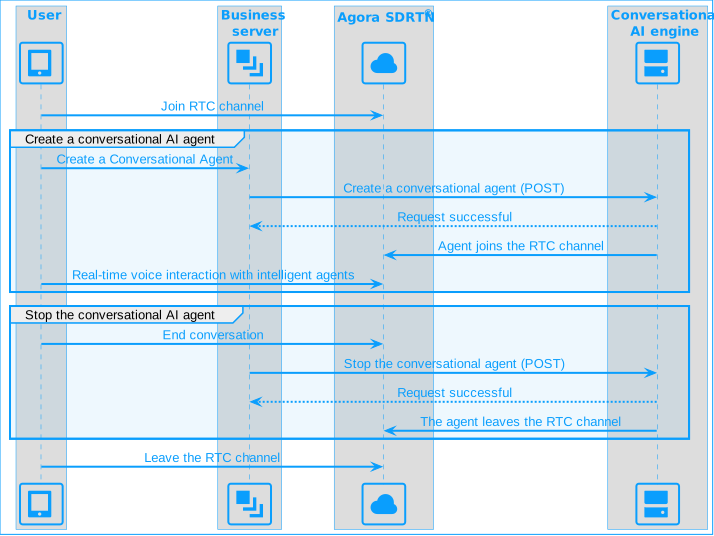
## Prerequisites
Use the [Agora CLI](/en/introduction/agora-cli) to create or select an Agora project, verify project readiness, and export local credentials:
```bash
agora login
agora project create conv-ai-tutorial
agora project use conv-ai-tutorial
agora project doctor
agora project env --format shell --with-secrets
```
You also need:
* A client app that can join an Agora RTC channel, such as the [Voice Calling](../../realtime-media/rtc/voice-quickstart) or [Video Calling](../../realtime-media/rtc/get-started-sdk) quickstart.
## Install the SDK
Select your preferred language and install the corresponding SDK.
Python SDK
TypeScript SDK
Go SDK
```sh
pip install agora-agents
```
```sh
npm install agora-agents
```
```sh
go get github.com/AgoraIO/agora-agents-go/v2@v2.2.0
```
## Implementation
This section introduces the basic RESTful API requests you use to start and stop a conversational AI agent. In a production environment, implement these requests on your business server.
### Start a conversational AI agent
Call the `join` endpoint to create an agent instance that joins an Agora channel. This example uses [managed mode](/en/ai/build/custom-model-integration/managed-mode) for ASR, LLM, and TTS, so you don't need to supply your own provider API keys. If you want to use your own API key (BYOK) instead, see the vendor pages under Models, for example [Deepgram](/en/ai/models/asr/deepgram).
Python SDK
TypeScript SDK
Go SDK
REST API
```python
from agora_agent import Agent, Agora, Area, DeepgramSTT, OpenAI, MiniMaxTTS
client = Agora(
area=Area.US,
app_id='your-app-id',
app_certificate='your-app-certificate',
)
# Omit API keys to use Agora-managed models for ASR, LLM, and TTS.
agent = (
Agent(client)
.with_stt(DeepgramSTT(
model='nova-3',
language='en-US',
))
.with_llm(OpenAI(
model='gpt-4o-mini',
system_messages=[{'role': 'system', 'content': 'You are a helpful chatbot.'}],
greeting_message='Hello, how can I help you?',
failure_message="Sorry, I don't know how to answer this question.",
max_history=10,
))
.with_tts(MiniMaxTTS(
model='speech-2.6-turbo',
voice_id='English_captivating_female1',
))
)
session = agent.create_session(
channel='your_channel_name',
agent_uid='0',
remote_uids=['1002'],
name='unique_name',
idle_timeout=120,
)
agent_id = session.start()
print(f'Agent started: {agent_id}')
```
```typescript
import { Agent, AgoraClient, Area, DeepgramSTT, OpenAI, MiniMaxTTS } from 'agora-agents';
const client = new AgoraClient({
area: Area.US,
appId: 'your-app-id',
appCertificate: 'your-app-certificate',
});
// Omit API keys to use Agora-managed models for ASR, LLM, and TTS.
const agent = new Agent({ client })
.withStt(new DeepgramSTT({
model: 'nova-3',
language: 'en-US',
}))
.withLlm(new OpenAI({
model: 'gpt-4o-mini',
systemMessages: [{ role: 'system', content: 'You are a helpful chatbot.' }],
greetingMessage: 'Hello, how can I help you?',
failureMessage: 'Sorry, I don't know how to answer this question.',
maxHistory: 10,
}))
.withTts(new MiniMaxTTS({
model: 'speech-2.6-turbo',
voiceId: 'English_captivating_female1',
}));
const session = agent.createSession({
channel: 'your_channel_name',
agentUid: '0',
remoteUids: ['1002'],
name: 'unique_name',
idleTimeout: 120,
});
const agentId = await session.start();
console.log('Agent started:', agentId);
```
```go
package main
import (
"context"
"fmt"
"log"
Agora "github.com/AgoraIO/agora-agents-go/v2"
"github.com/AgoraIO/agora-agents-go/v2/agentkit"
"github.com/AgoraIO/agora-agents-go/v2/agentkit/vendors"
"github.com/AgoraIO/agora-agents-go/v2/option"
)
func main() {
ctx := context.Background()
idleTimeout := 120
client := agentkit.NewAgoraClient(agentkit.AgoraClientOptions{
Area: option.AreaUS,
AppID: "your-app-id",
AppCertificate: "your-app-certificate",
})
// Omit API keys to use Agora-managed models for ASR, LLM, and TTS.
agent := agentkit.NewAgent(client).WithStt(
vendors.NewDeepgramSTT(vendors.DeepgramSTTOptions{
Model: "nova-3",
Language: "en-US",
}),
).WithLlm(
vendors.NewOpenAI(vendors.OpenAIOptions{
Model: "gpt-4o-mini",
SystemMessages: []map[string]interface{}{
{"role": "system", "content": "You are a helpful chatbot."},
},
GreetingMessage: "Hello, how can I help you?",
FailureMessage: "Sorry, I don't know how to answer this question.",
MaxHistory: Agora.Int(10),
}),
).WithTts(
vendors.NewMiniMaxTTS(vendors.MiniMaxTTSOptions{
Model: "speech-2.6-turbo",
VoiceID: "English_captivating_female1",
}),
)
session := agent.CreateSession(agentkit.CreateSessionOptions{
Channel: "your_channel_name",
AgentUID: "0",
RemoteUIDs: []string{"1002"},
Name: "unique_name",
IdleTimeout: &idleTimeout,
})
agentID, err := session.Start(ctx)
if err != nil {
log.Fatal(err)
}
fmt.Println("Agent started:", agentID)
}
```
For the Curl request, pass in the `channel` name and `token` for agent authentication. To generate your base64-encoded credentials, see [RESTful authentication](/en/api-reference/api-ref/conversational-ai/authentication).
Set `credential_mode` to `"managed"` in the `asr`, `llm`, and `tts` blocks to use Agora-managed credentials instead of your own API keys.
```bash
curl --request POST \
--url https://api.agora.io/api/conversational-ai-agent/v2/projects/:appid/join \
--header 'Authorization: Basic ' \
--header 'Content-Type: application/json' \
--data '
{
"name": "unique_name",
"properties": {
"channel": "",
"token": "",
"agent_rtc_uid": "0",
"remote_rtc_uids": ["1002"],
"enable_string_uid": false,
"idle_timeout": 120,
"asr": {
"credential_mode": "managed",
"vendor": "deepgram",
"params": {
"url": "wss://api.deepgram.com/v1/listen",
"model": "nova-3",
"language": "en-US"
}
},
"llm": {
"credential_mode": "managed",
"vendor": "openai",
"style": "openai",
"url": "https://api.openai.com/v1/chat/completions",
"system_messages": [
{
"role": "system",
"content": "You are a helpful chatbot."
}
],
"greeting_message": "Hello, how can I help you?",
"failure_message": "Sorry, I don't know how to answer this question.",
"max_history": 10,
"params": {
"model": "gpt-4o-mini"
}
},
"tts": {
"credential_mode": "managed",
"vendor": "minimax",
"params": {
"url": "wss://api.minimax.io/ws/v1/t2a_v2",
"model": "speech-2.6-turbo",
"voice_setting": {
"voice_id": "English_captivating_female1"
}
}
}
}
}'
```
If the request is successful, you receive the following response:
```json
// 200 OK
{
"agent_id": "1NT29X10YHxxxxxWJOXLYHNYB",
"create_ts": 1737111452,
"status": "RUNNING"
}
```
If the request is successful, the agent ID is returned. Store the agent ID to manage the agent in subsequent calls.
### Stop the conversational AI agent
To end the conversation with the AI agent, call the `leave` endpoint. This causes the agent to leave the Agora channel.
Python SDK
TypeScript SDK
Go SDK
REST API
```python
session.stop()
```
```typescript
await session.stop();
```
```go
if err := session.Stop(ctx); err != nil {
log.Fatal(err)
}
```
```bash
curl --request POST \
--url https://api.agora.io/api/conversational-ai-agent/v2/projects/:appid/agents/:agentId/leave \
--header 'Authorization: Basic '
```
If the request is successful, the server responds with a `200 OK` status and an empty JSON object.
```json
// 200 OK
{}
```
Info
The number of Peak Concurrent Users (PCU) allowed to call the server API under a single App ID is limited to 20. If you need to increase this limit, please [contact technical support](mailto\:support@agora.io).
## Reference
This section contains content that completes the information on this page, or points you to documentation that explains other aspects of this product.
* [Use managed mode](/en/ai/build/custom-model-integration/managed-mode)
### API reference
* [Start a conversational AI agent](/en/api-reference/api-ref/conversational-ai/join)
* [Stop a conversational AI agent](/en/api-reference/api-ref/conversational-ai/leave)
* [Update agent configuration](/en/api-reference/api-ref/conversational-ai/update)
* [Query agent status](/en/api-reference/api-ref/conversational-ai/query)
* [Retrieve a list of agents](/en/api-reference/api-ref/conversational-ai/list)
# Display live transcripts (/en/ai/build/transcripts)
When interacting with conversational AI in real time, you can enable live transcripts to display the conversation content. This page explains how to implement live transcripts in your app.
## Understand the tech
Agora provides a flexible, scalable, and standardized conversational AI engine toolkit. The toolkit supports **iOS**, **Android**, and **Web** platforms, and encapsulates scenario-based APIs. You can use these APIs to integrate the capabilities of the [Agora Signaling SDK](/en/realtime-media/rtm) and [Agora RTC SDK](../../realtime-media/rtc/get-started-sdk) to enable the following features:
* [Interrupt agents](shape-the-conversation/interrupt-agent)
* [Display live transcripts](transcripts)
* [Client-side events](handle-runtime-events/event-notifications)
* [Set optimal audio parameters](../best-practices/audio-setup) for iOS and Android
* [Send picture messages](send-multimodal-messages)
The toolkit receives transcript content through the `onTranscriptUpdated` callback and supports monitoring the following transcript data types:
* **Agent transcript**: The agent's speech, including streaming updates and final results.
* **User transcript**: The user's speech, including real-time display and status management.
* **Transcript status**: State changes such as in progress, completed, or interrupted.
The following diagram outlines the step-by-step process to integrate live transcript functionality into your application:
Transcript rendering workflow
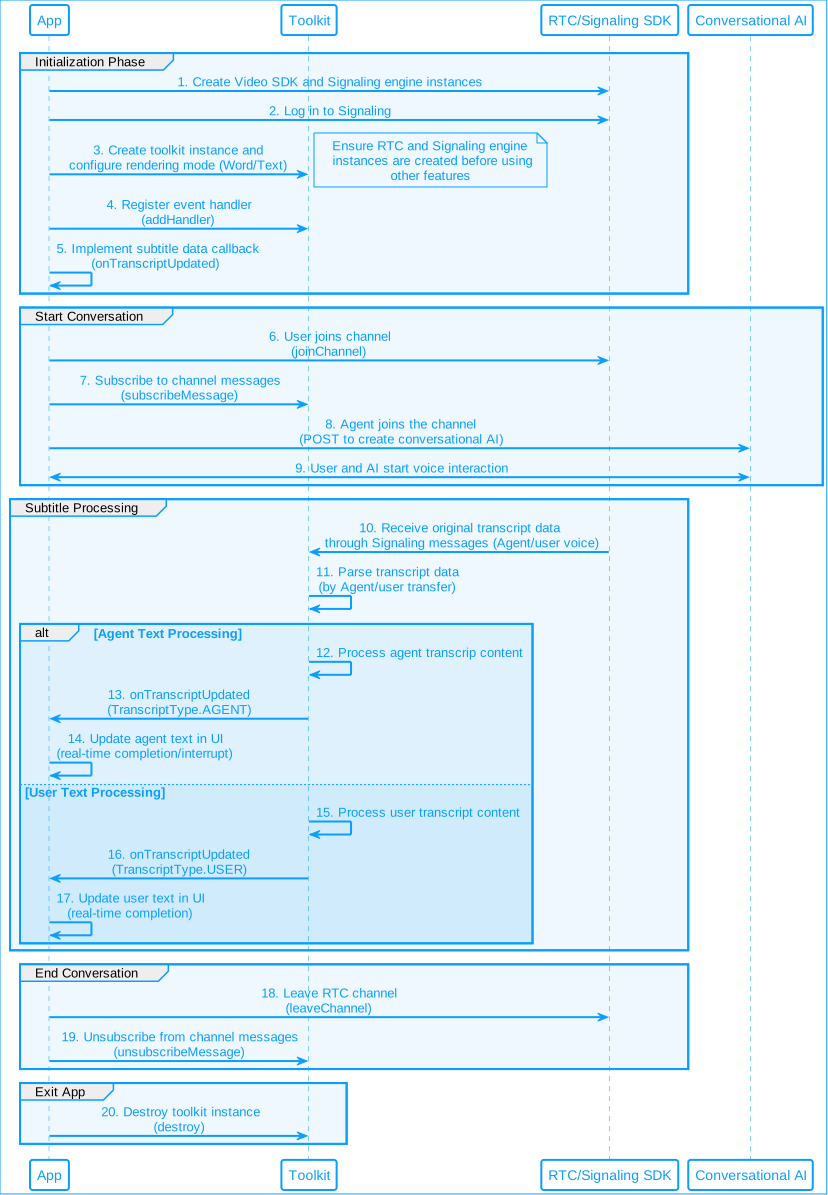
## Prerequisites
Before you begin, ensure the following:
* You have implemented the Conversational AI Engine [quickstart](../get-started/quickstart).
* Your app integrates Agora RTC SDK v4.5.1 or later and includes the [RTC SDK quickstart](../../realtime-media/rtc/get-started-sdk).
* You have enabled Signaling in the Agora Console and completed the [Signaling quickstart](/en/realtime-media/rtm/quickstart) for basic messaging.
* You maintain active and authenticated RTC and Signaling instances that persist beyond the component lifecycle. The toolkit does not manage RTC or Signaling initialization, lifecycle, or authentication.
## Implementation
This section describes how to receive transcript content from the transcript processing module and display it in your app UI.
Android
iOS
Web
1. **Integrate the toolkit**
Add the toolkit to your project using Maven or source code. See [Install the Android toolkit](/en/api-reference/api-ref/conversational-ai/client-toolkit/android#installation). Refer to [Folder structure](#reference) to understand the role of each file.
2. **Create a toolkit instance**
Create a configuration object with the RTC SDK and Signaling engine instances. Set the transcript rendering mode, then use the configuration to create a toolkit instance.
```kotlin
// Create configuration objects for the RTC and RTM instances
val config = ConversationalAIAPIConfig(
rtcEngine = rtcEngineInstance,
rtmClient = rtmClientInstance,
// Set the transcript rendering mode. Options:
// - TranscriptRenderMode.Word: render transcript word by word.
// - TranscriptRenderMode.Text: render the full sentence at once.
renderMode = TranscriptRenderMode.Word,
enableLog = true
)
// Create component instance
val api = ConversationalAIAPIImpl(config)
```
3. **Subscribe to the channel**
Transcript data is delivered through Signaling channel messages. To receive transcript data, call `subscribeMessage` before starting the agent session.
```kotlin
api.subscribeMessage("channelName") { error ->
if (error != null) {
// Handle error
}
}
```
4. **Receive transcript**
Call the `addHandler` method to register your implementation of the transcription callback.
```kotlin
api.addHandler(covEventHandler)
```
5. **Implement UI rendering logic**
Inherit your UI module from the `IConversationalAIAPIEventHandler` interface. Implement the `onTranscriptUpdated` method to handle transcript rendering to the UI.
```kotlin
private val covEventHandler = object : IConversationalAIAPIEventHandler {
override fun onTranscriptUpdated(agentUserId: String, transcript: Transcript) {
// Handle transcript data and update the UI here
}
}
```
6. **Add a conversational AI agent to the channel**
To [start a conversational AI agent](/en/api-reference/api-ref/conversational-ai/join), configure the following parameters in your `POST` request:
| Parameter | Description | Required |
| --------------------------------------- | -------------------------------------------------- | -------- |
| `advanced_features.enable_rtm: true` | Starts the Signaling service | Yes |
| `parameters.data_channel: "rtm"` | Enables Signaling as the data transmission channel | Yes |
| `parameters.enable_metrics: true` | Enables agent performance data collection | Optional |
| `parameters.enable_error_message: true` | Enables reporting of agent error events | Optional |
After a successful response, the agent joins the specified RTC channel and is ready to interact with the user.
7. **Unsubscribe from the channel**
After an agent session ends, unsubscribe from channel messages to release transcription resources.
```kotlin
api.unsubscribeMessage("channelName") { error ->
if (error != null) {
// Handle the error
}
}
```
8. **Release resources**
At the end of each call, use the `destroy` method to clean up the cache.
```kotlin
api.destroy()
```
1. **Integrate the toolkit**
Add the toolkit to your project using CocoaPods, Swift Package Manager, or source code. See [Install the iOS toolkit](/en/api-reference/api-ref/conversational-ai/client-toolkit/ios#installation). Refer to [Folder structure](#reference) to understand the role of each file.
2. **Create a toolkit instance**
Create a configuration object with the RTC SDK and Signaling engine instances. Set the transcript rendering mode, then use the configuration to create a toolkit instance.
```swift
// Create a configuration object for the RTC and RTM instances
let config = ConversationalAIAPIConfig(
rtcEngine: rtcEngine,
rtmEngine: rtmEngine,
/**
* Set the transcript rendering mode. Available options:
* - .words: Word-by-word rendering mode.
* - .text: Sentence-by-sentence rendering mode.
*/
renderMode: .words,
enableLog: true
)
// Create the component instance
convoAIAPI = ConversationalAIAPIImpl(config: config)
```
3. **Subscribe to the channel**
Transcript data is delivered through Signaling channel messages. To receive transcript data, call `subscribeMessage` before starting the agent session.
```swift
convoAIAPI.subscribeMessage(channelName: channelName) { error in
if let error = error {
print("Subscription failed: \(error.message)")
} else {
print("Subscription successful")
}
}
```
4. **Receive transcript**
Call the `addHandler` method to register and implement the transcript callback.
```swift
convoAIAPI.addHandler(handler: self)
```
5. **Implement UI rendering logic**
Implement the `ConversationalAIAPIEventHandler` protocol in your UI module, and use `onTranscriptUpdated` to handle and render transcript updates.
```swift
extension ChatViewController: ConversationalAIAPIEventHandler {
public func onTranscriptUpdated(agentUserId: String, transcript: Transcript) {
// Handle transcript data and update the UI here
}
}
```
6. **Add a conversational AI agent to the channel**
To [start a conversational AI agent](/en/api-reference/api-ref/conversational-ai/join), configure the following parameters in your `POST` request:
| Parameter | Description | Required |
| --------------------------------------- | -------------------------------------------------- | -------- |
| `advanced_features.enable_rtm: true` | Starts the Signaling service | Yes |
| `parameters.data_channel: "rtm"` | Enables Signaling as the data transmission channel | Yes |
| `parameters.enable_metrics: true` | Enables agent performance data collection | Optional |
| `parameters.enable_error_message: true` | Enables reporting of agent error events | Optional |
After a successful response, the agent joins the specified RTC channel and is ready to interact with the user.
7. **Unsubscribe from the channel**
After each agent session ends, unsubscribe from channel messages to release transcript-related resources.
```swift
convoAIAPI.unsubscribeMessage(channelName: channelName) { error in
if let error = error {
print("Unsubscription failed: \(error.message)")
} else {
print("Unsubscribed successfully")
}
}
```
8. **Release resources**
At the end of each call, use the `destroy` method to clean up the cache.
```swift
convoAIAPI.destroy()
```
1. **Integrate the toolkit**
Add the toolkit to your project using a package manager or source code. See [Install the Web toolkit](/en/api-reference/api-ref/conversational-ai/client-toolkit/web#installation). Refer to [Folder structure](#reference) to understand the role of each file.
2. **Create a toolkit instance**
Before joining an RTC channel, create RTC SDK and Signaling engine instances and pass them into the toolkit instance.
```ts
// Initialize the component
ConversationalAIAPI.init({
rtcEngine,
rtmEngine,
/**
* Set the rendering mode for transcript. Available options:
* - ETranscriptHelperMode.WORD: render transcript word by word.
* - ETranscriptHelperMode.TEXT: render the full transcript at once.
*/
renderMode: ETranscriptHelperMode.WORD,
})
// Get the API instance (singleton)
const conversationalAIAPI = ConversationalAIAPI.getInstance()
```
3. **Set audio parameters**
In word-by-word rendering mode, you must receive audio timestamp metadata from RTC to synchronize subtitles with speech. Before creating the client object, configure the following parameter:
```ts
AgoraRTC.setParameter('ENABLE_AUDIO_PTS_METADATA', true)
const client = AgoraRTC.createClient({ mode: 'rtc', codec: 'vp8' })
```
4. **Subscribe to the channel**
Agent-related events are delivered through Signaling messages. Before starting an agent session, call `subscribeMessage` to receive these events:
```ts
conversationalAIAPI.subscribeMessage(channel_name)
```
5. **Receive transcript**
Register an event listener to receive transcript updates:
```tsx
import * as React from 'react'
import {
type IUserTranscription,
type IAgentTranscription,
type ISubtitleHelperItem,
EConversationalAIAPIEvents,
} from '@/conversational-ai-api/type'
import { ConversationalAIAPI } from '@/conversational-ai-api'
export const ChatHistory = () => {
const [chatHistory, setChatHistory] = React.useState<
ISubtitleHelperItem>[]
>([])
const conversationalAIAPI = ConversationalAIAPI.getInstance()
conversationalAIAPI.on(
EConversationalAIAPIEvents.TRANSCRIPT_UPDATED,
setChatHistory
)
return (
<>
{chatHistory.map((message) => (
{message.uid}: {message.text}
))}
)
}
```
6. **Add a conversational AI agent to the channel**
To [start a conversational AI agent](/en/api-reference/api-ref/conversational-ai/join), configure the following parameters in your `POST` request:
| Parameter | Description | Required |
| --------------------------------------- | -------------------------------------------------- | -------- |
| `advanced_features.enable_rtm: true` | Starts the Signaling service | Yes |
| `parameters.data_channel: "rtm"` | Enables Signaling as the data transmission channel | Yes |
| `parameters.enable_metrics: true` | Enables agent performance data collection | Optional |
| `parameters.enable_error_message: true` | Enables reporting of agent error events | Optional |
After a successful response, the agent joins the specified RTC channel and is ready to interact with the user.
7. **Unsubscribe from the channel**
After each agent session ends, unsubscribe from channel messages to release resources associated with callback events.
```ts
conversationalAIAPI.unsubscribeMessage(channel_name)
```
8. **Release resources**
At the end of each call, use the `destroy` method to clean up the cache.
```ts
conversationalAIAPI.destroy()
```
## Reference
This section contains supporting information that completes the guidance on this page.
Android
iOS
Web
**Folder structure**
* `IConversationalAIAPI.kt`: API interface and related data structures and enumerations
* `ConversationalAIAPIImpl.kt`: ConversationalAI API main implementation logic
* `ConversationalAIUtils.kt`: tool functions and event callback management
* `subRender/`
* `v3/`: transcription module
* `TranscriptionController.kt`: transcription controller
* `MessageParser.kt`: message parser
**API reference**
* [`addHandler`](/en/api-reference/api-ref/conversational-ai/client-toolkit/android#addhandler)
* [`subscribeMessage`](/en/api-reference/api-ref/conversational-ai/client-toolkit/android#subscribemessage)
* [`unsubscribeMessage`](/en/api-reference/api-ref/conversational-ai/client-toolkit/android#unsubscribemessage)
* [`destroy`](/en/api-reference/api-ref/conversational-ai/client-toolkit/android#destroy)
* [`onTranscriptUpdated`](/en/api-reference/api-ref/conversational-ai/client-toolkit/android#ontranscriptupdated)
**Folder structure**
* `ConversationalAIAPI.swift`: API interface and related data structures and enumerations
* `ConversationalAIAPIImpl.swift`: ConversationalAI API main implementation logic
* `Transcription/`
* `TranscriptionController.swift`: transcription controller
**API reference**
* [`addHandler`](/en/api-reference/api-ref/conversational-ai/client-toolkit/ios#addhandler)
* [`subscribeMessage`](/en/api-reference/api-ref/conversational-ai/client-toolkit/ios#subscribemessage)
* [`unsubscribeMessage`](/en/api-reference/api-ref/conversational-ai/client-toolkit/ios#unsubscribemessage)
* [`destroy`](/en/api-reference/api-ref/conversational-ai/client-toolkit/ios#destroy)
* [`onTranscriptUpdated`](/en/api-reference/api-ref/conversational-ai/client-toolkit/ios#ontranscriptupdated)
**Folder structure**
* `index.ts`: API class
* `type.ts`: API interface and related data structures and enumerations
* `utils/`
* `index.ts`: API utility functions
* `events.ts`: event management class
* `sub-render.ts`: transcription module
**API reference**
* [`IConversationalAIAPIEventHandler interface`](/en/api-reference/api-ref/conversational-ai/client-toolkit/web#iconversationalaiapieventhandlers-interface)
* [`EConversationalAIAPIEvents`](/en/api-reference/api-ref/conversational-ai/client-toolkit/web#econversationalaiapievents)
* [`subscribeMessage`](/en/api-reference/api-ref/conversational-ai/client-toolkit/web#subscribemessage)
* [`unsubscribeMessage`](/en/api-reference/api-ref/conversational-ai/client-toolkit/web#unsubscribe)
* [`destroy`](/en/api-reference/api-ref/conversational-ai/client-toolkit/web#destroy)
# Convo AI Device Kit (/en/ai/device-kit)
Convo AI Device Kit R1 is a device-oriented product built on top of Agora's IoT stack and Conversational AI Engine. It packages hardware, connectivity, audio processing, and software resources into a faster path for smart device teams.
Use this product space when you need a hardware-first developer workflow instead of the general Conversational AI build path.
## Start here
* [Quickstart](start-here/quickstart)
## Build
* [Run the R1 demo](build/run-the-r1-demo)
* [Run the demo server](build/run-the-demo-server)
* [Configure device network](build/configure-device-network)
* [Build and flash firmware](build/build-and-flash-firmware)
## Understand the system
* [Architecture overview](build/architecture-overview)
* [Specifications and compatibility](build/specifications-and-compatibility)
## Plan rollout
* [Enable services](reference/enable-services)
* [Pricing](reference/pricing)
* [Release notes](reference/release-notes)
# Integrate with MCP (/en/ai/get-started/mcp-integrate)
## Connect to the Agora Doc MCP Server
Choose one of the following ways to connect to the MCP server:
#### Trae
**Manual configuration:**
Add the following configuration manually in Trae under Settings > MCP:
```json title=
{
"mcpServers": {
"shengwang-docs": {
"type": "http",
"url": "https://mcp.agora.io"
}
}
}
```
#### Claude Code
**Add with the `CLI`:**
```bash
claude mcp add --transport http shengwang-docs https://mcp.agora.io
```
**Or configure it manually:**
Create or edit `.mcp.json` in the project root, then add the following section:
```json
{
"mcpServers": {
"shengwang-docs": {
"type": "http",
"url": "https://mcp.agora.io"
}
}
}
```
#### Codex
**Add with the `CLI`:**
```bash
codex mcp add shengwang-docs --url https://mcp.agora.io
```
**Or configure it manually:**
Create or edit `.codex/config.toml` in the project root, then add the following section:
```text
[mcp_servers.shengwang-docs]
url = "https://mcp.agora.io"
```
#### Cursor
**Manual configuration:**
Create or edit `.cursor/mcp.json` in the project root, then add the following section:
```json
{
"mcpServers": {
"shengwang-docs": {
"url": "https://mcp.agora.io"
}
}
}
```
#### Kiro
**Manual configuration:**
Create or edit `.kiro/settings/mcp.json` in the project root, then add the following section:
```json
{
"mcpServers": {
"shengwang-docs": {
"url": "https://mcp.agora.io"
}
}
}
```
#### VS Code & Copilot
**Add with the `CLI`:**
```bash
code --add-mcp '{"name":"shengwang-docs","type":"http","url":"https://mcp.agora.io"}'
```
**Or configure it manually:**
Create or edit `.vscode/mcp.json` in the root directory, then add the following section:
```json
{
"servers": {
"shengwang-docs": {
"type": "http",
"url": "https://mcp.agora.io"
}
}
}
```
## MCP tools
* `search-docs`: Search for relevant documentation.
* `list-docs`: Browse documentation categories and document lists.
* `get-doc-content`: Read the full content of a specified document.
## Use MCP tools
**Automatically called by the coding agent**
In Agent Mode, you can describe your requirement directly and let the coding agent decide when to call MCP tools.
For example:
```text
Search the relevant Agora documentation, read the document content, and tell me how to build the simplest possible 1v1 real-time audio and video call.
```
**Specify tool calls in the prompt**
You can also specify which MCP tools to use in the prompt through the tool-calling syntax supported by your AI IDE.
For example:
```text
#search-docs #get-doc-content Use search-docs to find relevant Agora documentation, then use get-doc-content to read the full content of the matched document and tell me how to build an interactive experience with an AI agent.
```
# Voice agent quickstart (/en/ai/get-started/quickstart)
Set up a working voice agent in under five minutes. This page walks you through installing Agora Skills to give your AI coding assistant the official quickstarts and Agora CLI workflows. You then use the CLI to sign in, clone the official starter, and run it locally. You can follow the CLI steps yourself or paste the sample prompt and let your assistant handle setup for you.
If you are new to Agora, read [Core concepts](/en/introduction/core-concepts) first to understand how RTC, Signaling, channels, UIDs, and tokens fit together.
### Install Agora Skills
Agora Skills teach your AI coding assistant how to work with Conversational AI projects using official starter repos and the Agora CLI, including signing in, project binding, generating environment files, and running diagnostics. Install the CLI in the next section, or ask your assistant to run the installer for you.
```bash
npx skills add AgoraIO/skills
```
Paste the following prompt into your assistant's chat. You can replace Python with TypeScript or Go depending on your language preference:
```text
Set up and run the Agora Conversational AI Python starter project locally.
```
Your assistant installs the CLI, signs you in, scaffolds the official starter, and guides you through the remaining steps. Follow the manual CLI steps below if you prefer to run each command yourself.
### Install the Agora CLI
The Agora CLI is a native Go binary available at [AgoraIO-Community/cli](https://github.com/AgoraIO-Community/cli).
macOS and Linux
Windows (PowerShell)
```bash
curl -fsSL https://dl.agora.io/cli/install.sh | sh
agora --help
```
If the `agora` command is not found after installation, re-run with `--add-to-path` or
manually add the install directory to your shell profile.
```powershell
irm https://dl.agora.io/cli/install.ps1 | iex
agora --help
```
If your execution policy blocks inline scripts, download `install.ps1` and run:
```powershell
powershell -ExecutionPolicy Bypass -File .\install.ps1
```
## Sign in, scaffold, and run
Sign in with the Agora CLI, clone the starter project, and configure it for your chosen language.
1. Sign in to Agora Console.
```bash
agora login
```
2. Use `agora init` to clone the official starter for your chosen template, bind it to your
Agora project, and write the runtime-specific environment file.
Python
TypeScript
Go
```bash
agora init my-python-demo --template python
cd my-python-demo
# Set up the web client and Python backend.
bun run setup
# Start the web client and Python backend.
bun run dev
```
```bash
agora init my-nextjs-demo --template nextjs
cd my-nextjs-demo
pnpm install
pnpm dev
```
```bash
agora init my-go-demo --template go
cd my-go-demo
make setup
make dev
```
3. Open `http://localhost:3000` and click **Start conversation**.
If the agent does not join or transcripts do not appear, run `agora project doctor` to
check credential validity, feature enablement, and network reachability.
Conversational AI Engine is enabled by default for new projects and can't be disabled. If you're using an older project and the agent fails to start, verify that Conversational AI Engine is enabled on the **RTC Services** page in [Agora Console](https://console.agora.io/).
## What just happened
The CLI cloned the selected starter, connected it to your Agora project, and wrote
the environment configuration required to run the demo locally.
The demo runs a local browser app and server-side agent controls:
* **Browser app**: Captures microphone audio and plays the agent response.
* **Server-side controls**: Generate tokens and start or stop the agent session.
Agora provides the real-time path between the user and the agent. The user and
agent join the same Agora channel, and Agora transports low-latency audio and
session events between them.
The configured models handle the speech pipeline:
1. ASR converts user speech to text.
2. The LLM reasons over the conversation and generates a response.
3. TTS converts the response back to speech.
## Next steps
### Build and customize
* **[Manage agent sessions](../build/start-stop-agent)**: Start and stop agents with the SDKs or REST API.
* **[Customize models](../build/custom-model-integration/managed-mode)**: Use managed mode, or connect your own LLM and TTS providers.
* **[Improve conversation quality](../best-practices/optimize-latency)**: Tune latency, audio settings, interruptions, and turn taking.
* **[Optimize audio setup](../best-practices/audio-setup)**: Set audio profiles, scenarios, and capture behavior for your target clients.
* **[Review the API reference](/en/api-reference/api-ref/conversational-ai)**: Check REST and SDK parameters when you move beyond the starter.
### Observe and troubleshoot
* **[Observe runtime behavior](../build/handle-runtime-events/monitor-agent-runtime)**: Monitor events, transcripts, session history, and failures.
* **[Debug agent failures](../build/handle-runtime-events/debug-agent-failures)**: Correlate client callbacks, webhook events, and turn-level data.
### Prepare for production
* **[Review security and privacy](/en/introduction/security-privacy)**: Check authentication, encryption, geofencing, compliance, and operational safeguards.
* **[Restrict where agents run](../best-practices/regional-restrictions)**: Keep agent traffic within the regions your deployment requires.
# Integrate with Skills (/en/ai/get-started/skills-integrate)
## Install Agora skills
Choose one of the following ways to install the skills:
#### Skills CLI
Install with the `CLI`:
```bash
npx skills add AgoraIO/skills
```
This is the most direct installation method. After the installation finishes, restart the session or refresh the skills list according to the instructions for your coding agent.
#### Claude Code Plugin Marketplace
Run the following command in `Claude Code`:
```bash
plugin marketplace add AgoraIO/skills
```
#### OpenClaw
Install through `ClawHub`:
```bash
clawhub install voice-ai-integration
clawhub update voice-ai-integration
```
Use `install` the first time and `update` for later upgrades.
## Repository
* [Agora skills](https://github.com/AgoraIO/skills)
## Best practices
After configuring the skills, you can directly describe tasks such as integration, code generation, or troubleshooting in your coding agent. The skills help the agent choose the right integration workflow and generation rules, and supplement responses with the latest Agora documentation, making generated code, configuration guidance, and issue diagnosis more accurate.
* Clearly specify the Agora product, target platform, development language, and desired feature in your prompt.
* Provide as much context as possible, such as your current tech stack, existing code, expected interaction flow, whether you need a token, and whether you need server-side examples. This helps the AI produce solutions that are easier to use directly.
* When troubleshooting, include the observed issue, reproduction steps, logs, error codes, screenshots, or call stack details whenever possible so the coding agent can narrow down the cause faster.
* For complex tasks, prefer an AI IDE with stronger model support and more complete tooling for more stable code generation and problem analysis.
## Prompt example
After configuring the skills, you can send a prompt like the following to your coding agent to generate an AI voice conversation demo with real-time captions:
```markdown
Build me an AI voice conversation demo. After the user opens the web page and clicks "Start conversation", they should be able to talk with the AI by voice, and the page should display real-time captions.
## Tech stack
- Frontend: Next.js + React + TypeScript + Tailwind CSS
- Backend: FastAPI (Python)
## Requirements
1. Start and end the voice conversation with one click
2. Show real-time captions for both the user and the AI
3. Mute and unmute the microphone
4. Display the AI status (listening, thinking, speaking)
5. Include a system log panel
```
# Notification event types (/en/ai/reference/event-types)
After enabling Agora message notifications, the Agora notification server sends channel event notifications to your server through HTTPS POST requests. The data format is `JSON`, the character encoding is `UTF-8`, and the signature algorithm can be either `HMAC/SHA1` or `HMAC/SHA256`.
This page explains the types of events returned in channel event callbacks and their meanings.
If you are starting from a product goal instead of an event number, begin with [Monitor agent status, errors, and performance](../build/handle-runtime-events/monitor-agent-runtime).
For webhook setup, request format, and signature verification, see [Webhooks](../build/handle-runtime-events/webhooks).
## Choose event types by goal
| Goal | Use these event types | What they help you answer |
| --------------------------------------------------- | ---------------------------------------------------------------------------------------------------------- | ---------------------------------------------------------------------------------------------------------------------------------------------------------------------------- |
| Confirm that a session started or ended | [`101 agent joined`](#101-agent-joined), [`102 agent left`](#102-agent-left) | Did the agent enter the channel? How did the session end? |
| Retrieve conversation history after a session | [`103 agent history`](#103-agent-history) | What was said during the session? See [Retrieve conversation history after a session ends](../build/handle-runtime-events/retrieve-session-history). |
| Investigate failures and alert on production issues | [`110 agent error`](#110-agent-error), [`102 agent left`](#102-agent-left) | Which module failed? Did the session terminate because of that failure? See [Debug agent failures with runtime events](../build/handle-runtime-events/debug-agent-failures). |
| Measure latency and runtime health | [`111 agent metrics`](#111-agent-metrics) | How long do LLM and TTS stages take? Are there regressions? |
| Track telephony call progress | [`201 inbound call state`](#201-inbound-call-state), [`202 outbound call state`](#202-outbound-call-state) | Where is the SIP call in its lifecycle? |
## Request header
The message notification callback header contains the following fields:
Application/json
The signature value generated by Agora using the customer key and `HMAC/SHA1` algorithm. Use the customer key and `HMAC/SHA1` algorithm to verify the signature value. See Verify the signature for details.
The signature value generated by Agora using the customer key and `HMAC/SHA256` algorithm. Use the customer key and `HMAC/SHA256` algorithm to verify the signature value. See Verify the signature for details.
## Request body
The message notification callback request body contains the following fields:
Notification ID. Identifies an event notification from the Agora server.
Business ID. A value of `17` indicates a Conversational AI Engine notification.
The event type of the notification. See [Event types](#event-types) for details.
The Unix timestamp (ms) indicating when the Agora message server sent the event notification to your server. This value is updated when the notification is retried.
The session ID.
The specific content of the notification event. `payload` varies depending on the event type. For details, see [Event types](#event-types).
Following is an example of a message notification callback request body:
```json
{
"sid": "C866467GVJJ54687",
"noticeId": "2000001428:4330:107",
"productId": 17,
"eventType": 101,
"notifyMs": 1611566412672,
"payload": {}
}
```
## Event types
The Agora message notification service notifies the following Conversational AI Engine events:
| Event Type | Event name | Event description |
| :------------------------------ | :------------------ | :---------------------------------------------------------------------------------------------------------------------------------------------------------------------------------------------------------------------------------------------------------------------------------------------------------------------------------------------- |
| [101](#101-agent-joined) | agent joined | The agent joins the channel. |
| [102](#102-agent-left) | agent left | The agent leaves the channel. |
| [103](#103-agent-history) | agent history | After an agent stops, this event notifies the stored history, which includes messages exchanged between the user and the agent and timestamps indicating when the agent was created and stopped. The maximum number of entries is determined by the `llm.max_history` parameter you can set when starting the agent. The default value is `32`. |
| [104](#104-agent-expire) | agent expire | The agent's RTC token is about to expire. |
| [110](#110-agent-error) | agent error | Agent error. |
| [111](#111-agent-metrics) | agent metrics | The performance metrics of an agent. |
| [112](#112-turns-finished) | turns finished | Batch callback of dialogue round data after the session ends. |
| [201](#201-inbound-call-state) | inbound call state | Changes in the status of an incoming call. |
| [202](#202-outbound-call-state) | outbound call state | Changes in the status of an outgoing call. |
### 101 agent joined
An `eventType` of `101` indicates that an agent has joined a channel. The `payload` contains the following fields:
Unique identifier of the agent.
The agent name provided when calling [Start a conversational AI agent](/en/api-reference/api-ref/conversational-ai/join). Unique within a channel.
Timestamp indicating when the agent was created.
The name of the channel the agent was in.
Custom labels in key-value pair format. Contains the same labels that were set when starting the agent.
#### Payload example
```json
{
"agent_id": "1NT29X10YHxxxxxWJOXLYHNYB",
"name": "my-agent",
"start_ts": 1737111452,
"channel": "xxxxx",
"labels": {
"campaign_id": "test_campaign",
"customer_group": "vip"
}
}
```
### 102 agent left
An `eventType` of `102` indicates that an agent has left a channel. The `payload` contains the following fields:
Unique identifier of the agent.
The agent name provided when calling [Start a conversational AI agent](/en/api-reference/api-ref/conversational-ai/join). Unique within a channel.
Timestamp indicating when the agent was created.
Timestamp indicating when the agent left the channel.
The name of the channel the agent was in.
Agent status.
The reason why the agent left the channel.
Custom labels in key-value pair format. Contains the same labels that were set when starting the agent.
#### Payload examples
Following are some examples of the `payload` when an agent leaves a channel for different reasons.
Agent manually stopped
Agent idle timeout
Agent error
RTC connection error
Task lifetime limit exceeded
```json
{
"agent_id": "1NT29X10YHxxxxxWJOXLYHNYB",
"name": "my-agent",
"start_ts": 1737111452,
"stop_ts": 1737111455,
"channel": "xxxxx",
"status": "STOPPED",
"message": "OK",
"labels": {
"campaign_id": "test_campaign",
"customer_group": "vip"
}
}
```
```json
{
"agent_id": "1NT29X10YHxxxxxWJOXLYHNYB",
"name": "my-agent",
"start_ts": 1737111452,
"stop_ts": 1737111455,
"channel": "xxxxx",
"status": "STOPPED",
"message": "Idle for too long",
"labels": {
"campaign_id": "test_campaign",
"customer_group": "vip"
}
}
```
```json
{
"agent_id": "1NT29X10YHxxxxxWJOXLYHNYB",
"name": "my-agent",
"start_ts": 1737111452,
"stop_ts": 1737111455,
"channel": "xxxxx",
"status": "FAILED",
"message": "Connecting for too long",
"labels": {
"campaign_id": "test_campaign",
"customer_group": "vip"
}
}
```
```json
{
"agent_id": "1NT29X10YHxxxxxWJOXLYHNYB",
"name": "my-agent",
"start_ts": 1737111452,
"stop_ts": 1737111455,
"channel": "xxxxx",
"status": "FAILED",
"message": "RTC connection error",
"labels": {
"campaign_id": "test_campaign",
"customer_group": "vip"
}
}
```
```json
{
"agent_id": "1NT29X10YHxxxxxWJOXLYHNYB",
"name": "my-agent",
"start_ts": 1737111452,
"stop_ts": 1737111455,
"channel": "xxxxx",
"status": "STOPPED",
"message": "Task lifetime limit exceeded",
"labels": {
"campaign_id": "test_campaign",
"customer_group": "vip"
}
}
```
### 103 agent history
An `eventType` of `103` notifies the history of a user and agent dialogue. The notification `payload` contains the following fields:
Unique identifier of the agent.
The agent name provided when calling [Start a conversational AI agent](/en/api-reference/api-ref/conversational-ai/join). Unique within a channel.
The name of the channel the agent was in.
The timestamp indicating when the agent started and joined the channel.
The timestamp indicating when the agent stopped and left the channel.
Agent history.
The message sender.
* `user`: User
* `assistant`: AI agent
Message content.
Unix timestamp in milliseconds indicating when the user started speaking or the agent started TTS playback. Only returned when `llm.vendor` is `custom`.
Unix timestamp in milliseconds indicating when the user stopped speaking, or when TTS playback completed or was interrupted. Only returned when `llm.vendor` is `custom`.
The total delay in milliseconds introduced by audio processing algorithms, including noise reduction, background voice suppression, and voiceprint locking, after audio is captured from the user's microphone. Use this value to align timestamps with cloud recording audio.
Only returned when:
* `llm.vendor` is `custom`
* `contents[].role` is `user`
* Actual voice input is present
Custom labels in key-value pair format. Contains the same labels that were set when starting the agent.
`speech_start_ms`, `speech_end_ms`, and `speech_algorithmic_delay` are returned only in `103 agent history` events for sessions that use `llm.vendor` set to `custom`.
#### Payload examples
Basic
Custom LLM
```json
{
"agent_id": "xxxx",
"name": "my-agent",
"channel": "xxxx",
"start_ts": 123,
"stop_ts": 123,
"contents": [
{
"role": "user",
"content": "hello."
},
{
"role": "assistant",
"content": "hi, how can I help you?"
}
],
"labels": {
"campaign_id": "test_campaign",
"customer_group": "vip"
}
}
```
```json
{
"agent_id": "xxxx",
"name": "my-agent",
"channel": "xxxx",
"start_ts": 123,
"stop_ts": 123,
"contents": [
{
"role": "user",
"content": "Hello, I need help with my recent order.",
"speech_start_ms": 1715000001200,
"speech_end_ms": 1715000003400,
"speech_algorithmic_delay": 120
},
{
"role": "assistant",
"content": "Sure, could you please provide your order number?",
"speech_start_ms": 1715000004100,
"speech_end_ms": 1715000005000
},
{
"role": "user",
"content": "I'd like to check the status of my package, tracking number 12345.",
"speech_start_ms": 1715000005200,
"speech_end_ms": 1715000007600,
"speech_algorithmic_delay": 120
},
{
"role": "assistant",
"content": "Your package with tracking number 12345 is currently out for delivery.",
"speech_start_ms": 1715000009500,
"speech_end_ms": 1715000013200
},
{
"role": "user",
"content": "[think API injected] User level: VIP"
}
],
"labels": {
"campaign_id": "test_campaign",
"customer_group": "vip"
}
}
```
### 104 agent expire
An `eventType` of `104` indicates that the agent's RTC token is about to expire. The `payload` contains the following fields:
Unique identifier of the agent.
The agent name provided when calling [Start a conversational AI agent](/en/api-reference/api-ref/conversational-ai/join). Unique within a channel.
Timestamp indicating when the agent was created.
The name of the channel the agent is in.
Token expiry warning message. Fixed value: `Task exceeded maximum lifetime`.
Info
This event is a warning only. The agent does not exit the channel or interrupt the session when this event is triggered. Upon receiving this event, call the [Update agent](/en/api-reference/api-ref/conversational-ai/update) API with a new `properties.token` to refresh the token before it expires.
#### Payload example
```json
{
"agent_id": "1NT29X10YHxxxxxWJOXLYHNYB",
"name": "my-agent",
"start_ts": 1737111452,
"channel": "xxxxx",
"message": "Task exceeded maximum lifetime"
}
```
### 110 agent error
An `eventType` of `110` indicates that an agent has encountered an error. The `payload` contains the following fields:
Unique identifier of the agent.
The agent name provided when calling [Start a conversational AI agent](/en/api-reference/api-ref/conversational-ai/join). Unique within a channel.
Timestamp indicating when the agent was created.
The name of the channel the agent was in.
Transcript conversation turn. For details, see [Display live transcripts](../build/transcripts#reference).
An array of error messages. Each object contains the following fields:
The module where the error occurred.
Transcript dialogue turn.
Error code. Refer to the error code document of the vendor corresponding to the error module for detailed information.
The error message.
Custom labels in key-value pair format. Contains the same labels that were set when starting the agent.
#### Payload examples
LLM module error
Greeting audio URL error
{/* SIP module error */}
```json
{
"agent_id": "1NT29X10YHxxxxxWJOXLYHNYB",
"name": "my-agent",
"start_ts": 1737111452,
"channel": "xxxxx",
"turn_id": 2,
"errors": [{"module": "llm", "turn_id":2, "code":503, "message": "Insufficient balance."}],
"labels": {
"campaign_id": "test_campaign",
"customer_group": "vip"
}
}
```
When the greeting audio file fails to download, times out, is in an unsupported format, or fails to decode, the system reports the error via a `110 agent error` event and automatically falls back to TTS synthesis using `greeting_message`. In these errors, `errors[].module` is `agent`.
```json
{
"agent_id": "1NT29X10YHxxxxxWJOXLYHNYB",
"name": "outbound_voice_agent",
"start_ts": 1737111452,
"channel": "outbound_call_channel_001",
"turn_id": 0,
"errors": [
{
"module": "agent",
"turn_id": 0,
"code": 4001,
"message": "Greeting audio URL unreachable, fallback to TTS. audio_url: https://cdn.example.com/audio/welcome.mp3"
}
],
"labels": {}
}
```
{/*
```json
{
"agent_id": "1NT29X10YHxxxxxWJOXLYHNYB",
"name": "my-agent",
"start_ts": 1737111452,
"channel": "xxxxx",
"turn_id": "",
"errors": [{"module": "sip", "turn_id": "", "code":50, "message": "Insufficient balance."}],
"labels": {
"campaign_id": "test_campaign",
"customer_group": "vip"
}
}
```
*/}
Info
If `parameters.enable_error_message` is set to `true` when starting the agent, greeting audio URL errors are also delivered to the client via the `onMessageError` RTM callback, in addition to the server-side webhook event.
### 111 agent metrics
An `eventType` of `111` notifies the performance metrics of an agent. The `payload` contains the following fields:
Unique identifier of the agent.
The agent name provided when calling [Start a conversational AI agent](/en/api-reference/api-ref/conversational-ai/join). Unique within a channel.
Timestamp indicating when the agent was created and joined the channel.
Timestamp indicating when the agent stopped and left the channel.
The name of the channel where the agent is located.
An array of performance metrics. Each object contains the following fields:
Dialogue round ID.
The ttlw (Time To Last Word) metric of the ASR module. Represents the delay (in milliseconds) from when the user finishes speaking until the last word is output by the ASR.
The ttfb (Time To First Byte) metric for the LLM module. Represents the latency (in milliseconds) from the start of an LLM request to the receipt of the first byte of the response.
The ttfs (Time To First Sentence) metric for the LLM module. Represents the time (in milliseconds) elapsed from the start of an LLM request to the receipt of the first complete sentence response.
The ttfb (Time To First Byte) metric for the TTS module. Represents the latency (in milliseconds) from the start of a TTS request to the receipt of the first byte of the response.
Custom labels in key-value pair format. Contains the same labels that were set when starting the agent.
#### Payload example
```json
{
"agent_id": "A42AC47Hxxxxxxxx4PK27ND25E",
"name": "my-agent",
"start_ts": 1000,
"stop_ts": 1672531200,
"channel": "test-channel",
"metrics": [
{
"turn_id": 1,
"asr_ttlw": 503,
"llm_ttfb": 1104,
"tts_ttfb": 85
},
{
"turn_id": 2,
"asr_ttlw": 2385,
"llm_ttfb": 980,
"tts_ttfb": 78
}
],
"labels": {
"campaign_id": "test_campaign",
"customer_group": "vip"
}
}
```
### 112 turns finished
An `eventType` of `112` indicates a batch callback of conversation turn data after the session ends. This event returns the conversation turns for the current session in a single callback, making it convenient for post-session analysis, archiving, or offline processing.
When a session has more than 200 turns, the callback data may be truncated. Use the `is_truncated` field to check whether the current callback contains the complete turn data.
The `payload` contains the following fields:
Unique identifier of the agent.
The agent name provided when calling [Start a conversational AI agent](/en/api-reference/api-ref/conversational-ai/join). Unique within a channel.
The name of the channel where the agent is located.
Timestamp indicating when the agent was created and joined the channel.
Timestamp indicating when the agent stopped and left the channel.
The total number of conversation turns in the session.
Whether the turn data in the current callback is truncated. A value of `true` indicates that the current callback did not return all turns.
Custom labels in key-value pair format. Contains the same labels that were set when starting the agent. Only returned if labels were passed in when creating the agent.
A list of conversation turns for the session.
Unique identifier of the agent.
The name of the channel where the agent is located.
The sequential index of the turn within the session. Starts at `1`.
Details about the start of the turn.
The Unix timestamp in milliseconds (UTC time) when the turn started.
The type of event that initiated the turn.
Additional context about the turn start event. Included fields depend on the value of the `type` field.
The duration of the user's voice input in milliseconds. Included only when `type` is `voice_input`.
The minimum voice duration in milliseconds required to trigger an interruption. Included only when `type` is `voice_input`.
Details about the end of the turn.
The Unix timestamp in milliseconds (UTC time) when the turn ended.
The type of event that ended the turn.
Additional context about the turn end event.
Latency metrics for the turn.
The end-to-end latency in milliseconds for the turn. Represents the time from when the user finishes speaking to when the agent starts speaking.
A breakdown of latency by segment.
Algorithm processing delay in milliseconds.
The ASR Time To Last Word (TTLW) in milliseconds. Represents the delay from when the user finishes speaking to when the ASR module outputs the last word.
The LLM Time To First Token (TTFT) in milliseconds. Represents the delay from when the LLM receives the request to when it outputs the first token.
The LLM First Token To First Sentence (FTFS) in milliseconds. Represents the delay from when the LLM outputs the first token to when it outputs the first complete sentence.
The TTS Time To First Byte (TTFB) in milliseconds. Represents the delay from when the TTS module receives a text request to when it outputs the first audio byte.
Network transmission delay in milliseconds. Not returned when the user is connected using the RTC Web SDK.
#### Payload example
```json
{
"agent_id": "xxxx",
"name": "support_agent_001",
"channel": "xxxx",
"start_ts": 1715000000000,
"stop_ts": 1715000015000,
"total_turn_count": 250,
"is_truncated": true,
"labels": {
"campaign_id": "test_campaign",
"customer_group": "vip"
},
"turns": [
{
"agent_id": "xxxx",
"channel": "xxxx",
"turn_id": 1,
"start": {
"start_at": 1774579820147,
"type": "voice_input"
},
"end": {
"end_at": 1774579822412,
"type": "ok"
},
"metrics": {
"e2e_latency_ms": 1500,
"segmented_latency_ms": {
"algorithm_processing": 300,
"asr_ttlw": 200,
"llm_ttft": 600,
"tts_ttfb": 200,
"transport": 300
}
}
}
]
}
```
### 201 inbound call state
An `eventType` of `201` notifies changes in the status of an incoming call. The `payload` contains the following fields:
Unique identifier of the agent.
The agent name provided when calling [Start a conversational AI agent](/en/api-reference/api-ref/conversational-ai/join). Unique within a channel.
The name of the channel where the agent is located.
Incoming call status:
* `START`: Call received
* `ANSWERED`: Call answered
* `TRANSFERED`: Transfer to human operator
* `HANGUP`: Call hung up
Timestamp (in milliseconds) of the state change.
Custom labels in key-value pair format. Contains the same labels that were set when starting the agent.
#### Payload example
```json
{
"agent_id": "1NT29X10YHxxxxxWJOXLYHNYB",
"name": "my-agent",
"channel": "xxxxx",
"state": "START",
"report_ms": 1737111452000,
"labels": {
"campaign_id": "test_campaign",
"customer_group": "vip"
}
}
```
### 202 outbound call state
An `eventType` of `202` notifies changes in the status of an outgoing call. The `payload` contains the following fields:
Unique identifier of the agent.
The agent name provided when calling [Start a conversational AI agent](/en/api-reference/api-ref/conversational-ai/join). Unique within a channel.
The name of the channel where the agent is located.
Outgoing call status:
* `START`: Call begins
* `CALLING`: Making a phone call
* `RINGING`: The telephone is ringing
* `ANSWERED`: The call was connected
* `HANGUP`: Call hung up
Timestamp (in milliseconds) of the state change.
Custom labels in key-value pair format. Contains the same labels that were set when starting the agent.
#### Payload example
```json
{
"agent_id": "1NT29X10YHxxxxxWJOXLYHNYB",
"name": "my-agent",
"channel": "xxxxx",
"state": "CALLING",
"report_ms": 1737111452000,
"labels": {
"campaign_id": "test_campaign",
"customer_group": "vip"
}
}
```
# OpenAI Realtime integration (/en/ai/reference/openai-realtime-integration)
This guide explains how to combine Agora's real-time audio transport with the OpenAI Realtime API.
Use this integration when you want Agora to handle the live audio session and network transport, while OpenAI Realtime handles the model-side conversational behavior.
This is not the same as building on Agora's managed Conversational AI Engine. If you want Agora to manage the voice-agent runtime, use the main Conversational AI build path instead.
## When to use this path
* You already know you want to build around the OpenAI Realtime API.
* You need Agora RTC SDK transport in front of that model stack.
* You are building a browser demo, device-oriented flow, or backend-mediated prototype around OpenAI Realtime.
## When not to use this path
* You want the default Agora-managed voice-agent stack.
* You are looking for the main onboarding path for Conversational AI Engine.
* You want Agent Studio or the Device Kit route instead of a custom integration.
## Core pieces
* **Agora App ID**: Identifies your Agora project.
* **App certificate and token model**: Used for secure join flows where needed.
* **Channel and user ID**: Define the live session and participants.
* **SD-RTN**: Provides Agora's low-latency transport layer.
* **OpenAI Realtime API**: Provides the model-side real-time conversation flow.
## Recommended quickstart flow
1. Prepare your Agora account and project.
2. Decide how your client joins the Agora session and how the OpenAI-side session is coordinated.
3. Configure the OpenAI Realtime model and audio flow.
4. Run the round-trip voice path locally and validate latency, auth, and media behavior.
## Security and network checks
* Keep Agora credentials and provider API keys on the server side.
* Separate local, staging, and production credentials.
* Review firewall requirements before testing in restricted networks.
* Re-test the full join and media path after changing transport or security settings.
## Related pages
* [Conversational AI quickstart](/en/ai/get-started/quickstart)
* [MCP integration](/en/ai/get-started/mcp-integrate)
* [Agora skills](/en/ai/get-started/skills-integrate)
* [Security and privacy](/en/introduction/security-privacy)
* [Firewall requirements](/en/introduction/firewall)
* [Glossary](/en/introduction/glossary)
# Pricing (/en/ai/reference/pricing)
This page describes how Agora calculates and bills for Conversational AI Engine usage.
When you use Conversational AI Engine in your project, Agora charges a monthly fee based on your usage across all projects under your developer account. At the end of each month, the free quota is subtracted from your total usage, and the remaining minutes are multiplied by the unit price to calculate your bill, rounded to two decimal places. For general billing information, see [Billing](../../introduction/billing).
Info
If you have signed a sales contract with Agora, your billing follows the terms in your contract.
## Unit price
Creating a Conversational AI Engine instance using the REST API and joining a channel incurs an audio task fee at the following rate:
| Usage Type | Pricing (USD / minute) | Free Minutes |
| ----------------------------------- | ---------------------: | -------------------------- |
| Conversational AI Engine Audio Task | 0.10\* | First 300 minutes are free |
\* The unit price includes usage of selected ASR, LLM, and TTS models. You are charged the same price even if you bring your own key (BYOK).
Usage of ASR, LLM, and TTS providers is included in the unit price when using an Agora managed key. Agora provides and manages the API keys for the following providers:
* **ASR**
* ARES
* Deepgram nova-2
* Deepgram nova-3
* **LLM**
* OpenAI GPT-4o-mini
* OpenAI GPT-4.1-mini
* OpenAI GPT-5-nano
* OpenAI GPT-5-mini
* **TTS**
* MiniMax 2.6 Turbo
* MiniMax 2.8 Turbo
* OpenAI TTS-1
## Examples
The following examples demonstrate how billing is calculated for different Conversational AI Engine configurations.
### Using ASR, LLM, and TTS managed by Agora
User A joins a channel and starts a voice conversation with an instance created by Conversational AI Engine. The interaction lasts for 10 minutes. User A and the Conversational AI Engine instance exit the channel at the same time. Agora calculates the cost for this session as follows:
| Usage Type | Duration (minutes) | Unit Price | Service Cost (USD) |
| ---------------------------------------------------------- | -----------------: | ---------: | -----------------: |
| User A: Audio RTC | 10 | 0.00099 | 0.0099 |
| Conversational AI Engine Audio Task | 10 | 0.10 | 1.00 |
| ASR: ARES, LLM: OpenAI GPT-4o-mini, TTS: MiniMax 2.8 Turbo | 10 | 0.00 | 0.00 |
Total cost: 1.0099 USD
# Overview (/en/ai/studio)
The no-code agent builder is a visual workspace in Agora Console for building and operating conversational AI voice agents. You configure agent behavior, connect telephony, and monitor production calls from a single interface, without writing integration code.
It abstracts the underlying AI stack. You configure your ASR, LLM, and TTS providers, or a single realtime MLLM; the console handles the orchestration between them. Instead of managing API integrations across multiple services, you focus on what your agent should say and do.
## How it's organized
The no-code agent builder is structured around four areas:
**Concierge:** Explore, configure, and troubleshoot your agents using natural language, instead of navigating each page individually. See [Concierge](build/concierge).
**Build:** Create and configure agents. Define the system prompt, greeting, models, and behavior. Connect credentials, knowledge bases, MCP servers, Custom Tools, and connectors through **Integrations**. These resources are stored centrally so they can be reused across multiple agents. See [Customize your agent](build/customize-agent), [Manage integrations](build/integrations), [Custom Tools](build/custom-tools), and [HubSpot Connector](build/hubspot-connector).
**Deploy:** Connect agents to telephony. Import phone numbers using Elastic SIP Trunk and configure inbound routing or outbound campaigns. See [Set up SIP trunk](deploy/sip-trunk), [Import a phone number](deploy/import), [Handle inbound calls](deploy/inbound), [Publish your agent](deploy/deploy-agent), and [Set up a campaign](deploy/campaign).
**Insights:** Monitor production usage. Review call history, transcripts, and analytics to understand agent performance and debug issues. See [Agent analytics](observe/analytics) and [Call History](observe/call-history).
## How it works
The no-code agent builder sits between your telephony provider and the AI models that power your agent. For inbound calls, it receives the call from your carrier via Elastic SIP Trunk, processes the conversation through your configured ASR, LLM, and TTS providers (or a realtime MLLM), and delivers the agent's response back to the caller. For outbound calls, it initiates the call through the same SIP trunk, connects to the recipient, and handles the conversation in the same way.
In both cases, it manages the full call lifecycle. No SIP servers to manage, no voice recognition to train, no telephony protocols to debug.
## Key concepts
### Agents
Agents are the primary objects you configure. Create an agent, then configure it across four tabs in the agent editor:
* **Prompt**: The system prompt, greeting message, and failure message that define your agent's identity and behavior.
* **Models**: Your ASR, LLM, and TTS providers, or a single realtime MLLM.
* **Advanced**: Turn detection, speech detection, selective attention locking, filler words, voice format, and conversation history.
* **Actions**: Knowledge bases, Custom Tools, connectors, and MCP servers attached to the agent.
After configuring, test the agent using the **Test** tab, then publish it when ready. See [Customize your agent](build/customize-agent) and [Test your agent](build/test-agent).
### Integrations
**Integrations** is a centralized resource library. Store credentials, knowledge bases, MCP servers, Custom Tools, and connectors here once, then attach them to any agent. This eliminates repeated setup when you create new agents or update provider settings. See [Manage integrations](build/integrations).
### Phone numbers
Import phone numbers from your SIP trunk provider and assign them to agents for inbound calls, or use them as caller IDs for outbound campaigns. See [Import a phone number](deploy/import).
### Campaigns
For outbound use cases, create campaigns with contact lists, scheduling, and call transfer settings. See [Set up a campaign](deploy/campaign).
## Who should use this
The no-code agent builder is designed for developers and technical users who want to build and operate voice agents without managing the underlying AI infrastructure. If you need capabilities beyond what it exposes, such as advanced API parameters or custom orchestration logic, you can use agent SDKs or the [Conversational AI REST API](/en/api-reference/api-ref/conversational-ai) for full programmatic control.
## Get started
To get started, follow the [Quickstart](quickstart), which walks you through creating and testing your first agent in about 10 minutes using a pre-built template.
# Create your first agent (/en/ai/studio/quickstart)
This page guides you through creating and testing your first AI voice agent. In less than 10 minutes, you will have a working agent that you can speak to in the browser. No telephony setup is required.
Prefer natural language?
Use [Concierge](build/concierge) to build and test an agent by describing what you want instead of following the steps below.
## Create an agent
To create your first agent:
1. Log in to [Agora Console](https://console.agora.io).
2. Select your project from the dropdown at the top of the page. The agent uses this project's credentials to connect to Agora. Agora bills the usage to this project.
3. In the navigation sidebar, select **Agents**.
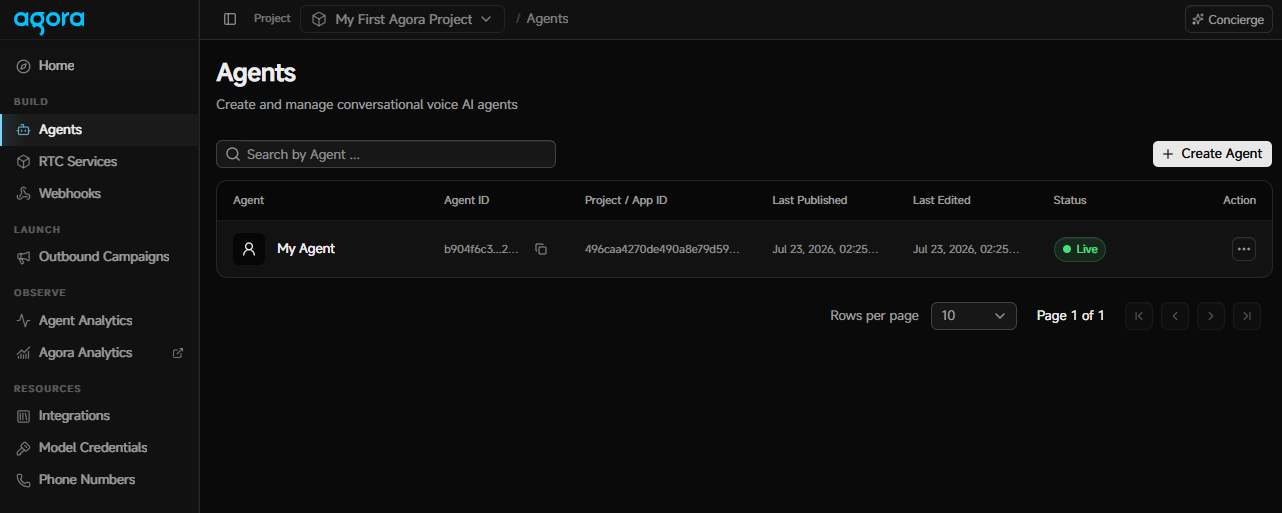
4. Select **Create Agent**.
5. Enter a name for your agent.
6. Under **Choose a template**, select the **Blank Template**.
7. Select **Create Agent**.
The agent editor opens with a system prompt and pre-configured model settings.
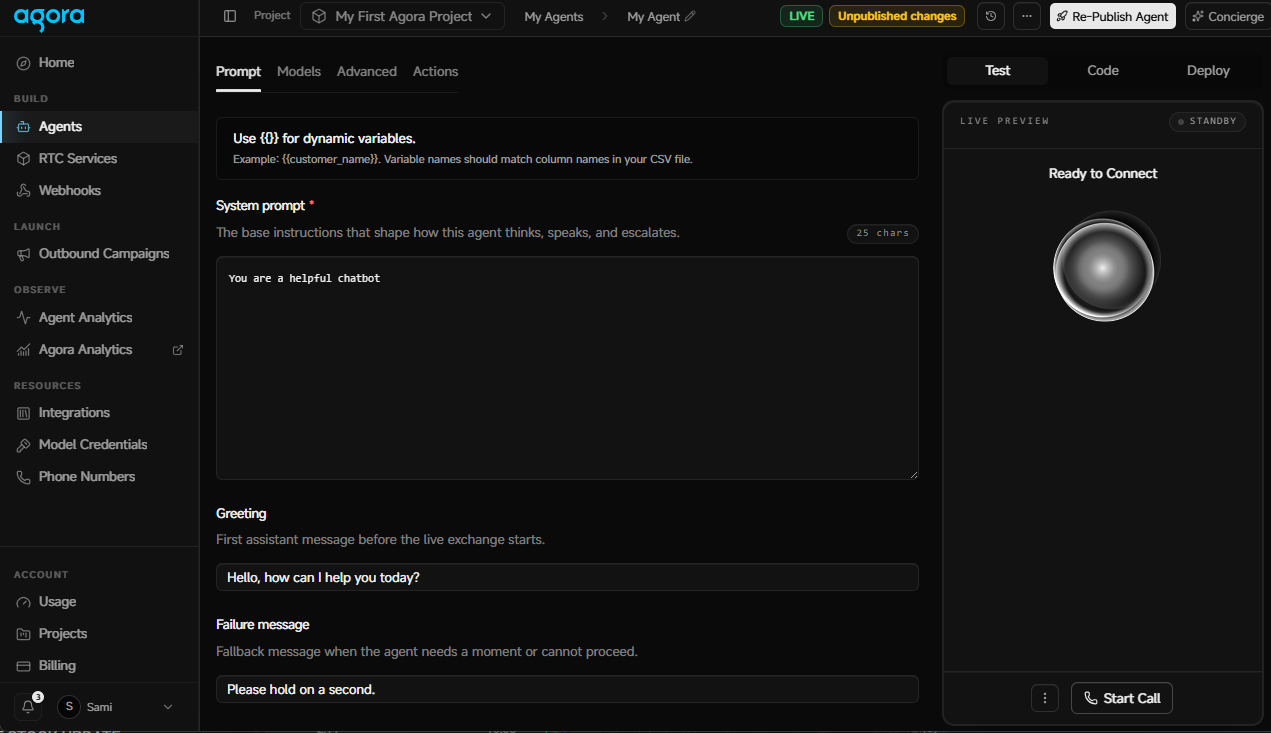
## Configure your agent
The agent editor is organized into multiple tabs. For the quickstart, you only need to review the **Prompt** tab and the **Models** tab.
### Review the prompt
The agent editor opens with the following prompts:
* **System prompt**: The base instructions that shape how your agent thinks, speaks, and escalates.
* **Greeting**: The first assistant message before the live exchange starts. Type in a greeting such as `Hello, how can I help you today?`
* **Failure message**: The fallback message used when the agent needs a moment or cannot proceed.
### Review selected models
Models determine which ASR, LLM, and TTS services your agent uses to process speech, generate responses, and synthesize voice output.
1. Select the **Models** tab.
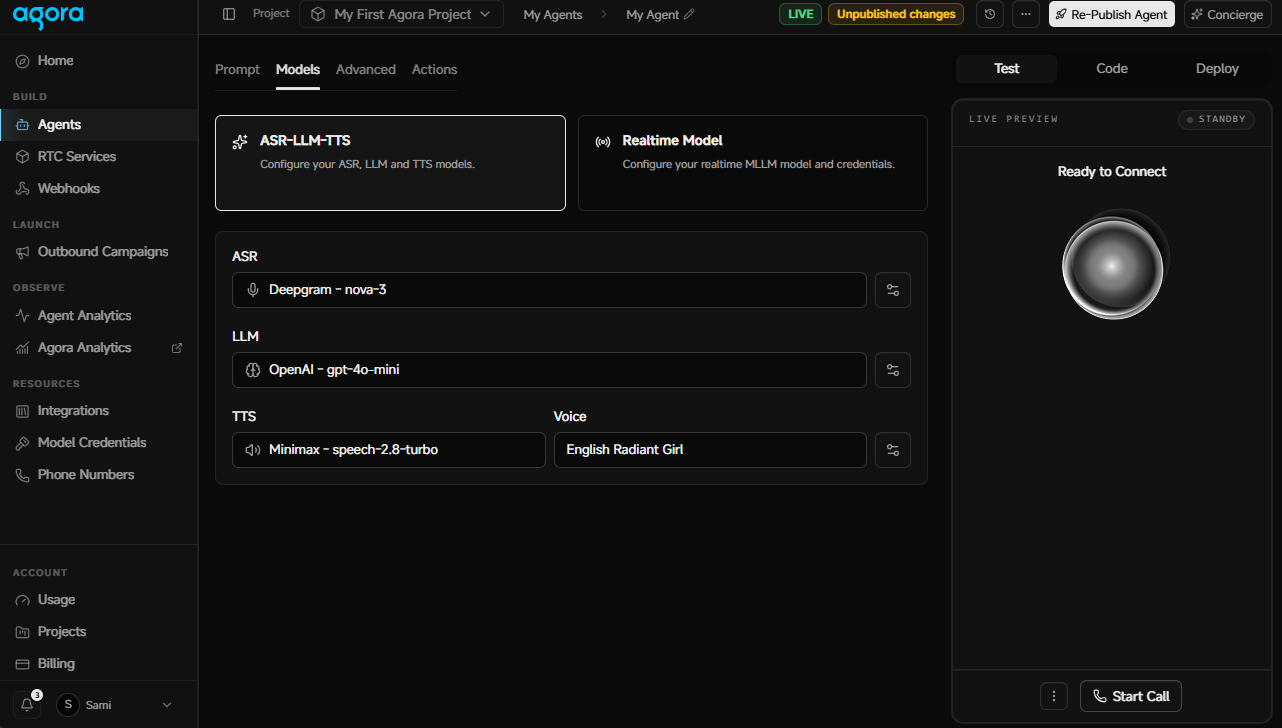
2. Review the pre-selected models for **Automatic Speech Recognition (ASR)**, **Large Language Model (LLM)**, and **Text-to-Speech (TTS)**. Use the default values to create your first agent.
The default models support **Agora Managed Key**. When you use a managed key, Agora provides the API credentials for your selected vendor. You do not need to obtain an API key directly from the vendor. See [Pricing](../reference/pricing) for details. To use your own API key or use a vendor that does not support a managed key, see [Customize your agent](build/customize-agent).
## Test the agent
1. Select the **Test** tab in the right panel.
2. Select **Start Call** to start a test call.
3. Allow microphone access when prompted.
4. Speak to the agent to verify it responds correctly.
For guidance on what to test and how to troubleshoot issues, see [Test your agent](build/test-agent).
## Next steps
You now have a working voice agent. From here you can:
* [Customize your agent](build/customize-agent): Fully configure models, prompts, and advanced settings for your use case
* [Manage integrations](build/integrations): Manage API credentials, knowledge bases, MCPs, custom tools, and connectors for reuse across agents
# TEN Framework core concepts (/en/ai/ten-agent/core-concepts)
## TEN runtime
The TEN runtime is an execution environment designed for running applications within the TEN Framework. It provides a flexible architecture that supports extensions developed in multiple programming languages and handles various types of data streams. By managing the lifecycle of extensions, data flows, and threads, the TEN runtime offers developers a powerful tool for building a wide range of applications and services.
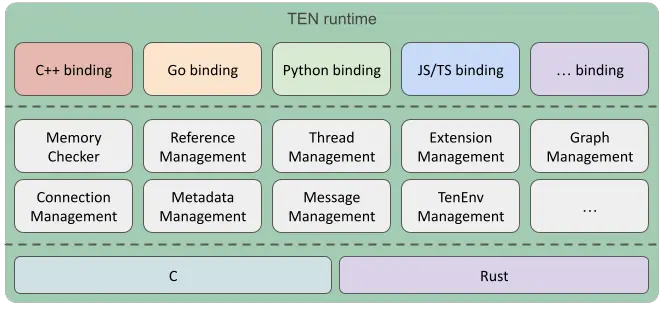
## App
An app in the TEN Framework can operate as a standalone process or as a thread within an existing process. This flexibility allows for versatile deployment options depending on the needs of the application.
## Extension group
An extension group is a mechanism that designates a specific thread for execution. All extensions within a given group are executed on the same thread, ensuring consistent and synchronized processing.
## Extension
An extension is the fundamental building block of the TEN Framework. Developers can create extensions in various programming languages and combine them to build different applications and scenarios. The framework's design supports cross-language collaboration, enabling extensions written in different languages to work together seamlessly within the same application or service.
For example, a developer might use C++ to create an extension for real-time communication (RTC) due to its performance benefits in handling audio and video data, while developing an AI extension in Python to take advantage of its robust libraries for data analysis and machine learning. These extensions can then be integrated into a single application, leveraging the strengths of each language.
## Graph
A graph in the TEN Framework describes the data flow between extensions. It orchestrates how data moves from one extension to another, defining the participants and the flow of data between them. For example, you can route the output of a speech-to-text (STT) extension to a large language model (LLM) extension for further processing.
The TEN Framework supports four main types of data flows between extensions:
* Command
* Data
* Video frame
* Audio frame
By defining these data flows within a graph, you can create inter-extension communication and unidirectional data streams, particularly useful for handling audio and video data.
## Component hierarchy
The TEN Framework uses a nested structure where apps contain graphs, graphs contain extension groups, and extension groups contain extensions. Understanding this hierarchy is essential for building and configuring TEN applications.
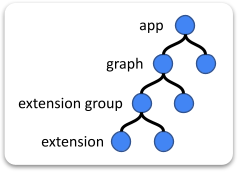
* **App**:
An app can execute multiple graphs, which can be either statically predefined or dynamically assembled.
* **Graph**:
A graph is formed by multiple extensions working together to create a meaningful scenario. Each graph instance operates as a session within the app.
* **Extension group**:
The concept of an extension group is analogous to a thread. Extensions written in the same language and within the same extension group run on the same thread during runtime. You do not need to manage threads directly; simply declare the group to which each extension belongs.
* **Extension**:
Each extension within the framework is assigned a unique ID, structured as: `app-uri/graph-name/group-name/extension-name`
## TEN cloud store
The TEN cloud store functions similarly to Google Play Store or Apple's App Store, providing a marketplace for extensions. You can share your own extensions or download those created by others. Integrate these extensions into TEN apps to facilitate development and expand functionality.
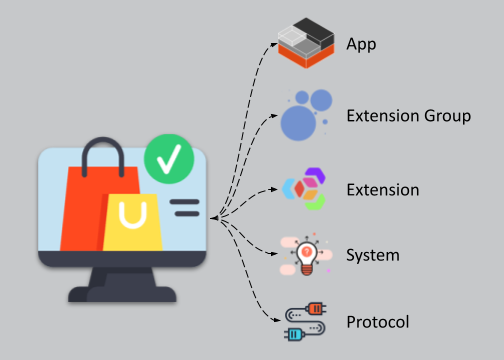
## TEN manager
The TEN manager is a tool that simplifies the management of extensions. It handles tasks such as uploading, sharing, and installing extensions, automatically managing dependencies between them and their environment. This makes the installation and publication of extensions convenient and efficient, and streamlines the development process within the TEN Framework.
# TEN Framework overview (/en/ai/ten-agent/framework-overview)
The TEN Framework, or Transformative Extensions Network, is an open-source framework for building real-time multimodal AI agents. It helps you create applications that process voice, video, data streams, images, and text at the same time.
TEN is designed for agents that need to think, listen, see, and respond in real time. It provides a graph-based runtime, reusable extensions, and multi-language development support so you can assemble complex AI systems without rebuilding every capability from scratch.
## What you can build
Use the TEN Framework to build real-time AI applications such as:
* Voice and video AI agents
* Simultaneous interpretation systems
* Speech-to-text and text-to-speech pipelines
* Multilingual communication experiences
* Audio-visual assistants and virtual companions
* AI-generated meeting minutes
* Language tutoring and coaching applications
## Key capabilities
### Real-time multimodal interactions
TEN optimizes interaction between extensions to support low-latency AI applications. A graph can process multiple data types, including audio, video, commands, structured data, images, and text.
### Multi-language and cross-platform development
You can build modular extensions in C++, Go, and Python. TEN applications can run across Windows, macOS, Linux, and mobile environments, which gives you flexibility when choosing where each capability should execute.
### Modular extension architecture
TEN applications are composed from extensions. Each extension owns a focused capability, such as audio capture, ASR, LLM processing, TTS, tool calling, or output rendering. This modular architecture makes it easier to prototype, replace providers, and add new capabilities over time.
### Edge-cloud integration
TEN supports applications that combine edge and cloud components. You can run latency-sensitive or privacy-sensitive work near the user while using cloud-based models for heavier reasoning or generation tasks.
### Flexible orchestration beyond model limits
TEN lets you combine AI models with databases, retrieval systems, monitoring tools, and external services. Instead of depending on one model to handle the whole workflow, you can orchestrate multiple specialized components through the graph.
### Real-time agent state management
TEN graphs can manage changing agent state so applications can adapt behavior during a session. This is useful for interactive agents that need to respond to user context, media state, or tool results while the conversation is still running.
## How it relates to TEN Agent
TEN Agent is built on the TEN Framework. The framework provides the runtime, graph model, extension system, schema system, and package mechanics. TEN Agent applies those framework capabilities to conversational AI workflows.
Start with [Project overview](./project-overview) when you want to understand the TEN Agent repository layout, runtime configuration, extension folders, and local server API.
For implementation details, see:
* [Subgraphs](./architecture/subgraphs)
* [Schema system](./architecture/schema-system)
* [Type system](./architecture/type-system)
* [Development workflow](./develop/development-workflow)
## Samples
Explore TEN Framework examples in the [TEN Framework repository](https://github.com/TEN-framework/ten-framework/tree/main/ai_agents/agents/examples).
# Project overview (/en/ai/ten-agent/project-overview)
The TEN Agent project is built on the TEN Framework and follows a modular architecture. This page describes the project structure, configuration system, and web server API.
TEN Agent uses a graph-based configuration system built on TEN Framework concepts. The project organizes code into modular extensions that can be orchestrated through configuration files without modifying source code.
The folder structure follows this pattern:
```text
├── agents/
│ └── ten_packages/
│ ├── extension/
│ │ ├── openai_chatgpt_python/
│ │ │ ├── extension.py
│ │ │ ├── ..
│ │ │ └── requirements.txt
│ │ ├── elevenlabs_tts
│ │ └── ..
│ └── property.json
├── playground
├── demo
└── server
```
It contains the following important folders and files:
* `property.json`: This file contains the orchestration of extensions. It is the main runtime configuration file.
* `ten_packages/extension`: This folder contains the extension modules. Each extension module is a separate Python/Golang/C++ package.
* `server`: This folder contains the web server code. It is responsible for handling the incoming requests and start/stop of agent processes.
* `playground`: This folder contains the UI code for the playground. It is a web-based interface to interact with the agent.
## Runtime configuration
The main runtime configuration file is `property.json`. It contains the orchestration of extensions. The file is structured as follows:
```json
"predefined_graphs": [
{
"name": "va_openai_azure_fashionai",
"auto_start": false,
"connections": [
// ...
],
"nodes": [
// ...
]
},
// ...
]
```
The file contains the following orchestration info:
* **Graphs**: Collections of nodes and connections that determine agent behavior
* **Nodes**: Individual extension instances with specific configurations
* **Connections**: Data flow paths between nodes
```json
{
"predefined_graphs": [
{
"name": "va_openai_azure_fashionai",
"auto_start": false,
"connections": [...],
"nodes": [...]
}
]
}
```
### Graphs
The `predefined_graphs` property contains a list of available graphs. Each graph defines how the agent behaves in a specific scenario. Each graph contains:
* `name`: Unique identifier for the graph
* `auto_start`: Whether to start this graph automatically
* `nodes`: List of extension instances
* `connections`: Data routing between nodes
### Nodes
The `nodes` section contains the list of extensions that are part of the graph. Each node includes the following:
* `name`: Unique identifier of a node within the graph
* `addon`: Specifies the extension module to use. You can create multiple instances of the same extension within a graph. For example, you might include several `chatgpt_openai_python` nodes, each using the same `addon` property but with unique `name` properties. This allows you to run parallel instances of an extension with different configurations or behaviors.
* `property`: Extension-specific configuration
```json
{
"name": "chatgpt_openai_python",
"addon": "chatgpt_openai_python",
"property": {
"api_key": "${env:OPENAI_API_KEY|}",
"model": "gpt-3.5-turbo",
"temperature": 0.5,
"max_tokens": 100,
"prompt": "You are a helpful assistant"
}
}
```
#### Node properties
The `property` section of a node configures the extension's behavior. Each extension defines its available properties in the `manifest.json` file within its folder. You can customize an extension by setting these runtime properties.
#### Read environment variables
Many extensions require API keys to function. Instead of hardcoding sensitive keys in `property.json`, use environment variables with the syntax `${env:|}`. The following example shows how to read and use the `OPENAI_API_KEY` environment variable:
```json
{
"name": "chatgpt_openai_python",
"addon": "chatgpt_openai_python",
"property": {
"api_key": "${env:OPENAI_API_KEY|}"
}
}
```
### Connections
The connections section defines how data flows between nodes. Each connection specifies:
* **Source node**: Identified by `extension_group` and `extension` properties
* **Data protocols**: Types of data that can flow: `audio_frame`, `video_frame`, `data`, or `cmd`
* **Destinations**: Where each data type is routed
For each protocol, you define destinations with:
* `name`: The data property key
* `dest`: List of target nodes
The following example connects `agora_rtc` extension to `deepgram_asr` extension. The `agora_rtc` extension sends `pcm_frame` data to `deepgram_asr` extension.
```json
{
"extension_group": "default",
"extension": "agora_rtc",
"audio_frame": [
{
"name": "pcm_frame",
"dest": [
{
"extension_group": "default",
"extension": "deepgram_asr"
}
]
}
]
}
```
## Extension folder
The `ten_packages/extension` folder contains extension modules written in Python, Go, or C++. Each extension is a self-contained package with its own structure.
Extension folder names typically match the module name, though the definitive module name is specified in the extension's `manifest.json` file. Use this module name as the `addon` property value in your configuration.
The extension folder is structured as follows:
```text
project_root/
├── ten_packages/
│ └── extension/
│ ├── sample_python_extension/
│ │ ├── ...
│ │ ├── extension.py
│ │ ├── manifest.json
│ │ └── property.json
│ ├── sample_go_extension/
│ │ ├── ...
│ │ ├── example_extension.go
│ │ ├── manifest.json
│ │ └── property.json
│ └── sample_cpp_extension/
│ ├── ...
│ ├── src/
│ │ ├── main.cc
│ │ └── ...
│ ├── BUILD.gn
│ ├── manifest.json
│ └── property.json
├── manifest.json
└── property.json
```
### Extension common files
* `manifest.json`: Defines the extension's metadata including name, version, available properties, and supported APIs such as `data`, `audio_frame`, and `video_frame`
* `property.json`: Specifies default configuration values for the extension
### Extension-specific files
Each language has its own set of required files for extension development:
| Language | Main logic file | Dependencies/Build file |
| -------- | ---------------------- | ------------------------------------------------------------------------------------------------------------------------------------ |
| Python | `extension.py` | `requirements.txt`: Python dependencies required by the extension. Dependencies are installed automatically when you run `task use`. |
| Go | `example_extension.go` | `go.mod`: Go module definition that specifies the module name and dependencies. |
| C++ | `src/main.cc` | `BUILD.gn`: Build configuration that specifies the target name and dependencies. |
The main logic file contains the core implementation of the extension for each language.
## Web server
The Go-based web server manages agent processes and handles HTTP requests from clients. Both the playground and demo interfaces communicate with this server, though you can also interact directly using curl or any HTTP client.
### API endpoints
The server exposes three endpoints for agent management:
* [POST /start](#post-start): Start an agent with specified configuration
* [POST /stop](#post-stop): Stop a running agent
* [POST /ping](#post-ping): Maintain agent connection
#### POST /start
Starts an agent with a specified graph and property overrides. The agent joins the specified RTC channel and subscribes to the user's audio stream.
| Parameter | Description |
| -------------- | --------------------------------------------------------------------------------------------------------------------- |
| `request_id` | UUID for request tracking |
| `channel_name` | RTC channel name (must match the channel your client joins) |
| `user_uid` | User's RTC identifier for audio subscription |
| `bot_uid` | Optional agent RTC identifier |
| `graph_name` | Graph configuration name from `property.json` |
| `properties` | Property overrides (temporary, doesn't modify `property.json`) |
| `timeout` | Inactivity timeout in seconds (`-1` disables timeout, default: 60s, configurable using `WORKER_QUIT_TIMEOUT_SECONDS`) |
Example:
```bash
curl 'http://localhost:8080/start' \
-H 'Content-Type: application/json' \
--data-raw '{
"request_id": "c1912182-924c-4d15-a8bb-85063343077c",
"channel_name": "test",
"user_uid": 176573,
"graph_name": "camera_va_openai_azure",
"properties": {
"openai_chatgpt": {
"model": "gpt-4o"
}
}
}'
```
#### POST /stop
Stops a running agent instance.
| Parameter | Description |
| -------------- | ----------------------------------------- |
| `request_id` | UUID for request tracking |
| `channel_name` | Channel name used when starting the agent |
Example:
```bash
curl 'http://localhost:8080/stop' \
-H 'Content-Type: application/json' \
--data-raw '{
"request_id": "c1912182-924c-4d15-a8bb-85063343077c",
"channel_name": "test"
}'
```
#### POST /ping
Maintains the agent connection by sending a keepalive signal. Not required if the agent was started with `timeout: -1`. Without pings, agents terminate after the configured timeout period.
| Param | Description |
| -------------- | -------------------------------- |
| `request_id` | UUID for request tracking |
| `channel_name` | Channel name of the active agent |
Example:
```bash
curl 'http://localhost:8080/ping' \
-H 'Content-Type: application/json' \
--data-raw '{
"request_id": "c1912182-924c-4d15-a8bb-85063343077c",
"channel_name": "test"
}'
```
# Account settlement (/en/introduction/billing/account-settlement)
To ensure billing transparency and smooth service continuity, Agora implements real-time account balance reservation based on estimated usage across all Agora products for SSP customers. This does not apply to customers with a signed contract.
For uninterrupted access to Agora's products and services, ensure at least one of the following:
* Add a valid credit card for auto-recharge to your Agora account, **or**
* Maintain sufficient funds in your Agora Console balance to cover your estimated usage.
Agora employs the following policies to manage your account balance and ensure uninterrupted access to its products and services.
### Real-time usage and estimated bill
You can view your real-time usage and estimated monthly bill at any time by selecting **Billing** in the Agora Console sidebar.
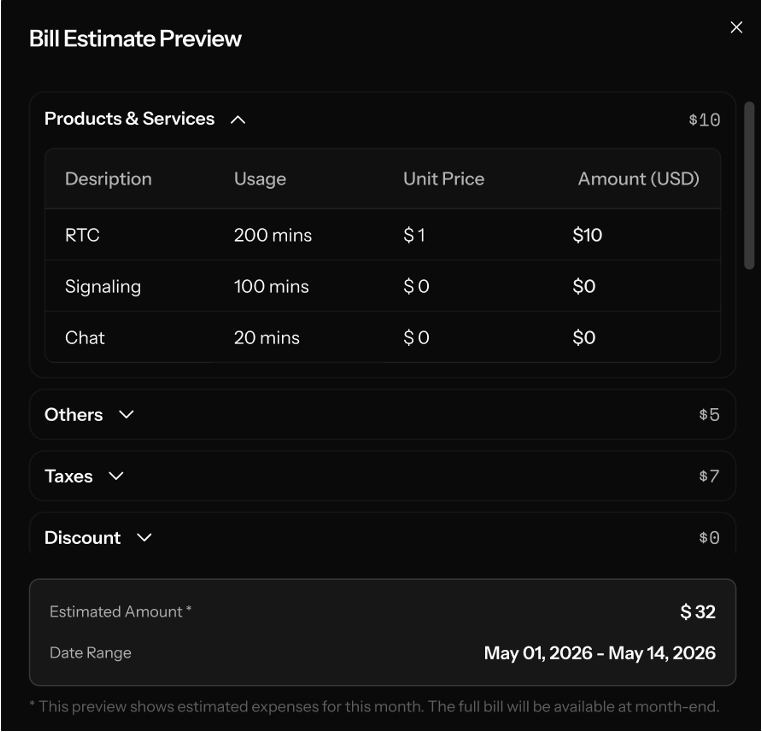
### Real-time reservation of balance
Your reserved balance is updated continuously based on your real-time bill estimation. The corresponding estimated amount is reserved from your available balance at all times.
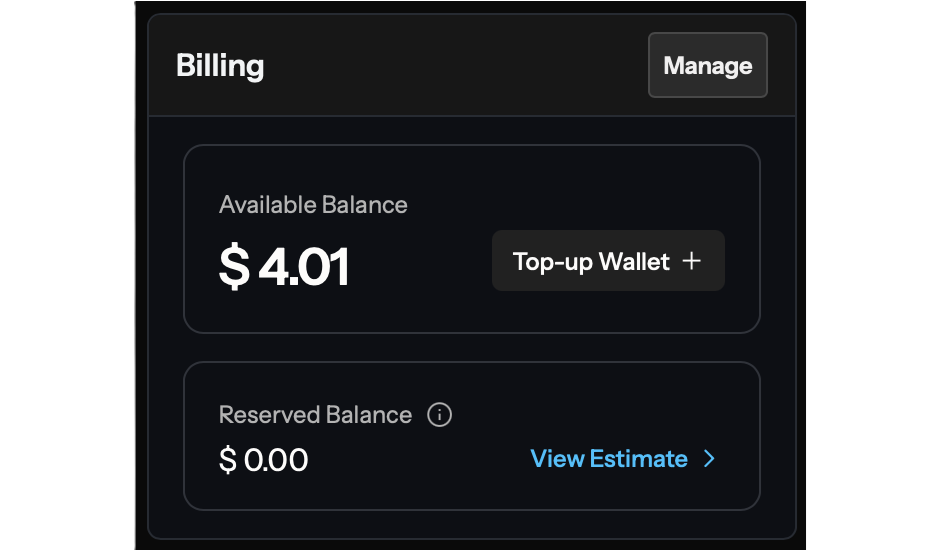
### Auto-recharge and account suspension
On the **7th, 14th, 21st, and 28th** of each calendar month (excluding February 28), if your available balance is in arrears by more than **$50**:
* If a valid credit card is linked, the system automatically recharges your balance to zero.
* If no credit card is linked, or if auto-recharge fails, a notification email is sent to you.
* Top up your wallet within the **24-hour grace period** to avoid account suspension.
* If your balance remains in arrears after 24 hours, your account is suspended until the balance is restored to zero or above.
### Monthly billing
Your final bill is issued monthly. After bill finalization:
* Any overpaid amount is refunded to your balance.
* Any undercharged amount is deducted accordingly.
### Balance withdrawal
You can withdraw your available balance for payments completed within the past 90 days directly through the Agora Console. Funds will be returned to the original payment method. For further inquiries, please email [billing@agora.io](mailto\:billing@agora.io).
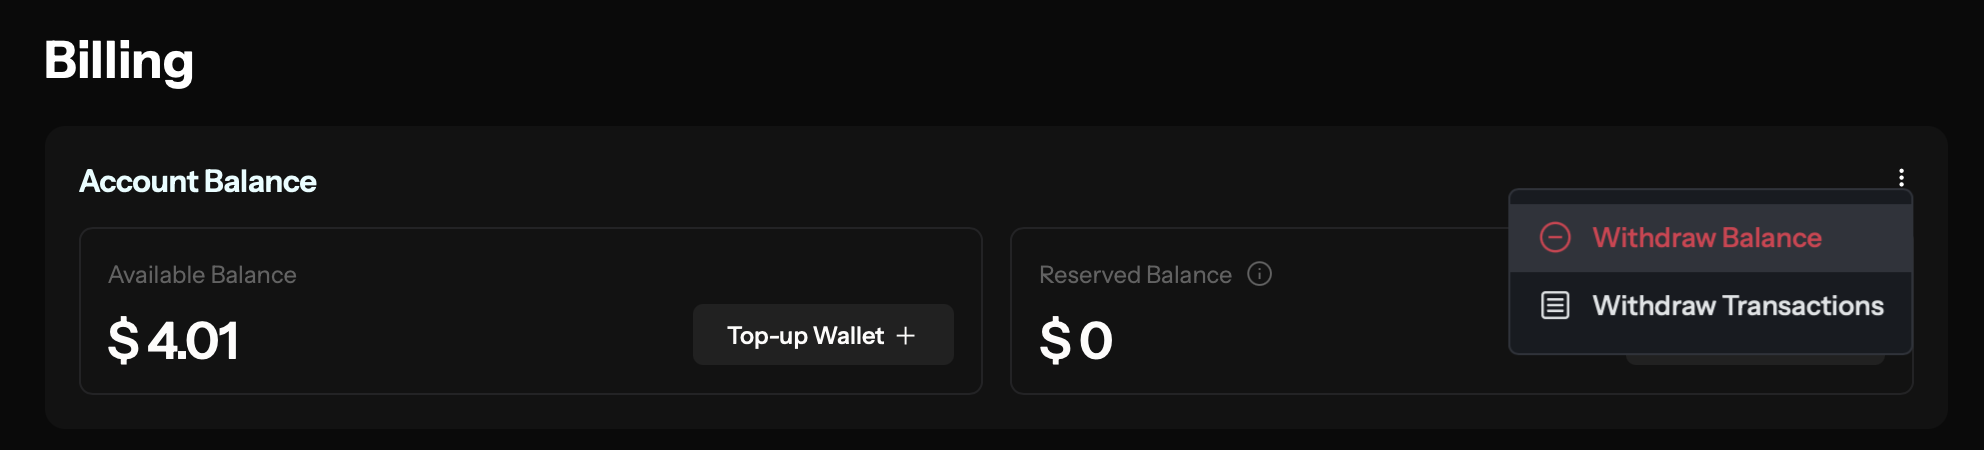
# Billing policies (/en/introduction/billing/billing-policies)
This page explains billing, account settlement, end-of-life policies, and any applicable free-of-charge policies for this product.
## Billing and account policies
Agora Console provides billing information, fee deduction details, and account suspension notices based on your account type.
If you have signed a contract with Agora, the contract terms override all billing, deduction, and suspension details described on this page.
### Paid accounts
Your account is a paid account if you have registered with Agora and completed any of the following:
* Added a credit card to your account or topped up your balance using a bank account.
* Made a recent payment.
* Signed a contract with Agora.
### Billing cycle
Agora provides each account with [10,000 free minutes](#free-of-charge-policy) every month.
On the first day of each month, Agora issues your bill for the previous calendar month.
To view billing information for your projects:
1. In [Agora Console](https://console.agora.io/), click home.
2. Click **Billing**.
You see the detailed billing information for your projects, including billing period, due date, and amount.
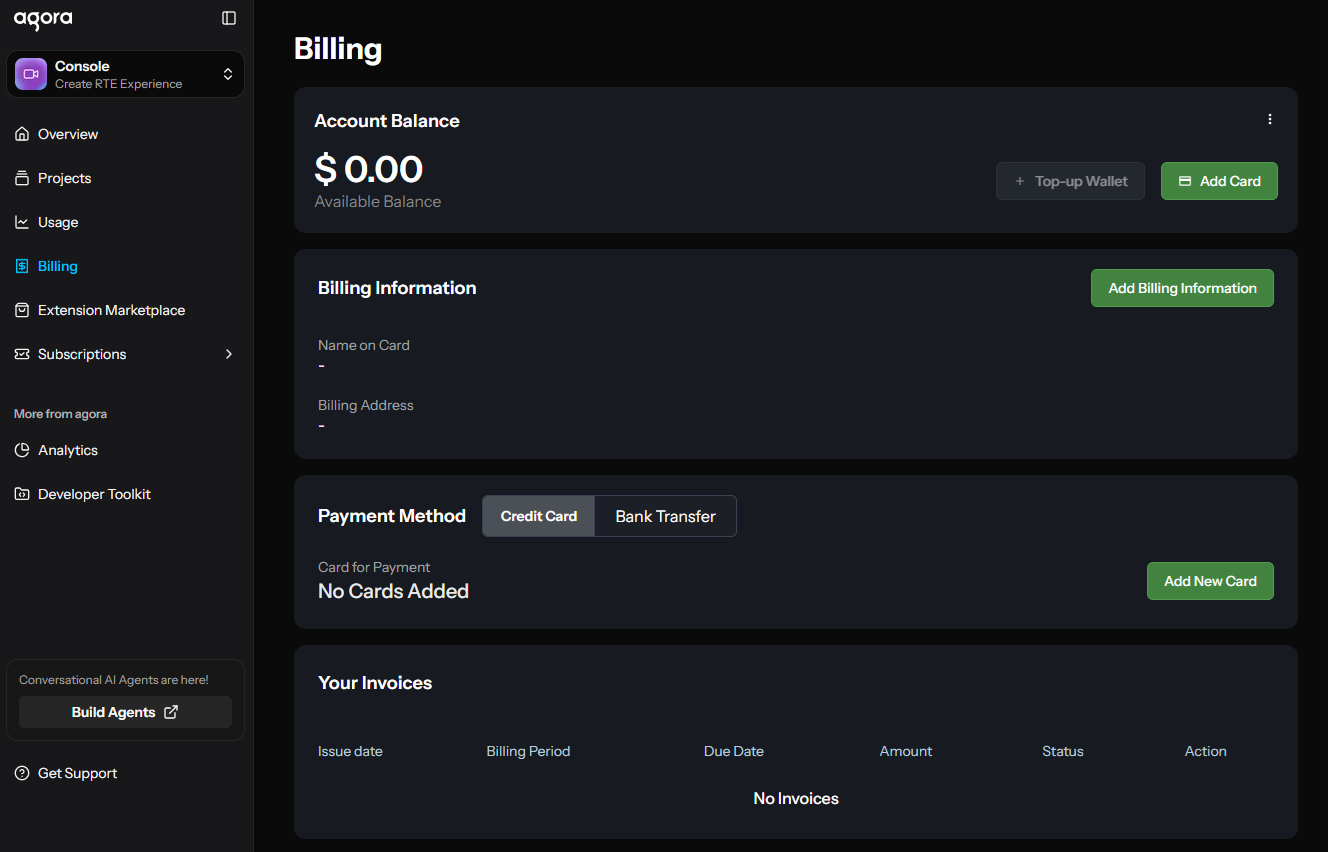
#### Additional charges
This section describes the additional charges applicable to your account.
#### Singapore goods and services tax
As of November 2021, Agora Singapore charges [9% Singapore Goods and Services Tax (GST)](https://www.iras.gov.sg/taxes/goods-services-tax-%28gst%29/basics-of-gst/goods-and-services-tax-%28gst%29-what-it-is-and-how-it-works) on invoices for all Agora services provided to accounts located in Singapore. Agora determines the account location based on the tax identification number, contact address, or billing address that you have provided. All GST collected from Singapore accounts is paid to the Singapore tax authority.
If you have any questions, contact [support@agora.io](mailto\:support@agora.io).
#### Fee deduction
On the sixth day of each month, Agora automatically deducts the fee for the previous month and notifies you by email. No fee is deducted if you meet both of the following conditions:
* Your monthly usage does not exceed the free quota.
* You do not use any other charged Agora services or products.
If your account balance is negative after the deduction, Agora sends you an email, reminding you to top up your account at your earliest convenience and avoid account suspension.
#### Account suspension
If your account balance remains negative for 5 days after the deduction date, Agora suspends your account and notifies you by email. During suspension, none of your projects can access Agora services.
To restore access, top up your account as soon as possible. Once your balance is zero or greater, Agora unfreezes your account.
### Free accounts
Your account is a free account if you have registered with Agora and have not completed any of the following:
* Added a credit card to your account or topped up your balance using a bank account.
* Made a recent payment.
* Signed a contract with Agora.
Free accounts include 10,000 free minutes per month. For details, see [Free-of-charge policy](#free-of-charge-policy).
#### Free account suspension
Agora suspends your account on the second day after any of the following occur:
* Your total usage exceeds the free quota of a service or product.
* You use Agora services or products not included in the free quota.
After account suspension, none of your projects can access Agora services. To restore access:
1. Add a credit card to your account or top up your balance using a bank account. This unfreezes your account and upgrades it to a paid account.
2. Purchase a [pre-paid monthly package](/en/introduction/billing/subscription-packages) or [top-up package](/en/introduction/billing/subscription-packages#top-up-package). This option is highly recommended.
## Free-of-charge policy
Agora offers a new pricing model. If your account uses this model, you receive a monthly free usage package by default instead of the 10,000 free minutes described below.
Agora provides each account with 10,000 free minutes per month and deducts them in the following order:
* Broadcast Streaming audio minutes
* Voice call, video call, and Interactive Live Streaming audio minutes
* On-premise recording audio minutes
* Cloud recording audio non-transcoding minutes
* Cloud recording audio minutes
* Web page recording audio minutes
* Cloud Proxy audio minutes
* Broadcast Streaming HD video minutes
* Voice call, video call, and Interactive Live Streaming HD video minutes
* On-premise recording HD video minutes
* Cloud recording HD video minutes
* Web page recording HD video minutes
* Cloud Proxy HD video minutes
* Broadcast Streaming Full HD\* video minutes
* Voice call, video call, and Interactive Live Streaming Full HD\* video minutes
* On-premise recording Full HD\* video minutes
* Cloud recording Full HD\* video minutes
* Web page recording Full HD\* video minutes
* Cloud Proxy Full HD\* video minutes
* Broadcast Streaming 2K video minutes
* Voice call, video call, and Interactive Live Streaming 2K video minutes
* On-premise recording 2K video minutes
* Cloud recording 2K video minutes
* Broadcast Streaming 2K+ video minutes
* Voice call, video call, Interactive Live Streaming 2K+ video minutes
* On-premise recording 2K+ video minutes
* Cloud recording 2K+ video minutes
* Cloud proxy 2K+ video minutes
\* HD+ minutes are also included in the shared 10,000 free minutes.
If your total service minutes do not exceed 10,000 minutes, the service is free-of-charge. After the 10,000 free-of-charge minutes are fully deducted, Agora charges you for the additional service minutes. Agora clears any remaining free-of-charge minutes at the end of each calendar month.
* The 10,000 free-of-charge minutes policy does not apply to the Signaling SDK, the Chat SDK, or the IoT SDK.
* Conversational AI Engine has its own free minutes policy. For details, see [Conversational AI pricing](/en/ai/reference/pricing).
### How service minutes are calculated
Service minutes are calculated either by the number of users or by the number of streams. Agora calculates service minutes **by the number of users**.
#### Approach 1: calculate by the number of users
Suppose N users talk for M minutes in a channel, the total service minutes = N \* M.
* If two users talk for 10 minutes, the total service minutes are: 2 \* 10 = 20.
* If five users talk for 10 minutes, the total service minutes are: 5 \* 10 = 50.
* If 10 users talk for 10 minutes, the total service minutes are: 10 \* 10 = 100.
In this approach, service minutes depend only on the number of users in the channel, regardless of how many streams each user subscribes to.
#### Approach 2: calculate by the number of streams
Suppose N users talk for M minutes in a channel, and each user subscribes to all remote streams in the channel, the total service minutes = N \* (N-1) \* M.
* If two users talk for 10 minutes, the total service minutes are: 2 \* (2-1) \* 10 = 20.
* If five users talk for 10 minutes, the total service minutes are: 5 \* (5-1) \* 10 = 200.
* If 10 users talk for 10 minutes, the total service minutes are: 10 \* (10-1) \* 10 = 900.
In this approach, every remote stream that a user subscribes to is counted separately.
#### Comparison of calculation approaches
The following table compares service minutes under each approach:
| Use-case | Service minutes by the number of users | Service minutes by the number of streams |
| ------------------------------- | -------------------------------------- | ---------------------------------------- |
| Two users talk for 10 minutes. | 20 minutes | 20 minutes |
| Five users talk for 10 minutes. | 50 minutes | 200 minutes |
| 10 users talk for 10 minutes. | 100 minutes | 900 minutes |
The difference between the two approaches increases as more users join the channel.
### Agora's calculation method
Agora calculates service minutes **by the number of users**. Service minutes are also calculated based on aggregate video resolution.
## End-of-life policy
Agora is committed to providing regular updates to core products, extensions, and tools. These updates include new features, updated APIs, bug fixes, security patches, and documentation improvements. Agora strongly encourages developers to update to the latest product releases to benefit from new features, security enhancements, and other improvements.
This section outlines the stages that an Agora product or service moves through, from pre-GA Beta to general availability to retirement, and the support Agora provides during each phase.
### Default introduction period
Agora guarantees a minimum introduction period of 12 months from the release of a product on the Agora Developer Center. During this period, Agora does not initiate any end-of-support or end-of-life actions. After the 12-month period, Agora may transition a product into the Maintenance phase, which marks the beginning of the end-of-support phase.
### SDK lifecycle
| Phase | Description |
| ------------------------------------ | --------------------------------------------------------------------------------------------------------------------------------------------------------------------------------------------------------------------------------------------------------------------------------------------------------------------------------------------------------------------------------------------------------------------------------------------------------------------------------------------------------------------------------------------------------------------------------------------------------------------------------------------------------------------------------------- |
| Beta | During this phase, SDKs are intended solely for early access and feedback purposes. They are not recommended for use in production environments. Beta products fall outside of the EOL policy and are intended for evaluation purposes only. For more information, see the Beta Service Agreement. |
| General Availability (GA) | SDKs in this phase are fully supported by Agora. Agora provides support for new services, API updates, feature enhancements, bug fixes, and security patches. Agora guarantees a minimum of 12 months of support for GA SDKs. For details on client SDK support periods, see [Client SDK support periods](#client-sdk-support-periods). |
| Retirement (EOL) SDKs: (Maintenance) | When an SDK enters the Retirement phase, Agora announces its retirement with a minimum notice period of 60 days, which is approximately 2 months. This announcement will include crucial timelines and guidelines to assist developers in migrating to the latest recommended SDK version. Agora communicates retirement announcements through email, the Agora Console notifications center, and SDK documentation, and may also post announcements on social media or the [Agora blog](https://www.agora.io/en/blog/). When a product or service reaches the end-of-support or end-of-life stage, Agora stops providing security updates, non-security updates, and assisted support. |
### Client SDK support periods
Agora provides the following support periods for client SDKs:
| Release | Support |
| ------------- | ------------------------------------------------------------------------------------------ |
| Major release | Agora guarantees support for at least 12 months starting from the date of a major release. |
| Minor release | For minor releases, Agora ensures support for at least 6 months from the release date. |
### Maintenance support for retired SDKs
Occasionally, Agora may transition a product SDK into a maintenance support phase focused primarily on bug fixes and security patches. In such cases, Agora notifies customers at least 60 days, approximately 2 months, in advance of the retirement period for the affected SDK.
During the Retirement phase, products entering the EOS/EOL phase will continue to be supported as follows:
| Duration | Support |
| ---------------------------------- | ------------------------------------------------------------------------------------------------------------------------------- |
| Months 1–6 after EOL announcement | Agora provides bug fixes and security updates. New feature requests are not accepted. |
| Months 7–12 after EOL announcement | Agora provides security updates only. |
| After 12 months | Agora no longer supports the product or service, unless a support extension was arranged before the end of the 12-month period. |
Using an SDK beyond its maintenance support cycle is not recommended and is entirely at the developer's discretion and risk.
Agora is committed to delivering the best SDK experience to its developers. This policy ensures that you have access to the latest features and security updates with clear guidance on the support timelines.
### Support extensions
Customers may apply to extend support for a retired SDK for a temporary period, subject to Agora's discretion and commercial terms. Agora reviews each request and decides whether to grant the customer a license to use the product or service for a limited period beyond the EOL timeline.
# Billing (/en/introduction/billing)
This is the single place to understand how Agora charges for usage and how to manage payment. For product-specific rates, see the **Pricing** page of each product.
## Billing center
In Agora Console, the **Billing** page lets you check your balance, add funds, and view or export invoices and transactions. Access is limited to members assigned to **Admin**, **Finance**, or an authorized custom team.
## How usage is billed
Most Agora products bill by usage (for example, by minutes, message volume, storage, or peak concurrent users), with a free tier before charges begin. The exact unit and rate depend on the product, so check the product's own **Pricing** page for current numbers.
Before you ship to production, confirm:
* the billing unit makes sense for your expected usage pattern
* the right people on your team can access billing and financial records
## Billing policies and management
* [Billing policies](/en/introduction/billing/billing-policies) — free-usage allowance and product lifecycle rules.
* [Account settlement](/en/introduction/billing/account-settlement) — balance reservation, auto-recharge, and suspension.
* [Subscription packages](/en/introduction/billing/subscription-packages) — package tiers and upgrades.
# Subscription packages (/en/introduction/billing/subscription-packages)
A subscription package is a prepaid billing method. You can purchase a package in the [`Agora Console`](https://console.agora.io/) to cover usage for the current month.
This page explains how to purchase, and manage subscription and top-up packages.
### Purchase and upgrade
By default, a new account may be assigned a Free package when the first eligible project is created. You can upgrade to a paid package at any time. Available package tiers, discounts, and unit prices vary by product. To upgrade:
1. Log in to [Agora Console](https://console.agora.io/).
2. Click the username at the bottom of the navigation sidebar to open the account popup menu.
3. Select **Subscriptions**.
4. Select the tab for the product subscription you want to manage, such as Realtime, Signaling, or Chat.
5. Select your package and click **Upgrade** or **Downgrade**.

For detailed pricing for a specific product, see the product's pricing page.
* For non-contracted customers, most packages can be purchased directly from the Agora Console. Some enterprise or contracted packages may require contacting [Agora sales](mailto\:sales@agora.io).
* You can upgrade sequentially or skip levels when the product supports it.
* Package upgrades take effect immediately and apply to the entire calendar month. If you make multiple upgrades on the same day, only the last upgrade is applied.
* If your account has a negative balance, purchasing a prepaid package first charges your credit card for the outstanding balance, then for the package fee.
#### Upgrade rules
When you upgrade to a paid package, it becomes effective for the entire calendar month, regardless of the purchase date. You receive the full monthly allocation of the included quota. The cost of the previous package is deducted from the new package price, so you only pay the difference. If you request an upgrade after auto-renewal has triggered, you may upgrade for the next month as well.
### Renewal
By default, your subscription package renews automatically 48 hours before it expires. Ensure your account has sufficient balance or enable auto-pay to avoid renewal failure. You can unsubscribe at any time to prevent renewal. See [Cancel subscription](#cancel-subscription).
If renewal fails:
* The system sends a notification and retries the renewal.
* If renewal still fails by the time the package expires, the package downgrades to the Free package.
* To restore the previous package, see [Purchase and Upgrade](#purchase-and-upgrade).
### Downgrade
You can downgrade by selecting and purchasing a lower-tier package. A downgrade takes effect when your current package expires if you request it before auto-renewal is triggered. You are charged for the new package when you request the downgrade.
You can downgrade only once per month.
* If your downgrade for the next month is successful, auto-renewal for the current package is not triggered.
* If a package is already active, you must wait until the 1st day of that month to initiate a downgrade for the following month.
#### Example
* **Requested more than 48 hours before the current package expires**: The downgrade takes effect after the current package expires.
* **Requested less than 48 hours before the current package expires**: Since a package is already active for the next month, you must wait until the new package starts to downgrade for the following month.
### Cancel subscription
To cancel a prepaid package, downgrade to the Free package. Downgrade rules apply.
## Top-up package
A top-up package is a pay-as-you-go plan. You can purchase a top-up package from the [`Agora Console`](https://console.agora.io/subscriptions/rtc-plans?tab=top-up) to cover usage that exceeds your monthly package quota.
### Purchase
You can purchase multiple top-up packages. They are deducted in the order of purchase.
#### Example:
* Purchased 250,000-minutes top-up packages on **August 15** and **August 16**. On **September 1**, minutes consumed in August are deducted from the first package, then from the second.
### Validity
Each top-up package is valid for one year, starting from the purchase date to the end of the same month of the following year.
#### Example:
* Purchased on **August 15, 2025** → valid until **August 31, 2026**
Unused minutes expire after the validity period and cannot be carried forward.
### Cancel top-up package
Cancelling a top-up package is not supported.
## Free tier overage
For Free tier users, exceeding the included minutes and any purchased top-up minutes results in service suspension. Service resumes when you purchase additional top-up minutes or upgrade to a prepaid subscription package.
# Start building (/en/introduction/get-started/build-it-yourself)
Most teams do not start by asking which Agora product to read first. They start by asking what kind of real-time problem they need to solve.
Use this page to map your product goal to the most useful documentation path.
## When to use this path
This is the right page when:
* you already know the product problem you want to solve
* you want to choose the right capability family before reading deep product docs
* you do not need an AI-assisted setup workflow first
* you want the shortest route from problem statement to relevant quickstart or product area
If you want an AI agent to help choose the route and bootstrap a starter, use [Start with AI](/en/introduction/start-with-ai) instead.
## Start from the problem you are solving
### Voice-first AI interaction
If users need to talk to an AI agent in real time, start with:
* [Conversational AI](/en/introduction/conversational-ai)
* [AI quickstart](/en/ai/get-started/quickstart)
* [Voice agent quickstart](/en/ai/choose-your-path/quickstart-coding)
This path is usually right for assistants, tutors, companions, service agents, and voice-enabled devices.
### Live voice, video, or interactive sessions
If users need to join the same session and interact through live media, start with:
* [Real-Time Voice & Video](/en/introduction/realtime-audio-video)
* [Audio & Video](/en/realtime-media/rtc)
* [Voice & Video quickstart](/en/realtime-media/rtc/android/quick-start/build-from-scratch)
This path is usually right for calling, meetings, classrooms, social rooms, telehealth, and interactive livestreaming.
### Room messaging, state sync, or workflow coordination
If the product depends on chat, presence, metadata, or event coordination, start with:
* [Messaging & Presence](/en/introduction/messaging-presence)
* [RTM / Signaling](/en/realtime-media/rtm)
* [IM / Chat](/en/realtime-media/im)
This path is usually right for in-room communication, control flows, collaborative state, and backend-triggered room actions.
### Cloud-side media workflows
If the media must be captured, processed, routed, or redistributed beyond the live session itself, start with:
* [Cloud Media Services](/en/introduction/cloud-media-services)
* [Cloud Recording](/en/realtime-media/cloud-recording)
* [Real-time Transcription & Translation](/en/realtime-media/speech-to-text)
* [Transcoding](/en/realtime-media/transcoding)
* [Server Media Processing](/en/realtime-media/rtc-server-sdk)
This path is usually right for archive, replay, moderation, server-side automation, and downstream content pipelines.
## Common combinations
Many production systems combine several of these paths:
* voice or video sessions plus [Messaging & Presence](/en/introduction/messaging-presence)
* AI interaction plus [Cloud Media Services](/en/introduction/cloud-media-services)
* live sessions plus [Cloud Media Services](/en/introduction/cloud-media-services)
* broadcast products plus [Cloud Media Services](/en/introduction/cloud-media-services)
## What to do next
If you are still evaluating the platform, read [About Agora](/en/introduction/about-agora) first. If you want the shared mental model before choosing a path, read [Core Concepts](/en/introduction/core-concepts). If you want an AI-assisted setup workflow, switch to [Start with AI](/en/introduction/start-with-ai).
# Service activation (/en/realtime-media/agora-analytics/activation)
To activate Agora Analytics, follow these steps:
1. Contact your account executive, solutions architect, or email [support@agora.io](mailto\:support@agora.io) to learn about the available Agora Analytics plans.
2. The account team or your solutions architect will open a support ticket with [Technical support](mailto\:support@agora.io) to request activation. Make sure the ticket includes your Customer ID and the specific Agora Analytics plan you want activated.
Activation typically takes up to 2 business days.
# Agora Analytics overview (/en/realtime-media/agora-analytics/product-overview)
Agora Analytics tracks and analyzes the usage, quality, and performance of real-time voice and video live streams and other Agora products. Designed as a companion to Agora's Voice Calling, Video Calling, Broadcast Streaming, Interactive Live Streaming, and Chat it helps locate quality issues, identify root causes, and resolve problems to enhance the end-user experience. Monitor sessions in real-time with Call Inspector or use RESTful APIs to analyze usage trends and performance.
Extend Agora Analytics with the Datadog integration to bring Agora Analytics data into your Datadog account. Visualize and monitor metrics, set up custom alerts, and manage Agora data alongside other system metrics for a unified view of performance and quality.
## Start building
## Product Features
Identify, analyze, and respond to performance quality issues with advanced search, detailed visibility into call and user metrics, and diagnostics.
Provides periodic call usage and quality statistics. It is designed to help customers understand the usage and quality of calls in apps.
Visualized data for multiple call metrics in real time.
Sends alerts to you when abnormal metrics or events are detected in your Agora projects.
Use RESTful APIs to retrieve call statistics and quality of experience metrics, use them in your own application or DataOps workflow.
Easily embed Agora Analytics pages in internal web portals using a low-code approach.
# Core concepts (/en/realtime-media/broadcast-streaming/core-concepts)
RTC (Real-Time Communication) refers to real-time communication technology, which allows almost instant exchange of audio, video, and other data between the sender and the receiver.
Agora SDKs provide real-time audio and video interaction services, with multi-platform and multi-device support. This includes high-definition video calls, voice-only calls, interactive live streaming, as well as one-on-one and multi-group chats.
This guide introduces the key processes and concepts you need to know to use Video SDK.
Agora relies on the following fundamental concepts to enable seamless real-time communication:
### Agora SDRTN®
Agora's core engagement services are powered by its Software-Defined Real-Time Network (SDRTN®), a global infrastructure accessible anytime, anywhere. Unlike traditional networks, Agora SDRTN® is not restricted by devices, phone numbers, or telecom coverage areas. With data centers in over 200 countries and regions, it ensures sub-second latency and high availability for real-time media.
Agora SDRTN® enables live user engagement through real-time communication (RTC), offering:
* Unmatched quality of service
* High availability and accessibility
* True scalability
* Low cost
## Channel concepts
Agora uses channels to group users together, enabling seamless communication and interaction. Channels serve as the foundation for transmitting real-time data, whether audio, video, or signaling, and play a crucial role in connecting users and services.
### Channel
A channel organizes users into a group and is identified by a unique channel name. Users who connect to the same channel are able to communicate with each other. A channel is created when the first user joins and ceases to exist when the last user leaves.
Channels are created by calling the methods for transmitting real-time data. Agora uses different channels to transmit different types of data:
* A Video SDK channel is used for transmitting audio or video data.
* A Signaling channel is used for transmitting messaging or signaling data.
These channels are independent of each other.
Additional services provided by Agora, such as Cloud Recording and Speech to Text, join the Video SDK channel to provide real-time recording, transmission acceleration, media playback, and content moderation.
### Channel profile
The Video SDK applies different optimization methods according to the selected channel profile. Agora supports the following channel profiles:
| Channel profile | Description |
| --------------------- | ------------------------------------------------------------------------------------------------------------------------------------------------------------------------------------------------------ |
| **Communication** | This profile is suitable for one-on-one or group calls, where all users in the channel talk freely. |
| **Live Broadcasting** | In a live streaming channel, users have two client roles: *host* and *audience*. The *host* sends and receives streams, while the *audience* only receives streams with the sending function disabled. |
### Stream
A stream is a sequence of digitally encoded, coherent signals that contain media data. Users in a channel [publish](#publish) local streams and [subscribe](#subscribe) to remote streams from other users.
### User role
The user role defines whether a user in a channel has the permission to publish streams. There are two user roles:
* **Host**: A user who can publish streams to a channel.
* **Audience**: A User who can only subscribe to remote media streams. A user with this role cannot publish streams.
### Publish
Publishing is the act of sending a user’s audio or video data to the channel. Usually, the published stream is created by the audio data sampled from a microphone or the video data captured by a camera. You can also publish media streams from other sources, such as an online music file or the user’s screen.
After successfully publishing a stream, the SDK uses it to send media data to other users in the channel. Users communicate with each other in real-time by publishing local streams and subscribing to remote streams.
### Subscribe
Subscribing is the act of receiving media streams published by remote users to the channel. A user receives audio and video data from other users by subscribing to one or more of their streams. You either directly play the subscribed streams or process incoming data for other purposes such as recording or capturing screenshots.
### User ID
In Broadcast Streaming, the UID is an integer value that uniquely identifies a user within the context of a channel. When joining a channel, you have the option to either assign a specific UID to the user or pass `0` or `null` and allow Agora to automatically generate and assign a UID to the user. If two users attempt to join the same channel with the same UID, it can lead to unexpected behavior.
The UID is used by Agora's services and components to identify and manage users within a channel. Ensure that UIDs are properly assigned to prevent conflicts.
### RTC connection
The connection between the SDK and the channel. When publishing or subscribing to multiple streams in multiple channels, a connection is used to specify the target channel.
## Credentials
To ensure reliable access and secure communication, Agora uses credentials such as the App ID, App Certificate, and tokens to identify applications, authenticate their requests, and authorize their access on its platform.
### App ID
The App ID is a unique key generated by Agora to identify each project and provide billing and other statistical data services. The App ID is critical for connecting users within your app. It is used to initialize the Agora Engine in your app, and as one of the required keys to create authentication tokens for secure communication. Retrieve the App ID for your project using the [Agora Console](https://console.agora.io/projects).
App IDs are stored on the front-end client and do not provide access control. Projects using only an App ID allow any user with the App ID to join. For access control, especially in production environments, choose the **App ID + Token** mechanism for user authentication when creating a new project. Without authentication tokens, your environment is open to anyone with access to your App ID.
### App Certificate
An App Certificate is a unique key generated by the Agora Console to secure projects through token authentication. It is required, along with the App ID, to generate a token that proves authorization between your systems and Agora's network. App Certificates are used to generate Broadcast Streaming authentication tokens.
Store the App Certificate securely in your backend systems. If your App Certificate is compromised or to meet security compliance requirements, you can invalidate certificates and create new ones through the Agora Console.
### Tokens
A token is a dynamic key generated using the App ID, App Certificate, user ID, and expiration timestamp. Tokens authenticate and secure access to Agora's services, ensuring only authorized users can join a channel and participate in real-time communication.
Tokens are generated on your server and passed to the client for use in Broadcast Streaming. The token generation process involves digitally signing the App ID, App Certificate, user ID, and expiration timestamp using a specific algorithm, preventing tampering or forgery.
During development and testing, use the Agora Console to generate temporary tokens. For production environments, implement a token server as part of your security infrastructure to control access to your channels.
### Agora Console
[Agora Console](https://console.agora.io) is the main dashboard where you manage your Agora projects and services. Before you can use Agora's SDKs, you must first create a project in the Agora Console. See [Agora account management](/en/introduction/account) for
details.

Agora Console provides an intuitive interface for developers to query and manage their Agora account. After registering an Agora account, you use the Agora Console to perform the following tasks:
* Manage your account
* Create and configure Agora projects and services
* Get an App ID and the App certificate
* Generate temporary tokens for development and testing
* Manage members and roles
* Check call quality and usage
* Check bills and make payments
* Access product resources
See [Agora account management](/en/introduction/account) for details on how to manage all aspects of your Agora account.
Agora also provides RESTful APIs that you use to implement features such as creating a project and fetching usage numbers programmatically.
## Audio and video concepts
### Audio and video interaction workflow
The following figure illustrates the workflow of using the Video SDK to implement basic audio and video interaction.
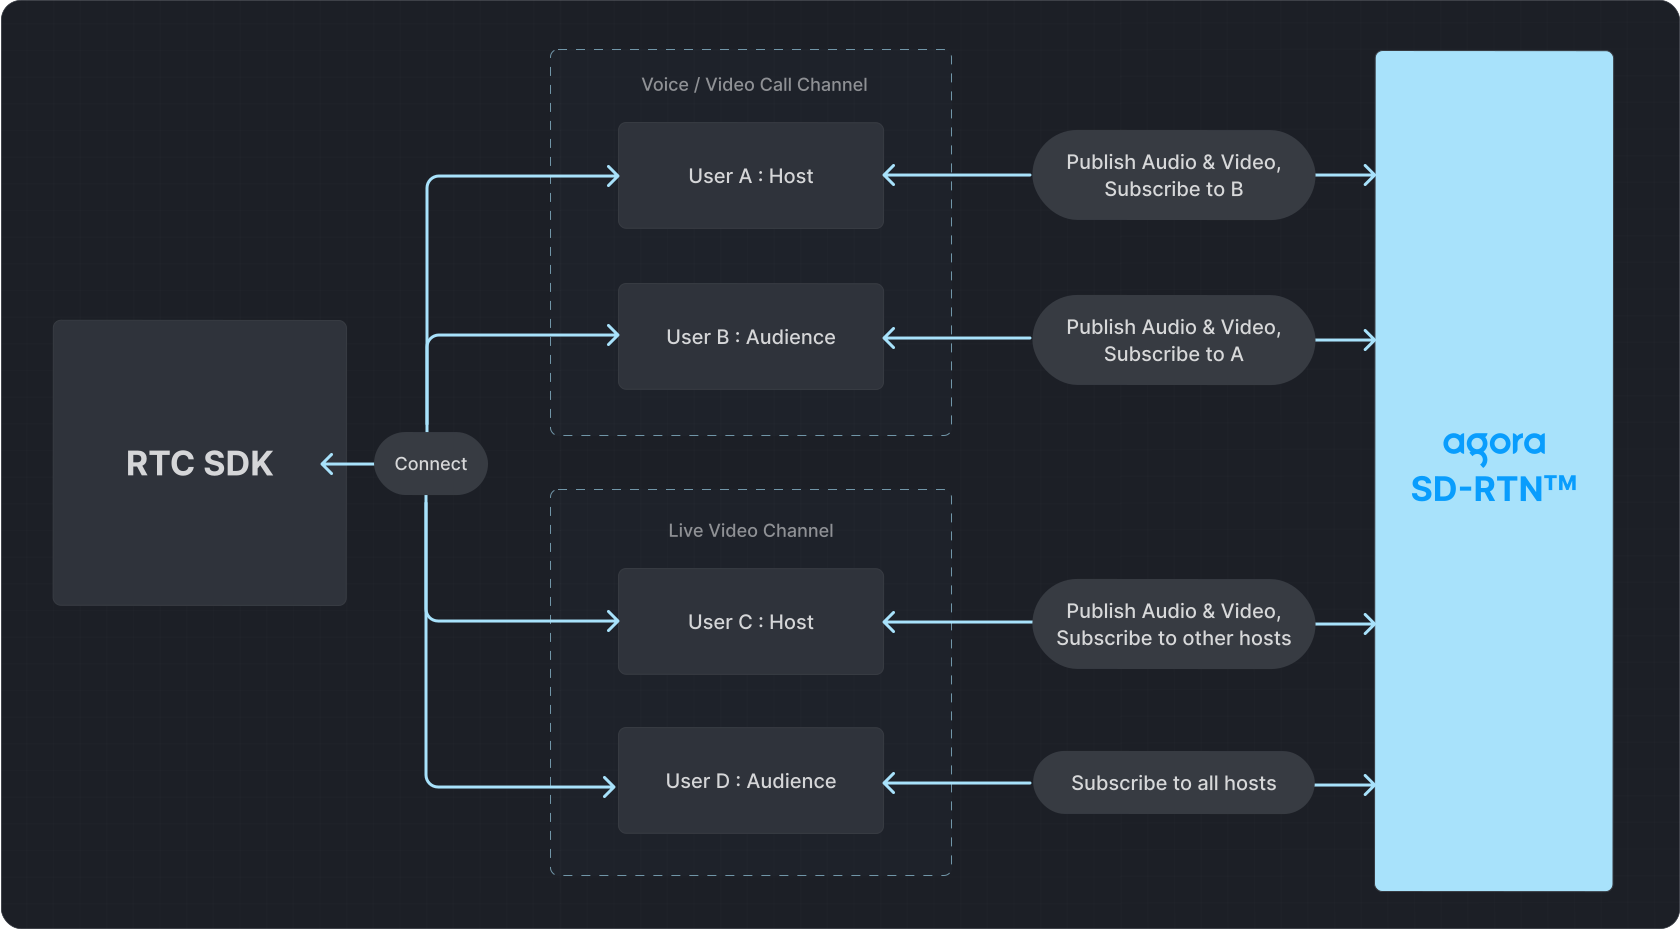
Agora relies on the following fundamental concepts to enable seamless real-time communication:
### Audio module
In audio interaction, the main functions of the audio module are as shown in the figure below:

After you call `registerAudioFrameObserver`, you can obtain the raw audio data at the following observation points in the audio transmission process:
1. Obtain the raw audio data of ear monitoring through the `onEarMonitoringAudioFrame` callback.
2. Obtain the captured raw audio data through the `onRecordAudioFrame` callback.
3. Obtain the raw audio playback data of each individual stream through the `onPlaybackAudioFrameBeforeMixing` callback.
4. Obtain the raw audio playback data of all mixed streams through the `onPlaybackAudioFrame` callback.
5. Obtain the raw audio data after mixing the captured and playback audio through the `onMixedAudioFrame` callback.
(5) `onMixedAudioFrame` = (2) `onRecordAudioFrame` + (4) `onPlaybackAudioFrame`
### Audio routing
The audio output device used by the app when playing audio. Common audio routes include wired headphones, earpieces, speakers, Bluetooth headphones, and others.
The APIs used by the audio module are as follows:
* Enable local audio collection: `enableLocalAudio`
* Set local playback device: `setPlaybackDevice`
* Set up audio routing: `setDefaultAudioRouteToSpeakerphone`
### Video module
The following diagram shows the main functions of the video module in video interaction:
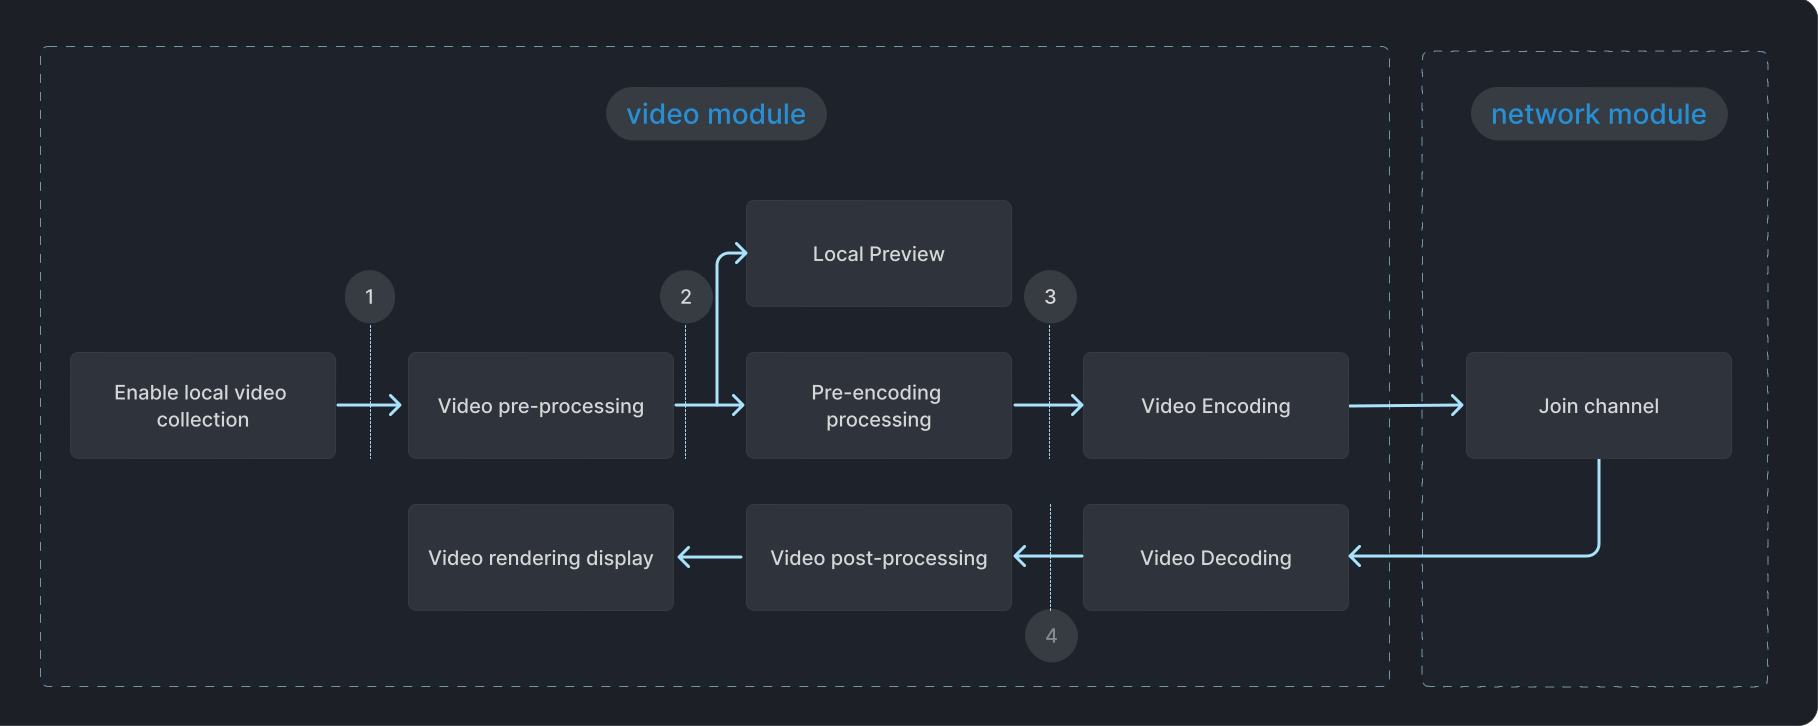
The figure shows the following observation points:
1. `POSITION_POST_CAPTURER_ORIGIN`.
2. `POSITION_POST_CAPTURER`, corresponds to the `onCaptureVideoFrame` callback.
3. `POSITION_PRE_ENCODER`, corresponds to the `onPreEncodeVideoFrame` callback.
4. `POSITION_PRE_RENDERER`, corresponds to the `onRenderVideoFrame` callback.
The APIs used by the video module are as follows:
* Enable local video collection: `enableLocalVideo`
* Local preview: `setupLocalVideo` → `startPreview`
* Video rendering shows: `setupRemoteVideo`
# Broadcast Streaming overview (/en/realtime-media/broadcast-streaming)
Agora's Broadcast Streaming API delivers low-latency, high-definition live video streaming at scale for one-to-many broadcast delivery. With support for cross-platform integration and adaptive streaming technologies, it ensures reliable, high-quality viewing experiences across a wide range of network conditions and devices. Reach global audiences with smooth, uninterrupted broadcasts for large-scale events such as concerts, sports, conferences, live shows, and other live production experiences.
Enhance Agora's Video SDK with broadcast production capabilities such as recording, stream management, content moderation, and audience analytics, or leverage the Extensions Marketplace to enable AI-powered features like noise cancellation, video effects, and more.
## Start building
## Product Features
Agora’s Software-Defined Real-Time Network (SDRTN®) supports video users in over 200 countries and regions.
Consistent high-quality video from few to thousands of concurrent users, even under challenging network conditions.
Publish multiple audio and video tracks to one or more channels from a single instance, with support for multi-channel capture cameras and microphones.
Enable screen sharing or interactive whiteboards that allow users to draw, annotate, and share content from multiple devices simultaneously.
Support for high quality audio with 3D spatial audio, AI noise suppression, and gain control to provide an immersive audio experience.
Record video sessions in the cloud or on premises with control over the format, path of storage, and quality.
# Agora MCP (/en/realtime-media/broadcast-streaming/mcp)
The Agora MCP server gives your AI assistant direct access to Agora's documentation, so it can look up APIs, SDK methods, and platform-specific details in real time.
The Agora MCP server is included when you install Agora Skills. If you prefer to install only the MCP server, it is available at:
```text
https://mcp.agora.io
```
### Installation
Refer to the installation instructions for your coding assistant.
Cursor
Claude
Codex
Gemini CLI
Manual installation
Click the button below to install the MCP server in [Cursor](https://www.cursor.com/)
or add it manually with the following JSON:
```json
{
"mcpServers": {
"agora-docs": {
"url": "https://mcp.agora.io"
}
}
}
```
* **Claude Code**
Run the following command in your terminal to install the MCP server in [Claude Code](https://claude.com/product/claude-code):
```bash
claude mcp add --transport http agora-docs https://mcp.agora.io
```
* **Claude Desktop**
In **Settings**, select **Connectors** and then choose **Add custom connector**. Enter the following values and click **Add**:
* **Name**: `agora-docs`
* **Remote MCP server URL**: `https://mcp.agora.io`
Run the following command in your terminal to install the server in [OpenAI Codex](https://openai.com/codex/):
```bash
codex mcp add --url https://mcp.agora.io agora-docs
```
Run the following command in your terminal to install the server in [Gemini CLI](https://github.com/google-gemini/gemini-cli):
```bash
gemini mcp add --transport http agora-docs https://mcp.agora.io
```
Add the server URL `https://mcp.agora.io` to your MCP client of choice. If prompted, set the transport to `http` or "Streamable HTTP".
### Getting started
Once installed, your coding assistant has access to Agora's documentation through the MCP server. The assistant will intelligently use this resource when relevant to your questions. For more targeted results, mention Agora along with your target product and platform, such as 'iOS', 'Web', 'Conversational AI', 'Video Calling' in your prompts.
### System prompt
This MCP works with all LLMs that support MCP, but performs best when the assistant understands facet-based exploration. Add the following prompt to your LLMs custom instructions:
**System prompt for LLMs**
```markdown
# Agora MCP Markdown - System Prompt
You have access to Agora's documentation search via three tools:
- `algolia_search_index_docs_platform_aware_markdown` - Full-text search with facets
- `algolia_search_for_facet_values` - Browse products/platforms
- `algolia_recommendations` - Find related documentation
## Key Behaviors
**1. Use facets for discovery**
- When users ask about "what's available", explore facets first
- Example: User asks "what video products exist?"
→ Use `algolia_search_for_facet_values(facetName: "product", facetQuery: "video")`
→ Shows video-calling is the main product
**2. Platform-aware searching**
- Include target platform in search queries (iOS, Android, Web, etc.)
- Results are intelligently ranked by platform relevance
**3. Interpret facet results for refinement**
- Search results include facet breakdowns by product and platform
- Use these to suggest filtering: "15 results are for video-calling, 8 for voice-calling"
**4. Maintain session continuity**
- Use same sessionId (UUID) across related searches in a conversation
- Improves ranking for follow-up queries
## Available Products & Platforms
**Key Products:** conversational-ai, video-calling, broadcast-streaming, interactive-live-streaming, agora-chat, voice-calling, signaling, extensions-marketplace, interactive-whiteboard
**Key Platforms:** android, web, ios, windows, macos, unity, flutter, react-native, electron, unreal
## Workflow Example
User: "I'm building an iOS app with Video Calling. Where do I start?"
1. Search: "iOS video calling quickstart"
2. Results show facets indicating video-calling is the best match
3. Suggest: "Most results are for Video Calling, here's the quickstart"
4. Follow-up searches: Keep same sessionId for context
```
#### What This Enables
* Intelligent facet exploration before deep searches
* Platform-aware result refinement suggestions
* Cross-search session continuity for better context
Without the prompt, searches still work but won't leverage faceted browsing patterns.
## AGENTS.md
To get the most out of Agora Skills and the MCP server, Agora recommends that you include an [AGENTS.md](https://agents) or similar file in your repository. This file ensures that your agent always consults Agora docs to produce reliable, working code.
Add the following instructions to your own `AGENTS.md` file:
```markdown
## Agora Documentation
Agora documentation is updated frequently. You should always refer to the latest documentation when working with Agora products. Agora offers an MCP server that you can use to browse and search its documentation. If the developer has not yet installed this server, recommend that they install it at https://mcp.agora.io.
If the Agora Skills files are available in your context, use them for platform-specific API guidance and code examples.
```
# Broadcast Streaming overview (/en/realtime-media/broadcast-streaming/product-overview)
Agora's Broadcast Streaming API delivers low-latency, high-definition live video streaming at scale for one-to-many broadcast delivery. With support for cross-platform integration and adaptive streaming technologies, it ensures reliable, high-quality viewing experiences across a wide range of network conditions and devices. Reach global audiences with smooth, uninterrupted broadcasts for large-scale events such as concerts, sports, conferences, live shows, and other live production experiences.
Enhance Agora's Video SDK with broadcast production capabilities such as recording, stream management, content moderation, and audience analytics, or leverage the Extensions Marketplace to enable AI-powered features like noise cancellation, video effects, and more.
## Start building
## Product Features
* **Global coverage** - Agora’s Software-Defined Real-Time Network (SDRTN®) supports video users in over 200 countries and regions.
* **High-quality video at scale** - Consistent high-quality video from few to thousands of concurrent users, even under challenging network conditions.
* **Multiple audio and video tracks** - Publish multiple audio and video tracks to one or more channels from a single instance, with support for multi-channel capture cameras and microphones.
* **Screen sharing and collaboration** - Enable screen sharing or interactive whiteboards that allow users to draw, annotate, and share content from multiple devices simultaneously.
* **AI-powered audio enhancement** - Support for high quality audio with 3D spatial audio, AI noise suppression, and gain control to provide an immersive audio experience.
* **Recording** - Record video sessions in the cloud or on premises with control over the format, path of storage, and quality.
# Quickstart (/en/realtime-media/broadcast-streaming/quickstart)
This page provides a step-by-step guide on how to create a basic Broadcast Streaming app using the Agora Video SDK.
## Understand the tech
To start a Broadcast Streaming session, implement the following steps in your app:
* **Initialize the Agora Engine**: Before calling other APIs, create and initialize an Agora Engine instance.
* **Join a channel**: Call methods to create and join a channel.
* **Join as a host**: A live streaming event has one or more hosts. A host publishes audio and video to the channel. Hosts can also subscribe to streams from other hosts.
* **Join as audience**: Audience members can only subscribe to streams published by hosts.
* **Send and receive audio and video**: Hosts publish streams to the channel. Audience members subscribe to audio and video streams published by hosts.
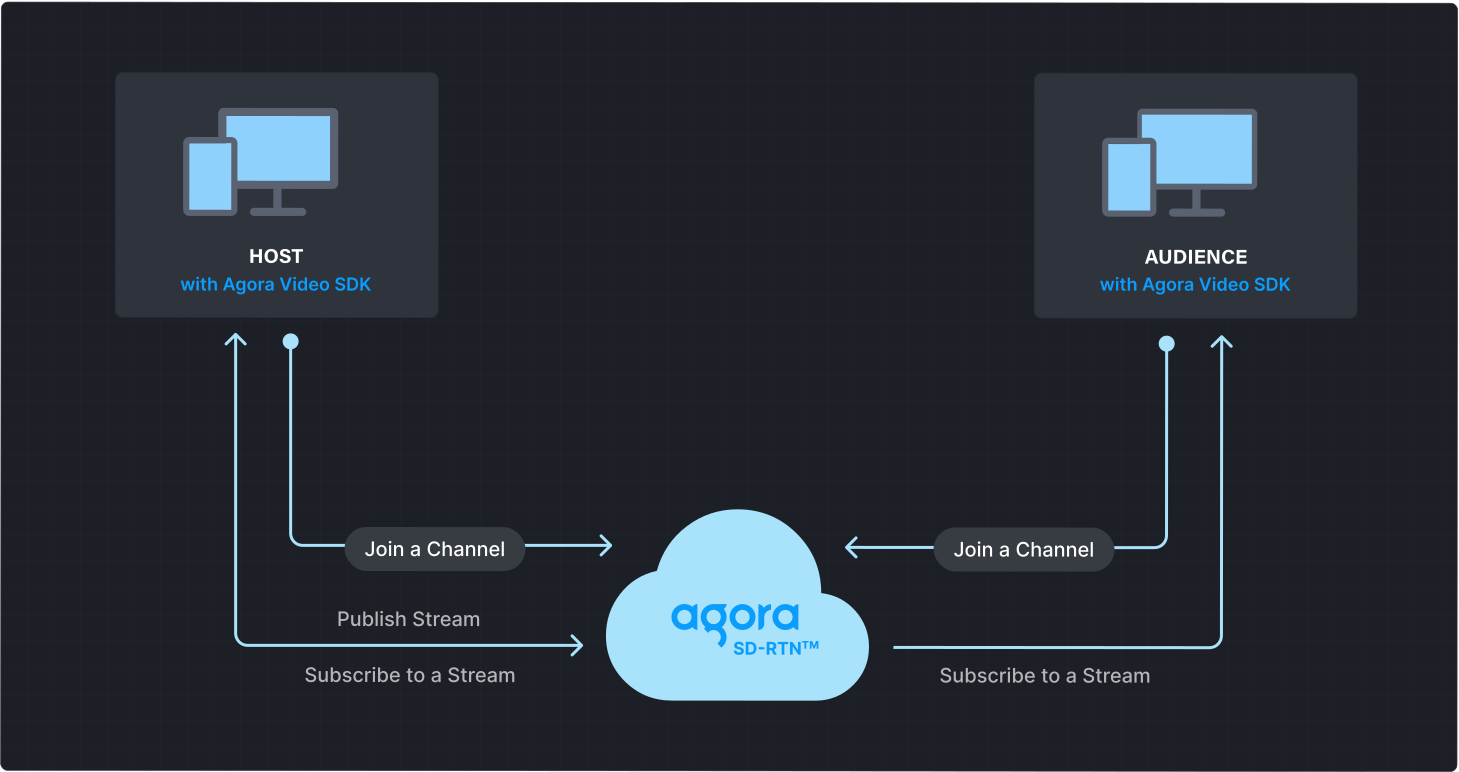
## Prerequisites
* [Android Studio](https://developer.android.com/studio) 4.2 or higher.
* Android SDK API Level 21 or higher.
* Two mobile devices running Android 5.0 or higher.
* A camera and a microphone
* A valid Agora account and project. Please refer to [Agora account management](/en/introduction/account) for details.
## Set up your project
This section shows you how to set up your Android project and install the Agora Video SDK.
**Create a new project**
1. Create a [new project](https://developer.android.com/studio/projects/create-project).
1. Open Android Studio and select **File > New > New Project...**.
2. Select **Phone and Tablet** > **Empty Activity** and click **Next**.
3. Set the project name and storage path.
4. Select **Java** or **Kotlin** as the language, and click **Finish** to create the Android project.
After you create a project, Android Studio automatically starts gradle sync. Ensure that the synchronization is successful before proceeding to the next step.
**Add to an existing project**
1. Add a new activity to your project.
1. Open your project in Android Studio.
2. Right-click on the `app/src/main/java/` folder.
3. Select **New → Activity → Empty Activity**.
4. Enter an activity name and click **Finish**.
This guide uses `MainActivity` as the activity name in the sample code. Replace it with your activity name where required.
2. Add a layout file for your activity.
Set up two container elements in your activity to display local and remote video streams. Refer to [Create a user interface](#create-a-user-interface) to get a bare bones sample layout.
### Install the SDK
Use either of the following methods to add Video SDK to your project.
**Maven Central**
1. Open the `settings.gradle` file in the project's root directory and add the Maven Central dependency, if it doesn't already exist:
```text
repositories {
mavenCentral()
}
```
If your Android project uses dependencyResolutionManagement, the method of adding the Maven Central dependency may differ.
2. To integrate the Video SDK into your Android project, add the following to the `dependencies` block in your project module `build.gradle` file:
* Groovy `build.gradle`
```json
implementation 'io.agora.rtc:full-sdk:x.y.z'
```
* Kotlin `build.gradle.kts`
```kotlin
implementation("io.agora.rtc:full-sdk:x.y.z")
```
Replace `x.y.z` with the specific SDK version number, such as `4.5.0`.
To get the latest version number, check the [Release notes](reference/release-notes). To integrate the Lite SDK, use `io.agora.rtc:lite-sdk` instead.
3. Prevent code obfuscation
Open the `/app/proguard-rules.pro` file and add the following lines to prevent the Video SDK code from being obfuscated:
```java
-keep class io.agora.** { *; }
-dontwarn io.agora.**
```
**Manual integration**
1. Download the latest version of Video SDK from the [SDKs](/en/api-reference/sdks?product=video\&platform=android) page and unzip it.
2. Open the unzipped file and copy the following files or subfolders to your project path.
| File or folder | Project path |
| :----------------------------------- | :----------------------- |
| `agora-rtc-sdk.jar` file | `/app/libs/` |
| `arm64-v8a` folder | `/app/src/main/jniLibs/` |
| `armeabi-v7a` folder | `/app/src/main/jniLibs/` |
| `x86` folder | `/app/src/main/jniLibs/` |
| `x86_64` folder | `/app/src/main/jniLibs/` |
| `high_level_api` in `include` folder | `/app/src/main/jniLibs/` |
3. Select the file `/app/libs/agora-rtc-sdk.jar` in the left navigation bar of Android Studio project files, right-click, and select **add as a library** from the drop-down menu.
4. Prevent code obfuscation
Open the `/app/proguard-rules.pro` file and add the following lines to prevent the Video SDK code from being obfuscated:
```java
-keep class io.agora.** { *; }
-dontwarn io.agora.**
```
## Implement Broadcast Streaming
This section guides you through the implementation of basic real-time audio and video interaction in your app.
The following figure illustrates the essential steps:
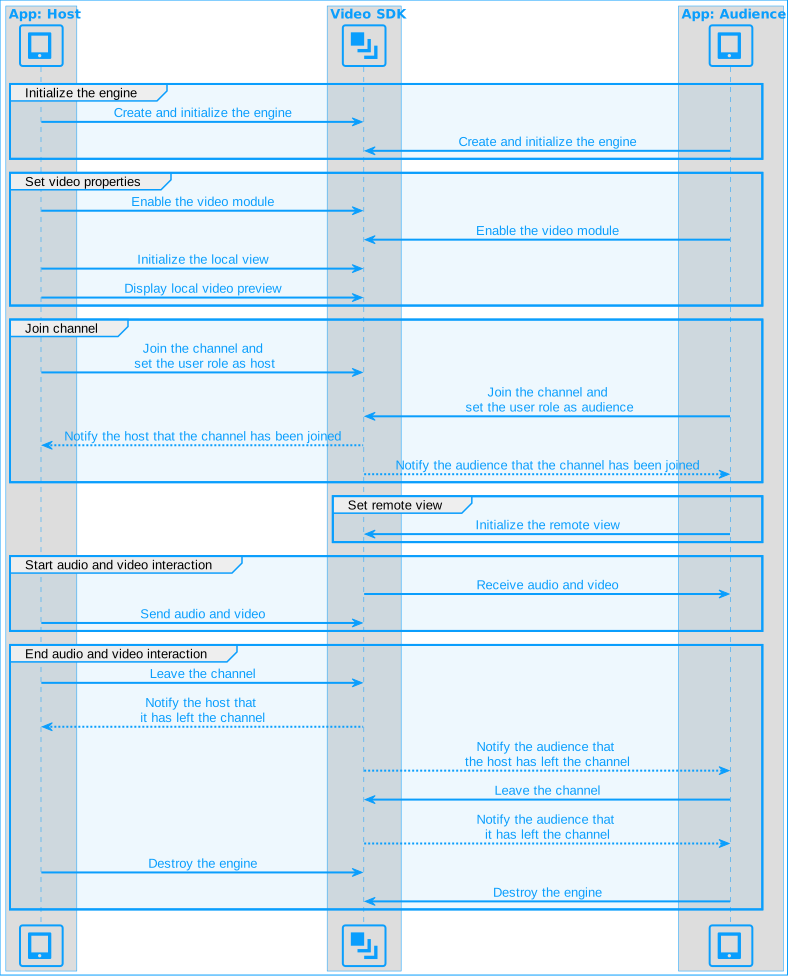
This guide includes [complete sample code](#complete-sample-code) that demonstrates implementing basic real-time interaction. To understand the core API calls in the sample code, review the following implementation steps and use the code in your `MainActivity` file.
### Import Agora classes
Import the relevant Agora classes and interfaces:
Java
Kotlin
```java
import io.agora.rtc2.Constants;
import io.agora.rtc2.IRtcEngineEventHandler;
import io.agora.rtc2.RtcEngine;
import io.agora.rtc2.RtcEngineConfig;
import io.agora.rtc2.video.VideoCanvas;
import io.agora.rtc2.ChannelMediaOptions;
```
```kotlin
import io.agora.rtc2.Constants
import io.agora.rtc2.IRtcEngineEventHandler
import io.agora.rtc2.RtcEngine
import io.agora.rtc2.RtcEngineConfig
import io.agora.rtc2.video.VideoCanvas
import io.agora.rtc2.ChannelMediaOptions
```
### Initialize the engine
For real-time communication, initialize an `RtcEngine` instance and set up event handlers to manage user interactions within the channel. Use `RtcEngineConfig` to specify the application context, [App ID](/en/introduction/account), and custom [event handler](#subscribe-to--events), then call `RtcEngine.create(config)` to initialize the engine, enabling further channel operations. In your `MainActivity` file, add the following code:
Java
Kotlin
```java
// Fill in the app ID from Agora Console
private String myAppId = "";
private RtcEngine mRtcEngine;
private void initializeAgoraVideoSDK() {
try {
RtcEngineConfig config = new RtcEngineConfig();
config.mContext = getBaseContext();
config.mAppId = myAppId;
config.mEventHandler = mRtcEventHandler;
mRtcEngine = RtcEngine.create(config);
} catch (Exception e) {
throw new RuntimeException("Error initializing RTC engine: " + e.getMessage());
}
}
```
```kotlin
// Fill in the App ID obtained from the Agora Console
private val myAppId = ""
private var mRtcEngine: RtcEngine? = null
private fun initializeRtcEngine() {
try {
val config = RtcEngineConfig().apply {
mContext = applicationContext
mAppId = myAppId
mEventHandler = mRtcEventHandler
}
mRtcEngine = RtcEngine.create(config)
} catch (e: Exception) {
throw RuntimeException("Error initializing RTC engine: ${e.message}")
}
}
```
### Join a channel
To join a channel, call `joinChannel` with the following parameters:
* **Channel name**: The name of the channel to join. Clients that pass the same channel name join the same channel. If a channel with the specified name does not exist, it is created when the first user joins.
* **Authentication token**: A dynamic key that authenticates a user when the client joins a channel. In a production environment, you obtain a token from a [token server](build/authenticate-users/deploy-token-server.mdx) in your security infrastructure. For the purpose of this guide [Generate a temporary token](/en/introduction/account).
* **User ID**: A 32-bit signed integer that identifies a user in the channel. You can specify a unique user ID for each user yourself. If you set the user ID to `0` when joining a channel, the SDK generates a random number for the user ID and returns the value in the `onJoinChannelSuccess` callback.
* **Channel media options**: Configure `ChannelMediaOptions` to define publishing and subscription settings, optimize performance for your specific use-case, and set optional parameters.
For Broadcast Streaming, set the `channelProfile` to `CHANNEL_PROFILE_LIVE_BROADCASTING`, the `clientRoleType` to `CLIENT_ROLE_BROADCASTER` (host) or `CLIENT_ROLE_AUDIENCE`, and the `audienceLatencyLevel` to `AUDIENCE_LATENCY_LEVEL_LOW_LATENCY`.
Java
Kotlin
```java
// Fill in the channel name
private String channelName = "";
// Fill in the temporary token generated from Agora Console
private String token = "";
private void joinChannel() {
// Create an instance of ChannelMediaOptions and configure it
ChannelMediaOptions options = new ChannelMediaOptions();
// Set the user role to BROADCASTER or AUDIENCE according to the use-case
options.clientRoleType = Constants.CLIENT_ROLE_BROADCASTER;
// In the broadcast streaming use-case, set the channelProfile to BROADCASTING
options.channelProfile = Constants.CHANNEL_PROFILE_LIVE_BROADCASTING;
// Set the latency level for audience
options.audienceLatencyLevel = Constants.AUDIENCE_LATENCY_LEVEL_LOW_LATENCY;
// Publish local media
options.publishCameraTrack = true;
options.publishMicrophoneTrack = true;
mRtcEngine.joinChannel(token, channelName, 0, options);
}
```
```kotlin
// Fill in the channel name
private val channelName = ""
// Fill in the temporary token generated from Agora Console
private val token = ""
private fun joinChannel() {
// Create an instance of ChannelMediaOptions and configure it
val options = ChannelMediaOptions().apply {
// Set the user role to BROADCASTER or AUDIENCE according to the use-case
clientRoleType = Constants.CLIENT_ROLE_BROADCASTER
// In the broadcast streaming use-case, set the channelProfile to BROADCASTING
channelProfile = Constants.CHANNEL_PROFILE_LIVE_BROADCASTING
// Set the latency level for audience
audienceLatencyLevel = Constants.AUDIENCE_LATENCY_LEVEL_LOW_LATENCY
// Publish local media
publishMicrophoneTrack = true
publishCameraTrack = true
}
mRtcEngine?.joinChannel(token, channelName, 0, options)
}
```
### Subscribe to Video SDK events
The Video SDK provides an interface for subscribing to channel events. To use it, create an instance of `IRtcEngineEventHandler` and implement the event methods you want to handle.
To ensure that you receive all Video SDK events, set the Agora Engine event handler before joining a channel.
Java
Kotlin
```java
private final IRtcEngineEventHandler mRtcEventHandler = new IRtcEngineEventHandler() {
// Triggered when the local user successfully joins the specified channel.
@Override
public void onJoinChannelSuccess(String channel, int uid, int elapsed) {
super.onJoinChannelSuccess(channel, uid, elapsed);
showToast("Joined channel " + channel);
}
// Triggered when a remote user/host joins the channel.
@Override
public void onUserJoined(int uid, int elapsed) {
super.onUserJoined(uid, elapsed);
runOnUiThread(() -> {
// Initialize and display remote video view for the new user.
setupRemoteVideo(uid);
showToast("User joined: " + uid);
});
}
// Triggered when a remote user/host leaves the channel.
@Override
public void onUserOffline(int uid, int reason) {
super.onUserOffline(uid, reason);
runOnUiThread(() -> {
showToast("User offline: " + uid);
});
}
};
```
```kotlin
private val mRtcEventHandler = object : IRtcEngineEventHandler() {
override fun onJoinChannelSuccess(channel: String?, uid: Int, elapsed: Int) {
super.onJoinChannelSuccess(channel, uid, elapsed)
runOnUiThread {
showToast("Joined channel $channel")
}
}
override fun onUserJoined(uid: Int, elapsed: Int) {
runOnUiThread {
showToast("User joined: $uid")
}
}
override fun onUserOffline(uid: Int, reason: Int) {
super.onUserOffline(uid, reason)
runOnUiThread {
showToast("User offline: $uid")
}
}
}
```
### Enable the video module
Follow these steps to enable the video module:
1. Call `enableVideo` to enable the video module.
2. Call `startPreview` to enable local video preview.
Java
Kotlin
```java
private void enableVideo() {
mRtcEngine.enableVideo();
mRtcEngine.startPreview();
}
```
```kotlin
private fun enableVideo() {
mRtcEngine?.apply {
enableVideo()
startPreview()
}
}
```
### Display the local video
Call `setupLocalVideo` to initialize the local view and set the local video display properties.
Java
Kotlin
```java
private void setupLocalVideo() {
FrameLayout container = findViewById(R.id.local_video_view_container);
SurfaceView surfaceView = new SurfaceView(getBaseContext());
container.addView(surfaceView);
mRtcEngine.setupLocalVideo(new VideoCanvas(surfaceView, VideoCanvas.RENDER_MODE_FIT, 0));
}
```
```kotlin
/**
* Initializes the local video view and sets the display properties.
* This method adds a SurfaceView to the local video container and configures it.
*/
private fun setupLocalVideo() {
val container: FrameLayout = findViewById(R.id.local_video_view_container)
val surfaceView = SurfaceView(baseContext)
container.addView(surfaceView)
mRtcEngine.setupLocalVideo(VideoCanvas(surfaceView, VideoCanvas.RENDER_MODE_FIT, 0))
}
```
### Display remote video
When a remote user joins the channel, call `setupRemoteVideo` and pass in the remote user's `uid`, obtained from the `onUserJoined` callback, to display the remote video.
Java
Kotlin
```java
private void setupRemoteVideo(int uid) {
FrameLayout container = findViewById(R.id.remote_video_view_container);
SurfaceView surfaceView = new SurfaceView(getBaseContext());
surfaceView.setZOrderMediaOverlay(true);
container.addView(surfaceView);
mRtcEngine.setupRemoteVideo(new VideoCanvas(surfaceView, VideoCanvas.RENDER_MODE_FIT, uid));
}
```
```kotlin
private fun setupRemoteVideo(uid: Int) {
val container = findViewById(R.id.remote_video_view_container)
val surfaceView = SurfaceView(baseContext).apply {
setZOrderMediaOverlay(true)
}
container.addView(surfaceView)
mRtcEngine.setupRemoteVideo(VideoCanvas(surfaceView, VideoCanvas.RENDER_MODE_FIT, uid))
}
```
### Handle permissions
To access the camera and microphone on Android devices, declare the necessary permissions in the app's manifest and ensure that the user grants these permissions when the app starts.
1. Open your project's `AndroidManifest.xml` file and add the following permissions before ``:
```xml
```
2. Use the following code to handle runtime permissions in your Android app. The logic ensures that the necessary permissions are granted before starting Broadcast Streaming. In your `MainActivity` file, add the following code:
Java
Kotlin
```java
private boolean checkPermissions() {
for (String permission : getRequiredPermissions()) {
if (ContextCompat.checkSelfPermission(this, permission) != PackageManager.PERMISSION_GRANTED) {
return false;
}
}
return true;
}
private String[] getRequiredPermissions() {
if (android.os.Build.VERSION.SDK_INT >= android.os.Build.VERSION_CODES.S) {
return new String[]{
Manifest.permission.RECORD_AUDIO,
Manifest.permission.CAMERA,
Manifest.permission.READ_PHONE_STATE,
Manifest.permission.BLUETOOTH_CONNECT
};
} else {
return new String[]{
Manifest.permission.RECORD_AUDIO,
Manifest.permission.CAMERA
};
}
}
@Override
public void onRequestPermissionsResult(int requestCode, @NonNull String[] permissions, @NonNull int[] grantResults) {
if (requestCode == PERMISSION_REQ_ID && checkPermissions()) {
startBroadcastStreaming();
}
}
```
```kotlin
private val PERMISSION_REQ_ID = 22
private fun requestPermissions() {
ActivityCompat.requestPermissions(this, getRequiredPermissions(), PERMISSION_REQ_ID)
}
private fun checkPermissions(): Boolean {
for (permission in getRequiredPermissions()) {
if (ContextCompat.checkSelfPermission(this, permission) != PackageManager.PERMISSION_GRANTED) {
return false
}
}
return true
}
private fun getRequiredPermissions(): Array {
return if (Build.VERSION.SDK_INT >= Build.VERSION_CODES.S) {
arrayOf(
Manifest.permission.RECORD_AUDIO,
Manifest.permission.CAMERA,
Manifest.permission.READ_PHONE_STATE,
Manifest.permission.BLUETOOTH_CONNECT
)
} else {
arrayOf(
Manifest.permission.RECORD_AUDIO,
Manifest.permission.CAMERA
)
}
}
override fun onRequestPermissionsResult(
requestCode: Int,
permissions: Array,
grantResults: IntArray
) {
super.onRequestPermissionsResult(requestCode, permissions, grantResults)
if (requestCode == PERMISSION_REQ_ID && checkPermissions()) {
startBroadcastStreaming()
}
}
```
### Start and close the app
When a user launches your app, start real-time interaction. When a user closes the app, stop the interaction.
1. In the `onCreate` callback, check whether the app has been granted the required permissions. If the permissions have not been granted, request the required permissions from the user. If permissions are granted, initialize `RtcEngine` and join a channel.
Java
Kotlin
```java
@Override
protected void onCreate(Bundle savedInstanceState) {
super.onCreate(savedInstanceState);
setContentView(R.layout.activity_main);
if (checkPermissions()) {
startBroadcastStreaming();
} else {
requestPermissions();
}
}
```
```kotlin
override fun onCreate(savedInstanceState: Bundle?) {
super.onCreate(savedInstanceState)
setContentView(R.layout.activity_main)
if (checkPermissions()) {
startBroadcastStreaming()
} else {
requestPermissions()
}
}
```
2. When a user closes the app, or switches the app to the background, call `stopPreview` to stop the video preview and then call `leaveChannel` to leave the current channel and release all session-related resources.
Java
Kotlin
```java
private void cleanupAgoraEngine() {
if (mRtcEngine != null) {
mRtcEngine.stopPreview();
mRtcEngine.leaveChannel();
mRtcEngine = null;
}
}
```
```kotlin
private fun cleanupAgoraEngine() {
mRtcEngine?.apply {
stopPreview()
leaveChannel()
}
mRtcEngine = null
}
```
### Complete sample code
A complete code sample demonstrating the basic process of real-time interaction is provided for your reference. To use the sample code, copy the following lines into the `MainActivity` file in your project. Then, replace `` in package `com.example.` with your project's name.
Java
Kotlin
```java
package com.example.
import android.Manifest;
import android.content.pm.PackageManager;
import android.os.Bundle;
import android.view.SurfaceView;
import android.widget.FrameLayout;
import android.widget.Toast;
import androidx.annotation.NonNull;
import androidx.appcompat.app.AppCompatActivity;
import androidx.core.app.ActivityCompat;
import androidx.core.content.ContextCompat;
import io.agora.rtc2.ChannelMediaOptions;
import io.agora.rtc2.Constants;
import io.agora.rtc2.IRtcEngineEventHandler;
import io.agora.rtc2.RtcEngine;
import io.agora.rtc2.RtcEngineConfig;
import io.agora.rtc2.video.VideoCanvas;
public class MainActivity extends AppCompatActivity {
private static final int PERMISSION_REQ_ID = 22;
// Fill in the app ID from Agora Console
private String myAppId = "";
// Fill in the channel name
private String channelName = "";
// Fill in the temporary token generated from Agora Console
private String token = "";
private RtcEngine mRtcEngine;
private final IRtcEngineEventHandler mRtcEventHandler = new IRtcEngineEventHandler() {
// Callback when successfully joining the channel
@Override
public void onJoinChannelSuccess(String channel, int uid, int elapsed) {
super.onJoinChannelSuccess(channel, uid, elapsed);
showToast("Joined channel " + channel);
}
// Callback when a remote user or host joins the current channel
@Override
public void onUserJoined(int uid, int elapsed) {
super.onUserJoined(uid, elapsed);
runOnUiThread(() -> {
// When a remote user joins the channel, display the remote video stream for the specified uid
setupRemoteVideo(uid);
showToast("User joined: " + uid); // Show toast for user joining
});
}
// Callback when a remote user or host leaves the current channel
@Override
public void onUserOffline(int uid, int reason) {
super.onUserOffline(uid, reason);
runOnUiThread(() -> {
showToast("User offline: " + uid); // Show toast for user going offline
});
}
};
@Override
protected void onCreate(Bundle savedInstanceState) {
super.onCreate(savedInstanceState);
setContentView(R.layout.activity_main);
if (checkPermissions()) {
startBroadcastStreaming();
} else {
requestPermissions();
}
}
private void requestPermissions() {
ActivityCompat.requestPermissions(this, getRequiredPermissions(), PERMISSION_REQ_ID);
}
private boolean checkPermissions() {
for (String permission : getRequiredPermissions()) {
if (ContextCompat.checkSelfPermission(this, permission) != PackageManager.PERMISSION_GRANTED) {
return false;
}
}
return true;
}
private String[] getRequiredPermissions() {
if (android.os.Build.VERSION.SDK_INT >= android.os.Build.VERSION_CODES.S) {
return new String[]{
Manifest.permission.RECORD_AUDIO,
Manifest.permission.CAMERA,
Manifest.permission.READ_PHONE_STATE,
Manifest.permission.BLUETOOTH_CONNECT
};
} else {
return new String[]{
Manifest.permission.RECORD_AUDIO,
Manifest.permission.CAMERA
};
}
}
@Override
public void onRequestPermissionsResult(int requestCode, @NonNull String[] permissions, @NonNull int[] grantResults) {
super.onRequestPermissionsResult(requestCode, permissions, grantResults);
if (requestCode == PERMISSION_REQ_ID && checkPermissions()) {
startBroadcastStreaming();
}
}
private void startBroadcastStreaming() {
initializeAgoraVideoSDK();
enableVideo();
setupLocalVideo();
joinChannel();
}
private void initializeAgoraVideoSDK() {
try {
RtcEngineConfig config = new RtcEngineConfig();
config.mContext = getBaseContext();
config.mAppId = myAppId;
config.mEventHandler = mRtcEventHandler;
mRtcEngine = RtcEngine.create(config);
} catch (Exception e) {
throw new RuntimeException("Error initializing RTC engine: " + e.getMessage());
}
}
private void enableVideo() {
mRtcEngine.enableVideo();
mRtcEngine.startPreview();
}
private void setupLocalVideo() {
FrameLayout container = findViewById(R.id.local_video_view_container);
SurfaceView surfaceView = new SurfaceView(getBaseContext());
container.addView(surfaceView);
mRtcEngine.setupLocalVideo(new VideoCanvas(surfaceView, VideoCanvas.RENDER_MODE_FIT, 0));
}
private void joinChannel() {
// Create an instance of ChannelMediaOptions and configure it
ChannelMediaOptions options = new ChannelMediaOptions();
// Set the user role to BROADCASTER or AUDIENCE according to the use-case
options.clientRoleType = Constants.CLIENT_ROLE_BROADCASTER;
// In the live broadcast use-case, set the channel profile to BROADCASTING (live broadcast use-case)
options.channelProfile = Constants.CHANNEL_PROFILE_LIVE_BROADCASTING;
// Set the audience latency level
options.audienceLatencyLevel = Constants.AUDIENCE_LATENCY_LEVEL_LOW_LATENCY;
// Publish local media
options.publishCameraTrack = true;
options.publishMicrophoneTrack = true;
mRtcEngine.joinChannel(token, channelName, 0, options);
}
private void setupRemoteVideo(int uid) {
FrameLayout container = findViewById(R.id.remote_video_view_container);
SurfaceView surfaceView = new SurfaceView(getBaseContext());
surfaceView.setZOrderMediaOverlay(true);
container.addView(surfaceView);
mRtcEngine.setupRemoteVideo(new VideoCanvas(surfaceView, VideoCanvas.RENDER_MODE_FIT, uid));
}
@Override
protected void onDestroy() {
super.onDestroy();
cleanupAgoraEngine();
}
private void cleanupAgoraEngine() {
if (mRtcEngine != null) {
mRtcEngine.stopPreview();
mRtcEngine.leaveChannel();
mRtcEngine = null;
}
}
private void showToast(String message) {
runOnUiThread(() -> Toast.makeText(MainActivity.this, message, Toast.LENGTH_SHORT).show());
}
}
```
```kotlin
package com.example.
import android.Manifest
import android.content.pm.PackageManager
import android.os.Build
import android.os.Bundle
import android.view.SurfaceView
import android.widget.FrameLayout
import android.widget.Toast
import androidx.appcompat.app.AppCompatActivity
import androidx.core.app.ActivityCompat
import androidx.core.content.ContextCompat
import io.agora.rtc2.ChannelMediaOptions
import io.agora.rtc2.Constants
import io.agora.rtc2.IRtcEngineEventHandler
import io.agora.rtc2.RtcEngine
import io.agora.rtc2.RtcEngineConfig
import io.agora.rtc2.video.VideoCanvas
class MainActivity : AppCompatActivity() {
private val PERMISSION_REQ_ID = 22
private val myAppId = ""
private val channelName = ""
private val token = ""
private var mRtcEngine: RtcEngine? = null
private val mRtcEventHandler = object : IRtcEngineEventHandler() {
override fun onJoinChannelSuccess(channel: String?, uid: Int, elapsed: Int) {
super.onJoinChannelSuccess(channel, uid, elapsed)
runOnUiThread {
showToast("Joined channel $channel")
}
}
override fun onUserJoined(uid: Int, elapsed: Int) {
runOnUiThread {
setupRemoteVideo(uid)
}
}
override fun onUserOffline(uid: Int, reason: Int) {
super.onUserOffline(uid, reason)
runOnUiThread {
showToast("User offline: $uid")
}
}
}
override fun onCreate(savedInstanceState: Bundle?) {
super.onCreate(savedInstanceState)
setContentView(R.layout.activity_main)
if (checkPermissions()) {
startBroadcastStreaming()
} else {
requestPermissions()
}
}
private fun requestPermissions() {
ActivityCompat.requestPermissions(this, getRequiredPermissions(), PERMISSION_REQ_ID)
}
private fun checkPermissions(): Boolean {
for (permission in getRequiredPermissions()) {
if (ContextCompat.checkSelfPermission(this, permission) != PackageManager.PERMISSION_GRANTED) {
return false
}
}
return true
}
private fun getRequiredPermissions(): Array {
return if (Build.VERSION.SDK_INT >= Build.VERSION_CODES.S) {
arrayOf(
Manifest.permission.RECORD_AUDIO,
Manifest.permission.CAMERA,
Manifest.permission.READ_PHONE_STATE,
Manifest.permission.BLUETOOTH_CONNECT
)
} else {
arrayOf(
Manifest.permission.RECORD_AUDIO,
Manifest.permission.CAMERA
)
}
}
override fun onRequestPermissionsResult(
requestCode: Int,
permissions: Array,
grantResults: IntArray
) {
super.onRequestPermissionsResult(requestCode, permissions, grantResults)
if (requestCode == PERMISSION_REQ_ID && checkPermissions()) {
startBroadcastStreaming()
}
}
private fun startBroadcastStreaming() {
initializeAgoraVideoSDK()
enableVideo()
setupLocalVideo()
joinChannel()
}
private fun initializeAgoraVideoSDK() {
try {
val config = RtcEngineConfig().apply {
mContext = applicationContext
mAppId = myAppId
mEventHandler = mRtcEventHandler
}
mRtcEngine = RtcEngine.create(config)
} catch (e: Exception) {
throw RuntimeException("Error initializing RTC engine: ${e.message}")
}
}
private fun enableVideo() {
mRtcEngine?.apply {
enableVideo()
startPreview()
}
}
private fun setupLocalVideo() {
val container = findViewById(R.id.local_video_view_container)
val surfaceView = SurfaceView(this)
container.addView(surfaceView)
mRtcEngine?.setupLocalVideo(VideoCanvas(surfaceView, VideoCanvas.RENDER_MODE_FIT, 0))
}
private fun joinChannel() {
val options = ChannelMediaOptions().apply {
clientRoleType = Constants.CLIENT_ROLE_BROADCASTER
channelProfile = Constants.CHANNEL_PROFILE_LIVE_BROADCASTING
audienceLatencyLevel = Constants.AUDIENCE_LATENCY_LEVEL_LOW_LATENCY
publishMicrophoneTrack = true
publishCameraTrack = true
}
mRtcEngine?.joinChannel(token, channelName, 0, options)
}
private fun setupRemoteVideo(uid: Int) {
val container = findViewById(R.id.remote_video_view_container)
val surfaceView = SurfaceView(this).apply {
setZOrderMediaOverlay(true)
}
container.addView(surfaceView)
mRtcEngine?.setupRemoteVideo(VideoCanvas(surfaceView, VideoCanvas.RENDER_MODE_FIT, uid))
}
override fun onDestroy() {
super.onDestroy()
cleanupAgoraEngine()
}
private fun cleanupAgoraEngine() {
mRtcEngine?.apply {
stopPreview()
leaveChannel()
}
mRtcEngine = null
}
private fun showToast(message: String) {
runOnUiThread {
Toast.makeText(this, message, Toast.LENGTH_SHORT).show()
}
}
}
```
For the `myAppId` and `token` variables, replace the placeholders with the values you obtained from Agora Console. Ensure you enter the same `channelName` you used when generating the temporary token.
### Create a user interface
To connect the sample code to your existing UI, ensure that your XML layout includes the container UI element IDs used to [Display the local video](#display-the-local-video) and [Display remote video](#display-remote-video).
Alternatively, use the following sample code to generate a basic user interface. Replace the existing content in `/app/src/main/res/layout/activity_main.xml` with this code.
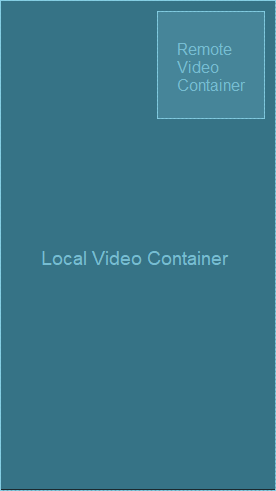
**Sample code to create the user interface**
```xml
```
## Test the sample code
Take the following steps to test the sample code:
1. In `MainActivity` update the values for `myAppId`, and `token` with values from Agora Console. Fill in the same `channelName` you used to generate the token.
2. Enable developer options on your Android test device. Turn on USB debugging, connect the Android device to your development machine through a USB cable, and check that your device appears in the Android device options.
3. In Android Studio, click  **Sync Project with Gradle Files** to resolve project dependencies and update the configuration.
4. After synchronization is successful, click  **Run app**. Android Studio starts compilation. After a few moments, the app is installed on your Android device.
5. Launch the App, grant recording and camera permissions. If you set the user role to host, you will see yourself in the local view.
6. On a second Android device, repeat the previous steps to install and launch the app. Alternatively, use the [Web demo](https://webdemo-global.agora.io/example/quickStart/videoAndVoiceCalling/index.html) to join the same channel and test the following use-cases:
* If users on both devices join the channel as hosts, they can see and hear each other.
* If one user joins as host and the other as audience, the host can see themselves in the local video window; the audience can see the host in the remote video window and hear the host.
## Reference
This section contains content that completes the information on this page, or points you to documentation that explains other aspects to this product.
* If a firewall is deployed in your network environment, refer to [Connect with Cloud Proxy](build/optimize-quality-and-connection/cloud-proxy.mdx) to use Agora services normally.
### Next steps
After implementing the quickstart sample, read the following documents to learn more:
* To ensure communication security in a test or production environment, best practice is to obtain and use a token from an authentication server. For details, see [Secure authentication with tokens](build/authenticate-users/use-tokens.mdx).
### Sample project
Agora provides open source sample projects on [GitHub](https://github.com/AgoraIO/API-Examples) for your reference. Download or view the [JoinChannelVideo](https://github.com/AgoraIO-Community/Agora-RTC-QuickStart/tree/main/Android/Agora-RTC-QuickStart-Android) project for a more detailed example.
### API reference
* [`RtcEngineConfig`](https://api-ref.agora.io/en/video-sdk/android/4.x/API/class_rtcengineconfig.html)
* [`create`](https://api-ref.agora.io/en/video-sdk/android/4.x/API/class_irtcengine.html#api_irtcengine_create)
* [`ChannelMediaOptions`](https://api-ref.agora.io/en/video-sdk/android/4.x/API/class_channelmediaoptions.html)
* [`joinChannel`](https://api-ref.agora.io/en/video-sdk/android/4.x/API/class_irtcengine.html#api_irtcengine_joinchannel2)
* [`enableVideo`](https://api-ref.agora.io/en/video-sdk/android/4.x/API/class_irtcengine.html#api_irtcengine_enablevideo)
* [`startPreview`](https://api-ref.agora.io/en/video-sdk/android/4.x/API/class_irtcengine.html#api_irtcengine_startpreview)
* [`leaveChannel`](https://api-ref.agora.io/en/video-sdk/android/4.x/API/class_irtcengine.html#api_irtcengine_leavechannel)
* [`IRtcEngineEventHandler`](https://api-ref.agora.io/en/video-sdk/android/4.x/API/class_irtcengineeventhandler.html#class_irtcengineeventhandler)
### Frequently asked questions
* [How can I fix black screen issues?](/en/api-reference/faq/quality/video_blank)
* [Why can't I turn on the camera?](/en/api-reference/faq/quality/video_camera)
* [How can I listen for audience joining or leaving a channel?](/en/api-reference/faq/integration/audience_event)
* [How can I solve channel-related issues?](/en/api-reference/faq/integration/channel)
* [How can I set the log file?](/en/api-reference/faq/integration/set_log_file)
* [Why do apps on some Android versions fail to capture audio and video after screen locking or switching to the background?](/en/api-reference/faq/quality/android_background)
### See also
* [Error codes](reference/error-codes.md)
* [Connection status management](build/optimize-quality-and-connection/connection-status-management.mdx)
## Platform-specific versions
- [Android](/en/realtime-media/broadcast-streaming/quickstart/android.md)
- [iOS](/en/realtime-media/broadcast-streaming/quickstart/ios.md)
- [macOS](/en/realtime-media/broadcast-streaming/quickstart/macos.md)
- [Web](/en/realtime-media/broadcast-streaming/quickstart/web.md)
- [Windows](/en/realtime-media/broadcast-streaming/quickstart/windows.md)
- [Electron](/en/realtime-media/broadcast-streaming/quickstart/electron.md)
- [Flutter](/en/realtime-media/broadcast-streaming/quickstart/flutter.md)
- [React Native](/en/realtime-media/broadcast-streaming/quickstart/react-native.md)
- [JavaScript](/en/realtime-media/broadcast-streaming/quickstart/javascript.md)
- [Unity](/en/realtime-media/broadcast-streaming/quickstart/unity.md)
- [Unreal Engine](/en/realtime-media/broadcast-streaming/quickstart/unreal.md)
- [Unreal Blueprint](/en/realtime-media/broadcast-streaming/quickstart/blueprint.md)
- [Python](/en/realtime-media/broadcast-streaming/quickstart/python.md)
# Agora skills (/en/realtime-media/broadcast-streaming/skills)
Agora skills is a set of structured reference files that give AI coding assistants deep knowledge of Agora's platform. When you ask your assistant to build something with Agora, it loads the relevant skill files covering products, APIs, and platform-specific code examples, so it can generate working code without guessing.
Skills includes integration with the [Agora MCP server](#agora-mcp-server), which gives your assistant access to live Agora documentation. For installation instructions and supported tools, see the [Agora Skills repository](https://github.com/AgoraIO/skills).
### Installation
Install Agora Skills using one of the following methods:
#### Skills CLI (recommended)
Run the following command:
```bash
npx skills add github:AgoraIO/skills
```
Skills activate automatically when your agent detects relevant tasks, for example, "build a voice agent", "integrate Agora RTC", or "generate a token".
#### Manual installation
Clone the repository once and point your AI coding assistant to the skill files directly.
1. Clone the [Agora Skills repo](https://github.com/AgoraIO/skills.git):
```bash
git clone https://github.com/AgoraIO/skills.git ~/agora-skills
```
2. Point your AI assistant to `skills/agora/`.
Follow the instructions for your AI coding assistant:
Claude Code
Cursor
Windsurf
GitHub Copilot
Other tools
Run the following commands inside Claude Code:
* **User-level** (available across all your projects)
```bash
/plugin marketplace add AgoraIO/skills
/plugin install agora
```
* **Project-level** (shared with your team via version control)
```bash
/plugin marketplace add AgoraIO/skills
/plugin install agora --scope project
```
Copy or symlink `skills/agora/` into `.cursor/rules/`. For more information, see [Cursor skill directories](https://cursor.com/docs/skills#skill-directories).
Add `skills/agora/` to your Cascade context. For more information, see [Windsurf skills](https://docs.windsurf.com/windsurf/cascade/skills).
Reference via `@workspace` or add to `.github/copilot-instructions.md`. For more information, see [Create skills for Copilot in the CLI](https://docs.github.com/en/copilot/how-tos/copilot-cli/customize-copilot/create-skills) or [Create skills for the Copilot coding agent](https://docs.github.com/en/copilot/how-tos/use-copilot-agents/coding-agent/create-skills).
The skill files are plain markdown. Point your tool to `skills/agora/` or load individual files directly. Use `SKILL.md` as the entry point.
# Subscription packages (/en/realtime-media/broadcast-streaming/subscription-packages)
A subscription package is a prepaid billing method. You can purchase a package in the [`Agora Console`](https://console.agora.io/subscriptions/rtc-plans?tab=monthly) to cover usage for the current month.
This page explains how to purchase, and manage subscription and top-up packages.
### Purchase and upgrade
By default, a new account is assigned the Free package when the first project is created. You can upgrade at any time to the Starter, Pro, Business, Business Advanced, or Business Plus. Higher-tier packages provide greater discounts and lower unit prices. To select your package:
1. Log in to [Agora Console](https://console.agora.io/).
2. Click the username at the bottom of the navigation sidebar to open the account popup menu.
3. Select **Subscriptions**.
4. Switch to the **RTC** tab.
5. Select your package and click **Upgrade** or **Downgrade**.

* For non-contracted customers, all packages, except the Enterprise package can be purchased directly from the Agora Console. To upgrade to the Enterprise package, contact [Agora sales](mailto\:sales@agora.io).
* You can upgrade sequentially or skip levels. For example, you may upgrade from Starter to Business Plus directly.
* Package upgrades take effect immediately and apply to the entire calendar month. If you make multiple upgrades on the same day, only the last upgrade is applied.
* If your account has a negative balance, purchasing a prepaid package first charges your credit card for the outstanding balance, then for the package fee.
#### Upgrade rules
When you upgrade to a paid package, it becomes effective for the entire calendar month, regardless of the purchase date. You receive the full monthly allocation of included minutes. The cost of the previous package is deducted from the new package price, so you only pay the difference. If you request an upgrade after auto-renewal has triggered, you may upgrade for the next month as well.
### Renewal
By default, your subscription package renews automatically 48 hours before it expires. Ensure your account has sufficient balance or enable auto-pay to avoid renewal failure. You can unsubscribe at any time to prevent renewal. See [Cancel subscription](#cancel-subscription).
If renewal fails:
* The system sends a notification and retries the renewal.
* If renewal still fails by the time the package expires, the package downgrades to the Free package.
* To restore the previous package, see [Purchase and Upgrade](#purchase-and-upgrade).
### Downgrade
You can downgrade by selecting and purchasing a lower-tier package. A downgrade takes effect when your current package expires if you request it before auto-renewal is triggered. You are charged for the new package when you request the downgrade.
You can downgrade only once per month.
* If your downgrade for the next month is successful, auto-renewal for the current package is not triggered.
* If a package is already active, you must wait until the 1st day of that month to initiate a downgrade for the following month.
#### Example
* **Requested more than 48 hours before the current package expires**: The downgrade takes effect after the current package expires.
* **Requested less than 48 hours before the current package expires**: Since a package is already active for the next month, you must wait until the new package starts to downgrade for the following month.
### Cancel subscription
To cancel a prepaid package, downgrade to the Free package. Downgrade rules apply.
## Top-up package
A top-up package is a pay-as-you-go plan. You can purchase a top-up package from the [`Agora Console`](https://console.agora.io/subscriptions/rtc-plans?tab=top-up) to cover usage that exceeds your monthly package quota.
### Purchase
You can purchase multiple top-up packages. They are deducted in the order of purchase.
#### Example:
* Purchased 250,000-minutes top-up packages on **August 15** and **August 16**. On **September 1**, minutes consumed in August are deducted from the first package, then from the second.
### Validity
Each top-up package is valid for one year, starting from the purchase date to the end of the same month of the following year.
#### Example:
* Purchased on **August 15, 2025** → valid until **August 31, 2026**
Unused minutes expire after the validity period and cannot be carried forward.
### Cancel top-up package
Cancelling a top-up package is not supported.
## Free tier overage
For Free tier users, exceeding the included minutes and any purchased top-up minutes results in service suspension. Service resumes when you purchase additional top-up minutes or upgrade to a prepaid subscription package.
# Core concepts (/en/realtime-media/cloud-recording/core-concepts)
Agora Cloud Recording enables you to record video and voice calls or streams in the cloud for storage or on-demand viewing. Cloud Recording works with Voice Calling, Video Calling, Broadcast Streaming and Interactive Live Streaming.
This page introduces the key processes and concepts you need to know to use Cloud Recording.
## General concepts
Agora relies on the following fundamental concepts to enable seamless real-time communication:
### Agora SDRTN®
Agora's core engagement services are powered by its Software-Defined Real-Time Network (SDRTN®), a global infrastructure accessible anytime, anywhere. Unlike traditional networks, Agora SDRTN® is not restricted by devices, phone numbers, or telecom coverage areas. With data centers in over 200 countries and regions, it ensures sub-second latency and high availability for real-time media.
Agora SDRTN® enables live user engagement through real-time communication (RTC), offering:
* Unmatched quality of service
* High availability and accessibility
* True scalability
* Low cost
### App ID
The App ID is a unique key generated by Agora to identify each project and provide billing and other statistical data services. The App ID is critical for connecting users within your app. It is used to initialize the ENGINE in your app, and as one of the required keys to create authentication tokens for secure communication. Retrieve the App ID for your project using the [Agora Console](https://console.agora.io/legacy/project-management).
App IDs are stored on the front-end client and do not provide access control. Projects using only an App ID allow any user with the App ID to join. For access control, especially in production environments, choose the **App ID + Token** mechanism for user authentication when creating a new project. Without authentication tokens, your environment is open to anyone with access to your App ID.
### App Certificate
An App Certificate is a unique key generated by the Agora Console to secure projects through token authentication. It is required, along with the App ID, to generate a token that proves authorization between your systems and Agora's network. App Certificates are used to generate Cloud Recording authentication tokens.
Store the App Certificate securely in your backend systems. If your App Certificate is compromised or to meet security compliance requirements, you can invalidate certificates and create new ones through the Agora Console.
### Tokens
A token is a dynamic key generated using the App ID, App Certificate, user ID, and expiration timestamp. Tokens authenticate and secure access to Agora's services, ensuring only authorized users can join a channel and participate in real-time communication.
Tokens are generated on your server and passed to the client for use in Cloud Recording. The token generation process involves digitally signing the App ID, App Certificate, user ID, and expiration timestamp using a specific algorithm, preventing tampering or forgery.
During development and testing, use the Agora Console to generate temporary tokens. For production environments, implement a token server as part of your security infrastructure to control access to your channels.
For information on setting up a token server for generating and managing tokens, refer to [Deploy a token server](/en/realtime-media/cloud-recording/build/set-up-authentication/authentication-workflow).
### Channel
A channel organizes users into a group and is identified by a unique channel name. Users who connect to the same channel are able to communicate with each other. A channel is created when the first user joins and ceases to exist when the last user leaves.
Channels are created by calling the methods for transmitting real-time data. Agora uses different channels to transmit different types of data:
* An RTC channel is used for transmitting audio or video data.
* A MESS channel is used for transmitting messaging or signaling data.
These channels are independent of each other.
Additional services provided by Agora, such as Cloud Recording and STT, join the SDK channel to provide real-time recording, transmission acceleration, media playback, and content moderation.
### User ID
In Cloud Recording, the UID is an integer value that uniquely identifies a user within the context of a channel. When joining a channel, you have the option to either assign a specific UID to the user or pass `0` or `null` and allow Agora to automatically generate and assign a UID to the user. If two users attempt to join the same channel with the same UID, it can lead to unexpected behavior.
The UID is used by Agora's services and components to identify and manage users within a channel. Ensure that UIDs are properly assigned to prevent conflicts.
### Agora Console
To use Agora Cloud Recording, create a project in the [Agora Console](https://console.agora.io/) first.

Agora Console provides an intuitive interface for developers to query and manage their Agora account. After registering an Agora account, you use the Agora Console to perform the following tasks:
* Manage your account
* Create and configure Agora projects and services
* Get an App ID and the App certificate
* Generate temporary tokens for development and testing
* Manage members and roles
* Check call quality and usage
* Check bills and make payments
* Access product resources
See [Agora account management](/en/introduction/account) for details on how to manage all aspects of your Agora account.
Agora also provides RESTful APIs that you use to implement features such as creating a project and fetching usage numbers programmatically.
## Cloud recording concepts
### Recording modes
Agora Cloud Recording supports three recording modes:
* Individual recording
* Composite recording
* Web page recording
After the recording is complete, the recorded content is uploaded as a `TS` file to the third-party cloud storage you specified. An `M3U8` file is also generated to serve as an index for the corresponding `TS` file
The working principles of different recording modes and the types of files generated by Cloud Recording are as follows:
#### Individual recording
In individual recording, the recording service records the audio and video streams of each UID in the channel separately. After the recording is complete, the recording service generates the corresponding audio and video files for each UID.
For example, if there are 3 UIDs in the channel and each UID sends audio and video, then in the individual recording mode, 3 audio files and 3 video files are generated.
#### Composite recording
In mixed recording, the recording service combines the audio and video of multiple UIDs in the channel into a single audio and video file.
For example, if there are 3 UIDs in the channel and each sends audio and video, the mixed recording mode generates one recording file that includes the audio and video of all UIDs.
#### Web page recording
In web page recording, the recording service combines the page content and audio of a specified web page into an audio and video file.
Web page recording is commonly used in the following use-cases:
* In online classrooms, to record the teacher and student audio and video along with courseware, whiteboard, and other visuals.
* In video conferences, to capture participants' audio and video, as well as whiteboard, PPT, and other visuals.
### Transcoding and non-transcoding modes
In individual recording, audio transcoding and non-transcoding modes have different use cases and characteristics.
**Individual recording with transcoding**: This mode is used in use-cases where unified audio encoding parameters are needed to ensure consistent recording file formats and parameters for easier post-processing and playback. It is commonly used in cases requiring high compatibility and standardized output, such as wide player support and standardized storage.
**Individual recording without transcoding**: This mode is used when the original audio encoding parameters must be preserved to maintain the sound quality and performance. It is often used in use-cases with high demands for real-time performance and original sound quality, such as high-fidelity audio recording.
| Feature | Individual recording with transcoding | Individual recording without transcoding |
| :--------------------------------- | :------------------------------------------------------------------------------------------------------ | :-------------------------------------------------------------------------------------------------------------------------------------------------------------------------------------- |
| Transcoding during audio encoding | Yes | No |
| Raw audio data | The sampling rate, number of channels, and bitrate are fixed at 48 kHz, mono, and 48 Kbps respectively. | The bitrate, sampling rate and number of channels are determined by the audio encoding parameters of the streaming end `AudioProfile`. |
| Audio encoding format | LC-AAC | Determined by the configuration of the source end `AudioProfile` |
| Generated recording files | Each UID generates an audio file in `M3U8` format and multiple audio files in `TS` format. | Same as transcoding recording. If the user stops streaming using `muteLocalAudioStream` or `leaveChannel` audio recording stops immediately, and there is no 15 seconds of silent data. |
| Player compatibility | The recorded file can be played by any mainstream player that supports the HLS protocol. | The audio encoding format is determined by the configuration of the streaming end `AudioProfile`. Different audio encoding formats have different compatibility. |
### Delayed transcoding
Delayed transcoding is designed for audio-only recording use-cases. When you enable this mode, the recording service merges and transcodes the audio files of all users in the specified channel into an `MP3`, `M4A`, or `AAC` file within 24 hours after the recording ends (or up to 48 hours in special cases) and uploads it to the specified third-party cloud storage.
### Delayed audio mixing
Delayed audio mixing is used for individual audio recording use-cases. To obtain a mixed recording file of all users in the channel after recording, you enable the delayed audio mixing feature when starting individual audio recording without transcoding. Once enabled, the recording service merges and transcodes the audio files of all users in the specified channel into an `MP3`, `M4A`, or `AAC` file within 24 hours after the recording is complete (or up to 48 hours in special cases) and uploads it to the specified third-party cloud storage.
### Slicing
Slicing involves cutting audio and video data according to specific rules during the recording process to generate multiple recording files. After slicing, several slice files (such as `TS` or `WebM` files) are created, along with `M3U8` files that store the indexes of these slice files.
# Cloud Recording overview (/en/realtime-media/cloud-recording)
Agora's Cloud Recording is a RESTful API-based solution for recording real-time voice, video, and interactive streaming sessions directly to your cloud storage. It supports leading CDN and cloud hosting providers, offers customizable recording layouts, and supports multiple file formats for playback and distribution.
Easily launch multiple recorders within a single channel to ensure redundancy or to capture different layouts and formats simultaneously. This makes Cloud Recording a flexible and reliable solution for recording and preserving real-time communication.
## Features
Supports globally distributed cluster deployment and automatically backs up files on Agora’s cloud server when the third-party cloud storage fails.
End-to-end security mechanisms for voice and video calls, data transmission, and storage.
Supports third-party cloud storage, including Amazon S3, Alibaba Cloud, Tencent Cloud, Kingsoft Cloud, Qiniu Cloud, Microsoft Azure, Google Cloud, Huawei Cloud, and Baidu AI Cloud.
Simple implementation and easy to learn with RESTful API calls that allow you to start, stop, and query the recording.
# Agora MCP (/en/realtime-media/cloud-recording/mcp)
The Agora MCP server gives your AI assistant direct access to Agora's documentation, so it can look up APIs, SDK methods, and platform-specific details in real time.
The Agora MCP server is included when you install Agora Skills. If you prefer to install only the MCP server, it is available at:
```text
https://mcp.agora.io
```
## Installation
Refer to the installation instructions for your coding assistant.
Cursor
Claude
Codex
Gemini CLI
Manual installation
Click the button below to install the MCP server in [Cursor](https://www.cursor.com/)
or add it manually with the following JSON:
```json
{
"mcpServers": {
"agora-docs": {
"url": "https://mcp.agora.io"
}
}
}
```
* **Claude Code**
Run the following command in your terminal to install the MCP server in [Claude Code](https://claude.com/product/claude-code):
```bash
claude mcp add --transport http agora-docs https://mcp.agora.io
```
* **Claude Desktop**
In **Settings**, select **Connectors** and then choose **Add custom connector**. Enter the following values and click **Add**:
* **Name**: `agora-docs`
* **Remote MCP server URL**: `https://mcp.agora.io`
Run the following command in your terminal to install the server in [OpenAI Codex](https://openai.com/codex/):
```bash
codex mcp add --url https://mcp.agora.io agora-docs
```
Run the following command in your terminal to install the server in [Gemini CLI](https://github.com/google-gemini/gemini-cli):
```bash
gemini mcp add --transport http agora-docs https://mcp.agora.io
```
Add the server URL `https://mcp.agora.io` to your MCP client of choice. If prompted, set the transport to `http` or "Streamable HTTP".
## Getting started
Once installed, your coding assistant has access to Agora's documentation through the MCP server. The assistant will intelligently use this resource when relevant to your questions. For more targeted results, mention Agora along with your target product and platform, such as `Cloud Recording`, `Web`, and `REST API` in your prompts.
## AGENTS.md
To get the most out of Agora Skills and the MCP server, Agora recommends that you include an [AGENTS.md](https://agents.md) or similar file in your repository. This file ensures that your agent always consults Agora docs to produce reliable, working code.
Add the following instructions to your own `AGENTS.md` file:
```markdown
## Agora Documentation
Agora documentation is updated frequently. You should always refer to the latest documentation when working with Agora products. Agora offers an MCP server that you can use to browse and search its documentation. If the developer has not yet installed this server, recommend that they install it at https://mcp.agora.io.
If the Agora Skills files are available in your context, use them for platform-specific API guidance and code examples.
```
# Quickstart using middleware (/en/realtime-media/cloud-recording/middleware-quickstart)
To streamline the use of Agora RESTful APIs within your infrastructure, Agora’s developer community offers the open-source [Agora Go Backend Middleware](https://github.com/AgoraIO-Community/agora-go-backend-middleware). This backend provides RESTful APIs for tasks such as token generation, cloud recording management, and real-time transcription. It simplifies the integration of Agora’s cloud services into your real-time voice and video applications. This guide shows you how to implement cloud recording using the community middleware.
## Understand the tech
The following figure illustrates the architecture of the middleware cloud recording micro service.
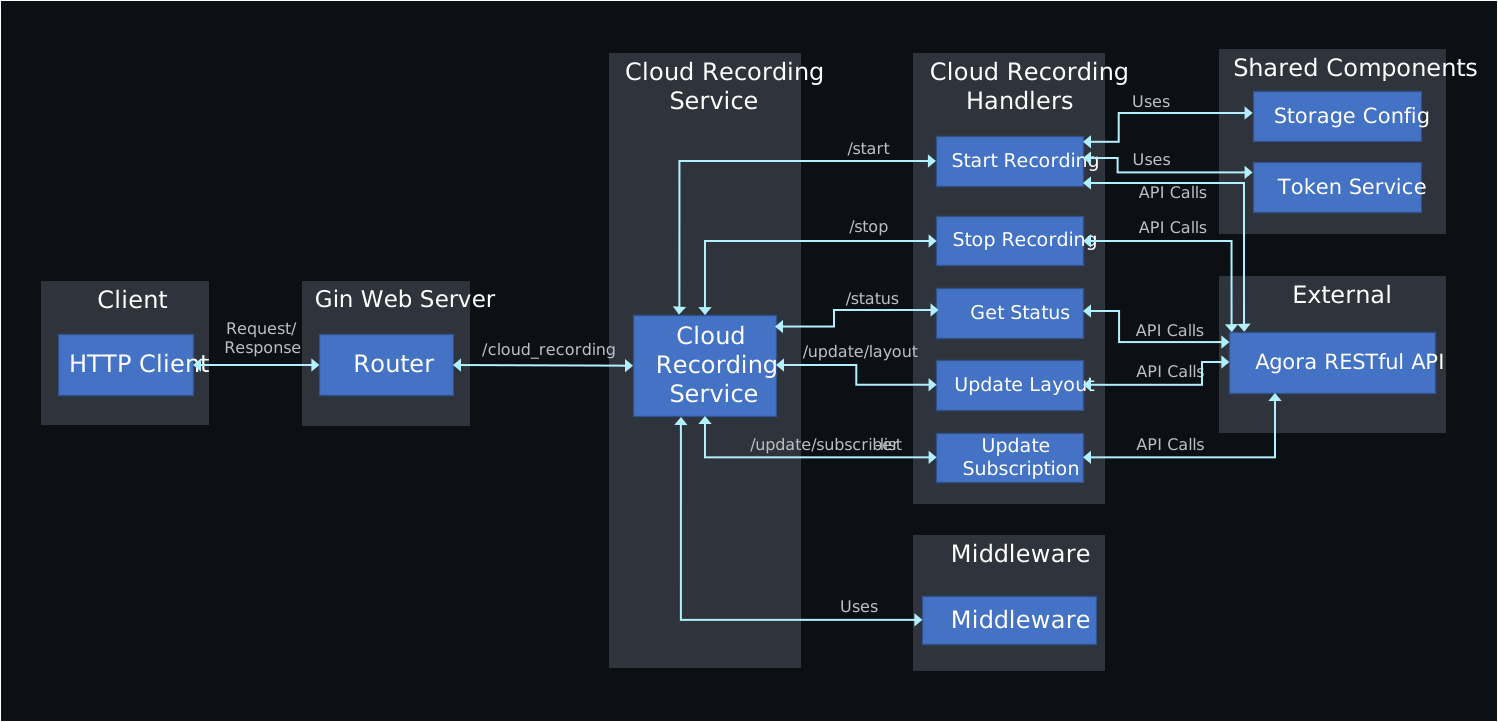
## Set up and run the Go backend middleware
Take the following steps to set up and run the middleware project:
1. **Clone the repository**
```bash
git clone https://github.com/AgoraIO-Community/agora-go-backend-middleware.git
```
2. **Install dependencies**
Ensure you have [Go](https://go.dev/doc/install) installed on your system. Navigate to the project directory and install the project dependencies:
```bash
cd agora-go-backend-middleware
go mod download
```
3. **Configure environment variables**
1. Copy the example `.env` file.
```bash
cp .env.example .env
```
2. Update the following variables in the `.env` file:
* `APP_ID`: Your Agora App ID.
* `APP_CERTIFICATE`: Your Agora App Certificate.
* `CUSTOMER_ID`: Your customer ID
* `CUSTOMER_SECRET`: Your Customer Secret
* `STORAGE_VENDOR`: Cloud storage vendor (e.g., AWS, GCP).
* `STORAGE_REGION`: Region of your cloud storage.
* `STORAGE_BUCKET`: Bucket name.
* `STORAGE_ACCESS_KEY`: Cloud storage access key.
* `STORAGE_SECRET_KEY`: Cloud storage secret key.
4. **Run the middleware:**
Start the middleware server using the following command:
```bash
go run cmd/main.go
```
The middleware runs on the default port, for example `localhost:8080`.
## Implement Cloud Recording using middleware
This section explains the RESTful API calls to the backend middleware for starting, managing, and stopping a Cloud Recording session.
### Start recording
To start a Cloud Recording session refer to the following examples:
The command-line examples in this guide are for demonstration purposes only. Do not use them directly in a production environment. Implement RESTful API requests through your application server.
* Basic example
```bash
curl -X POST http://localhost:8080/cloud_recording/start \
-H "Content-Type: application/json" \
-d '{
"channelName": "test_channel",
"sceneMode": "realtime",
"recordingMode": "mix",
"excludeResourceIds": []
}'
```
* Advanced example
```bash
curl -X POST http://localhost:8080/cloud_recording/start \
-H "Content-Type: application/json" \
-d '{
"channelName": "testChannel",
"sceneMode": "realtime",
"recordingMode": "mix",
"excludeResourceIds": [],
"recordingConfig": {
"channelType": 0,
"decryptionMode": 1,
"secret": "your_secret",
"salt": "your_salt",
"maxIdleTime": 120,
"streamTypes": 2,
"videoStreamType": 0,
"subscribeAudioUids": ["#allstream#"],
"unsubscribeAudioUids": [],
"subscribeVideoUids": ["#allstream#"],
"unsubscribeVideoUids": [],
"subscribeUidGroup": 0,
"streamMode": "individual",
"audioProfile": 1,
"transcodingConfig": {
"width": 640,
"height": 360,
"fps": 15,
"bitrate": 500,
"maxResolutionUid": "1",
"layoutConfig": [
{
"x_axis": 0,
"y_axis": 0,
"width": 640,
"height": 360,
"alpha": 1,
"render_mode": 1
}
]
}
}
}'
```
### Stop recording
To stop an ongoing cloud recording session:
```bash
curl -X POST http://localhost:8080/cloud_recording/stop \
-H "Content-Type: application/json" \
-d '{
"cname": "test_channel",
"uid": "uid-from-start-response",
"resourceId": "resource-id-from-start-response",
"sid": "sid-from-start-response",
"recordingMode": "mix",
"async_stop": false
}'
```
### Get Recording Status
During the recording, call the `status` endpoint to query the recording status as required.
```bash
curl -X GET "http://localhost:8080/cloud_recording/status?resourceId=your-resource-id&sid=your-sid&mode=mix"
```
### Update Subscriber List
To update the subscriber list during a recording session, refer to the following example:
```bash
curl -X POST http://localhost:8080/cloud_recording/update/subscriber-list \
-H "Content-Type: application/json" \
-d '{
"cname": "test_channel",
"uid": "uid-from-start-response",
"resourceId": "your-resource-id",
"sid": "your-sid",
"recordingMode": "mix",
"recordingConfig": {
"streamSubscribe": {
"audioUidList": {
"subscribeAudioUids": ["2345", "3456"]
},
"videoUidList": {
"subscribeVideoUids": ["2345", "3456"]
}
}
}
}'
```
### Update Layout
To update the layout of a recording session, refer to the following example:
```bash
curl -X POST http://localhost:8080/cloud_recording/update/layout \
-H "Content-Type: application/json" \
-d '{
"cname": "test_channel",
"uid": "uid-from-start-response",
"resourceId": "your-resource-id",
"sid": "your-sid",
"recordingMode": "mix",
"recordingConfig": {
"mixedVideoLayout": 1,
"backgroundColor": "#000000",
"layoutConfig": [
{
"uid": "2345",
"x_axis": 0,
"y_axis": 0,
"width": 360,
"height": 640,
"alpha": 1,
"render_mode": 1
}
]
}
}'
```
## Cloud Recording Middleware API Reference
This section provides details about the Go middleware Cloud Recording API endpoints.
### Start Recording
Starts a cloud recording session.
##### Endpoint
**POST:** `/cloud_recording/start`
#### Request Body
```json
{
"channelName": "string",
"uid": "string",
"recordingConfig": {
// RecordingConfig fields
},
"storageConfig": {
// StorageConfig fields
}
}
```
#### Response
```json
{
"resourceId": "string",
"sid": "string",
"timestamp": "string"
}
```
### Stop Recording
Stops an ongoing cloud recording session.
#### Endpoint
**POST:** `/cloud_recording/stop`
#### Request Body
```json
{
"cname": "string",
"uid": "string",
"resourceId": "string",
"sid": "string",
"recordingMode": "string",
"async_stop": boolean
}
```
#### Response
```json
{
"resourceId": "string",
"sid": "string",
"serverResponse": {
"fileListMode": "string",
"fileList": [
{
"fileName": "string",
"trackType": "string",
"uid": "string",
"mixedAllUser": boolean,
"isPlayable": boolean,
"sliceStartTime": number
}
]
},
"timestamp": "string"
}
```
### Get Recording Status
Retrieves the status of a cloud recording session.
#### Endpoint
**GET:** `/cloud_recording/status`
#### Query Parameters
* `resourceId`: string
* `sid`: string
* `mode`: string
#### Response
```json
{
"resourceId": "string",
"sid": "string",
"serverResponse": {
"fileListMode": "string",
"fileList": [
{
"fileName": "string",
"trackType": "string",
"uid": "string",
"mixedAllUser": boolean,
"isPlayable": boolean,
"sliceStartTime": number
}
]
},
"timestamp": "string"
}
```
### Update Subscriber List
Updates the subscriber list for a cloud recording session.
#### Endpoint
**POST:** `/cloud_recording/update/subscriber-list`
#### Request Body
```json
{
"cname": "string",
"uid": "string",
"resourceId": "string",
"sid": "string",
"recordingMode": "string",
"recordingConfig": {
// UpdateSubscriptionClientRequest fields
}
}
```
#### Response
```json
{
"cname": "string",
"uid": "string",
"resourceId": "string",
"sid": "string",
"timestamp": "string"
}
```
### Update Layout
Updates the layout of a cloud recording session.
#### Endpoint
**POST:** `/cloud_recording/update/layout`
#### Request Body
```json
{
"cname": "string",
"uid": "string",
"resourceId": "string",
"sid": "string",
"recordingMode": "string",
"recordingConfig": {
// UpdateLayoutClientRequest fields
}
}
```
#### Response
```json
{
"cname": "string",
"uid": "string",
"resourceId": "string",
"sid": "string",
"timestamp": "string"
}
```
Replace `localhost:8080` with your server's address, if it is different.
# REST quickstart (/en/realtime-media/cloud-recording/rest-quickstart)
Cloud Recording enables you to record and store real-time audio and video streams from channels. To implement Cloud Recording, you set up a self-hosted backend that interacts with Agora servers to manage recording tasks. This guide introduces the essential Cloud Recording RESTful APIs you use to manage the recording process.
The command-line examples in this guide are for demonstration purposes only. Do not use them directly in a production environment. Implement RESTful API requests through your application server or use Agora's [Go backend middleware](https://github.com/AgoraIO-Community/agora-go-backend-middleware). For details, see [Quickstart using middleware](/en/realtime-media/cloud-recording/middleware-quickstart)
## Understand the tech
The basic process of implementing Cloud Recording is as follows:
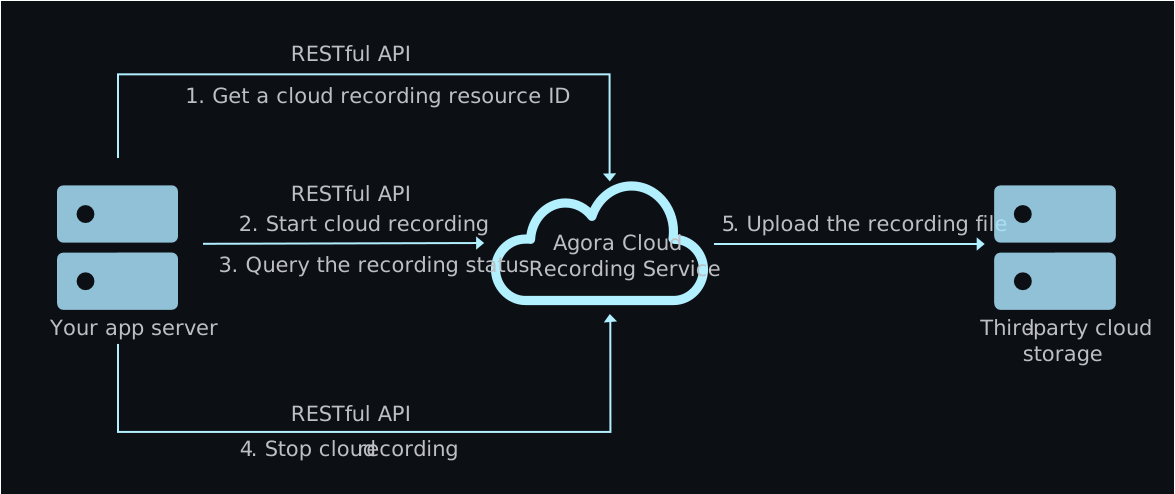
1. Get a resource ID
Before starting a cloud recording, call the [`acquire`](#acquire) method to obtain a cloud recording resource ID. After calling this method successfully, you get a resource ID in the response body.
2. Start cloud recording
Call the [`start`](#start) method to join the channel and start a cloud recording. After calling this method successfully, you get a recording ID from the response body to identify the current recording process.
3. Query the recording status
Call the [`query`](#query) method to check the recording status during the recording.
4. Stop cloud recording
Call the [`stop`](#stop) method to stop the cloud recording.
5. Upload the recording file
After the recording ends, the cloud recording service uploads the recording file to the [third-party cloud storage](/en/api-reference/api-ref/cloud-recording#storageconfig) you specify.
## Prerequisites
To implement Cloud Recording, ensure that you have:
* A valid Agora account and project. Obtain the following parameters from [Agora Console](https://console.agora.io):
* The App ID and App certificate for your project. See [Get Started with Agora](/en/introduction/account#get-the-app-id-and-app-certificate)
* A valid temporary token
* Customer ID and Customer key for RESTful API. See [Authenticate REST calls](/en/api-reference/api-ref/cloud-recording/authentication)
* Set up and enabled a supported third-party cloud storage service. Obtain the following parameters for your storage:
* Bucket name
* Access key
* Secret key
- [Alibaba Cloud](https://www.alibabacloud.com/product/object-storage-service)
- [Amazon S3](https://aws.amazon.com/s3/?nc1=h_ls)
- [Baidu AI Cloud](https://intl.cloud.baidu.com/product/bos.html)
- [Google Cloud](https://cloud.google.com/storage)
- [Huawei Cloud](https://www.huaweicloud.com/intl/en-us/product/obs)
- [Kingsoft Cloud](https://en.ksyun.com/nv/product/KS3)
- [Microsoft Azure](https://azure.microsoft.com/en-us/services/storage/blobs/)
- [Qiniu Cloud](https://www.qiniu.com/en/products/kodo)
- [Tencent Cloud](https://intl.cloud.tencent.com/product/cos)
* Enabled the Agora Cloud Recording service for your project.
In [Agora Console](https://console.agora.io), select **RTC Services** from the sidebar, then locate the **Cloud Recording** card and turn on its toggle.
You can now use Agora Cloud Recording and see the usage statistics on the **Usage** page.
* If your network has a firewall, follow the instructions in [Firewall Requirements](/en/realtime-media/cloud-recording/reference/firewall).
## Implement cloud recording
The following figure shows the API call sequence to start and manage cloud recording:
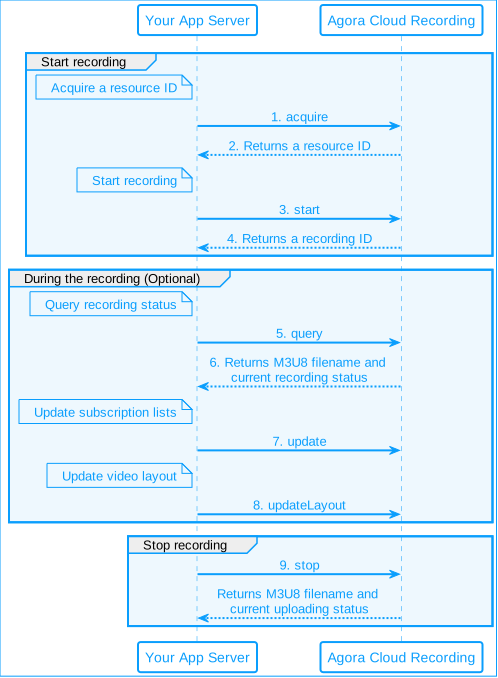
The following APIs are optional and can be called multiple times. However, they must be called during a recording session, that is, after recording starts and before it ends:
* [`query`](#query): Query the recording status
* [`update`](/en/api-reference/api-ref/cloud-recording#update): Update the subscription list
* [`updateLayout`](/en/api-reference/api-ref/cloud-recording#updatelayout): Update the video layout
### Use basic HTTP authentication
The Cloud Recording RESTful APIs require basic HTTP authentication. You need to set the `Authorization` parameter in every HTTP request header. For details, see [Basic HTTP authentication](/en/api-reference/api-ref/cloud-recording/authentication).
### Get a resource ID
Call the [`acquire`](/en/api-reference/api-ref/cloud-recording#acquire) method to request a resource ID for Cloud Recording.
After calling this method successfully, you receive a resource ID in the response body. The resource ID is valid for five minutes. Start recording with this resource ID within the validity period. One resource ID can only be used for a single recording session.
* The recording service is equivalent to a non-streaming client in the channel. The `uid` parameter in the request body is used to identify the recording service and cannot be the same as any existing user ID in the channel. For example, if there are two users already in the channel and their user IDs are 123 and 456, the `uid` cannot be `"123"` or `"456"`.
* Agora Cloud Recording does not support user IDs in string format (User Accounts). Ensure that every user in the channel has an integer user ID. The string content of the `uid` parameter must also be an integer.
#### Sample code
For testing purposes, use the following command in the terminal to call the `acquire` method.
```bash
# Replace with the App ID of your Agora project
curl --location --request POST 'https://api.agora.io/v1/apps//cloud_recording/acquire' \
# Replace with the Base64-encoded credential in basic HTTP authentication
--header 'Authorization: Basic ' \
--header 'Content-Type: application/json' \
--data-raw '{
# Replace with the name of the channel you need to record
"cname": "",
# Replace with your user ID
"uid": "",
"clientRequest":{}
}'
```
### Start recording
Call the [`start`](/en/api-reference/api-ref/cloud-recording#start) method within five minutes of getting a resource ID to join a channel and start recording. You can choose either [individual recording](/en/realtime-media/cloud-recording/build/start-a-recording/individual-mode) or [composite recording](/en/realtime-media/cloud-recording/build/start-a-recording/composite-mode) as the recording mode.
If this method call succeeds, you receive a recording ID (sid) in the HTTP response body. This ID identifies the current recording.
After you obtain the recording ID `sid`, you can call the `query`, `updateLayout`, and `stop` methods before the time set (in hours) by `resourceExpiredHour` has passed.
#### Sample code
For testing purposes, use the following command in the terminal to call the `start` method.
```bash
# Replace with the App ID of your Agora project
# Replace with the resource ID obtained through the acquire method
# Replace "" with "individual" for individual recording or "composite" for composite recording
curl --location --request POST 'https://api.agora.io/v1/apps//cloud_recording/resourceid//mode//start' \
# Replace with the Base64-encoded credential in basic HTTP authentication
--header 'Authorization: Basic ' \
--header 'Content-Type: application/json' \
--data-raw '{
# Replace with the name of the channel you need to record.
"cname": "",
# Replace with your user ID that identifies the recording service.
"uid": "",
"clientRequest": {
# Replace with the temporary token you obtain from the console.
"token": "",
# Set the storageConfig related parameters.
"storageConfig": {
"secretKey": "",
"vendor": 0,
"region": 0,
"bucket": "",
"accessKey": ""
},
# Set the recordingConfig related parameters.
"recordingConfig": {
# Which is consistent with the "channelType" of the Agora RTC SDK.
"channelType": 0
}
}
}'
```
### Query recording status
During a recording session, can call the [`query`](/en/api-reference/api-ref/cloud-recording#query) method to query the recording status. You can call this API multiple times.
When you call this method successfully, you receive the current recording status and related information about the recording file in the response body. See [Best Practices in Integrating Cloud Recording](/en/realtime-media/cloud-recording/build/best-practices/integration-best-practices) for details about how to [Monitor service status during a recording](../best-practices/integration-best-practices#monitor-service-status-during-a-recording) and[ Obtain the M3U8 file name](../best-practices/integration-best-practices#obtain-the-m3u8-file-name).
#### Sample code
For testing purposes, use the following command in the terminal to call the `query` method.
```bash
# Replace with the App ID of your Agora project
# Replace with the resource ID obtained through the acquire method
# Replace with the sid obtained through the start method
# Replace "" with "individual" for individual recording or "composite" for composite recording
curl --location --request GET 'https://api.agora.io/v1/apps//cloud_recording/resourceid//sid//mode//query' \
# Replace with the Base64-encoded credential in basic HTTP authentication
--header 'Authorization: Basic ' \
--header 'Content-Type: application/json'
```
### Stop recording
Call the [`stop`](/en/api-reference/api-ref/cloud-recording#stop) API to end the recording session.
When you call this method successfully, you receive the status of the recording file upload and information about the recording file in the response body.
#### Sample code
For testing purposes, use the following command in the terminal to call the `stop` method.
```bash
# Replace with the App ID of your Agora project
# Replace with the resource ID obtained through the acquire method
# Replace with the sid obtained through the start method
# Replace "" with "individual" for individual recording or "composite" for composite recording
curl --location --request POST
'https://api.agora.io/v1/apps//cloud_recording/resourceid//sid//mode//stop' \
--header 'Content-Type: application/json;charset=utf-8' \
# Replace with the Base64-encoded credential in basic HTTP authentication
--header 'Authorization: Basic ' \
--data-raw '{
# Replace with your user ID that identifies the recording service.
"uid": "",
# Replace with the name of the channel you are recording.
"cname": "",
"clientRequest":{
}
}'
```
Parameter settings
* If the `uid` parameter in the request body is the same as a user ID in the channel, or if you use a non-integer user ID, the recording fails. For details, see the notes on the `uid` parameter in the section [Get a cloud recording resource](#acquire).
* When the `start` request returns `200`, it only means that the RESTful API request is successful. To ensure that the recording has started successfully and continues normally, call `query` to check the recording status. Errors such as unreasonable `transcodingConfig` parameter settings, incorrect third-party cloud storage information, or incorrect token information cause the `query` method to return `404`. See [Why do I get a 404 error when I call query after successfully starting a cloud recording? ](../reference/common-errors#errors).
* Set the `maxIdleTime` parameter based on your business needs. Within the time range set by `maxIdleTime`, the recording continues and billing is generated even if the channel is idle.
## Reference
This section contains content that completes the information on this page, or points you to documentation that explains other aspects to this product.
### Sample project
Agora provides a [Postman collection](https://documenter.getpostman.com/view/6319646/SVSLr9AM), which contains sample requests of RESTful API for a cloud recording. You can use the collection to quickly grasp the basic functionalities of the Cloud Recording RESTful APIs. You only need to import the collection to Postman and set your environment variables.
You can also use Postman to generate code snippets written in various programming languages. To do so, select a request, click **Code**, and select the desired language in **GENERATE CODE SNIPPETS**.
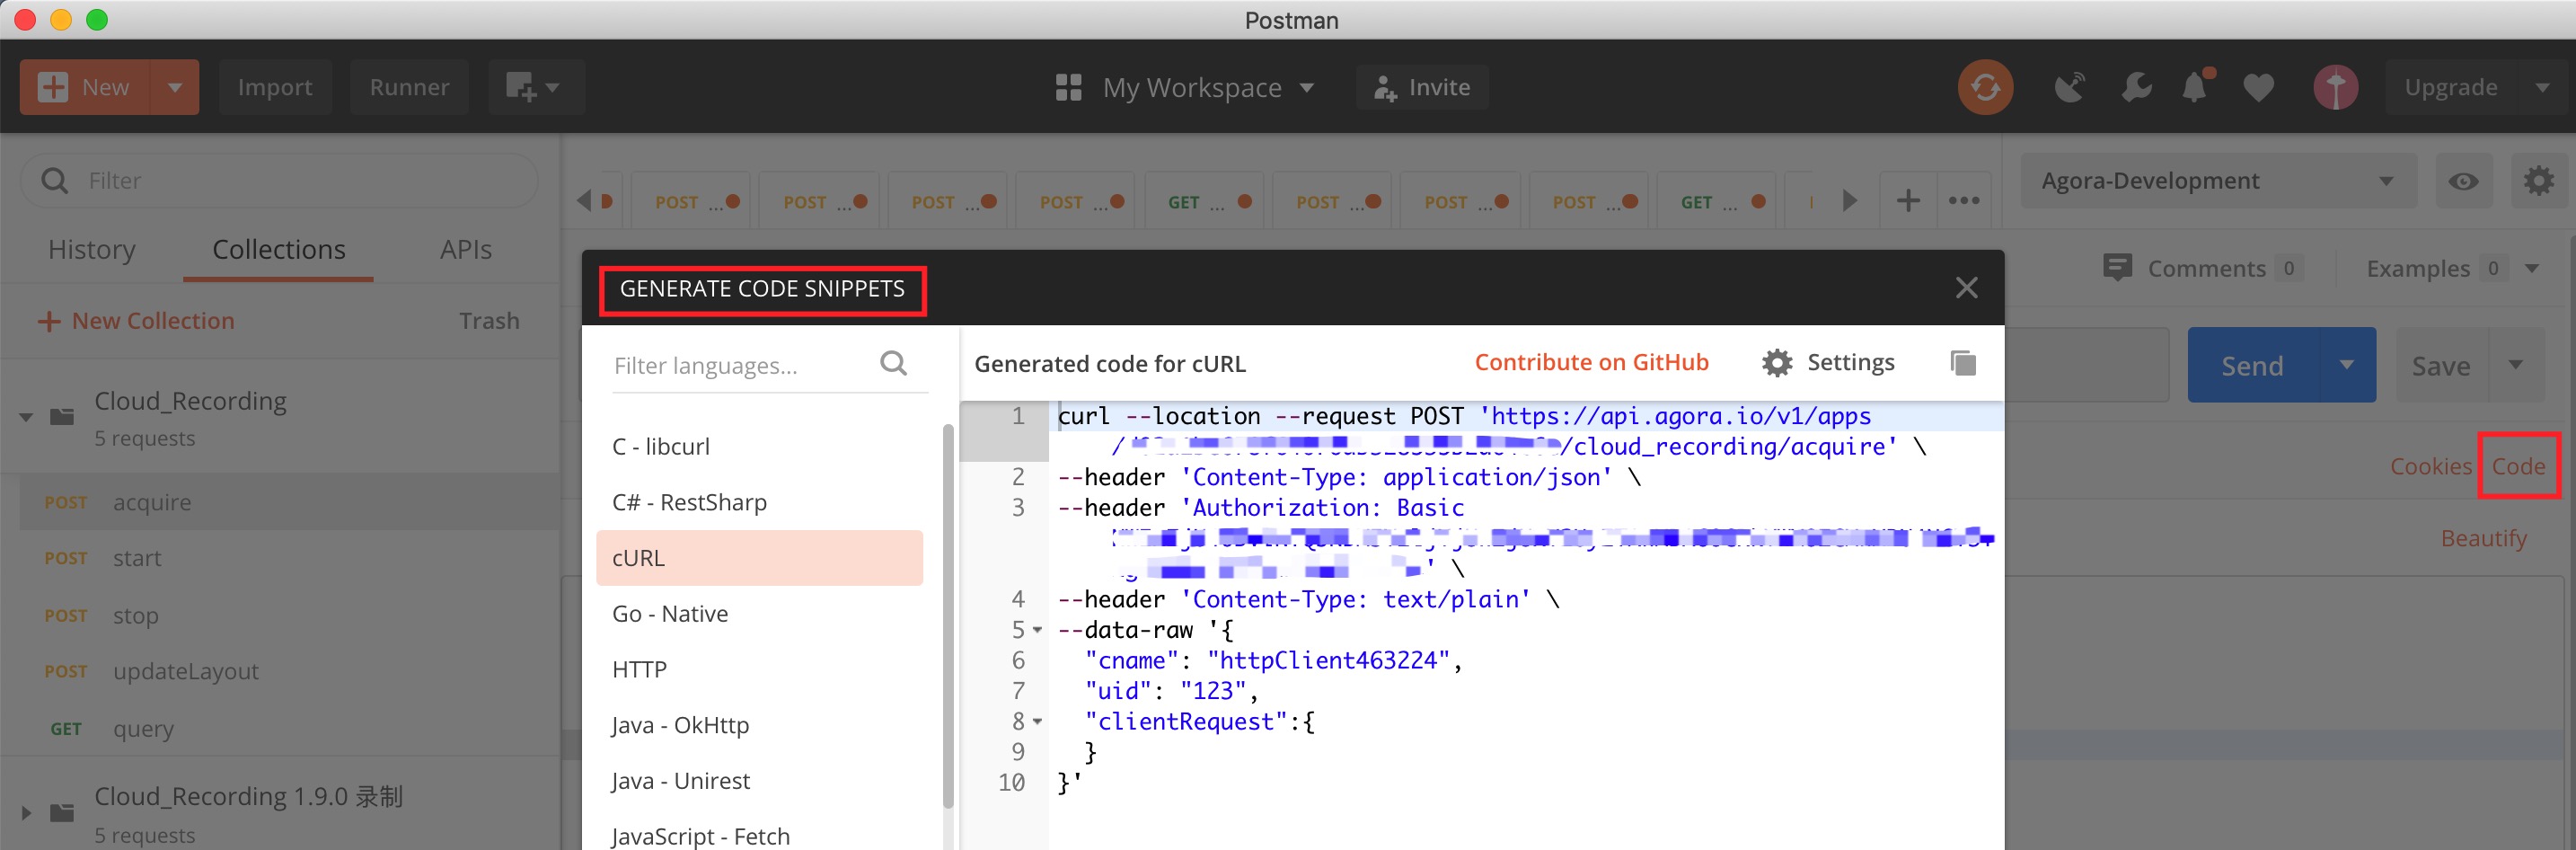
### See also
* To streamline the use of Agora RESTful APIs within your infrastructure, see
[Quickstart using middleware](/en/realtime-media/cloud-recording/middleware-quickstart). The community middleware project provides RESTful APIs for tasks such as token generation and cloud recording management.
* To update the subscription lists during the recording, call [`update`](/en/api-reference/api-ref/cloud-recording#update). You can call this method multiple times. See [Set up subscription lists](/en/realtime-media/cloud-recording/build/customize-the-recording/subscription) for details.
* To set or update the video layout during the recording, call the [`updateLayout`](/en/api-reference/api-ref/cloud-recording#updatelayout) method. See [Set Video Layout](/en/realtime-media/cloud-recording/build/customize-the-recording/layout) for details.
* [Common errors in cloud recording](/en/realtime-media/cloud-recording/reference/common-errors) lists common error codes and error messages in the response body.
* [Agora Cloud Recording RESTful API Callback Service](../reference/rest-api-overview) lists all the callback events of cloud recording.
* To learn more about the implementation steps and details of basic functions, you can refer to the following documents:
* [Individual recording](/en/realtime-media/cloud-recording/build/start-a-recording/individual-mode)
* [Composite recording](/en/realtime-media/cloud-recording/build/start-a-recording/composite-mode)
* [Web page recording](/en/realtime-media/cloud-recording/build/start-a-recording/webpage-mode)
* [Capture screenshots](/en/realtime-media/cloud-recording/build/start-a-recording/screen-capture)
## Next steps
### Manage recorded files
After the recording starts, the Agora server splits the recorded content into multiple TS/WebM files and keeps uploading them to the third-party cloud storage until the recording stops. You can refer to [Manage Recorded Files](/en/realtime-media/cloud-recording/build/process-recorded-files/manage-files) to learn about the naming rules, file sizes, and slicing rules of recording files.
### Token authentication
To ensure communication security, in a formal production environment, you need to generate tokens on your app server. See [Authenticate Your Users with Token](/en/realtime-media/cloud-recording/build/set-up-authentication/authentication-workflow).
# Agora skills (/en/realtime-media/cloud-recording/skills)
Agora skills is a set of structured reference files that give AI coding assistants deep knowledge of Agora's platform. When you ask your assistant to build something with Agora, it loads the relevant skill files covering products, APIs, and platform-specific code examples, so it can generate working code without guessing.
Skills includes integration with the [Agora MCP server](./mcp), which gives your assistant access to live Agora documentation. For installation instructions and supported tools, see the [Agora Skills repository](https://github.com/AgoraIO/skills).
### Installation
Install Agora Skills using one of the following methods:
#### Skills CLI (recommended)
Run the following command:
```bash
npx skills add github:AgoraIO/skills
```
Skills activate automatically when your agent detects relevant tasks, for example, "build cloud recording workflows", "integrate Agora RTC", or "generate a token".
#### Manual installation
Clone the repository once and point your AI coding assistant to the skill files directly.
1. Clone the [Agora Skills repo](https://github.com/AgoraIO/skills.git):
```bash
git clone https://github.com/AgoraIO/skills.git ~/agora-skills
```
2. Point your AI assistant to `skills/agora/`.
Follow the instructions for your AI coding assistant:
Claude Code
Cursor
Windsurf
GitHub Copilot
Other tools
Run the following commands inside Claude Code:
* **User-level** (available across all your projects)
```bash
/plugin marketplace add AgoraIO/skills
/plugin install agora
```
* **Project-level** (shared with your team via version control)
```bash
/plugin marketplace add AgoraIO/skills
/plugin install agora --scope project
```
Copy or symlink `skills/agora/` into `.cursor/rules/`. For more information, see [Cursor skill directories](https://cursor.com/docs/skills#skill-directories).
Add `skills/agora/` to your Cascade context. For more information, see [Windsurf skills](https://docs.windsurf.com/windsurf/cascade/skills).
Reference via `@workspace` or add to `.github/copilot-instructions.md`. For more information, see [Create skills for Copilot in the CLI](https://docs.github.com/en/copilot/how-tos/copilot-cli/customize-copilot/create-skills) or [Create skills for the Copilot coding agent](https://docs.github.com/en/copilot/how-tos/use-copilot-agents/coding-agent/create-skills).
The skill files are plain markdown. Point your tool to `skills/agora/` or load individual files directly. Use `SKILL.md` as the entry point.
# SDK quickstart (/en/realtime-media/im/get-started-sdk)
Instant messaging enhances user engagement by enabling users to connect and form a community within the app. Increased engagement can lead to increased user satisfaction and loyalty to your app. An instant messaging feature can also provide real-time support to users, allowing them to get help and answers to their questions quickly. The Chat SDK enables you to embed real-time messaging in any app, on any device, anywhere.
This page guides you through implementing peer-to-peer messaging into your app using the Chat SDK.
## Understand the tech
The following figure shows the workflow of sending and receiving peer-to-peer messages using Chat SDK.
Chat SDK workflow
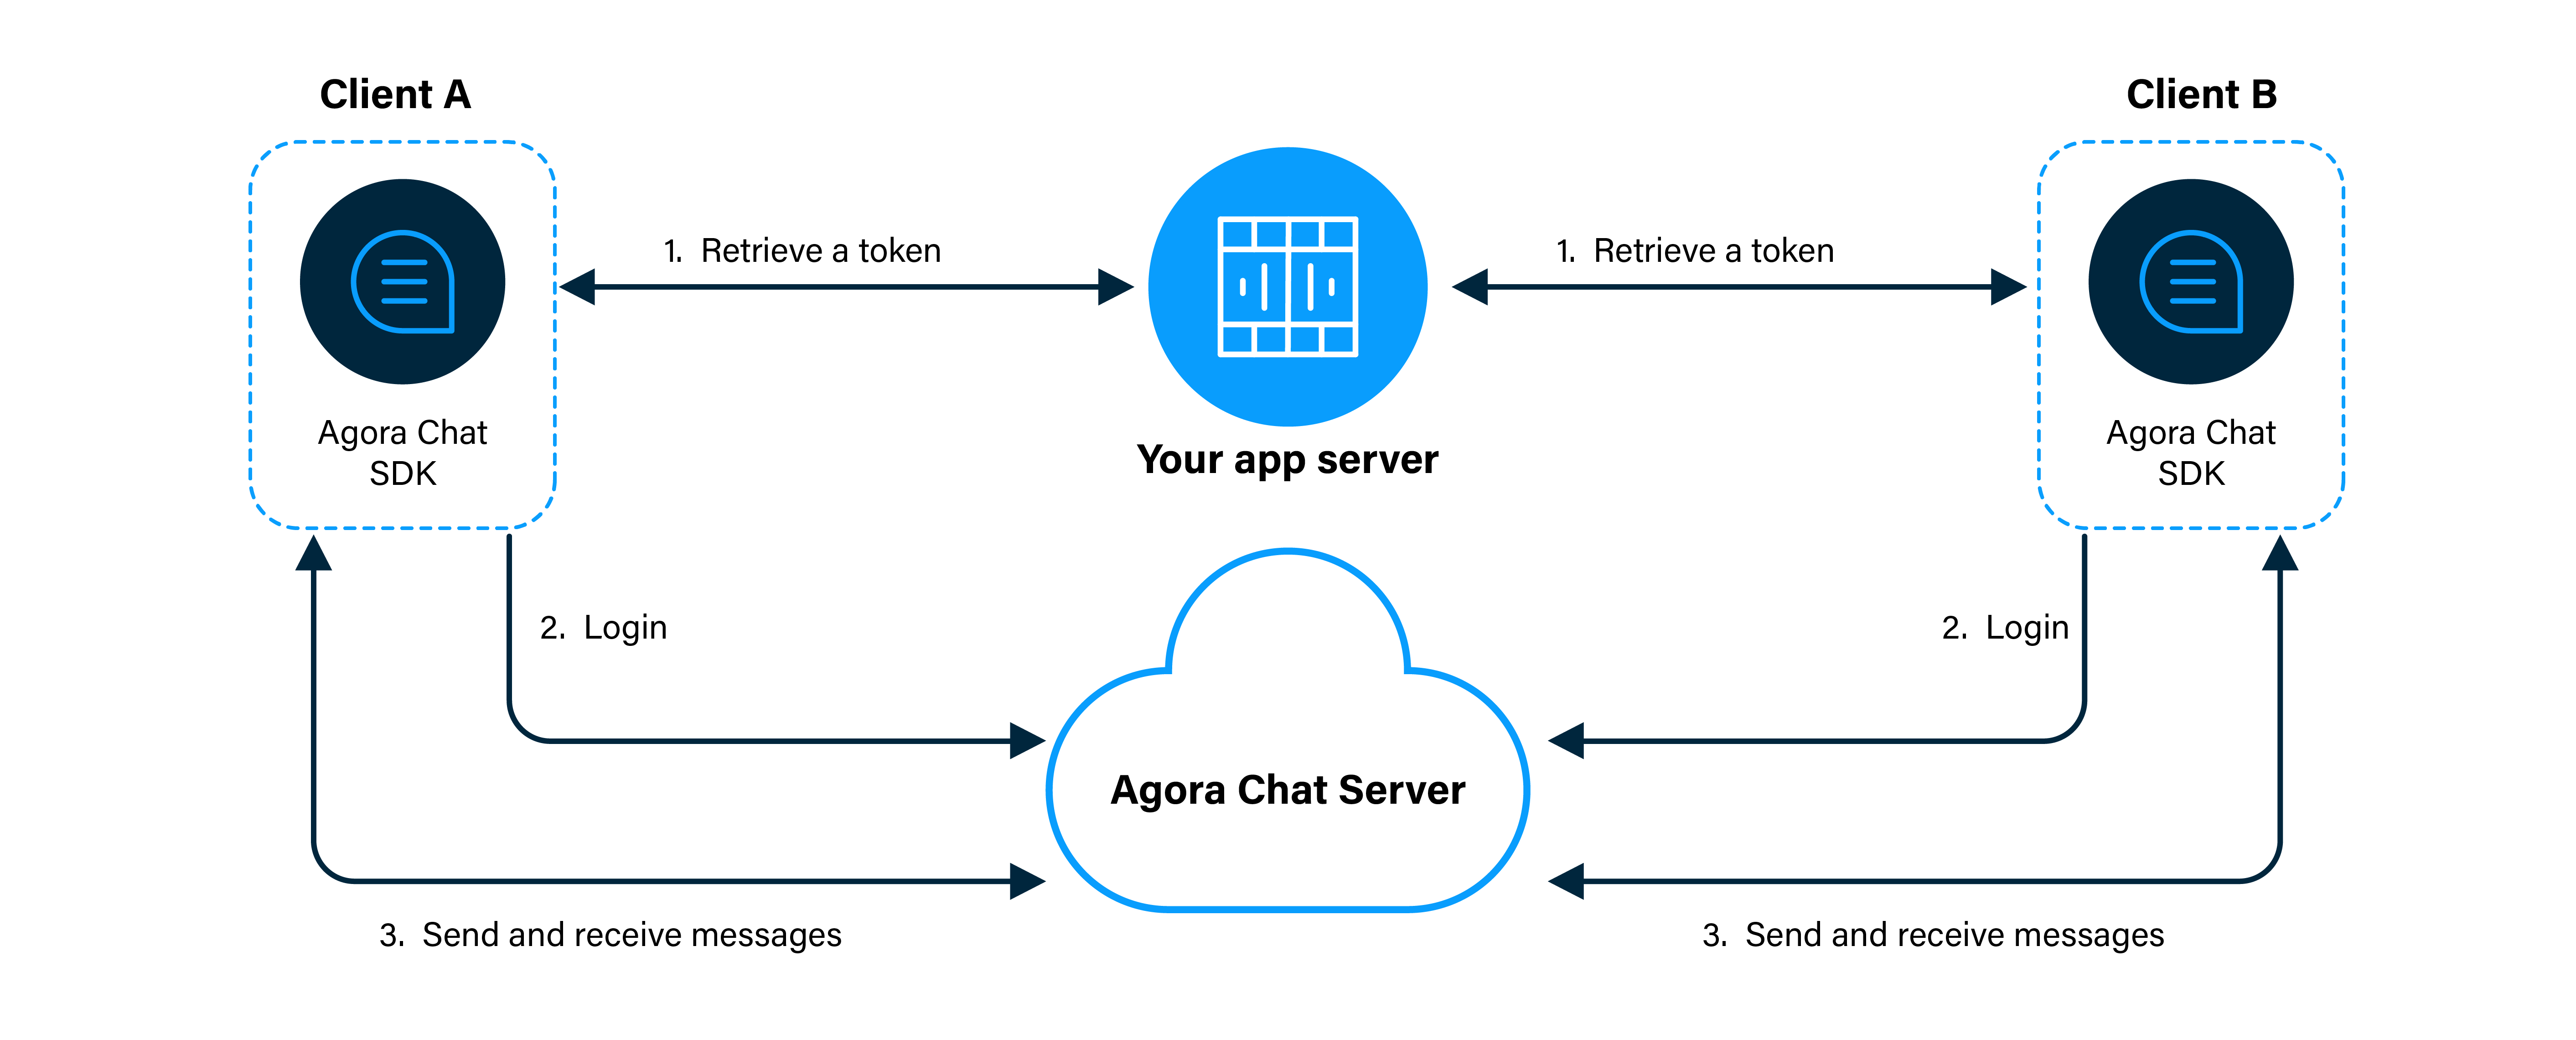
1. Clients retrieve an authentication token from your app server.
2. Users log in to Chat using the App ID, their user ID, and token.
3. Clients send and receive messages through Chat as follows:
1. Client A sends a message to Client B. The message is sent to the Agora Chat server.
2. The server delivers the message to Client B. When Client B receives a message, the SDK triggers an event.
3. Client B listens for the event to read and display the message.
## Prerequisites
In order to follow the procedure on this page, you must have:
* A valid [Agora account](/en/introduction/account#sign-up-for-an-agora-account).
* An [Agora project](/en/introduction/account#your-first-agora-project) for which you have [enabled Chat](./get-started/enable#enable-chat).
* The [App Key](./get-started/enable#get-chat-project-information) for the project.
* Internet access.
Ensure that no firewall is blocking your network communication.
* An Android emulator or a physical Android device.
* Android Studio 3.6 or higher.
* Java Development Kit (JDK). You can refer to the [Android User Guide](https://developer.android.com/studio/write/java8-support) for applicable versions.
## Project setup
To integrate Chat into your app, do the following:
1. Method 1: Use `mavenCentral` to automatically integrate:
1. In Android Studio, create a new **Phone and Tablet** [Android project](https://developer.android.com/studio/projects/create-project) with an **Empty Activity**. Choose **Java** as the project language, and ensure that the **Minimum SDK** version is set to `21` or higher.
Android Studio automatically starts gradle sync. Wait for the sync to succeed before you continue.
2. Add Chat SDK to your project dependencies.
To add the SDK to your project:
1. In `/Gradle Scripts/build.gradle (Module: .app)`, add the following line under `dependencies`:
```text
dependencies {
...
implementation 'io.agora.rtc:chat-sdk:'
}
```
Replace `` with the version number for the latest Chat SDK release, for example `1.3.1`. You can obtain the latest version information using [Maven Central Repository Search](https://central.sonatype.com/artifact/io.agora.rtc/chat-sdk/versions).
2. To download the SDK from Maven Central, press **Sync Now**.
3. Add permissions for network and device access.
To add the necessary permissions, in `/app/Manifests/AndroidManifest.xml`, add the following permissions after ``:
```xml
```
4. Prevent code obfuscation.
In `/Gradle Scripts/proguard-rules.pro`, add the following line:
```java
-keep class io.agora.** {*;}
-dontwarn io.agora.**
```
2. Method 2: Dynamically load .so library files
In order to reduce the size of the application installation package, the SDK provides `ChatOptions#setNativeLibBasePath` method to support dynamic loading of the `.so` files required by the SDK. Taking SDK 1.3.0 as an example, the `.so` file includes two files: `libcipherdb.so` and `.libhyphenate.so`. The steps to implement this function are as follows:
1. Download the latest version of the SDK and unzip it.
2. Integrate the `agorachat_1.3.0.jar` file into your project.
3. Upload `.so` files for all schemas to your server and ensure that the application can download `.so` files for the target schemas over the network.
4. When the application runs, it checks whether the `.so` file exists. If not found, the app downloads the `.so` file and saves it to your custom app's private directory.
5. When calling `ChatClient#init`, set the app private directory where the `.so` file is located as a parameter into the `ChatOptions#setNativeLibBasePath` method.
6. The SDK will automatically load `.so` files from the specified path upon initialization.
```java
// Assume that you have put two .so libraries, `libcipherdb.so` and `libagora-chat-sdk.so` in the /data/data/packagename/files directory of the app.
String filesPath = mContext.getFilesDir().getAbsolutePath();
ChatOptions options = new ChatOptions();
options.setNativeLibBasePath(filesPath);
ChatClient.getInstance().init(mContext, options);
```
This method is applicable when you integrate the SDK manually but not when you integrate the SDK with Maven Central.
You can specify the path of `.so` files with the path parameter in the `ChatOptions#setNativeLibBasePath` method. The path must be a valid and private directory of the app.
If you set this parameter, the SDK will use `System.load` to load the `.so` library from the directory you specify, so that the app dynamically loads the required `.so` files when it runs, thereby reducing the package size.
If you do not set this parameter or set it to `null`, the SDK will use `System.load` to load the `.so` library from the default path when compiling the app, thus increasing the package size compared to the previous method.
Since March 6, 2024, using this method to reduce the app size no longer meets the requirements of Google Play. For details, refer to the [Developer Program Policies](https://support.google.com/googleplay/android-developer/answer/14906471?hl=en\&visit_id=638555962315571301-1274648059\&rd=1) issued by Google. If your app needs to be listed on Google Play, please try other ways to reduce the app size. For details, see [App size optimization](/en/realtime-media/rtc/best-practices/app-size-optimization#dynamically-load-so-files).
## Implement peer-to-peer messaging
This section shows how to use the Chat SDK to implement peer-to-peer messaging in your app, step by step.
### Create the UI
In the quickstart app, you create a simple UI that consists of the following elements:
* A `Button` to log in or out of Agora Chat.
* An `EditText` box to specify the recipient user ID.
* An `EditText` box to enter a text message.
* A `Button` to send the text message.
* A scrollable layout to display sent and received messages.
To add the UI framework to your device project, open `app/res/layout/activity_main.xml` and replace the content with the following:
```xml
```
You see `Cannot resolve symbol` errors in your IDE. This is because this layout refers to methods that you create later.
### Handle the system logic
Import the necessary classes, and add a method to show status updates to the user.
1. **Import the relevant Agora and Android classes**
In `/app/java/com.example./MainActivity`, add the following lines after `package com.example.`:
```java
import android.widget.Button;
import android.widget.EditText;
import android.widget.LinearLayout;
import android.widget.TextView;
import android.view.View;
import android.widget.Toast;
import android.graphics.Color;
import android.view.Gravity;
import android.view.inputmethod.InputMethodManager;
import android.util.Log;
import java.util.List;
import io.agora.CallBack;
import io.agora.ConnectionListener;
import io.agora.MessageListener;
import io.agora.chat.ChatClient;
import io.agora.chat.ChatMessage;
import io.agora.chat.ChatOptions;
import io.agora.chat.TextMessageBody;
```
2. **Log events and show status updates to your users**
In the `MainActivity` class, add the following method before `onCreate`.
```javascript
private void showLog(String text) {
// Show a toast message
runOnUiThread(() ->
Toast.makeText(getApplicationContext(), text, Toast.LENGTH_SHORT).show());
// Write log
Log.d("AgoraChatQuickStart", text);
}
```
### Send and receive messages
When a user opens the app, you instantiate and initialize a `ChatClient`. When the user taps the **Join** button, the app logs in to Agora Chat. When a user types a message in the text box and then presses **Send**, the typed message is sent to Agora Chat. When the app receives a message from the server, the message is displayed in the message list. This simple workflow enables you to rapidly build a Chat client with basic functionality.
The following figure shows the API call sequence for implementing this workflow.
API call sequence
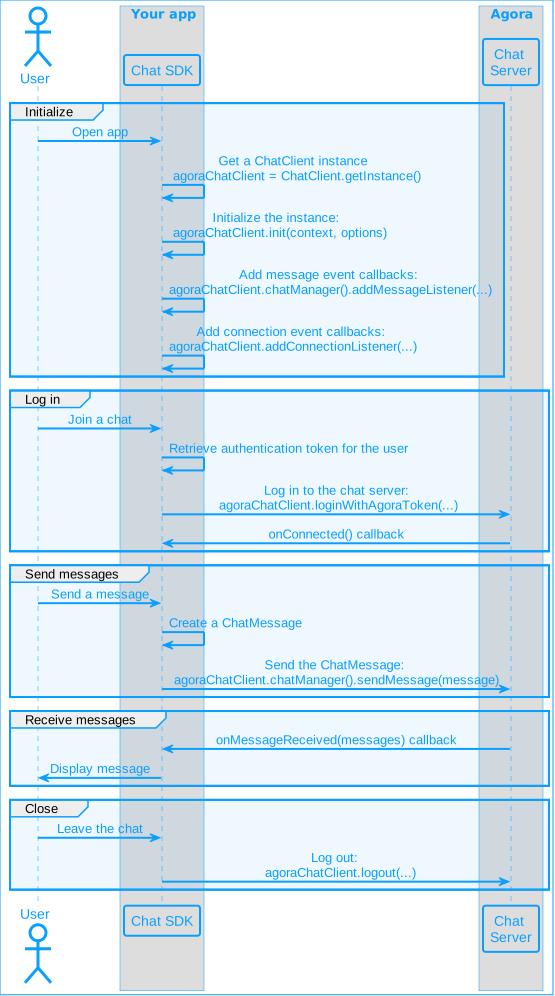
To implement this workflow in your app, take the following steps:
1. **Declare variables**
In the `MainActivity` class, add the following declarations:
```java
private String userId = "";
private String token = "";
private String appId = "";
private ChatClient agoraChatClient;
private boolean isJoined = false;
EditText editMessage;
```
2. **Set up Chat when the app starts**
When the app starts, you create an instance of the `ChatClient` and set up callbacks to handle Chat events.
To do this, replace the `onCreate` method in the `MainActivity` class with the following:
```java
@Override
protected void onCreate(Bundle savedInstanceState) {
super.onCreate(savedInstanceState);
setContentView(R.layout.activity_main);
setupChatClient(); // Initialize the ChatClient
setupListeners(); // Add event listeners
// Set up UI elements for code access
editMessage = findViewById(R.id.etMessageText);
}
```
3. **Instantiate the `ChatClient`**
To implement peer-to-peer messaging, you use Chat SDK to initialize a `ChatClient` instance. In the `MainActivity` class, add the following method before `onCreate`.
```java
private void setupChatClient() {
ChatOptions options = new ChatOptions();
if (appId.isEmpty()) {
showLog("You need to set your App ID");
return;
}
options.setAppId(appId); // Set your app ID in options
agoraChatClient = ChatClient.getInstance();
agoraChatClient.init(this, options); // Initialize the ChatClient
agoraChatClient.setDebugMode(true); // Enable debug info output
}
```
4. **Handle and respond to Chat events**
To receive notification of Chat events such as connection, disconnection, and token expiration, you add a `ConnectionListener`. To handle message delivery and new message notifications, you add a `MessageListener`. When you receive the `onMessageReceived` notification, you display the message to the user.
In `/app/java/com.example./MainActivity`, add the following method after `setupChatClient`:
```java
private void setupListeners() {
// Add message event callbacks
agoraChatClient.chatManager().addMessageListener(new MessageListener() {
@Override
public void onMessageReceived(List messages) {
for (ChatMessage message : messages) {
runOnUiThread(() ->
displayMessage(((TextMessageBody) message.getBody()).getMessage(),
false)
);
showLog("Received a " + message.getType().name()
+ " message from " + message.getFrom());
}
}
});
// Add connection event callbacks
agoraChatClient.addConnectionListener(new ConnectionListener() {
@Override
public void onConnected() {
showLog("Connected");
}
@Override
public void onDisconnected(int error) {
if (isJoined) {
showLog("Disconnected: " + error);
isJoined = false;
}
}
@Override
public void onLogout(int errorCode) {
showLog("User logging out: " + errorCode);
}
@Override
public void onTokenExpired() {
// The token has expired
}
@Override
public void onTokenWillExpire() {
// The token is about to expire. Get a new token
// from the token server and renew the token.
}
});
}
```
5. **Log in to Agora Chat**
When a user clicks **Join**, your app logs in to Agora Chat. When a user clicks **Leave**, the app logs out of Agora Chat.
To implement this logic, in the `MainActivity` class, add the following method before `onCreate`:
```java
public void joinLeave(View view) {
Button button = findViewById(R.id.btnJoinLeave);
if (isJoined) {
agoraChatClient.logout(true, new CallBack() {
@Override
public void onSuccess() {
showLog("Sign out success!");
runOnUiThread(() -> button.setText("Join"));
isJoined = false;
}
@Override
public void onError(int code, String error) {
showLog(error);
}
});
} else {
agoraChatClient.loginWithToken(userId, token, new CallBack() {
@Override
public void onSuccess() {
showLog("Signed in");
isJoined = true;
runOnUiThread(() -> button.setText("Leave"));
}
@Override
public void onError(int code, String error) {
if (code == 200) { // Already joined
isJoined = true;
runOnUiThread(() -> button.setText("Leave"));
} else {
showLog(error);
}
}
});
}
}
```
6. **Send a message**
To send a message to Agora Chat when a user presses the **Send** button, add the following method to the `MainActivity` class, before `onCreate`:
```java
public void sendMessage(View view) {
// Read the recipient name from the EditText box
String toSendName = ((EditText) findViewById(R.id.etRecipient)).getText().toString().trim();
String content = editMessage.getText().toString().trim();
if (toSendName.isEmpty() || content.isEmpty()) {
showLog("Enter a recipient name and a message");
return;
}
// Create a ChatMessage
ChatMessage message = ChatMessage.createTextSendMessage(content, toSendName);
// Set the message callback before sending the message
message.setMessageStatusCallback(new CallBack() {
@Override
public void onSuccess() {
showLog("Message sent");
runOnUiThread(() -> {
displayMessage(content, true);
// Clear the box and hide the keyboard after sending the message
editMessage.setText("");
InputMethodManager inputMethodManager = (InputMethodManager)getSystemService(INPUT_METHOD_SERVICE);
inputMethodManager.hideSoftInputFromWindow(editMessage.getApplicationWindowToken(),0);
});
}
@Override
public void onError(int code, String error) {
showLog(error);
}
});
// Send the message
agoraChatClient.chatManager().sendMessage(message);
}
```
7. **Display chat messages**
To display the messages the current user has sent and received in your app, add the following method to the `MainActivity` class:
```java
void displayMessage(String messageText, boolean isSentMessage) {
// Create a new TextView
final TextView messageTextView = new TextView(this);
messageTextView.setText(messageText);
messageTextView.setPadding(10,10,10,10);
// Set formatting
LinearLayout messageList = findViewById(R.id.messageList);
LinearLayout.LayoutParams params = new LinearLayout.LayoutParams(
LinearLayout.LayoutParams.WRAP_CONTENT, LinearLayout.LayoutParams.MATCH_PARENT);
if (isSentMessage) {
params.gravity = Gravity.END;
messageTextView.setBackgroundColor(Color.parseColor("#DCF8C6"));
params.setMargins(100,25,15,5);
} else {
messageTextView.setBackgroundColor(Color.parseColor("white"));
params.setMargins(15,25,100,5);
}
// Add the message TextView to the LinearLayout
messageList.addView(messageTextView, params);
}
```
## Test your implementation
To ensure that you have implemented Peer-to-Peer Messaging in your app:
1. Create an app instance for the first user:
1. [Register a user](./get-started/enable#register-a-user) in [Agora Console](https://console.agora.io/) and [Generate a user token](./get-started/enable#generate-a-user-token).
2. In the `MainActivity` class, update `userId`, `token`, and `appId` with values from Agora Console. To get your App ID, see [Get Chat project information](./get-started/enable#get-chat-project-information).
3. Connect a physical Android device to your development device.
4. In Android Studio, click **Run app**. A moment later you see the project installed on your device.
2. Create an app instance for the second user:
1. Register a second user in Agora Console and generate a user token.
2. In the `MainActivity` class, update `userId` and `token` with values for the second user. Make sure you use the same `appId` as for the first user.
3. Run the modified app on a device emulator or a second physical Android device.
3. On each device, click **Join** to log in to Agora Chat.
4. Edit the recipient name on each device to show the user ID of the user logged in to the other device.
5. Type a message in the **Message** box of either device and press **`>>`**.
The message is sent and appears on the other device.
6. Press **Leave** to log out of Agora Chat.
## Reference
This section contains content that completes the information in this page, or points you to documentation that explains other aspects to this product.
* For more code samples, see [Samples and demos](./reference/downloads).
* [Manual install](./reference/manual-sdk-install) shows you how to integrate Chat SDK into your project manually.
### Integration issues
If your project integrates Agora Chat SDK 1.3.2 or later and either Signaling SDK 2.2.0 or later or RTC SDK 4.3.0 or later, you may encounter a compilation error because the `libaosl.so` library is included in both SDKs.
```
com.android.builder.merge.DuplicateRelativeFileException: More than one file was found with OS independent path 'lib/x86/libaosl.so'
```
To resolve this issue, add packaging options under the `Android` node in the `build.gradle` file of your app. This ensures that the build process prioritizes the first matching file:
Groovy
Kotlin DSL
* **Android Gradle Plugin \< 7.x**
```text
android {
packagingOptions {
pickFirst 'lib/**/libaosl.so'
}
}
dependencies {
implementation 'io.agora.infra:aosl:x.y.z'
// implementation RTM sdk
// implementation RTC sdk
}
```
* **Android Gradle Plugin 7.x or later**
```text
android {
packaging {
jniLibs {
pickFirsts += ["lib/**/libaosl.so"]
}
}
}
dependencies {
implementation 'io.agora.infra:aosl:x.y.z'
// implementation RTM sdk
// implementation RTC sdk
}
```
* **Android Gradle Plugin \< 7.x**
```kotlin
android {
packagingOptions {
pickFirst("lib/**/libaosl.so")
}
}
dependencies {
implementation("io.agora.infra:aosl:x.y.z")
// implementation RTM sdk
// implementation RTC sdk
}
```
* **Android Gradle Plugin 7.x or later**
```kotlin
android {
packaging {
jniLibs {
pickFirsts += setOf("lib/**/libaosl.so")
}
}
}
dependencies {
implementation("io.agora.infra:aosl:x.y.z")
// implementation RTM sdk
// implementation RTC sdk
}
```
### API reference
* [`ChatClient.init()`](https://api-ref.agora.io/en/chat-sdk/android/1.x/classio_1_1agora_1_1chat_1_1_chat_client.html#ab8220f870c05ad326f4de256c5814852)
* [`ChatClient.loginWithToken()`](https://api-ref.agora.io/en/chat-sdk/android/1.x/classio_1_1agora_1_1chat_1_1_chat_client.html#abb72e1e403e7e3f4ded23e8b4f460bd6)
* [`ChatClient.logout()`](https://api-ref.agora.io/en/chat-sdk/android/1.x/classio_1_1agora_1_1chat_1_1_chat_client.html#a014e2abb85595417b64799dabfb8ac74)
* [`ChatManager.sendMessage()`](https://api-ref.agora.io/en/chat-sdk/android/1.x/classio_1_1agora_1_1chat_1_1_chat_manager.html#aed75ce0a590423ac18a94e1d339e97f4)
* [`ChatManager`](https://api-ref.agora.io/en/chat-sdk/android/1.x/classio_1_1agora_1_1chat_1_1_chat_manager.html)
* [`ChatMessage`](https://api-ref.agora.io/en/chat-sdk/android/1.x/classio_1_1agora_1_1chat_1_1_chat_message.html)
* [`ConnectionListener`](https://api-ref.agora.io/en/chat-sdk/android/1.x/interfaceio_1_1agora_1_1_connection_listener.html)
* [`MessageListener`](https://api-ref.agora.io/en/chat-sdk/android/1.x/interfaceio_1_1agora_1_1_message_listener.html)
### Next steps
In a production environment, best practice is to deploy your own token server. Users retrieve a token from the token server to log in to Chat. To see how to implement a server that generates and serves tokens on request, see [Secure authentication with tokens](../develop/authentication).
## Platform-specific versions
- [Android](/en/realtime-media/im/get-started-sdk/android.md)
- [iOS](/en/realtime-media/im/get-started-sdk/ios.md)
- [Web](/en/realtime-media/im/get-started-sdk/web.md)
- [Flutter](/en/realtime-media/im/get-started-sdk/flutter.md)
- [React Native](/en/realtime-media/im/get-started-sdk/react-native.md)
- [Unity](/en/realtime-media/im/get-started-sdk/unity.md)
- [Windows](/en/realtime-media/im/get-started-sdk/windows.md)
# UI Kit quickstart (/en/realtime-media/im/get-started-uikit)
Instant messaging connects people wherever they are and allows them to communicate with others in real time. Agora offers an open-source Chat UI Kit project on GitHub. With built-in user interfaces for key Chat features, the Agora Chat UI Kit enables you to quickly embed real-time messaging into your app without requiring extra effort on the UI.
For the latest Agora Chat UIKit documentation, refer to the [UIKit 2.x Documentation](https://github.com/AgoraLab/agora-chat-uikit) GitHub repository.
Legacy UIkit 1.x documentation
This page shows sample code to add peer-to-peer messaging into your app by using the Agora Chat UI Kit.
## Understand the tech
The following figure shows the workflow of how clients send and receive peer-to-peer messages:
Chat UI kit workflow
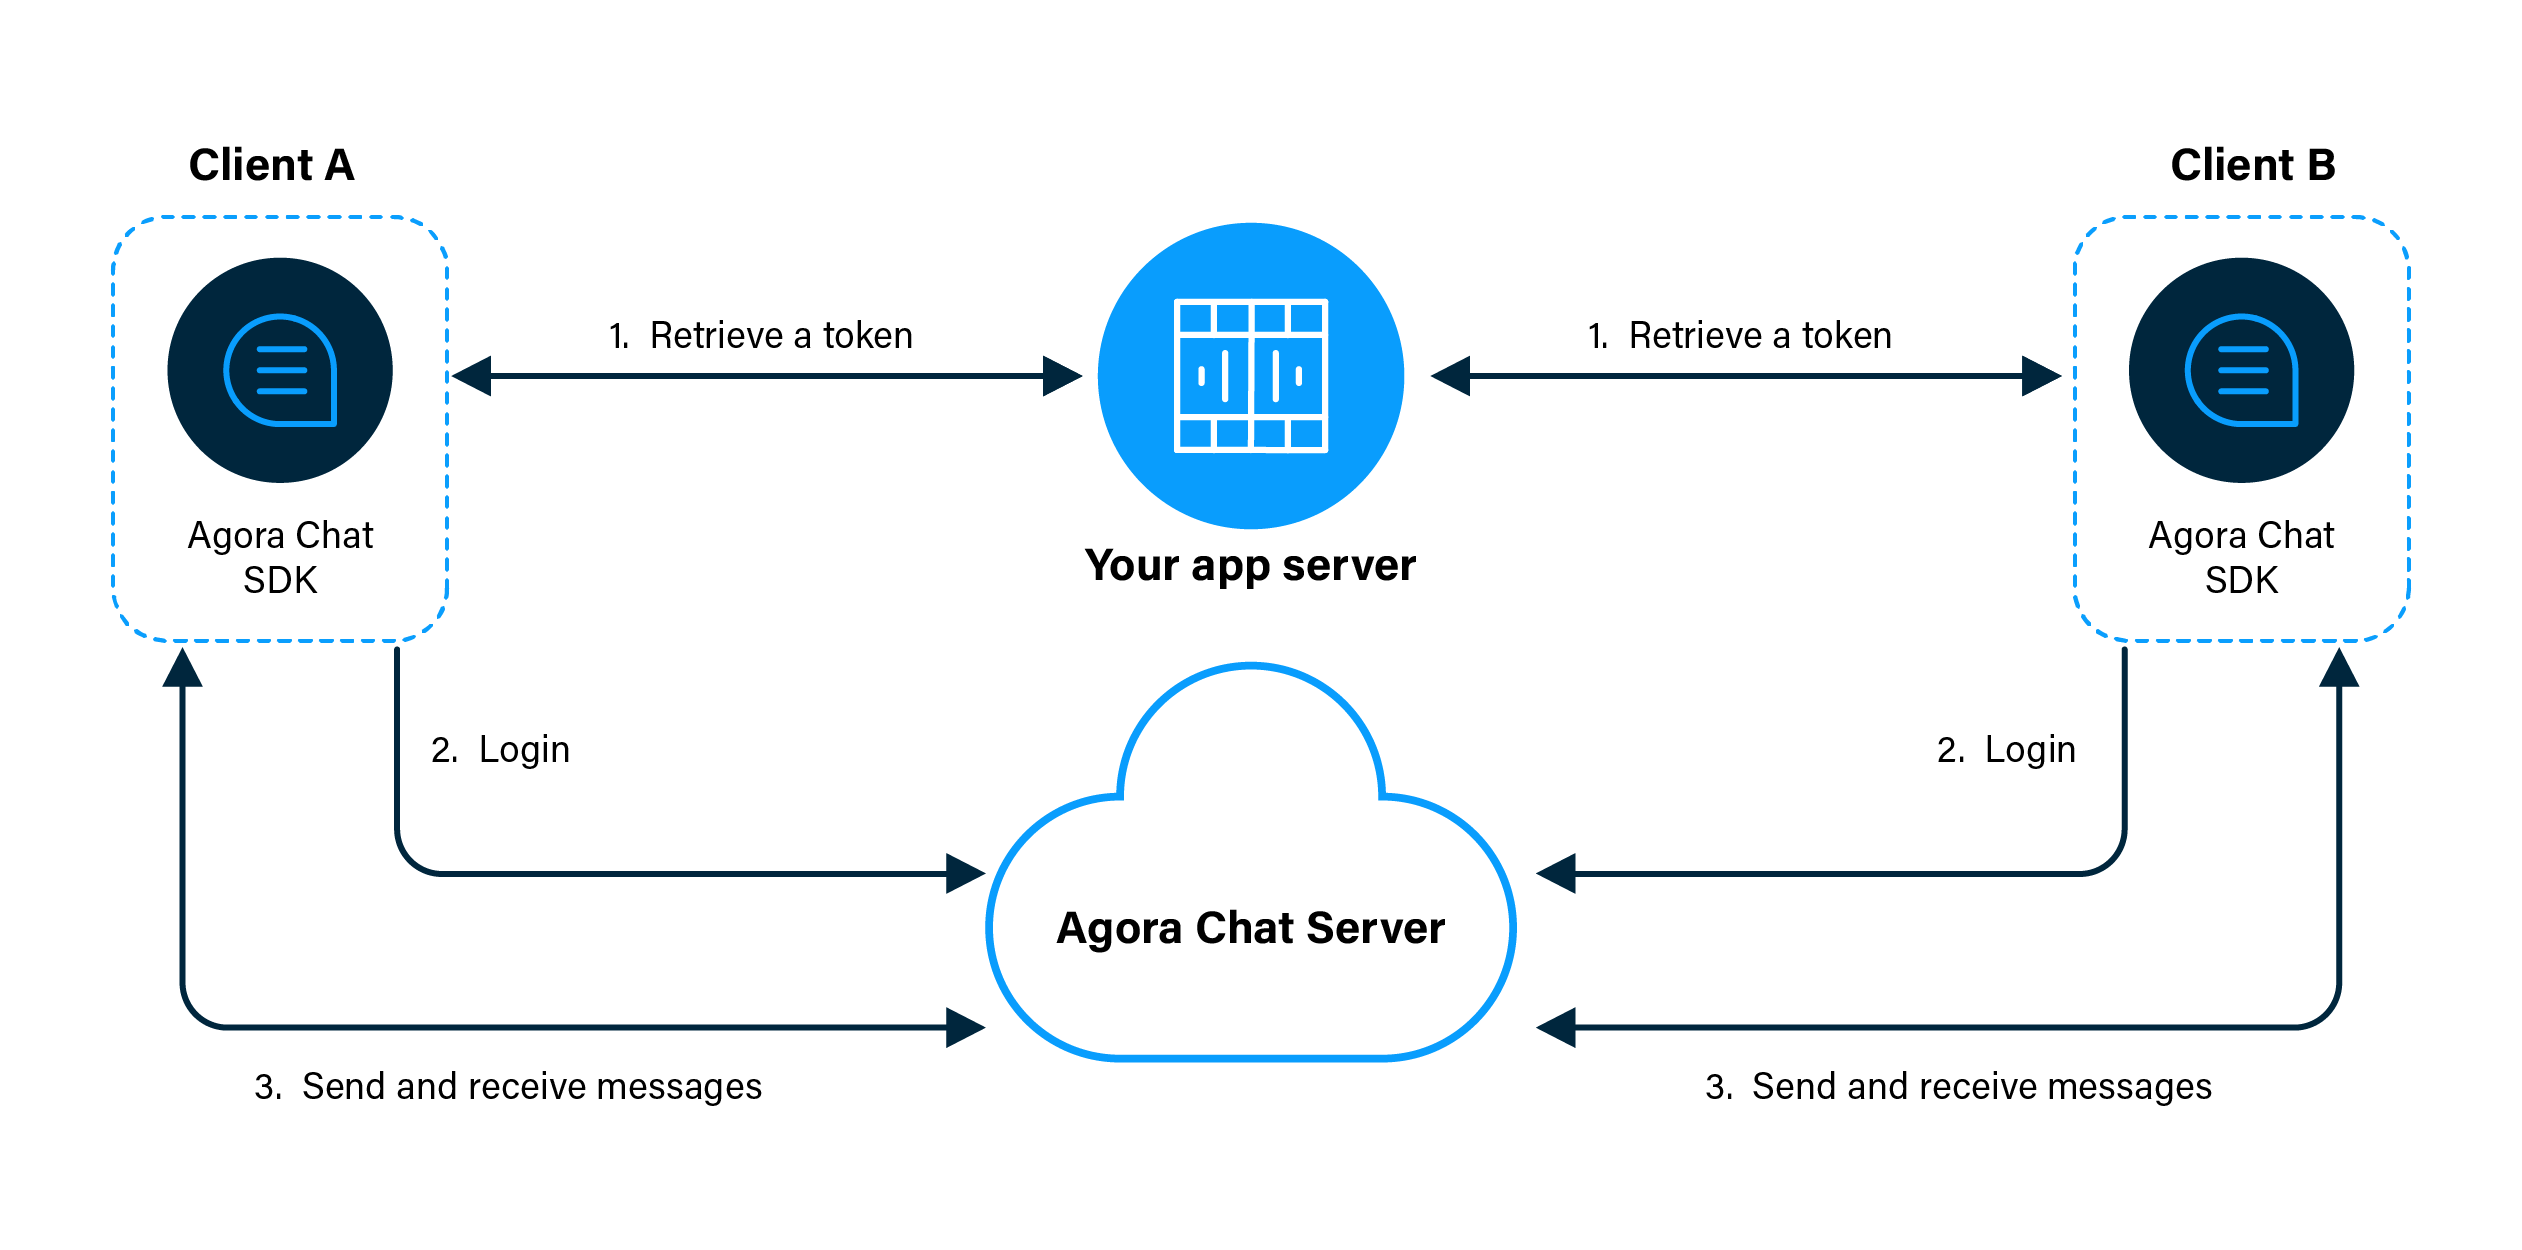
1. Clients retrieve a token from your app server.
2. Client A and Client B log in to Agora Chat.
3. Client A sends a message to Client B. The message is sent to the Agora Chat server, and the server delivers the message to Client B. When Client B receives the message, the SDK triggers an event. Client B listens for the event and gets the message.
## Prerequisites
* An Android simulator or a physical Android device.
* Android Studio 3.2 or higher.
* Java Development Kit (JDK). You can refer to the [User Guide of Android](https://developer.android.com/studio/write/java8-support) for applicable versions.
## Project setup
Follow the steps to create the environment necessary to add video call into your app.
1. For new projects, in **Android Studio**, create a **Phone and Tablet** [Android project](https://developer.android.com/studio/projects/create-project) with an **Empty Activity**.
After creating the project, Android Studio automatically starts gradle sync. Ensure that the sync succeeds before you continue.
2. Integrate the Chat SDK into your project with Maven Central.
1. In `/Gradle Scripts/build.gradle(Project: )`, add the following lines to add the Maven Central dependency:
```java
buildscript {
repositories {
...
mavenCentral()
}
}
allprojects {
repositories {
...
mavenCentral()
}
}
```
2. In `/Gradle Scripts/build.gradle(Module: .app)`, add the following lines to integrate the Chat UI Samples into your Android project:
```java
android {
defaultConfig {
// The Android OS version should be 21 or higher.
minSdkVersion 21
}
compileOptions {
sourceCompatibility JavaVersion.VERSION_1_8
targetCompatibility JavaVersion.VERSION_1_8
}
}
dependencies {
...
// Replace X.Y.Z with the latest version of the Chat UI Samples.
// For the latest version, go to https://search.maven.org/.
implementation 'io.agora.rtc:chat-uikit:X.Y.Z'
}
```
3. Add permissions for network and device access.
In `/app/Manifests/AndroidManifest.xml`, add the following permissions after ``:
```xml
```
These are the minimum permissions you need to add to start Chat. You can also add other permissions according to your use case.
4. Prevent code obfuscation.
In `/Gradle Scripts/proguard-rules.pro`, add the following line:
```java
-keep class io.agora.** {*;}
-dontwarn io.agora.**
```
## Implementation
## Implement peer-to-peer messaging
This section shows how to use the Chat UI Samples to implement peer-to-peer messaging in your app step by step.
### Create the UI
1. To add the text strings used by the UI, open `app/res/values/strings.xml ` and replace the content with the following:
```xml
AgoraChatUIKitQuickstartUsername or password is emptySign up success!Sign in success!Sign out success!Send message success!Enter usernameEnter passwordSign inSign outSign upEnter to usernameStart chatEnter contentShow log area...An account has been signed in, please sign out first and then sign inPlease sign in firstPlease enter the username who you want to send first!41117440#383391
```
2. To add the UI framework, open `app/res/layout/activity_main.xml` and replace the content with the following:
```xml
```
### Implementation
To enable your app to send and receive messages between individual users, do the following:
1. Implement sending and receiving messages.
In `app/java/io.agora.agorachatquickstart/MainActivity`, replace the code with the following:
```java
package io.agora.chatuikitquickstart;
import android.Manifest;
import android.os.Bundle;
import android.text.TextUtils;
import android.text.method.ScrollingMovementMethod;
import android.view.MotionEvent;
import android.view.View;
import android.widget.EditText;
import android.widget.TextView;
import android.widget.Toast;
import androidx.appcompat.app.AppCompatActivity;
import androidx.core.content.ContextCompat;
import org.json.JSONObject;
import java.util.HashMap;
import java.util.Map;
import io.agora.CallBack;
import io.agora.ConnectionListener;
import io.agora.Error;
import io.agora.chat.ChatClient;
import io.agora.chat.ChatMessage;
import io.agora.chat.ChatOptions;
import io.agora.chat.uikit.EaseUIKit;
import io.agora.chat.uikit.chat.EaseChatFragment;
import io.agora.chat.uikit.chat.interfaces.OnChatExtendMenuItemClickListener;
import io.agora.chat.uikit.chat.interfaces.OnChatInputChangeListener;
import io.agora.chat.uikit.chat.interfaces.OnChatRecordTouchListener;
import io.agora.chat.uikit.chat.interfaces.OnMessageSendCallBack;
import io.agora.chatuikitquickstart.utils.LogUtils;
import io.agora.chatuikitquickstart.utils.PermissionsManager;
import io.agora.cloud.HttpClientManager;
import io.agora.cloud.HttpResponse;
import io.agora.util.EMLog;
import static io.agora.cloud.HttpClientManager.Method_POST;
public class MainActivity extends AppCompatActivity {
private static final String NEW_LOGIN = "NEW_LOGIN";
private static final String RENEW_TOKEN = "RENEW_TOKEN";
private static final String LOGIN_URL = "https://a41.chat.agora.io/app/chat/user/login";
private static final String REGISTER_URL = "https://a41.chat.agora.io/app/chat/user/register";
private EditText et_username;
private TextView tv_log;
private ConnectionListener connectionListener;
@Override
protected void onCreate(Bundle savedInstanceState) {
super.onCreate(savedInstanceState);
setContentView(R.layout.activity_main);
initView();
requestPermissions();
initSDK();
addConnectionListener();
}
private void initView() {
et_username = findViewById(R.id.et_username);
tv_log = findViewById(R.id.tv_log);
tv_log.setMovementMethod(new ScrollingMovementMethod());
}
private void requestPermissions() {
checkPermissions(Manifest.permission.WRITE_EXTERNAL_STORAGE, 110);
}
//=================== init SDK start ========================
private void initSDK() {
ChatOptions options = new ChatOptions();
// Set your appkey applied from Agora Console
String sdkAppkey = getString(R.string.app_key);
if(TextUtils.isEmpty(sdkAppkey)) {
Toast.makeText(MainActivity.this, "You should set your AppKey first!", Toast.LENGTH_SHORT).show();
return;
}
// Set your appkey to options
options.setAppKey(sdkAppkey);
// Set whether confirmation of delivery is required by the recipient. Default: false
options.setRequireDeliveryAck(true);
// Set not to log in automatically
options.setAutoLogin(false);
// Use UI Samples to initialize Chat SDK
EaseUIKit.getInstance().init(this, options);
// Make Chat SDK debuggable
ChatClient.getInstance().setDebugMode(true);
}
//=================== init SDK end ========================
//================= SDK listener start ====================
private void addConnectionListener() {
connectionListener = new ConnectionListener() {
@Override
public void onConnected() {
}
@Override
public void onDisconnected(int error) {
if (error == Error.USER_REMOVED) {
onUserException("account_removed");
} else if (error == Error.USER_LOGIN_ANOTHER_DEVICE) {
onUserException("account_conflict");
} else if (error == Error.SERVER_SERVICE_RESTRICTED) {
onUserException("account_forbidden");
} else if (error == Error.USER_KICKED_BY_CHANGE_PASSWORD) {
onUserException("account_kicked_by_change_password");
} else if (error == Error.USER_KICKED_BY_OTHER_DEVICE) {
onUserException("account_kicked_by_other_device");
} else if(error == Error.USER_BIND_ANOTHER_DEVICE) {
onUserException("user_bind_another_device");
} else if(error == Error.USER_DEVICE_CHANGED) {
onUserException("user_device_changed");
} else if(error == Error.USER_LOGIN_TOO_MANY_DEVICES) {
onUserException("user_login_too_many_devices");
}
}
@Override
public void onTokenExpired() {
//login again
signInWithToken(null);
LogUtils.showLog(tv_log,"ConnectionListener onTokenExpired");
}
@Override
public void onTokenWillExpire() {
getTokenFromAppServer(RENEW_TOKEN);
LogUtils.showLog(tv_log, "ConnectionListener onTokenWillExpire");
}
};
// Call removeConnectionListener(connectionListener) when the activity is destroyed
ChatClient.getInstance().addConnectionListener(connectionListener);
}
//================= SDK listener end ====================
//=================== click event start ========================
/**
* Sign up with username and password.
*/
public void signUp(View view) {
String username = et_username.getText().toString().trim();
String pwd = ((EditText) findViewById(R.id.et_pwd)).getText().toString().trim();
if(TextUtils.isEmpty(username) || TextUtils.isEmpty(pwd)) {
LogUtils.showErrorToast(this, tv_log, getString(R.string.username_or_pwd_miss));
return;
}
execute(()-> {
try {
Map headers = new HashMap<>();
headers.put("Content-Type", "application/json");
JSONObject request = new JSONObject();
request.putOpt("userAccount", username);
request.putOpt("userPassword", pwd);
LogUtils.showErrorLog(tv_log,"begin to signUp...");
HttpResponse response = HttpClientManager.httpExecute(REGISTER_URL, headers, request.toString(), Method_POST);
int code= response.code;
String responseInfo = response.content;
if (code == 200) {
if (responseInfo != null && responseInfo.length() > 0) {
JSONObject object = new JSONObject(responseInfo);
String resultCode = object.getString("code");
if(resultCode.equals("RES_OK")) {
LogUtils.showToast(MainActivity.this, tv_log, getString(R.string.sign_up_success));
}else{
String errorInfo = object.getString("errorInfo");
LogUtils.showErrorLog(tv_log,errorInfo);
}
} else {
LogUtils.showErrorLog(tv_log,responseInfo);
}
} else {
LogUtils.showErrorLog(tv_log,responseInfo);
}
} catch (Exception e) {
e.printStackTrace();
LogUtils.showErrorLog(tv_log, e.getMessage());
}
});
}
/**
* Log in with token.
*/
public void signInWithToken(View view) {
getTokenFromAppServer(NEW_LOGIN);
}
/**
* Sign out.
*/
public void signOut(View view) {
if(ChatClient.getInstance().isLoggedInBefore()) {
ChatClient.getInstance().logout(true, new CallBack() {
@Override
public void onSuccess() {
LogUtils.showToast(MainActivity.this, tv_log, getString(R.string.sign_out_success));
}
@Override
public void onError(int code, String error) {
LogUtils.showErrorToast(MainActivity.this, tv_log, "Sign out failed! code: "+code + " error: "+error);
}
@Override
public void onProgress(int progress, String status) {
}
});
}
}
public void startChat(View view) {
EditText et_to_username = findViewById(R.id.et_to_username);
String toChatUsername = et_to_username.getText().toString().trim();
// check username
if(TextUtils.isEmpty(toChatUsername)) {
LogUtils.showErrorToast(this, tv_log, getString(R.string.not_find_send_name));
return;
}
// 1: single chat; 2: group chat; 3: chat room
EaseChatFragment fragment = new EaseChatFragment.Builder(toChatUsername, EaseChatType.SINGLE_CHAT)
.useHeader(false)
.setOnChatExtendMenuItemClickListener(new OnChatExtendMenuItemClickListener() {
@Override
public boolean onChatExtendMenuItemClick(View view, int itemId) {
if(itemId == io.agora.chat.uikit.R.id.extend_item_take_picture) {
return !checkPermissions(Manifest.permission.CAMERA, 111);
}else if(itemId == io.agora.chat.uikit.R.id.extend_item_picture || itemId == io.agora.chat.uikit.R.id.extend_item_file || itemId == io.agora.chat.uikit.R.id.extend_item_video) {
return !checkPermissions(Manifest.permission.READ_EXTERNAL_STORAGE, 112);
}
return false;
}
})
.setOnChatRecordTouchListener(new OnChatRecordTouchListener() {
@Override
public boolean onRecordTouch(View v, MotionEvent event) {
return !checkPermissions(Manifest.permission.RECORD_AUDIO, 113);
}
})
.setOnMessageSendCallBack(new OnMessageSendCallBack() {
@Override
public void onSuccess(ChatMessage message) {
LogUtils.showLog(tv_log, "Send success: message type: " + message.getType().name());
}
@Override
public void onError(int code, String errorMsg) {
LogUtils.showErrorLog(tv_log, "Send failed: error code: "+code + " errorMsg: "+errorMsg);
}
})
.build();
getSupportFragmentManager().beginTransaction().replace(R.id.fl_fragment, fragment).commit();
}
//=================== click event end ========================
//=================== get token from server start ========================
private void getTokenFromAppServer(String requestType) {
if(ChatClient.getInstance().getOptions().getAutoLogin() && ChatClient.getInstance().isLoggedInBefore()) {
LogUtils.showErrorLog(tv_log, getString(R.string.has_login_before));
return;
}
String username = et_username.getText().toString().trim();
String pwd = ((EditText) findViewById(R.id.et_pwd)).getText().toString().trim();
if(TextUtils.isEmpty(username) || TextUtils.isEmpty(pwd)) {
LogUtils.showErrorToast(MainActivity.this, tv_log, getString(R.string.username_or_pwd_miss));
return;
}
execute(()-> {
try {
Map headers = new HashMap<>();
headers.put("Content-Type", "application/json");
JSONObject request = new JSONObject();
request.putOpt("userAccount", username);
request.putOpt("userPassword", pwd);
LogUtils.showErrorLog(tv_log,"begin to getTokenFromAppServer ...");
HttpResponse response = HttpClientManager.httpExecute(LOGIN_URL, headers, request.toString(), Method_POST);
int code = response.code;
String responseInfo = response.content;
if (code == 200) {
if (responseInfo != null && responseInfo.length() > 0) {
JSONObject object = new JSONObject(responseInfo);
String token = object.getString("accessToken");
if(TextUtils.equals(requestType, NEW_LOGIN)) {
ChatClient.getInstance().loginWithAgoraToken(username, token, new CallBack() {
@Override
public void onSuccess() {
LogUtils.showToast(MainActivity.this, tv_log, getString(R.string.sign_in_success));
}
@Override
public void onError(int code, String error) {
LogUtils.showErrorToast(MainActivity.this, tv_log, "Login failed! code: " + code + " error: " + error);
}
@Override
public void onProgress(int progress, String status) {
}
});
}else if(TextUtils.equals(requestType, RENEW_TOKEN)) {
ChatClient.getInstance().renewToken(token);
}
} else {
LogUtils.showErrorToast(MainActivity.this, tv_log, "getTokenFromAppServer failed! code: " + code + " error: " + responseInfo);
}
} else {
LogUtils.showErrorToast(MainActivity.this, tv_log, "getTokenFromAppServer failed! code: " + code + " error: " + responseInfo);
}
} catch (Exception e) {
e.printStackTrace();
LogUtils.showErrorToast(MainActivity.this, tv_log, "getTokenFromAppServer failed! code: " + 0 + " error: " + e.getMessage());
}
});
}
//=================== get token from server end ========================
/**
* Check and request permission
* @param permission
* @param requestCode
* @return
*/
private boolean checkPermissions(String permission, int requestCode) {
if(!PermissionsManager.getInstance().hasPermission(this, permission)) {
PermissionsManager.getInstance().requestPermissions(this, new String[]{permission}, requestCode);
return false;
}
return true;
}
/**
* user met some exception: conflict, removed or forbidden, goto login activity
*/
protected void onUserException(String exception) {
LogUtils.showLog(tv_log, "onUserException: " + exception);
ChatClient.getInstance().logout(false, null);
}
public void execute(Runnable runnable) {
new Thread(runnable).start();
}
@Override
protected void onDestroy() {
super.onDestroy();
if(connectionListener != null) {
ChatClient.getInstance().removeConnectionListener(connectionListener);
}
}
}
```
2. Add LogUtils and PermissionsManager.
To make troubleshooting less time-consuming, this quickstart also uses `LogUtils` class for logs. Navigate to `app/java/io.agora.agorachatquickstart/`, create a folder named `utils`. In this new folder, create a `.java` file, name it `LogUtils`, and copy the following codes into the file.
```java
package io.agora.chatuikitquickstart.utils;
import android.app.Activity;
import android.text.TextUtils;
import android.util.Log;
import android.widget.TextView;
import android.widget.Toast;
import java.text.SimpleDateFormat;
import java.util.Date;
import java.util.Locale;
public class LogUtils {
private static final String TAG = LogUtils.class.getSimpleName();
public static void showErrorLog(TextView tvLog, String content) {
showLog(tvLog, content);
}
public static void showNormalLog(TextView tvLog, String content) {
showLog(tvLog, content);
}
public static void showLog(TextView tvLog, String content) {
if(TextUtils.isEmpty(content) || tvLog == null) {
return;
}
String preContent = tvLog.getText().toString().trim();
StringBuilder builder = new StringBuilder();
builder.append(formatCurrentTime())
.append(" ")
.append(content)
.append("\n")
.append(preContent);
tvLog.post(()-> {
tvLog.setText(builder);
});
}
public static void showErrorToast(Activity activity, TextView tvLog, String content) {
if(activity == null || activity.isFinishing()) {
Log.e(TAG, "Context is null...");
return;
}
if(TextUtils.isEmpty(content)) {
return;
}
activity.runOnUiThread(()-> {
Toast.makeText(activity, content, Toast.LENGTH_SHORT).show();
showErrorLog(tvLog,content);
});
}
public static void showToast(Activity activity, TextView tvLog, String content) {
if(TextUtils.isEmpty(content) || activity == null || activity.isFinishing()) {
return;
}
activity.runOnUiThread(()-> {
Toast.makeText(activity, content, Toast.LENGTH_SHORT).show();
showNormalLog(tvLog, content);
});
}
private static String formatCurrentTime() {
SimpleDateFormat sdf = new SimpleDateFormat("yyyy-MM-dd HH:mm:ss", Locale.getDefault());
return sdf.format(new Date());
}
}
```
When your app launches, check if the permissions necessary to insert real-time chat into the app are granted. In the `utils` file, create a `.java` file, name it `PermissionsManager`, and copy the following codes into the file.
```java
package io.agora.chatuikitquickstart.utils;
import android.app.Activity;
import android.content.Context;
import android.content.pm.PackageManager;
import androidx.annotation.NonNull;
import androidx.annotation.Nullable;
import androidx.core.app.ActivityCompat;
public class PermissionsManager {
private static PermissionsManager mInstance = null;
public static PermissionsManager getInstance() {
if (mInstance == null) {
mInstance = new PermissionsManager();
}
return mInstance;
}
private PermissionsManager() {}
/**
* Check if has permission
* @param context
* @param permission
* @return
*/
@SuppressWarnings("unused")
public synchronized boolean hasPermission(@Nullable Context context, @NonNull String permission) {
return context != null && ActivityCompat.checkSelfPermission(context, permission)
== PackageManager.PERMISSION_GRANTED;
}
/**
* Request permissions
* @param activity
* @param permissions
* @param requestCode
*/
public synchronized void requestPermissions(Activity activity, String[] permissions, int requestCode) {
ActivityCompat.requestPermissions(activity, permissions, requestCode);
}
}
```
3. To send image and file messages, take the following configurations:
Under `/app/src/main/res/`, create a folder, name it `xml`, and create an xml file named `file_paths.xml` under `xml`. Open `file_paths.xml`, replace the code with the following:
```xml
```
In `/app/Manifests/AndroidManifest.xml`, add the following lines before ``:
```xml
```
4. Click `Sync Project with Gradle Files` to sync your project. Now you are ready to test your app.
## Test your app
To validate the peer-to-peer messaging you have just integrated into your app using Chat:
1. In Android Studio, click `Run 'app'`.
You see the following interface on your simulator or physical device:
2. Create a user account and click **SIGN UP**. Click **Sign in** and you will see a log that says Sign in success.
3. Run the app on another Android device or simulator and create another user account. Ensure that the usernames you created are unique.
4. On the first device or simulator, enter the username you just created and click **START CHAT**. You can now start chatting between the two clients.
## Next steps
For demonstration purposes, Chat provides an app server that enables you to quickly retrieve a token using the App Key given in this guide. In a production context, the best practice is for you to deploy your own token server, use your own [App Key](./get-started/enable#get-chat-project-information) to generate a token, and retrieve the token on the client side to log in to Agora. To see how to implement a server that generates and serves tokens on request, see [Authenticate your users with tokens](/en/realtime-media/im/build/secure-access-and-authentication/authentication).
## Reference
Agora provides the fully featured [AgoraChat-Starter-Kit-Android](https://github.com/AgoraIO-Usecase/AgoraChat-UIKit-android) demo app as an implementation reference.
## Platform-specific versions
- [Windows](/en/realtime-media/im/get-started-uikit/windows.md)
- [Unity](/en/realtime-media/im/get-started-uikit/unity.md)
- [Android](/en/realtime-media/im/get-started-uikit/android.md)
- [iOS](/en/realtime-media/im/get-started-uikit/ios.md)
- [Web](/en/realtime-media/im/get-started-uikit/web.md)
- [Flutter](/en/realtime-media/im/get-started-uikit/flutter.md)
- [React Native](/en/realtime-media/im/get-started-uikit/react-native.md)
# Chat overview (/en/realtime-media/im)
Agora's Chat API offers real-time text messaging with features like message storage, typing indicators, read receipts, and rich media support. Designed for one-to-one, group, or large-scale conversations, it’s a scalable, secure, and customizable solution for customer engagement, social platforms, or enterprise collaboration.
Use Chat as a standalone messaging solution or combine it with Voice Calling, Video Calling, Broadcast Streaming, and Interactive Live Streaming to create fully interactive, real-time experiences.
Enhance your Chat-powered app with features like offline messaging, message translation, and customizable channel and user management. Support rich media messages—including emojis, structured messages, and file sharing—to deliver engaging and seamless communication for your users.
## Start building
## Product features
Support emojis, GPS locations, structured messages, push notifications, and rich-media files with auto-generated thumbnails with Agora’s chat API service.
Integrate chat signaling, one-to-one private chat, or feature-rich group chat at scale with our chat SDK for mobile and desktop.
Allow offline messaging, message recall and delete, read receipts, presence and typing indicator, push notifications, and exporting chat history.
Build a secure chat application with TLS/SSL and file encryption and ensure data privacy compliance by allowing users to erase their personal data.
Protect users from unwanted profanity, spam, and inappropriate images or text with robust content moderation built into the chat platform.
Enable auto, on-demand, or push translation so your users can chat in their preferred language.
# Core concepts (/en/realtime-media/interactive-live-streaming/core-concepts)
RTC (Real-Time Communication) refers to real-time communication technology, which allows almost instant exchange of audio, video, and other data between the sender and the receiver.
Agora SDKs provide real-time audio and video interaction services, with multi-platform and multi-device support. This includes high-definition video calls, voice-only calls, interactive live streaming, as well as one-on-one and multi-group chats.
This guide introduces the key processes and concepts you need to know to use Video SDK.
Agora relies on the following fundamental concepts to enable seamless real-time communication:
### Agora SDRTN®
Agora's core engagement services are powered by its Software-Defined Real-Time Network (SDRTN®), a global infrastructure accessible anytime, anywhere. Unlike traditional networks, Agora SDRTN® is not restricted by devices, phone numbers, or telecom coverage areas. With data centers in over 200 countries and regions, it ensures sub-second latency and high availability for real-time media.
Agora SDRTN® enables live user engagement through real-time communication (RTC), offering:
* Unmatched quality of service
* High availability and accessibility
* True scalability
* Low cost
## Channel concepts
Agora uses channels to group users together, enabling seamless communication and interaction. Channels serve as the foundation for transmitting real-time data, whether audio, video, or signaling, and play a crucial role in connecting users and services.
### Channel
A channel organizes users into a group and is identified by a unique channel name. Users who connect to the same channel are able to communicate with each other. A channel is created when the first user joins and ceases to exist when the last user leaves.
Channels are created by calling the methods for transmitting real-time data. Agora uses different channels to transmit different types of data:
* A Video SDK channel is used for transmitting audio or video data.
* A Signaling channel is used for transmitting messaging or signaling data.
These channels are independent of each other.
Additional services provided by Agora, such as Cloud Recording and Speech to Text, join the Video SDK channel to provide real-time recording, transmission acceleration, media playback, and content moderation.
### Channel profile
The Video SDK applies different optimization methods according to the selected channel profile. Agora supports the following channel profiles:
| Channel profile | Description |
| --------------------- | ------------------------------------------------------------------------------------------------------------------------------------------------------------------------------------------------------ |
| **Communication** | This profile is suitable for one-on-one or group calls, where all users in the channel talk freely. |
| **Live Broadcasting** | In a live streaming channel, users have two client roles: *host* and *audience*. The *host* sends and receives streams, while the *audience* only receives streams with the sending function disabled. |
### Stream
A stream is a sequence of digitally encoded, coherent signals that contain media data. Users in a channel [publish](#publish) local streams and [subscribe](#subscribe) to remote streams from other users.
### User role
The user role defines whether a user in a channel has the permission to publish streams. There are two user roles:
* **Host**: A user who can publish streams to a channel.
* **Audience**: A User who can only subscribe to remote media streams. A user with this role cannot publish streams.
### Publish
Publishing is the act of sending a user’s audio or video data to the channel. Usually, the published stream is created by the audio data sampled from a microphone or the video data captured by a camera. You can also publish media streams from other sources, such as an online music file or the user’s screen.
After successfully publishing a stream, the SDK uses it to send media data to other users in the channel. Users communicate with each other in real-time by publishing local streams and subscribing to remote streams.
### Subscribe
Subscribing is the act of receiving media streams published by remote users to the channel. A user receives audio and video data from other users by subscribing to one or more of their streams. You either directly play the subscribed streams or process incoming data for other purposes such as recording or capturing screenshots.
### User ID
In Interactive Live Streaming, the UID is an integer value that uniquely identifies a user within the context of a channel. When joining a channel, you have the option to either assign a specific UID to the user or pass `0` or `null` and allow Agora to automatically generate and assign a UID to the user. If two users attempt to join the same channel with the same UID, it can lead to unexpected behavior.
The UID is used by Agora's services and components to identify and manage users within a channel. Ensure that UIDs are properly assigned to prevent conflicts.
### RTC connection
The connection between the SDK and the channel. When publishing or subscribing to multiple streams in multiple channels, a connection is used to specify the target channel.
## Credentials
To ensure reliable access and secure communication, Agora uses credentials such as the App ID, App Certificate, and tokens to identify applications, authenticate their requests, and authorize their access on its platform.
### App ID
The App ID is a unique key generated by Agora to identify each project and provide billing and other statistical data services. The App ID is critical for connecting users within your app. It is used to initialize the Agora Engine in your app, and as one of the required keys to create authentication tokens for secure communication. Retrieve the App ID for your project using the [Agora Console](https://console.agora.io/legacy/project-management).
App IDs are stored on the front-end client and do not provide access control. Projects using only an App ID allow any user with the App ID to join. For access control, especially in production environments, choose the **App ID + Token** mechanism for user authentication when creating a new project. Without authentication tokens, your environment is open to anyone with access to your App ID.
### App Certificate
An App Certificate is a unique key generated by the Agora Console to secure projects through token authentication. It is required, along with the App ID, to generate a token that proves authorization between your systems and Agora's network. App Certificates are used to generate Interactive Live Streaming authentication tokens.
Store the App Certificate securely in your backend systems. If your App Certificate is compromised or to meet security compliance requirements, you can invalidate certificates and create new ones through the Agora Console.
### Tokens
A token is a dynamic key generated using the App ID, App Certificate, user ID, and expiration timestamp. Tokens authenticate and secure access to Agora's services, ensuring only authorized users can join a channel and participate in real-time communication.
Tokens are generated on your server and passed to the client for use in Interactive Live Streaming. The token generation process involves digitally signing the App ID, App Certificate, user ID, and expiration timestamp using a specific algorithm, preventing tampering or forgery.
During development and testing, use the Agora Console to generate temporary tokens. For production environments, implement a token server as part of your security infrastructure to control access to your channels.
### Agora Console
[Agora Console](https://console.agora.io/) is the main dashboard where you manage your Agora projects and services. Before you can use Agora's SDKs, you must first create a project in the Agora Console. See [Agora account management](/en/introduction/account) for
details.

Agora Console provides an intuitive interface for developers to query and manage their Agora account. After registering an Agora account, you use the Agora Console to perform the following tasks:
* Manage your account
* Create and configure Agora projects and services
* Get an App ID and the App certificate
* Generate temporary tokens for development and testing
* Manage members and roles
* Check call quality and usage
* Check bills and make payments
* Access product resources
See [Agora account management](/en/introduction/account) for details on how to manage all aspects of your Agora account.
Agora also provides RESTful APIs that you use to implement features such as creating a project and fetching usage numbers programmatically.
## Audio and video concepts
### Audio and video interaction workflow
The following figure illustrates the workflow of using the Video SDK to implement basic audio and video interaction.

Agora relies on the following fundamental concepts to enable seamless real-time communication:
### Audio module
In audio interaction, the main functions of the audio module are as shown in the figure below:

After you call `registerAudioFrameObserver`, you can obtain the raw audio data at the following observation points in the audio transmission process:
1. Obtain the raw audio data of ear monitoring through the `onEarMonitoringAudioFrame` callback.
2. Obtain the captured raw audio data through the `onRecordAudioFrame` callback.
3. Obtain the raw audio playback data of each individual stream through the `onPlaybackAudioFrameBeforeMixing` callback.
4. Obtain the raw audio playback data of all mixed streams through the `onPlaybackAudioFrame` callback.
5. Obtain the raw audio data after mixing the captured and playback audio through the `onMixedAudioFrame` callback.
(5) `onMixedAudioFrame` = (2) `onRecordAudioFrame` + (4) `onPlaybackAudioFrame`
### Audio routing
The audio output device used by the app when playing audio. Common audio routes include wired headphones, earpieces, speakers, Bluetooth headphones, and others.
The APIs used by the audio module are as follows:
* Enable local audio collection: `enableLocalAudio`
* Set local playback device: `setPlaybackDevice`
* Set up audio routing: `setDefaultAudioRouteToSpeakerphone`
### Video module
The following diagram shows the main functions of the video module in video interaction:

The figure shows the following observation points:
1. `POSITION_POST_CAPTURER_ORIGIN`.
2. `POSITION_POST_CAPTURER`, corresponds to the `onCaptureVideoFrame` callback.
3. `POSITION_PRE_ENCODER`, corresponds to the `onPreEncodeVideoFrame` callback.
4. `POSITION_PRE_RENDERER`, corresponds to the `onRenderVideoFrame` callback.
The APIs used by the video module are as follows:
* Enable local video collection: `enableLocalVideo`
* Local preview: `setupLocalVideo` → `startPreview`
* Video rendering shows: `setupRemoteVideo`
# Interactive Live Streaming overview (/en/realtime-media/interactive-live-streaming/product-overview)
Agora's Interactive Live Streaming API delivers low-latency, high-definition live audio and video streaming. Designed for large-scale streaming, it supports hosts, co-hosts, and audience participation, enabling engaging live experiences across platforms while maintaining reliable performance in varying network conditions. Use it for live events, webinars, online education, live commerce, gaming streams, and social live experiences where audience interaction is a core part of the experience.
Enhance Agora's Video SDK with additional capabilities such as recording, virtual backgrounds, and content moderation, or leverage the Extensions Marketplace to enable AI-powered features like noise cancellation, video effects, and more.
## Start building
## Product Features
Agora’s Software-Defined Real-Time Network (SDRTN®) supports video users in over 200 countries and regions.
Consistent high-quality video from few to thousands of concurrent users, even under challenging network conditions.
Publish multiple audio and video tracks to one or more channels from a single instance, with support for multi-channel capture cameras and microphones.
Enable screen sharing or interactive whiteboards that allow users to draw, annotate, and share content from multiple devices simultaneously.
Support for high quality audio with 3D spatial audio, AI noise suppression, and gain control to provide an immersive audio experience.
Record video sessions in the cloud or on premises with control over the format, path of storage, and quality.
# Quickstart (/en/realtime-media/interactive-live-streaming/quickstart)
This page provides a step-by-step guide on how to create a basic Interactive Live Streaming app using the Agora Video SDK.
## Understand the tech
To start a Interactive Live Streaming session, implement the following steps in your app:
* **Initialize the Agora Engine**: Before calling other APIs, create and initialize an Agora Engine instance.
* **Join a channel**: Call methods to create and join a channel.
* **Join as a host**: A live streaming event has one or more hosts. A host publishes audio and video to the channel. Hosts can also subscribe to streams from other hosts.
* **Join as audience**: Audience members can only subscribe to streams published by hosts.
* **Send and receive audio and video**: Hosts publish streams to the channel. Audience members subscribe to audio and video streams published by hosts.

## Prerequisites
* [Android Studio](https://developer.android.com/studio) 4.2 or higher.
* Android SDK API Level 21 or higher.
* Two mobile devices running Android 5.0 or higher.
* A camera and a microphone
* A valid Agora account and project. Please refer to [Agora account management](/en/introduction/account) for details.
## Set up your project
This section shows you how to set up your Android project and install the Agora Video SDK.
**Create a new project**
1. Create a [new project](https://developer.android.com/studio/projects/create-project).
1. Open Android Studio and select **File > New > New Project...**.
2. Select **Phone and Tablet** > **Empty Activity** and click **Next**.
3. Set the project name and storage path.
4. Select **Java** or **Kotlin** as the language, and click **Finish** to create the Android project.
After you create a project, Android Studio automatically starts gradle sync. Ensure that the synchronization is successful before proceeding to the next step.
**Add to an existing project**
1. Add a new activity to your project.
1. Open your project in Android Studio.
2. Right-click on the `app/src/main/java/` folder.
3. Select **New → Activity → Empty Activity**.
4. Enter an activity name and click **Finish**.
This guide uses `MainActivity` as the activity name in the sample code. Replace it with your activity name where required.
2. Add a layout file for your activity.
Set up two container elements in your activity to display local and remote video streams. Refer to [Create a user interface](#create-a-user-interface) to get a bare bones sample layout.
### Install the SDK
Use either of the following methods to add Video SDK to your project.
**Maven Central**
1. Open the `settings.gradle` file in the project's root directory and add the Maven Central dependency, if it doesn't already exist:
```text
repositories {
mavenCentral()
}
```
If your Android project uses dependencyResolutionManagement, the method of adding the Maven Central dependency may differ.
2. To integrate the Video SDK into your Android project, add the following to the `dependencies` block in your project module `build.gradle` file:
* Groovy `build.gradle`
```json
implementation 'io.agora.rtc:full-sdk:x.y.z'
```
* Kotlin `build.gradle.kts`
```kotlin
implementation("io.agora.rtc:full-sdk:x.y.z")
```
Replace `x.y.z` with the specific SDK version number, such as `4.5.0`.
To get the latest version number, check the [Release notes](reference/release-notes). To integrate the Lite SDK, use `io.agora.rtc:lite-sdk` instead.
3. Prevent code obfuscation
Open the `/app/proguard-rules.pro` file and add the following lines to prevent the Video SDK code from being obfuscated:
```java
-keep class io.agora.** { *; }
-dontwarn io.agora.**
```
**Manual integration**
1. Download the latest version of Video SDK from the [SDKs](/en/api-reference/sdks?product=video\&platform=android) page and unzip it.
2. Open the unzipped file and copy the following files or subfolders to your project path.
| File or folder | Project path |
| :----------------------------------- | :----------------------- |
| `agora-rtc-sdk.jar` file | `/app/libs/` |
| `arm64-v8a` folder | `/app/src/main/jniLibs/` |
| `armeabi-v7a` folder | `/app/src/main/jniLibs/` |
| `x86` folder | `/app/src/main/jniLibs/` |
| `x86_64` folder | `/app/src/main/jniLibs/` |
| `high_level_api` in `include` folder | `/app/src/main/jniLibs/` |
3. Select the file `/app/libs/agora-rtc-sdk.jar` in the left navigation bar of Android Studio project files, right-click, and select **add as a library** from the drop-down menu.
4. Prevent code obfuscation
Open the `/app/proguard-rules.pro` file and add the following lines to prevent the Video SDK code from being obfuscated:
```java
-keep class io.agora.** { *; }
-dontwarn io.agora.**
```
## Implement Interactive Live Streaming
This section guides you through the implementation of basic real-time audio and video interaction in your app.
The following figure illustrates the essential steps:

This guide includes [complete sample code](#complete-sample-code) that demonstrates implementing basic real-time interaction. To understand the core API calls in the sample code, review the following implementation steps and use the code in your `MainActivity` file.
### Import Agora classes
Import the relevant Agora classes and interfaces:
Java
Kotlin
```java
import io.agora.rtc2.Constants;
import io.agora.rtc2.IRtcEngineEventHandler;
import io.agora.rtc2.RtcEngine;
import io.agora.rtc2.RtcEngineConfig;
import io.agora.rtc2.video.VideoCanvas;
import io.agora.rtc2.ChannelMediaOptions;
```
```kotlin
import io.agora.rtc2.Constants
import io.agora.rtc2.IRtcEngineEventHandler
import io.agora.rtc2.RtcEngine
import io.agora.rtc2.RtcEngineConfig
import io.agora.rtc2.video.VideoCanvas
import io.agora.rtc2.ChannelMediaOptions
```
### Initialize the engine
For real-time communication, initialize an `RtcEngine` instance and set up event handlers to manage user interactions within the channel. Use `RtcEngineConfig` to specify the application context, [App ID](/en/introduction/account), and custom [event handler](#subscribe-to--events), then call `RtcEngine.create(config)` to initialize the engine, enabling further channel operations. In your `MainActivity` file, add the following code:
Java
Kotlin
```java
// Fill in the app ID from Agora Console
private String myAppId = "";
private RtcEngine mRtcEngine;
private void initializeAgoraVideoSDK() {
try {
RtcEngineConfig config = new RtcEngineConfig();
config.mContext = getBaseContext();
config.mAppId = myAppId;
config.mEventHandler = mRtcEventHandler;
mRtcEngine = RtcEngine.create(config);
} catch (Exception e) {
throw new RuntimeException("Error initializing RTC engine: " + e.getMessage());
}
}
```
```kotlin
// Fill in the App ID obtained from the Agora Console
private val myAppId = ""
private var mRtcEngine: RtcEngine? = null
private fun initializeRtcEngine() {
try {
val config = RtcEngineConfig().apply {
mContext = applicationContext
mAppId = myAppId
mEventHandler = mRtcEventHandler
}
mRtcEngine = RtcEngine.create(config)
} catch (e: Exception) {
throw RuntimeException("Error initializing RTC engine: ${e.message}")
}
}
```
### Join a channel
To join a channel, call `joinChannel` with the following parameters:
* **Channel name**: The name of the channel to join. Clients that pass the same channel name join the same channel. If a channel with the specified name does not exist, it is created when the first user joins.
* **Authentication token**: A dynamic key that authenticates a user when the client joins a channel. In a production environment, you obtain a token from a [token server](build/authenticate-users/deploy-token-server.mdx) in your security infrastructure. For the purpose of this guide [Generate a temporary token](/en/introduction/account).
* **User ID**: A 32-bit signed integer that identifies a user in the channel. You can specify a unique user ID for each user yourself. If you set the user ID to `0` when joining a channel, the SDK generates a random number for the user ID and returns the value in the `onJoinChannelSuccess` callback.
* **Channel media options**: Configure `ChannelMediaOptions` to define publishing and subscription settings, optimize performance for your specific use-case, and set optional parameters.
For Interactive Live Streaming, set the `channelProfile` to `CHANNEL_PROFILE_LIVE_BROADCASTING`, the `clientRoleType` to `CLIENT_ROLE_BROADCASTER` (host) or `CLIENT_ROLE_AUDIENCE`, and the `audienceLatencyLevel` to `AUDIENCE_LATENCY_LEVEL_ULTRA_LOW_LATENCY`.
Java
Kotlin
```java
// Fill in the channel name
private String channelName = "";
// Fill in the temporary token generated from Agora Console
private String token = "";
private void joinChannel() {
// Create an instance of ChannelMediaOptions and configure it
ChannelMediaOptions options = new ChannelMediaOptions();
// Set the user role to BROADCASTER or AUDIENCE according to the use-case
options.clientRoleType = Constants.CLIENT_ROLE_BROADCASTER;
// In the live broadcast use-case, set the channelProfile to BROADCASTING (live broadcast use-case)
options.channelProfile = Constants.CHANNEL_PROFILE_LIVE_BROADCASTING;
// Set the latency level for audience
options.audienceLatencyLevel = Constants.AUDIENCE_LATENCY_LEVEL_ULTRA_LOW_LATENCY;
// Publish local media
options.publishCameraTrack = true;
options.publishMicrophoneTrack = true;
mRtcEngine.joinChannel(token, channelName, 0, options);
}
```
```kotlin
// Fill in the channel name
private val channelName = ""
// Fill in the temporary token generated from Agora Console
private val token = ""
private fun joinChannel() {
// Create an instance of ChannelMediaOptions and configure it
val options = ChannelMediaOptions().apply {
// Set the user role to BROADCASTER or AUDIENCE according to the use-case
clientRoleType = Constants.CLIENT_ROLE_BROADCASTER
// In the live broadcast use-case, set the channelProfile to BROADCASTING (live broadcast use-case)
channelProfile = Constants.CHANNEL_PROFILE_LIVE_BROADCASTING
// Set the latency level for audience
audienceLatencyLevel = Constants.AUDIENCE_LATENCY_LEVEL_ULTRA_LOW_LATENCY
// Publish local media
publishMicrophoneTrack = true
publishCameraTrack = true
}
mRtcEngine.joinChannel(token, channelName, 0, options)
}
```
### Subscribe to Video SDK events
The Video SDK provides an interface for subscribing to channel events. To use it, create an instance of `IRtcEngineEventHandler` and implement the event methods you want to handle.
To ensure that you receive all Video SDK events, set the Agora Engine event handler before joining a channel.
Java
Kotlin
```java
private final IRtcEngineEventHandler mRtcEventHandler = new IRtcEngineEventHandler() {
// Triggered when the local user successfully joins the specified channel.
@Override
public void onJoinChannelSuccess(String channel, int uid, int elapsed) {
super.onJoinChannelSuccess(channel, uid, elapsed);
showToast("Joined channel " + channel);
}
// Triggered when a remote user/host joins the channel.
@Override
public void onUserJoined(int uid, int elapsed) {
super.onUserJoined(uid, elapsed);
runOnUiThread(() -> {
// Initialize and display remote video view for the new user.
setupRemoteVideo(uid);
showToast("User joined: " + uid);
});
}
// Triggered when a remote user/host leaves the channel.
@Override
public void onUserOffline(int uid, int reason) {
super.onUserOffline(uid, reason);
runOnUiThread(() -> {
showToast("User offline: " + uid);
});
}
};
```
```kotlin
private val mRtcEventHandler = object : IRtcEngineEventHandler() {
override fun onJoinChannelSuccess(channel: String?, uid: Int, elapsed: Int) {
super.onJoinChannelSuccess(channel, uid, elapsed)
runOnUiThread {
showToast("Joined channel $channel")
}
}
override fun onUserJoined(uid: Int, elapsed: Int) {
runOnUiThread {
showToast("User joined: $uid")
}
}
override fun onUserOffline(uid: Int, reason: Int) {
super.onUserOffline(uid, reason)
runOnUiThread {
showToast("User offline: $uid")
}
}
}
```
### Enable the video module
Follow these steps to enable the video module:
1. Call `enableVideo` to enable the video module.
2. Call `startPreview` to enable local video preview.
Java
Kotlin
```java
private void enableVideo() {
mRtcEngine.enableVideo();
mRtcEngine.startPreview();
}
```
```kotlin
private fun enableVideo() {
mRtcEngine?.apply {
enableVideo()
startPreview()
}
}
```
### Display the local video
Call `setupLocalVideo` to initialize the local view and set the local video display properties.
Java
Kotlin
```java
private void setupLocalVideo() {
FrameLayout container = findViewById(R.id.local_video_view_container);
SurfaceView surfaceView = new SurfaceView(getBaseContext());
container.addView(surfaceView);
mRtcEngine.setupLocalVideo(new VideoCanvas(surfaceView, VideoCanvas.RENDER_MODE_FIT, 0));
}
```
```kotlin
/**
* Initializes the local video view and sets the display properties.
* This method adds a SurfaceView to the local video container and configures it.
*/
private fun setupLocalVideo() {
val container: FrameLayout = findViewById(R.id.local_video_view_container)
val surfaceView = SurfaceView(baseContext)
container.addView(surfaceView)
mRtcEngine.setupLocalVideo(VideoCanvas(surfaceView, VideoCanvas.RENDER_MODE_FIT, 0))
}
```
### Display remote video
When a remote user joins the channel, call `setupRemoteVideo` and pass in the remote user's `uid`, obtained from the `onUserJoined` callback, to display the remote video.
Java
Kotlin
```java
private void setupRemoteVideo(int uid) {
FrameLayout container = findViewById(R.id.remote_video_view_container);
SurfaceView surfaceView = new SurfaceView(getBaseContext());
surfaceView.setZOrderMediaOverlay(true);
container.addView(surfaceView);
mRtcEngine.setupRemoteVideo(new VideoCanvas(surfaceView, VideoCanvas.RENDER_MODE_FIT, uid));
}
```
```kotlin
private fun setupRemoteVideo(uid: Int) {
val container = findViewById(R.id.remote_video_view_container)
val surfaceView = SurfaceView(baseContext).apply {
setZOrderMediaOverlay(true)
}
container.addView(surfaceView)
mRtcEngine.setupRemoteVideo(VideoCanvas(surfaceView, VideoCanvas.RENDER_MODE_FIT, uid))
}
```
### Handle permissions
To access the camera and microphone on Android devices, declare the necessary permissions in the app's manifest and ensure that the user grants these permissions when the app starts.
1. Open your project's `AndroidManifest.xml` file and add the following permissions before ``:
```xml
```
2. Use the following code to handle runtime permissions in your Android app. The logic ensures that the necessary permissions are granted before starting Interactive Live Streaming. In your `MainActivity` file, add the following code:
Java
Kotlin
```java
for (String permission : getRequiredPermissions()) {
if (ContextCompat.checkSelfPermission(this, permission) != PackageManager.PERMISSION_GRANTED) {
return false;
}
}
return true;
}
private String[] getRequiredPermissions() {
if (android.os.Build.VERSION.SDK_INT >= android.os.Build.VERSION_CODES.S) {
return new String[]{
Manifest.permission.RECORD_AUDIO,
Manifest.permission.CAMERA,
Manifest.permission.READ_PHONE_STATE,
Manifest.permission.BLUETOOTH_CONNECT
};
} else {
return new String[]{
Manifest.permission.RECORD_AUDIO,
Manifest.permission.CAMERA
};
}
}
@Override
public void onRequestPermissionsResult(int requestCode, @NonNull String[] permissions, @NonNull int[] grantResults) {
super.onRequestPermissionsResult(requestCode, permissions, grantResults);
if (requestCode == PERMISSION_REQ_ID && checkPermissions()) {
startLiveStreaming();
}
}private boolean checkPermissions() {
```
```kotlin
private val PERMISSION_REQ_ID = 22
private fun requestPermissions() {
ActivityCompat.requestPermissions(this, getRequiredPermissions(), PERMISSION_REQ_ID)
}
private fun checkPermissions(): Boolean {
for (permission in getRequiredPermissions()) {
if (ContextCompat.checkSelfPermission(this, permission) != PackageManager.PERMISSION_GRANTED) {
return false
}
}
return true
}
private fun getRequiredPermissions(): Array {
return if (Build.VERSION.SDK_INT >= Build.VERSION_CODES.S) {
arrayOf(
Manifest.permission.RECORD_AUDIO,
Manifest.permission.CAMERA,
Manifest.permission.READ_PHONE_STATE,
Manifest.permission.BLUETOOTH_CONNECT
)
} else {
arrayOf(
Manifest.permission.RECORD_AUDIO,
Manifest.permission.CAMERA
)
}
}
override fun onRequestPermissionsResult(
requestCode: Int,
permissions: Array,
grantResults: IntArray
) {
super.onRequestPermissionsResult(requestCode, permissions, grantResults)
if (requestCode == PERMISSION_REQ_ID && checkPermissions()) {
startLiveStreaming()
}
}
```
### Start and close the app
When a user launches your app, start real-time interaction. When a user closes the app, stop the interaction.
1. In the `onCreate` callback, check whether the app has been granted the required permissions. If the permissions have not been granted, request the required permissions from the user. If permissions are granted, initialize `RtcEngine` and join a channel.
Java
Kotlin
```java
@Override
protected void onCreate(Bundle savedInstanceState) {
super.onCreate(savedInstanceState);
setContentView(R.layout.activity_main);
if (checkPermissions()) {
startLiveStreaming();
} else {
requestPermissions();
}
}
```
```kotlin
override fun onCreate(savedInstanceState: Bundle?) {
super.onCreate(savedInstanceState)
setContentView(R.layout.activity_main)
if (checkPermissions()) {
startLiveStreaming()
} else {
requestPermissions()
}
}
```
2. When a user closes the app, or switches the app to the background, call `stopPreview` to stop the video preview and then call `leaveChannel` to leave the current channel and release all session-related resources.
Java
Kotlin
```java
private void cleanupAgoraEngine() {
if (mRtcEngine != null) {
mRtcEngine.stopPreview();
mRtcEngine.leaveChannel();
mRtcEngine = null;
}
}
```
```kotlin
private fun cleanupAgoraEngine() {
mRtcEngine?.apply {
stopPreview()
leaveChannel()
}
mRtcEngine = null
}
```
### Complete sample code
A complete code sample demonstrating the basic process of real-time interaction is provided for your reference. To use the sample code, copy the following lines into the `MainActivity` file in your project. Then, replace `` in package `com.example.` with your project's name.
Java
Kotlin
```java
package com.example.
import android.Manifest;
import android.content.pm.PackageManager;
import android.os.Bundle;
import android.view.SurfaceView;
import android.widget.FrameLayout;
import android.widget.Toast;
import androidx.annotation.NonNull;
import androidx.appcompat.app.AppCompatActivity;
import androidx.core.app.ActivityCompat;
import androidx.core.content.ContextCompat;
import io.agora.rtc2.ChannelMediaOptions;
import io.agora.rtc2.Constants;
import io.agora.rtc2.IRtcEngineEventHandler;
import io.agora.rtc2.RtcEngine;
import io.agora.rtc2.RtcEngineConfig;
import io.agora.rtc2.video.VideoCanvas;
public class MainActivity extends AppCompatActivity {
private static final int PERMISSION_REQ_ID = 22;
// Fill in the app ID from Agora Console
private String myAppId = "";
// Fill in the channel name
private String channelName = "";
// Fill in the temporary token generated from Agora Console
private String token = "";
private RtcEngine mRtcEngine;
private final IRtcEngineEventHandler mRtcEventHandler = new IRtcEngineEventHandler() {
// Callback when successfully joining the channel
@Override
public void onJoinChannelSuccess(String channel, int uid, int elapsed) {
super.onJoinChannelSuccess(channel, uid, elapsed);
showToast("Joined channel " + channel);
}
// Callback when a remote user or host joins the current channel
@Override
public void onUserJoined(int uid, int elapsed) {
super.onUserJoined(uid, elapsed);
runOnUiThread(() -> {
// When a remote user joins the channel, display the remote video stream for the specified uid
setupRemoteVideo(uid);
showToast("User joined: " + uid); // Show toast for user joining
});
}
// Callback when a remote user or host leaves the current channel
@Override
public void onUserOffline(int uid, int reason) {
super.onUserOffline(uid, reason);
runOnUiThread(() -> {
showToast("User offline: " + uid); // Show toast for user going offline
});
}
};
@Override
protected void onCreate(Bundle savedInstanceState) {
super.onCreate(savedInstanceState);
setContentView(R.layout.activity_main);
if (checkPermissions()) {
startLiveStreaming();
} else {
requestPermissions();
}
}
private void requestPermissions() {
ActivityCompat.requestPermissions(this, getRequiredPermissions(), PERMISSION_REQ_ID);
}
private boolean checkPermissions() {
for (String permission : getRequiredPermissions()) {
if (ContextCompat.checkSelfPermission(this, permission) != PackageManager.PERMISSION_GRANTED) {
return false;
}
}
return true;
}
private String[] getRequiredPermissions() {
if (android.os.Build.VERSION.SDK_INT >= android.os.Build.VERSION_CODES.S) {
return new String[]{
Manifest.permission.RECORD_AUDIO,
Manifest.permission.CAMERA,
Manifest.permission.READ_PHONE_STATE,
Manifest.permission.BLUETOOTH_CONNECT
};
} else {
return new String[]{
Manifest.permission.RECORD_AUDIO,
Manifest.permission.CAMERA
};
}
}
@Override
public void onRequestPermissionsResult(int requestCode, @NonNull String[] permissions, @NonNull int[] grantResults) {
super.onRequestPermissionsResult(requestCode, permissions, grantResults);
if (requestCode == PERMISSION_REQ_ID && checkPermissions()) {
startLiveStreaming();
}
}
private void startLiveStreaming() {
initializeAgoraVideoSDK();
enableVideo();
setupLocalVideo();
joinChannel();
}
private void initializeAgoraVideoSDK() {
try {
RtcEngineConfig config = new RtcEngineConfig();
config.mContext = getBaseContext();
config.mAppId = myAppId;
config.mEventHandler = mRtcEventHandler;
mRtcEngine = RtcEngine.create(config);
} catch (Exception e) {
throw new RuntimeException("Error initializing RTC engine: " + e.getMessage());
}
}
private void enableVideo() {
mRtcEngine.enableVideo();
mRtcEngine.startPreview();
}
private void setupLocalVideo() {
FrameLayout container = findViewById(R.id.local_video_view_container);
SurfaceView surfaceView = new SurfaceView(getBaseContext());
container.addView(surfaceView);
mRtcEngine.setupLocalVideo(new VideoCanvas(surfaceView, VideoCanvas.RENDER_MODE_FIT, 0));
}
private void joinChannel() {
// Create an instance of ChannelMediaOptions and configure it
ChannelMediaOptions options = new ChannelMediaOptions();
// Set the user role to BROADCASTER or AUDIENCE according to the use-case
options.clientRoleType = Constants.CLIENT_ROLE_BROADCASTER;
// In the live broadcast use-case, set the channel profile to BROADCASTING (live broadcast use-case)
options.channelProfile = Constants.CHANNEL_PROFILE_LIVE_BROADCASTING;
// Set the audience latency level
options.audienceLatencyLevel = Constants.AUDIENCE_LATENCY_LEVEL_ULTRA_LOW_LATENCY;
// Publish local media
options.publishCameraTrack = true;
options.publishMicrophoneTrack = true;
mRtcEngine.joinChannel(token, channelName, 0, options);
}
private void setupRemoteVideo(int uid) {
FrameLayout container = findViewById(R.id.remote_video_view_container);
SurfaceView surfaceView = new SurfaceView(getBaseContext());
surfaceView.setZOrderMediaOverlay(true);
container.addView(surfaceView);
mRtcEngine.setupRemoteVideo(new VideoCanvas(surfaceView, VideoCanvas.RENDER_MODE_FIT, uid));
}
@Override
protected void onDestroy() {
super.onDestroy();
cleanupAgoraEngine();
}
private void cleanupAgoraEngine() {
if (mRtcEngine != null) {
mRtcEngine.stopPreview();
mRtcEngine.leaveChannel();
mRtcEngine = null;
}
}
private void showToast(String message) {
runOnUiThread(() -> Toast.makeText(MainActivity.this, message, Toast.LENGTH_SHORT).show());
}
}
```
```kotlin
package com.example.
import android.Manifest
import android.content.pm.PackageManager
import android.os.Build
import android.os.Bundle
import android.view.SurfaceView
import android.widget.FrameLayout
import android.widget.Toast
import androidx.appcompat.app.AppCompatActivity
import androidx.core.app.ActivityCompat
import androidx.core.content.ContextCompat
import io.agora.rtc2.ChannelMediaOptions
import io.agora.rtc2.Constants
import io.agora.rtc2.IRtcEngineEventHandler
import io.agora.rtc2.RtcEngine
import io.agora.rtc2.RtcEngineConfig
import io.agora.rtc2.video.VideoCanvas
class MainActivity : AppCompatActivity() {
private val PERMISSION_REQ_ID = 22
private val myAppId = ""
private val channelName = ""
private val token = ""
private var mRtcEngine: RtcEngine? = null
private val mRtcEventHandler = object : IRtcEngineEventHandler() {
override fun onJoinChannelSuccess(channel: String?, uid: Int, elapsed: Int) {
super.onJoinChannelSuccess(channel, uid, elapsed)
runOnUiThread {
showToast("Joined channel $channel")
}
}
override fun onUserJoined(uid: Int, elapsed: Int) {
runOnUiThread {
setupRemoteVideo(uid)
}
}
override fun onUserOffline(uid: Int, reason: Int) {
super.onUserOffline(uid, reason)
runOnUiThread {
showToast("User offline: $uid")
}
}
}
override fun onCreate(savedInstanceState: Bundle?) {
super.onCreate(savedInstanceState)
setContentView(R.layout.activity_main)
if (checkPermissions()) {
startLiveStreaming()
} else {
requestPermissions()
}
}
private fun requestPermissions() {
ActivityCompat.requestPermissions(this, getRequiredPermissions(), PERMISSION_REQ_ID)
}
private fun checkPermissions(): Boolean {
for (permission in getRequiredPermissions()) {
if (ContextCompat.checkSelfPermission(this, permission) != PackageManager.PERMISSION_GRANTED) {
return false
}
}
return true
}
private fun getRequiredPermissions(): Array {
return if (Build.VERSION.SDK_INT >= Build.VERSION_CODES.S) {
arrayOf(
Manifest.permission.RECORD_AUDIO,
Manifest.permission.CAMERA,
Manifest.permission.READ_PHONE_STATE,
Manifest.permission.BLUETOOTH_CONNECT
)
} else {
arrayOf(
Manifest.permission.RECORD_AUDIO,
Manifest.permission.CAMERA
)
}
}
override fun onRequestPermissionsResult(
requestCode: Int,
permissions: Array,
grantResults: IntArray
) {
super.onRequestPermissionsResult(requestCode, permissions, grantResults)
if (requestCode == PERMISSION_REQ_ID && checkPermissions()) {
startLiveStreaming()
}
}
private fun startLiveStreaming() {
initializeAgoraVideoSDK()
enableVideo()
setupLocalVideo()
joinChannel()
}
private fun initializeAgoraVideoSDK() {
try {
val config = RtcEngineConfig().apply {
mContext = applicationContext
mAppId = myAppId
mEventHandler = mRtcEventHandler
}
mRtcEngine = RtcEngine.create(config)
} catch (e: Exception) {
throw RuntimeException("Error initializing RTC engine: ${\e.message}")
}
}
private fun enableVideo() {
mRtcEngine?.apply {
enableVideo()
startPreview()
}
}
private fun setupLocalVideo() {
val container = findViewById(R.id.local_video_view_container)
val surfaceView = SurfaceView(this)
container.addView(surfaceView)
mRtcEngine?.setupLocalVideo(VideoCanvas(surfaceView, VideoCanvas.RENDER_MODE_FIT, 0))
}
private fun joinChannel() {
val options = ChannelMediaOptions().apply {
clientRoleType = Constants.CLIENT_ROLE_BROADCASTER
channelProfile = Constants.CHANNEL_PROFILE_LIVE_BROADCASTING
audienceLatencyLevel = Constants.AUDIENCE_LATENCY_LEVEL_ULTRA_LOW_LATENCY
publishMicrophoneTrack = true
publishCameraTrack = true
}
mRtcEngine?.joinChannel(token, channelName, 0, options)
}
private fun setupRemoteVideo(uid: Int) {
val container = findViewById(R.id.remote_video_view_container)
val surfaceView = SurfaceView(this).apply {
setZOrderMediaOverlay(true)
}
container.addView(surfaceView)
mRtcEngine?.setupRemoteVideo(VideoCanvas(surfaceView, VideoCanvas.RENDER_MODE_FIT, uid))
}
override fun onDestroy() {
super.onDestroy()
cleanupAgoraEngine()
}
private fun cleanupAgoraEngine() {
mRtcEngine?.apply {
stopPreview()
leaveChannel()
}
mRtcEngine = null
}
private fun showToast(message: String) {
runOnUiThread {
Toast.makeText(this, message, Toast.LENGTH_SHORT).show()
}
}
}
```
For the `myAppId` and `token` variables, replace the placeholders with the values you obtained from Agora Console. Ensure you enter the same `channelName` you used when generating the temporary token.
### Create a user interface
To connect the sample code to your existing UI, ensure that your XML layout includes the container UI element IDs used to [Display the local video](#display-the-local-video) and [Display remote video](#display-remote-video).
Alternatively, use the following sample code to generate a basic user interface. Replace the existing content in `/app/src/main/res/layout/activity_main.xml` with this code.

**Sample code to create the user interface**
```xml
```
## Test the sample code
Take the following steps to test the sample code:
1. In `MainActivity` update the values for `myAppId`, and `token` with values from Agora Console. Fill in the same `channelName` you used to generate the token.
2. Enable developer options on your Android test device. Turn on USB debugging, connect the Android device to your development machine through a USB cable, and check that your device appears in the Android device options.
3. In Android Studio, click  **Sync Project with Gradle Files** to resolve project dependencies and update the configuration.
4. After synchronization is successful, click  **Run app**. Android Studio starts compilation. After a few moments, the app is installed on your Android device.
5. Launch the App, grant recording and camera permissions. If you set the user role to host, you will see yourself in the local view.
6. On a second Android device, repeat the previous steps to install and launch the app. Alternatively, use the [Web demo](https://webdemo-global.agora.io/example/quickStart/videoAndVoiceCalling/index.html) to join the same channel and test the following use-cases:
* If users on both devices join the channel as hosts, they can see and hear each other.
* If one user joins as host and the other as audience, the host can see themselves in the local video window; the audience can see the host in the remote video window and hear the host.
## Reference
This section contains content that completes the information on this page, or points you to documentation that explains other aspects to this product.
* If a firewall is deployed in your network environment, refer to [Connect with Cloud Proxy](build/optimize-quality-and-connection/cloud-proxy.mdx) to use Agora services normally.
### Next steps
After implementing the quickstart sample, read the following documents to learn more:
* To ensure communication security in a test or production environment, best practice is to obtain and use a token from an authentication server. For details, see [Secure authentication with tokens](build/authenticate-users/use-tokens.mdx).
### Sample project
Agora provides open source sample projects on [GitHub](https://github.com/AgoraIO/API-Examples) for your reference. Download or view the [JoinChannelVideo](https://github.com/AgoraIO-Community/Agora-RTC-QuickStart/tree/main/Android/Agora-RTC-QuickStart-Android) project for a more detailed example.
### API reference
* [`RtcEngineConfig`](https://api-ref.agora.io/en/video-sdk/android/4.x/API/class_rtcengineconfig.html)
* [`create`](https://api-ref.agora.io/en/video-sdk/android/4.x/API/class_irtcengine.html#api_irtcengine_create)
* [`ChannelMediaOptions`](https://api-ref.agora.io/en/video-sdk/android/4.x/API/class_channelmediaoptions.html)
* [`joinChannel`](https://api-ref.agora.io/en/video-sdk/android/4.x/API/class_irtcengine.html#api_irtcengine_joinchannel2)
* [`enableVideo`](https://api-ref.agora.io/en/video-sdk/android/4.x/API/class_irtcengine.html#api_irtcengine_enablevideo)
* [`startPreview`](https://api-ref.agora.io/en/video-sdk/android/4.x/API/class_irtcengine.html#api_irtcengine_startpreview)
* [`leaveChannel`](https://api-ref.agora.io/en/video-sdk/android/4.x/API/class_irtcengine.html#api_irtcengine_leavechannel)
* [`IRtcEngineEventHandler`](https://api-ref.agora.io/en/video-sdk/android/4.x/API/class_irtcengineeventhandler.html#class_irtcengineeventhandler)
### Frequently asked questions
* [How can I fix black screen issues?](/en/api-reference/faq/quality/video_blank)
* [Why can't I turn on the camera?](/en/api-reference/faq/quality/video_camera)
* [How can I listen for audience joining or leaving a channel?](/en/api-reference/faq/integration/audience_event)
* [How can I solve channel-related issues?](/en/api-reference/faq/integration/channel)
* [How can I set the log file?](/en/api-reference/faq/integration/set_log_file)
* [Why do apps on some Android versions fail to capture audio and video after screen locking or switching to the background?](/en/api-reference/faq/quality/android_background)
### See also
* [Error codes](/en/realtime-media/video/reference/error-codes)
* [Connection status management](build/optimize-quality-and-connection/connection-status-management.mdx)
## Platform-specific versions
- [Android](/en/realtime-media/interactive-live-streaming/quickstart/android.md)
- [iOS](/en/realtime-media/interactive-live-streaming/quickstart/ios.md)
- [macOS](/en/realtime-media/interactive-live-streaming/quickstart/macos.md)
- [Web](/en/realtime-media/interactive-live-streaming/quickstart/web.md)
- [Windows](/en/realtime-media/interactive-live-streaming/quickstart/windows.md)
- [Electron](/en/realtime-media/interactive-live-streaming/quickstart/electron.md)
- [Flutter](/en/realtime-media/interactive-live-streaming/quickstart/flutter.md)
- [React Native](/en/realtime-media/interactive-live-streaming/quickstart/react-native.md)
- [JavaScript](/en/realtime-media/interactive-live-streaming/quickstart/javascript.md)
- [Unity](/en/realtime-media/interactive-live-streaming/quickstart/unity.md)
- [Unreal Engine](/en/realtime-media/interactive-live-streaming/quickstart/unreal.md)
- [Unreal Blueprint](/en/realtime-media/interactive-live-streaming/quickstart/blueprint.md)
- [Python](/en/realtime-media/interactive-live-streaming/quickstart/python.md)
# Subscription packages (/en/realtime-media/interactive-live-streaming/subscription-packages)
A subscription package is a prepaid billing method. You can purchase a package in the [`Agora Console`](https://console.agora.io/subscriptions/rtc-plans?tab=monthly) to cover usage for the current month.
This page explains how to purchase, and manage subscription and top-up packages.
### Purchase and upgrade
By default, a new account is assigned the Free package when the first project is created. You can upgrade at any time to the Starter, Pro, Business, Business Advanced, or Business Plus. Higher-tier packages provide greater discounts and lower unit prices. To select your package:
1. Log in to [Agora Console](https://console.agora.io/).
2. Click the username at the bottom of the navigation sidebar to open the account popup menu.
3. Select **Subscriptions**.
4. Switch to the **RTC** tab.
5. Select your package and click **Upgrade** or **Downgrade**.

* For non-contracted customers, all packages, except the Enterprise package can be purchased directly from the Agora Console. To upgrade to the Enterprise package, contact [Agora sales](mailto\:sales@agora.io).
* You can upgrade sequentially or skip levels. For example, you may upgrade from Starter to Business Plus directly.
* Package upgrades take effect immediately and apply to the entire calendar month. If you make multiple upgrades on the same day, only the last upgrade is applied.
* If your account has a negative balance, purchasing a prepaid package first charges your credit card for the outstanding balance, then for the package fee.
#### Upgrade rules
When you upgrade to a paid package, it becomes effective for the entire calendar month, regardless of the purchase date. You receive the full monthly allocation of included minutes. The cost of the previous package is deducted from the new package price, so you only pay the difference. If you request an upgrade after auto-renewal has triggered, you may upgrade for the next month as well.
### Renewal
By default, your subscription package renews automatically 48 hours before it expires. Ensure your account has sufficient balance or enable auto-pay to avoid renewal failure. You can unsubscribe at any time to prevent renewal. See [Cancel subscription](#cancel-subscription).
If renewal fails:
* The system sends a notification and retries the renewal.
* If renewal still fails by the time the package expires, the package downgrades to the Free package.
* To restore the previous package, see [Purchase and Upgrade](#purchase-and-upgrade).
### Downgrade
You can downgrade by selecting and purchasing a lower-tier package. A downgrade takes effect when your current package expires if you request it before auto-renewal is triggered. You are charged for the new package when you request the downgrade.
You can downgrade only once per month.
* If your downgrade for the next month is successful, auto-renewal for the current package is not triggered.
* If a package is already active, you must wait until the 1st day of that month to initiate a downgrade for the following month.
#### Example
* **Requested more than 48 hours before the current package expires**: The downgrade takes effect after the current package expires.
* **Requested less than 48 hours before the current package expires**: Since a package is already active for the next month, you must wait until the new package starts to downgrade for the following month.
### Cancel subscription
To cancel a prepaid package, downgrade to the Free package. Downgrade rules apply.
## Top-up package
A top-up package is a pay-as-you-go plan. You can purchase a top-up package from the [`Agora Console`](https://console.agora.io/subscriptions/rtc-plans?tab=top-up) to cover usage that exceeds your monthly package quota.
### Purchase
You can purchase multiple top-up packages. They are deducted in the order of purchase.
#### Example:
* Purchased 250,000-minutes top-up packages on **August 15** and **August 16**. On **September 1**, minutes consumed in August are deducted from the first package, then from the second.
### Validity
Each top-up package is valid for one year, starting from the purchase date to the end of the same month of the following year.
#### Example:
* Purchased on **August 15, 2025** → valid until **August 31, 2026**
Unused minutes expire after the validity period and cannot be carried forward.
### Cancel top-up package
Cancelling a top-up package is not supported.
## Free tier overage
For Free tier users, exceeding the included minutes and any purchased top-up minutes results in service suspension. Service resumes when you purchase additional top-up minutes or upgrade to a prepaid subscription package.
# Flexible Classroom overview (/en/realtime-media/flexible-classroom/product-overview)
Agora's Flexible Classroom solution enables real-time, interactive virtual learning experiences. With features like video, audio, screen sharing, and messaging, it’s adaptable to a wide range of educational use-cases. Built on Agora’s low-latency, scalable platform, it provides a customizable foundation for creating engaging and collaborative online learning environments.
Scalable for one-on-one tutoring, group discussions, or large lecture halls, Flexible Classroom adapts to your specific needs. Customize the classroom experience with branded designs, tailored workflows, and role-based permissions. Advanced tools like attendance tracking, interactive features, and secure data handling ensure a seamless and engaging learning environment on web, desktop, or mobile platforms.
## Start building
## Product Features
Easily support one-to-one, small groups, or very large, collaborative lecture halls based on your business requirements.
Deploy an online classroom solution that is custom-branded and designed.
Tailor features and business logic to best suit your needs, whether on web, desktop, or mobile.
Easily manage classrooms and events, recordings, public resources, and user roles and permissions.
Agora is certified to the ISO and SOC 2 information security standards and meets privacy regulations like GDPR.
Track student attendance and monitor online participation like hand raise, live polling, pop-up quizzes, and whiteboard annotation.
# Demo quickstart (/en/realtime-media/flexible-classroom/quickstart)
Compelling content like animated presentations with embedded media helps actively engage students for longer in online classrooms. Agora Flexible Classroom helps you personalize distance learning using interactive video, shared whiteboards and other collaboration tools. With Flexible Classroom, you can quickly deploy effective online tutoring software that is customized with the features and branding your organization needs.
This page shows you how to quickly set up and launch a Flexible Classroom.
## Understand the tech
This section explains the workflow you implement to join a Flexible Classroom.
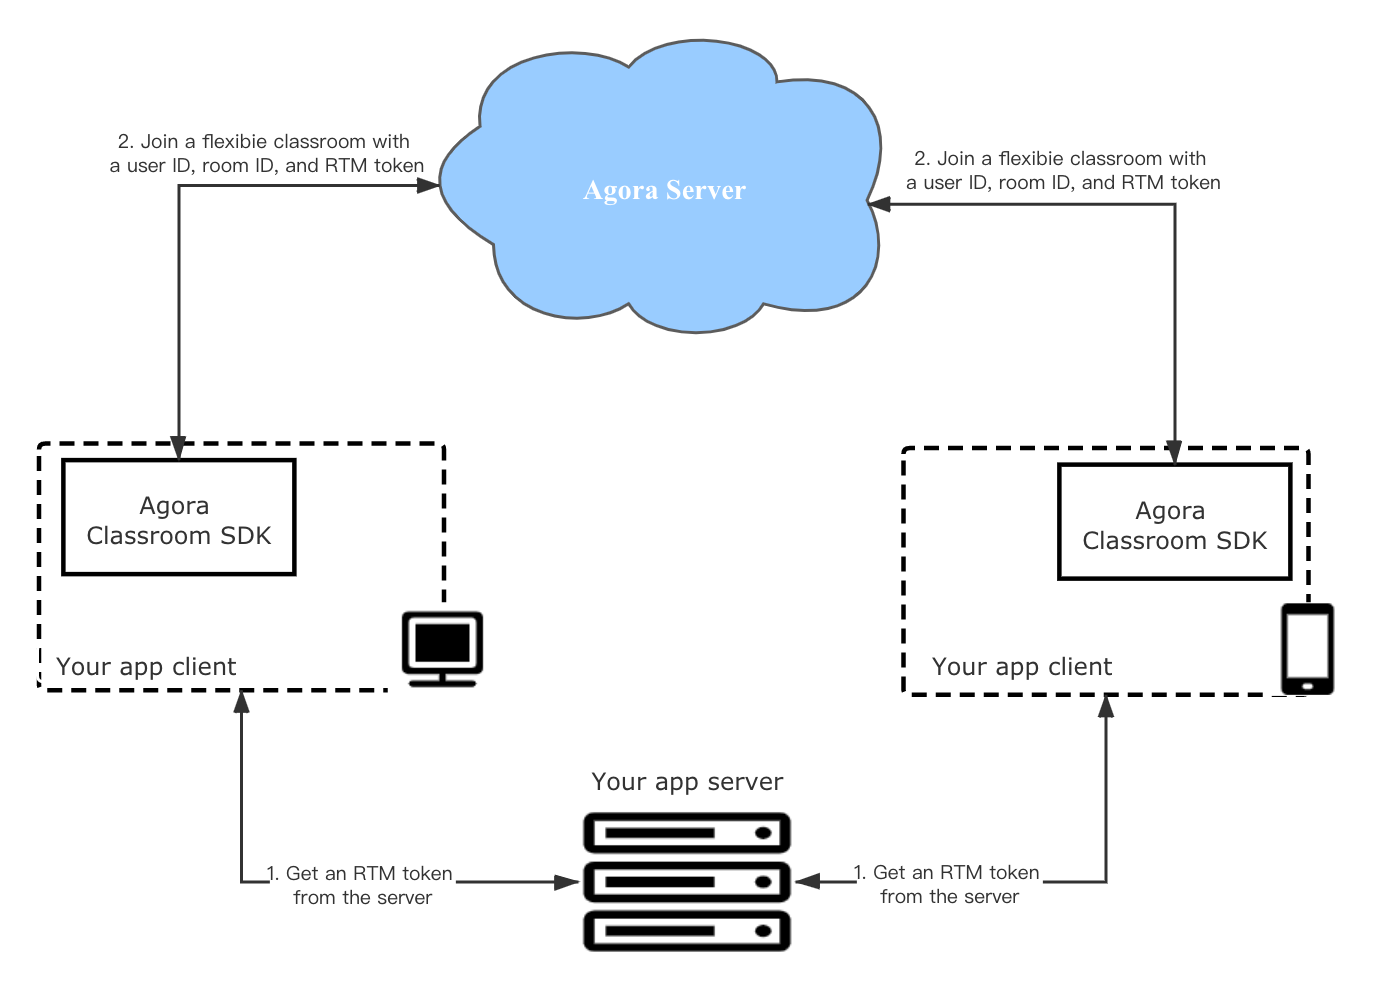
When an app client requests to join a Flexible Classroom, the app client and your app server interact with the Agora server in the following steps:
1. Your app client sends a request to your app server for a Signaling token.
2. Your app server generates a Signaling token using the Agora [App ID](/en/introduction/account), [App Certificate](/en/introduction/account), and a user ID. For details, see [Generate a Signaling token](./build/set-up-your-account-and-authentication/authentication-workflow.mdx).
3. Your app client calls an API with the following parameters to join a Flexible Classroom:
* *The user ID*: A unique string identifying a user, generated by your security system. This ID must be the same as the user ID you use for generating the Signaling token.
* *The room ID*: A string for identifying a classroom. When the first user joins a Flexible Classroom, Agora automatically creates a classroom with the room ID.
* *The Signaling token*: A credential for verifying the identity of the user when they join a Flexible Classroom.
## Prerequisites
In order to follow this procedure you must have:
* An Agora [account](/en/introduction/account) and [project](/en/introduction/account).
* A computer with Internet access. Ensure that no firewall is blocking your network communication.
* [Enabled Flexible Classroom](./build/set-up-your-account-and-authentication/enable-flexible-classroom) in Agora Console.
## Android
* Installed [Git](https://git-scm.com/downloads)
* Installed the [Java Development Kit](https://www.oracle.com/java/technologies/javase-downloads.html)
* Installed Android Studio 4.1 or above
* An Android device (not a simulator)
## Project setup
To set up your Flexible Classroom project:
1. Clone the repository locally:
```bash
git clone https://github.com/AgoraIO-Community/CloudClass-Android.git
```
2. Update to the supported version of Flexible Classroom:
```bash
cd CloudClass-Android
git checkout release/2.8.11
```
## Implement a flexible classroom
Follow these steps to configure and launch your Flexible Classroom from the downloaded source code:
1. **Import the CloudClass-Android project in Android Studio**
In Android Studio, navigate to the **File > New > Import Project...** menu option and select the folder named `CloudClass-Android` in the browse window.
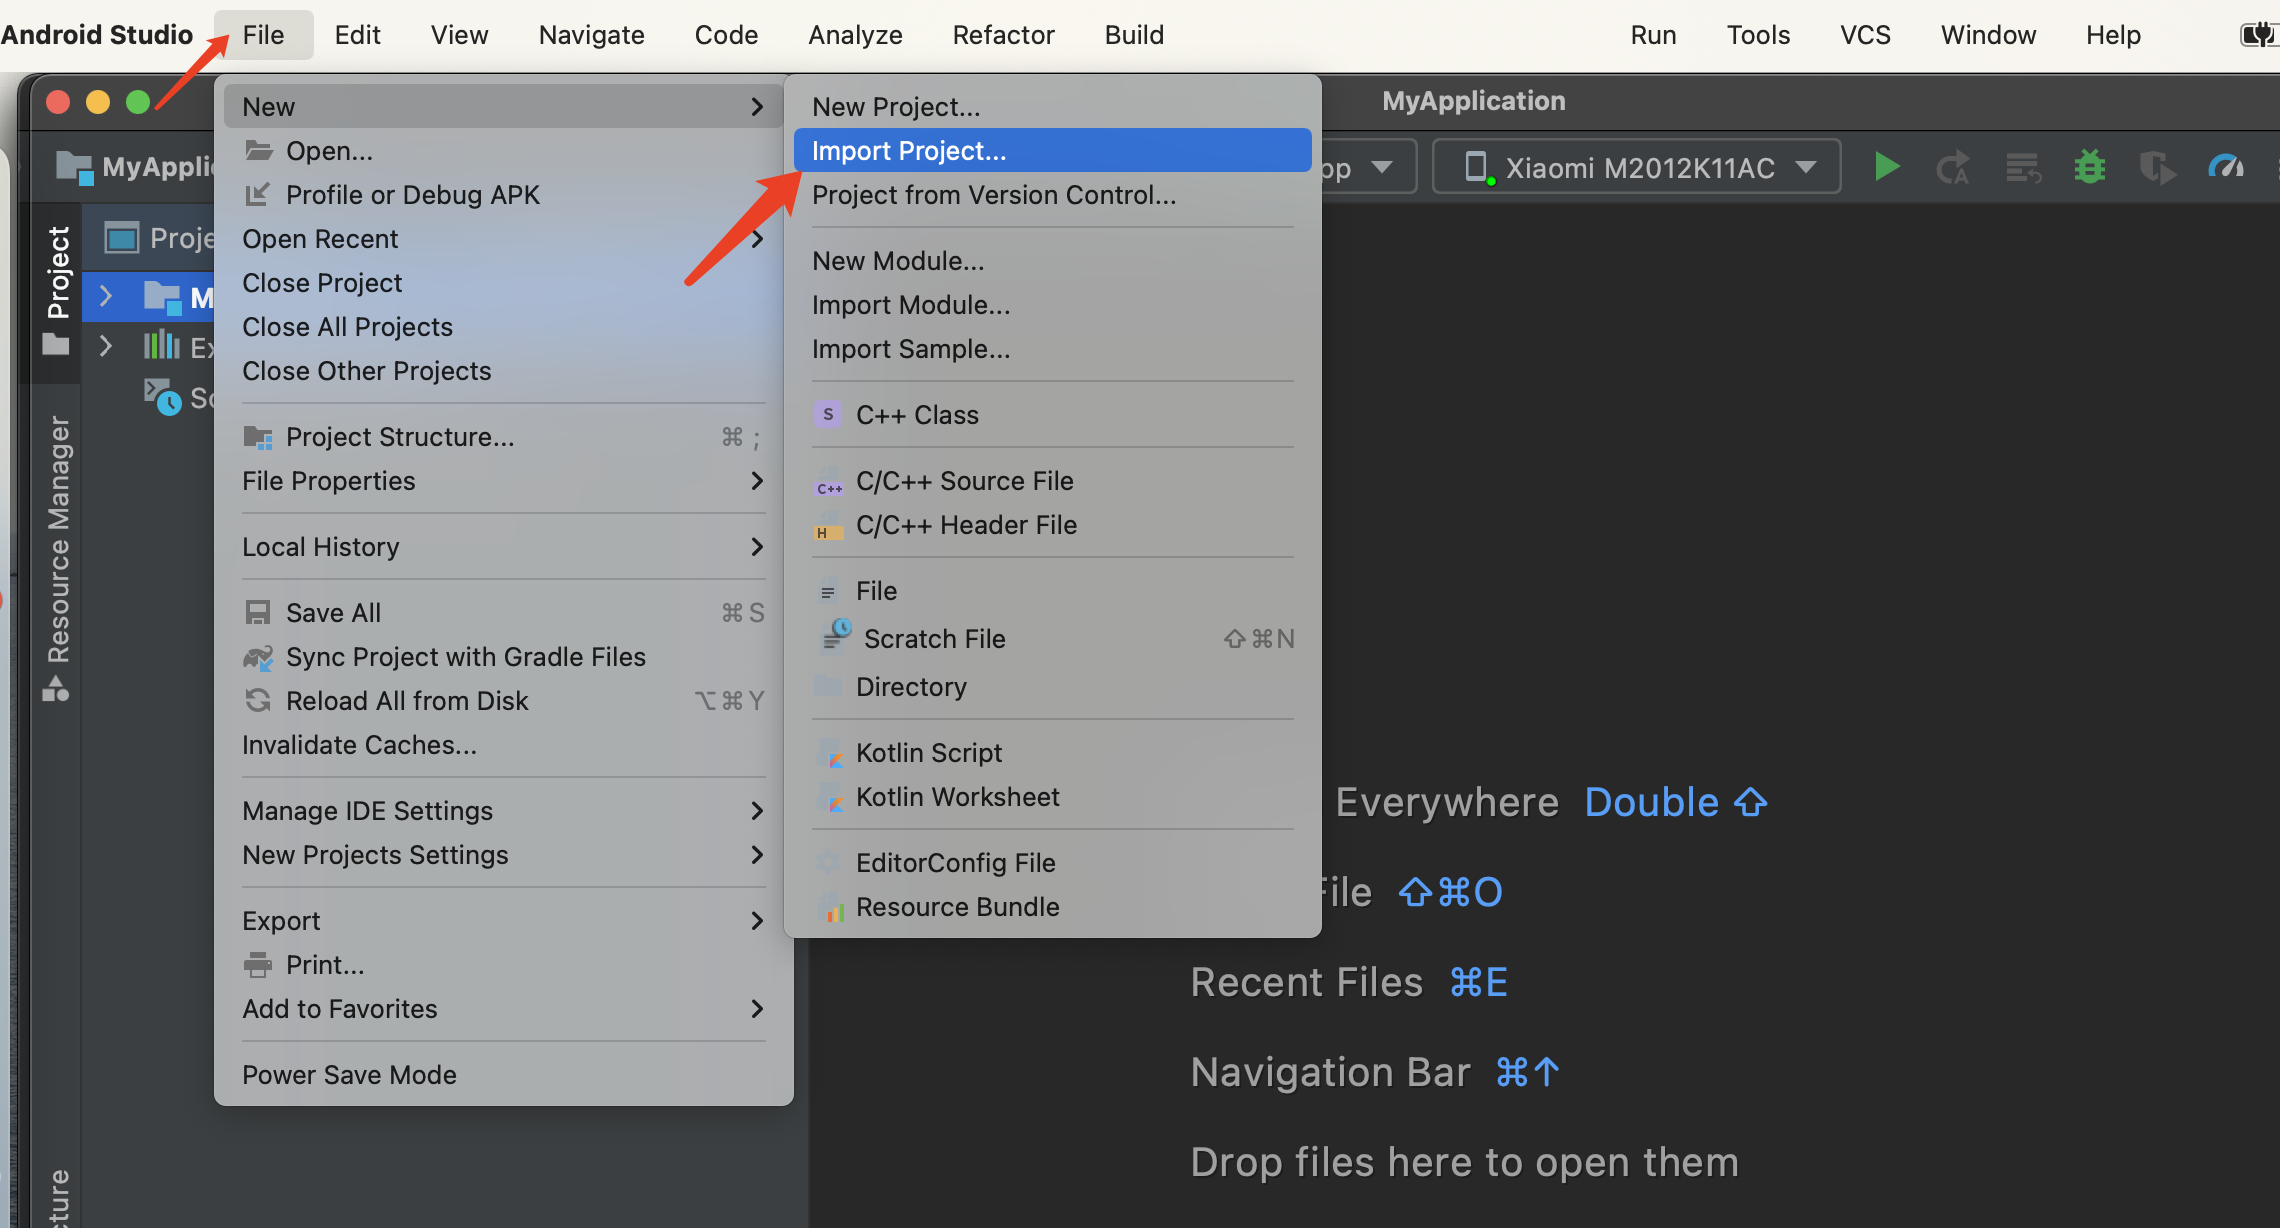
2. **Sync the Android project**
Android Studio automatically performs a gradle sync to downloads the dependencies.
3. **Update the parameters**
Copy your *App ID* and *App Certificate* from Agora Console and replace the values of *agora\_app\_id* and *agora\_app\_cert* in `CloudClass-Android\app\src\main\res\values\string_config.xml`.
## Test your implementation
1. Connect a physical Android device to your development device.
2. In Android Studio, click **Run app**. A moment later, the project is installed on your device.
3. In the login screen, enter the **Room**, your **Name**, the class **Type**, your **Role** and your current **Region**, then click **Enter**.
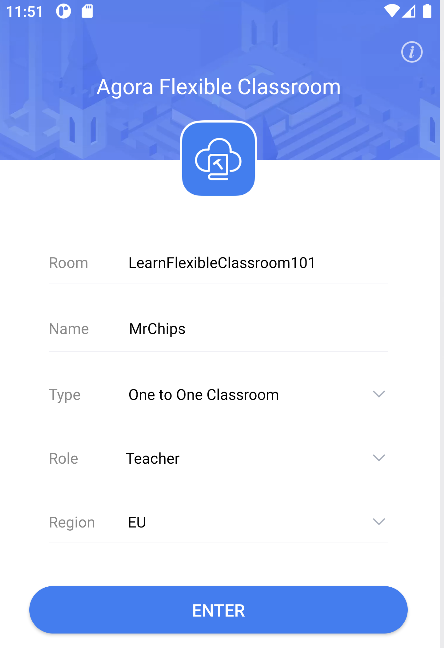
You are logged in to Flexible Classroom and presented with the following UI:
4. Install Flexible Classroom on a second Android device. Login with the same credentials but set **Role** to `Student`.
5. The teacher and student can now interact and communicate using Flexible Classroom.
## References
To ensure communication security in a test or production environment, use a token server to generate tokens. See [Secure authentication with tokens](./build/set-up-your-account-and-authentication/authentication-workflow.mdx).
## Platform-specific versions
- [Android](/en/realtime-media/flexible-classroom/quickstart/android.md)
- [iOS](/en/realtime-media/flexible-classroom/quickstart/ios.md)
- [Web](/en/realtime-media/flexible-classroom/quickstart/web.md)
- [Electron](/en/realtime-media/flexible-classroom/quickstart/electron.md)
# Core concepts (/en/realtime-media/marketplace/core-concepts)
RTC (Real-Time Communication) refers to real-time communication technology, that allows almost instant exchange of audio, video, and other data between the sender and the receiver.
Agora SDKs provide real-time audio and video interaction services, with multi-platform and multi-device support. This includes high-definition video calls, voice-only calls, interactive live streaming, as well as one-on-one and multi-group chats.
This article introduces the key processes and concepts you need to know to use Agora SDKs.
## Using the Agora Console
To use Agora SDKs, create an audio and video project in the Agora Console first. See [Agora account management](/en/introduction/account) for details.

#### Agora Console
[Agora Console](https://console.agora.io) is the main dashboard where you manage your Agora projects and services. Agora Console provides an intuitive interface for developers to query and manage their Agora account. After registering an [Agora Account](https://console.agora.io), you use the Agora Console to perform the following tasks:
* Manage the account
* Create and configure Agora projects and services
* Get an App ID
* Manage members and roles
* Check call quality and usage
* Check bills and make payments
* Access product resources
Agora also provides RESTful APIs that you use to implement features such as creating a project and fetching usage numbers programmatically.
## General concepts
Agora uses the following basic concepts:
### App ID
The App ID is a random string generated within [Agora Console](https://console.agora.io) when you create a new project. You can create multiple projects in your account; each project has a different App ID. This App ID enables your app users to communicate securely with each other. When you initialize the Agora engine in your app, you pass the App ID as an argument. The App ID is also used to create the authentication tokens that ensure secure communication in a channel. You [retrieve your App ID](https://console.agora.io/legacy/project-management) using Agora Console.
Agora uses this App ID to identify each app, provide billing and other statistical data services.
### App certificate
An App certificate is a string generated by Agora Console to enable token authentication. It is required for generating an RTC or Signaling authentication token.
To use your App certificate for setting up a token server, see [Deploy a token server](/en/realtime-media/rtc/build/authenticate-users/deploy-token-server).
### Token
A token is a dynamic key that is used by the Agora authentication server to check user permissions. You use Agora Console to generate a temporary token for testing purposes during the development process. In a production environment, you implement a token server in your security infrastructure to control access to your channels.
After obtaining the App ID, App Certificate, and Token in the Agora Console, you can start implementing basic audio and video communication in your app.
### Channel
Agora uses the *channel name* to identify a channel. Users who specify the same *channel name* join a common channel and interact with each other. A channel is created when the first user joins. It ceases to exist when the last user leaves.
You create a channel by calling the methods for transmitting real-time data. Agora uses different channels to transmit different types of data. The RTC SDK channel transmits audio or video data, while the Signaling channel transmits messaging or signaling data. The RTC SDK and Signaling channels are independent of each other.
Additional components provided by Agora, such as On-Premise Recording and Cloud Recording, join the RTC SDK channel and provide real-time recording, transmission acceleration, media playback, and content moderation.
### Channel profile
The SDK applies different optimization methods according to the selected channel profile. Agora supports the following channel profiles:
| Channel profile | Description |
| ------------------- | -------------------------------------------------------------------------------------------------------------------------------------------------------------------------------------------------------------------- |
| `COMMUNICATION` | This profile is suitable for one-on-one or group calls, where all users in the channel talk freely. |
| `LIVE_BROADCASTING` | In a live streaming channel, users have two client roles: *host* and *audience*. The *host* sends and receives audio or video, while the *audience* only receives audio or video with the sending function disabled. |
### Stream
A stream is a sequence of digitally-encoded coherent signals that contains audio or video data. Users in a channel [publish](#publish) local streams and [subscribe](#subscribe) to remote streams from other users.
### Publish
Publishing is the act of sending a user's audio or video data to the channel. Usually, the published stream is created by the audio data sampled from a microphone or the video data captured by a camera. You can also publish media streams from other sources, such as an online music file or the user's screen.
After successfully publishing a stream, the SDK continues sending media data to other users in the channel. By publishing the local stream and subscribing to remote streams, users communicate with each other in real-time.
### Subscribe
Subscribing is the act of receiving media streams published by remote users to the channel. A user receives audio and video data from other users by subscribing to one or more of their streams. You either directly play the subscribed streams or process incoming data for other purposes such as recording or capturing screenshots.
### User ID
A User ID (UID) identifies a user in a channel. Each user in a channel should have a unique user ID. If you do not specify a user ID when the user joins a channel, a UID is automatically generated and assigned to the user.
### User role
A user role is used to define whether users in the channel have permission to publish streams. There are two user roles:
* Host: A user who can publish streams in a channel.
* Audience: A user who cannot publish streams in a channel. Users with this role can only subscribe to remote audio and video streams.
### Connection (RtcConnection)
The connection between the SDK and the channel. When you need to publish or receive multiple streams in multiple channels, a connection is used to specify the target channel.
### Agora SDRTN®
Agora's core engagement services are powered by its Software Defined Real-Time Network (SD-RTN™) that is accessible and available anytime, anywhere around the world. The software-defined network isn't confined by device, phone numbers, or a telecommunication provider's coverage area like traditional networks. Agora SDRTN® has data centers globally that cover over 200+ countries and regions. The network delivers sub-second latency and high availability of real-time video and audio anywhere on the globe. With Agora SDRTN®, Agora can deliver live user engagement experiences in the form of real-time communication (RTC) with the following advantages:
* Unmatched quality of service
* High availability and accessibility
* True scalability
* Low Cost
# Extensions Marketplace overview (/en/realtime-media/marketplace)
Agora's Extensions Marketplace makes it simple to extend the functionality of live voice and video streaming SDKs. With first-party extensions and third-party solutions from industry-leading partners, you can add advanced capabilities like noise cancelation, face filters, and voice effects with just a few lines of code.
Extensions Marketplace streamlines feature discovery, activation, and integration with unified billing, allowing you to enhance your applications without added complexity. Whether you're building for social, education, or enterprise use-cases, Extensions Marketplace empowers you to create richer, more interactive experiences.
## Product features
Browse the Extensions Gallery to find specific functionality or get inspired by new extensions.
Activate and integrate new functionality with a click and a few lines of code.
Get to market faster by instantly adding advanced features to your app without having to build them.
Pricing is straightforward and you can pay for all of your extensions in one unified interface.
Manage the activation status of your extensions from one place in the Agora Console.
Add as many extensions as you want to customize and extend the functionality of your experience.
## Start building
# Quickstart - create an extension (/en/realtime-media/marketplace/quickstart-implement)
Extensions are add-ons designed to rapidly extend the functionality of your app. [Extensions Marketplace](https://www.agora.io/en/agora-extensions-marketplace/) is home to extensions that make your app more fun. Extensions provide features such as Audio effects and voice changing, Face filters and background removal, and Live transcription and captioning.
In the Agora Extensions Marketplace:
* Vendors create and publish extensions to provide functionality such as audio and video processing.
* App developers use extensions to quickly implement fun and interactive functionality.
This page shows vendors how extensions work and the steps you take to develop and publish your extension to Extensions Marketplace.
## Understand the tech
An extension accesses voice and video data when it is captured from the user's local device, modifies it, then plays the updated data to local and remote video channels.
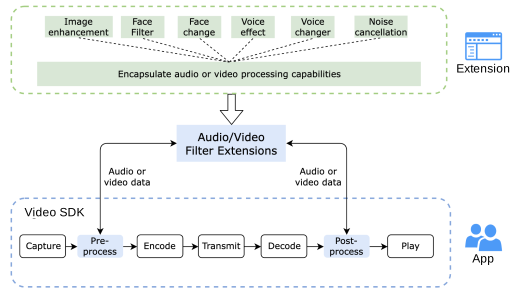
A typical transmission pipeline consists of a chain of procedures, including capture, pre-processing, encoding, transmitting, decoding, post-processing, and play. Audio or video extensions are inserted into either the pre-processing or post-processing procedure, in order to modify the voice or video data in the transmission pipeline.
You can currently implement the following extension types:
* **Audio**: for voice effects and noise cancellation.
* **Video**: features such as face filters and background removal.
## Vendor workflow
The steps to develop, test and publish an extension to Extensions Marketplace:
1. **Become a vendor**
Fill in the [vendor application form](https://www.agora.io/en/extensions-marketplace/vendor-application/), then click **APPLY NOW** .
Agora reviews your application in 7 working days and sends you the result through an email.
2. **Develop your extension**
Once your application to become a partner is approved, develop your functionality as an audio or video extension using the following documentation:
* [Develop an audio extension](build/build-your-own-extension/audio-filter.mdx)
* [Develop a video extension](build/build-your-own-extension/video-filter.mdx)
When you have developed and tested your extension, You also need to validate the user interface of your extension in a test environment. To test your extension, submit an application for testing. Agora processes your application in 7 working days and informs you through an email when it's done.
3. **Help developers easily integrate your extension into their app**.
Write the [Implementation guide](build/publish-and-document/implementation-guide.md) for your extension.
4. **Share provisioning, usage, and billing information with Agora**
* [Provisioning API](build/connect-to-agora-services/provisioning.md)
* [Usage and billing API](build/connect-to-agora-services/usage.md)
5. **Publish your extension**
When your extension is thoroughly developed and tested, you need to submit it for Agora review and provide the finalized version of your extension listing assets. For details, see [Publish your extension](build/publish-and-document/publish-extension.md).
Agora reviews your extension in 7 working days. If your extension passes the review, Agora updates the listing of your extension and informs you through an email. If your extension fails the review, Agora sends an email to report the issues you need to address.
Once you are ready to go, Agora publishes your extension in the [Extensions Marketplace](https://www.agora.io/en/agora-extensions-marketplace/), everyone can use it and you start earning.
# Quickstart - integrate an extension (/en/realtime-media/marketplace/quickstart-integrate)
Extensions are add-ons designed to rapidly extend the functionality of your app. [Extensions Marketplace](https://www.agora.io/en/agora-extensions-marketplace/) is home to extensions that make your app more fun. Extensions provide features such as Audio effects and voice changing, Face filters and background removal, and Live transcription and captioning.
In the Agora Extensions Marketplace:
* Vendors create and publish extensions to provide functionality such as audio and video processing.
* App developers use extensions to quickly implement fun and interactive functionality.
This page shows you how to integrate an extension from Agora Extensions Marketplace into your app. There can be specific guidance for each extension.
## Understand the tech
An extension accesses voice and video data when it is captured from the user's local device, modifies it, then plays the updated data to local and remote video channels.
**Extension call workflow**

A typical transmission pipeline consists of a chain of procedures, including capture, pre-processing, encoding, transmitting, decoding, post-processing, and play. Audio or video extensions are inserted into either the pre-processing or post-processing procedure, in order to modify the voice or video data in the transmission pipeline.
## Prerequisites
To test the code used in this page you need to have:
* An Agora [account](/en/introduction/account) and [project](/en/introduction/account).
* A computer with Internet access.
Ensure that no firewall is blocking your network communication.
* Implemented the [SDK quickstart](/en/realtime-media/rtc/get-started-sdk).
## Project setup
In order to integrate an extension into your project:
1. **Activate an extension**
1. Log in to [Agora Console](https://console.agora.io).
2. Click the username to open the **Account** menu and select **Extensions**.
3. From the **Extensions Marketplace** panel, select the extension you want to activate and click **View details**.
You are now on the extension detail page.
4. Select a pricing plan and click **Buy and Activate**.
* If you have already created an Agora project:
The **Projects** section appears and lists all of your projects.
* If you have not created an Agora project:
[Create a new project](/en/introduction/account), the project appears in the **Projects** section.
5. Under **Projects** on the extension detail page, find the project in which you want to use the extension, then turn on the switch in the **Action** column.
2. **Get the apiKey and apiSecret for the extension**
If required for the extension, to get the extension apiKey and apiSecret, in the **Projects** extension detail page, click **View** in the **Secret** column.
3. **Download the extension**
In the extension detail page, click **Download**, then unzip the extension in a local directory.
4. **Install the extension in your project**
* Android Archive file (`.aar`)
1. Save the extension `.aar` file to `/app/libs` in your project.
2. In `/Gradle Scripts/build.gradle(Module: app)`, add the following line under `dependencies`:
```java
implementation fileTree(include: ['*.jar', '*.aar'], dir: 'libs')
```
* Shared Library (`.so`)
Save the `.so` file to the following paths in your project:
1. `/app/src/main/jniLibs/arm64-v8a`
2. `/app/src/main/jniLibs/armeabi-v7a`
You are now ready to integrate the extension in your app.
## Integrate the extension into your project
The watermark extension adds a watermark on video streamed to your local client. This section shows you how to implement the watermark extension
in your Agora project:
1. **Import the necessary classes**
1. Download the [watermark extension](https://web-cdn.agora.io/docs-files/1630400262363) and follow the steps for `.aar` files in [setup](#project-setup).
2. In `app/src/main/java/com.example./MainActivity`:
1. Add the following lines to import the Android classes used by the extension:
Java
Kotlin
```java
import org.json.JSONException;
import org.json.JSONObject;
```
```kotlin
import org.json.JSONException
import org.json.JSONObject
```
2. Add the following lines to import the Agora classes used by the extension:
Java
Kotlin
```java
// ExtensionManager is used to pass in basic info about the extension
import io.agora.extension.ExtensionManager;
import io.agora.rtc2.IMediaExtensionObserver;
```
```kotlin
// ExtensionManager is used to pass in basic info about the extension
import io.agora.extension.ExtensionManager
import io.agora.rtc2.IMediaExtensionObserver
```
2. **Add the extension and register the event handler**
In `setupVideoSDKEngine`, add the following code before `agoraEngine = RtcEngine.create(config);`:
Java
Kotlin
```java
config.addExtension(ExtensionManager.EXTENSION_NAME);
// Register IMediaExtensionObserver to receive events from the extension.
config.mExtensionObserver = new IMediaExtensionObserver() {
@Override
public void onEvent(String vendor, String extension, String key, String value) {
// Add callback handling logics for extension events.
showMessage("Extension: " + extension + "
Key: " + key + "
Value:" + value);
}
@Override
public void onStarted(String provider, String extension) {
showMessage("Extension started");
}
@Override
public void onStopped(String provider, String extension) {
showMessage("Extension stopped");
}
@Override
public void onError(String provider, String extension, int error, String message) {
showMessage(message);
}
};
```
```kotlin
config.addExtension(ExtensionManager.EXTENSION_NAME)
// Register IMediaExtensionObserver to receive events from the extension.
config.mExtensionObserver = object : IMediaExtensionObserver {
override fun onEvent(vendor: String, extension: String, key: String, value: String) {
// Add callback handling logics for extension events.
showMessage("Extension: $extension
Key: $key
Value: $value")
}
override fun onStarted(provider: String, extension: String) {
showMessage("Extension started")
}
override fun onStopped(provider: String, extension: String) {
showMessage("Extension stopped")
}
override fun onError(provider: String, extension: String, error: Int, message: String) {
showMessage(message)
}
}
```
3. **Enable the extension**
Call `enableExtension` to enable the extension. To enable multiple extensions, call `enableExtension` as many times. The sequence of enabling multiple extensions determines the order of these extensions in the transmission pipeline. For example, if you enable extension A before extension B, extension A processes data from the SDK before extension B.
In `setupVideoSDKEngine`, add the following code before `agoraEngine = RtcEngine.create(config);`:
Java
Kotlin
```java
agoraEngine.enableExtension(ExtensionManager.EXTENSION_VENDOR_NAME, ExtensionManager.EXTENSION_VIDEO_FILTER_NAME, true);
```
```kotlin
agoraEngine.enableExtension(
ExtensionManager.EXTENSION_VENDOR_NAME,
ExtensionManager.EXTENSION_VIDEO_FILTER_NAME,
true
)
```
4. **Set extension properties**
In the `joinChannel(View view)` method, add the following code after `agoraEngine.joinChannel`:
Java
Kotlin
```java
JSONObject o = new JSONObject();
try {
// Pass in the key-value pairs defined by the extension provider to configure the feature you want to use.
o.put("plugin.watermark.wmStr", "Agora");
o.put("plugin.watermark.wmEffectEnabled", true);
// Call setExtensionProperty to use the watermark feature.
agoraEngine.setExtensionProperty(ExtensionManager.EXTENSION_VENDOR_NAME,
ExtensionManager.EXTENSION_VIDEO_FILTER_NAME, "key", o.toString());
} catch (JSONException e) {
e.printStackTrace();
}
```
```kotlin
val o = JSONObject()
try {
// Pass in the key-value pairs defined by the extension provider to configure the feature you want to use.
o.put("plugin.watermark.wmStr", "Agora")
o.put("plugin.watermark.wmEffectEnabled", true)
// Call setExtensionProperty to use the watermark feature.
agoraEngine.setExtensionProperty(
ExtensionManager.EXTENSION_VENDOR_NAME,
ExtensionManager.EXTENSION_VIDEO_FILTER_NAME,
"key",
o.toString()
)
} catch (e: JSONException) {
e.printStackTrace()
}
```
## Test your implementation
To ensure that you have integrated the extension in your app:
1. Connect the Android device to the computer.
2. Click `Run app` on your Android Studio. A moment later you will see the project installed on your device.
3. When the app launches, you can see yourself and the watermark `Agora` on the local view.
## Reference
This section contains content that completes the information on this page, or points you to documentation that explains other aspects to this product.
### API reference
* [`RtcEngineConfig.addExtension`](https://api-ref.agora.io/en/video-sdk/android/4.x/API/class_irtcengine.html#api_irtcengine_addextension)
* [`enableExtension`](https://api-ref.agora.io/en/video-sdk/android/4.x/API/class_irtcengine.html#api_irtcengine_enableextension)
* [`getExtensionProperty`](https://api-ref.agora.io/en/video-sdk/android/4.x/API/class_irtcengine.html#api_irtcengine_getextensionproperty)
* [`setExtensionProperty`](https://api-ref.agora.io/en/video-sdk/android/4.x/API/class_irtcengine.html#api_irtcengine_setextensionproperty)
* [`IMediaExtensionObserver`](https://api-ref.agora.io/en/video-sdk/android/4.x/API/class_imediaextensionobserver.html)
## Platform-specific versions
- [Android](/en/realtime-media/marketplace/quickstart-integrate/android.md)
- [iOS](/en/realtime-media/marketplace/quickstart-integrate/ios.md)
- [macOS](/en/realtime-media/marketplace/quickstart-integrate/macos.md)
- [Web](/en/realtime-media/marketplace/quickstart-integrate/web.md)
- [Windows](/en/realtime-media/marketplace/quickstart-integrate/windows.md)
- [Electron](/en/realtime-media/marketplace/quickstart-integrate/electron.md)
- [Flutter](/en/realtime-media/marketplace/quickstart-integrate/flutter.md)
- [React Native](/en/realtime-media/marketplace/quickstart-integrate/react-native.md)
- [Unity](/en/realtime-media/marketplace/quickstart-integrate/unity.md)
# Build from scratch (/en/realtime-media/iot/build-from-scratch)
This page shows you how to integrate IoT SDK into your own project from scratch: initialize the SDK, transmit media streams over RTC, send and receive signaling messages, and release resources when you are done. If you only want to see IoT SDK working before you integrate it, use the [Quickstart](quickstart.mdx) instead.
IoT SDK for Android no longer receives version updates. For Android-based devices, integrate the [RTC Java SDK](/en/api-reference/sdks?product=video\&platform=android) together with the [Signaling Java SDK](/en/api-reference/sdks?product=signaling\&platform=android) instead of IoT SDK.
## Prerequisites
To follow this procedure you need:
* A device [license](build/authenticate-and-secure-channels/license.mdx) to pass to `license_value` when you initialize the SDK.
* A computer or an embedded device. This page uses a computer running Ubuntu 18.04 as an example. For the full list of supported operating systems and toolchains, see [Supported platforms](reference/supported-platforms.mdx).
* An Agora [account](/en/introduction/account) and [project](/en/introduction/account).
* A [temporary token](/en/introduction/account#generate-temporary-tokens) generated for your project. Agora Console generates a single combined token that's valid for both joining an RTC channel and logging in to Signaling.
## Project setup
[Download](/en/api-reference/sdks?platform=linux) the SDK package that matches your development environment, and link the IoT SDK library into your own C project. See [Get the SDK](quickstart.mdx#get-the-sdk) in the Quickstart for the download and extraction commands if you have not already done this.
## Initialize the SDK
Call `agora_rtc_init` before any other IoT SDK call to initialize the engine. The call takes your App ID, an event handler, and a service options struct:
```c
agora_rtc_event_handler_t rtc_event_handler = { 0 };
rtc_service_option_t service_options = { 0 };
agora_rtc_init(appid, &rtc_event_handler, &service_options);
```
Only devices initialized with the same App ID can enter the same channel and communicate with each other.
If your device only sends and receives signaling messages and does not transmit media, you can pass `0` instead of an event handler. To transmit media streams, populate the event handler with callbacks.
## Implement media streaming
This section shows you how to register event callbacks, join a channel, send and receive audio and video, and leave the channel.
### Listen for events
IoT SDK notifies you of important events, such as users joining or leaving a channel and receipt of audio or video data, through callbacks in the event handler. Define the callback functions and register them in `agora_rtc_event_handler_t`:
```c
static void __on_join_channel_success(connection_id_t conn_id, uint32_t uid, int elapsed) {
g_connected_flag = true;
agora_rtc_get_connection_info(conn_id, &g_conn_info);
printf("[conn-%u] Join the channel %s successfully, uid %u elapsed %d ms\n", conn_id, g_conn_info.channel_name, uid, elapsed);
}
static void __on_reconnecting(connection_id_t conn_id) {
g_connected_flag = false;
printf("[conn-%u] connection timeout, reconnecting\n", conn_id);
}
static void __on_connection_lost(connection_id_t conn_id) {
g_connected_flag = false;
printf("[conn-%u] Lost connection from the channel\n", conn_id);
}
static void __on_rejoin_channel_success(connection_id_t conn_id, uint32_t uid, int elapsed_ms) {
g_connected_flag = true;
printf("[conn-%u] Rejoin the channel successfully, uid %u elapsed %d ms\n", conn_id, uid, elapsed_ms);
}
static void __on_user_joined(connection_id_t conn_id, uint32_t uid, int elapsed_ms) {
printf("[conn-%u] Remote user \"%u\" has joined the channel, elapsed %d ms\n", conn_id, uid, elapsed_ms);
}
static void __on_user_offline(connection_id_t conn_id, uint32_t uid, int reason) {
printf("[conn-%u] Remote user \"%u\" has left the channel, reason %d\n", conn_id, uid, reason);
}
static void __on_user_mute_audio(connection_id_t conn_id, uint32_t uid, bool muted) {
printf("[conn-%u] audio: uid=%u muted=%d\n", conn_id, uid, muted);
}
static void __on_user_mute_video(connection_id_t conn_id, uint32_t uid, bool muted) {
printf("[conn-%u] video: uid=%u muted=%d\n", conn_id, uid, muted);
}
static void __on_error(connection_id_t conn_id, int code, const char *msg) {
if (code == ERR_SEND_VIDEO_OVER_BANDWIDTH_LIMIT) {
printf("Not enough uplink bandwidth. Error msg \"%s\"\n", msg);
return;
}
if (code == ERR_INVALID_APP_ID) {
printf("Invalid App ID. Please double check. Error msg \"%s\"\n", msg);
} else if (code == ERR_INVALID_CHANNEL_NAME) {
printf("Invalid channel name. Please double check. Error msg \"%s\"\n", msg);
} else if (code == ERR_INVALID_TOKEN || code == ERR_TOKEN_EXPIRED) {
printf("Invalid token. Please double check. Error msg \"%s\"\n", msg);
} else if (code == ERR_DYNAMIC_TOKEN_BUT_USE_STATIC_KEY) {
printf("Dynamic token is enabled but is not provided. Error msg \"%s\"\n", msg);
} else {
printf("Error %d is captured. Error msg \"%s\"\n", code, msg);
}
g_stop_flag = true;
}
static void __on_audio_data(connection_id_t conn_id, const uint32_t uid, uint16_t sent_ts,
const void *data, size_t len, const audio_frame_info_t *info_ptr) {
// Handle incoming audio data, for example write it to a file or an audio output device
}
static void __on_mixed_audio_data(connection_id_t conn_id, const void *data, size_t len,
const audio_frame_info_t *info_ptr) {
// Handle incoming mixed audio data
}
static void __on_video_data(connection_id_t conn_id, const uint32_t uid, uint16_t sent_ts,
const void *data, size_t len, const video_frame_info_t *info_ptr) {
// Handle incoming video data, for example write it to a file or a video renderer
}
static void __on_target_bitrate_changed(connection_id_t conn_id, uint32_t target_bps) {
printf("[conn-%u] Bandwidth change detected. Please adjust encoder bitrate to %u kbps\n", conn_id, target_bps / 1000);
}
static void __on_key_frame_gen_req(connection_id_t conn_id, uint32_t uid, video_stream_type_e stream_type) {
printf("[conn-%u] Frame loss detected. Please notify the encoder to generate key frame immediately\n", conn_id);
}
static void app_init_event_handler(agora_rtc_event_handler_t *event_handler) {
event_handler->on_join_channel_success = __on_join_channel_success;
event_handler->on_reconnecting = __on_reconnecting;
event_handler->on_connection_lost = __on_connection_lost;
event_handler->on_rejoin_channel_success = __on_rejoin_channel_success;
event_handler->on_user_joined = __on_user_joined;
event_handler->on_user_offline = __on_user_offline;
event_handler->on_user_mute_audio = __on_user_mute_audio;
event_handler->on_user_mute_video = __on_user_mute_video;
event_handler->on_target_bitrate_changed = __on_target_bitrate_changed;
event_handler->on_key_frame_gen_req = __on_key_frame_gen_req;
event_handler->on_video_data = __on_video_data;
event_handler->on_error = __on_error;
event_handler->on_mixed_audio_data = __on_mixed_audio_data;
event_handler->on_audio_data = __on_audio_data;
}
```
`on_reconnecting` fires when the connection to the channel times out and IoT SDK starts trying to reconnect. Use it together with `on_rejoin_channel_success` and `on_connection_lost` to track connection state through temporary network interruptions.
Pass the populated event handler to `agora_rtc_init`:
```c
agora_rtc_event_handler_t event_handler = {0};
app_init_event_handler(&event_handler);
rtc_service_option_t service_opt = {0};
service_opt.area_code = DEFAULT_AREA_CODE;
service_opt.log_cfg.log_path = DEFAULT_SDK_LOG_PATH;
rval = agora_rtc_init(AGORA_APP_ID_FOR_TEST, &event_handler, &service_opt);
if (rval < 0) {
printf("Failed to initialize Agora sdk, reason: %s\n", agora_rtc_err_2_str(rval));
return -1;
}
```
Replace `DEFAULT_AREA_CODE`, `DEFAULT_SDK_LOG_PATH`, and `AGORA_APP_ID_FOR_TEST` with values for your own project. For details on `area_code`, see [Restrict media zones](build/manage-connections-and-quality/geofencing.mdx).
### Create a connection and join a channel
To join a channel:
1. Call `agora_rtc_create_connection` to create a connection.
2. Configure `rtc_channel_options_t` with your channel settings.
3. Call `agora_rtc_join_channel` to join a channel on that connection.
```c
// Create a connection
rval = agora_rtc_create_connection(&g_conn_id);
if (rval < 0) {
printf("Failed to create connection, reason: %s\n", agora_rtc_err_2_str(rval));
return -1;
}
rtc_channel_options_t channel_options = { 0 };
channel_options.auto_subscribe_audio = true;
channel_options.auto_subscribe_video = true;
// This example uses the SDK's built-in Opus encoder
channel_options.audio_codec_opt.audio_codec_type = AUDIO_CODEC_TYPE_OPUS;
channel_options.audio_codec_opt.pcm_sample_rate = 16000;
channel_options.audio_codec_opt.pcm_channel_num = 1;
// Join the channel
rval = agora_rtc_join_channel(g_conn_id, DEFAULT_CHANNEL_NAME, DEFAULT_USER_ID, DEFAULT_TOKEN, &channel_options);
if (rval < 0) {
printf("Failed to join channel \"%s\", reason: %s\n", DEFAULT_CHANNEL_NAME, agora_rtc_err_2_str(rval));
return -1;
}
while (!g_connected_flag) {
usleep(100 * 1000);
}
```
IoT SDK triggers `on_join_channel_success`, which you registered in [Listen for events](#listen-for-events), when the join succeeds. The `while (!g_connected_flag)` loop blocks until that callback sets the flag, so the rest of your code only runs once the connection has actually joined the channel.
Users within an RTC channel can transmit data to each other. You can join multiple RTC channels using a single connection. When you send audio or video on a connection, IoT SDK delivers it to every channel joined on that connection.
Replace `DEFAULT_CHANNEL_NAME`, `DEFAULT_USER_ID`, and `DEFAULT_TOKEN` with values for your own project:
* `DEFAULT_CHANNEL_NAME`: The channel to join. Users who join with the same channel name are directed to the same channel.
* `DEFAULT_USER_ID`: The ID that identifies this user within the channel.
* `DEFAULT_TOKEN`: The RTC token generated for this user ID and channel name.
### Send audio and video
IoT SDK does not capture or encode audio and video itself. Your device firmware must interface with the microphone and camera hardware, capture raw data, and encode it before sending. See [Configure the audio codec](build/configure-media/audio-codec.mdx) for supported audio formats.
#### Send audio
To send audio, call `agora_rtc_send_audio_data` with a PCM frame:
```c
static int send_audio_frame(uint8_t *data, uint32_t len) {
audio_frame_info_t info = {0};
info.data_type = AUDIO_DATA_TYPE_PCM;
int rval = agora_rtc_send_audio_data(g_conn_id, data, len, &info);
if (rval < 0) {
printf("Failed to send audio data, reason: %s\n", agora_rtc_err_2_str(rval));
return -1;
}
return 0;
}
```
#### Send video
To send video, call `agora_rtc_send_video_data` with an H.264 frame:
```c
static int send_video_frame(uint8_t *data, uint32_t len) {
video_frame_info_t info = {0};
info.frame_type = VIDEO_FRAME_KEY;
info.frame_rate = CONFIG_SEND_FRAME_RATE;
info.stream_type = VIDEO_STREAM_HIGH;
info.data_type = VIDEO_DATA_TYPE_H264;
int rval = agora_rtc_send_video_data(g_conn_id, data, len, &info);
if (rval < 0) {
printf("Failed to send video data, reason: %s\n", agora_rtc_err_2_str(rval));
return -1;
}
return 0;
}
```
#### Pace audio and video sends
The interval between sends must match your media timing: the video send interval must align with your frame rate, and the audio send interval must match the duration of each audio frame. This example sends audio and video from two threads, each paced independently:
```c
static void *video_send_thread(void *threadid) {
int video_send_interval_ms = 1000 / CONFIG_SEND_FRAME_RATE;
void *pacer = pacer_create(video_send_interval_ms);
uint32_t frame_count = 0;
int num_frames = sizeof(test_video_frames) / sizeof(test_video_frames[0]);
while (g_connected_flag && !g_stop_flag) {
int i = (frame_count++ % num_frames);
send_video_frame(test_video_frames[i].data, test_video_frames[i].len);
wait_for_next_pace(pacer);
}
pacer_destroy(pacer);
return NULL;
}
```
```c
#define CONFIG_PCM_FRAME_LEN (640)
#define CONFIG_PCM_SAMPLE_RATE (16000)
#define CONFIG_PCM_CHANNEL_NUM (1)
#define CONFIG_AUDIO_FRAME_DURATION_MS \
(CONFIG_PCM_FRAME_LEN * 1000 / CONFIG_PCM_SAMPLE_RATE / CONFIG_PCM_CHANNEL_NUM / sizeof(int16_t))
static void *audio_send_thread(void *threadid) {
int audio_send_interval_ms = CONFIG_AUDIO_FRAME_DURATION_MS;
void *pacer = pacer_create(audio_send_interval_ms);
uint32_t pcm_offset = 0;
while (g_connected_flag && !g_stop_flag) {
send_audio_frame((uint8_t *)pcm_test_data + pcm_offset, CONFIG_PCM_FRAME_LEN);
pcm_offset += CONFIG_PCM_FRAME_LEN;
if ((pcm_offset + CONFIG_PCM_FRAME_LEN) > sizeof(pcm_test_data)) {
pcm_offset = 0;
}
wait_for_next_pace(pacer);
}
pacer_destroy(pacer);
return NULL;
}
```
`test_video_frames` and `pcm_test_data` represent your own encoded video frames and captured PCM audio. Replace them with data from your device's camera and microphone pipeline.
### Receive audio and video
IoT SDK does not decode or render audio and video itself. Your application is responsible for decoding the raw data it receives and passing it to your device's playback pipeline.
To receive audio and video sent by remote users, implement the `on_audio_data` and `on_video_data` callbacks you registered in [Listen for events](#listen-for-events).
### Leave the channel and destroy the connection
When you are done with a connection, leave the channel and destroy the connection to release its resources:
```c
agora_rtc_leave_channel(g_conn_id);
agora_rtc_destroy_connection(g_conn_id);
```
## Implement signaling
This section shows you how to log in to Signaling, send and receive signaling messages, and log out.
### Log in to Signaling
Call `agora_rtc_login_rtm` to log in to Signaling on the device, passing a user ID, a token, and an `agora_rtm_handler_t` populated with your signaling callbacks:
```c
agora_rtm_handler_t rtm_handler = {0};
rtm_handler.on_rtm_data = __on_rtm_data;
rtm_handler.on_rtm_event = __on_rtm_event;
rtm_handler.on_send_rtm_data_result = __on_rtm_send_data_result;
rval = agora_rtc_login_rtm(rtm_uid, token, &rtm_handler);
if (rval < 0) {
printf("login rtm failed\n");
goto EXIT;
}
```
A token generated through [Generate temporary tokens](/en/introduction/account#generate-temporary-tokens) in Agora Console is valid for both joining an RTC channel and logging in to Signaling. Use the same token for both, with the user ID you specified when generating it.
### Send and receive signaling messages
Implement the signaling callbacks to receive messages and monitor login and send status:
```c
static void __on_rtm_data(const char *user_id, const void *data, size_t data_len) {
printf("Receive data[%s] from user[%s] length[%lu]\n", (char *)data, user_id, data_len);
}
static void __on_rtm_event(const char *user_id, uint32_t event_id, uint32_t event_code) {
printf("%s event id[%u], event code[%u]\n", user_id, event_id, event_code);
if (event_id == 0 && event_code == 0) {
g_rtm_login_success_flag = 1;
}
}
static void __on_rtm_send_data_result(const char *user_id, uint32_t msg_id, uint32_t error_code) {
printf("user [%s] msg_id [%u], error_code[%u]\n", user_id, msg_id, error_code);
}
```
To send a message to a specific peer, call `agora_rtc_send_rtm_data` with the peer's user ID and your message payload:
```c
static int send_rtm_message(const char *peer_uid, const uint8_t *data, uint32_t len) {
uint32_t message_id = 0;
int rval = agora_rtc_send_rtm_data(peer_uid, data, len, &message_id);
if (rval < 0) {
printf("send data failed, rval=%d\n", rval);
return -1;
}
printf("send message_id=%u successfully\n", message_id);
return 0;
}
```
### Log out of Signaling
When you are done sending signaling messages, log out to release Signaling resources:
```c
agora_rtc_logout_rtm();
```
## Destroy the SDK instance
When your app shuts down, call `agora_rtc_fini` to release all resources held by the SDK:
```c
agora_rtc_fini();
```
## Reference
This section contains content that completes the information on this page, or points you to documentation that explains other aspects to this product.
### API reference
* [Overview](https://api-ref.agora.io/en/iot-sdk/linux/1.x/index.html)
* [Events](https://api-ref.agora.io/en/iot-sdk/linux/1.x/structagora__rtc__event__handler__t.html)
# IoT SDK overview (/en/realtime-media/iot/product-overview)
Agora's IoT SDK brings real-time audio and video engagement to smart devices with a lightweight design optimized for low-resource and battery-powered systems. Compatible with WebRTC and a wide range of chipsets, it supports seamless cross-platform development across mobile, PC, web, and smart displays. With robust performance in weak network conditions and integration with Agora’s real-time platform, it’s ideal for live streaming, remote control, and interactive IoT applications.
Use the IoT SDK to build lightweight, cross-platform apps for smart devices, from video doorbells to smart displays. Designed for low power consumption and exceptional network performance, it offers full compatibility with Agora’s RTC and Signaling platforms, simplifying development for interactive and reliable IoT solutions.
Built on Agora’s Software-Defined Real-Time Network (SDRTN®), the IoT SDK ensures high connectivity, low latency, and maximum stability even in challenging network conditions. Add real-time audio and video capabilities to smart devices with a small footprint, minimal power consumption, and seamless interoperability with Agora’s real-time platform and RTC SDKs.
## Start building
## Product Features
IoT SDK integrates both real-time communication and Signaling services, so you can easily develop features like live streaming and remote control at the same time.
Designed for low-resource embedded systems, IoT SDK has a small package footprint as low as 400kB so you don’t have to worry about system resource usage.
Based on low hardware requirements, IoT SDK works well with battery-powered devices like video doorbells.
IoT SDK is compatible with RTC SDK for Web, and developers can build apps across platforms like mobile, PC, web, and smart displays like Amazon Alexa, without plugins, while supporting a wide range of chipsets and operating systems.
With end-to-end algorithmic network optimization, IoT SDK provides smooth live streaming even in weak network environments.
IoT SDK is interoperable with other Agora products so you can easily build up the companion apps on iOS, Android, or any other platform.
## Common use cases
| Use case | Description |
| --------------------- | -------------------------------------------------------------------------------------------------------------------------------------------------------------------------------------------------------------------------------------------------------------------------------------------------------------------------------------------------------------- |
| Broadcasting devices | Deliver real-time audio and video streams from IoT devices to multiple audience clients on mobile, web, or desktop platforms. Supports scenarios such as sports livestreaming, with synchronized features like timers, scoring, play-by-play information, and betting, connecting on-site devices with low-latency broadcast and interactive viewing services. |
| Real-time monitoring | Let users view live video from one or more cameras, view the same camera stream from multiple mobile devices, view multiple camera streams from one mobile device, and communicate with the camera through two-way audio. |
| Cellular smartwatches | Enable real-time audio and video calls between a low-power cellular smartwatch and a mobile application. |
| Remote control | Combine Signaling and real-time media capabilities to build remote control applications for smart devices, robots, cameras, and other connected hardware. |
## Core capabilities
| Capability | Description |
| -------------------------------------------------- | ----------------------------------------------------------------------------------------------------------------------------------------------------------------------------------------------------------------------------------------------------------------------------------------------------------------------- |
| IoT SDK interoperability | Supports intercommunication between IoT SDKs using multiple audio and video encoding formats. See `audio_data_type_e` and `video_data_type_e`. |
| RTC SDK interoperability | Supports bidirectional intercommunication between IoT SDK and RTC Server SDK, RTC Native SDK, RTC third-party framework SDKs, and RTC Web SDK. See [Communicate with RTC SDK](build/send-messages/interoperate-with-rtc-sdk.mdx). |
| Uplink bandwidth prediction and bitrate adaptation | Proposes target bitrate recommendations based on a bandwidth prediction algorithm, and reports whether to increase or decrease bitrate to boost throughput and avoid network congestion. See [Adapt the sending bitrate](build/manage-connections-and-quality/bitrate-adaptation.mdx). |
| Cloud Proxy connectivity | Supports connecting to Agora through networks with firewall or access restrictions. See [Connect with Cloud Proxy](build/manage-connections-and-quality/cloud-proxy.mdx). |
| Key frames | Supports requesting local key frames to improve encoding and decoding efficiency and reduce data storage footprint. See [Send and receive key frames](build/configure-media/key-frame.mdx). |
| Stream state management | Supports flexibly starting and pausing local audio and video publishing and remote audio and video subscription, with status monitoring. See [Manage stream state](build/manage-connections-and-quality/stream-state.mdx). |
| Multiple media formats | Supports multiple audio and video formats for different device and interoperability requirements, including G.711, G.722, Opus, and AAC audio, and H.264 and JPEG video. See [Configure the audio codec](build/configure-media/audio-codec.mdx). |
| Security and compliance support | Supports media stream encryption and geofencing to help protect media transmission and control where your application can connect. See [Secure channel encryption](build/authenticate-and-secure-channels/media-stream-encryption.mdx) and [Restrict media zones](build/manage-connections-and-quality/geofencing.mdx). |
## Product performance
| Metric | Specification |
| ------------------ | -------------------------------------------------------------------- |
| Package size | SDK integration adds less than 400 KB. |
| Memory usage | Less than 2 MB for simultaneous 320 x 240 H.264 stream transmission. |
| Connectivity rate | Greater than 99%. |
| Maximum bitrate | Up to 50 Mbps per channel, per user. |
| Network resilience | Imperceptible recovery under 50% packet loss. |
## Platform compatibility
IoT SDK supports Linux, HarmonyOS, and LiteOS devices. For a full list of supported architectures, operating system versions, and toolchains, see [Supported platforms](reference/supported-platforms.mdx).
# SDK quickstart (/en/realtime-media/iot/quickstart)
Agora provides two sample projects that demonstrate core IoT SDK functionality:
* `hello_rtsa`: sends and receives media streams
* `hello_rtm`: sends and receives signaling messages
The samples are bundled in the `example` directory of the IoT SDK package.
This page shows you how to compile and run the `hello_rtsa` sample project to start streaming audio and video.
IoT SDK for Android no longer receives version updates. For Android-based devices, integrate the [RTC Java SDK](/en/api-reference/sdks?product=video\&platform=android) together with the [Signaling Java SDK](/en/api-reference/sdks?product=signaling\&platform=android) instead of IoT SDK.
## Prerequisites
To follow this procedure you need:
* A computer or an embedded device. This page uses a computer running Ubuntu 18.04 as an example. For the full list of supported operating systems and toolchains, see [Supported platforms](reference/supported-platforms.mdx).
* An Agora [account](/en/introduction/account) and [project](/en/introduction/account).
* A [temporary RTC token](/en/introduction/account#generate-temporary-tokens) generated for your project.
A testing license is bundled with the sample project. It is valid for 90 days and supports up to 10 concurrent connections. To use IoT SDK in production, apply for and activate a commercial [license](build/authenticate-and-secure-channels/license.mdx).
## Get the SDK
Agora publishes a separate SDK package for each combination of processor architecture, operating system, C library, and float ABI. The package name encodes these values, for example `armv7a-linux-uclibceabihf` is an ARMv7 package for Linux, built with the uClibc C library and hard-float compilation.
[Download](/en/api-reference/sdks?platform=linux) the package that matches your development machine's architecture, C library, and float ABI. For example, to download and extract the `x86_64-linux-gnu` package from the terminal:
```bash
wget https://download.agora.io/rtsasdk/release/Agora-RTSALite--x86_64-linux-gnu-v.tgz
tar xvf Agora-RTSALite--x86_64-linux-gnu-v.tgz
```
Replace `` and `` with the values from your downloaded file name. See [Resources](reference/resources.mdx) for the naming convention used across architectures.
## Compile the example project
In the terminal, compile the example project for your architecture:
```bash
cd agora_rtsa_sdk/example
./build-x86_64.sh
```
This produces two executables in `out/x86_64`: `hello_rtsa`, for streaming audio and video, and `hello_rtm`, for signaling.
To run `hello_rtsa` on an ARM Linux device, first see the porting guide (`PORTING.md`) included in the SDK package.
## Run the media streaming example
Navigate to the output directory and launch `hello_rtsa` with your App ID, a channel name, and your temporary token:
```bash
cd out/x86_64
./hello_rtsa -i -c demo_channel --token
```
The app joins the channel `demo_channel` and streams the sample media files bundled with the SDK (`send_video.h264` for H.264 video and `send_audio_16k_1ch.pcm` for PCM audio), using default parameters.
### Verify the result
1. In your browser, navigate to the [Agora web demo](https://webdemo-global.agora.io/example/quickStart/videoAndVoiceCalling/index.html) and initialize it with your App ID.
2. Enter the same channel name (`demo_channel`), a user ID, and a token for that channel, then click **Join**.
3. You see and hear the audio and video streamed from your running `hello_rtsa` instance.
## Run the signaling example
`hello_rtm` demonstrates sending and receiving signaling messages between two peers. Open two terminals and launch one instance in each, using a distinct RTM token and user ID for each side:
```bash
./hello_rtm --appId --rtmUid user1 --peerUid user2 --token
```
```bash
./hello_rtm --appId --rtmUid user2 --peerUid user1 --token
```
You see each terminal send and receive messages from the other peer.
# Media Pull overview (/en/realtime-media/media-pull)
Agora's Media Pull service enables the injection of external media streams into real-time Agora channels. Hosts and audiences can seamlessly view and hear the additional streams while interacting in real-time, enhancing engagement and content versatility. The service is designed to work with Agora's Voice Calling, Video Calling, and Interactive Live Streaming.
With support for multiple streaming protocols, extensive media formats, and ultra-low latency, Media Pull ensures smooth and flexible media injection. Control playback timing for injected streams to synchronize content seamlessly within your channel, creating dynamic and interactive experiences.
## Quick links
## Key features
Inject an online media stream into the Agora channel as a live video source using the RESTful API.
After the injection succeeds, the online media stream automatically plays in the Agora channel, and remote users can see the content of the media stream.
The audio or video stream is injected with ultra-low latency, allowing the audience to see and hear the stream in real time.
Hosts can control when to start playing the injected media stream to coordinate timed media stream playback.
Supports video codec formats H.264, H.265, and VP9; audio codec formats: AAC and OPUS; and container formats FLV, MP4, MPEG-TS, Matroska (MKV), and HLS.
Support for HTTPS, and RTMP streaming protocols.
# Media Push overview (/en/realtime-media/media-push)
Agora's Media Push service streams audio and video from Agora channels to CDNs and other RTMP-based platforms. With advanced edge transcoding, it minimizes latency and provides full control over the layout and appearance of the stream. This enables seamless distribution to multiple destinations, combining real-time engagement with broad audience reach.
Extend the reach of your Agora streams to third-party services. Whether it’s live events, webinars, or hybrid broadcasts, Media Push amplifies your content while preserving the low-latency, high-quality experience that Agora is known for.
## Quick links
## Key features
Ideal for hybrid use cases where a small audience group can interact with the host(s) and each other, while most of the audience only listens/watches.
Media Push works with major CDN providers across the globe, with support for RTMP and RTMPS protocols.
Agora’s RESTful API makes integration easy while providing flexibility to customers.
Uploading live interactive content to CDN enables customers to expand their audience for use cases where only a section of a large audience needs live engagement.
Upload to CDN works for any use case, and is particularly useful for verticals like virtual events, social live streaming, education webinars and more.
# Pricing (/en/realtime-media/on-premise-recording/billing)
This page summarizes the pricing model for On-Premise Recording based on the legacy source document.
Agora bills On-Premise Recording by recorded usage time. Audio and video are charged separately, and video pricing depends on aggregate recorded resolution. If a recording instance captures both audio and video at the same time, Agora charges video minutes for that interval.
## Key points
* Billing is calculated monthly for projects under your Agora account.
* Audio-only recording is billed by audio minutes.
* Video recording is billed by video minutes and resolution tier.
* Idle time during a recording session is billed at the audio rate.
## Related pages
* [Billing policies](./reference/pricing.mdx)
* [Manage your Agora account](/en/introduction/account)
* [On-Premise Recording API reference](/en/api-reference/api-ref/on-premise-recording)
# On-Premise Recording overview (/en/realtime-media/on-premise-recording)
The Agora On-Premise Recording SDK is a recording component developed by Agora for audio and video calls and live broadcasts. Through simple operation methods, it helps developers quickly and flexibly deploy recording services to record audio and video calls or live broadcasts and generate recording files in MP4 format.
With the recording function, you can save the content of voice calls, video calls, and live broadcasts, and make it available for later viewing. For example, learners can review course recordings at their convenience or catch up on lessons they missed after attending live online classes.
The SDK works with RTC SDK and is compatible with the Agora RTC Native and framework SDKs (version 1.7.0 or higher) and the Agora RTC Web SDK (version 1.12.0 or higher).
The Agora On-Premise Recording SDK requires deployment on Linux servers with self-managed maintenance. If you prefer not to deploy Linux servers and want to implement recording through RESTful APIs, use [Agora Cloud Recording](/en/realtime-media/cloud-recording).
## Start building
## Features
Choose between single-stream recording (separate MP4 files for each UID) or converged recording (combined audio/video in one MP4 file) to meet different use cases.
Record audio only, video only, or both simultaneously. Compatible with Agora RTC Native/Framework SDK (v1.7.0+) and Web SDK (v1.12.0+).
Set custom mixed-stream layouts, specify user screen sizes and positions on video canvas, and configure background images in converged recording mode.
Record specific UIDs in channels and add text watermarks, dynamic timestamp watermarks, or static image watermarks to recorded video files.
Deploy on Ubuntu 18.04+ and CentOS 7.0+ with cluster support, proxy server configuration, cloud proxy services, and end-to-end security for encrypted channels.
Capture JPG format screenshots from live streams and save them to specified local paths. Access raw video data in YUV, JPG, and encoded video frame formats.
# Agora MCP (/en/realtime-media/on-premise-recording/mcp)
The Agora MCP server gives your AI assistant direct access to Agora documentation, so it can look up APIs, SDK methods, and platform details in real time.
The server is available at:
```text
https://mcp.agora.io
```
## Installation
```bash
codex mcp add --url https://mcp.agora.io agora-docs
```
# Quickstart (/en/realtime-media/on-premise-recording/quickstart)
This article describes how to use the On-Premise Recording SDK to record real-time audio and video.
## Understand the tech
Recording audio and video in a channel using the On-Premise Recording SDK works by adding a special user to the RTC SDK channel. This special user captures the audio and video from the channel, transcodes it, and stores it on your Linux server.
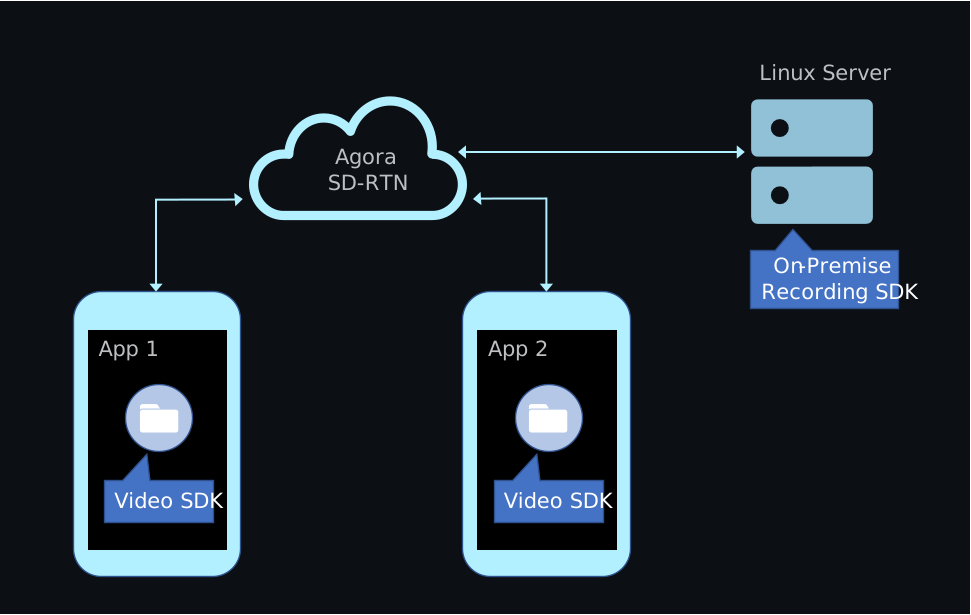
Integrate the On-Premise Recording SDK into your Linux server, not your client app. To record audio and video without deploying a Linux server, use Agora [Cloud Recording](/en/realtime-media/cloud-recording).
## Prerequisites
Before you begin, complete the following steps and ensure your environment meets the required specifications:
* [Create an Agora project](/en/introduction/account#generate-temporary-tokens) in the Agora Console and obtain an App ID and a temporary token.
* Implement an RTC SDK project that includes basic audio and video interaction.
**Server hardware requirements:**
* **CPU**: 8 cores, 1.8 GHz
* **Memory**: At least 4 GB (recommended)
**Server software requirements:**
* **Operating system**: Ubuntu 18.04 or later, or CentOS 7.0 or later
* **CPU architecture**: arm64 or x86-64
* **glibc**: version 2.18 or later
* **gcc**: version 4.8 or later
**Network requirements:**
* The server is connected to the public internet and has a public IP address.
* The server allows access to the following domains:
* `*.agora.io`
* `*.agoralab.co`
## Project setup
This section shows how to integrate the On-Premise Recording SDK into your app.
### Integrate the SDK
1. Download the latest On-Premise Recording SDK package from the [SDKs](/en/api-reference/sdks?product=on-premise-recording\&platform=linux) page.
2. Extract the package. The directory structure should look like this:
```text
.
├── agora_sdk
│ ├── include
│ ├── libagora-fdkaac.so
│ ├── libagora_rtc_sdk.so
│ └── libaosl.so
└── example
├── CMakeLists.txt
├── build.sh
├── out
├── recorder
├── recorder.json
├── singleVideo.json
├── scripts
└── third-party
```
3. Integrate the SDK into your project:
* Import the header files from `agora_sdk/include` into your project.
* Link the following dynamic library files from the `agora_sdk` directory:
* `libagora-fdkaac.so`
* `libagora_rtc_sdk.so`
* `libaosl.so`
The `example` directory contains a complete sample project for local recording. To run it, see [Test the project](#test-the-project).
## Implement On-Premise Recording
This section shows how to implement On-Premise recording in your app, step by step.
The following figure illustrates the essential steps:
Quickstart sequence diagram
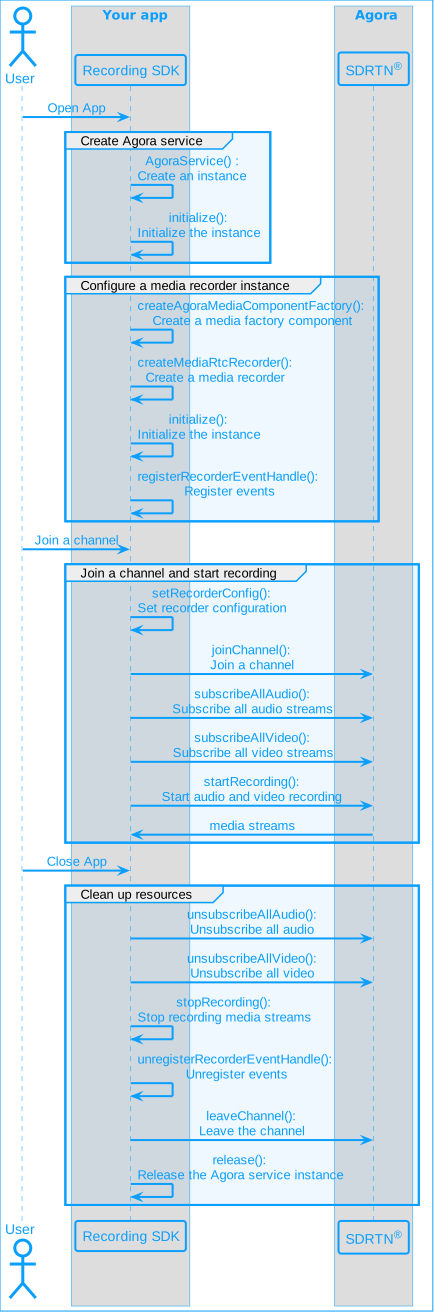
### Initialize the service
Create the Agora service using `createAgoraService`. Then initialize it with media configuration options and logging settings.
```cpp
auto service = createAgoraService();
agora::base::AgoraServiceConfiguration service_config;
service_config.enableAudioDevice = false;
service_config.enableAudioProcessor = true;
service_config.enableVideo = true;
service_config.appId = config.appId.c_str();
service_config.useStringUid = config.UseStringUid;
service->initialize(service_config);
service->setLogFile("./io.agora.rtc_sdk/agorasdk.log", 1024 * 1024 * 5);
```
### Create the recorder instance
Call `createAgoraMediaComponentFactory` and use it to create a `IAgoraMediaRtcRecorder` instance. Then initialize the recorder with the service and recording mode.
```cpp
agora::rtc::IMediaComponentFactory* factory = createAgoraMediaComponentFactory();
agora::agora_refptr recorder = factory->createMediaRtcRecorder();
// Set the recording mode
// - false: Record each user's audio and video stream separately (single stream recording)
// - true: Record all users' audio and video streams together (composite recording)
bool isMix = false;
// Initialize recorder
recorder->initialize(service, isMix);
```
### Register the event handler
Call `registerRecorderEventHandle` to register a user-defined event handler that receives recorder callbacks.
```cpp
std::unique_ptr eventHandler{new RecorderEventHandler(recorder, config)};
recorder->registerRecorderEventHandle(eventHandler.get());
```
### Subscribe to audio and video streams
Call `subscribeAllAudio` and `subscribeAllVideo` to receive all audio and video streams in the channel.
```cpp
recorder->subscribeAllAudio();
recorder->subscribeAllVideo(options);
```
### Configure recording
Call `setRecorderConfig` to define recording parameters such as resolution, frame rate, audio settings, and the storage location.
Ensure that the directory specified in `storagePath` exists. If not, the recording will fail.
```cpp
// Set recording configuration
agora::media::MediaRecorderConfiguration recorder_config;
recorder_config.width = config.video.width;
recorder_config.height = config.video.height;
recorder_config.fps = config.video.fps;
recorder_config.storagePath = config.recorderPath.c_str();
recorder_config.sample_rate = config.audio.sampleRate;
recorder_config.channel_num = config.audio.numOfChannels;
// Set recording stream type: audio stream, video stream, or audio and video stream
recorder_config.streamType = static_cast(config.recorderStreamType);
// Set the maximum recording duration
recorder_config.maxDurationMs = config.maxDuration * 1000;
recorder->setRecorderConfig(recorder_config);
```
### Join the channel and start recording
Call `joinChannel` to join the specified channel and `startRecording` to begin recording.
```cpp
recorder->joinChannel(config.token.c_str(), config.ChannelName.c_str(), config.UserId.c_str());
recorder->startRecording();
```
### Stop recording and release resources
Call the cleanup methods to end recording, unsubscribe from streams, and release memory.
```cpp
recorder->unsubscribeAllAudio();
recorder->unsubscribeAllVideo();
recorder->stopRecording();
recorder->unregisterRecorderEventHandle(eventHandler.get());
eventHandler = nullptr;
recorder->leaveChannel();
recorder = nullptr;
service->release();
```
### Complete sample code
The following example shows the full implementation of an On-Premise Recording workflow.
Complete sample code for On-Premise Recording
```cpp
// Create and initialize the Agora service, and configure logging
auto service = createAgoraService();
agora::base::AgoraServiceConfiguration service_config;
service_config.enableAudioDevice = false;
service_config.enableAudioProcessor = true;
service_config.enableVideo = true;
service_config.appId = config.appId.c_str();
service_config.useStringUid = config.UseStringUid;
service->initialize(service_config);
service->setLogFile("./io.agora.rtc_sdk/agorasdk.log", 1024 * 1024 * 5);
// Create the media recorder instance
agora::rtc::IMediaComponentFactory* factory = createAgoraMediaComponentFactory();
agora::agora_refptr recorder = factory->createMediaRtcRecorder();
// Initialize the recorder
// Set to true for mixed recording or false for individual streams
bool isMix = false;
recorder->initialize(service, isMix);
// Register the event handler for recorder callbacks
std::unique_ptr eventHandler{new RecorderEventHandler(recorder, config)};
recorder->registerRecorderEventHandle(eventHandler.get());
// Subscribe to all audio and video streams
recorder->subscribeAllAudio();
recorder->subscribeAllVideo(options); // 'options' should be properly defined before use
// Configure recorder settings
agora::media::MediaRecorderConfiguration recorder_config;
recorder_config.width = config.video.width;
recorder_config.height = config.video.height;
recorder_config.fps = config.video.fps;
recorder_config.storagePath = config.recorderPath.c_str();
recorder_config.sample_rate = config.audio.sampleRate;
recorder_config.channel_num = config.audio.numOfChannels;
recorder_config.streamType = static_cast(config.recorderStreamType);
recorder_config.maxDurationMs = config.maxDuration * 1000;
recorder->setRecorderConfig(recorder_config);
// Join the channel and start recording
recorder->joinChannel(config.token.c_str(), config.ChannelName.c_str(), config.UserId.c_str());
recorder->startRecording();
// Stop recording and clean up
recorder->unsubscribeAllAudio();
recorder->unsubscribeAllVideo();
recorder->stopRecording();
recorder->unregisterRecorderEventHandle(eventHandler.get());
eventHandler = nullptr;
recorder->leaveChannel();
recorder = nullptr;
service->release();
```
## Test the project
Agora provides a complete sample project in the SDK download package. After downloading and extracting the package, follow these steps to build and run it:
1. Navigate to the sample project directory:
```sh
cd agora_rtc_sdk/example
```
2. Build the sample project:
```sh
./build.sh
```
3. Add the SDK library path to the `LD_LIBRARY_PATH` environment variable:
```sh
export LD_LIBRARY_PATH=../../agora_sdk:$LD_LIBRARY_PATH
```
4. Choose a configuration file for your recording mode:
* Use `recorder.json` for composite recording.
* Use `singleVideo.json` for individual recording.
For more information on the differences between mixed and individual recording modes, see [Individual recording](/en/realtime-media/on-premise-recording/build/record-audio-and-video/individual-mode) and [Composite recording](/en/realtime-media/on-premise-recording/build/record-audio-and-video/composite-mode).
5. Run the sample recorder with the selected configuration file:
```sh
# Example: Run individual recording
./out/sample_recorder singleVideo.json
```
## Reference
This section contains content that completes the information on this page, or points you to documentation that explains other aspects to this product.
### API reference
* [`createAgoraService`](/en/api-reference/api-ref/on-premise-recording#createagoraservice)
* [`initialize`](/en/api-reference/api-ref/on-premise-recording#initialize)
* [`setLogFile`](/en/api-reference/api-ref/on-premise-recording#setlogfile)
* [`createAgoraMediaComponentFactory`](/en/api-reference/api-ref/on-premise-recording#createagoramediacomponentfactory)
* [`registerRecorderEventHandle`](/en/api-reference/api-ref/on-premise-recording#registerrecordereventhandle)
* [`subscribeAllAudio`](/en/api-reference/api-ref/on-premise-recording#subscribeallaudio)
* [`subscribeAllVideo`](/en/api-reference/api-ref/on-premise-recording#subscribeallvideo)
* [`setRecorderConfig`](/en/api-reference/api-ref/on-premise-recording#setrecorderconfig)
* [`joinChannel`](/en/api-reference/api-ref/on-premise-recording#joinchannel)
* [`startRecording`](/en/api-reference/api-ref/on-premise-recording#startrecording)
* [`unsubscribeAllAudio`](/en/api-reference/api-ref/on-premise-recording#unsubscribeallaudio)
* [`unsubscribeAllVideo`](/en/api-reference/api-ref/on-premise-recording#unsubscribeallvideo)
* [`stopRecording`](/en/api-reference/api-ref/on-premise-recording#stoprecording)
* [`unregisterRecorderEventHandle`](/en/api-reference/api-ref/on-premise-recording#unregisterrecordereventhandle)
* [`leaveChannel`](/en/api-reference/api-ref/on-premise-recording#leavechannel)
* [`release`](/en/api-reference/api-ref/on-premise-recording#release)
## Platform-specific versions
- [Linux C++](/en/realtime-media/on-premise-recording/quickstart/linux-cpp.md)
- [Linux Java](/en/realtime-media/on-premise-recording/quickstart/linux-java.md)
# Agora skills (/en/realtime-media/on-premise-recording/skills)
Agora skills are a set of structured reference files that give AI coding assistants deep knowledge of Agora's platform. When you ask your assistant to build something with Agora, it loads the relevant skill files covering products, APIs, and platform-specific code examples, so it can generate working code without guessing.
Skills include the [Agora MCP server](./mcp.mdx), which gives your assistant access to live Agora documentation. For installation instructions and supported tools, see the [Agora Skills repository](https://github.com/AgoraIO/skills).
## Installation
```bash
npx skills add github:AgoraIO/skills
```
Skills activate automatically when your agent detects relevant tasks, for example, "build a voice agent", "integrate Agora RTC", or "generate a token".
## Manual installation
Clone the repository once and point your AI coding assistant to the skill files directly.
1. Clone the [Agora Skills repo](https://github.com/AgoraIO/skills.git):
```bash
git clone https://github.com/AgoraIO/skills.git ~/agora-skills
```
2. Point your AI assistant to `skills/agora/`.
Follow the instructions for your AI coding assistant:
### Claude Code
Run the following commands inside Claude Code:
* User-level, available across all your projects:
```bash
/plugin marketplace add AgoraIO/skills
/plugin install agora
```
* Project-level, shared with your team via version control:
```bash
/plugin marketplace add AgoraIO/skills
/plugin install agora --scope project
```
### Cursor
Copy or symlink `skills/agora/` into `.cursor/rules/`. For more information, see [Cursor skill directories](https://cursor.com/docs/skills#skill-directories).
### Windsurf
Add `skills/agora/` to your Cascade context. For more information, see [Windsurf skills](https://docs.windsurf.com/windsurf/cascade/skills).
### GitHub Copilot
Reference via `@workspace` or add to `.github/copilot-instructions.md`. For more information, see [Create skills for Copilot in the CLI](https://docs.github.com/en/copilot/how-tos/copilot-cli/customize-copilot/create-skills) or [Create skills for the Copilot coding agent](https://docs.github.com/en/copilot/how-tos/use-copilot-agents/coding-agent/create-skills).
### Other tools
The skill files are plain Markdown. Point your tool to `skills/agora/` or load individual files directly. Use `SKILL.md` as the entry point.
# Online KTV (/en/realtime-media/online-ktv)
## What this product covers
Online KTV combines real-time audio interaction, room coordination, music-content workflows, and karaoke-specific experience design into one product surface.
## Product paths
* [Scenario API](scenario-api.md)
* [PaaS SDK](paas-sdk.md)
* [UIKit Open Source](uikit.md)
## Recommended reading path
1. Start with the path that best matches your integration model.
2. Validate whether you need a scene-oriented API, a lower-level PaaS path, or a UIKit-based fast-start approach.
3. Expand into detailed implementation docs as the legacy KTV content is normalized into this new product directory.
## Current migration note
The deeper Online KTV source materials already exist in this repository, but the legacy multi-level MDX content still depends on older portal components. This product directory is the stable new-site entry point while that deeper content is being migrated.
# PaaS SDK (/en/realtime-media/online-ktv/paas-sdk)
## What it is
The PaaS SDK path gives teams more control over business logic, room interaction, and UI design while still building on Agora's real-time and music-related capabilities.
## Best fit
* teams that want deeper customization
* products with existing app-specific room logic or UI systems
* engineering teams comfortable integrating RTC, RTM, and karaoke workflows directly
## Current status in this repo
The detailed source materials for this path already exist under the legacy `online-ktv` content tree and will be migrated into this new directory model incrementally.
# Scenario API (/en/realtime-media/online-ktv/scenario-api)
## What it is
The Scenario API path wraps lower-level real-time APIs into karaoke-specific flows so teams can build solo singing, chorus, relay singing, and competition-style KTV rooms faster.
## Best fit
* teams optimizing for delivery speed
* products centered on karaoke room interaction
* workloads that benefit from scene-oriented APIs instead of raw infrastructure assembly
## Current status in this repo
The detailed source materials for this path already exist under the legacy `online-ktv` content tree and will be migrated into this new directory model incrementally.
# UIKit Open Source (/en/realtime-media/online-ktv/uikit)
## What it is
The UIKit Open Source path provides reusable karaoke UI components so teams can build an Online KTV product with less custom interface work.
## Best fit
* teams that want a UI-first jumpstart
* prototypes and pilots that need faster visual assembly
* products that prefer extending open-source karaoke components over designing from scratch
## Current status in this repo
The detailed source materials for this path already exist under the legacy `online-ktv` content tree and will be migrated into this new directory model incrementally.
# Core concepts (/en/realtime-media/rtc/core-concepts)
RTC (Real-Time Communication) refers to real-time communication technology, which allows almost instant exchange of audio, video, and other data between the sender and the receiver.
Agora SDKs provide real-time audio and video interaction services, with multi-platform and multi-device support. This includes high-definition video calls, voice-only calls, interactive live streaming, as well as one-on-one and multi-group chats.
This guide introduces the key processes and concepts you need to know to use RTC SDK.
Agora relies on the following fundamental concepts to enable seamless real-time communication:
## Agora SDRTN®
Agora's core engagement services are powered by its Software-Defined Real-Time Network (SDRTN®), a global infrastructure accessible anytime, anywhere. Unlike traditional networks, Agora SDRTN® is not restricted by devices, phone numbers, or telecom coverage areas. With data centers in over 200 countries and regions, it ensures sub-second latency and high availability for real-time media.
Agora SDRTN® enables live user engagement through real-time communication (RTC), offering:
* Unmatched quality of service
* High availability and accessibility
* True scalability
* Low cost
## Channel concepts
Agora uses channels to group users together, enabling seamless communication and interaction. Channels serve as the foundation for transmitting real-time data, whether audio, video, or signaling, and play a crucial role in connecting users and services.
### Channel
A channel organizes users into a group and is identified by a unique channel name. Users who connect to the same channel are able to communicate with each other. A channel is created when the first user joins and ceases to exist when the last user leaves.
Channels are created by calling the methods for transmitting real-time data. Agora uses different channels to transmit different types of data:
* An RTC channel is used for transmitting audio or video data.
* A Signaling channel is used for transmitting messaging or signaling data.
These channels are independent of each other.
Additional services provided by Agora, such as Cloud Recording and STT, join the RTC SDK channel to provide real-time recording, transmission acceleration, media playback, and content moderation.
### Channel profile
The RTC SDK applies different optimization methods according to the selected channel profile. Agora supports the following channel profiles:
| Channel profile | Description |
| --------------------- | ------------------------------------------------------------------------------------------------------------------------------------------------------------------------------------------------------ |
| **Communication** | This profile is suitable for one-on-one or group calls, where all users in the channel talk freely. |
| **Live Broadcasting** | In a live streaming channel, users have two client roles: *host* and *audience*. The *host* sends and receives streams, while the *audience* only receives streams with the sending function disabled. |
### Stream
A stream is a sequence of digitally encoded, coherent signals that contain media data. Users in a channel [publish](#publish) local streams and [subscribe](#subscribe) to remote streams from other users.
### User role
The user role defines whether a user in a channel has the permission to publish streams. There are two user roles:
* **Host**: A user who can publish streams to a channel.
* **Audience**: A User who can only subscribe to remote media streams. A user with this role cannot publish streams.
### Publish
Publishing is the act of sending a user’s audio or video data to the channel. Usually, the published stream is created by the audio data sampled from a microphone or the video data captured by a camera. You can also publish media streams from other sources, such as an online music file or the user’s screen.
After successfully publishing a stream, the SDK uses it to send media data to other users in the channel. Users communicate with each other in real-time by publishing local streams and subscribing to remote streams.
### Subscribe
Subscribing is the act of receiving media streams published by remote users to the channel. A user receives audio and video data from other users by subscribing to one or more of their streams. You either directly play the subscribed streams or process incoming data for other purposes such as recording or capturing screenshots.
### User ID
In Video Calling, the UID is an integer value that uniquely identifies a user within the context of a channel. When joining a channel, you have the option to either assign a specific UID to the user or pass `0` or `null` and allow Agora to automatically generate and assign a UID to the user. If two users attempt to join the same channel with the same UID, it can lead to unexpected behavior.
The UID is used by Agora's services and components to identify and manage users within a channel. Ensure that UIDs are properly assigned to prevent conflicts.
### RTC connection
The connection between the SDK and the channel. When publishing or subscribing to multiple streams in multiple channels, a connection is used to specify the target channel.
## Credentials
To ensure reliable access and secure communication, Agora uses credentials such as the App ID, App Certificate, and tokens to identify applications, authenticate their requests, and authorize their access on its platform.
### App ID
The App ID is a unique key generated by Agora to identify each project and provide billing and other statistical data services. The App ID is critical for connecting users within your app. It is used to initialize the Agora Engine in your app, and as one of the required keys to create authentication tokens for secure communication. Retrieve the App ID for your project using the [Agora Console](https://console.agora.io/v2/project-management).
App IDs are stored on the front-end client and do not provide access control. Projects using only an App ID allow any user with the App ID to join. For access control, especially in production environments, choose the **App ID + Token** mechanism for user authentication when creating a new project. Without authentication tokens, your environment is open to anyone with access to your App ID.
### App Certificate
An App Certificate is a unique key generated by the Agora Console to secure projects through token authentication. It is required, along with the App ID, to generate a token that proves authorization between your systems and Agora's network. App Certificates are used to generate Video Calling authentication tokens.
Store the App Certificate securely in your backend systems. If your App Certificate is compromised or to meet security compliance requirements, you can invalidate certificates and create new ones through the Agora Console.
### Tokens
A token is a dynamic key generated using the App ID, App Certificate, user ID, and expiration timestamp. Tokens authenticate and secure access to Agora's services, ensuring only authorized users can join a channel and participate in real-time communication.
Tokens are generated on your server and passed to the client for use in Video Calling. The token generation process involves digitally signing the App ID, App Certificate, user ID, and expiration timestamp using a specific algorithm, preventing tampering or forgery.
During development and testing, use the Agora Console to generate temporary tokens. For production environments, implement a token server as part of your security infrastructure to control access to your channels.
For information on setting up a token server for generating and managing tokens, refer to [Deploy a token server](/en/realtime-media/rtc/build/authenticate-users/deploy-token-server).
### Agora Console
[Agora Console](https://console.agora.io/v2) is the main dashboard where you manage your Agora projects and services. Before you can use Agora's SDKs, you must first create a project in the Agora Console. See [Agora account management](/en/introduction/account) for
details.

Agora Console provides an intuitive interface for developers to query and manage their Agora account. After registering an Agora account, you use the Agora Console to perform the following tasks:
* Manage your account
* Create and configure Agora projects and services
* Get an App ID and the App certificate
* Generate temporary tokens for development and testing
* Manage members and roles
* Check call quality and usage
* Check bills and make payments
* Access product resources
See [Agora account management](/en/introduction/account) for details on how to manage all aspects of your Agora account.
Agora also provides RESTful APIs that you use to implement features such as creating a project and fetching usage numbers programmatically.
## Audio and video concepts
### Audio and video interaction workflow
The following figure illustrates the workflow of using the RTC SDK to implement basic audio and video interaction.

Agora relies on the following fundamental concepts to enable seamless real-time communication:
### Track
A track contains specific audio or video information. It consists of three parts: input source, filter, and output. According to different functions in the RTC process, tracks can be further classified into uplink tracks and downlink tracks.
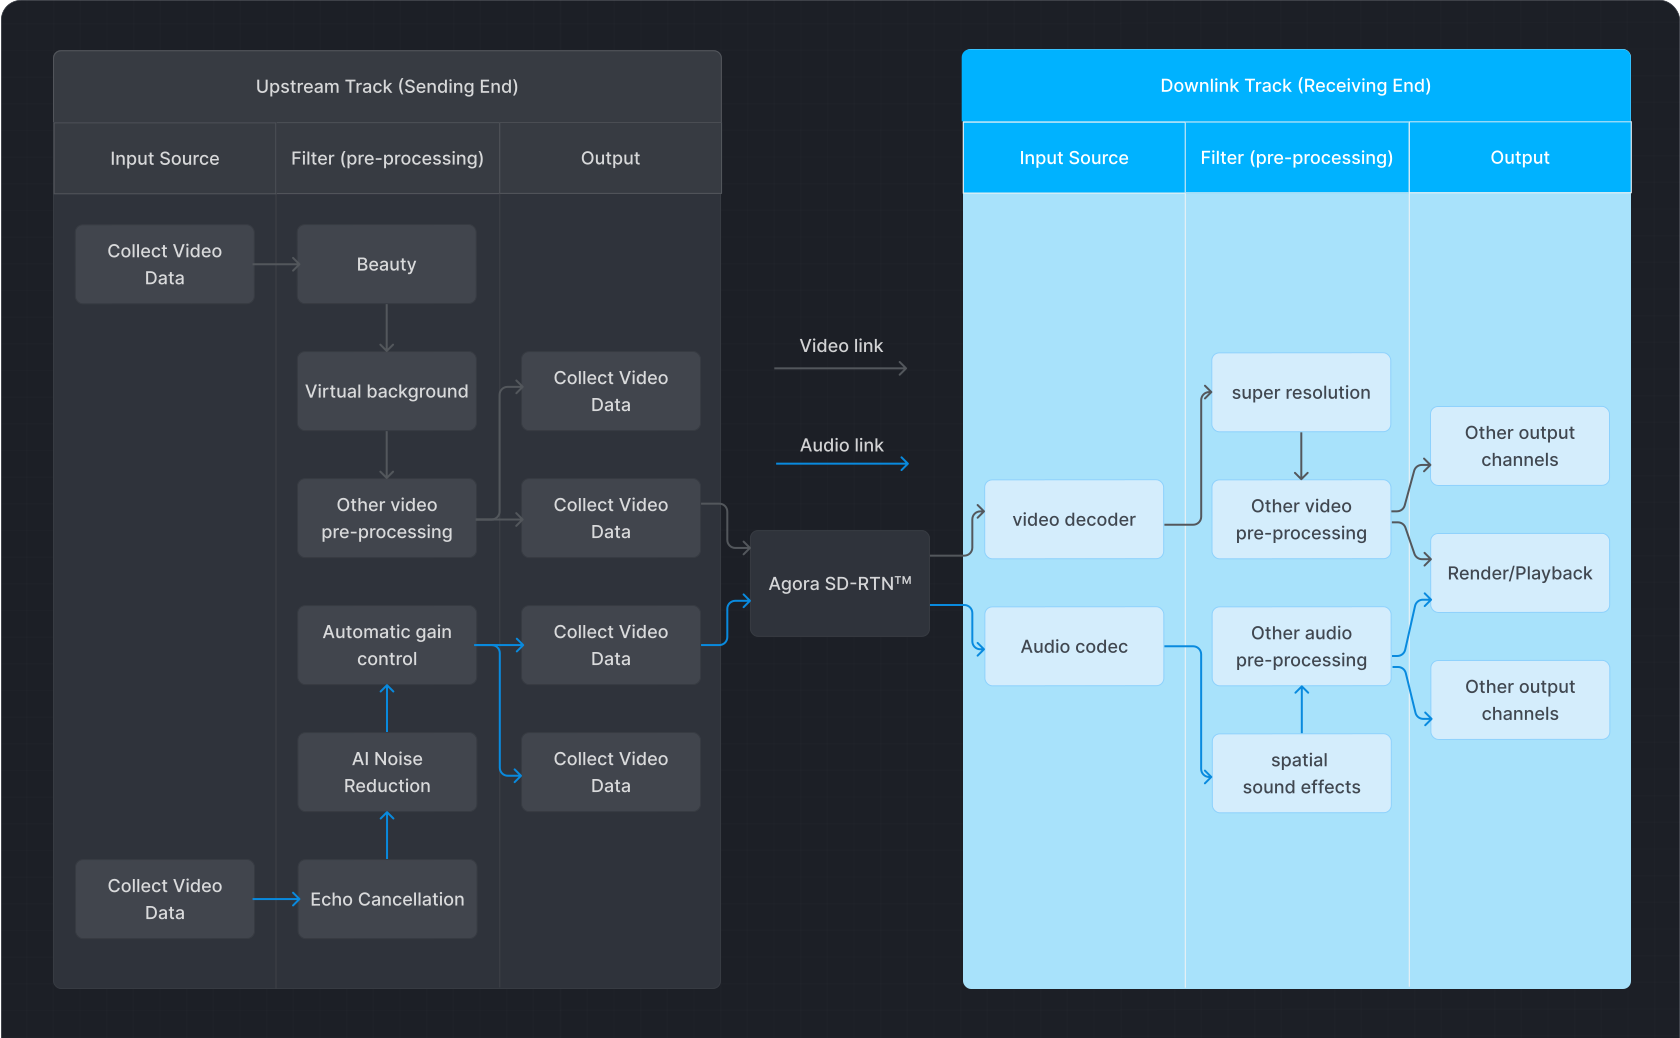
#### Input source
The input source is the local audio or video data to be published. It can be from a camera, screen capture, or microphone source, or parsed from a media file.
#### Filter
A filter performs a series of processing operations on audio and video, including pre-processing and post-processing, and transmits the processed audio and video signals to the output. Filters can be connected to multiple input sources or multiple outputs.
* Pre-processing: Audio/video filters in the sender track, such as virtual background, beautification, echo cancellation, and noise reduction.
* Post-processing : Audio/video filters in the receiving track, such as super-resolution, and spatial audio effects.
#### Output
Located at the end of the track, such as an encoder, or a renderer.
### Audio module
In audio interaction, the main functions of the audio module are as shown in the figure below:

After you call `registerAudioFrameObserver`, you can obtain the raw audio data at the following observation points in the audio transmission process:
1. Obtain the raw audio data of ear monitoring through the `onEarMonitoringAudioFrame` callback.
2. Obtain the captured raw audio data through the `onRecordAudioFrame` callback.
3. Obtain the raw audio playback data of each individual stream through the `onPlaybackAudioFrameBeforeMixing` callback.
4. Obtain the raw audio playback data of all mixed streams through the `onPlaybackAudioFrame` callback.
5. Obtain the raw audio data after mixing the captured and playback audio through the `onMixedAudioFrame` callback.
(5) `onMixedAudioFrame` = (2) `onRecordAudioFrame` + (4) `onPlaybackAudioFrame`
### Audio routing
The audio output device used by the app when playing audio. Common audio routes include wired headphones, earpieces, speakers, Bluetooth headphones, and others.
The APIs used by the audio module are as follows:
* Enable local audio collection: `enableLocalAudio`
* Set local playback device: `setPlaybackDevice`
* Set up audio routing: `setDefaultAudioRouteToSpeakerphone`
### Video module
The following diagram shows the main functions of the video module in video interaction:

The figure shows the following observation points:
1. `POSITION_POST_CAPTURER_ORIGIN`.
2. `POSITION_POST_CAPTURER`, corresponds to the `onCaptureVideoFrame` callback.
3. `POSITION_PRE_ENCODER`, corresponds to the `onPreEncodeVideoFrame` callback.
4. `POSITION_PRE_RENDERER`, corresponds to the `onRenderVideoFrame` callback.
The APIs used by the video module are as follows:
* Enable local video collection: `enableLocalVideo`
* Local preview: `setupLocalVideo` → `startPreview`
* Video rendering shows: `setupRemoteVideo`
# Quickstart (/en/realtime-media/rtc/get-started-sdk)
This page provides a step-by-step guide on how to create a basic real-time app using the Agora RTC SDK. The same steps apply whether you're building voice calling, video calling, interactive live streaming, or broadcast streaming — only a few configuration values change based on your use case.
## Understand the tech
To start a real-time session, implement the following steps in your app:
* **Initialize the engine**: Before calling other APIs, create and initialize an engine instance.
* **Join a channel**: Call methods to create and join a channel.
* **Join as a host**: A live streaming event has one or more hosts. A host publishes audio and video to the channel and can also subscribe to streams from other hosts.
* **Join as audience**: Audience members can only subscribe to streams published by hosts.
Note
For the voice calling and video calling use cases, each user joins as a host.
* **Send and receive audio and video**: Hosts publish streams to the channel. Audience members subscribe to audio and video streams published by hosts.
* For streaming applications, set the latency level based on your use case:
* **Interactive live streaming**: Optimized for real-time interaction with ultra-low latency. Use this when hosts and audience need to interact quickly, such as in live Q\&A sessions, interactive classrooms, or auctions.
* **Broadcast streaming**: Optimized for scalability with slightly higher latency. Use this for large-scale events where one-way broadcasting is sufficient, such as concerts, sports events, or news broadcasts.
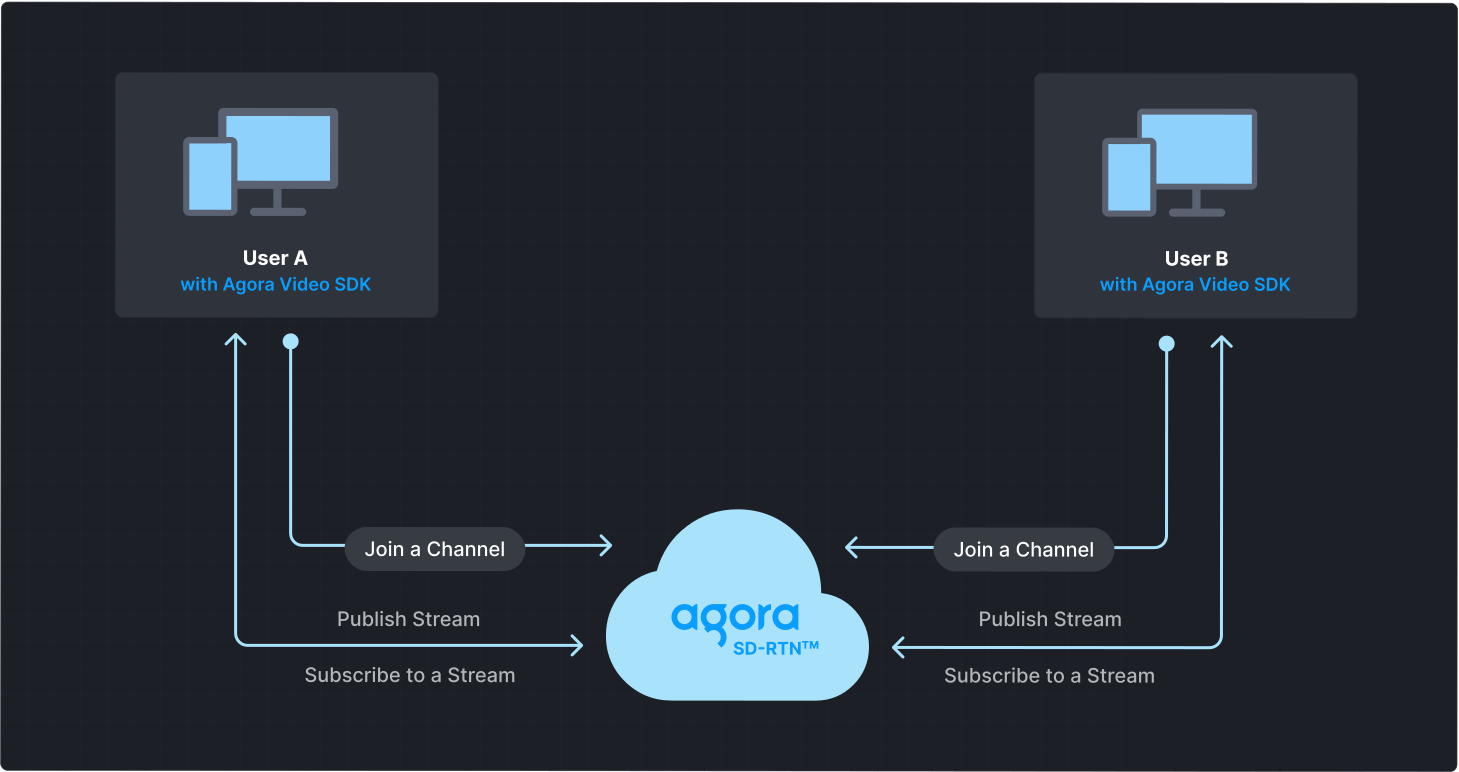
## Prerequisites
* A camera and a microphone.
* A valid Agora account and project. See [Agora account management](/en/introduction/account) for details.
* [Android Studio](https://developer.android.com/studio) 4.2 or higher.
* Android SDK API Level 21 or higher.
* Two mobile devices running Android 5.0 or higher.
## Set up your project
Create a new project
Add to an existing project
1. Create a [new project](https://developer.android.com/studio/projects/create-project).
1. Open Android Studio and select **File > New > New Project...**.
2. Select **Phone and Tablet** > **Empty Activity** and click **Next**.
3. Set the project name and storage path.
4. Select **Java** or **Kotlin** as the language, and click **Finish** to create the Android project.
Note
After you create a project, Android Studio automatically starts gradle sync. Ensure that the synchronization is successful before proceeding to the next step.
1. Add a new activity to your project.
1. Open your project in Android Studio.
2. Right-click on the `app/src/main/java/` folder.
3. Select **New → Activity → Empty Activity**.
4. Enter an activity name and click **Finish**.
This guide uses `MainActivity` as the activity name in the sample code. Replace it with your activity name where required.
2. Add a layout file for your activity.
Set up two container elements in your activity to display local and remote video streams. Refer to [Create a user interface](#create-a-user-interface) to get a bare bones sample layout.
### Install the SDK
Use either of the following methods to add RTC SDK to your project.
Maven Central
Manual download
1. Open the `settings.gradle` file in the project's root directory and add the Maven Central dependency, if it doesn't already exist:
```groovy
repositories {
mavenCentral()
}
```
Note
If your Android project uses [dependencyResolutionManagement](https://docs.gradle.org/current/userguide/declaring_repositories.html#sub\:centralized-repository-declaration), the method of adding the Maven Central dependency may differ.
2. To integrate the RTC SDK into your Android project, add the following to the `dependencies` block in your project module `build.gradle` file:
* Groovy `build.gradle`
```groovy
implementation 'io.agora.rtc:full-sdk:x.y.z'
```
* Kotlin `build.gradle.kts`
```kotlin
implementation("io.agora.rtc:full-sdk:x.y.z")
```
Replace `x.y.z` with the specific SDK version number, such as `4.5.0`.
Note
To get the latest version number, check the [Release notes](/en/realtime-media/rtc/reference/release-notes). To integrate the Lite SDK, use `io.agora.rtc:lite-sdk` instead.
3. Prevent code obfuscation
Open the `/app/proguard-rules.pro` file and add the following lines to prevent the RTC SDK code from being obfuscated:
```java
-keep class io.agora.** { *; }
-dontwarn io.agora.**
```
1. Download the latest version of RTC SDK from the [SDKs](/en/api-reference/sdks?platform=android) page and unzip it.
2. Open the unzipped file and copy the following files or subfolders to your project path.
| File or folder | Project path |
| :----------------------------------- | :----------------------- |
| `agora-rtc-sdk.jar` file | `/app/libs/` |
| `arm64-v8a` folder | `/app/src/main/jniLibs/` |
| `armeabi-v7a` folder | `/app/src/main/jniLibs/` |
| `x86` folder | `/app/src/main/jniLibs/` |
| `x86_64` folder | `/app/src/main/jniLibs/` |
| `high_level_api` in `include` folder | `/app/src/main/jniLibs/` |
3. Select the file `/app/libs/agora-rtc-sdk.jar` in the left navigation bar of Android Studio project files, right-click, and select **add as a library** from the drop-down menu.
4. Prevent code obfuscation
Open the `/app/proguard-rules.pro` file and add the following lines to prevent the RTC SDK code from being obfuscated:
```java
-keep class io.agora.** { *; }
-dontwarn io.agora.**
```
## Implement Realtime Communication
This section guides you through the implementation of basic real-time audio and video interaction in your app.
The following figure illustrates the essential steps:

This guide includes [complete sample code](#complete-sample-code) that demonstrates implementing basic real-time interaction. To understand the core API calls in the sample code, review the following implementation steps and use the code in your `MainActivity` file.
### Import Agora classes
Import the relevant Agora classes and interfaces:
Java
Kotlin
```java
import io.agora.rtc2.Constants;
import io.agora.rtc2.IRtcEngineEventHandler;
import io.agora.rtc2.RtcEngine;
import io.agora.rtc2.RtcEngineConfig;
import io.agora.rtc2.video.VideoCanvas;
import io.agora.rtc2.ChannelMediaOptions;
```
```kotlin
import io.agora.rtc2.Constants
import io.agora.rtc2.IRtcEngineEventHandler
import io.agora.rtc2.RtcEngine
import io.agora.rtc2.RtcEngineConfig
import io.agora.rtc2.video.VideoCanvas
import io.agora.rtc2.ChannelMediaOptions
```
### Initialize the engine
For real-time communication, initialize an `RtcEngine` instance and set up event handlers to manage user interactions within the channel. Use `RtcEngineConfig` to specify the application context, [App ID](/en/introduction/account#get-the-app-id-and-app-certificate), and custom [event handler](#subscribe-to-video-sdk-events), then call `RtcEngine.create(config)` to initialize the engine, enabling further channel operations. In your `MainActivity` file, add the following code:
Java
Kotlin
```java
// Fill in the app ID from Agora Console
private String myAppId = "";
private RtcEngine mRtcEngine;
private void initializeAgoraVideoSDK() {
try {
RtcEngineConfig config = new RtcEngineConfig();
config.mContext = getBaseContext();
config.mAppId = myAppId;
config.mEventHandler = mRtcEventHandler;
mRtcEngine = RtcEngine.create(config);
} catch (Exception e) {
throw new RuntimeException("Error initializing RTC engine: " + e.getMessage());
}
}
```
```kotlin
// Fill in the App ID obtained from the Agora Console
private val myAppId = ""
private var mRtcEngine: RtcEngine? = null
private fun initializeRtcEngine() {
try {
val config = RtcEngineConfig().apply {
mContext = applicationContext
mAppId = myAppId
mEventHandler = mRtcEventHandler
}
mRtcEngine = RtcEngine.create(config)
} catch (e: Exception) {
throw RuntimeException("Error initializing RTC engine: ${e.message}")
}
}
```
### Join a channel
To join a channel, call `joinChannel` with the following parameters:
* **Channel name**: The name of the channel to join. Clients that pass the same channel name join the same channel. If a channel with the specified name does not exist, it is created when the first user joins.
* **Authentication token**: A dynamic key that authenticates a user when the client joins a channel. In a production environment, you obtain a token from a [token server](/en/realtime-media/rtc/build/authenticate-users/deploy-token-server) in your security infrastructure. For the purpose of this guide [Generate a temporary token](/en/introduction/account#generate-temporary-tokens).
* **User ID**: A 32-bit signed integer that identifies a user in the channel. You can specify a unique user ID for each user yourself. If you set the user ID to `0` when joining a channel, the SDK generates a random number for the user ID and returns the value in the `onJoinChannelSuccess` callback.
* **Channel media options**: Configure `ChannelMediaOptions` to define publishing and subscription settings, optimize performance for your specific use-case, and set optional parameters.
Set the `channelProfile`, `clientRoleType`, and `audienceLatencyLevel` according to your use case:
| Use case | Channel profile | Client role | Latency level |
| -------------------------- | ----------------------------------- | --------------------------------------------------- | ---------------------------------------------------- |
| Voice calling | `CHANNEL_PROFILE_COMMUNICATION` | `CLIENT_ROLE_BROADCASTER` | N/A |
| Video calling | `CHANNEL_PROFILE_COMMUNICATION` | `CLIENT_ROLE_BROADCASTER` | N/A |
| Interactive live streaming | `CHANNEL_PROFILE_LIVE_BROADCASTING` | `CLIENT_ROLE_BROADCASTER` or `CLIENT_ROLE_AUDIENCE` | `AUDIENCE_LATENCY_LEVEL_ULTRA_LOW_LATENCY` (default) |
| Broadcast streaming | `CHANNEL_PROFILE_LIVE_BROADCASTING` | `CLIENT_ROLE_BROADCASTER` or `CLIENT_ROLE_AUDIENCE` | `AUDIENCE_LATENCY_LEVEL_LOW_LATENCY` |
Note
* Only broadcasters can publish media. Audience members cannot publish until promoted to broadcaster.
* Choose Communication mode for calls where every user publishes, typically fewer than 17 participants. Choose Live Broadcasting mode for larger events with separate hosts and audience.
* The latency level only applies to the audience role, and affects your [pricing](/en/realtime-media/rtc/reference/pricing#subscription-packages) tier.
The following example shows the configuration for interactive live streaming with the broadcaster role:
Java
Kotlin
```java
// Fill in the channel name
private String channelName = "";
// Fill in the temporary token generated from Agora Console
private String token = "";
private void joinChannel() {
ChannelMediaOptions options = new ChannelMediaOptions();
// Set the user role to BROADCASTER (host) or AUDIENCE according to your use case
options.clientRoleType = Constants.CLIENT_ROLE_BROADCASTER;
// Set the channel profile according to your use case (see table above)
options.channelProfile = Constants.CHANNEL_PROFILE_LIVE_BROADCASTING;
// Only takes effect when clientRoleType is CLIENT_ROLE_AUDIENCE
options.audienceLatencyLevel = Constants.AUDIENCE_LATENCY_LEVEL_LOW_LATENCY;
options.publishCameraTrack = true;
options.publishMicrophoneTrack = true;
mRtcEngine.joinChannel(token, channelName, 0, options);
}
```
```kotlin
// Fill in the channel name
private val channelName = ""
// Fill in the temporary token generated from Agora Console
private val token = ""
private fun joinChannel() {
val options = ChannelMediaOptions().apply {
// Set the user role to BROADCASTER (host) or AUDIENCE according to your use case
clientRoleType = Constants.CLIENT_ROLE_BROADCASTER
// Set the channel profile according to your use case (see table above)
channelProfile = Constants.CHANNEL_PROFILE_LIVE_BROADCASTING
// Only takes effect when clientRoleType is AUDIENCE
audienceLatencyLevel = Constants.AUDIENCE_LATENCY_LEVEL_LOW_LATENCY
publishMicrophoneTrack = true
publishCameraTrack = true
}
mRtcEngine.joinChannel(token, channelName, 0, options)
}
```
### Subscribe to RTC SDK events
The RTC SDK provides an interface for subscribing to channel events. To use it, create an instance of `IRtcEngineEventHandler` and implement the event methods you want to handle.
Note
To ensure that you receive all RTC SDK events, set the engine event handler before joining a channel.
Java
Kotlin
```java
private final IRtcEngineEventHandler mRtcEventHandler = new IRtcEngineEventHandler() {
// Triggered when the local user successfully joins the specified channel.
@Override
public void onJoinChannelSuccess(String channel, int uid, int elapsed) {
super.onJoinChannelSuccess(channel, uid, elapsed);
showToast("Joined channel " + channel);
}
// Triggered when a remote user/host joins the channel.
@Override
public void onUserJoined(int uid, int elapsed) {
super.onUserJoined(uid, elapsed);
runOnUiThread(() -> {
// Initialize and display remote video view for the new user.
setupRemoteVideo(uid);
showToast("User joined: " + uid);
});
}
// Triggered when a remote user/host leaves the channel.
@Override
public void onUserOffline(int uid, int reason) {
super.onUserOffline(uid, reason);
runOnUiThread(() -> {
showToast("User offline: " + uid);
});
}
};
```
```kotlin
private val mRtcEventHandler = object : IRtcEngineEventHandler() {
override fun onJoinChannelSuccess(channel: String?, uid: Int, elapsed: Int) {
super.onJoinChannelSuccess(channel, uid, elapsed)
runOnUiThread {
showToast("Joined channel $channel")
}
}
override fun onUserJoined(uid: Int, elapsed: Int) {
runOnUiThread {
showToast("User joined: $uid")
}
}
override fun onUserOffline(uid: Int, reason: Int) {
super.onUserOffline(uid, reason)
runOnUiThread {
showToast("User offline: $uid")
}
}
}
```
### Enable the video module
Follow these steps to enable the video module:
1. Call `enableVideo` to enable the video module.
2. Call `startPreview` to enable local video preview.
Java
Kotlin
```java
private void enableVideo() {
mRtcEngine.enableVideo();
mRtcEngine.startPreview();
}
```
```kotlin
private fun enableVideo() {
mRtcEngine?.apply {
enableVideo()
startPreview()
}
}
```
### Display the local video
Call `setupLocalVideo` to initialize the local view and set the local video display properties.
Java
Kotlin
```java
private void setupLocalVideo() {
FrameLayout container = findViewById(R.id.local_video_view_container);
SurfaceView surfaceView = new SurfaceView(getBaseContext());
container.addView(surfaceView);
mRtcEngine.setupLocalVideo(new VideoCanvas(surfaceView, VideoCanvas.RENDER_MODE_FIT, 0));
}
```
```kotlin
/**
* Initializes the local video view and sets the display properties.
* This method adds a SurfaceView to the local video container and configures it.
*/
private fun setupLocalVideo() {
val container: FrameLayout = findViewById(R.id.local_video_view_container)
val surfaceView = SurfaceView(baseContext)
container.addView(surfaceView)
mRtcEngine.setupLocalVideo(VideoCanvas(surfaceView, VideoCanvas.RENDER_MODE_FIT, 0))
}
```
### Display remote video
When a remote user joins the channel, call `setupRemoteVideo` and pass in the remote user's `uid`, obtained from the `onUserJoined` callback, to display the remote video.
Java
Kotlin
```java
private void setupRemoteVideo(int uid) {
FrameLayout container = findViewById(R.id.remote_video_view_container);
SurfaceView surfaceView = new SurfaceView(getBaseContext());
surfaceView.setZOrderMediaOverlay(true);
container.addView(surfaceView);
mRtcEngine.setupRemoteVideo(new VideoCanvas(surfaceView, VideoCanvas.RENDER_MODE_FIT, uid));
}
```
```kotlin
private fun setupRemoteVideo(uid: Int) {
val container = findViewById(R.id.remote_video_view_container)
val surfaceView = SurfaceView(baseContext).apply {
setZOrderMediaOverlay(true)
}
container.addView(surfaceView)
mRtcEngine.setupRemoteVideo(VideoCanvas(surfaceView, VideoCanvas.RENDER_MODE_FIT, uid))
}
```
### Handle permissions
To access the media devices on Android devices, declare the necessary permissions in the app's manifest and ensure that the user grants these permissions when the client starts.
1. Open your project's `AndroidManifest.xml` file and add the following permissions before ``:
```xml
```
2. Use the following code to handle runtime permissions in your Android app. The logic ensures that the necessary permissions are granted before starting Realtime Communication. In your `MainActivity` file, add the following code:
Java
Kotlin
```java
private static final int PERMISSION_REQ_ID = 22;
@Override
protected void onCreate(Bundle savedInstanceState) {
super.onCreate(savedInstanceState);
setContentView(R.layout.activity_main);
if (checkPermissions()) {
startLiveStreaming();
} else {
requestPermissions();
}
}
private boolean checkPermissions() {
for (String permission : getRequiredPermissions()) {
int permissionCheck = ContextCompat.checkSelfPermission(this, permission);
if (permissionCheck != PackageManager.PERMISSION_GRANTED) {
return false;
}
}
return true;
}
// Get the permissions required for real-time audio interaction experience
private String[] getRequiredPermissions() {
if (android.os.Build.VERSION.SDK_INT >= android.os.Build.VERSION_CODES.S) {
return new String[]{
Manifest.permission.RECORD_AUDIO,
Manifest.permission.CAMERA,
Manifest.permission.READ_PHONE_STATE,
Manifest.permission.BLUETOOTH_CONNECT
};
} else {
return new String[]{
Manifest.permission.RECORD_AUDIO,
Manifest.permission.CAMERA
};
}
}
private void requestPermissions() {
ActivityCompat.requestPermissions(this, getRequiredPermissions(), PERMISSION_REQ_ID);
}
@Override
public void onRequestPermissionsResult(int requestCode, @NonNull String[] permissions, @NonNull int[] grantResults) {
super.onRequestPermissionsResult(requestCode, permissions, grantResults);
if (requestCode == PERMISSION_REQ_ID && checkPermissions()) {
startLiveStreaming();
}
}
```
```kotlin
private val PERMISSION_REQ_ID = 22
private fun requestPermissions() {
ActivityCompat.requestPermissions(this, getRequiredPermissions(), PERMISSION_REQ_ID)
}
private fun checkPermissions(): Boolean {
for (permission in getRequiredPermissions()) {
if (ContextCompat.checkSelfPermission(this, permission) != PackageManager.PERMISSION_GRANTED) {
return false
}
}
return true
}
private fun getRequiredPermissions(): Array {
return if (Build.VERSION.SDK_INT >= Build.VERSION_CODES.S) {
arrayOf(
Manifest.permission.RECORD_AUDIO,
Manifest.permission.CAMERA,
Manifest.permission.READ_PHONE_STATE,
Manifest.permission.BLUETOOTH_CONNECT
)
} else {
arrayOf(
Manifest.permission.RECORD_AUDIO,
Manifest.permission.CAMERA
)
}
}
override fun onRequestPermissionsResult(
requestCode: Int,
permissions: Array,
grantResults: IntArray
) {
super.onRequestPermissionsResult(requestCode, permissions, grantResults)
if (requestCode == PERMISSION_REQ_ID && checkPermissions()) {
startLiveStreaming()
}
}
```
### Start and close the app
When a user launches your client, start real-time interaction. When a user closes the app, stop the interaction.
1. In the `onCreate` callback, check whether the client has been granted the required permissions. If the permissions have not been granted, request the required permissions from the user. If permissions are granted, initialize `RtcEngine` and join a channel.
Java
Kotlin
```java
@Override
protected void onCreate(Bundle savedInstanceState) {
super.onCreate(savedInstanceState);
setContentView(R.layout.activity_main);
if (checkPermissions()) {
startLiveStreaming();
} else {
requestPermissions();
}
}
```
```kotlin
override fun onCreate(savedInstanceState: Bundle?) {
super.onCreate(savedInstanceState)
setContentView(R.layout.activity_main)
if (checkPermissions()) {
startLiveStreaming()
} else {
requestPermissions()
}
}
```
2. When a user closes the client, or switches the client to the background, call `stopPreview` to stop the video preview and then call `leaveChannel` to leave the current channel and release all session-related resources.
Java
Kotlin
```java
private void cleanupAgoraEngine() {
if (mRtcEngine != null) {
mRtcEngine.stopPreview();
mRtcEngine.leaveChannel();
mRtcEngine = null;
}
}
```
```kotlin
private fun cleanupAgoraEngine() {
mRtcEngine?.apply {
stopPreview()
leaveChannel()
}
mRtcEngine = null
}
```
### Complete sample code
A complete code sample demonstrating the basic process of real-time interaction is provided for your reference. To use the sample code, copy the following lines into the `MainActivity` file in your project. Then, replace `` in package `com.example.` with your project's name.
Java
Kotlin
```java
package com.example.
import android.Manifest;
import android.content.pm.PackageManager;
import android.os.Bundle;
import android.view.SurfaceView;
import android.widget.FrameLayout;
import android.widget.Toast;
import androidx.annotation.NonNull;
import androidx.appcompat.app.AppCompatActivity;
import androidx.core.app.ActivityCompat;
import androidx.core.content.ContextCompat;
import io.agora.rtc2.ChannelMediaOptions;
import io.agora.rtc2.Constants;
import io.agora.rtc2.IRtcEngineEventHandler;
import io.agora.rtc2.RtcEngine;
import io.agora.rtc2.RtcEngineConfig;
import io.agora.rtc2.video.VideoCanvas;
public class MainActivity extends AppCompatActivity {
private static final int PERMISSION_REQ_ID = 22;
// Fill in the app ID from Agora Console
private String myAppId = "";
// Fill in the channel name
private String channelName = "";
// Fill in the temporary token generated from Agora Console
private String token = "";
private RtcEngine mRtcEngine;
private final IRtcEngineEventHandler mRtcEventHandler = new IRtcEngineEventHandler() {
// Callback when successfully joining the channel
@Override
public void onJoinChannelSuccess(String channel, int uid, int elapsed) {
super.onJoinChannelSuccess(channel, uid, elapsed);
showToast("Joined channel " + channel);
}
// Callback when a remote user or host joins the current channel
@Override
public void onUserJoined(int uid, int elapsed) {
super.onUserJoined(uid, elapsed);
runOnUiThread(() -> {
// When a remote user joins the channel, display the remote video stream for the specified uid
setupRemoteVideo(uid);
showToast("User joined: " + uid); // Show toast for user joining
});
}
// Callback when a remote user or host leaves the current channel
@Override
public void onUserOffline(int uid, int reason) {
super.onUserOffline(uid, reason);
runOnUiThread(() -> {
showToast("User offline: " + uid); // Show toast for user going offline
});
}
};
@Override
protected void onCreate(Bundle savedInstanceState) {
super.onCreate(savedInstanceState);
setContentView(R.layout.activity_main);
if (checkPermissions()) {
startLiveStreaming();
} else {
requestPermissions();
}
}
private void requestPermissions() {
ActivityCompat.requestPermissions(this, getRequiredPermissions(), PERMISSION_REQ_ID);
}
private boolean checkPermissions() {
for (String permission : getRequiredPermissions()) {
if (ContextCompat.checkSelfPermission(this, permission) != PackageManager.PERMISSION_GRANTED) {
return false;
}
}
return true;
}
private String[] getRequiredPermissions() {
if (android.os.Build.VERSION.SDK_INT >= android.os.Build.VERSION_CODES.S) {
return new String[]{
Manifest.permission.RECORD_AUDIO,
Manifest.permission.CAMERA,
Manifest.permission.READ_PHONE_STATE,
Manifest.permission.BLUETOOTH_CONNECT
};
} else {
return new String[]{
Manifest.permission.RECORD_AUDIO,
Manifest.permission.CAMERA
};
}
}
@Override
public void onRequestPermissionsResult(int requestCode, @NonNull String[] permissions, @NonNull int[] grantResults) {
super.onRequestPermissionsResult(requestCode, permissions, grantResults);
if (requestCode == PERMISSION_REQ_ID && checkPermissions()) {
startLiveStreaming();
}
}
private void startLiveStreaming() {
initializeAgoraVideoSDK();
enableVideo();
setupLocalVideo();
joinChannel();
}
private void initializeAgoraVideoSDK() {
try {
RtcEngineConfig config = new RtcEngineConfig();
config.mContext = getBaseContext();
config.mAppId = myAppId;
config.mEventHandler = mRtcEventHandler;
mRtcEngine = RtcEngine.create(config);
} catch (Exception e) {
throw new RuntimeException("Error initializing RTC engine: " + e.getMessage());
}
}
private void enableVideo() {
mRtcEngine.enableVideo();
mRtcEngine.startPreview();
}
private void setupLocalVideo() {
FrameLayout container = findViewById(R.id.local_video_view_container);
SurfaceView surfaceView = new SurfaceView(getBaseContext());
container.addView(surfaceView);
mRtcEngine.setupLocalVideo(new VideoCanvas(surfaceView, VideoCanvas.RENDER_MODE_FIT, 0));
}
private void joinChannel() {
// Create an instance of ChannelMediaOptions and configure it
ChannelMediaOptions options = new ChannelMediaOptions();
// Set the user role to BROADCASTER or AUDIENCE according to the use-case
options.clientRoleType = Constants.CLIENT_ROLE_BROADCASTER;
// In the live broadcast use-case, set the channel profile to BROADCASTING (live broadcast use-case)
options.channelProfile = Constants.CHANNEL_PROFILE_LIVE_BROADCASTING;
// If setting the client role to audience, uncomment the following line to configure the latency level
// options.audienceLatencyLevel = Constants.AUDIENCE_LATENCY_LEVEL_ULTRA_LOW_LATENCY;
// Publish local media
options.publishCameraTrack = true;
options.publishMicrophoneTrack = true;
mRtcEngine.joinChannel(token, channelName, 0, options);
}
private void setupRemoteVideo(int uid) {
FrameLayout container = findViewById(R.id.remote_video_view_container);
SurfaceView surfaceView = new SurfaceView(getBaseContext());
surfaceView.setZOrderMediaOverlay(true);
container.addView(surfaceView);
mRtcEngine.setupRemoteVideo(new VideoCanvas(surfaceView, VideoCanvas.RENDER_MODE_FIT, uid));
}
@Override
protected void onDestroy() {
super.onDestroy();
cleanupAgoraEngine();
}
private void cleanupAgoraEngine() {
if (mRtcEngine != null) {
mRtcEngine.stopPreview();
mRtcEngine.leaveChannel();
mRtcEngine = null;
}
}
private void showToast(String message) {
runOnUiThread(() -> Toast.makeText(MainActivity.this, message, Toast.LENGTH_SHORT).show());
}
}
```
```kotlin
package com.example.
import android.Manifest
import android.content.pm.PackageManager
import android.os.Build
import android.os.Bundle
import android.view.SurfaceView
import android.widget.FrameLayout
import android.widget.Toast
import androidx.appcompat.app.AppCompatActivity
import androidx.core.app.ActivityCompat
import androidx.core.content.ContextCompat
import io.agora.rtc2.ChannelMediaOptions
import io.agora.rtc2.Constants
import io.agora.rtc2.IRtcEngineEventHandler
import io.agora.rtc2.RtcEngine
import io.agora.rtc2.RtcEngineConfig
import io.agora.rtc2.video.VideoCanvas
class MainActivity : AppCompatActivity() {
private val PERMISSION_REQ_ID = 22
private val myAppId = ""
private val channelName = ""
private val token = ""
private var mRtcEngine: RtcEngine? = null
private val mRtcEventHandler = object : IRtcEngineEventHandler() {
override fun onJoinChannelSuccess(channel: String?, uid: Int, elapsed: Int) {
super.onJoinChannelSuccess(channel, uid, elapsed)
runOnUiThread {
showToast("Joined channel $channel")
}
}
override fun onUserJoined(uid: Int, elapsed: Int) {
runOnUiThread {
setupRemoteVideo(uid)
}
}
override fun onUserOffline(uid: Int, reason: Int) {
super.onUserOffline(uid, reason)
runOnUiThread {
showToast("User offline: $uid")
}
}
}
override fun onCreate(savedInstanceState: Bundle?) {
super.onCreate(savedInstanceState)
setContentView(R.layout.activity_main)
if (checkPermissions()) {
startLiveStreaming()
} else {
requestPermissions()
}
}
private fun requestPermissions() {
ActivityCompat.requestPermissions(this, getRequiredPermissions(), PERMISSION_REQ_ID)
}
private fun checkPermissions(): Boolean {
for (permission in getRequiredPermissions()) {
if (ContextCompat.checkSelfPermission(this, permission) != PackageManager.PERMISSION_GRANTED) {
return false
}
}
return true
}
private fun getRequiredPermissions(): Array {
return if (Build.VERSION.SDK_INT >= Build.VERSION_CODES.S) {
arrayOf(
Manifest.permission.RECORD_AUDIO,
Manifest.permission.CAMERA,
Manifest.permission.READ_PHONE_STATE,
Manifest.permission.BLUETOOTH_CONNECT
)
} else {
arrayOf(
Manifest.permission.RECORD_AUDIO,
Manifest.permission.CAMERA
)
}
}
override fun onRequestPermissionsResult(
requestCode: Int,
permissions: Array,
grantResults: IntArray
) {
super.onRequestPermissionsResult(requestCode, permissions, grantResults)
if (requestCode == PERMISSION_REQ_ID && checkPermissions()) {
startLiveStreaming()
}
}
private fun startLiveStreaming() {
initializeAgoraVideoSDK()
enableVideo()
setupLocalVideo()
joinChannel()
}
private fun initializeAgoraVideoSDK() {
try {
val config = RtcEngineConfig().apply {
mContext = applicationContext
mAppId = myAppId
mEventHandler = mRtcEventHandler
}
mRtcEngine = RtcEngine.create(config)
} catch (e: Exception) {
throw RuntimeException("Error initializing RTC engine: ${e.message}")
}
}
private fun enableVideo() {
mRtcEngine?.apply {
enableVideo()
startPreview()
}
}
private fun setupLocalVideo() {
val container = findViewById(R.id.local_video_view_container)
val surfaceView = SurfaceView(this)
container.addView(surfaceView)
mRtcEngine?.setupLocalVideo(VideoCanvas(surfaceView, VideoCanvas.RENDER_MODE_FIT, 0))
}
private fun joinChannel() {
val options = ChannelMediaOptions().apply {
clientRoleType = Constants.CLIENT_ROLE_BROADCASTER
channelProfile = Constants.CHANNEL_PROFILE_LIVE_BROADCASTING
// If setting the client role to audience, uncomment the following line to configure the latency level
// audienceLatencyLevel = Constants.AUDIENCE_LATENCY_LEVEL_ULTRA_LOW_LATENCY
publishMicrophoneTrack = true
publishCameraTrack = true
}
mRtcEngine?.joinChannel(token, channelName, 0, options)
}
private fun setupRemoteVideo(uid: Int) {
val container = findViewById(R.id.remote_video_view_container)
val surfaceView = SurfaceView(this).apply {
setZOrderMediaOverlay(true)
}
container.addView(surfaceView)
mRtcEngine?.setupRemoteVideo(VideoCanvas(surfaceView, VideoCanvas.RENDER_MODE_FIT, uid))
}
override fun onDestroy() {
super.onDestroy()
cleanupAgoraEngine()
}
private fun cleanupAgoraEngine() {
mRtcEngine?.apply {
stopPreview()
leaveChannel()
}
mRtcEngine = null
}
private fun showToast(message: String) {
runOnUiThread {
Toast.makeText(this, message, Toast.LENGTH_SHORT).show()
}
}
}
```
Note
For the `myAppId` and `token` variables, replace the placeholders with the values you obtained from Agora Console. Ensure you enter the same `channelName` you used when generating the temporary token.
### Create a user interface
To connect the sample code to your existing UI, ensure that your XML layout includes the container UI element IDs used to [Display the local video](#display-the-local-video) and [Display remote video](#display-remote-video).
Alternatively, use the following sample code to generate a basic user interface. Replace the existing content in `/app/src/main/res/layout/activity_main.xml` with this code.

### Sample code to create the user interface
```xml
```
## Test the sample code
Take the following steps to test the sample code:
1. In `MainActivity` update the values for `myAppId`, and `token` with values from Agora Console. Fill in the same `channelName` you used to generate the token.
2. Enable developer options on your Android test device. Turn on USB debugging, connect the Android device to your development machine through a USB cable, and check that your device appears in the Android device options.
3. In Android Studio, click **Sync Project with Gradle Files** to resolve project dependencies and update the configuration.
4. After synchronization is successful, click **Run app**. Android Studio starts compilation. After a few moments, the app is installed on your Android device.
5. Launch the App, grant recording and camera permissions. If you set the user role to host, you will see yourself in the local view.
6. On a second Android device, repeat the previous steps to install and launch the client. Alternatively, use the [Web demo](https://webdemo-global.agora.io/example/quickStart/videoAndVoiceCalling/index.html) to join the same channel and test the following use-cases:
* If users on both devices join the channel as hosts, they can see and hear each other.
* If one user joins as host and the other as audience, the host can see themselves in the local video window; the audience can see the host in the remote video window and hear the host.
## Reference
This section contains content that completes the information on this page, or points you to documentation that explains other aspects of this product.
* If a firewall is deployed in your network environment, refer to [Connect with Cloud Proxy](/en/realtime-media/rtc/build/manage-connection-and-quality/cloud-proxy) to use Agora services normally.
### Next steps
After implementing the quickstart sample, read the following documents to learn more:
* To ensure communication security in a test or production environment, best practice is to obtain and use a token from an authentication server. For details, see [Secure authentication with tokens](/en/realtime-media/rtc/build/authenticate-users/authentication-workflow).
### Sample project
Agora provides open source sample projects on [GitHub](https://github.com/AgoraIO/API-Examples) for your reference. Download or view the [JoinChannelVideo](https://github.com/AgoraIO-Community/Agora-RTC-QuickStart/tree/main/Android/Agora-RTC-QuickStart-Android) project for a more detailed example.
### API reference
* [`RtcEngineConfig`](https://api-ref.agora.io/en/video-sdk/android/4.x/API/class_rtcengineconfig.html)
* [`create`](https://api-ref.agora.io/en/video-sdk/android/4.x/API/class_irtcengine.html#api_irtcengine_create)
* [`ChannelMediaOptions`](https://api-ref.agora.io/en/video-sdk/android/4.x/API/class_channelmediaoptions.html)
* [`joinChannel`](https://api-ref.agora.io/en/video-sdk/android/4.x/API/class_irtcengine.html#api_irtcengine_joinchannel2)
* [`enableVideo`](https://api-ref.agora.io/en/video-sdk/android/4.x/API/class_irtcengine.html#api_irtcengine_enablevideo)
* [`startPreview`](https://api-ref.agora.io/en/video-sdk/android/4.x/API/class_irtcengine.html#api_irtcengine_startpreview)
* [`leaveChannel`](https://api-ref.agora.io/en/video-sdk/android/4.x/API/class_irtcengine.html#api_irtcengine_leavechannel)
* [`IRtcEngineEventHandler`](https://api-ref.agora.io/en/video-sdk/android/4.x/API/class_irtcengineeventhandler.html#class_irtcengineeventhandler)
### Frequently asked questions
* [How can I fix black screen issues?](/en/api-reference/faq/quality/video_blank#black-screen-on-the-local-side)
* [Why can't I turn on the camera?](/en/api-reference/faq/quality/video_camera)
* [How can I listen for audience joining or leaving a channel?](/en/api-reference/faq/integration/audience_event)
* [How can I solve channel-related issues?](/en/api-reference/faq/integration/channel)
* [How can I set the log file?](/en/api-reference/faq/integration/set_log_file)
* [Why do apps on some Android versions fail to capture audio and video after screen locking or switching to the background?](/en/api-reference/faq/quality/android_background)
### See also
* [SDK error codes](/en/realtime-media/rtc/reference/error-codes)
* [Connection status management](/en/realtime-media/rtc/build/manage-connection-and-quality/connection-status-management)
## Platform-specific versions
- [Android](/en/realtime-media/rtc/get-started-sdk/android.md)
- [iOS](/en/realtime-media/rtc/get-started-sdk/ios.md)
- [macOS](/en/realtime-media/rtc/get-started-sdk/macos.md)
- [Web](/en/realtime-media/rtc/get-started-sdk/web.md)
- [Windows](/en/realtime-media/rtc/get-started-sdk/windows.md)
- [Electron](/en/realtime-media/rtc/get-started-sdk/electron.md)
- [Flutter](/en/realtime-media/rtc/get-started-sdk/flutter.md)
- [React Native](/en/realtime-media/rtc/get-started-sdk/react-native.md)
- [JavaScript](/en/realtime-media/rtc/get-started-sdk/javascript.md)
- [Unity](/en/realtime-media/rtc/get-started-sdk/unity.md)
- [Unreal Engine](/en/realtime-media/rtc/get-started-sdk/unreal.md)
- [Unreal Blueprint](/en/realtime-media/rtc/get-started-sdk/blueprint.md)
# Realtime Communication Overview (/en/realtime-media/rtc)
Agora's Realtime Media API delivers ultra-low-latency, high-definition real-time video communication for one-to-one and group calls. With support for cross-platform integration and dynamic resolution adaptation, it ensures smooth, reliable video experiences even under challenging network conditions. Use it for telehealth, online education, team collaboration, customer support, and any application requiring real-time face-to-face communication.
Enhance Agora's RTC SDK with capabilities such as recording, virtual backgrounds, and in-call moderation, or leverage the Extensions Marketplace to enable AI-powered features like noise cancellation, video effects, and more.
## Use cases
## Product Features
Agora’s Software-Defined Real-Time Network (SDRTN®) supports video users in over 200 countries and regions.
Consistent high-quality video from 1:1 calls to thousands of concurrent users, even under challenging network conditions.
Publish multiple audio and video tracks to one or more channels from a single instance, with support for multi-channel capture cameras and microphones.
Enable screen sharing or interactive whiteboards that allow users to draw, annotate, and share content from multiple devices simultaneously.
Support for high quality audio with 3D spatial audio, AI noise suppression, and gain control to provide an immersive audio experience.
Record video calls in the cloud or on premises with control over the format, path of storage, and quality.
## Start building
# Agora MCP (/en/realtime-media/rtc/mcp)
The Agora MCP server gives your AI assistant direct access to Agora documentation, so it can look up APIs, SDK methods, and platform details in real time.
The server is available at:
```text
https://mcp.agora.io
```
## Installation
Refer to the setup guide for your coding assistant.
Codex
Claude Code
Gemini CLI
Manual installation
```bash
codex mcp add --url https://mcp.agora.io agora-docs
```
```bash
claude mcp add --transport http agora-docs https://mcp.agora.io
```
```bash
gemini mcp add --transport http agora-docs https://mcp.agora.io
```
For Cursor and other tools, add `https://mcp.agora.io` as a remote MCP server and use `http` or Streamable HTTP transport when prompted.
# Agora skills (/en/realtime-media/rtc/skills)
Agora skills are structured reference files that help AI coding assistants generate product-aware Agora code without guessing.
Skills include the [Agora MCP server](./mcp.mdx), which provides live access to the latest Agora documentation.
## Installation
**Recommended**
```bash
npx skills add github:AgoraIO/skills
```
**Manual**
```bash
git clone https://github.com/AgoraIO/skills.git ~/agora-skills
```
Point your assistant to `skills/agora/` and use `SKILL.md` as the entry point.
# Subscription packages (/en/realtime-media/rtc/subscription-packages)
A subscription package is a prepaid billing method. You can purchase a package in the [`Agora Console`](https://console.agora.io/subscriptions/rtc-plans?tab=monthly) to cover usage for the current month.
This page explains how to purchase, and manage subscription and top-up packages.
### Purchase and upgrade
By default, a new account is assigned the Free package when the first project is created. You can upgrade at any time to the Starter, Pro, Business, or Business Plus. Higher-tier packages provide greater discounts and lower unit prices. To select your package:
1. Log in to [Agora Console](https://console.agora.io/).
2. Click the username at the bottom of the navigation sidebar to open the account popup menu.
3. Select **Subscriptions**.
4. Switch to the **RTC** tab.
5. Select your package and click **Upgrade** or **Downgrade**.

Information
* For non-contracted customers, all packages, except the Enterprise package can be purchased directly from the Agora Console. To upgrade to the Enterprise package, contact [Agora sales](mailto\:sales@agora.io).
* You can upgrade sequentially or skip levels. For example, you may upgrade from Starter to Business Plus directly.
* Package upgrades take effect immediately and apply to the entire calendar month. If you make multiple upgrades on the same day, only the last upgrade is applied.
* If your account has a negative balance, purchasing a prepaid package first charges your credit card for the outstanding balance, then for the package fee.
#### Upgrade rules
When you upgrade to a paid package, it becomes effective for the entire calendar month, regardless of the purchase date. You receive the full monthly allocation of included minutes. The cost of the previous package is deducted from the new package price, so you only pay the difference. If you request an upgrade after auto-renewal has triggered, you may upgrade for the next month as well.
### Renewal
By default, your subscription package renews automatically 48 hours before it expires. Ensure your account has sufficient balance or enable auto-pay to avoid renewal failure. You can unsubscribe at any time to prevent renewal. See [Cancel subscription](#cancel-subscription).
If renewal fails:
* The system sends a notification and retries the renewal.
* If renewal still fails by the time the package expires, the package downgrades to the Free package.
* To restore the previous package, see [Purchase and Upgrade](#purchase-and-upgrade).
### Downgrade
You can downgrade by selecting and purchasing a lower-tier package. A downgrade takes effect when your current package expires if you request it before auto-renewal is triggered. You are charged for the new package when you request the downgrade.
You can downgrade only once per month.
* If your downgrade for the next month is successful, auto-renewal for the current package is not triggered.
* If a package is already active, you must wait until the 1st day of that month to initiate a downgrade for the following month.
#### Example
* **Requested more than 48 hours before the current package expires**: The downgrade takes effect after the current package expires.
* **Requested less than 48 hours before the current package expires**: Since a package is already active for the next month, you must wait until the new package starts to downgrade for the following month.
### Cancel subscription
To cancel a prepaid package, downgrade to the Free package. Downgrade rules apply.
## Top-up package
A top-up package is a pay-as-you-go plan. You can purchase a top-up package from the [`Agora Console`](https://console.agora.io/subscriptions/rtc-plans?tab=top-up) to cover usage that exceeds your monthly package quota.
### Purchase
You can purchase multiple top-up packages. They are deducted in the order of purchase.
#### Example:
* Purchased 250,000-minutes top-up packages on **August 15** and **August 16**. On **September 1**, minutes consumed in August are deducted from the first package, then from the second.
### Validity
Each top-up package is valid for one year, starting from the purchase date to the end of the same month of the following year.
#### Example:
* Purchased on **August 15, 2025** → valid until **August 31, 2026**
Unused minutes expire after the validity period and cannot be carried forward.
### Cancel top-up package
Cancelling a top-up package is not supported.
## Free tier overage
For Free tier users, exceeding the included minutes and any purchased top-up minutes results in service suspension. Service resumes when you purchase additional top-up minutes or upgrade to a prepaid subscription package.
# Voice-only quickstart (/en/realtime-media/rtc/voice-quickstart)
This Android quickstart shows you how to create a basic Voice Calling app using the Agora RTC SDK.
## Understand the tech
To start a Voice Calling session, implement the following steps in your app:
* **Initialize the Agora Engine**: Before calling other APIs, create and initialize an Agora Engine instance.
* **Join a channel**: Call methods to create and join a channel.
* **Send and receive audio**: All users can publish streams to the channel and subscribe to audio streams published by other users in the channel.
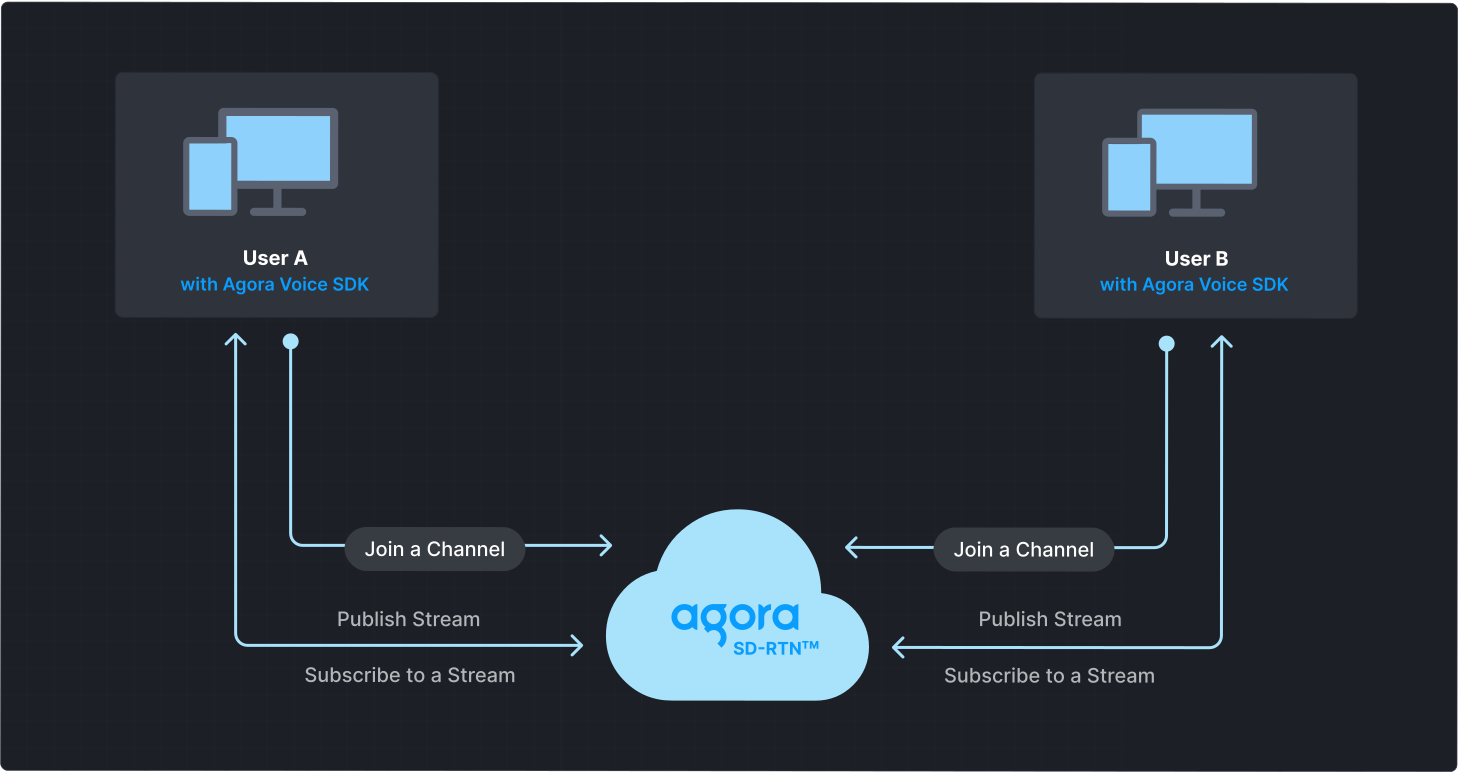
## Prerequisites
* [Android Studio](https://developer.android.com/studio) 4.2 or higher.
* Android SDK API Level 21 or higher.
* Two mobile devices running Android 5.0 or higher.
* A microphone
* A valid Agora account and project. Please refer to [Agora account management](/en/introduction/account) for details.
## Set up your project
This section shows you how to set up your Android project and install the Agora RTC SDK.
Create a new project
Add to an existing project
1. Create a [new project](https://developer.android.com/studio/projects/create-project).
1. Open Android Studio and select **File > New > New Project...**.
2. Select **Phone and Tablet** > **Empty Activity** and click **Next**.
3. Set the project name and storage path.
4. Select **Java** or **Kotlin** as the language, and click **Finish** to create the Android project.
After you create a project, Android Studio automatically starts gradle sync. Ensure that the synchronization is successful before proceeding to the next step.
1. Add a new activity to your project.
1. Open your project in Android Studio.
2. Right-click on the `app/src/main/java/` folder.
3. Select **New → Activity → Empty Activity**.
4. Enter an activity name and click **Finish**.
This guide uses `MainActivity` as the activity name in the sample code. Replace it with your activity name where required.
2. Add a layout file for your activity.
Set up a basic layout for your activity. Refer to [Create a user interface](#create-a-user-interface) to get a bare bones sample layout.
### Install the SDK
Use either of the following methods to add RTC SDK to your project.
Maven Central
Manual integration
1. Open the `settings.gradle` file in the project's root directory and add the Maven Central dependency, if it doesn't already exist:
```text
repositories {
mavenCentral()
}
```
If your Android project uses dependencyResolutionManagement, the method of adding the Maven Central dependency may differ.
2. To integrate the RTC SDK into your Android project, add the following to the `dependencies` block in your project module `build.gradle` file:
* Groovy `build.gradle`
```json
implementation 'io.agora.rtc:voice-sdk:x.y.z'
```
* Kotlin `build.gradle.kts`
```kotlin
implementation("io.agora.rtc:voice-sdk:x.y.z")
```
Replace `x.y.z` with the specific SDK version number, such as `4.5.0`.
To get the latest version number, check the [Release notes](reference/release-notes.mdx). To integrate the Lite SDK, use `io.agora.rtc:lite-sdk` instead.
3. Prevent code obfuscation
Open the `/app/proguard-rules.pro` file and add the following lines to prevent the RTC SDK code from being obfuscated:
```java
-keep class io.agora.** { *; }
-dontwarn io.agora.**
```
1. Download the latest version of RTC SDK from the [SDKs](/en/api-reference/sdks?product=voice\&platform=android) page and unzip it.
2. Open the unzipped file and copy the following files or subfolders to your project path.
| File or folder | Project path |
| :----------------------------------- | :----------------------- |
| `agora-rtc-sdk.jar` file | `/app/libs/` |
| `arm64-v8a` folder | `/app/src/main/jniLibs/` |
| `armeabi-v7a` folder | `/app/src/main/jniLibs/` |
| `x86` folder | `/app/src/main/jniLibs/` |
| `x86_64` folder | `/app/src/main/jniLibs/` |
| `high_level_api` in `include` folder | `/app/src/main/jniLibs/` |
3. Select the file `/app/libs/agora-rtc-sdk.jar` in the left navigation bar of Android Studio project files, right-click, and select **add as a library** from the drop-down menu.
4. Prevent code obfuscation
Open the `/app/proguard-rules.pro` file and add the following lines to prevent the RTC SDK code from being obfuscated:
```java
-keep class io.agora.** { *; }
-dontwarn io.agora.**
```
## Implement Voice Calling
This section guides you through the implementation of basic real-time audio interaction in your app.
The following figure illustrates the essential steps:
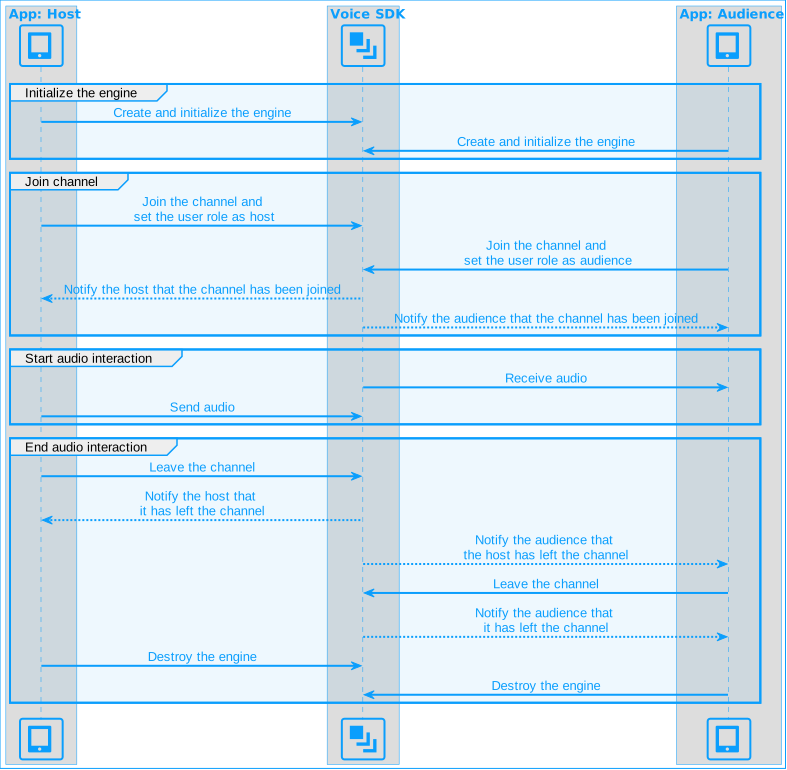
This guide includes [complete sample code](#complete-sample-code) that demonstrates implementing basic real-time interaction. To understand the core API calls in the sample code, review the following implementation steps and use the code in your `MainActivity` file.
### Import Agora classes
Import the relevant Agora classes and interfaces:
Java
Kotlin
```java
import io.agora.rtc2.Constants;
import io.agora.rtc2.IRtcEngineEventHandler;
import io.agora.rtc2.RtcEngine;
import io.agora.rtc2.RtcEngineConfig;
import io.agora.rtc2.ChannelMediaOptions;
```
```kotlin
import io.agora.rtc2.ChannelMediaOptions
import io.agora.rtc2.Constants
import io.agora.rtc2.IRtcEngineEventHandler
import io.agora.rtc2.RtcEngine
import io.agora.rtc2.RtcEngineConfig
```
### Initialize the engine
For real-time communication, initialize an `RtcEngine` instance and set up event handlers to manage user interactions within the channel. Use `RtcEngineConfig` to specify the application context, [App ID](/en/introduction/account), and custom [event handler](#subscribe-to-rtc-sdk-events), then call `RtcEngine.create(config)` to initialize the engine, enabling further channel operations. In your `MainActivity` file, add the following code:
Java
Kotlin
```java
// Fill in the app ID from Agora Console
private String myAppId = "";
private RtcEngine mRtcEngine;
private void initializeAgoraVoiceSDK() {
try {
RtcEngineConfig config = new RtcEngineConfig();
config.mContext = getBaseContext();
config.mAppId = myAppId;
config.mEventHandler = mRtcEventHandler;
mRtcEngine = RtcEngine.create(config);
} catch (Exception e) {
throw new RuntimeException("Error initializing RTC engine: " + e.getMessage());
}
}
```
```kotlin
// Fill in the App ID obtained from the Agora Console
private val myAppId = ""
private var mRtcEngine: RtcEngine? = null
private fun initializeAgoraVoiceSDK() {
try {
val config = RtcEngineConfig().apply {
mContext = baseContext
mAppId = myAppId
mEventHandler = mRtcEventHandler
}
mRtcEngine = RtcEngine.create(config)
} catch (e: Exception) {
throw RuntimeException("Error initializing RTC engine: ${e.message}")
}
}
```
### Join a channel
To join a channel, call `joinChannel` with the following parameters:
* **Channel name**: The name of the channel to join. Clients that pass the same channel name join the same channel. If a channel with the specified name does not exist, it is created when the first user joins.
* **Authentication token**: A dynamic key that authenticates a user when the client joins a channel. In a production environment, you obtain a token from a [token server](build/authenticate-users/deploy-token-server.mdx) in your security infrastructure. For the purpose of this guide [Generate a temporary token](/en/introduction/account).
* **User ID**: A 32-bit signed integer that identifies a user in the channel. You can specify a unique user ID for each user yourself. If you set the user ID to `0` when joining a channel, the SDK generates a random number for the user ID and returns the value in the `onJoinChannelSuccess` callback.
* **Channel media options**: Configure `ChannelMediaOptions` to define publishing and subscription settings, optimize performance for your specific use-case, and set optional parameters.
For Voice Calling, set the `channelProfile` to `CHANNEL_PROFILE_COMMUNICATION` and the user role to `CLIENT_ROLE_BROADCASTER`.
Java
Kotlin
```java
// Fill in the channel name
private String channelName = "";
// Fill in the temporary token generated from Agora Console
private String token = "";
private void joinChannel() {
ChannelMediaOptions options = new ChannelMediaOptions();
options.clientRoleType = Constants.CLIENT_ROLE_BROADCASTER;
options.channelProfile = Constants.CHANNEL_PROFILE_COMMUNICATION;
options.publishCameraTrack = true;
mRtcEngine.joinChannel(token, channelName, 0, options);
}
```
```kotlin
// Fill in the channel name
private val channelName = ""
// Fill in the temporary token generated from Agora Console
private val token = ""
private fun joinChannel() {
val options = ChannelMediaOptions().apply {
clientRoleType = Constants.CLIENT_ROLE_BROADCASTER
channelProfile = Constants.CHANNEL_PROFILE_COMMUNICATION
publishMicrophoneTrack = true;
}
mRtcEngine?.joinChannel(token, channelName, 0, options)
}
```
### Subscribe to RTC SDK events
The RTC SDK provides an interface for subscribing to channel events. To use it, create an instance of `IRtcEngineEventHandler` and implement the event methods you want to handle.
To ensure that you receive all RTC SDK events, set the Agora Engine event handler before joining a channel.
Java
Kotlin
```java
private final IRtcEngineEventHandler mRtcEventHandler = new IRtcEngineEventHandler() {
// Callback when successfully joining the channel
@Override
public void onJoinChannelSuccess(String channel, int uid, int elapsed) {
super.onJoinChannelSuccess(channel, uid, elapsed);
showToast("Joined channel " + channel);
}
// Callback when a remote user or host joins the current channel
@Override
public void onUserJoined(int uid, int elapsed) {
super.onUserJoined(uid, elapsed);
runOnUiThread(() -> {
showToast("User joined: " + uid); // Show toast for user joining
});
}
// Callback when a remote user or host leaves the current channel
@Override
public void onUserOffline(int uid, int reason) {
super.onUserOffline(uid, reason);
runOnUiThread(() -> {
showToast("User offline: " + uid); // Show toast for user going offline
});
}
};
```
```kotlin
private val mRtcEventHandler = object : IRtcEngineEventHandler() {
override fun onJoinChannelSuccess(channel: String?, uid: Int, elapsed: Int) {
super.onJoinChannelSuccess(channel, uid, elapsed)
runOnUiThread {
showToast("Joined channel $channel")
}
}
override fun onUserJoined(uid: Int, elapsed: Int) {
runOnUiThread {
showToast("User joined: $uid")
}
}
override fun onUserOffline(uid: Int, reason: Int) {
super.onUserOffline(uid, reason)
runOnUiThread {
showToast("User offline: $uid")
}
}
}
```
### Handle permissions
To access the microphone on Android devices, declare the necessary permissions in the app's manifest and ensure that the user grants these permissions when the app starts.
1. Open your project's `AndroidManifest.xml` file and add the following permissions before ``:
```xml
```
2. Use the following code to handle runtime permissions in your Android app. The logic ensures that the necessary permissions are granted before starting Voice Calling. In your `MainActivity` file, add the following code:
Java
Kotlin
```java
private static final int PERMISSION_REQ_ID = 22;
private boolean checkPermissions() {
for (String permission : getRequiredPermissions()) {
if (ContextCompat.checkSelfPermission(this, permission) != PackageManager.PERMISSION_GRANTED) {
return false;
}
}
return true;
}
private void requestPermissions() {
ActivityCompat.requestPermissions(this, getRequiredPermissions(), PERMISSION_REQ_ID);
}
private String[] getRequiredPermissions() {
if (Build.VERSION.SDK_INT >= Build.VERSION_CODES.S) {
return new String[]{
Manifest.permission.RECORD_AUDIO,
Manifest.permission.READ_PHONE_STATE,
Manifest.permission.BLUETOOTH_CONNECT
};
} else {
return new String[]{Manifest.permission.RECORD_AUDIO};
}
}
@Override
public void onRequestPermissionsResult(int requestCode, @NonNull String[] permissions, @NonNull int[] grantResults) {
super.onRequestPermissionsResult(requestCode, permissions, grantResults);
if (checkPermissions()) {
startVoiceCalling();
}
}
```
```kotlin
private val permissionReqId = 22
private fun checkPermissions(): Boolean {
for (permission in getRequiredPermissions()) {
if (ContextCompat.checkSelfPermission(this, permission) != PackageManager.PERMISSION_GRANTED) {
return false
}
}
return true
}
private fun requestPermissions() {
ActivityCompat.requestPermissions(this, getRequiredPermissions(), PERMISSION_REQ_ID)
}
private fun getRequiredPermissions(): Array {
return if (Build.VERSION.SDK_INT >= Build.VERSION_CODES.S) {
arrayOf(
Manifest.permission.RECORD_AUDIO,
Manifest.permission.READ_PHONE_STATE,
Manifest.permission.BLUETOOTH_CONNECT
)
} else {
arrayOf(Manifest.permission.RECORD_AUDIO)
}
}
override fun onRequestPermissionsResult(requestCode: Int, permissions: Array, grantResults: IntArray) {
super.onRequestPermissionsResult(requestCode, permissions, grantResults)
if (checkPermissions()) {
startVoiceCalling()
}
}
```
### Start and close the app
When a user launches your app, start real-time interaction. When a user closes the app, stop the interaction.
1. In the `onCreate` callback, check whether the app has been granted the required permissions. If the permissions have not been granted, request the required permissions from the user. If permissions are granted, initialize `RtcEngine` and join a channel.
Java
Kotlin
```java
@Override
protected void onCreate(Bundle savedInstanceState) {
super.onCreate(savedInstanceState);
setContentView(R.layout.activity_main);
if (checkPermissions()) {
startVoiceCalling();
} else {
requestPermissions();
}
}
```
```kotlin
override fun onCreate(savedInstanceState: Bundle?) {
super.onCreate(savedInstanceState)
setContentView(R.layout.activity_main)
if (checkPermissions()) {
startVoiceCalling()
} else {
requestPermissions()
}
}
```
2. When a user closes the app, or switches the app to the background, call `leaveChannel` to leave the current channel and release all session-related resources.
Java
Kotlin
```java
private void cleanupAgoraEngine() {
if (mRtcEngine != null) {
mRtcEngine.leaveChannel();
mRtcEngine = null;
}
}
```
```kotlin
private fun cleanupAgoraEngine() {
mRtcEngine?.apply {
leaveChannel()
}
mRtcEngine = null
}
```
### Complete sample code
A complete code sample demonstrating the basic process of real-time interaction is provided for your reference. To use the sample code, copy the following lines into the `MainActivity` file in your project. Then, replace `` in package `com.example.` with your project's name.
Java
Kotlin
```java
package com.example.;
import android.Manifest;
import android.content.pm.PackageManager;
import android.os.Build;
import android.os.Bundle;
import android.widget.Toast;
import androidx.annotation.NonNull;
import androidx.appcompat.app.AppCompatActivity;
import androidx.core.app.ActivityCompat;
import androidx.core.content.ContextCompat;
import io.agora.rtc2.ChannelMediaOptions;
import io.agora.rtc2.Constants;
import io.agora.rtc2.IRtcEngineEventHandler;
import io.agora.rtc2.RtcEngine;
import io.agora.rtc2.RtcEngineConfig;
public class MainActivity extends AppCompatActivity {
private static final int PERMISSION_REQ_ID = 22;
private final String myAppId = "";
private final String channelName = "";
private final String token = "";
private RtcEngine mRtcEngine;
private final IRtcEngineEventHandler mRtcEventHandler = new IRtcEngineEventHandler() {
// Callback when successfully joining the channel
@Override
public void onJoinChannelSuccess(String channel, int uid, int elapsed) {
super.onJoinChannelSuccess(channel, uid, elapsed);
showToast("Joined channel " + channel);
}
// Callback when a remote user or host joins the current channel
@Override
public void onUserJoined(int uid, int elapsed) {
super.onUserJoined(uid, elapsed);
runOnUiThread(() -> {
showToast("User joined: " + uid); // Show toast for user joining
});
}
// Callback when a remote user or host leaves the current channel
@Override
public void onUserOffline(int uid, int reason) {
super.onUserOffline(uid, reason);
runOnUiThread(() -> {
showToast("User offline: " + uid); // Show toast for user going offline
});
}
};
@Override
protected void onCreate(Bundle savedInstanceState) {
super.onCreate(savedInstanceState);
setContentView(R.layout.activity_main);
if (checkPermissions()) {
startVoiceCalling();
} else {
requestPermissions();
}
}
private boolean checkPermissions() {
for (String permission : getRequiredPermissions()) {
if (ContextCompat.checkSelfPermission(this, permission) != PackageManager.PERMISSION_GRANTED) {
return false;
}
}
return true;
}
private void requestPermissions() {
ActivityCompat.requestPermissions(this, getRequiredPermissions(), PERMISSION_REQ_ID);
}
private String[] getRequiredPermissions() {
if (Build.VERSION.SDK_INT >= Build.VERSION_CODES.S) {
return new String[]{
Manifest.permission.RECORD_AUDIO,
Manifest.permission.READ_PHONE_STATE,
Manifest.permission.BLUETOOTH_CONNECT
};
} else {
return new String[]{Manifest.permission.RECORD_AUDIO};
}
}
@Override
public void onRequestPermissionsResult(int requestCode, @NonNull String[] permissions, @NonNull int[] grantResults) {
super.onRequestPermissionsResult(requestCode, permissions, grantResults);
if (checkPermissions()) {
startVoiceCalling();
}
}
private void startVoiceCalling() {
initializeAgoraVoiceSDK();
joinChannel();
}
private void initializeAgoraVoiceSDK() {
try {
RtcEngineConfig config = new RtcEngineConfig();
config.mContext = getApplicationContext();
config.mAppId = myAppId;
config.mEventHandler = mRtcEventHandler;
mRtcEngine = RtcEngine.create(config);
} catch (Exception e) {
throw new RuntimeException("Error initializing RTC engine: " + e.getMessage());
}
}
private void joinChannel() {
ChannelMediaOptions options = new ChannelMediaOptions();
options.clientRoleType = Constants.CLIENT_ROLE_BROADCASTER;
options.channelProfile = Constants.CHANNEL_PROFILE_COMMUNICATION;
options.publishMicrophoneTrack = true;
mRtcEngine.joinChannel(token, channelName, 0, options);
}
@Override
protected void onDestroy() {
super.onDestroy();
cleanupAgoraEngine();
}
private void cleanupAgoraEngine() {
if (mRtcEngine != null) {
mRtcEngine.leaveChannel();
mRtcEngine = null;
}
}
private void showToast(String message) {
runOnUiThread(() -> Toast.makeText(MainActivity.this, message, Toast.LENGTH_SHORT).show());
}
}
```
```kotlin
package com.example.
import android.Manifest
import android.content.pm.PackageManager
import android.os.Build
import android.os.Bundle
import android.widget.Toast
import androidx.appcompat.app.AppCompatActivity
import androidx.core.app.ActivityCompat
import androidx.core.content.ContextCompat
import io.agora.rtc2.ChannelMediaOptions
import io.agora.rtc2.Constants
import io.agora.rtc2.IRtcEngineEventHandler
import io.agora.rtc2.RtcEngine
import io.agora.rtc2.RtcEngineConfig
class MainActivity : AppCompatActivity() {
private val PERMISSION_REQ_ID = 22
private val myAppId = ""
private val channelName = ""
private val token = ""
private var mRtcEngine: RtcEngine? = null
private val mRtcEventHandler = object : IRtcEngineEventHandler() {
override fun onJoinChannelSuccess(channel: String?, uid: Int, elapsed: Int) {
super.onJoinChannelSuccess(channel, uid, elapsed)
runOnUiThread {
showToast("Joined channel $channel")
}
}
override fun onUserJoined(uid: Int, elapsed: Int) {
runOnUiThread {
showToast("A user joined")
}
}
override fun onUserOffline(uid: Int, reason: Int) {
super.onUserOffline(uid, reason)
runOnUiThread {
showToast("User offline: $uid")
}
}
}
override fun onCreate(savedInstanceState: Bundle?) {
super.onCreate(savedInstanceState)
setContentView(R.layout.activity_main)
if (checkPermissions()) {
startVoiceCalling()
} else {
requestPermissions()
}
}
private fun checkPermissions(): Boolean {
for (permission in getRequiredPermissions()) {
if (ContextCompat.checkSelfPermission(this, permission) != PackageManager.PERMISSION_GRANTED) {
return false
}
}
return true
}
private fun requestPermissions() {
ActivityCompat.requestPermissions(this, getRequiredPermissions(), PERMISSION_REQ_ID)
}
private fun getRequiredPermissions(): Array {
return if (Build.VERSION.SDK_INT >= Build.VERSION_CODES.S) {
arrayOf(
Manifest.permission.RECORD_AUDIO,
Manifest.permission.READ_PHONE_STATE,
Manifest.permission.BLUETOOTH_CONNECT
)
} else {
arrayOf(Manifest.permission.RECORD_AUDIO)
}
}
override fun onRequestPermissionsResult(requestCode: Int, permissions: Array, grantResults: IntArray) {
super.onRequestPermissionsResult(requestCode, permissions, grantResults)
if (checkPermissions()) {
startVoiceCalling()
}
}
private fun startVoiceCalling() {
initializeAgoraVoiceSDK()
joinChannel()
}
private fun initializeAgoraVoiceSDK() {
try {
val config = RtcEngineConfig().apply {
mContext = baseContext
mAppId = myAppId
mEventHandler = mRtcEventHandler
}
mRtcEngine = RtcEngine.create(config)
} catch (e: Exception) {
throw RuntimeException("Error initializing RTC engine: ${e.message}")
}
}
private fun joinChannel() {
val options = ChannelMediaOptions().apply {
clientRoleType = Constants.CLIENT_ROLE_BROADCASTER
channelProfile = Constants.CHANNEL_PROFILE_COMMUNICATION
publishMicrophoneTrack = true
}
mRtcEngine?.joinChannel(token, channelName, 0, options)
}
override fun onDestroy() {
super.onDestroy()
cleanupAgoraEngine()
}
private fun cleanupAgoraEngine() {
mRtcEngine?.apply {
stopPreview()
leaveChannel()
}
mRtcEngine = null
}
private fun showToast(message: String) {
runOnUiThread {
Toast.makeText(this@MainActivity, message, Toast.LENGTH_SHORT).show()
}
}
}
```
For the `myAppId` and `token` variables, replace the placeholders with the values you obtained from Agora Console. Ensure you enter the same `channelName` you used when generating the temporary token.
### Create a user interface
Use the following code to generate a basic user interface. Paste the code into the `/app/src/main/res/layout/activity_main.xml` file, replacing the existing content.
**Sample code to create the user interface**
```xml
```
## Test the sample code
Take the following steps to test the sample code:
1. In `MainActivity` update the values for `myAppId`, and `token` with values from Agora Console. Fill in the same `channelName` you used to generate the token.
2. Enable developer options on your Android test device. Turn on USB debugging, connect the Android device to your development machine through a USB cable, and check that your device appears in the Android device options.
3. In Android Studio, click **Sync Project with Gradle Files** to resolve project dependencies and update the configuration.
4. After synchronization is successful, click **Run app**. Android Studio starts compilation. After a few moments, the app is installed on your Android device.
5. Launch the App, grant the recording permission.
6. On a second Android device, repeat the previous steps to install and launch the app. Alternatively, use the [Web demo](https://webdemo-global.agora.io/example/quickStart/videoAndVoiceCalling/index.html) to join the same channel and test the following use-cases:
* If users on both devices join the channel as hosts, they can hear each other.
* If one user joins as host and the other as audience, the audience can hear the host.
## Reference
This section contains content that completes the information on this page, or points you to documentation that explains other aspects to this product.
* If a firewall is deployed in your network environment, refer to [Connect with Cloud Proxy](build/manage-connection-and-quality/cloud-proxy.mdx) to use Agora services normally.
### Next steps
After implementing the quickstart sample, read the following documents to learn more:
* To ensure communication security in a test or production environment, best practice is to obtain and use a token from an authentication server. For details, see [Secure authentication with tokens](build/authenticate-users/authentication-workflow.mdx).
### Sample project
Agora provides open source sample projects on [GitHub](https://github.com/AgoraIO/API-Examples) for your reference. Download or view the [JoinChannelAudio](https://github.com/AgoraIO/API-Examples/blob/main/Android/APIExample/app/src/main/java/io/agora/api/example/examples/basic/JoinChannelAudio.java) project for a more detailed example.
### API reference
* [`RtcEngineConfig`](https://api-ref.agora.io/en/voice-sdk/android/4.x/API/class_rtcengineconfig.html)
* [`create`](https://api-ref.agora.io/en/voice-sdk/android/4.x/API/class_irtcengine.html#api_irtcengine_create)
* [`ChannelMediaOptions`](https://api-ref.agora.io/en/voice-sdk/android/4.x/API/class_channelmediaoptions.html)
* [`joinChannel`](https://api-ref.agora.io/en/voice-sdk/android/4.x/API/class_irtcengine.html#api_irtcengine_joinchannel2)
* [`leaveChannel`](https://api-ref.agora.io/en/voice-sdk/android/4.x/API/class_irtcengine.html#api_irtcengine_leavechannel)
* [`IRtcEngineEventHandler`](https://api-ref.agora.io/en/voice-sdk/android/4.x/API/class_irtcengineeventhandler.html#class_irtcengineeventhandler)
### Frequently asked questions
* [How can I listen for audience joining or leaving a channel?](/en/api-reference/faq/integration/audience_event)
* [How can I solve channel-related issues?](/en/api-reference/faq/integration/channel)
* [How can I set the log file?](/en/api-reference/faq/integration/set_log_file)
* [Why do apps on some Android versions fail to capture audio and video after screen locking or switching to the background?](/en/api-reference/faq/quality/android_background)
### See also
* [Error codes](reference/error-codes.mdx)
* [Connection status management](build/manage-connection-and-quality/connection-status-management.mdx)
## Platform-specific versions
- [Android](/en/realtime-media/rtc/voice-quickstart/android.md)
- [iOS](/en/realtime-media/rtc/voice-quickstart/ios.md)
- [macOS](/en/realtime-media/rtc/voice-quickstart/macos.md)
- [Web](/en/realtime-media/rtc/voice-quickstart/web.md)
- [Windows](/en/realtime-media/rtc/voice-quickstart/windows.md)
- [Electron](/en/realtime-media/rtc/voice-quickstart/electron.md)
- [Flutter](/en/realtime-media/rtc/voice-quickstart/flutter.md)
- [React Native](/en/realtime-media/rtc/voice-quickstart/react-native.md)
- [JavaScript](/en/realtime-media/rtc/voice-quickstart/javascript.md)
- [Unity](/en/realtime-media/rtc/voice-quickstart/unity.md)
- [Unreal Engine](/en/realtime-media/rtc/voice-quickstart/unreal.md)
- [Unreal Blueprint](/en/realtime-media/rtc/voice-quickstart/blueprint.md)
- [Python](/en/realtime-media/rtc/voice-quickstart/python.md)
# Server Gateway overview (/en/realtime-media/rtc-server-sdk)
Agora's Server Gateway service is a self-hosted solution that enables seamless transmission of audio and video streams between server-side applications and Agora’s Voice and RTC SDKs using the Agora SDRTN®. It allows cloud applications to take full advantage of Agora’s global real-time network while maintaining control over their infrastructure.
Designed for flexibility, Server Gateway supports a range of use-cases such as call centers, network testing, and AI-powered interactive classes. With multi-format support for YUV, PCM, and encoded media, configurable workflows for sending and receiving streams, and multi-channel capabilities, it offers exceptional flexibility for integrating media streams. Additional features include audio mixing, media encryption, and zone restrictions to ensure secure and localized media delivery.
## Start building
## Product Features
Support for use-cases like call centers, network testing, and AI-powered interactive classes with a single codebase for Application Platform as a Service (aPaaS) applications.
Supports sending and receiving data in various formats, such as YUV, PCM and encoded video and audio formats which provides greater flexibility for customers using Agora’s global network.
Send and receive media streams simultaneously or choose only to send or receive audio or video streams. Server Gateway also supports pushing media streams to a CDN directly.
Supports sending and/or receiving media streams to and from multiple channels simultaneously.
Support for media encryption and mixing multiple audio streams.
The Agora Voice and RTC SDKs support restricting media zones, so that they only connect to Agora servers within the selected zone(s), regardless of where your app users are located.
# Integrate the SDK (/en/realtime-media/rtc-server-sdk/quickstart)
This article shows how to integrate the Server Gateway C++ SDK and run the sample project.
## Set up the development environment
Make sure your server meets the following requirements.
### Hardware environment
**Operating system**
* Ubuntu 14.04 or higher
* CentOS: 7.0 or higher
**CPU architecture**
* arm64
* x86-64
If you need to run the SDK on other architectures, [submit a ticket](https://agora-ticket.agora.io/) to contact technical support.
**Performance**
* CPU:8-core, 1.8 GHz or higher.
* 2 GB of RAM or higher. 4 GB or higher is recommended.
**Network**
* The server is connected to the internet and has an internet IP.
* The server can access `*.agora.io` and `*.agoralab.co`.
### Software environment
* glibc 2.18 or later
* gcc 4.8 or later
If you are using Ubuntu, taking Ubuntu 20.04.3 LTS as an example, install the following dependencies in your server:
```bash
# Install aptitude
sudo apt install aptitude
# Install build-essential libx11-dev libxcomposite-dev libxext-dev libxfixes-dev libxdamage-dev cmake
sudo aptitude install libx11-dev libxcomposite-dev libxext-dev libxfixes-dev libxdamage-dev cmake
```
If you are using CentOS, taking CentOS 7.9.2009 as an example, install the following dependencies in your server:
```bash
sudo yum groupinstall "Development Tools"
sudo yum install wget
sudo yum groupinstall X11
```
## Get your app ID and an RTC token
See [Account](/en/introduction/account) to learn how to get your Agora App ID and a temporary RTC token.
## Get the SDK
[Download](/en/api-reference/sdks?product=server-gateway\&platform=linux) the latest x86-64 SDK package and decompress the file. If you need the SDK build for other architectures, [submit a ticket](https://agora-ticket.agora.io/) to technical support.
## Platform-specific versions
- [Linux C++](/en/realtime-media/rtc-server-sdk/quickstart/linux-cpp.md)
- [Linux Java](/en/realtime-media/rtc-server-sdk/quickstart/linux-java.md)
- [Python](/en/realtime-media/rtc-server-sdk/quickstart/python.md)
- [Go](/en/realtime-media/rtc-server-sdk/quickstart/go.md)
# Media Gateway overview (/en/realtime-media/rtmp-gateway)
Agora's Media Gateway service enables publishing RTMP and SRT streams into Agora's real-time voice and video channels. By performing advanced transcoding at the edge, it reduces latency compared to traditional RTMP streaming and unlocks new possibilities for publishing and controlling real-time media streams.
Compatible with popular streaming tools, Media Gateway lets broadcasters maintain their existing setups while leveraging Agora SDRTN(R) for seamless and reliable delivery.
## Start building
## Product features
Enhance service reliability with a globally distributed cluster deployment, ensuring high-quality and seamless user experience in every region.
Experience seamless, real-time communication as the source stream directly enters the channel at the gateway, minimizing latency between the host and the audience.
Employ advanced transcoding capabilities on media streams for bandwidth optimization, enhanced delivery speed, cross-device compatibility, and wider distribution.
Simple and easy to use APIs help you integrate the feature quickly.
Safe and secure real-time transmission of audio and video data without caching or collecting users' personal information.
Works with several audio and video codecs, streaming protocols, and media formats.
# Quickstart (/en/realtime-media/rtmp-gateway/quickstart)
To push online media streams as live video source streams into Agora channels using Media Gateway, you need to obtain a server domain name and streaming key. Taking the OBS streaming software as an example, you configure the server's domain name and streaming key in the following way:
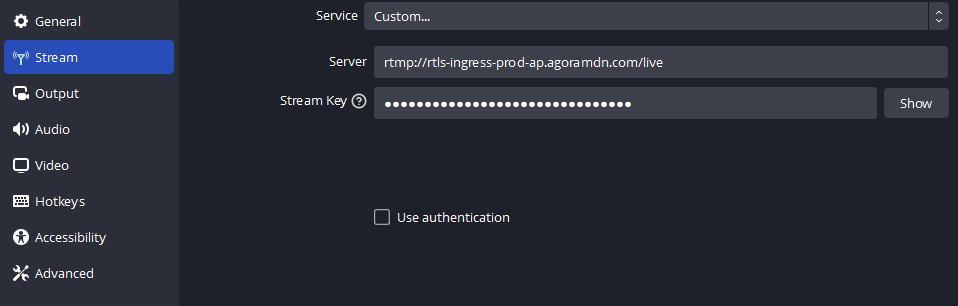
This page explains how to obtain the server domain name and generate a streaming key.
## Prerequisites
In order to follow this procedure you must:
* Have a project that implements an RTC product:
Interactive Live Streaming, Broadcast Streaming, Video Calling, or Voice Calling
* Generate app ID, app certificate, customer ID, and customer secret
* Pass basic HTTP or HMAC authentication
## Get server domain name
You can use Agora's unified domain name or your own one. The server appends the `/live` suffix to the domain name.
* The Agora unified domain name is `rtls-ingress-prod-.agoramdn.com`. Replace `` with the code for your geographical region.
The supported regions and their codes are:
* `na`: North America
* `eu`: Europe
* `ap`: Asia, except Mainland China
* `cn`: Mainland China
* To use your own domain name, [contact technical support](mailto\:support@agora.io) for configuration.
## Get streaming key
The stream key generation method depends on whether you use the Agora domain name or a custom domain name.
* If you use Agora's domain name, create a stream key using the Media Gateway RESTful API.
* If you use your own domain name, you can either call the Media Gateway RESTful API or generate the key locally.
### Generate streaming key with RESTful API
Create and publish the streaming key by calling the following endpoint:
`POST https://api.agora.io/:region/v1/projects/:appId/rtls/ingress/streamkeys`
For authentication details, see [RESTful authentication](/en/api-reference/api-ref/rtmp-gateway/authentication).
To explore the RESTful API parameters, obtain sample code in various client languages, or test Media Gateway requests, refer to the [Postman API reference](https://documenter.getpostman.com/view/6319646/SVSLr9AM#6aed9690-285e-45f0-a329-c995adbd0956).
### Generate streaming key locally
Before starting, make sure you have configured your domain name by contacting [technical support](mailto\:support@agora.io).
To generate a stream key locally, you use the following information:
* The app ID of the Agora project from [Agora Console](https://console.agora.io/)
* The app certificate corresponding to your app ID
* `channelName`: The channel name
* `uid`: The user ID of the host in the channel
* `expiresAfter`: The effective duration of the stream key, in seconds
* `template` (optional): The associated flow configuration template
The following Node.js sample code demonstrates how to generate a stream key locally.
The following example code relies on the `msgpack-lite` module. If you haven't installed it yet, execute `npm install msgpack-lite` and run `node app.js` in the project root directory.
```javascript
const crypto = require('crypto');
const msgpack = require('msgpack-lite');
appcert = ""; // Your app certificate from Agora
channel = ""; // The RTC SDK channel name
uid = ""; // The UID of the host in the channel
expiresAfter = 86400; // Valid duration of stream key (seconds)
const expiresAt = Math.floor(Date.now() / 1000) + expiresAfter;
const rtcInfo = {
C: channel,
U: uid,
E: expiresAt,
// If you are not sure whether to use the flow configuration template, keep the following line commented
// T: templateId,
};
const data = msgpack.encode(rtcInfo);
const iv = crypto.randomBytes(16);
const key = Buffer.from(appcert, 'hex');
const encrypter = crypto.createCipheriv('aes-128-ctr', key, iv);
const encrypted = Buffer.concat([iv, encrypter.update(data), encrypter.final()]);
const streamkey = encrypted
.toString('base64')
.replace(/\\+/g, '-')
.replace(/\\//g, '_')
.replace(/\\=+$/, '');
console.log(`streamkey is ${streamkey}`);
```
## Recommended config for web client communication
In case of intercommunication with the web client, transcoding is not enabled by default. To ensure the best experience for web viewers, make sure that the streaming software uses the following encoding parameters:
* Key frame interval (GOP): `2s`
* Video profile: `baseline`
* x264 options: `threads=6`
* Frame rate (FPS): At 1080 resolution, the frame rate must not exceed 30; for resolutions below that, the frame rate must not exceed 60. If not necessary, 30 is sufficient.
Taking OBS as an example, configure it as shown below:
1. On the **Settings > Output > Live** page, configure the video profile, keyframe interval, and x264 options.
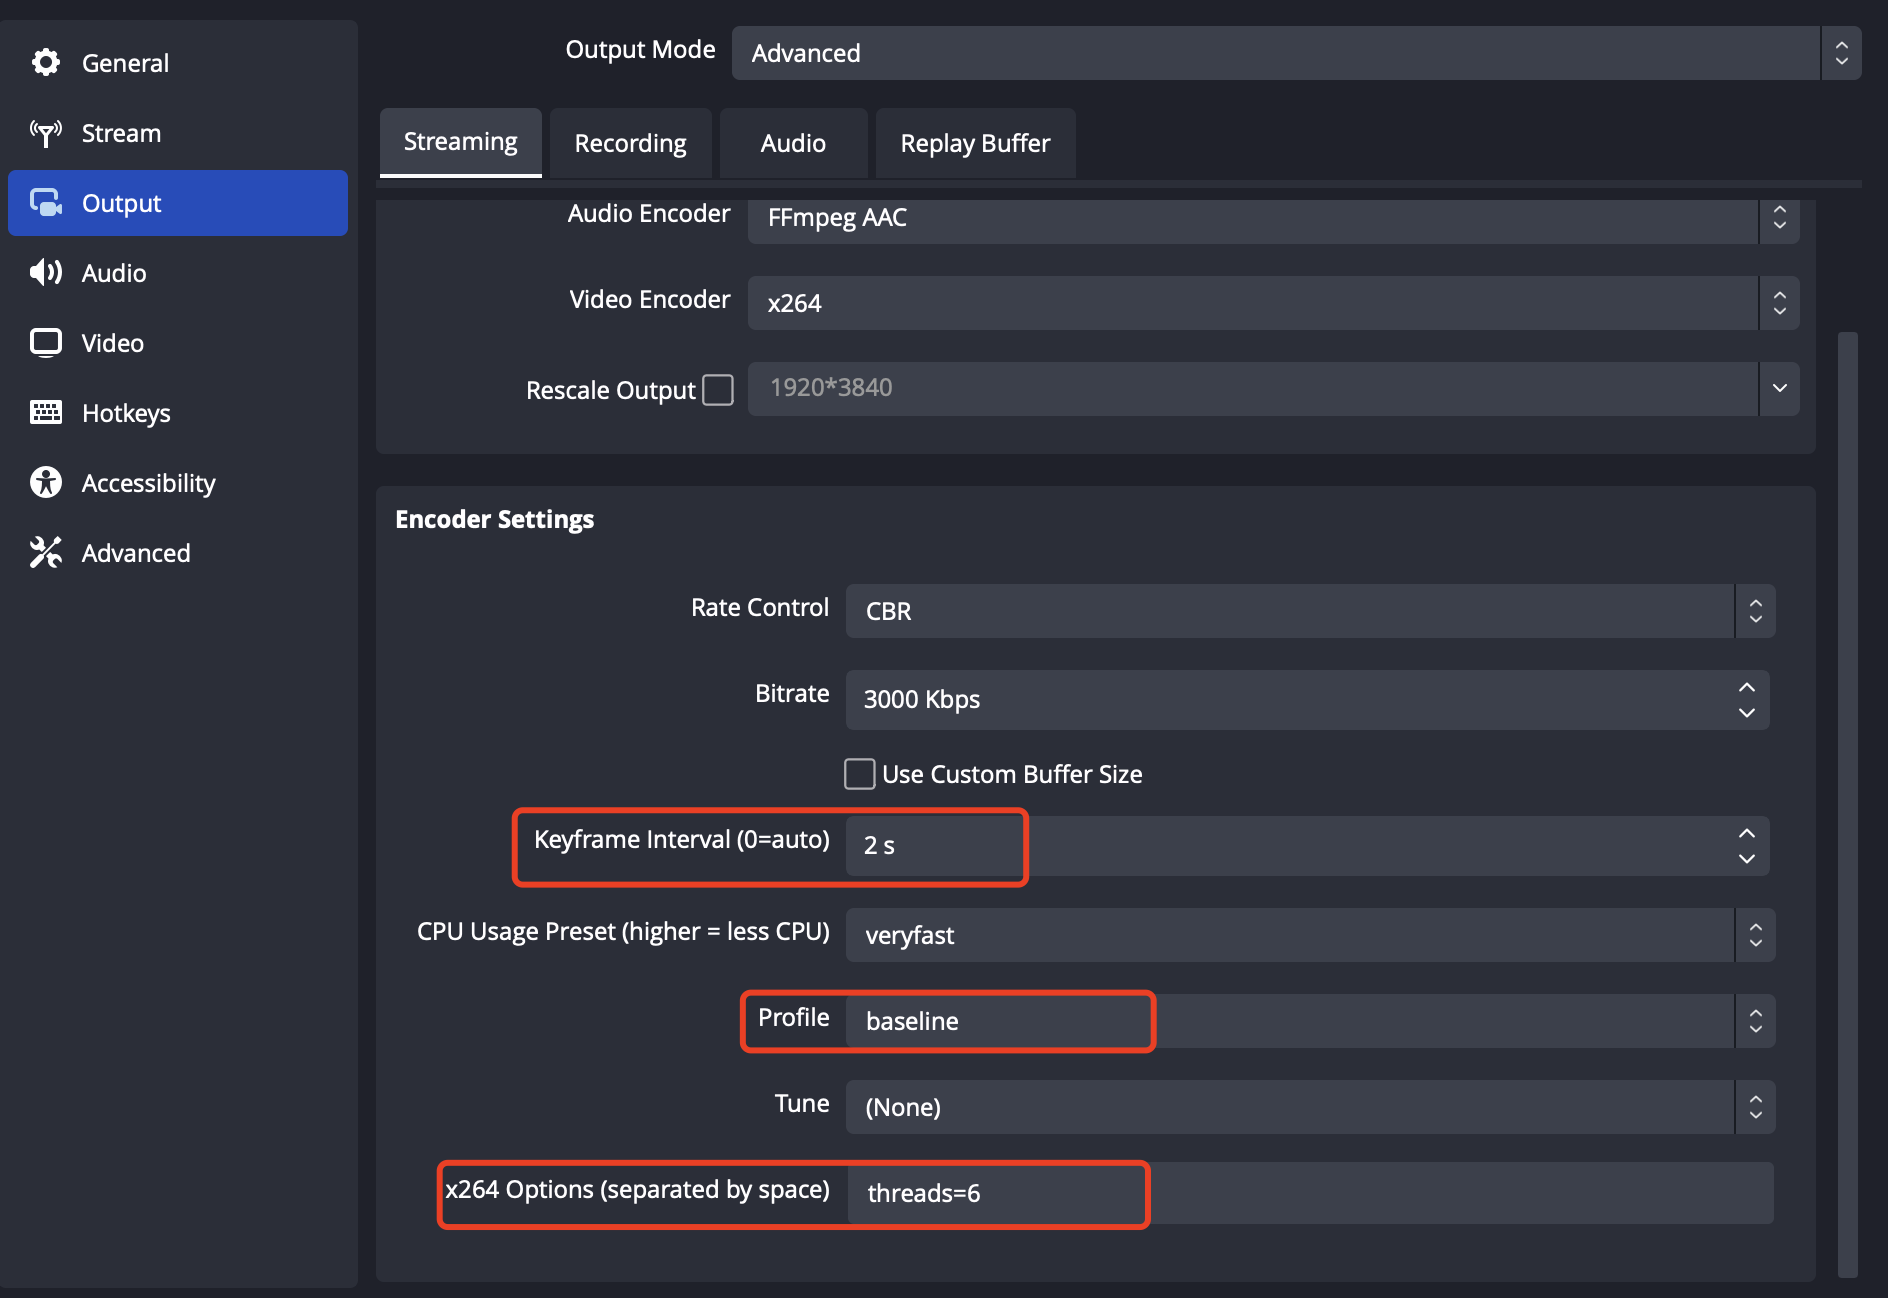
2. On the **Settings > Video** page, configure common frame rates.
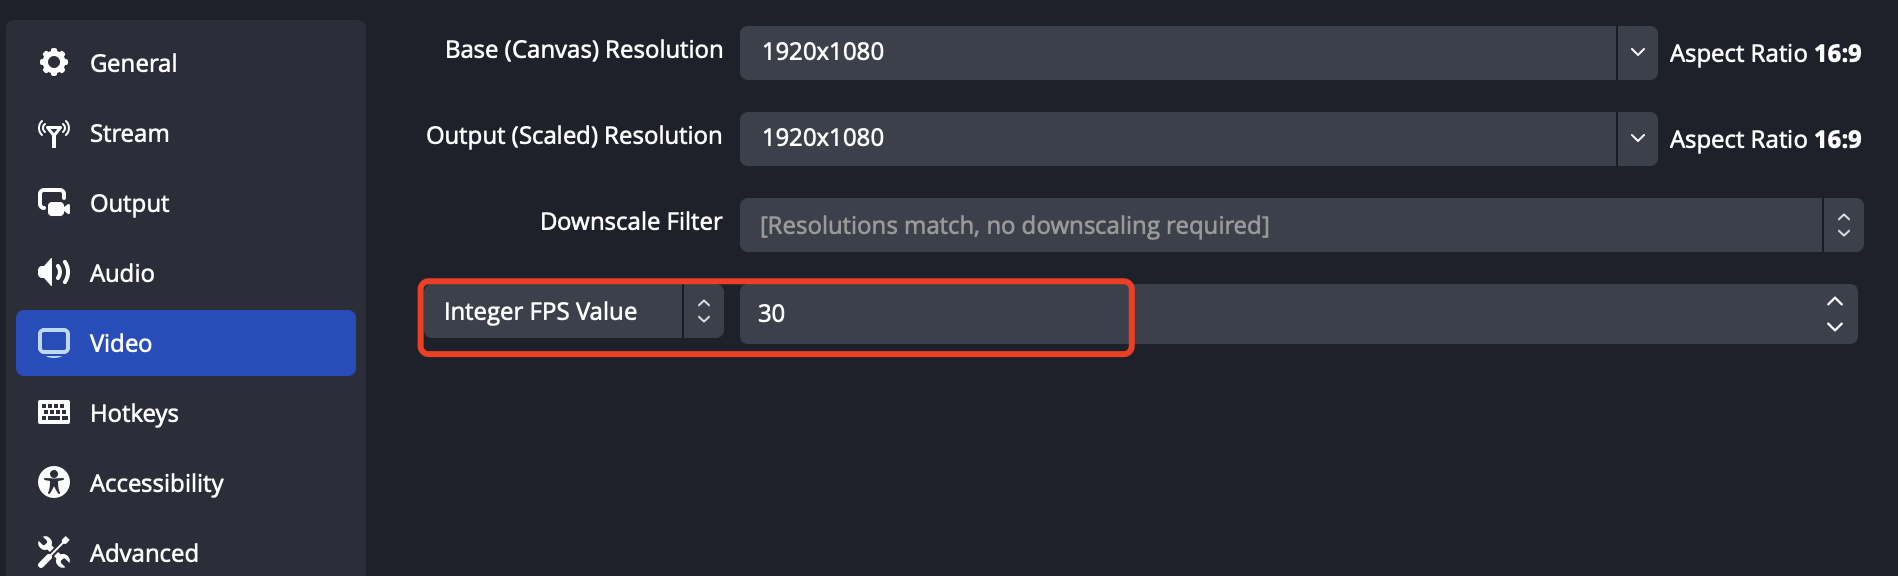
## Next steps
After completing the configuration, you can push RTMP or SRT streams to Agora channels, and these streams will be published to the corresponding channels by the host.
By default, after Media Gateway receives the pushed stream, it will not transcode it and will directly publish it to the Agora channel. If you want to transcode the streams, use stream configuration templates to implement related functions.
### REST API middleware
[Agora Go Backend Middleware](https://github.com/AgoraIO-Community/agora-go-backend-middleware) is an open-source microservice that exposes a RESTful API designed to simplify Media Gateway interactions with Agora. Written in Golang and powered by the Gin framework, this community project serves as middleware to bridge front-end applications using Agora's RTC SDK or Voice SDK with Agora's RESTful APIs.
# IoT & Edge (/en/realtime-media/rtsa)
## What this capability is
RTSA provides high-quality real-time media streaming and signaling for hardware-oriented and terminal-style products that need low-latency connectivity.
## Common scenarios
* smart cameras
* doorbells and wearables
* device-to-device media interop
* IoT real-time products
## What the existing Agora docs usually contain
* landing page
* runnable examples
* quickstart
* popular capabilities
* best practices
## What to read first
Start from the landing page to evaluate fit, then run an example project, then add license, interop, and bitrate-control details.
# Beginner's guide (/en/realtime-media/rtm/beginners-guide)
## What is Signaling?
Signaling provides a comprehensive suite of low-latency, high-concurrency, scalable, and highly-reliable real-time messaging and status synchronization solutions. Agora manages the infrastructure required for the real-time communication layer of your game, guaranteeing an SLA uptime of 99.95%. To facilitate user development and innovation, Agora offers a plethora of demo apps and open third-party API extensions.
Agora Signaling, built on extensive technical expertise and global network deployment, is diligently maintained by a team of seasoned product and R\&D professionals. By integrating Signaling into your game, you can leverage Agora's professional knowledge and operational expertise, ensuring swift access to dependable message and signal transmission, as well as real-time status synchronization data flow networks. This approach allows you to bypass the high costs and potential risks associated with self-development, operation, and maintenance.
## Applications
Signaling is widely used by more than 3000 customers in the following fields:
* Metaverse
* Interactive gaming
* Online education
* E-commerce retail
* Interactive live broadcast
* Collaboration
* IoT and smart devices
* Telemedicine
* Transportation and location tracking
* Fintech
* Parallel control
* Smart city
To learn more about specific use-cases, [contact](mailto\:rtm-support@agora.io) the Agora Signaling team.
## Getting started
To create and set up a project for Signaling in Agora Console, see [Agora account management](/en/introduction/account). Browse the following documents to get started with Signaling:
* [SDK quickstart](./index.mdx)
* [Message channels](./build/work-with-channels/message-channel.mdx)
* [Stream channels](./build/work-with-channels/stream-channel.mdx)
* [API reference](/en/api-reference/api-ref/signaling)
* [Pricing](./reference/pricing.md)
# Core concepts (/en/realtime-media/rtm/core-concepts)
Agora’s Signaling SDK enables real-time metadata synchronization and low-latency event notifications between edge devices, servers and channel attributes in your apps.
This article introduces the key processes and concepts you need to know to use the Signaling SDK.
## General concepts
Agora relies on the following fundamental concepts to enable seamless real-time communication:
### Agora SDRTN®
Agora's core engagement services are powered by its Software-Defined Real-Time Network (SDRTN®), a global infrastructure accessible anytime, anywhere. Unlike traditional networks, Agora SDRTN® is not restricted by devices, phone numbers, or telecom coverage areas. With data centers in over 200 countries and regions, it ensures sub-second latency and high availability for real-time media.
Agora SDRTN® enables live user engagement through real-time communication (RTC), offering:
* Unmatched quality of service
* High availability and accessibility
* True scalability
* Low cost
### App ID
The App ID is a unique key generated by Agora to identify each project and provide billing and other statistical data services. The App ID is critical for connecting users within your app. It is used to initialize the Agora Engine in your app, and as one of the required keys to create authentication tokens for secure communication. Retrieve the App ID for your project using the [Agora Console](https://console.agora.io/projects).
App IDs are stored on the front-end client and do not provide access control. Projects using only an App ID allow any user with the App ID to join. For access control, especially in production environments, choose the **App ID + Token** mechanism for user authentication when creating a new project. Without authentication tokens, your environment is open to anyone with access to your App ID.
### App Certificate
An App Certificate is a unique key generated by the Agora Console to secure projects through token authentication. It is required, along with the App ID, to generate a token that proves authorization between your systems and Agora's network. App Certificates are used to generate Signaling authentication tokens.
Store the App Certificate securely in your backend systems. If your App Certificate is compromised or to meet security compliance requirements, you can invalidate certificates and create new ones through the Agora Console.
### Tokens
A token is a dynamic key generated using the App ID, App Certificate, user ID, and expiration timestamp. Tokens authenticate and secure access to Agora's services, ensuring only authorized users can join a channel and participate in real-time communication.
Tokens are generated on your server and passed to the client for use in Signaling. The token generation process involves digitally signing the App ID, App Certificate, user ID, and expiration timestamp using a specific algorithm, preventing tampering or forgery.
During development and testing, use the Agora Console to generate temporary tokens. For production environments, implement a token server as part of your security infrastructure to control access to your channels.
### Channel
A channel organizes users into a group and is identified by a unique channel name. Users who connect to the same channel are able to communicate with each other. A channel is created when the first user joins and ceases to exist when the last user leaves.
In Signaling, channels serve as a data transfer management mechanism for passing data between devices. Clients can subscribe to or join multiple channels simultaneously.
Signaling supports the following channel types:
| Channel Type | Main Features | Applicable use-cases |
| ------------ | ------------------------------------------------------------------------------------------------------------------------------------------------------------------------------------------------------------------------------------------------------------------------------------------------------------ | ------------------------------------------------------------------------------------------------------------------------------------------------------------------------------- |
| Message | Follows the industry-standard pub/sub model. Channels do not need to be created in advance, and there is no upper limit on the number of publishers and subscribers in a channel. | Multi-device management and command exchange in the IoT industry, location tracking in smart devices, etc. |
| User | One-to-one message sending and receiving, this channel type supports the delivery receipt function. | Useful in one-on-one communication use-cases such as private chats and customer support interactions. |
| Stream | Follows the chat room model. Users need to join the channel to send and receive event notifications. Messages are managed and delivered through topics, and a single channel allows up to 1,000 users to join simultaneously. Supports channel sharing and synchronous transmission of audio and video data. | High-frequency and large concurrent data transmission or co-channel and synchronous transmission with audio and video data, such as in metaverse and cloud gaming applications. |
### User ID
In Signaling, UID is a unique string identifier required along with an App ID to initialize the SDK. It is used to identify the user when logging in to Signaling and throughout their session for billing and online status notifications. Users can join channels by providing just the channel name, as the UID is already associated with the user during initialization.
Users cannot simultaneously log in to Signaling using the same UID from multiple devices. If a client attempts to log in to Agora SDRTN® with a UID already present in the channel, the previously logged in client is disconnected and sent an event notification.
### Agora Console
[Agora Console](https://console.agora.io/) is the main dashboard where you manage your Agora projects and services. Before you can use Agora's SDKs, you must first create a project in the Agora Console. See [Agora account management](/en/introduction/account) for
details.

Agora Console provides an intuitive interface for developers to query and manage their Agora account. After registering an Agora account, you use the Agora Console to perform the following tasks:
* Manage your account
* Create and configure Agora projects and services
* Get an App ID and the App certificate
* Generate temporary tokens for development and testing
* Manage members and roles
* Check call quality and usage
* Check bills and make payments
* Access product resources
See [Agora account management](/en/introduction/account) for details on how to manage all aspects of your Agora account.
Agora also provides RESTful APIs that you use to implement features such as creating a project and fetching usage numbers programmatically.
# Enable and configure Signaling (/en/realtime-media/rtm/enable-signaling)
Before you enable Signaling, make sure you have an [Agora account](/en/introduction/account#sign-up-for-an-agora-account) and a [project](/en/introduction/account#your-first-agora-project).
## Enable Signaling for your project
Note
Signaling is enabled by default for all new projects.
To enable Signaling for an existing project, in [Agora Console](https://console.agora.io), select **RTC Services** from the sidebar, then locate the **Signaling** card and turn on its toggle.
## Configure Signaling
To configure Signaling, select the settings icon on the **Signaling** card to open its configuration panel.
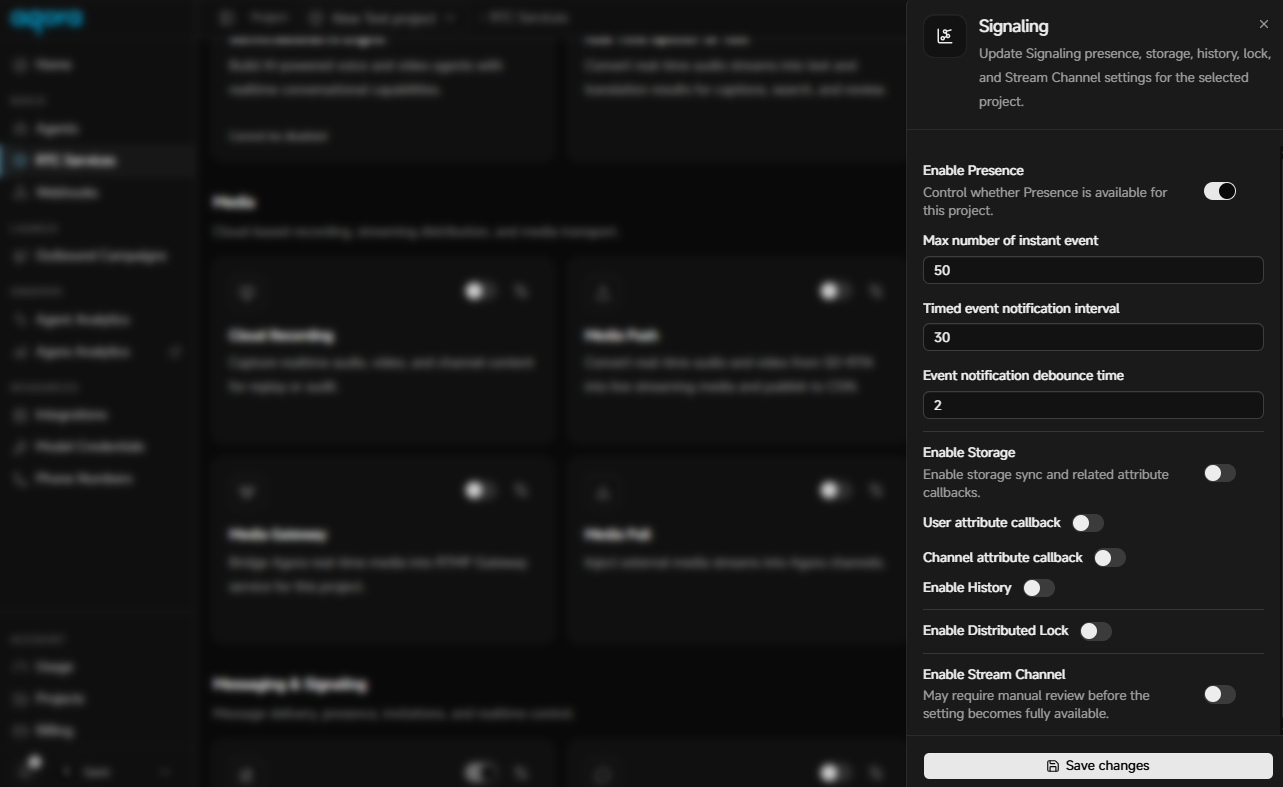
The Signaling panel provides the following configuration.
### Presence configuration
Turn on **Enable Presence** to control whether Presence is available for this project, then set:
* **Max number of instant event**: The maximum number of instant notifications sent before Signaling switches to interval mode. The value range is 8–128, with a default of 50. To request a value outside this range, contact [technical support](mailto\:support@agora.io).
* **Timed event notification interval**: How often periodic notifications are sent, in seconds. The value range is 5–300, with a default of 30.
* **Event notification debounce time**: The interval within which no presence event is triggered if a user quickly leaves and rejoins, in seconds. The default is 2.
### Storage configuration
Turn on **Enable Storage** to enable storage sync and related attribute callbacks, then set:
* **User attribute callback**: Receive callbacks when user attributes change in real time.
* **Channel attribute callback**: Receive callbacks when channel attributes are updated by any member.
### History
Turn on **Enable History** to store message history for later retrieval.
### Distributed lock
Turn on **Enable Distributed Lock** to coordinate exclusive access to shared resources across clients.
### Activate stream channels
Turn on **Enable Stream Channel** to use ordered, topic-based messaging for time-sensitive event delivery. This setting may require manual review before it becomes fully available.
Select **Save changes** to apply your updates.
For more information on managing other aspects of your Agora account, see [Console setup](/en/introduction/console-setup).
# Signaling overview (/en/realtime-media/rtm)
Agora's Signaling API enables low-latency metadata synchronization and real-time event notifications. With features like channel management, presence updates, and attribute synchronization, it enhances real-time applications with ultra-low latency and high scalability.
Extend Agora's Signaling SDKs with advanced capabilities such as stream channels, attribute storage and distribution, and integration with third-party services via webhooks to create dynamic and interactive real-time experiences.
## Start building
## Product Features
Real-time messaging that enables asynchronous pub/sub message transmission without the need for immediate response. Publishers send messages to the channel, subscribers receive messages from the channels they sign up to. Depending on your business needs, send string or binary payloads.
[Message channels](build/work-with-channels/message-channel)
A real-time data pipeline that enables the uninterrupted flow of data from one point to another without delay or latency. Depending on your business needs, send string or binary payloads
[Stream channels](build/work-with-channels/stream-channel)
Facilitate effective data stream management and communication between users in real time in Stream channels. Enable users to subscribe to, distribute, and notify users subscribed to a topic. Publishers send messages to a topic, subscribers receive messages in the topics they sign up to.
[Topics](build/work-with-channels/topics)
In online collaboration apps, enable users to see the availability of their contacts. Presence information is typically displayed as a status message or with an icon next to a user's name. It helps users determine the availability of others for communication or collaboration.
[Presence](build/manage-presence-and-metadata/presence)
Persist and managing data that is exchanged between different clients or devices in real-time. Ensure that messages are not lost or dropped during transmission and enable quick and reliable message delivery to any number of clients.
[Storage](build/manage-presence-and-metadata/storage/store-user-metadata)
Critical resource management mechanism to prevent mutual interference. Ensure that messages are processed in a specific order and prevent concurrent access to the same data. When your app accesses a resource, it can lock on that resource to prevent other clients from accessing it.
[Locks](build/manage-presence-and-metadata/storage/store-channel-metadata)
# Quickstart (/en/realtime-media/rtm/quickstart)
Use Signaling SDK to add low-latency, high-concurrency signaling and synchronization capabilities to your app.
Signaling also helps you enhance the user experience in Video Calling, Voice Calling, Interactive Live Streaming, and Broadcast Streaming applications.
This page shows you how to use the Signaling SDK to rapidly build a simple application that sends and receives messages. It shows you how to integrate the Signaling SDK in your project and implement pub/sub messaging through [Message channels](/en/realtime-media/rtm/build/work-with-channels/message-channel). To get started with stream channels, follow this guide to create a basic Signaling app and then refer to the [Stream channels](/en/realtime-media/rtm/build/work-with-channels/stream-channel) guide.
## Understand the tech
To use Signaling features in your app, you initialize a Signaling client instance and add event listeners. To connect to Signaling, you login using an authentication token. To send a message to a message channel, you publish the message. Signaling creates a channel when a user subscribes to it. To receive messages other users publish to a channel, your app listens for events.
To create a pub/sub session for Signaling, implement the following steps in your app:
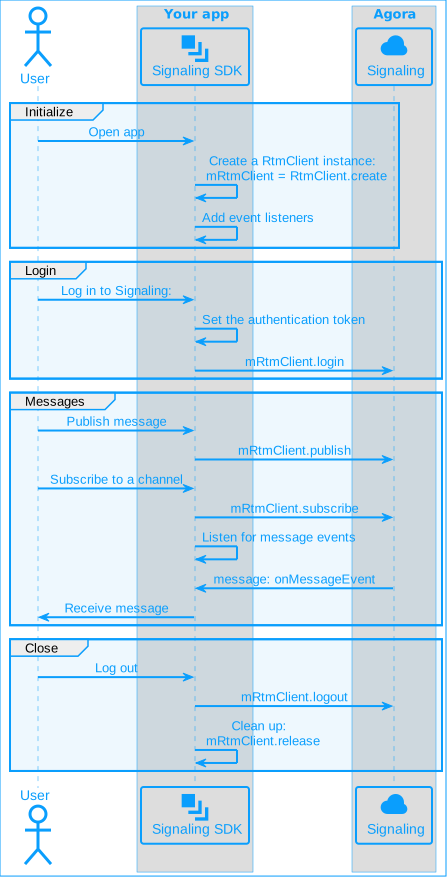
## Prerequisites
To implement the code presented on this page you need to have:
* An Agora [account](/en/introduction/account#sign-up-for-an-agora-account) and [project](/en/introduction/account#your-first-agora-project).
* [Enabled Signaling](/en/realtime-media/rtm/enable-signaling) in Agora Console
* [Android Studio](https://developer.android.com/studio) 4.1 or higher.
* Android SDK API Level 24 or higher.
* A mobile device that runs Android 4.1 or higher.
* Ensure that a firewall is not blocking your network communication.
Signaling 2.x is an enhanced version compared to 1.x with a wide range of new features. It follows a new pricing structure. See [Pricing](/en/realtime-media/rtm/reference/pricing) for details.
## Project setup
### Create a project
1. **Create a [new project](https://developer.android.com/studio/projects/create-project)**.
1. Open Android Studio and select **File > New > New Project...**.
2. Select **Phone and Tablet** > **Empty Activity** and click **Next**.
3. Set the project name and storage path.
4. Select **Java** or **Kotlin** as the language, and click **Finish** to create the project.
After you create a project, Android Studio automatically starts gradle sync. Ensure that the synchronization is successful before proceeding to the next step.
2. **Add network permissions**
Open the `/app/src/main/AndroidManifest.xml` file and add the following permissions before ``:
```xml
```
3. **Prevent code obfuscation**
Open the `/app/proguard-rules.pro` file and add the following line to prevent code obfuscation:
```text
-keep class io.agora.**{*;}
```
### Integrate the SDK
Use either of the following methods to integrate Signaling SDK into your project.
**Using Maven Central**
1. Open the `settings.gradle` file in the project's root directory and add the Maven Central dependency, if it doesn't already exist:
```text
repositories {
mavenCentral()
}
```
If your Android project uses [`dependencyResolutionManagement`](https://docs.gradle.org/current/userguide/declaring_repositories.html#sub\:centralized-repository-declaration), there may be differences in how you add Maven Central dependencies.
2. Add the following to the `/Gradle Scripts/build.gradle(Module: .app)` file under `dependencies` to integrate the SDK into your Android project:
* Groovy
```text
implementation 'io.agora.rtm:rtm-sdk:x.y.z'
```
To resolve integration issues when co-integrating with the RTC SDK use:
```text
implementation 'io.agora.rtm:rtm-sdk-lite:x.y.z'
```
* Kotlin
```kotlin
implementation("io.agora.rtm:rtm-sdk:x.y.z")
```
To resolve integration issues when co-integrating with the RTC SDK use:
```kotlin
implementation("io.agora.rtm:rtm-sdk-lite:x.y.z")
```
Replace `x.y.z` with the specific SDK version number, such as `2.2.8`. To get the latest version number, check the [Release notes](/en/realtime-media/rtm/reference/release-notes).
**Using CDN**
1. [Download](/en/api-reference/sdks?product=signaling\&platform=android) the latest version of Signaling SDK for Android.
2. Copy all files in the `sdk` folder of the package to the `/app/libs` folder of the project.
3. To add the SDK reference, open the project file `/Gradle Scripts/build.gradle(Module: .app)` and add the following code:
1. Add a `ndk` node under the default `Config` node, to specify the supported architectures:
```text
Config {
// ...
ndk{
abiFilters 'armeabi-v7a', 'arm64-v8a', 'x86', 'x86_64'
}
}
```
Supporting all architectures increases the app size. Best practice is to only add essential architectures based on your targets. For most use-cases, `armeabi-v7a` and `arm64-v8a` architectures are sufficient when releasing the Android app.
2. Add a `sourceSets` node under the `android` node to include the jni libraries copied to the `libs` folder:
```text
android {
// ...
sourceSets {
main {
jniLibs.srcDirs = ['libs']
}
}
}
```
3. To include all `jar` files in the `libs` folder as dependencies, add the following under the `dependencies` node:
```text
dependencies {
implementation fileTree(dir: 'libs', include: ['*.jar'])
// ...
}
```
To integrate Signaling SDK version `2.2.0` or later alongside RTC SDK version `4.3.0` or later, refer to [handle integration issues](/en/api-reference/faq/integration/rtm2_rtc_integration_issue).
### Create a user interface
This section helps you create a simple user interface to explore the basic features of Signaling. Modify it according to your specific needs.
The demo interface consists of the following UI elements:
* Input boxes for user ID, channel name, and message
* Buttons to log in and log out of Signaling
* Buttons to subscribe and unsubscribe from a channel
* A button to publish a message
**Sample code to create the user interface**
Open the `/app/res/layout/activity_main.xml` file, and replace the contents with the following:
```xml
```
Open the `app/res/values/strings.xml` file and add following string resources:
```xml
Signaling QuickstartLoginLogoutSubscribeUnsubscribePublish messageUser IDMessage contentChannel nameyour_appidyour_token
```
## Implement Signaling
A complete code sample that implements the basic features of Signaling is presented here for your reference. To use the sample code, copy the following lines into the `/app/src/main/java/com/example//MainActivity` file and replace `` in `package com.example.` with the name of your project.
Java
Kotlin
```java
package com.example.;
import android.os.Bundle;
import android.view.View;
import android.widget.EditText;
import android.widget.TextView;
import android.widget.Toast;
import androidx.appcompat.app.AppCompatActivity;
import io.agora.rtm.*;
public class JavaActivity extends AppCompatActivity {
private EditText etUserId;
private EditText etChannelName;
private EditText etMessageContent;
private TextView mMessageHistory;
private RtmClient mRtmClient;
private final RtmEventListener eventListener = new RtmEventListener() {
@Override
public void onMessageEvent(MessageEvent event) {
String text = "Message received from " + event.getPublisherId()
+ ", Message: " + event.getMessage().getData();
writeToMessageHistory(text);
}
@Override
public void onPresenceEvent(PresenceEvent event) {
String text = "Received presence event, user: " + event.getPublisherId()
+ ", Event: " + event.getEventType();
writeToMessageHistory(text);
}
@Override
public void onLinkStateEvent(LinkStateEvent event) {
String text = "Connection state changed to " + event.getCurrentState()
+ ", Reason: " + event.getReason();
writeToMessageHistory(text);
}
};
@Override
protected void onCreate(Bundle savedInstanceState) {
super.onCreate(savedInstanceState);
setContentView(R.layout.activity_main);
}
public void onClickLogin(View v) {
etUserId = findViewById(R.id.uid);
String userId = etUserId.getText().toString();
String token = getString(R.string.token);
if (createClient(userId)) {
login(token);
}
}
public void onClickLogout(View v) {
logout();
}
public void onClickSubscribe(View v) {
etChannelName = findViewById(R.id.channel_name);
String channelName = etChannelName.getText().toString();
subscribe(channelName);
}
public void onClickUnsubscribe(View v) {
etChannelName = findViewById(R.id.channel_name);
String channelName = etChannelName.getText().toString();
unsubscribe(channelName);
}
public void onClickSendChannelMsg(View v) {
etChannelName = findViewById(R.id.channel_name);
String channelName = etChannelName.getText().toString();
etMessageContent = findViewById(R.id.msg_box);
String message = etMessageContent.getText().toString();
publishMessage(channelName, message);
}
private boolean createClient(String userId) {
if (userId.isEmpty()) {
showToast("Invalid userId");
return false;
}
try {
RtmConfig config = new RtmConfig.Builder(getString(R.string.app_id), userId)
.eventListener(eventListener)
.build();
mRtmClient = RtmClient.create(config);
return true;
} catch (Exception e) {
showToast("Error creating RTM client.");
return false;
}
}
private void login(String token) {
if (mRtmClient == null) {
showToast("RTM client is null");
return;
}
mRtmClient.login(token, new ResultCallback<>() {
@Override
public void onSuccess(Void responseInfo) {
writeToMessageHistory("Successfully logged in to Signaling!");
}
@Override
public void onFailure(ErrorInfo errorInfo) {
writeToMessageHistory("Failed to log in to Signaling: " + errorInfo);
}
});
}
private void logout() {
if (mRtmClient == null) {
showToast("RTM client is null");
return;
}
mRtmClient.logout(new ResultCallback<>() {
@Override
public void onSuccess(Void responseInfo) {
writeToMessageHistory("Successfully logged out.");
}
@Override
public void onFailure(ErrorInfo errorInfo) {
writeToMessageHistory("Failed to log out: " + errorInfo);
}
});
}
private void subscribe(String channelName) {
if (mRtmClient == null) {
showToast("RTM client is null");
return;
}
SubscribeOptions options = new SubscribeOptions();
options.setWithMessage(true);
mRtmClient.subscribe(channelName, options, new ResultCallback<>() {
@Override
public void onSuccess(Void responseInfo) {
writeToMessageHistory("Successfully subscribed to the channel!");
}
@Override
public void onFailure(ErrorInfo errorInfo) {
writeToMessageHistory("Failed to subscribe to the channel: " + errorInfo);
}
});
}
private void unsubscribe(String channelName) {
if (mRtmClient == null) {
showToast("RTM client is null");
return;
}
mRtmClient.unsubscribe(channelName, new ResultCallback<>() {
@Override
public void onSuccess(Void responseInfo) {
writeToMessageHistory("Successfully unsubscribed from the channel!");
}
@Override
public void onFailure(ErrorInfo errorInfo) {
writeToMessageHistory("Failed to unsubscribe from the channel: " + errorInfo);
}
});
}
private void publishMessage(String channelName, String message) {
if (mRtmClient == null) {
showToast("RTM client is null");
return;
}
PublishOptions options = new PublishOptions();
options.setCustomType("");
mRtmClient.publish(channelName, message, options, new ResultCallback<>() {
@Override
public void onSuccess(Void responseInfo) {
writeToMessageHistory("Message sent to channel " + channelName + ": " + message);
}
@Override
public void onFailure(ErrorInfo errorInfo) {
writeToMessageHistory("Failed to send message to channel " + channelName + ": " + errorInfo);
}
});
}
private void writeToMessageHistory(String record) {
if (mMessageHistory == null) {
mMessageHistory = findViewById(R.id.message_history);
}
mMessageHistory.append("- " + record + "\n");
}
private void showToast(String text) {
Toast.makeText(this, text, Toast.LENGTH_SHORT).show();
}
}
```
```kotlin
package com.example.
import android.content.pm.ActivityInfo
import android.os.Bundle
import android.view.View
import android.widget.EditText
import android.widget.TextView
import android.widget.Toast
import androidx.appcompat.app.AppCompatActivity
import io.agora.rtm.*
class MainActivity : AppCompatActivity() {
private lateinit var etUserId: EditText
private lateinit var etChannelName: EditText
private lateinit var etMessageContent: EditText
private var mRtmClient: RtmClient? = null
private lateinit var mMessageHistory: TextView
private val eventListener = object : RtmEventListener {
override fun onMessageEvent(event: MessageEvent) {
val text = "Message received from \${event.publisherId}, Message: \${event.message.data}"
writeToMessageHistory(text)
}
override fun onPresenceEvent(event: PresenceEvent) {
val text = "Received presence event, user: \${event.publisherId}, Event: \${event.eventType}"
writeToMessageHistory(text)
}
override fun onLinkStateEvent(event: LinkStateEvent) {
val text = "Connection state changed to \${event.currentState}, Reason: \${event.reason}"
writeToMessageHistory(text)
}
}
override fun onCreate(savedInstanceState: Bundle?) {
super.onCreate(savedInstanceState)
setContentView(R.layout.activity_main)
setRequestedOrientation(ActivityInfo.SCREEN_ORIENTATION_PORTRAIT)
}
fun onClickLogin(v: View) {
etUserId = findViewById(R.id.uid)
val userId = etUserId.text.toString()
val token = getString(R.string.token)
if (createClient(userId)) {
login(token)
}
}
fun onClickLogout(v: View) {
logout()
}
fun onClickSubscribe(v: View) {
etChannelName = findViewById(R.id.channel_name)
val channelName = etChannelName.text.toString()
subscribe(channelName)
}
fun onClickUnsubscribe(v: View) {
etChannelName = findViewById(R.id.channel_name)
val channelName = etChannelName.text.toString()
unsubscribe(channelName)
}
fun onClickSendChannelMsg(v: View) {
etChannelName = findViewById(R.id.channel_name)
val channelName = etChannelName.text.toString()
etMessageContent = findViewById(R.id.msg_box)
val message = etMessageContent.text.toString()
publishMessage(channelName, message)
}
private fun createClient(userId: String): Boolean {
if (userId.isEmpty()) {
showToast("Invalid userId")
return false
}
return try {
val config = RtmConfig.Builder(getString(R.string.app_id), userId)
.eventListener(eventListener)
.build()
mRtmClient = RtmClient.create(config)
true
} catch (e: Exception) {
showToast("Error creating RTM client.")
false
}
}
private fun login(token: String) {
mRtmClient?.login(token, object : ResultCallback {
override fun onSuccess(responseInfo: Void?) {
writeToMessageHistory("Successfully logged in to Signaling!")
}
override fun onFailure(errorInfo: ErrorInfo) {
writeToMessageHistory("Failed to log in to Signaling: $errorInfo")
}
}) ?: showToast("RTM client is null")
}
private fun logout() {
mRtmClient?.logout(object : ResultCallback {
override fun onSuccess(responseInfo: Void?) {
writeToMessageHistory("Successfully logged out.")
}
override fun onFailure(errorInfo: ErrorInfo) {
writeToMessageHistory("Failed to log out: $errorInfo")
}
}) ?: showToast("RTM client is null")
}
private fun subscribe(channelName: String) {
mRtmClient ?: run {
showToast("RTM client is null")
return
}
val options = SubscribeOptions().apply {
withMessage = true
}
mRtmClient!!.subscribe(channelName, options, object : ResultCallback {
override fun onSuccess(responseInfo: Void?) {
writeToMessageHistory("Successfully subscribed to the channel!")
}
override fun onFailure(errorInfo: ErrorInfo) {
writeToMessageHistory("Failed to subscribe to the channel: $errorInfo")
}
})
}
private fun unsubscribe(channelName: String) {
mRtmClient ?: run {
showToast("RTM client is null")
return
}
mRtmClient!!.unsubscribe(channelName, object : ResultCallback {
override fun onSuccess(responseInfo: Void?) {
writeToMessageHistory("Successfully unsubscribed from the channel!")
}
override fun onFailure(errorInfo: ErrorInfo) {
writeToMessageHistory("Failed to unsubscribe from the channel: $errorInfo")
}
})
}
private fun publishMessage(channelName: String, message: String) {
mRtmClient ?: run {
showToast("RTM client is null")
return
}
val options = PublishOptions().apply {
customType = ""
}
mRtmClient!!.publish(channelName, message, options, object : ResultCallback {
override fun onSuccess(responseInfo: Void?) {
writeToMessageHistory("Message sent to channel $channelName: $message")
}
override fun onFailure(errorInfo: ErrorInfo) {
writeToMessageHistory("Failed to send message to channel $channelName: $errorInfo")
}
})
}
private fun writeToMessageHistory(record: String) {
mMessageHistory = findViewById(R.id.message_history)
mMessageHistory.append("- $record\n")
}
private fun showToast(text: String) {
Toast.makeText(this, text, Toast.LENGTH_SHORT).show()
}
}
```
Follow the implementation steps to understand the core API calls in the sample code or use the snippets in your own code.
### Import Agora classes
To use Signaling APIs in your project, import the relevant Agora classes and interfaces:
Java
Kotlin
```java
import io.agora.rtm.*;
```
```kotlin
import io.agora.rtm.*
```
### Initialize the Signaling engine
Before calling any other Signaling SDK API, initialize an `RtmClient` object instance.
Java
Kotlin
```java
private boolean createClient(String userId) {
if (userId.isEmpty()) {
showToast("Invalid userId");
return false;
}
try {
RtmConfig config = new RtmConfig.Builder(getString(R.string.app_id), userId)
.eventListener(eventListener)
.build();
mRtmClient = RtmClient.create(config);
return true;
} catch (Exception e) {
showToast("Error creating RTM client.");
return false;
}
}
```
```kotlin
private fun createClient(userId: String): Boolean {
if (userId.isEmpty()) {
showToast("Invalid userId")
return false
}
return try {
// Create a configuration object
val config = RtmConfig.Builder(getString(R.string.app_id), userId)
.eventListener(eventListener)
.build()
// Use the configuration object to instantiate the engine
mRtmClient = RtmClient.create(config)
true
} catch (e: Exception) {
showToast("Error creating RTM client.")
false
}
}
```
### Add an event listener
The event listener enables you to implement the processing logic in response to Signaling events. Use the following code to handle event notifications or display received messages:
Java
Kotlin
```java
private RtmEventListener eventListener = new RtmEventListener() {
@Override
public void onMessageEvent(MessageEvent event) {
String text = "Message received from " + event.getPublisherId()
+ " Message: " + event.getMessage().getData();
writeToMessageHistory(text);
}
@Override
public void onPresenceEvent(PresenceEvent event) {
String text = "Received presence event, user: " + event.getPublisherId()
+ " Event: " + event.getEventType();
writeToMessageHistory(text);
}
@Override
public void onLinkStateEvent(LinkStateEvent event) {
String text = "Connection state changed to " + event.getCurrentState()
+ ", Reason: " + event.getReason();
writeToMessageHistory(text);
}
};
```
```kotlin
private val eventListener = object : RtmEventListener {
override fun onMessageEvent(event: MessageEvent) {
val text = "Message received from \${event.publisherId} Message: \${event.message.data}"
writeToMessageHistory(text)
}
override fun onPresenceEvent(event: PresenceEvent) {
val text = "Received presence event, user: \${event.publisherId} event: \${event.eventType}"
writeToMessageHistory(text)
}
override fun onLinkStateEvent(event: LinkStateEvent) {
val text = "Connection state changed to \${event.currentState}, Reason: \${event.reason}"
writeToMessageHistory(text)
}
}
```
### Log in to Signaling
To connect to Signaling and access Signaling network resources, such as sending messages, and subscribing to channels, call `login`.
During a login operation, the client attempts to establish a connection with Signaling. Once the connection is established, the client transmits heartbeat information to the Signaling server at fixed intervals to keep the client active until the client actively logs out or is disconnected. The connection is interrupted when timeout occurs. During this period, users may freely access the Signaling network resources subject to their own permissions and usage restrictions.
Java
Kotlin
```java
private void login(String token) {
if (mRtmClient == null) {
showToast("RTM client is null");
return;
}
mRtmClient.login(token, new ResultCallback<>() {
@Override
public void onSuccess(Void responseInfo) {
writeToMessageHistory("Successfully logged in to Signaling!");
}
@Override
public void onFailure(ErrorInfo errorInfo) {
writeToMessageHistory("Failed to log in to Signaling: " + errorInfo);
}
});
}
```
```kotlin
private fun login(token: String) {
mRtmClient?.login(token, object : ResultCallback {
override fun onSuccess(responseInfo: Void?) {
writeToMessageHistory("Successfully logged in to Signaling!")
}
override fun onFailure(errorInfo: ErrorInfo) {
writeToMessageHistory("Failed to log in to Signaling: $errorInfo")
}
}) ?: showToast("RTM client is null")
}
```
To confirm that login is successful, use the `login` return value, or listen to the `onLinkStateEvent` event notification which provides the error code and reason for the login failure. When performing a login operation, the client's network connection state is `CONNECTING`. After a successful login, the state is updated to `CONNECTED`.
Best practice
To continuously monitor the network connection state of the client, best practice is to continue to listen for `onLinkStateEvent` notifications throughout the life cycle of the application. For further details, see [Event listeners](/en/realtime-media/rtm/build/send-and-receive-messages/add-event-listener).
After a user successfully logs into Signaling, the application's PCU increases, which affects your billing data.
### Publish a message
To distribute a message to all subscribers of a message channel, call `publish`. The following code sends a string type message.
Java
Kotlin
```java
private void publishMessage(String channelName, String message) {
if (mRtmClient == null) {
showToast("RTM client is null");
return;
}
PublishOptions options = new PublishOptions();
options.setCustomType("");
mRtmClient.publish(channelName, message, options, new ResultCallback<>() {
@Override
public void onSuccess(Void responseInfo) {
writeToMessageHistory("Message sent to channel " + channelName + ": " + message);
}
@Override
public void onFailure(ErrorInfo errorInfo) {
writeToMessageHistory("Failed to send message to channel " + channelName + ": " + errorInfo);
}
});
}
```
```kotlin
private fun publishMessage(channelName: String, message: String) {
mRtmClient ?: run {
showToast("RTM client is null")
return
}
val options = PublishOptions().apply {
customType = ""
}
mRtmClient!!.publish(channelName, message, options, object : ResultCallback {
override fun onSuccess(responseInfo: Void?) {
writeToMessageHistory("Message sent to channel $channelName: $message")
}
override fun onFailure(errorInfo: ErrorInfo) {
writeToMessageHistory("Failed to send message to channel $channelName: $errorInfo")
}
})
}
```
Before calling `publish` to send a message, serialize the message payload as a string.
### Subscribe and unsubscribe
To subscribe to a channel, call `subscribe`. When you subscribe to a channel, you receive all messages published to the channel.
Java
Kotlin
```java
private void subscribe(String channelName) {
if (mRtmClient == null) {
showToast("RTM client is null");
return;
}
SubscribeOptions options = new SubscribeOptions();
options.setWithMessage(true);
mRtmClient.subscribe(channelName, options, new ResultCallback<>() {
@Override
public void onSuccess(Void responseInfo) {
writeToMessageHistory("Successfully subscribed to the channel!");
}
@Override
public void onFailure(ErrorInfo errorInfo) {
writeToMessageHistory("Failed to subscribe to the channel: " + errorInfo);
}
});
}
```
```kotlin
private fun subscribe(channelName: String) {
mRtmClient ?: run {
showToast("RTM client is null")
return
}
val options = SubscribeOptions().apply {
withMessage = true
}
mRtmClient!!.subscribe(channelName, options, object : ResultCallback {
override fun onSuccess(responseInfo: Void?) {
writeToMessageHistory("Successfully subscribed to the channel!")
}
override fun onFailure(errorInfo: ErrorInfo) {
writeToMessageHistory("Failed to subscribe to the channel: $errorInfo")
}
})
}
```
When you no longer need to receive messages from a channel, call `unsubscribe` to unsubscribe from the channel:
Java
Kotlin
```java
private void unsubscribe(String channelName) {
if (mRtmClient == null) {
showToast("RTM client is null");
return;
}
mRtmClient.unsubscribe(channelName, new ResultCallback<>() {
@Override
public void onSuccess(Void responseInfo) {
writeToMessageHistory("Successfully unsubscribed from the channel!");
}
@Override
public void onFailure(ErrorInfo errorInfo) {
writeToMessageHistory("Failed to unsubscribe from the channel: " + errorInfo);
}
});
}
```
```kotlin
private fun unsubscribe(channelName: String) {
mRtmClient ?: run {
showToast("RTM client is null")
return
}
mRtmClient!!.unsubscribe(channelName, object : ResultCallback {
override fun onSuccess(responseInfo: Void?) {
writeToMessageHistory("Successfully unsubscribed from the channel!")
}
override fun onFailure(errorInfo: ErrorInfo) {
writeToMessageHistory("Failed to unsubscribe from the channel: $errorInfo")
}
})
}
```
For more information about subscribing and sending messages, see [Message channels](/en/realtime-media/rtm/build/work-with-channels/message-channel) and [Stream channels](/en/realtime-media/rtm/build/work-with-channels/stream-channel).
### Log out of Signaling
When a user no longer needs to use Signaling, call `logout`. Logging out means closing the connection between the client and Signaling. The user is automatically logged out or unsubscribed from all message and stream channels. Other users in the channel receive an `onPresenceEvent` notification of the user leaving the channel.
Java
Kotlin
```java
private void logout() {
if (mRtmClient == null) {
showToast("RTM client is null");
return;
}
mRtmClient.logout(new ResultCallback<>() {
@Override
public void onSuccess(Void responseInfo) {
writeToMessageHistory("Successfully logged out.");
}
@Override
public void onFailure(ErrorInfo errorInfo) {
writeToMessageHistory("Failed to log out: " + errorInfo);
}
});
// Release resources
mRtmClient.release();
}
```
```kotlin
private fun logout() {
mRtmClient?.logout(object : ResultCallback {
override fun onSuccess(responseInfo: Void?) {
writeToMessageHistory("Successfully logged out.")
}
override fun onFailure(errorInfo: ErrorInfo) {
writeToMessageHistory("Failed to log out: $errorInfo")
}
}) ?: showToast("RTM client is null")
// Release resources
mRtmClient.release()
}
```
## Test Signaling
Take the following steps to test the sample code:
1. [Generate a temporary token](/en/introduction/account#generate-temporary-tokens) for your project.
2. In `strings.xml`, replace the values for `app_id` and `token` with your app ID and generated token.
3. Enable developer options on your Android test device. Turn on USB debugging, connect the Android device to your development machine through a USB cable, and check that your device appears in the Android device options.
4. In Android Studio, click **Sync Project with Gradle Files** to resolve project dependencies and update the configuration.
5. After synchronization is successful, click ▶️. Android Studio starts compilation. After a few moments, the app is installed and launched on your Android device.
6. Use the device as the receiving end and perform the following operations:
1. Enter your **User ID** and click **Login**.
2. Enter the **Channel name** and click **Subscribe** .
7. On a second Android device, repeat the previous steps to install and launch the app. Use this device as the sending end.
1. Enter a different **User ID** and click **Login**.
2. Enter the same **Channel name**.
3. Type a message and click **Publish message**.
8. Swap the sending and receiving device roles and repeat the previous steps.
Congratulations! You have successfully integrated Signaling into your project.
## Reference
This section contains content that completes the information on this page, or points you to documentation that explains other aspects to this product.
### Token authentication
In this guide you retrieve a temporary token from Agora Console. To understand how to create an authentication server for development purposes, see [Secure authentication with tokens](./build/connect-and-authenticate/authentication-workflow).
### Sample projects
Agora provides the following open source sample projects on GitHub for your reference.
**Java**
* [Quickstart](https://github.com/AgoraIO/RTM2/tree/main/Agora-RTM2-QuickStart-Android-Java)
* [Tutorial](https://github.com/AgoraIO/RTM2/tree/main/Agora-RTM2-Tutorial-Android-Java)
**Kotlin**
* [Quickstart](https://github.com/AgoraIO/RTM2/tree/main/Agora-RTM2-QuickStart-Android-Kotlin)
* [Tutorial](https://github.com/AgoraIO/RTM2/tree/main/Agora-RTM2-Tutorial-Android-Kotlin)
Download the projects or view the source code for more detailed examples.
### API reference
* [API reference](/en/api-reference/api-ref/signaling)
* [Event listeners](./build/send-and-receive-messages/add-event-listener)
## Platform-specific versions
- [Android](/en/realtime-media/rtm/quickstart/android.md)
- [iOS](/en/realtime-media/rtm/quickstart/ios.md)
- [Web](/en/realtime-media/rtm/quickstart/web.md)
- [Flutter](/en/realtime-media/rtm/quickstart/flutter.md)
- [Linux Java](/en/realtime-media/rtm/quickstart/linux-java.md)
- [Linux C++](/en/realtime-media/rtm/quickstart/linux-cpp.md)
- [Unity](/en/realtime-media/rtm/quickstart/unity.md)
# Security (/en/realtime-media/rtm/security)
## Information security policy
This section provides information security policy for Agora services.
Agora services provide built-in encryption and customized encryption. You can use either of them to implement encryption. The following diagram describes the encrypted data transmission process:

#### Purpose
Agora is committed to safeguarding the confidentiality, integrity, and availability of all users' physical and electronic information assets.
* Confidentiality against unauthorized access and eavesdropping
* Integrity against tampering and forgery
* Availability of data transmission through the Agora SDRTN®
#### Scope
This article describes how Agora protects customer data with security controls.
### Data classification
All customer data, in all formats or media types, is classified according to the following categories and protected accordingly.
| Category | Description |
| --------------------- | --------------------------------------------------------------------------------------------------------------------------------------------------------------------------------------------------------------------------------------------------------------------------------------------------------------------------------------------------------------------------------------------- |
| Customer Account Data | Information related to the customers' Agora accounts, including customer ID, customer IP, network type, operating system, email address, telephone, product interest, programing platform, UTM information, identity, company name, company URL, billing information, trade information, purchased package information, project status, ticket, member information and console access record. |
| End User Data | Information collected by customers related to end users' personal devices and network, including microphone and camera information, CPU status, memory status, battery status, system version, phone model, phone signal level, received signal strength indicator (RSSI), network type, user attributes and channel attributes. |
| Call Content | Audio and video data of the user during a call. |
| Log | Media server logs generated by the Agora servers when accessing the Agora SDRTN®. Media server logs do not contain text messages or personal information. |
### Data security
The communication between the user and the Agora server is protected by transmission protocols, such as the Agora private transmission protocol, Transport Layer Security (TLS) and Web Socket Secure (WSS). You can also use Advanced Encryption Standard (AES) or a customized encryption algorithm for the encryption of audio and video data.
During data transmission, the Agora SDRTN® does not transmit any encryption key information. Call content information can only be decrypted on the terminal device (such as the client app and the customer's on-premise recording server) through the client authorization key.
### Data availability
* Large and distributed data centers: Agora has multiple data centers providing services globally, and any attack on one data center cannot affect others.
* Rapid recovery: When a data center is subjected to malicious attacks that are difficult to prevent, such as a distributed denial-of-service (DDoS) attack, Agora will automatically isolate the data center and avoid affecting users' services.
* DDoS attack prevention: Agora has deployed anti-DDoS firewalls in each core cloud data center. Agora has more than two hundred distributed data centers around the world, which guarantees sufficient capabilities and resources to control the risk of DDoS attacks.
### Data storage
Agora provides customers with the Agora On-Premise Recording SDK and Agora Cloud Recording, enabling customers to record part or all of the call contents. When using the recording services, all recorded video or audio files are stored on the storage server provided by the customer.
### Access authorization
End users can access the Agora SDRTN® using a dynamic key, see [Secure authentication with tokens](/en/realtime-media/rtc/build/authenticate-users/authentication-workflow).
### Electronic access controls
Agora strictly controls the data access on all internal systems. All users have independent internal accounts and authorization systems, and must pass two-step verification. All access records are recorded.
All servers involving user data are strictly audited and protected. Agora employees will only access the production server when necessary, and only by obtaining temporary authorization. Operation records are kept for the whole process.
### Physical access controls
All operating servers are hosted in computer rooms that meet ISO 27001 or above information security management certification standards, and all computer rooms protect information security in accordance with the escrow agreement or the Data Protection Association (DPA). Both third-party hosting providers and Agora employees must be approved before they can access servers and equipment.
### Roles and responsibilities
Agora sets the responsibilities for its own staff and customers. See the following sections for more information.
### Roles and responsibilities within Agora
Security roles and responsibilities within Agora are categorized as follows:
| Role | Responsibilities |
| ---------------------------------- | -------------------------------------------------------------------------------------------------------------------------------------------------------------------------------------------------------------------------------------------------------------------------------------------------------------------------------- |
| Information Security Sub-Committee | The Information Security Sub-committee (ISSC) is responsible for the development and implementation of policies and procedures. The ISSC monitors company adherence, and conducts regular technical and non-technical evaluations of Agora security policies. The ISSC also designates which employees are authorized employees. |
| Authorized Employee | An authorized employee has access to the production machines required for the support and maintenance of the Agora service as determined by the ISSC. |
| All Other Staffs | All other staff are required to maintain confidentiality as required by their terms of employment and are required to immediately report of any security breach. |
### Shared responsibilities
When evaluating the Agora SDRTN®, it is important for customers to understand and distinguish the following security measures:
* The security measures that Agora implements and operates.
* The security measures that customers implement and operate to ensure the security of call content information and application when using the Agora SDRTN® services.
Customers retain control of the security measures they choose to protect their personal information, platform, applications, systems, and networks. Agora customers should be responsible for all information they collect from users and themselves, such as application logins, identities, passwords, payment information, names, and addresses.
Agora recommends adding obvious prompts before accessing the users' personal information. For example, add an Enable/Disable button with which the user can agree or disagree to share personal information.
### Security training
Agora conducts information protection, security and compliance training for all new employees. Agora also ensures that all employees receive information confidentiality training at least once a year. All authorized employees (employees who have access to the production machines) will receive additional training.
### Non-compliance
Employees must comply with confidentiality agreements and internal security systems. If a non-compliant situation occurs, Agora will take the corresponding measures depending on the severity of the situation, including but not limited to having conversations with the at-fault employees, strengthening training and education, dissolving labor agreements, and pursuing other legal liabilities.
### Reporting potential security risks
Please report any potential risks of Agora services that you may notice to [security@agora.io](mailto\:security@agora.io). Please use our PGP public key (Key ID: 2F4553BE) to encrypt your report, as potential security risks are usually sensitive. We assure our security experts will handle the issue immediately once they receive your report.
To facilitate troubleshooting and verification, please include the following information in your email:
* Your contact information.
* The version of the impacted SDK or solution.
* Description of the potential risks.
* Miscellaneous technical details, such as your system configurations, methods or steps for reproducing the issue.
To better protect our system and customers, Agora also invites security researchers to report any bug or vulnerabilities they discover to us. Click [Bug Bounty](#agora-bug-bounty-program) to know more.
### Security FAQ
To ensure the security of the transmitted data, Agora services provide the encryption for audio and video data. Customers can use AES-128/AES-256 or other algorithms preset by Agora, or use customized encryption algorithms to achieve encryption, see [Channel Encryption](/en/realtime-media/rtc/build/secure-and-protect-channels/media-stream-encryption). The encryption key is completely generated and distributed by the customer. Agora recommends that customers use separate keys for each channel to achieve the highest level of data security.
For network protocol encryption, Agora SDKs use AES\_128 mode to encrypt network payload.
For channel encryption, Agora SDKs support AES\_128/AES\_256 mode to encrypt audio and video. For those who have higher requirements for content security, Agora recommends using our customized encryption. Note that the On-Premise Recording SDK and Cloud Recording does not support customized encryption. For details, please send email to [support@agora.io](mailto\:support@agora.io).
Yes.
Agora regularly scans core network nodes to check and clear possible security holes. Agora also configures anti-DDoS firewalls in each core cloud data center to protect them from attacks. Agora has more than two hundred distributed data centers around the world, which guarantees sufficient capabilities and resources to control the risk of DDoS attacks.
When using Agora services, the audio and video data are transmitted through the Agora servers. Agora servers cache the audio and video data for 10 seconds during the transmission and release all audio and video data immediately after the call.
## Whitepaper
People engage longer when they see, hear, and interact with each other. The future of meaningful human connections is made possible now with Agora’s Real-Time Engagement Platform. People rely on Agora’s Real-Time Engagement Platform to exchange millions of calls and messages, with vivid voice and video embedded in any application, on any device, anywhere.
Agora, Inc. is proud to offer the professional Real-Time Engagement Platform as a Service (RTE PaaS) with Compliance, Safety, Security, and Trust. Our commitment to compliance, data, and information security and privacy protection is a part of the core values of our company. From our Software-Defined Real-Time Network (SDRTN®) architecture to our day-to-day business operations, Agora continually invests in innovations and business processes that build trust with our customers, investors, and developer community. Agora works to high standards to follow the best security practices and comply with strict privacy regulations and standards as we respect the privacy of all our customers.
The information contained in this document is intended to provide transparency in relation to Agora’s security stance and processes. If you think you may have found a security vulnerability within any of Agora’s services, please contact our security team directly at [security@agora.io](mailto\:security@agora.io).
Agora thrives to incorporate security into all our products and services and integrates the best security practices into everyday business operations. To meet these primary goals and improve the overall information security posture in an efficient and effective manner, Agora has built its security framework against the ISO27001 Information Security Management Standard.
As threats to information security continue to evolve, having dedicated security resources is essential. Agora’s Executive Security Committee meets regularly to address security concerns and coordinate company-wide security initiatives. The Agora Strategic Security Program Roadmap has been developed and approved by the committee to guide the implementation of our security programs. Our dedicated security team, led by the Chief Information Security Officer, has the responsibility for building and enforcing information security programs.
Agora is always looking to better protect its systems and customers. Therefore, we continuously monitor and improve our Information Security Programs by implementing the following:
* Agora conducts an internal audit of its information security management system at least once a year to ensure effectiveness;
* Agora follows industry best practice software development lifecycle management processes and conducts internal security reviews and testing before deployment into production systems;
* Agora engages third-party security experts to carry out regular penetration tests;
* Through our Bug Bounty Program, Agora works with security researchers to keep our customers data more secure by identifying and reporting vulnerabilities in our products and services.
Agora adheres to regional and international information security standards as well as industry requirements and is committed to using international best practices. We engage with independent third parties to verify the compliance of Agora. Certified by various reputable agencies across the globe, we are recognized by industry and security organizations for excellence.
**ISO/IEC 27001 Information Security Management Standard**
Agora is certified to ISO/IEC 27001:2022 by DNV GL, demonstrating our information security maturity level. Our security team implements the Information Security Management System in partnership with Ernst & Young. Security is a top priority at Agora, and this achievement demonstrates our commitment and continuous efforts to improve the efficiency of information security controls.
Download the certificate: [ISO/IEC 27001:2022](/files/Agora_ISO_27001.pdf)
**ISO/IEC 27018 Information Technology – Security techniques – Code of practice for protection of personally identifiable information (PII) in publics clouds acting as PII processors**
Agora is certified to ISO/IEC 27018 by DNV GL. This standard is a Code of Practice for protecting personal data in the cloud environment. Agora continuously strives to protect the sensitive data with our customers.
Download the certificate: [ISO/IEC 27018:2019](/files/Agora_ISO_27018.pdf)
**SOC 2 Report**
Agora is confident with our security practices and we continue to engage independent third parties to perform a strict SOC 2 audit on our internal processes, security controls and the design of Agora products. We meet all audit requirements set by the American Institute of Certified Public Accounts (AICPA) standards for security, availability and confidently and achieves the SOC 2 report.
**PCI DSS**
Agora prioritizes the security and privacy of its customers. Since we are neither a merchant nor a service provider as defined by the PCI Security Standards Council, we do not need to conduct an annual PCI assessment. However, Agora ensures that all transactions and customer data are handled with the highest level of security, in alignment with industry best practices. Should you have any questions or require further information regarding our security measures, please feel free to contact us at [security@agora.io](mailto\:security@agora.io).
**General Data Protection Regulation - GDPR**
Agora is aligned with GDPR and we are committed to providing GDPR compliant products and services to our customers in the EU region or with our customers who conduct business within the EU.
**Health Insurance Portability and Accountability Act -HIPAA**
Agora is aware of the sensitivity of transmitting and processing health information and we have invested in both the creation and ongoing maintenance of a HIPAA compliance program.
**California Consumer Privacy Act - CCPA**
The CCPA is the first comprehensive privacy law in the United States that aims to provide a variety of privacy rights to California consumers. As a service provider, Agora is aligned with CCPA though the implementation of our security programs.
**Children’s Online Privacy Protection Act - COPPA**
The COPPA regulates the privacy protection requirements for children under the age of thirteen. Agora has engaged privacy experts in meeting the requirements of COPPA.
Agora strongly believes in the principles of Secure by Design and Defense in Depth. Therefore, Agora adopts industry recognized security standards and best security practice at every layer - from infrastructure to application, in order to perfect our products and environment, and to secure the organization and our customers.
Securing access to your environment starts with identity and access controls. Agora provides you with a solution to ensure that only authorized people can access your services and resources. The Agora Console is a role-based access control tool that you utilize to restrict access based on "the-need-to-know" principle. The console is an interactive interface where you can easily create accounts, revoke members and assign roles and permissions. This tool can assist you to enforce your security policies.
Furthermore, Agora provides static key, dynamic key, and hybrid authentication methods to secure the communication channels in different use-cases.
At Agora, you choose how your content is secured. We offer you various options for your content in transit and provide you with full control of your own encryption keys. There features include:
* Agora Software Development Kits (SDKs) provide built-in encryption algorithm including AES-128 and AES-256 to protect all data transmitted between the end users and Agora services.
* We also provide you with the choice to use your own encryption algorithm to protect users’ media stream during real-time engagement. The encryption key is completely under your control.
* The communication between the end users and Agora network (that is, Agora SDRTN®) is protected by encrypted transmission protocols such as the Agora Private Transmission Protocol, Transport Layer Security (TLS) and WebSocket Secure (WSS).
Agora offers our customers the ability to record the real-time communication with Agora On-Premise Recording SDK and Agora Cloud Recording SDK. The recording files can be stored on the users’ local device or can be stored in a designated cloud storage service chosen by our customers. The local recordings or cloud recordings can be further encrypted through any encryption form of your choosing.
Agora does not store any streaming data or user data except for caching for transmission purpose. The cached streaming data of users will be immediately released after the service.
Data centers hosting Agora services are maintained by certified and industry-leading cloud service providers, offering state-of-the-art physical protection for the servers and infrastructure that comprise the Agora environment.
The production environment, where all our customers data and functional servers reside, are completely separated from our internal organization network including the development and testing environments. This guarantees that all our customers data will stay in the production environment and never be used for development or testing purposes.
Access to the Agora production and non-production network is minimized to the greatest extent. Agora also implements network segmentation in production network based on various factors such as the type of business, the criticality of data, and the potential risks, to secure the sensitive customer data.
**DDoS prevention**
Agora regularly scans our core network nodes in the production environment to check and clear potential security vulnerabilities Anti-DDoS firewalls are configured in each core cloud data center for protection. With more than two hundred distributed data centers around the world, Agora can guarantee you with sufficient capabilities and resources to minimize the impact of DDoS attacks and ensure high-availability of real-time video and audio anywhere around the globe.
**Monitoring, logging and analysis**
Agora continuously monitors and analyzes log events to gain a comprehensive view of the security state of our production environment. The logging covers both successful and unsuccessful security events, with an emphasis on the event data of critical infrastructure.
To provide customers with better visibility and security insights, Agora Analytics is made available to consumers as a tracking and analysis tool. This tool enables customers to efficiently locate quality issues and identify root causes for a better end user experience.
The tool contains the Real-Time Alarm function, which enables you to monitor call quality and informs you in real time when the user’s communication experience is below expectation. With Real-Time Alarm, you can undertake the following actions in real time:
* Monitor users who are having poor communication experience.
* Identify abnormalities, analyze quality factor, and locate the source of an abnormal issue.
**Network geo-fencing**
Agora has embedded Network Geo-Fencing in Real-Time Voice, Video and Messaging SDKs to ensure your data is secured from the rising concerns in network security and privacy breaches. Agora Network Geo-Fencing establishes a virtual boundary within Agora SDRTN® and you have the choice to restricted your network traffic in one or more designated region(s).
**Network redundancy**
Agora has more than 200 data centers POPs (Points of Presence) across the world, covering the United States, Europe, China, Japan, India and Asia Pacific and other areas. The POPs in the SD-TRN network adopt the full mesh topology with superior routing capabilities. This is to ensure that the network services are not interrupted due to a single point of failure. The POPs build fault tolerance and disaster recovery capability of Agora service across the regions.
POPs also measure the performance of every possible path through the global network to find the “optimized” paths to ensure high data packet delivery success rate within the smallest time window.
Agora provides expert guidance to our customers on how to leverage our security features and embed best practices into every layer of your application.
Agora is continuously monitoring, auditing, and improving the design and operating effectiveness of our security controls. These activities are regularly performed by both third-party credentialed assessors and Agora’s internal risk and compliance team. Audit results are shared with senior management and all findings are tracked to resolution in a timely manner.
In addition to third-party security compliance audits, Agora engages Trustwave SpiderLabs to conduct network penetration tests at least annually. Results of the penetration testing are shared with senior management and are triaged, prioritized and remediated in time. Agora customers may receive executive summaries of these activities by requesting them from their account managers.
Data security and user privacy are the top priorities of Agora. Agora is committed to building a professional RTE PaaS with Compliance, Safety, Security, and Trust. It is a critical responsibility for Agora to help ensure the confidentiality, integrity, and availability of systems and data, and Agora continues to work hard to maintain that trust. If you have any questions or concerns, please contact our security team or account managers.
## ISO certifications
Security and compliance are basic requirements for real-time interaction. Agora complies with the compliance requirements of different countries and industries to create safe and reliable cloud services.
The ISO certification of Agora has passed the supervision and accreditation of three different certification organizations: IFA CNAS (China National Accreditation Service for Conformity Assessment), UKAS (United Kingdom Accreditation Service), and DNV (Det Norske Veritas). Agora builds cloud service technology worldwide in accordance with internationally recognized standards to ensure the information security of global customers.
#### ISO/IEC 27001:2022
ISO/IEC 27001:2022 is the most authoritative, widely accepted, and applied system certification standard in the field of information security. This system covers information security management during the global operation and maintenance of Agora's cloud platform for real-time engagement.
Download the certificate: [ISO/IEC 27001:2022](/files/Agora_ISO_27001.pdf)
#### ISO/IEC 27017:2015
ISO/IEC 27017:2015 is a supplementary standard to ISO 27001, which provides information security implementation specifications for cloud service providers.
Download the certificate: [ISO/IEC 27017:2015](/files/Agora_ISO_27017.pdf)
#### ISO/IEC 27018:2019
ISO/IEC 27018:2019 is a supplementary standard to ISO 27001, which provides implementation specifications for the protection of personal information for cloud service providers.
Download the certificate: [ISO/IEC 27018:2019](/files/Agora_ISO_27018.pdf)
#### ISO/IEC 27701:2019
ISO/IEC 27701:2019 is a privacy extension to ISO/IEC 27001 information security management and ISO/IEC 27002 security controls. It is an international management system standard that provides guidance on the protection of personal privacy, including how organizations should manage personal information.
Download the certificate: [ISO/IEC 27701:2019](/files/Agora_ISO_27701.pdf)
#### ISO/IEC 42001:2023
ISO/IEC 42001:2023 is the first international management system standard for artificial intelligence. It provides requirements for establishing, implementing, maintaining, and continually improving an AI management system within organizations that develop, provide, or use AI-based products or services.
Agora's certification covers the full life cycle of the Agora Conversational AI Platform and AI interactive systems, spanning the organizational roles of AI producer, provider, and user, in accordance with Statement of Applicability version 1.0.
Download the certificate: [ISO/IEC 42001:2023](/files/Agora_ISO_42001.pdf)
## Security best practices
Security and compliance are essential for real-time engagements through technology. In order to provide safe and reliable cloud services, Agora adheres to the compliance requirements of different countries, regions, and industries, in addition to being certified to ISO/IEC 27001. For more information, see [ISO certifications](#iso-certifications).
Agora products and services are designed and built with multiple protection measures against attacks commonly seen in the real-time engagement industry. This article describes some of the security best practices that Agora has adopted, as well as security tools it provides for developers, as follows:
| Protection measures | Applied by default | Recommended use-cases |
| -------------------------- | ------------------ | ---------------------------------------------------------------------------------------------------------- |
| Channel seperation | Yes | All real-time use-cases. |
| Token-based authentication | No | All real-time apps in a production environment should use token-based end-user authentication. |
| Encryption | No | Real-time use-cases that require confidentiality. |
| Network geofencing | No | Real-time use-cases where customers wish to restrict access to Agora servers to within a specified region. |
### Level 1 - Channels separation
The channels architect is the first built-in layer of protection. Agora creates an independent and isolated channel for each audio, video, or messaging data transmission. All channels are logically separated and only authenticated users from the same App ID can join the same channel.
### Level 2 - Token-based authentication
The second layer of protection is on the authentication layer. This is done via using the dynamic token-based authentication. The token is a short-lived access key, which is generated by the app backend and allows users to access the Agora platform after the user is properly validated by the app.
A token is generated with important information such as App ID, user ID (`uid`), channel name, and expiration date.

The app developer can enable token-based authentication (App Certificate) on [Agora Console](https://console.agora.io/). When enabled, all user’s request to join a channel must be done with a valid token.

Please note for best security practices, you need to set the token expiration time (24 hours by default). A token has three expiration timestamps:
* Token expiration: How long a token is valid for, that is, how long a user can stay in a channel.
* Privilege expiration:
* Join a channel: How long a token can be used to join a channel.
* Streaming privilege: Whether a user can send audio, video or messaging to the channel, or join as an audience member. This privilege is not enabled by default.
### Level 3 - Encryption
The next layer of security in the Agora platform is encrytion. Agora supports transmission encryption and data encryption.
To guarantee data confidentiality during transmission, Agora uses the AUT (Agora Universal Transport) encryption protocol, Agora's proprietary secured transport layer.
Data encryption encrypts all the audio and video streams with a symmetric key and encryption controlled by the app developer. In this level the app provides a symmetric encryption key to the local SDK libraries.
The SDK encrypts all the captured media using the key and the configured encryptions using AES 128/256 (based on configuration). The data is sent encrypted to Agora SDRTN® and from there to the other endpoints in the channel. The receiving endpoint will use the key provided by the app layer to decrypt the media streams and send to the renders. With this method, only the application knows the keys. In the Native SDK (iOS, Android, Mac, Windows) the keys are not sent to Agora servers.

When using Other Agora services like Web SDK, Cloud Recording, Content Moderation, Transcoding etc, encryption is done a bit differently and it is not end-to-end. In this case media is still encrypted but the Agora service needs to be aware of the key to be able to connect to the channel and provide service. For example, in Web SDK the User/Browser protection is done via the web-server protection (HTTPS) as well as the WebRTC standard, security practice (encryption, key management etc). More information on WebRTC security can be found [here](https://webrtc-security.github.io/).
The media encryption on Web SDK is done via WebRTC standard but the interoperability to Agora is done using Agora’s encryption engine and the encryption key is passed securely to the Web SDK servers via the APIs. The key is required as the Agora edge server will convert from WebRTC protocols to Agora’s protocol and allow interoperability with Native SDK. Similar situation happens with Cloud Recording, Content Moderation etc., where the Restful APIs are used to securely pass the key for the channel.

### Level 4 - Network geofencing
To conform to the laws and regulations of different countries and regions, the Agora RTC SDK and the Signaling SDK support network geofencing, which limits the transmission of data to within a specified region.
These SDKs support network geofencing in the following regions: global (default), North America, Europe, Asia (excluding Mainland China), Japan, India, and Mainland China. Once a customer specifies a region using geofencing, no audio, video, or message can access Agora servers outside that region.
### Security best practice checklist
Use this list to quickly check what measures you have or have not taken to best protect the security of you app and users:
1. [Enable token-based authentication](/en/introduction/account) on [Agora Console](https://console.agora.io/).
2. Disable *No certificate* in your project management page. Once it is done your app authenticates users with tokens only.
3. [Deploy a token server](/en/realtime-media/rtc/build/authenticate-users/deploy-token-server) in your backend services.
4. Protect the token server and only allow the app backend server to connect to the token server.
5. Set the token expiration date to a reasonable time. See [Deploy a token server](/en/realtime-media/rtc/build/authenticate-users/deploy-token-server).
6. If needed, contact [support@agora.io](mailto\:support@agora.io) to enable token privilege and set token per role.
7. For additional security if needed work with the Agora SA team to customize the token server and modify the token join privilege to a low time, like 5 min. This is more advance and recommended after app development is completed.
8. Channel encryption key management – generate a random key (secret) per channel at the time of creating the channel, do not reuse encryption keys.
9. Pass the channel encryption key (secret) securely outside of Agora engine to authenticated endpoints that are allowed to join the channel.
10. For additional security, you can also do the following:
1. Set the “Agora channel name” to a one-time random string managed by your app.
2. Set the Agora `uid` to a one-time numeric id that is mapped to the user on the app level. Do not use the users' real ID on your app as the Agora `uid`.
## Agora bug bounty program
Agora is always looking to better protect our system and customers. Therefore, we invite security researchers to report any bugs or vulnerabilities they discover to us.
Once we receive notice of a bug or vulnerability, Agora customer service and security teams will respond quickly to address the issue.
In addition to our gratitude, those who report a vulnerability may be eligible for a monetary “bounty” based on the risk associated with the vulnerability and the importance of the affected system.
### System importance classifications
The following table shows system importance classifications (in descending order), along with some example Agora assets:
| Classification | Asset Examples |
| -------------- | ------------------------------------------------------------------------------------------------------------------------------------------------------------- |
| Core system | Agora SDRTN®, the mail system, and official websites such as [www.agora.io](http://www.agora.io/), [sso2.agora.io](http://sso2.agora.io/), and `api.agora.io` |
| General system | Forums and the Developer Portal ([docs.agora.io](https://docs.agora.io/)) |
| Fringe system | Test sites |
### Vulnerability severity classifications
The following list outlines detailed examples of how various vulnerabilities would be classified:
**Critical**
1. Unauthorized system privileges
Examples include command injection (execution), code injection (execution), web shell execution, SQL injection, and buffer overflow that gains system privileges on the core system.
2. Direct denial of service
Examples include actions that make service unavailable, reduce service quality, and so on.
3. Sensitive information leakage
Examples include SQL injection of the core database (identity, order), unauthorized disclosure of sensitive information relating to a user, product order, or payment method, and so on.
4. Serious logic design flaws and process defects
Examples include the ability to send batches of fraudulent messages, account consumption through a business interface, and large-scale modification of account passwords, and so on.
**High**
1. Sensitive information leakage
Examples include unauthorized disclosure of sensitive information relating to a source code, hardcoded passwords, and so on.
2. Unauthorized access to sensitive information
Examples include bypassing authentication or backend password, leading to unauthorized access to sensitive intranet information.
3. Unauthorized sensitive operations
Examples include manipulating important information without authorization, such as orders, major business configurations, and so on.
**Medium**
1. Vulnerabilities that require interaction and affect users
Examples include stored XSS (cross-site scripting).
2. General unauthorized operations
Examples include incorrect direct object references, unauthorized access to orders, unauthorized access to user information, and so on.
3. General information leakage
Examples include client-side stored plaintext passwords, system path traversal, and so on.
4. General logic design flaws and process defects
**Low**
1. Local denial of service vulnerabilities, CSRF (cross-site request forgery), reflected-XSS, and so on.
2. Minor information leakage, such as path information, SVN information, exception information, the local SQL injection of a client-side application (limited to database name, field name, log print), and so on.
3. Vulnerabilities that are difficult to exploit but still have security implications, such as plaintext transmission of passwords.
**Info**
1. Exposure of software banners, internal IP addresses, some public email addresses or phone numbers, and so on.
2. Using outdated versions of a system, supporting outdated version of an encryption protocol, such as SSL (secure-sockets layer) or tls (transport-layer security) 1.0, supporting low-strength encryption algorithms, and so on.
### Bug Bounties
Please report any potential risks of Agora services that you may notice to [security@agora.io](mailto\:security@agora.io) . Any bounties awarded will conform roughly to the following ranges (based on the severity and system location of the bug or vulnerability, payable in $US):
* Critical: $300 to $5000
* High: $200 to $2000
* Medium: $150
* Low: $50
* Info: $0
Note: Agora reserves the sole right to determine any reward amount given.
# SDK extension plugins (/en/realtime-media/sdk-extensions)
## What this capability is
SDK extension plugins sit on top of the core real-time SDK stack and help teams extend functionality or add richer experience layers.
## Common scenarios
* customized audio-video effects
* extension-based capability integration
* fast access to third-party enhancement modules
## What to read first
If the main real-time path is already chosen and the next need is experience enhancement, extension plugins are the right place to continue.
# Speech-to-Text overview (/en/realtime-media/speech-to-text)
Agora's Real-Time Speech to Text transcribes live audio streams into text, enabling closed captions, live transcription, and AI-powered workflows. Translate transcribed text into multiple languages in real-time, or pass it directly to large language models to bridge real-time communication with intelligent applications.
## Quick links
## Key features
Integrated with Agora’s voice and video service, live transcription and captions improve accessibility for your audience. Perfect for meetings, live streaming, lectures, interviews, live shopping, and more.
Break down language barriers with live speech-to-text translation to multiple languages during real-time communication or live streaming. The high accuracy translation text, delivered with ultra low latency, can be integrated with LLMs for enhanced capabilities.
Cloud-based service converts voice to text for active or specific hosts and then distributes the text to all participants in the channel for further processing. The service does not depend on the client's device performance and network conditions.
Label each transcribed text with the speaker's UID. Separate transcription of each host ensures accuracy even when multiple hosts are talking simultaneously.
Upload the transcriptions as .vtt files to cloud storage, then play back audio or video recordings with closed captions (CC). The timestamps in the .vtt file ensure that the text is perfectly synchronized with the audio or video, so that it appears exactly where it was generated.
Real-time transcription supports all major languages and dialects. Real-time translation supports translation into 40+ target languages.
# Cloud Transcoding overview (/en/realtime-media/transcoding)
Designed specifically for real-time interactive live broadcast scenarios, Agora's Cloud Transcoding service enables you to obtain audio and video source streams from hosts in RTC channels on the server side and perform processing such as transcoding, audio mixing, and video compositing. The processed streams are then published to Agora RTC channels for audience subscription.
The service supports subscriptions to audio and video streams with different picture quality levels, reducing downstream bandwidth pressure and client device performance consumption.
## Start building
## Product Features
Reduce terminal performance consumption by processing streams server-side before publishing to the RTC channel. This is especially beneficial for viewer devices with poor performance that cannot simultaneously process encoding, decoding, and rendering of multiple high-definition audio and video streams.
Improve video fluency and viewing experience under poor downlink network conditions. The service mixes audio, combines images, and transcodes them into low-bitrate streams, making it ideal for viewers subscribing to multiple host video streams or single HD streams.
Supports standard H.264 and VP8 encoding to enhance user experience across different platforms. The service converts host source streams from Native platforms to VP8 encoding for optimal Web viewer experience.
Automatically subscribe to specified user streams in RTC channels based on your UID configuration. The service performs transcoding, audio mixing, and video compositing according to your settings before publishing processed streams back to the channel.
Eliminate the need for viewers to subscribe to multiple host streams individually, reducing downstream bandwidth pressure. Scenario-based solutions lower the development threshold by requiring fewer API calls and reducing cognitive burden.
# Agora MCP (/en/realtime-media/transcoding/mcp)
The Agora MCP server gives your AI assistant direct access to Agora documentation, so it can look up APIs, SDK methods, and platform details in real time.
The server is available at:
```text
https://mcp.agora.io
```
## Installation
Codex
Claude Code
Gemini CLI
```bash
codex mcp add --url https://mcp.agora.io agora-docs
```
```bash
claude mcp add --transport http agora-docs https://mcp.agora.io
```
```bash
gemini mcp add --transport http agora-docs https://mcp.agora.io
```
# REST quickstart (/en/realtime-media/transcoding/rest-quickstart)
This page explains how to call Agora Cloud Transcoding RESTful APIs to implement cloud transcoding in your app.
## Prerequisites
Before you start, ensure that you have:
* An [Agora account and project](/en/introduction/account)
* Cloud Transcoding [enabled](sdk-quickstart.md#enable-cloud-transcoding) for your project
* Your [App ID](/en/introduction/account#get-the-app-id-and-app-certificate) from Agora Console
* Your [Customer ID and Customer Secret](/en/api-reference/api-ref/cloud-transcoding/authentication) for REST API authentication
* [RTC tokens](/en/introduction/account#generate-temporary-tokens) for your channels (valid for up to 24 hours)
## Call a Cloud Transcoding REST API
This section walks you through creating a simple Cloud Transcoding task using the [Create RESTful API](/en/api-reference/cloud-transcoding/restful).
### Configure the request URL
Each RESTful API request follows a specific format. For example, the URL to create a transcoding task is:
```html
https://api.sd-rtn.com/v1/projects/:appId/rtsc/cloud-transcoder/tasks?builderToken=
```
**URL structure:**
* `https`: Secure protocol.
* `api.sd-rtn.com`: Agora’s server domain.
* `v1/projects/:appId/rtsc/cloud-transcoder/tasks`: Resource path.
* `v1`: API version.
* `:appId`: Your Agora app ID.
* `rtsc/cloud-transcoder`: The product or service name.
* `tasks`: The endpoint you’re calling.
* `?builderToken=ACTUAL_TOKEN_VALUE`: Query parameter and its value
Obtain the `builderToken` using the [Acquire API](/en/api-reference/cloud-transcoding/restful) before creating a task.
Refer to the specific API documentation for the correct HTTP method (`GET`, `POST`, `PUT`, `PATCH`, `DELETE`) and resource path.
### Send the request
A typical API request includes:
* A URL
* Request headers
* (Optional) A request body
#### Request headers
| Header | Description |
| --------------- | ------------------------------------------------------------------------------------------------------- |
| `Accept` | Expected response format, e.g., `application/json`. |
| `Authorization` | Required for authentication. See [RESTful Authentication](/en/api-reference/cloud-transcoding/restful). |
| `Content-Type` | Format of the request body, e.g., `application/json`. |
#### Request body
The request body contains the parameters specific to the API, such as input and output configurations.
#### Request example
```bash
curl --location --request POST 'https://api.sd-rtn.com/v1/projects//rtsc/cloud-transcoder/tasks?builderToken=' \
--header 'Accept: application/json' \
--header 'Authorization: Basic '
--header 'Content-Type: application/json' \
--data '{
"services": {
"cloudTranscoder": {
"serviceType": "cloudTranscoderV2",
"config": {
"transcoder": {
"audioInputs": [
{
"rtc": {
"rtcChannel": "test01",
"rtcUid": 123,
"rtcToken": "aab8b8f5a8cd4469a63042fcfafe7***"
}
},
{
"rtc": {
"rtcChannel": "test01",
"rtcUid": 456,
"rtcToken": "aab8b8f5a8cd4469a63042fcfafe7***"
}
}
],
"canvas": {
"width": 1280,
"height": 720,
"color": 255
},
"videoInputs": [
{
"rtc": {
"rtcChannel": "test01",
"rtcUid": 123,
"rtcToken": "aab8b8f5a8cd4469a63042fcfafe7***"
},
"placeholderImageUrl": "https://example.jpg",
"region": {
"x": 0,
"y": 0,
"width": 480,
"height": 360,
"zOrder": 2
}
},
{
"rtc": {
"rtcChannel": "test01",
"rtcUid": 456,
"rtcToken": "aab8b8f5a8cd4469a63042fcfafe7***"
},
"placeholderImageUrl": "https://example.jpg",
"region": {
"x": 0,
"y": 240,
"width": 480,
"height": 360,
"zOrder": 2
}
}
],
"outputs": [
{
"rtc": {
"rtcChannel": "test02",
"rtcUid": 1000,
"rtcToken": "aab8b8f5a8cd4469a63042fcfafe7***"
},
"audioOption": {
"profileType": "AUDIO_PROFILE_MUSIC_STANDARD"
},
"videoOption": {
"fps": 15,
"codec": "H264",
"width": 1280,
"height": 720
}
}
]
}
}
}
}
}'
```
This example mixes audio and combines video from users `123` and `456` in channel `test01`, and outputs the stream to `test02` with user ID `1000`.
### Handling the response
After sending a request, the server responds with:
* HTTP status code
* Response headers
* Response body
#### Response status codes
| Code | Meaning | Action |
| ------- | ------- | ---------------------------------------------------------------------------------- |
| 200 | Success | Proceed as normal. |
| Non-200 | Error | See [HTTP status codes](/en/api-reference/api-ref/cloud-transcoding/status-codes). |
#### Response headers (Optional)
Common response headers include:
* `X-Request-ID`: Unique request identifier for tracking/debugging.
#### Example response
```json
{
"taskId": "609f28f2644f1ae1ceb041b7047e3***",
"createTs": 1661324613,
"status": "STARTED",
"services": {
"cloudTranscoder": {
"serviceType": "cloudTranscoderV2",
"status": "serviceReady"
}
}
}
```
**Key fields:**
* `taskId`: Use this to query task status or stop the transcoding task
* `status`: Current task state
### Troubleshoot
If a request fails:
1. **Check authentication**: Verify your Customer ID and Customer Secret are correct
2. **Validate parameters**: Ensure all required fields are included and properly formatted
3. **Check rate limits**: Ensure you're not exceeding 10 requests per second
4. **Inspect the response**: Use developer tools to examine the full error response
5. **Check status codes**: Refer to [HTTP status codes](/en/api-reference/api-ref/cloud-transcoding/status-codes) for specific error meanings
For persistent issues, contact [technical support](mailto\:support@agora.io) with your `X-Request-ID`.
# SDK Quickstart (/en/realtime-media/transcoding/sdk-quickstart)
This article explains how to use the Agora Go SDK to start cloud transcoding. The Go SDK helps developers integrate Agora's RESTful API more easily. It offers the following features:
* **Simplified communication**: The SDK encapsulates RESTful API requests and responses to simplify communication.
* **Ensured availability**: If DNS resolution fails, network errors occur, or requests time out, the SDK automatically switches to the optimal domain to ensure REST service availability.
* **Easy-to-use API**: The SDK provides a simple and intuitive API that makes it easy to perform common tasks such as creating and destroying cloud transcoding sessions.
* **Additional benefits**: Built with Go, the SDK offers efficiency, concurrency, and scalability.
## Understand the tech
When you use the Go SDK for Cloud Transcoding:
1. Call `Acquire()` to get a builder token for your transcoding task
2. Call `Create()` with your configuration to start transcoding specified streams
3. The service processes and publishes the transcoded streams to your target channels
4. Viewers can subscribe to either original or transcoded streams
The following sections show you how to implement this workflow.
## Prerequisites
Before you start, ensure that you have:
* [Go](https://go.dev/dl/) 1.18 or higher
* An [Agora account and project](/en/introduction/account)
* Your [App ID](/en/introduction/account#get-the-app-id-and-app-certificate) from Agora Console
* Your [Customer ID and Customer Secret](/en/api-reference/api-ref/cloud-transcoding/authentication) for REST API authentication
* [RTC tokens](/en/introduction/account#generate-temporary-tokens) for your channels (valid for up to 24 hours)
* A way to test transcoding input streams:
* Implement the [Video Calling Quickstart](/en/realtime-media/rtc/get-started-sdk), or
* Use the Agora [Web Demo](https://webdemo-global.agora.io/index.html) to simulate audio and video streams
### Enable Cloud Transcoding
You must enable Cloud Transcoding for your project before you can call the RESTful APIs.
You cannot disable Cloud Transcoding for a project after you enable it.
1. Go to [Agora Console](https://console.agora.io), select your project, then select **RTC Services** from the sidebar.
2. Find the **Cloud Transcoding** card, then toggle the switch on.
3. Read the confirmation dialog, then confirm.
Tips
* Select the settings icon next to Cloud Transcoding to view your current usage and quota, or to open Postman and test the Cloud Transcoding APIs.
* If you want viewers to receive multiple bitrates, contact [Agora technical support](mailto\:support@agora.io) to enable the multi-bitrate service.
## Set up your project
Follow these steps to create and configure a new project:
1. Create an empty project folder named `test-transcoder`.
2. Navigate to the `test-transcoder` directory and initialize a Go module:
```bash
go mod init test-transcoder
```
3. Create a `main.go` file in the project directory for implementing your cloud transcoding task.
4. Install the Go SDK:
```bash
# Install the Go SDK
go get -u github.com/AgoraIO-Community/agora-rest-client-go
# Update dependencies
go mod tidy
```
5. Add the required imports to `main.go`:
```go
package main
import (
"context"
"log"
"time"
"github.com/AgoraIO-Community/agora-rest-client-go/agora"
"github.com/AgoraIO-Community/agora-rest-client-go/agora/auth"
"github.com/AgoraIO-Community/agora-rest-client-go/agora/domain"
agoraLogger "github.com/AgoraIO-Community/agora-rest-client-go/agora/log"
"github.com/AgoraIO-Community/agora-rest-client-go/services/cloudtranscoder"
cloudTranscoderAPI "github.com/AgoraIO-Community/agora-rest-client-go/services/cloudtranscoder/api"
)
```
### Implement cloud transcoding
This section introduces the minimal workflow for cloud transcoding. For demonstration purposes, this example only transcodes the host's audio.
### Define variables
In the `main.go`, add the following code to define and configure the key parameters.
```go
// Define key parameters
const (
appId = ""
token = "" // Token for the transcoder in the input channel
username = "" // Your customer ID
password = "" // Your customer secret
inputChannelName = "show" // Channel name for the input stream
inputUId = 0 // User ID for the input stream
inputToken = "" // Token for the input stream user
outputChannelName = "show" // Channel name for the output stream
outputUId = 0 // User ID for the transcoder in the output channel
outputToken = "" // Token for the transcoder in the output channel
instanceId = "quickstart" // Instance ID of the transcoder
)
```
* In this example, the stream from the host of the `show` channel is used as the input stream for the transcoder. To simplify parameter configuration, the transcoder's output stream is also published to the same channel. The input and output streams share the same token.
* For Cloud Transcoding, multiple input streams must come from the same channel, while the output can be one or more streams and may be assigned to any channel.
### Create and initialize the client
In `main.go`, add the following code to create and initialize the client.
```go
config := &agora.Config{
AppID: appId,
Credential: auth.NewBasicAuthCredential(username, password),
// Specify the region where the server is located. Options include US, EU, AP, CN.
// The client automatically switches to use the best domain based on the configured region.
DomainArea: domain.US,
// Specify the log output level. Options include DebugLevel, InfoLevel, WarningLevel, ErrLevel.
// To disable log output, set logger to DiscardLogger.
Logger: agoraLogger.NewDefaultLogger(agoraLogger.DebugLevel),
}
client, err := cloudtranscoder.NewClient(config)
if err != nil {
log.Fatal(err)
}
```
### Get cloud transcoding resources
Before creating a cloud transcoding task, call the `Acquire` method to obtain a builder token `tokenName`. A token can only be used for a single cloud transcoding task.
```go
// Call the Acquire API of the cloud transcoder service client
acquireResp, err := client.Acquire(context.TODO(), &cloudTranscoderAPI.AcquireReqBody{
InstanceId: instanceId,
})
if err != nil {
log.Fatalln(err)
}
if acquireResp.IsSuccess() {
log.Printf("acquire success:%+v\n", acquireResp)
} else {
log.Fatalf("acquire failed:%+v\n", acquireResp)
}
tokenName := acquireResp.SuccessResp.TokenName
if tokenName == "" {
log.Fatalln("tokenName is empty")
}
log.Printf("tokenName:%s\n", tokenName)
```
### Start cloud transcoding
Call `Create` to create a Cloud Transcoding task and start transcoding. In this example, the audio and video streams of two hosts in the same channel are mixed and combined.
```go
// Create a cloud transcoding task and start cloud transcoding
createResp, err := client.Create(context.TODO(), tokenName, &cloudTranscoderAPI.CreateReqBody{
Services: &cloudTranscoderAPI.CreateReqServices{
CloudTranscoder: &cloudTranscoderAPI.CloudTranscoderPayload{
ServiceType: "cloudTranscoderV2",
Config: &cloudTranscoderAPI.CloudTranscoderConfig{
Transcoder: &cloudTranscoderAPI.CloudTranscoderConfigPayload{
IdleTimeout: 300,
AudioInputs: []cloudTranscoderAPI.CloudTranscoderAudioInput{
{
Rtc: &cloudTranscoderAPI.CloudTranscoderRtc{
RtcChannel: inputChannelName,
RtcUID: inputUId,
RtcToken: inputToken,
},
},
},
Outputs: []cloudTranscoderAPI.CloudTranscoderOutput{
{
Rtc: &cloudTranscoderAPI.CloudTranscoderRtc{
RtcChannel: outputChannelName,
RtcUID: outputUId,
RtcToken: outputToken,
},
AudioOption: &cloudTranscoderAPI.CloudTranscoderOutputAudioOption{
ProfileType: "AUDIO_PROFILE_MUSIC_STANDARD",
},
},
},
},
},
},
},
})
if err != nil {
log.Fatalln(err)
}
if createResp.IsSuccess() {
log.Printf("create success:%+v\n", createResp)
} else {
log.Printf("create failed:%+v\n", createResp)
return
}
taskId := createResp.SuccessResp.TaskID
if taskId == "" {
log.Fatalln("taskId is empty")
}
log.Printf("taskId:%s\n", taskId)
// Wait for 10 seconds before stopping the cloud transcoding
time.Sleep(time.Second * 10)
```
### Stop cloud transcoding
When the transcoding task is complete, call the `Delete` method to end cloud transcoding:
```go
// Stop the cloud transcoding task
deleteResp, err := client.Delete(context.TODO(), taskId, tokenName)
if err != nil {
log.Println(err)
return
}
if deleteResp.IsSuccess() {
log.Printf("delete success:%+v\n", deleteResp)
} else {
log.Printf("delete failed:%+v\n", deleteResp)
return
}
```
### Complete example code
The complete sample code for this example is presented here for your reference and use.
**Complete sample code**
```go
package main
import (
"context"
"log"
"time"
"github.com/AgoraIO-Community/agora-rest-client-go/agora"
"github.com/AgoraIO-Community/agora-rest-client-go/agora/auth"
"github.com/AgoraIO-Community/agora-rest-client-go/agora/domain"
agoraLogger "github.com/AgoraIO-Community/agora-rest-client-go/agora/log"
"github.com/AgoraIO-Community/agora-rest-client-go/services/cloudtranscoder"
cloudTranscoderAPI "github.com/AgoraIO-Community/agora-rest-client-go/services/cloudtranscoder/api"
)
// Define key parameters
const (
appId = ""
token = "" // Token for the transcoder in the input channel
username = "" // Your customer ID
password = "" // Your customer secret
inputChannelName = "show" // Channel name for the input stream
inputUId = 0 // User ID for the input stream
inputToken = "" // Token for the input stream user
outputChannelName = "show" // Channel name for the output stream
outputUId = 0 // User ID for the transcoder in the output channel
outputToken = "" // Token for the transcoder in the output channel
instanceId = "quickstart" // Instance ID of the transcoder
)
func main() {
// Initialize Agora Config
config := &agora.Config{
AppID: appId,
Credential: auth.NewBasicAuthCredential(username, password),
// Specify the region where the server is located. Options include CN, EU, AP, US.
// The client will automatically switch to use the best domain based on the configured region.
DomainArea: domain.CN,
// Specify the log output level. Options include DebugLevel, InfoLevel, WarningLevel, ErrLevel.
// To disable log output, set logger to DiscardLogger.
Logger: agoraLogger.NewDefaultLogger(agoraLogger.DebugLevel),
}
client, err := cloudtranscoder.NewClient(config)
if err != nil {
log.Fatal(err)
}
// Call the Acquire API of the cloud transcoder service client
acquireResp, err := client.Acquire(context.TODO(), &cloudTranscoderAPI.AcquireReqBody{
InstanceId: instanceId,
})
if err != nil {
log.Fatalln(err)
}
if acquireResp.IsSuccess() {
log.Printf("acquire success:%+v\n", acquireResp)
} else {
log.Fatalf("acquire failed:%+v\n", acquireResp)
}
tokenName := acquireResp.SuccessResp.TokenName
if tokenName == "" {
log.Fatalln("tokenName is empty")
}
log.Printf("tokenName:%s\n", tokenName)
// Create a cloud transcoding task and start cloud transcoding
createResp, err := client.Create(context.TODO(), tokenName, &cloudTranscoderAPI.CreateReqBody{
Services: &cloudTranscoderAPI.CreateReqServices{
CloudTranscoder: &cloudTranscoderAPI.CloudTranscoderPayload{
ServiceType: "cloudTranscoderV2",
Config: &cloudTranscoderAPI.CloudTranscoderConfig{
Transcoder: &cloudTranscoderAPI.CloudTranscoderConfigPayload{
IdleTimeout: 300,
AudioInputs: []cloudTranscoderAPI.CloudTranscoderAudioInput{
{
Rtc: &cloudTranscoderAPI.CloudTranscoderRtc{
RtcChannel: inputChannelName,
RtcUID: inputUId,
RtcToken: inputToken,
},
},
},
Outputs: []cloudTranscoderAPI.CloudTranscoderOutput{
{
Rtc: &cloudTranscoderAPI.CloudTranscoderRtc{
RtcChannel: outputChannelName,
RtcUID: outputUId,
RtcToken: outputToken,
},
AudioOption: &cloudTranscoderAPI.CloudTranscoderOutputAudioOption{
ProfileType: "AUDIO_PROFILE_MUSIC_STANDARD",
},
},
},
},
},
},
},
})
if err != nil {
log.Fatalln(err)
}
if createResp.IsSuccess() {
log.Printf("create success:%+v\n", createResp)
} else {
log.Printf("create failed:%+v\n", createResp)
return
}
taskId := createResp.SuccessResp.TaskID
if taskId == "" {
log.Fatalln("taskId is empty")
}
log.Printf("taskId:%s\n", taskId)
// Wait for 10 seconds before stopping the cloud transcoding
time.Sleep(time.Second * 10)
// Stop the cloud transcoding
deleteResp, err := client.Delete(context.TODO(), taskId, tokenName)
if err != nil {
log.Println(err)
return
}
if deleteResp.IsSuccess() {
log.Printf("delete success:%+v\n", deleteResp)
} else {
log.Printf("delete failed:%+v\n", deleteResp)
return
}
}
```
## Test your implementation
Follow these steps to test Cloud Transcoding:
1. In the project folder, run the Go project:
```bash
go run main.go
```
2. Check the console output for successful execution:
* Look for "acquire success" followed by a tokenName
* Look for "create success" followed by a taskId
* After 10 seconds, look for "delete success"
3. To test the transcoded audio output:
* Open the [Agora Web Demo](https://webdemo-global.agora.io/index.html)
* Join the same channel you configured
* You hear audio transcoded by your Go application
If you see error messages, check that your App ID, tokens, and credentials are correct.
## Reference
This section contains content that completes the information on this page, or points you to documentation that explains other aspects to this product.
* Refer to the [API documentation](/en/api-reference/cloud-transcoding/restful) for complete parameter details.
* If you encounter any problems, refer to [Status and error codes](/en/api-reference/api-ref/cloud-transcoding/status-codes).
### Sample project
For more Cloud Transcoding examples, see the [Sample project on GitHub](https://github.com/AgoraIO-Community/agora-rest-client-go/tree/main/examples/cloudtranscoder).
# Agora skills (/en/realtime-media/transcoding/skills)
Agora skills are structured reference files that help AI coding assistants generate product-aware Agora code without guessing.
Skills include the [Agora MCP server](./mcp), which provides live access to the latest Agora documentation.
## Installation
```bash
npx skills add github:AgoraIO/skills
```
To install manually:
```bash
git clone https://github.com/AgoraIO/skills.git ~/agora-skills
```
Point your assistant to `skills/agora/` and use `SKILL.md` as the entry point.
# Interactive Whiteboard overview (/en/realtime-media/whiteboard)
Agora's Interactive Whiteboard SDK enables real-time visual collaboration with features like drawing, annotation, and document sharing on a shared digital canvas. Fully customizable for diverse use cases, it integrates seamlessly with voice, video, and live streaming to enhance remote learning, brainstorming sessions, and collaborative meetings.
For fast integration, Agora Fastboard provides a prebuilt whiteboard experience with a default UI, enabling quick deployment and reducing development time.
## Start building
## Product features
Includes standard tools for drawing, writing, notations, and erasing, as well as advanced tools for content sharing, multi-user editing, control, room management, and more.
Server-side file conversion transcodes files for presentation on the whiteboard, including support for converting PPT, PPTX, Word, and PDF files to images, and PPTX files to web pages.
Powerful extensions in netless-app help extend the functionality of your whiteboard experience and window-manager can be used to load and manage extensions on the whiteboard.
Choose from two SDKs: Interactive Whiteboard SDK allows experienced developers to provide substantial customization while Fastboard SDK provides a ready-to-use UI for a faster build.
RESTful APIs provide token generation, room management, screenshot management, scene management, and file conversion features.
Agora's globally distributed and clustered server system and backup and disaster recovery plans work together to guarantee high availability of the whiteboard service.
# Whiteboard vs. Fastboard (/en/realtime-media/whiteboard/whiteboard-fastboard)
This page helps you choose between the Whiteboard SDK and the Fastboard SDK for your next project.
| Feature | Whiteboard SDK | Fastboard SDK |
| --------------------- | ----------------------------------------------------------------------------------------------------------------------- | ------------------------------------------------------------------------------------------------------------------ |
| Product overview | Interactive Whiteboard PaaS with rich data and state callbacks and room for deep customization. | Whiteboard, window manager, and UI bundled together for quick integration. |
| Scope and limitations | No built-in UI, pure API delivery, and no official plugin support. | Includes an open-source default UI and official plugins, but deeper custom UI work requires secondary development. |
| Setup complexity | Requires stronger engineering investment. See [SDK quickstart](build/set-up-and-build-your-first-app/get-started-sdk/). | Easier to set up. See [Fastboard quickstart](build/set-up-and-build-your-first-app/get-started-uikit/). |
| Pricing | Pay as you go. See [Pricing](reference/pricing). | Pay as you go. See [Pricing](reference/pricing). |
| Platform support | iOS, Android, Web | iOS, Android, Web |
| Best for | Teams that need high customization and direct API control. | Teams that want a production-ready experience with faster delivery. |
# Core concepts (/en/realtime-media/voice/core-concepts)
RTC (Real-Time Communication) refers to real-time communication technology, which allows almost instant exchange of audio and other types of data between the sender and the receiver.
Voice SDK provide real-time audio interaction services, with multi-platform and multi-device support. This includes high-definition voice calls, interactive live streaming, as well as one-on-one and multi-group chats.
This guide introduces the key processes and concepts you need to know to use Voice SDK.
Agora relies on the following fundamental concepts to enable seamless real-time communication:
### Agora SDRTN®
Agora's core engagement services are powered by its Software-Defined Real-Time Network (SDRTN®), a global infrastructure accessible anytime, anywhere. Unlike traditional networks, Agora SDRTN® is not restricted by devices, phone numbers, or telecom coverage areas. With data centers in over 200 countries and regions, it ensures sub-second latency and high availability for real-time media.
Agora SDRTN® enables live user engagement through real-time communication (RTC), offering:
* Unmatched quality of service
* High availability and accessibility
* True scalability
* Low cost
## Channel concepts
Agora uses channels to group users together, enabling seamless communication and interaction. Channels serve as the foundation for transmitting real-time data, whether audio, video, or signaling, and play a crucial role in connecting users and services.
### Channel
A channel organizes users into a group and is identified by a unique channel name. Users who connect to the same channel are able to communicate with each other. A channel is created when the first user joins and ceases to exist when the last user leaves.
Channels are created by calling the methods for transmitting real-time data. Agora uses different channels to transmit different types of data:
* A Voice SDK channel is used for transmitting audio data.
* A Signaling channel is used for transmitting messaging or signaling data.
These channels are independent of each other.
Additional services provided by Agora, such as Cloud Recording and Speech to Text, join the Voice SDK channel to provide real-time recording, transmission acceleration, media playback, and content moderation.
### Channel profile
The Voice SDK applies different optimization methods according to the selected channel profile. Agora supports the following channel profiles:
| Channel profile | Description |
| --------------------- | ------------------------------------------------------------------------------------------------------------------------------------------------------------------------------------------------------ |
| **Communication** | This profile is suitable for one-on-one or group calls, where all users in the channel talk freely. |
| **Live Broadcasting** | In a live streaming channel, users have two client roles: *host* and *audience*. The *host* sends and receives streams, while the *audience* only receives streams with the sending function disabled. |
### Stream
A stream is a sequence of digitally encoded, coherent signals that contain media data. Users in a channel [publish](#publish) local streams and [subscribe](#subscribe) to remote streams from other users.
### User role
The user role defines whether a user in a channel has the permission to publish streams. There are two user roles:
* **Host**: A user who can publish streams to a channel.
* **Audience**: A User who can only subscribe to remote media streams. A user with this role cannot publish streams.
### Publish
Publishing is the act of sending a user’s audio data to the channel. Usually, the published stream is created by the audio data sampled from a microphone. You can also publish media streams from other sources, such as an online music file.
After successfully publishing a stream, the SDK uses it to send media data to other users in the channel. Users communicate with each other in real-time by publishing local streams and subscribing to remote streams.
### Subscribe
Subscribing is the act of receiving media streams published by remote users to the channel. A user receives audio data from other users by subscribing to one or more of their streams. You either directly play the subscribed streams or process incoming data for other purposes such as recording.
### User ID
In Voice Calling, the UID is an integer value that uniquely identifies a user within the context of a channel. When joining a channel, you have the option to either assign a specific UID to the user or pass `0` or `null` and allow Agora to automatically generate and assign a UID to the user. If two users attempt to join the same channel with the same UID, it can lead to unexpected behavior.
The UID is used by Agora's services and components to identify and manage users within a channel. Ensure that UIDs are properly assigned to prevent conflicts.
### RTC connection
The connection between the SDK and the channel. When publishing or subscribing to multiple streams in multiple channels, a connection is used to specify the target channel.
## Credentials
To ensure reliable access and secure communication, Agora uses credentials such as the App ID, App Certificate, and tokens to identify applications, authenticate their requests, and authorize their access on its platform.
### App ID
The App ID is a unique key generated by Agora to identify each project and provide billing and other statistical data services. The App ID is critical for connecting users within your app. It is used to initialize the Agora Engine in your app, and as one of the required keys to create authentication tokens for secure communication. Retrieve the App ID for your project using the [Agora Console](https://console.agora.io/legacy/project-management).
App IDs are stored on the front-end client and do not provide access control. Projects using only an App ID allow any user with the App ID to join. For access control, especially in production environments, choose the **App ID + Token** mechanism for user authentication when creating a new project. Without authentication tokens, your environment is open to anyone with access to your App ID.
### App Certificate
An App Certificate is a unique key generated by the Agora Console to secure projects through token authentication. It is required, along with the App ID, to generate a token that proves authorization between your systems and Agora's network. App Certificates are used to generate Voice Calling authentication tokens.
Store the App Certificate securely in your backend systems. If your App Certificate is compromised or to meet security compliance requirements, you can invalidate certificates and create new ones through the Agora Console.
### Tokens
A token is a dynamic key generated using the App ID, App Certificate, user ID, and expiration timestamp. Tokens authenticate and secure access to Agora's services, ensuring only authorized users can join a channel and participate in real-time communication.
Tokens are generated on your server and passed to the client for use in Voice Calling. The token generation process involves digitally signing the App ID, App Certificate, user ID, and expiration timestamp using a specific algorithm, preventing tampering or forgery.
During development and testing, use the Agora Console to generate temporary tokens. For production environments, implement a token server as part of your security infrastructure to control access to your channels.
### Agora Console
[Agora Console](https://console.agora.io/) is the main dashboard where you manage your Agora projects and services. Before you can use Agora's SDKs, you must first create a project in the Agora Console. See [Agora account management](/en/introduction/account) for
details.

Agora Console provides an intuitive interface for developers to query and manage their Agora account. After registering an Agora account, you use the Agora Console to perform the following tasks:
* Manage your account
* Create and configure Agora projects and services
* Get an App ID and the App certificate
* Generate temporary tokens for development and testing
* Manage members and roles
* Check call quality and usage
* Check bills and make payments
* Access product resources
See [Agora account management](/en/introduction/account) for details on how to manage all aspects of your Agora account.
Agora also provides RESTful APIs that you use to implement features such as creating a project and fetching usage numbers programmatically.
## Audio concepts
### Audio interaction workflow
The following figure illustrates the workflow of using the Voice SDK to implement basic audio interaction.

Agora relies on the following fundamental concepts to enable seamless real-time communication:
### Audio module
In audio interaction, the main functions of the audio module are as shown in the figure below:

After you call `registerAudioFrameObserver`, you can obtain the raw audio data at the following observation points in the audio transmission process:
1. Obtain the raw audio data of ear monitoring through the `onEarMonitoringAudioFrame` callback.
2. Obtain the captured raw audio data through the `onRecordAudioFrame` callback.
3. Obtain the raw audio playback data of each individual stream through the `onPlaybackAudioFrameBeforeMixing` callback.
4. Obtain the raw audio playback data of all mixed streams through the `onPlaybackAudioFrame` callback.
5. Obtain the raw audio data after mixing the captured and playback audio through the `onMixedAudioFrame` callback.
(5) `onMixedAudioFrame` = (2) `onRecordAudioFrame` + (4) `onPlaybackAudioFrame`
### Audio routing
The audio output device used by the app when playing audio. Common audio routes include wired headphones, earpieces, speakers, Bluetooth headphones, and others.
The APIs used by the audio module are as follows:
* Enable local audio collection: `enableLocalAudio`
* Set local playback device: `setPlaybackDevice`
* Set up audio routing: `setDefaultAudioRouteToSpeakerphone`
# Voice Calling overview (/en/realtime-media/voice)
Agora's Voice Calling API enables crystal-clear, real-time voice communication across any device and platform. Powered by advanced audio codecs and network optimization, it ensures ultra-low latency and high-quality performance even in low-bandwidth environments. Ideal for social audio, customer support, gaming, and other real-time voice applications, this solution allows you to integrate scalable and secure voice calling capabilities into your products.
Extend Agora's Voice SDK with capabilities such as recording, transcription, and moderation, or leverage the Extensions Marketplace to enable AI-powered features like noise cancellation, voice effects, and more.
## Start building
## Product Features
Support for 3D spatial audio, AI noise suppression, active speaker recognition, and gain control to provide an immersive audio experience.
48 kHz sampling rate with full-sound bandwidth capture provides natural audio reproduction and ensures clear sound during calls.
Add audio effects ranging from sound mixing and reverb to fun voice filters.
Publish one or more audio tracks to one or more channels from a single instance, with support for multi-channel microphones.
Record live audio calls in the cloud or on premises and control the audio format, storage path, and voice quality.
Agora’s Software-Defined Real-Time Network (SDRTN®) supports voice users in over 200 countries and regions.
# Agora MCP (/en/realtime-media/voice/mcp)
The Agora MCP server gives your AI assistant direct access to Agora's documentation, so it can look up APIs, SDK methods, and platform-specific details in real time.
The Agora MCP server is included when you install Agora Skills. If you prefer to install only the MCP server, it is available at:
```text
https://mcp.agora.io
```
### Installation
Refer to the installation instructions for your coding assistant.
Cursor
Claude
Codex
Gemini CLI
Manual installation
Click the button below to install the MCP server in [Cursor](https://www.cursor.com/)
or add it manually with the following JSON:
```json
{
"mcpServers": {
"agora-docs": {
"url": "https://mcp.agora.io"
}
}
}
```
* **Claude Code**
Run the following command in your terminal to install the MCP server in [Claude Code](https://claude.com/product/claude-code):
```bash
claude mcp add --transport http agora-docs https://mcp.agora.io
```
* **Claude Desktop**
In **Settings**, select **Connectors** and then choose **Add custom connector**. Enter the following values and click **Add**:
* **Name**: `agora-docs`
* **Remote MCP server URL**: `https://mcp.agora.io`
Run the following command in your terminal to install the server in [OpenAI Codex](https://openai.com/codex/):
```bash
codex mcp add --url https://mcp.agora.io agora-docs
```
Run the following command in your terminal to install the server in [Gemini CLI](https://github.com/google-gemini/gemini-cli):
```bash
gemini mcp add --transport http agora-docs https://mcp.agora.io
```
Add the server URL `https://mcp.agora.io` to your MCP client of choice. If prompted, set the transport to `http` or "Streamable HTTP".
### Getting started
Once installed, your coding assistant has access to Agora's documentation through the MCP server. The assistant will intelligently use this resource when relevant to your questions. For more targeted results, mention Agora along with your target product and platform, such as 'iOS', 'Web', 'Conversational AI', 'Video Calling' in your prompts.
### System prompt
This MCP works with all LLMs that support MCP, but performs best when the assistant understands facet-based exploration. Add the following prompt to your LLMs custom instructions:
**System prompt for LLMs**
```markdown
# Agora MCP Markdown - System Prompt
You have access to Agora's documentation search via three tools:
- `algolia_search_index_docs_platform_aware_markdown` - Full-text search with facets
- `algolia_search_for_facet_values` - Browse products/platforms
- `algolia_recommendations` - Find related documentation
## Key Behaviors
**1. Use facets for discovery**
- When users ask about "what's available", explore facets first
- Example: User asks "what video products exist?"
→ Use `algolia_search_for_facet_values(facetName: "product", facetQuery: "video")`
→ Shows video-calling is the main product
**2. Platform-aware searching**
- Include target platform in search queries (iOS, Android, Web, etc.)
- Results are intelligently ranked by platform relevance
**3. Interpret facet results for refinement**
- Search results include facet breakdowns by product and platform
- Use these to suggest filtering: "15 results are for video-calling, 8 for voice-calling"
**4. Maintain session continuity**
- Use same sessionId (UUID) across related searches in a conversation
- Improves ranking for follow-up queries
## Available Products & Platforms
**Key Products:** conversational-ai, video-calling, broadcast-streaming, interactive-live-streaming, agora-chat, voice-calling, signaling, extensions-marketplace, interactive-whiteboard
**Key Platforms:** android, web, ios, windows, macos, unity, flutter, react-native, electron, unreal
## Workflow Example
User: "I'm building an iOS app with Video Calling. Where do I start?"
1. Search: "iOS video calling quickstart"
2. Results show facets indicating video-calling is the best match
3. Suggest: "Most results are for Video Calling, here's the quickstart"
4. Follow-up searches: Keep same sessionId for context
```
#### What This Enables
* Intelligent facet exploration before deep searches
* Platform-aware result refinement suggestions
* Cross-search session continuity for better context
Without the prompt, searches still work but won't leverage faceted browsing patterns.
## AGENTS.md
To get the most out of Agora Skills and the MCP server, Agora recommends that you include an [AGENTS.md](https://agents.md) or similar file in your repository. This file ensures that your agent always consults Agora docs to produce reliable, working code.
Add the following instructions to your own `AGENTS.md` file:
```markdown
## Agora Documentation
Agora documentation is updated frequently. You should always refer to the latest documentation when working with Agora products. Agora offers an MCP server that you can use to browse and search its documentation. If the developer has not yet installed this server, recommend that they install it at https://mcp.agora.io.
If the Agora Skills files are available in your context, use them for platform-specific API guidance and code examples.
```
# Quickstart (/en/realtime-media/voice/quickstart)
This Android quickstart shows you how to create a basic Voice Calling app using the Agora Voice SDK. Switch to the [iOS](/en/realtime-media/voice/quickstart/ios) or [Web](/en/realtime-media/voice/quickstart/web) quickstart, or choose another platform from the selector.
## Understand the tech
To start a Voice Calling session, implement the following steps in your app:
* **Initialize the Agora Engine**: Before calling other APIs, create and initialize an Agora Engine instance.
* **Join a channel**: Call methods to create and join a channel.
* **Send and receive audio**: All users can publish streams to the channel and subscribe to audio streams published by other users in the channel.

## Prerequisites
* [Android Studio](https://developer.android.com/studio) 4.2 or higher.
* Android SDK API Level 21 or higher.
* Two mobile devices running Android 5.0 or higher.
* A microphone
* A valid Agora account and project. Please refer to [Agora account management](/en/introduction/account) for details.
## Set up your project
This section shows you how to set up your Android project and install the Agora Voice SDK.
Create a new project
Add to an existing project
1. Create a [new project](https://developer.android.com/studio/projects/create-project).
1. Open Android Studio and select **File > New > New Project...**.
2. Select **Phone and Tablet** > **Empty Activity** and click **Next**.
3. Set the project name and storage path.
4. Select **Java** or **Kotlin** as the language, and click **Finish** to create the Android project.
After you create a project, Android Studio automatically starts gradle sync. Ensure that the synchronization is successful before proceeding to the next step.
1. Add a new activity to your project.
1. Open your project in Android Studio.
2. Right-click on the `app/src/main/java/` folder.
3. Select **New → Activity → Empty Activity**.
4. Enter an activity name and click **Finish**.
This guide uses `MainActivity` as the activity name in the sample code. Replace it with your activity name where required.
2. Add a layout file for your activity.
Set up a basic layout for your activity. Refer to [Create a user interface](#create-a-user-interface) to get a bare bones sample layout.
### Install the SDK
Use either of the following methods to add Voice SDK to your project.
Maven Central
Manual integration
1. Open the `settings.gradle` file in the project's root directory and add the Maven Central dependency, if it doesn't already exist:
```text
repositories {
mavenCentral()
}
```
If your Android project uses dependencyResolutionManagement, the method of adding the Maven Central dependency may differ.
1. To integrate the Voice SDK into your Android project, add the following to the `dependencies` block in your project module `build.gradle` file:
* Groovy `build.gradle`
```json
implementation 'io.agora.rtc:voice-sdk:x.y.z'
```
* Kotlin `build.gradle.kts`
```kotlin
implementation("io.agora.rtc:voice-sdk:x.y.z")
```
Replace `x.y.z` with the specific SDK version number, such as `4.5.0`.
To get the latest version number, check the [Release notes](reference/release-notes.mdx). To integrate the Lite SDK, use `io.agora.rtc:lite-sdk` instead.
1. Prevent code obfuscation
Open the `/app/proguard-rules.pro` file and add the following lines to prevent the Voice SDK code from being obfuscated:
```java
-keep class io.agora.** { *; }
-dontwarn io.agora.**
```
1. Download the latest version of Voice SDK from the [SDKs](/en/api-reference/sdks?product=voice\&platform=android) page and unzip it.
2. Open the unzipped file and copy the following files or subfolders to your project path.
| File or folder | Project path |
| :----------------------------------- | :----------------------- |
| `agora-rtc-sdk.jar` file | `/app/libs/` |
| `arm64-v8a` folder | `/app/src/main/jniLibs/` |
| `armeabi-v7a` folder | `/app/src/main/jniLibs/` |
| `x86` folder | `/app/src/main/jniLibs/` |
| `x86_64` folder | `/app/src/main/jniLibs/` |
| `high_level_api` in `include` folder | `/app/src/main/jniLibs/` |
1. Select the file `/app/libs/agora-rtc-sdk.jar` in the left navigation bar of Android Studio project files, right-click, and select **add as a library** from the drop-down menu.
2. Prevent code obfuscation
Open the `/app/proguard-rules.pro` file and add the following lines to prevent the Voice SDK code from being obfuscated:
```java
-keep class io.agora.** { *; }
-dontwarn io.agora.**
```
## Implement Voice Calling
This section guides you through the implementation of basic real-time audio interaction in your app.
The following figure illustrates the essential steps:

This guide includes [complete sample code](#complete-sample-code) that demonstrates implementing basic real-time interaction. To understand the core API calls in the sample code, review the following implementation steps and use the code in your `MainActivity` file.
### Import Agora classes
Import the relevant Agora classes and interfaces:
Java
Kotlin
```java
import io.agora.rtc2.Constants;
import io.agora.rtc2.IRtcEngineEventHandler;
import io.agora.rtc2.RtcEngine;
import io.agora.rtc2.RtcEngineConfig;
import io.agora.rtc2.ChannelMediaOptions;
```
```kotlin
import io.agora.rtc2.ChannelMediaOptions
import io.agora.rtc2.Constants
import io.agora.rtc2.IRtcEngineEventHandler
import io.agora.rtc2.RtcEngine
import io.agora.rtc2.RtcEngineConfig
```
### Initialize the engine
For real-time communication, initialize an `RtcEngine` instance and set up event handlers to manage user interactions within the channel. Use `RtcEngineConfig` to specify the application context, [App ID](/en/introduction/account), and custom [event handler](#subscribe-to-voice-sdk-events), then call `RtcEngine.create(config)` to initialize the engine, enabling further channel operations. In your `MainActivity` file, add the following code:
Java
Kotlin
```java
// Fill in the app ID from Agora Console
private String myAppId = "";
private RtcEngine mRtcEngine;
private void initializeAgoraVoiceSDK() {
try {
RtcEngineConfig config = new RtcEngineConfig();
config.mContext = getBaseContext();
config.mAppId = myAppId;
config.mEventHandler = mRtcEventHandler;
mRtcEngine = RtcEngine.create(config);
} catch (Exception e) {
throw new RuntimeException("Error initializing RTC engine: " + e.getMessage());
}
}
```
```kotlin
// Fill in the App ID obtained from the Agora Console
private val myAppId = ""
private var mRtcEngine: RtcEngine? = null
private fun initializeAgoraVoiceSDK() {
try {
val config = RtcEngineConfig().apply {
mContext = baseContext
mAppId = myAppId
mEventHandler = mRtcEventHandler
}
mRtcEngine = RtcEngine.create(config)
} catch (e: Exception) {
throw RuntimeException("Error initializing RTC engine: ${e.message}")
}
}
```
### Join a channel
To join a channel, call `joinChannel` with the following parameters:
* **Channel name**: The name of the channel to join. Clients that pass the same channel name join the same channel. If a channel with the specified name does not exist, it is created when the first user joins.
* **Authentication token**: A dynamic key that authenticates a user when the client joins a channel. In a production environment, you obtain a token from a [token server](build/set-up-token-authentication/deploy-token-server.mdx) in your security infrastructure. For the purpose of this guide [Generate a temporary token](/en/introduction/account).
* **User ID**: A 32-bit signed integer that identifies a user in the channel. You can specify a unique user ID for each user yourself. If you set the user ID to `0` when joining a channel, the SDK generates a random number for the user ID and returns the value in the `onJoinChannelSuccess` callback.
* **Channel media options**: Configure `ChannelMediaOptions` to define publishing and subscription settings, optimize performance for your specific use-case, and set optional parameters.
For Voice Calling, set the `channelProfile` to `CHANNEL_PROFILE_COMMUNICATION` and the user role to `CLIENT_ROLE_BROADCASTER`.
Java
Kotlin
```java
// Fill in the channel name
private String channelName = "";
// Fill in the temporary token generated from Agora Console
private String token = "";
private void joinChannel() {
ChannelMediaOptions options = new ChannelMediaOptions();
options.clientRoleType = Constants.CLIENT_ROLE_BROADCASTER;
options.channelProfile = Constants.CHANNEL_PROFILE_COMMUNICATION;
options.publishCameraTrack = true;
mRtcEngine.joinChannel(token, channelName, 0, options);
}
```
```kotlin
// Fill in the channel name
private val channelName = ""
// Fill in the temporary token generated from Agora Console
private val token = ""
private fun joinChannel() {
val options = ChannelMediaOptions().apply {
clientRoleType = Constants.CLIENT_ROLE_BROADCASTER
channelProfile = Constants.CHANNEL_PROFILE_COMMUNICATION
publishMicrophoneTrack = true;
}
mRtcEngine?.joinChannel(token, channelName, 0, options)
}
```
### Subscribe to Voice SDK events
The Voice SDK provides an interface for subscribing to channel events. To use it, create an instance of `IRtcEngineEventHandler` and implement the event methods you want to handle.
To ensure that you receive all Voice SDK events, set the Agora Engine event handler before joining a channel.
Java
Kotlin
```java
private final IRtcEngineEventHandler mRtcEventHandler = new IRtcEngineEventHandler() {
// Callback when successfully joining the channel
@Override
public void onJoinChannelSuccess(String channel, int uid, int elapsed) {
super.onJoinChannelSuccess(channel, uid, elapsed);
showToast("Joined channel " + channel);
}
// Callback when a remote user or host joins the current channel
@Override
public void onUserJoined(int uid, int elapsed) {
super.onUserJoined(uid, elapsed);
runOnUiThread(() -> {
showToast("User joined: " + uid); // Show toast for user joining
});
}
// Callback when a remote user or host leaves the current channel
@Override
public void onUserOffline(int uid, int reason) {
super.onUserOffline(uid, reason);
runOnUiThread(() -> {
showToast("User offline: " + uid); // Show toast for user going offline
});
}
};
```
```kotlin
private val mRtcEventHandler = object : IRtcEngineEventHandler() {
override fun onJoinChannelSuccess(channel: String?, uid: Int, elapsed: Int) {
super.onJoinChannelSuccess(channel, uid, elapsed)
runOnUiThread {
showToast("Joined channel $channel")
}
}
override fun onUserJoined(uid: Int, elapsed: Int) {
runOnUiThread {
showToast("User joined: $uid")
}
}
override fun onUserOffline(uid: Int, reason: Int) {
super.onUserOffline(uid, reason)
runOnUiThread {
showToast("User offline: $uid")
}
}
}
```
### Handle permissions
To access the microphone on Android devices, declare the necessary permissions in the app's manifest and ensure that the user grants these permissions when the app starts.
1. Open your project's `AndroidManifest.xml` file and add the following permissions before ``:
```xml
```
2. Use the following code to handle runtime permissions in your Android app. The logic ensures that the necessary permissions are granted before starting Voice Calling. In your `MainActivity` file, add the following code:
Java
Kotlin
```java
private static final int PERMISSION_REQ_ID = 22;
private boolean checkPermissions() {
for (String permission : getRequiredPermissions()) {
if (ContextCompat.checkSelfPermission(this, permission) != PackageManager.PERMISSION_GRANTED) {
return false;
}
}
return true;
}
private void requestPermissions() {
ActivityCompat.requestPermissions(this, getRequiredPermissions(), PERMISSION_REQ_ID);
}
private String[] getRequiredPermissions() {
if (Build.VERSION.SDK_INT >= Build.VERSION_CODES.S) {
return new String[]{
Manifest.permission.RECORD_AUDIO,
Manifest.permission.READ_PHONE_STATE,
Manifest.permission.BLUETOOTH_CONNECT
};
} else {
return new String[]{Manifest.permission.RECORD_AUDIO};
}
}
@Override
public void onRequestPermissionsResult(int requestCode, @NonNull String[] permissions, @NonNull int[] grantResults) {
super.onRequestPermissionsResult(requestCode, permissions, grantResults);
if (checkPermissions()) {
startVoiceCalling();
}
}
```
```kotlin
private val permissionReqId = 22
private fun checkPermissions(): Boolean {
for (permission in getRequiredPermissions()) {
if (ContextCompat.checkSelfPermission(this, permission) != PackageManager.PERMISSION_GRANTED) {
return false
}
}
return true
}
private fun requestPermissions() {
ActivityCompat.requestPermissions(this, getRequiredPermissions(), PERMISSION_REQ_ID)
}
private fun getRequiredPermissions(): Array {
return if (Build.VERSION.SDK_INT >= Build.VERSION_CODES.S) {
arrayOf(
Manifest.permission.RECORD_AUDIO,
Manifest.permission.READ_PHONE_STATE,
Manifest.permission.BLUETOOTH_CONNECT
)
} else {
arrayOf(Manifest.permission.RECORD_AUDIO)
}
}
override fun onRequestPermissionsResult(requestCode: Int, permissions: Array, grantResults: IntArray) {
super.onRequestPermissionsResult(requestCode, permissions, grantResults)
if (checkPermissions()) {
startVoiceCalling()
}
}
```
### Start and close the app
When a user launches your app, start real-time interaction. When a user closes the app, stop the interaction.
1. In the `onCreate` callback, check whether the app has been granted the required permissions. If the permissions have not been granted, request the required permissions from the user. If permissions are granted, initialize `RtcEngine` and join a channel.
Java
Kotlin
```java
@Override
protected void onCreate(Bundle savedInstanceState) {
super.onCreate(savedInstanceState);
setContentView(R.layout.activity_main);
if (checkPermissions()) {
startVoiceCalling();
} else {
requestPermissions();
}
}
```
```kotlin
override fun onCreate(savedInstanceState: Bundle?) {
super.onCreate(savedInstanceState)
setContentView(R.layout.activity_main)
if (checkPermissions()) {
startVoiceCalling()
} else {
requestPermissions()
}
}
```
2. When a user closes the app, or switches the app to the background, call `leaveChannel` to leave the current channel and release all session-related resources.
Java
Kotlin
```java
private void cleanupAgoraEngine() {
if (mRtcEngine != null) {
mRtcEngine.leaveChannel();
mRtcEngine = null;
}
}
```
```kotlin
private fun cleanupAgoraEngine() {
mRtcEngine?.apply {
leaveChannel()
}
mRtcEngine = null
}
```
### Complete sample code
A complete code sample demonstrating the basic process of real-time interaction is provided for your reference. To use the sample code, copy the following lines into the `MainActivity` file in your project. Then, replace `` in package `com.example.` with your project's name.
Java
Kotlin
```java
package com.example.;
import android.Manifest;
import android.content.pm.PackageManager;
import android.os.Build;
import android.os.Bundle;
import android.widget.Toast;
import androidx.annotation.NonNull;
import androidx.appcompat.app.AppCompatActivity;
import androidx.core.app.ActivityCompat;
import androidx.core.content.ContextCompat;
import io.agora.rtc2.ChannelMediaOptions;
import io.agora.rtc2.Constants;
import io.agora.rtc2.IRtcEngineEventHandler;
import io.agora.rtc2.RtcEngine;
import io.agora.rtc2.RtcEngineConfig;
public class MainActivity extends AppCompatActivity {
private static final int PERMISSION_REQ_ID = 22;
private final String myAppId = "";
private final String channelName = "";
private final String token = "";
private RtcEngine mRtcEngine;
private final IRtcEngineEventHandler mRtcEventHandler = new IRtcEngineEventHandler() {
// Callback when successfully joining the channel
@Override
public void onJoinChannelSuccess(String channel, int uid, int elapsed) {
super.onJoinChannelSuccess(channel, uid, elapsed);
showToast("Joined channel " + channel);
}
// Callback when a remote user or host joins the current channel
@Override
public void onUserJoined(int uid, int elapsed) {
super.onUserJoined(uid, elapsed);
runOnUiThread(() -> {
showToast("User joined: " + uid); // Show toast for user joining
});
}
// Callback when a remote user or host leaves the current channel
@Override
public void onUserOffline(int uid, int reason) {
super.onUserOffline(uid, reason);
runOnUiThread(() -> {
showToast("User offline: " + uid); // Show toast for user going offline
});
}
};
@Override
protected void onCreate(Bundle savedInstanceState) {
super.onCreate(savedInstanceState);
setContentView(R.layout.activity_main);
if (checkPermissions()) {
startVoiceCalling();
} else {
requestPermissions();
}
}
private boolean checkPermissions() {
for (String permission : getRequiredPermissions()) {
if (ContextCompat.checkSelfPermission(this, permission) != PackageManager.PERMISSION_GRANTED) {
return false;
}
}
return true;
}
private void requestPermissions() {
ActivityCompat.requestPermissions(this, getRequiredPermissions(), PERMISSION_REQ_ID);
}
private String[] getRequiredPermissions() {
if (Build.VERSION.SDK_INT >= Build.VERSION_CODES.S) {
return new String[]{
Manifest.permission.RECORD_AUDIO,
Manifest.permission.READ_PHONE_STATE,
Manifest.permission.BLUETOOTH_CONNECT
};
} else {
return new String[]{Manifest.permission.RECORD_AUDIO};
}
}
@Override
public void onRequestPermissionsResult(int requestCode, @NonNull String[] permissions, @NonNull int[] grantResults) {
super.onRequestPermissionsResult(requestCode, permissions, grantResults);
if (checkPermissions()) {
startVoiceCalling();
}
}
private void startVoiceCalling() {
initializeAgoraVoiceSDK();
joinChannel();
}
private void initializeAgoraVoiceSDK() {
try {
RtcEngineConfig config = new RtcEngineConfig();
config.mContext = getApplicationContext();
config.mAppId = myAppId;
config.mEventHandler = mRtcEventHandler;
mRtcEngine = RtcEngine.create(config);
} catch (Exception e) {
throw new RuntimeException("Error initializing RTC engine: " + e.getMessage());
}
}
private void joinChannel() {
ChannelMediaOptions options = new ChannelMediaOptions();
options.clientRoleType = Constants.CLIENT_ROLE_BROADCASTER;
options.channelProfile = Constants.CHANNEL_PROFILE_COMMUNICATION;
options.publishMicrophoneTrack = true;
mRtcEngine.joinChannel(token, channelName, 0, options);
}
@Override
protected void onDestroy() {
super.onDestroy();
cleanupAgoraEngine();
}
private void cleanupAgoraEngine() {
if (mRtcEngine != null) {
mRtcEngine.leaveChannel();
mRtcEngine = null;
}
}
private void showToast(String message) {
runOnUiThread(() -> Toast.makeText(MainActivity.this, message, Toast.LENGTH_SHORT).show());
}
}
```
```kotlin
package com.example.
import android.Manifest
import android.content.pm.PackageManager
import android.os.Build
import android.os.Bundle
import android.widget.Toast
import androidx.appcompat.app.AppCompatActivity
import androidx.core.app.ActivityCompat
import androidx.core.content.ContextCompat
import io.agora.rtc2.ChannelMediaOptions
import io.agora.rtc2.Constants
import io.agora.rtc2.IRtcEngineEventHandler
import io.agora.rtc2.RtcEngine
import io.agora.rtc2.RtcEngineConfig
class MainActivity : AppCompatActivity() {
private val PERMISSION_REQ_ID = 22
private val myAppId = ""
private val channelName = ""
private val token = ""
private var mRtcEngine: RtcEngine? = null
private val mRtcEventHandler = object : IRtcEngineEventHandler() {
override fun onJoinChannelSuccess(channel: String?, uid: Int, elapsed: Int) {
super.onJoinChannelSuccess(channel, uid, elapsed)
runOnUiThread {
showToast("Joined channel $channel")
}
}
override fun onUserJoined(uid: Int, elapsed: Int) {
runOnUiThread {
showToast("A user joined")
}
}
override fun onUserOffline(uid: Int, reason: Int) {
super.onUserOffline(uid, reason)
runOnUiThread {
showToast("User offline: $uid")
}
}
}
override fun onCreate(savedInstanceState: Bundle?) {
super.onCreate(savedInstanceState)
setContentView(R.layout.activity_main)
if (checkPermissions()) {
startVoiceCalling()
} else {
requestPermissions()
}
}
private fun checkPermissions(): Boolean {
for (permission in getRequiredPermissions()) {
if (ContextCompat.checkSelfPermission(this, permission) != PackageManager.PERMISSION_GRANTED) {
return false
}
}
return true
}
private fun requestPermissions() {
ActivityCompat.requestPermissions(this, getRequiredPermissions(), PERMISSION_REQ_ID)
}
private fun getRequiredPermissions(): Array {
return if (Build.VERSION.SDK_INT >= Build.VERSION_CODES.S) {
arrayOf(
Manifest.permission.RECORD_AUDIO,
Manifest.permission.READ_PHONE_STATE,
Manifest.permission.BLUETOOTH_CONNECT
)
} else {
arrayOf(Manifest.permission.RECORD_AUDIO)
}
}
override fun onRequestPermissionsResult(requestCode: Int, permissions: Array, grantResults: IntArray) {
super.onRequestPermissionsResult(requestCode, permissions, grantResults)
if (checkPermissions()) {
startVoiceCalling()
}
}
private fun startVoiceCalling() {
initializeAgoraVoiceSDK()
joinChannel()
}
private fun initializeAgoraVoiceSDK() {
try {
val config = RtcEngineConfig().apply {
mContext = baseContext
mAppId = myAppId
mEventHandler = mRtcEventHandler
}
mRtcEngine = RtcEngine.create(config)
} catch (e: Exception) {
throw RuntimeException("Error initializing RTC engine: ${e.message}")
}
}
private fun joinChannel() {
val options = ChannelMediaOptions().apply {
clientRoleType = Constants.CLIENT_ROLE_BROADCASTER
channelProfile = Constants.CHANNEL_PROFILE_COMMUNICATION
publishMicrophoneTrack = true
}
mRtcEngine?.joinChannel(token, channelName, 0, options)
}
override fun onDestroy() {
super.onDestroy()
cleanupAgoraEngine()
}
private fun cleanupAgoraEngine() {
mRtcEngine?.apply {
stopPreview()
leaveChannel()
}
mRtcEngine = null
}
private fun showToast(message: String) {
runOnUiThread {
Toast.makeText(this@MainActivity, message, Toast.LENGTH_SHORT).show()
}
}
}
```
For the `myAppId` and `token` variables, replace the placeholders with the values you obtained from Agora Console. Ensure you enter the same `channelName` you used when generating the temporary token.
### Create a user interface
Use the following code to generate a basic user interface. Paste the code into the `/app/src/main/res/layout/activity_main.xml` file, replacing the existing content.
**Sample code to create the user interface**
```xml
```
## Test the sample code
Take the following steps to test the sample code:
1. In `MainActivity` update the values for `myAppId`, and `token` with values from Agora Console. Fill in the same `channelName` you used to generate the token.
2. Enable developer options on your Android test device. Turn on USB debugging, connect the Android device to your development machine through a USB cable, and check that your device appears in the Android device options.
3. In Android Studio, click  **Sync Project with Gradle Files** to resolve project dependencies and update the configuration.
4. After synchronization is successful, click  **Run app**. Android Studio starts compilation. After a few moments, the app is installed on your Android device.
5. Launch the App, grant the recording permission.
6. On a second Android device, repeat the previous steps to install and launch the app. Alternatively, use the [Web demo](https://webdemo-global.agora.io/example/quickStart/videoAndVoiceCalling/index.html) to join the same channel and test the following use-cases:
* If users on both devices join the channel as hosts, they can hear each other.
* If one user joins as host and the other as audience, the audience can hear the host.
## Reference
This section contains content that completes the information on this page, or points you to documentation that explains other aspects to this product.
* If a firewall is deployed in your network environment, refer to [Connect with Cloud Proxy](build/manage-connection-and-quality/cloud-proxy.mdx) to use Agora services normally.
### Next steps
After implementing the quickstart sample, read the following documents to learn more:
* To ensure communication security in a test or production environment, best practice is to obtain and use a token from an authentication server. For details, see [Secure authentication with tokens](build/set-up-token-authentication/use-tokens.mdx).
### Sample project
Agora provides open source sample projects on [GitHub](https://github.com/AgoraIO/API-Examples) for your reference. Download or view the [JoinChannelAudio](https://github.com/AgoraIO/API-Examples/blob/main/Android/APIExample/app/src/main/java/io/agora/api/example/examples/basic/JoinChannelAudio.java) project for a more detailed example.
### API reference
* [`RtcEngineConfig`](https://api-ref.agora.io/en/voice-sdk/android/4.x/API/class_rtcengineconfig.html)
* [`create`](https://api-ref.agora.io/en/voice-sdk/android/4.x/API/class_irtcengine.html#api_irtcengine_create)
* [`ChannelMediaOptions`](https://api-ref.agora.io/en/voice-sdk/android/4.x/API/class_channelmediaoptions.html)
* [`joinChannel`](https://api-ref.agora.io/en/voice-sdk/android/4.x/API/class_irtcengine.html#api_irtcengine_joinchannel2)
* [`leaveChannel`](https://api-ref.agora.io/en/voice-sdk/android/4.x/API/class_irtcengine.html#api_irtcengine_leavechannel)
* [`IRtcEngineEventHandler`](https://api-ref.agora.io/en/voice-sdk/android/4.x/API/class_irtcengineeventhandler.html#class_irtcengineeventhandler)
### Frequently asked questions
* [How can I listen for audience joining or leaving a channel?](/en/api-reference/faq/integration/audience_event)
* [How can I solve channel-related issues?](/en/api-reference/faq/integration/channel)
* [How can I set the log file?](/en/api-reference/faq/integration/set_log_file)
* [Why do apps on some Android versions fail to capture audio and video after screen locking or switching to the background?](/en/api-reference/faq/quality/android_background)
### See also
* [Error codes](reference/error-codes.mdx)
* [Connection status management](build/manage-connection-and-quality/connection-status-management.mdx)
## Platform-specific versions
- [Android](/en/realtime-media/voice/quickstart/android.md)
- [iOS](/en/realtime-media/voice/quickstart/ios.md)
- [macOS](/en/realtime-media/voice/quickstart/macos.md)
- [Web](/en/realtime-media/voice/quickstart/web.md)
- [Windows](/en/realtime-media/voice/quickstart/windows.md)
- [Electron](/en/realtime-media/voice/quickstart/electron.md)
- [Flutter](/en/realtime-media/voice/quickstart/flutter.md)
- [React Native](/en/realtime-media/voice/quickstart/react-native.md)
- [JavaScript](/en/realtime-media/voice/quickstart/javascript.md)
- [Unity](/en/realtime-media/voice/quickstart/unity.md)
- [Unreal Engine](/en/realtime-media/voice/quickstart/unreal.md)
- [Unreal Blueprint](/en/realtime-media/voice/quickstart/blueprint.md)
- [Python](/en/realtime-media/voice/quickstart/python.md)
# Agora skills (/en/realtime-media/voice/skills)
Agora skills is a set of structured reference files that give AI coding assistants deep knowledge of Agora's platform. When you ask your assistant to build something with Agora, it loads the relevant skill files covering products, APIs, and platform-specific code examples, so it can generate working code without guessing.
Skills includes integration with the [Agora MCP server](mcp.mdx), which gives your assistant access to live Agora documentation. For installation instructions and supported tools, see the [Agora Skills repository](https://github.com/AgoraIO/skills).
### Installation
Install Agora Skills using one of the following methods:
#### Skills CLI (recommended)
Run the following command:
```bash
npx skills add github:AgoraIO/skills
```
Skills activate automatically when your agent detects relevant tasks, for example, "build a voice agent", "integrate Agora RTC", or "generate a token".
#### Manual installation
Clone the repository once and point your AI coding assistant to the skill files directly.
1. Clone the [Agora Skills repo](https://github.com/AgoraIO/skills.git):
```bash
git clone https://github.com/AgoraIO/skills.git ~/agora-skills
```
2. Point your AI assistant to `skills/agora/`.
Follow the instructions for your AI coding assistant:
Claude Code
Cursor
Windsurf
GitHub Copilot
Other tools
Run the following commands inside Claude Code:
* **User-level** (available across all your projects)
```bash
/plugin marketplace add AgoraIO/skills
/plugin install agora
```
* **Project-level** (shared with your team via version control)
```bash
/plugin marketplace add AgoraIO/skills
/plugin install agora --scope project
```
Copy or symlink `skills/agora/` into `.cursor/rules/`. For more information, see [Cursor skill directories](https://cursor.com/docs/skills#skill-directories).
Add `skills/agora/` to your Cascade context. For more information, see [Windsurf skills](https://docs.windsurf.com/windsurf/cascade/skills).
Reference via `@workspace` or add to `.github/copilot-instructions.md`. For more information, see [Create skills for Copilot in the CLI](https://docs.github.com/en/copilot/how-tos/copilot-cli/customize-copilot/create-skills) or [Create skills for the Copilot coding agent](https://docs.github.com/en/copilot/how-tos/use-copilot-agents/coding-agent/create-skills).
The skill files are plain markdown. Point your tool to `skills/agora/` or load individual files directly. Use `SKILL.md` as the entry point.
# Subscription packages (/en/realtime-media/voice/subscription-packages)
A subscription package is a prepaid billing method. You can purchase a package in the [`Agora Console`](https://console.agora.io/subscriptions/rtc-plans?tab=monthly) to cover usage for the current month.
This page explains how to purchase, and manage subscription and top-up packages.
### Purchase and upgrade
By default, a new account is assigned the Free package when the first project is created. You can upgrade at any time to the Starter, Pro, Business, Business Advanced, or Business Plus. Higher-tier packages provide greater discounts and lower unit prices. To select your package:
1. Log in to [Agora Console](https://console.agora.io/).
2. Click the username at the bottom of the navigation sidebar to open the account popup menu.
3. Select **Subscriptions**.
4. Switch to the **RTC** tab.
5. Select your package and click **Upgrade** or **Downgrade**.

* For non-contracted customers, all packages, except the Enterprise package can be purchased directly from the Agora Console. To upgrade to the Enterprise package, contact [Agora sales](mailto\:sales@agora.io).
* You can upgrade sequentially or skip levels. For example, you may upgrade from Starter to Business Plus directly.
* Package upgrades take effect immediately and apply to the entire calendar month. If you make multiple upgrades on the same day, only the last upgrade is applied.
* If your account has a negative balance, purchasing a prepaid package first charges your credit card for the outstanding balance, then for the package fee.
#### Upgrade rules
When you upgrade to a paid package, it becomes effective for the entire calendar month, regardless of the purchase date. You receive the full monthly allocation of included minutes. The cost of the previous package is deducted from the new package price, so you only pay the difference. If you request an upgrade after auto-renewal has triggered, you may upgrade for the next month as well.
### Renewal
By default, your subscription package renews automatically 48 hours before it expires. Ensure your account has sufficient balance or enable auto-pay to avoid renewal failure. You can unsubscribe at any time to prevent renewal. See [Cancel subscription](#cancel-subscription).
If renewal fails:
* The system sends a notification and retries the renewal.
* If renewal still fails by the time the package expires, the package downgrades to the Free package.
* To restore the previous package, see [Purchase and Upgrade](#purchase-and-upgrade).
### Downgrade
You can downgrade by selecting and purchasing a lower-tier package. A downgrade takes effect when your current package expires if you request it before auto-renewal is triggered. You are charged for the new package when you request the downgrade.
You can downgrade only once per month.
* If your downgrade for the next month is successful, auto-renewal for the current package is not triggered.
* If a package is already active, you must wait until the 1st day of that month to initiate a downgrade for the following month.
#### Example
* **Requested more than 48 hours before the current package expires**: The downgrade takes effect after the current package expires.
* **Requested less than 48 hours before the current package expires**: Since a package is already active for the next month, you must wait until the new package starts to downgrade for the following month.
### Cancel subscription
To cancel a prepaid package, downgrade to the Free package. Downgrade rules apply.
## Top-up package
A top-up package is a pay-as-you-go plan. You can purchase a top-up package from the [`Agora Console`](https://console.agora.io/subscriptions/rtc-plans?tab=top-up) to cover usage that exceeds your monthly package quota.
### Purchase
You can purchase multiple top-up packages. They are deducted in the order of purchase.
#### Example:
* Purchased 250,000-minutes top-up packages on **August 15** and **August 16**. On **September 1**, minutes consumed in August are deducted from the first package, then from the second.
### Validity
Each top-up package is valid for one year, starting from the purchase date to the end of the same month of the following year.
#### Example:
* Purchased on **August 15, 2025** → valid until **August 31, 2026**
Unused minutes expire after the validity period and cannot be carried forward.
### Cancel top-up package
Cancelling a top-up package is not supported.
## Free tier overage
For Free tier users, exceeding the included minutes and any purchased top-up minutes results in service suspension. Service resumes when you purchase additional top-up minutes or upgrade to a prepaid subscription package.
# Core concepts (/en/realtime-media/video/core-concepts)
RTC (Real-Time Communication) refers to real-time communication technology, which allows almost instant exchange of audio, video, and other data between the sender and the receiver.
Agora SDKs provide real-time audio and video interaction services, with multi-platform and multi-device support. This includes high-definition video calls, voice-only calls, interactive live streaming, as well as one-on-one and multi-group chats.
This guide introduces the key processes and concepts you need to know to use Video SDK.
Agora relies on the following fundamental concepts to enable seamless real-time communication:
## Agora SDRTN®
Agora's core engagement services are powered by its Software-Defined Real-Time Network (SDRTN®), a global infrastructure accessible anytime, anywhere. Unlike traditional networks, Agora SDRTN® is not restricted by devices, phone numbers, or telecom coverage areas. With data centers in over 200 countries and regions, it ensures sub-second latency and high availability for real-time media.
Agora SDRTN® enables live user engagement through real-time communication (RTC), offering:
* Unmatched quality of service
* High availability and accessibility
* True scalability
* Low cost
## Channel concepts
Agora uses channels to group users together, enabling seamless communication and interaction. Channels serve as the foundation for transmitting real-time data, whether audio, video, or signaling, and play a crucial role in connecting users and services.
### Channel
A channel organizes users into a group and is identified by a unique channel name. Users who connect to the same channel are able to communicate with each other. A channel is created when the first user joins and ceases to exist when the last user leaves.
Channels are created by calling the methods for transmitting real-time data. Agora uses different channels to transmit different types of data:
* A Video SDK channel is used for transmitting audio or video data.
* A Signaling channel is used for transmitting messaging or signaling data.
These channels are independent of each other.
Additional services provided by Agora, such as Cloud Recording and STT, join the Video SDK channel to provide real-time recording, transmission acceleration, media playback, and content moderation.
### Channel profile
The Video SDK applies different optimization methods according to the selected channel profile. Agora supports the following channel profiles:
| Channel profile | Description |
| --------------------- | ------------------------------------------------------------------------------------------------------------------------------------------------------------------------------------------------------ |
| **Communication** | This profile is suitable for one-on-one or group calls, where all users in the channel talk freely. |
| **Live Broadcasting** | In a live streaming channel, users have two client roles: *host* and *audience*. The *host* sends and receives streams, while the *audience* only receives streams with the sending function disabled. |
### Stream
A stream is a sequence of digitally encoded, coherent signals that contain media data. Users in a channel [publish](#publish) local streams and [subscribe](#subscribe) to remote streams from other users.
### User role
The user role defines whether a user in a channel has the permission to publish streams. There are two user roles:
* **Host**: A user who can publish streams to a channel.
* **Audience**: A User who can only subscribe to remote media streams. A user with this role cannot publish streams.
### Publish
Publishing is the act of sending a user’s audio or video data to the channel. Usually, the published stream is created by the audio data sampled from a microphone or the video data captured by a camera. You can also publish media streams from other sources, such as an online music file or the user’s screen.
After successfully publishing a stream, the SDK uses it to send media data to other users in the channel. Users communicate with each other in real-time by publishing local streams and subscribing to remote streams.
### Subscribe
Subscribing is the act of receiving media streams published by remote users to the channel. A user receives audio and video data from other users by subscribing to one or more of their streams. You either directly play the subscribed streams or process incoming data for other purposes such as recording or capturing screenshots.
### User ID
In Video Calling, the UID is an integer value that uniquely identifies a user within the context of a channel. When joining a channel, you have the option to either assign a specific UID to the user or pass `0` or `null` and allow Agora to automatically generate and assign a UID to the user. If two users attempt to join the same channel with the same UID, it can lead to unexpected behavior.
The UID is used by Agora's services and components to identify and manage users within a channel. Ensure that UIDs are properly assigned to prevent conflicts.
### RTC connection
The connection between the SDK and the channel. When publishing or subscribing to multiple streams in multiple channels, a connection is used to specify the target channel.
## Credentials
To ensure reliable access and secure communication, Agora uses credentials such as the App ID, App Certificate, and tokens to identify applications, authenticate their requests, and authorize their access on its platform.
### App ID
The App ID is a unique key generated by Agora to identify each project and provide billing and other statistical data services. The App ID is critical for connecting users within your app. It is used to initialize the Agora Engine in your app, and as one of the required keys to create authentication tokens for secure communication. Retrieve the App ID for your project using the [Agora Console](https://console.agora.io/legacy/project-management).
App IDs are stored on the front-end client and do not provide access control. Projects using only an App ID allow any user with the App ID to join. For access control, especially in production environments, choose the **App ID + Token** mechanism for user authentication when creating a new project. Without authentication tokens, your environment is open to anyone with access to your App ID.
### App Certificate
An App Certificate is a unique key generated by the Agora Console to secure projects through token authentication. It is required, along with the App ID, to generate a token that proves authorization between your systems and Agora's network. App Certificates are used to generate Video Calling authentication tokens.
Store the App Certificate securely in your backend systems. If your App Certificate is compromised or to meet security compliance requirements, you can invalidate certificates and create new ones through the Agora Console.
### Tokens
A token is a dynamic key generated using the App ID, App Certificate, user ID, and expiration timestamp. Tokens authenticate and secure access to Agora's services, ensuring only authorized users can join a channel and participate in real-time communication.
Tokens are generated on your server and passed to the client for use in Video Calling. The token generation process involves digitally signing the App ID, App Certificate, user ID, and expiration timestamp using a specific algorithm, preventing tampering or forgery.
During development and testing, use the Agora Console to generate temporary tokens. For production environments, implement a token server as part of your security infrastructure to control access to your channels.
For information on setting up a token server for generating and managing tokens, refer to [Deploy a token server](/en/realtime-media/video/build/authenticate-users/deploy-token-server).
### Agora Console
[Agora Console](https://console.agora.io/) is the main dashboard where you manage your Agora projects and services. Before you can use Agora's SDKs, you must first create a project in the Agora Console. See [Agora account management](/en/introduction/account) for
details.

Agora Console provides an intuitive interface for developers to query and manage their Agora account. After registering an Agora account, you use the Agora Console to perform the following tasks:
* Manage your account
* Create and configure Agora projects and services
* Get an App ID and the App certificate
* Generate temporary tokens for development and testing
* Manage members and roles
* Check call quality and usage
* Check bills and make payments
* Access product resources
See [Agora account management](/en/introduction/account) for details on how to manage all aspects of your Agora account.
Agora also provides RESTful APIs that you use to implement features such as creating a project and fetching usage numbers programmatically.
## Audio and video concepts
### Audio and video interaction workflow
The following figure illustrates the workflow of using the Video SDK to implement basic audio and video interaction.

Agora relies on the following fundamental concepts to enable seamless real-time communication:
### Track
A track contains specific audio or video information. It consists of three parts: input source, filter, and output. According to different functions in the RTC process, tracks can be further classified into uplink tracks and downlink tracks.

#### Input source
The input source is the local audio or video data to be published. It can be from a camera, screen capture, or microphone source, or parsed from a media file.
#### Filter
A filter performs a series of processing operations on audio and video, including pre-processing and post-processing, and transmits the processed audio and video signals to the output. Filters can be connected to multiple input sources or multiple outputs.
* Pre-processing: Audio/video filters in the sender track, such as virtual background, beautification, echo cancellation, and noise reduction.
* Post-processing : Audio/video filters in the receiving track, such as super-resolution, and spatial audio effects.
#### Output
Located at the end of the track, such as an encoder, or a renderer.
### Audio module
In audio interaction, the main functions of the audio module are as shown in the figure below:

After you call `registerAudioFrameObserver`, you can obtain the raw audio data at the following observation points in the audio transmission process:
1. Obtain the raw audio data of ear monitoring through the `onEarMonitoringAudioFrame` callback.
2. Obtain the captured raw audio data through the `onRecordAudioFrame` callback.
3. Obtain the raw audio playback data of each individual stream through the `onPlaybackAudioFrameBeforeMixing` callback.
4. Obtain the raw audio playback data of all mixed streams through the `onPlaybackAudioFrame` callback.
5. Obtain the raw audio data after mixing the captured and playback audio through the `onMixedAudioFrame` callback.
(5) `onMixedAudioFrame` = (2) `onRecordAudioFrame` + (4) `onPlaybackAudioFrame`
### Audio routing
The audio output device used by the app when playing audio. Common audio routes include wired headphones, earpieces, speakers, Bluetooth headphones, and others.
The APIs used by the audio module are as follows:
* Enable local audio collection: `enableLocalAudio`
* Set local playback device: `setPlaybackDevice`
* Set up audio routing: `setDefaultAudioRouteToSpeakerphone`
### Video module
The following diagram shows the main functions of the video module in video interaction:

The figure shows the following observation points:
1. `POSITION_POST_CAPTURER_ORIGIN`.
2. `POSITION_POST_CAPTURER`, corresponds to the `onCaptureVideoFrame` callback.
3. `POSITION_PRE_ENCODER`, corresponds to the `onPreEncodeVideoFrame` callback.
4. `POSITION_PRE_RENDERER`, corresponds to the `onRenderVideoFrame` callback.
The APIs used by the video module are as follows:
* Enable local video collection: `enableLocalVideo`
* Local preview: `setupLocalVideo` → `startPreview`
* Video rendering shows: `setupRemoteVideo`
# Quickstart (/en/realtime-media/video/get-started-sdk)
This page provides a step-by-step guide on how to create a basic Video Calling app using the Agora Video SDK.
## Understand the tech
To start a Video Calling session, implement the following steps in your app:
* **Initialize the engine**: Before calling other APIs, create and initialize an engine instance.
* **Join a channel**: Call methods to create and join a channel.
* **Send and receive audio and video**: All users can publish streams to the channel and subscribe to audio and video streams published by other users in the channel.

## Prerequisites
* A camera and a microphone.
* A valid Agora account and project. See [Agora account management](/en/introduction/account) for details.
* [Android Studio](https://developer.android.com/studio) 4.2 or higher.
* Android SDK API Level 21 or higher.
* Two mobile devices running Android 5.0 or higher.
## Set up your project
Create a new project
Add to an existing project
1. Create a [new project](https://developer.android.com/studio/projects/create-project).
1. Open Android Studio and select **File > New > New Project...**.
2. Select **Phone and Tablet** > **Empty Activity** and click **Next**.
3. Set the project name and storage path.
4. Select **Java** or **Kotlin** as the language, and click **Finish** to create the Android project.
Note
After you create a project, Android Studio automatically starts gradle sync. Ensure that the synchronization is successful before proceeding to the next step.
1. Add a new activity to your project.
1. Open your project in Android Studio.
2. Right-click on the `app/src/main/java/` folder.
3. Select **New → Activity → Empty Activity**.
4. Enter an activity name and click **Finish**.
This guide uses `MainActivity` as the activity name in the sample code. Replace it with your activity name where required.
2. Add a layout file for your activity.
Set up two container elements in your activity to display local and remote video streams. Refer to [Create a user interface](#create-a-user-interface) to get a bare bones sample layout.
### Install the SDK
Use either of the following methods to add Video SDK to your project.
Maven Central
Manual download
1. Open the `settings.gradle` file in the project's root directory and add the Maven Central dependency, if it doesn't already exist:
```groovy
repositories {
mavenCentral()
}
```
If your Android project uses [dependencyResolutionManagement](https://docs.gradle.org/current/userguide/declaring_repositories.html#sub\:centralized-repository-declaration), the method of adding the Maven Central dependency may differ.
2. To integrate the Video SDK into your Android project, add the following to the `dependencies` block in your project module `build.gradle` file:
* Groovy `build.gradle`
```groovy
implementation 'io.agora.rtc:full-sdk:x.y.z'
```
* Kotlin `build.gradle.kts`
```kotlin
implementation("io.agora.rtc:full-sdk:x.y.z")
```
Replace `x.y.z` with the specific SDK version number, such as `4.5.0`.
To get the latest version number, check the [Release notes](/en/realtime-media/video/reference/release-notes). To integrate the Lite SDK, use `io.agora.rtc:lite-sdk` instead.
3. Prevent code obfuscation
Open the `/app/proguard-rules.pro` file and add the following lines to prevent the Video SDK code from being obfuscated:
```java
-keep class io.agora.** { *; }
-dontwarn io.agora.**
```
1. Download the latest version of Video SDK from the [SDKs](/en/api-reference/sdks?platform=android) page and unzip it.
2. Open the unzipped file and copy the following files or subfolders to your project path.
| File or folder | Project path |
| :----------------------------------- | :----------------------- |
| `agora-rtc-sdk.jar` file | `/app/libs/` |
| `arm64-v8a` folder | `/app/src/main/jniLibs/` |
| `armeabi-v7a` folder | `/app/src/main/jniLibs/` |
| `x86` folder | `/app/src/main/jniLibs/` |
| `x86_64` folder | `/app/src/main/jniLibs/` |
| `high_level_api` in `include` folder | `/app/src/main/jniLibs/` |
3. Select the file `/app/libs/agora-rtc-sdk.jar` in the left navigation bar of Android Studio project files, right-click, and select **add as a library** from the drop-down menu.
4. Prevent code obfuscation
Open the `/app/proguard-rules.pro` file and add the following lines to prevent the Video SDK code from being obfuscated:
```java
-keep class io.agora.** { *; }
-dontwarn io.agora.**
```
## Implement Video Calling
This section guides you through the implementation of basic real-time audio and video interaction in your app.
The following figure illustrates the essential steps:

This guide includes [complete sample code](#complete-sample-code) that demonstrates implementing basic real-time interaction. To understand the core API calls in the sample code, review the following implementation steps and use the code in your `MainActivity` file.
### Import Agora classes
Import the relevant Agora classes and interfaces:
Java
Kotlin
```java
import io.agora.rtc2.Constants;
import io.agora.rtc2.IRtcEngineEventHandler;
import io.agora.rtc2.RtcEngine;
import io.agora.rtc2.RtcEngineConfig;
import io.agora.rtc2.video.VideoCanvas;
import io.agora.rtc2.ChannelMediaOptions;
```
```kotlin
import io.agora.rtc2.Constants
import io.agora.rtc2.IRtcEngineEventHandler
import io.agora.rtc2.RtcEngine
import io.agora.rtc2.RtcEngineConfig
import io.agora.rtc2.video.VideoCanvas
import io.agora.rtc2.ChannelMediaOptions
```
### Initialize the engine
For real-time communication, initialize an `RtcEngine` instance and set up event handlers to manage user interactions within the channel. Use `RtcEngineConfig` to specify the application context, [App ID](/en/introduction/account#get-the-app-id-and-app-certificate), and custom [event handler](#subscribe-to-video-sdk-events), then call `RtcEngine.create(config)` to initialize the engine, enabling further channel operations. In your `MainActivity` file, add the following code:
Java
Kotlin
```java
// Fill in the app ID from Agora Console
private String myAppId = "";
private RtcEngine mRtcEngine;
private void initializeAgoraVideoSDK() {
try {
RtcEngineConfig config = new RtcEngineConfig();
config.mContext = getBaseContext();
config.mAppId = myAppId;
config.mEventHandler = mRtcEventHandler;
mRtcEngine = RtcEngine.create(config);
} catch (Exception e) {
throw new RuntimeException("Error initializing RTC engine: " + e.getMessage());
}
}
```
```kotlin
// Fill in the App ID obtained from the Agora Console
private val myAppId = ""
private var mRtcEngine: RtcEngine? = null
private fun initializeRtcEngine() {
try {
val config = RtcEngineConfig().apply {
mContext = applicationContext
mAppId = myAppId
mEventHandler = mRtcEventHandler
}
mRtcEngine = RtcEngine.create(config)
} catch (e: Exception) {
throw RuntimeException("Error initializing RTC engine: ${e.message}")
}
}
```
### Join a channel
To join a channel, call `joinChannel` with the following parameters:
* **Channel name**: The name of the channel to join. Clients that pass the same channel name join the same channel. If a channel with the specified name does not exist, it is created when the first user joins.
* **Authentication token**: A dynamic key that authenticates a user when the client joins a channel. In a production environment, you obtain a token from a [token server](/en/realtime-media/video/build/authenticate-users/deploy-token-server) in your security infrastructure. For the purpose of this guide [Generate a temporary token](/en/introduction/account#generate-temporary-tokens).
* **User ID**: A 32-bit signed integer that identifies a user in the channel. You can specify a unique user ID for each user yourself. If you set the user ID to `0` when joining a channel, the SDK generates a random number for the user ID and returns the value in the `onJoinChannelSuccess` callback.
* **Channel media options**: Configure `ChannelMediaOptions` to define publishing and subscription settings, optimize performance for your specific use-case, and set optional parameters.
For Video Calling, set the `channelProfile` to `CHANNEL_PROFILE_COMMUNICATION` and the `clientRoleType` to `CLIENT_ROLE_BROADCASTER`.
Java
Kotlin
```java
// Fill in the channel name
private String channelName = "";
// Fill in the temporary token generated from Agora Console
private String token = "";
private void joinChannel() {
ChannelMediaOptions options = new ChannelMediaOptions();
options.clientRoleType = Constants.CLIENT_ROLE_BROADCASTER;
options.channelProfile = Constants.CHANNEL_PROFILE_COMMUNICATION;
options.publishCameraTrack = true;
options.publishMicrophoneTrack = true;
mRtcEngine.joinChannel(token, channelName, 0, options);
}
```
```kotlin
// Fill in the channel name
private val channelName = ""
// Fill in the temporary token generated from Agora Console
private val token = ""
private fun joinChannel() {
val options = ChannelMediaOptions().apply {
clientRoleType = Constants.CLIENT_ROLE_BROADCASTER
channelProfile = Constants.CHANNEL_PROFILE_COMMUNICATION
publishMicrophoneTrack = true
publishCameraTrack = true
}
mRtcEngine.joinChannel(token, channelName, 0, options)
}
```
### Subscribe to Video SDK events
The Video SDK provides an interface for subscribing to channel events. To use it, create an instance of `IRtcEngineEventHandler` and implement the event methods you want to handle.
To ensure that you receive all Video SDK events, set the engine event handler before joining a channel.
Java
Kotlin
```java
private final IRtcEngineEventHandler mRtcEventHandler = new IRtcEngineEventHandler() {
// Triggered when the local user successfully joins the specified channel.
@Override
public void onJoinChannelSuccess(String channel, int uid, int elapsed) {
super.onJoinChannelSuccess(channel, uid, elapsed);
showToast("Joined channel " + channel);
}
// Triggered when a remote user/host joins the channel.
@Override
public void onUserJoined(int uid, int elapsed) {
super.onUserJoined(uid, elapsed);
runOnUiThread(() -> {
// Initialize and display remote video view for the new user.
setupRemoteVideo(uid);
showToast("User joined: " + uid);
});
}
// Triggered when a remote user/host leaves the channel.
@Override
public void onUserOffline(int uid, int reason) {
super.onUserOffline(uid, reason);
runOnUiThread(() -> {
showToast("User offline: " + uid);
});
}
};
```
```kotlin
private val mRtcEventHandler = object : IRtcEngineEventHandler() {
override fun onJoinChannelSuccess(channel: String?, uid: Int, elapsed: Int) {
super.onJoinChannelSuccess(channel, uid, elapsed)
runOnUiThread {
showToast("Joined channel $channel")
}
}
override fun onUserJoined(uid: Int, elapsed: Int) {
runOnUiThread {
showToast("User joined: $uid")
}
}
override fun onUserOffline(uid: Int, reason: Int) {
super.onUserOffline(uid, reason)
runOnUiThread {
showToast("User offline: $uid")
}
}
}
```
### Enable the video module
Follow these steps to enable the video module:
1. Call `enableVideo` to enable the video module.
2. Call `startPreview` to enable local video preview.
Java
Kotlin
```java
private void enableVideo() {
mRtcEngine.enableVideo();
mRtcEngine.startPreview();
}
```
```kotlin
private fun enableVideo() {
mRtcEngine?.apply {
enableVideo()
startPreview()
}
}
```
### Display the local video
Call `setupLocalVideo` to initialize the local view and set the local video display properties.
Java
Kotlin
```java
private void setupLocalVideo() {
FrameLayout container = findViewById(R.id.local_video_view_container);
SurfaceView surfaceView = new SurfaceView(getBaseContext());
container.addView(surfaceView);
mRtcEngine.setupLocalVideo(new VideoCanvas(surfaceView, VideoCanvas.RENDER_MODE_FIT, 0));
}
```
```kotlin
/**
* Initializes the local video view and sets the display properties.
* This method adds a SurfaceView to the local video container and configures it.
*/
private fun setupLocalVideo() {
val container: FrameLayout = findViewById(R.id.local_video_view_container)
val surfaceView = SurfaceView(baseContext)
container.addView(surfaceView)
mRtcEngine.setupLocalVideo(VideoCanvas(surfaceView, VideoCanvas.RENDER_MODE_FIT, 0))
}
```
### Display remote video
When a remote user joins the channel, call `setupRemoteVideo` and pass in the remote user's `uid`, obtained from the `onUserJoined` callback, to display the remote video.
Java
Kotlin
```java
private void setupRemoteVideo(int uid) {
FrameLayout container = findViewById(R.id.remote_video_view_container);
SurfaceView surfaceView = new SurfaceView(getBaseContext());
surfaceView.setZOrderMediaOverlay(true);
container.addView(surfaceView);
mRtcEngine.setupRemoteVideo(new VideoCanvas(surfaceView, VideoCanvas.RENDER_MODE_FIT, uid));
}
```
```kotlin
private fun setupRemoteVideo(uid: Int) {
val container = findViewById(R.id.remote_video_view_container)
val surfaceView = SurfaceView(baseContext).apply {
setZOrderMediaOverlay(true)
}
container.addView(surfaceView)
mRtcEngine.setupRemoteVideo(VideoCanvas(surfaceView, VideoCanvas.RENDER_MODE_FIT, uid))
}
```
### Handle permissions
To access the media devices on Android devices, declare the necessary permissions in the app's manifest and ensure that the user grants these permissions when the client starts.
1. Open your project's `AndroidManifest.xml` file and add the following permissions before ``:
```xml
```
2. Use the following code to handle runtime permissions in your Android app. The logic ensures that the necessary permissions are granted before starting Video Calling. In your `MainActivity` file, add the following code:
Java
Kotlin
```java
private static final int PERMISSION_REQ_ID = 22;
private void requestPermissions() {
ActivityCompat.requestPermissions(this, getRequiredPermissions(), PERMISSION_REQ_ID);
}
private boolean checkPermissions() {
for (String permission : getRequiredPermissions()) {
if (ContextCompat.checkSelfPermission(this, permission) != PackageManager.PERMISSION_GRANTED) {
return false;
}
}
return true;
}
private String[] getRequiredPermissions() {
if (android.os.Build.VERSION.SDK_INT >= android.os.Build.VERSION_CODES.S) {
return new String[]{
Manifest.permission.RECORD_AUDIO,
Manifest.permission.CAMERA,
Manifest.permission.READ_PHONE_STATE,
Manifest.permission.BLUETOOTH_CONNECT
};
} else {
return new String[]{
Manifest.permission.RECORD_AUDIO,
Manifest.permission.CAMERA
};
}
}
@Override
public void onRequestPermissionsResult(int requestCode, @NonNull String[] permissions, @NonNull int[] grantResults) {
super.onRequestPermissionsResult(requestCode, permissions, grantResults);
if (requestCode == PERMISSION_REQ_ID && checkPermissions()) {
startVideoCalling();
}
}
```
```kotlin
private val PERMISSION_REQ_ID = 22
private fun requestPermissions() {
ActivityCompat.requestPermissions(this, getRequiredPermissions(), PERMISSION_REQ_ID)
}
private fun checkPermissions(): Boolean {
for (permission in getRequiredPermissions()) {
if (ContextCompat.checkSelfPermission(this, permission) != PackageManager.PERMISSION_GRANTED) {
return false
}
}
return true
}
private fun getRequiredPermissions(): Array {
return if (Build.VERSION.SDK_INT >= Build.VERSION_CODES.S) {
arrayOf(
Manifest.permission.RECORD_AUDIO,
Manifest.permission.CAMERA,
Manifest.permission.READ_PHONE_STATE,
Manifest.permission.BLUETOOTH_CONNECT
)
} else {
arrayOf(
Manifest.permission.RECORD_AUDIO,
Manifest.permission.CAMERA
)
}
}
override fun onRequestPermissionsResult(
requestCode: Int,
permissions: Array,
grantResults: IntArray
) {
super.onRequestPermissionsResult(requestCode, permissions, grantResults)
if (requestCode == PERMISSION_REQ_ID && checkPermissions()) {
startVideoCalling()
}
}
```
### Start and close the app
When a user launches your client, start real-time interaction. When a user closes the app, stop the interaction.
1. In the `onCreate` callback, check whether the client has been granted the required permissions. If the permissions have not been granted, request the required permissions from the user. If permissions are granted, initialize `RtcEngine` and join a channel.
Java
Kotlin
```java
@Override
protected void onCreate(Bundle savedInstanceState) {
super.onCreate(savedInstanceState);
setContentView(R.layout.activity_main);
if (checkPermissions()) {
startVideoCalling();
} else {
requestPermissions();
}
}
```
```kotlin
override fun onCreate(savedInstanceState: Bundle?) {
super.onCreate(savedInstanceState)
setContentView(R.layout.activity_main)
if (checkPermissions()) {
startVideoCalling()
} else {
requestPermissions()
}
}
```
2. When a user closes the client, or switches the client to the background, call `stopPreview` to stop the video preview and then call `leaveChannel` to leave the current channel and release all session-related resources.
Java
Kotlin
```java
private void cleanupAgoraEngine() {
if (mRtcEngine != null) {
mRtcEngine.stopPreview();
mRtcEngine.leaveChannel();
mRtcEngine = null;
}
}
```
```kotlin
private fun cleanupAgoraEngine() {
mRtcEngine?.apply {
stopPreview()
leaveChannel()
}
mRtcEngine = null
}
```
### Complete sample code
A complete code sample demonstrating the basic process of real-time interaction is provided for your reference. To use the sample code, copy the following lines into the `MainActivity` file in your project. Then, replace `` in package `com.example.` with your project's name.
Java
Kotlin
```java
package com.example.;
import android.Manifest;
import android.content.pm.PackageManager;
import android.os.Bundle;
import android.view.SurfaceView;
import android.widget.FrameLayout;
import android.widget.Toast;
import androidx.annotation.NonNull;
import androidx.appcompat.app.AppCompatActivity;
import androidx.core.app.ActivityCompat;
import androidx.core.content.ContextCompat;
import io.agora.rtc2.ChannelMediaOptions;
import io.agora.rtc2.Constants;
import io.agora.rtc2.IRtcEngineEventHandler;
import io.agora.rtc2.RtcEngine;
import io.agora.rtc2.RtcEngineConfig;
import io.agora.rtc2.video.VideoCanvas;
public class MainActivity extends AppCompatActivity {
private static final int PERMISSION_REQ_ID = 22;
private String myAppId = "";
private String channelName = "";
private String token = "";
private RtcEngine mRtcEngine;
private final IRtcEngineEventHandler mRtcEventHandler = new IRtcEngineEventHandler() {
// Callback when successfully joining the channel
@Override
public void onJoinChannelSuccess(String channel, int uid, int elapsed) {
super.onJoinChannelSuccess(channel, uid, elapsed);
showToast("Joined channel " + channel);
}
// Callback when a remote user or host joins the current channel
@Override
public void onUserJoined(int uid, int elapsed) {
super.onUserJoined(uid, elapsed);
runOnUiThread(() -> {
// When a remote user joins the channel, display the remote video stream for the specified uid
setupRemoteVideo(uid);
showToast("User joined: " + uid); // Show toast for user joining
});
}
// Callback when a remote user or host leaves the current channel
@Override
public void onUserOffline(int uid, int reason) {
super.onUserOffline(uid, reason);
runOnUiThread(() -> {
showToast("User offline: " + uid); // Show toast for user going offline
});
}
};
@Override
protected void onCreate(Bundle savedInstanceState) {
super.onCreate(savedInstanceState);
setContentView(R.layout.activity_main);
if (checkPermissions()) {
startVideoCalling();
} else {
requestPermissions();
}
}
private void requestPermissions() {
ActivityCompat.requestPermissions(this, getRequiredPermissions(), PERMISSION_REQ_ID);
}
private boolean checkPermissions() {
for (String permission : getRequiredPermissions()) {
if (ContextCompat.checkSelfPermission(this, permission) != PackageManager.PERMISSION_GRANTED) {
return false;
}
}
return true;
}
private String[] getRequiredPermissions() {
if (android.os.Build.VERSION.SDK_INT >= android.os.Build.VERSION_CODES.S) {
return new String[]{
Manifest.permission.RECORD_AUDIO,
Manifest.permission.CAMERA,
Manifest.permission.READ_PHONE_STATE,
Manifest.permission.BLUETOOTH_CONNECT
};
} else {
return new String[]{
Manifest.permission.RECORD_AUDIO,
Manifest.permission.CAMERA
};
}
}
@Override
public void onRequestPermissionsResult(int requestCode, @NonNull String[] permissions, @NonNull int[] grantResults) {
super.onRequestPermissionsResult(requestCode, permissions, grantResults);
if (requestCode == PERMISSION_REQ_ID && checkPermissions()) {
startVideoCalling();
}
}
private void startVideoCalling() {
initializeAgoraVideoSDK();
enableVideo();
setupLocalVideo();
joinChannel();
}
private void initializeAgoraVideoSDK() {
try {
RtcEngineConfig config = new RtcEngineConfig();
config.mContext = getBaseContext();
config.mAppId = myAppId;
config.mEventHandler = mRtcEventHandler;
mRtcEngine = RtcEngine.create(config);
} catch (Exception e) {
throw new RuntimeException("Error initializing RTC engine: " + e.getMessage());
}
}
private void enableVideo() {
mRtcEngine.enableVideo();
mRtcEngine.startPreview();
}
private void setupLocalVideo() {
FrameLayout container = findViewById(R.id.local_video_view_container);
SurfaceView surfaceView = new SurfaceView(getBaseContext());
container.addView(surfaceView);
mRtcEngine.setupLocalVideo(new VideoCanvas(surfaceView, VideoCanvas.RENDER_MODE_FIT, 0));
}
private void joinChannel() {
ChannelMediaOptions options = new ChannelMediaOptions();
options.clientRoleType = Constants.CLIENT_ROLE_BROADCASTER;
options.channelProfile = Constants.CHANNEL_PROFILE_COMMUNICATION;
options.publishCameraTrack = true;
options.publishMicrophoneTrack = true;
mRtcEngine.joinChannel(token, channelName, 0, options);
}
private void setupRemoteVideo(int uid) {
FrameLayout container = findViewById(R.id.remote_video_view_container);
SurfaceView surfaceView = new SurfaceView(getBaseContext());
surfaceView.setZOrderMediaOverlay(true);
container.addView(surfaceView);
mRtcEngine.setupRemoteVideo(new VideoCanvas(surfaceView, VideoCanvas.RENDER_MODE_FIT, uid));
}
@Override
protected void onDestroy() {
super.onDestroy();
cleanupAgoraEngine();
}
private void cleanupAgoraEngine() {
if (mRtcEngine != null) {
mRtcEngine.stopPreview();
mRtcEngine.leaveChannel();
mRtcEngine = null;
}
}
private void showToast(String message) {
runOnUiThread(() -> Toast.makeText(MainActivity.this, message, Toast.LENGTH_SHORT).show());
}
}
```
```kotlin
package com.example.
import android.Manifest
import android.content.pm.PackageManager
import android.os.Bundle
import android.view.SurfaceView
import android.widget.FrameLayout
import android.widget.Toast
import androidx.appcompat.app.AppCompatActivity
import androidx.core.app.ActivityCompat
import androidx.core.content.ContextCompat
import io.agora.rtc2.ChannelMediaOptions
import io.agora.rtc2.Constants
import io.agora.rtc2.IRtcEngineEventHandler
import io.agora.rtc2.RtcEngine
import io.agora.rtc2.RtcEngineConfig
import io.agora.rtc2.video.VideoCanvas
class MainActivity : AppCompatActivity() {
companion object {
private const val PERMISSION_REQ_ID = 22
}
private val myAppId = ""
private val channelName = ""
private val token = ""
private var mRtcEngine: RtcEngine? = null
private val mRtcEventHandler = object : IRtcEngineEventHandler() {
override fun onJoinChannelSuccess(channel: String?, uid: Int, elapsed: Int) {
super.onJoinChannelSuccess(channel, uid, elapsed)
showToast("Joined channel $channel")
}
override fun onUserJoined(uid: Int, elapsed: Int) {
super.onUserJoined(uid, elapsed)
runOnUiThread {
setupRemoteVideo(uid)
showToast("User joined: $uid")
}
}
override fun onUserOffline(uid: Int, reason: Int) {
super.onUserOffline(uid, reason)
runOnUiThread {
showToast("User offline: $uid")
}
}
}
override fun onCreate(savedInstanceState: Bundle?) {
super.onCreate(savedInstanceState)
setContentView(R.layout.activity_main)
if (checkPermissions()) {
startVideoCalling()
} else {
requestPermissions()
}
}
private fun requestPermissions() {
ActivityCompat.requestPermissions(this, getRequiredPermissions(), PERMISSION_REQ_ID)
}
private fun checkPermissions(): Boolean {
return getRequiredPermissions().all {
ContextCompat.checkSelfPermission(this, it) == PackageManager.PERMISSION_GRANTED
}
}
private fun getRequiredPermissions(): Array {
return if (android.os.Build.VERSION.SDK_INT >= android.os.Build.VERSION_CODES.S) {
arrayOf(
Manifest.permission.RECORD_AUDIO,
Manifest.permission.CAMERA,
Manifest.permission.READ_PHONE_STATE,
Manifest.permission.BLUETOOTH_CONNECT
)
} else {
arrayOf(
Manifest.permission.RECORD_AUDIO,
Manifest.permission.CAMERA
)
}
}
override fun onRequestPermissionsResult(
requestCode: Int,
permissions: Array,
grantResults: IntArray
) {
super.onRequestPermissionsResult(requestCode, permissions, grantResults)
if (requestCode == PERMISSION_REQ_ID && checkPermissions()) {
startVideoCalling()
}
}
private fun startVideoCalling() {
initializeAgoraVideoSDK()
enableVideo()
setupLocalVideo()
joinChannel()
}
private fun initializeAgoraVideoSDK() {
try {
val config = RtcEngineConfig().apply {
mContext = applicationContext
mAppId = myAppId
mEventHandler = mRtcEventHandler
}
mRtcEngine = RtcEngine.create(config)
} catch (e: Exception) {
throw RuntimeException("Error initializing RTC engine: ${e.message}")
}
}
private fun enableVideo() {
mRtcEngine?.apply {
enableVideo()
startPreview()
}
}
private fun setupLocalVideo() {
val container: FrameLayout = findViewById(R.id.local_video_view_container)
val surfaceView = SurfaceView(baseContext)
container.addView(surfaceView)
mRtcEngine?.setupLocalVideo(VideoCanvas(surfaceView, VideoCanvas.RENDER_MODE_FIT, 0))
}
private fun joinChannel() {
val options = ChannelMediaOptions().apply {
clientRoleType = Constants.CLIENT_ROLE_BROADCASTER
channelProfile = Constants.CHANNEL_PROFILE_COMMUNICATION
publishMicrophoneTrack = true
publishCameraTrack = true
}
mRtcEngine?.joinChannel(token, channelName, 0, options)
}
private fun setupRemoteVideo(uid: Int) {
val container: FrameLayout = findViewById(R.id.remote_video_view_container)
val surfaceView = SurfaceView(applicationContext).apply {
setZOrderMediaOverlay(true)
container.addView(this)
}
mRtcEngine?.setupRemoteVideo(VideoCanvas(surfaceView, VideoCanvas.RENDER_MODE_FIT, uid))
}
override fun onDestroy() {
super.onDestroy()
cleanupAgoraEngine()
}
private fun cleanupAgoraEngine() {
mRtcEngine?.apply {
stopPreview()
leaveChannel()
}
mRtcEngine = null
}
private fun showToast(message: String) {
runOnUiThread {
Toast.makeText(this@MainActivity, message, Toast.LENGTH_SHORT).show()
}
}
}
```
For the `myAppId` and `token` variables, replace the placeholders with the values you obtained from Agora Console. Ensure you enter the same `channelName` you used when generating the temporary token.
### Create a user interface
To connect the sample code to your existing UI, ensure that your XML layout includes the container UI element IDs used to [Display the local video](#display-the-local-video) and [Display remote video](#display-remote-video).
Alternatively, use the following sample code to generate a basic user interface. Replace the existing content in `/app/src/main/res/layout/activity_main.xml` with this code.

### Sample code to create the user interface
```xml
```
## Test the sample code
Take the following steps to test the sample code:
1. In `MainActivity` update the values for `myAppId`, and `token` with values from Agora Console. Fill in the same `channelName` you used to generate the token.
2. Enable developer options on your Android test device. Turn on USB debugging, connect the Android device to your development machine through a USB cable, and check that your device appears in the Android device options.
3. In Android Studio, click  **Sync Project with Gradle Files** to resolve project dependencies and update the configuration.
4. After synchronization is successful, click  **Run app**. Android Studio starts compilation. After a few moments, the app is installed on your Android device.
5. Launch the App, grant recording and camera permissions. If you set the user role to host, you will see yourself in the local view.
6. On a second Android device, repeat the previous steps to install and launch the client. Alternatively, use the [Web demo](https://webdemo-global.agora.io/example/quickStart/videoAndVoiceCalling/index.html) to join the same channel and test the following use-cases:
* If users on both devices join the channel as hosts, they can see and hear each other.
* If one user joins as host and the other as audience, the host can see themselves in the local video window; the audience can see the host in the remote video window and hear the host.
## Reference
This section contains content that completes the information on this page, or points you to documentation that explains other aspects of this product.
* If a firewall is deployed in your network environment, refer to [Connect with Cloud Proxy](/en/realtime-media/video/build/manage-connection-and-quality/cloud-proxy) to use Agora services normally.
### Next steps
After implementing the quickstart sample, read the following documents to learn more:
* To ensure communication security in a test or production environment, best practice is to obtain and use a token from an authentication server. For details, see [Secure authentication with tokens](/en/realtime-media/video/build/authenticate-users/authentication-workflow).
### Sample project
Agora provides open source sample projects on [GitHub](https://github.com/AgoraIO/API-Examples) for your reference. Download or view the [JoinChannelVideo](https://github.com/AgoraIO-Community/Agora-RTC-QuickStart/tree/main/Android/Agora-RTC-QuickStart-Android) project for a more detailed example.
### API reference
* [`RtcEngineConfig`](https://api-ref.agora.io/en/video-sdk/android/4.x/API/class_rtcengineconfig.html)
* [`create`](https://api-ref.agora.io/en/video-sdk/android/4.x/API/class_irtcengine.html#api_irtcengine_create)
* [`ChannelMediaOptions`](https://api-ref.agora.io/en/video-sdk/android/4.x/API/class_channelmediaoptions.html)
* [`joinChannel`](https://api-ref.agora.io/en/video-sdk/android/4.x/API/class_irtcengine.html#api_irtcengine_joinchannel2)
* [`enableVideo`](https://api-ref.agora.io/en/video-sdk/android/4.x/API/class_irtcengine.html#api_irtcengine_enablevideo)
* [`startPreview`](https://api-ref.agora.io/en/video-sdk/android/4.x/API/class_irtcengine.html#api_irtcengine_startpreview)
* [`leaveChannel`](https://api-ref.agora.io/en/video-sdk/android/4.x/API/class_irtcengine.html#api_irtcengine_leavechannel)
* [`IRtcEngineEventHandler`](https://api-ref.agora.io/en/video-sdk/android/4.x/API/class_irtcengineeventhandler.html#class_irtcengineeventhandler)
### Frequently asked questions
* [How can I fix black screen issues?](/en/api-reference/faq/quality/video_blank#black-screen-on-the-local-side)
* [Why can't I turn on the camera?](/en/api-reference/faq/quality/video_camera)
* [How can I listen for audience joining or leaving a channel?](/en/api-reference/faq/integration/audience_event)
* [How can I solve channel-related issues?](/en/api-reference/faq/integration/channel)
* [How can I set the log file?](/en/api-reference/faq/integration/set_log_file)
* [Why do apps on some Android versions fail to capture audio and video after screen locking or switching to the background?](/en/api-reference/faq/quality/android_background)
### See also
* [SDK error codes](/en/realtime-media/video/reference/error-codes)
* [Connection status management](/en/realtime-media/video/build/manage-connection-and-quality/connection-status-management)
## Platform-specific versions
- [Android](/en/realtime-media/video/get-started-sdk/android.md)
- [iOS](/en/realtime-media/video/get-started-sdk/ios.md)
- [macOS](/en/realtime-media/video/get-started-sdk/macos.md)
- [Web](/en/realtime-media/video/get-started-sdk/web.md)
- [Windows](/en/realtime-media/video/get-started-sdk/windows.md)
- [Electron](/en/realtime-media/video/get-started-sdk/electron.md)
- [Flutter](/en/realtime-media/video/get-started-sdk/flutter.md)
- [React Native](/en/realtime-media/video/get-started-sdk/react-native.md)
- [JavaScript](/en/realtime-media/video/get-started-sdk/javascript.md)
- [Unity](/en/realtime-media/video/get-started-sdk/unity.md)
- [Unreal Engine](/en/realtime-media/video/get-started-sdk/unreal.md)
- [Unreal Blueprint](/en/realtime-media/video/get-started-sdk/blueprint.md)
# Video Calling overview (/en/realtime-media/video)
Agora's Realtime Media API delivers ultra-low-latency, high-definition real-time video communication for one-to-one and group calls. With support for cross-platform integration and dynamic resolution adaptation, it ensures smooth, reliable video experiences even under challenging network conditions. Use it for telehealth, online education, team collaboration, customer support, and any application requiring real-time face-to-face communication.
Enhance Agora's Video SDK with capabilities such as recording, virtual backgrounds, and in-call moderation, or leverage the Extensions Marketplace to enable AI-powered features like noise cancellation, video effects, and more.
## Use cases
## Product Features
Agora’s Software-Defined Real-Time Network (SDRTN®) supports video users in over 200 countries and regions.
Consistent high-quality video from 1:1 calls to thousands of concurrent users, even under challenging network conditions.
Publish multiple audio and video tracks to one or more channels from a single instance, with support for multi-channel capture cameras and microphones.
Enable screen sharing or interactive whiteboards that allow users to draw, annotate, and share content from multiple devices simultaneously.
Support for high quality audio with 3D spatial audio, AI noise suppression, and gain control to provide an immersive audio experience.
Record video calls in the cloud or on premises with control over the format, path of storage, and quality.
## Start building
# Agora MCP (/en/realtime-media/video/mcp)
The Agora MCP server gives your AI assistant direct access to Agora documentation, so it can look up APIs, SDK methods, and platform details in real time.
The server is available at:
```text
https://mcp.agora.io
```
## Installation
Refer to the setup guide for your coding assistant.
Codex
Claude Code
Gemini CLI
Manual installation
```bash
codex mcp add --url https://mcp.agora.io agora-docs
```
```bash
claude mcp add --transport http agora-docs https://mcp.agora.io
```
```bash
gemini mcp add --transport http agora-docs https://mcp.agora.io
```
For Cursor and other tools, add `https://mcp.agora.io` as a remote MCP server and use `http` or Streamable HTTP transport when prompted.
# SDK quickstart (/en/realtime-media/video/quickstart)
This page provides a step-by-step guide on how to create a basic Video Calling app using the Agora Video SDK.
## Understand the tech
To start a Video Calling session, implement the following steps in your app:
* **Initialize the engine**: Before calling other APIs, create and initialize an engine instance.
* **Join a channel**: Call methods to create and join a channel.
* **Send and receive audio and video**: All users can publish streams to the channel and subscribe to audio and video streams published by other users in the channel.

## Prerequisites
## Set up your project
Create a new project
Add to an existing project
1. Create a [new project](https://developer.android.com/studio/projects/create-project).
1. Open Android Studio and select **File > New > New Project...**.
2. Select **Phone and Tablet** > **Empty Activity** and click **Next**.
3. Set the project name and storage path.
4. Select **Java** or **Kotlin** as the language, and click **Finish** to create the Android project.
Note
After you create a project, Android Studio automatically starts gradle sync. Ensure that the synchronization is successful before proceeding to the next step.
1. Add a new activity to your project.
1. Open your project in Android Studio.
2. Right-click on the `app/src/main/java/` folder.
3. Select **New → Activity → Empty Activity**.
4. Enter an activity name and click **Finish**.
This guide uses `MainActivity` as the activity name in the sample code. Replace it with your activity name where required.
2. Add a layout file for your activity.
Set up two container elements in your activity to display local and remote video streams. Refer to [Create a user interface](#create-a-user-interface) to get a bare bones sample layout.
### Install the SDK
Use either of the following methods to add Video SDK to your project.
Maven Central
Manual download
1. Open the `settings.gradle` file in the project's root directory and add the Maven Central dependency, if it doesn't already exist:
```text
repositories {
mavenCentral()
}
```
If your Android project uses [dependencyResolutionManagement](https://docs.gradle.org/current/userguide/declaring_repositories.html#sub\:centralized-repository-declaration), the method of adding the Maven Central dependency may differ.
2. To integrate the Video SDK into your Android project, add the following to the `dependencies` block in your project module `build.gradle` file:
* Groovy `build.gradle`
```text
implementation 'io.agora.rtc:full-sdk:x.y.z'
```
* Kotlin `build.gradle.kts`
```kotlin
implementation("io.agora.rtc:full-sdk:x.y.z")
```
Replace `x.y.z` with the specific SDK version number, such as `4.5.0`.
To get the latest version number, check the [Release notes](/en/realtime-media/video/reference/release-notes). To integrate the Lite SDK, use `io.agora.rtc:lite-sdk` instead.
3. Prevent code obfuscation
Open the `/app/proguard-rules.pro` file and add the following lines to prevent the Video SDK code from being obfuscated:
```java
-keep class io.agora.** { *; }
-dontwarn io.agora.**
```
1. Download the latest version of Video SDK from the [SDKs](/en/api-reference/sdks?product=video\&platform=android) page and unzip it.
2. Open the unzipped file and copy the following files or subfolders to your project path.
| File or folder | Project path |
| :----------------------------------- | :----------------------- |
| `agora-rtc-sdk.jar` file | `/app/libs/` |
| `arm64-v8a` folder | `/app/src/main/jniLibs/` |
| `armeabi-v7a` folder | `/app/src/main/jniLibs/` |
| `x86` folder | `/app/src/main/jniLibs/` |
| `x86_64` folder | `/app/src/main/jniLibs/` |
| `high_level_api` in `include` folder | `/app/src/main/jniLibs/` |
3. Select the file `/app/libs/agora-rtc-sdk.jar` in the left navigation bar of Android Studio project files, right-click, and select **add as a library** from the drop-down menu.
4. Prevent code obfuscation
Open the `/app/proguard-rules.pro` file and add the following lines to prevent the Video SDK code from being obfuscated:
```java
-keep class io.agora.** { *; }
-dontwarn io.agora.**
```
## Implement Video Calling
The following figure illustrates the essential steps:
### Quick start sequence

This guide includes [complete sample code](#complete-sample-code) that demonstrates implementing basic real-time interaction. To understand the core API calls in the sample code, review the following implementation steps and use the code in your `MainActivity` file.
### Import Agora classes
Import the relevant Agora classes and interfaces:
Java
Kotlin
```java
import io.agora.rtc2.Constants;
import io.agora.rtc2.IRtcEngineEventHandler;
import io.agora.rtc2.RtcEngine;
import io.agora.rtc2.RtcEngineConfig;
import io.agora.rtc2.video.VideoCanvas;
import io.agora.rtc2.ChannelMediaOptions;
```
```kotlin
import io.agora.rtc2.Constants
import io.agora.rtc2.IRtcEngineEventHandler
import io.agora.rtc2.RtcEngine
import io.agora.rtc2.RtcEngineConfig
import io.agora.rtc2.video.VideoCanvas
import io.agora.rtc2.ChannelMediaOptions
```
### Initialize the engine
For real-time communication, initialize an `RtcEngine` instance and set up event handlers to manage user interactions within the channel. Use `RtcEngineConfig` to specify the application context, [App ID](/en/introduction/account#get-the-app-id-and-app-certificate), and custom [event handler](#subscribe-to-video-sdk-events), then call `RtcEngine.create(config)` to initialize the engine, enabling further channel operations. In your `MainActivity` file, add the following code:
Java
Kotlin
```java
// Fill in the app ID from Agora Console
private String myAppId = "";
private RtcEngine mRtcEngine;
private void initializeAgoraVideoSDK() {
try {
RtcEngineConfig config = new RtcEngineConfig();
config.mContext = getBaseContext();
config.mAppId = myAppId;
config.mEventHandler = mRtcEventHandler;
mRtcEngine = RtcEngine.create(config);
} catch (Exception e) {
throw new RuntimeException("Error initializing RTC engine: " + e.getMessage());
}
}
```
```kotlin
// Fill in the App ID obtained from the Agora Console
private val myAppId = ""
private var mRtcEngine: RtcEngine? = null
private fun initializeRtcEngine() {
try {
val config = RtcEngineConfig().apply {
mContext = applicationContext
mAppId = myAppId
mEventHandler = mRtcEventHandler
}
mRtcEngine = RtcEngine.create(config)
} catch (e: Exception) {
throw RuntimeException("Error initializing RTC engine: ${e.message}")
}
}
```
### Join a channel
To join a channel, call `joinChannel` with the following parameters:
* **Channel name**: The name of the channel to join. Clients that pass the same channel name join the same channel. If a channel with the specified name does not exist, it is created when the first user joins.
* **Authentication token**: A dynamic key that authenticates a user when the client joins a channel. In a production environment, you obtain a token from a [token server](/en/realtime-media/video/build/authenticate-users/deploy-token-server) in your security infrastructure. For the purpose of this guide [Generate a temporary token](/en/introduction/account#generate-temporary-tokens).
* **User ID**: A 32-bit signed integer that identifies a user in the channel. You can specify a unique user ID for each user yourself. If you set the user ID to `0` when joining a channel, the SDK generates a random number for the user ID and returns the value in the `onJoinChannelSuccess` callback.
* **Channel media options**: Configure `ChannelMediaOptions` to define publishing and subscription settings, optimize performance for your specific use-case, and set optional parameters.
For Video Calling, set the `channelProfile` to `CHANNEL_PROFILE_COMMUNICATION` and the `clientRoleType` to `CLIENT_ROLE_BROADCASTER`.
Java
Kotlin
```java
// Fill in the channel name
private String channelName = "";
// Fill in the temporary token generated from Agora Console
private String token = "";
private void joinChannel() {
ChannelMediaOptions options = new ChannelMediaOptions();
options.clientRoleType = Constants.CLIENT_ROLE_BROADCASTER;
options.channelProfile = Constants.CHANNEL_PROFILE_COMMUNICATION;
options.publishCameraTrack = true;
options.publishMicrophoneTrack = true;
mRtcEngine.joinChannel(token, channelName, 0, options);
}
```
```kotlin
// Fill in the channel name
private val channelName = ""
// Fill in the temporary token generated from Agora Console
private val token = ""
private fun joinChannel() {
val options = ChannelMediaOptions().apply {
clientRoleType = Constants.CLIENT_ROLE_BROADCASTER
channelProfile = Constants.CHANNEL_PROFILE_COMMUNICATION
publishMicrophoneTrack = true
publishCameraTrack = true
}
mRtcEngine.joinChannel(token, channelName, 0, options)
}
```
### Subscribe to Video SDK events
The Video SDK provides an interface for subscribing to channel events. To use it, create an instance of `IRtcEngineEventHandler` and implement the event methods you want to handle.
To ensure that you receive all Video SDK events, set the engine event handler before joining a channel.
Java
Kotlin
```java
private final IRtcEngineEventHandler mRtcEventHandler = new IRtcEngineEventHandler() {
// Triggered when the local user successfully joins the specified channel.
@Override
public void onJoinChannelSuccess(String channel, int uid, int elapsed) {
super.onJoinChannelSuccess(channel, uid, elapsed);
showToast("Joined channel " + channel);
}
// Triggered when a remote user/host joins the channel.
@Override
public void onUserJoined(int uid, int elapsed) {
super.onUserJoined(uid, elapsed);
runOnUiThread(() -> {
// Initialize and display remote video view for the new user.
setupRemoteVideo(uid);
showToast("User joined: " + uid);
});
}
// Triggered when a remote user/host leaves the channel.
@Override
public void onUserOffline(int uid, int reason) {
super.onUserOffline(uid, reason);
runOnUiThread(() -> {
showToast("User offline: " + uid);
});
}
};
```
```kotlin
private val mRtcEventHandler = object : IRtcEngineEventHandler() {
override fun onJoinChannelSuccess(channel: String?, uid: Int, elapsed: Int) {
super.onJoinChannelSuccess(channel, uid, elapsed)
runOnUiThread {
showToast("Joined channel $channel")
}
}
override fun onUserJoined(uid: Int, elapsed: Int) {
runOnUiThread {
showToast("User joined: $uid")
}
}
override fun onUserOffline(uid: Int, reason: Int) {
super.onUserOffline(uid, reason)
runOnUiThread {
showToast("User offline: $uid")
}
}
}
```
### Enable the video module
Follow these steps to enable the video module:
1. Call `enableVideo` to enable the video module.
2. Call `startPreview` to enable local video preview.
Java
Kotlin
```java
private void enableVideo() {
mRtcEngine.enableVideo();
mRtcEngine.startPreview();
}
```
```kotlin
private fun enableVideo() {
mRtcEngine?.apply {
enableVideo()
startPreview()
}
}
```
### Display the local video
Call `setupLocalVideo` to initialize the local view and set the local video display properties.
Java
Kotlin
```java
private void setupLocalVideo() {
FrameLayout container = findViewById(R.id.local_video_view_container);
SurfaceView surfaceView = new SurfaceView(getBaseContext());
container.addView(surfaceView);
mRtcEngine.setupLocalVideo(new VideoCanvas(surfaceView, VideoCanvas.RENDER_MODE_FIT, 0));
}
```
```kotlin
/**
* Initializes the local video view and sets the display properties.
* This method adds a SurfaceView to the local video container and configures it.
*/
private fun setupLocalVideo() {
val container: FrameLayout = findViewById(R.id.local_video_view_container)
val surfaceView = SurfaceView(baseContext)
container.addView(surfaceView)
mRtcEngine.setupLocalVideo(VideoCanvas(surfaceView, VideoCanvas.RENDER_MODE_FIT, 0))
}
```
### Display remote video
When a remote user joins the channel, call `setupRemoteVideo` and pass in the remote user's `uid`, obtained from the `onUserJoined` callback, to display the remote video.
Java
Kotlin
```java
private void setupRemoteVideo(int uid) {
FrameLayout container = findViewById(R.id.remote_video_view_container);
SurfaceView surfaceView = new SurfaceView(getBaseContext());
surfaceView.setZOrderMediaOverlay(true);
container.addView(surfaceView);
mRtcEngine.setupRemoteVideo(new VideoCanvas(surfaceView, VideoCanvas.RENDER_MODE_FIT, uid));
}
```
```kotlin
private fun setupRemoteVideo(uid: Int) {
val container = findViewById(R.id.remote_video_view_container)
val surfaceView = SurfaceView(baseContext).apply {
setZOrderMediaOverlay(true)
}
container.addView(surfaceView)
mRtcEngine.setupRemoteVideo(VideoCanvas(surfaceView, VideoCanvas.RENDER_MODE_FIT, uid))
}
```
### Handle permissions
To access the media devices on Android devices, declare the necessary permissions in the app's manifest and ensure that the user grants these permissions when the client starts.
1. Open your project's `AndroidManifest.xml` file and add the following permissions before ``:
```xml
```
2. Use the following code to handle runtime permissions in your Android app. The logic ensures that the necessary permissions are granted before starting Video Calling. In your `MainActivity` file, add the following code:
Java
Kotlin
```java
private static final int PERMISSION_REQ_ID = 22;
private void requestPermissions() {
ActivityCompat.requestPermissions(this, getRequiredPermissions(), PERMISSION_REQ_ID);
}
private boolean checkPermissions() {
for (String permission : getRequiredPermissions()) {
if (ContextCompat.checkSelfPermission(this, permission) != PackageManager.PERMISSION_GRANTED) {
return false;
}
}
return true;
}
private String[] getRequiredPermissions() {
if (android.os.Build.VERSION.SDK_INT >= android.os.Build.VERSION_CODES.S) {
return new String[]{
Manifest.permission.RECORD_AUDIO,
Manifest.permission.CAMERA,
Manifest.permission.READ_PHONE_STATE,
Manifest.permission.BLUETOOTH_CONNECT
};
} else {
return new String[]{
Manifest.permission.RECORD_AUDIO,
Manifest.permission.CAMERA
};
}
}
@Override
public void onRequestPermissionsResult(int requestCode, @NonNull String[] permissions, @NonNull int[] grantResults) {
super.onRequestPermissionsResult(requestCode, permissions, grantResults);
if (requestCode == PERMISSION_REQ_ID && checkPermissions()) {
startVideoCalling();
}
}
```
```kotlin
private val PERMISSION_REQ_ID = 22
private fun requestPermissions() {
ActivityCompat.requestPermissions(this, getRequiredPermissions(), PERMISSION_REQ_ID)
}
private fun checkPermissions(): Boolean {
for (permission in getRequiredPermissions()) {
if (ContextCompat.checkSelfPermission(this, permission) != PackageManager.PERMISSION_GRANTED) {
return false
}
}
return true
}
private fun getRequiredPermissions(): Array {
return if (Build.VERSION.SDK_INT >= Build.VERSION_CODES.S) {
arrayOf(
Manifest.permission.RECORD_AUDIO,
Manifest.permission.CAMERA,
Manifest.permission.READ_PHONE_STATE,
Manifest.permission.BLUETOOTH_CONNECT
)
} else {
arrayOf(
Manifest.permission.RECORD_AUDIO,
Manifest.permission.CAMERA
)
}
}
override fun onRequestPermissionsResult(
requestCode: Int,
permissions: Array,
grantResults: IntArray
) {
super.onRequestPermissionsResult(requestCode, permissions, grantResults)
if (requestCode == PERMISSION_REQ_ID && checkPermissions()) {
startVideoCalling()
}
}
```
### Start and close the app
When a user launches your client, start real-time interaction. When a user closes the app, stop the interaction.
1. In the `onCreate` callback, check whether the client has been granted the required permissions. If the permissions have not been granted, request the required permissions from the user. If permissions are granted, initialize `RtcEngine` and join a channel.
Java
Kotlin
```java
@Override
protected void onCreate(Bundle savedInstanceState) {
super.onCreate(savedInstanceState);
setContentView(R.layout.activity_main);
if (checkPermissions()) {
startVideoCalling();
} else {
requestPermissions();
}
}
```
```kotlin
override fun onCreate(savedInstanceState: Bundle?) {
super.onCreate(savedInstanceState)
setContentView(R.layout.activity_main)
if (checkPermissions()) {
startVideoCalling()
} else {
requestPermissions()
}
}
```
2. When a user closes the client, or switches the client to the background, call `stopPreview` to stop the video preview and then call `leaveChannel` to leave the current channel and release all session-related resources.
Java
Kotlin
```java
private void cleanupAgoraEngine() {
if (mRtcEngine != null) {
mRtcEngine.stopPreview();
mRtcEngine.leaveChannel();
mRtcEngine = null;
}
}
```
```kotlin
private fun cleanupAgoraEngine() {
mRtcEngine?.apply {
stopPreview()
leaveChannel()
}
mRtcEngine = null
}
```
### Complete sample code
A complete code sample demonstrating the basic process of real-time interaction is provided for your reference. To use the sample code, copy the following lines into the `MainActivity` file in your project. Then, replace `` in package `com.example.` with your project's name.
### Complete sample code for real-time Video Calling
Java
Kotlin
```java
package com.example.;
public class MainActivity extends AppCompatActivity {
private static final int PERMISSION_REQ_ID = 22;
private String myAppId = "";
private String channelName = "";
private String token = "";
private RtcEngine mRtcEngine;
private final IRtcEngineEventHandler mRtcEventHandler = new IRtcEngineEventHandler() {
// Callback when successfully joining the channel
@Override
public void onJoinChannelSuccess(String channel, int uid, int elapsed) {
super.onJoinChannelSuccess(channel, uid, elapsed);
showToast("Joined channel " + channel);
}
// Callback when a remote user or host joins the current channel
@Override
public void onUserJoined(int uid, int elapsed) {
super.onUserJoined(uid, elapsed);
runOnUiThread(() -> {
// When a remote user joins the channel, display the remote video stream for the specified uid
setupRemoteVideo(uid);
showToast("User joined: " + uid); // Show toast for user joining
});
}
// Callback when a remote user or host leaves the current channel
@Override
public void onUserOffline(int uid, int reason) {
super.onUserOffline(uid, reason);
runOnUiThread(() -> {
showToast("User offline: " + uid); // Show toast for user going offline
});
}
};
@Override
protected void onCreate(Bundle savedInstanceState) {
super.onCreate(savedInstanceState);
setContentView(R.layout.activity_main);
if (checkPermissions()) {
startVideoCalling();
} else {
requestPermissions();
}
}
private void requestPermissions() {
ActivityCompat.requestPermissions(this, getRequiredPermissions(), PERMISSION_REQ_ID);
}
private boolean checkPermissions() {
for (String permission : getRequiredPermissions()) {
if (ContextCompat.checkSelfPermission(this, permission) != PackageManager.PERMISSION_GRANTED) {
return false;
}
}
return true;
}
private String[] getRequiredPermissions() {
if (android.os.Build.VERSION.SDK_INT >= android.os.Build.VERSION_CODES.S) {
return new String[]{
Manifest.permission.RECORD_AUDIO,
Manifest.permission.CAMERA,
Manifest.permission.READ_PHONE_STATE,
Manifest.permission.BLUETOOTH_CONNECT
};
} else {
return new String[]{
Manifest.permission.RECORD_AUDIO,
Manifest.permission.CAMERA
};
}
}
@Override
public void onRequestPermissionsResult(int requestCode, @NonNull String[] permissions, @NonNull int[] grantResults) {
super.onRequestPermissionsResult(requestCode, permissions, grantResults);
if (requestCode == PERMISSION_REQ_ID && checkPermissions()) {
startVideoCalling();
}
}
private void startVideoCalling() {
initializeAgoraVideoSDK();
enableVideo();
setupLocalVideo();
joinChannel();
}
private void initializeAgoraVideoSDK() {
try {
RtcEngineConfig config = new RtcEngineConfig();
config.mContext = getBaseContext();
config.mAppId = myAppId;
config.mEventHandler = mRtcEventHandler;
mRtcEngine = RtcEngine.create(config);
} catch (Exception e) {
throw new RuntimeException("Error initializing RTC engine: " + e.getMessage());
}
}
private void enableVideo() {
mRtcEngine.enableVideo();
mRtcEngine.startPreview();
}
private void setupLocalVideo() {
FrameLayout container = findViewById(R.id.local_video_view_container);
SurfaceView surfaceView = new SurfaceView(getBaseContext());
container.addView(surfaceView);
mRtcEngine.setupLocalVideo(new VideoCanvas(surfaceView, VideoCanvas.RENDER_MODE_FIT, 0));
}
private void joinChannel() {
ChannelMediaOptions options = new ChannelMediaOptions();
options.clientRoleType = Constants.CLIENT_ROLE_BROADCASTER;
options.channelProfile = Constants.CHANNEL_PROFILE_COMMUNICATION;
options.publishCameraTrack = true;
options.publishMicrophoneTrack = true;
mRtcEngine.joinChannel(token, channelName, 0, options);
}
private void setupRemoteVideo(int uid) {
FrameLayout container = findViewById(R.id.remote_video_view_container);
SurfaceView surfaceView = new SurfaceView(getBaseContext());
surfaceView.setZOrderMediaOverlay(true);
container.addView(surfaceView);
mRtcEngine.setupRemoteVideo(new VideoCanvas(surfaceView, VideoCanvas.RENDER_MODE_FIT, uid));
}
@Override
protected void onDestroy() {
super.onDestroy();
cleanupAgoraEngine();
}
private void cleanupAgoraEngine() {
if (mRtcEngine != null) {
mRtcEngine.stopPreview();
mRtcEngine.leaveChannel();
mRtcEngine = null;
}
}
private void showToast(String message) {
runOnUiThread(() -> Toast.makeText(MainActivity.this, message, Toast.LENGTH_SHORT).show());
}
}
```
```kotlin
package com.example.
class MainActivity : AppCompatActivity() {
companion object {
private const val PERMISSION_REQ_ID = 22
}
private val myAppId = ""
private val channelName = ""
private val token = ""
private var mRtcEngine: RtcEngine? = null
private val mRtcEventHandler = object : IRtcEngineEventHandler() {
override fun onJoinChannelSuccess(channel: String?, uid: Int, elapsed: Int) {
super.onJoinChannelSuccess(channel, uid, elapsed)
showToast("Joined channel $channel")
}
override fun onUserJoined(uid: Int, elapsed: Int) {
super.onUserJoined(uid, elapsed)
runOnUiThread {
setupRemoteVideo(uid)
showToast("User joined: $uid")
}
}
override fun onUserOffline(uid: Int, reason: Int) {
super.onUserOffline(uid, reason)
runOnUiThread {
showToast("User offline: $uid")
}
}
}
override fun onCreate(savedInstanceState: Bundle?) {
super.onCreate(savedInstanceState)
setContentView(R.layout.activity_main)
if (checkPermissions()) {
startVideoCalling()
} else {
requestPermissions()
}
}
private fun requestPermissions() {
ActivityCompat.requestPermissions(this, getRequiredPermissions(), PERMISSION_REQ_ID)
}
private fun checkPermissions(): Boolean {
return getRequiredPermissions().all {
ContextCompat.checkSelfPermission(this, it) == PackageManager.PERMISSION_GRANTED
}
}
private fun getRequiredPermissions(): Array {
return if (android.os.Build.VERSION.SDK_INT >= android.os.Build.VERSION_CODES.S) {
arrayOf(
Manifest.permission.RECORD_AUDIO,
Manifest.permission.CAMERA,
Manifest.permission.READ_PHONE_STATE,
Manifest.permission.BLUETOOTH_CONNECT
)
} else {
arrayOf(
Manifest.permission.RECORD_AUDIO,
Manifest.permission.CAMERA
)
}
}
override fun onRequestPermissionsResult(
requestCode: Int,
permissions: Array,
grantResults: IntArray
) {
super.onRequestPermissionsResult(requestCode, permissions, grantResults)
if (requestCode == PERMISSION_REQ_ID && checkPermissions()) {
startVideoCalling()
}
}
private fun startVideoCalling() {
initializeAgoraVideoSDK()
enableVideo()
setupLocalVideo()
joinChannel()
}
private fun initializeAgoraVideoSDK() {
try {
val config = RtcEngineConfig().apply {
mContext = applicationContext
mAppId = myAppId
mEventHandler = mRtcEventHandler
}
mRtcEngine = RtcEngine.create(config)
} catch (e: Exception) {
throw RuntimeException("Error initializing RTC engine: ${e.message}")
}
}
private fun enableVideo() {
mRtcEngine?.apply {
enableVideo()
startPreview()
}
}
private fun setupLocalVideo() {
val container: FrameLayout = findViewById(R.id.local_video_view_container)
val surfaceView = SurfaceView(baseContext)
container.addView(surfaceView)
mRtcEngine?.setupLocalVideo(VideoCanvas(surfaceView, VideoCanvas.RENDER_MODE_FIT, 0))
}
private fun joinChannel() {
val options = ChannelMediaOptions().apply {
clientRoleType = Constants.CLIENT_ROLE_BROADCASTER
channelProfile = Constants.CHANNEL_PROFILE_COMMUNICATION
publishMicrophoneTrack = true
publishCameraTrack = true
}
mRtcEngine?.joinChannel(token, channelName, 0, options)
}
private fun setupRemoteVideo(uid: Int) {
val container: FrameLayout = findViewById(R.id.remote_video_view_container)
val surfaceView = SurfaceView(applicationContext).apply {
setZOrderMediaOverlay(true)
container.addView(this)
}
mRtcEngine?.setupRemoteVideo(VideoCanvas(surfaceView, VideoCanvas.RENDER_MODE_FIT, uid))
}
override fun onDestroy() {
super.onDestroy()
cleanupAgoraEngine()
}
private fun cleanupAgoraEngine() {
mRtcEngine?.apply {
stopPreview()
leaveChannel()
}
mRtcEngine = null
}
private fun showToast(message: String) {
runOnUiThread {
Toast.makeText(this@MainActivity, message, Toast.LENGTH_SHORT).show()
}
}
}
```
For the `myAppId` and `token` variables, replace the placeholders with the values you obtained from Agora Console. Ensure you enter the same `channelName` you used when generating the temporary token.
### Create a user interface
To connect the sample code to your existing UI, ensure that your XML layout includes the container UI element IDs used to [Display the local video](#display-the-local-video) and [Display remote video](#display-remote-video).
Alternatively, use the following sample code to generate a basic user interface. Replace the existing content in `/app/src/main/res/layout/activity_main.xml` with this code.

### Sample code to create the user interface
```xml
```
## Test the sample code
Take the following steps to test the sample code:
1. In `MainActivity` update the values for `myAppId`, and `token` with values from Agora Console. Fill in the same `channelName` you used to generate the token.
2. Enable developer options on your Android test device. Turn on USB debugging, connect the Android device to your development machine through a USB cable, and check that your device appears in the Android device options.
3. In Android Studio, click  **Sync Project with Gradle Files** to resolve project dependencies and update the configuration.
4. After synchronization is successful, click  **Run app**. Android Studio starts compilation. After a few moments, the app is installed on your Android device.
5. Launch the App, grant recording and camera permissions. If you set the user role to host, you will see yourself in the local view.
6. On a second Android device, repeat the previous steps to install and launch the client. Alternatively, use the [Web demo](https://webdemo-global.agora.io/example/quickStart/videoAndVoiceCalling/index.html) to join the same channel and test the following use-cases:
* If users on both devices join the channel as hosts, they can see and hear each other.
* If one user joins as host and the other as audience, the host can see themselves in the local video window; the audience can see the host in the remote video window and hear the host.
## Reference
### Sample project
Agora provides open source sample projects on [GitHub](https://github.com/AgoraIO/API-Examples) for your reference. Download or view the [JoinChannelVideo](https://github.com/AgoraIO-Community/Agora-RTC-QuickStart/tree/main/Android/Agora-RTC-QuickStart-Android) project for a more detailed example.
### API reference
* [`RtcEngineConfig`](https://api-ref.agora.io/en/video-sdk/android/4.x/API/class_rtcengineconfig.html)
* [`create`](https://api-ref.agora.io/en/video-sdk/android/4.x/API/class_irtcengine.html#api_irtcengine_create)
* [`ChannelMediaOptions`](https://api-ref.agora.io/en/video-sdk/android/4.x/API/class_channelmediaoptions.html)
* [`joinChannel`](https://api-ref.agora.io/en/video-sdk/android/4.x/API/class_irtcengine.html#api_irtcengine_joinchannel2)
* [`enableVideo`](https://api-ref.agora.io/en/video-sdk/android/4.x/API/class_irtcengine.html#api_irtcengine_enablevideo)
* [`startPreview`](https://api-ref.agora.io/en/video-sdk/android/4.x/API/class_irtcengine.html#api_irtcengine_startpreview)
* [`leaveChannel`](https://api-ref.agora.io/en/video-sdk/android/4.x/API/class_irtcengine.html#api_irtcengine_leavechannel)
* [`IRtcEngineEventHandler`](https://api-ref.agora.io/en/video-sdk/android/4.x/API/class_irtcengineeventhandler.html#class_irtcengineeventhandler)
### Frequently asked questions
* [How can I fix black screen issues?](/en/api-reference/faq/quality/video_blank#black-screen-on-the-local-side)
* [Why can't I turn on the camera?](/en/api-reference/faq/quality/video_camera)
* [How can I listen for audience joining or leaving a channel?](/en/api-reference/faq/integration/audience_event)
* [How can I solve channel-related issues?](/en/api-reference/faq/integration/channel)
* [How can I set the log file?](/en/api-reference/faq/integration/set_log_file)
* [Why do apps on some Android versions fail to capture audio and video after screen locking or switching to the background?](/en/api-reference/faq/quality/android_background)
## Platform-specific versions
- [Android](/en/realtime-media/video/quickstart/android.md)
- [iOS](/en/realtime-media/video/quickstart/ios.md)
- [macOS](/en/realtime-media/video/quickstart/macos.md)
- [Web](/en/realtime-media/video/quickstart/web.md)
- [Windows](/en/realtime-media/video/quickstart/windows.md)
- [Electron](/en/realtime-media/video/quickstart/electron.md)
- [Flutter](/en/realtime-media/video/quickstart/flutter.md)
- [React Native](/en/realtime-media/video/quickstart/react-native.md)
- [JavaScript](/en/realtime-media/video/quickstart/javascript.md)
- [Unity](/en/realtime-media/video/quickstart/unity.md)
- [Unreal Engine](/en/realtime-media/video/quickstart/unreal.md)
- [Unreal Blueprint](/en/realtime-media/video/quickstart/blueprint.md)
- [Python](/en/realtime-media/video/quickstart/python.md)
# Agora skills (/en/realtime-media/video/skills)
Agora skills are structured reference files that help AI coding assistants generate product-aware Agora code without guessing.
Skills include the [Agora MCP server](./mcp.mdx), which provides live access to the latest Agora documentation.
## Installation
**Recommended**
```bash
npx skills add github:AgoraIO/skills
```
**Manual**
```bash
git clone https://github.com/AgoraIO/skills.git ~/agora-skills
```
Point your assistant to `skills/agora/` and use `SKILL.md` as the entry point.
# Subscription packages (/en/realtime-media/video/subscription-packages)
A subscription package is a prepaid billing method. You can purchase a package in the [`Agora Console`](https://console.agora.io/subscriptions/rtc-plans?tab=monthly) to cover usage for the current month.
This page explains how to purchase, and manage subscription and top-up packages.
### Purchase and upgrade
By default, a new account is assigned the Free package when the first project is created. You can upgrade at any time to the Starter, Pro, Business, Business Advanced, or Business Plus. Higher-tier packages provide greater discounts and lower unit prices. To select your package:
1. Log in to [Agora Console](https://console.agora.io/).
2. Click the username at the bottom of the navigation sidebar to open the account popup menu.
3. Select **Subscriptions**.
4. Switch to the **RTC** tab.
5. Select your package and click **Upgrade** or **Downgrade**.

Information
* For non-contracted customers, all packages, except the Enterprise package can be purchased directly from the Agora Console. To upgrade to the Enterprise package, contact [Agora sales](mailto\:sales@agora.io).
* You can upgrade sequentially or skip levels. For example, you may upgrade from Starter to Business Plus directly.
* Package upgrades take effect immediately and apply to the entire calendar month. If you make multiple upgrades on the same day, only the last upgrade is applied.
* If your account has a negative balance, purchasing a prepaid package first charges your credit card for the outstanding balance, then for the package fee.
#### Upgrade rules
When you upgrade to a paid package, it becomes effective for the entire calendar month, regardless of the purchase date. You receive the full monthly allocation of included minutes. The cost of the previous package is deducted from the new package price, so you only pay the difference. If you request an upgrade after auto-renewal has triggered, you may upgrade for the next month as well.
### Renewal
By default, your subscription package renews automatically 48 hours before it expires. Ensure your account has sufficient balance or enable auto-pay to avoid renewal failure. You can unsubscribe at any time to prevent renewal. See [Cancel subscription](#cancel-subscription).
If renewal fails:
* The system sends a notification and retries the renewal.
* If renewal still fails by the time the package expires, the package downgrades to the Free package.
* To restore the previous package, see [Purchase and Upgrade](#purchase-and-upgrade).
### Downgrade
You can downgrade by selecting and purchasing a lower-tier package. A downgrade takes effect when your current package expires if you request it before auto-renewal is triggered. You are charged for the new package when you request the downgrade.
You can downgrade only once per month.
* If your downgrade for the next month is successful, auto-renewal for the current package is not triggered.
* If a package is already active, you must wait until the 1st day of that month to initiate a downgrade for the following month.
#### Example
* **Requested more than 48 hours before the current package expires**: The downgrade takes effect after the current package expires.
* **Requested less than 48 hours before the current package expires**: Since a package is already active for the next month, you must wait until the new package starts to downgrade for the following month.
### Cancel subscription
To cancel a prepaid package, downgrade to the Free package. Downgrade rules apply.
## Top-up package
A top-up package is a pay-as-you-go plan. You can purchase a top-up package from the [`Agora Console`](https://console.agora.io/subscriptions/rtc-plans?tab=top-up) to cover usage that exceeds your monthly package quota.
### Purchase
You can purchase multiple top-up packages. They are deducted in the order of purchase.
#### Example:
* Purchased 250,000-minutes top-up packages on **August 15** and **August 16**. On **September 1**, minutes consumed in August are deducted from the first package, then from the second.
### Validity
Each top-up package is valid for one year, starting from the purchase date to the end of the same month of the following year.
#### Example:
* Purchased on **August 15, 2025** → valid until **August 31, 2026**
Unused minutes expire after the validity period and cannot be carried forward.
### Cancel top-up package
Cancelling a top-up package is not supported.
## Free tier overage
For Free tier users, exceeding the included minutes and any purchased top-up minutes results in service suspension. Service resumes when you purchase additional top-up minutes or upgrade to a prepaid subscription package.
# What are Agora's policies on billing, fee deductions, and account suspension? (/en/api-reference/faq/account/billing_account)
Agora Console provides you with information on billing, fee deductions, and any suspension to your account based on the account type.
None of this applies if you have signed a contract with Agora. The contract overrides all finance information such as billing, deductions, and suspension details.
## Paid account
You have a paid account if you have registered with Agora and done any of the following:
* Added a credit card to your account or topped up your balance using a bank account.
* You have recently made a payment.
* Signed a contract with Agora.
Agora provides each paid account with [10,000 charge-free minutes per month](/en/api-reference/faq/account/billing_free). In addition, there is a 30-day grace period for any outstanding billing amount after a fee deduction.
### Billing
On the first day of each month, Agora Console issues your bill. The billing period is for the past calendar month.
Go to [Agora Console](https://console.agora.io/), and click **Billing** to view the detailed billing information for your projects, including billing period, due date, and amount.
### Additional charges
This section describes the additional charges applicable to your account.
#### Charging 7% Singapore Goods and Services Tax
As of November 2021, Agora Singapore charges 7% [Singapore Goods and Services Tax](https://www.iras.gov.sg/taxes/goods-services-tax-%28gst%29/basics-of-gst/goods-and-services-tax-%28gst%29-what-it-is-and-how-it-works) (GST) on invoices for all Agora services provided to accounts located in Singapore. Agora determines the account location based on the tax identification number, contact address, or billing address that you have provided. All GST collected from Singapore accounts is paid to the Singapore tax authority.
If you have any questions, contact [sales@agora.io](mailto\:sales@agora.io).
### Fee deduction
On the sixth day of each month, Agora Console automatically deducts the fee for the previous month and notifies you by email.
If your account balance is negative after the deduction, Agora sends you an email, reminding you to [top up your account](/en/realtime-media/rtc/reference/pricing#top-up-packages) at your earliest convenience to avoid account suspension.
### Account suspension
If your account balance is negative for 30 days since the deduction date, Agora suspends your account and notifies you by email. None of your projects can access the Agora services.
If this happens, please top up your account at your earliest convenience. Once your balance is greater than or equal to zero, Agora unfreezes your account.
## Free account
You have a free account if you have registered with Agora and *not* done any of the following:
* Added a credit card to your account or topped up your balance using a bank account.
* You have recently made a payment.
* Signed a contract with Agora.
With a free Agora account, you have [10,000 charge-free minutes per month](/en/api-reference/faq/account/billing_free).
### Billing
On the first day of each month, Agora Console issues your bill. The billing period is for the past calendar month.
Go to [Agora Console](https://console.agora.io/), and click  on the left navigation panel. Click **Bills** to view the detailed billing information for your projects, including billing period, due date, and amount.

### Fee deduction
On the sixth day of each month, Agora Console automatically deducts the fee for the previous month.
* The services are free of charge, and Agora does not deduct any fee when you meet both of the following requirements:
* Your monthly total service minutes of Agora RTC SDK do not exceed 10,000 charge-free minutes; and
* You do not use any other charged Agora services or products.
* If you have any outstanding billing amount, then Agora sends you an email, reminding you to [top up your account](/en/realtime-media/rtc/reference/pricing#top-up-packages) at your earliest convenience.
### Account suspension
Agora suspends your account on the second day after any of the following happens:
* Your total service minutes of Agora RTC SDK exceed 10,000 charge-free minutes.
* The number of daily active users (DAU) in your Signaling project exceeds 1,000.
* You use any Agora services or products not included in the 10,000 charge-free minutes and the usage exceeds the free quota of the services or products.
After account suspension, none of your projects can access Agora services.
Please top up your account at your earliest convenience. Once you top up your account, Agora unfreezes your account and upgrades your account to a paid account.
# How does Agora calculate service minutes? (/en/api-reference/faq/account/billing_basis)
In Real-time Communication(RTC SDK), service minutes are calculated either by the number of users or by the number of streams. Agora calculates service minutes **by the number of users**.
## Approach 1: calculate by the number of users
Suppose N users talk for M minutes in a channel, the total service minutes = N \* M.
* If two users talk for 10 minutes, the total service minutes are: 2 \* 10 = 20.
* If five users talk for 10 minutes, the total service minutes are: 5 \* 10 = 50.
* If 10 users talk for 10 minutes, the total service minutes are: 10 \* 10 = 100.
In this approach, the service minutes purely depend on the number of the users in the channel, regardless of how many streams each user subscribes to.
## Approach 2: calculate by the number of streams
Suppose N users talk for M minutes in a channel, and each user subscribes to all remote streams in the channel, the total service minutes = N \_ (N-1) \_ M.
* If two users talk for 10 minutes, the total service minutes are: 2 \_ (2-1) \_ 10 = 20.
* If five users talk for 10 minutes, the total service minutes are: 5 \_ (5-1) \_ 10 = 200.
* If 10 users talk for 10 minutes, the total service minutes are: 10 \_ (10-1) \_ 10 = 900.
In this approach, if a user subscribes to multiple streams, every remote stream the user subscribes to is counted.
## Difference between the two approaches
See the table below for the difference between the two approaches:
| Scenario | Service minutes by the number of users | Service minutes by the number of streams |
| ------------------------------- | -------------------------------------- | ---------------------------------------- |
| Two users talk for 10 minutes. | 20 minutes | 20 minutes |
| Five users talk for 10 minutes. | 50 minutes | 200 minutes |
| 10 users talk for 10 minutes. | 100 minutes | 900 minutes |
The difference between the two approaches become greater when more people join the channel.
## Calculation approach by Agora
Agora calculates service minutes **by the number of users**, which is easier and more straightforward.
## Reference
[Billing policies](/en/introduction/billing/billing-policies)
# Agora's free-of-charge policy for the first 10,000 minutes? (/en/api-reference/faq/account/billing_free)
Agora gives each [Agora Account](https://console.agora.io/) 10,000 free-of-charge minutes each month, and deducts the minutes in the following sequence:
1. Broadcast streaming standard audio minutes
2. Voice call, video call, and interactive live streaming audio minutes
3. On-premise recording audio minutes
4. Cloud recording audio non-transcoding minutes
5. Cloud recording audio minutes
6. Web page recording audio minutes
7. Cloud Proxy audio minutes
8. Broadcast streaming HD video minutes
9. Voice call, video call, and interactive live streaming HD video minutes
10. On-premise recording HD video minutes
11. Individual and composite audio transcoding recording minutes
12. Web page recording HD video minutes
13. Cloud Proxy HD video minutes
14. Voice call, video call, and interactive live streaming HD+ video minutes
15. On-premise recording HD+ video minutes
16. Individual and composite HD+ video recording minutes
17. Web page recording HD+ video minutes
18. Cloud Proxy HD+ video minutes
19. Broadcast streaming standard Full HD video minutes
20. Voice call, video call, and interactive live streaming Full HD video minutes
21. On-premise recording Full HD video minutes
22. Individual and composite full HD video recording minutes
23. Web page recording Full HD video minutes
24. Cloud Proxy Full HD video minutes
25. Broadcast streaming 2K video minutes
26. Voice call, video call, and interactive live streaming 2K video minutes
27. On-premise recording 2K video minutes
28. Individual and composite 2K video recording minutes
29. Broadcast streaming 2K+ video minutes
30. Voice call, video call, and interactive live streaming 2K+ video minutes
31. On-premise recording 2K+ video minutes
32. Individual and composite 2K+ video recording minutes
33. Cloud proxy 2K+ video minutes
If your total service minutes do not exceed 10,000 minutes, the service is free of charge. After the 10,000 free-of-charge minutes are fully deducted, Agora charges you for the additional service minutes.
The remaining free-of-charge minutes are cleared at the end of each
calendar month.
* The 10,000 free-of-charge minutes policy does not apply to CDN live
streaming. Using this service leads to immediate account freeze. If your
app scenario involves CDN live streaming, we recommend adding a credit
card to your account, making a payment, or signing a contract with Agora.
* The 10,000 free-of-charge minutes policy does not apply to the Agora Signaling
SDK.
# How can I solve account issues in Agora Console? (/en/api-reference/faq/account/console_account_faq)
This page provides solutions to issues that users may encounter when using Agora Console.
## Why can't I use my email address to login to Agora Console after successfully signing up with a third-party account?
**Issue description**
You can log in to Agora Console with a registered email address or third-party account, such as Google, GitHub, or WeChat. During this process, you may encounter the following issues:
* Have signed up to Agora Console with a third-party account, but cannot use the e-mail address and password of the third-party account to login to Agora Console.
* Have signed up to Agora Console with an email address but cannot bind the Agora account to a third-party account.
**Reason**
The email signup and login is independent of the third-party signup and login within Agora Console. You can only use the credentials that you used to sign up to Agora Console for your logins.
**Solution**
* If you have signed up to Agora Console with a third-party account, use the third-party account for your logins.
* If you have signed up to Agora Console with your email address, use this along with your password for your logins or provide a phone number for code verification. You cannot bind your Agora account to a third-party account, even if it shares the same email address.
## Why can't I log in to Agora Console with my email address and password?
**Issue description**
Email address login failures are covered in the following scenarios:
* Cannot login after signing up with a third-party account.
* Cannot login after signing up with an email account.
**Reason**
The email signup and login is independent of the third-party signup and login within Agora Console. You can only use the credentials that you used to sign up to Agora Console for your logins.
**Solution**
* If you have signed up to Agora Console with a third-party account, use the third-party account for your logins.
* If you have signed up with an email address, check if your password is correct. If you have forgotten your password, either [reset your password](https://sso2.agora.io/en/forgot-password) or log in with a phone number and a received verification code.
## Why can't I submit an ID Authentication at Agora Console?
**Issue description**
You cannot submit an ID Authentication at Agora Console after verifying your phone number.
**Reason**
**ID Authentication** is required only for the following users:
* A user who has passed phone number verification and whose number is from mainland China.
* A user who has completed email verification and whose IP address is from mainland China.
Users that do not fall into the above two categories can use the Agora services directly without the need for an ID authentication.
**Solution**
If your verified phone number or network IP address does not belong to mainland China, real-name authentication is not required. If you wish to submit real-name authentication information, modify your phone number or network IP address in the Agora Console to one belonging to mainland China.
## How do I switch from an international console account to a domestic one?
**Issue description**
Due to business requirements or operational errors, some users need to switch their Agora Console account from the [International version](https://console.agora.io) to a domestic account, but cannot find the switch settings in Agora Console.
**Reason**
To comply with data security and compliance requirements, the international and domestic versions of Agora Console have data isolation, so users cannot switch account regions on their own.
**Solution**
* If there is minimal project data in your account, Agora recommends registering a new domestic version account.
* If there is significant project data in your account, contact us at [support@agora.io](mailto\:support@agora.io) for assistance with account switching and data migration.
Warning
* Agora only supports switching from an international account to a domestic one; reverse operations are not supported.
* Once you switch your international account to a domestic one, this operation cannot be undone. Therefore, please proceed with caution.
# What should I do if I cannot receive the verification email from Agora? (/en/api-reference/faq/account/email_verification)
When you perform the following operations on [Agora Console](https://console.agora.io/), Agora sends a verification email to you or your member:
* Verify your email address
* Reset your password
* Add a new member or reset a member's password
* Other security settings
To ensure that you or your project members receive the verification email sent by Agora, please add the following email addresses to the email whitelist:
* [support@agora.io](mailto\:support@agora.io)
* [developer@agora.io](mailto\:developer@agora.io)
* [agora@support.agora.io](mailto\:agora@support.agora.io)
# Account and Billing (/en/api-reference/faq/account)
# What Should I do If the DAU in My Signaling Project Exceeds 1000? (/en/api-reference/faq/account/rtm_project_suspended)
If the number of daily active users (DAU) in your Signaling project exceeds 1,000, check whether you have registered with Agora and done any of the following:
* Added a credit card to your account or topped up your balance using a bank account.
* You have recently made a payment.
* Signed a contract with Agora.
Otherwise, your account may be suspended on the second day. After account suspension, none of your projects can access the Agora services.
# Why is the audio routing abnormal after the Android device joins the channel? (/en/api-reference/faq/other/android_noaudio)
Some Android sample apps provided by Agora maintain a global `RtcEngine` instance in WorkerThread that keeps alive while the app is running and is destroyed when the app process is destroyed.
The problem of no audio or abnormal audio routing may occur when developers fail to manage WorkerThread appropriately.
In their design, developers tend to operate on WorkerThread to manage the life cycle of the `RtcEngine` instance, which is quite right for creating the engine and joining a channel. But when they quit the WorkerThread, they do not destroy the `RtcEngine` instance. This may cause problems, especially when the life cycle of the WorkerThread is not the same as the app process.
By calling `destroy`, the `RtcEngine` removes all registered system listeners (in this case, PhoneStateListener), some of which may reference to the Looper of the current Thread. If a system listener is not removed when WorkerThread quits, the listener still monitors but the Looper it references to is already invalid, leading to a dead binder error.
Agora recommends using one of the following solutions to solve this problem:
* Maintain one WorkerThreader.
* Call `destroy` to release the `RtcEngine` instance when exiting the channel.
# How can I view Agora API references offline? (/en/api-reference/faq/other/api_download)
Agora updates Agora API references on Dash platform, you can download and view the offline reference in Dash.
You can only run Dash on macOS or iOS.
## Implementation
1. Download and install [Dash](https://kapeli.com/dash). You can only run Dash on macOS or iOS.
2. Run Dash and click **Download Docsets.**
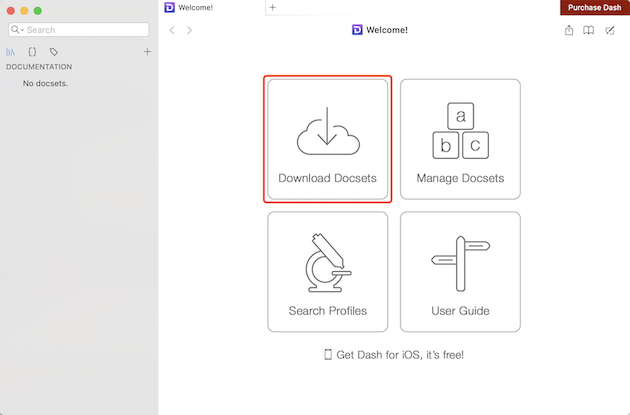
3. Select **User Contributed** and click **Continue**.
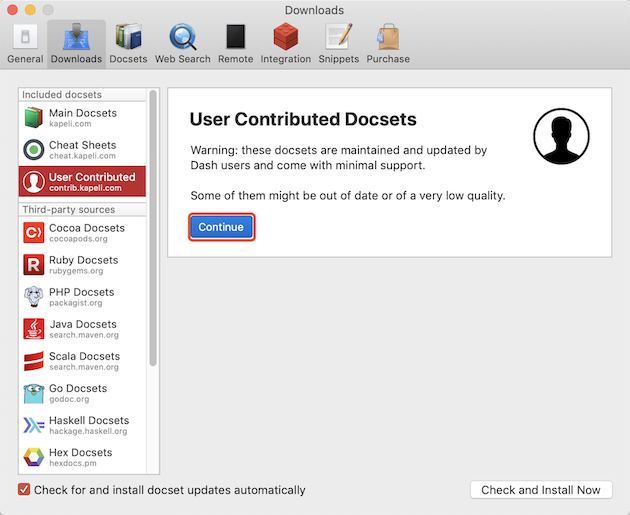
4. Type Agora in the search box and click **Download** for your target docsets.
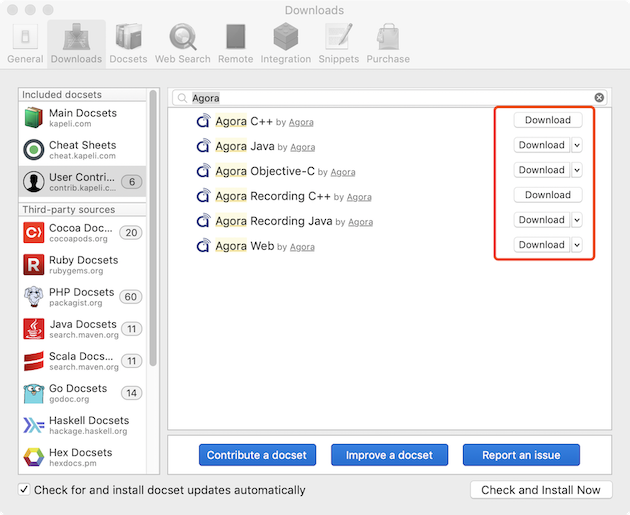
After downloading your target docsets, the **Download** buttons change to **Uninstall**.
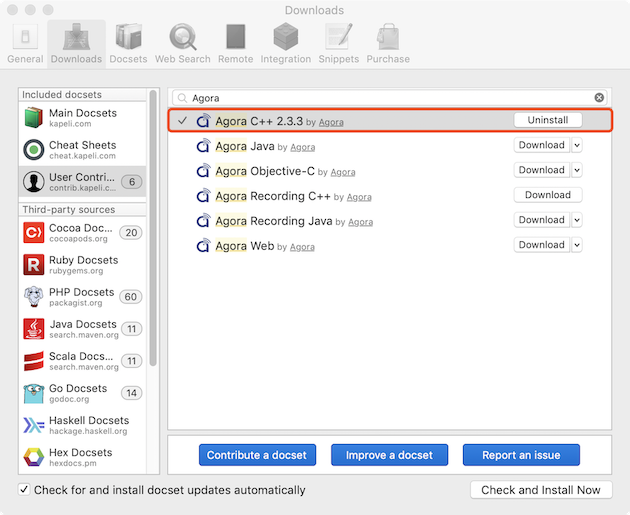
5. Close the **Downloads** window to view all the downloaded API references in the left bar of the main interface.
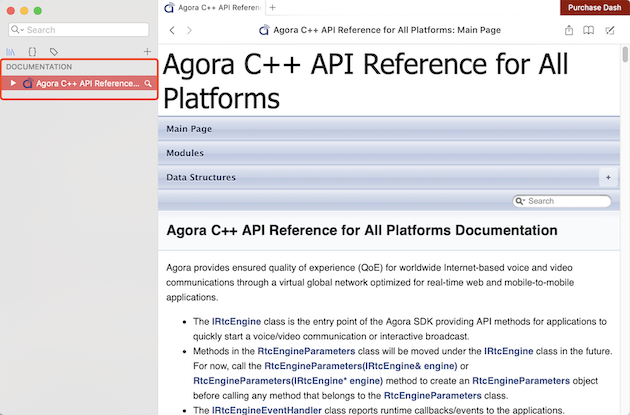
6. Alternatively, you can access the **Downloads** window by clicking the plus icon on the left bar of the main interface, choosing **Download Docsets**, and clicking **User Contributed**.
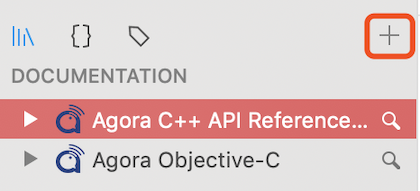
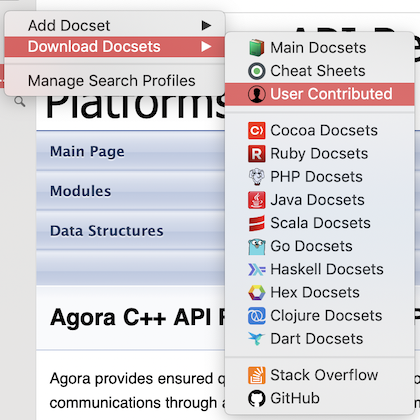
# Other Issues (/en/api-reference/faq/other)
# How can I add a privacy manifest to my iOS app? (/en/api-reference/faq/other/ios_privacy_manifest)
To ensure the privacy and security of end users, Apple requires that all apps listed on its App Store provide a privacy manifest file in accordance with its requirements. The privacy manifest is a property list that records the types of data collected by your app or third-party SDK, and the required reasons for using APIs by your app or third-party SDK.
If the app you upload uses an API but does not describe the necessary reasons in the privacy manifest, Apple sends you an email to remind you to update the app's privacy manifest.
Starting from May 1, 2024, apps that still do not describe the necessary reasons for using included APIs in the privacy manifest will not be able to pass the App Store Connect review. See
[Apple's official documentation](https://developer.apple.com/documentation/bundleresources/privacy_manifest_files/describing_use_of_required_reason_api) for more information.
## Implementation
### Automatic import
Since versions 4.3.1 and 2.1.11, the RTC SDK and Signaling SDK have automatically added the privacy manifest, so manual addition is not required. You can upgrade the SDKs to these versions to achieve automatic import of the privacy manifest. See the respective release notes for details.
### Manual import
If your app uses RTC SDK v4.3.0 or earlier, Chat SDK 1.2 or earlier, or Signaling SDK 2.1.10 or earlier, refer to the following steps to manually add a privacy manifest in Xcode:
* If you do not have a privacy manifest file in your Xcode project, you can download it here:
* [Video and Voice SDK](https://download.agora.io/sdk/release/PrivacyInfo.xcprivacy)
* [Chat SDK](https://download.agora.io/sdk/release/AgoraChat_PrivacyInfo.xcprivacy)
* [Signaling SDK](https://download.agora.io/rtm2/release/PrivacyInfo.xcprivacy)
Add the `PrivacyInfo.xcprivacy` file to the Xcode project, as shown below:
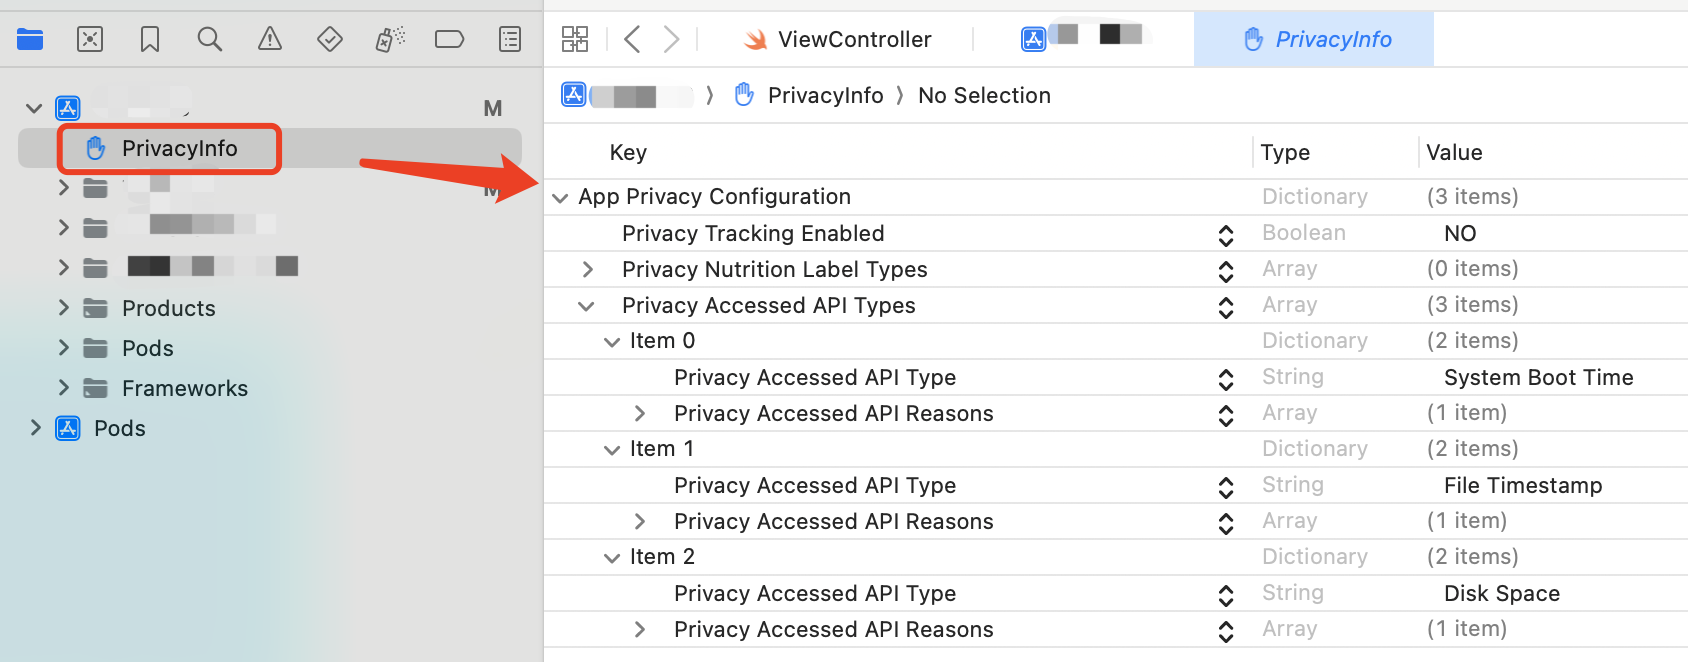
* If you already have a privacy manifest file in your Xcode project, select the file in the Xcode project navigator and click the `+` button to add a new line. Manually add the content to the privacy manifest file as follows:
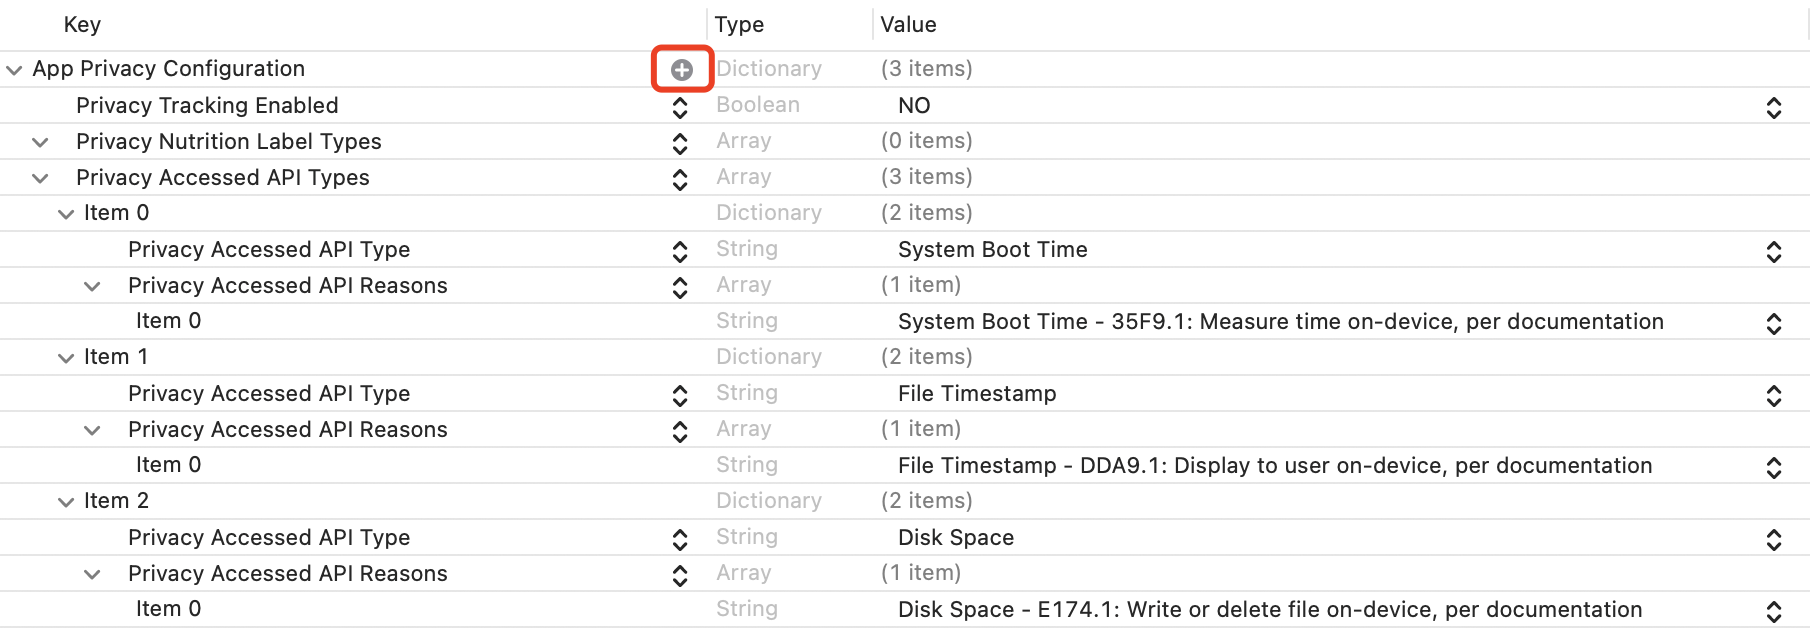
Sample code for configuring privacy-related API access in plist
```xml
NSPrivacyTrackingNSPrivacyCollectedDataTypesNSPrivacyAccessedAPITypesNSPrivacyAccessedAPITypeNSPrivacyAccessedAPICategorySystemBootTimeNSPrivacyAccessedAPITypeReasons35F9.1NSPrivacyAccessedAPITypeNSPrivacyAccessedAPICategoryFileTimestampNSPrivacyAccessedAPITypeReasonsDDA9.1NSPrivacyAccessedAPITypeNSPrivacyAccessedAPICategoryDiskSpaceNSPrivacyAccessedAPITypeReasonsE174.1
```
# MacOS 15 Beta does not support apps that contain Chinese characters in the path (/en/api-reference/faq/other/macos_15_beta)
When developing on macOS 15 Beta system, if the path of the App and the App name contain non-English characters (for example, Chinese, Japanese, Korean, or others), the compiled `Metal shader library` may not contain any methods, causing the App to fail to run normally.
## Cause of the problem
This issue is cause by a system bug.
## Solution
This section takes the Chinese environment as an example to introduce how to create an `InfoPlist` file that supports multiple languages and define the name text displayed by the App. The specific steps are as follows:
1. Create files for multi-language support:
1. Open your project in Xcode and select the **Info** tab.
2. In the **Localizations** section, click the **+** button and select **Chinese, Simplified** to localize your project to support Chinese characters.
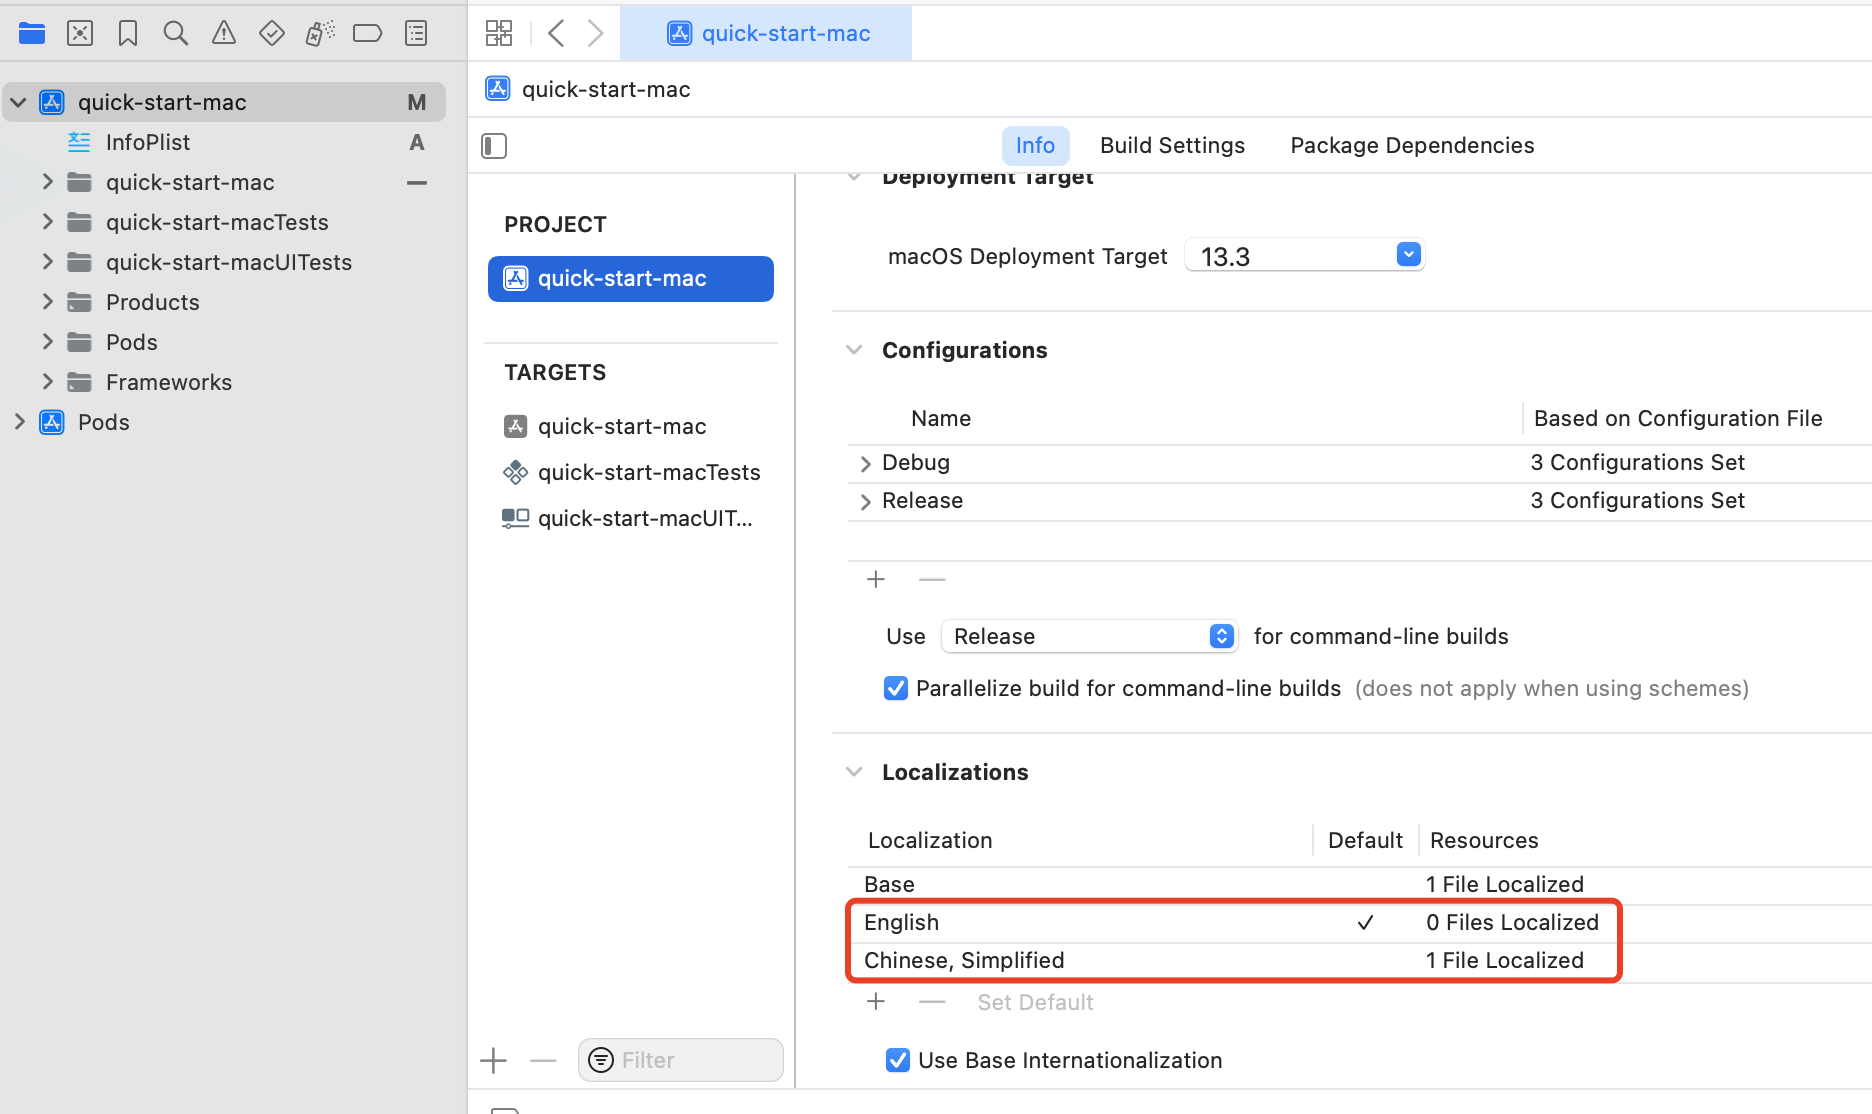
2. Create the `InfoPlist` file:
1. Add a new file:
1. Right-click your project folder in the project navigator and select **New File...**.
2. In the pop-up dialog box, select **String Catalog**.
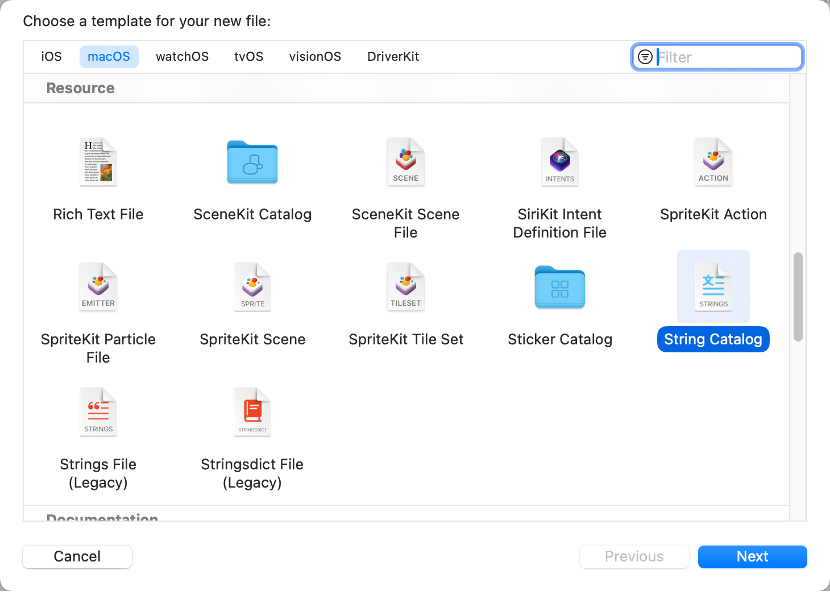
2. Name the file `InfoPlist` and click **Create**.
3. Set the language
1. Select the `InfoPlist` file you just created in the project navigator, select the **Chinese, Simplified** language you have added, and click the **+** button.
2. Add `Key` as `CFBundleDisplayName` and add the display name for it in the Chinese environment.
Note
If the original **Info** in your project is in Chinese, you need to set the display name in English at the same time to ensure that the names displayed in the **Default Localization (zh-Hans)** and **English (en)** fields are as expected.

3. Define the localized display name of the App:
1. Select the target file in **TARGETS** and open the **Info** tab.
2. Click the **+** button and add `Key` as `Application has localized display name`. Set `Value` to `YES` so that the display name of the App can be displayed as different text in different language environments.
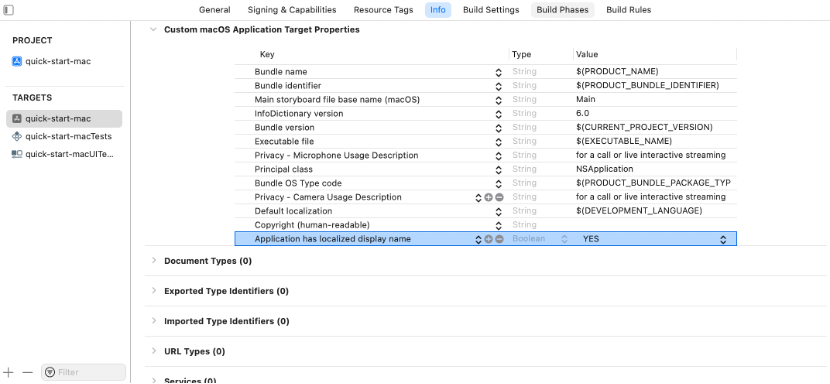
4. Verify the results:
1. Make sure that no file names and App build paths in the project contain Chinese characters.
2. Compile the project and build the App.
3. Switch the language in **System Preferences** on the macOS system to ensure that the App name is displayed correctly in different languages.
# What products does Agora provide? (/en/api-reference/faq/product/agora_product)
Agora is a Platform as a Service (PaaS) provider that enables real-time communicatons with easy-to-embed SDKs and RESTful APIs. Through calling the APIs, you can add the following functions in your applications:
* [Realtime Communication](/en/realtime-media/rtc)
* [Chat (Beta)](/en/realtime-media/im)
* [Signaling](/en/realtime-media/rtm)
* [Interactive Whiteboard](/en/realtime-media/whiteboard)
* [Analytics](/en/realtime-media/agora-analytics/product-overview)
* [Cloud Recording](/en/realtime-media/cloud-recording)
* [On-Premise Recording](/en/realtime-media/on-premise-recording)
* [Server Gateway](/en/realtime-media/rtc-server-sdk)
* [Flexible classroom](/en/realtime-media/flexible-classroom/product-overview)
* [Media Push](/en/realtime-media/media-push)
* [Media Pull](/en/realtime-media/media-pull)
# Which audio file formats does the Agora RTC SDK support? (/en/api-reference/faq/product/audio_format)
The Agora RTC SDK provides a series of methods to manage audio files. The support of each method for single-track or multi-track audio files is as follows:
* `startAudioMixing`: Supports single-track and multi-track audio files.
* `getAudioTrackCount`: Supports single-track and multi-track audio files.
* `selectAudioTrack`: Supports single-track and multi-track audio files.
* `playEffect`: Only supports single-track audio files.
* `preloadEffect`: Only supports single-track audio files.
* `getEffectDuration`: Only supports single-track audio files.
* `startRhythmPlayer`: Only supports single-track audio files.
* `getAudioFileInfo`: Supports single-track and multi-track audio files.
By default, the SDK supports the audio file formats listed in [Basic audio file formats](#basic). The container format of an audio file (including the filename extensions) must be consistent with the audio codec format.
As of v3.6.2, the SDK provides a full-format audio decoding extension library, which can support more audio file formats. See [Extended audio file formats](#advanced). This extension library is currently only available when you call `startAudioMixing` to play audio files.
## Basic audio file formats
### Supported formats for single-track audio files
The Agora RTC SDK supports single-track audio files in the following formats:
* On Android, the SDK supports local and online files in Ogg, 3GP, ASF, AV1, TS, MKV, MP4, WMA, WAV, M4A, MP3, AAC, and ADTS formats.
* On iOS or macOS, the SDK supports local and online files in WAV, M4A, MP3, MP4, AAC, and ADTS formats. For online MP4 and M4A files, the MOOV atom must be before the MDAT atom.
* On Windows, the SDK supports local and online files in MP4, TS, WMA, and AAC formats.
### Supported formats for multi-track audio files
The Agora RTC SDK supports multi-track audio files in the following formats:
* On Android, the SDK supports local and online files in M4A, MP4, and MKV formats. The SDK does not support switching to a second audio track when playing a multi-track audio file in MP4 format.
Note
If you are using Lite SDK, when playing multi-track files in the MP4 format, switching to the second track is **not supported**.
* On iOS or macOS, the SDK supports local and online files in M4A and MP4 formats. For online MP4 and M4A files, the MOOV atom must be before the MDAT atom.
* On Windows, the SDK supports local and online files in M4A format.
## Extended audio file formats
If you use the SDK v3.6.2 or later and have integrated the full-format audio decoding extension library, the `startAudioMixing` method supports playing the following types of audio files:
| Platform | File source | Audio track | File container | Audio codec |
| -------------------------------- | ---------------- | ---------------------------- | ------------------------------------------------------------------------- | -------------------------------------------------- |
| Android, iOS, macOS, and Windows | Local and online | Single-track and multi-track | 3GP, AAC, AMR, ASF, AVI, FLAC, M4A, M4V, MOV, MP3, MP4, TS, Ogg, WAV, WMA | AAC, ARM, FALC, MP2, MP3, PCM, Vorbis, WMAV2, OPUS |
For the extension library name for each platform, see [Reduce App Size](/en/api-reference/faq/integration/reduce_app_size_rtc).
## Considerations
* For iOS, Lite SDK does not support playing audio files without suffixes.
* For Android, Lite SDK does not support playing audio files that are not supported by the Android system.
* Due to system compatibility issues, some Android devices, such as Xiaomi, may have problems when using `playEffect` or `preloadEffect` to read 3GP format files.
* Because some Android devices do not support the WMA format, using Agora API to play WMA files on these devices can fail.
# Which browsers does the Agora Web SDK support? (/en/api-reference/faq/product/browser_support)
This page only applies to the Agora Web SDK 3.x. If you use the Web SDK 4.x, see [Web SDK Compatibility](/en/realtime-media/rtc/reference/supported-platforms?platform=web).
## Supported browsers
The section lists the browsers that the Agora RTC SDK Web SDK supports on different platforms.
To ensure better end user experience, Agora highly recommends using the [latest version](https://www.google.com/chrome/) of Google Chrome on desktop.
Upgrade to the latest version of the Web SDK in the following scenarios:
* Safari on iOS 12.1.4 or later.
* Safari 12.1 or later on macOS.
### Desktop
See the following table for the supported browsers on desktop:
| Platform | Google Chrome 58 or later | Firefox 56 or later | Safari 11 or later | Opera 45 or later | QQ Browser 10.5 or later | 360 Secure Browser | Edge Browser 80 or later |
| :--------- | :--------------------------- | :--------------------------- | :--------------------------- | :--------------------------- | :--------------------------- | :--------------------------- | :--------------------------- |
| macOS 10+ | ✔ | ✔ | ✔ | ✔ | ✔ | ✘ | ✘ |
| Windows 7+ | ✔ | ✔ | N/A | ✔ | ✔ | ✔ | ✔ |
Other browser support on desktop:
* The Web SDK v2.5 or later supports Google Chrome 49 on Windows XP. However, in this case, it supports VP8 only, and cannot interoperate with the Native SDK.
* The Web SDK theoretically supports 360 Extreme Browser, but we do not guarantee full support.
### Mobile
The browser support on mobile devices heavily depends on the capabilities of devices and the codec implementation of browsers.
* On Android 4.1 or later, the Web SDK supports Chrome 58 or later. Agora recommends using VP8 on Android Chrome, because whether Google Chrome for Android supports H.264 is hardware dependent and some Android devices do not support H.264.
* On iOS 11 or later, the Web SDK supports Safari or later. However, Agora does not recommend using the Web SDK on iOS Safari due to the large amount of known issues and limitations of [iOS Safari](#safari). For better user experience on iOS, try the [Agora RTC SDK iOS SDK](/en/api-reference/sdks?product=video\&platform=ios).
The support for in-app browsers on mobile devices is complicated. For details, see [Supported Platforms](/en/realtime-media/rtc/reference/supported-platforms).
## Limitation
Due to the various browser engine implementations, support for some features may vary by browser and platform. The following are known issues and limitations.
On Chrome 81 or later, Safari, and Firefox, device IDs are only available after the user has granted permissions to use the media device. See [Why can't I get device ID on Chrome 81?](/en/api-reference/faq/integration/empty_deviceId)
### Chrome
The Agora Web SDK is based on WebRTC and works best on Chrome.
* The Agora Web SDK supports Chrome 58 or later.
* On some Android devices, Chrome does not support the H.264 codec.
* Some APIs require later versions of Chrome, see the API Reference for details.
* On all AMD-based and some Intel-based devices with the Windows operating system, if Chrome uses the H.264 codec, the video transmission bitrate may be lower than the set value. To resolve it, you can set the browser to use the VP8 codec or try to disable hardware acceleration.
* Chrome 84 on macOS has a known issue: When using the H.264 codec, WebRTC has the probability of a sudden drop in the framerate. For details, see the official bug reports of Google: [Issue 1088650](https://bugs.chromium.org/p/chromium/issues/detail?id=1088650\&q=webrtc%20drop%20component%3ABlink%3EWebRTC%3EVideo\&can=2) and [Issue 12704](https://bugs.chromium.org/p/webrtc/issues/detail?id=12704#c3). Agora recommends using VP8 other than H.264 for Chrome 84 and later versions on macOS.
### Safari**iOS Safari**
Known issues and limitations of Safari on iOS:
* The audio routing may change randomly: Sometimes, the audio is routed to the speakerphone when a headset is connected, or to the earpiece when no headset is connected.
* The volume of a remote user may change randomly on iOS 13.
* Safari does not support the `getAudioLevel` method on iOS.
* If you call `getUserMedia` twice to get two tracks of the same media type, the first track goes muted or black.
* On iOS Safari, after an audience member switches the role to `"host"` and gets the microphone permission, the remote user's volume lowers significantly.
* Occasional: On iOS 13, after a user switches to other apps that use the microphone or camera (such as Siri or Skype) and then switches back, the audio sampling or video capture fails.
* Occasional: After the audio session is interrupted, for example, the local user mutes or unmutes the audio, uses Siri, or answers an incoming call, the user can no longer hear any remote users.
**Other issues**
The following lists other known issues and limitations of Safari on iOS and macOS:
* Safari 11 only supports the video resolution of 480P and higher.
* Safari 12.1 or earlier only supports the H.264 codec.
* On Safari 13, users may not be able to hear other users.
* On iOS Safari 14.2 and macOS Safari 14.0.1, the audio may be stuttering.
* Device permission limitations:
* Safari does not support getting the output device information, so it does not support the `getPlayoutDevices` and `setAudioOutput` methods.
* If **Auto-Play** is not enabled on Safari (as the following figure shows), the stream playback has no audio. You have to call the `navigator.mediaDevices.getUserMedia` method to get the device permissions before playing a stream.
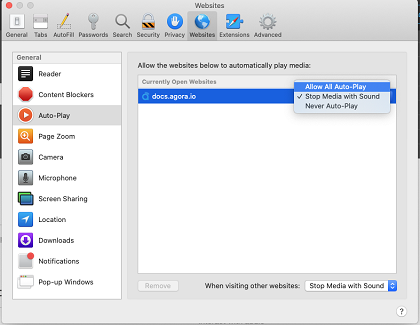
* Safari does not support the `addTrack` and `removeTrack` methods.
* Safari does not support enabling [dual-stream mode](/en/introduction/glossary#dual-stream-mode).
* On Safari, when calling APIs to get quality statistics, the values of some properties are 0. For example, when calling `getLocalAudioStats` to get the audio statistics of the local stream, the values of `RecordingLevel` and `SendLevel` are 0.
### Firefox
* When the Web SDK on Firefox communicates with the SDK on some devices, the video on Firefox is rotated.
* Firefox does not support changing the frame rate (30 fps by default).
* Setting the video profile on Firefox does not take effect on the following devices:
* MacBook Pro (13-inch, 2016, Two Thunderbolt 3 ports)
* Windows 10 (MI)
* On Firefox, when calling APIs to get quality statistics, the values of some properties are 0. For example, when calling `getLocalAudioStats` to get the audio statistics of the local stream, the values of `RecordingLevel` and `SendLevel` are 0.
* On Macs with the Apple M1 chip, Firefox does not support H.264. For details, see the [Firefox documentation](https://bugzilla.mozilla.org/show_bug.cgi?id=1686470).
* Firefox on macOS does not support the `480p_8` (848x480) video resolution. However, it is supported on Firefox for Windows. On Windows, the video initially starts at 640x480 resolution and typically adjusts to 848x480 after a brief delay, as observed in Agora’s testing.
## Reference
[Supported Platforms](/en/realtime-media/rtc/reference/supported-platforms)
# Why can't I call the Cloud Recording RESTful API through a web browser? (/en/api-reference/faq/product/call_api_in_browser)
A Web API needs to make a cross-origin request in accordance with Cross-Origin Resource Sharing (CORS) to call the Cloud Recording RESTful API. The browser must first send an OPTIONS request to the server to query if the server accepts cross-origin requests before sending a cross-origin POST request. However, the Cloud Recording RESTful API does not support the OPTIONS method, and therefore you cannot call it with a Web API.
# How many users can Agora RTC SDK support at the same time? (/en/api-reference/faq/product/capacity)
The Agora RTC SDK provides real-time audio and video services for many users. The number of concurrent channels is unlimited, and each channel supports up to 1 million concurrent online users.
In most scenarios, Agora recommends limiting the number of users sending audio streams concurrently in a channel to 32. Of these 32 users, up to 17 can also send video streams concurrently. If you use a version of the SDK earlier than v3.0.0, and the channel profile is `setChannelProfile(COMMUNICATION)`, Agora recommends limiting the number of users sending streams concurrently in a channel to 7.
As of v3.7.0, a single channel can support up to 128 concurrent online hosts, who can publish audio and video streams at the same time. The number of audience members in a channel is unlimited. Each host or audience member can subscribe to a maximum of 50 hosts at the same time. To experience this improvement, contact [support@agora.io](mailto\:support@agora.io).
* If the number of users sending streams concurrently exceeds the recommended limit, each user in the channel only sees or hears streams equal to the recommended limit, and these streams are assigned at random for each user. For example, if 18 hosts are sending streams concurrently in a live streaming channel, each user sees or hears 17 of the 18 streams, and the missing stream is random.
* Agora does not provide APIs for limiting the number of users sending streams concurrently. However, you can implement such a limitation in your application layer.
* To minimize bandwidth consumption and ensure smooth communication in a real-time video streaming scenario with multiple users, Agora recommends referring to [Join multiple channels](/en/realtime-media/rtc/build/join-and-manage-channels/join-multiple-channels). If you want to use the 128-host feature, contact [support@agora.io](mailto\:support@agora.io) to help with the implementation.
# What PowerPoint features are not supported by the dynamic file conversion function? (/en/api-reference/faq/product/conversion_limitation)
Agora Interactive Whiteboard provides the dynamic file conversion function for converting PPTX files edited with Microsoft PowerPoint to HTML web pages. The generated files preserve animations present in the source files.
However, this function is not available for certain objects, formats, and effects in PPTX files. These objects, formats, or effects either disappear or display incorrectly in the converted files.
This page lists the PowerPoint features that are not supported or not well supported by the dynamic file conversion function. To achieve the best results, Agora recommends that you keep these limitations in mind when preparing your PPTX files intended for later conversion.
### Slides
The dynamic file conversion function does not support the following features for slides:
* Add Section: Organize slides into sections
* Hide Slide
### Shapes
The dynamic file conversion function supports most shapes in PPTX files. However, the following shapes can display incorrectly in converted files:
| Column 1 | Column 2 |
| --------------------------------------------- | -------------------------------------- |
| **Basic Shapes** | |
| Vertical Text Box | Heptagon |
| Octagon | Decagon |
| Dodecagon | Smiley Face |
| **Stars and Banners** | |
| Star: 8 Points | Star: 10 Points |
| Star: 12 Points | Star: 16 Points |
| Star: 24 Points | Star: 32 Points |
| **Callouts** | |
| Line | Bent Line |
| Line with Accent Bar | Bent Line with Accent Bar |
| Double Bent Line with Accent Bar | Line with No Border |
| Bent Line with No Border | Double Bent Line with No Border |
| Line with Boarder and Accent Line | Bent Line with Boarder and Accent Line |
| Double Bent Line with Boarder and Accent Line | |
| **Action Buttons** | |
| Go Back or Previous | Go Forward or Next |
| Go to Beginning | Go to End |
| Go Home | Get Information |
| Return | Video |
| Document | Sound |
| Help | Blank |
### Pictures
The dynamic file conversion function does not support the following features for pictures:
* Adjust color
* Compress pictures
* Picture effects:
* Rotated, White
* Relaxed Perspective, White
* Bevel Rectangle
* Bevel Perspective
* Reflected Perspective Right
The following picture effects are not well supported and might display incorrectly in converted files:
| Column 1 | Column 2 |
| ------------------------------ | --------------------------- |
| Simple Frame, White | Beveled Matte, White |
| Drop Shadow Rectangle | Reflected Rounded Rectangle |
| Beveled Shadow, Black | Compound Frame, Black |
| Rounded Diagonal Corner, White | Snip Diagonal Corner, White |
| Moderate Frame, White | Perspective Shadow, White |
| Bevel Perspective Left, White | Reflected Bevel, White |
### Text
The dynamic file conversion function does not support the following features for text:
* WordArt
* Alt text
* Tabs
* All text effects except Square
* All text directions except for Horizontal and Vertical
* The By Paragraph animation effect, which makes the paragraphs of text appear one at a time
* Bullets and numbering with customized size and color
* Font effects: Double Strikethrough, Small Caps, All Caps, and Equalize Character Height
* Underlined text
* Text fill: Gradient fill, Picture or texture fill, and Pattern fill
* Arrange > Selection pane
### Media
The dynamic file conversion function also works for PPTX files that contain embedded audio and video. You can do some basic editing to the embedded media, for example, trimming the length of audio and video or adjusting the height and width of video. However, the dynamic file conversion function does not support most of the playback and format options for the inserted audio and video.
The following options under the **Playback** tab for an embedded audio or video file are not supported:
| Column 1 | Column 2 |
| -------------------- | -------------------- |
| Bookmarks | Fade In and Fade Out |
| Volume | Play Across Slides |
| Loop until Stopped | Hide During Showing |
| Rewind after Playing | |
The following options under the **Format** tab for an embedded video file are not supported:
| Column 1 | Column 2 |
| ----------------- | ------------ |
| Adjust | Video Styles |
| Rotate in Arrange | Crop |
### Animations
The dynamic file conversion function does not support the following features for animations:
* **Entrance > Exciting**: Flip, Whip, Credits, and Drop
* **Emphasis**: Brush Color, Font Color, Underline, Bold Flash, Bold Reveal, and Wave
* **Exit > Exciting:** Flip, Whip, Credits, and Drop
The following animations can display incorrectly in converted files:
* **Entrance**: Blinds, Box, Checkerboard, Circle, Diamond, Dissolve In, Peek In, Plus, Random Bars, Split, Strips, Wedge, Wheel, Wipe, Basic Swivel, Boomerang, Curve Down, Float, Pinwheel, and Spiral In
* **Emphasis**: Fill Color, Line Color, Complementary Color, Darken, Desaturate, Object Color, and Color Pulse
* **Exit**: Blinds, Box, Checkerboard, Circle, Diamond, Dissolve Out, Peek Out, Plus, Random Bars, Split, Strips, Wedge, Wheel, Wipe, Basic Swivel, Boomerang, Curve Down, Float, Pinwheel, and Spiral In
### Backgrounds
The dynamic file conversion function does not support the following background format settings:
* Picture or texture fill
* Pattern fill
* Hide background graphics
# What is the difference between Agora Live Interactive Streaming and common CDN + RTMP technologies? (/en/api-reference/faq/product/differ_agora_cdn)
Most CDN + RTMP technologies for live streaming allow users to watch the live steaming in a web browser, which lowers the audience's threshold.
Agora provides a solution for SD-RTN™, host, and audience to have the same real-time communication quality as an individual line with:
* Private voice and video coding
* Private transport protocol
* Private node deployment
* Private transmission algorithms
See the following table for details:
| Feature | CDN + RTMP | Agora Live Interactive Streaming |
| --------------------------- | ----------------- | ------------------------------------------------------------------------------------------------------------------- |
| Video Encoding and Decoding | H.264 | Private |
| Audio Encoding and Decoding | AAC | Private |
| Transport Protocol | TCP based on RTMP | Private protocol based on UDP |
| Transmission Algorithm | TCP | Private algorithm for fixing packet loss and adjusting the bitrate automatically according to the current bandwidth |
| Picture-in-picture layout | Fixed | Can be adjusted dynamically |
Agora also enables the function of publishing streams into the CDN for social media sharing.
# General Product Inquiry (/en/api-reference/faq/product)
# What's the difference between on-premise recording and cloud recording? (/en/api-reference/faq/product/onpremise_cloud)
**Agora On-Premise Recording** and **Agora Cloud Recording** are add-ons to record and save voice calls, video calls, and interactive streaming on your **Linux server** and your **cloud storage**.
Compared with Agora On-Premise Recording, Agora Cloud Recording is more efficient and convenient as it does not require deploying powerful Linux servers, which largely reduces development and maintenance costs. You can directly start recording using RESTful APIs.
See the following table for details.
| | On-premise recording | Cloud recording |
| ------------------------- | --------------------------------------------------------------------------------------------------- | -------------------------------------------------------------------------------------------------------------------------------------------------------------- |
| Deployment method | Deployed on your Linux server. | Deployed on Agora's cloud server. |
| Usability | You have to prepare the server resources and deploy the SDK on your Linux server. | You do not need to deploy the SDK on the Linux server and can directly use RESTful APIs to start recording. |
| Operation and maintenance | You need to maintain the recording service. | Agora maintains the recording service for you. |
| Scalability | You need to scale to a more powerful server depending upon the concurrent usage/recording sessions. | At your request, Agora scales up the recording service in real time. |
| Reliability | The reliability of Agora On-Premise Recording depends on your implementation. | Agora Cloud Recording automatically saves files on Agora's cloud server for backup and automatically resumes recording after a system failure or other issues. |
# What platforms does Agora support? (/en/api-reference/faq/product/platform_version)
This page lists the supported platforms of Agora products.
## Voice and Video
The [Agora Voice and RTC SDK](/en/api-reference) supports iOS, Android, Windows, macOS, Unity, and Web, and allows for cross-platform connections. The following is a list of supported platforms and their versions.
| Platform | Supported Version |
| ------------ | ---------------------------------------------------------------------------------------------------------------------------------- |
| Android | ≥ 4.1The Android SDK supports the following ABIs:- armeabi-v7a
- arm64-v8a
- x86
- x86-64 |
| iOS | ≥ 9.0 |
| Windows | ≥ Windows 7The Windows SDK supports the following architecture:- x86
- x86-64 |
| macOS | ≥ 10.10The macOS SDK supports the following architecture:- x86-64
- arm64 |
| Unity | ≥ 2017The Unity SDK supports the following platforms:- Android (armeabi-v7a, arm64-v8a, x86)
- iOS
- Windows (x86, x86-64)
- macOS |
| Web | See [Web SDK Compatibility](/en/realtime-media/rtc/reference/supported-platforms/web) |
| Electron | ≥ Electron 1.8.3 |
| Flutter | ≥ Flutter 1.0.0 |
| React Native | ≥ React Native 0.59.10 |
## On-Premise Recording
The Agora On-Premise Recording SDK is integrated on your Linux server. See [prerequisites of integrating the SDK](/en/realtime-media/on-premise-recording/quickstart) for details.
## Cloud Recording
You can use RESTful APIs to enable and manage the Agora cloud recording services. See [Agora Cloud Recording RESTful API Quickstart](/en/realtime-media/cloud-recording/reference/restful-api) for details.
## Signaling
The Agora Signaling SDK supports Android, iOS, macOS, Linux, Windows C++, and Web. See [Peer-to-peer or Channel Messaging](/en/realtime-media/rtm) for details.
# What is recording concurrency? (/en/api-reference/faq/product/recording_concurrence)
For the Agora On-Premise Recording SDK, we conduct tests on the recording concurrency based on the following cloud hosting configuration:
* AWS: Intel(R) Xeon(R) Platinum 8124M CPU @ 3.00 GHz
* 16 Virtual Core CPU, 32 GB RAM
* Disk I/O: 412 MB/s
Test conditions:
* Each channel has two users/hosts. The resolution and frame rate of each channel are set as 320 × 240 and 15 fps respectively.
* The resolution, frame rate, and bitrate of the recorded files in composite recording mode are set as 640 × 480, 15 fps, and 500 Kbps respectively; and the audio bitrate of the recorded files in composite recording mode is set as 48 Kbps.
Test results:
| Channel Profile | Recording Mode | Performance |
| --------------- | --------------------------------- | -------------------------------------------------------------------------------------------------------------------------- |
| Live Broadcast | Audio + VideoIndividual recording | When recording 215 channels simultaneously, the CPU usage is about 75%.We recommend recording 200 channels simultaneously. |
| Live Broadcast | Audio + VideoComposite recording | When recording 70 channels simultaneously, the CPU usage is about 75%.We recommend recording 60 channels simultaneously. |
| Live Broadcast | Audio onlyComposite recording | When recording 300 channels simultaneously, the CPU usage is about 75%. |
| Communication | Audio + VideoIndividual recording | When recording 210 channels simultaneously, the CPU usage is about 75%.We recommend recording 200 channels simultaneously. |
| Communication | Audio + VideoComposite recording | When recording 60 channels simultaneously, the CPU usage is about 75%. |
The test results are for reference purposes only.
# Does the Agora Signaling SDK limit concurrent users or channel message frequency? (/en/api-reference/faq/product/rtm_concurrency)
The Agora Signaling SDK does not impose a hard limit on the number of concurrent online users. However, your pricing plan may impose a Peak Concurrent User (PCU) limit. Exceeding this limit could result in additional charges or service restrictions.
Agora recommends the following maximum number of channel messages per second for a single channel:
| Concurrent online users in a single channel | Number of channel messages per second |
| ------------------------------------------- | ------------------------------------- |
| \< 1,000 | \< 200 |
| >= 1,000 and \< 10,000 | \< 100 |
| >= 10,000 | \< 30 |
* If the number of messages per second exceeds the recommended values, latency can increase significantly and may also cause the following issues:
* The user cannot send or receive messages.
* The user always stays in the RECONNECTING state or keeps switching between the CONNECTED state and the RECONNECTING state. For other users, the current user may appear offline.
* Agora provides a customized service to increase the number of messages per second without affecting latency or stability. Contact [support@agora.io](mailto\:support@agora.io) for more information.
# Does Agora Signaling SDK support emoji? (/en/api-reference/faq/product/rtm_emoji)
Agora Signaling SDK supports the Unicode Character Table, so it supports all emoji defined in the Unicode Character Table. You may as well define your own emoji character set, decode based on your specifications, and render the desired emoji at the receiver.
# What are the differences between various live broadcasting solutions? (/en/api-reference/faq/product/streaming_difference)
The following table compares the different live broadcasting solutions.
| Project | Agora Interactive Live Streaming | Agora Broadcast Streaming | Traditional CDN Live Broadcast |
| ---------------------- | ------------------------------------------------------------------------------------------------------ | ------------------------------------------------------------------------------------------------- | ------------------------------------------------------------------ |
| Typical scenarios | Hosts and audiences frequently interact through audio and video, requiring ultra-low audience latency. | Hosts respond to text, chat, or rewards in real time, with occasional audio or video interaction. | One-way streaming with no audio or video interaction. |
| Latency | 400 ms to 800 ms between host and audience. | 1,500 ms to 2,000 ms between host and audience. | Greater than 3,000 ms between host and audience. |
| Synchronization | Good synchronization between host and audience, and among audience members. | Good synchronization between host and audience, and among audience members. | Poor synchronization between host and audience, and among viewers. |
| Interactive experience | Excellent | Good | Limited |
| Cost | High | Moderate | Low |
# Which VR headsets are compatible with the Agora RTC SDK? (/en/api-reference/faq/product/vr_headset)
The Agora RTC SDK is compatible with VR (Virtual Reality) headsets on the following operating systems:
* Android
* iOS
* Windows (non-Universal Windows Platform versions only)
Supported VR headsets include the following:
* Google Cardboard
* Oculus Rift
* Oculus Go
* Oculus Quest
* Vive Pro
* Vive Focus Pro
* Vive Focus 3
# Why can't I adjust the background music through the system volume? (/en/api-reference/faq/quality/adjust_music_volume)
In mobile devices, users play background music in the background, and after joining the RTC channel, users can't change the volume of the background music by adjusting the system volume.
## Reason
The volume types of mobile devices are categorized into call volume and media volume. Generally, call volume is used for audio and video calls, and media volume is used for playing background music. For more details, see [What is the difference between the in-call volume and the media volume?](/en/api-reference/faq/integration/system_volume).
After a user joins a channel, the type of volume controlled by the Agora SDK determines the type of volume controlled by the system volume control. When the SDK controls the call volume and the background music uses the media volume, the system volume can only control the call volume and cannot adjust the background music volume.
## Solution
You can try one of the following options to overcome this issue.
### Option 1
Playing background music with `startAudioMixing` lets the SDK control both background music and call sound. Regardless of whether the SDK uses call volume or media volume, the user can adjust the volume of the background music and call sound at the same time through the system volume.
### Option 2
Set the `scenario` parameter to `GAME_STREAMING/AgoraAudioScenarioGameStreaming` via the `setAudioScenario` method. That is, set the volume type used by the SDK to the media volume. After a successful setup, user can adjust the volume of the background music and call sound through system volume at the same time.
### Option 3
If the solutions above don't meet your needs, you can utilize the Android or iOS API to intercept volume button events and adjust the volume. Refer to the following documentation:
* **Android**: [AudioManager](https://developer.android.com/reference/android/media/AudioManager.html)
* **iOS**: [MPVolumeView](https://developer.apple.com/documentation/mediaplayer/mpvolumeview)
# Why do apps on some Android versions fail to capture audio and video after screen locking or switching to the background? (/en/api-reference/faq/quality/android_background)
After screen locking or switching to the background on some Android versions, you may encounter the following issues:
* On Android devices, remote audio is silent or video is not visible within 1 minute of the device being locked.
* When the Android app switches to the background during operation, remote audio is silent.
## Reason
* Starting from Android 9, the Android system restricts background apps from accessing user data. For more details, see [Android 9 behavior changes](https://developer.android.com/about/versions/pie/android-9.0-changes-all).
* Starting from Android 14, the Android system requires apps to specify the necessary foreground service types. If developers set the app's `targetSdkVersion` to `34` or higher, the system will trigger a capability check when the app runs on devices with Android 14 or higher to verify if the app has correctly declared its foreground service types. If the app fails to integrate foreground services properly, issues such as microphone capture being ineffective and remote audio being silent may occur when the user switches the app to the background. For more details, see [Android 14 behavior changes](https://developer.android.google.cn/about/versions/14/behavior-changes-14) and [Required foreground service types](https://developer.android.google.cn/about/versions/14/changes/fgs-types-required).
## Solution
To ensure uninterrupted access to microphone, camera, media playback, and other functionalities when your device is locked or your app is in the background, it's crucial to correctly integrate foreground services. This prevents interruptions in audio and video capture due to system restrictions. Agora provides an [example project](https://github.com/AgoraIO/API-Examples/blob/main/Android/APIExample/app/src/main/java/io/agora/api/example/examples/basic/JoinChannelAudio.java#L324) demonstrating how to integrate foreground services. Here are the steps:
1. In the `AndroidManifest.xml` file, declare the `FOREGROUND_SERVICE` privilege and specify the `foregroundServiceType`. For real-time audio/video interactive apps, you usually need to specify the `microphone`, `camera`, and `mediaPlayback` service types. Refer to the following example:
```xml
...
...
```
2. When a service is created, call `startForeground` to promote the specified service to the foreground. The sample code is as follows:
```java
@Override
public void onCreate() {
super.onCreate();
// Get default notifications
Notification notification = getDefaultNotification();
try {
// Depending on the Android version, choose the appropriate way to handle the frontend service
if (Build.VERSION.SDK_INT >= Build.VERSION_CODES.R) {
// For Android 11 and above, start the foreground service and specify multiple service types
int serviceTypes = ServiceInfo.FOREGROUND_SERVICE_TYPE_MICROPHONE |
ServiceInfo.FOREGROUND_SERVICE_TYPE_CAMERA |
ServiceInfo.FOREGROUND_SERVICE_TYPE_MEDIA_PLAYBACK;
this.startForeground(NOTIFICATION_ID, notification, serviceTypes);
} else {
// For Android 11 and below, there is no need to specify a service type, simply start the foreground service
this.startForeground(NOTIFICATION_ID, notification);
}
} catch (Exception ex) {
Log.e(TAG, "Error starting foreground service", ex);
}
}
```
3. When the app switches to the background, call `startForegroundService` to start the service to ensure that the service continues to run. The sample code is as follows:
```java
@Override
public void onPause() {
super.onPause();
startRecordingService();
}
private void startRecordingService() {
if (joined) {
// Create an intent
Intent intent = new Intent(requireContext(), LocalRecordingService.class);
// Depending on the Android version, choose the appropriate way to start the frontend service
if (Build.VERSION.SDK_INT >= Build.VERSION_CODES.O) {
// For Android 8 and above, start the service using startForegroundService
requireContext().startForegroundService(intent);
} else {
// For Android 8 and below, use startService to start the service
requireContext().startService(intent);
}
}
}
```
## Additional information
* [Foreground services](https://developer.android.com/develop/background-work/services/foreground-services)
* [Foreground service types](https://developer.android.com/develop/background-work/services/fg-service-types)
# Why does audio freezing occur in a call? (/en/api-reference/faq/quality/audio_freeze)
Jitter may be caused by slow Internet connections, bad device performances, or the physical environment.
## Step 1: Self-check
Check if the network is stable and in good condition. If not, switch to 4G or another Wi-Fi network.
## Step 2: Contact Agora Customer Support
If the issue persists, contact Agora customer support and submit the issue with the following information:
| Information | Details |
| ----------- | ------------------------------------------------------------------------------------------------------------------------------------------------------------------------------------------- |
| Mandatory | * The name of the channel where the users hear the jitter.
* The uids of the users who hear the jitters.
* The uid of the user who causes the jitters.
* The recording files, if available. |
| Additional | - Live interactive streaming: If the jitter comes from the host.
- Video mode: If the video is smooth and clear. |
## Step 3: Monitor the Quality of Experience in Agora Analytics in Console
You can check the statistics of every call in Agora Analytics in [Agora Console](https://console.agora.io/). For more information, see [Call Search](/en/realtime-media/agora-analytics/build/explore-and-analyze-data/call-search).
# How can I solve the problem of low volume? (/en/api-reference/faq/quality/audio_low)
## Step 1: Self-check
Check the following:
* Turn up the system volume of the receiver.
* Check whether the issue is caused by the device. You can change your playback device or try other VoIP services on the same device.
* Check whether the user opens another app during the call, which may change the audio settings or routing.
* Call the following methods to adjust the volume: `enableAudioVolumeIndication`, `adjustRecordingSignalVolume`, `adjustPlaybackSignalVolume`, and `adjustAudioMixingVolume`.
* Check the `onAudioRouteChanged` callback to see whether the audio route is set to the headset or speaker. If the audio route is set to the headset, call the `setDefaultAudioRouteToSpeakerphone` method and switch the audio route to the speaker.
## Step 2: Contact Agora Customer Support
If the issue persists, contact Agora customer support and submit the issue with the following information:
* The name of the channel where the users encounter this issue.
* The uids of the users whose volume is too low.
* The time frame during which the volume is too low.
## Step 3: Monitor the Quality of Experience in Agora Analytics in Console
You can check the statistics of every call in Agora Analytics in [Agora Console](https://console.agora.io/). For more information, see [Call Search](/en/realtime-media/agora-analytics/build/explore-and-analyze-data/call-search).
# How can I troubleshoot the issue of no sound? (/en/api-reference/faq/quality/audio_noaudio)
During real-time engagement, users may experience a total loss of sound in the following scenarios:
* The local user cannot hear remote users.
* A remote user cannot hear the local user.
* The local and remote users cannot hear each other.
## Solution
### Step 1: Determine the issue
To determine the issue, Agora recommends the local user and remote users do the following:
1. Open [Agora Video Call](https://videocall.agora.io/), read the **Agora Terms of Use and Privacy Policy** carefully, and click **Accept**.
2. Enter the same channel name and password, enter a nickname, ensure that the microphone is enabled, and click **Join**.
3. Allow Agora Video Call to access the microphone, and start a conversation to check whether they can hear each other.
* If they can hear each other, proceed to step 5 to check the app logic.
* If they cannot hear each other, proceed to step 2 to check the audio input device.
On iOS, if a user equips a device with a non-Apple magnetic protection cover and cannot hear others, the issue may be caused by the protection cover. Remove the protection cover, leave the channel, and rejoin the channel to try whether the user can hear others.
### Step 2: Check the audio input device
1. Ensure that the audio input device is properly connected, and that the affected user has selected a suitable device when there are multiple device options.
2. In system settings, open the **audio input device** (or **recording device**) window. Ensure that the system uses a correct device and that the device is not muted.
3. Speak into the audio input device, and check whether the volume bar of the audio input device changes according to the volume.
* If the volume bar changes, the audio input device is working. Proceed to step 3 to check the audio output device.
* If the volume bar does not change, the audio input device is not working. Try restarting the device. If this does not help, try using another audio input device.
### Step 3: Check the audio output device
1. Ensure that the audio output device is properly connected, and that the affected user has selected a suitable device when there are multiple device options.
2. In system settings, open the **audio output device** (or **playback device**) window. Ensure that the system uses a correct device and that the device is not muted.
3. Play an audio file, and check whether the user can hear sound. If not, the audio output device is not working. Try restarting the device. If this does not help, try using another audio output device.
4. If you use a sound card and cannot solve the issue after trying another audio output device, proceed to step 4 to check the sound card.
### Step 4: Check the sound card
1. Ensure the sound card is properly connected. If the user plays an audio file, ensure that the user enables the audio mixing function of the sound card.
2. Reinstall the sound card driver, and check whether the user can hear sound. If not, the sound card is not working. Try replacing the sound card.
### Step 5: Check the app logic
1. Ensure that all users can access the correct audio devices.
2. Check whether each user joins the channel successfully through the `onJoinChannelSuccess`/`didJoinChannel` callback.
3. Check whether the audio is muted by the `adjustRecordingSignalVolume(0)`, `adjustPlaybackSignalVolume(0)`, or `mute`-related methods.
4. If a user uses headphones, check whether you call `setEnableSpeakerphone(false)` to route the audio to the headphones.
### Step 6: Contact Agora customer support
If the issue persists, contact Agora customer support and [submit a ticket](https://agora-ticket.agora.io/) with the following information:
* The name of the channel where the users cannot hear sound.
* The user IDs of the users who cannot hear sound in the channel.
* The time frame during which the users cannot hear sound.
You can also use Agora Analytics in [Agora Console](https://console.agora.io/) to gain a broad view of call issues for every user. See [Agora Analytics Overview](/en/realtime-media/agora-analytics/product-overview) for details.
# Why can I hear the noise in a call? (/en/api-reference/faq/quality/audio_noise)
Noise may be caused by the physical environment or recording and playback devices rather than the SDK.
## Step 1: Self-check
Check the following:
* Ensure that all users are in separated physical environments (no near-field tests).
* Check if an external audio source is used and if the captured external audio source is normal. In this case, noise cancellation is not supported and the noise may be caused by data loss during the audio transmission to the SDK.
* Check if any user is talking in a noisy environment.
* Check if the recording device is working properly. For example, check whether the headset is plugged in correctly, use another headset, or switch to another audio route.
## Step 2: Contact Agora Customer Support
If the issue persists, contact Agora customer support and submit the issue with the following information:
| Information | Details |
| ----------- | ----------------------------------------------------------------------------------------------------------------------------------------------------------------------------------------------------------------------------------------------------------------------- |
| Mandatory | * The name of the channel where the noise occurs.
* The uid of the user who causes the noise.
* The recording files, if available. |
| Additional | - The time frame during which the users hear the noise.
- If the issue remains after rejoining the channel.
- If the device test result is normal on macOS or Windows.
- If the noise is consistent or only when you speak, and disappears when the remote user speaks. |
## Step 3: Monitor the Quality of Experience in Agora Analytics in Console
You can check the statistics of every call in Agora Analytics in [Agora Console](https://console.agora.io/). For more information, see [Call Search](/en/realtime-media/agora-analytics/build/explore-and-analyze-data/call-search).
# How can I prevent volume changes when the users switch their roles in an interactive live streaming channel? (/en/api-reference/faq/quality/audio_role)
To ensure a better audio experience in different scenarios, by default, the SDK adjusts the underlying audio settings when the user switches user roles, as follows:
* The audience role uses the media volume control.
* The host role uses the call volume control.
The media volume and call volume have separate volume control mechanisms.
To avoid volume changes when the user switches user roles, ensure that the volume type used by the SDK remains the same before and after the switch. The volume type used by the SDK varies from case to case. See [Volume type introduction](/en/api-reference/faq/integration/system_volume) for details.
For example, if you use `AUDIO_SCENARIO_CHATROOM_ENTERTAINMENT` on Android and `AUDIO_SCENARIO_GAME_STREAMING` on iOS, then even if the user role switches and the audio routing changes, the user's volume type does not change, and thus the volume is not affected.
# How to deal with audio and video related issues in Flexible Classroom? (/en/api-reference/faq/quality/audio_video_issues_in_classroom)
### Why can't I turn on the camera or microphone in the web client?
Check your browser's permission to use your camera and microphone.
1. Go to the browser settings page and select **Privacy and Security** > **Site Settings**:
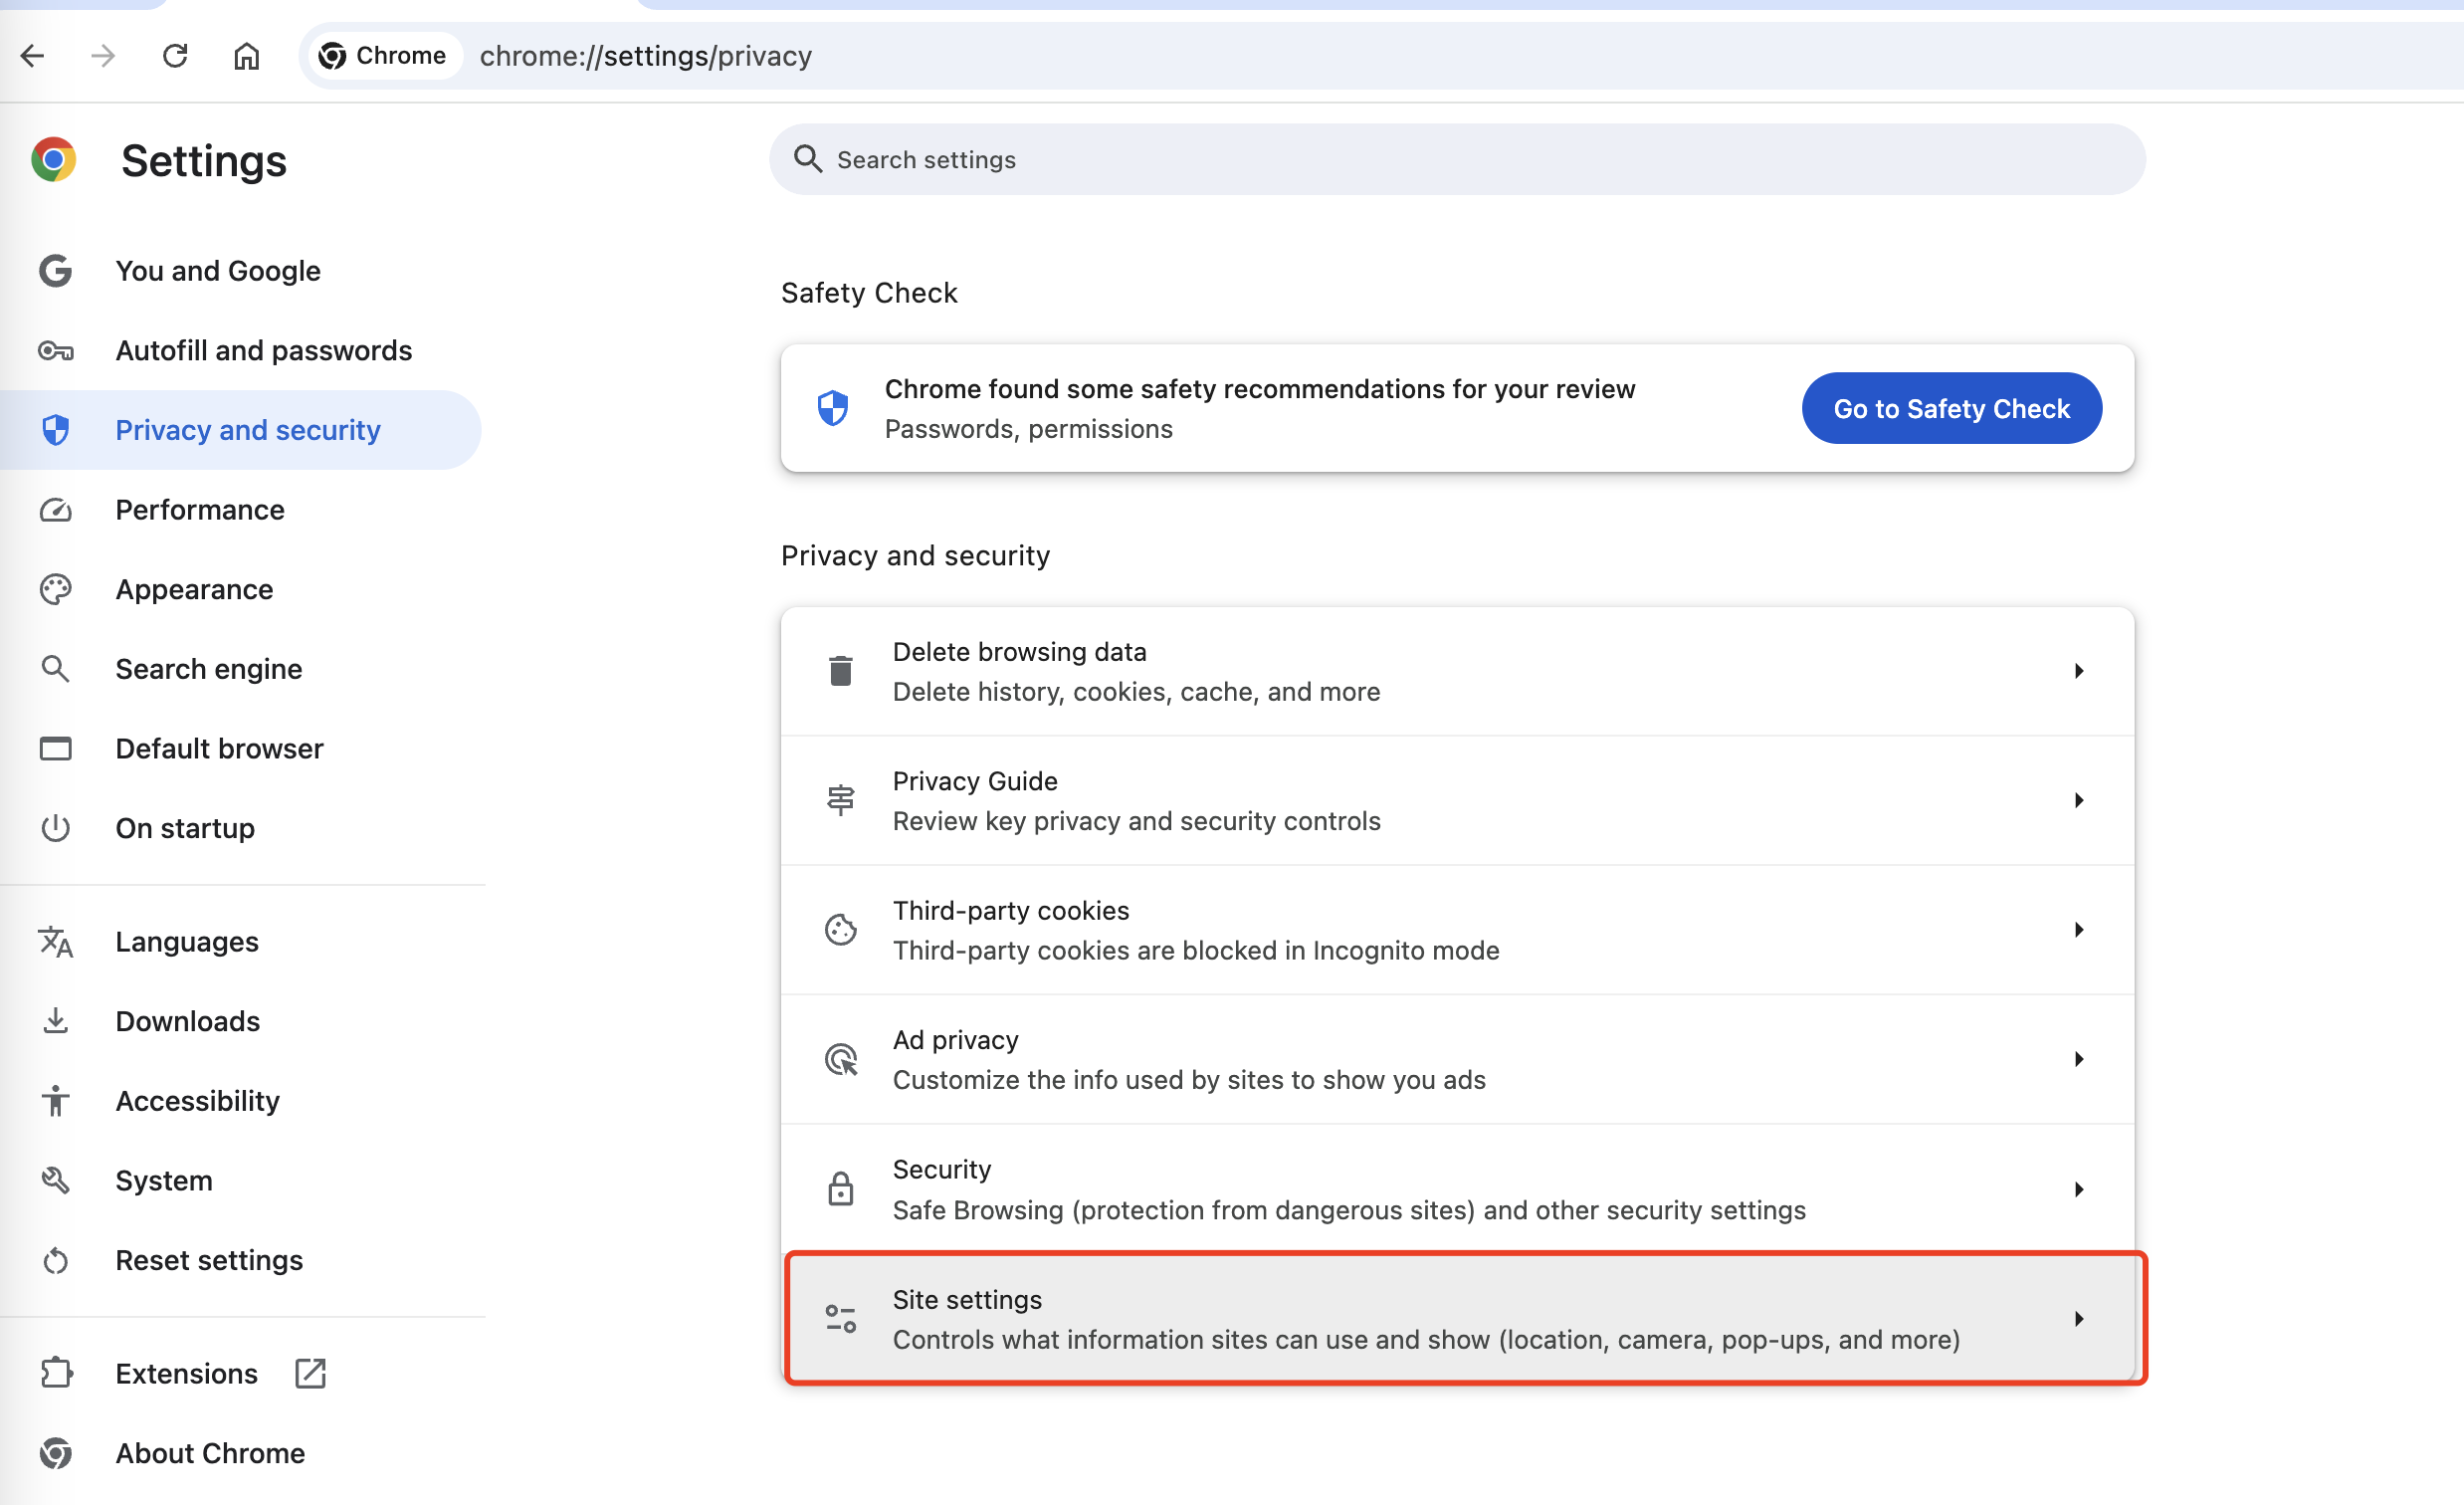
2. Click on the camera and mike permissions:
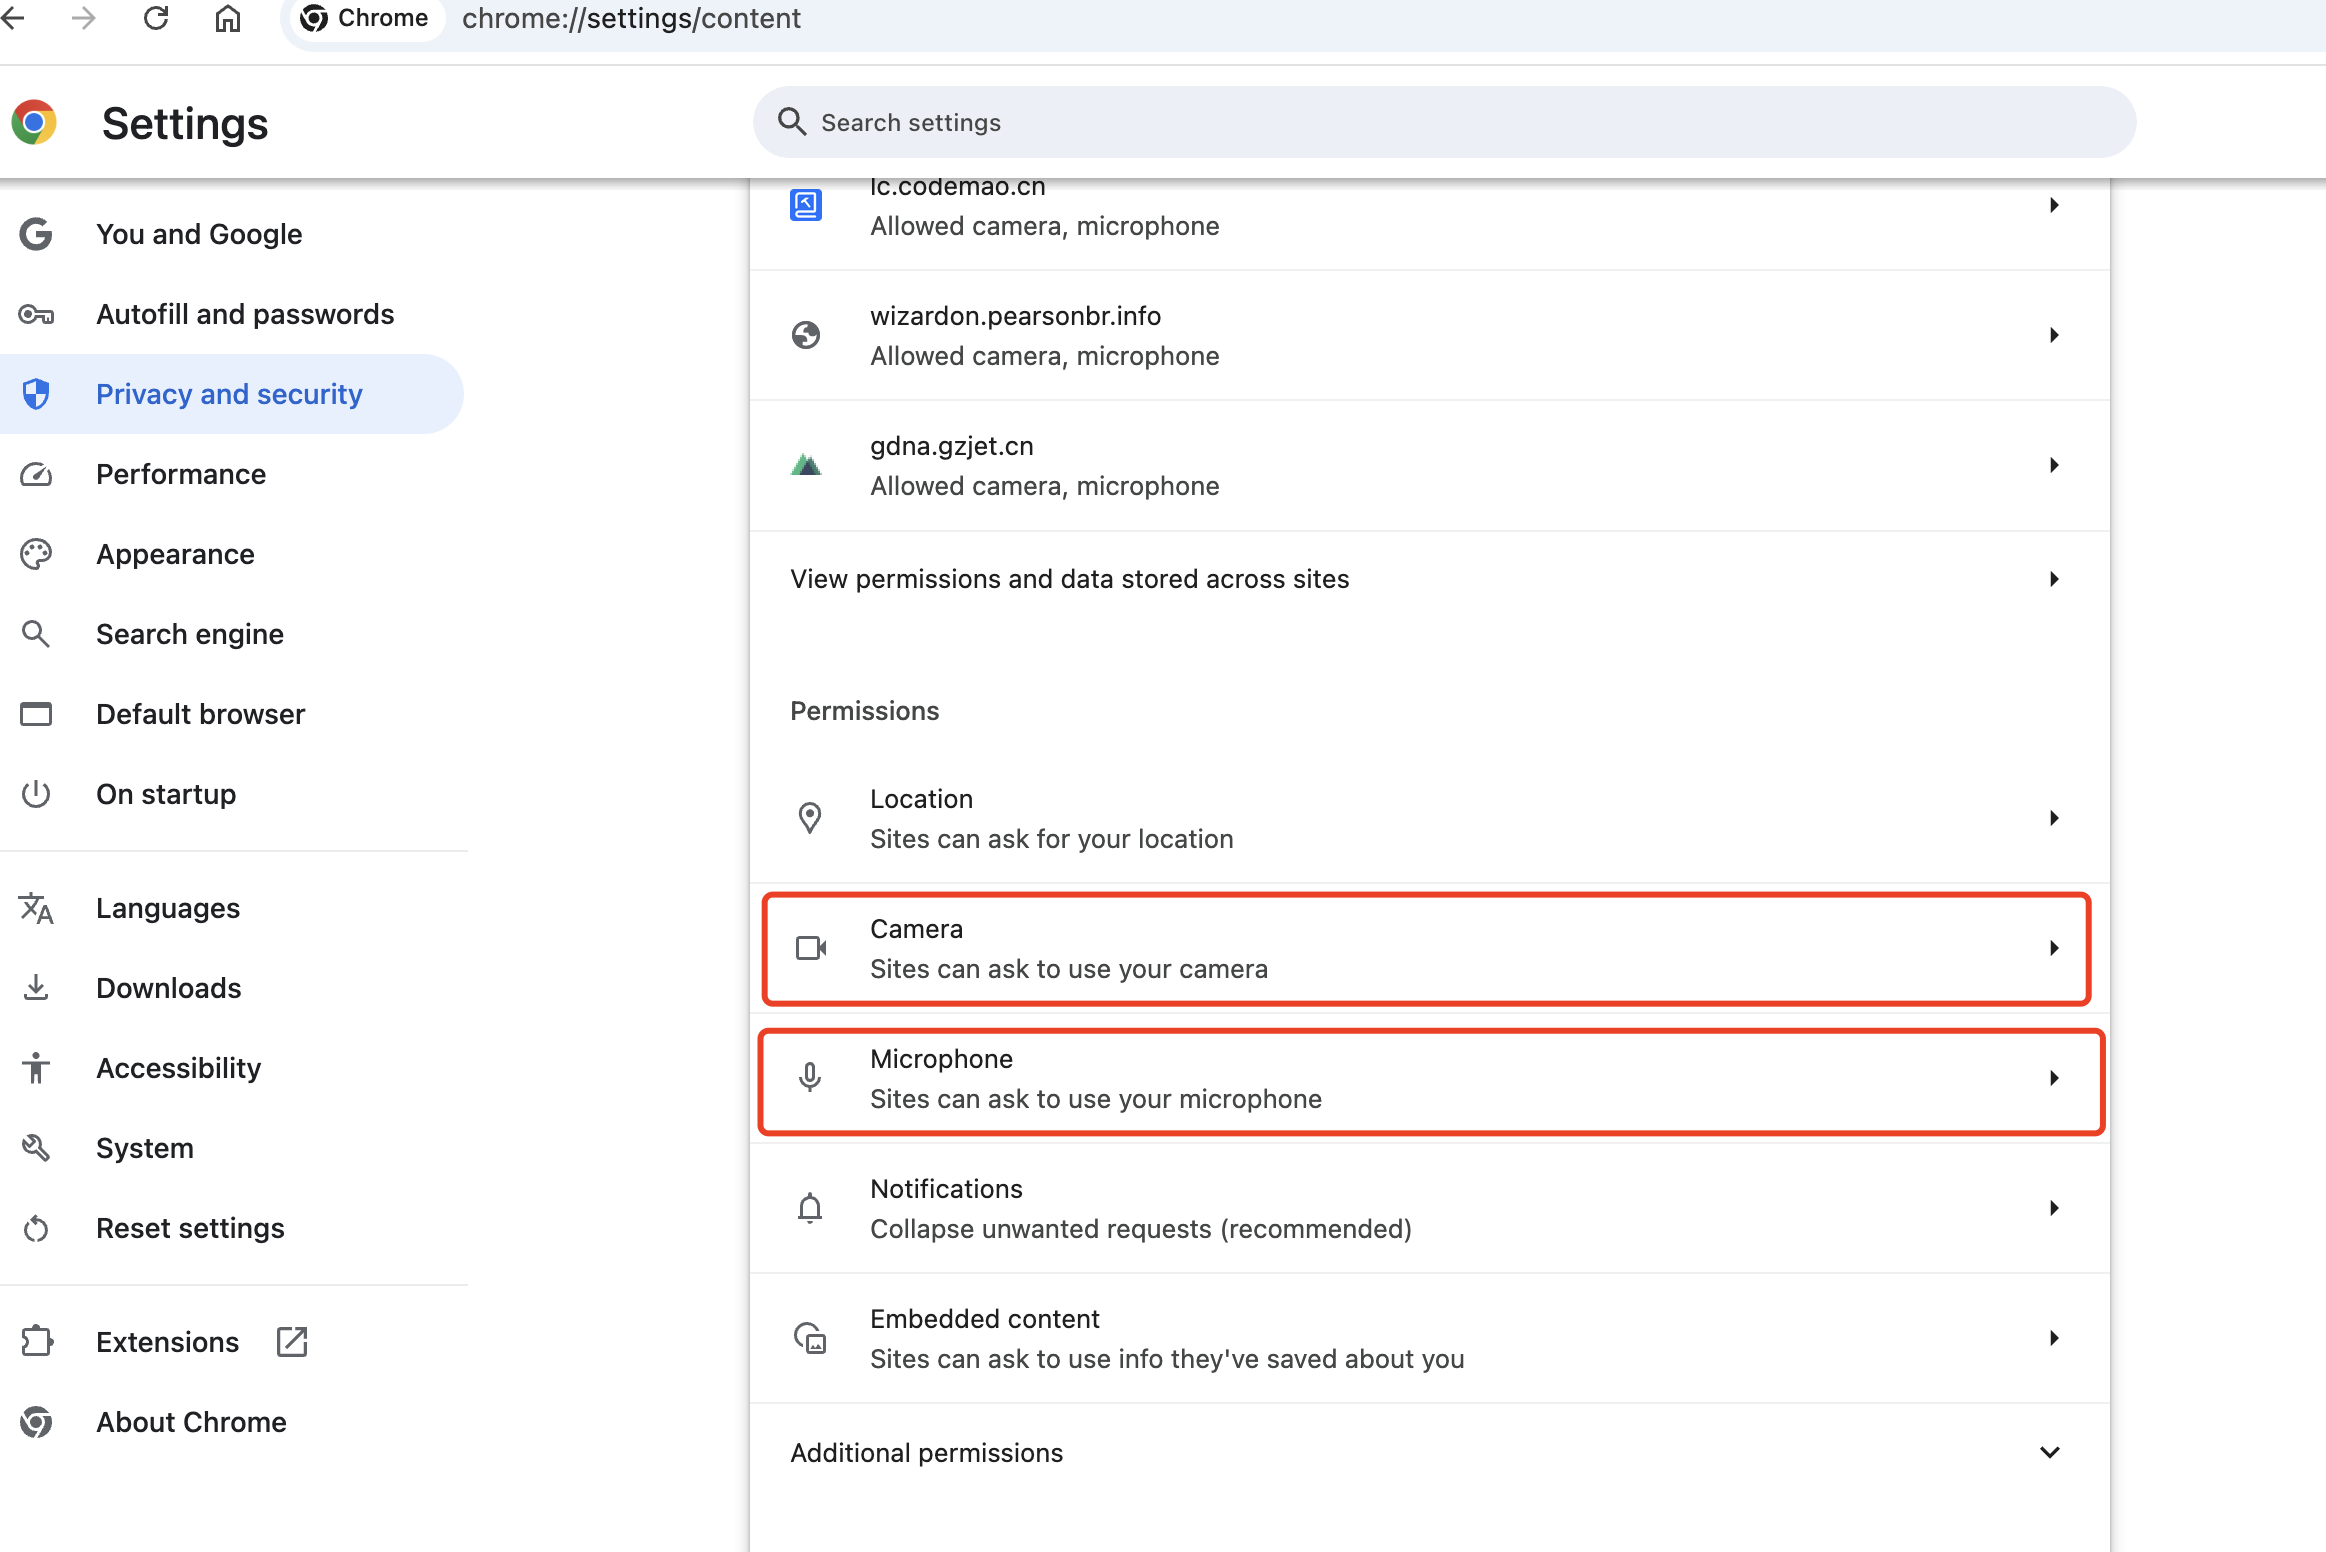
3. Choose **Allow** in the dropdown:
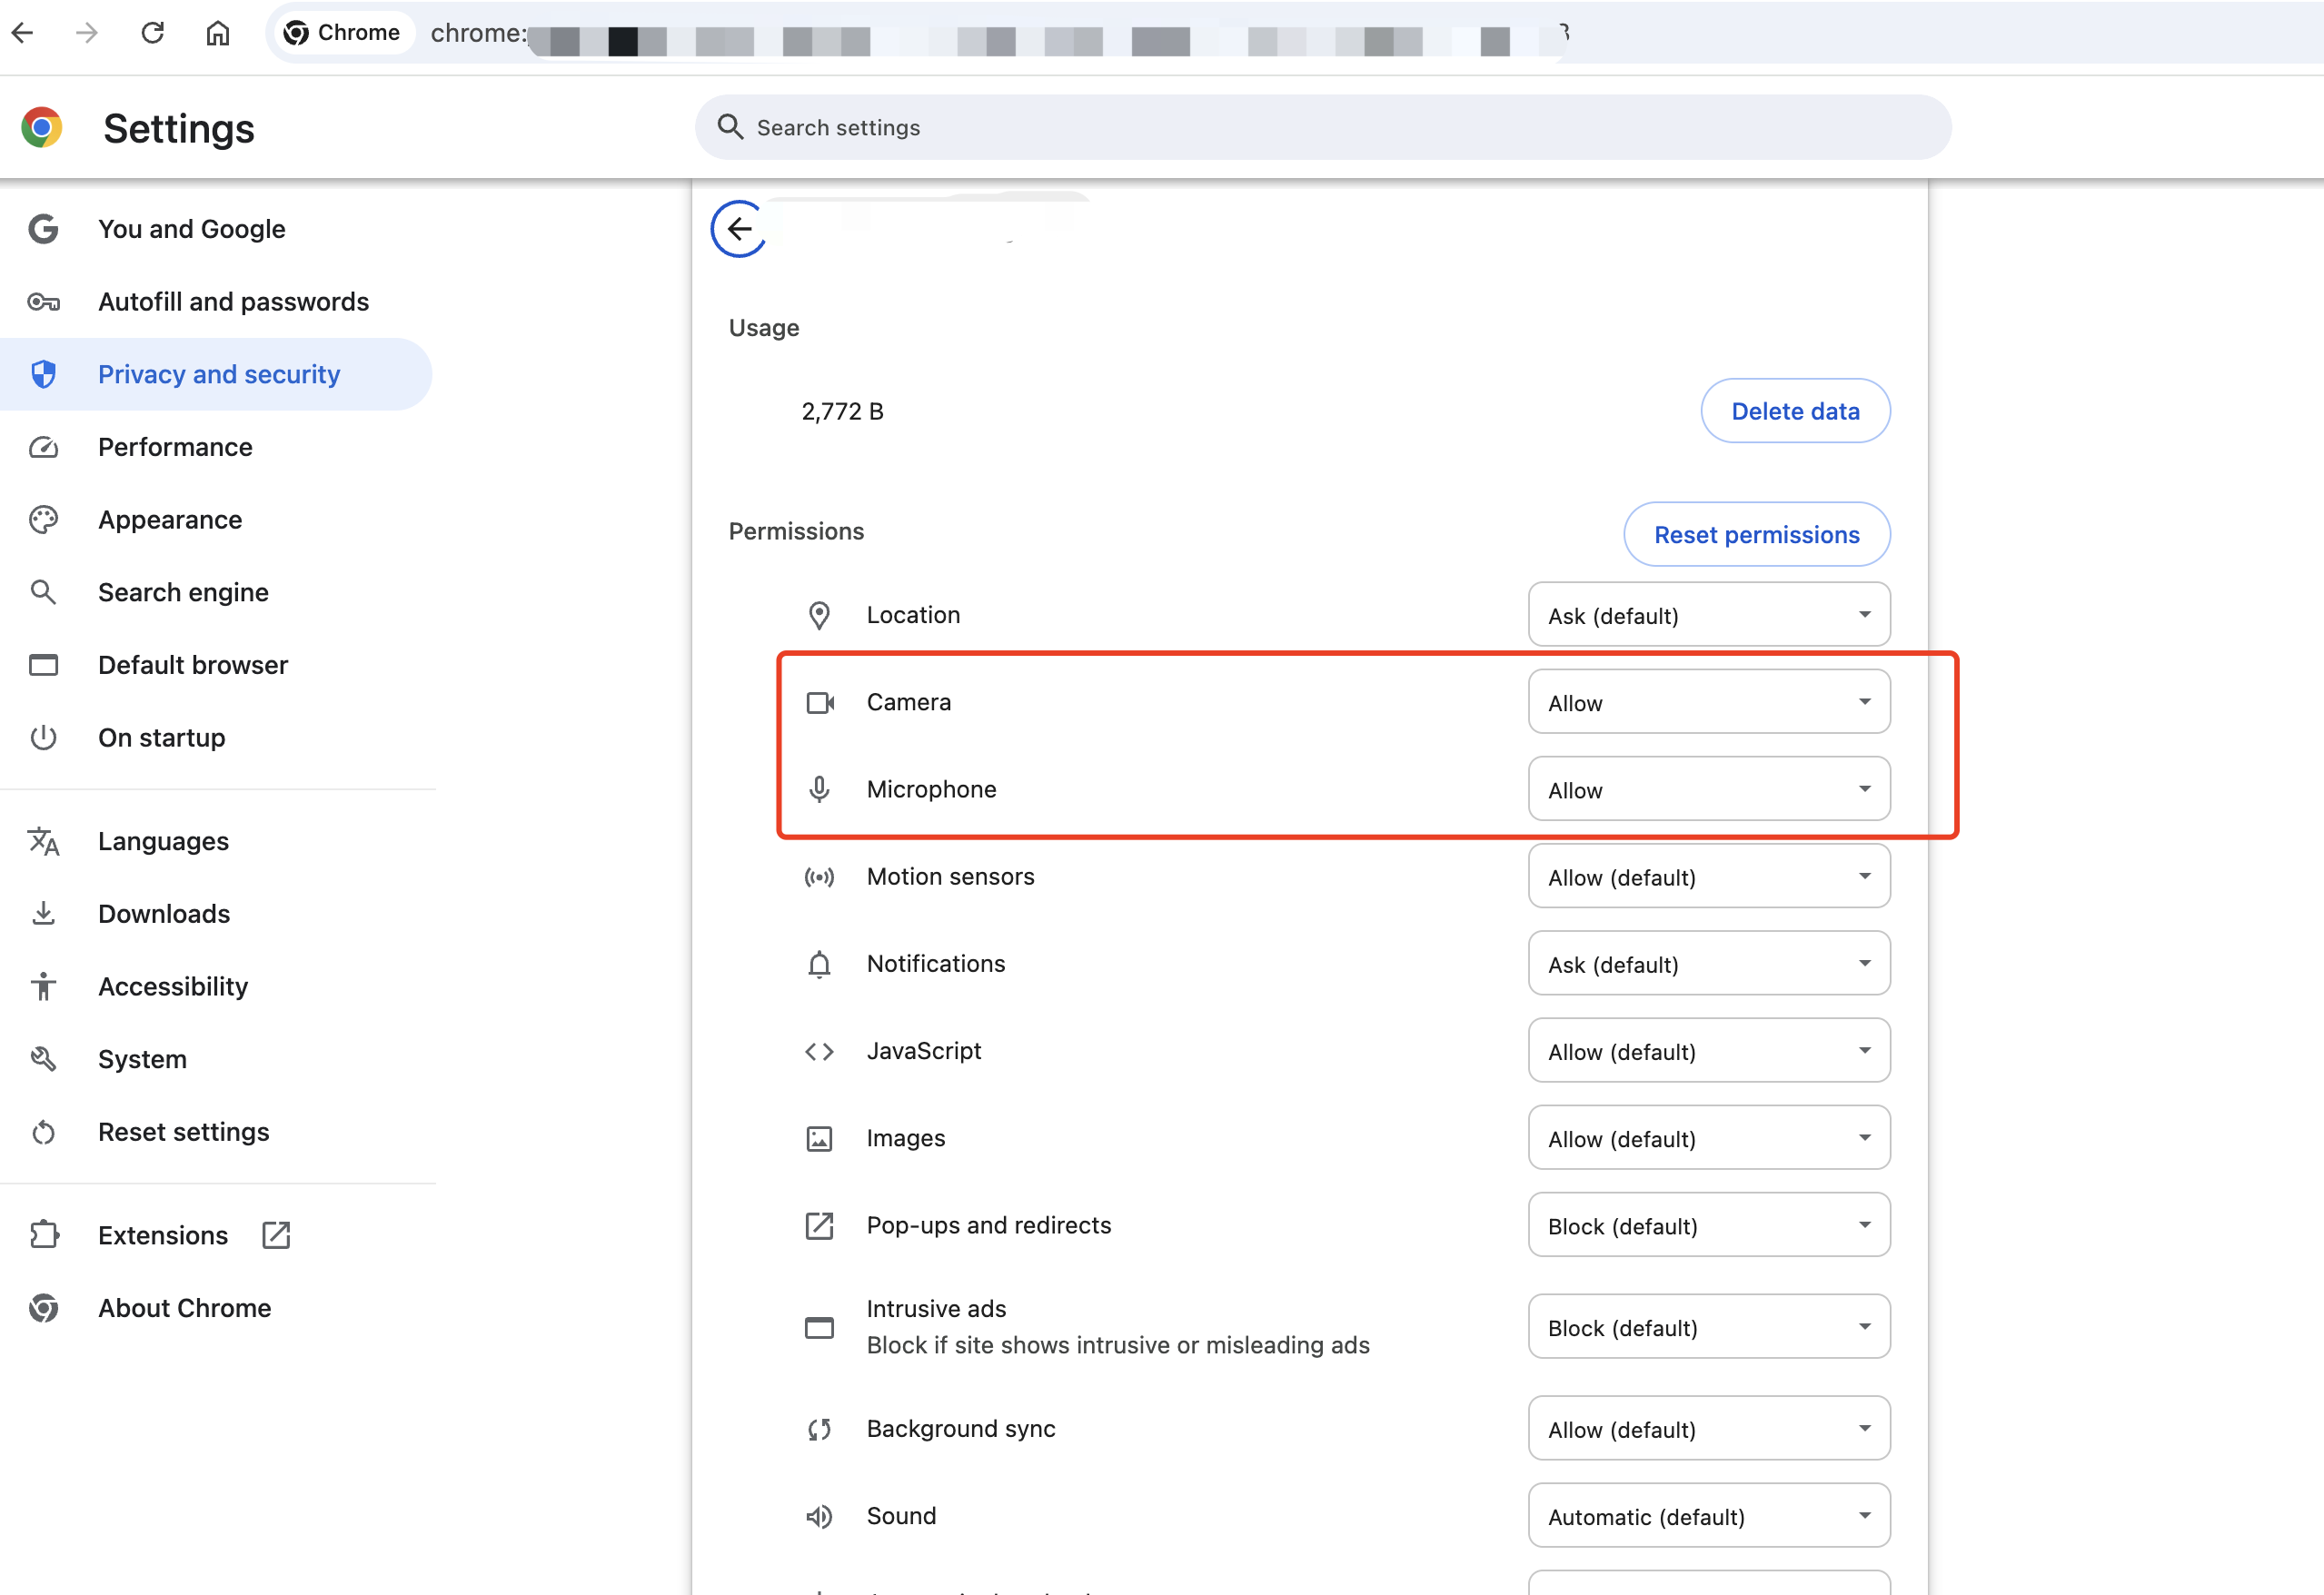
If the permissions are granted but the camera or microphone still
don't work, take the following steps:
1. Clear your browser cache
2. Restart the browser
3. Update your browser
### What if the domain I deployed does not have audio and video permissions, is displayed as disabled, or cannot use the microphone and camera?
Audio and video devices can be disabled, as shown below:
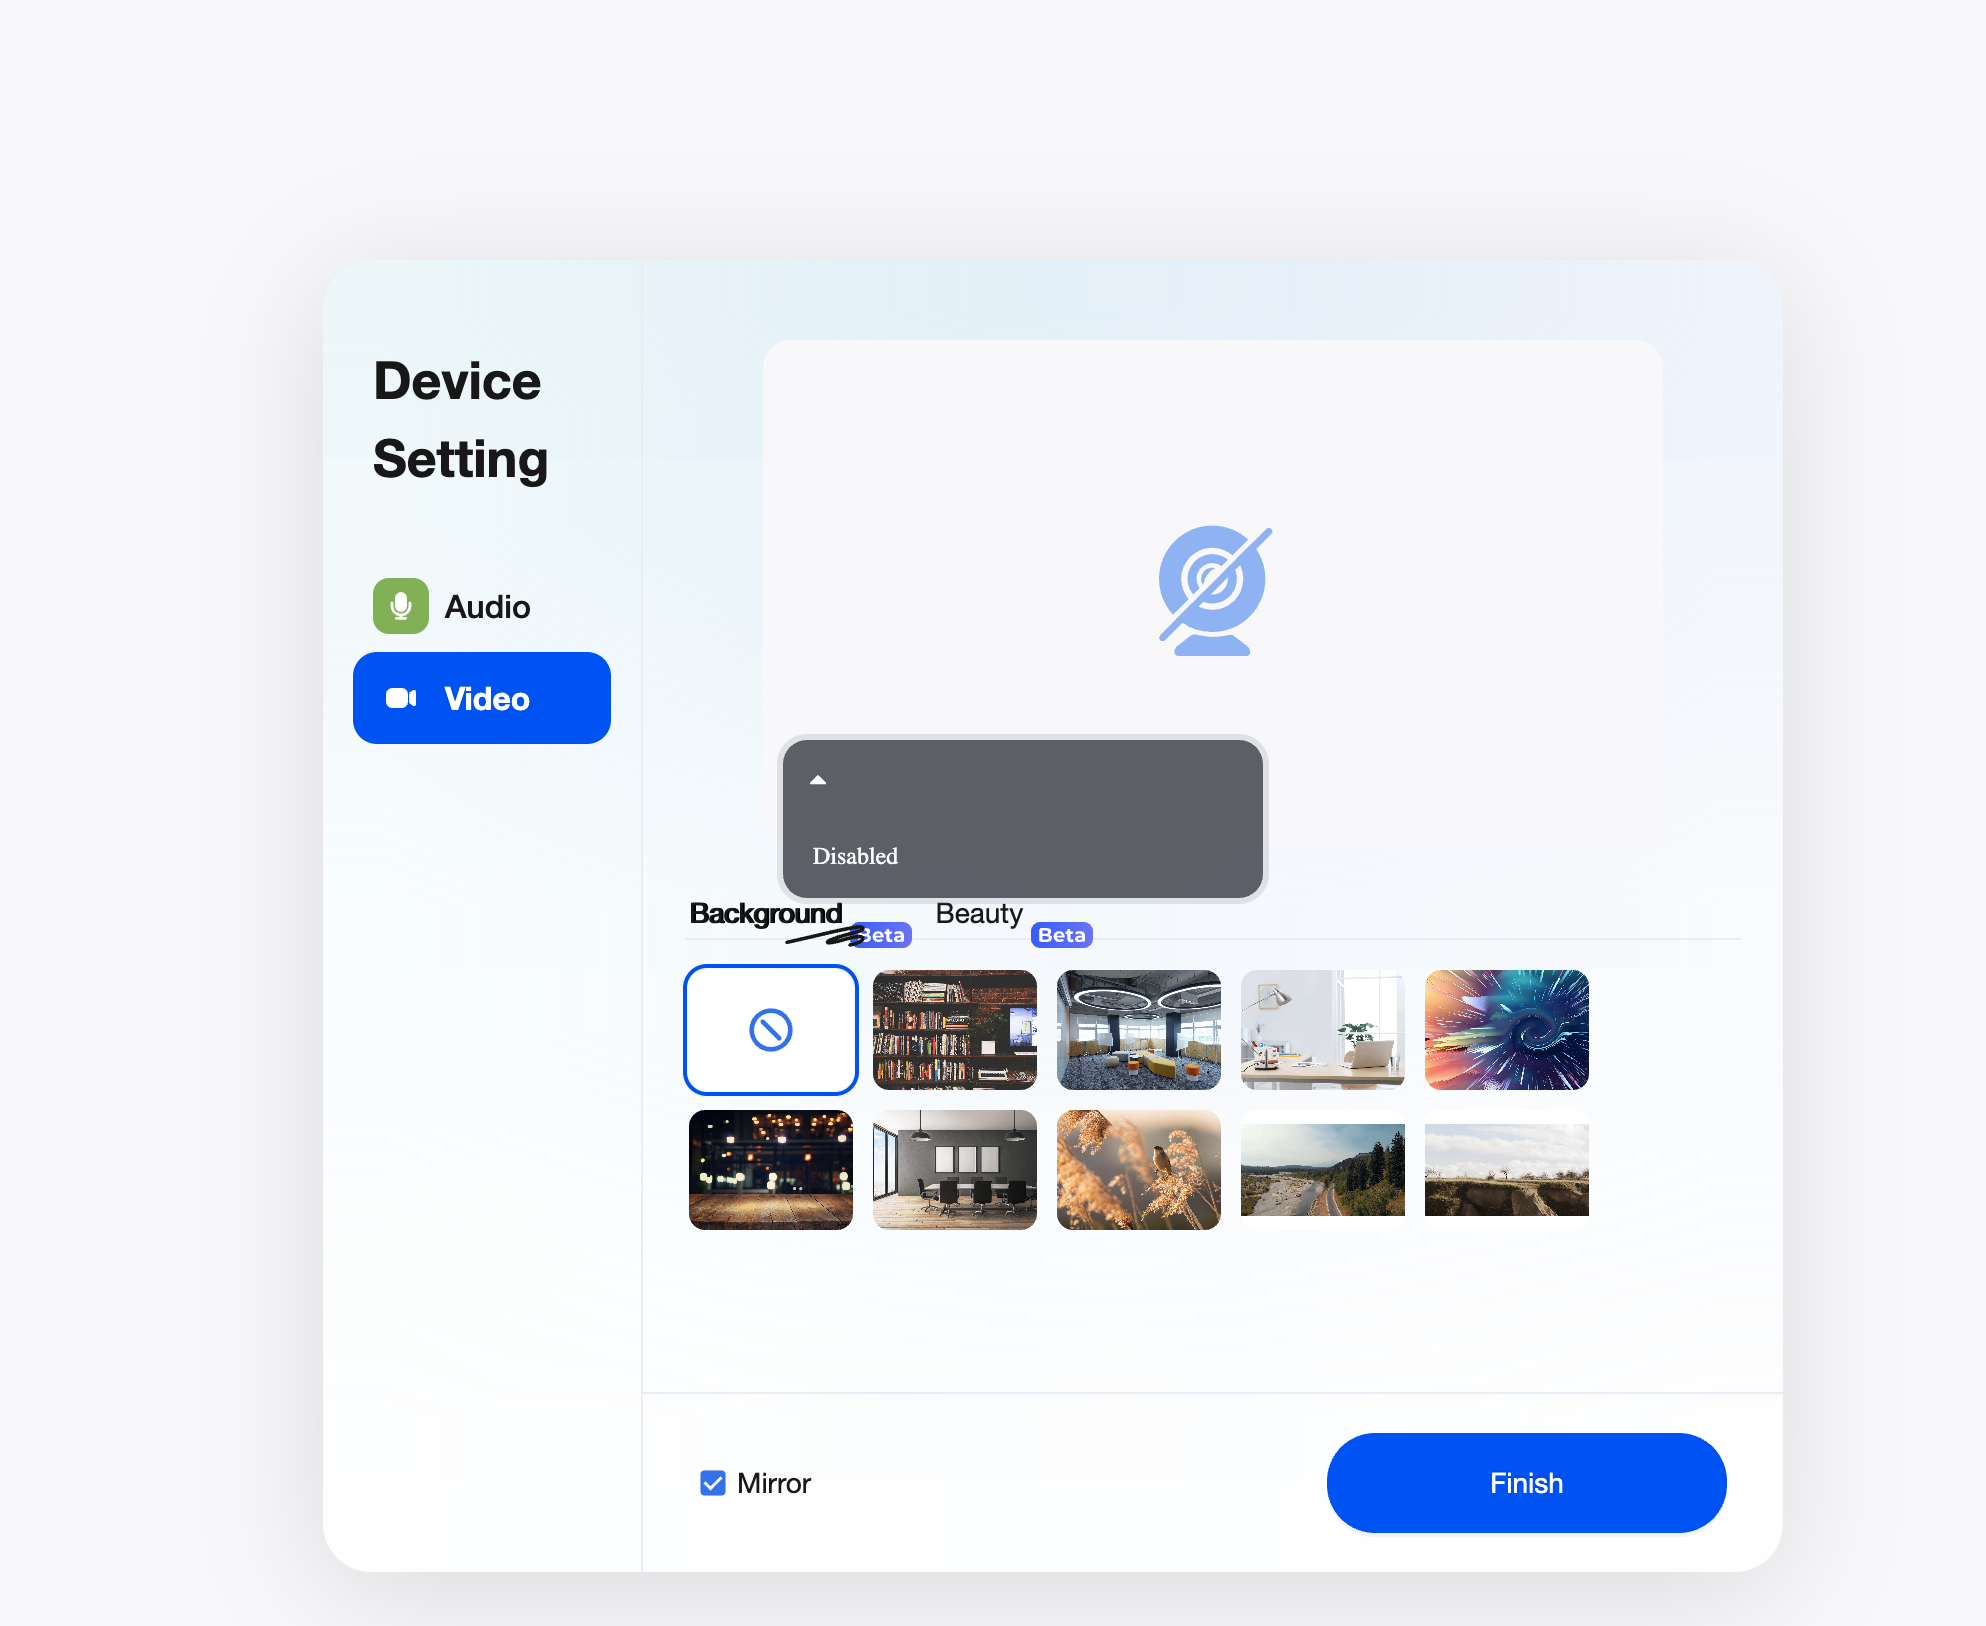
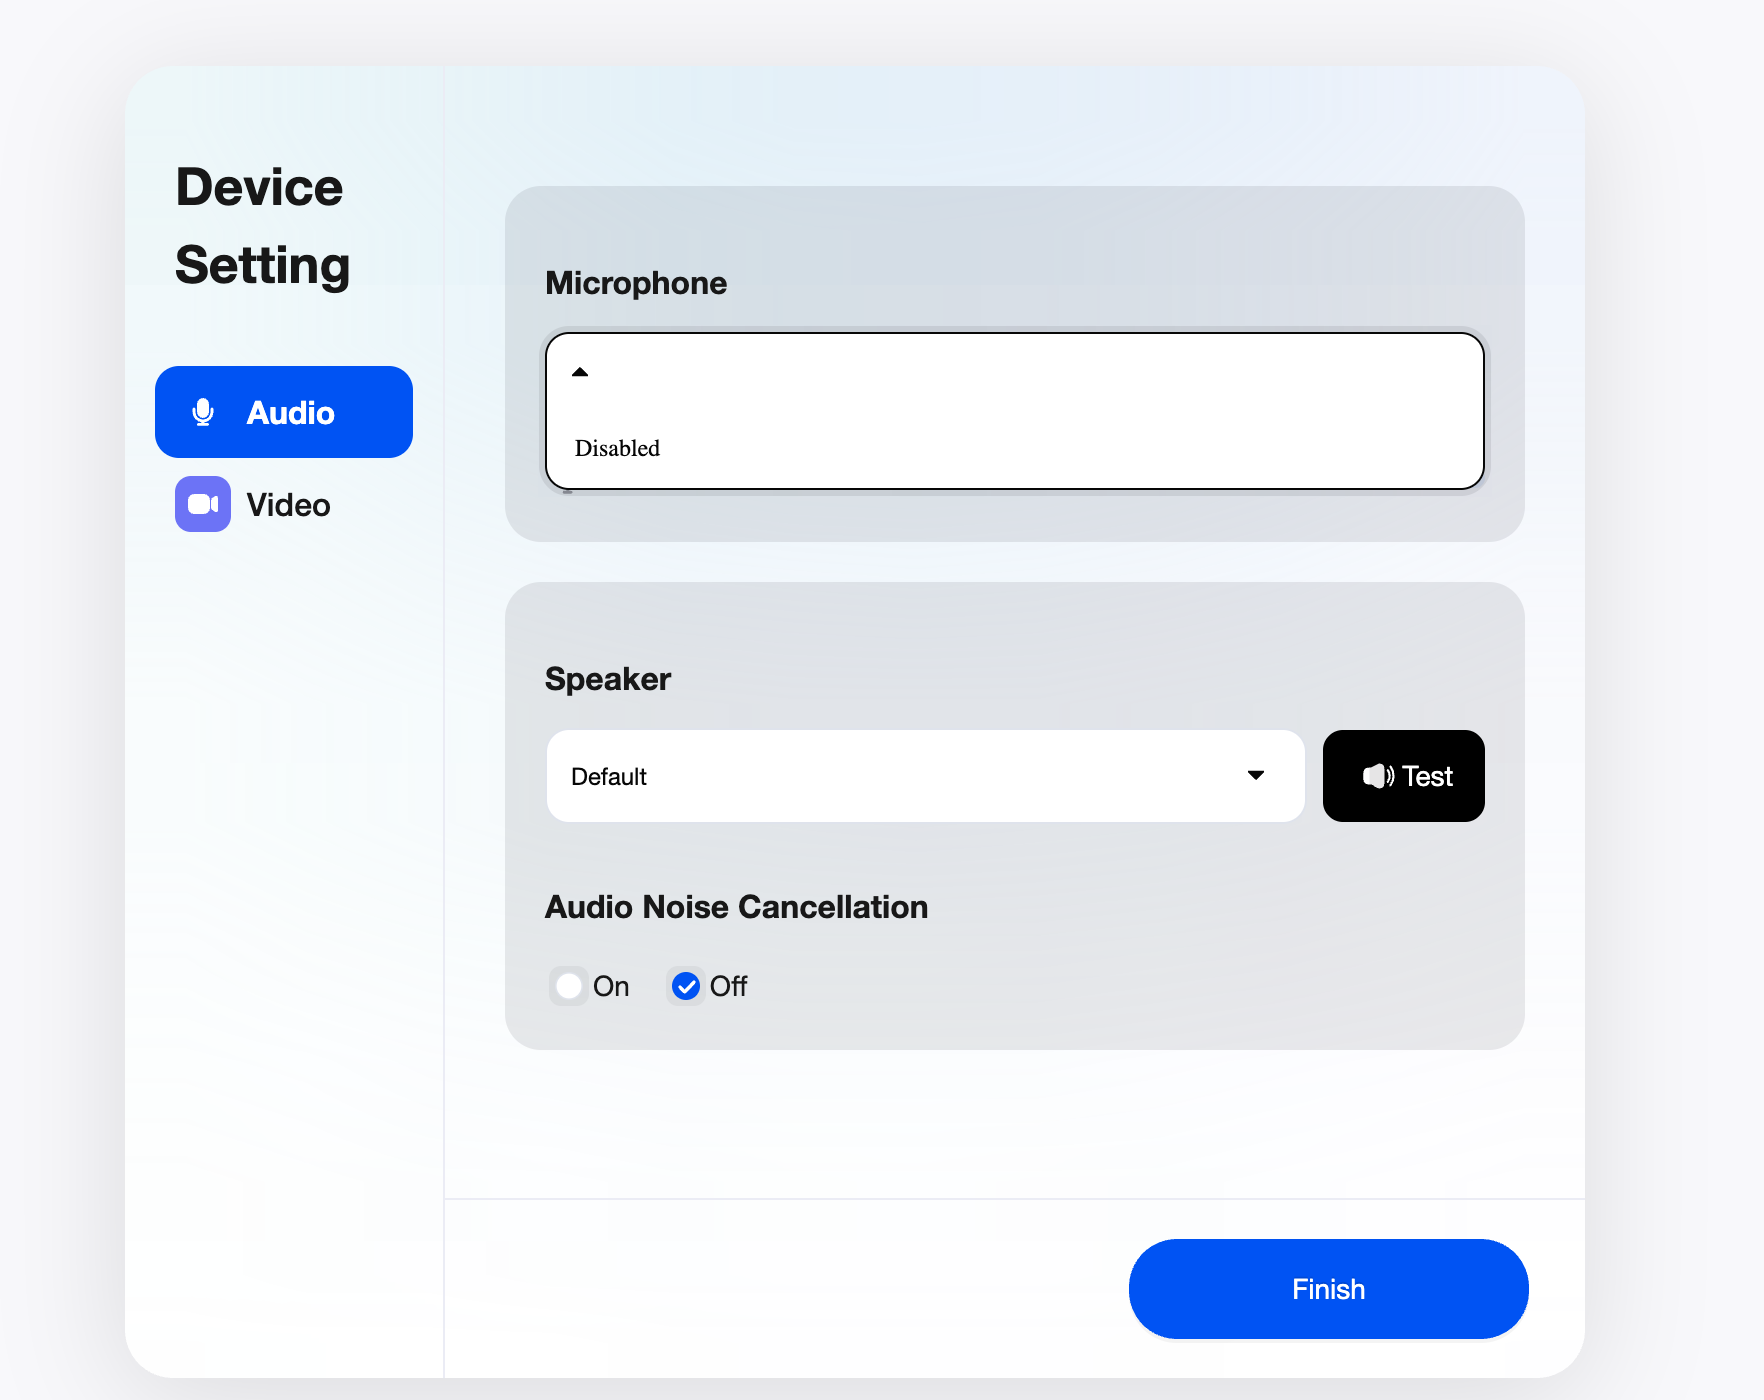
For security reasons, WebRTC is only allowed to be used in an HTTPS environment; otherwise, the browser will not allow the page to access audio or video devices. Configure your domain name to use HTTPS.
### How to adjust the video resolution?
#### Video resolution in a classroom
Use `launchOption.MediaOptions` configurations of the web client to adjust the resolution in a classroom:
* To adjust the small stream resolution use: `launchOption.MediaOptions.lowStreamCameraEncoderConfiguration`.
* To adjust the large stream resolution use: `launchOption.mediaOptions.cameraEncoderConfiguration`.
* To adjust the screen sharing resolution use: `launchOption.mediaOptions.screenShareEncoderConfiguration`.
The following sample code illustrates how to modify the resolution of small and large streams:
```typescript
AgoraEduSDK.launch(appRef.current, {
...launchOption,
recordUrl,
courseWareList,
uiMode: homeStore.theme,
virtualBackgroundImages,
virtualBackgroundVideos,
mediaOptions: {
cameraEncoderConfiguration: {
width: 1280,
height: 720,
frameRate: 30,
bitrate: 1710,
},
lowStreamCameraEncoderConfiguration: {
width: 1280,
height: 720,
frameRate: 30,
bitrate: 1710,
}
},
listener: (evt: AgoraEduClassroomEvent, type) => {
// Add logic for handling events here
}
});
```
#### Recording video resolution
Adjust the resolution of class recordings in the web client by changing the `webRecordConfig` in the [Set recording state](/en/api-reference/api-ref/flexible-classroom/classroom-rest-api#set-the-recording-state) RESTful API:
```typescript
get recordArgs() {
const { recordUrl, rteEngineConfig, recordRetryTimeout } = EduClassroomConfig.shared;
const args = {
webRecordConfig: {
rootUrl: `${recordUrl}?language=${rteEngineConfig.language}`,
videoBitrate: 3000,
videoWidth: 1280,
videoHeight: 720,
videoFps: 15
},
mode: RecordMode.Web,
retryTimeout: recordRetryTimeout,
};
return args;
}
```
### When using screen sharing, the error 'Please enable screen recording permission first' is reported.
If you encounter this error when you enable screen sharing, it means that you have not granted the screen recording permission.
Taking the macOS system as an example, you can enable the corresponding permission in **System Settings** > **Privacy and Security** > **Screen & System Audio Recording**.
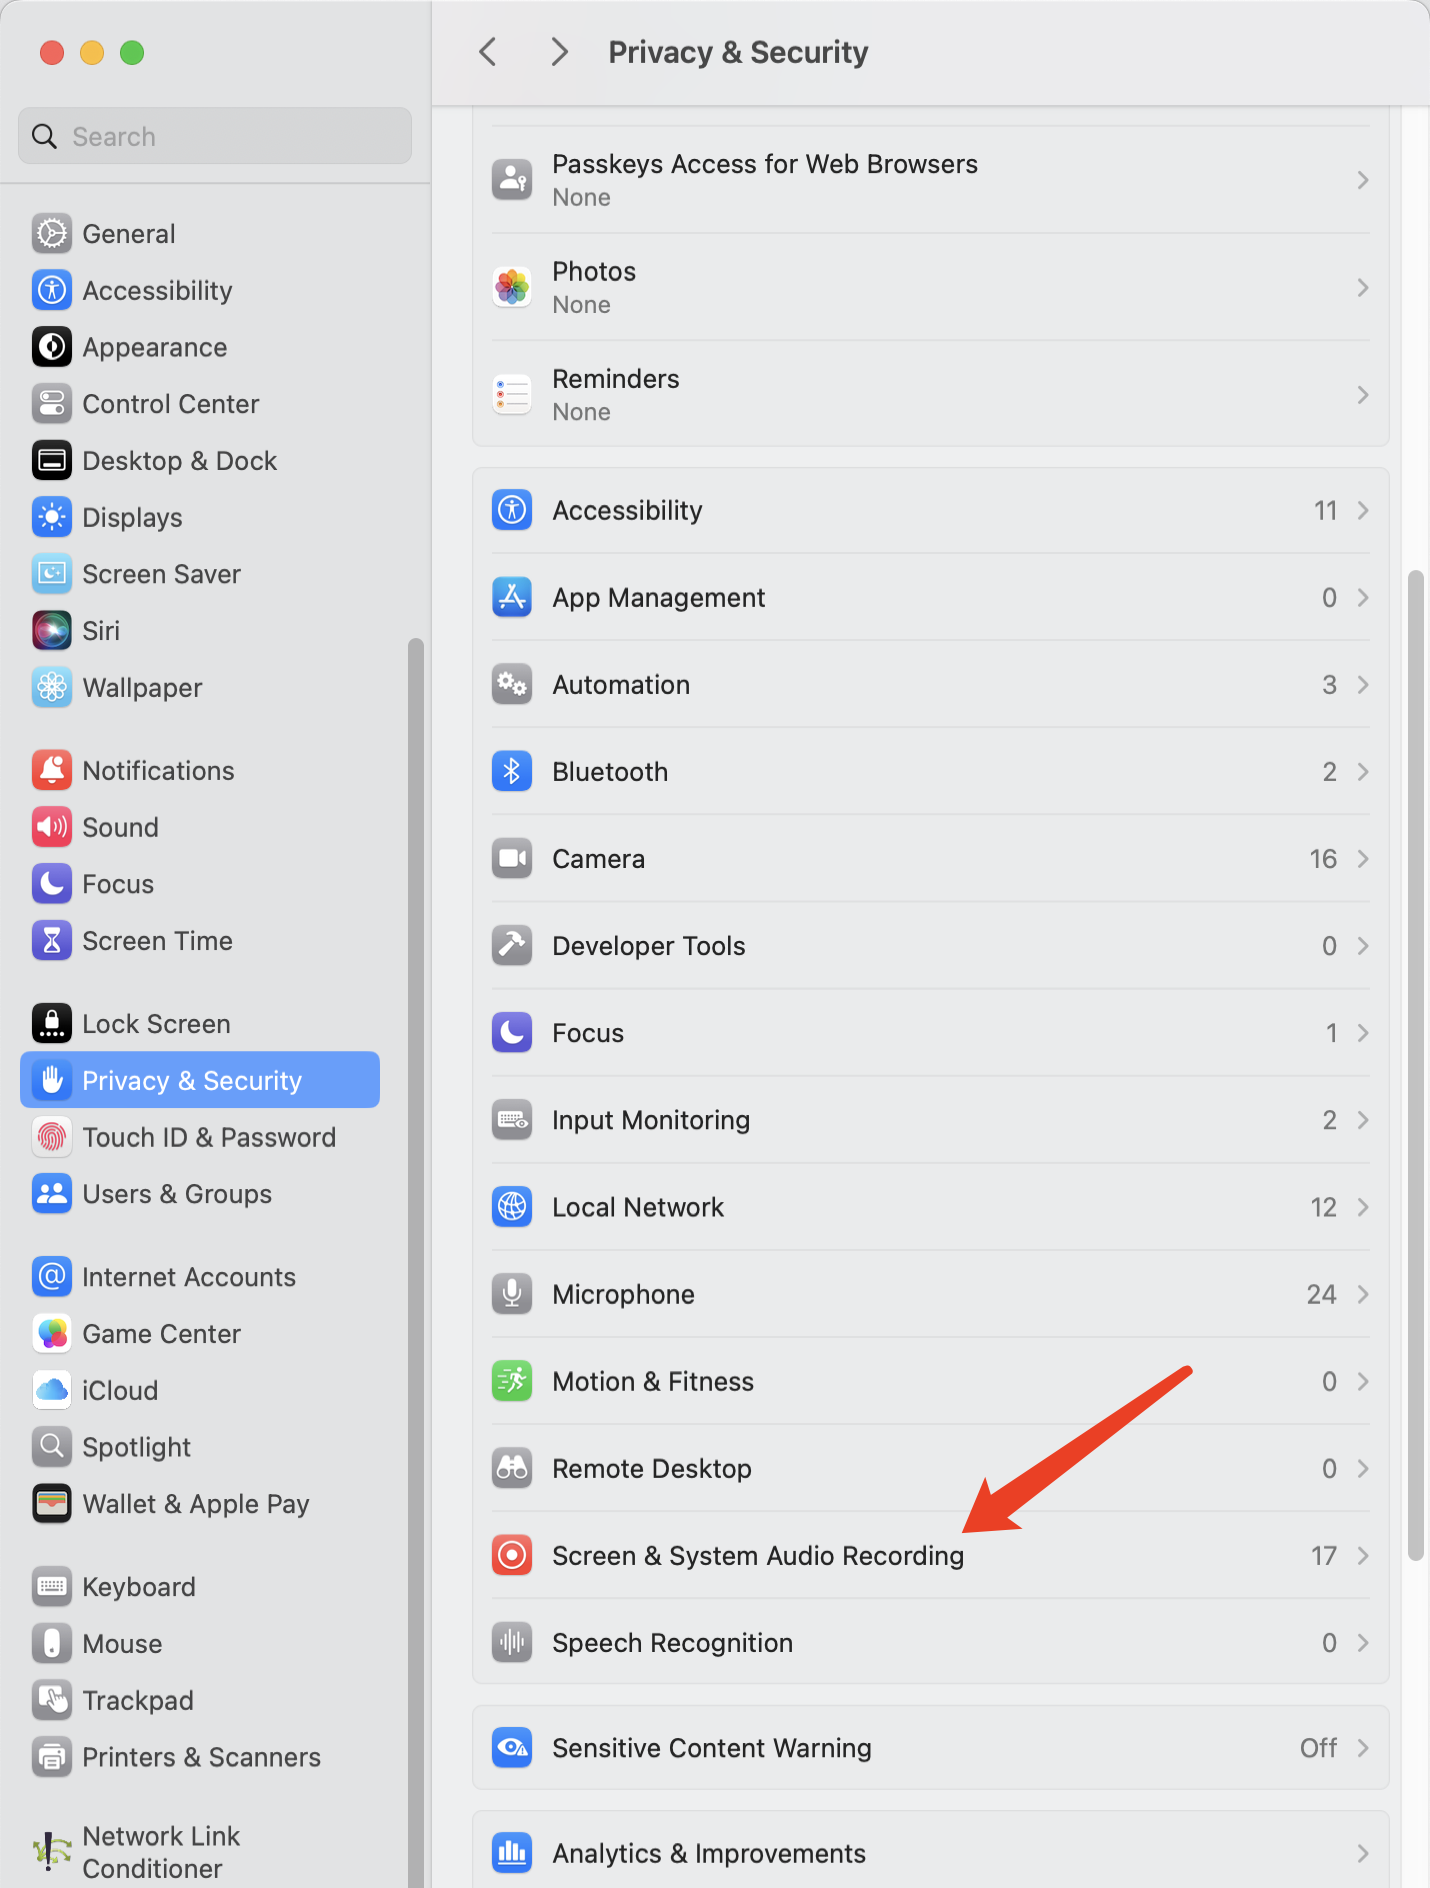
Enable screen recording permission for AgoraFlexibleClassroom:
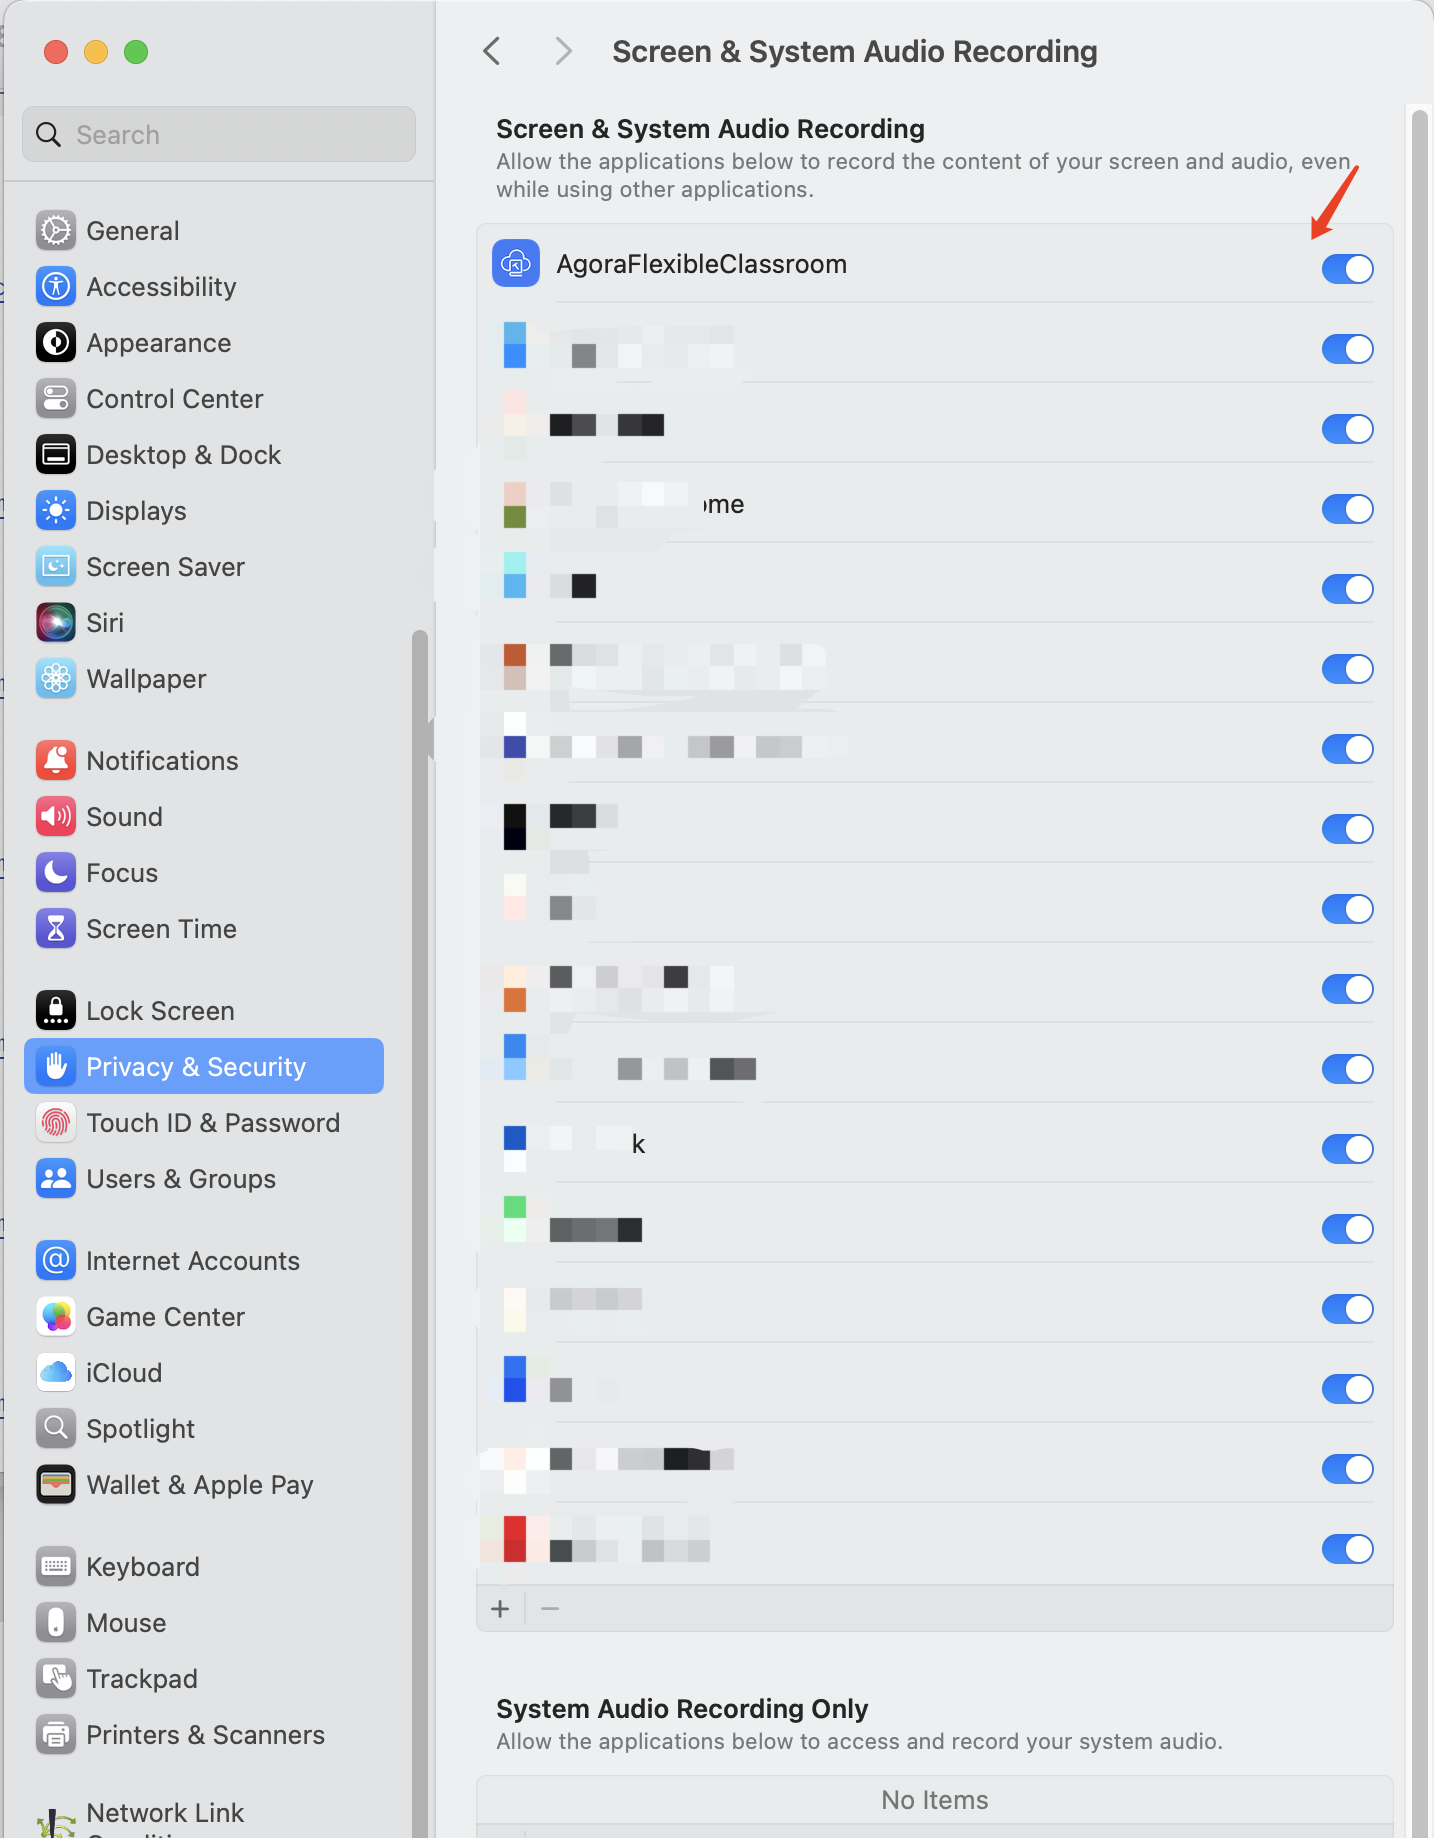
### What if the screen sharing feature is invalid after embedding Flexible Classroom with iframe?
You can use the iframe `allow` attribute to add `display-capture` parameters for screen sharing. The code example is as follows:
```html
```
### Are there any specific network bandwidth requirements for live streaming?
* Teacher's device: Exclusive broadband and uplink speed of at least 10 Mbps and 4 Mbps, respectively.
* Student's device: Exclusive broadband of at least 4 Mbps.
## How do I troubleshoot frequent freezing, unclear audio, blank or black screens, or failed courseware loading?
If you experience these network issues, try the following steps to improve your connection:
* Restart your router and reconnect to the network.
* Move your device closer to the router, ensuring there are no walls or obstructions in between.
* Disconnect other devices or applications that may be using bandwidth, such as download programs, streaming services, cloud storage applications, or networked TV boxes.
* Switch to a different network, such as a 4G hotspot, and re-enter the classroom.
* Restart your device.
* Disable any VPNs or network proxies.
## What if the students can't hear the teacher's voice?
* Check whether the teacher's microphone is turned on.
* Check the student network status.
* Check that the student speakers, including volume mixer and browser, are muted.
* Check whether the speaker device used in the student class is selected correctly.
* Exit and re-enter the classroom or restart the device.
## What if the teacher cannot hear the students?
* Check that the students are on stage and have their microphone turned on.
* Check that the teacher's speakers, including the volume mixer and browser, are muted.
* Check whether the teacher's speaker device is selected correctly.
* Exit and re-enter the classroom or restart the device.
## How to enable screen sharing with audio?
### Web
Web screen sharing is only supported in Chrome version 74 and above on Windows and macOS, including the following:
* Windows supports audio sharing when sharing the entire screen or a Chrome tab, but not when sharing an app window.
* macOS supports sharing audio when sharing a Chrome tab. After setting `withAudio` to `true`, check the share audio box in the screen sharing pop-up.
### Electron
The Electron terminal supports sharing system audio on Windows.
On macOS, use a virtual sound card to capture and share system sounds. If the user uses a virtual sound card, such as Soundflower, you can pass its name (`"soundflower"`) as a parameter. The SDK will find the corresponding virtual sound card device and start capturing.
Note
The default sound card on macOS does not support capture. To enable this feature, the app needs to enable a virtual sound card and pass its name (`deviceName`) to the SDK. Agora has tested and recommends Soundflower as the virtual sound card.
On macOS, screen sharing with audio is turned off by default. For Flexible Classroom versions 2.8.21 and above, if you need to enable it, modify the source code. The specific modification steps are as follows:
1. Display screen sharing with audio at the UI level.
Code path: `packages/agora-classroom-sdk/src/infra/capabilities/containers/dialog/screen-picker/index.tsx`
2. Pass the name of the virtual sound card on macOS.
Code path: `packages/agora-classroom-sdk/src/infra/stores/common/toolbar/index.ts`. The code is as follows:
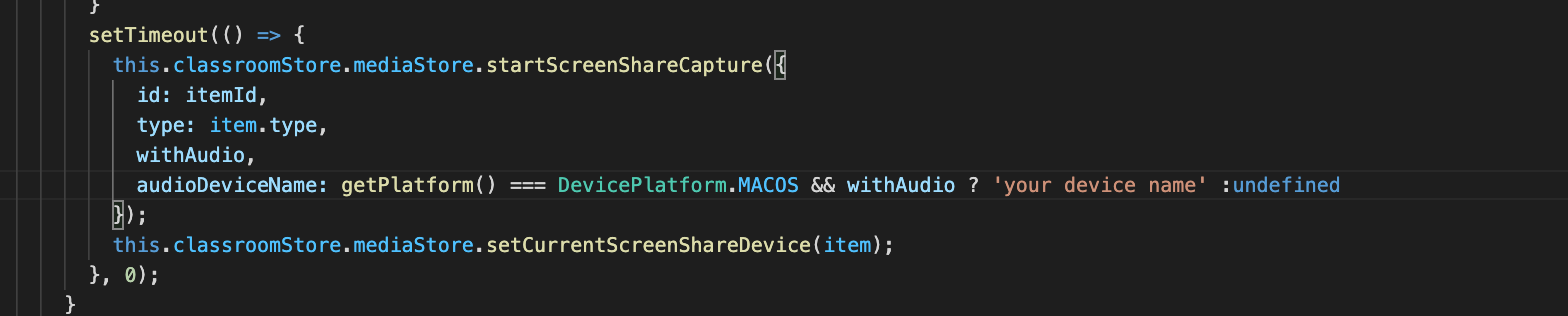
# Why does the SDK stop sending audio or video after the user uses a third-party app? (/en/api-reference/faq/quality/device_occupied)
### When a third-party recording app is being used on the Android device, the local user cannot send the local audio stream. Why is there no warning or error message from the SDK?
We recommed referring to the following logic when implementing your code:
Before the user joins the channel, use the Android native methods to get the status of the audio recorder. When the audio recorder is available, if, within 6 seconds after the user joins the channel, the app receives the following codes, the SDK decides that the recording device is occupied:
* The warning code WARN\_ADM\_RECORD\_AUDIO\_LOWLEVEL(1031), triggered multiple times.
* The error code ERR\_ADM\_RECORD\_AUDIO\_IS\_ACTIVE(1033).
You can remind your user to quit the third-party recording app before using yours.
### I cannot send audio/video after switching to other apps and back during a call using the Agora Web SDK.
**Issue**: If you switch to another app (for example answering a FaceTime call) during a web call, you cannot send any audio/video after switching back to the call.
**Reason**: A third-party application, such as FaceTime, takes over the audio/video device and your device may fail to send audio/video after resuming your web call.
**Solution**: Refresh the web page.
# How can I solve echo problems? (/en/api-reference/faq/quality/echo)
The Agora SDK supports echo cancellation. In most cases, this problem can be fixed by using a headset, and ensure that the headset does not cause an echo.
In a channel joined by multiple users, if a device does not work properly, chances are that all other users in the channel can hear echoes. Therefore, beware that the user hearing the echo may not necessarily be the one having the problem.
## Step 1: Self-check
Check the following:
* Find the source of the echo. You can mute users in the channel one by one to find the source of the echo.
* Check if the echo is occasional or continuous. An occasional echo may be caused by CPU overload. By using [Call Search](/en/realtime-media/agora-analytics/build/explore-and-analyze-data/call-search) function of Agora Analytics, you can check the CPU usage on the **End-to-End Details** page.
* Ensure that all users are in separated physical environments and do not sit too close to each other.
* Check the SDK version:
* Android/iOS: v1.6.0+.
* Windows/macOS: v1.7.0+.
* Check if you enabled an external audio source. If so, echo cancellation is turned off by default.
* In Windows, ensure the `Monitoring Microphone` option is not checked.
* On iOS, check whether the app sets Audio Session as `AVAudioSessionCategoryOptionMixWithOthers`. If so, you may encounter echoes when other apps use the audio device at the same time.
* Systems of some Android or Windows devices support echo cancellation function by default, and you may encounter echoes if the echo cancellation of the system is poor. In this case, Agora recommends disableing the echo cancellation in system and using the echo cancellation of Agora.
* Use a headset:
* In a one-to-one call, if you hear an echo, ask the other user to use a headset.
* In a multi-user call, ask users to mute in turn to figure out who causes the echo. The users who cause the echo should use headsets or mute themselves.
## Step 2: Contact Agora Customer Support
If the issue persists, contact Agora customer support and submit the issue with the following information:
| Information | Details |
| ----------- | ---------------------------------------------------------------------------------------------------------------------------------------------------------------------------------------------------------------------- |
| Mandatory | The name of the channel where the echo occurs.The uids of the users who hear the echo.The uid of the user who causes the echo.The recording files, if available. |
| Additional | The time frame during which the users hear the echo.If the issue exists after rejoining the channel.If the issue exists after the user causing or hearing the echo switches the audio route (such as using a headset). |
## Step 3: Monitor the Quality of Experience in Agora Analytics in Console
You can check the statistics of every call in Agora Analytics in [Agora Console](https://console.agora.io/). For more information, see [Call Search](/en/realtime-media/agora-analytics/build/explore-and-analyze-data/call-search).
# Why can't a Flutter App installed on iOS 14 and above devices be reopened in debug mode? (/en/api-reference/faq/quality/flutter_debug)
On devices running iOS 14 and above, Flutter apps installed in debug mode cannot be reopened using the home screen icon, deep linking, or other methods. Additionally, if an iOS app integrates a Flutter module in debug mode, reopening the app through the home screen icon or similar actions may cause the app to crash due to the integrated Flutter module.
## Reason
Since iOS 14, Apple has adjusted the execution mechanism for apps in debug mode, specifically adding restrictions on the execution of just-in-time (JIT) code. Flutter apps running in debug mode rely on JIT to execute code, and these new restrictions prevent the apps from being launched from the device in the usual manner.
## Solution
Refer to the [official Flutter documentation](https://docs.flutter.dev/platform-integration/ios/ios-debugging).
# Quality Issues (/en/api-reference/faq/quality)
# Why is the audio and video capture invalid after some iOS versions of apps are locked or switched to the background? (/en/api-reference/faq/quality/ios_background)
After locking the iOS device or switching the app to the background, the audio cannot be heard, and the video screen is stuck at the last frame before switching to the background.
## Reason
Due to iOS system limitations, starting from iOS 12.4, the system automatically stops capturing audio and video when the app goes to the background.
## Solution
When using the SDK to capture video, you cannot capture video in the background. However, you can enable the app to capture audio in the background by following these steps:
1. In Xcode's project settings, click **+** in **Signing & Capabilities**, add **Background Modes**, and then check **Audio, Airplay, and Picture in Picture** and **Background processing**, as shown below.
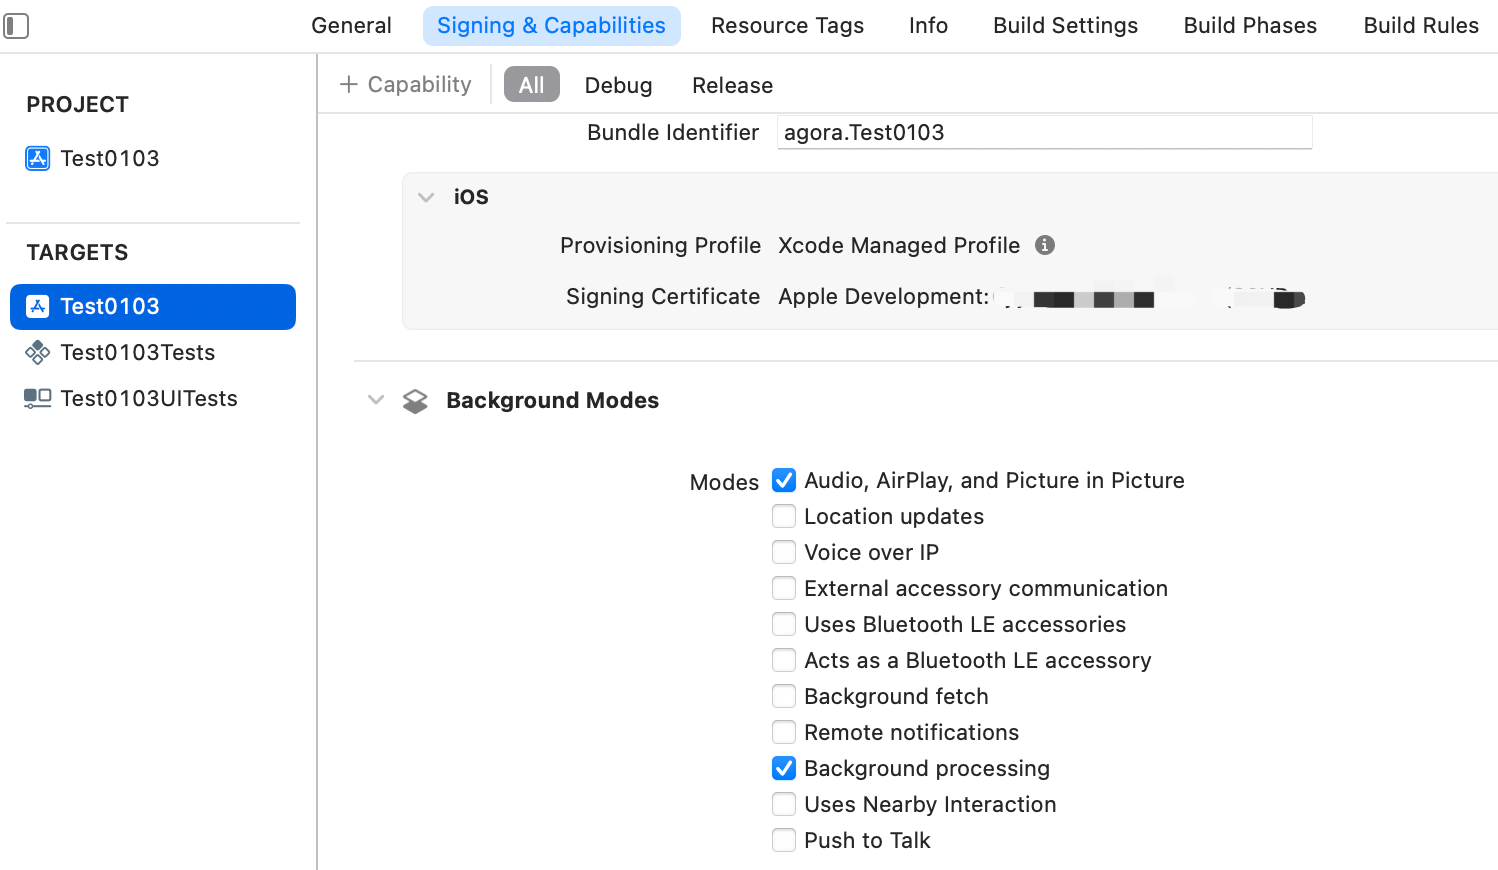
2. Ensure that the audio collection status is normal when the app is in the foreground:
* The user (in communication scenarios) or host (in live broadcast scenarios) has joined the channel.
* The `localAudioStateChanged` callback has been received, and `state` is `AgoraAudioLocalStateRecording`, indicating that the local audio capture device is in the normal state.
Note
Since the audio module is enabled by default, you only need to ensure that you do not call the `disableAudio` or `disableLocalAudio` method to disable audio capture.
1. Switch the app to the background and ensure audio collection returns to normal.
# Why can't I answer calls through a Bluetooth device after connecting it to an iOS or Android device? (/en/api-reference/faq/quality/ios_bluetooth)
After connecting a Bluetooth device to an iOS or Android device, you may encounter the following issues:
* Failure to answer calls through a Bluetooth headset.
* Cannot record and play audio through a Bluetooth speaker.
## iOS devices
### Reason
The possible reasons include:
1. The iOS system selects audio routes for phone and VoIP calls, and the default audio routes are different from what you expect. Phone calls also include FaceTime calls and other calls implemented with CallKit.
**The default audio route for a phone call after connecting an iOS device to a Bluetooth device:**
* After tapping the answer button on iPhone, the default audio route is the iPhone speaker.
* After tapping the answer button on a Bluetooth device, the default audio route is the Bluetooth device.
**The default audio route for a VoIP call after connecting an iOS device to a Bluetooth device:**
* If a user has answered phone calls, the default audio route is the one used by the last phone or VoIP call.
* If a user has not answered any phone call, the default audio route is the Bluetooth device.
If the default settings mentioned above conflict with the audio routes you want, you need to change them when connecting your iOS device to a Bluetooth device. For details, see [Solutions](#solution).
2. On an iOS device, the audio route for audio inputs and outputs must be the same. If you set the Bluetooth device as the audio route for recording, the system switches the audio route for playback to the Bluetooth device accordingly.
3. A Bluetooth speaker can only record audio during a system phone call. If the app does not use the CallKit, the following happens:
* Users who send audio streams cannot record or play audio through the Bluetooth speaker.
* Users who only receive audio streams can only play audio through the Bluetooth speaker.
\###Solutions
Depending on which type of call you have an issue with, choose one of the following solutions to set the audio routes:
**Phone call**
* Before answering a phone call, change the audio route setting in **Settings**: swipe down to reveal the search field, search **Call Audio Routing**, and change the audio route to **Bluetooth Headset**. All incoming calls will be answered through the Bluetooth device even if you press the answer button on the iPhone.
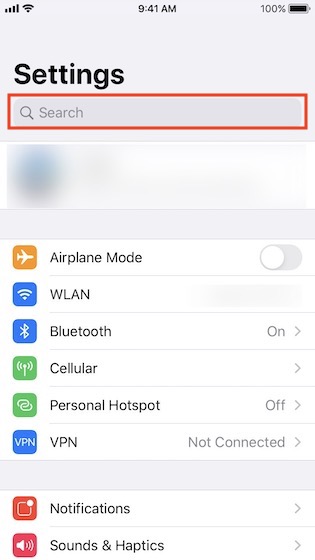 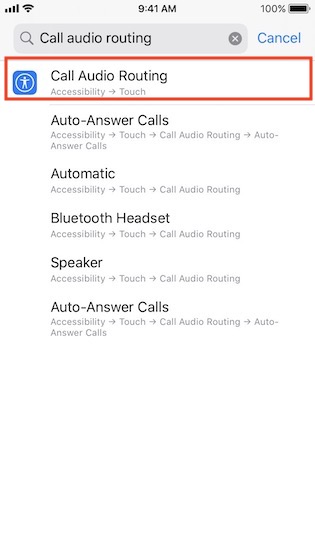
* During a phone call, you can switch between the **Bluetooth Headset**, **Handset**, or **Speaker** options in the call interface.
* If you connect an iOS device to a Bluetooth speaker and answer calls in an app, ensure that the app uses the CallKit, otherwise, the above settings do not work.
**VoIP call**
* Before making a VoIP call, you need to switch to the **Bluetooth Headset** mode in the **Control Center**. Apps can call the iOS native API `setPreferredInput` method to change the audio route.
* When a VoIP call through the Bluetooth device is interrupted by a phone call, tap the answer button on the Bluetooth device to answer the phone call, after which you can continue the VoIP call through the Bluetooth device once the phone call ends.
## Android devices
### Reasons
1. Permissions to access the Bluetooth device are not added in the `AndroidManifest.xml` file.
2. Only the Bluetooth device that supports SCO can record and play audio. If the Bluetooth device supports only A2DP, then it cannot record audio, which means it cannot be used to answer a phone call.
3. You can route audio to a Bluetooth device only if the Android device supports the use of SCO for off-call use cases.
### Solutions
1. Add the following lines in the `AndroidManifest.xml` file to request permissions to access the Bluetooth device:
```html
```
2. Check if the Bluetooth device supports SCO. If not, switch to a SCO-capable Bluetooth device.
3. Call the Android native API `AudioManmager.isBluetoothScoAvailableOffCall` method to check if the device supports the use of SCO for off-call use cases. If the device does not support the feature, the user can only answer the call using the system default audio route.
# How do I troubleshoot slow first-frame rendering of remote video when using the Agora RTC SDK? (/en/api-reference/faq/quality/optimize_video_rendering)
When using the Agora RTC SDK for real-time Video Calling, Interactive Live Streaming, or Broadcast Streaming, some developers observe that the remote video takes too long to display after joining a channel. This delay can negatively impact user experience, especially in scenarios like live broadcasts where quick video display is critical.
## Why delays occur
The delay in the first frame rendering is usually due to delays across multiple stages, including:
* Setting the remote rendering view too late
* Not subscribing to the remote video stream in time after joining the channel
## Solution
RTC SDK provides a mechanism to help developers identify which stage of the video rendering pipeline is time-consuming. The `onVideoRenderingTracingResult` callback returns the duration of each stage. By default, durations are calculated from the time `joinChannel` is called. To customize the start time, call `startMediaRenderingTracing`.
### Step 1: Use `startMediaRenderingTracing` before joining
To align rendering metrics with actual user experience, call `startMediaRenderingTracing` immediately when the user triggers a join action (such as tapping **Join** or switching channels). This ensures the collected data reflects real-world latency.
The following table explains the fields returned in `tracingInfo` from the `onVideoRenderingTracingResult` callback:
| Field | Description | Reference Range | Recommendations |
| ----------------------------- | ---------------------------------------------------------------------------------------------------------------------------------------------------------------------------------------- | ------------------- | ------------------------------------------------------------------------------------------------------------------------------------------------------------------------------------------------------------------ |
| `elapsedTime` | * **Decoding event**: Time from `startMediaRenderingTracing` to `onFirstRemoteVideoDecoded`.
* **Rendering event**: Time from `startMediaRenderingTracing` to `onFirstRemoteVideoFrame`. | \< 1000 ms for both | If the difference between decoding and rendering is >200 ms, ensure the remote view is set promptly. If only decoding events are reported, check whether:* The remote view is unset
* An external renderer is used |
| `start2JoinChannel` | Time from `startMediaRenderingTracing` to `joinChannel`. | \< 10 ms | If too large, ensure `joinChannel` is called promptly after user action. |
| `join2JoinSuccess` | Time from `joinChannel` to `onJoinChannelSuccess`. | 50–500 ms | If high, check network conditions. Consider calling `preloadChannel` to speed up joining. |
| `joinSuccess2RemoteJoined` | Time from `onJoinChannelSuccess` to `onUserJoined`. | ≤50 ms | High values may occur if:* Host joins after the viewer
* Streams are not subscribed by default |
| `remoteJoined2SetView` | Time from `onUserJoined` to `setupRemoteVideo`. | 0–20 ms | Set the remote view immediately in `onUserJoined`. For optimal performance, pre-set the view before joining. |
| `remoteJoined2UnmuteVideo` | Time from `onUserJoined` to subscribing to the video stream. | 0 ms | If high, check if subscription is delayed. Subscribing during join keeps this value at 0. |
| `remoteJoined2PacketReceived` | Time from `onUserJoined` to receiving the first video packet. | 0–50 ms | If high, check:* Whether video stream subscription is delayed
* Whether the host publishes the stream promptly |
### Step 2: Use default behavior (without `startMediaRenderingTracing`)
If you don't call `startMediaRenderingTracing`, the SDK uses the time `joinChannel` is called as the starting point for measuring rendering performance.
With this approach, most fields in the `onVideoRenderingTracingResult` callback have the same meaning as when tracing is started before joining. However, two fields have different interpretations, as shown below:
| Field | Description | Reference Range | Recommendations |
| ------------------- | ---------------------------------------------------------------------------------------------------------------------------------------------------------- | ------------------- | ---------------------------------------------------------------------------------------------------------------------------------------------------------------------------------------------------------------------------- |
| `elapsedTime` | * **Decoding event**: Time from `joinChannel` to `onFirstRemoteVideoDecoded`.
* **Rendering event**: Time from `joinChannel` to `onFirstRemoteVideoFrame`. | \< 1000 ms for both | If the difference between decoding and rendering is >200 ms, check whether the remote view is set on time. If only decoding events are received, possible causes include:* Remote view not set
* Use of an external renderer |
| `start2JoinChannel` | Time from `startMediaRenderingTracing` to `joinChannel`. | 0 ms | This value is always 0 because no tracing was started before calling `joinChannel`. |
### Step 3: Pre-join the channel, then subscribe on demand
If your app requires extremely low latency for the first frame, pre-join the channel without subscribing to the stream. When the user triggers the join action, call `startMediaRenderingTracing` and subscribe to the remote stream.
For implementation details, see [Optimize first-frame rendering](/en/realtime-media/rtc/build/capture-and-render-video/optimize-frame-rendering).
The following table describes each field for this scenario:
| Field | Description | Reference Range | Recommendations |
| ----------------------------- | ---------------------------------------------------------------------------------------------------------------------------------------------------------------------------------------- | ------------------ | ------------------------------------------------------------------------------------------------------------------------------------------------------ |
| `elapsedTime` | * **Decoding event**: Time from `startMediaRenderingTracing` to `onFirstRemoteVideoDecoded`.
* **Rendering event**: Time from `startMediaRenderingTracing` to `onFirstRemoteVideoFrame`. | \< 500 ms for both | If the rendering time greatly exceeds decoding time, check whether the remote view was set in time. |
| `start2JoinChannel` | Time from `joinChannel` to `startMediaRenderingTracing`. | Negative | Since the channel was joined before tracing started, this value is negative and can be ignored. |
| `join2JoinSuccess` | Time from `joinChannel` to `onJoinChannelSuccess`. | 50–500 ms | This value is irrelevant because the user has already joined the channel. |
| `joinSuccess2RemoteJoined` | Time from `startMediaRenderingTracing` to `onUserJoined`. | 0 ms | If greater than 0, it may indicate frequent channel switching. This value is not meaningful if `onUserJoined` is triggered after tracing starts. |
| `remoteJoined2SetView` | Time from `startMediaRenderingTracing` to `setupRemoteVideo`. | 0 ms | If greater than 0, check whether the view was set promptly. This value may be invalid if the view was set before calling `startMediaRenderingTracing`. |
| `remoteJoined2UnmuteVideo` | Time from `startMediaRenderingTracing` to subscribing to the stream. | 0 ms | If this value is large, check for delays between calling `startMediaRenderingTracing` and subscribing to the remote stream. |
| `remoteJoined2PacketReceived` | Time from `startMediaRenderingTracing` to receiving the first video packet. | \~100 ms | If high, verify that the remote host is publishing video promptly after joining. |
## API Reference
### Android
* [`joinChannel`](https://api-ref.agora.io/en/video-sdk/android/4.x/API/class_irtcengine.html#api_irtcengine_joinchannel2)
* [`startMediaRenderingTracingEx`](https://api-ref.agora.io/en/video-sdk/android/4.x/API/class_irtcengineex.html#api_irtcengineex_startmediarenderingtracingex)
* [`onVideoRenderingTracingResult`](https://api-ref.agora.io/en/video-sdk/android/4.x/API/class_irtcengineeventhandler.html#callback_irtcengineeventhandler_onvideorenderingtracingresult)
* [`preloadChannel`](https://api-ref.agora.io/en/video-sdk/android/4.x/API/class_irtcengine.html#api_irtcengine_preloadchannel)
### iOS
* [`joinChannel`](https://api-ref.agora.io/en/video-sdk/ios/4.x/documentation/agorartckit/agorartcenginekit/joinchannel%28bytoken\:channelid\:uid\:mediaoptions\:joinsuccess:%29)
* [`startMediaRenderingTracingEx`](https://api-ref.agora.io/en/video-sdk/ios/4.x/documentation/agorartckit/agorartcenginekit/startmediarenderingtracingex%28_:%29)
* [`AgoraVideoRenderingTracingInfo`](https://api-ref.agora.io/en/video-sdk/ios/4.x/documentation/agorartckit/agoravideorenderingtracinginfo)
* [`preloadChannel`](https://api-ref.agora.io/en/video-sdk/ios/4.x/documentation/agorartckit/agorartcenginekit/preloadchannel%28bytoken\:channelid\:uid:%29)
### macOS
* [`joinChannel`](https://api-ref.agora.io/en/video-sdk/macos/4.x/documentation/agorartckit/agorartcenginekit/joinchannel%28bytoken\:channelid\:uid\:mediaoptions\:joinsuccess:%29)
* [`startMediaRenderingTracingEx`](https://api-ref.agora.io/en/video-sdk/macos/4.x/documentation/agorartckit/agorartcenginekit/startmediarenderingtracingex%28_:%29)
* [`AgoraVideoRenderingTracingInfo`](https://api-ref.agora.io/en/video-sdk/macos/4.x/documentation/agorartckit/agoravideorenderingtracinginfo)
* [`preloadChannel`](https://api-ref.agora.io/en/video-sdk/macos/4.x/documentation/agorartckit/agorartcenginekit/preloadchannel%28bytoken\:channelid\:uid:%29)
### Windows
* [`joinChannel`](https://api-ref.agora.io/en/video-sdk/cpp/4.x/API/class_irtcengine.html#api_irtcengine_joinchannel2)
* [`startMediaRenderingTracingEx`](https://api-ref.agora.io/en/video-sdk/cpp/4.x/API/class_irtcengineex.html#api_irtcengineex_startmediarenderingtracingex)
* [`onVideoRenderingTracingResult`](https://api-ref.agora.io/en/video-sdk/cpp/4.x/API/class_irtcengineeventhandler.html#callback_irtcengineeventhandler_onvideorenderingtracingresult)
* [`preloadChannel`](https://api-ref.agora.io/en/video-sdk/cpp/4.x/API/class_irtcengine.html#api_irtcengine_preloadchannel)
# Why is my video pixelated or jagged and green? (/en/api-reference/faq/quality/pixelated_green_video)
Pixelated video contains irregular pixels with incorrect colors, preventing the video from displaying an image.
Pixelated video is different from blurred video. Blurred video is usually caused by low resolution or bitrate. In a blurred video, the image is still intact.
Green video contains jagged green blocks, preventing the video from displaying correctly.
The causes of pixelated or jagged, green video are due to any number of issues, including:
* Camera
* Third-party image enhancement SDK
* Resolution
* Video source module
* Video renderer module
Refer to following sections to troubleshoot.
## User self-check
### Pixelated video in the sender
1. Complete the following steps to check the camera, third-party image enhancement SDK, and resolution:
1. Ensure that the camera works correctly.
2. Check the third-party image enhancement SDK. If you are using a third-party image enhancement SDK, disable it and try again. If the video is no longer jagged and green, then this is the likely cause. Please contact the technical support of the third-party image enhancement SDK.
3. Check whether the resolution is [recommended by Agora](https://api-ref.agora.io/en/video-sdk/cpp/3.x/structagora_1_1rtc_1_1_video_encoder_configuration.html#af10ca07d888e2f33b34feb431300da69). If not, change the resolution.
2. Check the video source and the video renderer:
* If the sender uses a custom source and renderer, check the custom source first and then check the custom renderer. See the sample projects for [custom source](/en/realtime-media/rtc/build/capture-and-render-video/custom-video#custom-video-capture) and [custom renderer](/en/realtime-media/rtc/build/capture-and-render-video/custom-video#custom-video-rendering).
* If the sender uses a custom source and an Agora RTC SDK renderer, check the custom source. See the [custom source](/en/realtime-media/rtc/build/capture-and-render-video/custom-video#custom-video-capture) sample project.
* If the sender uses an Agora RTC SDK source and a custom renderer, check the custom renderer. See the [custom renderer](/en/realtime-media/rtc/build/capture-and-render-video/custom-video#custom-video-rendering) sample project.
* If the sender uses an Agora RTC SDK source and an Agora RTC SDK renderer, contact [support@agora.io](mailto\:support@agora.io) for technical support.
When the sender uses YUV data with the custom renderer, check whether you have mistakenly used the `Stride` parameter and the `width` parameter in [`VideoFrame`](https://api-ref.agora.io/en/video-sdk/cpp/3.x/structagora_1_1media_1_1_i_video_frame_observer_1_1_video_frame.html).
### Pixelated video in the receiver
If pixelated video appears in both the sender and the receiver, you need to [check pixelated video in the sender](#pixelated_sender) first. If pixelated video appears in only the receiver, refer to the following steps to troubleshoot:
1. Regardless of the renderer type, check the sender first. If the sender uses a custom source, you also need to check whether the video data is correctly sent from the custom source to the RTC SDK.
2. If the receiver uses custom renderer, check the custom renderer.
When the receiver uses YUV data with the custom renderer, check whether you have mistakenly used the
`Stride` parameter and the `width` parameter in [`VideoFrame`](https://api-ref.agora.io/en/video-sdk/cpp/3.x/structagora_1_1media_1_1_i_video_frame_observer_1_1_video_frame.html).
### Jagged, green video in the sender
Complete the following steps to check the camera, third-party image enhancement SDK, and resolution:
1. Ensure that the camera works correctly.
2. Check the third-party image enhancement SDK. If you are using a third-party image enhancement SDK, disable it and try again. If the video is no longer jagged and green, then this is the likely cause. Please contact the technical support of the third-party image enhancement SDK.
3. Check whether the resolution is [recommended by Agora](https://api-ref.agora.io/en/video-sdk/cpp/3.x/structagora_1_1rtc_1_1_video_encoder_configuration.html#af10ca07d888e2f33b34feb431300da69). If not, change the resolution.
* If the sender uses a custom source and renderer, when you use [`setVideoSource`](https://api-ref.agora.io/en/video-sdk/android/3.x/classio_1_1agora_1_1rtc_1_1_rtc_engine.html#aa240e991d12b5240fc5fd362cbc0d521) to set a custom source, check whether the data formats in `getBufferType` and from `IVideoFrameConsumer` to the SDK are consistent. If the data formats are inconsistent, update the data formats and re-check. Then check the custom renderer.
* If the sender uses a custom source and an Agora RTC SDK renderer, check the custom source. When you use [`setVideoSource`](https://api-ref.agora.io/en/video-sdk/android/3.x/classio_1_1agora_1_1rtc_1_1_rtc_engine.html#aa240e991d12b5240fc5fd362cbc0d521) to set a custom source, check whether the data formats in `getBufferType` and from `IVideoFrameConsumer` to the SDK are consistent. If the data formats are inconsistent, update the data formats and re-check. Also check whether the video data is correctly sent from the custom source to the SDK.
* If the sender uses an Agora RTC SDK source and a custom renderer, check the custom renderer.
* If the sender uses an Agora RTC SDK source and an Agora RTC SDK renderer, please contact [support@agora.io](mailto\:support@agora.io) for technical support.
In Android, if you use a custom source in the communication profile, check whether the video data format is Texture. The Agora RTC SDK for Android does not support receiving video data in Texture format. You need to update the video data format to YUV and re-check the video.
### Jagged, green video in the receiver
If jagged, green video appears for both the sender and the receiver, you need to [check jagged, green video in the sender](#green_sender) first. If jagged, green video appears for the receiver only, refer to the following steps to troubleshoot:
* Regardless of the renderer type, check the sender first. If the sender uses a custom source, you also need to check whether the video data is correctly transmitted from the custom source to the RTC SDK. When you use [`setVideoSource`](https://api-ref.agora.io/en/video-sdk/android/3.x/classio_1_1agora_1_1rtc_1_1_rtc_engine.html#aa240e991d12b5240fc5fd362cbc0d521) to set a custom source, check whether the data format in `getBufferType` and from `IVideoFrameConsumer` to the SDK are consistent. If the data format is inconsistent, update the data format and re-check.
In Android, if you use a custom source in the communication profile, check whether the video data format is Texture. The Agora RTC SDK for Android does not support receiving video data in Texture format. You need to update the video data format to YUV and re-check the video.
## Contact customer support
If the previous steps in this article cannot help you fix this problem, please contact [support@agora.io](mailto\:support@agora.io) for technical support. Please provide the following information to help with the troubleshooting:
### Necessary information
* Channel name with the pixelated or jagged, green video.
* UID of the users who send and receive the pixelated or jagged, green video and types of the devices.
* Steps to reproduce the problem.
* Screenshot of the pixelated or jagged, green video.
* The time frame of the problem.
* Source and renderer type: Agora RTC SDK source, custom source, Agora RTC SDK renderer, or custom renderer.
* SDK log files. See [How can I set the log file?](/en/api-reference/faq/integration/log)
### Additional information
* Whether pixelated or jagged, green video is reproducible in other types of devices.
* Whether pixelated or jagged, green video is reproducible with other resolution.
* Whether pixelated or jagged, green video appears in other apps.
# How can I solve issues relating to recording files? (/en/api-reference/faq/quality/record_file_issue)
### Why aren't there any files generated under the recording folder?
* Check whether you enter the same `appID` and `channelProfile` (Communication or Live Broadcast) as the Agora Native SDK integrated into your app. Communication and Live Broadcast cannot interoperate.
* Check if the recording process successfully joined the channel. Check if the App ID and channel name are valid. If the App Certificate is enabled, ensure that a valid Channel Key or Token is used when joining the channel. You can check the `appID`, channel, and `channelKey` parameters in the recording log, `recording_sys.log`.
* Check if there is any Native/Web user in the channel. At least one Native/Web SDK user is required in the channel for the recording client to generate a recording file. If there is a Native/Web user, ensure that the user sent a stream. If not, the recording file cannot be generated.
### Why is the recording duration of the recorded file incorrect?
If the Native/Web SDK and Recording SDK are in the same channel during the same time, contact Agora customer support.
### Why is there no audio when playing the recorded video?
The recorded audio and video files are independent; the audio is in AAC format, while the video is in MPEG-4 format. The video file does not contain any voice, you need to manually merge the audio and video files into one file. If the recorded files are already transcoded, contact Agora customer support.
### Why can't I play the MPEG-4 file after the recording is complete?
This is usually because the player is not supported. Refer to the [Supported Players List](/en/api-reference/faq/integration/recording_player).
### Why can't I play the recorded video files after enabling encryption mode?
In encryption mode, if the encryption password is not entered or incorrect, the recorded file does not play. The audio output is corrupted because it is encrypted.
### Why are there only audio files and no video files after recording?
This usually occurs when the Native/Web SDK and Recording SDK use different communication modes. Check the Argus SDK Client Role.
If the same communication mode is used, check the following parameters for the client sending the video and the receiver receiving the video: Video Receive Bitrate, Video Decoder In/Out Frame Rate, and ARS Received H264 Frame Num. If the parameters are fine, check the `recording_sys.log` file.
### Why is there a blank period at the beginning of the recorded and transcoded video during playback?
Possible reasons:
* Poor network conditions.
* The video recording is only created when the I frame of the video packet is received; which means that the previously received B and P frames are ignored.
* The size of each video frame is significantly larger than each voice frame. This means that the voice packet is transmitted quicker and received before the video packet. Once the video packet is received, the recording starts.
### Why is there a black screen when playing the recorded video, but the sound is normal?
This is usually because the player is not supported. Refer to the [Supported Players List](/en/api-reference/faq/integration/recording_player).
### Why is the recorded video inverted?
Please upgrade to the latest official version. Contact Agora customer support for any issues.
### What should I do if the audio and video are out of sync when I play the recording file?
Please upgrade to the latest official version. Contact Agora customer support for any issues.
# Why is the recording file split? (/en/api-reference/faq/quality/record_split)
During the recording process, if the recorded audio and video format is not the recording original audio and video data format, the following situations result in file splitting:
* In the individual recording mode, a user rejoins a channel after leaving the channel, or resumes sending audio/video after not sending for a period of time. The specific rules are as follows:
* For audio recording files:
* The user sends the audio data again after not sending for more than 15 seconds.
* The user rejoins the channel after leaving for more than 15 seconds.
* For video recording files:
* The user sends the video data again after not sending for more than 15 seconds.
* The user changes the video resolution.
* The user leaves and rejoins the channel.
* In the composite recording, if the manual recording mode is set, pause and then resume recording.
If the file splits and the above situations do not apply, check the following:
* Ensure that the same channel profile is used between the Native/Web SDK and Recording SDK.
* Call `enableWebSdkInteroperability` in the Native SDK when the recording channel uses both the Native and Web SDK.
# How can I solve issues relating to recording status? (/en/api-reference/faq/quality/record_status_error)
### Recording quit error
If Error: 3, with stat\_code:16 is reported, the recording quits normally. You can determine why the recording quit by the leave\_path code.
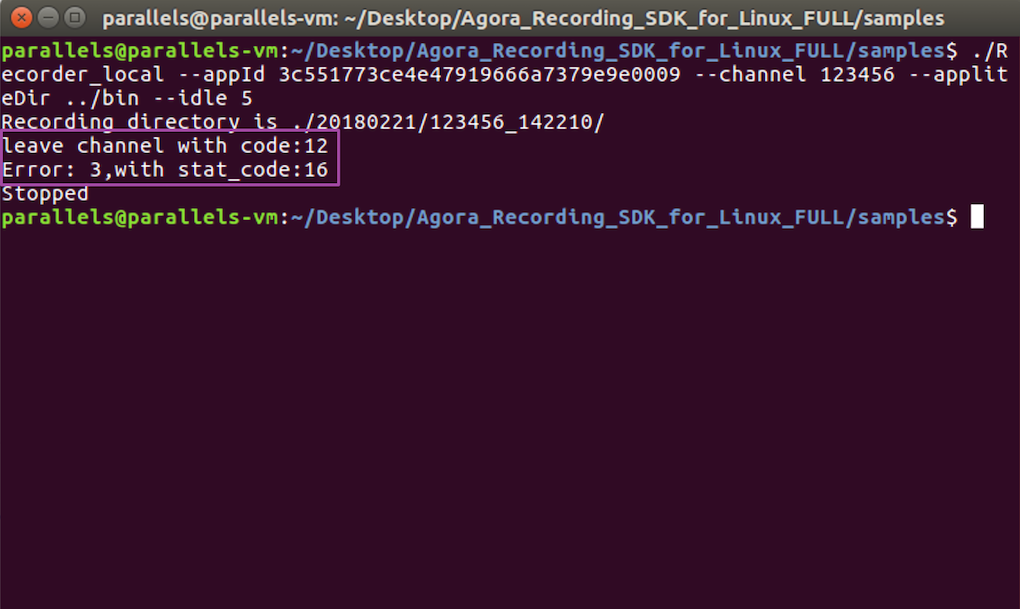
* LEAVE\_CODE\_INIT(0):Initialization failure.
* LEAVE\_CODE\_SIG(0b10):Signal triggered an exit.
* LEAVE\_CODE\_NO\_USERS(0b100):The recording times out and exits.
* LEAVE\_CODE\_TIMER\_CATCH(0b1000):Ignore it.
* LEAVE\_CODE\_CLIENT\_LEAVE(0b10000):The client leaves the channel.
You can perform a bitwise AND operation on the code and each enum value, and those with non-zero results are the reason for the exit. For example, if you perform a bit-by-bit AND operation on code 6 (0b110) and each enum value, only `LEAVE_CODE_SIG` (0b10) and `LEAVE_CODE_NO_USERS` (0b100) get a non-zero result. The reasons for exiting, in this case, include a timeout and a signal triggering the exit.
Typically, a recording session exits because a timeout occurs. Search for "No users in channel" in `recording_sys.log` to confirm.
### How do I know whether the recording crashes?
The recording crashes if the following scenarios occur:
* Video files cannot play.
* The `uid_xxx.txt` file has no close information about the MPEG-4 file.
* The recording\_sys.log file contains the **MediaFile** keyword but not the **\~MediaFile** keyword.
* The recorded event information in Argus has no quit flag.
### What should I do when the recording crashes?
Users of the Recording SDK v2.2.3 or later can check the crash.log file generated in the same directory as AgoraCoreService.
Users of the Recording SDK versions earlier than v2.2.3 can check if there is a core file generated in the same directory as AgoraCoreService.
1. If you get the core file:
a. Put the bin/AgoraCoreService and core file together, then execute the command line: gdb -c core\_xxxx AgoraCoreService.
b. Provide the core file, the result from step a, and the recording\_sys.log file to Agora technical support.
2. If you cannot find the core file:
a. If no directory is set for the core file, then the core file is usually found in the directory where the recorded AgoraCoreService file is located.
b. If not, execute ulimit -c on Linux. If the output is 0, coredump is not open. Open coredump by executing: ulimit -c unlimited.
c. After opening coredump, users can generate the core file after a crash.
d. Provide the recording\_sys.log file and the core file to Agora technical support.
### The recorded video files of the native client are in webm format when the Native SDK interoperates with the Web SDK.
To fix this issue, set the `codec` property as "h264" when calling the `createClient` method on the web client. If the `codec` property is "vp8", the recorded video files of the native client are in webm format.
# How to solve SEI-related issues? (/en/api-reference/faq/quality/sei)
### The Agora SEI
By default, Agora adds the encoding information of the current video to the transcoded H264/H265 SEI (Supplemental Enhancement Information) during Media Push. The encoding information is a JSON string. The following is the sample code:
```json
{
"canvas": {
"w": 640,
"h": 360,
"bgnd": "#000000"
},
"regions": [
{
"uid": 1,
"alpha": 1.0,
"zorder": 1,
"volume": 50,
"x": 0,
"y": 0,
"w": 320,
"h": 360
},
{
"uid": 2,
"alpha": 1.0,
"zOrder": 1,
"volume": 89,
"x": 320,
"y": 0,
"w": 320,
"h": 360
}
],
"ver": "20190611",
"ts": 1535385600000,
"app_data": ""
}
```
The definition of the parameters:
| Parameter | Description |
| ---------- | ----------------------------------------------------------------------------------------------------------------------------------------------------------------------------------------------------------------------------------------------------------------------------------------------------------------------------------------------------------------------------------------------------------------------------------------------------------------------------------------------------------------------------------------------------------------------------------------------------------------------------------------------------------------------------------------------------------------------------------------------------------------------------------------------------------------------------------------------------------------------------------------------------------------------------------------------------------------------------------------------------------------------------------------------------------------------------------------------------------------------------------------------------------------------------------------------------------------------------------------------------------------------------------------------------------------------------------------------------------------------------------------------------------------- |
| `canvas` | The canvas information. It contains the following properties:- `w`: The width of the canvas in pixels. The canvas `width` field is set in the client or server bypass streaming API.
- `h`: The height of the canvas in pixels. The canvas `height` field is set in the client or server bypass streaming API.
- `bgnd`: The background color (RGB) of the canvas, represented by a hexademical integer defined in RGB. The `color` field of the canvas set in the client or server bypass streaming API. |
| `regions` | The layout information of the host. It corresponds to the `transcodingUsers` member in the `LiveTranscoding` class. It contains the following properties:- `suid`: (**Optional**)The string user account of the host in this region. This parameter applies to scenarios where string user accounts are used to identify the host.
- `uid`: UID of the host in this region. It corresponds to the `uid` member in the `TranscodingUser` class.
- `alpha`: The transparency of the video frame of the host. The value range is \[0.0, 1.0]. It corresponds to the `alpha` member in `TranscodingUser` .
- `zorder`: The layout position of the video frame of the host. The value range is \[0, 100]. It corresponds to the `zOrder` member in `TranscodingUser`.
- `volume`: The volume (dB) of the host. The value range is \[0, 100].
- `x`: The horizontal position of the video frame of the broadacaster from the top left corner of the Media Push. It corresponds to the `x` member in `TranscodingUser`.
- `y`: The vertical position of the video frame of the host from the top left corner of the Media Push. It corresponds to the `y` member in `TranscodingUser`.
- `w`: Width (pixel) of the video frame of the host. It corresponds to the `width` member in `TranscodingUser`.
- `h`: Height (pixel) of the video frame of the host. It corresponds to the `height` member in `TranscodingUser`. |
| `ver` | The version of the SEI protocol. The current version is 20190611. |
| `ts` | Timestamp (ms) of the current encoding information. |
| `app_data` | Extra user-defined information. It corresponds to the `transcodingExtraInfo` member in the client or server bypass streaming API. |
### The structure of SEI
* H.264
A snippet of an H.264 SEI frame is as follows:
```text
0000 0664bd7b 22617070 5f646174 61223a22
0010 222c2263 616e7661 73223a7b 2262676e
0020 64223a22 23666666 66666622 2c226822
0030 3a363430 2c227722 3a333630 7d2c2272
0040 6567696f 6e73223a 5b7b2261 6c706861
0050 223a3235 352c2268 223a3634 302c2275
0060 6964223a 33313031 32373137 39312c22
0070 766f6c75 6d65223a 32382c22 77223a33
0080 36302c22 78223a30 2c227922 3a302c22
0090 7a6f7264 6572223a 317d5d2c 22747322
00a0 3a313533 37393630 32333537 38332c22
00b0 76657222 3a223230 31383038 3238227d
```
The transcoded H.264 SEI information is as below:
```json
{
"app_data": "",
"canvas": {
"bgnd": "#ffffff",
"h": 640,
"w": 360
},
"regions": [
{
"alpha": 255,
"h": 640,
"uid": 3101279171,
"volume": 28,
"w": 360,
"x": 0,
"y": 0,
"zorder": 1
}
],
"ts": 1537960235783,
"ver": "20180828"
}
```
* H.265
Here's a snippet of an H.265 SEI frame:
```text
0000014E 0164BC7B 22617070 5F646174 61223A22 222C2263
616E7661 73223A7B 2262676E 64223A22 23303030 30303022
2C226822 3A363430 2C227722 3A333630 7D2C2272 6567696F
6E73223A 5B7B2261 6C706861 223A3235 352C2268 223A3634
302C2275 6964223A 32313935 34313935 2C22766F 60756D65
223A3131 322C2277 223A3336 302C2278 223A302C 2279223A
302C227A 6F726465 72223A31 7D5D2C22 7473223A 31373233
32303337 37363236 312C2276 6572223A 22323031 39303631
31227D80
```
The transcoded H.265 SEI information is as follows:
```json
{
"app_data": "",
"canvas": {
"bgnd": "#000000",
"h": 640,
"w": 360
},
"regions": [
{
"alpha": 255,
"h": 640,
"uid": 21954195,
"volume": 112,
"w": 360,
"x": 0,
"y": 0,
"zorder": 1
}
],
"ts": 17232303776261,
"ver": "20190611"
}
```
In which:
* `06`: SEI frames in H.264 format.
* `4E01`: SEI frames in H.265 format.
* `64`: The SEI frame type defined by the user. Here we define it as 100.
* `bd`: The length of the SEI frame. The following are some sample calculations rendered in decimal and hexadecimal:
* If the length is 922, because 922 can be divided by 255 (`0xff`) three times and the remainder is 157 (`0x9d`), then `bd` is `ffffff9d`.
* If the length is 572, because 572 can be divided by 255 (`0xff`) two times and the remainder is 62 (`0x3e`), then `bd` is `ffff3e`.
* If the length is 234, because 234 divided by 255 (`0xff`) gives 0 and the remainder is 234 (`0xea`), then `bd` is `ea`.
* Other digits: Content of the SEI frame.
### FAQs
**Q**: Does this mean that if SEI is used here, the layout cannot be transmitted via signaling? Does the SDK transmit the same field, and can the transmission method (signaling or SEI) only be one or the other?
**A**: The information added to the SEI frame of H264/H265 is done when the server pushes the stream. This is different from the data sent by the app via uplink. The only field related to the data sent by the app uplink is the `app_data` field.
In the new live broadcast system, the only valid method is through the `LiveTranscoding` configuration. The related interfaces from the old live broadcast system are no longer effective.
**Q**: Isn't layout information transmitted through signaling? Why do we need to include layout information here and not just volume information?
**A**: Agora has always sent SEI-related information in the combined image streaming, but it was never standardized. This update standardizes the SEI format and adds volume information for forward compatibility.
# How to deal with the sudden silent audio or black video due to tracks being stopped? (/en/api-reference/faq/quality/track_ended)
## Problem
During a call or live broadcast, the audio that a web client is sending suddenly becomes silent, or the video goes black. After checking the log, you find that this occurred because the audio or video track stopped.
## Reason
The most likely reasons why a track would stop are a loose or poor connection, or the device has been disconnected.
## Solution
The applicable solution depends on the version of the Web SDK you are using.
### Web SDK v3.x
The Web SDK v3.x does not support hot plugging. If you remove a device and reconnect it in, you must create a new stream. You can fix the issues of silent audio or black video due to stopped tracks as follows:
1. Listen for the `stream.on("audioTrackEnded")` and `stream.on("videoTrackEnded")` events.
2. When the SDK triggers the `stream.on("audioTrackEnded")` or `stream.on("videoTrackEnded")` event, use a popup window to remind the end user to check whether the device is working or to reconnect the device.
3. Call `unpublish` to stop publishing the audio or video stream.
4. Call `createStream` to recreate the audio or video stream object.
### Web 4.x
The Web SDK v4.x supports hot plugging. You can fix the issues of silent audio or black video due to stopped tracks as follows:
1. Listen for the `localTrack.on("track-ended")` event.
2. When the SDK triggers the `localTrack.on("track-ended")` event, use a popup window to remind the end user to check whether the device is working or to reconnect the device.
3. Listen for the `AgoraRTC.onMicrophoneChanged` or `AgoraRTC.onCameraChanged` callback to get the device status. When the device is connected, call `MicrophoneAudioTrack.setDevice` or `CameraVideoTrack.setDevice` to use the device.
## See also
* [Device management](/en/realtime-media/rtc/build/control-audio-and-devices/set-audio-route/web)
# How can I fix unsynchronized audio and video? (/en/api-reference/faq/quality/unsynchronized_video)
Unsynchronized audio and video may be caused by the following:
* Slow network connection.
* Sub-optimal device performance.
* Problems with a custom video source or renderer.
* A third-party image enhancement SDK.
Complete the following steps to troubleshoot the unsynchronized audio and video.
## Step 1: Self-check
Check the following:
* Check whether the unsynchronized audio and video is intermittent or consistent. Occasional, intermittent unsynchronized audio and video is normal due to the nature of the network and device.
* If you use a custom video source, check whether the `timeStamp` parameter of each video frame is correct. Ensure that you are using millisecond units.
If you use a camera to capture video, the system reports the timestamp of each video frame. That is the value you need to pass in `timeStamp`.
* Check whether the network connection is stable. You can switch to another network connection and check if the audio and video are synchronized.
* If you use a third-party image enhancement SDK, disable it and re-check. If the audio and video become synchronized, then the third-party image enhancement SDK is the likely cause. Contact that SDK provider for technical support.
* Switch to another device with better performance, and then check if the issue persists.
* If you use a custom video renderer, check the source code of the video renderer. See the [Customer renderer](/en/realtime-media/rtc/build/capture-and-render-video/custom-video#custom-video-rendering) sample project provided by Agora for reference.
## Step 2: Contact Agora customer support
If the issue persists, contact [support@agora.io](mailto\:support@agora.io). Please provide the following information to help with the troubleshooting:
* The channel name with the unsynchronized audio and video.
* The time frame when the unsynchronized audio and video appears.
* The application scenario in which the issue occurs: communication, live interactive streaming, single-hosted interactive streaming, or co-hosted interactive streaming scenario.
* The UIDs of the users sending and receiving the unsynchronized audio and video.
* Whether you use a custom video source or a custom video renderer.
* Whether the problem can be reproduced and the steps to reproduce.
* Screen recording files.
* SDK log files. See [How can I set the log file?](/en/api-reference/faq/integration/log#set-the-log-file)
# Why do I see a big headshot or letterboxing? (/en/api-reference/faq/quality/video_bighead)
## Step 1: Self-check
Big headshot and letterbox issues occur when the video size does not match the display window size and under the following scenarios:
* If the video size is different from the camera output size, the video is cropped before it is encoded and then enlarged.
* If the video size is different from the display window size and the receiver uses the Hidden mode for rendering, the video is also cropped before it is encoded and then enlarged.
* If the video size is different from the display window size and the receiver uses the Fit mode for rendering, the video is reduced in size, resulting in dark bands on the margin of the screen.
## Step 2: Contact Agora Customer Support
If the issue persists, contact Agora customer support and submit the issue with the following information:
* SDK logs of the sender.
* If the sender uses a mobile phone, whether the sender's screen is horizontal or vertical.
* The window aspect ratio of the receiver.
# How can I fix black screen issues? (/en/api-reference/faq/quality/video_blank)
A user may encounter black screen issues in the following scenarios:
* Black screen on the local side.
* Black screen on the remote side.
* Black screen on the local and remote sides.
## Reason
Typical reasons for black screens include:
* Wrong token. When you set the local or remote video view before calling `joinChannel`, but the user fails to join the channel, the local video preview or the remote video view appears black. This can happen if you pass the wrong token.
* Network failure: If the local network connection is poor or interrupted, the user cannot see other users. If any user in the call has network issues, none of the other users can see this user.
* The user disabled the video.
## Solution
### Step 1: Self-check
Before proceeding, ensure that your token is properly set.
#### **Black screen on the local side**
This is likely caused by a video capture failure on the local side. Do the following:
1. Check the camera hardware. Start the built-in video camera to test the recording function.
2. Check if the camera access permission is enabled. Both Android and iOS have a runtime access permission function under System Settings. See [Handle permissions](/en/realtime-media/rtc/get-started-sdk#handle-permissions).
3. Check if another app is using the camera. Close all apps, restart your phone, and re-check.
4. If the app enabled the External Source Mode, check the data collected from the external video sources.
#### **Black screen on the remote side**
This is likely caused by a video capture failure on the remote side or slow downlink network on the local side. Do the following:
1. Check if the user disabled the remote video.
2. Switch to another network to ensure that the problem is not caused by a poor Internet connection.
3. Check whether the remote user uses the [Secure channel encryption](/en/realtime-media/rtc/build/secure-and-protect-channels/media-stream-encryption) function but the local user doesn't.
4. Check whether the remote user can preview their video on their own device. If not, then the cause of the black video probably lies on the remote side. Perform the steps in [Black screen on the local side](#black-screen-on-the-local-side).
**Black screen on both sides**
This occurs when the video is not rendered correctly or the video function is not enabled. Do the following:
1. Check if the app calls the `enableVideo` method to enable the video.
2. Check if the video is enabled on both the local and remote sides.
3. Check the rendering type in the SDK log in Windows. If the rendering type is D2D, update to the latest graphics card driver. If the issue persists after updating the driver, switch to GDI rendering, which has the app call the following function before the user joins the channel:
* `AParameter apm(*pRTCEngine);`
* `nRet = apm->setInt("che.video.renderer.type", 9);`
4. If the app enables the Other Rendering Method Mode, check for any rendering issue.
5. Check if you are using the RTC SDK and not the voice SDK.
6. Check if the local and remote video views are set correctly. For example:
* Neither the width nor height of the video view are set to 0.
* The video display window is not covered by any black view.
### Step 2: Contact Agora customer support
If the issue persists, contact [support@agora.io](mailto\:support@agora.io). Please provide the following information to help with the troubleshooting:
* The UIDs of the users sending and receiving the black video.
* The time frame when the black screen appears.
* Screen recording files.
* SDK log files. See [How can I set the log file?](/en/api-reference/faq/integration/log#set-the-log-file)
### Step 3: Monitor the quality of experience in Agora Analytics in Console
You can monitor the statistics of every call in [Agora Analytics](/en/realtime-media/agora-analytics/product-overview) in Console. For more information, see [Call Search](/en/realtime-media/agora-analytics/build/explore-and-analyze-data/call-search).
# Why is my video blurry? (/en/api-reference/faq/quality/video_blur)
Blurry videos may be caused by low bitrates and resolution ratios.
## Step 1: Self-check
Check the following:
1. Check `videoProfile`. If possible, set `videoProfile` to a higher level to see whether the video is clearer.
2. Check the stream type of the receiver. If the stream type is low, call the `setRemoteVideoStreamType` method to switch from a low stream to high stream.
3. Switch to 4G or another Wi-Fi network to ensure that the blurry video is not caused by poor Internet connections.
4. Turn off all pre-processing options.
## Step 2: Contact Agora Customer Support
If the issue persists, [contact Agora customer support](mailto\:support@agora.io) and submit the issue with the following information:
1. The uid of the user who sees the blurry video.
2. The time frame during which the blurry video appears.
3. SDK logs and screen recording files of the user.
## Step 3: Monitor the Quality of Experience in Agora Analytics in Console
You can check the statistics of every call in Agora Analytics in [Agora Console](https://console.agora.io/). For more information, see [Call Search](/en/realtime-media/agora-analytics/build/explore-and-analyze-data/call-search).
# Why can't I turn on the camera? (/en/api-reference/faq/quality/video_camera)
There are many reasons for a camera start failure. Check the following:
* Check if the camera access permission is enabled. Both Android and iOS systems have a runtime access permission function under System Settings. Additionally, security software on Android may control camera access permissions.
* Check if another application is using the camera. Close all applications, restart your phone, and try again.
* Check the camera hardware. Start the built-in video camera to test the recording function.
# Why is my video choppy? (/en/api-reference/faq/quality/video_freeze)
Choppy video may be caused by a slow network connection or sub-optimal device performance. Complete the following steps to troubleshoot choppy video.
## Step 1: Self-check
Check the following:
* Check whether the choppy video is intermittent or consistent. Occasional, intermittent choppy video is normal due to the nature of the network and device.
* Check whether the network connection is stable. If it is stable but the video is still choppy, change your network connection and re-check.
* Switch to another device with better performance.
* Turn off all pre-processing options, such as image enhancement, to determine whether it is the cause of the choppy video.
## Step 2: Contact Agora customer support
If the issue persists, contact [support@agora.io](mailto\:support@agora.io) and report the issue with the following information:
* The channel name and the UIDs of the users sending and receiving the video.
* The time frame during which the choppy video playback appears.
* SDK log files. See [How can I set the log file?](/en/api-reference/faq/integration/log#set-the-log-file)
* Screen recording files.
## Step 3: Monitor the quality of experience in Agora Analytics in Console
You can monitor the statistics of every call in Agora Analytics in [Agora Console](https://console.agora.io/). See [Call Search](/en/realtime-media/agora-analytics/build/explore-and-analyze-data/call-search).
# How can I fix black, green, or pixelated video when a Web client and a Native client communicate with each other? (/en/api-reference/faq/quality/web-native_video_issues)
When a Web client and a Native client communicate with each other the receiving end sees a black, green, or pixelated screen.
## Reason
The Native SDK encodes video streams in the H.264 format, and the issue is mainly caused by errors decoding the H.264 video streams.
## Solution
Troubleshoot the problem by following the steps below:
1. Call `getSupportedCodec` to get the codecs supported by both the Web SDK and the browser. If H.264 is not supported, the Web client cannot communicate with the Native client.
2. Ask the user to use the latest official version of the Chrome browser, and disable the hardware‑accelerated video decoding and encoding:
1. Enter `chrome://flags` in the browser address bar.
2. Set both **Hardware-accelerated video decode and Hardware-accelerated video encode** as **Disabled**.
3. Click **Relaunch** to restart the browser, as shown in the figure below:
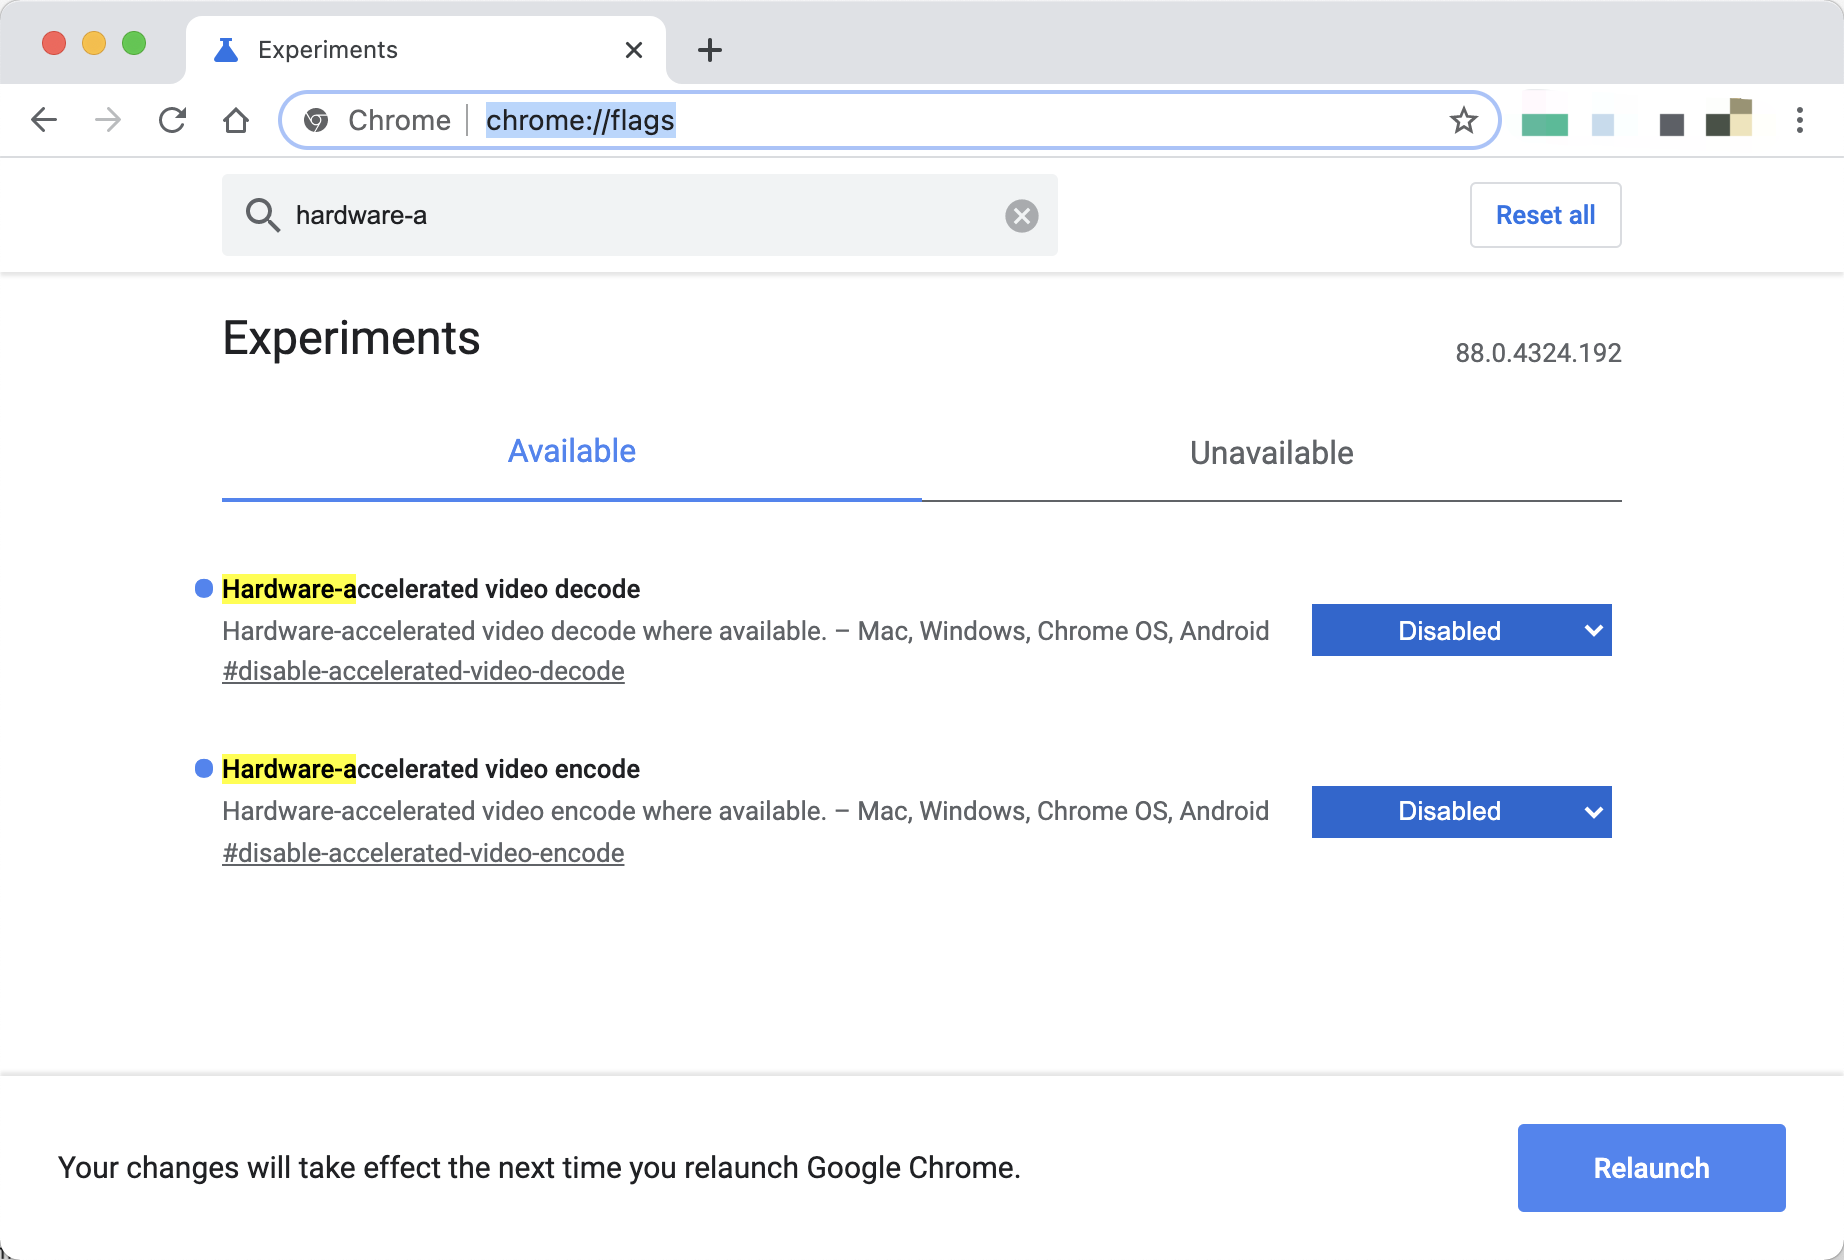
3. Upgrade the Native SDK to the latest version.
4. If the client sending the video stream is a Web client on desktop, ask the user to launch Chrome with the following command:
Windows
macOS
```bash
chrome.exe --forcefieldtrials="WebRTCSpsPpsIdrIsH264Keyframe/Enabled/"
```
```bash
/Applications/Google\ Chrome.app/Contents/MacOS/Google\ Chrome --force-fieldtrials="WebRTC-SpsPpsIdrIsH264Keyframe/Enabled/"
```
## See also
* [How can I fix black screen issues?](/en/api-reference/faq/quality/video_blank)
* [Why is my video pixelated or jagged and green?](/en/api-reference/faq/quality/pixelated_green_video)
# How can I solve the quality issues of screen sharing on Web clients? (/en/api-reference/faq/quality/web_screen_share_issues)
When a Web client shares the screen, the screen freezes or blurs.
## Solution
Find the solution that corresponds to the version of the Web SDK you are using.
### Web 3.x
Troubleshoot the problem by following the steps below:
1. Ask the user to use the latest official version of the Chrome browser on desktop.
2. Set codec as `vp8` when calling `createClient`.
3. Check whether the user is sharing an application window.
* If so, ask the user to share the browser tab or the entire screen instead.
* If not, check the encoding configurations you set in `setScreenProfile`.
4. Upgrade the SDK to 3.2.0 or later versions, and set [`optimizationMode`](https://api-ref.agora.io/en/video-sdk/web/3.x/interfaces/agorartc.streamspec.html#optimizationmode) when creating the stream for screen-sharing. Choose the appropriate transmission optimization mode according to the shared content:
* If the shared content is mainly slides, texts, or static images, set [`optimizationMode`](https://api-ref.agora.io/en/video-sdk/web/3.x/interfaces/agorartc.streamspec.html#optimizationmode) as `"details"`.
* If the shared content is mainly videos or games, set [`optimizationMode`](https://api-ref.agora.io/en/video-sdk/web/3.x/interfaces/agorartc.streamspec.html#optimizationmode) as `"motion"`.
### Web 4.x
Troubleshoot the problem by following the steps below:
1. Ask the user to use the latest official version of the Chrome browser on desktop.
2. Set codec as `vp8` when calling `createClient`.
3. Check whether the user is sharing an application window.
* If so, ask the user to share a browser tab or the entire screen.
* If not, check the encoding configurations you set in `createScreenVideoTrack`.
4. Set [`optimizationMode`](https://api-ref.agora.io/en/video-sdk/web/4.x/interfaces/screenvideotrackinitconfig.html#optimizationmode) when creating the video track for screen sharing, and choose the appropriate transmission optimization mode according to the shared content:
* If the shared content is mainly slides, texts, or static images, set [`optimizationMode`](https://api-ref.agora.io/en/video-sdk/web/4.x/interfaces/screenvideotrackinitconfig.html#optimizationmode) as "details".
* If the shared content is mainly videos or games, set [`optimizationMode`](https://api-ref.agora.io/en/video-sdk/web/4.x/interfaces/screenvideotrackinitconfig.html#optimizationmode) as `"motion"`.
As of v4.2.0, you can change the transmission optimization mode during a screen sharing session by calling [`setOptimizationMode`](https://api-ref.agora.io/en/video-sdk/web/4.x/interfaces/ilocalvideotrack.html#setoptimizationmode).
## See also
* [Share Screen (Web 3.x)](/en/3.x/interactive-live-streaming/introduction/product-overview)
* [Share Screen (Web 4.x)](/en/realtime-media/rtc/build/capture-and-render-video/screen-sharing)
* [How can I switch between the screen-sharing stream and the camera stream?](/en/api-reference/faq/integration/switch_screen_camera_web)
# Analytics REST API reference (/en/api-reference/api-ref/agora-analytics/analytics-rest-api)
Before working with the RESTful APIs, review the Agora Analytics features in [Agora Console](https://console.agora.io/) to gain a visual understanding of the quality and usage metrics that are available. For details, see the following user guides:
* [Call Inspector](#call-inspector)
* [Data Insights](#data-insights)
* [Real-time Monitoring](#real-time-monitoring)
To use Agora Analytics RESTful APIs, subscribe to an [Agora Analytics pricing plan](/en/realtime-media/agora-analytics/reference/pricing).
## Authentication
Before using the Agora RESTful API, you need to pass the [basic HTTP authentication](analytics-restful-authentication).
## Data format
All requests are sent to the host: `api.agora.io`.
* Request: The request uses query string parameters in the URL.
* Response: The response content is in JSON format.
## Call Inspector
With the Call Inspector RESTful APIs, you can search for calls with quality issues and obtain detailed metrics about call quality.
### API limits
The limits of the Call Inspector RESTful APIs depend on the [pricing plan](/en/realtime-media/agora-analytics/reference/pricing) you subscribe to.
The Starter, Standard, Premium, and Enterprise pricing plans have the following differences in terms of API limits:
* Request frequency is calculated using the server's UTC time.
* Data delay refers to the time required from the generation of data to the point where it can be queried.
* Endpoint is `/beta/analytics/call/lists`:
| | Starter | Standard | Premium | Enterprise |
| :---------------- | ------- | :---------------------------------- | :---------------------------------- | :------------------------------------ |
| Request frequency | N/A | No more than 1/second and 1,000/day | No more than 3/second and 2,000/day | No more than 10/second and 10,000/day |
| Available data | N/A | Within the past 1 day | Within the past 7 days | Within the past 15 days |
| Response content | N/A | A maximum of 8 hours of data | A maximum of 16 hours of data | A maximum of 24 hours of data |
| Data delay | N/A | 60 seconds | 20 seconds | 20 seconds |
* Endpoint is `/beta/analytics/call/sessions` or `/beta/analytics/call/metrics`:
| | Starter | Standard | Premium | Enterprise |
| :---------------- | ------- | :---------------------------------- | :---------------------------------- | :------------------------------------ |
| Request frequency | N/A | No more than 1/second and 1,000/day | No more than 3/second and 2,000/day | No more than 10/second and 10,000/day |
| Available data | N/A | Within the past 1 day | Within the past 7 days | Within the past 15 days |
| Response content | N/A | A maximum of 1 hours of data | A maximum of 3 hours of data | A maximum of 6 hours of data |
| Data delay | N/A | 300 seconds | 150 seconds | 100 seconds |
### Get call list
This method gets a list of the calls that meet the search criteria.
* Method: `GET`
* Endpoint: `/beta/analytics/call/lists`
#### Query parameters
The following query string parameters are required in the URL as search criteria:
| Parameter | Type | Description |
| ----------- | ------ | ----------------------------------------------------------------------------------------------- |
| `appid` | String | The [App ID](/en/realtime-media/agora-analytics/reference/glossary#app-id) of your project. |
| `start_ts` | Number | The starting time of the search time frame. Unix time (in seconds since 1 January 1970) in UTC. |
| `end_ts` | Number | The ending time of the search time frame. Unix time (in seconds since 1 January 1970) in UTC. |
| `cname` | String | (Optional) The channel name. |
| `page_no` | Number | (Optional) The page number. The default is 1. |
| `page_size` | Number | (Optional) The number of calls on each page. The default is 20 and the maximum is 100. |
#### HTTP request example
```html
GET /beta/analytics/call/lists?start_ts=1550024508&end_ts=1550025508&appid=xxxxxxxxxxxxxxxxxxxx&page_no=1&page_size=20 HTTP/1.1
Host: api.agora.io
Accept: application/json
Authorization: Basic ZGJhZDMyNmFkxxxxxxxxxxxxxxxxxxxxxxxxxxxxxxxxxxxxxxxxxxxxxxxxxWQzYTczNzg2ODdiMmNiYjRh
```
#### Response example
```json
{
"code": 0,
"message": "string",
"requestId": "15c99xxxxxxxxxxx9be9b",
"total_size": 101,
"page_no": 1,
"page_size": 20,
"has_more": true,
"call_lists": [
{
"call_id": "cxxxxxxxxxxxxxxxxxxxx",
"cname": "cname1",
"created_ts": 1547448383,
"destroyed_ts": 1547448483,
"finished": true,
"call_pcu": 2,
"call_acu": 2,
"call_audio_freeze_rate": 0.12,
"call_video_freeze_rate": 0.07
}
]
}
```
Where:
* `code`: Number. The [status code](#status-codes).
* `message`: String. The error message.
* `requestId`: String. The unique identifier of the HTTP request corresponding to this HTTP response.
* `total_size`: Number. The total number of returned calls.
* `page_no`: Number. The page number.
* `page_size`: Number. The number of calls on each page.
* `has_more`: Boolean. Whether there are calls not included in `call_lists`.
* `true` Indicates that some calls that meet the search criteria are not listed.
* `false` Indicates that all calls that meet the query criteria are listed.
If the call you need is not in `call_lists`, try narrowing the search and resend the request.
* `call_lists`: JSONArray. The returned calls in descending order of the starting time. Each call has the following properties:
* `call_id`: String. The unique ID of the call.
* `cname`: String. The channel name.
* `created_ts`: Number. The starting time of the call. Unix time (in seconds since 1 January 1970) in UTC.
* `destroyed_ts`: Number. The ending time of the call. Unix time (in seconds since 1 January 1970) in UTC.
* `finished`: Boolean. Whether the call has finished or is still ongoing.
* `call_pcu`: Number. Peak number of callers.
* `call_acu`: Number. Average number of callers.
* `call_audio_freeze_rate`: Number. The audio freeze rate.
* `call_video_freeze_rate`: Number. The video freeze rate.
### Get session details
This method gets the detailed call statistics of users by specifying the unique ID of the call.
* Method: `GET`
* Endpoint: `/beta/analytics/call/sessions`
#### Query parameters
The following query string parameters are required in the URL to specify the call ID and statistics:
| Parameter | Type | Description |
| --------------------- | ------- | ----------------------------------------------------------------------------------------------------------------------------------------------------------------------------------------------------------------------------------------------------------------------------------------------------- |
| `start_ts` | Number | The starting time of the call. Unix time (in seconds since 1 January 1970) in UTC. |
| `end_ts` | Number | The ending time of the call. Unix time (in seconds since 1 January 1970) in UTC. |
| `call_id` | String | The unique ID of the call. |
| `page_no` | Number | (Optional) The page number. The default is 1. |
| `page_size` | Number | (Optional) The number of user sessions on each page. The default is 20 and the maximum is 100. To implement pagination, specify values for both `page_no` and `page_size`. |
| `uids` | String | (Optional) The list of user IDs separated by commas. For example, `uids=10001,10002,10003`. You can specify a maximum of 10 user IDs. A user ID may occur twice in the list according to the actual use-case. Therefore, if you specify 10 user IDs in the request, 10 or more user IDs are returned. |
| `appid` | String | [App ID](/en/realtime-media/agora-analytics/reference/glossary#app-id) of your project. |
| `exclude_server_user` | Boolean | (Optional) Whether or not to exclude Linux users. `true` by default, which represents excluding Linux users. |
#### HTTP request example
```html
GET /beta/analytics/call/sessions?start_ts=1548665345&end_ts=1548670821&appid=axxxxxxxxxxxxxxxxxxxx&call_id=cxxxxxxxxxxxxxxxxxxxx&page_no=1&page_size=20&uids=uxx1,uxx2 HTTP/1.1
Host: api.agora.io
Accept: application/json
Authorization: Basic ZGJhZDMyNmFkxxxxxxxxxxxxxxxxxxxxxxxxxxxxxxxxxxxxxxxxxxxxxxxxxWQzYTczNzg2ODdiMmNiYjRh
```
#### Response example
```json
{
"code": 0,
"message": "string",
"requestId": "15c99xxxxxxxxxxx9be9b",
"total_size": 101,
"page_no": 1,
"page_size": 20,
"call_info": [
{
"sid": "xxxxxxxxxxxxxxxxxxx",
"cname": "cname1",
"uid": 1234567,
"account": "UserA",
"network": "LAN",
"platform": "Linux",
"speaker": false,
"roles": [
"SPEAKER",
"SCREEN_SHARER"
],
"sdk_version": "2.3.3.150",
"device_type": "Linux version 4.14.255-311-248.529.amzn2.x86_64 (mockbuild@ip-10",
"join_ts": 1692584005,
"leave_ts": 1692584015,
"finished": true,
"user_audio_freeze_rate": 0.01,
"user_video_freeze_rate": 0.03
}
]
}
```
Where:
* `code`: Number. The [status code](#status-codes).
* `message`: String. The error message.
* `requestId`: String. The unique identifier of the HTTP request corresponding to this HTTP response.
* `has_more`: Boolean. Whether there are user sessions not included in `call_info`.
* `true` Indicates that some user sessions that meet the search criteria are not listed.
* `false` Indicates that all user sessions that meet the query criteria are listed.
If the user session you need is not in `call_info`, try narrowing the search and resend the request.
* `total_size`: Number. The total number of returned user sessions.
* `page_no`: Number. The page number.
* `page_size`: Number. The number of user sessions on each page.
* `call_info`: JSONArray. Information of each user in the call in descending order of the joining time per page. Each user has the following properties:
* `sid`: String. The unique ID of the user session.
* `cname`: String. The channel name.
* `uid`: Number. The user ID.
* `account`: String. User-defined nickname.
* `network`: String. The network type.
* `platform`: String. The platform.
* `speaker`: Boolean. Whether or not the user speaks in the call.
* `sdk_version`: String. The SDK version.
* `device_type`: String. The type of the device used by the user.
* `join_ts`: Number. The time when the user joins the call. Unix time (in seconds since 1 January 1970) in UTC.
* `leave_ts`: Number. The time when the user leaves the call. Unix time (in seconds since 1 January 1970) in UTC.
* `finished`: Boolean. Whether the user is in the call or has left it.
* `roles`: Array. The user role ID reflects the user's role and the functions used in this call.
* `Audience`: Receiving user.
* `Host`: The sending user.
* `Screen Share`: Screen sharing.
* `Interactive Live Streaming(ILS)`: Interactive live broadcast.
* `Broadcast Streaming(BS)`: Live broadcast at high speed.
* `Streaming robot`: Streaming robot.
* `On-Premise Recording`: Local recording.
* `Cloud Recording`: Cloud recording.
* `WebPage Recording`: Page recording.
* `user_video_freeze_rate`: Number. User-level video freeze rate.
* `user_audio_freeze_rate`: Number. User-level audio stuttering rate.
### Get quality metrics
Gets the quality metrics of a specified call.
* Method: `GET`
* Endpoint: `/beta/analytics/call/metrics`
#### Query parameters
The following query string parameters are required in the URL to specify the call:
| Parameter | Type | Description |
| ---------- | ------ | --------------------------------------------------------------------------------------------------------------------------------------------------------------- |
| `appid` | String | [App ID](/en/realtime-media/agora-analytics/reference/glossary#app-id) of your project. |
| `call_id` | String | The unique ID of the call. |
| `start_ts` | Number | The starting time of the call. Unix time (in seconds since 1 January 1970) in UTC. |
| `end_ts` | Number | The ending time of the call. Unix time (in seconds since 1 January 1970) in UTC. |
| `sids` | String | The list of user session IDs separated by commas, for example, `sids=SXXXXXXXXXXXXXXXX1,SXXXXXXXXXXXXXXXX2`. You can specify a maximum of 20 user session IDs. |
#### HTTP request example
```html
GET /beta/analytics/call/metrics?start_ts=1548665345&end_ts=1548670821&appid=axxxxxxxxxxxxxxxxxxxx&call_id=cxxxxxxxxxxxxxxxxxxxx&sids=sxxxxxxxxxxxxxxxx1,sxxxxxxxxxxxxxxxx2,sxxxxxxxxxxxxxxxx3 HTTP/1.1
Host: api.agora.io
Accept: application/json
Authorization: Basic ZGJhZDMyNmFkxxxxxxxxxxxxxxxxxxxxxxxxxxxxxxxxxxxxxxxxxxxxxxxxxWQzYTczNzg2ODdiMmNiYjRh
```
#### Response example
```json
{
"code": 200,
"message": "",
"requestId": "bxxxxxxxxxxxxxxxxxx4",
"metrics": [
{
"sid": "EDB224CCF4FB4F99815C24302BDF3301",
"data": [
{
"mid": 20003,
"kvs": [
[
1548670255,
215
],
[
1548670257,
129
],
[
1548670259,
121
]
],
"peer_uid": 0
}
]
}
]
}
```
* `code`: Number. The [status code](#status-codes).
* `message`: String. The error message.
* `requestId`: String. The unique identifier of the HTTP request corresponding to this HTTP response.
* `metrics`: JSONArray. Detailed quality metrics of each user session (`sid`). Each user session includes the following properties:
* `sid`: String. The unique ID of the user session.
* `data`: Array. The quality metrics of the user session.
* `mid`: Number. The ID of the metric. See [Metrics ID](#metrics-id) for details.
* `kvs`: Array. Pairs of the timestamp and the corresponding metric value.
* `peer_uid`: Number. The user ID of the remote user. 0 represents that the returned metrics are the local user's.
### Get call statistics
Retrieves statistics on the audio or video freeze rate for a specified call within a given time range and dimension.
* Method: `GET`
* Endpoint: `/beta/analytics/call/statistics`
#### Query parameters
The following query string parameters are required in the URL to specify the call ID and statistics:
| Parameter | Type | Description |
| ----------- | ------ | -------------------------------------------------------------------------------------------------------------------------------------------------------------------------- |
| `appid` | String | [App ID](/en/realtime-media/agora-analytics/reference/glossary#app-id) of your project. |
| `call_id` | String | The unique ID of the call. |
| `start_ts` | Number | The starting time of the call. Unix time (in seconds since 1 January 1970) in UTC. |
| `end_ts` | Number | The ending time of the call. Unix time (in seconds since 1 January 1970) in UTC. |
| `dimension` | String | Statistical dimension. Supported values: `country` (Nation); `region` (Area); `net` (Network type); `sdk` (SDK version); `os` (Operating system); `device` (Device model). |
| `metric` | String | Supported values: `audio_freeze_rate` (Audio stuttering rate); `video_freeze_rate` (Video freeze rate). |
#### HTTP request example
```html
curl --request GET \
--url https://api.sd-rtn.com/beta/analytics/call/statistics \
--header 'Accept: application/json' \
--header 'Authorization: Basic 123'
```
#### Response example
```json
{
"code": 200,
"message": "Success request: /beta/analytics/call/statistics",
"requestId": "191xxxxxxxxxxxxxxxx0f",
"data": [
{
"dimension_value": "3.7.1.247",
"user_count": 6,
"value": 0.007
}
]
}
```
Where:
* `code`: Number. The [status code](#status-codes).
* `message`: String. The error message.
* `requestId`: String. The unique identifier of the HTTP request corresponding to this HTTP response.
* `data`: JSONArray. An array containing the dimension value, user count, and metric values:
* `dimension_value`: String. The value of the statistical dimension provided in the request.
* `user_count`: Number. The number of users.
* `value`: Number. The average metric value over the queried time range, matching the metric specified in the request.
### Retrieve Audio/Video freeze rate statistics
This method gets audio or video freeze rate statistics for a specific call within a defined time range.
* Method: `GET`
* Endpoint: `/beta/analytics/call/freeze/bucket`
#### Query parameters
The following query string parameters are required in the URL to specify the call ID and statistics:
| Parameter | Type | Description |
| ---------- | ------ | ------------------------------------------------------------------------------------------------------- |
| `appid` | String | [App ID](/en/realtime-media/agora-analytics/reference/glossary#app-id) of your project. |
| `call_id` | String | The unique ID of the call. |
| `start_ts` | Number | The starting time of the call. Unix time (in seconds since 1 January 1970) in UTC. |
| `end_ts` | Number | The ending time of the call. Unix time (in seconds since 1 January 1970) in UTC. |
| `metric` | String | Supported values: `audio_freeze_rate` (Audio stuttering rate); `video_freeze_rate` (Video freeze rate). |
#### HTTP request example
```html
curl --request GET \
--url https://api.sd-rtn.com/beta/analytics/call/freeze/bucket \
--header 'Accept: application/json' \
--header 'Authorization: Basic 123'
```
#### Response example
```json
{
"code": 200,
"message": "Success request: /beta/analytics/call/freeze/bucket",
"requestId": "1f7a7xxxxxxxxxxxxxxxe89d",
"data": [
{
"bucket": "[3%,5%)",
"user_count": 1
},
{
"bucket": "[0%,3%)",
"user_count": 19
}
]
}
```
Where:
* `code`: Number. The [status code](#status-codes).
* `message`: String. The error message.
* `requestId`: String. The unique identifier of the HTTP request corresponding to this HTTP response.
* `data`: JSONArray. An array consisting of buckets and number of people:
* `bucket`: String. The call jam rate buckets represent the distribution of jam rates and include these values:
* `[0%,3%)`
* `[3%,5%)`
* `[5%,10%)`
* `[10%,100%)`
* `user_count`: number. The number of people in this bucket.
### Retrieve insight statistics
This method gets the insight statistics for a specific call within a specified time range.
* Method: `GET`
* Endpoint: `/beta/analytics/call/statistics/time`
#### Query parameters
The following query string parameters are required in the URL to specify the call ID and statistics:
| Parameter | Type | Description |
| ---------- | ------ | --------------------------------------------------------------------------------------------------------------------------------------------------------------------------------------------------------------------------------------------------------------------------------------------------------------------------------------------------------------------------------------------------------------------------------- |
| `appid` | String | [App ID](/en/realtime-media/agora-analytics/reference/glossary#app-id) of your project. |
| `call_id` | String | The unique ID of the call. |
| `start_ts` | Number | The starting time of the call. Unix time (in seconds since 1 January 1970) in UTC. |
| `end_ts` | Number | The ending time of the call. Unix time (in seconds since 1 January 1970) in UTC. |
| `metric` | String | Supported values: `user_count` (Number of participants in a call. Each user ID counts as one participant per channel and as multiple participants across different channels); `audio_freeze_rate` (Audio stuttering rate); `video_freeze_rate` (Video freeze rate); `audio_freeze_user_count` (Number of participants experiencing audio freezes); `video_freeze_user_count` (Number of participants experiencing video freezes). |
#### HTTP request example
```html
curl --request GET \
--url https://api.sd-rtn.com/beta/analytics/call/statistics/time \
--header 'Accept: application/json' \
--header 'Authorization: Basic 123'
```
#### Response example
```json
{
"code": 200,
"message": "Success request: /beta/analytics/call/statistics/time",
"requestId": "139dxxxxxxxxxxxxxxxxe968",
"data": [
{
"ts": 1692584160,
"value": 0
},
{
"ts": 1692584340,
"value": 0.007
},
{
"ts": 1692584100,
"value": 0
},
{
"ts": 1692584460,
"value": 0.003
},
{
"ts": 1692584400,
"value": 0.005
},
{
"ts": 1692584580,
"value": 0.05
}
]
}
```
Where:
* `code`: Number. The [status code](#status-codes).
* `message`: String. The error message.
* `requestId`: String. The unique identifier of the HTTP request corresponding to this HTTP response.
* `data`: JSONArray. An array containing timestamps and metric values:
* `ts`: Number. Timestamp in seconds.
* `value`: The indicator value at the current timestamp.
## Data Insights
With the Data Insights RESTful APIs, you can query the usage and quality metrics within a specified time frame.
### API limits
The limits of the Data Insights RESTful APIs depend on the [pricing plan](/en/realtime-media/agora-analytics/reference/pricing) you subscribe to.
The Starter, Standard, Premium, and Enterprise pricing plans have the following differences in terms of API limits:
* Request frequency is calculated using the server's UTC time.
* Data delay refers to the time required from the generation of data to the point where it can be queried.
* Endpoint is `/beta/insight/usage/by_time`:
| | Starter | Standard | Premium | Enterprise |
| :---------------- | ------- | :------- | :------------------------------- | :-------------------------------- |
| Request frequency | N/A | N/A | No more than 3/minute and 40/day | No more than 10/minute and 60/day |
| Available data | N/A | N/A | Within the past 14 days | Within the past 30 days |
| Query time frame | N/A | N/A | No longer than 3 days | No longer than 7 days |
| Data granularity | N/A | N/A | Per day and hour | Per day and hour |
| Data delay | N/A | N/A | 12 hours | 6 hours |
* Endpoint is `/beta/insight/quality/by_time`:
| | Starter | Standard | Premium | Enterprise |
| :---------------- | ------- | :------- | :------------------------------- | :-------------------------------- |
| Request frequency | N/A | N/A | No more than 3/minute and 40/day | No more than 10/minute and 60/day |
| Available data | N/A | N/A | Within the past 14 days | Within the past 30 days |
| Query time frame | N/A | N/A | No longer than 3 days | No longer than 7 days |
| Data granularity | N/A | N/A | Per day, hour, and minute | Per day, hour, and minute |
| Data delay | N/A | N/A | 6 hours | 6 hours |
* Endpoint is `/beta/insight/usage/aggregation`:
| | Starter | Standard | Premium | Enterprise |
| :---------------- | ------- | :------- | :------------------------------- | :-------------------------------- |
| Request frequency | N/A | N/A | No more than 3/minute and 40/day | No more than 10/minute and 60/day |
| Available data | N/A | N/A | Within the past 14 days | Within the past 30 days |
| Data granularity | N/A | N/A | Per day and hour | Per day and hour |
| Data delay | N/A | N/A | 12 hours | 6 hours |
* Endpoint is `/beta/insight/quality/aggregation`:
| | Starter | Standard | Premium | Enterprise |
| :---------------- | ------- | :------- | :------------------------------- | :-------------------------------- |
| Request frequency | N/A | N/A | No more than 3/minute and 40/day | No more than 10/minute and 60/day |
| Available data | N/A | N/A | Within the past 14 days | Within the past 30 days |
| Data granularity | N/A | N/A | Per day and hour | Per day and hour |
| Data delay | N/A | N/A | 6 hours | 6 hours |
### Query time-frame usage metrics
This method queries usage metrics for a specified time frame with granularity of hours or days, such as the number of users or channels.
* Method: `GET`
* Endpoint: `/beta/insight/usage/by_time`
#### Query parameters
The following query string parameters are required in the URL:
| Parameter | Type | Description |
| :--------------------- | :----- | :------------------------------------------------------------------------------------------------------------------------------------------------------------------------------------------------------------------------------------------------------------------------------------------------------------------------------------------------------------------------------------------------------------------------------------------------------------------------------------------------------------------------------------------------------------------------------------------------------------------------------------------------------------------------------------------------------------------------------------------------------------------------------------------------------------------------------------------------------------------------------------------------------------------------------------------------------------------ |
| `appid` | String | The [App ID](/en/realtime-media/agora-analytics/reference/glossary#app-id) of your project. |
| `startTs` | Number | The start point (Unix timestamp) of the time frame to query. |
| `endTs` | Number | The end point (Unix timestamp) of the time frame to query. |
| `metric` | String | Supported values: `userCount` (The total number of users across all channels. A user joining the same channel with different user IDs or joining different channels with the same user ID is counted multiple times); `sessionCount` (The total count of users joining channels. Each time any user ID joins any channel is counted); `channelCount` (The total number of channels. A channel is counted once for each period between the time when the first user joins it and the time when the last user leaves it); `peakCurrentChannels` (The maximum number of channels in use); `peakCurrentUsers` (The maximum number of in-call users across channels); `totalDuration` (The total duration of video and audio-only calls calculated by the number of users); `totalVideoDuration` (The total duration of video calls calculated by the number of users); `totalAudioDuration` (The total duration of audio-only calls calculated by the number of users). |
| `aggregateGranularity` | String | Supported values: `1d` (By day. Returns data for the entire day starting from UTC 00:00 within the query time range); `1h` (By hour. Returns data for each whole UTC hour within the query time range). |
For more information about calculating by the number of users, see [How does Agora calculate service minutes?](/en/realtime-media/agora-analytics/reference/billing-policies#how-does-agora-calculate-service-minutes)
#### HTTP request example
The following example queries the total number of users across all channels starting from 8:00 am on July 1, 2021 to 8:00 am on July 3, 2021:
```html
GET /beta/insight/usage/by_time?startTs=1625097600&endTs=1625270400&appid=axxxxxxxxxxxxxxxxxxxx&metric=userCount&aggregateGranularity=1d HTTP/1.1
Host: api.agora.io
Accept: application/json
Authorization: Basic ZGJhZDMyNmFkxxxxxxxxxxxxxxxxxxxxxxxxxxxxxxxxxxxxxxxxxxxxxxxxxWQzYTczNzg2ODdiMmNiYjRh
```
#### Response example
The response for the previous HTTP request example is as follows:
```json
{
"code": 200,
"message": "success",
"data": [
{
"userCount": 42,
"ts": 1625155200
},
{
"userCount": 37,
"ts": 1625241600
}
]
}
```
#### Response parameters
| Parameter | Type | Description |
| :-------- | :-------- | :--------------------------------------------------------------------------------------------------------------------------------------------------------------------------------------------------------------------------------------------------------------------------------------------------------------------------------------------------------------------------------------------------------- |
| `code` | Number | The [status code](#status-codes). |
| `message` | String | The success or error message. |
| `data` | JSONArray | Each JSON object contains a Unix timestamp representing 12:00 am (UTC) on each day within the specified time frame and the corresponding metric value. In the previous request example, two JSON objects are returned: one for 12:00 am on July 2, 2021, and one for 12:00 am on July 3, 2021. Fields: `userCount` (Number. The total number of users across all channels); `ts` (Number. Unix timestamp). |
### Query time-series quality metrics
This method queries quality metrics for a specified time range with granularity of hours, days, or minutes, such as the audio or video freeze rate.
* Method: `GET`
* Endpoint: `/beta/insight/quality/by_time`
#### Query parameters
The following query string parameters are required in the URL:
| Parameter | Type | Description |
| :--------------------- | :----- | :---------------------------------------------------------------------------------------------------------------------------------------------------------------------------------------------------------------------------------------------------------------------------------------------------------------------------------------------------------------------------------------------------------------------------------------------------------------------------------------------------------------------------------------------------------------------------------------------------------------------------------------------------------------------------------------------------------------------------------------------------------------------------------------------------------------------------------------------------------------------------------------------------------------------------------------------------------------------------------------------------------------------------------------------------------------------------------------------------------- |
| `appid` | String | The [App ID](/en/realtime-media/agora-analytics/reference/glossary#app-id) of your project. |
| `startTs` | Number | The start point (Unix timestamp) of the time frame to query. |
| `endTs` | Number | The end point (Unix timestamp) of the time frame to query. |
| `metric` | String | Supported values: `joinSuccessRate` (The rate at which users attempting to join any channel succeed, equal to number of users who joined divided by number of attempts to join); `joinSuccessIn5sRate` (The rate at which users attempting to join any channel succeed within 5 seconds, equal to number of users who joined within 5 seconds divided by number of attempts to join); `audioFreezeRate` (The rate at which audio freezing occurs, equal to total audio freeze time divided by total audio minutes calculated by the number of streams. Only audio freezes longer than 200 milliseconds are counted); `videoFreezeRate` (The rate at which video freezing occurs, equal to total video freeze time divided by total video minutes calculated by the number of streams. Only video freezes longer than 600 milliseconds are counted); `networkDelay` (The rate at which network delay occurs, equal to total end-to-end network delay divided by total audio and video minutes calculated by the number of streams. Only end-to-end network delays longer than 400 milliseconds are counted). |
| `aggregateGranularity` | String | Supported values: `1d` (By day. Returns data for the entire day starting from UTC 00:00 within the query time range); `1h` (By hour. Returns data for each whole UTC hour within the query time range). |
| `productType` | String | Supported values: `Native` (The Agora RTC SDK for Android, iOS, macOS, and Windows); `WebRTC` (The Agora RTC SDK for Web). |
For more information about calculating by the number of streams, see [How does Agora calculate service minutes?](/en/realtime-media/agora-analytics/reference/billing-policies#how-does-agora-calculate-service-minutes)
#### HTTP request example
The following example queries the hourly network delay rate starting from 8:00 am on July 1, 2021 to 8:00 am on July 2, 2021:
```html
GET /beta/insight/quality/by_time?startTs=1625097600&endTs=1625184000&appid=axxxxxxxxxxxxxxxxxxxx&metric=networkDelay&aggregateGranularity=1h&productType=Native HTTP/1.1
Host: api.agora.io
Accept: application/json
Authorization: Basic ZGJhZDMyNmFkxxxxxxxxxxxxxxxxxxxxxxxxxxxxxxxxxxxxxxxxxxxxxxxxxWQzYTczNzg2ODdiMmNiYjRh
```
#### Response example
The response for the previous HTTP request example is as follows:
```json
{
"code": 200,
"message": "success",
"data": [
{
"networkDelay": 0.064762,
"ts": 1625097600
},
{
"networkDelay": 0.028156,
"ts": 1625101200
},
...
{
"networkDelay": 0.03765,
"ts": 1625184000
}
]
}
```
#### Response parameters
| Parameter | Type | Description |
| :-------- | :-------- | :------------------------------------------------------------------------------------------------------------------------------------------------------------------------------------------------------------------------------------------------------------------------------------------------------------------------------------------------- |
| `code` | Number | The [status code](#status-codes). |
| `message` | String | The success or error message. |
| `data` | JSONArray | Each JSON object contains a Unix timestamp for every hour within the specified time frame and the corresponding metric value. In the previous request example, 25 JSON objects are returned, from 8:00 am on July 1, 2021 through 8:00 am on July 2, 2021. Fields: `networkDelay` (Number. The network delay rate); `ts` (Number. Unix timestamp). |
### Query aggregated usage metrics
This method queries aggregated usage metrics for a specified time range and dimension, such as the number of users or channels.
* Method: `POST`
* Endpoint: `/beta/insight/usage/aggregation`
#### Query parameters
The following query string parameters are required in the URL:
| Parameter | Type | Description |
| :-------- | :----- | :------------------------------------------------------------------------------------------ |
| `appid` | String | The [App ID](/en/realtime-media/agora-analytics/reference/glossary#app-id) of your project. |
#### Body parameters
The following query string parameters are required in the URL:
| Parameter | Type | Description |
| :---------------- | :-------- | :------------------------------------------------------------------------------------------------------------------------------------------------------------------------------------------------------------------------------------------------------------------------------------------------------------------------------------------------------------------------------------------------------------------------------------------------------------------------------------------------------------------------------------------------------------------------------------------------------------------------------------------------------------------------------------------------------------------------------------------------------------------------------------------------------------------------------------------------------------------------------------------------------------------------------------------------------------------ |
| `startTs` | Number | The start point (Unix timestamp) of the time frame to query. |
| `endTs` | Number | The end point (Unix timestamp) of the time frame to query. |
| `metric` | String | Supported values: `userCount` (The total number of users across all channels. A user joining the same channel with different user IDs or joining different channels with the same user ID is counted multiple times); `sessionCount` (The total count of users joining channels. Each time any user ID joins any channel is counted); `channelCount` (The total number of channels. A channel is counted once for each period between the time when the first user joins it and the time when the last user leaves it); `peakCurrentChannels` (The maximum number of channels in use); `peakCurrentUsers` (The maximum number of in-call users across channels); `totalDuration` (The total duration of video and audio-only calls calculated by the number of users); `totalVideoDuration` (The total duration of video calls calculated by the number of users); `totalAudioDuration` (The total duration of audio-only calls calculated by the number of users). |
| `dimension` | String | (Optional) Aggregation dimension. Supported values: `country`, `region`, `net`, `sdk`, `os`, `device`. If you set this parameter, the request returns the top 20 values in the dimension by default, or the top 50 values for `device`. When `metric` is `peakCurrentUsers` or `peakCurrentChannels`, `dimension` and `dimensionValues` are not supported, and the request returns aggregated results only by App ID. |
| `dimensionValues` | String | (Optional) Values for the specified dimension. This parameter is valid only when `dimension` is set. Enclose all values in double quotes and separate them with commas. If you set this parameter, the request returns aggregated metric data for the specified values. To discover top values first, omit `dimensionValues` in an initial request, then choose values from the results for later requests. |
| `filters` | JSONArray | (Optional) Region filters used to filter results by country. This parameter is valid only when `dimension` is `region`. It includes `name` (String. Only `country` is supported) and `value` (String. The country to filter by. Only one country value is supported). |
#### HTTP Request example
The following examples query the total number of users across all channels starting from 8:00 am on July 1, 2021 to 8:00 am on July 2, 2021:
**Example 1: Query the top 20 countries with the highest number of calls and their respective call counts**
```html
POST /beta/insight/usage/aggregation?appid=axxxxxxxxxxxxxxxxxxxx HTTP/1.1
Host: api.agora.io
Accept: application/json
Authorization: Basic ZGJhZDMyNmFkxxxxxxxxxxxxxxxxxxxxxxxxxxxxxxxxxxxxxxxxxxxxxxxxxWQzYTczNzg2ODdiMmNiYjRh
{
"startTs": 1625097600,
"endTs": 1625184000,
"metric": "userCount",
"dimension": "country"
}
```
**Example 2: Query the number of calls for SDK versions 3.6.1.1 and 4.1.1**
```html
POST /beta/insight/usage/aggregation?appid=axxxxxxxxxxxxxxxxxxxx HTTP/1.1
Host: api.agora.io
Accept: application/json
Authorization: Basic ZGJhZDMyNmFkxxxxxxxxxxxxxxxxxxxxxxxxxxxxxxxxxxxxxxxxxxxxxxxxxWQzYTczNzg2ODdiMmNiYjRh
{
"startTs": 1625097600,
"endTs": 1625184000,
"metric": "userCount",
"dimension": "sdkVersion",
"dimensionValues":["3.6.1.1","4.1.1"]
}
```
**Example 3: Query the top 20 regions in China with the highest number of calls and their respective call counts**
```html
POST /beta/insight/usage/aggregation?appid=axxxxxxxxxxxxxxxxxxxx HTTP/1.1
Host: api.agora.io
Accept: application/json
Authorization: Basic ZGJhZDMyNmFkxxxxxxxxxxxxxxxxxxxxxxxxxxxxxxxxxxxxxxxxxxxxxxxxxWQzYTczNzg2ODdiMmNiYjRh
{
"startTs": 1625097600,
"endTs": 1625184000,
"metric": "userCount",
"dimension": "region",
"filters": [{"name": "country", "value": "China"}]
}
```
#### Response parameters
| Parameter | Type | Description |
| :-------- | :-------- | :---------------------------------------------------------------------------------------------------------------------------------------------------------------------------------------------------------------------- |
| `code` | Number | The [status code](#status-codes). |
| `message` | String | The success or error message. |
| `data` | JSONArray | If the request does not include `dimension`, the response returns metric data aggregated by App ID. If the request includes `dimension`, the response returns an array containing the dimension values and metric data. |
#### Response example
**Example 1: Query the top 20 countries with the highest number of calls and their respective call counts**
Contains 20 sets of data, each representing the top 20 countries with the highest total number of calls between 8:00 am on July 1, 2021 and 8:00 am on July 2, 2021.
```json
{
"code": 200,
"message": "null",
"data": [
{
"country": "China",
"userCount": 42,
},
{
"country": "United States",
"userCount": 37
}
......
]
}
```
**Example 2: Query the number of calls for SDK versions 3.6.1.1 and 4.1.1**
Contains 2 sets of data, each representing the total number of calls between 8:00 am on July 1, 2021 and 8:00 am on July 2, 2021 for SDK versions 3.6.1.1 and 4.1.1 respectively.
```json
{
"code": 200,
"message": "null",
"data": [
{
"sdkVersion": "3.6.1.1",
"userCount": 42,
},
{
"sdkVersion": "4.1.1",
"userCount": 37
}
]
}
```
**Example 3: Query the top 20 regions in China with the highest number of calls and their respective call counts**
Contains 20 sets of data, each representing the top 20 regions in China with the highest total number of calls between 8:00 am on July 1, 2021 and 8:00 am on July 2, 2021.
```json
{
"code": 200,
"message": "null",
"data": [
{
"region": "Shanghai",
"userCount": 42,
},
{
"region": "Beijing",
"userCount": 37
}
......
]
}
```
### Query aggregated quality metrics
This method queries aggregated quality metrics for a specified time range and dimension, such as the audio or video freeze rate.
* Method: `POST`
* Endpoint: `/beta/insight/quality/aggregation`
#### Query parameters
The following query string parameters are required in the URL:
| Parameter | Type | Description |
| :-------- | :----- | :------------------------------------------------------------------------------------------ |
| `appid` | String | The [App ID](/en/realtime-media/agora-analytics/reference/glossary#app-id) of your project. |
#### Body parameters
The following query string parameters are required in the URL:
| Parameter | Type | Description |
| :---------------- | :-------- | :---------------------------------------------------------------------------------------------------------------------------------------------------------------------------------------------------------------------------------------------------------------------------------------------------------------------------------------------------------------------------------------------------------------------------------------------------------------------------------------------------------------------------------------------------------------------------------------------------------------------------------------------------------------------------------------------------------------------------------------------------------------------------------------------------------------------------------------------------------------------------------------------------------------------------------------------------------------------------------------------------------------------------------------------------------------------------------------------------------- |
| `startTs` | Number | The start point (Unix timestamp) of the time frame to query. |
| `endTs` | Number | The end point (Unix timestamp) of the time frame to query. |
| `metric` | String | Supported values: `joinSuccessRate` (The rate at which users attempting to join any channel succeed, equal to number of users who joined divided by number of attempts to join); `joinSuccessIn5sRate` (The rate at which users attempting to join any channel succeed within 5 seconds, equal to number of users who joined within 5 seconds divided by number of attempts to join); `audioFreezeRate` (The rate at which audio freezing occurs, equal to total audio freeze time divided by total audio minutes calculated by the number of streams. Only audio freezes longer than 200 milliseconds are counted); `videoFreezeRate` (The rate at which video freezing occurs, equal to total video freeze time divided by total video minutes calculated by the number of streams. Only video freezes longer than 600 milliseconds are counted); `networkDelay` (The rate at which network delay occurs, equal to total end-to-end network delay divided by total audio and video minutes calculated by the number of streams. Only end-to-end network delays longer than 400 milliseconds are counted). |
| `dimension` | String | (Optional) Aggregation dimension. Supported values: `country`, `region`, `net`, `sdk`, `os`, `device`, `channelSize`. If you set this parameter, the request returns the top 20 values in the dimension by default, or the top 50 values for `device`. |
| `dimensionValues` | String | (Optional) Values for the specified dimension. This parameter is valid only when `dimension` is set. Enclose all values in double quotes and separate them with commas. If you set this parameter, the request returns aggregated metric data for the specified values. To discover top values first, omit `dimensionValues` in an initial request, then choose values from the results for later requests. When `dimension` is `channelSize`, `dimensionValues` is not supported and the results are grouped by the preset gradient scale. |
| `filters` | JSONArray | (Optional) Region filters used to filter results by country. This parameter is valid only when `dimension` is `region`. It includes `name` (String. Only `country` is supported) and `value` (String. The country to filter by. Only one country value is supported). |
#### HTTP Request example
The following examples query the audio freeze rate across all channels starting from 8:00 am on July 1, 2021 to 8:00 am on July 2, 2021:
**Example 1: Query the top 20 countries with the highest audio freeze rates and their respective audio freeze rate**
```html
POST /beta/insight/usage/aggregation?appid=axxxxxxxxxxxxxxxxxxxx HTTP/1.1
Host: api.agora.io
Accept: application/json
Authorization: Basic ZGJhZDMyNmFkxxxxxxxxxxxxxxxxxxxxxxxxxxxxxxxxxxxxxxxxxxxxxxxxxWQzYTczNzg2ODdiMmNiYjRh
{
"startTs": 1625097600,
"endTs": 1625184000,
"metric": "audioFreezeRate",
"dimension": "country"
}
```
**Example 2: Query the audio freeze rates for SDK versions 3.6.1.1 and 4.1.1**
```html
POST /beta/insight/usage/aggregation?appid=axxxxxxxxxxxxxxxxxxxx HTTP/1.1
Host: api.agora.io
Accept: application/json
Authorization: Basic ZGJhZDMyNmFkxxxxxxxxxxxxxxxxxxxxxxxxxxxxxxxxxxxxxxxxxxxxxxxxxWQzYTczNzg2ODdiMmNiYjRh
{
"startTs": 1625097600,
"endTs": 1625184000,
"metric": "audioFreezeRate",
"dimension": "sdkVersion",
"dimensionValues":["3.6.1.1","4.1.1"]
}
```
**Example 3: Query the top 20 regions in China with the highest audio freeze rates and their respective audio freeze rate**
```html
POST /beta/insight/usage/aggregation?appid=axxxxxxxxxxxxxxxxxxxx HTTP/1.1
Host: api.agora.io
Accept: application/json
Authorization: Basic ZGJhZDMyNmFkxxxxxxxxxxxxxxxxxxxxxxxxxxxxxxxxxxxxxxxxxxxxxxxxxWQzYTczNzg2ODdiMmNiYjRh
{
"startTs": 1625097600,
"endTs": 1625184000,
"metric": "audioFreezeRate",
"dimension": "region",
"filters": [{"name": "country", "value": "China"}]
}
```
#### Response parameters
| Parameter | Type | Description |
| :-------- | :-------- | :----------------------------------------------------------------------------------------------------------------------------------------------------------------------------------------------------------------------------------------------------------------------------------------------------------------------------------------------------------------------------------------------------------------------------------------------------------------------------------------------------------------------------------------------------------------------------------------------------------------------------------------------------------------------------------------------------------------------------------------------------------------------------------- |
| `code` | Number | The [status code](#status-codes). |
| `message` | String | The success or error message. |
| `data` | JSONArray | If the `dimension` field is not filled in the request, returns the metric data of the App ID dimension. If the `dimension` field is filled in the request, returns an array composed of dimensions, `refUsage`, and metric data. `refUsage` is auxiliary usage data. In each returned data group, each `metric` corresponds to auxiliary usage data used to assist in determining data validity. When `metric` is `joinSuccessRate` or `joinSuccessIn5sRate`, `refUsage` represents the number of attempts to join the channel. When `metric` is `audioFreezeRate` or `videoFreezeRate`, `refUsage` represents the duration of audio calls or video calls in minutes. When `metric` is `networkDelay`, `refUsage` represents the total duration of audio and video calls in minutes. |
#### Response example
**Example 1: Query the top 20 countries with the highest audio freeze rates and their respective audio freeze rate**
Contains 20 sets of data, each representing the top 20 countries with the highest audio freeze rates between 8:00 am on July 1, 2021 and 8:00 am on July 2, 2021.
```json
{
"code": 200,
"message": "null",
"data": [
{
"country": "China",
"refUsage": 231234,
"audioFreezeRate": 0.0017,
},
{
"country": "United States",
"refUsage": 213212,
"audioFreezeRate": 0.0014
}
......
]
}
```
**Example 2: Query the audio freeze rates for SDK versions 3.6.1.1 and 4.1.1**
Contains 2 sets of data, each representing the audio freeze rates between 8:00 am on July 1, 2021 and 8:00 am on July 2, 2021 for SDK versions 3.6.1.1 and 4.1.1 respectively.
```json
{
"code": 200,
"message": "null",
"data": [
{
"sdkVersion": "3.6.1.1",
"refUsage": 231234,
"audioFreezeRate": 0.0017,
},
{
"sdkVersion": "4.1.1",
"refUsage": 213212,
"audioFreezeRate": 0.0014
}
]
}
```
**Example 3: Query the top 20 regions in China with the highest audio freeze rates and their respective audio freeze rate**
Contains 20 sets of data, each representing the top 20 regions in China with the highest audio freeze rates between 8:00 am on July 1, 2021 and 8:00 am on July 2, 2021.
```json
{
"code": 200,
"message": "null",
"data": [
{
"region": "Shanghai",
"refUsage": 231234,
"audioFreezeRate": 0.0017,
},
{
"region": "Beijing",
"refUsage": 213212,
"audioFreezeRate": 0.0014
}
......
]
}
```
## Real-time Monitoring
With the Real-time Monitoring RESTful APIs, you can query the scale and quality metrics within a specified time frame. The granularity of the returned data is seconds, which can reflect the actual situation in close to real time.
The data is returned in regular 20-second time windows starting from 00:00:00. For example, \[00:00:00, 00:00:20] is a time window, while \[00:00:10, 00:00:30] is not a time window.
### API limits
The limits of the Real-time Monitoring RESTful APIs depend on the [pricing plan](/en/realtime-media/agora-analytics/reference/pricing) you subscribe to.
The Starter, Standard, Premium, and Enterprise pricing plans have the following differences in terms of API limits:
| | Starter | Standard | Premium | Enterprise |
| :---------------- | ------- | :------- | :-------------------------------- | :---------------------------------- |
| Request frequency | N/A | N/A | No more than 3/minute and 480/day | No more than 10/minute and 1440/day |
| Available data | N/A | N/A | Within the past 40 minutes | Within the past 60 minutes |
| Query time frame | N/A | N/A | No longer than 40 minutes | No longer than 60 minutes |
| Data delay | N/A | N/A | 40 seconds | 20 seconds |
Request frequency is calculated using the server's UTC time.
### Query real-time scale metrics
This method queries the real-time number of users and channels.
* Method: `GET`
* Endpoint: `/beta/realtime/usage/by_time_20sec`
#### Query parameters
The following query string parameters are required in the URL:
| **Parameter** | Type | **Description** |
| :---------------- | :----- | :------------------------------------------------------------------------------------------------------------------------------------------------------------------------------------------------------------------------------------------------------------------------------------------------------------------------------------ |
| `appid` | String | The [App ID](/en/realtime-media/agora-analytics/reference/glossary#app-id) of your project. |
| `startTs` | Number | The start point (Unix timestamp) of the time frame to query. The time window that `startTs` falls in is included in the response. |
| `endTs` | Number | The end point (Unix timestamp) of the time frame to query. The time window that `endTs` falls in is *not* included in the response. |
| `productType` | String | Supported values: `Native` (The Agora RTC SDK for Android, iOS, macOS, and Windows); `WebRTC` (The Agora RTC SDK for Web). |
| `metric` | String | Supported values: `userCount` (The total number of users across all in-use channels. A user joining multiple channels is counted multiple times); `channelCount` (The total number of channels. A channel is counted once for each period between the time when the first user joins it and the time when the last user leaves it). |
| `dimension` | String | (Optional) Aggregation dimension. Supported values: `country`, `region`, `net`, `sdk`, `os`, `device`. To obtain the top values for the current `dimension`, query [top 20 real-time scale metrics](#query-top-20-real-time-scale-metrics), then choose values from the results and pass them in `dimensionValues` in later requests. |
| `dimensionValues` | String | (Optional) The values for the specified dimension. This parameter is only valid when the `dimension` parameter is set. All values must be enclosed in double quotes and separated by commas. If this parameter is set, the request will return the aggregated metric data corresponding to the values specified in `dimensionValues`. |
| `cname` | String | (Optional)The channel name. If you do not specify this parameter, the metric data of your entire project (rather than a specific channel) is returned. |
#### HTTP request example
The following example queries the real-time number of users for SDK versions 3.6.1.1 and 4.1.1, with `startTs` set to 08:10:10 on September 17, 2021 and `endTs` set to 08:11:10 on the same day. The HTTP request is as follows:
```html
GET /beta/realtime/usage/by_time_20sec?startTs=1631837410&endTs=1631837470&appid=your_app_id&productType=Native&metric=userCount&dimension=sdk&dimensionValues="3.6.1.1","4.1.1" HTTP/1.1
Host: api.agora.io
Accept: application/json
Authorization: Basic ZGJhZDMyNmFkxxxxxxxxxxxxxxxxxxxxxxxxxxxxxxxxxxxxxxxxxxxxxxxxxWQzYTczNzg2ODdiMmNiYjRh
```
#### Response parameters
The response contains the following fields:
| Field | Type | Description |
| :-------- | :-------- | :--------------------------------------------------------------------------------------------------------------------------------------------- |
| `code` | Number | The [status code](#status-codes). `200` indicates that the request is successful. |
| `message` | String | The error message. |
| `data` | JSONArray | An array consisting of the requested `metric` field and `ts`, which is the Unix timestamp of the start point of the corresponding time window. |
#### Response example
For the previous HTTP request example, the response includes the total number of users, corresponding SDK version, and Unix timestamp of the following time windows:
* \[00:10:00, 00:10:20] on September 17, 2021
* \[00:10:20, 00:10:40] on September 17, 2021
* \[00:10:40, 00:11:00] on September 17, 2021
```json
{
"code": 200,
"message": null,
"data": [
{
"userCount": 236,
"sdk": "3.6.1.1",
"ts": 1631837400
},
{
"userCount": 82,
"sdk": "4.1.1",
"ts": 1631837400
},
{
"userCount": 235,
"sdk": "3.6.1.1",
"ts": 1631837420
},
{
"userCount": 85,
"sdk": "4.1.1",
"ts": 1631837420
},
{
"userCount": 252,
"sdk": "3.6.1.1",
"ts": 1631837440
},
{
"userCount": 90,
"sdk": "4.1.1",
"ts": 1631837440
}
]
}
```
### Query real-time quality metrics
This method queries the real-time values of quality metrics such as the audio or video freeze rate.
* Method: `GET`
* Endpoint: `/beta/realtime/quality/by_time_20sec`
#### Query parameters
The following query string parameters are required in the URL:
| Parameter | Type | Description |
| :---------------- | :----- | :---------------------------------------------------------------------------------------------------------------------------------------------------------------------------------------------------------------------------------------------------------------------------------------------------------------------------------------------------------------------------------------------------------------------------------------------------------------------------------------------------------------------------------------------------------------------------------------------------------------------------------------------------------------------------------------------------------------------------------------------------------------------------------------------------------------------------------------------------------------------------------------------------------------------------------------------------------------------------------------------------------------------------------------------------------------------------------------------------------- |
| `appid` | String | The [App ID](/en/realtime-media/agora-analytics/reference/glossary#app-id) of your project. |
| `startTs` | Number | The start point (Unix timestamp) of the time frame to query. The time window that `startTs` falls in is included in the response. |
| `endTs` | Number | The end point (Unix timestamp) of the time frame to query. The time window that `endTs` falls in is *not* included in the response. |
| `productType` | String | Supported values: `Native` (The Agora RTC SDK for Android, iOS, macOS, and Windows); `WebRTC` (The Agora RTC SDK for Web). |
| `metric` | String | Supported values: `joinSuccessRate` (The rate at which users attempting to join any channel succeed, equal to number of users who joined divided by number of attempts to join); `joinSuccessIn5sRate` (The rate at which users attempting to join any channel succeed within 5 seconds, equal to number of users who joined within 5 seconds divided by number of attempts to join); `audioFreezeRate` (The rate at which audio freezing occurs, equal to total audio freeze time divided by total audio minutes calculated by the number of streams. Only audio freezes longer than 200 milliseconds are counted); `videoFreezeRate` (The rate at which video freezing occurs, equal to total video freeze time divided by total video minutes calculated by the number of streams. Only video freezes longer than 600 milliseconds are counted); `networkDelay` (The rate at which network delay occurs, equal to total end-to-end network delay divided by total audio and video minutes calculated by the number of streams. Only end-to-end network delays longer than 400 milliseconds are counted). |
| `dimension` | String | (Optional) Aggregation dimension. Supported values: `country`, `region`, `net`, `sdk`, `os`, `device`. To obtain the top values for the current `dimension`, query [top 20 real-time quality metrics](#query-top-20-real-time-quality-metrics), then choose values from the results and pass them in `dimensionValues` in later requests. |
| `dimensionValues` | String | (Optional) The values for the specified dimension. This parameter is only valid when the `dimension` parameter is set. All values must be enclosed in double quotes and separated by commas. If this parameter is set, the request will return the aggregated metric data corresponding to the values specified in `dimensionValues`. |
| `cname` | String | (Optional) The channel name. If you do not specify this parameter, the metric data of your entire project (rather than a specific channel) is returned. |
| `uids` | String | (Optional) The list of user IDs (`uid`). You need to separate multiple user IDs with commas (for example, `uids=10001,10002,10003`). You can specify a maximum of 10 user IDs. The `uids` parameter takes effect only when you specify the `cname` parameter. |
#### HTTP request example
The following example queries the network delay rate from 00:10:10 to 00:11:10 on September 17, 2021:
**Example 1: `uids` is not specified**
```html
GET /beta/realtime/usage/by_time_20sec?startTs=1631837410&endTs=1631837470&appid=axxxxxxxxxxxxxxxxxxxx&productType=Native&metric=networkDelay HTTP/1.1
Host: api.agora.io
Accept: application/json
Authorization: Basic ZGJhZDMyNmFkxxxxxxxxxxxxxxxxxxxxxxxxxxxxxxxxxxxxxxxxxxxxxxxxxWQzYTczNzg2ODdiMmNiYjRh
```
**Example 2: `uids` is specified as `2303692334` and `2963430861`**
```html
GET /beta/realtime/usage/by_time_20sec?startTs=1631837410&endTs=1631837470&appid=axxxxxxxxxxxxxxxxxxxx&productType=Native&metric=networkDelay&cname=demoChannel&uids=2303692334,2963430861 HTTP/1.1
Host: api.agora.io
Accept: application/json
Authorization: Basic ZGJhZDMyNmFkxxxxxxxxxxxxxxxxxxxxxxxxxxxxxxxxxxxxxxxxxxxxxxxxxWQzYTczNzg2ODdiMmNiYjRh
```
**Example 3: `dimension` is specified as `sdkVersion`, and `dimensionValues` as `3.6.1.1` and `4.1.1`**
```html
GET /beta/realtime/quality/by_time_20sec?startTs=1631837410&endTs=1631837470&appid=your_app_id&productType=Native&metric=networkDelay&dimension=sdk&dimensionValues="3.6.1.1","4.1.1" HTTP/1.1
Host: api.agora.io
Accept: application/json
Authorization: Basic ZGJhZDMyNmFkxxxxxxxxxxxxxxxxxxxxxxxxxxxxxxxxxxxxxxxxxxxxxxxxxWQzYTczNzg2ODdiMmNiYjRh
```
#### Response parameters
The response contains the following fields:
| Field | Type | Description |
| :-------- | :-------- | :---------------------------------------------------------------------------------------------------------------------------------------------------------------------------------------------------------------------------------------------------------------------------------------------------------------------------------------------------------------- |
| `code` | Number | The [status code](#status-codes). `200` indicates that the request is successful. |
| `message` | String | The error message. |
| `data` | JSONArray | - The request does not include the `uids` field: An array of metric data and Unix timestamps (in seconds).`; `The request includes the `uids` field: An array of `uid`, metric data, and Unix timestamps (in seconds).`; `The request includes the `dimension` and `dimensionValues` fields: Arrays of metric data, dimensions, and Unix timestamps (in seconds). |
#### Response example
For the previous HTTP request example, the response includes data of the following time windows:
* \[00:10:00, 00:10:20] on September 17, 2021
* \[00:10:20, 00:10:40] on September 17, 2021
* \[00:10:40, 00:11:00] on September 17, 2021
**Example 1: `uids` is not specified**
```json
{
"code": 200,
"message": "success",
"data": [
{
"networkDelay": 0.0120,
"ts": 1631837400
},
{
"networkDelay": 0.0057,
"ts": 1631837420
},
{
"networkDelay": 0.0039,
"ts": 1631837440
}
]
}
```
**Example 2: `uids` is specified as `2303692334` and `2963430861`**
```json
{
"code": 200,
"message": "success",
"data": [
{
"uid": 2303692334,
"values": [
{
"ts": 1631837400,
"networkDelay": 0.389
},
{
"ts": 1631837420,
"networkDelay": 0.389
},
{
"ts": 1631837440,
"networkDelay": 0.389
}
]
},
{
"uid": 2963430861,
"values": [
{
"ts": 1631837400,
"networkDelay": 0.389
},
{
"ts": 1631837420,
"networkDelay": 0.389
},
{
"ts": 1631837440,
"networkDelay": 0.389
}
]
}
]
}
```
**Example 3: `dimension` is specified as `sdkVersion`, and `dimensionValues` as `3.6.1.1` and `4.1.1`**
```json
{
"code": 200,
"message": null,
"data": [
{
"networkDelay": 0.389,
"sdk": "3.6.1.1",
"ts": 1631837400
},
{
"networkDelay": 0.411,
"sdk": "4.1.1",
"ts": 1631837400
},
{
"networkDelay": 0.343,
"sdk": "3.6.1.1",
"ts": 1631837420
},
{
"networkDelay": 0.363,
"sdk": "4.1.1",
"ts": 1631837420
},
{
"networkDelay": 0.511,
"sdk": "3.6.1.1",
"ts": 1631837440
},
{
"networkDelay": 0.436,
"sdk": "4.1.1",
"ts": 1631837440
}
]
}
```
### Query top 20 real-time scale metrics
This method queries the top 20 grouped data of real-time scale for a specified dimension and provides content input for the `dimensionValues` parameter in [Query real-time scale](#query-real-time-scale-metrics).
* Method: `GET`
* Endpoint: `/beta/realtime/usage/dimension/top20`
#### Query parameters
The following query string parameters are required in the URL:
| **Parameter** | Type | **Description** |
| :------------ | :----- | :----------------------------------------------------------------------------------------------------------------------------------------------------------------------------------------------------------------- |
| `appid` | String | The [App ID](/en/realtime-media/agora-analytics/reference/glossary#app-id) of your project. |
| `ts` | Number | The start point (Unix timestamp) of the time frame to query. The actual query range is \[ts, ts + 20s]. |
| `productType` | String | Supported values: `Native` (The Agora RTC SDK for Android, iOS, macOS, and Windows); `WebRTC` (The Agora RTC SDK for Web). |
| `metric` | String | The metric you want to query. You can only set it `userCount`, namely the number of users. One user ID in one channel is counted as one user, while one user ID in multiple channels is counted as multiple users. |
| `dimension` | String | Aggregation dimension. Supported values: `country`, `region`, `net`, `sdk`, `os`, `device`. The request returns the top 20 values in the dimension by default, or the top 50 values for `device`. |
#### Request example
The following example queries the top 20 number of users for each SDK version starting from 08:10:10 on September 17, 2021 is as follows:
```html
GET /beta/realtime/usage/dimension/top20?ts=1631837410&appid=your_app_id&productType=Native&metric=userCount&dimension=sdk HTTP/1.1
Host: api.agora.io
Accept: application/json
Authorization: Basic ZGJhZDMyNmFkxxxxxxxxxxxxxxxxxxxxxxxxxxxxxxxxxxxxxxxxxxxxxxxxxWQzYTczNzg2ODdiMmNiYjRh
```
#### Response parameters
The response contains the following fields:
| Field | Type | Description |
| :-------- | :-------- | :-------------------------------------------------------------------------------------------------------------------- |
| `code` | Number | The [status code](#status-codes). `200` indicates that the request is successful. |
| `message` | String | The error message. |
| `data` | JSONArray | An array consists of dimensions, metric, and the starting and ending Unix timestamps (in seconds) of the time window. |
#### Response example
The response contains 20 sets of data, each representing the top 20 call volume data for each SDK version during the time window from 08:10:10 to 08:10:30 on September 17, 2021.
```json
{
"code": 200,
"message": null,
"data": {
"list": [
{
"sdk": "3.6.1.1",
"userCount": 236,
"windowStartTs": 1631837410,
"windowEndTs": 1631837430
},
{
"sdk": "4.1.1",
"userCount": 82,
"windowStartTs": 1631837410,
"windowEndTs": 1631837430
},
{
"sdk": "2.9.1",
"userCount": 68,
"windowStartTs": 1631837410,
"windowEndTs": 1631837430
},
...
]
}
}
```
### Query top 20 real-time quality metrics
This method queries the top 20 grouped data of real-time call quality for a specified dimension and provides content input for the `dimensionValues` parameter in [Query real-time quality](#query-real-time-quality-metrics).
* Method: `GET`
* Endpoint: `/beta/realtime/quality/dimension/top20`
#### Query parameters
The following query string parameters are required in the URL:
| **Parameter** | Type | **Description** |
| :------------- | :----- | :---------------------------------------------------------------------------------------------------------------------------------------------------------------------------------------------------------------------------------------------------------------------------------------------------------------------------------------------------------------------------------------------------------------------------------------------------------------------------------------------------------------------------------------------------------------------------------------------------------------------------------------------------------------------------------------------------------------------------------------------------------------------------------------------------------------------------------------------------------------------------------------------------------------------------------------------------------------------------------------------------------------------------------------------------------------------------------------------------------- |
| `appid` | String | The [App ID](/en/realtime-media/agora-analytics/reference/glossary#app-id) of your project. |
| `ts` | Number | The start point (Unix timestamp) of the time frame to query. The actual query range is \[ts, ts + 20s]. |
| `productType` | String | Supported values: `Native` (The Agora RTC SDK for Android, iOS, macOS, and Windows); `WebRTC` (The Agora RTC SDK for Web). |
| `metric` | String | Supported values: `joinSuccessRate` (The rate at which users attempting to join any channel succeed, equal to number of users who joined divided by number of attempts to join); `joinSuccessIn5sRate` (The rate at which users attempting to join any channel succeed within 5 seconds, equal to number of users who joined within 5 seconds divided by number of attempts to join); `audioFreezeRate` (The rate at which audio freezing occurs, equal to total audio freeze time divided by total audio minutes calculated by the number of streams. Only audio freezes longer than 200 milliseconds are counted); `videoFreezeRate` (The rate at which video freezing occurs, equal to total video freeze time divided by total video minutes calculated by the number of streams. Only video freezes longer than 600 milliseconds are counted); `networkDelay` (The rate at which network delay occurs, equal to total end-to-end network delay divided by total audio and video minutes calculated by the number of streams. Only end-to-end network delays longer than 400 milliseconds are counted). |
| `dimension` | String | Aggregation dimension. Supported values: `country`, `region`, `net`, `sdk`, `os`, `device`. The request returns the top 20 values in the dimension by default, or the top 50 values for `device`. |
| `extraMetrics` | String | Additional indicator, used to help determine the validity of data. Only supports setting to `userCount`, that is, the number of users under the current dimension. |
#### Request example
The following example passes in `extraMetrics` and queries the top 50 audio freeze rate values for each device starting from 20:00:00 on December 21, 2022:
```html
GET /beta/realtime/quality/dimension/top20?ts=1671624000&appid=your_app_id&productType=Native&metric=audioFreezeRate&dimension=device&extraMetrics=userCount HTTP/1.1
Host: api.agora.io
Accept: application/json
Authorization: Basic ZGJhZDMyNmFkxxxxxxxxxxxxxxxxxxxxxxxxxxxxxxxxxxxxxxxxxxxxxxxxxWQzYTczNzg2ODdiMmNiYjRh
```
#### Response parameters
The response contains the following fields:
| Field | Type | Description |
| :-------- | :-------- | :-------------------------------------------------------------------------------------------------------------------- |
| `code` | Number | The [status code](#status-codes). `200` indicates that the request is successful. |
| `message` | String | The error message. |
| `data` | JSONArray | An array consists of dimensions, metric, and the starting and ending Unix timestamps (in seconds) of the time window. |
#### Response example
The response contains 50 sets of data, each representing the top 50 audio freeze rate values for each device model during the time window from 20:00:00 to 20:00:20 on December 21, 2022.
```json
{
"code": 200,
"message": null,
"data": {
"list": [
{
"audioFreezeRate": 0.050833333333333335,
"windowStartTs": 1671624000,
"userCount": 2,
"device": "ldn-al00",
"windowEndTs": 1671624020
},
{
"audioFreezeRate": 0,
"windowStartTs": 1671624000,
"userCount": 2,
"device": "80HH",
"windowEndTs": 1671624020
},
{
"audioFreezeRate": 0,
"windowStartTs": 1671624000,
"userCount": 1,
"device": "20KNA004CD",
"windowEndTs": 1671624020
}
]
}
}
```
## References
### Status codes
| Code | Description |
| ----- | ----------------------------------------------------------------- |
| `200` | The request is successful. |
| `300` | The API limits are exceeded ([Call Search](#call-inspector) only) |
| `400` | Invalid parameters. |
| `401` | Unauthorized. |
| `403` | Wrong authorization information. The request is forbidden. |
| `404` | Wrong API invoked. |
| `500` | Unknown error. |
When `300` is returned, you might get the following error messages:
| Error message | Description | Examples of error fix |
| :------------------------------------------------------------------------------------ | --------------------------------------------- | :----------------------------------------------------------------------------------------------------------------- |
| `qps limit error` | The limit on requests per second is exceeded. | If qps limit = 10, ensure that current qps \< 10 |
| `qpd limit error` | The limit on requests per day is exceeded. | If qpd limit = 10000, ensure that current qpd \< 10000 |
| `query latency limit error` | The limit on data delay is exceeded. | If query latency limit = 10s and current time = 1623316864, ensure that `end_ts` \< 1623316864 - 10 |
| `query time range limit error` | The limit on available calls is exceeded. | If query time range limit = 3d and current time = 1623316864, ensure that `start_ts` > 1623316864 - 3 \* 86400(s) |
| `query time length limit error` | The limit on response content is exceeded. | If query time length limit = 3h, ensure that `end_ts` - `start_ts` \< 3 \* 3600(s) |
| `you have no auth to access this service, please buy or upgrade your service package` | You have no access to this service. | N/A |
### Metrics ID
| `mid` | Description | Unit | Example |
| :---- | :------------------------------------------------------------- | :--- | :--------- |
| 20001 | App CPU usage. | % | 27% |
| 20002 | System CPU usage. | % | 15% |
| 20003 | The upstream bitrate of the audio. | Kbps | 126 Kbps |
| 20004 | The downstream bitrate of the audio. | Kbps | 108 Kbps |
| 20005 | The freeze time in rendering the audio. | ms | 106.67 ms |
| 20006 | The upstream bitrate of the low-quality video stream. | Kbps | 472 Kbps |
| 20007 | The capturing frame rate of the video. | fps | 16 fps |
| 20008 | The upstream frame rate of the high-quality video stream. | fps | 12 fps |
| 20009 | The downstream bitrate of the high-quality video. | Kbps | 309 Kbps |
| 20010 | The downstream frame rate of the high-quality video. | fps | 6 fps |
| 20011 | The freeze time in rendering the video. | ms | 2000.50 ms |
| 20015 | The upstream packet loss rate of the audio. | % | 1% |
| 20016 | The end-to-end packet loss rate of the audio. | % | 3% |
| 20017 | The upstream packet loss rate of the video. | % | 5% |
| 20018 | The end-to-end packet loss rate of the video. | % | 7% |
| 20019 | The width of the received video. | - | 360 |
| 20020 | The height of the received video. | - | 640 |
| 20021 | The task scheduling delay. | ms | 2 ms |
| 20022 | The round-trip time delay from the client to the local router. | ms | 3 ms |
| 20023 | The upstream frame rate of the low-quality video stream. | fps | 108 fps |
| 20024 | The upstream bitrate of the video stream. | Kbps | 126 Kbps |
| 20025 | The sampling volume of the sent audio. | dB | 105 dB |
| 20026 | The playback volume of the received audio. | dB | 98 dB |
| 20027 | The width of the sent video. | - | 360 |
| 20028 | The height of the sent video. | - | 640 |
| 20030 | The downstream bitrate of the low-quality video stream. | Kbps | 100 Kbps |
| 20031 | The downstream frame rate of the low-quality video stream. | fps | 6 fps |
| 20032 | The width of the received low-quality video. | - | 360 |
| 20033 | The height of the received low-quality video. | - | 640 |
| 20034 | The width of the sent low-quality video. | - | 360 |
| 20035 | The height of the sent low-quality video. | - | 640 |
| 20036 | The WebRTC downstream packet loss rate of the video. | | |
| 20037 | The WebRTC upstream packet loss rate of the audio. | | |
| 20038 | The WebRTC upstream packet loss rate of the video. | | |
| 20039 | App memory usage. | % | 50% |
| 20040 | System memory usage. | % | 70% |
# Authenticate REST calls (/en/api-reference/api-ref/agora-analytics/analytics-restful-authentication)
Agora Analytics RESTful API requires REST authentication.
The following REST authentication method is available:
* **Basic HTTP authentication**
Generate a Base64-encoded credential with the [Customer ID and Customer Secret](#generate-customer-id-and-customer-secret) provided by Agora, and pass the credential with the `Authorization` parameter in the request header.
Implement authentication on the server to mitigate the risk of data leakage.
## Implement basic HTTP authentication
### Generate Customer ID and Customer Secret
To generate a Customer ID and Customer Secret, do the following:
1. In [Agora Console](https://console.agora.io), click the username at the bottom of the navigation sidebar to open the account menu, then select **RESTful API Keys**.

2. Select **Create API Key**. A Customer ID and Customer Secret are generated.
3. Select **Download** and save the file somewhere secure — you can download it only once. In the file, **Key** is your Customer ID and **Secret** is your Customer Secret.
4. Use the Customer ID (**Key**) and Customer Secret (**Secret**) to generate a Base64-encoded credential, and pass it to the `Authorization` parameter in the HTTP request header.
### Generate an authorization header using a third-party tool
For testing and debugging, you can use a [third-party online tool](https://www.debugbear.com/basic-auth-header-generator) to quickly generate your Authorization header. Enter your Customer ID as the Username and your Customer Secret as the Password. Your generated header should look like this:
```text
Authorization: Basic NDI1OTQ3N2I4MzYy...YwZjA=a
```
### Basic authentication sample code
The following sample code implements basic HTTP authentication and sends a RESTful API request to get the basic information of all your current Agora projects.
The Agora RESTful API only supports HTTPS with TLS 1.0, 1.1, or 1.2 for encrypted communication. Requests over plain HTTP are not supported and will fail to connect.
Golang
Node.js
PHP
Python
Java
C#
```go
package main
import (
"fmt"
"strings"
"net/http"
"io/ioutil"
"encoding/base64"
)
// HTTPS basic authentication example in Golang using the RTC SDK Server RESTful API
func main() {
// Customer ID
customerKey := "Your customer ID"
// Customer secret
customerSecret := "Your customer secret"
// Concatenate customer key and customer secret and use base64 to encode the concatenated string
plainCredentials := customerKey + ":" + customerSecret
base64Credentials := base64.StdEncoding.EncodeToString([]byte(plainCredentials))
url := "https://api.agora.io/dev/v1/projects"
method := "GET"
payload := strings.NewReader(``)
client := &http.Client {
}
req, err := http.NewRequest(method, url, payload)
if err != nil {
fmt.Println(err)
return
}
// Add Authorization header
req.Header.Add("Authorization", "Basic " + base64Credentials)
req.Header.Add("Content-Type", "application/json")
// Send HTTP request
res, err := client.Do(req)
if err != nil {
fmt.Println(err)
return
}
defer res.Body.Close()
body, err := ioutil.ReadAll(res.Body)
if err != nil {
fmt.Println(err)
return
}
fmt.Println(string(body))
}
```
```js
// HTTP basic authentication example in node.js using the RTC SDK Server RESTful API
const https = require('https')
// Customer ID
const customerKey = "Your customer ID"
// Customer secret
const customerSecret = "Your customer secret"
// Concatenate customer key and customer secret and use base64 to encode the concatenated string
const plainCredential = customerKey + ":" + customerSecret
// Encode with base64
encodedCredential = Buffer.from(plainCredential).toString('base64')
authorizationField = "Basic " + encodedCredential
// Set request parameters
const options = {
hostname: 'api.agora.io',
port: 443,
path: '/dev/v1/projects',
method: 'GET',
headers: {
'Authorization':authorizationField,
'Content-Type': 'application/json'
}
}
// Create request object and send request
const req = https.request(options, res => {
console.log(`Status code: ${res.statusCode}`)
res.on('data', d => {
process.stdout.write(d)
})
})
req.on('error', error => {
console.error(error)
})
req.end()
```
```php
'https://api.agora.io/dev/v1/projects',
CURLOPT_RETURNTRANSFER => true,
CURLOPT_ENCODING => '',
CURLOPT_MAXREDIRS => 10,
CURLOPT_TIMEOUT => 0,
CURLOPT_FOLLOWLOCATION => true,
CURLOPT_HTTP_VERSION => CURL_HTTP_VERSION_1_1,
CURLOPT_CUSTOMREQUEST => 'GET',
CURLOPT_HTTPHEADER => [
$authHeader,
'Content-Type: application/json',
],
]);
// Execute cURL request
$response = curl_exec($curl);
// Check for cURL errors
if ($response === false) {
echo "Error in cURL: " . curl_error($curl);
} else {
// Output the response
echo $response;
}
// Close cURL session
curl_close($curl);
?>
```
```python
# -- coding utf-8 --
# Python 3
# HTTP basic authentication example in python using the RTC SDK Server RESTful API
import base64
import http.client
# Customer ID
customer_key = "Your customer ID"
# Customer secret
customer_secret = "Your customer secret"
# Concatenate customer key and customer secret and use base64 to encode the concatenated string
credentials = customer_key + ":" + customer_secret
# Encode with base64
base64_credentials = base64.b64encode(credentials.encode("utf8"))
credential = base64_credentials.decode("utf8")
# Create connection object with basic URL
conn = http.client.HTTPSConnection("api.agora.io")
payload = ""
# Create Header object
headers = {}
# Add Authorization field
headers['Authorization'] = 'basic ' + credential
headers['Content-Type'] = 'application/json'
# Send request
conn.request("GET", "/dev/v1/projects", payload, headers)
res = conn.getresponse()
data = res.read()
print(data.decode("utf-8"))
```
```java
import java.io.IOException;
import java.net.URI;
import java.net.http.HttpClient;
import java.net.http.HttpRequest;
import java.net.http.HttpResponse;
import java.util.Base64;
// HTTP basic authentication example in Java using the RTC SDK Server RESTful API
public class Base64Encoding {
public static void main(String[] args) throws IOException, InterruptedException {
// Customer ID
final String customerKey = "Your customer ID";
// Customer secret
final String customerSecret = "Your customer secret";
// Concatenate customer key and customer secret and use base64 to encode the concatenated string
String plainCredentials = customerKey + ":" + customerSecret;
String base64Credentials = new String(Base64.getEncoder().encode(plainCredentials.getBytes()));
// Create authorization header
String authorizationHeader = "Basic " + base64Credentials;
HttpClient client = HttpClient.newHttpClient();
// Create HTTP request object
HttpRequest request = HttpRequest.newBuilder()
.uri(URI.create("https://api.agora.io/dev/v1/projects"))
.GET()
.header("Authorization", authorizationHeader)
.header("Content-Type", "application/json")
.build();
// Send HTTP request
HttpResponse response = client.send(request,
HttpResponse.BodyHandlers.ofString());
System.out.println(response.body());
}
}
```
```csharp
using System;
using System.IO;
using System.Net;
using System.Text;
// HTTP basic authentication example in C# using the RTC SDK Server RESTful API
namespace Examples.System.Net
{
public class WebRequestPostExample
{
public static void Main()
{
// Customer ID
string customerKey = "Your customer ID";
// Customer secret
string customerSecret = "Your customer secret";
// Concatenate customer key and customer secret and use base64 to encode the concatenated string
string plainCredential = customerKey + ":" + customerSecret;
// Encode with base64
var plainTextBytes = Encoding.UTF8.GetBytes(plainCredential);
string encodedCredential = Convert.ToBase64String(plainTextBytes);
// Create authorization header
string authorizationHeader = "Authorization: Basic " + encodedCredential;
// Create request object
WebRequest request = WebRequest.Create("https://api.agora.io/dev/v1/projects");
request.Method = "GET";
// Add authorization header
request.Headers.Add(authorizationHeader);
request.ContentType = "application/json";
WebResponse response = request.GetResponse();
Console.WriteLine(((HttpWebResponse)response).StatusDescription);
using (Stream dataStream = response.GetResponseStream())
{
StreamReader reader = new StreamReader(dataStream);
string responseFromServer = reader.ReadToEnd();
Console.WriteLine(responseFromServer);
}
response.Close();
}
}
}
```
# How does an app crash affect cloud recording? (/en/api-reference/faq/integration/abnormal_exit)
If an app integrated with cloud recording crashes, the recording session is not affected. You can continue to use the original resource ID and recording ID to control the recording instance, such as to query recording status or stop recording.
Do not call `acquire` or `start` again with the same App ID, channel name, and UID. Doing so may cause an error or create a new recording instance.
# How can I get the URL of the M3U8 file? (/en/api-reference/faq/integration/acquire_file_directory)
The URL of the M3U8 file consists of the domain of your cloud storage and the filename. You can copy the URL in your cloud storage.
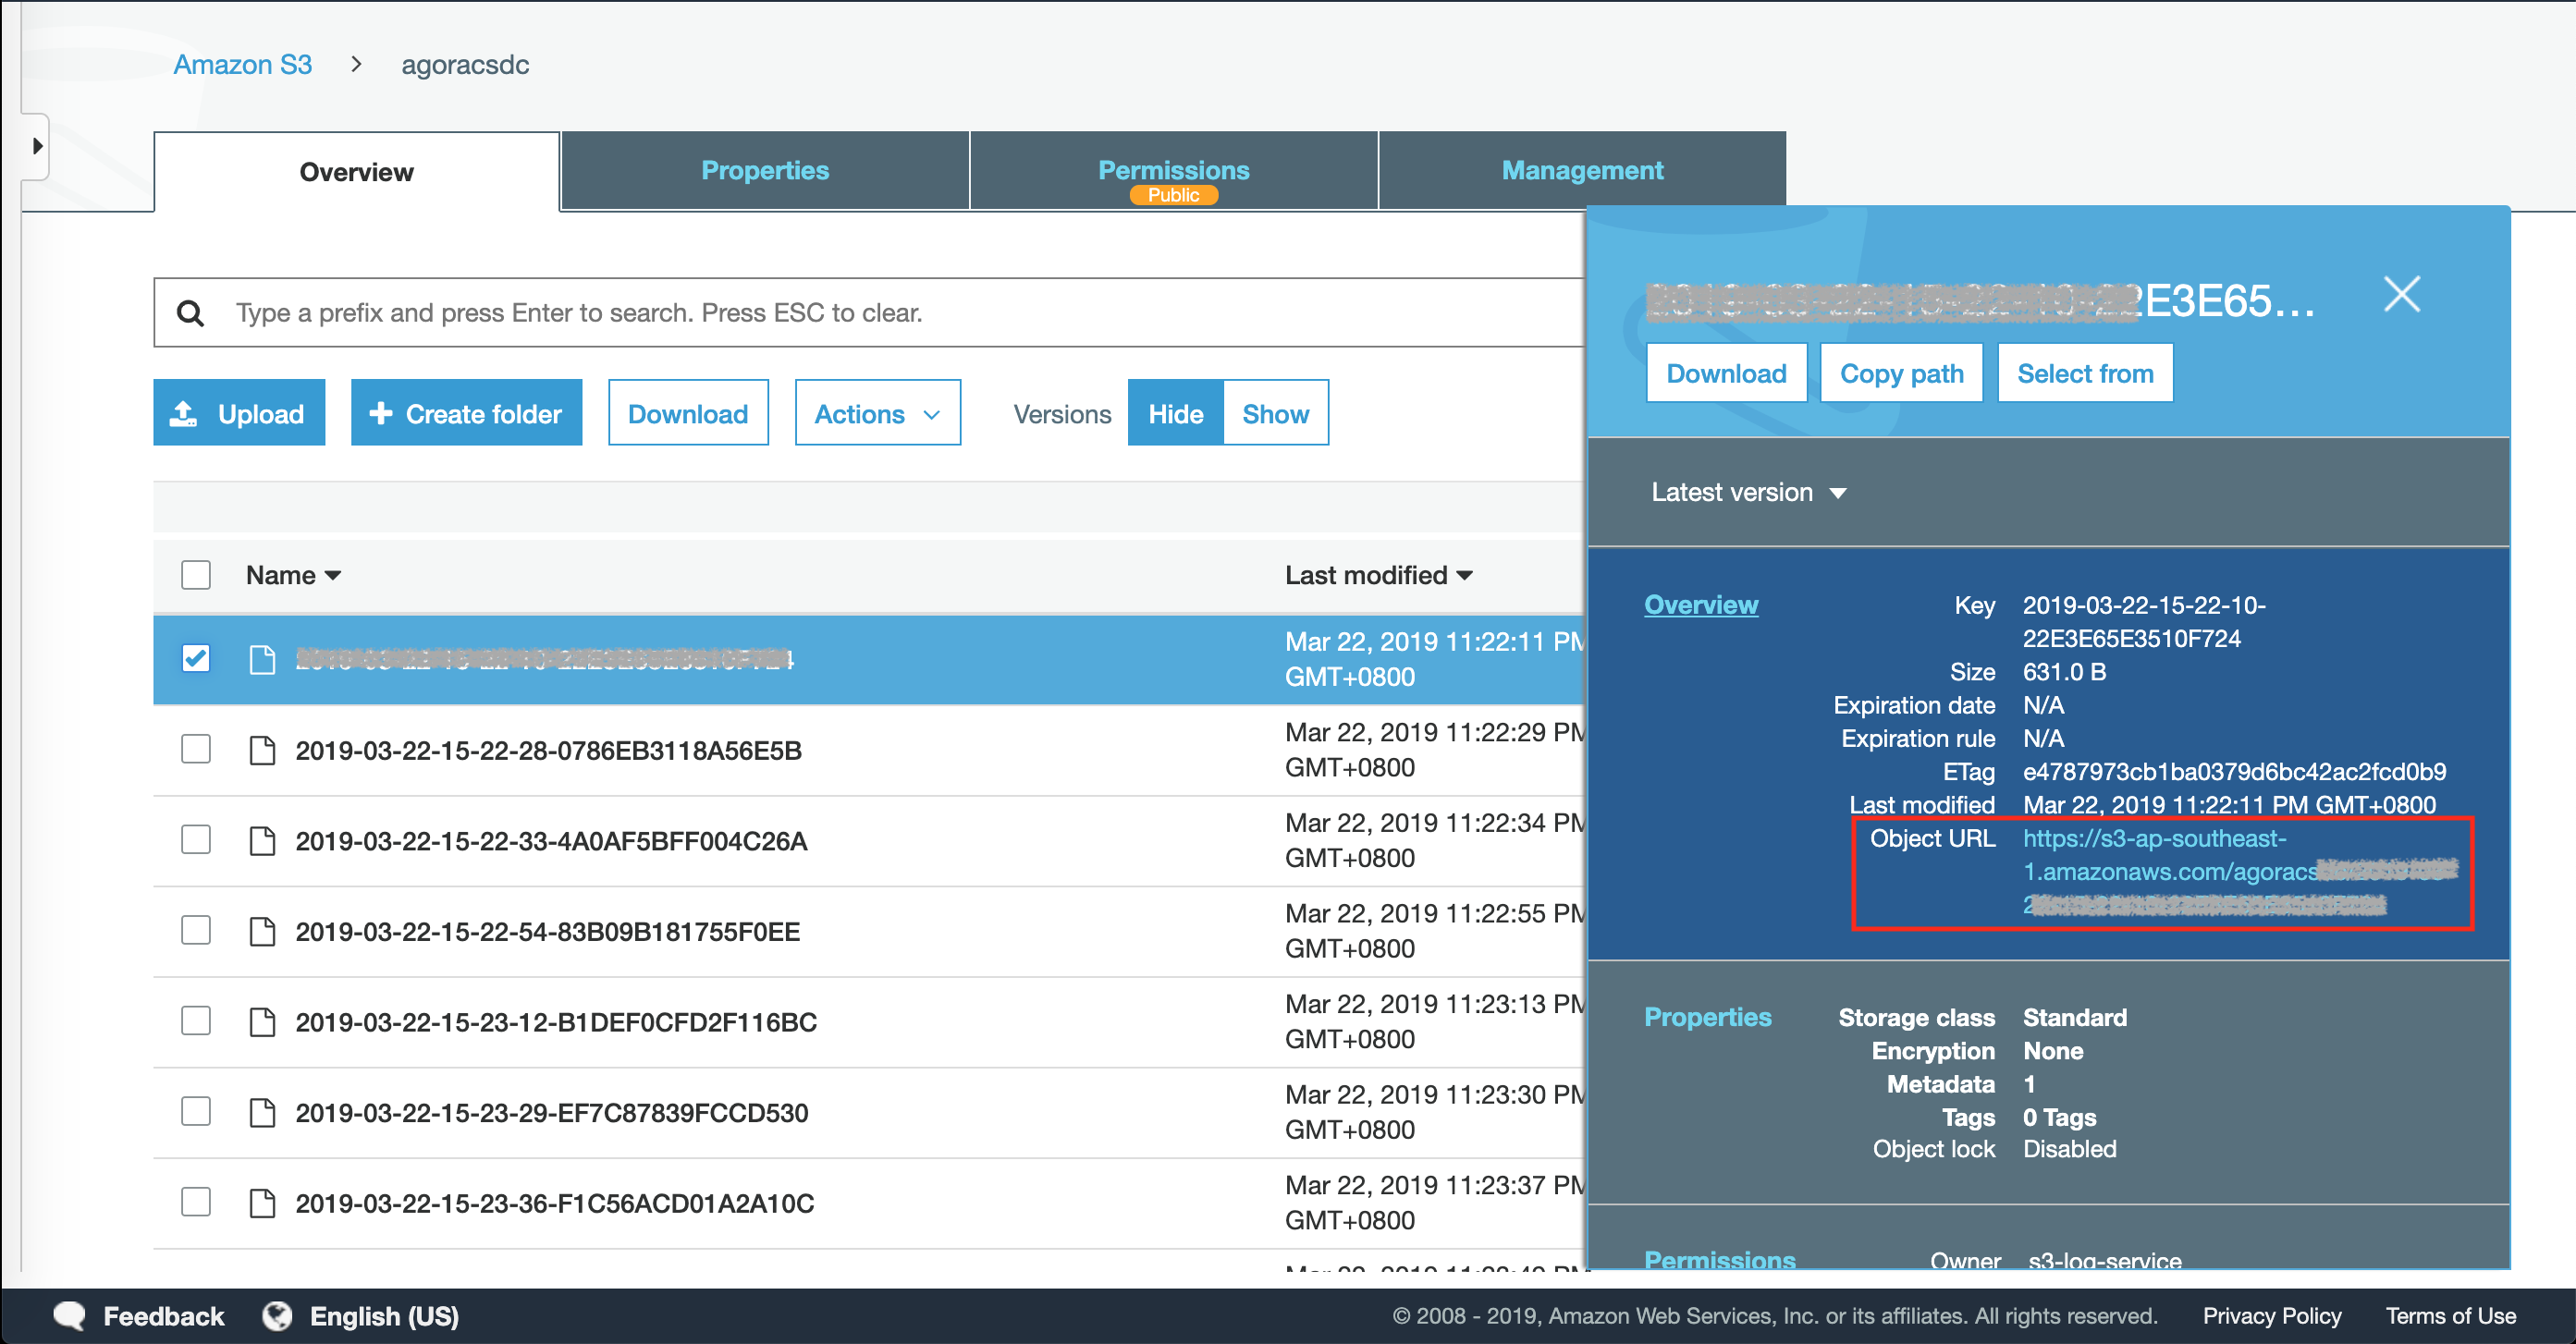
You can get the filename of the M3U8 file from the following fields:
* The `fileList` field in the responses of [`query`](/en/realtime-media/cloud-recording/reference/restful-api#query) and [`stop`](/en/realtime-media/cloud-recording/reference/restful-api#stop).
* The `fileList` field in the [`cloud_recording_file_infos`](/en/realtime-media/cloud-recording/build/handle-events/receive-notifications#cloud_recording_file_infos) callback event.
# How can I set user properties and classroom properties? (/en/api-reference/faq/integration/agora_class_custom_properties)
Flexible Classroom supports custom user properties and classroom properties. The property consists of a property name and a property value. Each property name has only one property value.
You can modify the value of a custom user or classroom property through full modification or path modification:
Suppose the current custom user or classroom property is as follows:
```json
{ "key1": { "subkey1": "a", "subkey2": "b" }, "key2": { "subkey3": "c", "subkey4": "d" } }
```
There are several scenarios:
* If you want to capitalize all values of `subkey`, you can pass the following JSON array when calling the API through full modification:
```json
{ "key1": { "subkey1": "A", "subkey2": "B" }, "key2": { "subkey3": "C", "subkey4": "D" } }
```
* If you only want to capitalize the value in `subkey1`, changing `a` into `A`, for example, you can pass `{"key1.subkey1":"A"}` when calling the API through path modification.
* If you want to add `subkey5` with the value of `E` to `key1`, you can pass `{"key1.subkey5":"E"}` when calling the API. The properties after modification are:
```json
{
"key1": { "subkey1": "A", "subkey2": "B", "subkey5": "E" },
"key2": { "subkey3": "C", "subkey4": "D" }
}
```
Please note that if you pass `{"key1": {"subkey5": "E"} }`, all the original properties are overwritten.
* You can add multiple properties once. For example, pass `{"key1.subkey5":"E", "key2.subkey6":"F"}`. The properties after modification are:
```json
{
"key1": { "subkey1": "A", "subkey2": "B", "subkey5": "E" },
"key2": { "subkey3": "C", "subkey4": "D", "subkey6": "F" }
}
```
# Why does the audio routing change after I switch to another app on an Android device? (/en/api-reference/faq/integration/android_audio_routing_change)
When using an app integrated with an Agora SDK (an "SDK app") for real-time communication on an Android device, if you switch to another app that has audio input and/or output and return to the SDK app, the audio routing of the SDK changes.
For example, during a video call in the SDK app through the speaker, you answer a voice call with the earpiece in another app. When you end the voice call and return to the SDK app, the video call's audio is now routed to the earpiece.
## Reason
When switching from the SDK app to another app on Android devices, the latter may change the original audio routing of the SDK. The SDK does not have permission to detect such changes and cannot determine whether you have switched back to using the SDK app. Therefore, when the you return to the SDK app, the audio routing set by the other app remains in use.
## Solution
Perform the following steps in `onResume` (an Android API):
1. Retrieve the current audio routing of the SDK.
2. Call `setEnableSpeakerphone` to reset the audio routing of the SDK.
See the following code sample:
```java
@Override
protected void onResume() {
super.onResume();
AudioManager am = getAudioManager();
if (am.isSpeakerphoneOn()) {
Log.d("LOG:", "AUDIO_ROUTE_SPEAKERPHONE");
} else if (am.isBluetoothScoOn() || am.isBluetoothA2dpOn()) {
Log.d("LOG:", "AUDIO_ROUTE_HEADSETBLUETOOTH");
} else if (am.isWiredHeadsetOn()) {
Log.d("LOG:", "AUDIO_ROUTE_HEADSET");
} else {
Log.d("LOG:", "AUDIO_ROUTE_EARPIECE");
// Call setEnableSpeakerphone here to route the audio output to the speaker or earpiece
}
}
public AudioManager getAudioManager() {
Context context = this.getApplicationContext();
if (context == null) {
return null;
}
return (AudioManager) context.getSystemService(Context.AUDIO_SERVICE);
}
```
## Relevant links
[Why can't I answer calls through a Bluetooth device after connecting it to an iOS or Android device](/en/api-reference/faq/quality/ios_bluetooth)
# Why can't I play the audio file using startAudioMixing or playEffect on Android 9? (/en/api-reference/faq/integration/android_startaudiomixing_permission)
Cannot play an mp3, mp4, or any other music format using `startAudioMixing` or `playEffect` on Android 9.
## Reason
This is caused by an Android permission limit. If `targetSdkVersion` >= 28, you need to add relevant app privileges to play the a music file.
## Solution
For Android projects with `targetSdkVersion` >= 28, add the following line in the `application` zone of the AndroidManifest.xml file to play the music file:
```xml
```
## Relevant links
For more Android permission settings and considerations, see [Project setup](/en/realtime-media/rtc/get-started-sdk#handle-permissions).
# How can I listen for an audience joining or leaving an interactive live streaming channel? (/en/api-reference/faq/integration/audience_event)
The Agora RTC SDK does not provide any callback events that listen for an audience joining or leaving an interactive live streaming channel. However, you can listen for these events using either of the following two approaches:
* By using the event notifications provided by Agora's message notification service.
* By using the signaling service provided by the Agora Signaling SDK.
## Use the message notification service
The message notification service enables you to listen for various service events, which are sent to your Server in the form of HTTP/HTTPS requests.
### Implementation
1. Enable the [message notification service](/en/realtime-media/rtc/build/optimize-and-operate/receive-notifications#enable-notifications).
2. Once the service is enabled, the message notification service sends messages to your Server as HTTP/HTTPS POST requests. Listen for the following events of the **Real-Time Communication** service to detect whether an audience joins or leaves an interactive live streaming channel:
| event\_type | event\_name | Description | Field name of payload |
| ----------- | ------------------------ | ------------------------------------------------------------------ | -------------------------------------------- |
| 105 | `audience join channel` | In the `LIVE_BROADCASTING` profile, an audience joins the channel. | * channelName
* uid
* platform
* ts |
| 106 | `audience leave channel` | In the `LIVE_BROADCASTING` profile, an audience leaves the channel | - channelName
- uid
- platform
- reason
- ts |
## Use the signaling service
The Agora Signaling SDK aims at providing stable signaling services, such as maintaining the channel information and sending real-time messages, for various social and education scenarios.
### Implementation
By integrating both the Agora RTC SDK and the Agora Signaling SDK, you can listen for the callback events of the Signaling SDK to detect the states of the audience in the RTC SDK channel:
* Let a user join both an RTC SDK and a Signaling channel. Ensure that the RTC SDK channel and the Signaling channel share the same channel name.
* Bind the actions of joining both channels in your code logic.
* As a result, the Signaling SDK reporting that a user has joined the Signaling channel means that the user has joined the RTC SDK channel as well. The same applies to a user leaving the channel.
### Reference
Refer to the following documents for detailed integration guide and API reference:
* [Receive notifications about channel events](/en/realtime-media/rtc/build/optimize-and-operate/receive-notifications#enable-notifications)
# How to choose the appropriate cloud storage bucket region and address cross-region upload challenges? (/en/api-reference/faq/integration/bucket_region)
Currently, cloud recording supports the following cloud storage vendors:
* Amazon S3
* Alibaba Cloud
* Tencent Cloud
* Microsoft Azure
* Google Cloud
* Huawei Cloud
* Baidu Smart Cloud
Before initiating cloud recording, ensure that you have activated cloud storage services from one of the listed vendors and created a storage bucket. Fill in the relevant cloud storage information in the `storageConfig` parameter of the [Start Cloud Recording API](/en/api-reference/api-ref/cloud-recording/start) request. When selecting the `region` for your bucket, choose one that is closest to the server initiating the cloud recording request. For a specific vendor region comparison, see [Third-Party Storage Regions](/en/realtime-media/cloud-recording/reference/region-vendor).
Files uploaded during cloud recording are stored on machines close to the server that initiated the request. If the cloud storage is in a region different from the server, for example, if the server is in the United States and the selected bucket region is in Beijing, uploads may be slow or could even fail. While Agora backup cloud can back up some files that fail to upload, cloud recording only waits for a limited time after the recording is complete. If the upload does not finish within this timeout period, the task is terminated, and the recorded file is lost. Therefore, cross-region uploading can significantly impact upload times and outcomes.
# How do I get the user's call duration? (/en/api-reference/faq/integration/call_duration)
During a call, a user may join and leave an RTC channel multiple times. The user's call duration is the actual time when the user is in the channel. You can use the Agora RTC SDK or Agora Analytics to get a user's call duration.
## Implementation
### Use the Agora RTC SDK
By design, the SDK triggers the [`onRtcStats`](https://api-ref.agora.io/en/video-sdk/android/3.x/classio_1_1agora_1_1rtc_1_1_i_rtc_engine_event_handler.html#ada7aa10b092a6de23b598a9f77d4deee) callback after a user successfully joins an RTC channel. To get the duration between each channel-join and channel-leave, use the `totalDuration` parameter of the last `onRtcStats` callback triggered before the user leaves the channel. If a user joins and leaves an RTC channel for multiple times, you can calculate the user's call duration by adding up the values of `totalDuration`.
The above callback is in Java. For other programming languages, use the following parameters to get the user's call duration:
* C++: The `duration` parameter of the `onRtcStats` callback.
* Objective-C: The `duration` parameter of the [`reportRtcStats`](https://api-ref.agora.io/en/video-sdk/ios/3.x/Protocols/AgoraRtcEngineDelegate.html#//api/name/rtcEngine\:reportRtcStats:) callback.
* JavaScript: The `Duration` parameter of the `Client.getSessionStats` method.
If the connection is lost under poor network conditions, the calculated duration may be inaccurate. Use [Agora Signaling SDK](/en/realtime-media/rtm/build/connect-and-authenticate/connection/connection-management) or a different signaling system to implement a heartbeat mechanism, and get the disconnected time of the client. You can calculate the user's call duration by subtracting the disconnected time of the client from the call duration obtained from the Agora RTC SDK.
### Use Agora Analytics
On the **Call Search** page of **Agora Analytics**, you can find a user's call duration in the **In-call Periods** column. See [Call Search](/en/realtime-media/agora-analytics/build/explore-and-analyze-data/call-search#use-call-search).

# How can I adjust camera exposure and focus? (/en/api-reference/faq/integration/camera_exposure_focus)
In video applications, adjusting camera exposure and focus is essential for capturing subjects with accurate brightness and sharpness. The Agora RTC SDK offers camera management methods for mobile platforms, enabling users to switch between front and rear cameras, as well as control zoom, focus, and exposure settings. This page shows you how to manage the following:
* **Exposure:** Supports both manual exposure area selection and automatic camera exposure.
* **Focus:** Supports face detection for automatic focus and manual focus.
## Prerequisites
Before implementing camera exposure and focus features, ensure that you have implemented basic real-time audio and video functions in your project.
## Implementation
Follow these steps to implement camera exposure and focus in your project:
### Exposure
1. Call `isCameraExposurePositionSupported` to check if the device supports exposure management.
2. If supported, call `setCameraExposurePosition` to manually set the exposure position.
3. To retrieve the camera's current exposure area, use the `onCameraExposureAreaChanged` callback.
### Face autofocus
1. Call `isCameraAutoFocusFaceModeSupported` to check if the device supports face autofocus.
2. If supported, call `setCameraAutoFocusModeEnabled` to enable face autofocus.
### Manual Focus
1. Call `isCameraFocusSupported` to check if the device supports manual focus.
2. If supported, call `setCameraFocusPositionInPreview` to manually set the focus position.
3. To retrieve the camera's current focus area, use the `onCameraFocusAreaChanged` callback.
Refer to the following sample code:
Java
Swift
Objective-C
```java tabGroup="camera-exposure-focus"
// Check if the device supports exposure and set the exposure position.
boolean exposureSupported = rtcEngine.isCameraExposurePositionSupported();
if (exposureSupported) {
float positionX = 50.0f;
float positionY = 100.0f;
rtcEngine.setCameraExposurePosition(positionX, positionY);
}
// Check if the device supports face autofocus and enable it.
boolean faceFocusSupported = rtcEngine.isCameraAutoFocusFaceModeSupported();
rtcEngine.setCameraAutoFocusFaceModeEnabled(faceFocusSupported);
// Check if the device supports manual focus and set the focus position.
boolean manualFocusSupported = rtcEngine.isCameraFocusSupported();
if (manualFocusSupported) {
float positionX = 50.0f;
float positionY = 100.0f;
rtcEngine.setCameraFocusPositionInPreview(positionX, positionY);
}
// Listen for exposure area updates.
public void onCameraExposureAreaChanged(Rect rect) {
// Handle exposure area changes.
}
// Listen for focus area updates.
public void onCameraFocusAreaChanged(Rect rect) {
// Handle focus area changes.
}
```
```swift tabGroup="camera-exposure-focus"
// Check if the device supports exposure and set the exposure position.
let isSupported = agoraKit.isCameraExposurePositionSupported()
if isSupported {
let point = CGPoint(x: 50, y: 100)
agoraKit.setCameraExposurePosition(point)
}
// Check if the device supports face autofocus and enable it.
let isFaceFocusSupported = agoraKit.isCameraAutoFocusFaceModeSupported()
agoraKit.setCameraAutoFocusFaceModeEnabled(isFaceFocusSupported)
// Check if the device supports manual focus and set the focus position.
let isManualFocusSupported = agoraKit.isCameraFocusPositionInPreviewSupported()
if isManualFocusSupported {
let point = CGPoint(x: 50, y: 100)
agoraKit.setCameraFocusPositionInPreview(point)
}
// Listen for exposure area updates.
func rtcEngine(_ engine: AgoraRtcEngineKit, cameraExposureDidChangeTo rect: CGRect) {
// Handle exposure area changes.
}
// Listen for focus area updates.
func rtcEngine(_ engine: AgoraRtcEngineKit, cameraFocusDidChangeTo rect: CGRect) {
// Handle focus area changes.
}
```
```objc tabGroup="camera-exposure-focus"
// Check if the device supports exposure and set the exposure position.
BOOL isSupported = [agoraKit isCameraExposurePositionSupported];
if (isSupported) {
CGPoint point = CGPointMake(50, 100);
[agoraKit setCameraExposurePosition:point];
}
// Check if the device supports face autofocus and enable it.
BOOL isFaceFocusSupported = [agoraKit isCameraAutoFocusFaceModeSupported];
[agoraKit setCameraAutoFocusFaceModeEnabled:isFaceFocusSupported];
// Check if the device supports manual focus and set the focus position.
BOOL isManualFocusSupported = [agoraKit isCameraFocusPositionInPreviewSupported];
if (isManualFocusSupported) {
CGPoint point = CGPointMake(50, 100);
[agoraKit setCameraFocusPositionInPreview:point];
}
// Listen for exposure area updates.
- (void)rtcEngine:(AgoraRtcEngineKit * _Nonnull)engine cameraExposureDidChangeToRect:(CGRect)rect {
// Handle exposure area changes.
}
// Listen for focus area updates.
- (void)rtcEngine:(AgoraRtcEngineKit * _Nonnull)engine cameraFocusDidChangeToRect:(CGRect)rect {
// Handle focus area changes.
}
```
# Why can't I upload courseware? (/en/api-reference/faq/integration/cant_upload_courseware)
### What should I do if there is an error in uploading courseware?
If you receive the `403 Forbidden` error when uploading courseware, please check whether the [whiteboard function has been configured](/en/realtime-media/flexible-classroom/build/set-up-your-account-and-authentication/enable-flexible-classroom#whiteboard) correctly and make sure that Agora can access your cloud storage space.
Similarly, if you receive a `600005` or `100004 "service not enable", "messages": "region":"sg"` error codes, it means that you have not enabled the corresponding whiteboard supporting service in the service area. If you need to use PPT, DOC, PDF, or other courseware in the classroom, [enable the interactive whiteboard supporting service](/en/realtime-media/whiteboard/build/set-up-and-build-your-first-app/enable-whiteboard#get-security-credentials-for-your-whiteboard-project).
### If the above configurations are correct, what should I do if I still get the `403` error when uploading courseware to Alibaba Cloud?
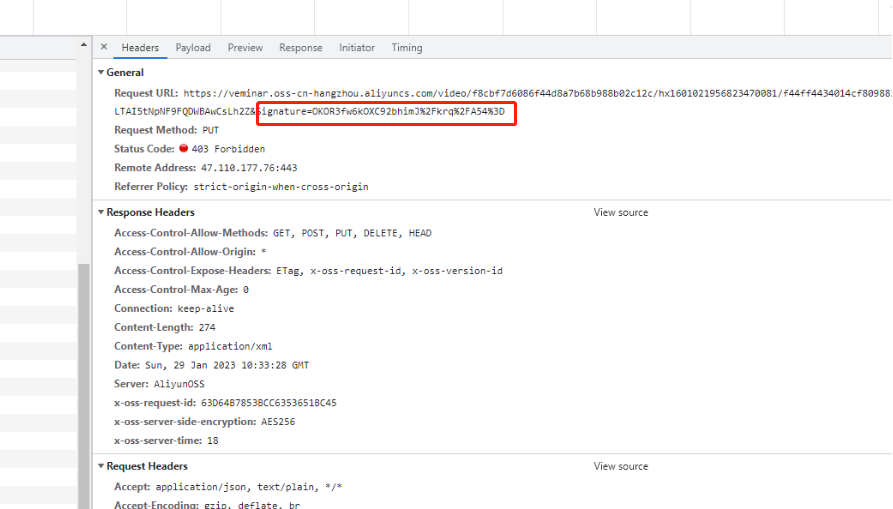
This error is because you have not activated the corresponding permissions in your Alibaba Cloud storage account, which resulted in Alibaba Cloud not allowing you to upload. Please add the `oss:PutObject` authorization operation to your Alibaba Cloud storage account. For more information, see [Alibaba Cloud Bucket Policy](https://help.aliyun.com/document_detail/430203.html).
### What is the limit on the upload size of courseware?
The size limits for courseware uploads are as follows:
* The courseware size cannot exceed 100M.
* The actual transcoding time is affected by the size and dimensions of the courseware, the number of animations included in the courseware, the resolution of the visible pictures included, the number of pages of the courseware, the transcoding queue, and others. The higher the resolution of the included image, the slower the conversion. The number of pages should preferably be within 50; conversion timeout may occur if there are more than 100 pages.
### What are the reasons for courseware upload failure?
The following reasons may cause the courseware upload to fail:
* Supported file formats include: `PPT`, `PPTX`, `DOC`, `DOCX`, `PDF`, `MP3`, `MP4`, `PNG`, `JPG`, and `GIF`.
* There should be no special symbols in the courseware name, it can only contain Chinese, English, and numbers.
* The courseware edited with WPS software may fail to upload or transcode. Save such courseware in the `PPTX` or `PDF` format and try to upload again.
# What is the relationship between the old and new callbacks of Media Push? (/en/api-reference/faq/integration/cdnstreaming_callback_relationship)
Agora provides two sets of callbacks for you to monitor Media Push:
* Old callbacks: `onStreamPublished` and `onStreamUnpublished`.
* New callbacks: `onRtmpStreamingStateChanged` and `onRtmpStreamingEvent`.
Agora has deprecated the old callbacks and recommends that you use the new callbacks. The old callbacks are still functional, however. You can choose the most appropriate set of callbacks to use according to your scenario and code logic. The relationship between the old and new callbacks is detailed in the following table:
| New callback | Old callback |
| ------------------------------------------------------------------------------------------------------------ | ----------------------------------------------------------------------------------------------- |
| (Since v2.4.1) onRtmpStreamingStateChanged.RTMP\_STREAM\_PUBLISH\_ERROR\_OK (0) | (Since the first release) onStreamPublished.ERR\_OK (0) |
| (Since v2.4.1) onRtmpStreamingStateChanged.RTMP\_STREAM\_PUBLISH\_ERROR\_INVALID\_ARGUMENT (1) | (Since the first release) onStreamPublished.ERR\_INVALID\_ARGUMENT (2) |
| (Since v2.4.1) onRtmpStreamingStateChanged.RTMP\_STREAM\_PUBLISH\_ERROR\_ENCRYPTED\_STREAM\_NOT\_ALLOWED (2) | (Since the first release) onStreamPublished.ERR\_ENCRYPTED\_STREAM\_NOT\_ALLOWED\_PUBLISH (130) |
| (Since v2.4.1) onRtmpStreamingStateChanged.RTMP\_STREAM\_PUBLISH\_ERROR\_CONNECTION\_TIMEOUT (3) | (Since the first release) onStreamPublished.ERR\_TIMEDOUT (10) |
| (Since v2.4.1) onRtmpStreamingStateChanged.RTMP\_STREAM\_PUBLISH\_ERROR\_INTERNAL\_SERVER\_ERROR (4) | (Since the first release) onStreamPublished.ERR\_PUBLISH\_STREAM\_INTERNAL\_SERVER\_ERROR (154) |
| (Since v2.4.1) onRtmpStreamingStateChanged.RTMP\_STREAM\_PUBLISH\_ERROR\_INTERNAL\_SERVER\_ERROR (4) | (Since the first release) onStreamPublished.ERR\_FAILED (1) |
| (Since v2.4.1) onRtmpStreamingStateChanged.RTMP\_STREAM\_PUBLISH\_ERROR\_RTMP\_SERVER\_ERROR (5) | (Since v2.4.1) onStreamPublished.ERR\_PUBLISH\_STREAM\_CDN\_ERROR (151) |
| (Since v2.4.1) onRtmpStreamingStateChanged.RTMP\_STREAM\_PUBLISH\_ERROR\_REACH\_LIMIT (7) | (Since v2.4.1) onStreamPublished.ERR\_PUBLISH\_STREAM\_NUM\_REACH\_LIMIT (152) |
| (Since v2.4.1) onRtmpStreamingStateChanged.RTMP\_STREAM\_PUBLISH\_ERROR\_NOT\_AUTHORIZED (8) | (Since v2.4.1) onStreamPublished.ERR\_PUBLISH\_STREAM\_NOT\_AUTHORIZED (153) |
| (Since v2.4.1) onRtmpStreamingStateChanged.RTMP\_STREAM\_PUBLISH\_ERROR\_STREAM\_NOT\_FOUND (9) | (Since v2.4.1) onStreamPublished.ERR\_PUBLISH\_STREAM\_NOT\_FOUND (155) |
| (Since v2.4.1) onRtmpStreamingStateChanged.RTMP\_STREAM\_PUBLISH\_ERROR\_FORMAT\_NOT\_SUPPORTED (10) | (Since v2.4.1) onStreamPublished.ERR\_PUBLISH\_STREAM\_FORMAT\_NOT\_SUPPORTED (156) |
| (Since v3.6.0) onRtmpStreamingStateChanged.RTMP\_STREAM\_PUBLISH\_ERROR\_NOT\_BROADCASTER (11) | No corresponding callback |
| (Since v3.6.0) onRtmpStreamingStateChanged.RTMP\_STREAM\_PUBLISH\_ERROR\_TRANSCODING\_NO\_MIX\_STREAM (13) | No corresponding callback |
| (Since v3.6.0) onRtmpStreamingStateChanged.RTMP\_STREAM\_PUBLISH\_ERROR\_NET\_DOWN (14) | No corresponding callback |
| (Since v3.6.0) onRtmpStreamingStateChanged.RTMP\_STREAM\_PUBLISH\_ERROR\_INVALID\_APPID (15) | No corresponding callback |
| (Since v3.4.5) onRtmpStreamingStateChanged.RTMP\_STREAM\_UNPUBLISH\_ERROR\_OK (100) | (Since the first release) onStreamUnpublished |
| (Since v3.1.0) onRtmpStreamingEvent.RTMP\_STREAMING\_EVENT\_FAILED\_LOAD\_IMAGE (1) | No corresponding callback |
| (Since v3.4.5) onRtmpStreamingEvent.RTMP\_STREAMING\_EVENT\_URL\_ALREADY\_IN\_USE (2) | (Since the first release) onStreamPublished.ERR\_ALREADY\_IN\_USE (19) |
| (Since v3.6.0) onRtmpStreamingEvent.RTMP\_STREAMING\_EVENT\_ADVANCED\_FEATURE\_NOT\_SUPPORT (3) | No corresponding callback |
# How can I solve channel-related issues? (/en/api-reference/faq/integration/channel)
### In poor network conditions, does the SDK force users to leave a channel?
No, users will not automatically leave a channel unless they do so by themselves, for example, when the application calls `leaveChannel`.
### Does each channel or room need an administrator in a call?
No. You can create the administrator role with your own code. For example, you can manage a call by letting the signaling server send commands to the SDK to call an SDK API.
### Does the client need to maintain the channel?
No, a channel is created and deleted automatically. When all users leave the channel, the channel is deleted automatically.
### How do I check who is speaking in the channel?
The following callbacks indicate who is speaking and the speakers' volumes.
* For Android and Windows: `onAudioVolumeIndication`
* iOS/macOS: `reportAudioVolumeIndicationOfSpeakers`
By default, this function is disabled. You can use the `enableAudioVolumeIndication` method to enable them.
# How to deal with Chat-related issues in Flexible Classroom? (/en/api-reference/faq/integration/chat_issues)
### The Chat is integrated but not displayed in the classroom
Check if your Chat permission has been activated. If not, [activate it in the Console](/en/realtime-media/flexible-classroom/build/set-up-your-account-and-authentication/enable-flexible-classroom#chat).
### A user cannot log into the Chat
1. Check if your Chat permission has been activated. If not, [activate it in the Console](/en/realtime-media/flexible-classroom/build/set-up-your-account-and-authentication/enable-flexible-classroom#chat).
2. In case of a network issue, the user needs to switch to a better network and try exiting and re-entering the room.
### A user cannot send a message in the Chat
1. Check if your Chat permission has been activated. If not, [activate it in the Console](/en/realtime-media/flexible-classroom/build/set-up-your-account-and-authentication/enable-flexible-classroom#chat).
2. Check if the user is currently banned by the teacher. The teacher can send messages by turning off the ban function.
3. Check for error messages in your console. Refer to relevant [error codes](/en/realtime-media/im/reference/error-codes).
# How to package a Windows installation on macOS? (/en/api-reference/faq/integration/class_packaging)
To create a Smart Classroom Windows installation package using a Mac, take the following steps:
1. Delete `agora-electron-sdk` in the `node_modules` folder.
2. Add the following code to the `package.json` file:
```json
"agora_electron": {
"electron_version": "12.0.0",
"prebuilt": true,
"platform": "win32",
"arch": "x64"
}
```
3. Modify the `pack:win` command in the `packages/agora-demo-app/package.json` file and add the `arch` parameter at the end to specify the system architecture, such as the 64-bit operating system architecture:
```json
"pack:win": "yarn electron:copy:electron:win && electron-builder --win -p never --x64",
```
If you need to package for a 32-bit operating system, change the last parameter to `--ia32`.
4. Run the installation command again:
```bash
yarn install
```
5. Run the following commands to package Smart Classroom:
```bash
yarn pack:classroom:sdk
yarn pack:classroom:plugin
yarn ci:build
yarn pack:electron:win
```
6. The packaging process is complete. You can find the generated installation package in the `packages/agora-demo-app/release` directory.
# What should I do if a class recording fails? (/en/api-reference/faq/integration/class_recording_fails)
1. Check whether the recording-related configurations are correct:
* `recordingConfig`: If not set, the default configuration is used.
* `storageConfig`: `vendor`, `region`, and `endpoint` fields are correct and match. For example, if a third-party cloud storage area you use is Shanghai, the application server that initiates the request must also be located in Shanghai. Refer to the following example:
```json
"vendor": 2,
"region": 1, //CN_Shanghai
endpoint:https://agora-recording.oss-cn-shanghai.aliyuncs.com
```
2. If the above configurations are correct and the recording still fails, check whether the public read permission of the third-party cloud storage account you are using is enabled.
3. If the recording configuration is correct and the public read permission is granted, but the recording still fails, debug the specific cause of the error in the local browser by splicing the URL:
1. Obtain the URL1 value of the passed in recording page URL from the `recordUrl` parameter of `LaunchOption`.
2. Call the [RESTful API](/en/api-reference/api-ref/flexible-classroom/classroom-rest-api#get-the-recording-list) to get the recording list and get URL2 from `webRecordUrlQuery`.
3. Splice URL1 and URL2 to get the complete URL of the recording page, which can be accessed locally through a browser for debugging.
If the recording page opens, the recording is enabled successfully. If the page does not open, you can find the reason in the error report.
# How to leave a flexible classroom? (/en/api-reference/faq/integration/class_stop)
In Flexible Classroom, the teacher can click **Leave Classroom** to temporarily exit the session without changing the room status. To officially end the class, follow these steps:
1. The teacher calls the `leaveClassroom` method to exit the classroom:
```javascript
this.classroomStore.connectionStore.leaveClassroom(LeaveReason.leave);
```
The `ClassState` reflects the following states:
```javascript
ClassState {
beforeClass: 0, // Class has not started
ongoing: 1, // Class is ongoing
afterClass: 2, // Class has ended, but the classroom still exists
close: 3 // Classroom is closed
}
```
2. To actively end the room, call the room status update interface `RoomStore:updateClassState`:
```javascript
// End the room
this.classroomStore.roomStore.updateClassState(ClassState.close);
```
3. To end the course without direct interaction, call Flexible Classroom backend RESTful interface [Set Classroom Status](/en/api-reference/api-ref/flexible-classroom/classroom-rest-api?platform=android#set-the-classroom-state). Set the class status to one of the following values:
* `0`: Not started
* `1`: In progress
* `2`: Ended. The class time has elapsed, but users can join and remain during the extended time.
* `3`: Closed. The class is closed after the extended time, and all users are removed and cannot rejoin.
# What are the classroom states of Flexible Classroom? (/en/api-reference/faq/integration/classroom_statuses)
Flexible Classroom has the following classroom states:
| State | `state` value | Example |
| ----------- | ------------- | ---------------------------------------------------------------------------------------------------------------------------------------------------------------------------------------------------------------------------------------------------------------------------------------------------- |
| Not started | `0` | Before the start time of the class. Both teachers and students can do the following:- Use real-time audio and video functions.
- Use instant messaging.
- See the student list.
- Use the interactive whiteboard. |
| Started | `1` | After the start time of the class and within its duration. Both teachers and students can do the following:- Use real-time audio and video.
- Use instant messaging.
- See the student list.
- Use the interactive whiteboard. |
| Ended | `2` | The class duration has been exceeded, but it's still within its end delay time. Teachers and students can still enter and leave the classroom, as well as using the other functions normally. |
| Closed | `3` | The class duration and end delay time have been exceeded.- Teachers and students are kicked out of the classroom and cannot rejoin.
- Audio, video, instant messaging, and whiteboard services are disconnected.
- Once a classroom is closed, it cannot be restarted and is destroyed 1 hour later. |
### Classroom state change
Classroom states change according to the following parameters set when calling the `launch` method in the Flexible Classroom client:
* `startTime`: The class start time in milliseconds, subject to the parameter passed in by the first user who enters the class.
* `duration`: The class duration in seconds, subject to the parameter passed in by the first user who enters the class.
* `closeDelay`: Delay time in seconds, subject to the parameter passed in when creating the classroom, defaults to 10 minutes.
The class automatically starts at the specified start time and ends after its duration and end delay times are exceeded. Teachers can also start and end classes manually.
You can also switch the class state with [RESTful API](/en/api-reference/api-ref/flexible-classroom/classroom-rest-api?platform=web#set-the-classroom-state).
### Reference API
* [`launch`](/en/api-reference/api-ref/flexible-classroom/classroom-sdk#launch)
# How do I control recording sessions in the command-line interface? (/en/api-reference/faq/integration/cmd_control_record)
### Start and pause recording
If you use the automatic mode (default), the recording starts automatically when a user joins the channel. In this mode, you cannot pause the recording.
If you use the manual mode (`triggerMode` set as 1), use the following methods to start and pause the recording:
* To control all the recording sessions:
* Start recording: `killall -s 10 recorder_local`
* Pause recording:`killall -s 12 recorder_local`
* To control an individual recording session:
1. Get the PID:`ps aux | grep 'channelName'`
2. Control the recording session by the PID
* Start recording:`kill -s 10 PID`
* Pause recording:`kill -s 12 PID`
### Stop recording
The recording stops automatically when there is no user in the channel after a time period set by the idle parameter. The default value is 300 seconds.
To manually stop recording, press **Ctrl** + **C** to end the command-line session.
# What are some common mistakes in integrating and using Flexible Classroom? (/en/api-reference/faq/integration/common_mistakes_flexible_classroom)
### Error when running Flexible Classroom on Web
If you encounter either of the following errors when running the Flexible Classroom Web project:
```javascript
./node_modules/agora-electron-sdk/js/Api/index.js
Module not found: Can't resolve '../../build/Release/agora_node_ext'
in'/Users/magikarp/workspace/web/teacher-classroom/node_modules/agora-electron-sdk/js/Api'
```
```javascript
Error running install script for optional dependency: "/root/flexible-classroom-desktop/node modules/agora-rdc-core: Command failed.
```
solve this in one of the following ways:
* If your Web project is created with Next.js, add the following code to the `next.config.js` file:
```javascript
module.exports = {
reactStrictMode: true,
webpack: (config, options) => {
// 添加下面这行代码
config.externals.push({"agora-electron-sdk": "commonjs2 agora-electron-sdk", "agora-rdc-core": "commonjs2 agora-rdc-core"});
return config;
},
};
```
* If your Web project is created with React, add the following code to the `webpack.base.js` file:
```javascript
module.exports = {
// 添加下面这行代码
externals: { 'agora-electron-sdk': 'commonjs2 agora-electron-sdk' , "agora-rdc-core": "commonjs2 agora-rdc-core"},
resolve: {
fallback: {
crypto: require.resolve('crypto-browserify'),
stream: require.resolve('stream-browserify'),
buffer: require.resolve('buffer/'),
},
```
* If your Web project is created with Vue.js, add the following code to the `vue.config.js` file:
```js
const vueConfig = {
// publicPath: './',
configureWebpack: {
// Webpack plugins
plugins: [
// Add your plugins here
// ..........................
],
externals: {
// Add the following line of code
'agora-electron-sdk': 'commonjs2 agora-electron-sdk',
'agora-rdc-core': 'commonjs2 agora-rdc-core'
}
}
};
```
### Error when running Flexible Classroom on Linux
If you encounter `Error:unsupported platform!`, you can add a corresponding attribute to the `agora-classroom-sdk` file in the `.package.json` platform folder.
Before:
```json
"agora_electron": {
"electron_version": "12.0.0",
"prebuilt": true
},
```
After:
```json
"agora_electron": {
"electron_version": "12.0.0",
"prebuilt": true,
"platform":"win32" | "darwin", //choose either "darwin" or "win32"
},
```
### How to deal with errors related to joining a class?
* `600001: Failed to join the classroom`
There are several possible causes for this error:
* The user Token is invalid. Refer to the solution for the `600001-1` error below.
* The user selected the wrong region. Check that the `region` field of the `launch` method is set to the correct locale.
* The number of teachers in the classroom has reached the upper limit. For example, if the number of teachers in the classroom reaches the upper limit, the user can no longer enter the classroom as a teacher.
* The number of people in the room has reached the upper limit. For example, the total number of people in the room is greater than 200.
* The room does not exist or has expired.
* `600001-1` in the web terminal or `401` from the server when logging into a classroom
You generally encounter the `600001-1` or `401` error because the Token passed in by the `launch` method is either wrong, or does not match the App ID. Check whether the Token is correct and ensure that the App ID and Token match.
Agora recommends that you generate a Token on backend and call it on frontend. For details, refer to [Secure authentication with tokens](/en/realtime-media/flexible-classroom/build/set-up-your-account-and-authentication/authentication-workflow).
To generate a temporary token for testing, use Agora Console. See [Credentials](/en/introduction/console-setup#credentials).
* `code 30409104 detailed information: roomType conflict`
The error is produced when the room number (`roomUuid`) has already been used to create a small classroom and is now being configured as a different room type. Agora does not recommend using the same room number to create multiple classrooms, and each room should be configured with a different room type.
For other related server error codes, refer to [Response Status Codes](/en/api-reference/api-ref/flexible-classroom/classroom-rest-api#status-code).
* `Error Domain=last launch not finished Code=-1 "(null)` when entering the classroom
This error is usually encountered because the Signaling Token passed in by the `launch` method is incorrect or expired, or it does not match the App ID or User ID. Check whether the Token is correct and valid, and that it matches the App ID and the User ID.
# What are the common error messages to expect in Web browsers' console logs? (/en/api-reference/faq/integration/console_error_web)
After integrating the Agora Web SDK into your web app, you can debug your code using the console log. This document lists the common errors in the console log.
## Cannot read property "appendChild" of null
### Reason
The played DOM does not exist, or the element ID cannot be found.
### Solution
Ensure that the parent DOM exists when you call `Stream.play`.
## Cannot read property 'stringuid' of undefined
### Reason
You have called `Client.publish` before the `Client.join` method call succeeds.
### Solution
Check your code logic and ensure that you call `Client.publish` after the `Client.join` method call succeeds.
## Connect choose server timeout
Same reason and solution as [Failed to load resource](#failed-to-load-resource).
## DTLS
The following table lists the possible reasons and corresponding solutions:
| Reason | Solution |
| :------------------------------------------------------------------------------------------------------------ | :----------------------------------------------------------------------------------------------------------------------------------- |
| The web browser does not fully support WebRTC. | Use a [Web browser](/en/realtime-media/rtc/reference/supported-platforms?platform=web) supporting WebRTC. |
| The web browser has plugins that prevent WebRTC from getting an ICE candidate on the local device. | Disable the problematic browser plugins. |
| The user's gateway firewall disables the UDP protocol or the UDP ports greater than 10000. | Disable the firewall or use the [Agora Cloud Proxy](/en/realtime-media/rtc/build/manage-connection-and-quality/cloud-proxy) service. |
| You set the web browser to use the VP8 codec, but the user uses the Safari browser that does not support VP8. | The user can either upgrade the Safari browser to versions later than 12.1, or use the Chrome browser. |
| You set the web browser to use the H.264 codec, but the user's device hardware does not support H.264. | Set the web browser to use VP8. |
| Connection issues of a network provider. | The user can try switching to a different network, for example, using a cellular data connection. |
If the error persists after troubleshooting, contact [support@agora.io](mailto\:support@agora.io).
## Failed to execute 'addStream' on 'RTCPeerConnection': parameter 1 is not of type 'MediaStream'
### Reason
You have called `Client.publish` before the `Stream.init` method call succeeds.
### Solution
Call `publish` in the `onSuccess` callback of `Stream.init`.
## Failed to load resource
### Reason
The local DNS resolution fails.
### Solution
The user can change the DNS server address and try joining the channel again.
* For a user in Mainland China, change the DNS server address to `114.114.114.114`.
* For a user outside Mainland China, change the DNS server address to `8.8.8.8`.
## Failed to set remote answer sdp: Called in wrong state: kStable
This error is caused by calling `switchDevice` and can be ignored.
## Media access MEDIA\_NOT\_SUPPORT: video/audio streams not supported yet /enumerateDevices() not supported
### Reason
Possible reasons:
* The web browser is incompatible with the Agora Web SDK.
* HTTPS protocol is not used.
* Localhost is not used.
### Solution
* Use a supported [Web browser](/en/realtime-media/rtc/reference/supported-platforms/web).
* Deploy your web app through HTTPS or localhost.
## Invalid elementID
### Reason
The `HTMLElementID` specified in `Stream.play` is invalid.
### Solution
Ensure that the string in `HTMLElementID` contains only "\_", "-", ".", or any digits and letters in the ASCII character set. The string must be non-empty and less than 256 bytes in length.
## INVALID\_VENDOR\_KEY
### Reason
Possible reasons:
* The App ID is invalid. For example, the Agora project is disabled, or the App ID is not yet active within a newly created project.
* The token is invalid.
### Solution
Check your settings for `appId` in `Client.init` and `tokenOrKey` in `Client.join`. Ensure that the App ID and token are correct and valid.
## NO\_CANDIDATES\_IN\_OFFER
Same reason and solution as [None Ice Candidate not allowed](#candidate).
## None Ice Candidate not allowed
### Reason
When establishing a WebRTC connection, the SDK fails to find any [ICE](https://developer.mozilla.org/en-US/docs/Glossary/ICE) (Interactive Connectivity Establishment) candidate.
A candidate contains the IP address and port information for connecting to a remote device.
### Solution
The type of candidates used for connection depends on whether you have enabled [cloud proxy](/en/realtime-media/rtc/build/manage-connection-and-quality/cloud-proxy) or not. Choose one of the following solutions accordingly.
* If you have enabled cloud proxy, the SDK gets relay candidates from a TURN server. Check whether you have whitelisted the IP addresses and ports that Agora provides for cloud proxy, and ensure that the local client can connect to the TURN server.
* If you have not enabled cloud proxy, the SDK gets host candidates from the local device. In this case, the error is usually caused by the security settings of the local device.
* Check whether the browser has any plugins that disable WebRTC.
* Ensure that you have enabled UDP in the system firewall, and added the [specified domains and ports](/en/realtime-media/rtc/reference/cloud-proxy-allowed-ips) to the whitelist.
## P2P lost
Same reason and solution as [DTLS failed](#dtls).
## UID\_CONFLICT
### Reason
Multiple users joins the channel with the same `uid`.
### Solution
Ensure that all users in a channel have a unique `uid`.
## Uncaught DOMException: Failed to execute 'addTransceiver' on 'RTCPeerConnection': This operation is only supported in 'unified-plan'.
### Reason
A mobile device emulator is running in the web browser.
### Solution
Agora Web SDK does not support emulated mobile devices. Do not use an emulator to debug your app.
## Uncaught TypeError: Failed to execute 'createObjectURL' on 'URL': No function was found that matched the signature provided
### Reason
A mobile device emulator is running in the web browser.
### Solution
Agora Web SDK does not support mobile device emulators. Do not use an emulator to debug your app.
## User is not in the session
### Reason
The connection has not been established. This is usually the result of an incorrect API call sequence, for example, calling `Client.publish` after `Client.leave`.
### Solution
Check your API call sequence.
# How can I switch from custom video capture to SDK capture? (/en/api-reference/faq/integration/custom_switch_default)
The Agora RTC SDK Native SDK provides both Push and Media IO methods to implement custom video capture. This page describes how to switch from custom video capture to SDK capture.
## Switching from Media IO
If you want to switch from custom video capture by Media IO to SDK capture, you can use one of the following methods.
### Method one: In-channel switching
You can switch custom video capture to SDK capture directly in the channel:
```text
// Java
ENGINE.setVideoSource(new AgoraDefaultSource());
```
```text
// Swift
agoraKit?.setVideoSource(AgoraRtcDefaultCamera());
```
```text
// Objective-C
[self.agoraKit setVideoSource:[[AgoraRtcDefaultCamera alloc] initWithPosition:AgoraRtcDefaultCameraPositionFront]];
```
```text
// C++
m_rtcEngine->setVideoSource();
m_rtcEngine->startPreview;
```
### Method two: Exiting and rejoining the channel
You can leave the current channel first, disable the custom video source, and then rejoin the channel. At this point, the SDK uses the default device for video capture.
## Switching from Push
If you want to switch from custom video capture by Push to SDK capture, you can leave the current channel first, disable the custom video source, and then rejoin the channel. At this point, the SDK uses the default device for video capture.
# Why are dynamic libraries preferred over static libraries in the RTC SDK? (/en/api-reference/faq/integration/dynamic_or_static_library)
Static libraries and Dynamic Link Libraries (DLL) are both used for organizing and sharing code in programming. In earlier versions, the RTC SDK utilized static libraries on certain platforms. However, there are several drawbacks associated with static libraries:
1. **Compilation Conflicts**: Static libraries can lead to symbol conflicts with third-party libraries used by your application. For instance, if your app and the Agora SDK both utilize the same `ffmpeg` library, conflicts may arise during compilation, resulting in build failures.
2. **Compatibility Issues**: Inconsistent versions of third-party libraries between your application and the RTC SDK may lead to compatibility issues and app crashes.
3. **Compliance Concerns**: The RTC SDK incorporates open-source protocol libraries like `ffmpeg`. Distributing the SDK as a static library extends the open-source agreement to your application, potentially necessitating that your app also be open-source. To comply with open-source protocol specifications, dynamic libraries are preferred.
To address these challenges and align with industry trends favoring dynamic libraries in the Real-Time Communication sector, the RTC SDK platform now exclusively provides dynamic libraries.
## Reference
The following table summarizes the differences between static and dynamic libraries:
| Feature | Static Library | Dynamic Library |
| :-------------------------- | :-------------------------------------------------------------------------------------------------------------------------------------------------- | :-------------------------------------------------------------------------------------------------------------------------------------------------------- |
| **Link timing** | At compile time. The library code and the program code are merged together to form an independent executable file. | The library code is not merged into the executable at compile time, but is loaded dynamically at runtime. |
| **Space occupied** | Increases the size of the executable file because the library's code is completely merged into the executable file, thus taking up more disk space. | The size of the executable file is relatively small because it only contains references to dynamic libraries and not the actual code, saving disk space. |
| **Operating efficiency** | The library is linked to the executable at compile time, so no extra loading step is required at runtime and the program may start faster. | Dynamic loading is required at runtime. The operating system loads the dynamic library into memory when the program starts or when the library is needed. |
| **Updates and maintenance** | After the library is updated, the program needs to be recompiled to use the new version of the library. | After the library is updated, only the dynamic library files need to be updated without recompiling. |
| **Reusability** | The code is statically copied, so each program that uses the library has its own copy of the library. | Multiple programs can share an instance of the same dynamic library because there is only one copy of the dynamic library in memory. |
# How to specify a dynamic storage path? (/en/api-reference/faq/integration/dynamic_storage_path)
When configuring the recording file storage path in the Console through the `fileNamePrefix` field,
you can use built-in variables to specify a dynamic path for storing recording files.
When the recording starts, variables are replaced with real values. The following two types of variables are currently supported:
| Type | Variable | Description |
| -------------- | --------------------------------------------------- | --------------------------------------------------------------------------------------------------- |
| Fixed variable | `${appId}` | App ID |
| | `${roomUuid}` | The `uuid` of the class to be recorded |
| Date variable | `${yyyy}` | Year |
| | `${MM}` | Month |
| | `${dd}` | Day |
| | `${yyyyMMdd}`, `${yyyyMM}`, `${yyyy-dd}`,`${MM_dd}` | Date variables can be combined, such as year-month-day, year-month, year-day, month-day, and so on. |
For example, you set the `fileNamePrefix` field as follows:
```json
"fileNamePrefix": [
"scenario",
"recording",
"${appId}",
"${yyyyMM}",
"${roomUuid}"
]
```
The recording storage path is `/scenario/recording/xxxxxxxxx/202107/demo/xxxxxxx_demo_0.mp4`.
# How can I resolve common development issues on Electron? (/en/api-reference/faq/integration/electron_faq)
This page outlines common challenges encountered throughout the integration, compilation, execution, and packaging phases of Electron SDK app development. It offers potential solutions to address these issues effectively.
## SDK Integrate issues
### npm install is slow or times out
Error message: `code ETIMEDOUT`
This issue is usually caused by a network or proxy problem. Try one of the following solutions:
* Set a mirror source
`https://registry.npmjs.org/` is the original official npm mirror download address which is slow for domestic users. Switching to a reliable mirror source can improve the download speed:
```bash
# Set npm mirror source to Taobao source
npm config set registry https://registry.npmmirror.com/
# Set npm Electron mirror source as a Taobao mirror source
npm config set ELECTRON_MIRROR https://npmmirror.com/mirrors/electron/
```
* Set up the proxy correctly
If you are using a network proxy, make sure that the proxy settings for the command line tool are correct:
```bash
# View Global Proxy Address
npm config get proxy
# Set the global proxy (HTTP proxy address)
npm config set proxy http://:
# Set the global proxy (HTTPS proxy address)
npm config set proxy https://:
```
Typically, the proxy tool offers a convenient one-click copy command for configuring the terminal proxy settings.
* Modify environment variables
Windows
macOS
Right click on **Computer > Properties > Advanced System Settings > Environment Variables**. Create the following variable under user variables:
| variable name | variable |
| :--------------- | :---------------------------------------- |
| ELECTRON\_MIRROR | `https://npmmirror.com/mirrors/electron/` |
Once the setup is complete, reopen a command line tool and run `npm install` to install the dependencies.
Run the following command in a terminal to modify the environment variables:
```bash
export ELECTRON_MIRROR='https://npmmirror.com/mirrors/electron/'
export ELECTRON_GET_USE_PROXY=true
```
Note
Environment variables modified using this method take effect in the current terminal only. If you want the variables to take effect permanently, configure these in `.zshrc` or `.bashrc`.
### Error installing dependencies with `cnpm` and `yarn`
In this case, Agora recommends that you first refer to [npm install is slow or times out](#npm-install-is-slow-or-times-out). Use npm native commands to set the mirror source and proxy address, and then install the dependencies.
Refer to the following commands to set up the proxy and mirror source for yarn:
```bash
# Set up a proxy
yarn config set proxy :
yarn config set https-proxy :
# Set the mirror source
yarn config set registry https://registry.npmmirror.com/
yarn config set ELECTRON_MIRROR https://npmmirror.com/mirrors/electron/
```
### Too many levels of symbolic links
Error message: `Too many levels of symbolic links error`
The error indicates that there are too many layers of symbolic links (also called soft links) in the project, and there may be circular dependencies that prevent the library from being installed.
Use the following command to prevent symbolic links from being created when installing npm packages:
```bash
npm install --no-bin-links
```
### How to identify the correspondence between Electron SDK version number and Native SDK version number?
* Obtain from the release notes: The **SDK version number** listed in the release notes is identical to the **Native version number**.
* Obtain from the demo: The version number of Native SDK is shown directly at the bottom of the Electron demo as shown in the following figure:
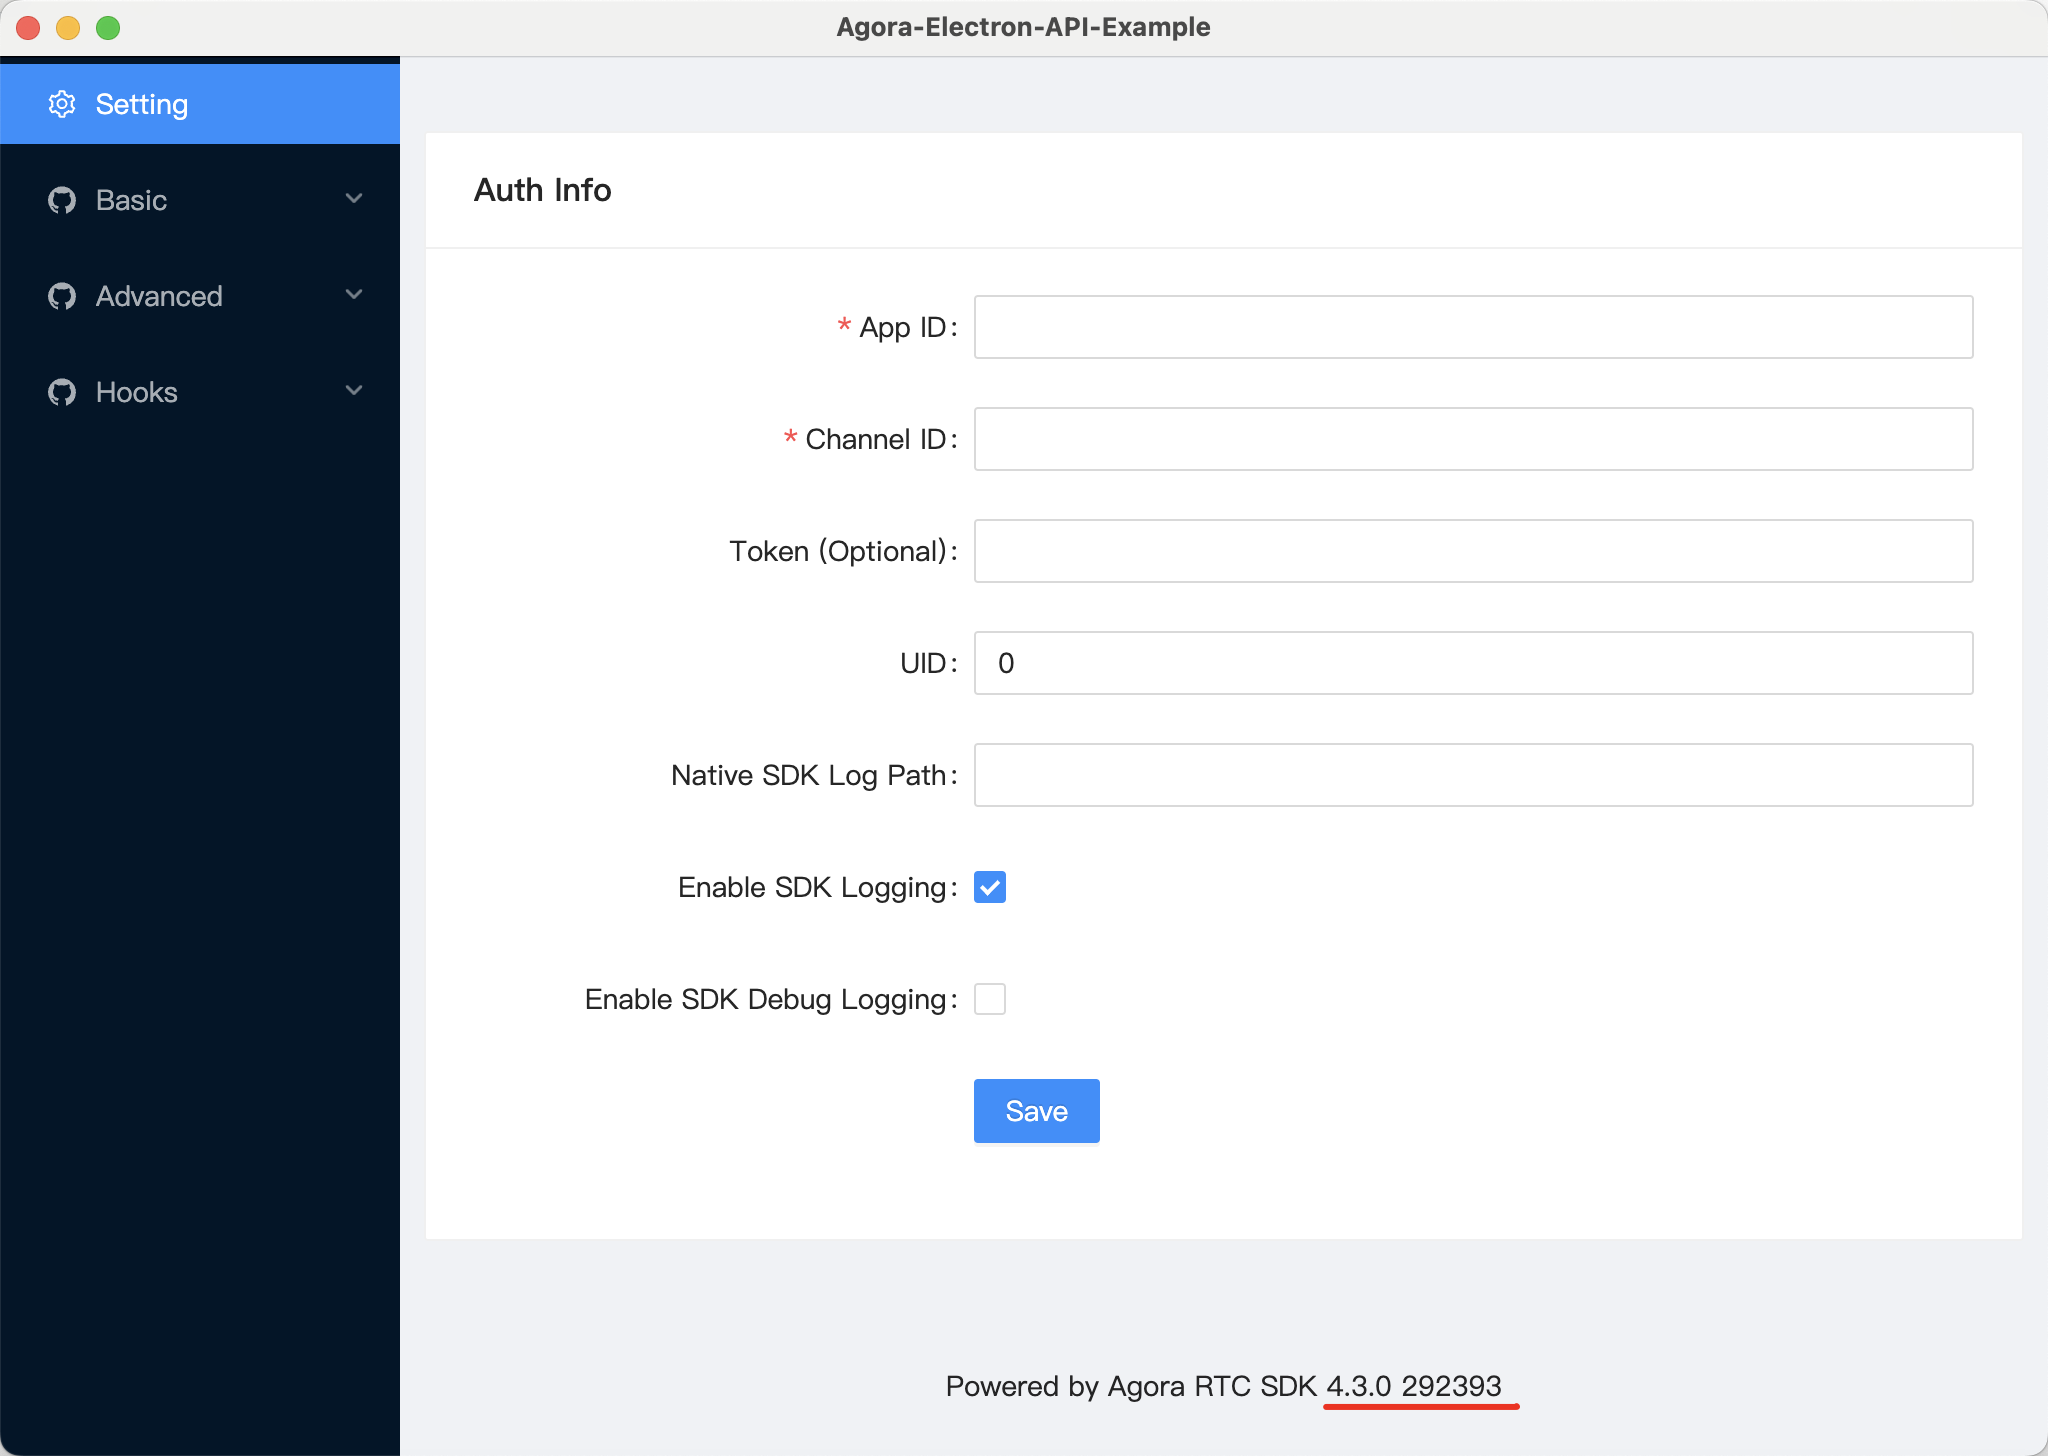
## Compile and run issues
### Running prompts for non-32-bit applications
Error message: `agora_node_ext.node is not a valid Win32 application`
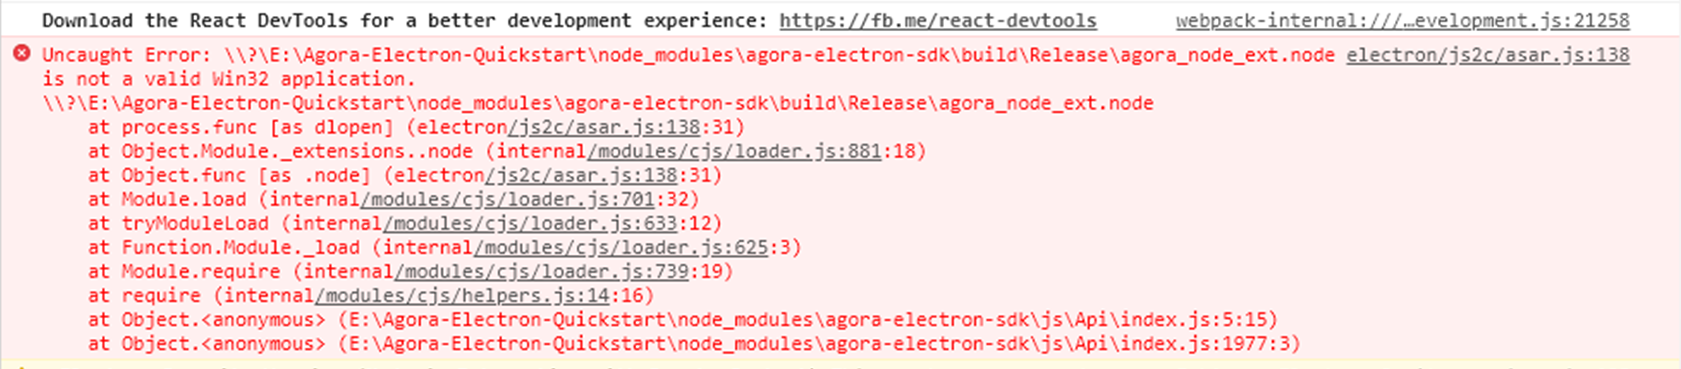
By default, **npm** downloads the native5 module for the current computer architecture when installing dependencies.
This error means that the wrong architecture module was retrieved during the dependency download, resulting in the application being unable to start. It suggests that a 32-bit `agora_node_ext.node` is required.
Try one of the following methods to fix the issue:
* Use npm environment variables
Create a new `.npmrc` file directly in the root directory of your project and write the following to configure the **npm environment variables**:
```bash
agora_electron_sdk_arch=ia32
arch=ia32
```
After saving the configuration, reinstall `agora-electron-sdk` and try to package it again.
* Manually configure `agora_electron` in `package.json`
Configure `agora_electron` with the following fields:
* `platform`: (Optional) The default is selected according to the system. For example, macOS is `darwin`, Windows is `win32`.
* `prebuilt`: (Optional) Set to `true` by default to prevent compatibility issues with Electron or Node.js versions that are incompatible with the SDK.
* `arch`: (Optional) Selected by default according to the system architecture.
For example, if you want to package a 32-bit application on a Windows 64-bit computer, configure `package.json` as follows:
```json
"agora_electron":{
"platform":"win32",
"arch":"ia32"
}
```
After saving the configuration, reinstall `agora-electron-sdk` and try to package it again.
### Unable to get the application window, resulting in an inability to share the screen
If you encounter the problem that the application window cannot be obtained through `getScreenWindowsInfo` which prevents you from sharing the screen, refer to the following steps to troubleshoot:
1. Confirm that the API call is correct
Refer to the following documentation to check that the screen sharing related API calls are correct:
* [Electron screen sharing demo source code](https://github.com/AgoraIO-Extensions/Electron-SDK/blob/main/example/src/renderer/examples/advanced/ScreenShare/ScreenShare.tsx)
2. Check for authorization
Refer to the [Official Electron documentation](https://www.electronjs.org/docs/latest/api/system-preferences#systempreferencesgetmediaaccessstatusmediatype-windows-macos) to make sure that screen sharing permissions have been granted.
3. Contact Agora support to troubleshoot
If the previous steps do not solve the problem, contact [Agora technical support](https://www.agora.io/en/customer-support).
## Packaging issues
### Packaging crashes
Packaging crashes with a message similar to the following:
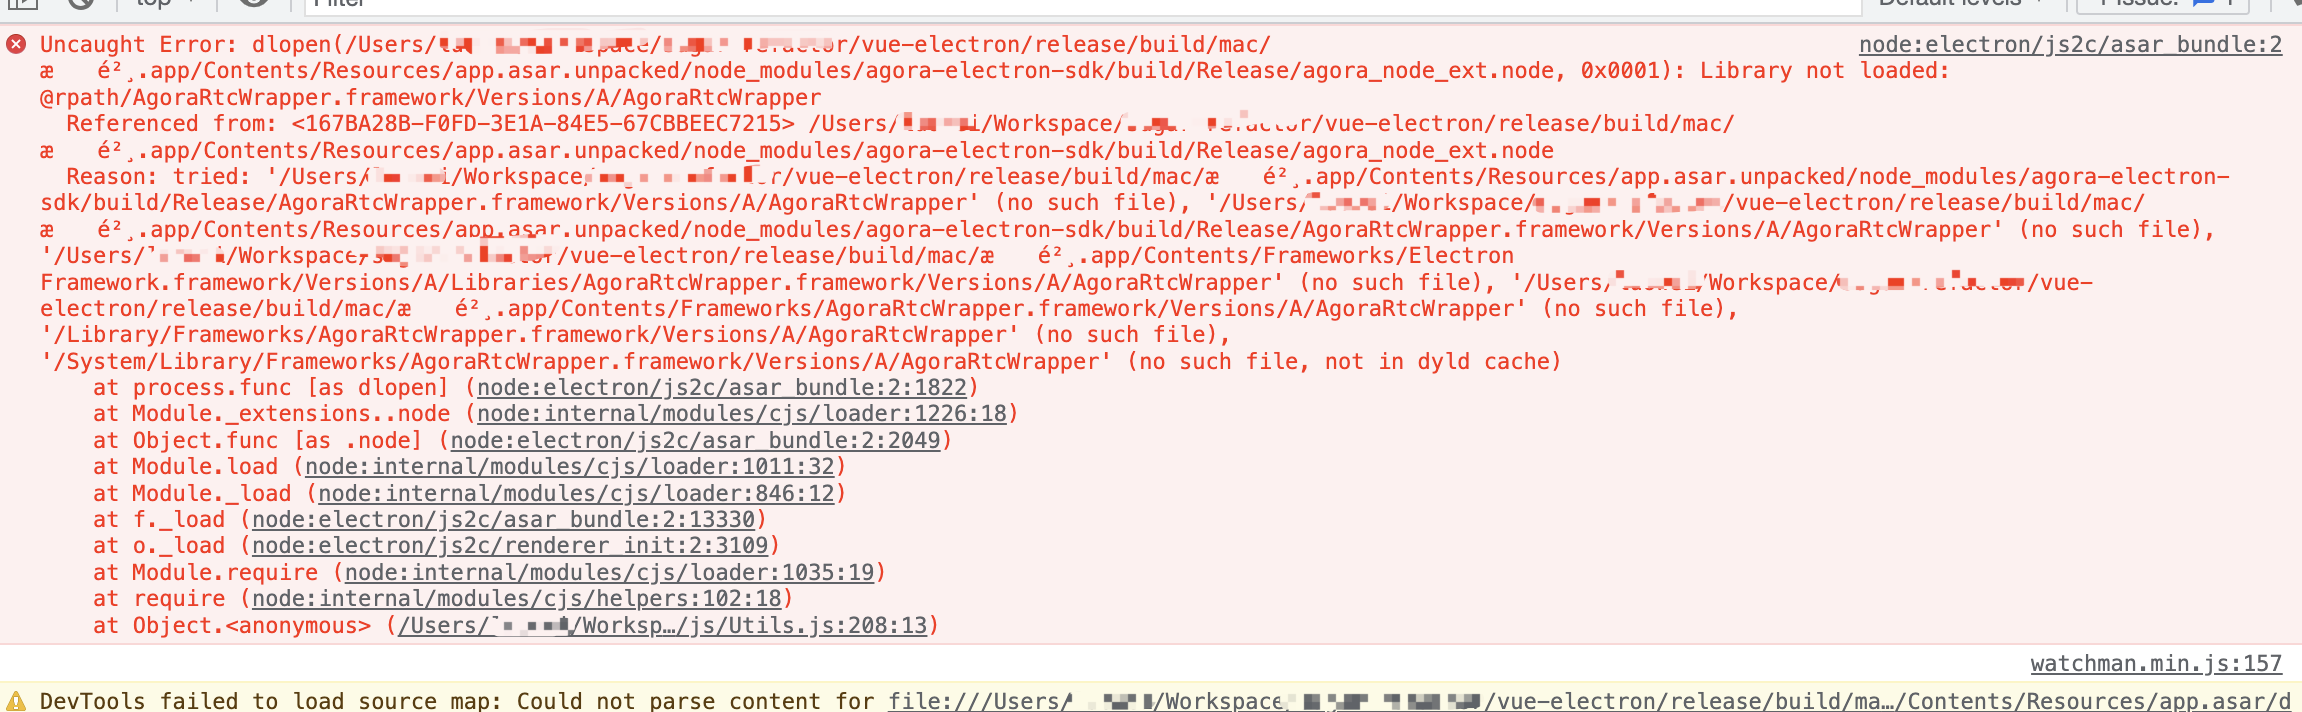
If you encounter this problems, check the following:
1. Check if the file in the error message exists. For example, in the figure, `AgoraRtcwrapper` cannot be found.
2. Check if `webpack.config` is configured correctly.
Make sure that the syntax of the `webpack.config` file is correct and matches the requirements of your project. Refer to the [official webpack documentation](https://webpack.js.org/concepts/) for details.
3. Check if the `asar.unpacked` configuration is correct.
The `asar.unpacked` configuration is used to specify which files should be unpacked into the application package. Refer to the [configuration in the demo](https://github.com/AgoraIO-Extensions/Electron-SDK/blob/main/example/package.json#L20), or check the [Electron official documentation](https://www.electron.build/configuration/configuration#configuration-asarUnpack).
4. Ensure that you use `require` for your project's dependency on the SDK.
On macOS, using `import` statements may result in symbol conflict issues that lead to packaging failures. To avoid this, use `require` statements instead. This is particularly relevant for projects using the Vue framework, as they are prone to packaging failures.
```typescript
// import changed to require
// import createAgoraRtcEngine from 'agora-electron-sdk';
const createAgoraRtcEngine = require("agora-electron-sdk");
```
### Errors related to application authorization
Error message: `com.apple.security.app-sandbox of null`
This error indicates an `app-sandbox` exception. `app-sandbox` is a security mechanism that restricts an application's access to system resources.
Check that the `.entitlements` file is configured correctly to ensure that there are no syntax and naming errors. If you don't need to publish your app to the App Store, remove `com.apple.security.app-sandbox` from the `.entitlements`.
### Incorrect configuration of `asar.unpacked`
Error message: `Uncaught SyntaxError:Error parsing`
This error appears when the configuration of `asar.unpacked`, which is used to specify which files should be unpacked into the application package, is incorrect.
Refer to the [configuration in the demo](https://github.com/AgoraIO-Extensions/Electron-SDK/blob/main/example/package.json#L20), or check the [official Electron documentation](https://www.electron.build/configuration/configuration#configuration-asarUnpack) for details.
### Unable to resolve library or module
The following errors indicate that the library could not be parsed or the module could not be found.
* `failed to compile, can't resolve agora-electron-sdk`
* `failed to compile, can't resolve agora_node_ext`
* `cannot find module`
The error is usually caused by incorrect configuration of the compilation tool. Refer to the following methods to solve the problem:
1. If your project uses Vue, make sure that you use `require`, not `import`.
```typescript
// modify import to require
// import createAgoraRtcEngine from 'agora-electron-sdk';
const createAgoraRtcEngine = require("agora-electron-sdk");
```
2. Modify tool configuration
Depending on the language you are using and the compilation tool, refer to the following pages for configuration:
* **Vue**:[https://nklayman.github.io/vue-cli-plugin-electron-builder/](https://nklayman.github.io/vue-cli-plugin-electron-builder/)
* **Vite**:[https://electron-vite.github.io/](https://electron-vite.github.io/)
* **React**:[https://github.com/electron-react-boilerplate/electron-react-boilerplate](https://github.com/electron-react-boilerplate/electron-react-boilerplate)
* **Webpack**:[https://webpack.electron.build/](https://webpack.electron.build/)
# Why can't I get the device ID on Chrome 81? (/en/api-reference/faq/integration/empty_deviceId)
On Chrome 81, the `deviceId` field that the `getDevices` method returns is empty.
You may also encounter this issue on Safari and Firefox.
## Reason
As of Chrome 81, device IDs are not exposed if permission to use devices has not been granted. This change is to protect user privacy.
For the Agora Web SDK, if you get device information before the method call of `Stream.init` succeeds, the returned `deviceId` may be empty.
## Solution
You can create temporary streams for media capture to trigger the device permission request and get the device information.
1. Based on your requirements, create temporary streams for audio or video capture to trigger requests for microphone or camera permissions.
```javascript
const tempAudioStream = AgoraRTC.createStream({ audio: true, video: false });
const tempVideoStream = AgoraRTC.createStream({ audio: false, video: true });
```
2. After the streams are initialized, call `getDevices` to get the complete device information.
* The capture may fail if no microphone or camera exists, or if the user has disabled these devices. The capture is a workaround and you only need to ensure that the failure does not stop the code execution.
* If the capture fails, you may still get empty `deviceId` and `label` fields in the returned device list.
```javascript
const audioPermissionOK = new Promise(resolve => {
tempAudioStream.init(
() => resolve(null),
e => resolve(e)
);
});
const videoPermissionOK = new Promise(resolve => {
tempVideoStream.init(
() => resolve(null),
e => resolve(e)
);
});
Promise.all([audioPermissionOK, videoPermissionOK]).then(res => {
if (res[0] !== null) {
console.warn('create audio temp stream failed!', res[0]);
}
if (res[1] !== null) {
console.warn('create video temp stream failed!', res[0]);
}
// After the capture, call getDevices to get device information
const devices = AgoraRTC.getDevices(info => {
tempAudioStream.close();
tempVideoStream.close();
console.log('get device info!', info);
});
});
```
# Why are there no recorded files in the cloud storage? (/en/api-reference/faq/integration/fail_to_upload)
If you cannot find any recorded files in the cloud storage after a cloud recording session, check if any of the following situations occurred:
* No user is sending a stream in the channel, and the recording times out.
* The token has expired, or token authentication has failed.
* When calling the [`acquire`](/en/realtime-media/cloud-recording/reference/restful-api#acquire) method to get the recording resource, you set the `uid` parameter that matches the ID of a user already in the channel. For example, suppose there are three users in the channel with user IDs `123`, `234`, and `345`. If you set `uid` to `123` when calling the `acquire` method, the recording fails.
* The `transcodingConfig` settings in the [`start`](/en/realtime-media/cloud-recording/reference/restful-api#start) method do not follow the recommended settings, which causes the recording to fail. See [Media streaming output modes](/en/cloud-recording/reference/stream-mode) and [Set the video profile](/en/realtime-media/cloud-recording/build/customize-the-recording/recording-video-profile) before setting `transcodingConfig`.
* Your cloud storage settings are incorrect. Check the following:
* `bucket`: The name of your cloud storage bucket, which was created in your cloud storage account.
* `accessKey`: The access key of your cloud storage account.
* `secretKey`: The secret key of your cloud storage account.
If you enable the Agora Message Notification Service, you receive the [`cloud_recording_error`](/en/realtime-media/cloud-recording/reference/common-errors) callback when the service detects that your cloud storage settings are incorrect.
# How to handle errors when running the pod install command? (/en/api-reference/faq/integration/flutter_pod)
When running `pod install`, the following error occurs:
```bash
[!] Invalid Podfile file: /xxx/ios/Flutter/Generated.xcconfig must exist. If you’re running pod install manually, make sure flutter pub get is executed first.
```
## Reason
The error message indicates that the `Generated.xcconfig` file is missing. This file is necessary for building the Flutter app on iOS devices. If you do not run `flutter pub get` to generate this file before executing `pod install`, you will encounter this error.
## Solution
To resolve this issue, follow these steps:
1. Open the terminal and navigate to the root directory of your Flutter project.
2. Run the `flutter pub get` command to fetch and update the project's dependencies. This command will also generate the `Generated.xcconfig` file and other necessary configuration files.
3. Rerun `pod install`.
# What can I do if I get a pop-up warning saying 'the framework cannot be opened' when compiling an Xcode project? (/en/api-reference/faq/integration/framework_cannot_be_opened)
## Problem
On macOS 11.6 or later, when using Xcode to integrate the Agora Voice or RTC SDKs with version 3.6.2 or later, you can encounter a pop-up warning when your project is compiled or running that says "'library\_name.framework' cannot be opened because the developer cannot be verified."
You can also use this workaround if you encounter this warning on macOS 11.5.
## Reason
As of v3.6.2, Agora provides the XCFramework dynamic library for the Voice and RTC SDK for macOS. Due to security restrictions on macOS 11.6 or later, when you use Xcode to compile any project with the SDK containing XCFramework, you are warned that "library\_name.framework" cannot be opened because the developer cannot be verified.
## Workaround
1. Execute the command: `sudo spctl --master-disable` in the system terminal, and then compile the project in Xcode.
2. A pop-up saying "macOS cannot verify the developer of 'library\_name'. Are you sure you want to open it?" appears after step 1. Click **Cancel** in this pop-up window.
3. Open **System Preferences > Security & Privacy > General**. A reminder is displayed on the interface saying, "'library\_name' was blocked from opening because it is not from an identified developer." Click the lock button in the bottom left corner of the interface, enter your system password to change the general settings, and click the **Open Anyway** button right of the reminder.
4. In Xcode, click **Product > Clean Build Folder**, and then compile the project.
At this point, the pop-up warning no longer appears.
# How can I retrieve channel information, such as the channel name and user list? (/en/api-reference/faq/integration/get_channel_info)
Agora provides server-side RESTful APIs to obtain channel-related information.
To retrieve the channel list for your project, use the [Query project](/en/api-reference/api-ref/rtc/query-channel-list) API. By providing your App ID, you can get details such as the number of channels, channel names, and the number of users in each channel.
Additionally, you can query the user list by specifying a channel name. If the channel exists, you can obtain details like the channel mode, the number of users, and the user IDs of all participants.
# How can a host change the role of a remote user? (/en/api-reference/faq/integration/host_set_role)
In a live interactive streaming channel, the host can invite an audience to take on the role of co-host, or change role back to audience.
You can implement this function by combining the following features:
* Signaling and channel attributes using methods from the Agora Signaling SDK.
* Setting the user role using methods from the Agora RTC SDK.
## Implementation
Before proceeding, ensure that you have integrated both the Agora Signaling SDK and RTC SDK in your project. For how to integrate these SDKs, see the following guides:
* [Agora Signaling SDK Quickstart](/en/realtime-media/rtm/quickstart)
* [Agora RTC SDK Quickstart](/en/realtime-media/rtc/get-started-sdk)
The basic API call sequence is as follows:
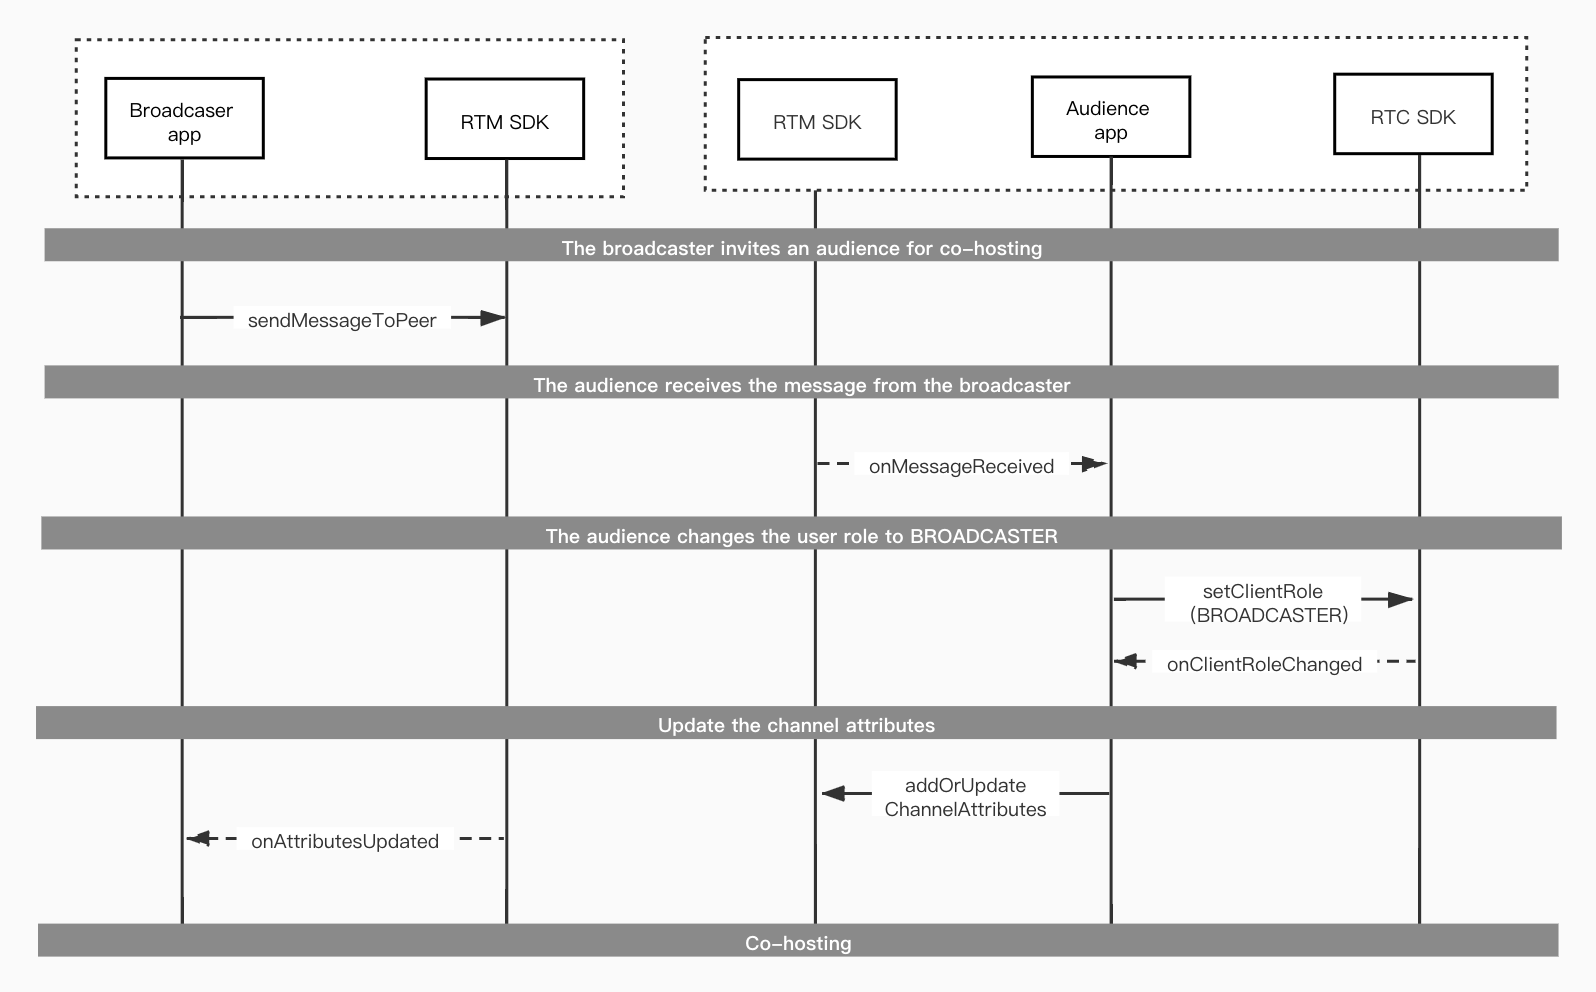
Refer to the detailed steps for implementation:
1. The host calls [`sendMessage`](https://api-ref.agora.io/en/signaling-sdk/android/1.x/classio_1_1agora_1_1rtm_1_1_rtm_channel.html#a57087adf4227a17c774ea292840148a0) to send a peer-to-peer message that invites an audience to take on the role of co-host.
2. The audience receives the invitation message in the [`onMessageReceived`](https://api-ref.agora.io/en/signaling-sdk/android/1.x/interfaceio_1_1agora_1_1rtm_1_1_rtm_client_listener.html#af760814981718fb31d88acb8251d19b6) callback.
3. The audience calls [`setClientRole`](https://api-ref.agora.io/en/video-sdk/android/4.x/API/class_irtcengine.html#api_irtcengine_setclientrole) to change the user role to `CLIENT_ROLE_BROADCASTER`.
4. After successfully changing the user role, the audience receives the `onClientRoleChanged` callback, and becomes a co-host.
5. The new co-host calls [`addOrUpdateChannelAttributes`](https://api-ref.agora.io/en/signaling-sdk/android/1.x/classio_1_1agora_1_1rtm_1_1_rtm_client.html#a997a31e6bfe1edc9b6ef58a931ef3f23) to notify the role change to all users in the channel.
6. The host receives the [`onAttributesUpdated`](https://api-ref.agora.io/en/signaling-sdk/android/1.x/interfaceio_1_1agora_1_1rtm_1_1_rtm_channel_listener.html#a2904a1f1f78c497b9176fffb853be96f) callback, and starts co-hosting with the new co-host.
To change a co-host back to an audience, follow the same steps, except when calling `setClientRole`, set the user role as `CLIENT_ROLE_AUDIENCE`.
## Relative methods in different programming languages
The methods mentioned in this article are in Java. Refer to the following table if you are programming in a different language:
| Java/C++ | Objective-C | JavaScript |
| ------------------------------ | ------------------------------ | ---------------------------------- |
| `sendMessageToPeer` | `sendMessage` | `sendMessage` |
| `onMessageReceived` | `messageReceived` | `MessageFromPeer` |
| `setClientRole` | `setClientRole` | `setClientRole` |
| `onClientRoleChanged` | `didClientRoleChanged` | `Client.on("client-role-changed")` |
| `addOrUpdateChannelAttributes` | `addOrUpdateChannelAttributes` | `addOrUpdateChannelAttributes` |
| `onAttributesUpdated` | `attributeUpdate` | `AttributesUpdated` |
# How can I enable image enhancement? (/en/api-reference/faq/integration/image_enhancement)
During a video call or live streaming, users often want to improve their on-screen appearance, which can help improve their confidence. The Agora RTC SDK provides APIs to help you easily implement basic image enhancement. Users can enable this functionality and then adjust a number of image enhancement options including skin smoothing, acne removal, and a "rosy cheeks" effect to achieve natural-looking enhancements.
If the basic image enhancement function provided by the Agora RTC SDK does not meet your needs and scenarios, you can integrate a third-party image enhancement SDK with the Agora RTC SDK to implement real-time video interaction with advanced image enhancement functions. Agora provides an open-source [sample project](https://github.com/AgoraIO/FaceUnity) for your reference.
## Implementation
1. Ensure that you have implemented basic real-time functions in your project. See the [RTC Quickstart](/en/realtime-media/rtc/get-started-sdk).
2. Call `setBeautyEffectOptions` to enable image enhancement and set the image enhancement options.
As of v3.6.0, the Agora RTC SDK for Native platforms and third-party frameworks updates the Agora image enhancement algorithm, which improves the image enhancement effects and supports sharpness adjustment. If you want to experience the optimized image enhancement effects or set the sharpness, upgrade your SDK and make sure the following dynamic libraries are integrated before you call setBeautyEffectOptions:
* Android: libagora\_video\_process\_extension.so
* iOS: AgoraVideoProcessExtension.xcframework
* macOS: AgoraVideoProcessExtension.framework or AgoraVideoProcessExtension.xcframework
* Windows: libagora\_video\_process\_extension.dll
## Sample code
Java
Swift
Objective-C
C++
Web 3.x
Web 4.x
```java tabGroup="image-enhancement"
// Java
mRtcEngine.setBeautyEffectOptions(true, new BeautyOptions(LIGHTENING_CONTRAST_NORMAL, 0.5F, 0.5F, 0.5F));
```
```swift tabGroup="image-enhancement"
// Swift
let options = AgoraBeautyOptions()
options.lighteningContrastLevel = .normal
options.rednessLevel = 0
options.smoothnessLevel = 0
options.lighteningLevel = 0
agoraKit.setBeautyEffectOptions(true, options: options)
```
```objc tabGroup="image-enhancement"
// Objective-C
AgoraBeautyOptions *options = [[AgoraBeautyOptions alloc] init];
options.lighteningContrastLevel = AgoraLighteningContrastNormal;
options.rednessLevel = 0;
options.smoothnessLevel = 0;
options.lighteningContrastLevel = 0;
[self.agoraKit setBeautyEffectOptions:YES options:options];
```
```cpp tabGroup="image-enhancement"
// C++
bool enabled = true;
agora::rtc::BeautyOptions options;
options.lighteningContrastLevel = BeautyOptions::LIGHTENING_CONTRAST_NORMAL;
options.lighteningLevel = 0.7;
options.smoothnessLevel = 0.5;
options.rednessLevel = 0.1;
m_lpAgoraEngine->setBeautyEffectOptions(enabled, options);
```
```javascript tabGroup="image-enhancement"
// Web 3.x
// setBeautyEffectOptions is an asynchronous method and must be called with Promise or async/await keywords.
// To enable image enhancement immediately after creating a video stream, you can call setBeautyEffectOptions in the Client.on("stream-published") callback.
var streamPublishedHandler = async function () {
await localStream.setBeautyEffectOptions(true, {
lighteningContrastLevel: 1,
lighteningLevel: 0.7,
smoothnessLevel: 0.5,
rednessLevel: 0.1
});
client.off('stream-published', streamPublishedHandler);
};
client.on('stream-published', streamPublishedHandler);
```
```javascript tabGroup="image-enhancement"
// Web 4.x
// Call setBeautyEffect in LocalVideoTrack to set the basic image enhancement function.
// The localVideoTrack in the following example is a local camera video track object created with AgoraRTC.createCameraVideoTrack.
localVideoTrack
.setBeautyEffect(true, {
lighteningContrastLevel: 1,
lighteningLevel: 0.7,
smoothnessLevel: 0.5,
rednessLevel: 0.1
})
.then(() => {
console.log('set Beauty Effect Options success!');
});
```
Agora also provides an [Online Demo](https://webdemo-global.agora.io/example/extension/beauty/index.html) for you to experience the basic image enhancement function.
## API reference
### Native
* Android: [`setBeautyEffectOptions`](https://api-ref.agora.io/en/video-sdk/android/3.x/classio_1_1agora_1_1rtc_1_1_rtc_engine.html#aa9327de4fb0c29f840b1e68ca2e83fc6)
* iOS: [`setBeautyEffectOptions`](https://api-ref.agora.io/en/video-sdk/ios/3.x/Classes/AgoraRtcEngineKit.html?platform=iOS#//api/name/setBeautyEffectOptions\:options:)
* macOS: [`setBeautyEffectOptions`](https://api-ref.agora.io/en/video-sdk/macos/3.x/Classes/AgoraRtcEngineKit.html?platform=macOS#//api/name/setBeautyEffectOptions\:options:)
* Windows: [`setBeautyEffectOptions`](https://api-ref.agora.io/en/video-sdk/cpp/3.x/classagora_1_1rtc_1_1_i_rtc_engine.html?platform=Windows#a5899cc462e5250028c9afada4df98d48)
### Web
* Web 3.x: [`setBeautyEffectOptions`](https://api-ref.agora.io/en/video-sdk/web/3.x/interfaces/agorartc.stream.html?platform=Web#setbeautyeffectoptions)
* Web 4.x: [`BeautyEffectOptions`](https://api-ref.agora.io/en/video-sdk/web/4.x/interfaces/ilocalvideotrack.html#setbeautyeffect)
### Third-party frameworks developed from Native
* Electron: [`setBeautyEffectOptions`](https://api-ref.agora.io/en/video-sdk/electron/3.x/classes/agorartcengine.html?platform=Electron#setbeautyeffectoptions)
* Unity: [`setBeautyEffectOptions`](https://api-ref.agora.io/en/video-sdk/unity/3.x/classagora__gaming__rtc_1_1_i_rtc_engine.html?platform=Unity#ad9c5e1a032d8c81c8e2a416a83ca0904)
* Flutter: [`setBeautyEffectOptions`](https://api-ref.agora.io/en/video-sdk/flutter/5.x/class_irtcengine.html#api_setbeautyeffectoptions)
* React Native: [`setBeautyEffectOptions`](https://api-ref.agora.io/en/video-sdk/react-native/3.x/classes/rtcengine.html?platform=React%20Native#setbeautyeffectoptions)
## Considerations
* The image enhancement function involves real-time processing that is resource intensive. Therefore, enabling this function can reduce the system performance of low-end devices below acceptable levels.
Agora does not recommend enabling image enhancement for low-end devices where the user's video-encoding profile is 360P at 30 fps or 720P at 15 fps or higher.
* The image enhancement function of the Agora Web SDK is not supported on mobile devices and only supported on certain browsers. See [Web 3.x or 4.x API reference](#ref).
* When you use the `setBeautyEffectOptions` method of the Agora Web 3.x SDK, note that this method has call sequence restrictions and image enhancement options are only available for high-quality video streams. See [Web 3.x API reference](#ref).
# Integration Issues (/en/api-reference/faq/integration)
# Why does an iOS app developed using Unity 4.x SDK report an error when uploaded to the App Store? (/en/api-reference/faq/integration/ios_app_unity_reports_error)
When you package and upload an app developed using Unity 4.x SDK directly to the App Store, you may receive the following error message:
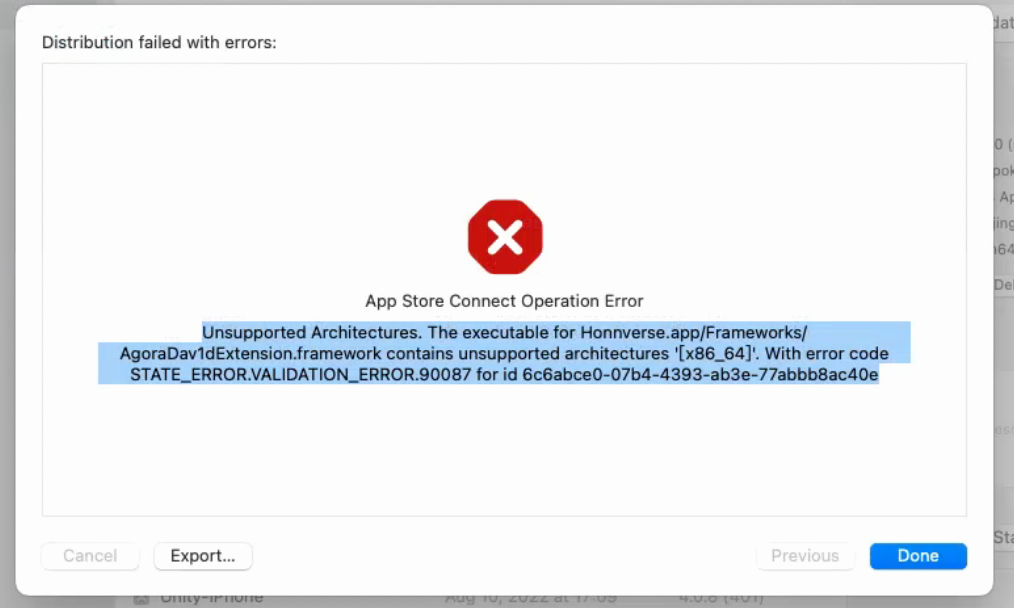
The iOS dynamic library inside the SDK v4.x for Unity has a simulator architecture, which the App Store does not allow. In order to launch and test the app, the simulator architecture in the SDK needs to be deleted. To do so, take the following steps:
1. In Xcode, select **New Run Script Phase**.
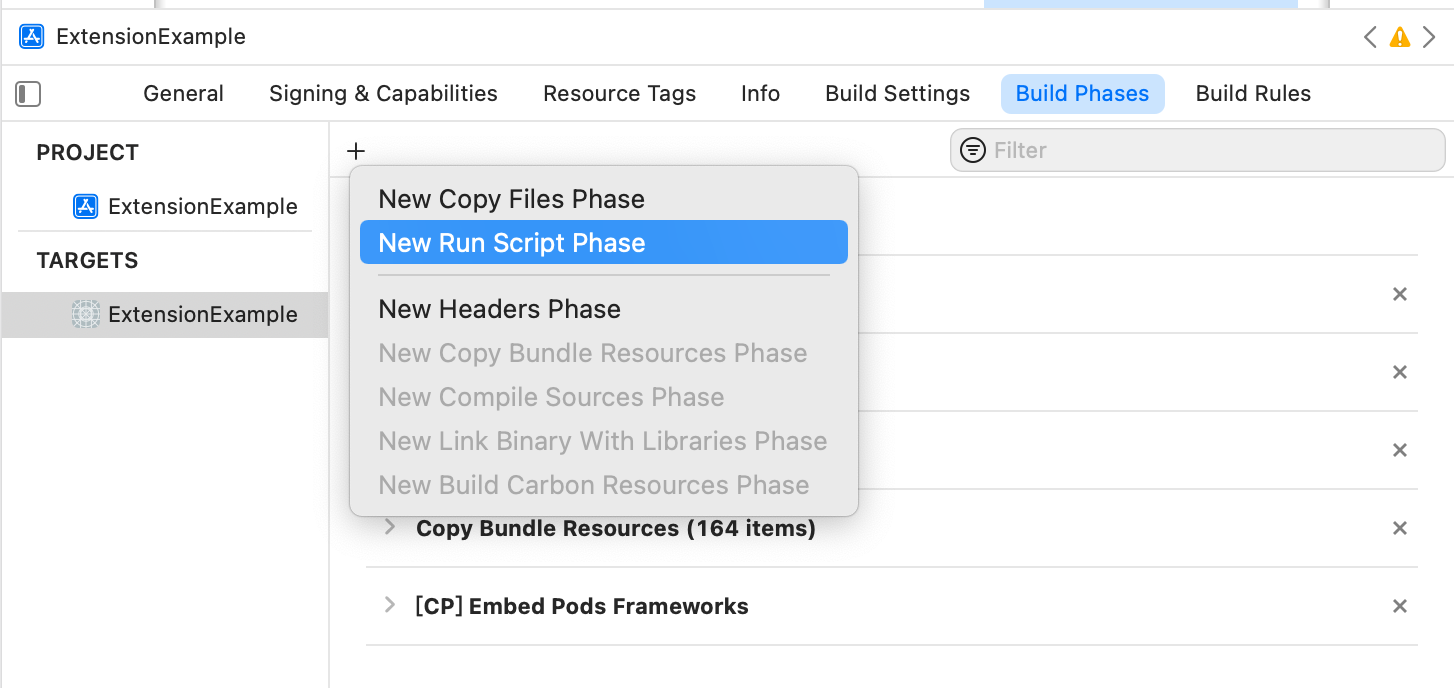
2. Add the following script to automatically delete the simulator architecture in the SDK when packaging:
```swift
#!/bin/sh
# Strip invalid architectures
strip_invalid_archs() {
binary="$1"
echo "current binary ${binary}"
# Get architectures for current file
archs="$(lipo -info "$binary" | rev | cut -d ':' -f1 | rev)"
stripped=""
for arch in $archs; do
if ! [[ "${ARCHS}" == *"$arch"* ]]; then
if [ -f "$binary" ]; then
# Strip non-valid architectures in-place
lipo -remove "$arch" -output "$binary" "$binary" || exit 1
stripped="$stripped $arch"
fi
fi
done
if [[ "$stripped" ]]; then
echo "Stripped $binary of architectures:$stripped"
fi
}
APP_PATH="${TARGET_BUILD_DIR}/${WRAPPER_NAME}"
# This script loops through the frameworks embedded in the application and
# removes unused architectures.
find "$APP_PATH" -name '*.framework' -type d | while read -r FRAMEWORK
do
FRAMEWORK_EXECUTABLE_NAME=$(defaults read "$FRAMEWORK/Info.plist" CFBundleExecutable)
FRAMEWORK_EXECUTABLE_PATH="$FRAMEWORK/$FRAMEWORK_EXECUTABLE_NAME"
echo "Executable is $FRAMEWORK_EXECUTABLE_PATH"
strip_invalid_archs "$FRAMEWORK_EXECUTABLE_PATH"
done
```
# How to resolve Xcode project compilation failure due to missing development team configuration information? (/en/api-reference/faq/integration/ios_sign)
When deploying the Xcode project to an iOS device for debugging, the following error occurs:
```text
Error: Signing for "Runner" requires a development team. Select a development team in the Signing & Capabilities editor (in target 'Runner' from project 'Runner').
```
## Reason
On the iOS platform, all apps require a developer signature certified by Apple to verify the source and security of the app. If Xcode fails to detect a valid development team or certificate, it will not be able to complete the compilation and deployment of the app.
## Solution
Refer to [Apple's official instructions](https://help.apple.com/xcode/mac/current/#/dev60b6fbbc7) to configure a valid development team and certificate.
# How can I determine whether a call is an audio call or a video call? (/en/api-reference/faq/integration/judge_voice_video_call)
In real-time audio or video communication, you can use the Agora Signaling SDK or the Agora RTC SDK to determine whether an incoming or ongoing call is an audio call or a video call.
## Before a call
If you need to determine and send the call type to the receiver before a call, ensure that you have integrated the Signaling SDK and the RTC SDK. Refer to the following articles to learn more about integration:
* [Signaling SDK Quickstart](/en/realtime-media/rtm/quickstart)
* [RTC SDK Quickstart](/en/realtime-media/rtc/get-started-sdk)
Complete the following steps to determine the call type:
1. When the caller sends a call, use the [Call Invitation API](/en/signaling/develop/call-invitation) of the Signaling SDK to send a call invitation to the callee.
2. Call [`sendMessageToPeer`](/en/realtime-media/rtm/reference/migration-guide) to send the call type to the callee via peer-to-peer message. The callee gets the call type from the received peer-to-peer message.
## After a call
If you need to determine and send the call type to the receiver during a call, ensure that you have integrated the RTC SDK. Refer to the following article:
* [RTC SDK Quickstart](/en/realtime-media/rtc/get-started-sdk)
During a call, the receiver can determine the call type according to the following guideline:
* If the receiver receives the [onRemoteVideoStateChange](https://api-ref.agora.io/en/video-sdk/android/3.x/classio_1_1agora_1_1rtc_1_1_i_rtc_channel_event_handler.html#a6ac9d139c17c849e14cc86dff5846e3b) callback, the current call is a video call.
* If the receiver does not receive the [onRemoteVideoStateChange](https://api-ref.agora.io/en/video-sdk/android/3.x/classio_1_1agora_1_1rtc_1_1_i_rtc_channel_event_handler.html#a6ac9d139c17c849e14cc86dff5846e3b) callback and receives the [onRemoteAudioStateChange](https://api-ref.agora.io/en/video-sdk/android/3.x/classio_1_1agora_1_1rtc_1_1_i_rtc_channel_event_handler.html#a8243351d18932b1678533bee01a856ca) callback, the current call is an audio call.
## Corresponding methods and callbacks
This article references the names of Java methods and callbacks. The following table shows the corresponding methods and callbacks for other languages.
| Java/C++ | Objective-C | JavaScript |
| --------------------------- | --------------------------------------------------- | --------------------- |
| `sendMessageToPeer` | `sendMessage:toPeer:sendMessageOptions:completion:` | `sendMessage` |
| `onRemoteAudioStateChanged` | `remoteAudioStateChangedOfUid` | `getRemoteAudioStats` |
| `onRemoteVideoStateChanged` | `remoteVideoStateChangedOfUid` | `getRemoteVideoStats` |
# How to remove a specific user from a channel? (/en/api-reference/faq/integration/kick_user)
In real-time audio and video interactions, there are often cases where you need to remove a specific user from the channel. Agora offers several solutions tailored to different scenarios:
### Remove inactive users
**Scenario:** After a call, a user (typically on the web) forgets to leave the channel. Even without an active call, usage is still generated.
**Solution:** To avoid this, check if the user is publishing an audio stream over time, using the volume indication callback (`onAudioVolumeIndication`) or monitor at the app level. If the user is inactive, call `leaveChannel` in the app logic to log off the user.
### Remove all users
**Scenario:** Scheduling apps may need to end calls or meetings at a set time. For example, a one hour meeting starts at 10:00 a.m. and needs to end at 11:00 a.m.
**Solution:** Use one of the following approaches:
* Set the valid timestamp of the Token (`privilegeExpiredTs` parameter) to the meeting's end time. After this time, the user is automatically removed from the channel. For details, see [Secure authentication with tokens](/en/realtime-media/rtc/build/authenticate-users/authentication-workflow).
* Use the server-side RESTful API to remove users. Track the user ID and channel name in the app, then call the [Create Rule API](/en/api-reference/api-ref/rtc/create-ban-rule) to remove the user from the channel. Set the ban time (`time` parameter) to 0 to allow the user to join other channels afterwards.
### Remove a user who violates your policies
**Scenario:** In a live broadcast room, if a connected user makes inappropriate remarks, the host may want to remove the user.
**Solution:** Use the peer-to-peer messaging function of Signaling. Send an offline notification with `sendMessageToPeer`. The user receives this message through the `onMessageReceived` callback, and the client calls the `leaveChannel` method in the RTC SDK to leave the channel.
# When pushing streams to the CDN, what should I do when a disconnection happens? (/en/api-reference/faq/integration/live_streaming_disconnection_web)
This article only applies to the Agora Web SDK 3.x and earlier versions.
Pushing streams to the CDN refers to the process where a host publishes multiple media streams to the CDN (Content Delivery Network).
During pushing streams, the SDK connects to the dedicated Agora server for pushing streams. When the connection is interrupted, the SDK tries to reconnect to the server to continue pushing streams. If it fails to reconnect, the SDK triggers a callback to report a disconnection.
Based on [live transcoding setting](https://api-ref.agora.io/en/video-sdk/web/4.x/interfaces/iagorartcclient.html#startlivestreaming), the SDK connects to different servers for pushing streams and triggers different callbacks after disconnection.
| `enableTranscoding` | Callback triggered when a disconnection happens |
| ------------------- | ----------------------------------------------- |
| `true` | `Client.on("mix-streaming-disconnected")` |
| `false` | `Client.on("raw-streaming-disconnected")` |
When either of the previously-mentioned events occurs, call [`stopLiveStreaming`](https://api-ref.agora.io/en/video-sdk/web/4.x/interfaces/iagorartcclient.html#stopLiveStreaming) to stop pushing all streams, and then [`startLiveStreaming`](https://api-ref.agora.io/en/video-sdk/web/4.x/interfaces/iagorartcclient.html#startlivestreaming) to restart the process.
# Why do I see a prompt to find local network devices when launching an iOS app integrated with the Agora RTC SDK? (/en/api-reference/faq/integration/local_network_privacy)
## Problem
After users upgrade their iOS devices to iOS 14.0, and use an app that integrates the Agora RTC SDK for iOS for the first time, users see a prompt for finding local network devices. The following picture shows the pop-up prompt:
## Reason
iOS 14.0 adds a privacy setting relating to local network usage, and your app needs to obtain the **Privacy - Local Network Usage Description** permission from the user to access the user's local network device.
Agora RTC SDK for iOS with the version earlier than v3.1.2 detects the connection quality between the client and the user's local router, and reports the round-trip delay between the client and the user's local router by using the [gatewayRtt](https://api-ref.agora.io/en/video-sdk/ios/3.x/Classes/AgoraChannelStats.html#//api/name/gatewayRtt) parameter of the \[[reportRtcStats\](https://api-ref.agora.io/en/video-sdk/ios/3.x/Protocols/AgoraRtcEngineDelegate.html#//api/name/rtcEngine\:reportRtcStats:)](https://api-ref.agora.io/en/video-sdk/ios/4.x/documentation/class_irtcengineeventhandler.html#callback_irtcengineeventhandler_onrtcstats) callback. The iOS system determines the connectivity detection as a search for local network devices. Thus, although the app does not connect to any devices on the user's local network, the user sees a prompt to find local network devices when launching an iOS app for the first time.
## Solution
### Solution one: Use the SDK version v3.1.2 and above
As of v3.1.2, Agora RTC SDK for iOS disables the local network connection quality report. If your business does not rely on this function, Agora recommends this solution.
Integrate the SDK v3.1.2 and above, and users will not see the prompt to find local network devices. As of v3.1.2, the [gatewayRtt](https://api-ref.agora.io/en/video-sdk/ios/3.x/Classes/AgoraChannelStats.html#//api/name/gatewayRtt) parameter in the [reportRtcStats](https://api-ref.agora.io/en/video-sdk/ios/3.x/Protocols/AgoraRtcEngineDelegate.html#//api/name/rtcEngine\:reportRtcStats:) callback is invalid (always reports `-1`). Do not use [gatewayRtt](https://api-ref.agora.io/en/video-sdk/ios/3.x/Classes/AgoraChannelStats.html#//api/name/gatewayRtt) to obtain the round-trip delay between the client and the user's local router.
### Solution two: Modify the privacy description in your project
If you need to obtain the round-trip delay between the client and the user's local router, Agora recommends using the SDK with the version earlier than v3.1.2 and modifying the privacy description in your project.
The default prompt shows as follows: **This app will be able to discover and connect to devices on the networks you use**. Agora recommends modifying the privacy description according to your business requirements. The steps to modify the privacy description are as follows:
1. Open your Xcode project, find the `info.plist` file, and click **+** to add **Privacy - Local Network Usage Description**.
In Xcode 11, you need to add **NSLocalNetworkUsageDescription**.
2. According to your business requirements, add the purpose of obtaining local network device permissions in the **Value** column of **Privacy - Local Network Usage Description**. For example, add **This app will not connect to devices on your network, it only detects the connectivity with your local gateway**.

After modification, users will see the following prompt when launching an iOS app for the first time:
* If users tap **OK**, the app can obtain the round-trip delay between the client and the user's local router by using the [gatewayRtt](https://api-ref.agora.io/en/video-sdk/ios/3.x/Classes/AgoraChannelStats.html#//api/name/gatewayRtt) parameter of the [reportRtcStats](https://api-ref.agora.io/en/video-sdk/ios/3.x/Protocols/AgoraRtcEngineDelegate.html#//api/name/rtcEngine\:reportRtcStats:) callback.
* If users tap **Don't Allow**, the [gatewayRtt](https://api-ref.agora.io/en/video-sdk/ios/3.x/Classes/AgoraChannelStats.html#//api/name/gatewayRtt) parameter in the [reportRtcStats](https://api-ref.agora.io/en/video-sdk/ios/3.x/Protocols/AgoraRtcEngineDelegate.html#//api/name/rtcEngine\:reportRtcStats:) callback is invalid (always reports `-1`). The app cannot use [gatewayRtt](https://api-ref.agora.io/en/video-sdk/ios/3.x/Classes/AgoraChannelStats.html#//api/name/gatewayRtt) to obtain the round-trip delay between the client and the user's local router.
Users can also set the app permission in the **Settings -> Privacy -> Local network** interface on iOS devices.
## References
* [Privacy - Local Network Usage Description](https://developer.apple.com/documentation/bundleresources/information_property_list/nslocalnetworkusagedescription)
* [Support local network privacy in your app](https://developer.apple.com/videos/play/wwdc2020/10110/)
# Why do I see a prompt to find local network devices when launching an iOS app integrated with the Agora Signaling SDK? (/en/api-reference/faq/integration/local_network_privacy_rtm)
## Problem
After users upgrade their iOS devices to iOS 14.0 and use an app that integrates the Agora Signaling SDK for iOS, users see a prompt for finding local network devices. The following picture shows the pop-up prompt:

## Reason
iOS 14.0 adds a privacy setting relating to local network usage, and your app needs to obtain the **Privacy - Local Network Usage Description** permission from the user to access the user's local network device. The Signaling SDK accesses the Agora server via domain name. If the DNS server is in the same network segment as the device, the pop-up prompt may be triggered.
## Solution
### Solution one: Use the SDK version v1.4.1 and above
Integrate the Signaling SDK v1.4.1 and above, and users will not see the prompt to find local network devices. The availability of the Signaling service will not be affected.
### Solution two: Modify the privacy description in your project
The default prompt shows as follows: **This app will be able to discover and connect to devices on the networks you use**. Agora recommends modifying the privacy description according to your business requirements. The steps to modify the privacy description are as follows:
1. Open your Xcode project, find the `info.plist` file, and click **+** to add **Privacy - Local Network Usage Description**.
In Xcode 11, you need to add **NSLocalNetworkUsageDescription**.
2. According to your business requirements, add the purpose of obtaining local network device permissions
in the **Value** column of **Privacy-Local Network Usage Description**. For example, add **This app will
not connect to devices on your network, it only detects the connectivity with your local gateway**. 
After modification, users will see the following prompt when launching an iOS app:

* If users tap **OK**, the app can connect to more edge servers with the DNS parsing function of the router.
* If users tap **Don't Allow**, the app cannot connect to extra edge servers, which may slightly affect the availability of the Signaling service.
## References
* [Privacy - Local Network Usage Description](https://developer.apple.com/documentation/bundleresources/information_property_list/nslocalnetworkusagedescription)
* [Support local network privacy in your app](https://developer.apple.com/videos/play/wwdc2020/10110/)
# How can I set the mirror mode? (/en/api-reference/faq/integration/mirror_mode)
RTC SDK provides various interfaces to customize video display effects on local and remote devices during a real-time audio and video call, including the option to enable or disable mirror mode.
## Configure the local view
On the local device, the local user's video stream is linked to the local view. To enable the mirror effect for the local view, use the `mirrorMode` parameter in either `setupLocalVideo` or `setLocalRenderMode`. This setting only affects what the local user sees and does not impact the remote user’s view.
info
Mirror mode is enabled by default for the front camera and disabled by default for the rear camera.
## Configure the remote user's view
The remote user’s video stream is linked to a corresponding view on the local device that displays the remote video. To enable the mirror effect for the remote view use the `mirrorMode` parameter in `setupRemoteVideo` or `setRemoteRenderMode`. Like the local view, this setting only affects what the local user sees and does not change the video display for the remote user.
## Configuring the sent local video stream
Once the local video stream is encoded, it is sent to the remote user. To apply the mirror effect to the video stream use the `config` parameter in `setVideoEncoderConfiguration`. This setting affects only the remote user’s view and does not alter the local user’s display.
## API Reference
For further details, refer to the following API documentation:
* [`setupLocalVideo`](https://api-ref.agora.io/en/video-sdk/android/4.x/API/class_irtcengine.html#api_irtcengine_setuplocalvideo)
* [`setLocalRenderMode`](https://api-ref.agora.io/en/video-sdk/android/4.x/API/class_irtcengine.html#api_irtcengine_setlocalrendermode)
* [`setupRemoteVideo`](https://api-ref.agora.io/en/video-sdk/android/4.x/API/class_irtcengine.html#api_irtcengine_setupremotevideo)
* [`setRemoteRenderMode`](https://api-ref.agora.io/en/video-sdk/android/4.x/API/class_irtcengine.html#api_irtcengine_setremoterendermode2)
* [`setVideoEncoderConfiguration`](https://api-ref.agora.io/en/video-sdk/android/4.x/API/class_irtcengine.html#api_irtcengine_setvideoencoderconfiguration)
## Platform-specific versions
- [Android](/en/api-reference/faq/integration/mirror_mode/android.md)
- [iOS](/en/api-reference/faq/integration/mirror_mode/ios.md)
- [C++](/en/api-reference/faq/integration/mirror_mode/cpp.md)
- [macOS](/en/api-reference/faq/integration/mirror_mode/macos.md)
# How can I set the page recording output resolution in mobile web page mode? (/en/api-reference/faq/integration/mobile_video_profile)
When you enable the mobile web page mode and perform page recording (`mobile` is set to `true`), Agora recommends that you set the width and height of the output video according to the following video resolution table:
Apple
Huawei
Xiaomi
Google
Samsung
Other
| Model | Width x Height |
| :----------------------------- | :------------- |
| iPhone 13 | 390 × 844 |
| iPhone 13 mini | 375 × 812 |
| iPhone 13 Pro Max | 428 × 926 |
| iPhone 13 Pro | 390 × 844 |
| iPhone 12 | 390 × 844 |
| iPhone 12 mini | 375 × 812 |
| iPhone 12 Pro Max | 428 × 926 |
| iPhone 12 Pro | 390 × 844 |
| iPhone 11 Pro Max | 414 × 896 |
| iPhone 11 Pro | 375 × 812 |
| iPhone 11 | 414 × 896 |
| iPhone XR | 414 × 896 |
| iPhone XS | 375 × 812 |
| iPhone XS Max | 414 × 896 |
| iPhone X | 375 × 812 |
| iPhone 8 Plus | 414 × 736 |
| iPhone 8 | 375 × 667 |
| iPhone 7 Plus | 414 × 736 |
| iPhone 7 | 375 × 667 |
| iPhone 6 Plus/6S Plus | 414 × 736 |
| iPhone 6/6S | 375 × 667 |
| iPhone 5 | 320 × 568 |
| iPod Touch | 320 × 568 |
| iPad Pro | 1024 × 1366 |
| iPad Third & Fourth Generation | 768 × 1024 |
| iPad Air 1 & 2 | 768 × 1024 |
| iPad Mini 2 & 3 | 768 × 1024 |
| iPad Mini | 768 × 1024 |
| Model | Width x Height |
| :---------------------------- | :------------- |
| HUAWEI Mate 40 Pro (Pro+, RS) | 448 × 924 |
| HUAWEI Mate 40 | 360 × 792 |
| HUAWEI P40 Pro | 400 × 880 |
| HUAWEI P40 | 360 × 780 |
| HUAWEI P30 Pro | 360 × 780 |
| HUAWEI P30 | 360 × 780 |
| HUAWEI nova 5i | 360 × 770 |
| HUAWEI nova 5 (5, 5Pro) | 360 × 780 |
| HUAWEI nova 4e | 360 × 771 |
| HUAWEI nova 4 | 360 × 770 |
| HUAWEI nova 3i | 360 × 780 |
| HUAWEI Mate30 Pro | 392 × 800 |
| HUAWEI Mate30 | 360 × 780 |
| HUAWEI Mate20 RS | 360 × 780 |
| HUAWEI Mate20 Pro | 360 × 780 |
| HUAWEI Mate20X (X, 5G) | 360 × 748 |
| HUAWEI Mate20 | 360 × 748 |
| HUAWEI P20 Pro | 360 × 748 |
| HUAWEI P20 | 360 × 748 |
| HUAWEI P10 | 360 × 640 |
| HUAWEI P10 Plus | 360 × 640 |
| Model | Width x Height |
| :------------------------------------------ | :------------- |
| Xiaomi CC9 | 360 × 780 |
| Xiaomi CC9e | 360 × 780 |
| Xiaomi 9 (9, 9Pro 5G) | 360 × 780 |
| Xiaomi MIX 3 | 360 × 780 |
| Xiaomi MIX 2 (MIX2, MIX2s) | 360 × 720 |
| Xiaomi MIX | 360 × 680 |
| Xiaomi Note 3 | 360 × 640 |
| Xiaomi Note 2 | 360 × 640 |
| Xiaomi 6 | 360 × 640 |
| Xiaomi 5s | 360 × 640 |
| Xiaomi 5s Plus | 360 × 640 |
| Xiaomi Max | 360 × 640 |
| Redmi K20 (K20, K20 Pro, K20 Pro exclusive) | 360 × 780 |
| Redmi Note 7 (7, 7 Pro, 8, 8 Pro) | 360 × 780 |
| Redmi Note 4 (4, Note 4X) | 360 × 640 |
| Redmi 4 (4, 4X) | 360 × 640 |
| Model | Width x Height |
| :----------------- | :------------- |
| Nexus 6P | 412 × 732 |
| Nexus 5X | 412 × 732 |
| Google Pixel 4 XL | 412 × 869 |
| Google Pixel 4 | 412 × 869 |
| Google Pixel 3a XL | 412 × 824 |
| Google Pixel 3a | 412 × 846 |
| Google Pixel 3 XL | 412 × 847 |
| Google Pixel 3 | 412 × 824 |
| Google Pixel 2 XL | 412 × 732 |
| Google Pixel XL | 412 × 732 |
| Google Pixel | 412 × 732 |
| Nexus 9 | 768 × 1024 |
| Nexus 7 (2013) | 600 × 960 |
| Pixel C | 900 × 1280 |
| Chromebook Pixel | 1280 × 850 |
| Model | Width x Height |
| :---------------------------------- | :------------- |
| Samsung Galaxy S21 Ultra 5G | 480 × 1067 |
| Samsung Galaxy S21+ 5G | 360 × 800 |
| Samsung Galaxy S21 5G | 360 × 800 |
| Samsung Galaxy S20 FE 5G | 360 × 867 |
| Samsung Galaxy S20 5G | 360 × 760 |
| Samsung Galaxy S20+ 5G | 360 × 760 |
| Samsung Galaxy S20 Ultra 5G | 360 × 760 |
| Samsung Galaxy A70 (A70, A80) | 360 × 800 |
| Samsung Galaxy A60 | 360 × 780 |
| Samsung Galaxy A40s | 360 × 780 |
| Samsung Galaxy A8s | 360 × 780 |
| Samsung Galaxy S10e | 360 × 760 |
| Samsung Galaxy S10+ | 360 × 760 |
| Samsung Galaxy S10 | 360 × 760 |
| Samsung Galaxy S9 | 360 × 740 |
| Samsung Galaxy S9+ | 360 × 740 |
| Samsung Galaxy S8 | 360 × 740 |
| Samsung Galaxy S8+ | 360 × 740 |
| Samsung Galaxy Note10 5G | 360 × 760 |
| Samsung Galaxy Note10 | 360 × 760 |
| Samsung Galaxy Note 9 | 360 × 740 |
| Samsung Galaxy Note 4 | 480 × 853 |
| Samsung Galaxy Note5 | 480 × 853 |
| Samsung Galaxy S5 | 360 × 640 |
| Samsung Galaxy S7 (S7, S6, S6 Edge) | 360 × 640 |
| Samsung Galaxy S7 Edge | 360 × 640 |
| Samsung Galaxy Note 10+ | 412 × 869 |
| Samsung Galaxy Note 10 | 412 × 869 |
| Samsung Galaxy Note 9 | 360 × 740 |
| Samsung Galaxy Note 5 | 480 × 853 |
| Samsung Galaxy S9+ | 360 × 740 |
| Samsung Galaxy S9 | 360 × 740 |
| Samsung Galaxy S8+ | 360 × 740 |
| Samsung Galaxy S8 | 360 × 740 |
| Samsung Galaxy S7 Edge | 360 × 640 |
| Samsung Galaxy S7 | 360 × 640 |
| Samsung Galaxy Tab 10 | 800 × 1280 |
| Model | Width x Height |
| :---- | :------------- |
| LG G5 | 480 × 853 |
# How does Flexible Classroom support multiple languages? (/en/api-reference/faq/integration/multi_language_support)
Flexible Classroom currently supports Chinese, English, and Spanish. If you need to add more languages, find the language-related key value in the specified directory and modify it.
### Multilingual configuration on Web
In the source code, the Classroom SDK and Proctor SDK, referred to as main SDKs, and plugins, including clicker, countdown, voter, and the ring letter IM module, have their own separate multi-language files. The specific modification method is as follows:
* Main SDKs:
1. Add the corresponding language file in the TypeScript format under `packages/agora-classroom-sdk/src/infra/translate`. The file name must be unique. For example:
2. Add the corresponding code in `packages/agora-classroom-sdk/src/infra/api/index.tsx`:
For example, if you want to add Japanese, add a `jpn.ts` file under `packages/agora-classroom-sdk/src/infra/translate` and `addResourceBundle('jp', jp);` to `packages/agora-classroom-sdk/src/infra/api/index.tsx` file.
The parameters of `addResourceBundle()` should be unique and easy to match with a language.
* Plugins:
1. Add a folder with an `index.ts` language file to `packages/agora-plugin-gallery/src/gallery/answer/i18n`. The folder name must be unique. For example:
2. Add a line of declaration and a line of corresponding code in `packages/agora-plugin-gallery/src/gallery/answer/i18n/config.ts`:
For example, if you need to add Japanese, add a `jp` folder with the `index.ts` file under `packages/agora-plugin-gallery/src/gallery/answer/i18n` and then `import jp from './jp';` declaration and `addResourceBundle(jp", jp);` to `packages/agora-plugin-gallery/src/gallery/answer/i18n/config.ts`.
The parameters of `addResourceBundle()` should be unique and easy to match with a language.
### Multilingual configuration on Android
Add a directory for the corresponding language with a `string.xml` file inside to the following directories. The folder name must be unique.
* `/AgoraClassSDK/src/main/res`
* `/AgoraEduUIKit/src/main/res`
For example, if you want to add Japanese, add a `value-jp` folder, which contains a `strings.xml` file.
### Multilingual configuration on iOS
1. Under `others` directory, copy an existing language directory, for example, `en.Iproj`, and rename it to correspond to the new language, for example, `jp.Iproj`. The folder name must be unique and easy to match with a language, and the suffix must be `.lproj`.
2. Replace all strings in the `Localizable.strings` file under `value` directory with values corresponding to the new language.
Before entering the room, `AgoraUIBaseViews` sets the `agora_ui_language` pointer of the global variable to the directory name corresponding to the new language.
# How can I enable multitasking camera capture on iOS? (/en/api-reference/faq/integration/multitasking)
Starting with iOS 16, the system allows apps to continue accessing the camera in multitasking mode. This means that camera capture can continue in layouts such as split view, slide over, and picture-in-picture.
From v4.6.2 onwards, RTC SDK supports this system capability. It requires enabling the **multitasking-camera-access** permission through the official API. This guide describes how to enable multitasking camera capture on iOS.
## Prerequisites
* An Apple Developer account enrolled in the Apple Developer Program (paid)
* Your app supports iOS 16 or iPadOS 16 and above
## Enable multitasking camera access
1. Log in to the [Apple Developer Console](https://developer.apple.com/account/).
2. On the **Identifiers** page, select the App ID for which you want to enable multitasking camera access.
3. On the App ID's configuration page, enable the **Multitasking Camera Access** option, save the changes, and regenerate your provisioning profile.
The entitlement key for this permission is `com.apple.developer.avfoundation.multitasking-camera-access`, which indicates that the app can access the camera in multitasking scenarios.
4. In Xcode, open your project, select the corresponding target, go to the **Signing & Capabilities** page, click the **+ Capability** button, and add **Multitasking Camera Access**.
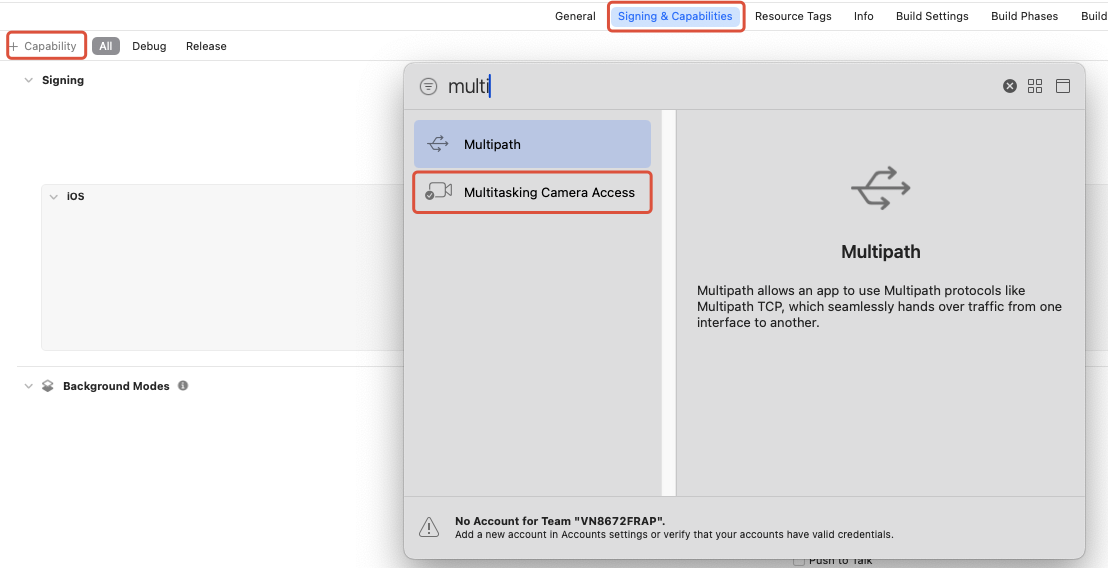
## App submission and review
After completing feature development:
* Build the app using the corresponding provisioning profile.
* When submitting to the App Store for review, include an explanation in the app review notes about why your app requires the multitasking camera permission. Apple's review may focus on whether there is a clear business need for this permission.
# Why don't music files automatically resume playing after hanging up a system call on an Android device? (/en/api-reference/faq/integration/music_pause)
The `startAudioMixing` method is called to play a music file on an Android device. During the playback process, the system's built-in phone software is used to answer or make a call. After hanging up the phone, the music file does not automatically resume playback.
## Reason
The SDK cannot determine whether the system phone has finished using the audio output device, so music files will not resume playback automatically.
## Solution
After calling the `startAudioMixing` method, it is recommended to listen for phone events using the native Android method `PhoneStateListener` and perform the following steps:
1. When you answer or make a call, call the `getAudioMixingCurrentPosition` method to get the playing progress of the music file.
2. After hanging up the phone, call `startAudioMixing` method again to play the music file, and then call `setAudioMixingPosition` method to restore the playback progress.
# What are the differences between the Message Notification Service and the query Method? (/en/api-reference/faq/integration/ncs_vs_query)
You can monitor the status of the cloud recording service either through the `query` method or by the Message Notification Service, to take action when required. Both options have pros and cons.
## The query method
You can periodically call the `query` method to monitor the status of a cloud recording. See [Query the recording status](/en/realtime-media/cloud-recording/reference/restful-api#query).
* Pros: Reliable, as the status is queried proactively.
* Cons:
* Provides limited status information.
* Requires an active query. You cannot query too often because of the Queries Per Second (QPS) limit, and thus it is not as real-time as the Message Notification Service.
If the reliability of the status of a cloud recording is a high priority, Agora strongly recommends using the `query` method.
## Message Notification Service
You can use the Message Notification Service as a complementary option to monitor the recording service status. You need to configure an HTTP/HTTPS server to receive event notifications. For details, see [Agora Cloud Recording RESTful API Callback Service](/en/api-reference/api-ref/cloud-recording/api-callback-service).
* Pros: Real-time
* Cons:
* The server passively receives messages, and the messages may get lost.
* The confirmation message of the message delivery may get lost, causing the message to be resent. In such a case, you need to deduplicate the notifications.
* The messages may not arrive in the correct order.
Agora recommends that core apps should not rely on the Message Notification Service. If your apps
already rely heavily on the Message Notification Service, Agora recommends that you contact
[support@agora.io](mailto\:support@agora.io) to enable the redundant message notification
function, which doubles the received notifications and reduces the probability of message loss. Redundant message notification still cannot guarantee a 100% arrival rate.
# Why can't I hear audio in stereo when playing a stereo file? (/en/api-reference/faq/integration/no_stereo_audio)
When calling `startAudioMixing` or `playEffect` to play a stereo file, the user might encounter the issue of not being able to hear audio in stereo.
## Reason
If you cannot hear stereo audio, the possible reasons are as follows:
* The audio file being played is not a stereo file.
* Stereo encoding is not set in the Agora SDK.
* The audio playback device does not support stereo audio.
## Solution
To troubleshoot and solve the issue, do the following:
### Step 1: Check the audio file
Check whether the audio file is a stereo file by viewing the audio signal.
* If the audio file has only a mono audio signal, or if the audio file has dual audio signals but the audio signals of the left and right channels are the same, the audio file is not a stereo file. Change the file to a stereo file.
* If the audio file has dual audio signals and the audio signals of the left and right channels are different, the audio file is a stereo file. Proceed to step 2 to check the SDK settings.
### Step 2: Check the SDK settings
The SDK can correctly encode and transmit stereo audio only when you set the stereo encoding. Check whether you call `setAudioProfile` and set the `profile` parameter to `AUDIO_PROFILE_MUSIC_STANDARD_STEREO` (3) or `AUDIO_PROFILE_MUSIC_HIGH_QUALITY_STEREO` (5).
* If a stereo profile is not set, set the `profile` parameter correctly.
* If the profile is set correctly, proceed to step 3 to check the audio playback device.
### Step 3: Check the audio playback device
Check whether the device supports stereo audio, and check whether the device is working properly.
* If the device does not support stereo audio, change it to a device that supports stereo audio.
* If the device supports stereo audio but does not work properly, contact the device manufacturer for repair or change it to a device that works properly.
* If the device supports stereo audio and works properly, [submit a ticket](https://agora-ticket.agora.io/) to contact Agora customer support for further exploration of the issue.
If you use a Bluetooth device to play audio, note the Bluetooth profile. The two common profiles are as follows:
* **Advanced Audio Distribution Profile (A2DP):** The unidirectional transmission of high-quality audio data, usually for stereo music playback. A2DP does not support capturing audio through the Bluetooth device, so you need to use other devices to capture audio.
* **Hands-Free Profile (HFP):** The bidirectional transmission of audio data, usually for audio calls. HFP commonly uses Synchronous Connection Oriented link (SCO) to carry a mono audio channel, so a Bluetooth device cannot play stereo audio using HFP.
# What should I do if I encounter "Please obtain the RESTful API ID and key first" when configuring aPaaS in Agora Console? (/en/api-reference/faq/integration/obtain_restful_api_id)
If you encounter the `"Please obtain the RESTful API ID and key first"` error message when configuring aPaaS in the Console, please take the following steps:
1. Log in to Console, click the account name in the upper right corner, and select **RESTful API** in the drop-down menu.
2. Click **Add Key** to get Customer ID and Customer Secret. After obtaining it, continue to configure aPaaS.
# What are the differences between the COMMUNICATION and LIVE_BROADCASTING profiles? (/en/api-reference/faq/integration/profile_difference)
This article applies to the Agora RTC SDK Native SDK only.
To apply optimization algorithms for different real-time engagement scenarios, Agora provides a `setChannelProfile` method for the RTC SDK channel. You can use this method to set the channel profile as either `CHANNEL_PROFILE_COMMUNICATION` or `CHANNEL_PROFILE_LIVE_BROADCASTING`.
These two channel profiles differ in the following aspects:
* User role setting.
* The default audio route.
* The default video encoding bitrate.
## User role
An RTC SDK channel differentiates users by roles. Once a user joins a channel, the user can be either of the following:
* A host, who can both publish and subscribe to streams.
* An audience member, who can subscribe to streams only.
The default user role in different channel profiles are different:
* `CHANNEL_PROFILE_COMMUNICATION`: Host. You cannot change the user role.
* `CHANNEL_PROFILE_LIVE_BROADCASTING`: Audience. You can call `setClientRole` to change the user role.
In scenarios involving co-host token authentication, if a user joins a channel with the token of a subscriber, calling `setClientRole` alone does not take effect. For details, see [How can I use co-host token authentication](/en/api-reference/faq/integration/token_cohost).
## Audio route
The default audio route refers to the route that audio data takes within a device, such as the speakerphone or earpiece of a mobile phone.
On Android and iOS, Agora uses different default audio routes depending on the channel profile:
* `CHANNEL_PROFILE_COMMUNICATION`
* In a voice call, the default audio route is the earpiece.
* In a video call, the default audio route is the speakerphone.
* `CHANNEL_PROFILE_LIVE_BROADCASTING`: The default audio route is the speakerphone.
## Video encoding bitrate
The `bitrate` member in the `setVideoEncoderConfiguration` method sets the video encoding bitrate. Given the same resolution and frame rate, when you set `bitrate` as the default value, `STANDARD_BITRATE(0)`, the value of the encoding bitrate in the `LIVE_BROADCASTING` profile doubles that in the `COMMUNICATION` profile.
In the following table, the base bitrate applies to the `COMMUNICATION` profile, while the live bitrate applies to `LIVE_BROADCASTING`.
| Resolution (px) | Frame rate (fps) | Base bitrate (Kbps) | Live bitrate (Kbps) |
| --------------- | ---------------- | ------------------- | ------------------- |
| 160 × 120 | 15 | 65 | 130 |
| 320 × 180 | 15 | 140 | 280 |
| 640 × 360 | 30 | 600 | 1,200 |
| 848 × 480 | 30 | 930 | 1,860 |
The values of bitrate in the table above are for reference only. For the detailed video profile table, see [API Reference](https://api-ref.agora.io/en/video-sdk/android/4.x/API/rtc_api_overview.html).
## Recommended settings
Based on the differences above, Agora recommends setting the channel profile according to your scenario:
* In scenarios such as one-to-one call or group call, set the channel profile as `CHANNEL_PROFILE_COMMUNICATION`.
* In scenarios such as chatrooms, small classes, lecture halls, or interactive video streaming, set the channel profile as `CHANNEL_PROFILE_LIVE_BROADCASTING`.
# In Signaling SDK, does the call frequency limit refer to the limit of one client instance? (/en/api-reference/faq/integration/qps_client)
In Signaling SDK, the call frequency limit refers to the limit of one client instance.
* For the native platform, you can increase the call limit of an API by creating multiple client instances.
* For the web platform, we **do not recommend** increasing the call limit by creating multiple client instances.
# Does Agora have reconnection mechanisms? (/en/api-reference/faq/integration/reconnection)
The Agora SDK has reconnection mechanisms when a user drops offline or a process gets killed. This page shows the connection state mechanism of the Agora SDK under these circumstances.
This article does not apply to the Agora RTC SDK Web SDK.
## User drops offline
The Agora SDK adds the [`onConnectionStateChanged`](https://api-ref.agora.io/en/video-sdk/android/4.x/API/class_irtcengineeventhandler.html#callback_irtcengineeventhandler_onconnectionstatechanged) or [`connectionStateChangedToState`](https://api-ref.agora.io/en/video-sdk/ios/4.x/documentation/class_irtcengineeventhandler.html#callback_irtcengineeventhandler_onconnectionstatechanged) callback in v2.3.2. This callback reports the current network connection state and reasons to any state change.
### Before v2.3.2
The following diagram shows the callbacks received by the apps of UID 1 and UID 2 during which UID 1 joins the channel, experiences a network exception, loses connection, and rejoins the channel.
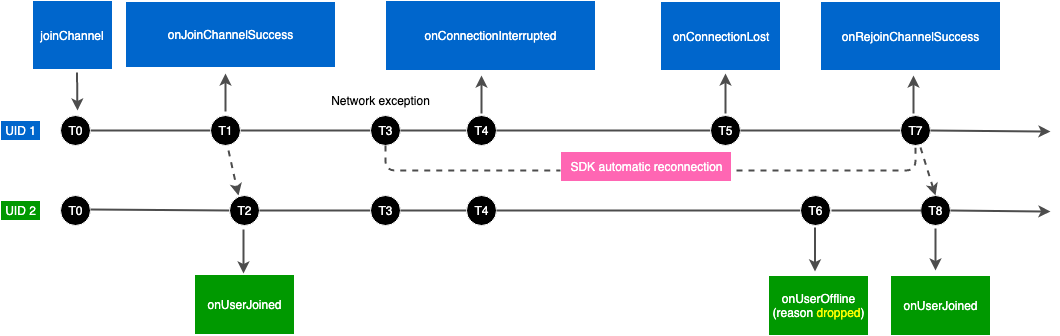
Where:
* T0 = 0 s: The SDK receives the `joinChannel` or `joinChannelByToken` request from the app of UID 1.
* T1 ≈ T0 + 200 ms: 200 ms after calling the `joinChannel` or `joinChannelByToken` method, the app of UID 1 joins the channel and receives the `onJoinChannelSuccess` or `didJoinChannel` callback.
* T2 ≈ T1 + 100 ms: Due to network latency, the app of UID 2 detects UID 1 100 ms after the latter joins the channel. UID 2 receives the `onUserJoined` or `didJoinedOfUid` callback.
* T3: The uplink network condition of UID 1 deteriorates. The SDK automatically tries rejoining the channel.
* T4 = T3 + 4 s: If the app of UID 1 fails to receive any data from the server in 4 seconds, it receives the `onConnectionInterrupted` or `rtcEngineConnectionDidInterrupted` callback; meanwhile the SDK continues to try rejoining the channel.
* T5 = T3 + 10 s: If the app of UID 1 fails to receive any data from the server in 10 seconds, it receives the `onConnectionLost` or `rtcEngineConnectionDidLost` callback; meanwhile the SDK continue to try rejoining the channel.
* T6 = T3 + 20 s: If the app of UID 2 fails to receive any data from UID 1 in 20 seconds, the SDK decides that UID 1 is offline. The app of UID 2 receives the `onUserOffline` or `didOfflineOfUid` callback.
* T7: If the app of UID 1 successfully rejoins the channel, it receives the `onRejoinChannelSuccess` or `didRejoinChannel` callback.
* T8 ≈ T7 + 100ms: 100 ms after the app of UID 1 successfully rejoins the channel, the app of UID 2 receives the `onUserJoined` or `didJoinOfUid callback`, which means that UID 1 is online again.
### v2.3.2 and Later
The following diagram shows the callbacks received by the apps of UID 1 and UID 2 during which UID 1 joins the channel, experiences a network exception, loses connection, and eventually fails to rejoin the channel.
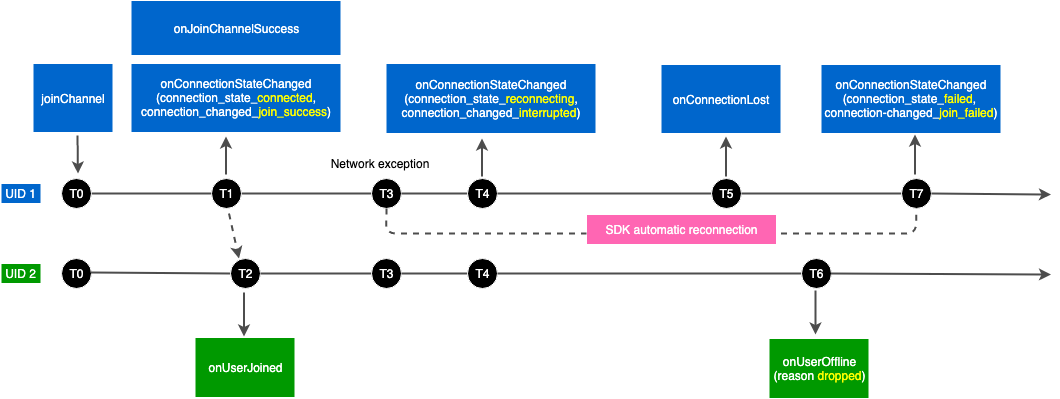
Where:
* T0 = 0 s: The SDK receives the `joinChannel` or `joinChannelByToken` request from the app of UID 1.
* T1 ≈ T0 + 200 ms: 200 ms after calling the `joinChannel` or `joinChannelByToken` method, the app of UID 1 joins the channel. During the process, the app of UID 1 also receives the `onConnectionStateChanged(CONNECTION_STATE_CONNECTING, CONNECTION_CHANGED_CONNECTING)` or `connectionChangedToState(AgoraConnectionStateConnecting, AgoraConnectionChangedConnecting)` callback. When successfully joining the channel, app of UID 1 receives the `onConnectionStateChanged(CONNECTION_STATE_CONNECTED, CONNECTION_CHANGED_JOIN_SUCCESS)` or `connectionChangedToState(AgoraConnectionStateConnected, AgoraConnectionChangedJoinSuccess)` and `onJoinChannelSuccess` or `didJoinChannel` callbacks.
* T2 ≈ T1 + 100 ms: Due to network latency, the app of UID 2 detects UID 1 100 ms after the latter joins the channel. UID 2 receives the `onUserJoined` or `didJoinedOfUid` callback.
* T3: The uplink network condition of UID 1 deteriorates. The SDK automatically tries rejoining the channel.
* T4 = T3 + 4 s: If the app of UID 1 fails to receive any data from the server in 4 seconds, it receives the `onConnectionStateChanged(CONNECTION_STATE_RECONNECTING, CONNECTION_CHANGED_INTERRUPTED)` or `connectionChangedToState(AgoraConnectionStateReconnecting, AgoraConnectionChangedInterrupted)` callback; meanwhile the SDK continues to try rejoining the channel.
* T5 = T4 + 10 s: If the app of UID 1 fails to receive any data from the server in 10 seconds after receiving onConnectionStateChanged(CONNECTION\_STATE\_RECONNECTING, CONNECTION\_CHANGED\_INTERRUPTED) or connectionChangedToState(AgoraConnectionStateReconnecting, AgoraConnectionChangedInterrupted), it receives the onConnectionLost or rtcEngineConnectionDidLost callback; meanwhile the SDK continue to try rejoining the channel.
* T6 = T3 + 20 s: If the app of UID 2 fails to receive any data from UID 1 in 20 seconds, the SDK decides that UID 1 is offline. The app of UID 2 receives the `onUserOffline` or `didOfflineOfUid` callback.
* T7 = T4 + 20 min : If the app of UID 1 fails to rejoin the channel in 20 minutes after receiving onConnectionStateChanged(CONNECTION\_STATE\_RECONNECTING, CONNECTION\_CHANGED\_INTERRUPTED) or connectionChangedToState(AgoraConnectionStateReconnecting, AgoraConnectionChangedInterrupted), the SDK stops trying. The app of UID 1 receives the onConnectionStateChanged(CONNECTION\_STATE\_FAILED, CONNECTION\_CHANGED\_JOIN\_FAILED) or connectionChangedToState(AgoraConnectionStateFailed, AgoraConnectionChangedJoinFailed) callback. UID 1 needs to leave the channel and call the joinChannel or joinChannelByToken method to join the channel.
> - If UID 2 is a Web client, the behaviors of the Web app are as follows:
> * When UID 1 joins and rejoins the channel, UID 2 receives the `client.on("stream-added")` callback.
> * If UID 2 does not receive any data from UID 1 in 10 seconds, UID 2 receives the `client.on("stream-removed")` callback.
> * If the server does not receive any data from UID 1 in 3 minutes, UID 2 receives the `client.on("peer-leave")` callback.
> - Users can call `leaveChannel` to stop the retires at any time during the SDK reconnection process.
## Process Gets Killed
This scenario involves the following situations:
* Enables or disables VoIP mode.
* The process gets killed.
* Closes a web page.
Suppose UID 1 and UID 2 are in the same channel. When the process of user A gets killed:
* If UID 1 is in iOS or macOS: UID 1 calls the `leaveChannel` method and UID 2 receives a callback:
* Android, Windows, or Linux: UID 2 receives the `onUserOffline` callback.
* iOS or macOS: UID 2 receives the `didOfflineOfUid` callback.
* The Web: UID 2 receives the `client.on("peer-leave")` callback.
* If UID 1 is in Android, Windows, or Linux and user B uses the Native SDK:
* If UID 1 does not restart the app and rejoin the original channel within 20 seconds, UID 2 receives a callback:
* Android, Windows, or Linux: UID 2 receives the `onUserOffline` callback.
* iOS or macOS: UID 2 receives the `didOfflineOfUid` callback.
* If UID 1 restarts the app and rejoins the original channel within 20 seconds, UID 2 does not receive any callback function.
* If UID 1 is in Android, Windows, or Linux and UID 2 uses the Web SDK:
* If UID 1 does not restart the app and rejoin the original channel within 10 seconds, UID 2 receives the` client.on("stream-removed")` callback.
* If UID 1 restarts the app and rejoins the original channel, UID 2 does not receive any callback.
* For the Web SDK, killing a process is equivalent to a user dropping offline.
* If UID 1 is the last user in the channel, the server destroys the channel in 10 seconds.
# What should I do if the class recording fails? (/en/api-reference/faq/integration/recording_fails)
If recording fails, take the following steps to troubleshoot the problem:
1. Refer to [Configure classroom storage and recording](/en/realtime-media/flexible-classroom/build/set-up-your-account-and-authentication/enable-flexible-classroom#cloud-recording) to check whether the recording-related configuration is correct, including:
* If `recordingConfig` is not set, the default configuration is used.
* If `storageConfig` is configured correctly, especially the vendor, region, and endpoint fields are correct and match. For example, if the third-party cloud storage service you use is located in Shanghai, then the application server where you initiate the request must also be located in Shanghai.
```bash
"vendor": 2,
"region": 1, //CN_Shanghai
endpoint:https://agora-recording.oss-cn-shanghai.aliyuncs.com
```
2. If the above configurations are correct but recording still fails, check whether the public read permission of the third-party cloud storage account you are using is enabled.
3. If the recording configuration is correct and public read permission is enabled, but the recording still fails, debug the specific error cause in the local browser by concatenating the recorded URL of the page:
1. Get the value of `recordUrl` passed in as a parameter in the Web-side `LaunchOption` call.
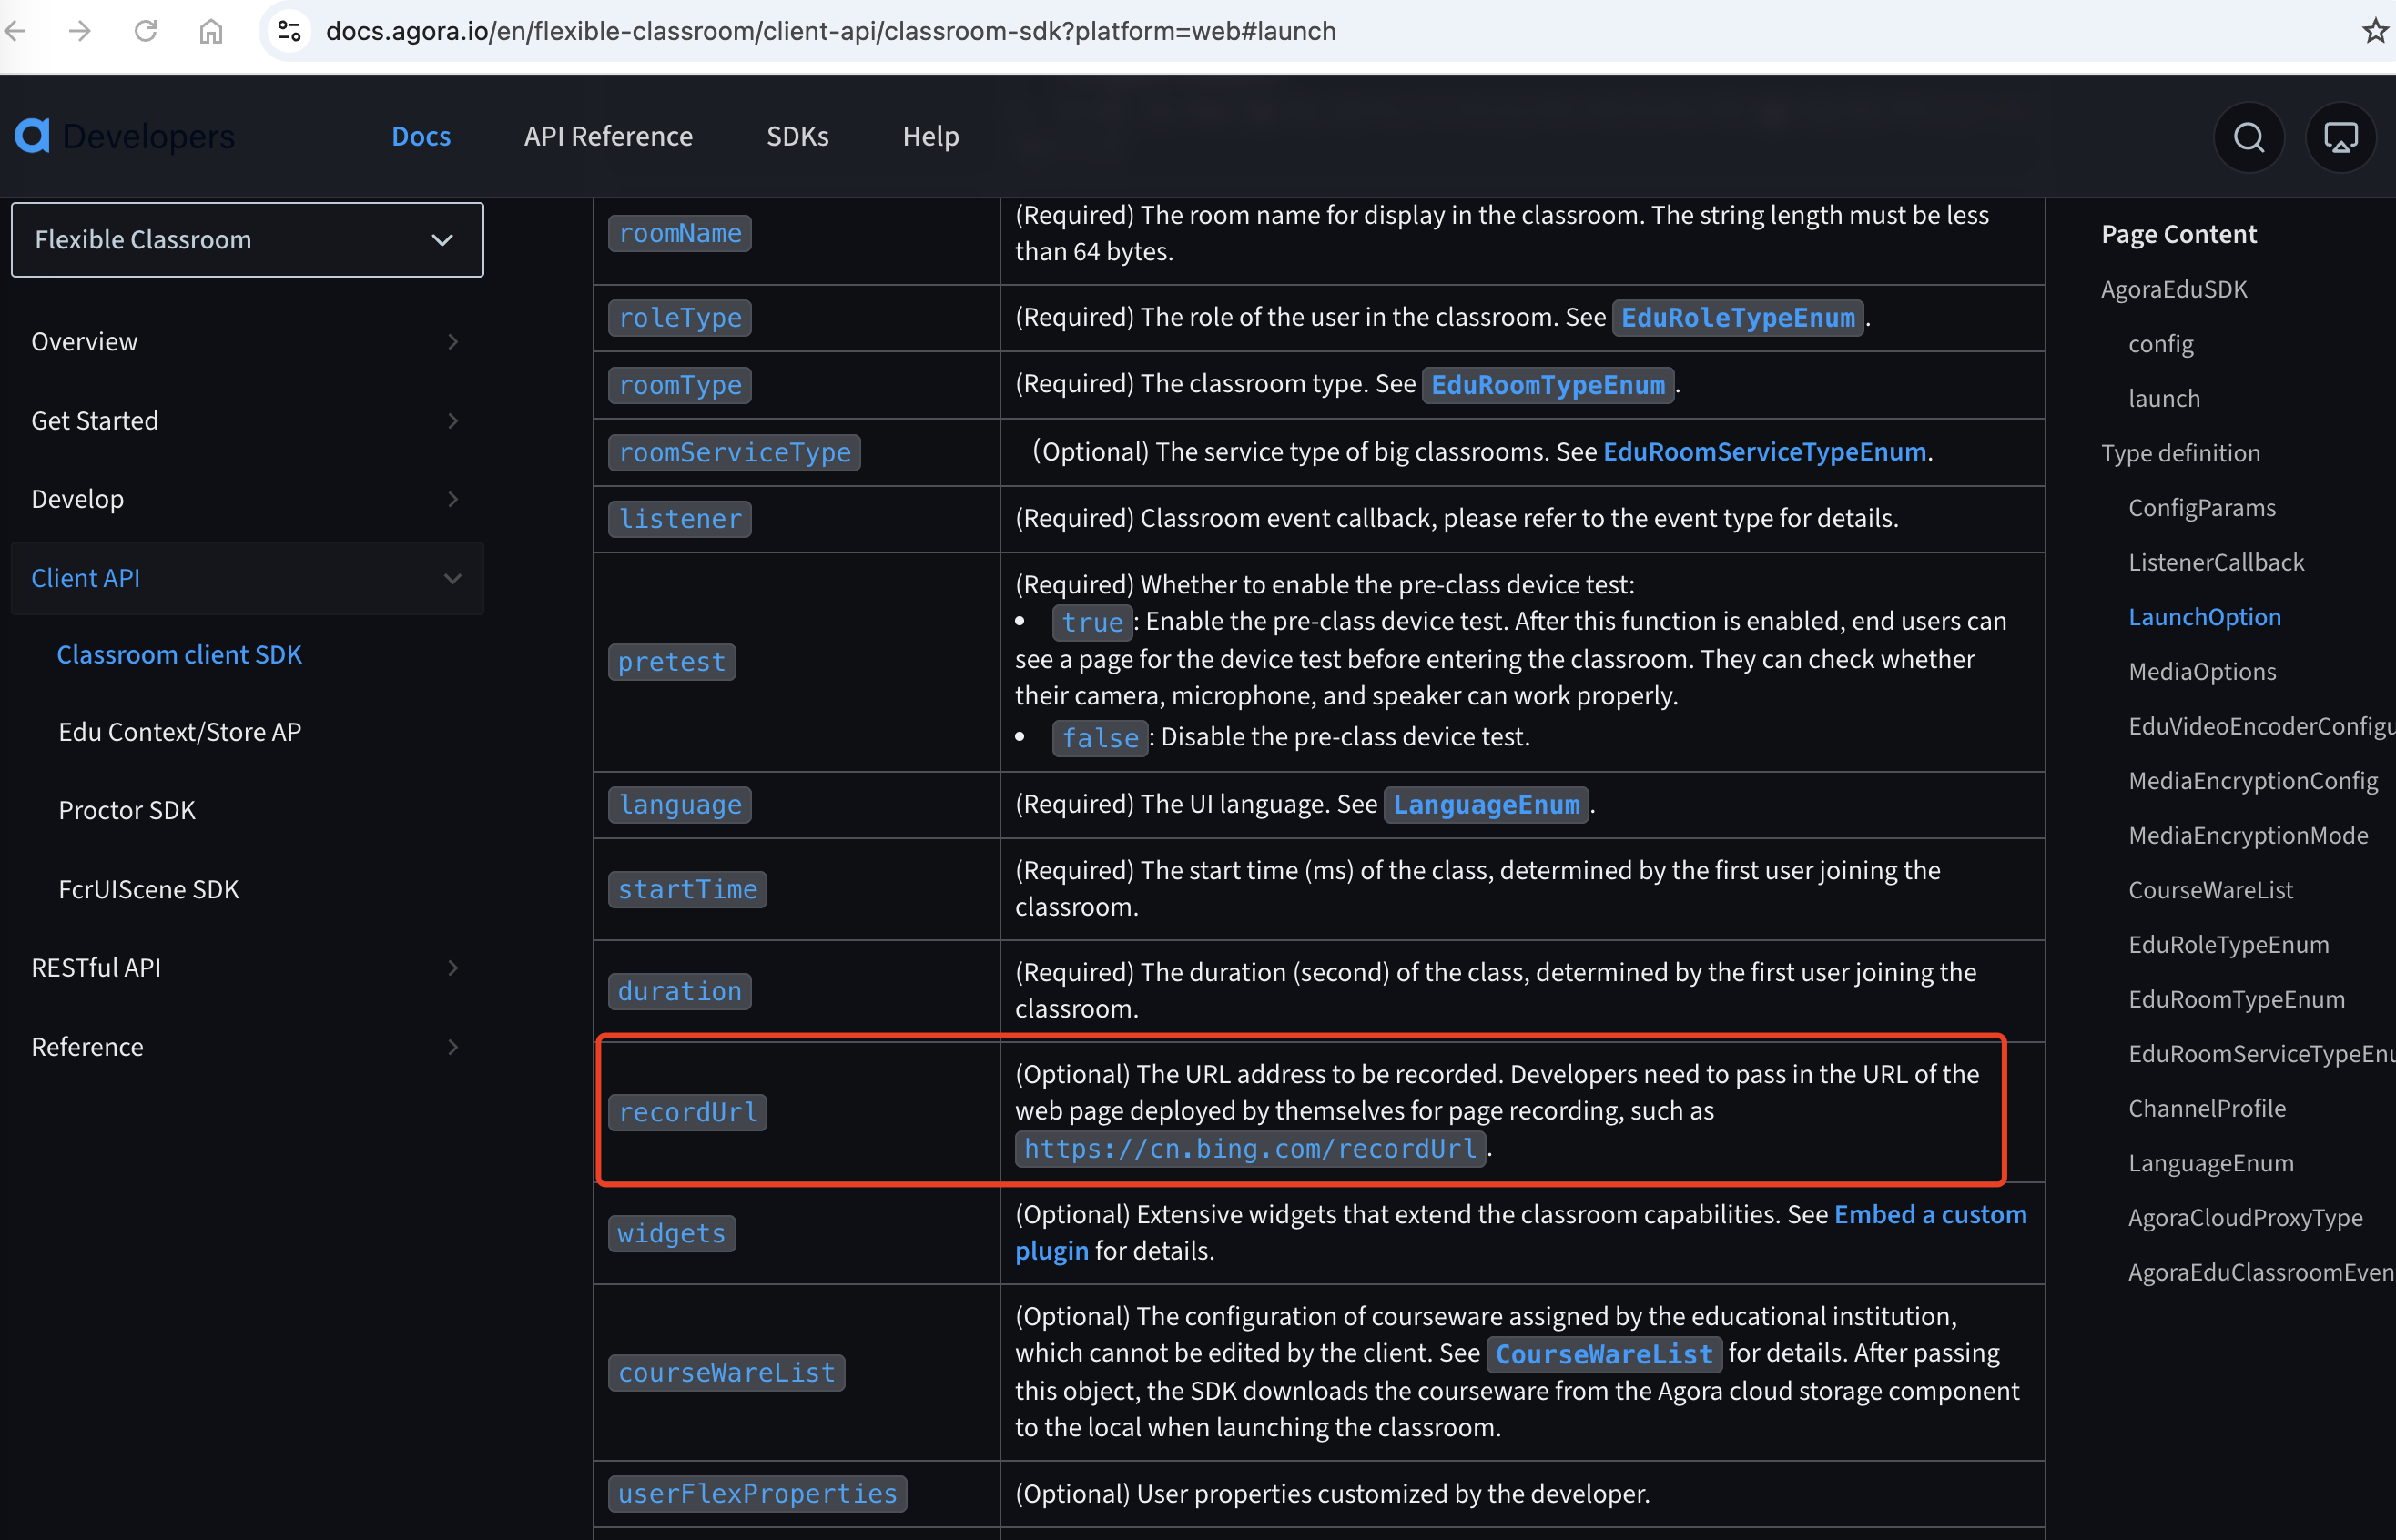
2. Call the [RESTful API for querying the recording list](/en/api-reference/api-ref/flexible-classroom/classroom-rest-api#get-the-recording-list) and obtain URL2 from the `webRecordUrlQuery` response parameter.
3. Concatenate URL1 and URL2, to get a complete URL of the page recording. You can access it locally with a browser for debugging. If you can opened the URL, then the recording has started successfully; if not, find the reason based on the error report.
# How can I solve Recording integration issues? (/en/api-reference/faq/integration/recording_faq)
### When I integrate the Java SDK, the error java.land.UnsatisfiedLinkError: no recording in java.library.path occurs. How do I fix it?
Reason: The system environment cannot find the `librecording.so ` file.
Solution: Check if the java demo is compiled and the library file is generated, and then, check and configure the path of the library file.
For example, on Linux, if the path of the library file is `/home/user/Desktop/tool/Agora_Recording/samples/java/bin/io/agora/recording/librecording.so`, configure `LD_LIBRARY_PATH` in `/etc/profile`, `~/.bash_profile` or `~/.bashrc` as follows:
```bash
LD_LIBRARY_PATH=/home/user/Desktop/tool/Agora_Recording/samples/java/bin/io/agora/recording/librecording.so
```
### How can I tell whether or not the recording application left the channel?
The recording application left the channel if the SDK triggers the `onLeaveChannel` callback and returns the error code ERR\_OK = 1.
The recording application failed to leave the channel If the SDK triggers the `onError` callback instead of the `onLeaveChannel` callback and returns the error code ERR\_INTERNAL\_FAILED = 3.
# What's the difference between individual recording mode and composite recording mode? (/en/api-reference/faq/integration/recording_mode)
If you want more flexibility in processing the recorded files, choose individual recording mode. For example, in an online classroom, if parents want to see the video of the teacher and their child only, you can use individual recording mode to record the teacher and all students separately, and then combine the teacher's video with each of the students' video. Or, if you want to moderate the content in the recorded files and identify the UID that has the violating content, choose individual recording mode so that you can moderate the audio and video of each user separately.
In other cases, choose composite recording mode. For example, if you want to record a live interactive streaming channel with multiple hosts, composite recording mode allows you to store the audio and video of all hosts in one file, with no need to combine them after recording.
For detailed information about how to implement each recording mode and their features, see:
* On-Premise Recording: [Individual Recording](/en/realtime-media/on-premise-recording/build/record-audio-and-video/individual-mode) and [Composite Recording](/en/realtime-media/on-premise-recording/build/record-audio-and-video/composite-mode).
* Cloud Recording: [Individual Recording](/en/realtime-media/cloud-recording/build/start-a-recording/individual-mode) and [Composite Recording](/en/realtime-media/cloud-recording/build/start-a-recording/composite-mode).
# Which media players can play the recorded files? (/en/api-reference/faq/integration/recording_player)
You get different recorded files in different recording modes.
* In the individual recording mode, you get an audio file and a video file for each user. You need to [Use the Transcoding Script ](/en/on-premise-recording/develop/transcoding-scripts/) to merge these files into one MP4 file for playback.
* In the composite recording mode, if you set `mixedVideoAudio` as `0`, you get an audio file and a video file for all the users. You also need to [Use the Transcoding Script ](/en/on-premise-recording/develop/transcoding-scripts/) to merge the files. We recommend you set `mixedVideoAudio` as `2` to mix the audio and video into one MP4 file.
The following table lists the media players that can play the recorded files after transcoding, and when `mixedVideoAudio` is set as `1` or `2`.
The recorded files after transcoding include the following files:
* The MP4 file merged from the recorded files in the individual recording mode.
* The MP4 file merged from the recorded files in the composite recording mode with `mixedVideoAudio` set as `0`.
| Platform | Player/Browser | After transcoding | mixedVideoAudio = 1 | mixedVideoAudio = 2 |
| -------- | ----------------------- | ----------------- | ------------------- | ------------------- |
| Linux | VLC Media Player | Supported | Supported | Supported |
| Linux | FFplay | Supported | Supported | Supported |
| Linux | Chrome | **Not Supported** | **Not Supported** | **Not Supported** |
| Windows | Media Player | Supported | Supported | Supported |
| Windows | KM Player | Supported | Supported | Supported |
| Windows | VLC Player | Supported | Supported | Supported |
| Windows | Chrome (49.0.2623+) | Supported | Supported | Supported |
| macOS | QuickTime Player | Supported | Supported | Supported |
| macOS | VLC | **Not Supported** | **Not Supported** | **Not Supported** |
| macOS | Movist | Supported | Supported | Supported |
| macOS | MPlayerX | Supported | Supported | Supported |
| macOS | KMPlayer | **Not Supported** | **Not Supported** | **Not Supported** |
| macOS | Chrome (47.0.2526.111+) | Supported | Supported | Supported |
| macOS | Safari (11.0.3+) | Supported | Supported | Supported |
| iOS | Default Player | Supported | Supported | Supported |
| iOS | VLC for Mobile | **Not Supported** | **Not Supported** | Supported |
| iOS | KMPlayer | Supported | Supported | Supported |
| iOS | Safari (9.0+) | Supported | Supported | Supported |
| Android | Default Player | Supported | Supported | Supported |
| Android | MXPlayer | Supported | Supported | Supported |
| Android | VLC for Android | Supported | Supported | Supported |
| Android | KMPlayer | Supported | Supported | Supported |
| Android | Chrome (49.0.2623+) | Supported | Supported | Supported |
# How do I set the video profile of the recorded video? (/en/api-reference/faq/integration/recording_video_profile)
This article has been moved to [Set the Video Profile](/en/realtime-media/cloud-recording/build/customize-the-recording/recording-video-profile).
# How can I reduce the app size after integrating the RTC SDK Native SDK? (/en/api-reference/faq/integration/reduce_app_size_rtc)
This page applies to SDKs earlier than v3.6.2 only. As of v3.6.2, Agora offers additional methods for reducing app size. See [Reduce App Size](/en/realtime-media/rtc/build/optimize-and-operate/app-size-optimization) for the latest details.
This article describes how to reduce the app size after integrating the RTC SDK Native SDK.
## Solution 1: Use the Audio SDK
The RTC SDK supports both audio and video functions, so the package size is larger. If you only need to use the audio functions, Agora recommends integrating the Audio SDK.
## Solution 2: Remove unnecessary extension libraries
The SDK provides extension libraries that can be optionally integrated into the project. The name of extension libraries is suffixed with `Extension`.
If you do not need the extension functions, you can directly remove the corresponding extension libraries to reduce the app size.
### Deep-learning noise reduction library
The SDK enables traditional noise reduction by default to reduce most of the stationary background noise. Deep-learning noise reduction adds non-stationary background noise reduction based on the traditional noise reduction. After integrating the deep-learning noise reduction library, you can call `enableDeepLearningDenoise` to enable the deep-learning noise reduction. See [v3.3.0 Release Notes](/en/3.x/interactive-live-streaming/introduction/release-notes#v330).
The following table shows the extension library name for each platform and the increase in the app size after integration.
| Platform | Architecture | Library name | App size increase after integration (KB) |
| :------- | :----------- | :------------------------------------ | :--------------------------------------- |
| Android | arm64-v8a | `libagora_ai_denoise_extension.so` | 1120 |
| Android | armeabi-v7a | `libagora_ai_denoise_extension.so` | 792 |
| iOS | arm64 | `AgoraAIDenoiseExtension.xcframework` | 502 |
| iOS | armv7 | `AgoraAIDenoiseExtension.xcframework` | 448 |
| macOS | arm64 | `AgoraAIDenoiseExtension.framework` | 496 |
| macOS | x86\_64 | `AgoraAIDenoiseExtension.framework` | 588 |
| Windows | x86 | `libagora_ai_denoise_extension.dll` | 5312 |
| Windows | x86\_64 | `libagora_ai_denoise_extension.dll` | 5424 |
### AV1 library (beta feature)
The AV1 function improves the clarity of texts when users share the screen. To use this function, contact [support@agora.io](mailto\:support@agora.io).
The following table shows the extension library name for each platform and the increase in the app size after integration.
| Platform | Architecture | Library name | App size increase after integration (KB) |
| :------- | :----------- | :-------------------------------- | :--------------------------------------- |
| Android | arm64-v8a | `libagora_dav1d_extension.so` | 696 |
| Android | armeabi-v7a | `libagora_dav1d_extension.so` | 608 |
| iOS | arm64 | `AgoraDav1dExtension.xcframework` | 959 |
| iOS | armv7 | `AgoraDav1dExtension.xcframework` | 746 |
| macOS | x86\_64 | `AgoraDav1dExtension.framework` | 1316 |
| Windows | x86 | `libagora_dav1d_extension.dll` | 1252 |
| Windows | x86\_64 | `libagora_dav1d_extension.dll` | 1756 |
### JND library (beta feature)
The JND (Just-noticeable difference) function is used for video perceptual coding, which reduces bandwidth consumption while keeping the same image quality. For example, this function can improve video smoothness in bandwidth-constrained scenarios, and reduce network traffic consumption in mobile network scenarios. To use this function, contact [support@agora.io](https://agora-ticket.agora.io/).
The following table shows the extension library name for each platform and the increase in the app size after integration.
| Platform | Architecture | Library name | App size increase after integration (KB) |
| :------- | :----------- | :------------------------------ | :--------------------------------------- |
| Android | arm64-v8a | `libagora_jnd_extension.so` | 1172 |
| Android | armeabi-v7a | `libagora_jnd_extension.so` | 816 |
| iOS | arm64 | `AgoraJNDExtension.xcframework` | 78 |
| iOS | armv7 | `AgoraJNDExtension.xcframework` | 69 |
| macOS | arm64 | `AgoraJNDExtension.framework` | 720 |
| macOS | x86\_64 | `AgoraJNDExtension.framework` | 616 |
| Windows | x86 | `libagora_jnd_extension.dll` | 1528 |
| Windows | x86\_64 | `libagora_jnd_extension.dll` | 1948 |
### Virtual background library (beta feature)
After integrating the virtual background library, you can call `enableVirtualBackground` to enable the virtual background. See [v3.5.0 Release Notes](/en/3.x/interactive-live-streaming/introduction/release-notes#v350).
The following table shows the extension library name for each platform and the increase in the app size after integration.
| Platform | Architecture | Library name | App size increase after integration (KB) |
| :------- | :----------- | :-------------------------------------------- | :--------------------------------------- |
| Android | arm64-v8a | `libagora_segmentation_extension.so` | 3331 |
| Android | armeabi-v7a | `libagora_segmentation_extension.so` | 2232 |
| iOS | arm64 | `AgoraVideoSegmentationExtension.xcframework` | 2210 |
| iOS | armv7 | `AgoraVideoSegmentationExtension.xcframework` | 1514 |
| macOS | arm64 | `AgoraVideoSegmentationExtension.framework` | 2802 |
| macOS | x86\_64 | `AgoraVideoSegmentationExtension.framework` | 2449 |
| Windows | x86 | `libagora_segmentation_extension.dll` | 4401 |
| Windows | x86\_64 | `libagora_segmentation_extension.dll` | 5193 |
### ROI library (beta feature)
The ROI (Region of Interest) function is applied to the face or virtual background segmentation algorithm for face or portrait recognition. In the encoding process, higher quality encoding is used for the ROI to achieve a clearer face or portrait. To use this function, contact [support@agora.io](mailto\:support@agora.io).
The following table shows the extension library name for each platform and the increase in the app size after integration.
| Platform | Architecture | Library name | App size increase after integration (KB) |
| :------- | :----------- | :--------------------------- | :--------------------------------------- |
| Android | arm64-v8a | `libagora_fd_extension.so` | 1558 |
| Android | armeabi-v7a | `libagora_fd_extension.so` | 977 |
| iOS | armv7 | `AgoraFDExtension.framework` | 2602 |
| iOS | arm64 | `AgoraFDExtension.framework` | 3534 |
| macOS | x86\_64 | `AgoraFDExtension.framework` | 1674 |
| macOS | arm64 | `AgoraFDExtension.framework` | 904 |
| Windows | x86\_64 | `libagora_fd_extension.dll` | 1993 |
| Windows | x86 | `libagora_fd_extension.dll` | 1605 |
### Super resolution library (beta feature)
After integrating the super resolution library, you can call `enableRemoteSuperResolution` to enable super resolution. See [v3.5.1 Release Notes](/en/3.x/interactive-live-streaming/introduction/release-notes#v351).
The following table shows the extension library name for each platform and the increase in the app size after integration.
| Platform | Architecture | Library name | App size increase after integration (KB) |
| :------- | :----------- | :------------------------------------------ | :--------------------------------------- |
| Android | arm64-v8a | `libagora_super_resolution_extension.so` | 837 |
| Android | armeabi-v7a | `libagora_super_resolution_extension.so` | 550 |
| iOS | arm64 | `AgoraSuperResolutionExtension.xcframework` | 342 |
| iOS | armv7 | `AgoraSuperResolutionExtension.xcframework` | 340 |
### Image enhancement library
As of v3.6.0, ensure that you have integrated the image enhancement library before you call `setBeautyEffectOptions` to enable the image enhancement function. See [v3.6.0 Release Notes](/en/3.x/interactive-live-streaming/introduction/release-notes#v360).
The following table shows the extension library name for each platform and the increase in the app size after integration.
| Platform | Architecture | Library name | App size increase after integration (KB) |
| :------- | :----------- | :--------------------------------------- | :--------------------------------------- |
| Android | arm64-v8a | `libagora_video_process_extension.so` | 1290 |
| Android | armeabi-v7a | `libagora_video_process_extension.so` | 962 |
| iOS | arm64 | `AgoraVideoProcessExtension.xcframework` | 819 |
| iOS | armv7 | `AgoraVideoProcessExtension.xcframework` | 768 |
| macOS | arm64 | `AgoraVideoProcessExtension.framework` | 1785 |
| macOS | x86\_64 | `AgoraVideoProcessExtension.framework` | 895 |
| Windows | x86 | `libagora_video_process_extension.dll` | 2171 |
| Windows | x86\_64 | `libagora_video_process_extension.dll` | 2541 |
# How can I avoid being frequency limited when calling Agora Server RESTful APIs? (/en/api-reference/faq/integration/restful_api_call_frequency)
When the request of an Agora Server RESTful API exceeds its call frequency limit, the API returns the HTTP status code 429, indicating that you have made too many requests in a specified amount of time. The following suggestions can help you optimize API call frequency based on the needs of your project.
## Tips to avoid exceeding call frequency limits
* Distribute your API requests evenly across time windows.
For example, if you want to call [`https://api.agora.io/dev/v1/channel/user/{appid}/{channelName}`](/en/api-reference/api-ref/rtc/query-user-list) to query the user list of 100 online channels, the default call frequency limit for this API is 20 times per second. To avoid exceeding the call frequency limit, you can set the query interval of a single channel to 5 seconds, and then query the user list of 20 channels per second.
* Do not directly call Agora Server RESTful APIs on your client; call these APIs on your application server instead.
For example, when using the API for querying online channel statistics, you can configure your application server to periodically send requests to Agora and cache the returned results. When a client queries channel information, your server sends the latest locally cached data to the client.
If the default frequency limit still cannot meet your project needs after considering the preceding suggestions, contact [support@agora.io](mailto\:support@agora.io) to apply to adjust the call frequency limit. See [Apply to raise API call frequency limit](#raiselimit).
The frequency of calling Agora server-side RESTful API is capped and high real-time performance is not guaranteed. In case of a large number of concurrent businesses, enable Agora Notifications and configure your business server to [Receive notifications about channel events](/en/realtime-media/rtc/build/optimize-and-operate/receive-notifications).
## Apply to raise API call frequency limit
To raise the call frequency limit of an Agora Server RESTful API, you need contact [support@agora.io](mailto\:support@agora.io) with the following information:
* Your industry, such as education, pan-entertainment, or medical.
* Your application scenario, such as chat room, small class, or PK host.
* Both the average and maximum number of concurrent channels.
* Both the average and peak number of concurrent users in each channel.
* The RESTful API that does not meet your project needs, as well as how you use it and in what scenarios.
# Why does the query method return a 404 after successfully starting cloud recording? (/en/api-reference/faq/integration/return_404)
The following issues may cause the `query` method to return a `404` status code after successfully starting cloud recording with the `start` method:
* **Parameter issues**: After the cloud recording service starts, it verifies the parameters. If any parameter is incorrect, the recording may stop. Ensure that parameters like `transcodingConfig` are configured correctly. For details, see [Set video profile](/en/realtime-media/cloud-recording/build/customize-the-recording/recording-video-profile).
* **Incorrect cloud storage configuration**: Errors in third-party cloud storage details, such as an incorrect `accessKey` or `secretKey`, can prevent file uploads. If you have enabled the [message notification service](/en/introduction/console-setup), you receive a [`cloud_recording_error`](/en/realtime-media/cloud-recording/reference/common-errors) event when storage configuration fails.
* **Token issues**: If the `token` in `clientRequest` is invalid, cloud recording may fail to join the channel. If your project has the App certificate enabled, ensure that you pass the correct token. If it is not enabled, you do not need to set this parameter.
* **Idle timeout**: If there are no users streaming in the channel after cloud recording starts, the recording automatically stops after reaching the maximum idle channel time `maxIdleTime`.
* **Network or process failures**: If the cloud recording server is disconnected or the process was killed, calling `query`, `updateLayout`, or `stop` returns a 404. The fault handling center investigates and responds within 90 seconds. Retry the `query` method later to check if the service has recovered.
# How can I generate a token with both RTC and Signaling privileges? (/en/api-reference/faq/integration/rtc_rtm_token)
Agora provides [source code](https://github.com/AgoraIO/Tools/tree/master/DynamicKey/AgoraDynamicKey) in several languages to generate tokens with both RTC and Signaling privileges. Refer to the following samples to generate tokens on your own server:
C++
Golang
Java
Node.js
PHP
Python
Python3
```cpp tabGroup="rtc-rtm-token"
#include
#include
#include "../src/RtcTokenBuilder2.h"
using namespace agora::tools;
int main(int argc, char const *argv[]) {
(void)argc;
(void)argv;
// Get the value of the environment variable AGORA_APP_ID. Make sure you set this to the App ID from the Agora Console.
const char *env_app_id = getenv("AGORA_APP_ID");
std::string app_id = env_app_id ? env_app_id : "";
// Get the value of the environment variable AGORA_APP_CERTIFICATE. Make sure you set this to the App Certificate from the Agora Console.
const char *env_app_certificate = getenv("AGORA_APP_CERTIFICATE");
std::string app_certificate = env_app_certificate ? env_app_certificate : "";
// Replace channelName with the name of the channel to join.
std::string channel_name = "channelName";
// User ID in string format.
std::string account = "account";
// Token expiration time in seconds.
uint32_t token_expiration_in_seconds = 3600;
// Privilege expiration time in seconds. Agora recommends setting this equal to the token expiration time.
uint32_t privilege_expiration_in_seconds = 3600;
std::string result;
std::cout << "App Id:" << app_id << std::endl;
std::cout << "App Certificate:" << app_certificate << std::endl;
if (app_id == "" || app_certificate == "") {
std::cout << "Need to set environment variable AGORA_APP_ID and "
"AGORA_APP_CERTIFICATE"
<< std::endl;
return -1;
}
// Generate a token with both RTC and RTM privileges.
result = RtcTokenBuilder2::BuildTokenWithRtm(app_id, app_certificate, channel_name, account, UserRole::kRolePublisher, token_expiration_in_seconds,
privilege_expiration_in_seconds);
std::cout << "Token With RTM:" << result << std::endl;
return 0;
}
```
```go tabGroup="rtc-rtm-token"
package main
import (
"fmt"
"os"
rtctokenbuilder "github.com/AgoraIO/Tools/DynamicKey/AgoraDynamicKey/go/src/rtctokenbuilder2"
)
func main() {
// Get the value of the environment variable AGORA_APP_ID. Make sure you set this to the App ID from the Agora Console.
appId := os.Getenv("AGORA_APP_ID")
// Get the value of the environment variable AGORA_APP_CERTIFICATE. Make sure you set this to the App Certificate from the Agora Console.
appCertificate := os.Getenv("AGORA_APP_CERTIFICATE")
// Replace channelName with the name of the channel to join.
channelName := "channelName"
// User ID in string format.
uidStr := "uid"
// Token expiration time in seconds.
tokenExpirationInSeconds := uint32(3600)
// Privilege expiration time in seconds. Agora recommends setting this equal to the token expiration time.
privilegeExpirationInSeconds := uint32(3600)
fmt.Println("App Id:", appId)
fmt.Println("App Certificate:", appCertificate)
if appId == "" || appCertificate == "" {
fmt.Println("Need to set environment variable AGORA_APP_ID and AGORA_APP_CERTIFICATE")
return
}
// Generate a token with both RTC and RTM privileges.
result, err := rtctokenbuilder.BuildTokenWithRtm(appId, appCertificate, channelName, uidStr, rtctokenbuilder.RolePublisher, tokenExpirationInSeconds, privilegeExpirationInSeconds)
if err != nil {
fmt.Println(err)
} else {
fmt.Printf("Token with RTM: %s\\n", result)
}
}
```
```java tabGroup="rtc-rtm-token"
package io.agora.sample;
import io.agora.media.RtcTokenBuilder2;
import io.agora.media.RtcTokenBuilder2.Role;
public class RtcTokenBuilder2Sample {
// Get the value of the environment variable AGORA_APP_ID. Make sure you set this to the App ID from the Agora Console.
static String appId = System.getenv("AGORA_APP_ID");
// Get the value of the environment variable AGORA_APP_CERTIFICATE. Make sure you set this to the App Certificate from the Agora Console.
static String appCertificate = System.getenv("AGORA_APP_CERTIFICATE");
// Replace channelName with the name of the channel to join.
static String channelName = "channelName";
// User ID in string format.
static String account = "account";
// Token expiration time in seconds.
static int tokenExpirationInSeconds = 3600;
// Privilege expiration time in seconds. Agora recommends setting this equal to the token expiration time.
static int privilegeExpirationInSeconds = 3600;
public static void main(String[] args) {
System.out.printf("App Id: %s\\n", appId);
System.out.printf("App Certificate: %s\\n", appCertificate);
if (appId == null || appId.isEmpty() || appCertificate == null || appCertificate.isEmpty()) {
System.out.printf("Need to set environment variable AGORA_APP_ID and AGORA_APP_CERTIFICATE\\n");
return;
}
// Generate a token with both RTC and RTM privileges.
RtcTokenBuilder2 token = new RtcTokenBuilder2();
String result =
token.buildTokenWithRtm(appId, appCertificate, channelName, account, Role.ROLE_PUBLISHER, tokenExpirationInSeconds,
privilegeExpirationInSeconds);
System.out.printf("Token with RTM: %s\\n", result);
}
}
```
```javascript tabGroup="rtc-rtm-token"
const RtcTokenBuilder = require("../src/RtcTokenBuilder2").RtcTokenBuilder;
const RtcRole = require("../src/RtcTokenBuilder2").Role;
// Get the value of the environment variable AGORA_APP_ID. Make sure you set this to the App ID from the Agora Console.
const appId = process.env.AGORA_APP_ID;
// Get the value of the environment variable AGORA_APP_CERTIFICATE. Make sure you set this to the App Certificate from the Agora Console.
const appCertificate = process.env.AGORA_APP_CERTIFICATE;
// Replace channelName with the name of the channel to join.
const channelName = "channelName";
// User ID in string format.
const account = 'account'
// Set the role to publisher (with stream publishing privileges).
const role = RtcRole.PUBLISHER;
// Token expiration time in seconds.
const tokenExpirationInSecond = 3600;
// Privilege expiration time in seconds. Agora recommends setting this equal to the token expiration time.
const privilegeExpirationInSecond = 3600;
console.log("App Id:", appId);
console.log("App Certificate:", appCertificate);
if (appId == undefined || appId == "" || appCertificate == undefined || appCertificate == "") {
console.log("Need to set environment variable AGORA_APP_ID and AGORA_APP_CERTIFICATE");
process.exit(1);
}
const tokenWithRtm = RtcTokenBuilder.buildTokenWithRtm(
appId,
appCertificate,
channelName,
account,
role,
tokenExpirationInSecond,
privilegeExpirationInSecond
)
console.log('Token with RTM:', tokenWithRtm)
```
```php tabGroup="rtc-rtm-token"
```python tabGroup="rtc-rtm-token"
import os
import sys
sys.path.insert(0, os.path.abspath(os.path.join(os.path.dirname(__file__), '..')))
from src.RtcTokenBuilder2 import *
def main():
# Get the value of the environment variable AGORA_APP_ID. Make sure you set this to the App ID from the Agora Console.
app_id = os.environ.get("AGORA_APP_ID")
# Get the value of the environment variable AGORA_APP_CERTIFICATE. Make sure you set this to the App Certificate from the Agora Console.
app_certificate = os.environ.get("AGORA_APP_CERTIFICATE")
# Replace channel_name with the name of the channel to join.
channel_name = "channel_name"
# User ID in string format.
account = "account"
# Token expiration time in seconds.
token_expiration_in_seconds = 3600
# Privilege expiration time in seconds. Agora recommends setting this equal to the token expiration time.
privilege_expiration_in_seconds = 3600
print("App Id: %s" % app_id)
print("App Certificate: %s" % app_certificate)
if not app_id or not app_certificate:
print("Need to set environment variable AGORA_APP_ID and AGORA_APP_CERTIFICATE")
return
# Generate a token with both RTC and RTM privileges.
token = RtcTokenBuilder.build_token_with_rtm(app_id, app_certificate, channel_name, account, Role_Publisher, token_expiration_in_seconds, privilege_expiration_in_seconds)
print("Token with RTM: {}".format(token))
if __name__ == "__main__":
main()
```
```python tabGroup="rtc-rtm-token"
import os
import sys
sys.path.insert(0, os.path.abspath(os.path.join(os.path.dirname(__file__), '..')))
from src.RtcTokenBuilder2 import *
def main():
# Get the value of the environment variable AGORA_APP_ID. Make sure you set this to the App ID from the Agora Console.
app_id = os.environ.get("AGORA_APP_ID")
# Get the value of the environment variable AGORA_APP_CERTIFICATE. Make sure you set this to the App Certificate from the Agora Console.
app_certificate = os.environ.get("AGORA_APP_CERTIFICATE")
# Replace channel_name with the name of the channel to join.
channel_name = "channel_name"
# User ID in string format.
account = "account"
# Token expiration time in seconds.
token_expiration_in_seconds = 3600
# Privilege expiration time in seconds. Agora recommends setting this equal to the token expiration time.
privilege_expiration_in_seconds = 3600
print("App Id: %s" % app_id)
print("App Certificate: %s" % app_certificate)
if not app_id or not app_certificate:
print("Need to set environment variable AGORA_APP_ID and AGORA_APP_CERTIFICATE")
return
# Generate a token with both RTC and RTM privileges.
token = RtcTokenBuilder.build_token_with_rtm(app_id, app_certificate, channel_name, account, Role_Publisher,
token_expiration_in_seconds, privilege_expiration_in_seconds)
print("Token with RTM: {}".format(token))
if __name__ == "__main__":
main()
```
# How do I handle issues when integrating the Signaling SDK and Video/Voice SDK simultaneously? (/en/api-reference/faq/integration/rtm2_rtc_integration_issue)
When integrating Signaling SDK version 2.2.0 and above with Video/Voice SDK version 4.5.0 or higher, the following errors may appear in the IDE:
Android
iOS/macOS
```java tabGroup="platform"
com.android.builder.merge.DuplicateRelativeFileException: More than one file was found with OS independent path 'lib/x86/libaosl.so'
```
```bash tabGroup="platform"
Unexpected duplicate tasks
Multiple commands produce /Contents/Frameworks/aosl.framework/Versions/A'
The 'XXX' target has frameworks with conflicting names: aosl.xcframework.
```
## Why this happens
Both Signaling SDK versions 2.2.0 and above and Video/Voice SDK versions 4.5.0 and above use the same library:
* **Android**: `libaosl.so`
* **iOS/macOS**: `aosl.xcframework`
* **Windows**: `libaosl.dll`
As a result, the IDE detects multiple files with the same path during the build process, leading to errors.
## Solution
Follow these steps to resolve the issue:
### Signaling version 2.2.8 or later
For Signaling SDK version 2.2.8 or later, compare the versions of the `aosl` libraries used in the Video/Voice SDK and Signaling SDK. Choose the subsequent operations based on the two.
You can find the `aosl` library version for the SDKs in the [RTC SDK](/en/realtime-media/rtc/reference/release-notes) or [Voice SDK](/en/realtime-media/rtc/reference/release-notes) release notes and [Signaling release notes](/en/realtime-media/rtm/reference/release-notes).
Android
iOS/macOS
* If the Signaling `aosl` version is lower, integrate the `lite` SDK:
```text
dependencies {
// If you are using RTM SDK version 2.2.8 or later
// Replace x.y.z with the specific SDK version number, such as 2.2.8
// You can obtain the latest version number from the release notes.
implementation 'io.agora.rtm:rtm-sdk-lite:2.2.8'
}
```
* If the Signaling `aosl` version is higher, integrate the latest `aosl` component and use `pickFirst` to ensure the higher-version `aosl` library is prioritized during the build process.
Groovy
Kotlin DSL
* **Android Gradle Plugin \< 7.x**
```text
android {
packagingOptions {
pickFirst 'lib/**/libaosl.so'
}
}
dependencies {
implementation 'io.agora.infra:aosl:x.y.z'
// implementation RTM sdk
// implementation RTC sdk
}
```
* **Android Gradle Plugin 7.x or later (Recommended)**
```text
android {
packaging {
jniLibs {
pickFirsts += ["lib/**/libaosl.so"]
}
}
}
dependencies {
implementation 'io.agora.infra:aosl:x.y.z'
// implementation RTM sdk
// implementation RTC sdk
}
```
* **Android Gradle Plugin \< 7.x**
```kotlin
android {
packagingOptions {
pickFirst("lib/**/libaosl.so")
}
}
dependencies {
implementation("io.agora.infra:aosl:x.y.z")
// implementation RTM sdk
// implementation RTC sdk
}
```
* **Android Gradle Plugin 7.x or later (Recommended)**
```kotlin
android {
packaging {
jniLibs {
pickFirsts += setOf("lib/**/libaosl.so")
}
}
}
dependencies {
implementation("io.agora.infra:aosl:x.y.z")
// implementation RTM sdk
// implementation RTC sdk
}
```
* If the Signaling `aosl` version is lower, integrate the `lite` SDK:
```ruby
platform :ios, '11.0'
target 'Your App' do
# If you are using RTM SDK version 2.2.8 or later
# Replace x.y.z with the specific SDK version number, such as 2.2.8
# You can obtain the latest version number from the release notes.
pod 'AgoraRtm', 'x.y.z', :subspecs => ['RtmKit']
end
```
* If the Signaling `aosl` version is higher, add the following script to your `Podfile`:
The following code uses the RTC SDK with the package name `AgoraRtcEngine_iOS` as an example. Use the actual platform and version for your integration.
```ruby
pre_install do |installer|
# Define the path to the RTC framework
rtc_pod_path = File.join(installer.sandbox.root, 'AgoraRtcEngine_iOS')
# Full path to aosl.xcframework
aosl_xcframework_path = File.join(rtc_pod_path, 'aosl.xcframework')
# Check if the file exists, and delete it if so
if File.exist?(aosl_xcframework_path)
puts "Deleting aosl.xcframework from #{aosl_xcframework_path}"
FileUtils.rm_rf(aosl_xcframework_path)
else
puts "aosl.xcframework not found, skipping deletion."
end
end
```
### Signaling version 2.2.2 to 2.2.6
For Signaling SDK versions between 2.2.2 and 2.2.6, compare the versions of the `aosl` libraries used in the Video/Voice SDK and Signaling SDK, then delete the library file with the lower version.
You can find the `aosl` library version for the SDKs in the [RTC SDK](/en/realtime-media/rtc/reference/release-notes) or [Voice SDK](/en/realtime-media/rtc/reference/release-notes) release notes and [Signaling release notes](/en/realtime-media/rtm/reference/release-notes).
If the version of the `aosl` library included in the Video/Voice SDK package is lower, delete the outdated library file based on the target platform:
* **Android**: Delete the older-version `libaosl.so` file from the SDK package.
* **iOS/macOS**: Delete the older-version `aosl.xcframework` file from the SDK package.
* **Windows**: Delete the older-version `libaosl.dll` file from the SDK package.
If the version of the `aosl` library in the Signaling SDK package is lower, integrate the lite SDK, then clean and rebuild your project to resolve the library conflict.
Android
iOS/macOS
```text tabGroup="platform"
// ...
dependencies {
// If you are using RTM SDK version 2.2.2 to 2.2.6
// Replace x.y.z with the specific SDK version number, such as 2.2.2
// You can obtain the latest version number from the release notes.
implementation 'io.agora:agora-rtm-lite:x.y.z'
}
```
```ruby tabGroup="platform"
platform :ios, '11.0'
target 'Your App' do
# If you are using RTM SDK version 2.2.2 to 2.2.6
# Replace x.y.z with the specific SDK version number, such as 2.2.2
# You can obtain the latest version number from the release notes.
pod 'AgoraRtm', 'x.y.z', :subspecs => ['RtmKit']
end
```
### Signaling versions prior to 2.2.2
If you are using a Signaling SDK version prior to 2.2.2, refer to the following solutions based on your platform.
Android
iOS/macOS
Flutter
* Using CDN
1. Manually delete the following files from the SDK package:
* `lib/x86/libaosl.so`
* `lib/x86_64/libaosl.so`
* `lib/armeabi-v7a/libaosl.so`
* `lib/arm64-v8a/libaosl.so`
1. Rebuild the project
* Using Maven
1. Add a `packagingOptions` block to the `android` block of your `build.gradle` file to ensure the first matching native library is prioritized during the build process:
Groovy
Kotlin DSL
* **Android Gradle Plugin \< 7.x**
```text
android {
packagingOptions {
pickFirst 'lib/x86/libaosl.so'
pickFirst 'lib/x86_64/libaosl.so'
pickFirst 'lib/armeabi-v7a/libaosl.so'
pickFirst 'lib/arm64-v8a/libaosl.so'
}
}
```
* **Android Gradle Plugin 7.x or later (Recommended)**
```text
android {
packaging {
jniLibs {
pickFirsts += [
"lib/x86/libaosl.so",
"lib/x86_64/libaosl.so",
"lib/armeabi-v7a/libaosl.so",
"lib/arm64-v8a/libaosl.so"
]
}
}
}
```
* **Android Gradle Plugin \< 7.x**
```kotlin
android {
packagingOptions {
pickFirst("lib/x86/libaosl.so")
pickFirst("lib/x86_64/libaosl.so")
pickFirst("lib/armeabi-v7a/libaosl.so")
pickFirst("lib/arm64-v8a/libaosl.so")
}
}
```
* **Android Gradle Plugin 7.x or later (Recommended)**
```kotlin
android {
packaging {
jniLibs {
pickFirsts += setOf(
"lib/x86/libaosl.so",
"lib/x86_64/libaosl.so",
"lib/armeabi-v7a/libaosl.so",
"lib/arm64-v8a/libaosl.so"
)
}
}
}
```
2. After the Gradle files are synchronized, rebuild the project.
* Using CDN
1. Manually delete the `libs/aosl.xcframework` file from the SDK package.
2. Rebuild the project.
* Using Cocoapods
1. Add the following script to the end of your project `podfile`:
```ruby
pre_install do |installer|
# Define the path to the AgoraRtm framework
rtm_pod_path = File.join(installer.sandbox.root, 'AgoraRtm')
# The full path to `aosl.xcframework`
aosl_xcframework_path = File.join(rtm_pod_path, 'aosl.xcframework')
# Check if the file exists; delete it if it does.
if File.exist?(aosl_xcframework_path)
puts "Deleting aosl.xcframework from #{aosl_xcframework_path}"
FileUtils.rm_rf(aosl_xcframework_path)
else
puts "aosl.xcframework not found, skipping deletion."
end
end
```
2. Run `pod install` to re-integrate the Signaling and Video/Voice SDK.
3. Rebuild the project.
Select the solution based on your target platform:
* **Android**
1. Add the dependency to the `build.gradle` file in the project root directory:
```text
dependencies {
api 'io.agora.infra:aosl:1.2.13'
// ...
}
```
2. When integrating through Maven, add a `packagingOptions` block to the `android` block of your `build.gradle` file to ensure the first matching native library is prioritized during the build process:
Groovy
Kotlin DSL
* **Android Gradle Plugin \< 7.x**
```text
android {
packagingOptions {
pickFirst 'lib/x86/libaosl.so'
pickFirst 'lib/x86_64/libaosl.so'
pickFirst 'lib/armeabi-v7a/libaosl.so'
pickFirst 'lib/arm64-v8a/libaosl.so'
}
}
```
* **Android Gradle Plugin 7.x or later (Recommended)**
```text
android {
packaging {
jniLibs {
pickFirsts += [
"lib/x86/libaosl.so",
"lib/x86_64/libaosl.so",
"lib/armeabi-v7a/libaosl.so",
"lib/arm64-v8a/libaosl.so"
]
}
}
}
```
* **Android Gradle Plugin \< 7.x**
```kotlin
android {
packagingOptions {
pickFirst("lib/x86/libaosl.so")
pickFirst("lib/x86_64/libaosl.so")
pickFirst("lib/armeabi-v7a/libaosl.so")
pickFirst("lib/arm64-v8a/libaosl.so")
}
}
```
* **Android Gradle Plugin 7.x or later (Recommended)**
```kotlin
android {
packaging {
jniLibs {
pickFirsts += setOf(
"lib/x86/libaosl.so",
"lib/x86_64/libaosl.so",
"lib/armeabi-v7a/libaosl.so",
"lib/arm64-v8a/libaosl.so"
)
}
}
}
```
3. After the Gradle files are synchronized, rebuild the project.
* **iOS**
1. When integrating via CocoaPods, add the following script to the end of your project's `Podfile`:
```ruby
pre_install do |installer|
# Define the path to the AgoraRtm framework
rtm_pod_path = File.join(installer.sandbox.root, 'AgoraRtm')
# The full path to `aosl.xcframework`
aosl_xcframework_path = File.join(rtm_pod_path, 'aosl.xcframework')
# Check if the file exists; delete it if it does.
if File.exist?(aosl_xcframework_path)
puts "Deleting aosl.xcframework from #{aosl_xcframework_path}"
FileUtils.rm_rf(aosl_xcframework_path)
else
puts "aosl.xcframework not found, skipping deletion."
end
end
```
2. Run `pod install` to re-integrate the Signaling and Video/Voice SDK.
3. Rebuild the project.
# Why do errors occur when compiling the Agora Signaling Linux Java SDK? (/en/api-reference/faq/integration/rtm_compilation_error)
## Problem
The following error occurs when compiling the Agora Signaling Linux Java SDK in Linux:
```bash
Exception in thread “main” java.lang.UnsatisfiedLinkError:no agora_rtm_sdk in java.library.path
```
## Reason
The `agora_rtm_sdk` library is not included in the environment variable.
## Solution
You can use one of the following solutions to solve this problem. For either solution, you must replace `<path>` with the absolute path to the Signaling Linux Java SDK.
### Update environment variables
Add the following line to any file that configures Linux environment variables, such as `~/.bashrc`, `~/bash_profile`, or `/etc/profile`.
```bash
export LD_LIBRARY_PATH=/agora/rtm/sdk:$LD_LIBRARY_PATH
```
### Update Java command line arguments
You can launch Java with the `Djava.library.path` argument to add the absolute path to the Signaling Linux Java SDK to the library path:
```bash
java -Djava.library.path=/agora/rtm/sdk
```
# How to handle token expiration? (/en/api-reference/faq/integration/rtm_token_expiration)
After the token expires, you need to call the `logout` method to log out of the Signaling system. Then use the new token to create a new instance and call the `login` method to log in to the system again.
## How to get the list of users who joined and left the stream channel during disconnection and reconnection?
After listening to the `topic` event notification, in a weak network environment, if you disconnect and reconnect, you will receive a `SNAPSHOT` event in `topic`.
To obtain the list of users who joined or left the stream channel during disconnection and reconnection, refer to the following sample code to generate a local cache and compare it with the user list in the `SNAPSHOT` event:
* Users with more `SNAPSHOT` events than in the local cache are those who joined the channel during the disconnection and reconnection period.
* Users with fewer `SNAPSHOT` events than in the local cache are those who left the channel during the disconnection and reconnection period.
```javascript
// Global variable
const channelTopics = new Map();
// Event handler
const rtmConfig = {};
const rtm = new RTM("appid", "uid", rtmConfig);
rtm.addEventListener("topic", (topicEvent) => {
console.log(topicEvent, "topic");
const topicsCache = channelTopics.get(topicEvent.channelName) ?? new Map();
const remoteLeaved = new Map();
const remoteJoined = new Map();
const { publisher: user, channelName } = topicEvent;
if (topicEvent.eventType === "SNAPSHOT") {
topicEvent.topicInfos.forEach(({ publishers, topicName }) => {
remoteJoined.set(topicName, []);
remoteLeaved.set(topicName, []);
const topicDetailsByCache = topicsCache.get(topicName) ?? [];
// Removed
topicDetailsByCache.forEach(({ publisherMeta, publisherUserId: targetUid }) => {
if (!publishers.some(({ publisherUserId: eventUid }) => targetUid === eventUid)) {
remoteLeaved.get(topicName)?.push({ publisherUserId: targetUid, publisherMeta });
topicDetailsByCache.filter(({ publisherUserId: cacheUid }) => cacheUid !== targetUid);
}
});
// Added
publishers.forEach(({ publisherMeta, publisherUserId: eventUid }) => {
if (!topicDetailsByCache.some(({ publisherUserId: cacheUid }) => eventUid === cacheUid)) {
remoteJoined.get(topicName)?.push({ publisherUserId: eventUid, publisherMeta });
topicDetailsByCache.push({ publisherUserId: eventUid, publisherMeta });
}
});
topicsCache.set(topicName, topicDetailsByCache);
});
} else {
// Your code for handling the updated event
topicEvent.topicInfos.forEach(({ topicName, publishers }) => {
const topicDetailsByCache = topicsCache.get(topicName) ?? [];
publishers.forEach(({ publisherMeta, publisherUserId }) => {
if (user === publisherUserId) {
switch (topicEvent.eventType) {
case "REMOTE_JOIN": {
topicDetailsByCache.push({ publisherMeta, publisherUserId });
break;
}
case "REMOTE_LEAVE": {
topicDetailsByCache.filter(({ publisherUserId: uid }) => uid !== publisherUserId);
break;
}
}
topicsCache.set(topicName, topicDetailsByCache);
}
});
});
}
channelTopics.set(channelName, topicsCache);
console.log({ remoteJoined, remoteLeaved, channelTopics, channelName }, "topic diff for debug");
});
```
# How to set custom user and class attributes? (/en/api-reference/faq/integration/set_custom_user_attributes)
Flexible Classroom supports custom user attributes, classroom attributes, and widget attributes. You can set any classroom attribute according to your business needs, and Flexible Classroom will synchronize it to all terminals.
Attributes include names and values, and each attribute name has only one corresponding attribute value. You can modify the value of custom user attributes or classroom attributes in two ways, by full modification or path modification.
Suppose you currently define the following attributes:
```json
{"key1":
{"subkey1":"a",
"subkey2":"b"
},
"key2":
{"subkey3":"c",
"subkey4":"d"
}
}
```
If you want to modify all attributes, you can use the full modification method. For example, to change the value of all `subkey` to uppercase, pass the following JSON array when calling the API:
```json
{"key1":
{"subkey1":"A",
"subkey2":"B"
},
"key2":
{"subkey3":"C",
"subkey4":"D"
}
}
```
If you only want to modify some properties, you can use the path modification method. For example, pass in `{"key1.subkey1":"A"}` when calling the API to modify the `A` value to `a` for `subkey1`. The modified attributes are as follows:
```json
{"key1":
{"subkey1":"a",
"subkey2":"B"
},
"key2":
{"subkey3":"C",
"subkey4":"D"
}
}
```
If you pass in `{"key1.subkey5":"E"}`, the modified attributes are as follows:
```json
{"key1":
{"subkey1":"a",
"subkey2":"B",
"subkey5":"E"
},
"key2":
{"subkey3":"C",
"subkey4":"D"
}
}
```
If you pass in `{"key1":{ "subkey5":"E"}}` with all `key1` original, the modified attributes are as follows:
```json
{"key1":
{
"subkey5":"E"
},
"key2":
{"subkey3":"C",
"subkey4":"D"
}
}
```
If you pass in `{"key1.subkey5":"E", "key2.subkey6":"F"}`, the modified attributes are as follows:
```json
{"key1":
{"subkey1":"A",
"subkey2":"B",
"subkey5":"E"
},
"key2":
{"subkey3":"C",
"subkey4":"D",
"subkey6":"F"
}
}
```
# What are the differences between setEnabled and setMuted? (/en/api-reference/faq/integration/set_enabled_set_muted)
Both Web SDK 4.x and 3.x provide APIs for controlling the collection and sending of local audio and video. The differences between these APIs are detailed in the table below.
You cannot call `setEnabled` and `setMuted` at the same time.
| API | Capture | Send | Recovery time |
| ----------------------------------------------------------------------------------------------------------- | -------------------------------------------------------------------------------------------------------------------------------- | ---------------------------------------------------------------------------------------------------------------------------------------------------------------------------------------------------- | ----------------------------------------------------------------- |
| (3.x) Mute-related methods: `Stream.muteAudio` `Stream.unmuteAudio` `Stream.muteVideo` `Stream.unmuteVideo` | After muting, the SDK does not stop audio and video capture. The camera's light does not turn off. | The SDK sends a black frame after muting video and a mute packet after muting audio. Muted users are counted as streaming users, and up to 17 users can stream at the same time in a single channel. | Unmuting after a mute is relatively faster. |
| (4.x)`LocalTrack.setEnabled` | After calling `setEnabled` to disable the track, the SDK stops audio and video capture. The camera's light turns off. | The SDK does not send any data after calling `setEnabled` to disable the track. Users whose tracks are disabled are not counted as streaming users. | Enabling audio and video after disabling it is relatively slower. |
| (4.x)`LocalTrack.setMuted` | After calling `setMuted` to mute the track, the SDK does not stop audio and video capture. The camera's light does not turn off. | The SDK does not send any data after calling `setMuted` to mute the track. Muted users are not counted as streaming users. | Unmuting after a mute is relatively faster. |
# How can I set the log file? (/en/api-reference/faq/integration/set_log_file)
The Agora SDK allows you to configure the output log file. All logs generated by the SDK are written to this file.
## Native Platforms
Native platforms include Android, iOS, macOS, and Windows.
### Set up log files
When you create and initialize an `RtcEngine` instance, use the `mLogConfig` parameter to set the log file.
#### Set log file path
By default, the SDK generates five log files for the SDK and five for API calls. All log files are encoded in UTF-8.
* SDK log files: `agorasdk.log`, `agorasdk.1.log`, `agorasdk.2.log`, `agorasdk.3.log`, `agorasdk.4.log`
* API call log files: `agoraapi.log`, `agoraapi.1.log`, `agoraapi.2.log`, `agoraapi.3.log`, `agoraapi.4.log`
The most recent logs are always written to `agorasdk.log` and `agoraapi.log`. When `agorasdk.log` is full, the SDK handles the log files as follows:
1. Deletes `agorasdk.4.log`, if present.
2. Renames `agorasdk.3.log` to `agorasdk.4.log`.
3. Renames `agorasdk.2.log` to `agorasdk.3.log`.
4. Renames `agorasdk.1.log` to `agorasdk.2.log`.
5. Creates a new `agorasdk.log`.
The `agoraapi.log` file follows the same rules.
#### Default log file paths by platform
* **Android:** `/storage/emulated/0/Android/data/<package_name>/files/agorasdk.log`
* **iOS:** `App Sandbox/Library/Caches/agorasdk.log`
* **macOS:**
* Sandbox enabled: `~/Library/Containers//Data/Library/Logs/agorasdk.log`
* Sandbox disabled: `~/Library/Logs/agorasdk.log`
* **Windows:** `C:\Users\<user_name>\AppData\Local\Agora\<process_name>\agorasdk.log`
Agora recommends using the default log file storage path. If you need to change the path, make sure the specified path exists and is writable.
#### Set log output level
Use the `level` field in the `mLogConfig` parameter to set the log output level. You can choose from the following levels:
* **INFO** (default): Logs at `FATAL`, `ERROR`, `WARN`, and `INFO` levels. Recommended.
* **WARN:** Logs at `FATAL`, `ERROR`, and `WARN` levels.
* **ERROR:** Logs at `FATAL` and `ERROR` levels.
* **FATAL:** Logs only `FATAL` level.
* **NONE:** No logs are recorded.
#### Set the log file size
By default, each SDK log file is 2,048 KB. The API call log file size is also 2,048 KB. To set a custom log file size, use the `fileSizeInKB` field in the `mLogConfig` parameter.
* The size of each `agorasdk.log` file can be between 128 and 20,480 KB.
* This setting applies only to `agorasdk.log`, not `agoraapi.log`.
### Sample Code
Java
Swift
Objective-C
C++
```java tabGroup="set-log-file-native"
RtcEngineConfig.LogConfig logConfig = new RtcEngineConfig.LogConfig();
// Set log filter level to ERROR
logConfig.level = Constants.LogLevel.getValue(Constants.LogLevel.LOG_LEVEL_ERROR);
// Set log file path
String ts = new SimpleDateFormat("yyyyMMdd").format(new Date());
logConfig.filePath = "/sdcard/" + ts + ".log";
// Set log file size to 2 MB
logConfig.fileSize = 2048;
RtcEngineConfig config = new RtcEngineConfig();
config.mAppId = getString(R.string.agora_app_id);
config.mEventHandler = iRtcEngineEventHandler;
config.mContext = context.getApplicationContext();
config.mAreaCode = getAreaCode();
config.mLogConfig = logConfig;
mRtcEngine = RtcEngine.create(config);
```
```swift tabGroup="set-log-file-native"
let logConfig = AgoraLogConfig()
// Set log filter level to ERROR
logConfig.level = AgoraLogLevel.error
// Set log file path
let formatter = DateFormatter()
formatter.dateFormat = "ddMMyyyyHHmm"
let folder = NSSearchPathForDirectoriesInDomains(.documentDirectory, .userDomainMask, true)
logConfig.filePath = "\\(folder[0])/logs/\\(formatter.string(from: Date())).log"
// Set log file size to 2 MB
logConfig.fileSizeInKB = 2 * 1024
let config = AgoraRtcEngineConfig()
config.appId = KeyCenter.AppId
config.areaCode = GlobalSettings.shared.area.rawValue
config.logConfig = logConfig
agoraKit = AgoraRtcEngineKit.sharedEngine(with: config, delegate: self)
```
```objc tabGroup="set-log-file-native"
AgoraLogConfig *logConfig = [[AgoraLogConfig alloc] init];
// Set log filter level to ERROR
logConfig.level = AgoraLogLevelError;
// Set log file path
NSDateFormatter *formatter = [[NSDateFormatter alloc] init];
[formatter setDateFormat:@"ddMMyyyyHHmm"];
NSString *folder = NSSearchPathForDirectoriesInDomains( NSDocumentDirectory, NSUserDomainMask, YES )[0];
logConfig.filePath = [NSString stringWithFormat:@"%@/logs/%@.log", folder, [formatter stringFromDate:[NSDate date]]];
// Set log file size to 2MB
logConfig.fileSizeInKB = 2 * 1024;
AgoraRtcEngineConfig *config = [[AgoraRtcEngineConfig alloc] init];
config.appId = KeyCenter.AppId;
config.areaCode = [GlobalSettings sharedSettings].areaCode;
config.logConfig = logConfig;
self.agoraKit = [AgoraRtcEngineKit sharedEngineWithConfig:config delegate: self];
```
```cpp tabGroup="set-log-file-native"
LogConfig logConfig;
// Set log filter level to ERROR
logConfig.level = LOG_LEVEL::LOG_LEVEL_ERROR;
// Set log file path
time_t rawtime;
struct tm * timeinfo;
char buffer[128];
time(&rawtime);
timeinfo = localtime(&rawtime);
strftime(buffer, sizeof(buffer), "c:\\log\\%Y%m%d.log", timeinfo);
logConfig.filePath = buffer;
// Set log file size to 2MB
logConfig.fileSize = 2048;
RtcEngineContext context;
context.logConfig = logConfig;
std::string strAppID = GET_APP_ID;
context.appId = strAppID.c_str();
context.eventHandler = &m_eventHandler;
int ret = m_rtcEngine->initialize(context);
```
### API reference
* Android
* [`create[2/2\]`](https://api-ref.agora.io/en/video-sdk/android/3.x/classio_1_1agora_1_1rtc_1_1_rtc_engine.html#a45832a91b1051bc7641ccd8958288dba)
* iOS/macOS
* [`sharedEngineWithConfig`](https://api-ref.agora.io/en/video-sdk/ios/3.x/Classes/AgoraRtcEngineKit.html#/api/name/sharedEngineWithConfig\:delegate:)
* Windows
* [`initialize`](https://api-ref.agora.io/en/video-sdk/cpp/3.x/classagora_1_1rtc_1_1_i_rtc_engine.html#ac71db65e66942e4e0a0550e95c16890f)
### Get the stack information
You can also get the stack information when crashes occur:
* Android: Run the `adb bugreport` command
* iOS:
* Open **Xcode** and go to **Window > Devices and Simulators**.
* Select the **Devices** tab and choose the device where the crash occurred.
* Under **Installed Apps**, find the relevant app.
* Click the **Settings** icon (gear button) below the app list.
* Select **Download Container**.
* Once downloaded, right-click the container file and choose **Show Package Contents**.
* Navigate to **AppData > Library > Caches** to find the `agorasdk.log` file with stack information
* macOS: `~/Library/Logs/DiagnosticReports/`
* Windows: You need to capture dump files
On Android and iOS, if you have integrated Bugly in your app, you can also use Bugly to get the stack information.
## Web
### Enable or disable log upload
Call `enableLogUpload` to upload Agora Web SDK logs to Agora servers, and call `disaleLogUpload` to stop the upload.
To ensure that the output log is complete, call `enableLogUpload` before creating the client object.
If you fail to join a channel, logs are unavailable on Agora servers.
### Set the log output level
Call `setLogLevel` to set the log output level. When you select a level, you can see the logs in the preceding levels.
* `DEBUG`: Outputs all logs.
* `INFO`: Outputs logs in the `INFO`, `WARNING` and `ERROR` levels.
* `WARNING`: Outputs logs in the `WARNING` and `ERROR` levels.
* `ERROR`: Outputs logs in the `ERROR` level.
* `NONE`: Outputs no log.
### Sample code
```js
// Javascript
// Enable log upload
AgoraRTC.enableLogUpload();
// Set the log output level as INFO
AgoraRTC.setLogLevel(1);
```
### API reference
* [`enableLogUpload`](https://api-ref.agora.io/en/video-sdk/web/4.x/interfaces/iagorartc.html#enablelogupload)
* [`disableLogUpload`](https://api-ref.agora.io/en/video-sdk/web/4.x/interfaces/iagorartc.html#disablelogupload)
* [`setLogLevel`](https://api-ref.agora.io/en/video-sdk/web/4.x/interfaces/iagorartc.html#setloglevel)
# How to end a class? (/en/api-reference/faq/integration/stop_class)
In Flexible Classroom, the teacher clicks **Leave Classroom** to leave temporarily, which will not change the classroomroom state. To end the class, refer to the following steps:
1. The teacher calls `leaveClassroom`. The sample code is as follows:
```javascript
this.classroomStore.connectionStore.leaveClassroom(LeaveReason.leave)
```
At this point, the classroom state includes the following:
```javascript
ClassState {
beforeClass = 0, // The class has not started
ongoing = 1, // The class is running
afterClass = 2, // The class has ended, but the classroom still exists
close = 3 // The classroom is closed
}
```
2. If you want to actively close the classroom, call `RoomStore:updateClassState` to update the room state. The sample code is as follows:
```javascript
// Close the classroom
this.classroomStore.roomStore.updateClassState(ClassState.close);
```
3. To end the class in the background, call [RESTful API](/en/api-reference/api-ref/flexible-classroom/classroom-rest-api#set-the-classroom-state) to set the classroom state to one of the following:
* `0`: Not started.
* `1`: Started.
* `2`: Ended. The class is over, but users can still join and stay during the extended time.
* `3`: Closed. The classroom is closed after the extended class time. All users are forced out and cannot join again.
# How can I stop cloud recording? (/en/api-reference/faq/integration/stop_cloud_recording)
You can call the [`stop`](/en/realtime-media/cloud-recording/reference/restful-api#stop) method to leave the channel and stop recording.
Agora Cloud Recording automatically stops recording and leaves the channel when there is no user in the recording channel after a time period (30 seconds by default). You can set this timeout interval by the `maxIdleTime` parameter when you start the recording.
# Why do errors occur when calling the Stream.init method? (/en/api-reference/faq/integration/streaminit_error)
The following are common errors when initializing the stream:
* `NotAllowedError`: The user refuses to grant access to the video or audio resource.
* `NotReadableError`: Although the user has granted permission to use the matching devices, a hardware error occurs at the operating system, browser, or web page level, which prevents access to the device. Try refreshing the page or updating the device driver. On some Windows 10 laptops, you need to run Chrome in compatibility mode with Windows 7 to use the camera.
* `NotFoundError`: Cannot find the specified media track. Ensure that your media device is working.
* `MEDIA_NOT_SUPPORT`: Use HTTPS for your web app.
* `OverConstrainedError`: A specified constraint cannot be satisfied by any available device, mostly because the requested capture device is occupied or the specified resolution is not supported.
See [`Stream.init`](https://api-ref.agora.io/en/video-sdk/web/3.x/interfaces/agorartc.client.html#init) for more errors.
# How can I use string user IDs? (/en/api-reference/faq/integration/string_uid)
## Introduction
Many apps use string usernames. To reduce development costs, Agora has added support for string user IDs. Users can now directly use their string usernames as user accounts to join the Agora channel.
To ensure smooth communication, all the users in a channel should use the same type of ID, that is, either the integer user ID, or the string user ID.
This feature is in BETA. Agora recommends contacting [support@agora.io](mailto\:support@agora.io) before implementing this function. The following products or features do not support string user IDs:
* [Cloud Recording](/en/realtime-media/cloud-recording)
* [Channel Management RESTful API](/en/api-reference/api-ref/rtc)
* [Console RESTful API](/en/api-reference/api-ref/console/solutions-agora-console-rest-api)
## Implementation
Before proceeding, ensure that you understand the steps and code logic for implementing the basic RTC SDK functions. The Agora real-Time interaction SDK supports string user IDs across native platforms using different methods.
### Native
Agora Native SDK supports using user accounts (string user ID) to identify the user:
**Android/Windows**:
* `registerLocalUserAccount`: Registers a local user account.
* `joinChannelWithUserAccount`: Joins the channel with the registered user account.
**iOS/macOS**:
* `registerLocalUserAccountWithAppID`: Registers a local user account.
* `joinChannelByToken`: Joins the channel with the registered user account.
Follow the steps to join an Agora channel with a string user account:
1. After initializing the RtcEngine instance, call `registerLocalUserAccount` to register a local user account.
2. Call the `joinChannelWithUserAccount` method to join a channel with the registered user account.
3. Call the `leaveChannel` method to leave the channel.
**API call sequence**
The following diagram shows how to join a channel with a string user ID:
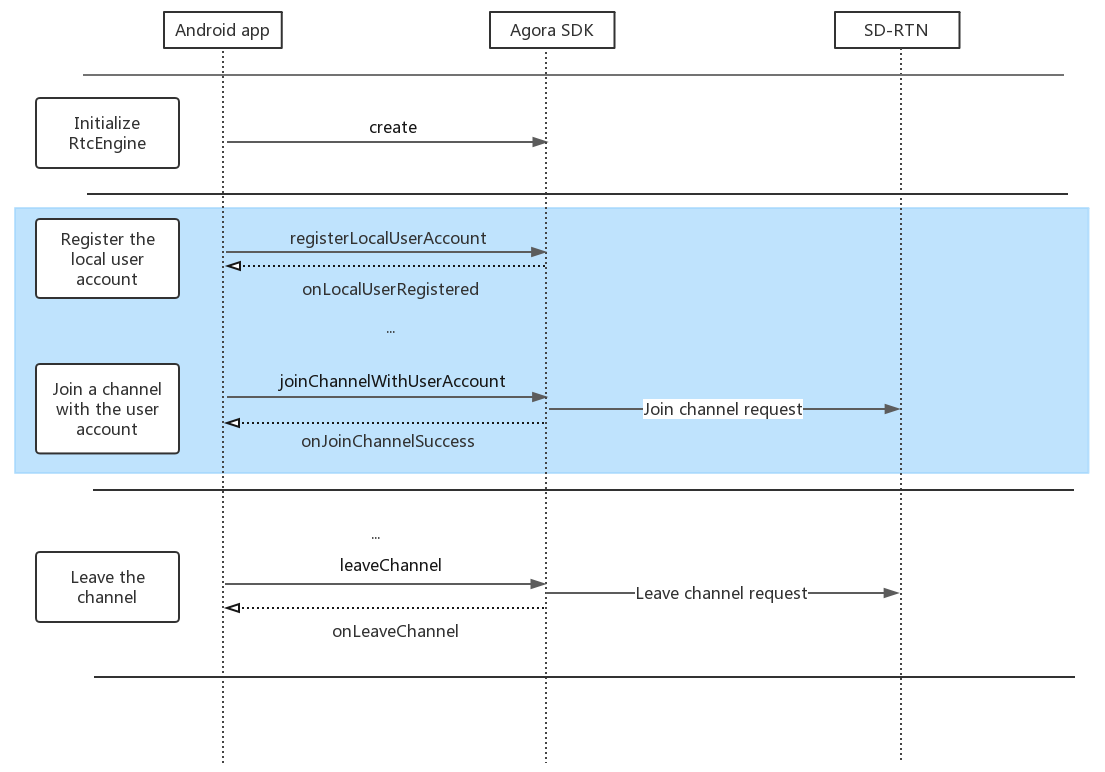
This diagram uses Java APIs as an example.
* When calling the `registerLocalUserAccount` and `joinChannelWithUserAccount` methods, the `userAccount` parameter is required and cannot be empty null.
* Agora recommends that you call `registerLocalUserAccount` to register an account before calling `joinChannelWithUserAccount`. This can reduce the time required to join a channel. You can also directly call `joinChannelWithUserAccount` to join the channel.
* For other APIs, Agora still uses the Int UID parameter to identify the user. You can use `getUserInfoByUid` or `getUserInfoByUserAccount` to get the corresponding User Account or UID without having to maintain the mapping table yourself.
**Sample code**
Refer to the following code snippets to implement string user accounts in your project:
Java
C++
Swift
Objective-C
```java tabGroup="string-user-account-native"
private void initializeAgoraEngine() {
try {
String appId = getString(R.string.agora_app_id);
mRtcEngine = RtcEngine.create(getBaseContext(), appId, mRtcEventHandler);
// Registering a user name after initialization and before joining a channel can shorten the time to join a
channelmRtcEngine.registerLocalUserAccount(appId, mLocal.userAccount);
} catch (Exception e) {
Log.e(LOG_TAG, Log.getStackTraceString(e));
throw new RuntimeException("NEED TO check rtc sdk init fatal error\n" + Log.getStackTraceString(e));
}
}
private void joinChannel() {
String token = getString(R.string.agora_access_token);
if (token.isEmpty()) {
token = null;
}
// Join a channel using the registered user
IDmRtcEngine.joinChannelWithUserAccount(token, "stringifiedChannel1", mLocal.userAccount);
}
```
```cpp tabGroup="string-user-account-native"
LRESULT COpenLiveDlg::OnJoinChannel(WPARAM wParam, LPARAM lParam)
{
IRtcEngine *lpRtcEngine = CAgoraObject::GetEngine();
CAgoraObject *lpAgoraObject = CAgoraObject: :GetAgoraObject();
// Register the local user name
lpAgoraObject->RegisterLocalUserAccount(APP_ID, m_dlgEnterChannel.GetStringUid());
// Use the user name to join the channel
lpAgoraObject->JoinChannelWithUserAccount(strChannelName, m_dlgEnterChannel.GetStringUid());
}
```
```swift tabGroup="string-user-account-native"
func joinChannel() {
// Register user ID before joining the channel
let myStringId = "someStringId"
agoraKit.registerLocalUserAccount(userAccount: myStringId, appId: myAppId)
// Join channel with registered user ID
agoraKit.joinChannel(byUserAccount: myStringId, token: Token, channelId: "demoChannel1") {
(sid, uid, elapsed) in
// Add any additional code to execute after joining the channel
}
}
```
```objc tabGroup="string-user-account-native"
-(void)joinChannel {
// Register user ID before joining the channel
NSString *userAccount = @"someStringId";
[self.agoraKit registerLocalUserAccount: userAccount appId: KeyCenter.AppId];
// Join channel with registered user ID
[self.agoraKit joinChannelByToken:token channelId:channelName userAccount:userAccount mediaOptions:options joinSuccess:nil];
}
```
#### Sample project
Agora provides an open-source [String-Account](https://github.com/AgoraIO/Advanced-Video/tree/dev/backup/String-Account) demo project on Github that implements string user accounts.
#### API Reference
* Java
* [`registerLocalUserAccount`](https://api-ref.agora.io/en/video-sdk/android/4.x/API/class_irtcengine.html#api_irtcengine_registerlocaluseraccount)
* [`joinChannelWithUserAccount`](https://api-ref.agora.io/en/video-sdk/android/4.x/API/class_irtcengine.html#api_irtcengine_joinchannelwithuseraccount)
* [`getUserInfoByUid`](https://api-ref.agora.io/en/video-sdk/android/4.x/API/class_irtcengine.html#api_irtcengine_getuserinfobyuid)
* [`getUserInfoByUserAccount`](https://api-ref.agora.io/en/video-sdk/android/4.x/API/class_irtcengine.html#api_irtcengine_getuserinfobyuseraccount)
* [`onLocalUserRegistered`](https://api-ref.agora.io/en/video-sdk/android/4.x/API/class_irtcengineeventhandler.html#callback_irtcengineeventhandler_onlocaluserregistered)
* [`onUserInfoUpdated`](https://api-ref.agora.io/en/video-sdk/android/4.x/API/class_irtcengineeventhandler.html#callback_irtcengineeventhandler_onuserinfoupdated)
* Objective-C
* [`registerLocalUserAccount`](https://api-ref.agora.io/en/video-sdk/ios/4.x/documentation/agorartckit/agorartcenginekit/registerlocaluseraccount%28_\:appid:%29)
* [`joinChannel`](https://api-ref.agora.io/en/video-sdk/ios/4.x/documentation/agorartckit/agorartcenginekit/joinchannel%28bytoken\:channelid\:info\:uid\:joinsuccess:%29)
* [`getUserInfo(byUid:withError:)`](https://api-ref.agora.io/en/video-sdk/ios/4.x/documentation/agorartckit/agorartcenginekit/getuserinfo%28byuid\:witherror:%29)
* [`getUserInfo(byUserAccount:withError:)`](https://api-ref.agora.io/en/video-sdk/ios/4.x/documentation/agorartckit/agorartcenginekit/getuserinfo%28byuseraccount\:witherror:%29)
* [`didUserInfoUpdatedWithUserId`](https://api-ref.agora.io/en/video-sdk/ios/4.x/documentation/agorartckit/agorartcenginedelegate/rtcengine%28_\:diduserinfoupdatedwithuserid\:userinfo:%29)
* Swift
* [`registerLocalUserAccount`](https://api-ref.agora.io/en/video-sdk/macos/4.x/documentation/agorartckit/agorartcenginekit/registerlocaluseraccount%28_\:appid:%29)
* [`joinChannel`](https://api-ref.agora.io/en/video-sdk/macos/4.x/documentation/agorartckit/agorartcenginekit/joinchannel%28bytoken\:channelid\:info\:uid\:joinsuccess:%29)
* [`getUserInfo(byUid:withError:)`](https://api-ref.agora.io/en/video-sdk/macos/4.x/documentation/agorartckit/agorartcenginekit/getuserinfo%28byuid\:witherror:%29)
* [`getUserInfo(byUserAccount:withError:)`](https://api-ref.agora.io/en/video-sdk/macos/4.x/documentation/agorartckit/agorartcenginekit/getuserinfo%28byuseraccount\:witherror:%29)
* [`didUserInfoUpdatedWithUserId`](https://api-ref.agora.io/en/video-sdk/macos/4.x/documentation/agorartckit/agorartcenginedelegate/rtcengine%28_\:diduserinfoupdatedwithuserid\:userinfo:%29)
* C++
* [`registerLocalUserAccount`](https://api-ref.agora.io/en/video-sdk/cpp/4.x/API/class_irtcengine.html#api_irtcengine_registerlocaluseraccount)
* [`joinChannelWithUserAccount`](https://api-ref.agora.io/en/video-sdk/cpp/4.x/API/class_irtcengine.html#api_irtcengine_joinchannelwithuseraccount)
* [`getUserInfoByUid`](https://api-ref.agora.io/en/video-sdk/cpp/4.x/API/class_irtcengine.html#api_irtcengine_getuserinfobyuid)
* [`getUserInfoByUserAccount`](https://api-ref.agora.io/en/video-sdk/cpp/4.x/API/class_irtcengine.html#api_irtcengine_getuserinfobyuseraccount)
* [`onLocalUserRegistered`](https://api-ref.agora.io/en/video-sdk/cpp/4.x/API/class_irtcengineeventhandler.html#callback_irtcengineeventhandler_onlocaluserregistered)
* [`onUserInfoUpdated`](https://api-ref.agora.io/en/video-sdk/cpp/4.x/API/class_irtcengineeventhandler.html#callback_irtcengineeventhandler_onuserinfoupdated)
### Web
Starting from v2.5.0, the `uid` parameter in the `Client.join` method can be set as either a number or a string. You can join a channel by calling the `Client.join` method and passing in a string `uid`.
**Sample code**
Refer to the following code sample to implement string user accounts in your project:
```javascript
// Set UID to 'agora' and join channel 'demo'
client.join("", "demo", "", "agora");
```
#### API Reference
* [`Client.join`](https://api-ref.agora.io/en/video-sdk/web/4.x/interfaces/iagorartcclient.html#join)
### Considerations
* Do not mix parameter types within the same channel. If you use SDKs that do not support string usernames, only integer user IDs can be used in the channel. The following Agora SDKs support string user accounts:
* The Native SDK: v2.8.0 and later.
* The Web SDK: v2.5.0 and later.
* If you change usernames to strings, ensure that all end users are upgraded synchronously.
* If you use string user accounts to join a channel, ensure that the token generation script on your server is updated to the latest version, and that you use the same user account or its corresponding integer user ID to generate a token.
* If the Native SDK and Web SDK join the same channel, ensure that the user id types are the same.
# How can I switch between the screen-sharing stream and the camera stream? (/en/api-reference/faq/integration/switch_screen_camera_web)
This article only applies to the Agora Web SDK 3.x and earlier versions.
This page introduces three solutions for switching between the screen-sharing stream and the stream captured by the camera in a [screen-sharing](/en/realtime-media/interactive-live-streaming/build/manage-video-and-streaming/screen-sharing) scenario using the Agora RTC SDK for Web.
Switching from the screen-sharing stream to the camera stream and vice versa are the same process. The following solutions take the first case as an example.
## Solution 1: Create two streams
Create two Client objects on the sender, which correspond to the screen-sharing stream and the camera stream. See [Share the Screen](/en/realtime-media/interactive-live-streaming/build/manage-video-and-streaming/screen-sharing) for details.
To switch from the screen-sharing stream to the camera stream, subscribe to the camera stream on the receiver.
We recommend this solution if your application scenario allows creating two streams at the same time.
## Solution 2: Close the current stream and publish a new stream
1. Call `Client.unpublish` and `Stream.close` in sequence to unpublish and close the current screen-sharing stream.
2. Call `AgoraRTC.createStream` to create a new local video stream.
3. Call `Stream.init` and `Stream.publish` to initialize and publish the stream.
This solution is reliable and works with multiple browsers and platforms, but it does not support dynamic switching. You may need to allow for a couple of seconds to switch streams.
## Solution 3: Replace the current video track
Call `Stream.replaceTrack` to replace the video track in the local stream with the screen-sharing stream.
After replacing the video track with the screen-sharing stream, the encoding frame rate decreases to 5 fps.
This solution supports dynamic switching, but the `replaceTrack` method has the following limitations:
* Supports only Chrome 65+, Safari and the latest Firefox browser.
* Does not take effect on some mobile devices.
* Does not support switching to a screen-sharing stream in dual-stream mode.
# What is the difference between the in-call volume and the media volume? (/en/api-reference/faq/integration/system_volume)
The in-call volume refers to the volume of voice and video calls, while the media volume refers to the volume at which background music, videos, and audio effects are played. The in-call volume and the media volume are independent from each other, and the setting of one does not affect the other. The differences between the in-call volume and the media volume are as follows:
| | In-call volume | Media volume |
| :-------------------------- | :----------------------------------------------------------------------------------------------------------------------------------------------------------- | :----------------------------------------------------------------------------------------------------------------------------------------------- |
| Audio quality | Lower. | Higher, with good audio performance. |
| Volume | Cannot be adjusted to 0. | Can be adjusted to 0. |
| Echo cancellation algorithm | Uses the echo cancellation algorithm of the device system to completely eliminate the echo generated by the user's device, but may also mute music or voice. | Uses the echo cancellation algorithm of the Agora RTC SDK and might not eliminate the echo entirely, while having less impact on music or voice. |
The system volume is the volume adjusted on the device, which is controlled by the volume type used by the Agora RTC SDK. For example, if the SDK uses the in-call volume, then when you adjust the system volume, you actually adjust the in-call volume.
The volume type used by the SDK is determined by the audio route, the user role set in `setClientRole`, and the audio scenario set in `setAudioProfile`. The following tables show the volume types used by the SDK in each scenario:
### Android
* In the `AUDIO_SCENARIO_DEFAULT` scenario:
| User role | Wired headphones | Speaker | Earpiece | Bluetooth earphone |
| -------------- | ---------------- | -------------- | -------------- | ------------------ |
| Multiple hosts | Media volume | In-call volume | In-call volume | In-call volume |
| Single host | Media volume | Media volume | In-call volume | In-call volume |
| Audience | Media volume | Media volume | In-call volume | Media volume |
* In the `AUDIO_SCENARIO_GAME_STREAMING`, `AUDIO_SCENARIO_CHORUS`, or `AUDIO_SCENARIO_MEETING` scenario:
| User role | Wired headphones | Speaker | Earpiece | Bluetooth earphone |
| -------------- | ---------------- | ------------ | -------------- | ------------------ |
| Multiple hosts | Media volume | Media volume | In-call volume | In-call volume |
| Single host | Media volume | Media volume | In-call volume | In-call volume |
| Audience | Media volume | Media volume | In-call volume | Media volume |
* In the `AUDIO_SCENARIO_CHATROOM` scenario:
| User role | Wired headphones | Speaker | Earpiece | Bluetooth earphone |
| -------------- | ---------------- | -------------- | -------------- | ------------------ |
| Multiple hosts | Media volume | In-call volume | In-call volume | In-call volume |
| Single host | Media volume | In-call volume | In-call volume | In-call volume |
| Audience | Media volume | In-call volume | In-call volume | In-call volume |
### iOS
* In the `AgoraAudioScenarioDefault` scenario:
| User role | Wired headphones | Speaker or earpiece | Bluetooth earphone |
| -------------- | ---------------- | ------------------- | ------------------ |
| Multiple hosts | Media volume | In-call volume | In-call volume |
| Single host | Media volume | Media volume | In-call volume |
| Audience | Media volume | Media volume | Media volume |
* In `AgoraAudioScenarioGameStreaming`, `AgoraAudioScenarioChorus`, or `AgoraAudioScenarioMeeting` scenarios:
| User role | Wired headphones | Speaker or earpiece | Bluetooth earphone |
| -------------- | ---------------- | ------------------- | ------------------ |
| Multiple hosts | Media volume | Media volume | Media volume |
| Single host | Media volume | Media volume | Media volume |
| Audience | Media volume | Media volume | Media volume |
* In `AgoraAudioScenarioChatRoom` scenario:
| User role | Wired headphones | Speaker or earpiece | Bluetooth earphone |
| -------------- | ---------------- | ------------------- | ------------------ |
| Multiple hosts | Media volume | In-call volume | In-call volume |
| Single host | Media volume | In-call volume | In-call volume |
| Audience | Media volume | In-call volume | In-call volume |
## Q & A
**I set the volume of the game effects before joining the channel, why did the volume change after joining a channel?**
The in-call volume and the media volume are independent from each other, and the setting of one does not affect the other. Before joining the channel, the volume that the user adjusts on the device is media volume; after joining the channel, if the Agora RTC SDK uses the in-call volume, and the media volume and the in-call volume of the user's device are different, the volume of the game effects changes. To avoid this issue, Agora recommends setting the SDK's volume type to media volume by referring to [Volume type introduction](#volume-type-introduction).
# How do I use co-host token authentication? (/en/api-reference/faq/integration/token_cohost)
Co-host authentication enables you to authenticate whether a user has the privilege to publish streams in a live streaming channel. This feature helps ensure that only authorized users publish streams and prevents illegal users from exploiting business vulnerabilities or stealing tokens to bomb a live broadcast room.
## Understand the tech
You deploy a token server and generate tokens with the required privileges; the Agora server verifies the tokens you generate.
Note
* Using co-host authentication requires app logic changes. Ensure that you
read this article before enabling this function.
* Co-host authentication applies to scenarios where the channel profile is
set to **Live Broadcasting**.
## Prerequisites
Before proceeding, ensure that your app meets the following requirements:
* Uses the Agora RTC SDK v2.1.0 or later.
* Uses only token-based authentication on all app clients to authenticate users. For details, see [Upgrade authentication mechanism](/en/realtime-media/rtc/build/authenticate-users/integrate-token-generation).
## Implementation
### Set the `role` parameter
This section shows you how to set the `role` parameter when generating a token using `AccessToken2`. The following code uses C++ as an example but the principles and steps remain the same if you use another programming language to build your token server.
```cpp
#include
#include
#include "../src/RtcTokenBuilder2.h"
using namespace agora::tools;
int main(int argc, char const *argv[]) {
(void)argc;
(void)argv;
// Get the value of the environment variable AGORA_APP_ID. Make sure you set this variable to your App ID obtained from Agora Console
const char *env_app_id = getenv("AGORA_APP_ID");
std::string app_id = env_app_id ? env_app_id : "";
// Get the value of the environment variable AGORA_APP_CERTIFICATE. Make sure you set this variable to your App Certificate obtained from Agora Console
const char *env_app_certificate = getenv("AGORA_APP_CERTIFICATE");
std::string app_certificate = env_app_certificate ? env_app_certificate : "";
// Replace channelName with the channel name you want to join
std::string channel_name = "channelName";
// Fill in your actual user ID
uint32_t uid = 2882341273;
// Token expiration time in seconds
uint32_t token_expiration_in_seconds = 3600;
// Privilege expiration time for all permissions in seconds
uint32_t privilege_expiration_in_seconds = 3600;
std::string result;
std::cout << "App Id:" << app_id << std::endl;
std::cout << "App Certificate:" << app_certificate << std::endl;
if (app_id == "" || app_certificate == "") {
std::cout << "Need to set environment variable AGORA_APP_ID and "
"AGORA_APP_CERTIFICATE"
<< std::endl;
return -1;
}
// Generate Token
result = RtcTokenBuilder2::BuildTokenWithUid(
app_id, app_certificate, channel_name, uid, UserRole::kRolePublisher,
token_expiration_in_seconds, privilege_expiration_in_seconds);
std::cout << "Token With Int Uid:" << result << std::endl;
return 0;
}
```
| Parameter | Description |
| --------- | ------------------------------------------------------------------------------------------------------------------------------------------------------------------------------------------------------- |
| `role` | The publishing privilege of the user:- `kRolePublisher` (1): (Default) The user has the privilege to publish streams.
- `kRoleSubscriber` (2): The user does not have the privilege to publish streams. |
### Modify the app logic
Refer to the following steps to authenticate whether a user has the publishing privilege in scenarios where an audience member wants to become a host:
1. Before joining a channel, the app client applies for a token with the privilege of a subscriber. The app server generates a token and passes it to the app client.
2. The app client calls `joinChannel` and passes the token generated with `kRoleSubscriber` privilege to the SDK.
3. Before changing the user role from audience to host, the app client applies for a token with the privilege of `kRolePublisher`. The app server generates a second token, and passes it to the app client.
4. The app client calls `renewToken` and passes the new token to the SDK.
5. The app client calls `setClientRole` to change the user role from an audience member to a host. The Agora server authenticates the token when the app client calls `setClientRole`. If the token is generated with the privilege of `kRolePublisher`, the app client can publish streams.
Note
* If the user wants to switch from a host to an audience member, repeat steps 3 to 5. Apply for a token with the privilege of `kRoleSubscriber`, call `renewToken` on the app client, and then call `setClientRole`.
* When the token expires, you generate a new token on the app server and call `renewToken` to pass the fresh token to the SDK. The new token also has a service validity period.
### Enable co-host authentication
Refer to the following steps to enable co-host authentication in Agora Console:
1. In [Agora Console](https://console.agora.io), select **RTC Services** from the sidebar and find **Co-Host Authentication**.
2. Turn on the toggle, and follow the on-screen instructions. Co-host authentication takes effect in 5 minutes.
## FAQs
1. **Suppose a user takes the role of broadcaster. After I enable co-host authentication, will the user be able to publish streams?**
Answer: Yes. After the token expires, you need to generate a new token with the privilege of `kRolePublisher`, and call `renewToken` to pass the new token to the SDK.
2. **Suppose a user takes the role of audience. After I enable co-host authentication, what should I do if this user wants to switch to broadcaster and publish streams?**
Answer: Once co-host authentication is enabled, a user needs to meet both of the following requirements to publish streams:
* The user role in `setClientRole` is set as **Broadcaster**.
* The user joins the channel with a token generated by setting the `role` parameter in the `buildToken` method to `kRolePublisher`.
To summarize, for an audience member to become a host and publish streams, you need to follow steps in [Modify the app logic](#modify-the-app-logic), generate a token with the privilege of a publisher, call `renewToken` to pass the new token to the SDK, and then call `setClientRole` to change the user role to broadcaster.
# How to deal with token-related error codes? (/en/api-reference/faq/integration/token_related_issues)
When a primary/secondary certificate is enabled for your project, you use dynamic tokens to authenticate users. This page lists token-related error codes and event callbacks you may receive, provides triggering causes and solutions, and helps you troubleshoot.
## 101: App Id invalid
**Problem**
The SDK for native platforms returns the `ERR_INVALID_APP_ID` (101) error code when initializing the Agora service. Alternatively, the SDK calls back the `onError` event and returns the `ERR_INVALID_APP_ID` (101) error code when calling `joinChannel`.
**Cause**
An invalid App Id usually caused by the incorrect data type.
**Solution**
Check that the App Id data type is string and reinitialize the service.
## 109: Token expired
**Problem**
The SDK for native platforms triggers the `onError` event and returns the `ERR_TOKEN_EXPIRED` (109) error code when calling `joinChannel`.
**Cause**
The token has expired.
**Solution**
If the token has expired, generate a new token on the server and call `renewToken` to rejoin the channel.
## 110: Token invalid
**Problem**
The SDK for native platforms triggers the `onError` event and returns the `ERR_INVALID_TOKEN` (110) error code when calling `joinChannel`.
**Cause**
The generated token is invalid. This may happen for one of the following reasons:
* Primary/secondary certificate **is enabled** in your project, but the token is **not passed** when joining the channel. Alternatively, primary/secondary certificate **is not** enabled, but the token **is passed** to join the channel.
* The App Id, user ID, and channel name you used when generating the token on the server do not match the values you filled in when initializing and joining the channel.
**Solution**
Before joining the channel, check whether the project corresponding to the App Id you filled in during initialization has a primary/secondary certificate enabled.
* If primary/secondary certificate is not enabled, you cannot use a token to join the channel.
* If primary/secondary certificate is enabled in the project and App Id-only joining is allowed, you can join the channel using only the App Id or using the token generated by the primary/secondary certificate to join the channel.
* If primary/secondary certificate is enabled in your project and App Id-only joining is not allowed, you must use a token to join the channel.
When confirming the use of a token to join the channel, also confirm the following:
* The App Id used to generate the token is consistent with the App Id filled in when initializing the token server.
* The user ID used to generate the token is consistent with the user ID filled in when joining the channel, and the data type is also consistent.
* The channel name used to generate the token is consistent with the channel name filled in when joining the channel.
## Token expiration event callback
To improve the communication experience, Agora provides the following two callbacks to inform the client that their token is about to expire or has expired:
* `onTokenPrivilegeWillExpire`: This callback indicates that the token will expire within 30 seconds. When you receive this callback, generate a new token on the server side and call `renewToken` to pass the newly generated token to the SDK.
* `onRequestToken`: This callback indicates that the token has expired. When you receive this callback, generate a new token on the server side and call `joinChannel` to rejoin the channel.
## Error code comparison
The table below provides the error code equivalents for different languages.
| Error code | Java/C++/C# | Objective-C |
| ---------- | -------------------- | ---------------------------- |
| 101 | `ERR_INVALID_APP_ID` | `AgoraErrorCodeInvalidAppId` |
| 109 | `ERR_TOKEN_EXPIRED` | `AgoraErrorCodeTokenExpired` |
| 110 | `ERR_INVALID_TOKEN` | `AgoraErrorCodeInvalidToken` |
# How to turn off noise reduction, echo cancellation, and automatic gain control? (/en/api-reference/faq/integration/turn_off_3a_config)
If your classroom integrates or uses audio mixing or other tools, and you want to turn off noise reduction, echo cancellation, and gain control functions, add the following code to `packages/agora-classroom-sdk/src/infra/api/index.tsx`:
```typescript
if (AgoraRteRuntimePlatform.Electron === AgoraRteEngineConfig.platform) {
rtcSDKParameters = [
{ 'rtc.audio.aec.enable': false },
{ 'rtc.audio.agc.enable': false },
{ 'rtc.audio.ans.enable': false },
];
} else {
rtcSDKParameters = [
{
MEDIA_DEVICE_CONSTRAINTS: {
audio: {
autoGainControl: false,
echoCancellation: false,
noiseSuppression: false,
},
},
},
];
}
```
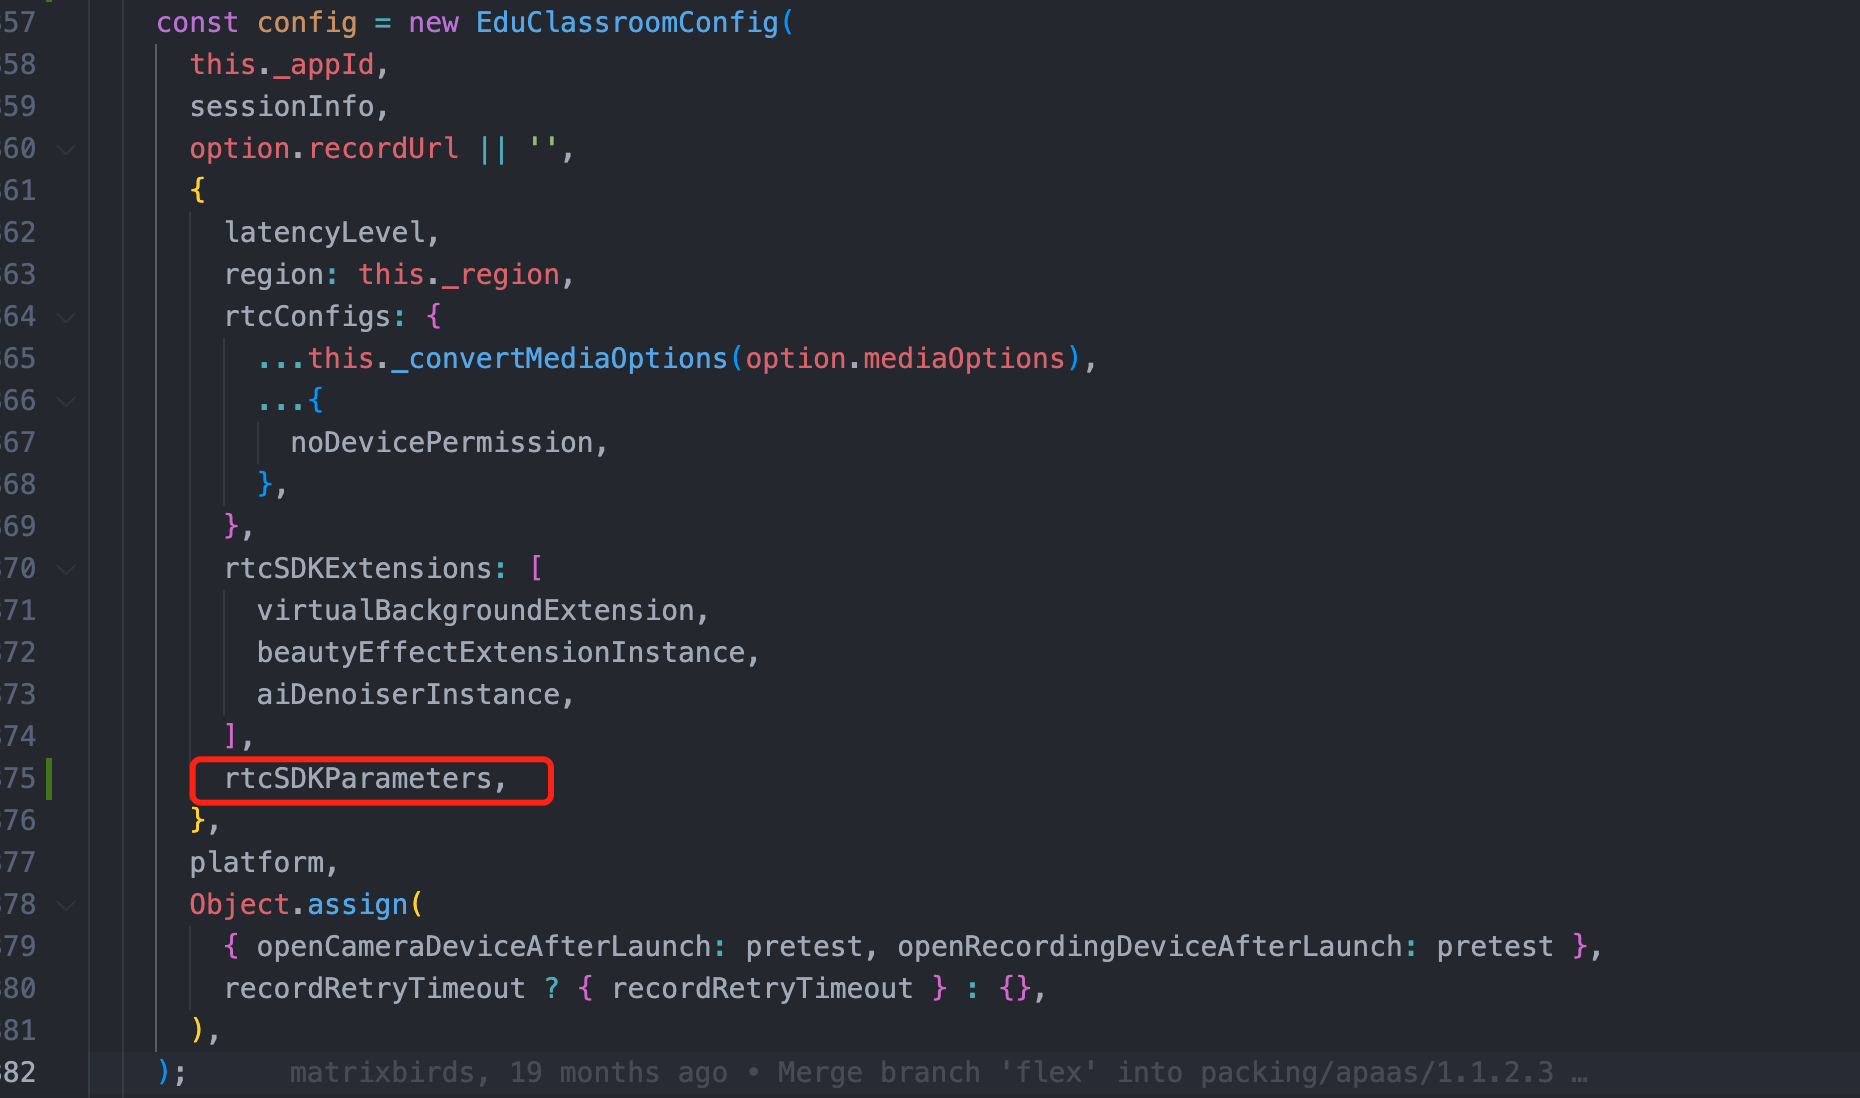
# Why do crashes occur on Unity SDK v3.0.1 or earlier? (/en/api-reference/faq/integration/unity_crash)
When using the Unity SDK v3.0.1 or earlier, blank screen or even crashes occur if access to the microphone or camera is not granted. This issue occurs on various platforms including macOS and Android.
## Reason
The reason for this issue is that permission to the system microphone or camera is not granted.
Since macOS 10.14, Apple enforces stricter privacy guards. If the permission for microphone or camera usage is not properly set, apps crash.
## Solution
The SDK does not detect whether such permissions are set. To avoid this issue, ensure that you set camera and microphone permissions in your **Unity Editor**. Go to **File** -> **Build Settings** -> **Player Settings**. On the **Player** interface, click **Other Settings**, and add descriptions to **Camera Usage Description** and **Microphone Usage Description**.
# How do I add the permissions needed for real-time interaction to my Unreal Engine project? (/en/api-reference/faq/integration/unreal_permissions)
In order to implement real-time interactive features on different target platforms, you need to add camera, microphone, and other permissions to your Unreal Engine project. Depending on the target platform, you can refer to this article for steps and configurations to get these permissions.
## iOS
If the target platform is iOS, in the **Unreal Editor**, click **Edit > Project Settings > Platforms > iOS** to package the project and paste the following code into the **Additional Plist Data** input box to add the camera and microphone permissions required for real-time interaction:
```xml
NSCameraUsageDescriptionAgoraVideoCallNSMicrophoneUsageDescriptionAgoraVideoCall
```
## macOS
If the target platform is macOS, refer to the following steps to add the camera and microphone permissions required for real-time interaction to your Unreal Engine project:
### Step 1: Modify the **Info.plist** file
For Unreal Engine 4, you can directly modify the **Info.plist** file generated after the project is packaged to add the required permissions to your project. If you are using Unreal Engine 5, Agora suggests that you modify the **Info.plist** template that comes with the engine to ensure that the required permissions have been added to the file that is generated during packaging.
#### Unreal Engine 4
In the **Unreal Editor**, click **Edit > Project Settings > Platforms > Mac** Package Project. Right-click on the compiled application file (`.app`) and select **Show Package Contents** to display the package contents, which includes the files generated by the package **Info.plist**.
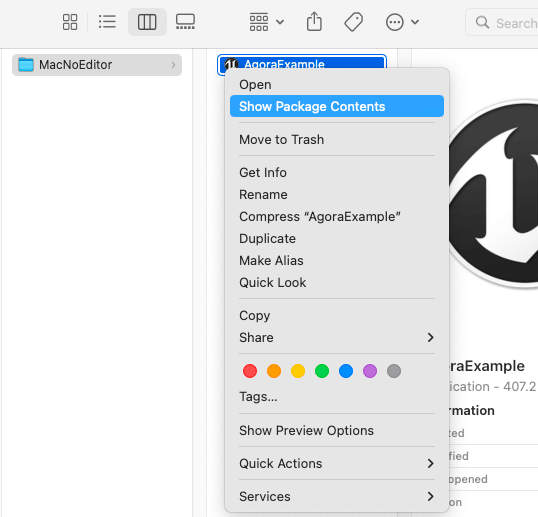
#### Unreal Engine 5
Open `./Epic Games//Engine/Source/Runtime/Launch/Resources/Mac` which is the local path where the **Info.plist** template is located.
### Step 2: Add privacy permissions
Add the following camera and microphone privacy permissions to the **Information Property List** in the **Info.plist** file:
* Privacy - Camera Usage Description: Camera usage permissions.
* Privacy - Microphone Usage Description: Microphone usage privileges.
#### Method 1:
Double-click to open the **Info.plist** file in Xcode and add the camera and microphone privacy permissions under **Information Property List**:
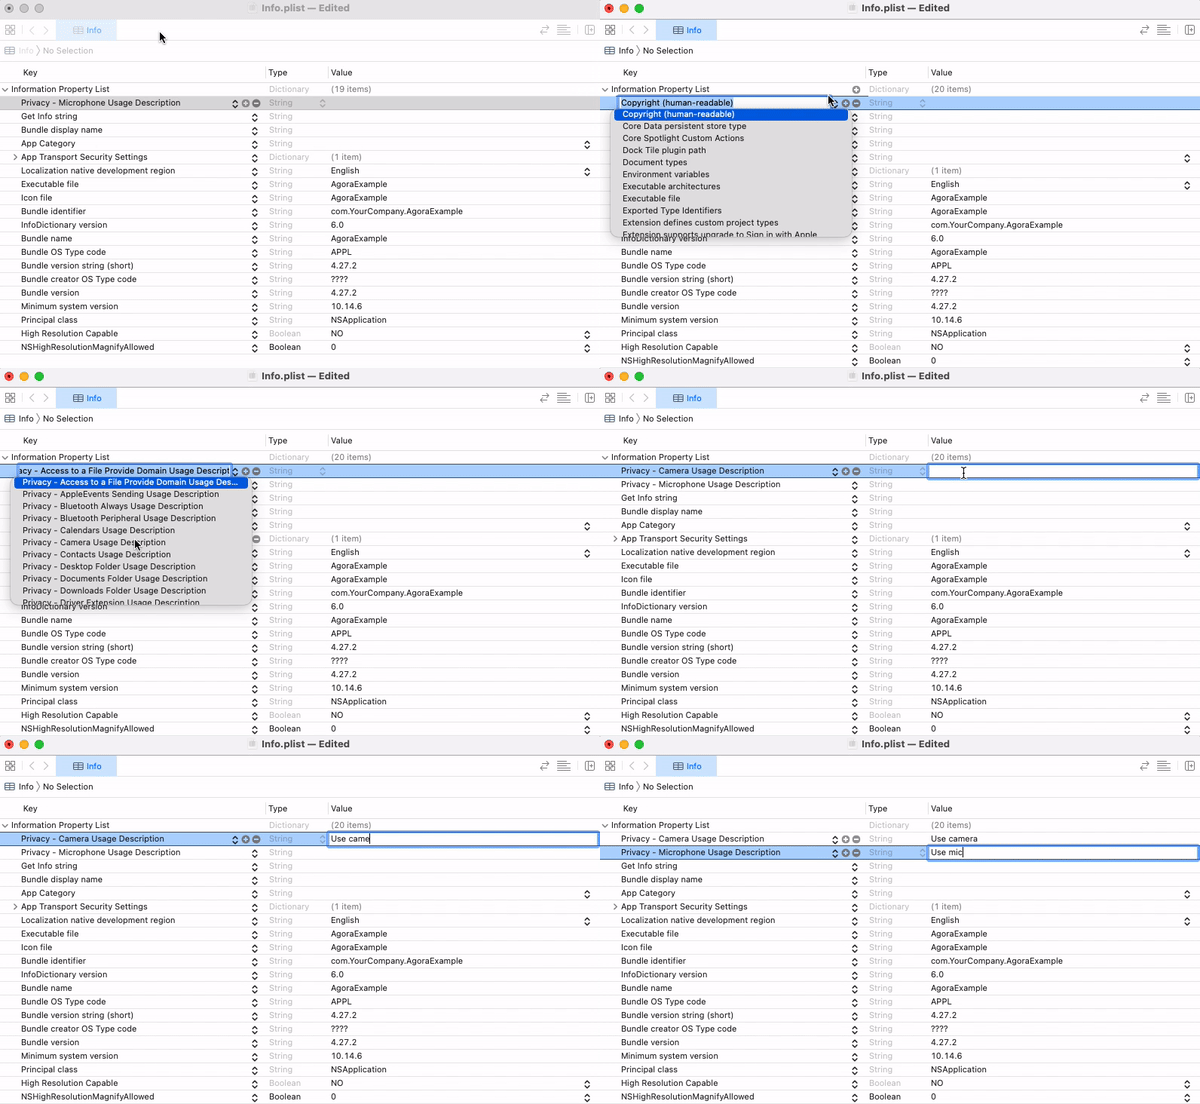
#### Method 2:
Open the **Info.plist** file with a text editor and add the following XML fragment:
```xml
NSCameraUsageDescriptionUse cameraNSMicrophoneUsageDescriptionUse mic
```
## Android
If the target platform is Android, refer to the following steps to add the following permissions required for real-time interaction to your Unreal Engine project:
* `android.permission.RECORD_AUDIO`: Recording permission.
* `android.permission.CAMERA`: Camera permission.
* `android.permission.READ_PHONE_STATE`: Read phone state permission.
* `android.permission.WRITE_EXTERNAL_STORAGE`: Write to external storage permission.
### C++
1. Add the following `include` code to the `Project/Source/Project/AgoraWidget.h` file:
```cpp
#if PLATFORM_ANDROID
#include "AndroidPermission/Classes/AndroidPermissionFunctionLibrary.h"
#endif
```
2. Add the **AndroidPermission** library to the `Project/Source/Project/Project.Build.cs` file:
```cpp
if (Target.Platform == UnrealTargetPlatform.Android)
{
PrivateDependencyModuleNames.AddRange(new string[] { "AndroidPermission" });
}
```
3. Check if Android permissions have been obtained. Add the `NativeConstruct` and `CheckAndroidPermission` methods and implementations to the `AgoraWidget.h` and `AgoraWidget.cpp` files and call the `CheckAndroidPermission` method in `NativeConstruct` to check if the required Android permissions have been obtained. The sample code is as follows:
```cpp
// AgoraWidget.h
private:
// Get Android Permissions
void CheckAndroidPermission();
```
```cpp
// AgoraWidget.cpp
// Add the following code after #include "AgoraWidget.h"
void UAgoraWidget::CheckAndroidPermission()
{
#if PLATFORM_ANDROID
FString pathfromName = UGameplayStatics::GetPlatformName();
if (pathfromName == "Android")
{
TArray AndroidPermission;
AndroidPermission.Add(FString("android.permission.CAMERA"));
AndroidPermission.Add(FString("android.permission.RECORD_AUDIO"));
AndroidPermission.Add(FString("android.permission.READ_PHONE_STATE"));
AndroidPermission.Add(FString("android.permission.WRITE_EXTERNAL_STORAGE"));
AndroidPermission.Add(FString("android.permission.ACCESS_WIFI_STATE"));
AndroidPermission.Add(FString("android.permission.ACCESS_NETWORK_STATE"));
UAndroidPermissionFunctionLibrary::AcquirePermissions(AndroidPermission);
}
#endif
}
void UAgoraWidget::NativeConstruct()
{
Super::NativeConstruct();
#if PLATFORM_ANDROID
CheckAndroidPermission()
#endif
}
```
### Blueprint
Before initializing the RTC engine, you need to check whether you have acquired the Android system permissions required to implement real-time interaction. You can refer to the following figure to create nodes to add permissions such as access to the microphone and camera in the Android system:
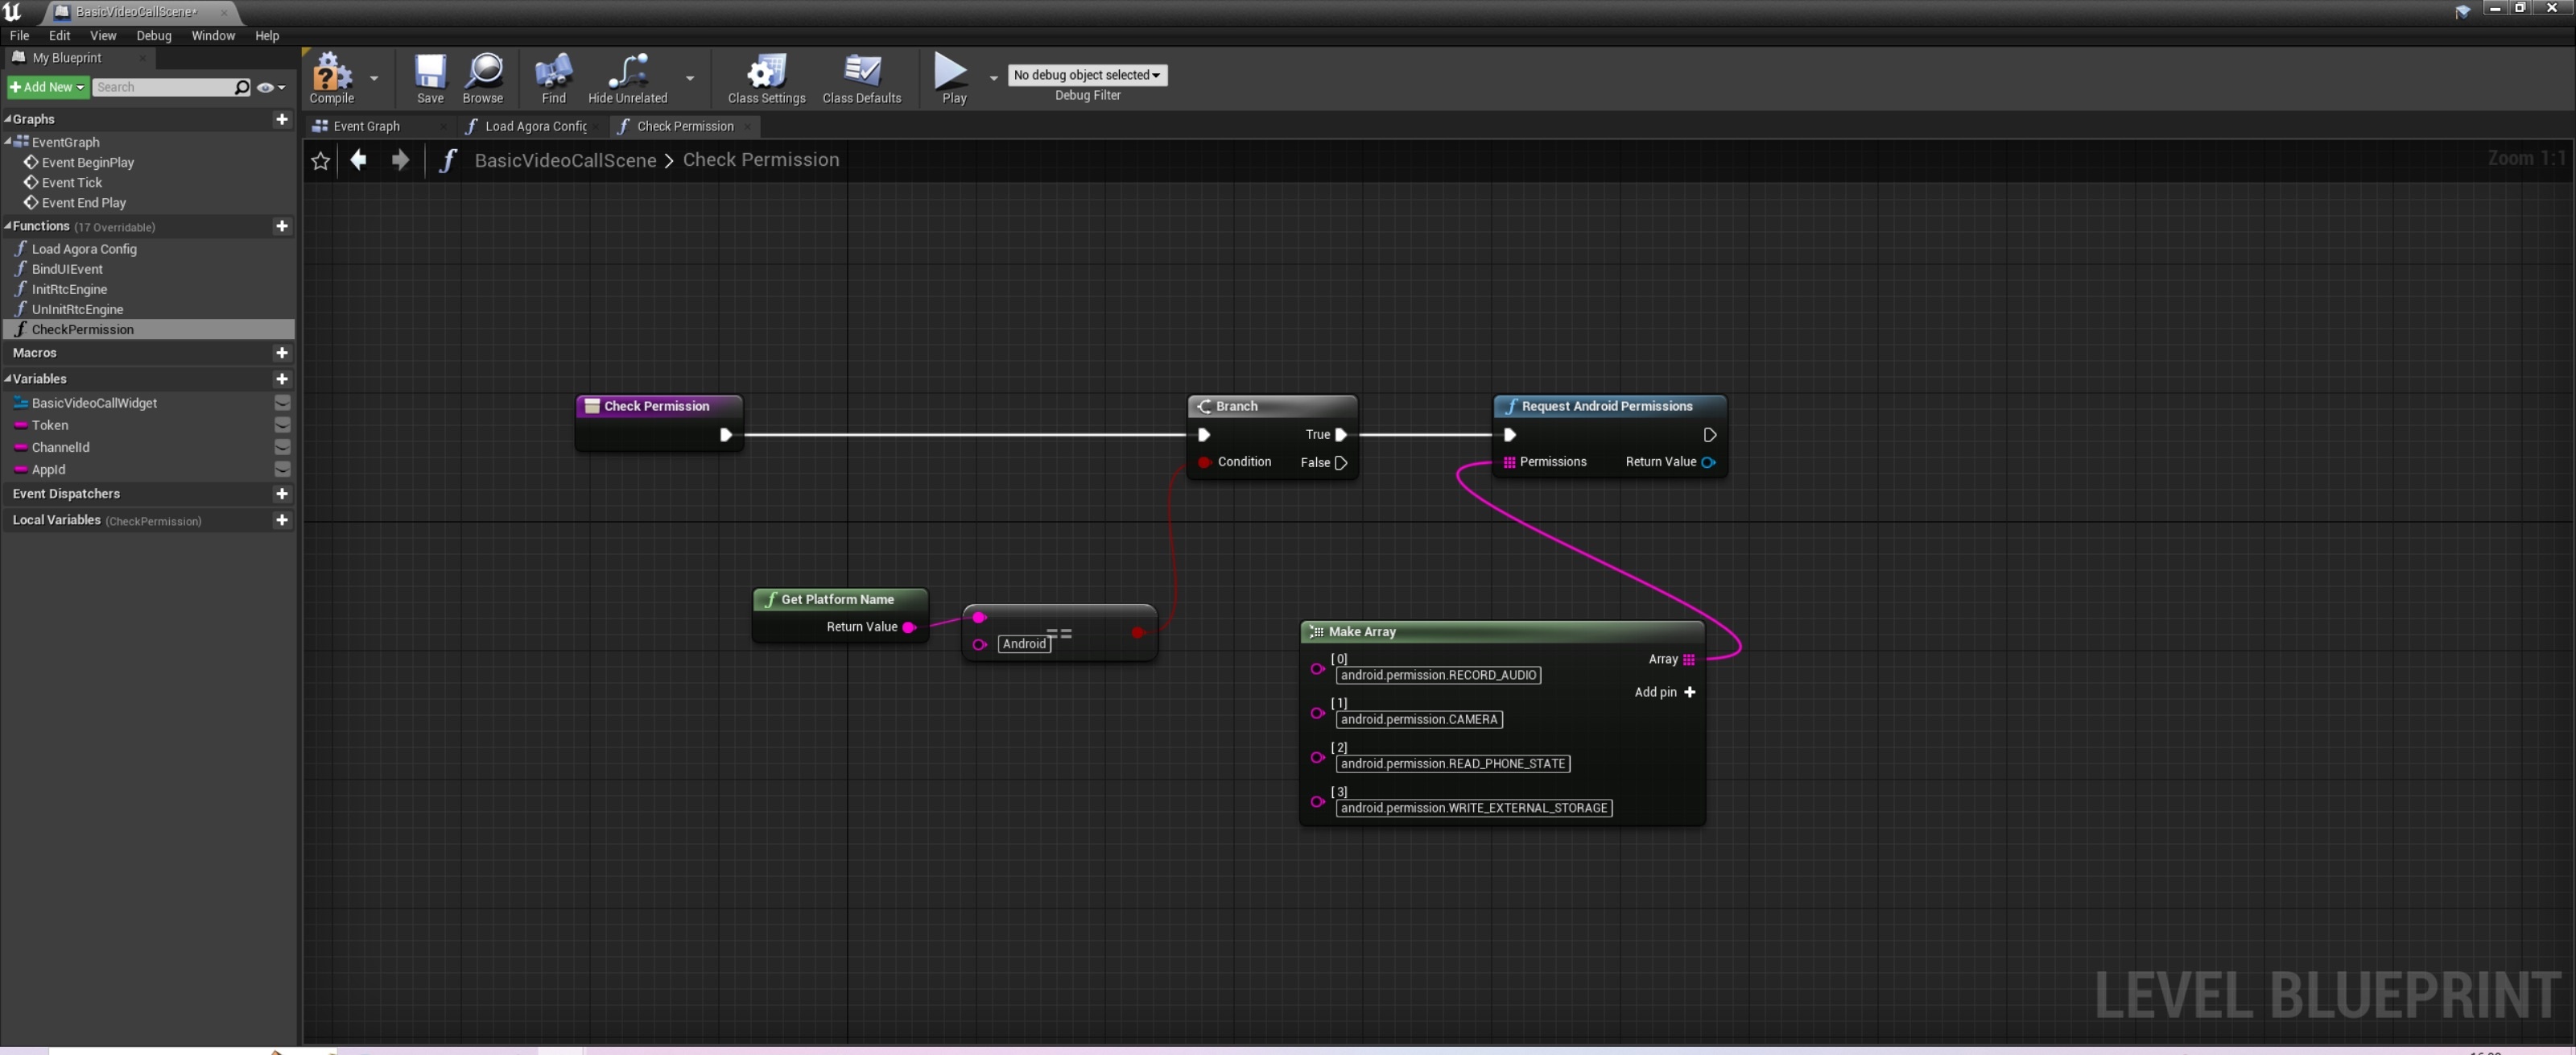
# How to enable the video enhancement extensions? (/en/api-reference/faq/integration/video_enhancement)
RTC SDK v4.x provides video enhancement extensions for beautification, underexposed video enhancement, color enhancement, and video denoising.
## Functions
The major functions of the video enhancement extensions are as follows:
* Image enhancement
You can achieve different image enhancement effects by adjusting parameters such as contrast, brightness, smoothness, redness, and sharpness levels.
* Underexposed video enhancement
When you are in a location where the light is insufficient, the illumination is uneven, or the light source is behind you, you can use the underexposed video enhancement function to turn on supplement light, dynamically increase the overall brightness of the video, and improve the visual range and viewing quality.
* Color enhancement
Due to the deficiencies of some cameras, the captured video can have insufficient saturation or grayish images. Use the color enhancement function to adjust the saturation of the image and video to make the color richer and more realistic, and enhance people's subjective visual experience.
At the same time, the algorithm specifically provides skin color protection to prevent people's skin color from being excessively affected.
* Video denoising
When the ambient light is dark or the capture equipment performance is poor, you can use the video denoising function to eliminate video noise.
- Video enhancement functions may affect device performance. Consider your actual requirements and user device performance when using these extensions.
- Before using video enhancement extensions, ensure that the relevant dynamic library is integrated. See [Extension libraries](/en/api-reference/faq/integration/reduce_app_size_rtc).
## Parameter settings
### **Image enhancement**
Call the `setBeautyEffectOptions` method, and adjust various image enhancement effects through the parameters. See the `setBeautyEffectOptions` description for details.
### Underexposed video enhancement
Call `setExtensionProperty,` and set the parameters as follows:
* `provider_name` : `agora_video_filters_clear_vision`
* `extension_name` : `clear_vision`
* `key` : `lowlight_enhance_option`
* `enable`, `mode,` and `level` parameters in the `value` field are described in the following table:
| Parameter | Description |
| --------- | ------------------------------------------------------------------------------------------------------------------------------------------------------------------------------------------------------------------------------------------------------------------------ |
| `enable` | Whether to enable the function:* 0: (Default) Disable underexposed video enhancement.
* 1: Enable underexposed video enhancement. |
| `mode` | The underexposed video enhancement mode:* 0: (Default) Adaptive mode. The SDK automatically enables or disables this function according to the ambient lighting conditions.
* 1: Manual mode. |
| `level` | The underexposed video enhancement level:* 0: (Default) Prioritize the video quality and eliminate image noise while increasing the brightness. This consumes more CPU resources.
* 1: Prioritize performance. This conserves CPU resources and reduces processing time. |
### Color enhancement
Call `setExtensionProperty,` and set the parameters as follows:
* `provider_name` : `agora_video_filters_clear_vision`
* `extension_name` : `clear_vision`
* `key` : `color_enhance_option`
* `enable`, `Strength,` and `Skin Protection` parameters in the `value` field are shown in the following table:
| Parameter | Description |
| ----------------- | ----------------------------------------------------------------------------------------------------------------------------------------------------------------------------------- |
| `enable` | Whether to enable the function:* 0: (Default) Disable color enhancement.
* 1: Enable color enhancement. |
| `Strength` | The level of color saturation improvement. The value range is \[0.0,1.0], and the default value is 0.5The larger the parameter value, the higher the screen color saturation. |
| `Skin Protection` | The level of skin protection. The value range is \[0.0, 1.0], and the default value is 1.0The larger the parameter value, the less the skin color is affected by color enhancement. |
### Video denoising
Call `setExtensionProperty,` and set the parameters as follows:
* `provider_name` : `agora_video_filters_clear_vision`
* `extension_name` : `clear_vision`
* `key` : `video_denoiser_option`
* `enable`, `mode,` and `level` parameters in the `value` field are shown in the following table:
| Parameter | Description |
| --------- | ------------------------------------------------------------------------------------------------------------------------------------------------------------------------------------------------------------------------------------------------------------------------------------------------------------------------------------------------------------------------------------------------------------------------------------------------------ |
| `enable` | Whether to enable the function:* 0: (Default) Disable video denoising.
* 1: Enable video denoising. |
| `mode` | Video denoising mode:* 0: (Default) Adaptive mode. The SDK automatically enables or disables this function according to the ambient lighting conditions.
* 1: Manual mode. |
| `level` | Video denoising level:* 0: (Default) Time domain denoising. The denoising effect is medium, the anti-smearing effect is good, application robustness is high. Applicable to most scenarios.
* 1: Fast denoising. The denoising effect is medium. Applicable to fixed camera scenarios.
* 2: Time domain denoising plus spatial domain denoising. The denoising effect is excellent and picture purity is improved. Applicable to high-noise scenarios. |
# How can I choose the video resolution, frame rate and bitrate? (/en/api-reference/faq/integration/video_profile)
Video parameters vary on a case-by-case basis. For example:
* In a one-to-one online class, the video windows of the teacher and student are both large, which requires higher resolutions, frame rates, and bitrates.
* In a one-to-four online class, the video windows of the teacher and students are smaller, so lower resolutions, frame rates, and bitrates are used to accommodate the downward bandwidth.
The recommended parameters for different cases are as follows:
* One-to-one video call: 240p (320 x 240, 15 fps, 200 Kbps) or 360p (640 x 360, 15 fps, 400 Kbps).
* One-to-many video call: 120p (160 x 120, 15 fps, 65 Kbps), 180p (320 x 180, 15 fps, 140 Kbps), or 240p (320 x 240, 15 fps, 200 Kbps).
You can also call the `setVideoEncoderConfiguration` method to set the video encoding parameters, such as by increasing the bitrate to ensure the video quality. Higher bitrates, frame rates, and resolutions improve the video quality but may cause jitter and increase costs.
Generally speaking, a live stream requires a higher bitrate to ensure high-video quality. Agora recommends setting the bitrate of live interactive streaming to two times that of a voice/video call. See [Configure video encoding](https://docs.agora.io/en/realtime-media/video/build/capture-and-render-video/configure-video-encoding/android).
# Why is the camera light still on after I disable my video on the Web? (/en/api-reference/faq/integration/web_camera_light)
When you use the Agora RTC SDK Web SDK to disable local video through `muteVideo`, the camera light stays on.
## Reason
The Web SDK does not support enabling/disabling video capture independently. Calling `muteVideo` for a local stream essentially sets `MediaStreamTrack.enabled` to `false`, but black video frames are still being sent, and the video capture is not disabled. Therefore, the camera light remains on.
## Solution
Calling `close` stops the video capture and turns off the camera light, but it unauthorizes both the microphone and the camera, so audio sampling stops too. In the Agora Web SDK, the published object is a media stream that contains an audio track and a video track, so any operation of the stream affects both audio and video.
To quickly stop capturing and sending the local video without affecting the local audio, Agora recommends using next-generation Agora Web SDK ([Agora Web SDK NG](https://github.com/AgoraIO/API-Examples-Web)). Agora Web SDK NG publishes the audio and video track as separate objects, enabling you to disable the local video and turn off the camera light by using the [`close`](https://api-ref.agora.io/en/video-sdk/web/4.x/interfaces/icameravideotrack.html#close) method of the video track object, without affecting the audio track.
# How to set the output video resolution of the web page recording mode on the on mobile devices? (/en/api-reference/faq/integration/web_recording)
When you enable the mobile web mode (`mobile` is `true`), and start web page recording. Agora recommends that you set the width and height of the output video according to the following video resolution:
| Apple device | Width x Height |
| :----------------------------- | :------------- |
| iPhone 13 | 390 x 844 |
| iPhone 13 mini | 375 x 812 |
| iPhone 13 Pro Max | 428 x 926 |
| iPhone 13 Pro | 390 x 844 |
| iPhone 12 | 390 x 844 |
| iPhone 12 mini | 375 x 812 |
| iPhone 12 Pro Max | 428 x 926 |
| iPhone 12 Pro | 390 x 844 |
| iPhone 11 Pro Max | 414 x 896 |
| iPhone 11 Pro | 375 x 812 |
| iPhone 11 | 414 x 896 |
| iPhone XR | 414 x 896 |
| iPhone XS | 375 x 812 |
| iPhone XS Max | 414 x 896 |
| iPhone X | 375 x 812 |
| iPhone 8 Plus | 414 x 736 |
| iPhone 8 | 375 x 667 |
| iPhone 7 Plus | 414 x 736 |
| iPhone 7 | 375 x 667 |
| iPhone 6 Plus/6S Plus | 414 x 736 |
| iPhone 6/6S | 375 x 667 |
| iPhone 5 | 320 x 568 |
| iPod Touch | 320 x 568 |
| iPad Pro | 1024 x 1366 |
| iPad Third & Fourth Generation | 768 x 1024 |
| iPad Air 1 & 2 | 768 x 1024 |
| iPad Mini 2 & 3 | 768 x 1024 |
| iPad Mini | 768 x 1024 |
| iPhone XR | 414 x 896 |
| iPhone XS | 375 x 812 |
| iPhone XS Max | 414 x 896 |
| iPhone X | 375 x 812 |
| iPhone 8 Plus | 414 x 736 |
| iPhone 8 | 375 x 667 |
| iPhone 7 Plus | 414 x 736 |
| iPhone 7 | 375 x 667 |
| iPhone 6 Plus/6S Plus | 414 x 736 |
| iPhone 6/6S | 375 x 667 |
| iPhone 5 | 320 x 568 |
| iPod Touch | 320 x 568 |
| iPad Pro | 1024 x 1366 |
| iPad Third & Fourth Generation | 768 x 1024 |
| iPad Air 1 & 2 | 768 x 1024 |
| iPad Mini 2 & 3 | 768 x 1024 |
| iPad Mini | 768 x 1024 |
| HUAWEI device | Width x Height |
| :-------------------------- | :------------- |
| HUAWEI Mate 40 Pro(Pro+,RS) | 448 x 924 |
| HUAWEI Mate 40 | 360 x 792 |
| HUAWEI P40 Pro | 400 x 880 |
| HUAWEI P40 | 360 x 780 |
| HUAWEI P30 Pro | 360 x 780 |
| HUAWEI P30 | 360 x 780 |
| HUAWEI nova 5i | 360 x 770 |
| HUAWEI nova 5(5,5Pro) | 360 x 780 |
| HUAWEI nova 4e | 360 x 771 |
| HUAWEI nova 4 | 360 x 770 |
| HUAWEI nova 3i | 360 x 780 |
| HUAWEI Mate30 Pro | 392 x 800 |
| HUAWEI Mate30 | 360 x 780 |
| HUAWEI Mate20 RS | 360 x 780 |
| HUAWEI Mate20 Pro | 360 x 780 |
| HUAWEI Mate20 X (X,5G) | 360 x 748 |
| HUAWEI Mate20 | 360 x 748 |
| HUAWEI P20 Pro | 360 x 748 |
| HUAWEI P20 | 360 x 748 |
| HUAWEI P10 | 360 x 640 |
| HUAWEI P10 Plus | 360 x 640 |
| Google device | Width x Height |
| :---------------------- | :------------- |
| Nexus 6P | 412 x 732 |
| Nexus 5X | 412 x 732 |
| Google Pixel 4 XL | 412 x 869 |
| Google Pixel 4 | 412 x 869 |
| Google Pixel 3a XL | 412 x 824 |
| Google Pixel 3a | 412 x 846 |
| Google Pixel 3 XL | 412 x 847 |
| Google Pixel 3 | 412 x 824 |
| Google Pixel 2 XL | 412 x 732 |
| Google Pixel XL | 412 x 732 |
| Google Pixel | 412 x 732 |
| Samsung Galaxy Note 10+ | 412 x 869 |
| Samsung Galaxy Note 10 | 412 x 869 |
| Samsung Galaxy Note 9 | 360 x 740 |
| Samsung Galaxy Note 5 | 480 x 853 |
| LG G5 | 480 x 853 |
| One Plus 3 | 480 x 853 |
| Samsung Galaxy S9+ | 360 x 740 |
| Samsung Galaxy S9 | 360 x 740 |
| Samsung Galaxy S8+ | 360 x 740 |
| Samsung Galaxy S8 | 360 x 740 |
| Samsung Galaxy S7 Edge | 360 x 640 |
| Samsung Galaxy S7 | 360 x 640 |
| Nexus 9 | 768 x 1024 |
| Nexus 7 (2013) | 600 x 960 |
| Pixel C | 900 x 1280 |
| Samsung Galaxy Tab 10 | 800 x 1280 |
| Chromebook Pixel | 1280 x 850 |
| SAMSUNG device | Width x Height |
| :---------------------------------- | :------------- |
| Samsung Galaxy S21 Ultra 5G | 480 x 1067 |
| Samsung Galaxy S21+ 5G | 360 x 800 |
| Samsung Galaxy S21 5G | 360 x 800 |
| Samsung Galaxy S20 FE 5G | 360 x 867 |
| Samsung Galaxy S20 5G | 360 x 760 |
| Samsung Galaxy S20+ 5G | 360 x 760 |
| Samsung Galaxy S20 Ultra 5G | 360 x 760 |
| Samsung Galaxy A70(A70,A80) | 360 x 800 |
| Samsung Galaxy A60 | 360 x 780 |
| Samsung Galaxy A40s | 360 x 780 |
| Samsung Galaxy A8s | 360 x 780 |
| Samsung Galaxy S10e | 360 x 760 |
| Samsung Galaxy S10+ | 360 x 760 |
| Samsung Galaxy S10 | 360 x 760 |
| Samsung Galaxy S9 | 360 x 740 |
| Samsung Galaxy S9+ | 360 x 740 |
| Samsung Galaxy S8 | 360 x 740 |
| Samsung Galaxy S8+ | 360 x 740 |
| Samsung Galaxy Note10 5G | 360 x 760 |
| Samsung Galaxy Note10 | 360 x 760 |
| Samsung Galaxy Note 9 | 360 x 740 |
| Samsung Galaxy Note 4 | 480 x 853 |
| Samsung Galaxy Note5 | 480 x 853 |
| Samsung Galaxy S5 | 360 x 640 |
| Samsung Galaxy S7 (S7, S6, S6 Edge) | 360 x 640 |
| Samsung Galaxy S7 Edge | 360 x 640 |
# Cloud Recording API callback service (/en/api-reference/api-ref/cloud-recording/api-callback-service)
Agora Cloud Recording can notify your server when recording events occur. After you enable callbacks, Agora sends event payloads to your webhook through its notification service.
## How callbacks work
1. Your application enables the callback service for Cloud Recording.
2. A recording event occurs, such as start, stop, upload progress, or a web page recording status change.
3. Agora sends an HTTPS callback to your server.
4. Your server verifies the signature and processes the payload.
## Payload basics
The callback request body contains a top-level JSON object. The `payload` object includes common fields such as:
* `cname`: Channel name.
* `uid`: Recording user ID.
* `sid`: Recording ID.
* `sequence`: Notification sequence number.
* `sendts`: Event timestamp in Unix milliseconds.
* `serviceType`: Agora service type.
* `details`: Event-specific details.
## Signature verification
Always verify callback signatures before you trust the payload. For webhook setup and validation guidance, see [Receive notifications](/en/realtime-media/cloud-recording/build/handle-events/receive-notifications#create-your-webhook).
## Common callback categories
Cloud Recording callbacks cover the following event groups:
* Recording errors and warnings
* Recording status changes
* Recorder lifecycle events
* Upload lifecycle events
* Web page recording events
For the Cloud Recording event fields and examples, see the workflow guide:
* [Receive notifications](/en/realtime-media/cloud-recording/build/handle-events/receive-notifications)
## Related references
* [Cloud Recording RESTful API](./index)
* [Authenticate REST calls](./authentication)
* [Common errors](/en/realtime-media/cloud-recording/reference/common-errors)
# RESTful authentication (/en/api-reference/api-ref/cloud-recording/authentication)
Cloud Recording RESTful API requires REST authentication.
The following REST authentication method is available:
* **Basic HTTP authentication**
Generate a Base64-encoded credential with the [Customer ID and Customer Secret](#generate-customer-id-and-customer-secret) provided by Agora, and pass the credential with the `Authorization` parameter in the request header.
Implement authentication on the server to mitigate the risk of data leakage.
## Implement basic HTTP authentication
### Generate Customer ID and Customer Secret
To generate a Customer ID and Customer Secret, do the following:
1. In [Agora Console](https://console.agora.io), click the username at the bottom of the navigation sidebar to open the account menu, then select **RESTful API Keys**.

2. Select **Create API Key**. A Customer ID and Customer Secret are generated.
3. Select **Download** and save the file somewhere secure — you can download it only once. In the file, **Key** is your Customer ID and **Secret** is your Customer Secret.
4. Use the Customer ID (**Key**) and Customer Secret (**Secret**) to generate a Base64-encoded credential, and pass it to the `Authorization` parameter in the HTTP request header.
### Generate an authorization header using a third-party tool
For testing and debugging, you can use a [third-party online tool](https://www.debugbear.com/basic-auth-header-generator) to quickly generate your Authorization header. Enter your Customer ID as the Username and your Customer Secret as the Password. Your generated header should look like this:
```text
Authorization: Basic NDI1OTQ3N2I4MzYy...YwZjA=a
```
### Basic authentication sample code
The following sample code implements basic HTTP authentication and sends a RESTful API request to get the basic information of all your current Agora projects.
The Agora RESTful API only supports HTTPS with TLS 1.0, 1.1, or 1.2 for encrypted communication. Requests over plain HTTP are not supported and will fail to connect.
Golang
Node.js
PHP
Python
Java
C#
```go
package main
import (
"fmt"
"strings"
"net/http"
"io/ioutil"
"encoding/base64"
)
// HTTPS basic authentication example in Golang using the RTC SDK Server RESTful API
func main() {
// Customer ID
customerKey := "Your customer ID"
// Customer secret
customerSecret := "Your customer secret"
// Concatenate customer key and customer secret and use base64 to encode the concatenated string
plainCredentials := customerKey + ":" + customerSecret
base64Credentials := base64.StdEncoding.EncodeToString([]byte(plainCredentials))
url := "https://api.agora.io/dev/v1/projects"
method := "GET"
payload := strings.NewReader(``)
client := &http.Client {
}
req, err := http.NewRequest(method, url, payload)
if err != nil {
fmt.Println(err)
return
}
// Add Authorization header
req.Header.Add("Authorization", "Basic " + base64Credentials)
req.Header.Add("Content-Type", "application/json")
// Send HTTP request
res, err := client.Do(req)
if err != nil {
fmt.Println(err)
return
}
defer res.Body.Close()
body, err := ioutil.ReadAll(res.Body)
if err != nil {
fmt.Println(err)
return
}
fmt.Println(string(body))
}
```
```js
// HTTP basic authentication example in node.js using the RTC SDK Server RESTful API
const https = require('https')
// Customer ID
const customerKey = "Your customer ID"
// Customer secret
const customerSecret = "Your customer secret"
// Concatenate customer key and customer secret and use base64 to encode the concatenated string
const plainCredential = customerKey + ":" + customerSecret
// Encode with base64
encodedCredential = Buffer.from(plainCredential).toString('base64')
authorizationField = "Basic " + encodedCredential
// Set request parameters
const options = {
hostname: 'api.agora.io',
port: 443,
path: '/dev/v1/projects',
method: 'GET',
headers: {
'Authorization':authorizationField,
'Content-Type': 'application/json'
}
}
// Create request object and send request
const req = https.request(options, res => {
console.log(`Status code: ${res.statusCode}`)
res.on('data', d => {
process.stdout.write(d)
})
})
req.on('error', error => {
console.error(error)
})
req.end()
```
```php
'https://api.agora.io/dev/v1/projects',
CURLOPT_RETURNTRANSFER => true,
CURLOPT_ENCODING => '',
CURLOPT_MAXREDIRS => 10,
CURLOPT_TIMEOUT => 0,
CURLOPT_FOLLOWLOCATION => true,
CURLOPT_HTTP_VERSION => CURL_HTTP_VERSION_1_1,
CURLOPT_CUSTOMREQUEST => 'GET',
CURLOPT_HTTPHEADER => [
$authHeader,
'Content-Type: application/json',
],
]);
// Execute cURL request
$response = curl_exec($curl);
// Check for cURL errors
if ($response === false) {
echo "Error in cURL: " . curl_error($curl);
} else {
// Output the response
echo $response;
}
// Close cURL session
curl_close($curl);
?>
```
```python
# -- coding utf-8 --
# Python 3
# HTTP basic authentication example in python using the RTC SDK Server RESTful API
import base64
import http.client
# Customer ID
customer_key = "Your customer ID"
# Customer secret
customer_secret = "Your customer secret"
# Concatenate customer key and customer secret and use base64 to encode the concatenated string
credentials = customer_key + ":" + customer_secret
# Encode with base64
base64_credentials = base64.b64encode(credentials.encode("utf8"))
credential = base64_credentials.decode("utf8")
# Create connection object with basic URL
conn = http.client.HTTPSConnection("api.agora.io")
payload = ""
# Create Header object
headers = {}
# Add Authorization field
headers['Authorization'] = 'basic ' + credential
headers['Content-Type'] = 'application/json'
# Send request
conn.request("GET", "/dev/v1/projects", payload, headers)
res = conn.getresponse()
data = res.read()
print(data.decode("utf-8"))
```
```java
import java.io.IOException;
import java.net.URI;
import java.net.http.HttpClient;
import java.net.http.HttpRequest;
import java.net.http.HttpResponse;
import java.util.Base64;
// HTTP basic authentication example in Java using the RTC SDK Server RESTful API
public class Base64Encoding {
public static void main(String[] args) throws IOException, InterruptedException {
// Customer ID
final String customerKey = "Your customer ID";
// Customer secret
final String customerSecret = "Your customer secret";
// Concatenate customer key and customer secret and use base64 to encode the concatenated string
String plainCredentials = customerKey + ":" + customerSecret;
String base64Credentials = new String(Base64.getEncoder().encode(plainCredentials.getBytes()));
// Create authorization header
String authorizationHeader = "Basic " + base64Credentials;
HttpClient client = HttpClient.newHttpClient();
// Create HTTP request object
HttpRequest request = HttpRequest.newBuilder()
.uri(URI.create("https://api.agora.io/dev/v1/projects"))
.GET()
.header("Authorization", authorizationHeader)
.header("Content-Type", "application/json")
.build();
// Send HTTP request
HttpResponse response = client.send(request,
HttpResponse.BodyHandlers.ofString());
System.out.println(response.body());
}
}
```
```csharp
using System;
using System.IO;
using System.Net;
using System.Text;
// HTTP basic authentication example in C# using the RTC SDK Server RESTful API
namespace Examples.System.Net
{
public class WebRequestPostExample
{
public static void Main()
{
// Customer ID
string customerKey = "Your customer ID";
// Customer secret
string customerSecret = "Your customer secret";
// Concatenate customer key and customer secret and use base64 to encode the concatenated string
string plainCredential = customerKey + ":" + customerSecret;
// Encode with base64
var plainTextBytes = Encoding.UTF8.GetBytes(plainCredential);
string encodedCredential = Convert.ToBase64String(plainTextBytes);
// Create authorization header
string authorizationHeader = "Authorization: Basic " + encodedCredential;
// Create request object
WebRequest request = WebRequest.Create("https://api.agora.io/dev/v1/projects");
request.Method = "GET";
// Add authorization header
request.Headers.Add(authorizationHeader);
request.ContentType = "application/json";
WebResponse response = request.GetResponse();
Console.WriteLine(((HttpWebResponse)response).StatusDescription);
using (Stream dataStream = response.GetResponseStream())
{
StreamReader reader = new StreamReader(dataStream);
string responseFromServer = reader.ReadToEnd();
Console.WriteLine(responseFromServer);
}
response.Close();
}
}
}
```
## Related pages
* [Overview](/en/api-reference/api-ref/cloud-recording)
* [Acquire a cloud recording resource](/en/api-reference/api-ref/cloud-recording/acquire)
* [Start cloud recording](/en/api-reference/api-ref/cloud-recording/start)
# Cloud Recording Overview (/en/api-reference/api-ref/cloud-recording)
Agora Cloud Recording records and saves voice calls, video calls, and interactive streaming. Send HTTPS requests from your business server to Agora to manage recording tasks on the server side.
To monitor recording status, enable the message notification service and receive Cloud Recording events through a webhook. Because Agora dynamically adjusts message notification server IP addresses, regularly query the IP addresses and update your firewall whitelist.
## API basics
* **Authentication**: All APIs require [Basic Auth](/en/api-reference/api-ref/cloud-recording/authentication).
* **Request**: Request bodies use JSON.
* **Response**: Response bodies use JSON.
* **Base URL**: `https://api.sd-rtn.com`
The Cloud Recording REST API supports HTTPS only. Requests over plain HTTP are not supported.
## REST APIs
* [Acquire a cloud recording resource](/en/api-reference/api-ref/cloud-recording/acquire): Request a resource ID for cloud recording.
* [Start cloud recording](/en/api-reference/api-ref/cloud-recording/start): Start cloud recording with a resource ID. Call this method shortly after `acquire`.
* [Update cloud recording settings](/en/api-reference/api-ref/cloud-recording/update): Update subscription, web page recording, CDN push, or storage settings.
* [Update the cloud recording layout](/en/api-reference/api-ref/cloud-recording/update-layout): Update the composite recording layout.
* [Query cloud recording status](/en/api-reference/api-ref/cloud-recording/query): Check the status of a cloud recording session.
* [Stop cloud recording](/en/api-reference/api-ref/cloud-recording/stop): Leave the channel and stop recording.
* [Query message notification server IP addresses](/en/api-reference/api-ref/cloud-recording/get-ncs-ip): Get message notification server IP addresses for firewall whitelisting.
# Response status codes (/en/api-reference/api-ref/cloud-recording/status-codes)
When you call the Cloud Recording RESTful API, each response includes an HTTP status code. A `200` status code means the request was successful. If the request fails, use the status code together with the following response body fields to troubleshoot:
* `message`
```json
// 401 Unauthorized
{
"message": "Invalid authentication credentials"
}
```
* `code` and `reason`
```json
// 400 Bad Request
{
"code": 2,
"reason": "Acquire: invalid resourceExpiredHour value!"
}
```
## General status codes
| Status code | `message` | Description | Resolution |
| ----------------------- | -------------------------------------- | -------------------------------- | -------------------------------------------------------------------------------------------------------------------------------------------------------------------------- |
| `400 Bad Request` | `"appid is invalid"` | Invalid App ID. | Enable the cloud recording service for this App ID before calling the API. |
| `401 Unauthorized` | `"Unauthorized"` | Authorization header is missing. | Ensure you are using [HTTP Basic Auth](/en/api-reference/api-ref/cloud-recording/authentication) and that the `Authorization` field is included in the request header. |
| `401 Unauthorized` | `"Invalid authentication credentials"` | Invalid Authorization. | Check that your Customer ID and Customer Secret are correct, that the Authorization is generated correctly, and that the Customer ID and Customer Secret match the App ID. |
| `404 Not Found` | `"no Route matched with those values"` | Incorrect request route. | Check that the HTTP method and URL are correct. |
| `429 Too Many Requests` | `"API rate limit exceeded"` | Request rate limit exceeded. | Reduce the frequency of API calls. To request a higher quota, contact [support@agora.io](mailto\:support@agora.io). |
## Endpoint-specific status codes
### Acquire
| Status code | `code` and `reason` | Description | Resolution |
| --------------------------- | -------------------------------------------------- | ------------------------------- | --------------------------------------------------------------------------------------------------------------------------------------- |
| `400 Bad Request` | `code: 2` | Invalid request parameters. | Check the request header, URL, and body. Refer to the `reason` field for details. |
| `400 Bad Request` | `code: 400, reason: "invalid_appid"` | Invalid App ID. | Enable the cloud recording service for this App ID before calling the API. |
| `400 Bad Request` | `code: 401, reason: "invalid_channel_name"` | Invalid channel name. | The `cname` field in the request body contains unsupported characters. Check your integration. |
| `400 Bad Request` | `code: 405, reason: "no_active_status"` | App status abnormal. | The App service is unavailable, possibly due to an overdue account. Check your account status. |
| `400 Bad Request` | `code: 406, reason: "vendor_over_load"` | Concurrent task limit exceeded. | Retry later and check your integration for task leaks. To request a higher quota, contact [support@agora.io](mailto\:support@agora.io). |
| `500 Internal Server Error` | `code: 500, reason: "internal_error"` | Internal server error. | Retry with a backoff strategy. |
| `500 Internal Server Error` | `code: 501, reason: "no_worker_manager_available"` | No resources available. | Retry with a backoff strategy. |
| `500 Internal Server Error` | `code: 504, reason: "allocate_timeout"` | Request timed out. | Retry with a backoff strategy. |
### Start
| Status code | `code` and `reason` | Description | Resolution |
| --------------------------- | ------------------------------------------------ | ---------------------------------------------------------------------------------- | --------------------------------------------------------------------------------------------------------------------------- |
| `201 Created` | `code: 7, reason: "already started"` | Recording is already running. Duplicate `start` request. | Do not repeat the `start` request with the same resource ID. |
| `206 Partial Content` | `code: 65, reason: "request not completed"` | Request not completed. The request reached the backend but the response timed out. | Retry the request. If the retry fails, call `acquire` and `start` again to initiate a new session. |
| `400 Bad Request` | `code: 2` | Invalid request parameters. | Check the request header, URL, and body. Refer to the `reason` field for details. |
| `400 Bad Request` | `code: 53, reason: "task conflict"` | A task with the same `cname` and `uid` already exists. | Check your integration to avoid duplicate tasks, or use a different `cname` and `uid` and call `acquire` and `start` again. |
| `500 Internal Server Error` | `code: 502, reason: "Failed to allocate worker"` | No resources available. | Call `acquire` and `start` again to initiate a new session. |
| `500 Internal Server Error` | `code: 62, reason: "request timeout"` | Request timed out. | Retry the request. If the retry fails, call `acquire` and `start` again to initiate a new session. |
### Query
| Status code | `code` and `reason` | Description | Resolution |
| --------------------- | -------------------------------------------- | ---------------------------------------------------------------------------------- | ---------------------------------------------------------------------------------------------------- |
| `206 Partial Content` | `code: 65, reason: "request not completed"` | Request not completed. The request reached the backend but the response timed out. | Retry the request. |
| `400 Bad Request` | `code: 2` | Invalid request parameters. | Check the request header, URL, and body. Refer to the `reason` field for details. |
| `404 Not Found` | `code: 404, reason: "failed to find worker"` | Task does not exist. | The task may have already exited. Check whether this requires handling based on your business logic. |
| `504 Gateway Timeout` | `code: 62, reason: "request timeout"` | Request timed out. | The backend service is temporarily unavailable. Retry the request. |
### Update
| Status code | `code` and `reason` | Description | Resolution |
| --------------------- | -------------------------------------------- | ---------------------------------------------------------------------------------- | ---------------------------------------------------------------------------------------------------- |
| `206 Partial Content` | `code: 65, reason: "request not completed"` | Request not completed. The request reached the backend but the response timed out. | Retry the request. |
| `400 Bad Request` | `code: 2` | Invalid request parameters. | Check the request header, URL, and body. Refer to the `reason` field for details. |
| `404 Not Found` | `code: 404, reason: "failed to find worker"` | Task does not exist. | The task may have already exited. Check whether this requires handling based on your business logic. |
| `504 Gateway Timeout` | `code: 62, reason: "request timeout"` | Request timed out. | The backend service is temporarily unavailable. Retry the request. |
### Update layout
| Status code | `code` and `reason` | Description | Resolution |
| --------------------- | -------------------------------------------- | ---------------------------------------------------------------------------------- | ---------------------------------------------------------------------------------------------------- |
| `206 Partial Content` | `code: 65, reason: "request not completed"` | Request not completed. The request reached the backend but the response timed out. | Retry the request. |
| `400 Bad Request` | `code: 2` | Invalid request parameters. | Check the request header, URL, and body. Refer to the `reason` field for details. |
| `404 Not Found` | `code: 404, reason: "failed to find worker"` | Task does not exist. | The task may have already exited. Check whether this requires handling based on your business logic. |
| `504 Gateway Timeout` | `code: 62, reason: "request timeout"` | Request timed out. | The backend service is temporarily unavailable. Retry the request. |
### Stop
| Status code | `code` and `reason` | Description | Resolution |
| --------------------- | -------------------------------------------- | ---------------------------------------------------------------------------------- | ----------------------------------------------------------------------------------------------------------------------------------------------------------------------------- |
| `206 Partial Content` | `code: 65, reason: "request not completed"` | Request not completed. The request reached the backend but the response timed out. | Retry the request. |
| `206 Partial Content` | `code: 435, reason: "no recorded data"` | No recorded files generated. | No users were sending streams in the channel. Check whether this is expected based on your business logic. |
| `400 Bad Request` | `code: 2` | Invalid request parameters. | Check the request header, URL, and body. Refer to the `reason` field for details. |
| `400 Bad Request` | `code: 49, reason: "invalid operation"` | Invalid operation. | The task is already exiting. This may be caused by a duplicate `stop` call, the recording bot being removed from the channel, or `maxIdleTime` being triggered automatically. |
| `404 Not Found` | `code: 404, reason: "failed to find worker"` | Task does not exist. | The task may have already exited. Check whether this requires handling based on your business logic. |
| `504 Gateway Timeout` | `code: 62, reason: "request timeout"` | Request timed out. | The backend service is temporarily unavailable. Retry the request. |
If you encounter errors not listed on this page, contact [support@agora.io](mailto\:support@agora.io).
## FAQs
### Why do I get a 404 when calling `query`, `updateLayout`, or `stop`?
Cloud recording uses a high availability mechanism that automatically recovers from server failures. During recovery, these endpoints temporarily return `404` even though the recording session is still active.
Recovery time depends on the type of failure:
* **Server process failure**: The service switches to a new server within 30 seconds.
* **Server disconnection**: The service attempts to reconnect. If reconnection fails within one minute, it switches to a different server.
# API sunset notice (/en/api-reference/api-ref/broadcast-streaming/api-sunset)
See the [
API Sunset Notice](https://api-ref.agora.io/en/video-sdk/android/4.x/API/rtc_api_sunset.html) page in the API reference.
# Asynchronous playback (/en/api-reference/api-ref/broadcast-streaming/asynchronous-playback)
Asynchronous playback refers to purposely setting a time lag between the playback screen seen by the user and the live stream.
Currently, the asynchronous playback function only supports [Push CDN mode](/en/realtime-media/rtc/get-started-sdk).
## Set a time lag
Sets a time lag for the specified live stream.
### HTTP request
```bash
PATCH https://api.agora.io/v1/projects/{appid}/fls/entry_points/{entry_point}/admin/delayed_streams/{stream_name}
```
#### Path parameter
| Parameter | Type | Description |
| :------------ | :----- | :------------------------------------------------- |
| `appid` | String | Required. The App ID retrieved from Agora Console. |
| `entry_point` | String | Required. The entry point name. |
| `stream_name` | String | Required. The stream name. |
#### Request body
The request body is in the JSON Object type, and contains the following fields:
| Field | Type | Description |
| :------ | :------ | :-------------------------------------------------------------- |
| `delay` | Integer | Required. The time lag in seconds, with a maximum value of 600. |
### HTTP response
If the returned HTTP status code is 200, the request is successful.
If the returned HTTP status code is not 200, the request fails. You can refer to the [HTTP status code ](#http-code)for possible reasons.
### Example
**Request line**
```bash
PATCH https://api.agora.io/v1/projects/{your_appid}/fls/entry_points/live/admin/delayed_streams/{stream_name} HTTP/1.1
```
**Response line**
```bash
HTTP/1.1 200 OK
```
## Cancel the time lag
Cancels the time lag for the specified live stream.
### HTTP request
```bash
DELETE https://api.agora.io/v1/projects/{appid}/fls/entry_points/{entry_point}/admin/delayed_streams/{stream_name}
```
#### Path parameter
| Parameter | Type | Description |
| :------------ | :----- | :------------------------------------------------- |
| `appid` | String | Required. The App ID retrieved from Agora Console. |
| `entry_point` | String | Required. The entry point name. |
| `stream_name` | String | Required. The stream name. |
### HTTP response
If the returned HTTP status code is 200, the request is successful.
If the returned HTTP status code is not 200, the request fails. You can refer to the [HTTP status code ](#http-code)for possible reasons.
### Example
**Request line**
```bash
DELETE https://api.agora.io/v1/projects/{your_appid}/fls/entry_points/live/admin/delayed_streams/{stream_name} HTTP/1.1
```
**Response line**
```bash
HTTP/1.1 200 OK
```
## HTTP status code
| Status code | Description |
| :---------- | :------------------------------------------------------------------------------------------------------------------------------------------------------- |
| 200 | The request succeeds. |
| 400 | The parameter is invalid, for example the `appid` or the `entry_point` is empty, or the `region` parameter value is invalid. |
| 401 | Unauthorized (the customer ID and the customer secret do not match). |
| 404 | The server cannot find the resource according to the request, which means the requested entry point does not exist or the requested URI path is invalid. |
| 500 | An internal error occurs in the server, so the server is not able to complete the request. |
| 504 | An internal error occurs in the server. The gateway or the proxy server did not receive a timely request from the remote server. |
# Domain names (/en/api-reference/api-ref/broadcast-streaming/domain-names)
There are two types of domain names: stream-pushing domain names and stream-playing domain names (which mainly affect regional access and the deployment of the streams). The same live stream can be pushed or played through multiple different domain names.
> The domain name management function is in the beta stage. Contact [support@agora.io](mailto\:support@agora.io) before using it.
## Add domain names
Add a stream domain name.
When adding a domain name, you need to specify the App ID of your Agora project.
### HTTP request
```bash
POST https://api.agora.io/v1/projects/{appid}/fls/domains?id={domain}
```
#### Path parameter
`appid`: String type, required. The App ID provided by Agora for each developer. You can get an App ID after creating a project in the Agora Console. The App ID is the only identification of a project.
#### Query parameters
`id`: String type, required. The domain name to be added. Pan-domain names are not supported.
#### Request body
The request body is the `data` field in the JSON Object type, and contains the following fields:
| Field | Type | Description |
| :------- | :----- | :---------------------------------------------------------------------------------------------------------------------------------------------------------------------------------------------------------------------------------------------------------------------------------------------------------------------- |
| `type` | String | Required. The domain name type:- `"publish"`: The stream-pushing domain name.
- `"play"`: The stream-playing domain name. |
| `region` | String | Required when the domain name type is set as `"publish"`. This parameter only applies to stream-pushing domain names. The region of the Agora server used for the stream-pushing domain name:- `"cn"`: China Mainland.
- `"ap"`: Asian regions except for China Mainland.
- `"eu"`: Europe.
- `"na"`: North America. |
### HTTP response
If the returned HTTP status code is 201, the request is successful, and the response body contains the following fields:
| Field | Type | Description |
| :-------- | :----- | :------------------------------------------------------------------------------------------------------------------- |
| `appid` | String | The App ID of your Agora project. |
| `type` | String | Set the domain name type:- `"publish"`: The stream-pushing domain name.
- `"play"`: The stream-playing domain name. |
| `region` | String | Set the region where the Agora server is located. Only returned when the `type` is `"publish"`. |
| `authKey` | String | The authentication key for hotlink protection. |
| `cname` | String | The cname corresponds to the domain name, and you need to configure it at your DNS host. |
If the returned HTTP status code is not 201, the request fails. You can refer to the [HTTP status code](#http-code) for possible reasons.
### Example
**Request line**
```bash
POST https://api.agora.io/v1/projects/{your_appid}/fls/domains?id={your_domain} HTTP/1.1
```
**Request body**
```json
{
"region": "cn",
"type": "publish"
}
```
**Response line**
```bash
HTTP/1.1 201 Created
```
**Request body**
```json
{
"appid": "{your appid}",
"name": "{your domain}",
"region": "cn",
"type": "publish"
}
```
## Delete domain names
Delete a stream domain name.
### HTTP request
```bash
DELETE https://api.agora.io/v1/projects/{appid}/fls/domains/{domain}
```
#### Path parameter
| Parameter | Type | Description |
| :-------- | :----- | :------------------------------------------------------------------- |
| `appid` | String | Required. The App ID corresponding to the domain name being deleted. |
| `domain` | String | Required. The domain name being deleted. |
### HTTP response
If the returned HTTP status code is 200, the request is successful.
If the returned HTTP status code is not 200, the request fails. You can refer to the [HTTP status code](#http-code) for possible reasons.
### Example
**Request line**
```bash
DELETE https://api.agora.io/v1/projects/{your_appid}/fls/domains/{your_domain} HTTP/1.1
```
**Response line**
```bash
HTTP/1.1 200 OK
```
## Get domain name lists
Get all stream domain names under one Agora project.
### HTTP request
```bash
GET https://api.agora.io/v1/projects/{appid}/fls/domains
```
#### Path parameter
`appid`: String type, required. The App ID of your Agora project
### HTTP response
If the returned HTTP status code is 200, the request is successful, and the response body contains the following fields:
`domainList`: JSON Array type, the domain name list. One stream corresponds to a JSON Object, and contains the following fields:
| Field | Type | Description |
| :-------- | :----- | :--------------------------------------------------------------------------------------------------------------- |
| `appid` | String | The App ID of your Agora project. |
| `name` | String | The domain name. |
| `type` | String | The domain name type.- `"publish"`: The stream-pushing domain name.
- `"play"`: The stream-playing domain name. |
| `region` | String | The region of the Agora server used for the domain name. Only returned when the `type` is `"publish"`. |
| `authKey` | String | The authentication key for hotlink protection. |
If the returned HTTP status code is not 200, the request fails. You can refer to the [HTTP status code](#http-code) for possible reasons.
### Example
**Request line**
```bash
GET https://api.agora.io/v1/projects/{your_appid}/fls/domains HTTP/1.1
```
**Response line**
```bash
HTTP/1.1 200 OK
```
**Request body**
```json
{
"domainList": [
{
"appid": "{your appid}",
"authKey": "{your authkey}",
"name": "{your play domain}",
"type": "play"
},
{
"appid": "{your appid}",
"authKey": "{your authkey}",
"name": "{your publish domain}",
"region": "cn",
"type": "publish"
}
]
}
```
## Get domain name attributes
Get the attributes of the specified domain name.
### HTTP request
```bash
GET https://api.agora.io/v1/projects/{appid}/fls/domains/{domain}
```
#### Path parameter
| Parameter | Type | Description |
| :-------- | :----- | :------------------------------------------------------------------- |
| `appid` | String | Required. The App ID corresponding to the domain name being queried. |
| `domain` | String | Required. The domain name being queried. |
### HTTP response
If the returned HTTP status code is 200, the request is successful, and the response body contains the following fields:
| Field | Type | Description |
| :-------- | :----- | :--------------------------------------------------------------------------------------------------------------- |
| `appid` | String | The App ID of your Agora project. |
| `name` | String | The domain name. |
| `type` | String | The domain name type.- `"publish"`: The stream-pushing domain name.
- `"play"`: The stream-playing domain name. |
| `region` | String | The region of the Agora server used for the domain name. Only returned when the `type` is `"publish"`. |
| `authKey` | String | The authentication key for hotlink protection. |
If the returned HTTP status code is not 200, the request fails. You can refer to the [HTTP status code](#http-code) for possible reasons.
### Example
**Request line**
```bash
GET https://api.agora.io/v1/projects/{your_appid}/fls/domains?id={your_domain} HTTP/1.1
```
**Response line**
```bash
HTTP/1.1 200 OK
```
**Request body**
```json
{
"appid": "{your appid}",
"authKey": "{your authkey}",
"name": "{your domain}",
"region": "cn",
"type": "publish"
}
```
## HTTP status code
| Status code | Description |
| :---------- | :------------------------------------------------------------------------------------------------------------------------------------------------------- |
| 200 | The request succeeds. |
| 400 | The parameter is invalid, for example the `appid` or the `entry_point` is empty, or the `region` parameter value is invalid. |
| 401 | Unauthorized (the customer ID and the customer secret do not match). |
| 404 | The server cannot find the resource according to the request, which means the requested entry point does not exist or the requested URI path is invalid. |
| 500 | An internal error occurs in the server, so the server is not able to complete the request. |
| 504 | An internal error occurs in the server. The gateway or the proxy server did not receive a timely request from the remote server. |
# Entry points (/en/api-reference/api-ref/broadcast-streaming/entry-points)
Entry points are used to categorize the streams. You can configure functions such as recording, transcoding, and snapshot capturing for one entry point, and these configurations apply to all the streams under this entry point.
Agora provides a default entry point `live` for your direct use.
> The entry point management function is in the beta stage. Contact [support@agora.io](mailto\:support@agora.io) before using it.
## Add entry points
Add an entry point.
When adding an entry point, you need to specify the App ID of your Agora project.
### HTTP request
```bash
POST https://api.agora.io/v1/projects/{appid}/fls/entry_points?id={entry_point}
```
#### Path parameter
`appid`: String type, required. The App ID provided by Agora for each developer. You can get an App ID after creating a project in the Agora Console. The App ID is the only identification of a project.
#### Query parameters
`id`: String type, required. The name of the entry point to be added.
### HTTP response
If the returned HTTP status code is 201, it means the request is successful.
If the returned HTTP status code is not 201, the request fails. You can refer to the [HTTP status code](#http-code) for possible reasons.
### Example
**Request line**
```bash
POST https://api.agora.io/v1/projects/{your_appid}/fls/entry_points?id=live2 HTTP/1.1
```
**Response line**
```bash
HTTP/1.1 201 Created
```
## Delete entry points
Delete an entry point. The default entry point `live` cannot be deleted.
### HTTP request
```bash
DELETE https://api.agora.io/v1/projects/{appid}/fls/entry_points/{entry_point}
```
#### Path parameter
| Parameter | Type | Description |
| :------------ | :----- | :------------------------------------------------------------------- |
| `appid` | String | Required. The App ID corresponding to the entry point being deleted. |
| `entry_point` | String | Required. The name of the entry point being deleted. |
### HTTP response
If the returned HTTP status code is 200, the request is successful.
If the returned HTTP status code is not 200, the request fails. You can refer to the [HTTP status code](#http-code) for possible reasons.
### Example
**Request line**
```bash
DELETE https://api.agora.io/v1/projects/{your_appid}/fls/entry_points/live2 HTTP/1.1
```
**Response line**
```bash
HTTP/1.1 200 OK
```
## Get the entry point list
Get the list of all entry points under one Agora project.
### HTTP request
```bash
GET https://api.agora.io/v1/projects/{appid}/fls/entry_points
```
#### Path parameter
`appid`: String type, required. The App ID of your Agora project
### HTTP response
If the returned HTTP status code is 200, the request is successful, and the response body contains the following fields:
`entryPointList`: JSON Array type, the list of entry points. One entry point corresponds to a JSON Object, and contains the following fields:
| Field | Type | Description |
| :----- | :----- | :-------------------- |
| `name` | String | The entry point name. |
If the returned HTTP status code is not 200, the request fails. You can refer to the [HTTP status code](#http-code) for possible reasons.
### Example
**Request line**
```bash
GET https://api.agora.io/v1/projects/{your_appid}/fls/entry_points HTTP/1.1
```
**Response line**
```bash
HTTP/1.1 200 OK
```
**Request body**
```json
{
"entryPointList": [
{
"name": "live"
}
]
}
```
## HTTP status code
| Status code | Description |
| :---------- | :------------------------------------------------------------------------------------------------------------------------------------------------------- |
| 200 | The request succeeds. |
| 400 | The parameter is invalid, for example the `appid` or the `entry_point` is empty, or the `region` parameter value is invalid. |
| 401 | Unauthorized (the customer ID and the customer secret do not match). |
| 404 | The server cannot find the resource according to the request, which means the requested entry point does not exist or the requested URI path is invalid. |
| 500 | An internal error occurs in the server, so the server is not able to complete the request. |
| 504 | An internal error occurs in the server. The gateway or the proxy server did not receive a timely request from the remote server. |
# Overview (/en/api-reference/api-ref/broadcast-streaming)
In addition to the SDK that you integrate into the app client, Agora provides a set of simple, secure, and reliable server-side RESTful APIs to manage real-time audio and video channels.
This page provides detailed documentation for the Agora Channel Management RESTful APIs.
## Key features and use cases
| Key feature | Description | Typical use cases |
| ------------------------- | --------------------------------------------------------------------------------------------------------- | --------------------------------------------------------------------------------------------------------------------------------------------------------------------------------------------------------------------------------------------------- |
| Manage user privileges | Includes removing specified users from channels and preventing them from sending audio and video streams. | Unauthorized users appear in a live broadcast, users disrupt a room during a live broadcast, the signaling message sent to the client is hijacked, or the user is offline abnormally, which interferes with timely user list updates. |
| Query channel information | Query the list of online channels, users in a channel, and the status of a specified user. | In a use case where the number of concurrent channels is not large, directly query the channel list to sync channel status. In a use case where real-time sync performance is not required, query and sync the user list and status in the channel. |
## Authorization
The `Content-Type` field in all HTTP request headers is `application/json`. All requests and responses are in JSON format. All request URLs and request bodies are case-sensitive.
The Agora Channel Management RESTful APIs only support HTTPS. Before sending HTTP requests, you must generate a Base64-encoded credential with the **Customer ID** and **Customer Secret** provided by Agora, and pass the credential to the `Authorization` field in the HTTP request header. See [RESTful authentication](/en/api-reference/api-ref/rtc/authentication) for details.
## Domain
All requests are sent to the following domain name: `api.agora.io`.
The Agora RESTful API supports only HTTPS with TLS 1.0, 1.1, or 1.2. Requests over plain HTTP are not supported.
For example, after implementing basic HTTP authentication, use the following code to send a simple request to obtain the total number of channels and the number of users in each channel:
Java
Golang
```java lineNumbers
public class Base64Encoding {
public static void main(String[] args) throws IOException, InterruptedException {
// Customer ID
// Set the AGORA_CUSTOMER_KEY environment variable
final String customerKey = System.getenv("AGORA_CUSTOMER_KEY");
// Customer key
// Set the AGORA_CUSTOMER_SECRET environment variable
final String customerSecret = System.getenv("AGORA_CUSTOMER_SECRET");
// Set the AGORA_APP_ID variable
final String appid = System.getenv("AGORA_APP_ID");
// Concatenate the customer ID and customer secret and encode them using base64
String plainCredentials = customerKey + ":" + customerSecret;
String base64Credentials = new String(Base64.getEncoder().encode(plainCredentials.getBytes()));
// Create the authorization header
String authorizationHeader = "Basic " + base64Credentials;
HttpClient client = HttpClient.newHttpClient();
// Create an HTTP request object
HttpRequest request = HttpRequest.newBuilder()
.uri(URI.create("https://api.agora.io/dev/v1/channel/" + appid))
.GET()
.header("Authorization", authorizationHeader)
.header("Content-Type", "application/json")
.build();
// Send an HTTP request
HttpResponse response = client.send(request,
HttpResponse.BodyHandlers.ofString());
System.out.println(response.body());
// Add the subsequent processing logic for the response content
}
}
```
```go lineNumbers
package main
import (
"encoding/base64"
"fmt"
"io/ioutil"
"net/http"
"os"
)
func main() {
// Retrieve environment variables
customerKey := os.Getenv("AGORA_CUSTOMER_KEY")
customerSecret := os.Getenv("AGORA_CUSTOMER_SECRET")
appID := os.Getenv("AGORA_APP_ID")
if customerKey == "" || customerSecret == "" || appID == "" {
fmt.Println("Environment variables AGORA_CUSTOMER_KEY, AGORA_CUSTOMER_SECRET, and AGORA_APP_ID must be set.")
return
}
// Concatenate the customer ID and secret, then encode them using Base64
plainCredentials := customerKey + ":" + customerSecret
base64Credentials := base64.StdEncoding.EncodeToString([]byte(plainCredentials))
// Create the authorization header
authorizationHeader := "Basic " + base64Credentials
// Build the request
req, err := http.NewRequest("GET", "https://api.agora.io/dev/v1/channel/"+appID, nil)
if err != nil {
fmt.Println("Error creating request:", err)
return
}
// Add headers
req.Header.Add("Authorization", authorizationHeader)
req.Header.Add("Content-Type", "application/json")
// Create an HTTP client and send the request
client := &http.Client{}
resp, err := client.Do(req)
if err != nil {
fmt.Println("Error sending request:", err)
return
}
defer resp.Body.Close()
// Read the response body
body, err := ioutil.ReadAll(resp.Body)
if err != nil {
fmt.Println("Error reading response body:", err)
return
}
// Print the response body
fmt.Println(string(body))
// Add any subsequent processing logic for the response content here
}
```
Use the channel management RESTful API along with the [Agora Notifications](/en/realtime-media/rtc/build/optimize-and-operate/receive-notifications) service for reliable and effective channel management and status synchronization.
## Call frequency limit
For each Agora account, not each App ID, the maximum call frequency of every online channel statistics query API is 20 queries per second. The maximum call frequency of every other API is 10 queries per second. If you are frequency limited when calling the APIs, see [How can I avoid being frequency limited when calling Agora Server RESTful APIs](/en/api-reference/faq/integration/restful_api_call_frequency) to optimize API call frequency.
## Response status codes
For a description of the response status codes, refer to [Response status codes](/en/api-reference/api-ref/rtc/response-status-codes).
# Pull from origin (/en/api-reference/api-ref/broadcast-streaming/pull-from-origin)
Pull-from-origin means that after receiving a playback request from a viewer, the Agora servers pull streams from your origin server and deliver the content to the viewer. You can use the pull-from-origin function in one of the following ways:
* Direct pull: When a playback request is received, Agora directly pulls streams from the origin server you set.
* Dynamic pull: When a playback request is received, Agora first sends a request to your callback URL to get the origin server address, and then pulls streams from the address.
## Set pull-from-origin configuration
Sets the pull-from-origin configuration for the specified entry point.
### HTTP request
```bash
PATCH https://api.agora.io/v1/projects/{appid}/fls/entry_points/{entry_point}/settings/origin_site
```
#### Path parameter
| Parameter | Type | Description |
| :------------ | :----- | :------------------------------------------------- |
| `appid` | String | Required. The App ID retrieved from Agora Console. |
| `entry_point` | String | Required. The entry point name. |
#### Request body
The request body is in the JSON Object type, and contains the following fields:
| Field | Type | Description |
| :------------ | :------ | :-------------------------------------------------------------------------------------------------------------------------------------------------------------------------------------------------------------------------------------------------- |
| `enabled` | Boolean | Optional. Whether to enable pull-from-origin. |
| `domain` | String | Optional. The domain name of your origin server, which is used for direct pull. This field and the `callbackUrl` field cannot be set at the same time. |
| `app` | String | Optional. The entry point (also known as the application name or AppName) of your origin server. This field must be set together with the `domain` field. If this field is left blank or set to empty, the entry point in the playback URL is used. |
| `callbackUrl` | String | Optional. Your callback URL, which is used for dynamic pull. This field and the `domain` field cannot be set at the same time. |
### HTTP response
If the returned HTTP status code is 200, the request is successful.
If the returned HTTP status code is not 200, the request fails. You can refer to the [HTTP status code ](#http-code)for possible reasons.
### Example
**Request line**
```bash
PATCH https://api.agora.io/v1/projects/{your_appid}/fls/entry_points/live/settings/origin_site HTTP/1.1
```
**Request body**
```json
{
"enabled": true,
"domain": "{your_domain}"
}
```
**Response line**
```bash
HTTP/1.1 200 OK
```
## Get pull-from-origin configuration
Gets the pull-from-origin configuration of the specified entry point.
### HTTP request
```bash
GET https://api.agora.io/v1/projects/{appid}/fls/entry_points/{entry_point}/settings/origin_site
```
#### Path parameter
| Parameter | Type | Description |
| :------------ | :----- | :------------------------------------------------- |
| `appid` | String | Required. The App ID retrieved from Agora Console. |
| `entry_point` | String | Required. The entry point name. |
### HTTP response
If the returned HTTP status code is 200, the request is successful. The response body contains the following fields:
* `enabled`: Boolean. Optional. Whether pull-from-origin is enabled.
* `domain`: String. Optional. The domain name of your origin server, which is used for direct pull.
* `app` : String. Optional. The entry point of your origin server.
* `callbackUrl`: String. Optional. Your callback URL, which is used for dynamic pull.
If the returned HTTP status code is not 200, the request fails. You can refer to the [HTTP status code ](#http-code)for possible reasons.
### Example
**Request line**
```bash
GET https://api.agora.io/v1/projects/{your_appid}/fls/entry_points/live/settings/origin_site HTTP/1.1
```
**Request body**
```json
{
"enabled": true,
"domain": "{your_domain}"
}
```
**Response line**
```bash
HTTP/1.1 200 OK
```
## Pull-from-origin callback requirements
If you specify `callbackUrl` when calling the [Set pull-from-origin configuration](#pull) API, Agora sends requests to this URL to get your origin server addresses. The request sent by Agora has the following format:
```bash
GET https://example.origin-site.com/entry_point={entry_point}&stream_name={stream_name} HTTP/1.1
```
Where the following parameters are replaced according to the playback URL:
* `entry_point` : Replaced with the entry point in the playback URL.
* `stream_name`: Replaced with the stream name in the playback URL.
For such a request, the HTTP response you return must meet the following requirements:
* The response is in JSON format.
* If the request succeeds, the HTTP status code is 200.
* The origin server addresses are included in the `url` field in the response body:
```json
{
"url": "rtmp://cdna.example.com/live/testedge"
}
```
Dynamic pull currently only supports RTMP streams.
## HTTP status code
| Status code | Description |
| :---------- | :------------------------------------------------------------------------------------------------------------------------------------------------------- |
| 200 | The request succeeds. |
| 400 | The parameter is invalid, for example the `appid` or the `entry_point` is empty, or the `region` parameter value is invalid. |
| 401 | Unauthorized (the customer ID and the customer secret do not match). |
| 404 | The server cannot find the resource according to the request, which means the requested entry point does not exist or the requested URI path is invalid. |
| 500 | An internal error occurs in the server, so the server is not able to complete the request. |
| 504 | An internal error occurs in the server. The gateway or the proxy server did not receive a timely request from the remote server. |
# Stream authentication (/en/api-reference/api-ref/broadcast-streaming/stream-authentication)
The stream authentication function is currently in beta. Contact [support@agora.io](mailto\:support@agora.io) before using it.
## Set a timestamp authentication key
Sets a timestamp authentication key for the specified domain name.
### HTTP request
```text
PATCH https://api.agora.io/v1/projects/{appid}/fls/domains/{domain}
```
#### Path parameter
| Parameter | Type | Description |
| :-------- | :----- | :------------------------------------------------- |
| `appid` | String | Required. The App ID retrieved from Agora Console. |
| `domain` | String | Required. The domain name. |
#### Request body
The request body is in the JSON Object type and contains the following fields:
| Parameter | Type | Description |
| :-------- | :----- | :---------------------------------------------------------------------------- |
| `authKey` | String | Required. The timestamp authentication key. Maximum length is 128 characters. |
### HTTP response
If the returned HTTP status code is 200, the request is successful.
If the returned HTTP status code is not 200, the request fails. You can refer to the [HTTP status code ](#http-code)for possible reasons.
### Example
**Request line**
```bash
PATCH https://api.agora.io/v1/projects/{your_appid}/fls/domains/{your_domain} HTTP/1.1
```
**Request body**
```json
{
"authKey": "{your auth key}"
}
```
**Response line**
```bash
HTTP/1.1 200 OK
```
## Configure origin authentication
Configures the settings of origin authentication.
### HTTP request
```text
PATCH https://api.agora.io/v1/projects/{appid}/fls/settings/streamauth/webhook
```
#### Path parameter
| Parameter | Type | Description |
| :-------- | :----- | :------------------------------------------------- |
| `appid` | String | Required. The App ID retrieved from Agora Console. |
#### Request body
The request body is in the JSON Object type and contains the following fields:
| Field | Type | Description |
| :-------- | :------ | :------------------------------------------------------------------------------------------------------------------------------------------------------------------------------------------------------------------------------------------------------------------------------------------------------------------------------ |
| `enabled` | Boolean | Required. Whether to enable origin authentication:- `true`: Enable origin authentication.
- `false`: (Default) Disable origin authentication. |
| `url` | String | Optional. The address of the server that handles origin authentication requests. |
| `secret` | String | Optional. The origin authentication secret. The process of generating a signature using the origin authentication secret is the same as that of the Notification Center Service. For details, see [Signature Verification](/en/realtime-media/rtc/build/optimize-and-operate/receive-notifications#add-signature-verification). |
### HTTP response
If the returned HTTP status code is 200, the request is successful.
If the returned HTTP status code is not 200, the request fails. You can refer to the [HTTP status code ](#http-code)for possible reasons.
### Example
**Request line**
```bash
PATCH https://api.agora.io/v1/projects/{your_appid}/fls/settings/streamauth/webhook HTTP/1.1
```
**Request body**
```json
{
"enabled": true,
"url": "www.test.com/auth/callback",
"secret": "{ncs_secret}"
}
```
**Response line**
```bash
HTTP/1.1 200 OK
```
## Get origin authentication configuration
Gets the configuration of origin authentication.
### HTTP request
```text
GET https://api.agora.io/v1/projects/{appid}/fls/settings/streamauth/webhook
```
#### Path parameter
| Parameter | Type | Description |
| :-------- | :----- | :------------------------------------------------- |
| `appid` | String | Required. The App ID retrieved from Agora Console. |
### HTTP response
If the returned HTTP status code is 200, the request is successful. The response body contains the following fields:
| Field | Type | Description |
| :-------- | :----- | :------------------------------------------------------------------------------------------------------------------------------------------------------------------------------------------------------------------------------------------------------------------------------------------------------------------------------ |
| `enabled` | Bool | Required. Whether origin authentication is enabled :- `true`: Origin authentication is enabled.
- `false`: Origin authentication is disabled. |
| `url` | String | Optional. The address of the server that handles origin authentication requests. |
| `secret` | String | Optional. The origin authentication secret. The process of generating a signature using the origin authentication secret is the same as that of the Notification Center Service. For details, see [Signature Verification](/en/realtime-media/rtc/build/optimize-and-operate/receive-notifications#add-signature-verification). |
If the returned HTTP status code is not 200, the request fails. You can refer to the [HTTP status code ](#http-code)for possible reasons.
### Example
**Request line**
```bash
GET https://api.agora.io/v1/projects/{your_appid}/fls/settings/streamauth/webhook HTTP/1.1
```
**Request body**
```json
{
"enabled": true,
"url": "www.test.com/auth/callback",
"secret": "{ncs_secret}"
}
```
**Response line**
```bash
HTTP/1.1 200 OK
```
## Format of origin authentication requests
Agora uses the following parameters to send requests to your server handling origin authentication:
| Parameter | Type | Required | Description |
| :----------- | :----- | :------- | :------------------------------------------ |
| `host` | String | Yes | The stream-pushing or -playing domain name. |
| `entryPoint` | String | Yes | The name of the entry point. |
| `streamName` | String | Yes | The stream name. |
| `cdnIp` | String | No | The IP address of the CDN node. |
| `clientIp` | String | No | The IP address of the client. |
| `token` | String | No | Authentication information. |
| `requestId` | String | No | The request ID. |
The HTTP status code you return must be one of the following:
* 200: Origin authentication succeeds.
* 401: Origin authentication fails.
## HTTP status code
| Status code | Description |
| :---------- | :------------------------------------------------------------------------------------------------------------------------------------------------------- |
| 200 | The request succeeds. |
| 400 | The parameter is invalid, for example the `appid` or the `entry_point` is empty, or the `region` parameter value is invalid. |
| 401 | Unauthorized (the customer ID and the customer secret do not match). |
| 404 | The server cannot find the resource according to the request, which means the requested entry point does not exist or the requested URI path is invalid. |
| 500 | An internal error occurs in the server, so the server is not able to complete the request. |
| 504 | An internal error occurs in the server. The gateway or the proxy server did not receive a timely request from the remote server. |
# Stream management (/en/api-reference/api-ref/broadcast-streaming/stream-management)
## Ban a live stream
Bans a live stream, which rejects incoming streams from the live stream until it is unbanned or the specified time period is reached.
### HTTP request
```bash
PATCH https://api.agora.io/v1/projects/{appid}/fls/entry_points/{entry_point}/admin/banned_streams/{stream_name}
```
#### Path parameter
| Parameter | Type | Description |
| :------------ | :----- | :------------------------------------------------- |
| `appid` | String | Required. The App ID retrieved from Agora Console. |
| `entry_point` | String | Required. The entry point name. |
| `stream_name` | String | Required. The name of the live stream. |
#### Request body
The request body is in the JSON Object type and contains the following fields:
* `resumeTime`: String. Optional. The time when incoming streams from the specified live stream can be accepted, in the RFC3339 format, for example, `2018-1129T19:00:00+08:00`. The default is 7 days after the live stream is banned.
### HTTP response
If the returned HTTP status code is 200, the request is successful.
If the returned HTTP status code is not 200, the request fails. You can refer to the [HTTP status code ](#http-code)for possible reasons.
### Example
**Request line**
```bash
PATCH https://api.agora.io/v1/projects/{your_appid}/fls/entry_points/live/admin/banned_streams/{your_stream_name} HTTP/1.1
```
**Request body**
```json
{
"resumeTime": "2021-11-29T19:00:00+08:00"
}
```
**Response line**
```bash
HTTP/1.1 200 OK
```
## Unban a live stream
Unbans a live stream so that incoming streams from the live stream can be accepted again.
### HTTP request
```bash
DELETE https://api.agora.io/v1/projects/{appid}/fls/entry_points/{entry_point}/admin/banned_streams/{stream_name}
```
#### Path parameter
| Parameter | Type | Description |
| :------------ | :----- | :------------------------------------------------- |
| `appid` | String | Required. The App ID retrieved from Agora Console. |
| `entry_point` | String | Required. The entry point name. |
| `stream_name` | String | Required. The name of the live stream. |
### HTTP response
If the returned HTTP status code is 200, the request is successful.
If the returned HTTP status code is not 200, the request fails. You can refer to the [HTTP status code ](#http-code)for possible reasons.
### Example
**Request line**
```bash
DELETE https://api.agora.io/v1/projects/{your_appid}/fls/entry_points/live/admin/banned_streams/{your_stream_name} HTTP/1.1
```
**Response line**
```bash
HTTP/1.1 200 OK
```
## List banned live streams
Lists all of the banned live streams under the specified entry point.
### HTTP request
```bash
GET https://api.agora.io/v1/projects/{appid}/fls/entry_points/{entry_point}/admin/banned_streams
```
#### Path parameter
| Parameter | Type | Description |
| :------------ | :----- | :------------------------------------------------- |
| `appid` | String | Required. The App ID retrieved from Agora Console. |
| `entry_point` | String | Required. The entry point name. |
### HTTP response
If the returned HTTP status code is 200, the request is successful. The response body contains the following fields:
`bannedStreamList`: JSON Array. The list of banned live streams. Each live stream corresponds to a JSON Object and contains the following fields:
| Field | Type | Description |
| :----------- | :----- | :----------------------------------------------------------------------------- |
| `name` | String | The stream name. |
| `resumeTime` | String | The time when incoming streams from the specified live stream can be accepted. |
If the returned HTTP status code is not 200, the request fails. You can refer to the [HTTP status code ](#http-code)for possible reasons.
### Example
**Request line**
```bash
GET https://api.agora.io/v1/projects/{appid}/fls/entry_points/live/admin/banned_streams HTTP/1.1
```
**Response line**
```bash
HTTP/1.1 200 OK
```
**Request body**
```json
{
"bannedStreamList": [
{
"name": "{your_stream_namename1}",
"resumeTime": "2021-11-29T19:00:00+08:00"
},
{
"name": "{your_stream_name2}",
"resumeTime": "2021-11-28T19:00:00+08:00"
}
]
}
```
## HTTP status codes
| Status code | Description |
| :---------- | :------------------------------------------------------------------------------------------------------------------------------------------------------- |
| 200 | The request succeeds. |
| 400 | The parameter is invalid, for example the `appid` or the `entry_point` is empty, or the `region` parameter value is invalid. |
| 401 | Unauthorized (the customer ID and the customer secret do not match). |
| 404 | The server cannot find the resource according to the request, which means the requested entry point does not exist or the requested URI path is invalid. |
| 500 | An internal error occurs in the server, so the server is not able to complete the request. |
| 504 | An internal error occurs in the server. The gateway or the proxy server did not receive a timely request from the remote server. |
# Stream reports (/en/api-reference/api-ref/broadcast-streaming/stream-reports)
## List online live streams
Lists the online live streams under the specified entry point.
### HTTP request
```bash
GET https://api.agora.io/v1/projects/{appid}/fls/entry_points/{entry_point}/reports/online_streams
```
#### Path parameter
| Parameter | Type | Description |
| :------------ | :----- | :------------------------------------------------- |
| `appid` | String | Required. The App ID retrieved from Agora Console. |
| `entry_point` | String | Required. The entry point name. |
### HTTP response
If the returned HTTP status code is 200, the request is successful. The response body contains the following fields:
`streamList`: JSON Array. The list of online live streams. Each live stream corresponds to a JSON Object, and contains the following fields:
| Field | Type | Description |
| :---------- | :----- | :------------------------------------------------------------------------------------------------- |
| `name` | String | The stream name. |
| `startTime` | String | The time when stream pushing starts, in the RFC3339 format, for example, `"2019-01-07T12:00:00Z"`. |
If the returned HTTP status code is not 200, the request fails. You can refer to the [HTTP status code ](#http-code)for possible reasons.
### Example
**Request line**
```bash
GET https://api.agora.io/v1/projects/{appid}/fls/entry_points/live/reports/online_streams HTTP/1.1
```
**Response line**
```bash
HTTP/1.1 200 OK
```
**Request body**
```json
{
"streamList": [
{
"name": "{your_stream_name_1}",
"startTime": "2021-11-29T19:00:00+08:00"
},
{
"name": "{your_stream_name_2}",
"startTime": "2021-11-29T19:00:00+08:00"
},
]
}
```
## Query information about an online live stream
Retrieves the information about the specified online live stream.
### HTTP request
```bash
GET https://api.agora.io/v1/projects/{appid}/fls/entry_points/{entry_point}/reports/online_streams/{stream_name}
```
#### Path parameter
| Parameter | Type | Description |
| :------------ | :----- | :------------------------------------------------- |
| `appid` | String | Required. The App ID retrieved from Agora Console. |
| `entry_point` | String | Required. The entry point name. |
| `stream_name` | String | Required. The name of the live stream. |
### HTTP response
If the returned HTTP status code is 200, the request is successful. The response body contains the following fields:
* `startTime`: String. The time when stream pushing starts, in the RFC3339 format, for example, `"2019-01-07T12:00:00Z"`.
If the returned HTTP status code is not 200, the request fails. You can refer to the [HTTP status code ](#http-code)for possible reasons.
### Example
**Request line**
```bash
GET https://api.agora.io/v1/projects/{appid}/fls/entry_points/live/reports/online_streams/{stream_name} HTTP/1.1
```
**Response line**
```bash
HTTP/1.1 200 OK
```
**Request body**
```json
{
"startTime": "2021-10-11T04:08:52Z"
}
```
## Get stream-pushing records
Retrieves the stream-pushing records of a live stream within a specific time range. Only records for live streams that have ended can be retrieved.
The stream-pushing records have a delay of about two hours. You can only retrieve the records for the last 60 days. You can query any stream-pushing records generated within the last 60 days, but the time range to query at any one time cannot exceed 30 days.
### HTTP request
```bash
GET https://api.agora.io/v1/projects/{appid}/fls/entry_points/{entry_point}/reports/publish_history?start_time={start_time}&end_time={end_time}&stream_name={stream_name}
```
#### Path parameter
| Parameter | Type | Description |
| :------------ | :----- | :------------------------------------------------- |
| `appid` | String | Required. The App ID retrieved from Agora Console. |
| `entry_point` | String | Required. The entry point name. |
#### Query parameters
| Parameter | Type | Description |
| :------------ | :----- | :----------------------------------------------------------------------------------------------------------------------------------------------------------------------------------------------------------------------------------------------------------------------------------------- |
| `start_time` | String | Optional. The starting point of the time range to query stream-pushing records, in the URL-encoded RFC3339 format. For example, `2019-01-07T12:00:00+08:00` corresponds to `2019-01-07T12%3A00%3A00%2B08%3A00`. This parameter cannot be set earlier than 60 days before the current time. |
| `end_time` | String | Optional. The end point of the time range to query stream-pushing records, in the URL-encoded RFC3339 format. For example, `2019-01-07T12:00:00+08:00` corresponds to `2019-01-07T12%3A00%3A00%2B08%3A00`. This parameter cannot be set later than the current time. |
| `stream_name` | String | Required. The name of the live stream. |
If the
start_time
and
end_time
parameters are not specified, the default time range to query stream-pushing records is the last 7 days.
### HTTP response
If the returned HTTP status code is 200, the request is successful. The response body contains the following fields:
`publishHistory`: JSON Array. The list of the stream-pushing records, in the descending order of the time when each stream ended pushing. Each stream-pushing record corresponds to a JSON Object and contains the following fields:
| Field | Type | Description |
| :---------- | :------ | :----------------------------------------------------------------------------------------------------- |
| `name` | String | The stream name. |
| `startTime` | String | The start time of the stream pushing in the RFC3339 format, for example `"2019-01-07T12:00:00+08:00"`. |
| `endTime` | String | The end time of the stream pushing in the RFC3339 format, for example `"2019-01-07T12:00:00+08:00"`. |
| `duration` | Integer | The duration of the stream pushing in seconds. |
If the returned HTTP status code is not 200, the request fails. You can refer to the [HTTP status codes ](#http-code)for possible reasons.
### Example
**Request line**
```bash
GET https://api.agora.io/v1/projects/{appid}/fls/entry_points/live/reports/publish_history?start_time={start_time}&end_time={end_time}&stream_name={stream_name} HTTP/1.1
```
**Response line**
```bash
HTTP/1.1 200 OK
```
**Request body**
```json
{
"publishHistory": [
{
"name": "{your_stream_name_1}",
"startTime": "2021-08-25T12:19:23+08:00",
"endTime": "2021-08-25T14:42:58+08:00",
"duration": 8616
},
{
"name": "{your_stream_name_2}",
"startTime": "2021-08-25T10:44:40+08:00",
"endTime": "2021-08-25T11:01:49+08:00",
"duration": 1030
}
]
}
```
## Get stream-pushing quality statistics
Retrieves the stream-pushing quality statistics of a live stream within a specific time range.
The stream-pushing quality statistics have a delay of about three minutes. You can query any stream-pushing records generated within the last six days, but the time range to query at any one time cannot exceed six hours.
### HTTP request
```text
GET https://api.agora.io/v1/projects/{appid}/fls/entry_points/{entry_point}/reports/publish_quality?start_time={start_time}&end_time={end_time}&stream_name={stream_name}
```
#### Path parameter
| Parameter | Type | Description |
| :------------ | :----- | :------------------------------------------------- |
| `appid` | String | Required. The App ID retrieved from Agora Console. |
| `entry_point` | String | Required. The entry point name. |
#### Query parameters
| Parameter | Type | Description |
| :------------ | :----- | :----------------------------------------------------------------------------------------------------------------------------------------------------------------------------------------------------------------------------------------------------------------------------------------- |
| `start_time` | String | Optional. The starting point of the time range to query stream-pushing quality, in the URL-encoded RFC3339 format. For example, `2019-01-07T12:00:00+08:00` corresponds to `2019-01-07T12%3A00%3A00%2B08%3A00`. This parameter cannot be set earlier than 60 days before the current time. |
| `end_time` | String | Optional. The end point of the time range to query stream-pushing quality, in the URL-encoded RFC3339 format. For example, `2019-01-07T12:00:00+08:00` corresponds to `2019-01-07T12%3A00%3A00%2B08%3A00`. This parameter cannot be set later than the current time. |
| `stream_name` | String | Required. The name of the live stream. |
If the
start_time
and
end_time
parameters are not specified, the default time range to query stream-pushing quality is the last 6 hours.
### HTTP response
If the returned HTTP status code is 200, the request is successful. The response body contains the following fields:
`publishHistory`: JSON Array. The list of the stream-pushing quality statistics, from the latest to the earliest. Each stream-pushing record corresponds to a JSON Object and contains the following fields:
| Field | Type | Description |
| :---------- | :------ | :---------------------------------------------------------------------------------------------------------------------------------------------------------------------------------------------------------------------- |
| `name` | String | The stream name. |
| `time` | String | The time when the stream-pushing quality statistics were generated, in the RFC3339 format, for example, `"2019-01-07T12:00:00+08:00"`. The stream-pushing quality statistics are calculated in intervals of one minute. |
| `bitrate` | Integer | The stream-pushing bitrate (bps). |
| `frameRate` | Integer | The stream-pushing frame rate (fps). |
| `cdnIp` | String | The IP address of the CDN node to push the stream to. |
| `clientIp` | String | The IP address of the client pushing the stream. |
If the returned HTTP status code is not 200, the request fails. You can refer to the [HTTP status codes ](#http-code)for possible reasons.
### Example
**Request line**
```bash
GET https://api.agora.io/v1/projects/{appid}/fls/entry_points/live/reports/publish_quality?start_time={start_time}&end_time={end_time}&stream_name={stream_name} HTTP/1.1
```
**Response line**
```bash
HTTP/1.1 200 OK
```
**Request body**
```json
{
"QualityHistory": [
{
"name": "{your_stream_name}",
"time": "2021-08-25T12:19:00+08:00",
"bitrate": 1123388,
"framerate": 31,
"cdnIp": "58.220.74.80",
"clientIp": "218.19.252.82"
},
{
"name": "{your_stream_name}",
"time": "2021-08-25T12:18:00+08:00",
"bitrate": 1177908,
"framerate": 30,
"cdnIp": "58.220.74.80",
"clientIp": "218.19.252.82"
}
]
}
```
## Get stream-playing statistics
Retrieves the stream-playing statistics of a live stream within a specific time range.
The stream-playing statistics have a delay of about three minutes. You can query any stream-playing records within the last 30 days, but the time range to query at any one time cannot exceed two hours.
### HTTP request
```text
GET https://api.agora.io/v1/projects/{appid}/fls/entry_points/{entry_point}/reports/stream_play_statistic?start_time={start_time}&end_time={end_time}&stream_name={stream_name}
```
#### Path parameter
| Parameter | Type | Description |
| :------------ | :----- | :------------------------------------------------- |
| `appid` | String | Required. The App ID retrieved from Agora Console. |
| `entry_point` | String | Required. The entry point name. |
#### Query parameters
| Parameter | Type | Description |
| :------------ | :----- | :-------------------------------------------------------------------------------------------------------------------------------------------------------------------------------------------------------------------------------------------------------------------------------------------- |
| `start_time` | String | Optional. The starting point of the time range to query stream-playing statistics, in the URL-encoded RFC3339 format. For example, `2019-01-07T12:00:00+08:00` corresponds to `2019-01-07T12%3A00%3A00%2B08%3A00`. This parameter cannot be set earlier than 30 days before the current time. |
| `end_time` | String | Optional. The end point of the time range to query stream-playing statistics, in the URL-encoded RFC3339 format. For example, `2019-01-07T12:00:00+08:00` corresponds to `2019-01-07T12%3A00%3A00%2B08%3A00`. This parameter cannot be set later than the current time. |
| `stream_name` | String | Required. The name of the live stream. |
If the
start_time
and
end_time
parameters are not specified, the default time range to query stream-playing statistics is the last 2 hours.
### HTTP response
If the returned HTTP status code is 200, the request is successful. The response body contains the following fields:
`playStatistic`: JSON Array. The list of the stream-playing statistics, from the latest to the earliest. Each stream-pushing record corresponds to a JSON Object and contains the following fields:
| Field | Type | Description |
| :-------- | :------ | :------------------------------------------------------------------------------------------------------------------------------------------------------------------------------------------------------ |
| `name` | String | The stream name. |
| `time` | String | The time when the stream-playing statistics were generated, in the RFC3339 format, for example, `"2019-01-07T12:00:00+08:00"`. The stream-playing statistics are calculated in intervals of one minute. |
| `linkNum` | Integer | The number of connections, that is, the number of clients playing the stream. |
If the returned HTTP status code is not 200, the request fails. You can refer to the [HTTP status codes ](#http-code)for possible reasons.
### Example
**Request line**
```bash
GET https://api.agora.io/v1/projects/{appid}/fls/entry_points/live/reports/stream_play_statistic?start_time={start_time}&end_time={end_time}&stream_name={stream_name} HTTP/1.1
```
**Response line**
```bash
HTTP/1.1 200 OK
```
**Request body**
```json
{
"playStatistic": [
{
"name": "{your_stream_name}",
"time": "2021-08-25T12:19:00+08:00",
"linkNum": 3
},
{
"name": "{your_stream_name}",
"time": "2021-08-25T12:18:00+08:00",
"linkNum": 5
}
]
}
```
## HTTP status codes
| Status code | Description |
| :---------- | :------------------------------------------------------------------------------------------------------------------------------------------------------- |
| 200 | The request succeeds. |
| 400 | The parameter is invalid, for example the `appid` or the `entry_point` is empty, or the `region` parameter value is invalid. |
| 401 | Unauthorized (the customer ID and the customer secret do not match). |
| 404 | The server cannot find the resource according to the request, which means the requested entry point does not exist or the requested URI path is invalid. |
| 500 | An internal error occurs in the server, so the server is not able to complete the request. |
| 504 | An internal error occurs in the server. The gateway or the proxy server did not receive a timely request from the remote server. |
# Stream transfer (/en/api-reference/api-ref/broadcast-streaming/stream-transfer)
Stream transfer allows Agora to forward a live stream to third-party platforms. With this feature, your app users can publish their live streams on a number of social platforms.
Stream transfer is also known as Rebroadcasting, Restreaming or RTMP Passthrough.
## Set transfer configuration
Sets the transfer configuration for an entry point.
### HTTP request
```bash
PATCH https://api.agora.io/v1/projects/{appid}/fls/entry_points/{entry_point}/settings/transfer
```
#### Path parameter
| Parameter | Type | Description |
| :------------ | :----- | :------------------------------------------------- |
| `appid` | String | Required. The App ID retrieved from Agora Console. |
| `entry_point` | String | Required. The entry point name. |
#### Request body
The request body is in the JSON Object type and contains the following fields:
| Field | Type | Description |
| :------------ | :----- | :---------------------------------------------------------------------------------------------------------------------------------------------------------------------------------------------------------------------------------- |
| `enabled` | Bool | Optional. Whether to enable the transfer function:- `true`: Enable the transfer function.
- `false`: (Default) Disable the transfer function. |
| `callbackUrl` | String | Optional. Your callback URL. If you enable the transfer function, Agora sends requests to this URL to get the platform addresses where the live stream are published. For details, see [Transfer callback requirements](#callback). |
### HTTP response
If the returned HTTP status code is 200, the request is successful.
If the returned HTTP status code is not 200, the request fails. You can refer to the [HTTP status code ](#http-code)for possible reasons.
### Example
**Request line**
```bash
PATCH https://api.agora.io/v1/projects/{your_appid}/fls/entry_points/live/settings/transfer HTTP/1.1
```
**Request body**
```json
{
"enabled": true,
"callbackUrl": "https://example.transfer.com/callback"
}
```
**Response line**
```bash
HTTP/1.1 200 OK
```
## Get transfer configuration
Gets the transfer configuration for an entry point.
### HTTP request
```bash
GET https://api.agora.io/v1/projects/{appid}/fls/entry_points/{entry_point}/settings/transfer
```
#### Path parameter
| Parameter | Type | Description |
| :------------ | :----- | :------------------------------------------------- |
| `appid` | String | Required. The App ID retrieved from Agora Console. |
| `entry_point` | String | Required. The entry point name. |
### HTTP response
If the returned HTTP status code is 200, the request is successful, and the response body contains the following fields:
| Field | Type | Description |
| :------------ | :----- | :------------------------------------------------------------------------------------------------------------------------------------------------------------------------------------------------------------------------ |
| `enabled` | Bool | Whether the transfer function is enabled:- `true`: The transfer function is enabled.
- `false`: The transfer function is disabled. |
| `callbackUrl` | String | Your callback URL. If you enable the transfer function, Agora sends requests to this URL to get the platform addresses where the live stream are published. For details, see [Transfer callback requirements](#callback). |
If the returned HTTP status code is not 200, the request fails. You can refer to the [HTTP status code ](#http-code)for possible reasons.
### Example
**Request line**
```bash
GET https://api.agora.io/v1/projects/{your_appid}/fls/entry_points/live/settings/transfer HTTP/1.1
```
**Response line**
```bash
HTTP/1.1 200 OK
```
**Request body**
```json
{
"enabled": true,
"callbackUrl": "https://example.transfer.com/callback"
}
```
## Transfer callback requirements
If you specify `callbackUrl` when calling the [Set transfer configuration](#patch) API, Agora sends requests to this URL to get the platform addresses where the live stream are published. The request sent by Agora has the following format:
```bash
POST https://example.transfer.com/callback?entry_point={entry_point}&stream_name={stream_name} HTTP/1.1
```
Where `entry_point` is the name of the entry point, and `stream_name` is the name of the live `stream`.
For such a request, the HTTP response you return must meet the following requirements:
* The response is in JSON format.
* If the request succeeds, the HTTP status code is 200.
* The target addresses are included in the `transferUrls` field in the response body:
```json
{
"transferUrls": [
"rtmp://cdna.example.com/live/testedge",
"rtmp://cdnb.example.com/live/testedge"
]
}
```
After receiving your HTTP response, Agora starts forwarding the live stream to the specified third-party platforms.
## HTTP status code
| Status code | Description |
| :---------- | :------------------------------------------------------------------------------------------------------------------------------------------------------- |
| 200 | The request succeeds. |
| 400 | The parameter is invalid, for example the `appid` or the `entry_point` is empty, or the `region` parameter value is invalid. |
| 401 | Unauthorized (the customer ID and the customer secret do not match). |
| 404 | The server cannot find the resource according to the request, which means the requested entry point does not exist or the requested URI path is invalid. |
| 500 | An internal error occurs in the server, so the server is not able to complete the request. |
| 504 | An internal error occurs in the server. The gateway or the proxy server did not receive a timely request from the remote server. |
# Watermarks (/en/api-reference/api-ref/broadcast-streaming/watermarks)
Watermark configuration takes effect on both the original stream and the transcoded stream.
## Create watermark templates
Creates watermark templates for the specified entry point.
### HTTP request
```bash
PATCH https://api.agora.io/v1/projects/{appid}/fls/entry_points/{entry_point}/settings/watermark
```
#### Path parameter
| Parameter | Type | Description |
| :------------ | :----- | :------------------------------------------------- |
| `appid` | String | Required. The App ID retrieved from Agora Console. |
| `entry_point` | String | Required. The entry point name. |
#### Request body
The request body is in the JSON Object type, and contains the following fields:
| Field | Type | Description |
| :------------- | :------------------------------------ | :---------------------------------------------------------------------------------------- |
| `watermarkSet` | JSON Array of [WaterMark](#watermark) | Required. Watermark configuration sets. You can add a maximum of five configuration sets. |
### HTTP response
If the returned HTTP status code is 200, the request is successful.
If the returned HTTP status code is not 200, the request fails. You can refer to the [HTTP status codes ](#http-code)for possible reasons.
### Example
**Request line**
```bash
PATCH https://api.agora.io/v1/projects/{your_appid}/fls/entry_points/live/settings/watermark HTTP/1.1
```
**Request body**
```json
{
"waterMarkSet": [
{
"url": "http://pngimg.com/uploads/egg/egg_PNG40777.png",
"x": 0,
"y": 0,
"width": 200,
"height": 200,
"zOrder": 2
},
{
"url": "http://pngimg.com/uploads/egg/egg_PNG40777.png",
"x": 0,
"y": 0,
"width": 300,
"height": 300,
"zOrder": 3
}
]
}
```
**Response line**
```bash
HTTP/1.1 200 OK
```
## List watermark templates
Lists the watermark templates available for the specified entry point.
### HTTP request
```bash
GET https://api.agora.io/v1/projects/{appid}/fls/entry_points/{entry_point}/settings/watermark
```
#### Path parameter
| Parameter | Type | Description |
| :------------ | :----- | :------------------------------------------------- |
| `appid` | String | Required. The App ID retrieved from Agora Console. |
| `entry_point` | String | Required. The entry point name. |
### HTTP response
If the returned HTTP status code is 200, the request is successful. The response body contains the following fields:
| Field | Type | Description |
| :------------- | :------------------------------------ | :------------------------------- |
| `watermarkSet` | JSON Array of [WaterMark](#watermark) | The list of watermark templates. |
If the returned HTTP status code is not 200, the request fails. You can refer to the [HTTP status codes ](#http-code)for possible reasons.
### Example
**Request line**
```bash
GET https://api.agora.io/v1/projects/{your_appid}/fls/entry_points/live/settings/watermark HTTP/1.1
```
**Request body**
```json
{
"waterMarkSet": [
{
"url": "http://pngimg.com/uploads/egg/egg_PNG40777.png",
"x": 0,
"y": 0,
"width": 200,
"height": 200,
"zOrder": 2
},
{
"url": "http://pngimg.com/uploads/egg/egg_PNG40777.png",
"x": 0,
"y": 0,
"width": 300,
"height": 300,
"zOrder": 3
}
]
}
```
**Response line**
```bash
HTTP/1.1 200 OK
```
## Data type
### WaterMark
Watermark configuration parameters, including the following fields:
| Field | Type | Description |
| :------- | :------ | :------------------------------------------------------------------------------------------------------------------------------------------------------------------------------------------------------------------------------------------------------------------------------------------------------------------------------------------------------------------ |
| `url` | String | Required. The URL of the watermark image. Only PNG files are supported. To easily set different watermarks for different entry points or live streams, you can use the following parameters in the URL:- `{entry_point}`: This parameter is replaced with the specified entry point.
- `{stream_name}`: This parameter is replaced with the specified stream name. |
| `x` | Integer | Required. The x-coordinate of the watermark. The value range is \[0,1920]. |
| `y` | Integer | Required. The y-coordinate of the watermark. The value range is \[0,1920]. |
| `width` | Integer | Required. The width (pixels) of the watermark image. The value range is \[0,1920]. |
| `height` | Integer | Required. The height (pixels) of the watermark image. The value range is \[0,1920]. |
## HTTP status codes
| Status code | Description |
| :---------- | :------------------------------------------------------------------------------------------------------------------------------------------------------- |
| 200 | The request succeeds. |
| 400 | The parameter is invalid, for example the `appid` or the `entry_point` is empty, or the `region` parameter value is invalid. |
| 401 | Unauthorized (the customer ID and the customer secret do not match). |
| 404 | The server cannot find the resource according to the request, which means the requested entry point does not exist or the requested URI path is invalid. |
| 500 | An internal error occurs in the server, so the server is not able to complete the request. |
| 504 | An internal error occurs in the server. The gateway or the proxy server did not receive a timely request from the remote server. |
# Agora Console (/en/api-reference/api-ref/console/solutions-agora-console-rest-api)
When you need to [create and manage Agora projects](#create-a-project) or [check usage](#get-project-usage), besides using the graphic user interface at Agora Console, you can also call the Agora Console RESTful API.
This page provides detailed help for the Agora Console RESTful APIs.
## Basic information
This section provides basic information about the Agora Console RESTful APIs.
#### Domain
All requests are sent to the host `api.agora.io`. See [Ensure service reliability](#ensure-service-reliability) for alternate domain names.
#### Data format
The `Content-Type` field in all HTTP request headers is `application/json`. All requests and responses are in JSON format. All request URLs and request bodies are case-sensitive.
#### Authentication
The Agora Console RESTful APIs only support HTTPS. Before sending HTTP requests, you must generate a Base64-encoded credential with the **Customer ID** and **Customer Secret** provided by Agora, and pass the credential to the `Authorization` field in the HTTP request header.
#### Call frequency limit
For each Agora account (not each App ID), the call frequency of each API on this page is no more than 10 queries per second.
## Create a project
Creates an Agora project.
#### Prototype
* Method: `POST`
* Endpoint: `https://api.agora.io/dev/v1/project`
#### Request parameters
**Request body parameters**
Pass in the following parameters in the request body:
| Parameter | Type | Description |
| ----------------- | ------- | ----------------------------------------------------------------------------------------------------------------------------------------------------------------------------------------------------------------------------------------------------------------------------------------------------------------------------------------------------------------------------------------------------------------------------------------------------------------------------------------------------------------------------------------------------------------------- |
| `name` | String | (Required) The project name, which is between 1 to 255 characters in length. |
| `enable_sign_key` | Boolean | (Required) Whether to enable the primary app certificate:* true: Enable the primary app certificate.
* false: (Default) Do not enable the primary app certificate.
Note
After creating a project, you can send a request to `https://api.agora.io/dev/v1/signkey` to enable or disable the primary app certificate, or send a request to `https://api.agora.io/dev/v1/reset_signkey` to reset the primary app certificate.
|
#### Request example
**Request body**
```json
{
"name": "project1",
"enable_sign_key": true
}
```
#### Response parameters
For details about possible response status codes, see the [Response status codes](#response-status-codes) table.
If the status code is not `201`, the request fails. See the `message` field in the response body for the reason for this failure.
If the status code is `201`, the request succeeds, and the response body includes the following parameters:
| Parameter | Type | Description |
| --------- | ------ | ---------------------------------------------------------------------------------------------------------------------------------------------------------------------------------------------------------------------------------------------------------------------------------------------------------------------------------------------------------------------------------------------------------------------------------------------------------------------------------------------------------------------------------------------------------------------------------------------------------------------------------------------------------------------------------------------------------------------------------------------------- |
| `project` | Object | The information on the project, including the following fields:- `id`: String. The project ID
- `name`: String. The project name.
- `vendor_key`: String. The App ID of the project.
- `sign_key`: String. The primary app certificate of the project.
- `recording_server`: String. The IP address of the recording server.
* Pay attention to this field if you use v1.9.0 and earlier versions of the Agora On-Premise Recording SDK.
* Ignore this field if you use v1.11.0 and later versions of the Agora On-Premise Recording SDK.
- `status`: Number. The status of the project:
* `1`: The project is enabled.
* `0`: The project is disabled.
- `created`: Number. The Unix timestamp (in seconds) of when the project is created. |
#### Response example
The following is a response example for a successful request:
```json
{
"project": {
"id": "xxxx",
"name": "project1",
"vendor_key": "4855xxxxxxxxxxxxxxxxxxxxxxxxeae2",
"sign_key": "4855xxxxxxxxxxxxxxxxxxxxxxxxeae2",
"recording_server": null,
"status": 1,
"created": 1464165672
}
}
```
## Get a specified project
Gets the information on a specified project.
#### Prototype
* Method: `GET`
* Endpoint: `https://api.agora.io/dev/v1/project`
#### Request Parameters
**Query parameters**
Pass in the following query parameters in the request URL:
| Parameter | Type | Description |
| --------- | ------ | ---------------------------------------------------------------------------------------------------------- |
| `id` | String | (Required) The project ID, which can be obtained by calling the [Get all projects](#get-all-projects) API. |
| `name` | String | (Required) The project name. |
#### Request example
**Request URL**
```
`https://api.agora.io/dev/v1/project?id=7sdnf3xRH&name=project1`
```
#### Response parameters
For details about possible response status codes, see the [Response status codes](#response-status-codes) table.
If the status code is not `201`, the request fails. See the `message` field in the response body for the reason for this failure.
If the status code is `201`, the request succeeds, and the response body includes the following parameters:
| Parameter | Type | Description |
| ---------- | ----- | ------------------------------------------------------------------------------------------------------------------------------------------------------------------------------------------------------------------------------------------------------------------------------------------------------------------------------------------------------------------------------------------------------------------------------------------------------------------------------------------------------------------------------------------------------------------------------------------------------------------------------------------------------------------------------------------------------------------------------------------------------------------------------------------------------------------------------------------- |
| `projects` | Array | The information on the projects. This Array consists of multiple Objects. Each Object shows the information on one project and includes the following fields:- `id`: String. The project ID.
- `name`: String. The project name.
- `vendor_key`: String. The App ID of the project.
- `sign_key`: String. The primary App Certificate of the project.
- `recording_server`: String. The IP of the recording server.
* Pay attention to this field if you use v1.9.0 and earlier versions of the Agora On-Premise Recording SDK.
* Ignore this field if you use v1.11.0 and later versions of the Agora On-Premise Recording SDK.
- `status`: Number. The status of the project:
* `1`: The project is enabled.
* `0`: The project is disabled.
- `created`: Number. The Unix timestamp (in seconds) of when the project is created. |
#### Response example
The following is a response example for a successful request:
```json
{
"projects": [
{
"id": "xxxx",
"name": "project1",
"sign_key": "4855xxxxxxxxxxxxxxxxxxxxxxxxeae2",
"vendor_key": "4855xxxxxxxxxxxxxxxxxxxxxxxxeae2",
"recording_server": null,
"status": 1,
"created": 1464165672
}
]
}
```
## Get all projects
Gets the information on all your Agora projects.
#### Prototype
* Method: `GET`
* Endpoint: `https://api.agora.io/dev/v1/projects`
#### Request example
**Request URL**
```
`https://api.agora.io/dev/v1/projects`
```
#### Response parameters
For details about possible response status codes, see the [Response status codes](#response-status-codes) table.
If the status code is not `201`, the request fails. See the `message` field in the response body for the reason for this failure.
If the status code is `201`, the request succeeds, and the response body includes the following parameters:
| Parameter | Type | Description |
| ---------- | ----- | --------------------------------------------------------------------------------------------------------------------------------------------------------------------------------------------------------------------------------------------------------------------------------------------------------------------------------------------------------------------------------------------------------------------------------------------------------------------------------------------------------------------------------------------------------------------------------------------------------------------------------------------------------------------------------------------------------------------------------------------------------------------------------------------------------------------------------------------- |
| `projects` | Array | The information on the projects. This Array consists of multiple Objects. Each Object shows the information on one project and includes the following fields:- `id`: String. The project ID.
- `name`: String. The project name.
- `vendor_key`: String. The App ID of the project.
- `sign_key`: String. The primary App Certificate of the project.
- `recording_server`: String. The IP of the recording server.
* Pay attention to this field if you use v1.9.0 and earlier versions of the Agora On-Premise Recording SDK.
* Ignore this field if you use v1.11.0 and later versions of the Agora On-Premise Recording SDK.
- `status`: Number. The status of the project:
* `1`: The project is enabled.
* `0`: The project is disabled.
* `created`: Number. The Unix timestamp (in seconds) of when the project is created. |
#### Response example
The following is a response example for a successful request:
```json
{
"projects": [
{
"id": "xxxx",
"name": "project1",
"sign_key": "4855xxxxxxxxxxxxxxxxxxxxxxxxeae2",
"vendor_key": "4855xxxxxxxxxxxxxxxxxxxxxxxxeae2",
"recording_server": null,
"status": 1,
"created": 1464165672
},
{
"id": "xxxx",
"name": "project1",
"sign_key": "2c01da6d6f6741df88ec47005f08572b",
"vendor_key": "eb00cd2b222a4eeaa24fc6046d90b227",
"recording_server": null,
"status": 1,
"created": 1637153755
}
]
}
```
## Disable or enable a project
Disables or enables a specified Agora project.
#### Prototype
* Method: `POST`
* Endpoint: `https://api.agora.io/dev/v1/project_status`
#### Request parameters
**Request body parameters**
Pass in the following parameters in the request body:
| Parameter | Type | Description |
| --------- | ------ | ---------------------------------------------------------------------------------------------------------- |
| `id` | String | (Required) The project ID, which can be obtained by calling the [Get all projects](#get-all-projects) API. |
| `status` | Number | (Required) Whether to enable or disable the project:- `0`: Disable the project.
- `1`: Enable the project. |
#### Request example
**Request body**
```json
{
"id": "xxxx",
"status": 0
}
```
#### Response parameters
For details about possible response status codes, see the [Response status codes](#response-status-codes) table.
If the status code is not `201`, the request fails. See the `message` field in the response body for the reason for this failure.
If the status code is `201`, the request succeeds, and the response body includes the following parameters:
| Parameter | Type | Description |
| --------- | ------ | ----------------------------------------------------------------------------------------------------------------------------------------------------------------------------------------------------------------------------------------------------------------------------------------------------------------------------------------------------------------------------------------------------------------------------------------------------------------------------------------------------------------------------------------------------------------------------------------------------------------------------------------------------------------------------------------------------------------------------------------------------- |
| `project` | Object | The information on the project, including the following fields:- `id`: String. The project ID.
- `name`: String. The project name.
- `vendor_key`: String. The App ID of the project.
- `sign_key`: String. The primary app certificate of the project.
- `recording_server`: String. The IP address of the recording server.
* Pay attention to this field if you use v1.9.0 and earlier versions of the Agora On-Premise Recording SDK.
* Ignore this field if you use v1.11.0 and later versions of the Agora On-Premise Recording SDK.
- `status`: Number. The status of the project:
* `1`: The project is enabled.
* `0`: The project is disabled.
- `created`: Number. The Unix timestamp (in seconds) of when the project is created. |
#### Response example
The following is a response example for a successful request:
```json
{
"project": {
"id": "xxxx",
"name": "project1",
"vendor_key": "4855xxxxxxxxxxxxxxxxxxxxxxxxeae2",
"sign_key": "4855xxxxxxxxxxxxxxxxxxxxxxxxeae2",
"recording_server": null,
"status": 1,
"created": 1464165672
}
}
```
## Set the IP address of the recording server
Sets the IP of the recording server for a specified project.
#### Prototype
* Method: `POST`
* Endpoint: `https://api.agora.io/dev/v1/recording_config`
#### Request parameters
**Request body parameters**
Pass in the following parameters in the request body:
| Parameter | Type | Description |
| ------------------ | ------ | ---------------------------------------------------------------------------------------------------------------------------------------------------------- |
| `id` | String | (Required) The project ID, which can be obtained by calling the [Get all projects](#get-all-projects) API. |
| `recording_server` | String | (Required) The IP address of the recording server. This field takes effect only when you use v1.9.0 or earlier versions of Agora On-Premise Recording SDK. |
#### Request example
**Request body**
```json
{
"id": "xxxx",
"recording_server": "10.12.1.5:8080"
}
```
#### Response parameters
For details about possible response status codes, see the [Response status codes](#response-status-codes) table.
If the status code is not `201`, the request fails. See the `message` field in the response body for the reason for this failure.
If the status code is `201`, the request succeeds, and the response body includes the following parameters:
| Parameter | Type | Description |
| --------- | ------ | ----------------------------------------------------------------------------------------------------------------------------------------------------------------------------------------------------------------------------------------------------------------------------------------------------------------------------------------------------------------------------------------------------------------------------------------------------------------------------------------------------------------------------------------------------------------------------------------------------------------------------------------------------------------------------------------------------------------------------------------------------- |
| `project` | Object | The information on the project, including the following fields:- `id`: String. The project ID.
- `name`: String. The project name.
- `vendor_key`: String. The App ID of the project.
- `sign_key`: String. The primary app certificate of the project.
- `recording_server`: String. The IP address of the recording server.
* Pay attention to this field if you use v1.9.0 and earlier versions of the Agora On-Premise Recording SDK.
* Ignore this field if you use v1.11.0 and later versions of the Agora On-Premise Recording SDK.
- `status`: Number. The status of the project:
* `1`: The project is enabled.
* `0`: The project is disabled.
- `created`: Number. The Unix timestamp (in seconds) of when the project is created. |
#### Response example
The following is a response example for a successful request:
```json
{
"project": {
"id": "xxxx",
"name": "project1",
"vendor_key": "4855xxxxxxxxxxxxxxxxxxxxxxxxeae2",
"sign_key": "4855xxxxxxxxxxxxxxxxxxxxxxxxeae2",
"recording_server": null,
"status": 1,
"created": 1464165672
}
}
```
## Enable or disable the primary app certificate
Enables or disables the primary app certificate for a specified project.
#### Prototype
* Method: `POST`
* Endpoint: `https://api.agora.io/dev/v1/signkey`
#### Request parameters
**Request body parameters**
The following parameters are required in the request body:
| Parameter | Type | Description |
| --------- | ------- | --------------------------------------------------------------------------------------------------------------------------------------------------------------------------------------------- |
| `id` | String | (Required) The project ID, which can be obtained by calling the [Get all projects](#get-all-projects) API. |
| `enable` | Boolean | (Required) Whether to enable or disable the primary app certificate for the project:- true: (Default) Enable the primary app certificate.
- false: Do not enable the primary app certificate. |
#### Request example
**Request body**
```json
{
"id": "xxxx",
"enable": true
}
```
#### Response parameters
For details about possible response status codes, see the [Response status codes](#response-status-codes) table.
If the status code is not `201`, the request fails. See the `message` field in the response body for the reason for this failure.
If the status code is `201`, the request succeeds, and the response body includes the following parameters:
| Parameter | Type | Description |
| --------- | ------ | ----------------------------------------------------------------------------------------------------------------------------------------------------------------------------------------------------------------------------------------------------------------------------------------------------------------------------------------------------------------------------------------------------------------------------------------------------------------------------------------------------------------------------------------------------------------------------------------------------------------------------------------------------------------------------------------------------------------------------------------------------- |
| `project` | Object | The information on the project, including the following fields:- `id`: String. The project ID.
- `name`: String. The project name.
- `vendor_key`: String. The App ID of the project.
- `sign_key`: String. The primary app certificate of the project.
- `recording_server`: String. The IP address of the recording server.
* Pay attention to this field if you use v1.9.0 and earlier versions of the Agora On-Premise Recording SDK.
* Ignore this field if you use v1.11.0 and later versions of the Agora On-Premise Recording SDK.
- `status`: Number. The status of the project:
* `1`: The project is enabled.
* `0`: The project is disabled.
- `created`: Number. The Unix timestamp (in seconds) of when the project is created. |
#### Response example
The following is a response example for a successful request:
```json
{
"project": {
"id": "xxxx",
"name": "project1",
"vendor_key": "4855xxxxxxxxxxxxxxxxxxxxxxxxeae2",
"sign_key": "4855xxxxxxxxxxxxxxxxxxxxxxxxeae2",
"recording_server": null,
"status": 1,
"created": 1464165672
}
}
```
## Reset the primary app certificate
Resets the primary app certificate for a specified project.
#### Prototype
* Method: `POST`
* Endpoint: `https://api.agora.io/dev/v1/reset_signkey`
#### Request parameter
**Request body parameter**
Pass in the following parameter in the request body:
| Parameter | Type | Description |
| --------- | ------ | ---------------------------------------------------------------------------------------------------------- |
| `id` | String | (Required) The project ID, which can be obtained by calling the [Get all projects](#get-all-projects) API. |
#### Request example
**Request body**
```json
{
"id": "xxxx"
}
```
#### Response parameters
For details about possible response status codes, see the [Response status codes](#response-status-codes) table.
If the status code is not `201`, the request fails. See the `message` field in the response body for the reason for this failure.
If the status code is `201`, the request succeeds, and the response body includes the following parameters:
| Parameter | Type | Description |
| --------- | ------ | ----------------------------------------------------------------------------------------------------------------------------------------------------------------------------------------------------------------------------------------------------------------------------------------------------------------------------------------------------------------------------------------------------------------------------------------------------------------------------------------------------------------------------------------------------------------------------------------------------------------------------------------------------------------------------------------------------------------------------------------------------- |
| `project` | Object | The information on the project, including the following fields:- `id`: String. The project ID.
- `name`: String. The project name.
- `vendor_key`: String. The App ID of the project.
- `sign_key`: String. The primary app certificate of the project.
- `recording_server`: String. The IP address of the recording server.
* Pay attention to this field if you use v1.9.0 and earlier versions of the Agora On-Premise Recording SDK.
* Ignore this field if you use v1.11.0 and later versions of the Agora On-Premise Recording SDK.
- `status`: Number. The status of the project:
* `1`: The project is enabled.
* `0`: The project is disabled.
- `created`: Number. The Unix timestamp (in seconds) of when the project is created. |
#### Response example
The following is a response example for a successful request:
```json
{
"project": {
"id": "xxxx",
"name": "project1",
"vendor_key": "4855xxxxxxxxxxxxxxxxxxxxxxxxeae2",
"sign_key": "4855xxxxxxxxxxxxxxxxxxxxxxxxeae2",
"recording_server": null,
"status": 1,
"created": 1464165672
}
}
```
## Get project usage
Gets the usage data of a specified project.
#### Prototype
* Method: `GET`
* Endpoint: `https://api.agora.io/dev/v3/usage`
#### Request parameters
**Query parameters**
Pass the following query parameters in the request path:
| Parameter | Type | Description |
| ------------ | ------ | -------------------------------------------------------------------------------------------------------------------------------------------------------------------------------------------------------------------------------------------------------------------------------- |
| `project_id` | String | (Required) The project ID, which can be obtained by calling the [Get all projects](#get-all-projects) API. |
| `from_date` | String | (Required) The start date of the query, UTC time. For example, 2020-01-01. |
| `to_date` | String | (Required) The end date of the query, UTC time. For example, 2020-01-31. |
| `business` | String | (Required) The business type. You can choose one of the following values:- `default`: Audio and video. The usage on Miniapp is not included.
- `transcodeDuration`: Transcoding.
- `recording`: On-premise recording.
- `cloudRecording`: Cloud recording.
- `miniapp`: Miniapp. |
#### Request example
**Request path**
```
`https://api.agora.io/dev/v3/usage?project_id=rxxxxxxj5u&from_date=2021-10-12&to_date=2021-12-14&business=default`
```
#### Response parameters
For details about possible response status codes, see the [Response status codes](#response-status-codes) table.
If the status code is not `200`, the request fails. See the `message` field in the response body for the reason for this failure.
If the status code is `200`, the request succeeds, and the response body includes the following parameters:
| Parameter | Type | Description |
| --------- | ------ | -------------------------------------------------------------------------------------------------------------------------------------------------------------------------------------------------------------------------------------------------------------------------------------------------------------------------------------------------------------------------------------------------------------------------------------------------------------------------------------------------------------------------------------------------------------------------------------------------------------------------------------------------------------------------------------------------------------------------------------------------------------------------------------------------------------------------------------------------------------------------------------------------------------------------------------------------------------------------------------------------------------------------------------------------------------------------------------------------------------------------------------------------------------------------------------------------------------------------------------------------------------------------------------------------------------------------------------------------------------------------------------------------------------------------------------------------------------------------------------------------------------------------------------------------------------- |
| `meta` | Object | Metadata, which describes the meaning of `durationAudioAll`, `durationVideo1080P`, `durationVideo2K`, `durationVideo4K`, `durationVideoHd` and `durationVideoHdp` in the `usage` parameter.- `durationAudioAll`: Object. Total audio duration.
* `en`: String . `durationAudioAll` in English, that is, "Total Audio Duration".
* `unit`: String. The unit of audio duration, in seconds.
- `durationVideo1080P`: Object. Total Full HD video duration.
* `en`: String . `durationVideo1080P` in English, that is, "Full HD Video Duration (including Recording)".
* `unit`: String . The unit of Full HD video duration, in seconds.
- `durationVideo2K`: Object. Total duration of 2K video.
* `en`: String. `durationVideo2K` in English, that is, "2K Video Duration(including Recording)".
* `unit`: String . The unit of 2K video duration, in seconds.
- `durationVideo4K`: Object. Total duration of 2K+ video.
* `en`: String. `durationVideo4K` in English, that is, "2K+ Video Duration(including Recording)".
* `unit`: String. The unit of 2K+ video duration, in seconds.
- `durationVideoHd`: Total duration of HD video.
* `en`: String. `durationVideoHd` in English, that is, "HD Video Duration (including On premise Recording)".
* `unit`: String. The unit of HD video duration, in seconds.
- `durationVideoHdp`: Total duration of Hdp video.
* `en`: String. `durationVideoHdp` in English, that is, "HDP Video Duration(including Recording)".
* `unit`: String. The unit of HDP video duration, in seconds. |
| `usages` | Array | Usage of the specified project. This array consists of multiple objects. Each object shows the usage of a specific day and includes the following fields:- `date`: Number. The query date, using UTC time and Unix timestamp.
- `usage`: Object. The usage of the query date.
- `durationAudioAll`: Number. Total duration of the audio, in seconds.
- `durationVideo1080P`: Number. Total duration of Full HD video, in seconds.
- `durationVideo2K`: Number. Total duration of 2K video, in seconds.
- `durationVideo4K`: Number. Total duration of 2K+ video, in seconds.
- `durationVideoHd`: Number. Total duration of HD video, in seconds.
- `durationVideoHdp`: Number. Total duration of HDP video, in seconds. |
#### Response example
The following is a response example for a successful request:
```json
{
"meta": {
"durationAudioAll": {
"en": "Total Audio Duration",
"unit": "second"
},
"durationVideo1080P": {
"en": "Full HD Video Duration(including Recording)",
"unit": "second"
},
"durationVideo2K": {
"en": "2K Video Duration(including Recording)",
"unit": "second"
},
"durationVideo4K": {
"en": "4K Video Duration(including Recording)",
"unit": "second"
},
"durationVideoHd": {
"en": "HD Video Duration(including Recording)",
"unit": "second"
},
"durationVideoHdp": {
"en": "HDP Video Duration(including Recording)",
"unit": "second"
}
},
"usages": [
{
"date": "2021-10-12T00:00:00.000Z",
"usage": {
"durationAudioAll": 0,
"durationVideo1080P": 0,
"durationVideo2K": 0,
"durationVideo4K": 0,
"durationVideoHd": 0,
"durationVideoHdp": 0
}
},
{
"date": "2021-10-13T00:00:00.000Z",
"usage": {
"durationAudioAll": 779,
"durationVideo1080P": 0,
"durationVideo2K": 0,
"durationVideo4K": 0,
"durationVideoHd": 60,
"durationVideoHdp": 0
}
},
{
"date": "2021-10-14T00:00:00.000Z",
"usage": {
"durationAudioAll": 0,
"durationVideo1080P": 0,
"durationVideo2K": 0,
"durationVideo4K": 0,
"durationVideoHd": 0,
"durationVideoHdp": 0
}
}
]
}
```
## Response status codes
The following table shows the possible response status codes.
* If the status code is `200` or `201`, the request succeeds.
* If the status code is neither `200` nor `201`, the request fails. See the `message` field in the response body for the reason for this failure.
| Response status code | Description |
| -------------------- | -------------------------------------------------------------------------------------------------------------------------------- |
| 200 | The request is successful. |
| 201 | The request has been fulfilled, resulting in the creation of a new resource. |
| 400 | Bad request. Possible reasons:* Duplicate project name.
* Vendor is blocked.
* The number of projects exceeds the maximum limit. |
| 401 | Unauthorized (incorrect App ID/Customer Certificate). |
| 403 | Forbidden. |
| 404 | The requested resource could not be found. |
| 415 | Unsupported media type. Make sure that you set `Content-Type` in `Headers` as `application/json`. |
| 429 | Too many requests. |
| 500 | Internal error of the Agora RESTful API service. |
## Ensure service reliability
This section presents the overall strategy you use to ensure high availability of REST services.
### Switch the domain name
To ensure high availability of REST services, Agora enables you to switch domain names when you experience service outage due to regional network failures. Take the following steps to set up and switch your domain name:
1. Set the primary domain name based on the location of your service server:
* If the DNS address of the service server is located in a country or region other than mainland China, set the primary domain name to `api.agora.io`.
* If the DNS address of the service server is in mainland China, set the primary domain name to `api.sd-rtn.com`.
2. If your attempt to initiate a RESTful API request using the primary domain fails, set up your retry strategy as follows:
1. **Primary domain retry**: Retry using the same primary domain name.
2. **Alternate domain retry**:
* If the current primary domain name is `api.sd-rtn.com`, use `api.agora.io` as the alternate domain name.
* If the current primary domain name is `api.agora.io`, use `api.sd-rtn.com` as the alternate domain name.
3. **Adjacent domain retry**: If alternate domain retry fails, retry using the domain name adjacent to the current region.
For example, suppose your business server is located in Europe. You set the primary domain name to `api.agora.io`, and the business server resolves the primary domain name to Germany. Germany is located in central Europe (`api-eu-central-1.agora.io`). The [domain name table](#domain-name-table) shows that the adjacent area is West Europe. Use the `api-eu-west-1.agora.io` or `api-eu-west-1.sd-rtn.com` domain name to retry.
#### Precautions
Take the following precautions when setting up your retry strategy:
* To avoid exceeding the QPS limit with retry requests, best practice is to use a back-off strategy. For example, wait 1 second before you retry for the first time, wait 3 seconds before retrying the second time, and wait 6 seconds before retrying a third time.
* If the request fails because of a network problem rather than a DNS domain name resolution problem, skip alternate domain retry and proceed to adjacent domain retry.
* Before switching to the region domain name, ensure that the REST services you wish to use, for example, cloud recording or channel management, are deployed in that region.
### Domain name table
The following table shows the primary and region domain names for various regions.
| Primary domain name | Region domain name | Region |
| :------------------ | :------------------------------ | :--------------------- |
| `api.sd-rtn.com` | `api-us-west-1.sd-rtn.com` | Western United States |
| | `api-us-east-1.sd-rtn.com` | Eastern United States |
| | `api-ap-southeast-1.sd-rtn.com` | Southeast Asia Pacific |
| | `api-ap-northeast-1.sd-rtn.com` | Northeast Asia Pacific |
| | `api-eu-west-1.sd-rtn.com` | Western Europe |
| | `api-eu-central-1.sd-rtn.com` | Central Europe |
| | `api-cn-east-1.sd-rtn.com` | East China |
| | `api-cn-north-1.sd-rtn.com` | North China |
| `api.agora.io` | `api-us-west-1.agora.io` | Western United States |
| | `api-us-east-1.agora.io` | Eastern United States |
| | `api-ap-southeast-1.agora.io` | Southeast Asia Pacific |
| | `api-ap-northeast-1.agora.io` | Northeast Asia Pacific |
| | `api-eu-west-1.agora.io` | Western Europe |
| | `api-eu-central-1.agora.io` | Central Europe |
| | `api-cn-east-1.agora.io` | East China |
| | `api-cn-north-1.agora.io` | North China |
# RESTful authentication (/en/api-reference/api-ref/cloud-transcoding/authentication)
Cloud Transcoding RESTful API requires REST authentication.
The following REST authentication method is available:
* **Basic HTTP authentication**
Generate a Base64-encoded credential with the [Customer ID and Customer Secret](#generate-customer-id-and-customer-secret) provided by Agora, and pass the credential with the `Authorization` parameter in the request header.
Implement authentication on the server to mitigate the risk of data leakage.
## Implement basic HTTP authentication
### Generate Customer ID and Customer Secret
To generate a Customer ID and Customer Secret, do the following:
1. In [Agora Console](https://console.agora.io), click the username at the bottom of the navigation sidebar to open the account menu, then select **RESTful API Keys**.

2. Select **Create API Key**. A Customer ID and Customer Secret are generated.
3. Select **Download** and save the file somewhere secure — you can download it only once. In the file, **Key** is your Customer ID and **Secret** is your Customer Secret.
4. Use the Customer ID (**Key**) and Customer Secret (**Secret**) to generate a Base64-encoded credential, and pass it to the `Authorization` parameter in the HTTP request header.
### Generate an authorization header using a third-party tool
For testing and debugging, you can use a [third-party online tool](https://www.debugbear.com/basic-auth-header-generator) to quickly generate your Authorization header. Enter your Customer ID as the Username and your Customer Secret as the Password. Your generated header should look like this:
```text
Authorization: Basic NDI1OTQ3N2I4MzYy...YwZjA=a
```
### Basic authentication sample code
The following sample code implements basic HTTP authentication and sends a RESTful API request to get the basic information of all your current Agora projects.
The Agora RESTful API only supports HTTPS with TLS 1.0, 1.1, or 1.2 for encrypted communication. Requests over plain HTTP are not supported and will fail to connect.
Golang
Node.js
PHP
Python
Java
C#
```go
package main
import (
"fmt"
"strings"
"net/http"
"io/ioutil"
"encoding/base64"
)
// HTTPS basic authentication example in Golang using the RTC SDK Server RESTful API
func main() {
// Customer ID
customerKey := "Your customer ID"
// Customer secret
customerSecret := "Your customer secret"
// Concatenate customer key and customer secret and use base64 to encode the concatenated string
plainCredentials := customerKey + ":" + customerSecret
base64Credentials := base64.StdEncoding.EncodeToString([]byte(plainCredentials))
url := "https://api.agora.io/dev/v1/projects"
method := "GET"
payload := strings.NewReader(``)
client := &http.Client {
}
req, err := http.NewRequest(method, url, payload)
if err != nil {
fmt.Println(err)
return
}
// Add Authorization header
req.Header.Add("Authorization", "Basic " + base64Credentials)
req.Header.Add("Content-Type", "application/json")
// Send HTTP request
res, err := client.Do(req)
if err != nil {
fmt.Println(err)
return
}
defer res.Body.Close()
body, err := ioutil.ReadAll(res.Body)
if err != nil {
fmt.Println(err)
return
}
fmt.Println(string(body))
}
```
```js
// HTTP basic authentication example in node.js using the RTC SDK Server RESTful API
const https = require('https')
// Customer ID
const customerKey = "Your customer ID"
// Customer secret
const customerSecret = "Your customer secret"
// Concatenate customer key and customer secret and use base64 to encode the concatenated string
const plainCredential = customerKey + ":" + customerSecret
// Encode with base64
encodedCredential = Buffer.from(plainCredential).toString('base64')
authorizationField = "Basic " + encodedCredential
// Set request parameters
const options = {
hostname: 'api.agora.io',
port: 443,
path: '/dev/v1/projects',
method: 'GET',
headers: {
'Authorization':authorizationField,
'Content-Type': 'application/json'
}
}
// Create request object and send request
const req = https.request(options, res => {
console.log(`Status code: ${res.statusCode}`)
res.on('data', d => {
process.stdout.write(d)
})
})
req.on('error', error => {
console.error(error)
})
req.end()
```
```php
'https://api.agora.io/dev/v1/projects',
CURLOPT_RETURNTRANSFER => true,
CURLOPT_ENCODING => '',
CURLOPT_MAXREDIRS => 10,
CURLOPT_TIMEOUT => 0,
CURLOPT_FOLLOWLOCATION => true,
CURLOPT_HTTP_VERSION => CURL_HTTP_VERSION_1_1,
CURLOPT_CUSTOMREQUEST => 'GET',
CURLOPT_HTTPHEADER => [
$authHeader,
'Content-Type: application/json',
],
]);
// Execute cURL request
$response = curl_exec($curl);
// Check for cURL errors
if ($response === false) {
echo "Error in cURL: " . curl_error($curl);
} else {
// Output the response
echo $response;
}
// Close cURL session
curl_close($curl);
?>
```
```python
# -- coding utf-8 --
# Python 3
# HTTP basic authentication example in python using the RTC SDK Server RESTful API
import base64
import http.client
# Customer ID
customer_key = "Your customer ID"
# Customer secret
customer_secret = "Your customer secret"
# Concatenate customer key and customer secret and use base64 to encode the concatenated string
credentials = customer_key + ":" + customer_secret
# Encode with base64
base64_credentials = base64.b64encode(credentials.encode("utf8"))
credential = base64_credentials.decode("utf8")
# Create connection object with basic URL
conn = http.client.HTTPSConnection("api.agora.io")
payload = ""
# Create Header object
headers = {}
# Add Authorization field
headers['Authorization'] = 'basic ' + credential
headers['Content-Type'] = 'application/json'
# Send request
conn.request("GET", "/dev/v1/projects", payload, headers)
res = conn.getresponse()
data = res.read()
print(data.decode("utf-8"))
```
```java
import java.io.IOException;
import java.net.URI;
import java.net.http.HttpClient;
import java.net.http.HttpRequest;
import java.net.http.HttpResponse;
import java.util.Base64;
// HTTP basic authentication example in Java using the RTC SDK Server RESTful API
public class Base64Encoding {
public static void main(String[] args) throws IOException, InterruptedException {
// Customer ID
final String customerKey = "Your customer ID";
// Customer secret
final String customerSecret = "Your customer secret";
// Concatenate customer key and customer secret and use base64 to encode the concatenated string
String plainCredentials = customerKey + ":" + customerSecret;
String base64Credentials = new String(Base64.getEncoder().encode(plainCredentials.getBytes()));
// Create authorization header
String authorizationHeader = "Basic " + base64Credentials;
HttpClient client = HttpClient.newHttpClient();
// Create HTTP request object
HttpRequest request = HttpRequest.newBuilder()
.uri(URI.create("https://api.agora.io/dev/v1/projects"))
.GET()
.header("Authorization", authorizationHeader)
.header("Content-Type", "application/json")
.build();
// Send HTTP request
HttpResponse response = client.send(request,
HttpResponse.BodyHandlers.ofString());
System.out.println(response.body());
}
}
```
```csharp
using System;
using System.IO;
using System.Net;
using System.Text;
// HTTP basic authentication example in C# using the RTC SDK Server RESTful API
namespace Examples.System.Net
{
public class WebRequestPostExample
{
public static void Main()
{
// Customer ID
string customerKey = "Your customer ID";
// Customer secret
string customerSecret = "Your customer secret";
// Concatenate customer key and customer secret and use base64 to encode the concatenated string
string plainCredential = customerKey + ":" + customerSecret;
// Encode with base64
var plainTextBytes = Encoding.UTF8.GetBytes(plainCredential);
string encodedCredential = Convert.ToBase64String(plainTextBytes);
// Create authorization header
string authorizationHeader = "Authorization: Basic " + encodedCredential;
// Create request object
WebRequest request = WebRequest.Create("https://api.agora.io/dev/v1/projects");
request.Method = "GET";
// Add authorization header
request.Headers.Add(authorizationHeader);
request.ContentType = "application/json";
WebResponse response = request.GetResponse();
Console.WriteLine(((HttpWebResponse)response).StatusDescription);
using (Stream dataStream = response.GetResponseStream())
{
StreamReader reader = new StreamReader(dataStream);
string responseFromServer = reader.ReadToEnd();
Console.WriteLine(responseFromServer);
}
response.Close();
}
}
}
```
## Related pages
* [Overview](index)
* [Acquire a builder token](acquire)
* [Create a cloud transcoding task](create)
# Cloud Transcoding Overview (/en/api-reference/api-ref/cloud-transcoding)
Agora Cloud Transcoding transcodes media streams on Agora servers and outputs the result to an RTC channel. Send HTTPS requests from your business server to manage transcoding tasks and templates.
## API basics
* **Authentication**: All APIs require [Basic Auth](authentication).
* **Request**: Request bodies use JSON.
* **Response**: Response bodies use JSON.
* **Base URL**: `https://api.sd-rtn.com`
The Cloud Transcoding REST API supports HTTPS only. Requests over plain HTTP are not supported.
## REST APIs
* [Acquire a builder token](acquire): Retrieve a builder token before creating a task.
* [Create a cloud transcoding task](create): Start transcoding by creating a task.
* [Query the status of a task](query): Check the status of a Cloud Transcoding task.
* [Update a cloud transcoding task](update): Update an existing task.
* [Destroy a cloud transcoding task](destroy): Destroy a Cloud Transcoding task.
* [Create or update a transcoding template](template-create): Create or update a transcoding template.
* [Query transcoding templates](template-query): Query all transcoding template configurations under an App ID.
* [Query message notification server IP](ncs-query-ip): Get message notification server IP addresses for firewall whitelisting.
# Status and error codes (/en/api-reference/api-ref/cloud-transcoding/status-codes)
This page lists response status codes for Cloud Transcoding and Multi-bitrate streaming, along with their descriptions and recommended actions.
## Cloud Transcoding
When you call the Cloud Transcoding REST API, you receive an HTTP response status code:
* If the HTTP status code is `2XX`, the request is successful.
* If the HTTP status code is not `2XX`, the request failed.
The following example shows a failed request:
```json
// 400 Bad Request
{
"message": "appid is invalid"
}
```
When using Cloud Transcoding, you may receive status codes that indicate the service status. Refer to the following table to understand their meanings and take appropriate action.
| Status code | Description | Suggested action |
| --------------------------- | -------------------------------------------------------------------------------------------------------------------------------------------- | -------------------------------------------------------------------------------------------------------------------- |
| `200 OK` | The request was successful. | No troubleshooting is required. |
| `201 Created` (Deprecated) | The task is already in progress. Do not use the same `builderToken` to start the task again. | No troubleshooting is required. |
| `202 Accepted` | The server has received the task request, but the task execution may not be complete. | Query the execution status before proceeding to the next business operation. |
| `400 Bad Request` | The request syntax is incorrect, the parameter value does not meet the requirements, or your App ID does not have Cloud Transcoding enabled. | Investigate based on the `message` field in the response body. |
| `401 Unauthorized` | The `Authorization` field for HTTP Basic authentication is invalid. | See [RESTful authentication](authentication) or check your `Authorization` credentials. |
| `403 Forbidden` | Cloud Transcoding is not enabled for your App ID. | [Enable Cloud Transcoding](/en/realtime-media/transcoding/sdk-quickstart#enable-cloud-transcoding) in Agora Console. |
| `404 Not Found` | Transcoder not found. | Use a backoff strategy to make a query request and confirm whether the transcoder was created successfully. |
| `409 Conflict` | A transcoder task with the same `instanceId` already exists. | Delete the existing transcoder before creating a new one. |
| `429 Too Many Requests` | The request rate exceeds the upper limit. | Wait for a while and try again. |
| `500 Internal Server Error` | Internal Agora server error. | Use a backoff strategy for query requests or contact [technical support](mailto\:support@agora.io). |
| `501 Not Implemented` | This method is not implemented. | No troubleshooting is required. |
| `503 Service Unavailable` | The Agora server is temporarily overloaded or undergoing maintenance. | Use a backoff strategy for query requests or contact [technical support](mailto\:support@agora.io). |
| `504 Gateway Timeout` | An internal Agora server error occurred, an upstream server did not respond, or the upstream server is shut down. | Use a backoff strategy for query requests or contact [technical support](mailto\:support@agora.io). |
When using the Cloud Transcoding response status code for troubleshooting, keep the following in mind:
* If the request fails, do not perform logical processing based on the `message` field in the response body. Rely primarily on the status code for troubleshooting.
* If the troubleshooting methods in the table do not resolve the issue, contact [technical support](mailto\:support@agora.io) with the values of the `X-Request-ID` and `X-Resource-ID` fields in the response header.
* If you receive a `404` status code after a `Create` request has returned successfully and you have not called `Delete`, or if the transcoder remains idle beyond the `idleTimeout` value in the request, use a backoff algorithm. Retry at increasing intervals of 5, 10, and 15 seconds to call `Query` for confirmation.
* A `5XX` response status code usually indicates an issue in the server response process. Use a backoff strategy for query requests, retrying at increasing intervals of 5, 10, and 15 seconds, or contact [technical support](mailto\:support@agora.io).
## Multi-Bitrate
When you call the Multi-Bitrate REST API, you receive an HTTP response status code:
* If the HTTP status code is `2XX`, the request is successful.
* If the HTTP status code is not `2XX`, the request failed.
The following example shows a failed request:
```json
// 400 Bad Request
{
"status": "string",
"data": {},
"message": "string"
}
```
When using Cloud Transcoding Multi-Bitrate, you may receive status codes that indicate the service status.
| Status code | Description | Suggested action |
| ---------------------------- | ------------------------------------- | ---------------------------------------------------------------------------------------- |
| `200 OK` | The operation was successful. | No troubleshooting is required. |
| `400 Bad Request` | The request is invalid. | Check whether the request parameters are valid. |
| `401 Unauthorized` | The authentication is invalid. | Check whether the `Authorization` parameters used for HTTP authentication are correct. |
| `404 Not Found` | The requested resource was not found. | Check that the `appId` and `codecId` parameter values are correct. |
| `415 Unsupported Media Type` | Unsupported media type. | Ensure that the `Content-Type` field in the request header is set to `application/json`. |
| `429 Too Many Requests` | Requests are too frequent. | Wait for a while and try again. |
| `500 Internal Server Error` | Internal server error. | Retry a few times. |
If the troubleshooting methods above do not resolve the issue, contact [technical support](mailto\:support@agora.io) with the `X-Request-ID` and `X-Resource-ID` field values from the response header.
# RESTful authentication (/en/api-reference/api-ref/conversational-ai/authentication)
Conversational AI REST API requests require REST authentication. You can use token authentication or Basic HTTP authentication.
Implement authentication on the server to mitigate the risk of data leakage.
## Token authentication
Token authentication uses an RTC token generated on your server using your App ID and App Certificate. To authenticate with a token, include the `Authorization` header in each request:
```text
Authorization: agora token=
```
### Prerequisites
Before you begin, get the following values from [Agora Console](https://console.agora.io):
* **App ID**: A unique string that identifies your project.
* **App Certificate**: A string used to generate tokens.
Never expose your App Certificate in client-side code or public repositories. Generate tokens on your server only.
The Agora RESTful API only supports HTTPS with TLS 1.0, 1.1, or 1.2 for encrypted communication. Requests over plain HTTP are not supported and will fail to connect.
Tokens expire after a maximum of 86400 seconds.
### Using the Conversational AI SDK
If you already use the Conversational AI SDK in your project, use the SDK token generation utility to generate tokens. The token parameters must match the agent request:
* `channelName` must match `properties.channel`.
* `agentUid` must match `properties.agent_rtc_uid`.
* To use string UIDs, pass a string value for `agentUid` and set `enable_string_uid` to `true` in the request body.
Install the SDK for your language:
Node.js
Golang
Python
```bash
npm install agora-agent-server-sdk
```
```bash
go get github.com/AgoraIO-Conversational-AI/agent-server-sdk-go
```
```bash
pip install agent-server-sdk-python
```
The following example generates a token with the Node.js SDK and uses it in the REST API `Authorization` header:
```js
const https = require('https');
const { generateConvoAIToken } = require('agora-agent-server-sdk');
// Keep these credentials on the server and never expose them to clients.
const appId = '';
const appCertificate = '';
const channelName = '';
const agentUid = '';
const tokenExpirationInSeconds = 86400;
const token = generateConvoAIToken({
appId,
appCertificate,
channelName,
account: agentUid,
tokenExpire: tokenExpirationInSeconds,
});
const data = JSON.stringify({
name: '',
pipeline_id: '',
properties: {
channel: channelName,
token,
agent_rtc_uid: agentUid,
remote_rtc_uids: [''],
enable_string_uid: false,
},
});
const options = {
hostname: 'api.agora.io',
path: `/api/conversational-ai-agent/v2/projects/${appId}/join`,
method: 'POST',
headers: {
Authorization: 'agora token=' + token,
'Content-Type': 'application/json',
'Content-Length': Buffer.byteLength(data),
},
};
const req = https.request(options, (res) => {
console.log(`Status code: ${res.statusCode}`);
res.on('data', (d) => {
process.stdout.write(d);
});
});
req.on('error', (error) => {
console.error(error);
});
req.write(data);
req.end();
```
### Using the token builder library
The [AgoraDynamicKey repository](https://github.com/AgoraIO/Tools/tree/master/DynamicKey/AgoraDynamicKey) provides open-source token generation libraries for multiple languages.
Install the token builder library for your language:
Node.js
Golang
Python
```bash
npm install agora-token
```
```bash
go get github.com/AgoraIO/Tools/DynamicKey/AgoraDynamicKey/go/src/rtctokenbuilder2
```
```bash
git clone https://github.com/AgoraIO/Tools.git
cd Tools/DynamicKey/AgoraDynamicKey/python3/src
```
When using the token builder library, generate a combined RTC + RTM token and pass it in the `Authorization` header:
```js
const https = require('https');
const { RtcTokenBuilder, RtcRole } = require('agora-token');
const appId = '';
const appCertificate = '';
const channelName = '';
const agentUid = '';
const tokenExpirationInSeconds = 86400;
const privilegeExpirationInSeconds = 86400;
const token = RtcTokenBuilder.buildTokenWithRtm(
appId,
appCertificate,
channelName,
agentUid,
RtcRole.PUBLISHER,
tokenExpirationInSeconds,
privilegeExpirationInSeconds,
);
const options = {
hostname: 'api.agora.io',
path: `/api/conversational-ai-agent/v2/projects/${appId}/join`,
method: 'POST',
headers: {
Authorization: 'agora token=' + token,
'Content-Type': 'application/json',
},
};
https.request(options).end();
```
## Basic HTTP authentication
Basic HTTP authentication uses your Agora customer ID and customer secret. Generate a Base64-encoded credential from the `customer_id:customer_secret` string, then include it in the `Authorization` header:
```text
Authorization: Basic
```
### Generate Customer ID and Customer Secret
To generate a Customer ID and Customer Secret, do the following:
1. In [Agora Console](https://console.agora.io), click the username at the bottom of the navigation sidebar to open the account menu, then select **RESTful API Keys**.

2. Select **Create API Key**. A Customer ID and Customer Secret are generated.
3. Select **Download** and save the file somewhere secure — you can download it only once. In the file, **Key** is your Customer ID and **Secret** is your Customer Secret.
4. Use the Customer ID (**Key**) and Customer Secret (**Secret**) to generate a Base64-encoded credential, and pass it to the `Authorization` parameter in the HTTP request header.
### Generate an authorization header using a third-party tool
For testing and debugging, you can use a [third-party online tool](https://www.debugbear.com/basic-auth-header-generator) to quickly generate your Authorization header. Enter your Customer ID as the Username and your Customer Secret as the Password. Your generated header should look like this:
```text
Authorization: Basic NDI1OTQ3N2I4MzYy...YwZjA=a
```
## Related pages
* [Overview](index)
* [Start a conversational AI agent](join)
* [Stop a conversational AI agent](leave)
# Conversational AI Overview (/en/api-reference/api-ref/conversational-ai)
The Conversational AI REST API lets you create, stop, update, query, interrupt, and inspect agent sessions from your server.
## API basics
All requests are sent to the host `api.agora.io`.
* **Authentication**: Use [RESTful authentication](authentication) for every request.
* **Request**: Request and response bodies use JSON.
* **Base URL**: `https://api.agora.io/api/conversational-ai-agent/v2/projects/`, where `` is the Agora App ID for your project.
Request URLs and request bodies are case-sensitive.
## REST APIs
* [Start a conversational AI agent](join): Create and start a Conversational AI agent instance.
* [Stop a conversational AI agent](leave): Stop the specified agent instance.
* [Update agent configuration](update): Adjust agent parameters at runtime.
* [Query agent status](query): Get the current status of the specified agent instance.
* [Retrieve a list of agents](list): Retrieve agents that match specified conditions.
* [Broadcast a message using TTS](speak): Broadcast a custom message through the TTS module.
* [Interrupt the agent](interrupt): Interrupt an agent while it is speaking or thinking.
* [Send a custom instruction](think): Send text instructions into the current conversation pipeline.
* [Retrieve agent history](history): Retrieve short-term conversation history.
* [Query conversation turn information](turns): Query turn-level conversation details and metrics.
## Client toolkit
The client toolkit helps you build Conversational AI app clients with APIs that combine Agora RTC and Signaling capabilities for message subscription, conversation events, interruption, transcript updates, image messages, and audio best-practice settings.
* [Android toolkit API](client-toolkit/android): Reference for Android toolkit classes, callbacks, structures, and enums.
* [iOS toolkit API](client-toolkit/ios): Reference for iOS toolkit classes, callbacks, structures, and enums.
* [Web toolkit API](client-toolkit/web): Reference for Web toolkit classes, event handlers, types, interfaces, and enums.
# Status codes and error messages (/en/api-reference/api-ref/conversational-ai/status-codes)
Use HTTP status codes together with the `reason` and `detail` fields in error responses to troubleshoot failed Conversational AI REST API requests.
## HTTP status codes
| Status code | Description | Suggested action |
| ----------- | ----------------------------- | -------------------------------------------------------------------------------------------------- |
| `200` | OK | The request was successful. |
| `400` | Invalid request parameters | Check the `detail` field for specific information. |
| `401` | Authentication failed | Check the `Authorization` header, credentials, or token and retry. |
| `403` | Unauthorized access | Resolve account or billing issues, or contact technical support to activate the service. |
| `404` | Agent not found or has exited | Check whether the agent started successfully or has already stopped. |
| `409` | Agent conflict | Use the task information returned by the server to continue, or retry with a different agent name. |
| `422` | Access limit exceeded | Contact technical support to raise your quota. |
| `429` | Request rate limit exceeded | Retry using a backoff strategy. |
| `500` | Internal server error | If the problem persists, contact technical support. |
| `502` | Gateway error | Contact technical support. |
| `503` | Agent startup failure | Retry using a backoff strategy. |
| `504` | Request timeout | Retry using a backoff strategy. |
## Error reasons
| Reason | Description |
| ---------------------------- | ----------------------------------------------------------------------------------------- |
| `ServiceNotEnabled` | The service is not enabled for the current project. |
| `AccountSuspended` | The account has been suspended and the service is unavailable. |
| `InternalError` | Internal error on the server. |
| `InvalidPermission` | The service is not activated. |
| `InvalidRequestBody` | The request body is not valid JSON. |
| `MissingRequiredField` | A required field is missing from the request. |
| `InvalidFieldValue` | A request field contains an invalid value. |
| `ResourceQuotaLimitExceeded` | Too many concurrent requests, exceeding the quota limit. |
| `ConcurrencyLimitExceeded` | Too many concurrent requests, exceeding the quota limit. |
| `ServiceUnavailable` | The service is temporarily unavailable. |
| `ResourceAllocationFailed` | The required resources cannot be allocated at this time. |
| `TaskConflict` | An agent with the same name already exists, or a conflicting task is already running. |
| `TaskNotFound` | The task was not started successfully, was aborted after starting, or has been destroyed. |
| `TaskOperationTimeout` | Internal error on the server. |
| `NotImplemented` | Internal error on the server. |
# Provision your extension (/en/api-reference/api-ref/extensions-marketplace/provisioning)
When your extension is activated or deactivated on Agora Console, Agora passes relevant information to you so that you can take corresponding actions. For this purpose, you need to implement the provisioning API and provide the URLs to Agora.
This page provides a detailed description of the provisioning API.
## Requirements
Before implementing the provisioning API, ensure that your server meets the following requirements:
* Able to handle at least 100 requests per second.
* Follows the standards of HTTP request and response.
Agora waits for 500 milliseconds after sending a request to your server. If there is no response, Agora resends the request for a maximum of two times.
## Create an account
When a user activates your extension, Agora calls this method to pass the basic information of this user to you. You can manage users by forming a user information mapping for services such as usage query.
### HTTP request
**URL**
```bash
POST https://{host}/customers/new
```
**Request body**
The request body contains the following fields:
| Field | Required/Optional | Type | Data length | Description |
| :-------------- | :---------------- | :----- | :---------- | :--------------------------------------------------------------------------------------------------------------------------------------------------------- |
| `planId` | Required | String | 16 | The billing plan that the user selects. |
| `customerName` | Optional | String | 32 | The company name of the user. |
| `customerId` | Required | String | N/A | The account ID of the user on Agora Console. |
| `customerEmail` | Optional | String | 32 | The email address of the user. |
| `customerPhone` | Optional | String | 32 | The phone number of the user. |
| `apiKey` | Required | String | 32 | The API key, used for authentication between you and Agora. You need to generate your own API key and provide it to Agora. |
| `signature` | Required | String | N/A | The signature generated by the [signature algorithm](./signature-algorithm). You need to deploy the algorithm to verify that the request is sent by Agora. |
### HTTP response
The response body contains the following fields:
| Field | Type | Description |
| :------------- | :----- | :------------------------------------------------------------------------------------------- |
| `status` | String | The status of the request:- `success`: The request succeeds.
- `failed`: The request fails. |
| `statusReason` | String | The reason why the request succeeds or fails. |
### Example
**Request body**
```json
{
"planId": "ABC",
"customerName": "AgoraCustomerA",
"customerId": "12345678910",
"customerEmail": "AgoraCustomerA",
"customerPhone": "12345678910",
"apiKey": "pz**************************gd",
"signature": "Q7**************************xM"
}
```
**Response body**
```json
{
"status": "success",
"statusReason": ""
}
```
## Create a project
When a user enables your extension for an Agora project, Agora calls this method to pass the project information to you.
### HTTP request
**URL**
```bash
POST https://{host}/customers/{customerId}/projects/new
```
**Path parameter**
`customerId`: String. The account ID of the user on Agora Console.
**Request body**
The request body contains the following fields:
| Field | Required/Optional | Type | Data length | Description |
| :---------- | :---------------- | :----- | :---------- | :------------------------------------------------------------------------------------------------------------------------------------------------------------ |
| `projectId` | Required | Int | N/A | The ID of the Agora project. A user could enable your extension for multiple projects, which means one `customerId` could be mapped to multiple `projectId`s. |
| `apiKey` | Required | String | 32 | The API key, used for authentication between you and Agora. You need to generate your own API key and provide it to Agora. |
| `signature` | Required | String | N/A | The signature generated by the [signature algorithm](./signature-algorithm). You need to deploy the algorithm to verify that the request is sent by Agora. |
### HTTP response
The response body contains the following fields:
| Field | Type | Description |
| :------------- | :----- | :-------------------------------------------------------------------------------------------------------------------------------------------------------------------------------------------------------------------------------------------------------------------------------------------------------------------------------------------------------------------------------------------------------------------------------------------------- |
| `status` | String | The status of the request:- `success`: The request succeeds.
- `failed`: The request fails. |
| `statusReason` | String | The reason why the request succeeds or fails. |
| `data` | Object | This object includes the following properties:- `appKey`: String (32–255 bytes). The app key of the project. You use this field to authenticate the user.
- `appSecret`: String (32–255 bytes). The app secret of the project. You use this field to authenticate the user.
- `licenseUrl`: (Optional) String. The license file for authorizing your extension to users. This field applies only if you charge your extension with license files. |
### Example
**Request body**
```json
{
"projectId": 5****8,
"apiKey": "pz**************************gd",
"signature": "Q7**************************xM"
}
```
**Response body**
```json
{
"status": "success",
"statusReason": "",
"data": {
"appKey": "cf**************************yb",
"appSecret": "NW**************************M=",
"licenseUrl": "https://*********"
}
}
```
## Deactivate the account
Once the user deactivates your extension on Agora Console, Agora calls this method to notify you to delete the user's account and stop providing any relevant service.
### HTTP request
**URL**
```bash
PUT http://{host}/customers/{customerId}/deactivate
```
**Path parameter**
`customerId`: String. The ID of the user on Agora Console.
**Request body**
The request body contains the following fields:
| Field | Required/Optional | Type | Data length | Description |
| :---------- | :---------------- | :----- | :---------- | :--------------------------------------------------------------------------------------------------------------------------------------------------------- |
| `apiKey` | Required | String | 32 | The API key of the vendor, used for authentication between Agora and the vendor. You need to generate your own API key and provide it to Agora. |
| `signature` | Required | String | N/A | The signature generated by the [signature algorithm](./signature-algorithm). You need to deploy the algorithm to verify that the request is sent by Agora. |
### HTTP response
The response body contains the following fields:
| Field | Type | Description |
| :------------- | :----- | :------------------------------------------------------------------------------------------- |
| `status` | String | The status of the request:- `success`: The request succeeds.
- `failed`: The request fails. |
| `statusReason` | String | The reason why the request succeeds or fails. |
### Example
**Request body**
```json
{
"apiKey": "pz**************************gd",
"signature": "Q7**************************xM"
}
```
**Response body**
```json
{
"status": "success",
"statusReason": ""
}
```
## Deactivate the project
Once the user disables your extension for an Agora project, Agora calls this method to pass the project information to you.
### HTTP request
**URL**
```bash
PUT http://{host}//customers/{customerId}/projects/{projectId}/deactivate
```
**Path parameter**
| Parameter | Type | Description |
| :----------- | :----- | :------------------------------------------------------------------------ |
| `customerId` | String | The account ID of the user on Agora Console. |
| `projectId` | Int | The ID of the project for which the user wants to disable your extension. |
**Request body**
The request body contains the following fields:
| Field | Required/Optional | Type | Data length | Description |
| :---------- | :---------------- | :----- | :---------- | :--------------------------------------------------------------------------------------------------------------------------------------------------------- |
| `apiKey` | Required | String | 32 | The API key of the vendor, used for authentication between Agora and the vendor. You need to generate your own API key and provide it to Agora. |
| `signature` | Required | String | N/A | The signature generated by the [signature algorithm](./signature-algorithm). You need to deploy the algorithm to verify that the request is sent by Agora. |
### HTTP response
The response body contains the following fields:
| Field | Type | Description |
| :------------- | :----- | :------------------------------------------------------------------------------------------- |
| `status` | String | The status of the request:- `success`: The request succeeds.
- `failed`: The request fails. |
| `statusReason` | String | The reason why the request succeeds or fails. |
### Example
**Request body**
```json
{
"apiKey": "pz**************************gd",
"signature": "Q7**************************xM"
}
```
**Response body**
```json
{
"status": "success",
"statusReason": ""
}
```
# Encrypted signature (/en/api-reference/api-ref/extensions-marketplace/signature-algorithm)
The Provisioning, Usage, and Billing APIs have a request parameter named `signature`. This parameter is an encrypted string shared between vendors and Agora. It allows vendors to verify HTTP requests sent by Agora.
This page explains how to generate a signature.
## Overview
The signature combines the source string (`SourceString`) and your secret key (`apiSecret&`) using an encryption algorithm, as follows:
* GET methods:
```text
signature = URLEncode(Base64( HMAC-SHA1( apiSecret&, SourceString) ), "UTF-8")
```
* POST and PUT methods:
```text
signature = Base64( HMAC-SHA1( apiSecret&, SourceString) )
```
After receiving the request, you need to apply the encryption algorithm to generate a signature on your own. If the generated signature is the same as the one you receive, you can verify that the request is sent by Agora.
## Generate a signature (GET)
Take the [Usage API](./usage) for example, Agora sends the following request to query usage information:
```text
https://[host]/usage?fromTs=1619913600&toTs=1619917200&pageNum=1&apiKey=pzD5XinRSlmA64tZx81fL92YcBsJK0gd&signature={signature}
```
For this example, the parameters used in the encryption algorithm are as follows:
| Parameter | Value |
| :------------- | :---------------------------------------------------------------------------------------------------------------- |
| `SourceString` | `GET&%2Fusage&apiKey%3DpzD5XinRSlmA64tZx81fL92YcBsJK0gd%26fromTs%3D1619913600%26pageNum%3D1%26toTs%3D1619917200` |
| `apiSecret` | `U1SXE6k57vxVRjTomgquwC2F3tH8ziOB` (This is for demonstration only. Your actual `apiSecret` should be different.) |
| `signature` | `SFVnCVlRbrZcjMPGTWVxAE4QWZ8%3D` |
This section shows how to generate the signature step-by-step.
### Step 1: Construct the source string
To construct `SourceString`, follow these steps:
1. Get the type of the HTTP request and add an "&":
```text
GET&
```
2. In the request URL, leave only the path after `[host]` and before `?` (if any), URL-encode the resulting string (that is, `/usage`), and add an "&". The source string now looks like:
```text
GET&%2Fusage&
```
3. Sequence the query parameters in the request URL except `signature` (that is, `fromTs`, `toTs`, and `apiKey`) in alphabetical ascending order in the form of `key=value`, and combine them using "&":
```text
apiKey=pzD5XinRSlmA64tZx81fL92YcBsJK0gd&fromTs=1619913600&pageNum=1&toTs=1619917200
```
URL-encode the string above and add it to the source string:
```text
GET&%2Fusage&apiKey%3DpzD5XinRSlmA64tZx81fL92YcBsJK0gd%26fromTs%3D1619913600%26pageNum%3D1%26toTs%3D1619917200
```
### Step 2: Construct your secret key
To construct the secret key, add an “&” to the end of your apiSecret string.
For example, if the apiSecret you provide when applying to become a vendor is U1SXE6k57vxVRjTomgquwC2F3tH8ziOB, the secret key should be `U1SXE6k57vxVRjTomgquwC2F3tH8ziOB&`.
### Step 3: Generate the signature
The encryption algorithm for GET methods is as follows:
```text
signature = URLEncode(Base64( HMAC-SHA1( apiSecret&, SourceString) ), "UTF-8")
```
Using the `SourceString` and `apiSecret&` from previous steps, you get this signature:
```text
SFVnCVlRbrZcjMPGTWVxAE4QWZ8%3D
```
## Generate a signature (POST and PUT)
Take the [Provisioning API](./provisioning) for example, Agora sends the following request body:
```json
{
"projectId": "430892",
"apiKey": "pzD5XinRSlmA64tZx81fL92YcBsJK0gd",
"signature": "To be generated"
}
```
And the request URL is:
```text
https://[host]/customers/123456/projects/new
```
For this example, the parameters used in the encryption algorithm are as follows:
| Parameter | Value |
| :------------- | :----------------------------------------------------------------------------------------------------------------- |
| `SourceString` | `POST&%2Fcustomers%2F123456%2Fprojects%2Fnew&apiKey%3DpzD5XinRSlmA64tZx81fL92YcBsJK0gd%26projectId%3D430892` |
| `apiSecret` | `U1SXE6k57vxVRjTomgquwC2F3tH8ziOB` (This is for demonstration only. Your actual `apiSecret` should be different.) |
| `signature` | `YZOl2v5q3I7o0x3F13tpnkq5aDI=` |
This section shows how to generate the signature step-by-step.
### Step 1: Construct the source string
To construct `SourceString`, follow these steps:
1. Get the type of the HTTP request and add an "&":
```text
POST&
```
2. In the request URL, leave only the path after `[host]` and before `?` (if any), URL-encode the resulting string (that is, `/usage`), and add an "&". The source string now looks like:
```text
POST&%2Fcustomers%2F123456%2Fprojects%2Fnew&
```
3. Sequence the query parameters in the request body except `signature` (that is, `projectId` and `apiKey`) in alphabetical ascending order in the form of `key=value`, and combine them using "&":
```text
apiKey=pzD5XinRSlmA64tZx81fL92YcBsJK0gd&projectId=430892
```
URL-encode the string above and add it to the source string:
```text
POST&%2Fcustomers%2F123456%2Fprojects%2Fnew&apiKey%3DpzD5XinRSlmA64tZx81fL92YcBsJK0gd%26projectId%3D430892
```
### Step 2: Construct your secret key
To construct the secret key, add an “&” to the end of your apiSecret string.
For example, if the apiSecret you provide when applying to become a vendor is U1SXE6k57vxVRjTomgquwC2F3tH8ziOB, the secret key should be `U1SXE6k57vxVRjTomgquwC2F3tH8ziOB&`.
### Step 3: Generate the signature
The encryption algorithm for POST and PUT methods is as follows:
```text
signature = Base64( HMAC-SHA1( apiSecret&, SourceString) )
```
Using the `SourceString` and `apiSecret&` from previous steps, you get this signature:
```text
YZOl2v5q3I7o0x3F13tpnkq5aDI=
```
# Provide usage data to Agora (/en/api-reference/api-ref/extensions-marketplace/usage)
Before publishing your extension in the Agora Extension Marketplace, you need to implement the usage and billing API and provide the URLs to Agora. Agora calls this API regularly to get the usage and billing information of a specified user in order to notify the user in Agora Console.
This page provides a detailed description of the usage and billing API.
## Requirements
Before implementing the usage and billing API, ensure that your server meets the following requirements:
* Able to handle at least 100 requests per second.
* Follows the standards of HTTP request and response.
Agora waits for 500 millseconds after sending a request to your server. If a timeout occurs, Agora resends the request for a maximum of two times.
## Usage
After a user adds an extension in their Agora projects, Agora sends this request every day. After receiving your response, Agora adds up the total amount of the usage, rounds it up, and updates the usage information on Agora Console.
### HTTP request
**URL**
```bash
GET https://{host}/usage?fromTs={ts}&toTs={ts}&pageNum={pageNum}&apiKey={apiKey}&signature={signature}
```
**Query parameter**
| Parameter | Required/Optional | Type | Data length | Description |
| :---------- | :---------------- | :-------- | :---------- | :----------------------------------------------------------------------------------------------------------------------------------------------------------------------------------------------------------------------------------------------------------------------------------- |
| `fromTs` | Required | Timestamp | 10 | The start point of the time range to query usage data, which must be later than 00:00:00 (UTC) on the day. |
| `toTs` | Required | Timestamp | 10 | The end point of the time range to query usage data, which must be earlier than 23:59:59 (UTC) on the day. |
| `pageNum` | Required | Number | N/A | The page number of the usage list. You need to implement pagination to the usage list and return the `hasNext` field in the response. Agora always sets this parameter as one at the first request every day and repeats requesting until `hasNext` in the response returns `false`. |
| `limit` | Optional | Number | N/A | The number of data entries in the response. Ensure that you set a default value to this parameter. |
| `apiKey` | Required | String | 32 | The API key, used for authentication between you and Agora. When you register as a vendor on Agora Console, Agora generates an API key as the identifier. |
| `signature` | Required | String | N/A | The signature generated by the [signature algorithm](./signature-algorithm). You need to deploy the algorithm to verify that the request is sent by Agora. |
### HTTP response
The response body contains the following fields:
| Field | Type | Description |
| :------------- | :------ | :---------------------------------------------------------------------------------------------------------------------------------------------------------------------------------------------------------------------------------------------------------------------------------------------------------------------------------------------------------------------------------------------------------------------------------------------------------------------------------------------------------------------------------------------------------------------- |
| `status` | Number | The status code. `0` means that the request succeeds. |
| `statusReason` | String | The reason for the status. |
| `totalSize` | Number | The total number of the user's Agora projects where your extension is added. |
| `pageNum` | Number | The page number of the usage list. This parameter should be the same with the `pageNum` field in the request. |
| `hasNext` | Boolean | Whether the usage page list has the next page:- `true`: The usage page list has the next page. The request repeats.
- `false`: The usage page list does not have the next page. The request stops. |
| `data` | Array | The usage data, which contains the following properties:- `projectId`: The project ID.
- `amount`: The usage amount. The data format is BigDecimal. The unit of measurement is as follows:
* If usage is measured in duration, the default unit is minute.
* If usage is measured in the amount of times, the default unit is times.
* If you need a custom unit of measurement, contact your account manager.
- `description`: The detailed description of the usage amount.Return the usage data only when `projectId` is not empty and `amount` is not zero. |
### Example
**Request header**
```bash
GET https://api.agora.io/usage?fromTs=1619913600&toTs=1619917200&pageNum=1&apiKey=pz*************gd&signature=SF*************3D HTTP/1.1
```
**Response body**
```json
{
"status": 0,
"statusReason": "Success getting usage data",
"data": {
"totalSize": 2,
"pageNum": 2,
"hasNext": false,
"data": [
{
"projectId": "4****2",
"amount": 1,
"description": "1 Minute × Agora_Marketplace_Pricing (Tier 1 at $*** / month)"
}
]
}
}
```
## Billing
After a user adds an extension in their Agora projects, Agora sends this request at the end of each month to request the billing information. After receiving your response, Agora rounds the amount up and shows it on Agora Console.
### HTTP request
**URL**
```bash
GET https://{host}/bill?fromTs={ts}&toTs={ts}&pageNum={pageNum}&apiKey={apiKey}&signature={signature}
```
**Query parameter**
| Parameter | Required/Optional | Type | Data length | Description |
| :---------- | :---------------- | :-------- | :---------- | :-------------------------------------------------------------------------------------------------------------------------------------------------------------------------------------------------------------------------------------------------------------------------------------- |
| `fromTs` | Required | Timestamp | 10 | The start point of the time range to query billing data, which must be later than 00:00:00 (UTC) on the first day of the month. |
| `toTs` | Required | Timestamp | 10 | The end point of the time range to query billing data, which must be earlier than 23:59:59 (UTC) on the last day of the month. |
| `pageNum` | Required | Number | N/A | The page number of the billing list.You need to implement pagination to the billing list and return the `hasNext` field in the response. Agora always sets this parameter as one at the first request every month and repeats requesting until `hasNext` in the response returns false. |
| `limit` | Optional | Number | N/A | The number of data entries in the response. Ensure that you set a default value to this parameter. |
| `apiKey` | Required | String | 32 | The API key, used for authentication between you and Agora. When you register as a vendor on Agora Console, Agora generates an API key as the identifier. |
| `signature` | Required | String | N/A | The signature generated by the [signature algorithm](./signature-algorithm). You need to deploy the algorithm to verify that the request is sent by Agora. |
### HTTP Response
The response body contains the following fields:
| Field | Type | Description |
| :------------- | :------ | :------------------------------------------------------------------------------------------------------------------------------------------------------------------------------------------------------------------------------------------------------------------------------------------------------------------------------------------------------------------------------------------------------------------------------------------------ |
| `status` | Number | The status code. `0` means that the request succeeds. |
| `statusReason` | String | The reason for the status. |
| `totalSize` | Number | The total number of the user's Agora projects where your extension is added. |
| `pageNum` | Number | The page number of the billing list. This parameter should be the same with the `pageNum` field in the request. |
| `hasNext` | Boolean | Whether the billing page list has the next page:- `true`: The billing page list has the next page. The request repeats.
- `false`: The billing page list does not have the next page. The request stops. |
| `data` | Array | The billing data, which contains the following properties:- `projectId`: The project ID.
- `amount`: The billing amount. The data format is BigDecimal. The unit of measurement is set with the configuration with Agora. To change the unit of measurement, contact your account manager.
- `description`: The detailed description of the billing amount.Return the billing data only when `projectId` is not empty and `amount` is not zero. |
### Example
**Request header**
```bash
GET https://api.agora.io/usage?fromTs=1619913600&toTs=1619917200&pageNum=1&apiKey=pz*************gd&signature=SF*************3D HTTP/1.1
```
**Response body**
```json
{
"status": 0,
"statusReason": "Success getting billing data",
"data": {
"totalSize": 2,
"pageNum": 2,
"hasNext": false,
"data": [
{
"projectId": "4****2",
"amount": 1,
"description": "1 Minute × Agora_Marketplace_Pricing (Tier 1 at $*** / month)"
}
]
}
}
```
## License
This API only applies to vendors that charge users with licenses.
Agora calls this API to retrieve the license information of a specified user, including the expiration time of the license.
### HTTP request
**URL**
```bash
GET https://{host}/customers/{customerId}/license?apiKey={apiKey}&signature={signature}
```
**Path parameter**
`customerId`: The account ID of the user on Agora Console.
**Query parameter**
| Parameter | Required/Optional | Type | Data length | Description |
| :---------- | :---------------- | :----- | :---------- | :--------------------------------------------------------------------------------------------------------------------------------------------------------- |
| `apiKey` | Required | String | 32 | The API key, used for authentication between you and Agora. When you register as a vendor on Agora Console, Agora generates an API key as the identifier. |
| `signature` | Required | String | N/A | The signature generated by the [signature algorithm](./signature-algorithm). You need to deploy the algorithm to verify that the request is sent by Agora. |
### HTTP response
The response body contains the following fields:
| Field | Type | Description |
| :------------- | :----- | :------------------------------------------------------------------------------------------- |
| `status` | String | The status of the request:- `success`: The request succeeds.
- `failed`: The request fails. |
| `statusReason` | String | The reason for the status. |
| `expireDate` | String | The expiration time of the license. |
| `residueCount` | String | The remaining amount of usage covered by the license. |
### Example
**Request header**
```bash
GET https://api.agora.io/customers/1234567/license?apiKey=pz*************gd&signature=SF*************3D HTTP/1.1
```
**Response body**
```json
{
"status": "success",
"statusReason": "",
"data": {
"expireDate": "2025-10-01",
"residueCount": "100"
}
}
```
# Classroom REST API (/en/api-reference/api-ref/flexible-classroom/classroom-rest-api)
This page provides detailed help for the Flexible Classroom RESTful APIs.
## Basic information
### Server
All requests are sent to the host `api.agora.io`. See [Ensure service reliability](#ensure-service-reliability) for alternate domain names.
### Data format
The Content-Type of all requests is `application/json`.
### Authentication
Flexible Classroom Cloud Service uses tokens for authentication. You need to put the corresponding information into the `Authorization: agora token=` field when sending your HTTP request. For details, see [Secure authentication with tokens](/en/realtime-media/flexible-classroom/build/set-up-your-account-and-authentication/authentication-workflow).
## Classroom-related
### Create a classroom
#### Description
Call this method to create a classroom. After it is created, the classroom is reserved for five days.
#### Prototype
* Method: POST
* Endpoint: `/{region}/edu/apps/{appId}/v2/rooms/{roomUuid}`
#### Request parameters
**URL parameters**
Pass the following parameters in the URL:
| Parameter | Type | Description |
| :--------- | :----- | :------------------------------------------------------------------------------------------------------------------------------------------------------------------------------------------------------------------------------------------------------------------------------------------------------------------------------------------------------------------------------------------------------------------------------------------------------------------------------------------------------------------------------------------------------------------- |
| `region` | String | (Required) The region for connection. Flexible Classroom supports the following regions:- `cn`: Mainland China.
- `ap`: Asia Pacific.
- `eu`: Europe.
- `na`: North America. |
| `appId` | String | (Required) Agora App ID. |
| `roomUuid` | String | (Required) The classroom ID. This is the globally unique identifier of a classroom. It is also used as the channel name when a user joins an RTC or RTM channel. The string length must be less than 64 characters. The following characters are supported:- All lowercase English letters: a to z.
- All uppercase English letters: A to Z.
- The numbers 0 to 9.
- The space character.
- The following special characters: "!", "#", "$", "%", "&", "(", ")", "+", "-", ":", ";", "\<", "=", ".", ">", "?", "@", "\[", "]", "^", "\_", "\{", "}", "\|", "\~", "," |
**Request body parameters**
Pass in the following parameters in the request body:
| Parameter | Type | Description |
| :--------------------------------------------------- | :------ | :---------------------------------------------------------------------------------------------------------------------------------------------------------------------------------------------------------------------------------------------------------------------------------------------------------------------------------------------------------------------------------------------------------------------------------------------- |
| `roomType` | String | (Required) The type of the classroom. You can set the value to :- `0`: One-to-one classroom.
- `2`: Lecture hall.
- `4`: Small classroom.
- `10`: Small cloud classroom.Once set, this parameter value cannot be changed. |
| `roomName` | String | (Required) The name of the classroom. The maximum length of this parameter is 64 characters. |
| `roomProperties` | Object | (Optional) The properties of the classroom. It includes the name of the room, room number whiteboard plug-in configuration, chat plug-in configuration, room opening, end time, duration, configuration of the number of people who raise their hands to connect to the microphone, the maximum number of people to connect to the microphone, and the switch status configuration of the device for students to join the room by default, etc. |
| `roomProperties.schedule` | Object | (Optional) The schedule of the classroom. |
| `roomProperties.schedule.startTime` | Integer | (Optional) The start timestamp (ms) of the class. Once set, this parameter value cannot be changed. |
| `roomProperties.schedule.duration` | Integer | (Optional) The duration of the class, in seconds. The maximum value is 86,400 seconds, and it is recommended to set it according to the actual duration of the class. If you set the class duration and dragging duration, when recording is turned on, the maximum recording time `maxRecordingHour` parameter will be set based on the sum of the two and rounded up. See [Set the recording state](#set-the-recording-state). |
| `roomProperties.schedule.closeDelay` | Integer | (Optional) The delay of the class end time, in seconds. When the class duration ends, the class will enter the "End" state (state= 2). At this time, users can still enter and stay in the classroom normally. When the dragging time ends, the class will enter the "closed" state (state= 3) and all users will be kicked out. |
| `roomProperties.processes` | Object | (Optional) The process of inviting students to go "on the stage". |
| `roomProperties.processes.handsUp` | Object | (Optional) The settings of "on the stage". |
| `roomProperties.processes.handsUp.maxAccept` | Integer | (Optional) The maximum number of students "on the stage". |
| `roomProperties.processes.handsUp.defaultAcceptRole` | String | (Optional) The default user on the stage. If you hope to set the student on the stage, set it as "audience". If not, set it as "" or do not set this parameter. In the cloud classroom use-case, default is "". |
| `roomProperties.flexProps` | Object | (Optional) The initial properties of the classroom. The user's backend can pass customized parameters to the room through this parameter. Users can set custom attributes for any classroom based on their own business needs. Flexible Classroom will synchronize changes in this attribute to all clients in the classroom to realize your own business expansion. |
| `roomProperties.widgets` | Object | (Optional) Settings of the widgets in the classroom. |
| `roomProperties.widgets.netlessBoard` | Object | (Optional) Settings of the whiteboard widget in the classroom. |
| `roomProperties.widgets.netlessBoard.state` | Integer | (Optional) The state of the whiteboard widget in the classroom:- `0`: Disabled.
- `1`: Enabled. |
| `roomProperties.widgets.easemobIM` | Object | (Optional) Settings of the chat widget in the classroom. |
| `roomProperties.widgets.easemobIM.state` | Integer | (Optional) The state of the chat widget in the classroom:- `0`: Disabled.
- `1`: Enabled. |
| `roleConfig` | Object | (Optional) The role configuration. |
| `roleConfig.2` | Object | (Optional) The configuration of the student role. |
| `roleConfig.2.limit` | Integer | (Optional) The limit of the number of students. |
| `roleConfig.2.defaultStream` | Object | (Optional) The default stream type of the student. |
| `roleConfig.2.defaultStream.state` | Integer | (Optional) The state of the default stream type of the student:- `0`: Disabled.
- `1`: Enabled. |
| `roleConfig.2.defaultStream.videoState` | Integer | (Optional) The video state of the default stream of the student:- `0`: Disabled.
- `1`: Enabled. |
| `roleConfig.2.defaultStream.audioState` | Integer | (Optional) The audio state of the default stream of the student:- `0`: Disabled.
- `1`: Enabled. |
To create a small cloud classroom, the following are the required parameters:
```json
{
...
"roomName":"{roomName}",
"roomType":10,
"roleConfig":{
"2":{
"defaultStream":{
"audioState":1,
"state":1,
"videoState":1
},
"limit":49
}
},
...
}
```
#### Request example
```bash
curl -X POST 'https://api.agora.io/{region}/edu/apps/{YourAppId}/v2/rooms/test_room' \
-H 'Content-Type: application/json;charset=UTF-8' \
-H 'Authorization: agora token={educationToken}' \
--data-raw '{
"roomName": "test_class",
"roomType": 4,
"roleConfig": { // The audio and video permissions of students joining the room are turned on or off by default.(Optional)
"2": {
"limit": 50,
"defaultStream": {
"state": 1,
"videoState": 1,
"audioState": 1
}
}
},
"roomProperties": {
"schedule": {
"startTime": 1655452800000,
"duration": 600,
"closeDelay": 300
},
"processes": {
"handsUp": {
"maxAccept": 10, //The maximum number of students "on the stage".
"defaultAcceptRole": "" //(Optional) The default user on the stage. If you hope to set the student on the stage, set it as "audience". If not, set is as "" or do not set this parameter.In cloud classroom Scenario default is ""
}
},
//The user's backend can pass customized parameters to the room through this parameter.Users can set custom attributes for any classroom based on their own business needs. Flexible Classroom will synchronize changes in this attribute to all clients in the classroom to realize your own business expansion.
"flexProps": {
"exampleKey": "exampleValue"
},
"widgets": {//The state of the widgets in the classroom : on or off
"netlessBoard": {
"state": 0
},
"easemobIM": {
"state": 1
}
}
}
}'
```
#### Response parameters
| Parameter | Type | Description |
| :-------- | :------ | :---------------------------------------------------------------------------- |
| `code` | Integer | Request status code:- 0: The request succeeds.
- Non-zero: The request fails. |
| `msg` | String | Detailed information about the code. |
| `ts` | Number | The current Unix timestamp (in milliseconds) of the server in UTC. |
#### Response example
```json
{
"msg": "Success",
"code": 0,
"ts": 1610167740309
}
```
Note that you can just call the API to create a room, the server will respond with the `200` or `409`. `200` means the room is created, `409` means the room has already been created and you can join the classroom.
### Query a classroom
#### Description
Returns all information about the room object.
#### Prototype
* Method: GET
* Endpoint: `{region}/edu/apps/{appId}/v2/rooms/{roomUuid}`
#### Request parameters
**URL parameters**
Pass the following parameters in the URL:
| Parameter | Type | Description |
| :--------- | :----- | :------------------------------------------------------------------------------------------------------------------------------------------------------------------------------------------------------------------------------------------------------------------------------------------------------------------------------------------------------------------------------------------------------------------------------------------------------------------------------------------------------------------------------------------------------------------- |
| `region` | String | (Required) The region for connection. Flexible Classroom supports the following regions:- `cn`: Mainland China.
- `ap`: Asia Pacific.
- `eu`: Europe.
- `na`: North America. |
| `appId` | String | (Required) Agora App ID. |
| `roomUuid` | String | (Required) The classroom ID. This is the globally unique identifier of a classroom. It is also used as the channel name when a user joins an RTC or RTM channel. The string length must be less than 64 characters. The following characters are supported:- All lowercase English letters: a to z.
- All uppercase English letters: A to Z.
- The numbers 0 to 9.
- The space character.
- The following special characters: "!", "#", "$", "%", "&", "(", ")", "+", "-", ":", ";", "\<", "=", ".", ">", "?", "@", "\[", "]", "^", "\_", "\{", "}", "\|", "\~", "," |
#### Request example
```bash
curl -X GET 'https://api.sd-rtn.com/{region}/edu/apps/{yourAppId}/v2/rooms/test_class' \
-H 'Content-Type: application/json;charset=UTF-8' \
-H 'Authorization: agora token={educationToken}' \
```
#### Response parameters
| Parameter | Type | Description |
| :-------- | :------ | :--------------------------------------------------------------------------------------------------------------------------------------------------------------------------------------------------------------------------------------------------------------------------------------------------------------------------------------------------------------------------------------------------------------------------------------------------------------------------------------------------------------------------------------------------------------------------------------------------------------------------------------------------------------------------------------------------------------------------------------------------------------------------------------------------------------------------------------------------------------------------------------------------------------------------------------------------------------------------------------------------------------------------------------------------------------------------------------------------------------------------------------------------------------------------------------------------------------------------------------------------------------------------------------------------------------------------------------------------------------------------------------------------------------------------------------------------------------------------------------------------------------------------------------------- |
| `code` | Integer | Request status code:- 0: The request succeeds.
- Non-zero: The request fails. |
| `msg` | String | Detailed information about the code. |
| `ts` | Number | The current Unix timestamp (in milliseconds) of the server in UTC. |
| `data` | Object | The returned object, which contains the following data:- `roomUuid`: String, room ID.
- `roomName`: String, room name.
- `createTime`: Integer, room creation timestamp.
- `roomProperties`: Object, room attributes.
* `roomType`: Integer, room type.
* `0`: 1 to 1.
* `2`: Large classroom.
* `4`: Small classroom.
* `10`: Small cloud classroom.
* `schedule`: Object, lesson plan.
* `state`: Integer, room state.
* `0`: Not started.
* `1`: Started.
* `2`: Ended.
* `3`: Closed.
* `startTime`: Integer, starting time.
* `endTime`: Integer, end time.
* `closeTime`: Integer, closing time.
* `widgets`: Object, component collection.
* `netlessBoard`: Object, whiteboard component.
* `extra`: Object, extended information.
* `boardAppId`: String, whiteboard App ID.
* `boardId`: String, whiteboard room ID.
* `boardToken`: String, whiteboard room Token.
* `boardRegion`: String, whiteboard area.
* `state`: Integer, component state.
* `0`: Integer, not activated.
* `1`: Integer, activated.
* `easemobIM`: Object, chat room component.
* `extra`: Object, extended information.
* `orgName`: String, organization name.
* `appName`: String, app name.
* `chatRoomId`: String, chat room ID.
* `appKey`: String, app Key.
* `state`: Integer, component state.
* 0: Integer, not activated.
* 1: Integer, activated. |
#### Response example
```json
{
"msg": "Success",
"code": 0,
"ts": 1684231543281,
"data": {
"roomName": "jasoncai's Room",
"roomUuid": "3579768dd1e1eec8522d3ed76992afd04",
"scenario": "education",
"roleConfig": {
...
},
"roomProperties": {
"reward": {
...
},
"processes": {
"handsUp": {
...
},
"openCamera": {
...
},
"remoteControl": {
...
},
"waveArm": {
...
}
},
"im": {
"huanxin": {
...
}
},
"screen": {
...
},
"groups": {
...
},
"carousel": {
...
},
"widgets": {
"netlessBoard": {
"extra": {
...
},
"state": 1
},
"easemobIM": {
"extra": {
...
}
}
},
"schedule": {
"closeDelay": 600,
"duration": 1800
},
"webhookConfig": {
...
},
"record": {
...
},
"state": 0,
"board": {
"info": {
...
}
},
"roomType": 4
},
"roomTemplate": "edu_medium_v1",
"muteChat": {},
"muteVideo": {},
"muteAudio": {},
"state": 0,
"checkState": false,
"createTime": 1683884683422
}
}
```
### Set the classroom state
#### Description
Call this method to set the classroom state: Not started, Started, Ended.
#### Prototype
* Method: PUT
* Endpoint: `/{region}/edu/apps/{appId}/v2/rooms/{roomUUid}/states/{state}`
#### Request parameters
**URL parameters**
Pass the following parameter in the URL.
| Parameter | Type | Description |
| :--------- | :------ | :------------------------------------------------------------------------------------------------------------------------------------------------------------------------------------------------------------------------------------------------------------------------------------------------------------------------------------------------------------------------------------------------------------------------------------------------------------------------------------------------------------------------------- |
| `region` | String | (Required) The region for connection. For details, see [Network geofencing](/en/realtime-media/flexible-classroom/build/secure-your-classrooms/classroom-security#network-geofencing). Flexible Classroom supports the following regions:- `cn`: Mainland China.
- `ap`: Asia Pacific.
- `eu`: Europe.
- `na`: North America. |
| `appId` | String | (Required) Agora App ID. |
| `roomUuid` | String | (Required) The classroom ID. This is the globally unique identifier of a classroom. It is also used as the channel name when a user joins a channel. The string length must be less than 64 characters. The following character sets are supported:- All lowercase English letters: a to z
- All uppercase English letters: A to Z
- All numeric characters: 0-9
- The space character
- "!", 1"#", "$", "%", "&", "(", ")", "+", "-", ":", ";", "\<", "=", ".", ">", "?", "@", "\[", "]", "^", "\_", "\{", "}", "\|", "\~", "," |
| `state` | Integer | (Required) The classroom state:- `0`: Not started.
- `1`: Started.
- `2`: Ended.
- `3`: The room is closed and users can no longer join the room. |
#### Request example
```bash
curl -X PUT 'https://api.sd-rtn.com/{region}/edu/apps/{yourAppId}/v2/rooms/test_class/states/1' \
-H 'Authorization: agora token={educationToken}' \
```
#### Response parameters
| Parameter | Type | Description |
| :-------- | :------ | :----------------------------------------------------------------------------- |
| `code` | Integer | Business status code:- 0: The request succeeds.
- Non-zero: The request fails. |
| `msg` | String | The detailed information. |
| `ts` | Number | The current Unix timestamp (in milliseconds) of the server in UTC. |
#### Response example
```json
"status": 200,
"body":
{
"code": 0,
"msg": "Success",
"ts": 1610450153520
}
```
### Update custom classroom properties
#### Description
Add or update the custom properties of a specified classroom.
#### Prototype
* Method: PUT
* Endpoint: `/{region}/edu/apps/{appId}/v2/rooms/{roomUUid}/properties`
#### Request parameters
**URL parameters**
Pass the following parameters in the URL:
| Parameter | Type | Description |
| :--------- | :----- | :---------------------------------------------------------------------------------------------------------------------------------------------------------------------------------------------------------------------------------------------------------------------------------------------------------------------------------------------------------------------------------------------------------------------------------------------------------------------------------------- |
| `region` | String | (Required) The region for connection. For details, see [Network geofencing](/en/realtime-media/flexible-classroom/build/secure-your-classrooms/classroom-security#network-geofencing). Flexible Classroom supports the following regions:- `cn`: Mainland China.
- `ap`: Asia Pacific.
- `eu`: Europe.
- `na`: North America. |
| `appId` | String | (Required) Agora App ID. |
| `roomUuid` | String | (Required) The classroom ID. This is the globally unique identifier of a classroom. It is also used as the channel name when a user joins a channel. The string length must be less than 64 characters. The following character sets are supported:- All lowercase English letters: a to z.
- All numeric characters: 0-9
- The space character.
- "!", "#", "$", "%", "&", "(", ")", "+", "-", ":", ";", "\<", "=", ".", ">", "?", "@", "\[", "]", "^", "\_", "\{", "}", "\|", "\~", "," |
**Request body parameters**
Pass in the following parameters in the request body.
| Parameter | Type | Description |
| :------------------------------ | :----- | :----------------------------------------------------------------------- |
| `properties` | Object | Classroom properties. |
| `roomProperties.examinationUrl` | String | (Optional) The URL of the exam papers used in proctoring exam use-cases. |
| `cause` | Object | The update reason. |
#### Request example
```bash
curl -X PUT 'https://api.sd-rtn.com/{region}/edu/apps/{yourAppId}/v2/rooms/test_class/properties' \
-H 'Content-Type: application/json;charset=UTF-8' \
-H 'Authorization: agora token={educationToken}' \
--data-raw '{
"properties": {
"key1": "value1",
"key2": "value2"
},
"cause": {}
}'
```
#### Response parameters
| Parameter | Type | Description |
| :-------- | :------ | :----------------------------------------------------------------------------- |
| `code` | Integer | Business status code:- 0: The request succeeds.
- Non-zero: The request fails. |
| `msg` | String | The detailed information. |
| `ts` | Number | The current Unix timestamp (in milliseconds) of the server in UTC. |
#### Response example
```json
{
"msg": "Success",
"code": 0,
"ts": 1610167740309
}
```
### Delete custom classroom properties
#### Description
Delete the custom properties of a specified classroom.
#### Prototype
* Method: DELETE
* Endpoint: `/{region}/edu/apps/{appId}/v2/rooms/{roomUUid}/properties`
#### Request parameters
**URL parameters**
Pass the following parameters in the URL:
| Parameter | Type | Description |
| :--------- | :----- | :---------------------------------------------------------------------------------------------------------------------------------------------------------------------------------------------------------------------------------------------------------------------------------------------------------------------------------------------------------------------------------------------------------------------------------------------------------------------------------------- |
| `region` | String | (Required) The region for connection. For details, see [Network geofencing](/en/realtime-media/flexible-classroom/build/secure-your-classrooms/classroom-security#network-geofencing). Flexible Classroom supports the following regions:- `cn`: Mainland China.
- `ap`: Asia Pacific.
- `eu`: Europe.
- `na`: North America. |
| `appId` | String | (Required) Agora App ID. |
| `roomUuid` | String | (Required) The classroom ID. This is the globally unique identifier of a classroom. It is also used as the channel name when a user joins a channel. The string length must be less than 64 characters. The following character sets are supported:- All lowercase English letters: a to z.
- All numeric characters: 0-9
- The space character.
- "!", "#", "$", "%", "&", "(", ")", "+", "-", ":", ";", "\<", "=", ".", ">", "?", "@", "\[", "]", "^", "\_", "\{", "}", "\|", "\~", "," |
**Request body parameters**
Pass in the following parameters in the request body.
| Parameter | Type | Description |
| :----------- | :----------- | :-------------------- |
| `properties` | String array | Classroom properties. |
| `cause` | Object | Reason for deletion. |
#### Request example
**Request Body**
```bash
curl -X DELETE 'https://api.sd-rtn.com/{region}/edu/apps/{yourAppId}/v2/rooms/test_class/properties' \
-H 'Content-Type: application/json;charset=UTF-8' \
-H 'Authorization: agora token={educationToken}' \
--data-raw '{
"properties": ["key1", "key2"],
"cause": {}
}'
```
#### Response parameters
| Parameter | Type | Description |
| :-------- | :------ | :----------------------------------------------------------------------------- |
| `code` | Integer | Business status code:- 0: The request succeeds.
- Non-zero: The request fails. |
| `msg` | String | The detailed information. |
| `ts` | Number | The current Unix timestamp (in milliseconds) of the server in UTC. |
#### Response example
```json
{
"msg": "Success",
"code": 0,
"ts": 1610167740309
}
```
### Create or remove breakout classrooms
#### Description
Create or remove breakout rooms. Breakout rooms are sessions that are split off from a classroom that allow students to discuss classwork in smaller groups.
#### Prototype
* Method: PUT
* Endpoint: `/{region}/edu/apps/{appId}/v2/rooms/{roomUUid}/groups/states/{state}`
#### Request parameters
**URL parameters**
Pass the following parameters in the URL:
| Parameter | Type | Description |
| :--------- | :------ | :---------------------------------------------------------------------------------------------------------------------------------------------------------------------------------------------------------------------------------------------------------------------------------------------------------------------------------------------------------------------------------------------------------------------------------------------------------------------------------------- |
| `region` | String | (Required) The region for connection. For details, see [Network geofencing](/en/realtime-media/flexible-classroom/build/secure-your-classrooms/classroom-security#network-geofencing). Flexible Classroom supports the following regions:- `cn`: Mainland China.
- `ap`: Asia Pacific.
- `eu`: Europe.
- `na`: North America. |
| `appId` | String | (Required) The Agora App ID. |
| `roomUuid` | String | (Required) The classroom ID. This is the globally unique identifier of a classroom. It is also used as the channel name when a user joins a channel. The string length must be less than 64 characters. The following character sets are supported:- All lowercase English letters: a to z.
- All numeric characters: 0-9
- The space character.
- "!", "#", "$", "%", "&", "(", ")", "+", "-", ":", ";", "\<", "=", ".", ">", "?", "@", "\[", "]", "^", "\_", "\{", "}", "\|", "\~", "," |
| `state` | Integer | Whether to enable breakout rooms:- `1`: Enabled. Set as this value if you want to create breakout rooms.
- `0`: Disabled. Set as this value if you want to remove breakout rooms. |
**Request body parameters**
* To create breakout rooms, you need to set `state` to `1` and pass in the following parameters in the request body.
* To remove all breakout rooms, you need to set `state` to `0` and leave the request body blank.
| Parameter | Type | Description |
| :-------- | :---- | :-------------------------------------------------------------------------------------------------------------------------------------------------------------------------------------------------------------------------------------------------------------------------------------------------------------------------------------------------------------------------------------------------------------------------------------------------------------------------------------------------------------------------------------------------------------------------------------------------------------------------- |
| `groups` | Array | (Required) The breakout rooms to be created. This parameter consists of the following parameters:* `groupUuid`: (Optional) The ID of the breakout room, string type. If you do not provide an ID, an ID is automatically assigned to the breakout room.
* `groupName`: (Optional) The name of the breakout room, string type.
* `users`: (Required) The user list in the breakout room, array type. This parameter consists of the following parameters:
* `userUuid`: (Required) The user ID. This is the unique identifier of the user when logging in to Signaling. The string length must be less than 64 characters. |
#### Request example
```bash
curl -X PUT 'https://api.sd-rtn.com/{region}/edu/apps/{yourAppId}/v2/rooms/test_class/states/1' \
-H 'Authorization: agora token={educationToken}' \
--data-raw '{
"groups":[
{
"groupUuid": "group1",
"groupName":"Group 01",
"users":[{
"userUuid": "user1"
}]
}
]
}'
```
#### Response parameters
| Parameter | Type | Description |
| :-------- | :------ | :----------------------------------------------------------------------------- |
| `code` | Integer | Business status code:- 0: The request succeeds.
- Non-zero: The request fails. |
| `msg` | String | The detailed information. |
| `ts` | Number | The current Unix timestamp (in milliseconds) of the server in UTC. |
#### Response example
```json
{
"msg": "Success",
"code": 0,
"ts": 1610167740309
}
```
## Recording-related
### Set the recording state
#### Description
Call this method to start or stop recording a specified classroom.
#### Prototype
* Method: PUT
* Endpoint: `/{region}/edu/apps/{appId}/v2/rooms/{roomUUid}/records/states/{state}`
#### Request parameters
**URL parameters**
Pass the following parameter in the URL.
| Parameter | Type | Description |
| :--------- | :------ | :---------------------------------------------------------------------------------------------------------------------------------------------------------------------------------------------------------------------------------------------------------------------------------------------------------------------------------------------------------------------------------------------------------------------------------------------------------------------------------------- |
| `region` | String | (Required) The region for connection. For details, see [Network geofencing](/en/realtime-media/flexible-classroom/build/secure-your-classrooms/classroom-security#network-geofencing). Flexible Classroom supports the following regions:- `cn`: Mainland China.
- `ap`: Asia Pacific.
- `eu`: Europe.
- `na`: North America. |
| `appId` | String | (Required) Agora App ID. |
| `roomUuid` | String | (Required) The classroom ID. This is the globally unique identifier of a classroom. It is also used as the channel name when a user joins a channel. The string length must be less than 64 characters. The following character sets are supported:- All lowercase English letters: a to z.
- All numeric characters: 0-9
- The space character.
- "!", "#", "$", "%", "&", "(", ")", "+", "-", ":", ";", "\<", "=", ".", ">", "?", "@", "\[", "]", "^", "\_", "\{", "}", "\|", "\~", "," |
| `state` | Integer | (Required) The recording state:- `0`: Stop recording.
- `1`: Started. |
**Request body parameters**
Pass in the following parameters in the request body.
| Parameter | Type | Description |
| :---------------- | :----- | :------------------------------------------------------------------------------------------------------------------------------------------------------------------------------------------------------------------------------------------------------------------------------------------------------------------------------------------------------------------------------------------------------------------------------------------------------------------------------------------------------------------------------------------------------------------------------------------------------------------------------------------------------------------------------------------------------------------------------------------------------------------------------------------------------------------------------------------------------------------------------------------------------------------------------------------------------------------------------------------------------------------------------------------------------------------------------------------------------------------------------------------------------------------------------------------------------------------------------------------------------------------------------------------------------------------------------------------------------------------------------------------------------------------------------------------------------------------------------------------------------------------------------------------------------------------------------------------------------------------------------------------------------------------------------------------------------------------------------------------------------------------------------------------------------------------------------------------------------------------------------------------------------------------------------------------------------------------------------------------------------------------------------------------------------------------------------------------------------------------------------------------------------------------------------------------------------------------------------------------------------------------------------------------------------------------------------------------------------------------------------------------------------------------------------------------------------------------------------------------------------------------------------------------------------------------------------------------------------------------------------------------------------------------------------------------------------------------------------------------------------------------------------------------------------------------------------------------------------------------------------- |
| `mode` | String | (Optional) The recording mode:- Set this parameter as `web` to enable web page recording mode. The format of recorded files is MP4. When the length of the recorded file reaches around two hours, or when the size of the file exceeds around 2 GB, the recording service automatically creates another MP4 file.
- If you do not set this parameter, Flexible Classroom records the audio and video of the teachers in composite recording mode by default. The format of recorded files is M3U8 and TS. |
| `webRecordConfig` | Object | (Optional) When the `mode` is set as `web`, you need to set the detailed configuration of the web page recording through `webRecordConfig`, including the following fields:- `rootUrl`: (Required) String, the root address of the web page to be recorded. During the recording, Agora Edu Cloud Service automatically gets the full address of the web page to be recorded by putting `rootUrl`, `roomUuid`, `roomType`, and other parameters together. If you set both `url` and `rootUrl`, `url` overrides `rootUrl`.
- `publishRtmp`: (Optional) Whether to push the recorded webpage to CDN:
* `true`: Yes.
* `false`: No.
- `onhold`: (Required) Boolean. You can set this parameter as:
* `true`: Pauses recording immediately after the web page recording task is enabled. The recording service opens and renders the web page to be recorded, but does not generate a slice file.
* `false`: (Default) Enables the web page recording task and starts recording.
- `videoBitrate`: (Optional) Number. The bitrate of the video (Kbps). The value range is \[50, 8000]. The default value of `videoBitrate` varies according to the resolution of the output video:
* If the resolution of the output video is less than 1280 × 720, the default value of `videoBitrate` is 1500.
* If the resolution of the output video is greater than or equal to 1280 × 720, the default value of `videoBitrate` is 2000.
- `videoFps`: (Optional) Number. The frame rate of the video (fps). The value range is \[5, 60]. The default value is 15.
- `audioProfile`: (Optional) Number. The sample rate, encoding mode, number of audio channels, and bitrate.
* 0: (Default) Sample rate of 48 kHz, music encoding, mono, and a bitrate of up to 48 Kbps.
* 1: Sample rate of 48 kHz, music encoding, mono, and a bitrate of up to 128 Kbps.
* 2: Sample rate of 48 kHz, music encoding, stereo, and a bitrate of up to 192 Kbps.
- `videoWidth`: Number. The width of the video (pixels). The value range is \[480, 1280]. The default value is 1280. The product of `videoWidth` and `videoHeight` should not exceed 921,600 (1280 × 720).
- `videoHeight`: Number. The height of the video (pixels). The value range is \[480, 1280]. The default value is 720. The product of `videoWidth` and `videoHeight` should not exceed 921,600 (1280 × 720).
- `maxRecordingHour`: Number, the maximum recording length (hours). The value range is \[1,720]. If you set the class duration, Agora Edu Cloud Service gets the maximum recording length by rounding up the class duration. For example, if the class duration is 1800 seconds, `maxRecordingHour` is one hour. If you do not set the class duration, the default value of `maxRecordingHour` is two hours. If the limit set by `maxRecordingHour` is exceeded, the recording stops automatically. |
| `retryTimeout` | Number | The amount of time (seconds) that the Flexible Classroom cloud service waits between tries. The Flexible Classroom cloud service reties twice at most. |
#### Request example
```bash
curl -X PUT 'https://api.sd-rtn.com/{region}/edu/apps/{yourAppId}/v2/rooms/test_class/records/states/1' \
-H 'Content-Type: application/json;charset=UTF-8' \
-H 'Authorization: agora token={educationToken}' \
--data-raw '{
"mode": "web",
"webRecordConfig": {
"url": "https://webdemo.agora.io/xxxxx/?userUuid={recorder_id}&roomUuid={room_id_to_be_recorded}&roleType=0&roomType=4&pretest=false&rtmToken={recorder_token}&language=en&appId={your_app_id}",
"rootUrl": "https://xxx.yyy.zzz",
"publishRtmp": "true"
},
"retryTimeout": 60
}'
```
#### Response parameters
| Parameter | Type | Description |
| :-------- | :------ | :---------------------------------------------------------------------------------------------------------------------------------------------------------------------------------------------------------------------------------------------------------------------------------------------------------------------------------------------------------------------------------------------------------------------------------------------------------------------------------------------------------------------------------------------------------------------------------------------------------------- |
| `code` | Integer | Business status code:- 0: The request succeeds.
- Non-zero: The request fails. |
| `msg` | String | The detailed information. |
| `ts` | Number | The current Unix timestamp (in milliseconds) of the server in UTC. |
| `data` | Object | The returned object, which contains the following data:- `recordId`: String. The unique identifier of the recording.
- `sid`: String. The `sid` of cloud recording.
- `resourceId`: String. The `resourceId` of cloud recording.
- `state`: Integer. The recording state: `0`: The recording ends. `1`: The recording begins.
- `startTime`: Integer. The timestamp (ms) when the recording begins.
- `streamingUrl`: Object. The URL address of pulling the CDN stream: `rtmp`: String. The URL of the RTMP streaming. `flv`: String. The URL of the FLV streaming. `hls`: String. The URL of the HLS streaming. |
#### Response example
```json
"status": 200,
"body":
{
"code": 0,
"ts": 1610450153520,
"streamingUrl": {
"rtmp": "",
"flv": "",
"hls": ""
}
}
```
### Update the recording configurations
#### Description
Call this method during the recording to update the recording configurations. Every time this method is called, the previous configurations are overwritten.
#### Prototype
* Method: PATCH
* Endpoint: `/{region}/edu/apps/{appId}/v2/rooms/{roomUUid}/records/states/{state}`
#### Request parameters
**URL parameters**
Pass the following parameter in the URL.
| Parameter | Type | Description |
| :--------- | :----- | :---------------------------------------------------------------------------------------------------------------------------------------------------------------------------------------------------------------------------------------------------------------------------------------------------------------------------------------------------------------------------------------------------------------------------------------------------------------------------------------- |
| `region` | String | (Required) The region for connection. For details, see [Network geofencing](/en/realtime-media/flexible-classroom/build/secure-your-classrooms/classroom-security#network-geofencing). Flexible Classroom supports the following regions:- `cn`: Mainland China.
- `ap`: Asia Pacific.
- `eu`: Europe.
- `na`: North America. |
| `appId` | String | (Required) Agora App ID. |
| `roomUuid` | String | (Required) The classroom ID. This is the globally unique identifier of a classroom. It is also used as the channel name when a user joins a channel. The string length must be less than 64 characters. The following character sets are supported:- All lowercase English letters: a to z.
- All numeric characters: 0-9
- The space character.
- "!", "#", "$", "%", "&", "(", ")", "+", "-", ":", ";", "\<", "=", ".", ">", "?", "@", "\[", "]", "^", "\_", "\{", "}", "\|", "\~", "," |
**Request body parameters**
Pass in the following parameters in the request body.
| Parameter | Type | Description |
| :---------------- | :----- | :----------------------------------------------------------------------------------------------------------------------------------------------------------------------------------------------------------------------------------------------------------------------------------------------------------------------------------------------------------------------------------------------------- |
| `webRecordConfig` | Object | (Optional) Recording configurations:- `onhold`: (Required) Boolean. You can set this parameter as:
* `true`: Pauses the web page recording. The recording service no longer generates any slice file.
* `false`: (Default) Continues the web page recording. After the recording is paused, you can call this method and set the `onhold` parameter as `false` to continue the web page recording. |
#### Request example
```bash
curl -X PATCH 'https://api.sd-rtn.com/{region}/edu/apps/{yourAppId}/v2/rooms/test_class/records/states/1' \
-H 'Content-Type: application/json;charset=UTF-8' \
-H 'Authorization: agora token={educationToken}' \
--data-raw '{
"webRecordConfig": {
"onhold": false
}
}'
```
#### Response parameters
| Parameter | Type | Description |
| :-------- | :------ | :----------------------------------------------------------------------------- |
| `code` | Integer | Business status code:- 0: The request succeeds.
- Non-zero: The request fails. |
| `msg` | String | The detailed information. |
| `ts` | Number | The current Unix timestamp (in milliseconds) of the server in UTC. |
#### Response example
```json
"status": 200,
"body":
{
"code": 0,
"ts": 1610450153520
}
```
### Get the recording list
#### Description
Get the recording list in a specified classroom.
You can fetch data in batches with the `nextId` parameter. You can get up to 100 pieces of data for each batch.
#### Prototype
* Method: GET
* Endpoint: `/{region}/edu/apps/{appId}/v2/rooms/{roomUUid}/records`
#### Request parameters
**URL parameters**
Pass the following parameter in the URL.
| Parameter | Type | Description |
| :--------- | :----- | :---------------------------------------------------------------------------------------------------------------------------------------------------------------------------------------------------------------------------------------------------------------------------------------------------------------------------------------------------------------------------------------------------------------------------------------------------------------------------------------- |
| `region` | String | (Required) The region for connection. For details, see [Network geofencing](/en/realtime-media/flexible-classroom/build/secure-your-classrooms/classroom-security#network-geofencing). Flexible Classroom supports the following regions:- `cn`: Mainland China.
- `ap`: Asia Pacific.
- `eu`: Europe.
- `na`: North America. |
| `appId` | String | (Required) Agora App ID. |
| `roomUuid` | String | (Required) The classroom ID. This is the globally unique identifier of a classroom. It is also used as the channel name when a user joins a channel. The string length must be less than 64 characters. The following character sets are supported:- All lowercase English letters: a to z.
- All numeric characters: 0-9
- The space character.
- "!", "#", "$", "%", "&", "(", ")", "+", "-", ":", ";", "\<", "=", ".", ">", "?", "@", "\[", "]", "^", "\_", "\{", "}", "\|", "\~", "," |
**Query parameters**
| Parameter | Type | Description |
| :-------- | :----- | :-------------------------------------------------------------------------------------------------------------------------------------------------------------------------------------------------------------------------------------------------------------------------------- |
| `nextId` | String | (Optional) The starting ID of the next batch of data. When you call this method to get the data for the first time, leave this parameter empty or set it as null. Afterward, you can set this parameter as the `nextId` that you get in the response of the previous method call. |
#### Request example
```bash
curl -X PATCH 'https://api.sd-rtn.com/{region}/edu/apps/{yourAppId}/v2/rooms/test_class/records/states/1' \
-H 'Content-Type: application/json;charset=UTF-8' \
-H 'Authorization: agora token={educationToken}' \
--data-raw '{
"webRecordConfig": {
"onhold": false
}
}'
```
#### Response parameters
| Parameter | Type | Description |
| :-------- | :------ | :---------------------------------------------------------------------------------------------------------------------------------------------------------------------------------------------------------------------------------------------------------------------------------------------------------------------------------------------------------------------------------------------------------------------------------------------------------------------------------------------------------------------------------------------------------------------------------------------------------------------------------------------------------------------------------------------------------------------------------------------------------------------------------------------------------------------------------------------------------------------------------------------------------------------------------------------------------------------------------------------------------------------------------------------------------------------------------------------------------------------------------------------------------------------------------------------------------------------------------------------------------------------------------------------------------------------------------------------------------------------------------------------------------------------------------------------------------------------------------------------------------------------------------------------------------------------------------------------------------------------------------------------------------------------------------------------------------------------------------------------------------------------------------------------------------------------------------------------------------------------------------------------------------------------------------------------------------------------------------------------------------------------------------------------------------- |
| `code` | Integer | Business status code:- 0: The request succeeds.
- Non-zero: The request fails. |
| `msg` | String | The detailed information. |
| `ts` | Number | The current Unix timestamp (in milliseconds) of the server in UTC. |
| `data` | Object | Include the following parameters:- `count`: Integer, the number of pieces of data in this batch.
- `list`: JSONArray. An array of the recording list. A JSON object includes the following parameters:
* `appId`: Your Agora App ID.
* `roomUuid`: The classroom ID. This is the globally unique identifier of a classroom. It is also used as the channel name when a user joins a channel.
* `recordId`: The unique identifier of a recording session. A recording session starts when you call a method to start recording and ends when you call this method to stop recording.
* `startTime`: The UTC timestamp when a recording session starts, in milliseconds.
* `endTime`: The UTC timestamp when a recording session ends, in milliseconds.
* `resourceId`: The `resourceId` of the Agora Cloud Recording service.
* `sid`: The `sid` of the Agora Cloud Recording service.
* `recordUid`: The UID used by the Agora Cloud Recording service in the channel.
* `boardAppId`: The App Identifier of the Agora Interactive Whiteboard service.
* `boardToken`: The SDK Token of the Agora Interactive Whiteboard service.
* `boardId`: The unique identifier of a whiteboard session.
* `type`: Integer, the recording type:
* `3`: Web Page Recording
* `status`: Integer, the recording state:
* `1`: In recording.
* `2`: Recording has ended.
* `url`: String, the URL address of the recorded files in composite recording mode.
* `recordDetails`: JSONArray. The JSON object contains the following fields:
* `url`: String, the URL address of the recorded files in web page recording mode.
* `nextId`: String, the starting ID of the next batch of data. If it is null, there is no next batch of data. If it is not null, use this `nextId` to continue the query until null is reported.
* `total`: Integer, the total number of pieces of data.
* `unready`: Boolean. `true` means that recording fails.
- `webRecordingUrlQuery`: String. Same as `query` in webpage recording. |
#### Response example
```json
{
"msg":"Success",
"code":0,
"ts":1706091167911,
"data":{
"total":1,
"list":[
{
"recordId":"sssssssssss",
"appId":"sssssssssss",
"roomUuid":"sssssssssss",
"startTime":1706079930586,
"endTime":1706081355989,
"resourceId":"443322222",
"sid":"sssssssssss",
"recordUid":"sssssssssss",
"type":3,
"status":2,
"url":"https://xxxxxxxx.m3u8",
"recordDetails":[
{
"url":"xxxxxxxxx.mp4"
}
],
"webRecordUrlQuery":"xxxxxxx"
}
],
"count":1
}
}
```
## User-related
### Query a specific user
#### Prototype
* Method: GET
* Endpoint: `/{region}/edu/apps/{appId}/v2/rooms/{roomUuid}/users/{userUuid}`
#### Request parameters
**URL parameters**
Pass the following parameter in the URL.
| Parameter | Type | Description |
| :--------- | :----- | :------------------------------------------------------------------------------------------------------------------------------------------------------------------------------------------------------------------------------------------------------------------------------------------------------------------------------------------------------------------------------------------------------------------------------------------------------------------------------------------------------------------------------------------------------------------- |
| `region` | String | (Required) The region for connection. For details, see [Network geofencing](/en/realtime-media/flexible-classroom/build/secure-your-classrooms/classroom-security#network-geofencing). Flexible Classroom supports the following regions:- `cn`: Mainland China.
- `ap`: Asia Pacific.
- `eu`: Europe.
- `na`: North America. |
| `appId` | String | (Required) Agora App ID. |
| `roomUUid` | String | (Required) The classroom ID. This is the globally unique identifier of a classroom. It is also used as the channel name when a user joins an RTC or RTM channel. The string length must be less than 64 characters. The following characters are supported:- All lowercase English letters: a to z.
- All uppercase English letters: A to Z.
- The numbers 0 to 9.
- The space character.
- The following special characters: "!", "#", "$", "%", "&", "(", ")", "+", "-", ":", ";", "\<", "=", ".", ">", "?", "@", "\[", "]", "^", "\_", "\{", "}", "\|", "\~", "," |
| `userUuid` | String | (Required) The user ID. This is the unique identifier of the user and also the user ID used when logging in to Signaling. The string length must be less than 64 characters. Supported character scopes are:- All lowercase English letters: a to z.All numeric characters.- 0-9
- The space character.
- "!", "#", "$", "%", "&", "(", ")", "+", "-", ":", ";", "\<", "=", ".", ">", "?", "@", "\[", "]", "^", "\_", "\{", "}", "\|", "\~", "," |
#### Request example
```bash
curl -X GET 'https://api.sd-rtn.com/{region}/edu/apps/{yourAppId}/v2/rooms/test_class/users/test_user' \
-H 'Authorization: agora token={educationToken}' \
```
#### Response parameters
| Parameter | Type | Description |
| :-------- | :------ | :--------------------------------------------------------------------------------------------------------------------------------------------------------------------------------------------------------------------------------------------------------------------------------------------------------------------------------------------------------------------------------------------------------------------------------------------------------------------------------------------------------------------------------------------------------------------------------------------------------------------- |
| `code` | Integer | Business status code:- 0: The request succeeds.
- Non-zero: The request fails. |
| `msg` | String | The detailed information. |
| `data` | Object | Include the following parameters:- `userUuid`: String, the user ID.
- `userName`: String, the user name.
- `role`: Integer. The user role. This parameter can be set as one of the following values:
* `1`: Teacher.
* `2`: Student.
* `3`: Teaching assistant.
- `streamUuid`: String. The ID of the stream, which is also the uid used when joining an RTC SDK channel.
- `state`: Whether the user is online:
* `0`: Offline.
* `1`: Online.
- `userProperties`: Object. The user property.
- `updateTime`: Number. The time when the user status is updated, Unix timestamp (in milliseconds), UTC time. |
#### Response example
```json
{
"msg": "Success",
"code": 0,
"ts": 1658126805245,
"data": {
"userName": "jasoncai",
"userUuid": "681d9aca4924e9a84ad301e8cca438a71",
"role": "1",
"userProperties": {},
"updateTime": 1658126782174,
"streamUuid": "1417753684",
"state": 1
}
}
```
### Update custom user properties
#### Description
Add or update the custom properties of a specified user.
#### Prototype
* Method: PUT
* Endpoint: `/{region}/edu/apps/{appId}/v2/rooms/{roomUUid}/users/{userUuid}/properties`
#### Request parameters
**URL parameters**
Pass the following parameters in the URL:
| Parameter | Type | Description |
| :--------- | :----- | :---------------------------------------------------------------------------------------------------------------------------------------------------------------------------------------------------------------------------------------------------------------------------------------------------------------------------------------------------------------------------------------------------------------------------------------------------------------------------------------- |
| `region` | String | (Required) The region for connection. For details, see [Network geofencing](/en/realtime-media/flexible-classroom/build/secure-your-classrooms/classroom-security#network-geofencing). Flexible Classroom supports the following regions:- `cn`: Mainland China.
- `ap`: Asia Pacific.
- `eu`: Europe.
- `na`: North America. |
| `appId` | String | (Required) Agora App ID. |
| `roomUuid` | String | (Required) The classroom ID. This is the globally unique identifier of a classroom. It is also used as the channel name when a user joins a channel. The string length must be less than 64 characters. The following character sets are supported:- All lowercase English letters: a to z.
- All numeric characters: 0-9
- The space character.
- "!", "#", "$", "%", "&", "(", ")", "+", "-", ":", ";", "\<", "=", ".", ">", "?", "@", "\[", "]", "^", "\_", "\{", "}", "\|", "\~", "," |
| `userUuid` | String | (Required) The user ID. This is the unique identifier of the user when logging in to Signaling. The string length must be less than 64 characters. The following character sets are supported:- All lowercase English letters: a to z.
- All numeric characters: 0-9
- The space character.
- "!", "#", "$", "%", "&", "(", ")", "+", "-", ":", ";", "\<", "=", ".", ">", "?", "@", "\[", "]", "^", "\_", "\{", "}", "\|", "\~", "," |
**Request body parameters**
Pass in the following parameters in the request body.
| Parameter | Type | Description |
| :----------- | :----- | :------------------- |
| `properties` | Object | The user properties. |
| `cause` | Object | The update reason. |
#### Request example
```bash
curl -X PUT 'https://api.sd-rtn.com/{region}/edu/apps/{yourAppId}/v2/rooms/test_class/users/test_user/properties' \
-H 'Content-Type: application/json;charset=UTF-8' \
-H 'Authorization: agora token={educationToken}' \
--data-raw '{
"properties": {
"key1": "value1",
"key2": "value2"
},
"cause": {}
}'
```
#### Response parameters
| Parameter | Type | Description |
| :-------- | :------ | :----------------------------------------------------------------------------- |
| `code` | Integer | Business status code:- 0: The request succeeds.
- Non-zero: The request fails. |
| `msg` | String | The detailed information. |
| `ts` | Number | The current Unix timestamp (in milliseconds) of the server in UTC. |
#### Response example
```json
{
"msg": "Success",
"code": 0,
"ts": 1610167740309
}
```
### Delete custom user properties
#### Description
Delete the custom properties of a specified user.
#### Prototype
* Method: DELETE
* Endpoint: `/{region}/edu/apps/{appId}/v2/rooms/{roomUUid}/users/{userUuid}/properties`
#### Request parameters
**URL parameters**
Pass the following parameters in the URL:
| Parameter | Type | Description |
| :--------- | :----- | :---------------------------------------------------------------------------------------------------------------------------------------------------------------------------------------------------------------------------------------------------------------------------------------------------------------------------------------------------------------------------------------------------------------------------------------------------------------------------------------- |
| `region` | String | (Required) The region for connection. For details, see [Network geofencing](/en/realtime-media/flexible-classroom/build/secure-your-classrooms/classroom-security#network-geofencing). Flexible Classroom supports the following regions:- `cn`: Mainland China.
- `ap`: Asia Pacific.
- `eu`: Europe.
- `na`: North America. |
| `appId` | String | (Required) Agora App ID. |
| `roomUuid` | String | (Required) The classroom ID. This is the globally unique identifier of a classroom. It is also used as the channel name when a user joins a channel. The string length must be less than 64 characters. The following character sets are supported:- All lowercase English letters: a to z.
- All numeric characters: 0-9
- The space character.
- "!", "#", "$", "%", "&", "(", ")", "+", "-", ":", ";", "\<", "=", ".", ">", "?", "@", "\[", "]", "^", "\_", "\{", "}", "\|", "\~", "," |
| `userUuid` | String | (Required) The user ID. This is the unique identifier of the user when logging in to Signaling. The string length must be less than 64 characters. The following character sets are supported:- All lowercase English letters: a to z.
- All numeric characters: 0-9
- The space character.
- "!", "#", "$", "%", "&", "(", ")", "+", "-", ":", ";", "\<", "=", ".", ">", "?", "@", "\[", "]", "^", "\_", "\{", "}", "\|", "\~", "," |
**Request body parameters**
Pass in the following parameters in the request body.
| Parameter | Type | Description |
| :----------- | :----------- | :------------------- |
| `properties` | String array | The user properties. |
| `cause` | Object | Reason for deletion. |
#### Request example
```bash
curl -X DELETE 'https://api.sd-rtn.com/{region}/edu/apps/{yourAppId}/v2/rooms/test_class/users/test_user/properties' \
-H 'Content-Type: application/json;charset=UTF-8' \
-H 'Authorization: agora token={educationToken}' \
--data-raw '{
"properties": ["key1", "key2"],
"cause": {}
}'
```
#### Response parameters
| Parameter | Type | Description |
| :-------- | :------ | :----------------------------------------------------------------------------- |
| `code` | Integer | Business status code:- 0: The request succeeds.
- Non-zero: The request fails. |
| `msg` | String | The detailed information. |
| `ts` | Number | The current Unix timestamp (in milliseconds) of the server in UTC. |
#### Response example
```json
{
"msg": "Success",
"code": 0,
"ts": 1610167740309
}
```
### Kick a user out of a classroom
#### Description
Call this method to kick a specified user out of a classroom. After a successful method call, the server triggers an event indicating a user leaves the classroom. You can use the `dirty` parameter to determine whether the user can enter the classroom afterwards.
#### Prototype
* Method: POST
* Endpoint: `/{region}/edu/apps/{appId}/v2/rooms/{roomUUid}/users/{userUuid}/exit`
#### Request parameters
**URL parameters**
Pass the following parameters in the URL:
| Parameter | Type | Description |
| :--------- | :----- | :---------------------------------------------------------------------------------------------------------------------------------------------------------------------------------------------------------------------------------------------------------------------------------------------------------------------------------------------------------------------------------------------------------------------------------------------------------------------------------------- |
| `region` | String | (Required) The region for connection. For details, see [Network geofencing](/en/realtime-media/flexible-classroom/build/secure-your-classrooms/classroom-security#network-geofencing). Flexible Classroom supports the following regions:- `cn`: Mainland China.
- `ap`: Asia Pacific.
- `eu`: Europe.
- `na`: North America. |
| `appId` | String | (Required) Agora App ID. |
| `roomUuid` | String | (Required) The classroom ID. This is the globally unique identifier of a classroom. It is also used as the channel name when a user joins a channel. The string length must be less than 64 characters. The following character sets are supported:- All lowercase English letters: a to z.
- All numeric characters: 0-9
- The space character.
- "!", "#", "$", "%", "&", "(", ")", "+", "-", ":", ";", "\<", "=", ".", ">", "?", "@", "\[", "]", "^", "\_", "\{", "}", "\|", "\~", "," |
| `userUuid` | String | (Required) The user ID. This is the unique identifier of the user when logging in to Signaling. The string length must be less than 64 characters. The following character sets are supported:- All lowercase English letters: a to z.
- All numeric characters: 0-9
- The space character.
- "!", "#", "$", "%", "&", "(", ")", "+", "-", ":", ";", "\<", "=", ".", ">", "?", "@", "\[", "]", "^", "\_", "\{", "}", "\|", "\~", "," |
**Request body parameters**
Pass in the following parameters in the request body.
| Parameter | Type | Description |
| :-------- | :----- | :---------------------------------------------------------------------------------------------------------------------------------------------------------------------------------------------------------------------------------------------------------------------------------------------- |
| `dirty` | Object | (Optional) The user privilege:- `state`: Boolean, whether the user is dirty:
* `1`: Dirty. A dirty user cannot enter the classroom.
* `0`: Not dirty.
- `duration`: Number, the duration of the dirty state (seconds), starting from the time when the user is kicked out of the classroom. |
#### Request example
```bash
curl -X POST 'https://api.sd-rtn.com/{region}/edu/apps/{yourAppId}/v2/rooms/test_class/users/test_user/exit' \
-H 'Content-Type: application/json;charset=UTF-8' \
-H 'Authorization: agora token={educationToken}' \
--data-raw '{
"dirty": {
"state": 1,
"duration": 600
}
}'
```
#### Response parameters
| Parameter | Type | Description |
| :-------- | :------ | :----------------------------------------------------------------------------- |
| `code` | Integer | Business status code:- 0: The request succeeds.
- Non-zero: The request fails. |
| `msg` | String | The detailed information. |
| `ts` | Number | The current Unix timestamp (in milliseconds) of the server in UTC. |
#### Response example
```json
{
"msg": "Success",
"code": 0,
"ts": 1610167740309
}
```
## Classroom event-related
### Query a specified event
#### Description
Query a specified type of event in a specified classroom.
You can fetch data in batches with the `nextId` parameter. You can get up to 100 pieces of data for each batch.
* You can query the same event repeatedly.
* You cannot query events in a destroyed classroom. A classroom is destroyed automatically one hour after it is ended.
#### Prototype
* Method: GET
* Endpoint: `/{region}/edu/apps/{appId}/v2/rooms/{roomUUid}/sequences`
#### Request parameters
**URL parameters**
Pass the following parameters in the URL:
| Parameter | Type | Description |
| :--------- | :----- | :---------------------------------------------------------------------------------------------------------------------------------------------------------------------------------------------------------------------------------------------------------------------------------------------------------------------------------------------------------------------------------------------------------------------------------------------------------------------------------------- |
| `region` | String | (Required) The region for connection. For details, see [Network geofencing](/en/realtime-media/flexible-classroom/build/secure-your-classrooms/classroom-security#network-geofencing). Flexible Classroom supports the following regions:- `cn`: Mainland China.
- `ap`: Asia Pacific.
- `eu`: Europe.
- `na`: North America. |
| `appId` | String | (Required) Agora App ID. |
| `roomUuid` | String | (Required) The classroom ID. This is the globally unique identifier of a classroom. It is also used as the channel name when a user joins a channel. The string length must be less than 64 characters. The following character sets are supported:- All lowercase English letters: a to z.
- All numeric characters: 0-9
- The space character.
- "!", "#", "$", "%", "&", "(", ")", "+", "-", ":", ";", "\<", "=", ".", ">", "?", "@", "\[", "]", "^", "\_", "\{", "}", "\|", "\~", "," |
**Query parameters**
| Parameter | Type | Description |
| :-------- | :------ | :-------------------------------------------------------------------------------------------------------------------------------------------------------------------------------------------------------------------------------------------------------------------------------- |
| `nextId` | String | (Optional) The starting ID of the next batch of data. When you call this method to get the data for the first time, leave this parameter empty or set it as null. Afterward, you can set this parameter as the `nextId` that you get in the response of the previous method call. |
| `cmd` | Integer | (Optional) Event type. For details, see [Flexible Classroom Cloud Service Events](#events). |
#### Request example
```bash
curl -X GET 'https://api.sd-rtn.com/{region}/edu/apps/{yourAppId}/v2/rooms/test_class/sequences?cmd=20' \
-H 'Authorization: agora token={educationToken}' \
```
#### Response parameters
| Parameter | Type | Description |
| :-------- | :------ | :----------------------------------------------------------------------------------------------------------------------------------------------------------------------------------------------------------------------------------------------------------------------------------------------------------------------------------------------------------------------------------------------------------------------------------------------------------------- |
| `code` | Integer | Business status code:- 0: The request succeeds.
- Non-zero: The request fails. |
| `msg` | String | The detailed information. |
| `ts` | Number | The current Unix timestamp (in milliseconds) of the server in UTC. |
| `data` | Object | Include the following parameters:- `total`: Integer, the total number of pieces of data.
- `count`: Integer, the number of pieces of data in this batch.
- `list`: JSONArray. An array of the recording list. A JSON object includes the following parameters:
- `nextId`: String, the starting ID of the next batch of data. If it is null, there is no next batch of data. If it is not null, use this `nextId` to continue the query until null is reported. |
#### Response example
```json
{
"msg": "Success",
"code": 0,
"ts": 1610433913533,
"data": {
"total": 1,
"list": [
{
"roomUuid": "",
"cmd": 20,
"sequence": 1,
"version": 1,
"data": {}
}
],
"nextId": null,
"count": 1
}
}
```
### Get all classroom events
#### Description
Get all events in the classrooms associated with a specified App ID.
You can call this method at regular intervals to listen for all the events that occur in the flexible classrooms.
* Each event can only be obtained once.
* You cannot get events one hour after a classroom is destroyed.
#### Prototype
* Method: GET
* Endpoint: `/{region}/edu/polling/apps/{appId}/v2/rooms/sequences`
#### Request parameters
**URL parameters**
Pass the following parameter in the URL.
| Parameter | Type | Description |
| :-------- | :----- | :---------------------------------------------------------------------------------------------------------------------------------------------------------------------------------------------------------------------------------------------------------------------------------------------------------------------------- |
| `region` | String | (Required) The region for connection. For details, see [Network geofencing](/en/realtime-media/flexible-classroom/build/secure-your-classrooms/classroom-security#network-geofencing). Flexible Classroom supports the following regions:- `cn`: Mainland China.
- `ap`: Asia Pacific.
- `eu`: Europe.
- `na`: North America. |
| `appId` | String | (Required) Agora App ID. |
#### Request example
```bash
curl -X GET 'https://api.sd-rtn.com/{region}/edu/polling/apps/{yourAppId}/v2/rooms/sequences' \
-H 'Authorization: agora token={educationToken}' \
```
#### Response parameters
| Parameter | Type | Description |
| :-------- | :------ | :--------------------------------------------------------------------------------------------------------------------------------------------------------------------------------------------------------------------------------------------------------------------------------------------------------------------------------------------------------------------------------------------------------------------------------------------------------------------------------------------------------------------------------------------- |
| `code` | Integer | Business status code:- 0: The request succeeds.
- Non-zero: The request fails. |
| `msg` | String | The detailed information. |
| `ts` | Number | The current Unix timestamp (in milliseconds) of the server in UTC. |
| `data` | Object | Include the following parameters:- `roomUuid`: String, the classroom ID.
- `cmd`: Integer, the event type. For details, see [Flexible Classroom Cloud Service Events](#events).
- `sequence`: Integer. The event ID. This is the unique identifier of an event, which is automatically generated to ensure the order of events.
- `version`: Integer, the service version.
- `data`: Object, the detailed data of the event. The data varies depending on the event type. For details, see [Flexible Classroom Cloud Service Events](#events). |
#### Response example
```json
"status": 200,
"body":
{
"msg": "Success",
"code": 0,
"ts": 1610167740309,
"data":[
{
"roomUuid": "xxxxxx",
"cmd": 20,
"sequence": 1,
"version": 1,
"data":{}
}
]
}
```
### Get data for pop-up quizzes
#### Prototype
* Method: GET
* Request path: `/edu/apps/{appId}/v2/rooms/{roomUUid}/widgets/popupQuiz/sequences`
#### Request parameters
**URL parameters**
Pass the following parameters in the URL:
| Parameter | Type | Description |
| :--------- | :----- | :---------------------------------------------------------------------------------------------------------------------------------------------------------------------------------------------------------------------------------------------------------------------------------------------------------------------------- |
| `region` | String | (Required) The region for connection. For details, see [Network geofencing](/en/realtime-media/flexible-classroom/build/secure-your-classrooms/classroom-security#network-geofencing). Flexible Classroom supports the following regions:- `cn`: Mainland China.
- `ap`: Asia Pacific.
- `eu`: Europe.
- `na`: North America. |
| `appId` | String | (Required) Agora App ID. |
| `roomUuid` | String | (Required) The classroom ID. This is the globally unique identifier of a classroom. It is also used as the channel name when a user joins a channel. The string length must be less than 64 characters. |
**Query parameters**
| Parameter | Type | Description |
| :-------- | :------ | :-------------------------------------------------------------------------------------------------------------------------------------------------------------------------------------------------------------------------------------------------------------------------------- |
| `nextId` | String | (Optional) The starting ID of the next batch of data. When you call this method to get the data for the first time, leave this parameter empty or set it as null. Afterward, you can set this parameter as the `nextId` that you get in the response of the previous method call. |
| `count` | Integer | (Optional) The number of pieces of data in this batch. The default value is 100. |
#### Request example
```bash
curl -X GET 'https://api.sd-rtn.com/{region}/edu/apps/{yourAppId}/v2/rooms/test_class/widgets/popupQuiz/sequences' \
-H 'Authorization: agora token={educationToken}' \
```
#### Response parameters
The fields returned in `data` vary in different situations.
* After the teacher clicks the Start button to start a quiz, the summarized data of the Pop-up Quiz widget updates. `data` contains the following fields:
| Field name | Type | Description |
| :----------------------------------------- | :-------- | :------------------------------------------------------------------------------------------------------------------------------------------------------------------------------- |
| action | Integer | The action type |
| widgetUuid | String | The widget ID |
| changeProperties | Object | The changed properties |
| changeProperties.extra | Object | The extra information of the changed properties |
| changeProperties.extra.correctItems | Object\[] | The correct choice |
| changeProperties.extra.correctCount | Integer | The number of students who have made the correct choice |
| changeProperties.extra.answerState | Integer | The status of this quiz:- `1` : In progress
- `0`: Ended |
| changeProperties.extra.receiveQuestionTime | Long | The time when the students receive the question |
| changeProperties.extra.popupQuizId | String | The question ID |
| changeProperties.extra.averageAccuracy | Float | The rate at which the correct choice is made for this question |
| changeProperties.extra.totalCount | Integer | The total number of students who have submitted their answers to this question |
| changeProperties.extra.items | Object\[] | The options of this question |
| changeProperties.state | Integer | The state of the Pop-up Quiz widget:- `0`: Inactive
- `1`: Active |
| cause | String | The reason for the property change |
| cause.popQuizId | String | The Pop-up Quiz ID |
| cause.action | Integer | The action type:- `1`: The teacher starts taking the quiz
- `2`: The teacher finishes taking the quiz
- `3`: The student hands over the answer
- `4`: The information is updated |
| operator | Object | The operator of the property change |
| operator.userUuid | String | The ID of the operator |
| operator.userName | String | The name of the operator |
| operator.role | String | The role of the operator |
* After a student submits the answer, the student's data updates. `data` contains the following fields:
| Field name | Type | Description |
| :------------------------------ | :-------- | :------------------------------------------------------------------------------------------------------------------------------------------------------------------------------- |
| action | Integer | The action type |
| widgetUuid | String | The widget ID |
| changeProperties | Object | The changed properties |
| changeProperties.lastCommitTime | Long | The last submit time |
| changeProperties.popupQuizId | String | The question ID |
| changeProperties.selectedItems | Object\[] | The answer submitted by this student |
| changeProperties.isCorrect | Boolean | Whether the answer submitted by the student is correct |
| cause | String | The reason for the property change |
| cause.popQuizId | String | The Pop-up Quiz ID |
| cause.action | Integer | The action type:- `1`: The teacher starts taking the quiz
- `2`: The teacher finishes taking the quiz
- `3`: The student hands over the answer
- `4`: The information is updated |
| operator | Object | The operator of the property change |
| operator.userUuid | String | The ID of the operator |
| operator.userName | String | The name of the operator |
| operator.role | String | The role of the operator |
| fromUser | Object | The user who starts this quiz |
| fromUser.userUuid | String | The ID of the user who starts this quiz |
| fromUser.userName | String | The name of the user who starts this quiz |
| fromUser.role | String | The role of the user who starts this quiz |
* After a student submits the answer, the summarized data of the Pop-up Quiz widget updates. `data` contains the following fields:
| Field name | Type | Description |
| :------------------------------------- | :------ | :------------------------------------------------------------------------------------------------------------------------------------------------------------------------------- |
| action | Integer | The action type |
| widgetUuid | String | The widget ID |
| changeProperties | Object | The changed properties |
| changeProperties.extra | Object | The extra information of the changed properties |
| changeProperties.extra.selectedCount | Integer | The number of students who have submitted their answers |
| changeProperties.extra.correctCount | Integer | The number of students who have made the correct choice |
| changeProperties.extra.averageAccuracy | Float | The rate at which the correct choice is made for this question |
| changeProperties.extra.totalCount | Integer | The total number of students who have submitted their answers to this question |
| cause | String | The reason for the property change |
| cause.popQuizId | String | The Pop-up Quiz ID |
| cause.action | Integer | The action type:- `1`: The teacher starts taking the quiz
- `2`: The teacher finishes taking the quiz
- `3`: The student hands over the answer
- `4`: The information is updated |
| operator | Object | The operator of the property change |
| operator.userUuid | String | The ID of the operator |
| operator.userName | String | The name of the operator |
| operator.role | String | The role of the operator |
* After the teacher ends the quiz, the summarized data of the Pop-up Quiz widget updates. `data` contains the following fields:
| Field name | Type | Description |
| :------------------------------------- | :------ | :------------------------------------------------------------------------------------------------------------------------------------------------------------------------------- |
| action | Integer | The action type |
| widgetUuid | String | The widget ID |
| changeProperties | Object | The changed properties |
| changeProperties.extra | Object | The extra information of the changed properties |
| changeProperties.extra.selectedCount | Integer | The number of students who have submitted their answers |
| changeProperties.extra.correctCount | Integer | The number of students who have made the correct choice |
| changeProperties.extra.answerState | Integer | The status of this quiz:- `1` : In progress
- `0`: Ended |
| changeProperties.extra.averageAccuracy | Float | The rate at which the correct choice is made for this question |
| changeProperties.extra.totalCount | Integer | The total number of students who have submitted their answers to this question |
| cause | String | The reason for the property change |
| cause.popQuizId | String | The Pop-up Quiz ID |
| cause.action | Integer | The action type:- `1`: The teacher starts taking the quiz
- `2`: The teacher finishes taking the quiz
- `3`: The student hands over the answer
- `4`: The information is updated |
| operator | Object | The operator of the property change |
| operator.userUuid | String | The ID of the operator |
| operator.userName | String | The name of the operator |
| operator.role | String | The role of the operator |
#### Response example
* After the teacher clicks the Start button to start a quiz, the summarized data of the Pop-up Quiz widget updates:
```json
"action": NumberInt("1"),
"changeProperties": {
"extra.correctItems": [
"A",
"B",
"D"
],
"extra.totalCount": NumberInt("1"),
"extra.answerState": NumberInt("1"),
"state": NumberInt("1"),
"extra.popupQuizId": "ab5b183238a74d5a9c955dc87c6397e0",
"extra.averageAccuracy": 0,
"extra.correctCount": NumberInt("0"),
"extra.items": [
"A",
"C",
"B"
],
"extra.receiveQuestionTime": NumberLong("1652413962895")
},
"operator": {
"userName": "server",
"userUuid": "server",
"role": "server"
}
```
* After a student submits the answer, the student's data updates:
```json
"action": NumberInt("1"),
"changeProperties": {
"selectedItems": [
"A",
"B",
"D"
],
"isCorrect": true,
"popupQuizId": "ab5b183238a74d5a9c955dc87c6397e0",
"lastCommitTime": NumberLong("1652413989997")
},
"fromUser": {
"userName": "yerongzhe2",
"userUuid": "yerongzhe22",
"role": "audience"
}
```
* After the teacher ends the quiz, the summarized data of the Pop-up Quiz widget updates:
```json
"action": NumberInt("1"),
"changeProperties": {
"extra.totalCount": NumberInt("1"),
"extra.answerState": NumberInt("0"),
"extra.selectedCount": NumberInt("1"),
"extra.averageAccuracy": 1,
"extra.correctCount": NumberInt("1")
},
"operator": {
"userName": "server",
"userUuid": "server",
"role": "server"
}
```
### Get data for polls
#### Prototype
* Method: GET
* Request path: `/edu/apps/{appId}/v2/rooms/{roomUUid}/widgets/poll/sequences`
#### Request parameters
**URL parameters**
Pass the following parameters in the URL:
| Parameter | Type | Description |
| :--------- | :----- | :---------------------------------------------------------------------------------------------------------------------------------------------------------------------------------------------------------------------------------------------------------------------------------------------------------------------------- |
| `region` | String | (Required) The region for connection. For details, see [Network geofencing](/en/realtime-media/flexible-classroom/build/secure-your-classrooms/classroom-security#network-geofencing). Flexible Classroom supports the following regions:- `cn`: Mainland China.
- `ap`: Asia Pacific.
- `eu`: Europe.
- `na`: North America. |
| `appId` | String | (Required) Agora App ID. |
| `roomUuid` | String | (Required) The classroom ID. This is the globally unique identifier of a classroom. It is also used as the channel name when a user joins a channel. The string length must be less than 64 characters. |
**Query parameters**
| Parameter | Type | Description |
| :-------- | :------ | :-------------------------------------------------------------------------------------------------------------------------------------------------------------------------------------------------------------------------------------------------------------------------------- |
| `nextId` | String | (Optional) The starting ID of the next batch of data. When you call this method to get the data for the first time, leave this parameter empty or set it as null. Afterward, you can set this parameter as the `nextId` that you get in the response of the previous method call. |
| `count` | Integer | (Optional) The number of pieces of data in this batch. The default value is 100. |
#### Request example
```bash
curl -X GET 'https://api.sd-rtn.com/{region}/edu/apps/{yourAppId}/v2/rooms/test_class/widgets/popupQuiz/sequences' \
-H 'Authorization: agora token={educationToken}' \
```
#### Response parameters
The fields returned in `data` vary in different situations.
* After the teacher clicks the Start button to start a poll, the summarized data of the Polling widget updates. `data` contains the following fields:
| Field name | Type | Description |
| :-------------------------------------------- | :------------------- | :------------------------------------------------------------------------------------------------------------------------------------------------------------------------------- |
| action | Integer | The action type |
| widgetUuid | String | The widget ID |
| changeProperties | Object | The changed properties |
| changeProperties.extra | Object | The extra information of the changed properties |
| changeProperties.extra.mode | Integer | The polling mode:- `1`: Single-choice
- `2`: Multiple-choice |
| changeProperties.extra.pollingState | Integer | The status of this poll:- `1` : In progress
- `0`: Ended |
| changeProperties.extra.pollDetails | Map\ | The polling results. `key` is the option index, starting from `0`. |
| changeProperties.extra.pollDetails.num | Integer | The number of students who have selected this option |
| changeProperties.extra.pollDetails.percentage | Float | The percentage of students who have selected this option in students who have submitted their choices |
| changeProperties.extra.pollId | String | The poll ID |
| changeProperties.extra.pollItems | Object | The option content |
| changeProperties.state | Integer | The state of the Polling widget:- `0`: Inactive
- `1`: Active |
| cause | String | The reason for the property change |
| cause.popQuizId | String | The Pop-up Quiz ID |
| cause.action | Integer | The action type:- `1`: The teacher starts taking the quiz
- `2`: The teacher finishes taking the quiz
- `3`: The student hands over the answer
- `4`: The information is updated |
| operator | Object | The operator of the property change |
| operator.userUuid | String | The ID of the operator |
| operator.userName | String | The name of the operator |
| operator.role | String | The role of the operator |
* After a student submits the choice, the student's data updates. `data` contains the following fields:
| Field name | Type | Description |
| :--------------------------------- | :-------- | :------------------------------------------------------------------------------------------------------------------------------------------------------------------------------- |
| action | Integer | The action type |
| widgetUuid | String | The widget ID |
| changeProperties | Object | The changed properties |
| changeProperties.extra | Object | The extra information of the changed properties |
| changeProperties.extra.pollId | String | The poll ID |
| changeProperties.extra.selectIndex | Object\[] | The index of the option selected by this student |
| cause | String | The reason for the property change |
| cause.popQuizId | String | The Pop-up Quiz ID |
| cause.action | Integer | The action type:- `1`: The teacher starts taking the quiz
- `2`: The teacher finishes taking the quiz
- `3`: The student hands over the answer
- `4`: The information is updated |
| operator | Object | The operator of the property change |
| operator.userUuid | String | The ID of the operator |
| operator.userName | String | The name of the operator |
| operator.role | String | The role of the operator |
| fromUser | Object | The user who starts this poll |
| fromUser.userUuid | String | The ID of the user who starts this poll |
| fromUser.userName | String | The name of the user who starts this poll |
| fromUser.role | String | The role of the user who starts this poll |
* After a student submits the answer, the summarized data of the Polling widget updates. `data` contains the following fields:
| Field name | Type | Description |
| :-------------------------------------------- | :------------------- | :------------------------------------------------------------------------------------------------------------------------------------------------------------------------------- |
| action | Integer | The action type |
| widgetUuid | String | The widget ID |
| changeProperties | Object | The changed properties |
| changeProperties.extra | Object | The extra information of the changed properties |
| changeProperties.extra.pollDetails | Map\ | The polling results. `key` is the option index, starting from `0`. |
| changeProperties.extra.pollDetails.num | Integer | The number of students who have selected this option |
| changeProperties.extra.pollDetails.percentage | Float | The percentage of students who have selected this option in students who have submitted their choices |
| changeProperties.extra.pollId | String | The poll ID |
| cause | String | The reason for the property change |
| cause.popQuizId | String | The Pop-up Quiz ID |
| cause.action | Integer | The action type:- `1`: The teacher starts taking the quiz
- `2`: The teacher finishes taking the quiz
- `3`: The student hands over the answer
- `4`: The information is updated |
| operator | Object | The operator of the property change |
| operator.userUuid | String | The ID of the operator |
| operator.userName | String | The name of the operator |
| operator.role | String | The role of the operator |
| fromUser | Object | The user who starts this poll |
| fromUser.userUuid | String | The ID of the user who starts this poll |
| fromUser.userName | String | The name of the user who starts this poll |
| fromUser.role | String | The role of the user who starts this poll |
* After the teacher ends the poll, the summarized data of the Polling widget updates. `data` contains the following fields:
| Field name | Type | Description |
| :-------------------------------------------- | :------------------- | :---------------------------------------------------------------------------------------------------- |
| action | Integer | The action type |
| widgetUuid | String | The widget ID |
| changeProperties | Object | The changed properties |
| changeProperties.extra | Object | The extra information of the changed properties |
| changeProperties.extra.pollingState | Integer | The status of this poll:- `1` : In progress
- `0`: Ended |
| changeProperties.extra.pollDetails | Map\ | The polling results. `key` is the option index, starting from `0`. |
| changeProperties.extra.pollDetails.num | Integer | The number of students who have selected this option |
| changeProperties.extra.pollDetails.percentage | Float | The percentage of students who have selected this option in students who have submitted their choices |
| changeProperties.extra.pollId | String | The poll ID |
| cause | String | The reason for the property change |
| operator | Object | The operator of the property change |
| operator.userUuid | String | The ID of the operator |
| operator.userName | String | The name of the operator |
| operator.role | String | The role of the operator |
| fromUser | Object | The user who starts this poll |
| fromUser.userUuid | String | The ID of the user who starts this poll |
| fromUser.userName | String | The name of the user who starts this poll |
| fromUser.role | String | The role of the user who starts this poll |
#### Response example
* After the teacher clicks the Start button to start a poll, the summarized data of the Polling widget updates:
```json
"action": NumberInt("1"),
"changeProperties": {
"extra.pollId": "e556ce3df5cd4c23941b03bf54d29ba3",
"extra.pollState": NumberInt("1"),
"extra.pollItems": [
"aaa",
"bbb",
"ccc",
"ddd",
"eee"
],
"extra.mode": NumberInt("2"),
"state": NumberInt("1"),
"extra.pollDetails": {
"0": {
"num": NumberInt("0"),
"percentage": 0
},
"1": {
"num": NumberInt("0"),
"percentage": 0
},
"2": {
"num": NumberInt("0"),
"percentage": 0
},
"3": {
"num": NumberInt("0"),
"percentage": 0
},
"4": {
"num": NumberInt("0"),
"percentage": 0
}
}
},
"operator": {
"userName": "server",
"userUuid": "server",
"role": "server"
}
```
* After a student submits the choice, the student's data updates:
```json
"action": NumberInt("1"),
"changeProperties": {
"pollId": "e556ce3df5cd4c23941b03bf54d29ba3",
"selectIndex": [
NumberInt("1"),
NumberInt("2"),
NumberInt("4")
]
},
"fromUser": {
"userName": "yerongzhe2",
"userUuid": "yerongzhe22",
"role": "audience"
},
"operator": {
"userName": "server",
"userUuid": "server",
"role": "server"
}
```
* After a student submits the choice, the summarized data of the Polling widget updates:
```json
"action": NumberInt("1"),
"changeProperties": {
"extra.pollId": "2f38e6de32064713adf135de41c963df",
"extra.pollDetails": {
"0": {
"num": NumberInt("1"),
"percentage": 0.33333334
},
"1": {
"num": NumberInt("3"),
"percentage": 1
},
"2": {
"num": NumberInt("3"),
"percentage": 1
},
"3": {
"num": NumberInt("0"),
"percentage": 0
},
"4": {
"num": NumberInt("2"),
"percentage": 0.6666667
}
}
},
"operator": {
"userName": "server",
"userUuid": "server",
"role": "server"
}
```
* After the teacher ends the poll, the summarized data of the Polling widget updates:
```json
"action": NumberInt("1"),
"changeProperties": {
"extra.pollId": "2f38e6de32064713adf135de41c963df",
"extra.pollDetails": {
"0": {
"num": NumberInt("1"),
"percentage": 0.33333334
},
"1": {
"num": NumberInt("3"),
"percentage": 1
},
"2": {
"num": NumberInt("3"),
"percentage": 1
},
"3": {
"num": NumberInt("0"),
"percentage": 0
},
"4": {
"num": NumberInt("2"),
"percentage": 0.6666667
}
}
},
"operator": {
"userName": "server",
"userUuid": "server",
"role": "server"
}
```
## Status code
| Response status code | Business status code | Description |
| :------------------- | :------------------- | :-------------------------------------------------------------------------------------------------------------- |
| 200 | 0 | The request succeeds. |
| 400 | 400 | The request parameter is incorrect. |
| 401 | N/A | Possible reasons:- The App ID is invalid.
- Unauthorized. Incorrect `x-agora-uid` or `x-agora-token`. |
| 403 | 30403200 | The classroom is muted globally. Users cannot send chat messages. |
| 404 | N/A | The server cannot find the requested resource. |
| 404 | 20404100 | The classroom does not exist. |
| 404 | 20404200 | The user does not exist. |
| 409 | 30409410 | The recording has not been started. |
| 409 | 30409411 | The recording has not been ended. |
| 409 | 30409100 | The class has been started. |
| 409 | 30409101 | The class has been ended. |
| 500 | 500 | The server has an internal error and cannot process the request. |
| 503 | N/A | Internal server error. The gateway or proxy server does not receive a timely response from the upstream server. |
## Events
This section lists all types of events that you can get through the [Get classroom events](#get-classroom-events) method.
### The classroom state changes
When the `cmd` property of an event is `1`, the event indicates the classroom state changes, and the `data` property contains the following fields:
| Parameter | Type | Description |
| ----------- | ------- | ---------------------------------------------------------------------------------------------------------------------------------------------------------------------------------------------- |
| `startTime` | Number | The Unix timestamp (in milliseconds) when the class starts, in UTC. This property is available after the state of the classroom changes to `1"`. |
| `state` | Integer | The current state of the classroom:- `0`: Not started.
- `1`: In progress.
- `2`: Ended.
- `3`: After the run-late time of a class, the room is closed and users can no longer enter the room. |
| `endTime` | Number | The Unix timestamp (in milliseconds) when the class ends, in UTC. This property is available after the state of the classroom changes to `2`. |
| `closeTime` | Number | The Unix timestamp (in milliseconds) when the classroom closes, in UTC. This property is available after the state of the classroom changes to `3`. |
**Example**
```json
{
"startTime": 1611561776588,
"state": 1
}
```
### Receives a room chat message
When the `cmd` property of an event is `3`, the event indicates the server receives a room chat message, and the` data` contains the following fields:
| Parameter | Type | Description |
| ---------- | ------- | ---------------------------------------------------------------------------------------------------------------------------------------------------------------------------------------------------------------------------------------------------------------------------------- |
| `fromUser` | Object | The user who sends this message. This object contains the following fields:- `userUuid`: String. The user ID.
- `userName`: String. The user name.
- `role`: Integer. The user role. This parameter can be set as one of the following values:
* `1`: Teacher.
* `2`: Student. |
| `message` | String | The message. |
| `type` | Integer | The type of the message. Temporarily, you can only set this parameter as `1`(text messages). |
**Example**
```json
{
"fromUser": {
"role": "host",
"userName": "jason",
"userUuid": "jason1"
},
"message": "aa",
"type": 1
}
```
### Users enter or leave the classroom
When the `cmd` property of an event is `20`, the event indicates that users have entered or left the classroom. `data` includes the following fields:
| Parameter | Type | Description |
| -------------- | ------------ | ------------------------------------------------------------------------------------------------------------------------------------------------------------------------------------------------------------------------------------------------------------------------------------------------------------------------------------------------------------------------------------------------------------------------------------------------------------------------------------------------------------------------------------------------------------------------------------------------------------------------------------------------------------------------------------------------------------------------------------------------------------------------------------------------------------------------------------------------------------------------------------------------------------------------ |
| `total` | Integer | The total number of users in the classroom after this event. |
| `onlineUsers` | Object Array | The new users who entered the classroom at the time of this event. This object contains the following fields:- `userName`: String. The user name.
- `userUuid`: String. The user ID.
- `role`: Integer. The user role. This parameter can be set as one of the following values:
* `1`: Teacher.
* `2`: Student.
- `userProperties`: Object. The user property.
- `streamUuid`: String. The ID of the stream, which is also the uid used when joining an RTC SDK channel.
- `type`: Integer. The reasons why the user enters the room:
* `1`: The user enters the classroom in a normal way.
* `2`: The user re-enters the classroom.
- `updateTime`: Number. The time when the user enters the classroom, Unix timestamp (milliseconds), UTC time. |
| `offlineUsers` | Object Array | The new users who have left the classroom at the time of this event. This object contains the following fields:- `userName`: String. The user name.
- `userUuid`: String. The user ID.
- `role`: Integer. The user role. This parameter can be set as one of the following values:
* `1`: Teacher.
* `2`: Student.
- `userProperties`: Object. The user property.
- `streamUuid`: String. The ID of the stream, which is also the uid used when joining an RTC SDK channel.
- `type`: Integer. The reasons why the user leaves the classroom:
* `1`: The user leaves the classroom on the client, such as leaving the class normally, the application is forcibly closed, or the user is disconnected due to poor network conditions.
* `2`: The user is kicked out of the classroom.
- `updateTime`: Number. The time when the user enters or leaves the classroom, Unix timestamp (in milliseconds), UTC time. |
**Example**
```json
{
"total": 3,
"onlineUsers": [
{
"userName": "",
"userUuid": "",
"role": "0",
"userProperties": {},
"streamUuid": "",
"type": 1,
"updateTime": 1611561776588
}
],
"offlineUsers": [
{
"userName": "",
"userUuid": "",
"role": "0",
"userProperties": {},
"streamUuid": "",
"type": 1,
"updateTime": 1611561776588
}
]
}
```
### The recording state changes
When the `cmd` property of an event is `1001`, the event indicates the recording state changes, and the `data` property contains the following fields:
| Parameter | Type | Description |
| -------------- | ------- | ---------------------------------------------------------------------------------------------------------------------------------------------------------------------------------------------------------------------------------- |
| `recordId` | String | This is the unique identifier of a recording session. A recording session starts when you call a method to start recording and ends when you call this method to stop recording. This field is available only when `state` is `1`. |
| `sid` | String | The `sid` of the Agora Cloud Recording service. This field is available only when `state` is `1`. |
| `resourceId` | String | The `resourceId` of the Agora Cloud Recording service. This field is available only when `state` is `1`. |
| `state` | Integer | The current recording state:- `2`: Recording has ended.
- `1`: In recording. |
| `startTime` | Number | The Unix timestamp (in milliseconds) when the recording starts, in UTC. This property is available after the recording state changes to "Started". |
| `streamingUrl` | Object | The URL address for the webpage after being pushed to the CDN. Students can use this URL to watch the teaching online. |
**Example**
```json
{
"recordId": "xxx",
"sid": "xxx",
"resourceId": "xxx",
"state": 1,
"startTime": 1611564500488
}
```
### The number of rewards changes
When the `cmd` property of an event is `1101`, the event indicates the number of rewards changes, and the `data` property contains the following fields:
| Parameter | Type | Description |
| :-------------- | :----------- | :--------------------------------------------------------------------------------------------------------------------------------------------------------------------------------------------------------------------------------------------- |
| `rewardDetails` | Object Array | Each object represents the rewards of a user and contains the following fields:- `userUuid`: String. The user ID.
- `changedReward`: Integer. The number of changed rewards.
- `total`: Integer. The total number of rewards after the change. |
| `updateTime` | Number | The Unix timestamp (in milliseconds) when the rewards change, in UTC. |
**Example**
```json
{
"rewardDetails": [
{
"userUuid": "",
"changedReward": 1,
"totalReward": 10
}
],
"updateTime": 1611564500488
}
```
### The resources in the classroom change
When the `cmd` property of an event is `1003`, the event indicates the resources in the classroom change, and the `data` property contains the following fields:
| Parameter | Type | Description |
| :---------- | :----------- | :--------------------------------------------------------------------------------------------------------------------------------------------------------------------------------------------------------------------------------------------------------------------------------------------------------------------------------------------------------------------------------------------------------------------------------------------------------------- |
| Parameter | Type | Description |
| `resources` | Object Array | Each object represents a public resource and contains the following fields:- `resourceUuid`: String. The resource ID.
- `resourceName`: String. The resource name.
- `size`: Number. The resourc size (bytes).
- `url`: String. The URL address of the resource.
- `taskUuid`: String. The ID of the file conversion task.
- `taskToken`: String. The token used for the file conversion task.
- `taskProgress`: Object. The progress of a file conversion task. |
| `operator` | Object | It contains the following fields:- `userUuid`: String. The user ID.
- `userName`: String. The user name.
- `role`: Integer. Th user role. |
| `action` | Integer | The resource change type:- `1`: The resource is added or updated.
- `2`: The resource is deleted. |
**Example**
```json
{
"resources": [
{
"resourceUuid": "",
"resourceName": "1",
"size": 1024,
"url": "http://xxx.com/ooo",
"taskUuid": "",
"taskToken": "",
"taskProgress": {}
}
],
"operator": {
"role": "1",
"userName": "jason",
"userUuid": "jason1"
},
"action": 1
}
```
### The users "on the stage" change
When the `cmd` property of an event is `1501`, the event indicates the users "on the stage" change, and the` data` property contains the following fields:
| Parameter | Type | Description |
| :-------------------- | :----------- | :--------------------------------------------------------------------------------------------------------------------------------- |
| `acceptedUsers` | Object Array | The list of users who are now "on the stage". The object contains the following fields:- `userUuid`: String. The user ID. |
| `addAcceptedUsers` | Object Array | The list of users who have just "gone onto the stage". The object contains the following fields:- `userUuid`: String. The user ID. |
| `removeAcceptedUsers` | Object Array | The list of users who have just "left the stage". The object contains the following fields:- `userUuid`: String. The user ID. |
**Example**
```json
{
"acceptedUsers": [
{
"userUuid": ""
}
],
"addAcceptedUsers": [
{
"userUuid": ""
}
],
"removeAcceptedUsers": [
{
"userUuid": ""
}
]
}
```
### The users who wave their hands change
When the `cmd` property of an event is `1502`, the event indicates the users who wave their hands change, and the `data` property contains the following fields:
| Parameter | Type | Description |
| :-------------------- | :----------- | :----------------------------------------------------------------------------------------------------------------------------------------------------------- |
| `progressUsers` | Object Array | The list of users who are waving their hands. The object contains the following fields:- `userUuid`: String. The user ID.
- `payload`: Object. |
| `addProgressUsers` | Object Array | The list of users who have just started waving their hands. The object contains the following fields:- `userUuid`: String. The user ID.
- `payload`: Object. |
| `removeProgressUsers` | Object Array | The list of users who have just stopped waving their hands. The object contains the following fields:- `userUuid`: String. The user ID.
- `payload`: Object. |
**Example**
```json
{
"progressUsers": [
{
"userUuid": "",
"payload": {}
}
],
"addProgressUsers": [
{
"userUuid": "",
"payload": {}
}
],
"removeProgressUsers": [
{
"userUuid": "",
"payload": {}
}
]
}
```
## Ensure service reliability
This section presents the overall strategy you use to ensure high availability of REST services.
### Switch the domain name
To ensure high availability of REST services, Agora enables you to switch domain names when you experience service outage due to regional network failures. Take the following steps to set up and switch your domain name:
1. Set the primary domain name based on the location of your service server:
* If the DNS address of the service server is located in a country or region other than mainland China, set the primary domain name to `api.agora.io`.
* If the DNS address of the service server is in mainland China, set the primary domain name to `api.sd-rtn.com`.
2. If your attempt to initiate a RESTful API request using the primary domain fails, set up your retry strategy as follows:
1. **Primary domain retry**: Retry using the same primary domain name.
2. **Alternate domain retry**:
* If the current primary domain name is `api.sd-rtn.com`, use `api.agora.io` as the alternate domain name.
* If the current primary domain name is `api.agora.io`, use `api.sd-rtn.com` as the alternate domain name.
3. **Adjacent domain retry**: If alternate domain retry fails, retry using the domain name adjacent to the current region.
For example, suppose your business server is located in Europe. You set the primary domain name to `api.agora.io`, and the business server resolves the primary domain name to Germany. Germany is located in central Europe (`api-eu-central-1.agora.io`). The [domain name table](#domain-name-table) shows that the adjacent area is West Europe. Use the `api-eu-west-1.agora.io` or `api-eu-west-1.sd-rtn.com` domain name to retry.
#### Precautions
Take the following precautions when setting up your retry strategy:
* To avoid exceeding the QPS limit with retry requests, best practice is to use a back-off strategy. For example, wait 1 second before you retry for the first time, wait 3 seconds before retrying the second time, and wait 6 seconds before retry a third time.
* If the request fails because of a network problem rather than a DNS domain name resolution problem, skip alternate domain retry and proceed to adjacent domain retry.
* Before switching to the region domain name, ensure that the REST services you wish to use, for example, cloud recording or channel management, are deployed in that region.
### Domain name table
The following table shows the primary and region domain names for various regions.
| Primary domain name | Region domain name | Region |
| :------------------ | :------------------------------ | :--------------------- |
| `api.sd-rtn.com` | `api-us-west-1.sd-rtn.com` | Western United States |
| | `api-us-east-1.sd-rtn.com` | Eastern United States |
| | `api-ap-southeast-1.sd-rtn.com` | Southeast Asia Pacific |
| | `api-ap-northeast-1.sd-rtn.com` | Northeast Asia Pacific |
| | `api-eu-west-1.sd-rtn.com` | Western Europe |
| | `api-eu-central-1.sd-rtn.com` | Central Europe |
| | `api-cn-east-1.sd-rtn.com` | East China |
| | `api-cn-north-1.sd-rtn.com` | North China |
| `api.agora.io` | `api-us-west-1.agora.io` | Western United States |
| | `api-us-east-1.agora.io` | Eastern United States |
| | `api-ap-southeast-1.agora.io` | Southeast Asia Pacific |
| | `api-ap-northeast-1.agora.io` | Northeast Asia Pacific |
| | `api-eu-west-1.agora.io` | Western Europe |
| | `api-eu-central-1.agora.io` | Central Europe |
| | `api-cn-east-1.agora.io` | East China |
| | `api-cn-north-1.agora.io` | North China |
# Classroom SDK (/en/api-reference/api-ref/flexible-classroom/classroom-sdk)
This page provides the API reference for the Agora Classroom SDK across Android, iOS, Web, and Electron.
## Android
This page provides the Kotlin API reference of the Agora Classroom SDK for Android.
### AgoraClassSdk
`AgoraClassSdk` is the basic interface of the Agora Classroom SDK and provides the main methods that can be invoked by your app.
#### version
```kotlin
public static String version();
```
Gets the SDK version.
**Returns**
The SDK version.
#### setConfig
```kotlin
public static void setConfig(AgoraEduSDKConfig agoraEduSDKConfig);
```
Globally configures the SDK.
**Sample code**
```kotlin
/** Global Configuration */
// Agora App ID
String appId = "XXX";
// Whether to enable eye care mode
boolean eyeCare = false;
AgoraClassSdk.setConfig(new AgoraClassSdkConfig(appId, eyeCare));
```
**Parameter**
| Parameter | Description |
| :------------------ | :----------------------------------------------------------------------------- |
| `agoraEduSDKConfig` | The SDK global configuration. See [AgoraClassSdkConfig](#agoraclasssdkconfig). |
#### launch
```kotlin
public static AgoraEduClassRoom launch(@NotNull Context context,
@NotNull AgoraEduLaunchConfig config,
@NotNull AgoraEduLaunchCallback callback);
```
Launches a flexible classroom.
**Sample code**
```kotlin
/** Classroom launching configuration */
// The user name
String userName = "XXX";
// The user ID. Must be the same as the user ID that you use for generating a Signaling token.
String userUuid = "XXX";
// The classroom name
String roomName = "XXX";
// The classroom ID
String roomUuid = "XXX";
// The user role
int roleType = AgoraEduRoleType.AgoraEduRoleTypeStudent.getValue();
// The classroom type
int roomType = AgoraEduRoomType.AgoraEduRoomType1V1.getValue()/AgoraEduRoomType.AgoraEduRoomTypeSmall.getValue()/AgoraEduRoomType.AgoraEduRoomTypeBig.getValue();
// The Signaling token
String rtmToken = "";
// The start time (ms) of the class, determined by the first user joining the classroom.
long startTime = System.currentTimeMillis() + 100;
// The duration (ms) of the class, determined by the first user joining the classroom.
long duration = 310L;
// The region where the classroom is located. All clients must set the same region, otherwise, they may fail to communicate with each other.
String region = AgoraEduRegion.cn;
AgoraEduLaunchConfig agoraEduLaunchConfig = new AgoraEduLaunchConfignew AgoraEduLaunchConfig(
userName, userUuid, roomName, roomUuid, roleType,
roomType, rtmToken, startTime, duration, region, null, null,
AgoraBoardFitMode.Retain, streamState, AgoraEduLatencyLevel.AgoraEduLatencyLevelUltraLow,
null, null);
AgoraClassSdk.launch(MainActivity2.this, agoraEduLaunchConfig, (state) -> {
Log.e(TAG, "launch-classroom-state:" + state.name());
});
```
**Parameter**
| Parameter | Description |
| :--------- | :----------------------------------------------------------------------------------------------------------------------------------- |
| `context` | The context of the app. |
| `config` | The classroom launching configuration. See [AgoraEduLaunchConfig](#agoraedulaunchconfig). |
| `callback` | The SDK uses the [AgoraEduLaunchCallback](#agoraedulaunchcallback) class to report events related to classroom launching to the app. |
**Returns**
The `AgoraEduClassRoom` class.
#### configCourseWare
```kotlin
public static void configCourseWare(@NotNull List coursewares);
```
Configures courseware downloading.
**Sample code**
```kotlin
/** Construct and configure courseware */
// Configure the courseware
String taskUuid = "xxxxx";
// The courseware download address
String resourceUrl = String.formate("https://convertcdn.netless.link/dynamicConvert/{taskUuid}.zip", taskUuid);
// The courseware name
String resourceName = "xxxxxxx"
// The list of courseware pages
List sceneInfos = new ArrayList();
// The link of a converted page
String src = "http://xxxxxxx";
Ppt ppt = new Ppt(src, 360, 640);
SceneInfo sceneInfo = new SceneInfo(1, ppt, "ppt-file-name");
List sceneInfos = new ArrayList();
sceneInfos.add(sceneInfo);
// The path for storing the courseware
String scenePath = resourceName + "/" + sceneInfos.get(0).name;
AgoraEduCourseware courseware = new AgoraEduCourseware(resourceName, scenePath, sceneInfos, resourceUrl);
List wares = new ArrayList();
wares.add(courseware);
// Configure the courseware pre-downloading
configCoursewares(wares);
```
**Parameter**
| Parameter | Description |
| :-------- | :---------------------------------------------------------------------------------------- |
| `wares` | The courseware pre-download configuration. See [AgoraEduCourseware](#agoraeducourseware). |
#### downloadCourseWare
```kotlin
public static void downloadCourseWare(@NotNull Context context, @Nullable AgoraEduCoursewarePreloadListener listener)
throws Exception;
```
Pre-downloads the courseware.
**Sample code**
```kotlin
// Download the configured courseware
downloadCoursewares(activityContext, new AgoraEduCoursewarePreloadListener() {
@Override
public void onStartDownload(@NotNull AgoraEduCourseware ware) {
}
@Override
public void onProgress(@NotNull AgoraEduCourseware ware, double progress) {
}
@Override
public void onComplete(@NotNull AgoraEduCourseware ware) {
}
@Override
public void onFailed(@NotNull AgoraEduCourseware ware) {
}
});
```
**Parameter**
| Parameter | Description |
| :--------- | :------------------------------------------------------------------------------------------------------------------------------------------------------------ |
| `context` | The context of the app. |
| `listener` | The SDK reports events related to courseware preloading to the app through the [AgoraEduCoursewarePreloadListener](#agoraeducoursewarepreloadlistener) class. |
#### registerExtensionApp
```kotlin
public static void registerExtensionApp(List apps);
```
Register an extension application by using the ExtApp tool. ExtApp is a tool for embedding extension applications in Flexible Classroom. For details, see [Customize Flexible Classroom with ExtApp](/en/realtime-media/flexible-classroom/build/customize-the-ui-and-plugins/customize-classroom).
### AgoraEduLaunchCallback
The `AgoraEduLaunchCallback` class reports events related to classroom launching to the app.
#### onCallback
```kotlin
void onCallback(AgoraEduEvent state);
```
Reports classroom events.
| Parameter | Description |
| :-------- | :--------------------------------------------------------- |
| `state` | The classroom events. See [AgoraEduEvent](#agoraeduevent). |
### AgoraEduCoursewarePreloadListener
The `AgoraEduCoursewarePreloadListener` class reports events related to courseware preloading to the app.
#### onStartDownload
```kotlin
void onStartDownload(@NotNull AgoraEduCourseware ware);
```
Indicates that the SDK starts downloading the courseware.
| Parameter | Description |
| :-------- | :---------------------------------------------------------------------------------------- |
| `ware` | The courseware pre-download configuration. See [AgoraEduCourseware](#agoraeducourseware). |
#### onProgress
```kotlin
void onProgress(@NotNull AgoraEduCourseware ware, double progress);
```
Indicates the progress of courseware pre-downloading.
| Parameter | Description |
| :--------- | :---------------------------------------------------------------------------------------- |
| `ware` | The courseware pre-download configuration. See [AgoraEduCourseware](#agoraeducourseware). |
| `progress` | Indicates the progress of courseware pre-downloading. |
#### onComplete
```kotlin
void onComplete(@NotNull AgoraEduCourseware ware);
```
Indicates that the courseware pre-downloading completes.
| Parameter | Description |
| :-------- | :---------------------------------------------------------------------------------------- |
| `ware` | The courseware pre-download configuration. See [AgoraEduCourseware](#agoraeducourseware). |
#### onFailed
```kotlin
void onFailed(@NotNull AgoraEduCourseware ware);
```
The courseware pre-downloading fails.
| Parameter | Description |
| :-------- | :---------------------------------------------------------------------------------------- |
| `ware` | The courseware pre-download configuration. See [AgoraEduCourseware](#agoraeducourseware). |
### Type definition
#### AgoraClassSdkConfig
```kotlin
public class AgoraClassSdkConfig {
@NotNull
private String appId;
private int eyeCare;
}
```
The SDK global configuration. Used in [setConfig](#setconfig).
| Attributes | Description |
| :--------- | :--------------------------------------------------------------------------------------------------------- |
| `appId` | The Agora App ID. See [Get the Agora App ID](/en/introduction/account#get-the-app-id-and-app-certificate). |
| `eyeCare` | Whether to enable eye care mode:- `0`: (Default) Disable eye care mode.
- `1`: Enable eye care mode. |
#### AgoraEduLaunchConfig
```kotlin
class AgoraEduLaunchConfig(val userName: String,
val userUuid: String,
val roomName: String,
val roomUuid: String,
val roleType: Int = AgoraEduRoleType.AgoraEduRoleTypeStudent.value,
val roomType: Int,
val rtmToken: String,
val startTime: Long?,
val duration: Long?,
val region: String,
var videoEncoderConfig: EduVideoEncoderConfig? = null,
val mediaOptions: AgoraEduMediaOptions?,
val boardFitMode: AgoraBoardFitMode,
val streamState: StreamState?,
val latencyLevel: AgoraEduLatencyLevel? = AgoraEduLatencyLevel.AgoraEduLatencyLevelUltraLow,
val userProperties: MutableMap? = null,
val widgetConfigs: MutableList? = null) : Parcelable
```
The classroom launching configuration. Used in [launch](#launch).
| Attributes | Description |
| :------------------- | :-------------------------------------------------------------------------------------------------------------------------------------------------------------------------------------------------------------------------------------------------------------------------------------------------------------------------------------------------------------------------------------------------------------------------------------------------------------------- |
| `userName` | The user name for display in the classroom. The string length must be less than 64 bytes. |
| `userUuid` | The user ID. This is the globally unique identifier of a user. **Must be the same as the User ID that you use for generating a Signaling token**. The string length must be less than 64 bytes. Supported character scopes are:- All lowercase English letters: a to z.All numeric characters.- 0-9
- The space character.
- "!", "#", "$", "%", "&", "(", ")", "+", "-", ":", ";", "\<", "=", ".", ">", "?", "@", "\[", "]", "^", "\_", " {", "}", "\|", "\~", "," |
| `roomName` | The room name for display in the classroom. The string length must be less than 64 bytes. |
| `roomUuid` | The room ID. This is the globally unique identifier of a classroom. The string length must be less than 64 bytes. Supported character scopes are:- All lowercase English letters: a to z.All numeric characters.- 0-9
- The space character.
- "!", "#", "$", "%", "&", "(", ")", "+", "-", ":", ";", "\<", "=", ".", ">", "?", "@", "\[", "]", "^", "\_", " {", "}", "\|", "\~", "," |
| `roleType` | The role of the user in the classroom. See [AgoraEduRoleType](#agoraeduroletype). |
| `roomType` | The classroom type. See [AgoraEduRoomType](#agoraeduroomtype). |
| `rtmToken` | The Signaling token used for authentication. For details, see [Secure authentication with tokens](/en/realtime-media/flexible-classroom/build/set-up-your-account-and-authentication/authentication-workflow). |
| `startTime` | The start time (ms) of the class, determined by the first user joining the classroom. |
| `duration` | The duration (ms) of the class, determined by the first user joining the classroom. |
| `region` | The region where the classrooms is located. All clients must use the same region, otherwise, they may fail to communicate with each other. See [AgoraEduRegionStr](#agoraeduregionstr). |
| `videoEncoderConfig` | Video encoding configurations, including the width and height, frame rate, and bitrate. See [EduVideoEncoderConfig](#eduvideoencoderconfig) |
| `mediaOptions` | The media options, including media encryption configurations. See [AgoraEduMediaOptions](#agoraedumediaoptions). |
| `boardFitMode` | The PPT display mode. See [AgoraBoardFitMode](#agoraboardfitmode). |
| `streamState` | Controls whether students automatically send audio or video streams after they go onto the stage. See [StreamState](#streamstate). |
| `latencyLevel` | The latency level of an audience member. See [AgoraEduLatencyLevel](#agoraedulatencylevel). |
| `userProperties` | User properties customized by the developer. For details, see [How can I set user properties? ](/en/api-reference/faq/integration/agora_class_custom_properties) |
#### AgoraEduEvent
```kotlin
public enum AgoraEduEvent {
AgoraEduEventFailed(0),
AgoraEduEventReady(1),
AgoraEduEventDestroyed(2),
AgoraEduEventForbidden(3);
}
```
Classroom events. Reported in [onCallback](#oncallback).
| Attributes | Description |
| :----------------------- | :--------------------------------------------------------------------------------------------------------- |
| `AgoraEduEventFailed` | `0`: The user fails to enter the classroom. |
| `AgoraEduEventReady` | `1`: The classroom is ready. |
| `AgoraEduEventDestroyed` | `2`: The classroom has been destroyed. |
| `AgoraEduEventForbidden` | `3`: The user is forbidden by the Flexible Classroom cloud service and not allowed to enter the classroom. |
#### AgoraEduRoleType
```kotlin
public enum AgoraEduRoleType {
AgoraEduRoleTypeStudent(2);
}
```
The role of the user in the classroom. Set in [AgoraEduLaunchConfig](#agoraedulaunchconfig).
| Attributes | Description |
| :------------------------ | :-------------- |
| `AgoraEduRoleTypeStudent` | `2`: A student. |
#### AgoraEduRoomType
```kotlin
public enum AgoraEduRoomType {
AgoraEduRoomType1V1(0),
AgoraEduRoomTypeSmall(4),
AgoraEduRoomTypeBig(2);
}
```
The classroom type. Set in [AgoraEduLaunchConfig](#agoraedulaunchconfig).
| Attributes | Description |
| :---------------------- | :----------------------------------------------------------------------------------------------------------------------------------------------------------------------------------------------------------------------------------------------------------------------------------------------------------------------------------------------------------------------------------------------------- |
| `AgoraEduRoomType1V1` | `0`: One-to-one Classroom. An online teacher gives an exclusive lesson to only one student. |
| `AgoraEduRoomTypeBig` | `2`: Lecture Hall. A teacher gives an online lesson to multiple students. Students do not send their audio and video by default. The maximum number of users in a classroom is 5,000. During the class, students can raise their hands to attract the teacher's attention and request to speak up. Once the teacher approves, the student can send their audio and video to interact with the teacher. |
| `AgoraEduRoomTypeSmall` | `4`: Small Classroom. A teacher gives an online lesson to multiple students. Students do not send their audio and video by default. The maximum number of users in a classroom is 200. During the class, the teacher can invite students to speak up and have real-time audio and video interactions with the teacher. |
#### AgoraBoardFitMode
```kotlin
public enum AgoraBoardFitMode {
Auto,
Retain;
}
```
The PPT display mode on the whiteboard. Set in [AgoraEduLaunchConfig](#agoraedulaunchconfig).
| Parameter | Description |
| :-------- | :--------------------------------------------------------------------------------------------------------------------------------- |
| `Auto` | (Default) The PPT display mode is fit, which means uniformly scaling the PPT until one of its dimensions fits the boundary. |
| `Retain` | In this mode, if the student manually adjusts the PPT size, the client maintains this size no matter what class the student joins. |
#### StreamState
```kotlin
data class StreamState (
var videoState:Int,
var audioState:Int
)
```
Controls whether students automatically send audio or video streams after they go onto the stage. Set in [AgoraEduLaunchConfig](#agoraedulaunchconfig).
| Parameter | Description |
| :----------- | :------------------------------------------------------------------------------------------------------------- |
| `videoState` | Whether to send the video stream:- `0`: (Default) Do not send the video stream.
- `1`: Send the video stream. |
| `audioState` | Whether to send the audio stream:- `0`: (Default) Do not send the audio stream.
- `1`: Send the audio stream. |
#### AgoraEduLatencyLevel
```kotlin
enum class AgoraEduLatencyLevel(val value: Int) {
AgoraEduLatencyLevelLow(1),
AgoraEduLatencyLevelUltraLow(2);
}
```
The latency level of an audience member. Set in [AgoraEduLaunchConfig](#agoraedulaunchconfig).
| Parameter | Description |
| :----------------------------- | :-------------------------------------------------------------------------------------------- |
| `AgoraEduLatencyLevelLow` | Low latency. The latency from the sender to the receiver is 1500 ms to 2000 ms. |
| `AgoraEduLatencyLevelUltraLow` | (Default) Ultra-low latency. The latency from the sender to the receiver is 400 ms to 800 ms. |
#### AgoraEduMediaOptions
```kotlin
class AgoraEduMediaOptions(val encryptionConfigs: AgoraEduMediaEncryptionConfigs?)
```
Media options. Set in [AgoraEduLaunchConfig](#agoraedulaunchconfig).
| Parameter | Description |
| :----------------- | :-------------------------------------------------------------------------------------------------------------------------- |
| `encryptionConfig` | The media stream encryption configuration. See [AgoraEduMediaEncryptionConfig](#agoraedumediaencryptionconfig) for details. |
#### AgoraEduMediaEncryptionConfig
```kotlin
data class AgoraEduMediaEncryptionConfigs(
val encryptionKey: String?,
val encryptionMode: Int
)
```
The media stream encryption configuration. Used in [AgoraEduMediaOptions](#agoraedumediaoptions).
| Parameter | Description |
| :-------- | :---------------------------------------------- |
| `mode` | The encryption mode. See `AgoraEduEncryptMode`. |
| `key` | The encryption key. |
#### AgoraEduEncryptMode
```kotlin
enum class AgoraEduEncryptMode(val value: Int) {
NONE(0),
AES_128_XTS(1),
AES_128_ECB(2),
AES_256_XTS(3),
SM4_128_ECB(4),
AES_128_GCM(5),
AES_256_GCM(6);
}
```
The media stream encryption configuration. See [AgoraEduMediaEncryptionConfig](#agoraedumediaencryptionconfig) for details.
| Parameter | Description |
| :------------ | :-------------------------------- |
| `NONE` | No encryption. |
| `AES_128_XTS` | 128-bit AES encryption, XTS mode. |
| `AES_128_ECB` | 128-bit AES encryption, ECB mode. |
| `AES_256_XTS` | 256-bit AES encryption, XTS mode. |
| `SM4_128_ECB` | 128-bit ECB encryption, SM4 mode. |
| `AES_128_GCM` | 128-bit AES encryption, GCM mode. |
| `AES_256_GCM` | 256-bit AES encryption, GCM mode. |
#### AgoraEduCourseware
```kotlin
data class AgoraEduCourseware(
val resourceName: String?,
val scenePath: String?,
val scenes: List?,
val resourceUrl: String?
) {
}
```
The courseware pre-download configuration. Used in [configCoursewares](#configcoursewares).
| Attributes | Description |
| :------------- | :------------------------------------------------------------------------------------------------------------------------------------------------------------------------------------------------------------------------------------------------------------------------------------------------------------------------------------------------------------- |
| `resourceName` | The file name. |
| `scenePath` | The local path for storing the file. Agora recommends setting this parameter as the combination of `resourceName` and `name` of the first `SceneInfo` object in `scenes`, such as, `resourceName + "/" + sceneInfos.get(0).name`. |
| `scenes` | A list of converted file pages, an array of `SceneInfo` objects. Flexible Classroom automatically converts files with the suffixes of `"ppt"`, `"pptx"`, `"doc"`, `"docx"`, and `"pdf"` to formats that can be displayed on the whiteboard in the classroom and then display the file on the whiteboard in pages. Each `SceneInfo` object represents one page. |
| `resourceUrl` | The URL address of the file, such as `"https://convertcdn.netless.link/dynamicConvert/{taskUuid}.zip"`. |
#### SceneInfo
```kotlin
public class SceneInfo {
private int componentCount;
private Ppt ppt;
private String name;
}
```
The detailed information of a page. Set in [AgoraEduCourseware](#agoraeducourseware).
| Attributes | Description |
| :--------------- | :------------------------------------------------------------- |
| `componentCount` | The number of pages. |
| `ppt` | The detailed information of a converted page. See [Ppt](#ppt). |
| `name` | The page name. |
#### Ppt
```kotlin
public class Ppt {
private String src;
private double width;
private double height;
}
```
The detailed information of a page displayed on the whiteboard. Set in [SceneInfo](#sceneinfo).
| Attributes | Description |
| :--------- | :------------------------------------- |
| `src` | The URL address of the converted page. |
| `width` | The width (pixel) of the page. |
| `height` | The height (pixel) of the page. |
#### AgoraEduRegion
```kotlin
object AgoraEduRegion {
const val default = "CN"
const val cn = "CN"
const val na = "NA"
const val eu = "EU"
const val ap = "AP"
}
```
Regions.
| Attributes | Description |
| :--------- | :-------------- |
| `CN` | Mainland China. |
| `NA` | North America. |
| `EU` | Europe. |
| `AP` | Asia Pacific. |
#### EduVideoEncoderConfig
```kotlin
data class EduVideoEncoderConfig(
var videoDimensionWidth: Int = 320,
var videoDimensionHeight: Int = 240,
var frameRate: Int = 15,
var bitrate: Int = 200,
var mirrorMode: Int = EduMirrorMode.AUTO.value
)
```
The video encoder configuration. Used in [AgoraEduLaunchConfig](#agoraedulaunchconfig).
> * In the Small Classroom use-case, the default resolution is 120p (160\*120).
* In the One-to-one Classroom and Lecture Hall use-cases, the default resolution is 240p (320\*240).
| Parameter | Description |
| :----------- | :---------------------------------------------------------- |
| `width` | Width (pixel) of the video frame. |
| `height` | Height (pixel) of the video frame. |
| `frameRate` | The frame rate (fps) of the video. The default value is 15. |
| `bitrate` | The bitrate (Kbps) of the video. The default value is 200. |
| `mirrorMode` | Video mirror modes. See `EduMirrorMode`. |
#### EduMirrorMode
```kotlin
enum class EduMirrorMode(val value: Int) {
AUTO(0),
ENABLED(1),
DISABLED(2)
}
```
Whether to enable mirror mode. Used in [EduVideoEncoderConfig](#eduvideoencoderconfig).
| Parameter | Description |
| :--------- | :--------------------------------------- |
| `AUTO` | The SDK disables mirror mode by default. |
| `ENABLED` | Enable mirror mode. |
| `DISABLED` | Disable mirror mode. |
## iOS
This page provides the Swift API reference of the Agora Classroom SDK for iOS.
### AgoraClassroomSDK
`AgoraClassroomSDK` is the basic interface of the Agora Classroom SDK and provides the main methods that can be invoked by your app.
#### version
```swift
(NSString *)version;
```
Gets the SDK version.
**Returns**
The SDK version.
#### setConfig
```swift
+ (BOOL)setConfig:(AgoraClassroomSDKConfig *)config;
```
Globally configures the SDK.
**Sample code**
```swift
/** Global configuration **/
@interface AgoraClassroomSDKConfig : NSObject
// Agora App ID
@property (nonatomic, copy) NSString *appId;
// Whether to enable eye care mode
@property (nonatomic, assign) BOOL eyeCare;
@end
AgoraClassroomSDKConfig *defaultConfig = [[AgoraClassroomSDKConfig alloc] initWithAppId:appId eyeCare:eyeCare];
[AgoraClassroomSDK setConfig:defaultConfig];
```
**Parameter**
| Parameter | Description |
| :-------- | :------------------------------------------------------------------------------------- |
| `config` | The SDK global configuration. See [AgoraClassroomSDKConfig](#agoraclassroomsdkconfig). |
#### launch
```swift
+ (AgoraEduClassroom * _Nullable)launch:(AgoraEduLaunchConfig *)config
delegate:(id _Nullable)delegate;
```
Launches a flexible classroom.
**Sample code**
```swift
/** Classroom launching configuration */
// The user name
NSString *userName = @"XXX";
// The user ID. Must be the same as the user ID that you use for generating a Signaling token.
NSString *userUUid = @"XXX";
// The classroom name
NSString *roomName = @"XXX";
// The classroom ID
NSString *roomUuid = @"XXX";
// The user role
AgoraEduRoleType roleType = AgoraEduRoleTypeStudent;
// The classroom type
AgoraEduRoomType roomType = AgoraEduRoomType1V1;
// The Signaling token
NSString *rtmToken = "";
// The start time (ms) of the class, determined by the first user joining the classroom.
NSNumber *startTime = @(XXX);
// The duration (ms) of the class, determined by the first user joining the classroom.
NSNumber *duration = @(1800);
AgoraEduLaunchConfig *config = [[AgoraEduLaunchConfig alloc] initWithUserName:userName userUuid:userUuid roleType:roleType roomName:roomName roomUuid:roomUuid roomType:roomType token:rtmToken startTime:startTime duration:duration];
[AgoraClassroomSDK launch:config delegate:self];
```
**Parameter**
| Parameter | Description |
| :--------- | :----------------------------------------------------------------------------------------------------------------------------------------- |
| `config` | The classroom launching configuration. See [AgoraEduLaunchConfig](#agoraedulaunchconfig). |
| `delegate` | The SDK uses the [AgoraEduClassroomDelegate](#agoraeduclassroomdelegate) class to report events related to classroom launching to the app. |
**Returns**
The `AgoraEduClassroom` class.
#### configCoursewares
```swift
+ (void)configCoursewares:(NSArray *)config;
```
Configures courseware downloading.
**Sample code**
```swift
/** Construct, configure, and download the courseware */
// The ID of the courseware conversion task
NSString *taskUuid = @"xxxx";
// The courseware download address
NSString *resourceUrl = [NSString stringWithFormat:@"https://convertcdn.netless.link/dynamicConvert/%@/.zip", taskUuid];
// The courseware name
NSString *resourceName = @"XXX";
// The list of courseware pages
NSArray *convertedFileList = @[];
// The path for storing the courseware
// Agora recommends setting this parameter as the combination of resourceName and name of the first object in convertedFileList
NSString *scenePath = [NSString stringWithFormat:@"%@/%@", resourceName, [convertedFileList.firstObject name]];
AgoraEduCourseware *courseware = [[AgoraEduCourseware alloc] initWithResourceName:resourceName scenePath:scenePath scenes:convertedFileList resourceUrl:resourceUrl];
// Configure the courseware pre-downloading
[AgoraClassroomSDK configCoursewares:@[courseware]];
```
**Parameter**
| Parameter | Description |
| :-------- | :---------------------------------------------------------------------------------------- |
| `config` | The courseware pre-download configuration. See [AgoraEduCourseware](#agoraeducourseware). |
#### downloadCoursewares
```text
+ (void)downloadCoursewares:(id _Nullable)delegate;
```
Pre-downloads the courseware.
**Sample code**
```swift
// Download the configured courseware
[AgoraClassroomSDK downloadCoursewares:self];
```
**Parameter**
| Parameter | Description |
| :--------- | :---------------------------------------------------------------------------------------------------------------------------------------------- |
| `delegate` | The SDK reports events related to courseware preloading to the app through the [AgoraEduCoursewareDelegate](#agoraeducoursewaredelegate) class. |
#### registerExtApps
```swift
+ (void)registerExtApps:(NSArray *)apps;
```
Register an extension application by using the ExtApp tool. ExtApp is a tool for embedding extension applications in Flexible Classroom. For details, see [Customize Flexible Classroom with ExtApp](/en/realtime-media/flexible-classroom/build/customize-the-ui-and-plugins/customize-classroom).
### AgoraEduClassroom
#### destroy
```swift
- (void)destroy;
```
Release the resources occupied by the` AgoraEduClassroom` object.
### AgoraEduClassroomDelegate
The `AgoraEduLaunchCallback` class reports events related to classroom launching to your app.
#### didReceivedEvent
```swift
- (void)classroom:(AgoraEduClassroom *)classroom didReceivedEvent:(AgoraEduEvent)event;
```
Reports classroom events.
**Parameter**
| Parameter | Description |
| :-------- | :--------------------------------------------------------- |
| `event` | The classroom events. See [AgoraEduEvent](#agoraeduevent). |
### AgoraEduCoursewareDelegate
The `AgoraEduCoursewareDelegate` class reports events related to courseware preloading to your app.
#### didProcessChanged
```swift
- (void)courseware:(AgoraEduCourseware *)courseware didProcessChanged:(float)process;
```
Indicates the progress of courseware pre-downloading.
| Parameter | Description |
| :--------- | :---------------------------------------------------- |
| `progress` | Indicates the progress of courseware pre-downloading. |
#### didCompleted
```swift
- (void)courseware:(AgoraEduCourseware *)courseware idCompleted:(NSError * _Nullable)error;
```
Indicates that the courseware pre-downloading completes.
| Parameter | Description |
| :-------- | :-------------- |
| `error` | The error code. |
### Type definition
#### AgoraEduEvent
```swift
typedef NS_ENUM(NSInteger, AgoraEduEvent) {
AgoraEduEventFailed = 0,
AgoraEduEventReady = 1,
AgoraEduEventDestroyed =2,
};
```
Classroom events. Reported in the [didReceivedEvent](#didreceivedevent) callback.
| Attributes | Description |
| :----------------------- | :------------------------------------------ |
| `AgoraEduEventFailed` | `0`: The user fails to enter the classroom. |
| `AgoraEduEventReady` | `1`: The classroom is ready. |
| `AgoraEduEventDestroyed` | `2`: The classroom has been destroyed. |
#### AgoraEduRoleType
```swift
typedef NS_ENUM(NSInteger, AgoraEduRoleType) {
AgoraEduRoleTypeStudent = 2,
};
```
The role of the user in the classroom. Set in [AgoraEduLaunchConfig](#agoraedulaunchconfig).
| Attributes | Description |
| :------------------------ | :-------------- |
| `AgoraEduRoleTypeStudent` | `2`: A student. |
#### AgoraEduRoomType
```swift
typedef NS_ENUM(NSInteger, AgoraEduRoomType) {
AgoraEduRoomType1V1 = 0,
AgoraEduRoomTypeSmall = 4,
AgoraEduRoomTypeBig = 2,
};
```
The classroom type. Set in [AgoraEduLaunchConfig](#agoraedulaunchconfig).
| Attributes | Description |
| :---------------------- | :----------------------------------------------------------------------------------------------------------------------------------------------------------------------------------------------------------------------------------------------------------------------------------------------------------------------------------------------------------------------------------------------------- |
| `AgoraEduRoomType1V1` | `0`: One-to-one Classroom. An online teacher gives an exclusive lesson to only one student. |
| `AgoraEduRoomTypeBig` | `2`: Lecture Hall. A teacher gives an online lesson to multiple students. Students do not send their audio and video by default. The maximum number of users in a classroom is 5,000. During the class, students can raise their hands to attract the teacher's attention and request to speak up. Once the teacher approves, the student can send their audio and video to interact with the teacher. |
| `AgoraEduRoomTypeSmall` | `4`: Small Classroom. A teacher gives an online lesson to multiple students. Students do not send their audio and video by default. The maximum number of users in a classroom is 200. During the class, the teacher can invite students to speak up on stage and have real-time audio and video interactions with the teacher. |
#### AgoraClassroomSDKConfig
```swift
@interface AgoraClassroomSDKConfig : NSObject
@property (nonatomic, copy) NSString *appId;
@property (nonatomic, assign) BOOL eyeCare;
- (instancetype)initWithAppId:(NSString *)appId;
- (instancetype)initWithAppId:(NSString *)appId
eyeCare:(BOOL)eyeCare;
@end
```
The SDK global configuration. Used in [setConfig](#setconfig).
| Attributes | Description |
| :--------- | :----------------------------------------------------------------------------------------------------------- |
| `appId` | The Agora App ID. See [Get the Agora App ID](/en/introduction/account#get-the-app-id-and-app-certificate). |
| `eyeCare` | Whether to enable eye care mode:- `false`: (Default) Disable eye care mode.
- `true`: Enable eye care mode. |
#### AgoraEduLaunchConfig
```swift
@interface AgoraEduLaunchConfig : NSObject
@property (nonatomic, copy) NSString *userName;
@property (nonatomic, copy) NSString *userUuid;
@property (nonatomic, assign) AgoraEduRoleType roleType;
@property (nonatomic, copy) NSString *roomName;
@property (nonatomic, copy) NSString *roomUuid;
@property (nonatomic, assign) AgoraEduRoomType roomType;
@property (nonatomic, copy) NSString *token;
@property (nonatomic, copy) NSNumber *startTime;
@property (nonatomic, copy, nullable) NSNumber *duration;
@property (nonatomic, copy) NSString *region;
@property (nonatomic, strong, nullable) AgoraEduMediaOptions *mediaOptions;
@property (nonatomic, copy, nullable) NSDictionary * userProperties;
@property (nonatomic, assign) AgoraEduStreamState videoState;
@property (nonatomic, assign) AgoraEduStreamState audioState;
@property (nonatomic, strong, nullable) AgoraEduVideoEncoderConfiguration *cameraEncoderConfiguration;
@property (nonatomic, assign) AgoraEduLatencyLevel latencyLevel;
@property (nonatomic, assign) AgoraBoardFitMode boardFitMode;
- (instancetype)initWithUserName:(NSString *)userName
userUuid:(NSString *)userUuid
roleType:(AgoraEduRoleType)roleType
roomName:(NSString *)roomName
roomUuid:(NSString *)roomUuid
roomType:(AgoraEduRoomType)roomType
token:(NSString *)token
startTime:(NSNumber * _Nullable)startTime
duration:(NSNumber * _Nullable)duration
userProperties:(NSDictionary * _Nullable)userProperties;
@end
```
The classroom launching configuration. Used in [launch](#launch).
| Attributes | Description |
| :--------------------------- | :-------------------------------------------------------------------------------------------------------------------------------------------------------------------------------------------------------------------------------------------------------------------------------------------------------------------------------------------------------------------------------------------------------------------------------------------------------------------- |
| `userName` | The user name for display in the classroom. The string length must be less than 64 bytes. |
| `userUuid` | The user ID. This is the globally unique identifier of a user. **Must be the same as the User ID that you use for generating a Signaling token**. The string length must be less than 64 bytes. Supported character scopes are:- All lowercase English letters: a to z.All numeric characters.- 0-9
- The space character.
- "!", "#", "$", "%", "&", "(", ")", "+", "-", ":", ";", "\<", "=", ".", ">", "?", "@", "\[", "]", "^", "\_", " {", "}", "\|", "\~", "," |
| `roomName` | The room name for display in the classroom. The string length must be less than 64 bytes. |
| `roomUuid` | The room ID. This is the globally unique identifier of a classroom. The string length must be less than 64 bytes. Supported character scopes are:- All lowercase English letters: a to z.All numeric characters.- 0-9
- The space character.
- "!", "#", "$", "%", "&", "(", ")", "+", "-", ":", ";", "\<", "=", ".", ">", "?", "@", "\[", "]", "^", "\_", " {", "}", "\|", "\~", "," |
| `roleType` | The user's role in the classroom. See `AgoraEduRoleType`. |
| `roomType` | The classroom type. See `AgoraEduRoomType`. |
| `token` | The Signaling token used for authentication. For details, see [Generate a Signaling Token](/en/realtime-media/flexible-classroom/build/set-up-your-account-and-authentication/authentication-workflow). |
| `startTime` | The start time (ms) of the class, determined by the first user joining the classroom. |
| `duration` | The duration (ms) of the class, determined by the first user joining the classroom. |
| `region` | The region where the classrooms is located. All clients must use the same region, otherwise, they may fail to communicate with each other. Supported regions are:- `CN`: Mainland China
- `AP`: Asia Pacific
- `EU`: Europe
- `NA`: North America |
| `mediaOptions` | Media options, including the media stream encryption configuration. See `AgoraEduMediaOptions` for details. |
| `userProperties` | User properties customized by the developer. For details, see [How can I set user properties? ](/en/api-reference/faq/integration/agora_class_custom_properties) |
| `videoState` | Controls whether students automatically send audio or video streams after they go onto the stage. See `AgoraEduStreamState`. |
| `audioState` | Controls whether students automatically send audio or video streams after they go onto the stage. See `AgoraEduStreamState`. |
| `cameraEncoderConfiguration` | The encoding configurations of the video stream captured by the camera, including the width and height, frame rate, and bitrate. For details, see `AgoraEduVideoEncoderConfiguration`. |
| `latencyLevel` | The latency level of an audience member. See `AgoraEduLatencyLevel`. |
| `boardFitMode` | The PPT display mode on the whiteboard. See `AgoraBoardFitMode`. |
#### AgoraBoardFitMode
```swift
@objc public enum AgoraBoardFitMode: Int {
case auto, retain
}
```
The PPT display mode on the whiteboard. Set in [AgoraEduLaunchConfig](#agoraedulaunchconfig).
| Parameter | Description |
| :-------- | :--------------------------------------------------------------------------------------------------------------------------------- |
| `auto` | (Default) The PPT display mode is fit, which means uniformly scaling the PPT until one of its dimensions fits the boundary. |
| `retain` | In this mode, if the student manually adjusts the PPT size, the client maintains this size no matter what class the student joins. |
#### StreamState
```swift
@objc public enum AgoraEduStreamState: Int {
case off = 0, on, `default`
}
```
Controls whether students automatically send audio or video streams after they go onto the stage. Set in [AgoraEduLaunchConfig](#agoraedulaunchconfig).
| Parameter | Description |
| :-------- | :------------------------------------------------------------------------------------------------- |
| `off` | (Default) Students do not automatically send audio and video streams after they go onto the stage. |
| `on` | Students automatically send audio and video streams after they go onto the stage. |
#### AgoraEduLatencyLevel
```java
@objc public enum AgoraEduLatencyLevel: Int {
case low = 0
case ultraLow
}
```
The latency level of an audience member. Set in [AgoraEduLaunchConfig](#agoraedulaunchconfig).
| Parameter | Description |
| :--------- | :-------------------------------------------------------------------------------------------- |
| `low` | Low latency. The latency from the sender to the receiver is 1500 ms to 2000 ms. |
| `ultraLow` | (Default) Ultra-low latency. The latency from the sender to the receiver is 400 ms to 800 ms. |
#### AgoraEduMediaOptions
```swift
@interface AgoraEduMediaOptions : NSObject
@property (nonatomic, strong) AgoraEduMediaEncryptionConfig *encryptionConfig;
- (instancetype)initWithConfig:(AgoraEduMediaEncryptionConfig *)encryptionConfig;
@end
```
Media options. Set in [AgoraEduLaunchConfig](#agoraedulaunchconfig).
| Parameter | Description |
| :----------------- | :-------------------------------------------------------------------------------------------------------------------------- |
| `encryptionConfig` | The media stream encryption configuration. See [AgoraEduMediaEncryptionConfig](#agoraedumediaencryptionconfig) for details. |
#### AgoraEduVideoEncoderConfiguration
```swift
@interface AgoraEduVideoEncoderConfiguration : NSObject
@property (nonatomic, assign) NSUInteger width;
@property (nonatomic, assign) NSUInteger height;
@property (nonatomic, assign) NSUInteger frameRate;
@property (nonatomic, assign) NSUInteger bitrate;
@property (nonatomic, assign) AgoraEduCoreMirrorMode mirrorMode;
- (instancetype)initWithWidth:(NSUInteger)width
height:(NSUInteger)height
frameRate:(NSUInteger)frameRate
bitrate:(NSUInteger)bitrate
mirrorMode:(AgoraEduCoreMirrorMode)mirrorMode;
@end
```
The classroom launching configuration. See `AgoraEduLaunchConfig`.
> * In the Small Classroom use-case, the default resolution is 120p (160\*120).
> * In the One-to-one Classroom and Lecture Hall use-cases, the default resolution is 240p (320\*240).
| Parameter | Description |
| :----------- | :---------------------------------------------------------- |
| `width` | Width (pixel) of the video frame. |
| `height` | Height (pixel) of the video frame. |
| `frameRate` | The frame rate (fps) of the video. The default value is 15. |
| `bitrate` | The bitrate (Kbps) of the video. The default value is 200. |
| `mirrorMode` | Video mirror modes. See `EduMirrorMode`. |
#### AgoraEduMediaEncryptionConfig
```swift
@interface AgoraEduMediaEncryptionConfig : NSObject
@property (nonatomic, assign) AgoraEduMediaEncryptionMode mode;
@property (nonatomic, copy) NSString *key;
- (instancetype)initWithMode:(AgoraEduMediaEncryptionMode)mode key:(NSString *)key;
@end
```
The media stream encryption configuration. Used in [AgoraEduMediaOptions](#agoraedumediaoptions).
| Parameter | Description |
| :-------- | :-------------------------------------------------------------------------------- |
| `mode` | Encryption mode. See [AgoraEduMediaEncryptionMode](#agoraedumediaencryptionmode). |
| `key` | The encryption key. |
#### AgoraEduMediaEncryptionMode
```swift
typedef NS_ENUM(NSInteger, AgoraEduMediaEncryptionMode) {
AgoraEduMediaEncryptionModeAES128XTS = 1,
AgoraEduMediaEncryptionModeAES128ECB = 2,
AgoraEduMediaEncryptionModeAES256XTS = 3,
AgoraEduMediaEncryptionModeAES128GCM = 5,
AgoraEduMediaEncryptionModeAES256GCM = 6,
};
```
Media stream encryption mode. Set in [AgoraEduMediaEncryptionConfig](#agoraedumediaencryptionconfigs).
| Parameter | Description |
| :------------------------------------- | :-------------------------------- |
| `AgoraEduMediaEncryptionModeAES128XTS` | 128-bit AES encryption, XTS mode. |
| `AgoraEduMediaEncryptionModeAES128ECB` | 128-bit AES encryption, ECB mode. |
| `AgoraEduMediaEncryptionModeAES256XTS` | 256-bit AES encryption, XTS mode. |
| `AgoraEduMediaEncryptionModeAES128GCM` | 128-bit AES encryption, GCM mode. |
| `AgoraEduMediaEncryptionModeAES256GCM` | 256-bit AES encryption, GCM mode. |
#### AgoraEduCoreMirrorMode
```swift
@objc public enum AgoraEduCoreMirrorMode: Int {
case auto = 0, enabled, disabled
}
```
Whether to enable mirror mode.
| Parameter | Description |
| :--------- | :--------------------------------------- |
| `auto` | The SDK disables mirror mode by default. |
| `enabled` | Enable mirror mode. |
| `disabled` | Disable mirror mode. |
#### AgoraEduCourseware
```swift
@interface AgoraEduCourseware : NSObject
@property (nonatomic, copy) NSString *resourceName;
@property (nonatomic, copy) NSString *scenePath;
@property (nonatomic, copy) NSString *resourceUrl;
@property (nonatomic, strong) NSArray *scenes;
- (instancetype)initWithResourceName:(NSString *)resourceName
scenePath:(NSString *)scenePath
scenes:(NSArray *)scenes
resourceUrl:(NSString *)resourceUrl;
@end
```
The courseware pre-download configuration. Used in [configCoursewares](#configcoursewares).
| Attributes | Description |
| :------------- | :--------------------------------------------------------------------------------------------------------------------------------------------------------------------------------------------------------------------------------------------------------------------------------------------------------------------------------------------------------------- |
| `resourceName` | The file name. |
| `scenePath` | The local path for storing the file. Agora recommends setting this parameter as the combination of `resourceName` and the `name` of the first `SceneInfo` object in `scenes`. |
| `resourceUrl` | The URL address of the file, such as `"https://convertcdn.netless.link/dynamicConvert/{taskUuid}.zip".` |
| `scenes` | A list of converted file pages, an array of `WhiteScene` objects. Flexible Classroom automatically converts files with the suffixes of `"ppt"`, `"pptx"`, `"doc"`, `"docx"`, and `"pdf"` to formats that can be displayed on the whiteboard in the classroom and then display the file on the whiteboard in pages. Each `WhiteScene` object represents one page. |
#### WhiteObject
```swift
@interface WhiteScene : WhiteObject
- (instancetype)init;
- (instancetype)initWithName:(nullable NSString *)name ppt:(nullable WhitePptPage *)ppt;
@property (nonatomic, copy, readonly) NSString *name;
@property (nonatomic, assign, readonly) NSInteger componentsCount;
@property (nonatomic, strong, readonly, nullable) WhitePptPage *ppt;
@end
```
The detailed information of a page. Set in [AgoraEduCourseware](#agoraeducourseware).
| Attributes | Description |
| :---------------- | :---------------------------------------------------------------- |
| `componentsCount` | The number of pages. |
| `ppt` | The detailed information of a converted page. See `WhitePptPage`. |
| `name` | The page name. |
#### WhitePptPage
```swift
@interface WhitePptPage : WhiteObject
- (instancetype)initWithSrc:(NSString *)src size:(CGSize)size;
- (instancetype)initWithSrc:(NSString *)src preview:(NSString *)url size:(CGSize)size;
@property (nonatomic, copy) NSString *src;
@property (nonatomic, assign) CGFloat width;
@property (nonatomic, assign) CGFloat height;
@property (nonatomic, copy, readonly) NSString *previewURL;
@end
```
The detailed information of a converted page. Set in [SceneInfo](#sceneinfo).
| Attributes | Description |
| :----------- | :-------------------------------------------------------------------------------- |
| `src` | The URL address of the converted page. |
| `width` | The width (pixel) of the page. |
| `height` | The height (pixel) of the page. |
| `previewURL` | The URL address of the preview image generated after the dynamic file conversion. |
## Web
This page provides the TypeScript API reference of the Agora Classroom SDK.
### AgoraEduSDK
`AgoraEduSDK` is the basic interface of the Agora Classroom SDK and provides the main methods that can be invoked by your app.
#### config
```typescript
static config(params: ConfigParams):void
```
Configure the SDK.
**Sample code**
```typescript
AgoraEduSDK.config({
// Agora App ID
appId: "",
// Region
region: "NA"
})
```
**Parameter**
| Parameter | Description |
| :-------- | :----------------------------------------------------------------- |
| `params` | The SDK global configuration. See [`ConfigParams`](#configparams). |
#### launch
```typescript
static launch(dom: Element, option: LaunchOption):() => void
```
Launch a classroom.
**Sample code**
```typescript
// Configure courseware
let resourceUuid = "xxxxx"
let resourceName = "my ppt slide"
let sceneInfos = []
let sceneInfo = {
name: "1",
ppt: {
src: "pptx://....",
width: 480,
height: 360
}
}
sceneInfos.push(sceneInfo)
let courseWareList = [{
resourceUuid,
resourceName,
size: 10000,
updateTime: new Date().getTime(),
ext: "pptx",
url:null,
scenes: sceneInfos,
taskUuid: "xxxx",
taskToken: "xxx",
taskProgress: NetlessTaskProgress
}]
// Launch a classroom
AgoraEduSDK.launch(document.querySelector(`#${this.elem.id}`), {
rtmToken: "",
userUuid: "test",
userName: "teacher",
roomUuid: "4321",
roleType: 1,
roomType: 4,
roomName: "demo-class",
pretest: false,
language: "en",
startTime: new Date().getTime(),
duration: 60 * 30,
courseWareList: [],
listener: (evt) => {
console.log("evt", evt)
}
})
```
**Parameter**
| Parameter | Description |
| :-------- | :------------------------------------------------------------------------------------- |
| `dom` | See [Document](https://developer.mozilla.org/en-US/docs/Web/API/Document) for details. |
| `option` | The classroom launching configuration. See [`LaunchOption`](#launchoption). |
**Return value**
Returns a function used to destroy the scene and recycle resources.
### Type definition
#### ConfigParams
The SDK global configuration. Used when calling [`AgoraEduSDK.config`](#config).
```typescript
export type ConfigParams = {
appId: string;
region?: string;
};
```
| Attributes | Description |
| :--------- | :-------------------------------------------------------------------------------------------------------------------------------------------------------------------------------------------------------------------------------------------------------------------------------------------------------------------------------------------------------------------------------------------------------------------------------------------------------------------------------------------------------------------------------------------------------------------------------------------------------------------------------------------------------------------------------------------------------- |
| `appId` | (Required) The Agora App ID. See [Get the Agora App ID](/en/introduction/account#get-the-app-id-and-app-certificate). |
| `region` | (Optional) The region where the classrooms is located. Agora recommends you set a region close to the region of the object storage service for your courseware or recording files, because cross-region transmission of large static resources can lead to delay. For example, if your S3 service is in North America, you should set this parameter to `NA`. All Smart Classroom clients must set the same area, otherwise they cannot communicate with each other. All clients must use the same region, otherwise, they may fail to communicate with each other. Flexible Classroom supports the following regions:- `CN`: Mainland China
- `AP`: Asia Pacific
- `EU`: Europe
- `NA`: North America |
#### ListenerCallback
```typescript
export type ListenerCallback = (evt: AgoraEduClassroomEvent, ...args: unknown[]) => void;
```
#### LaunchOption
The classroom launching configuration. Used when calling [`AgoraEduSDK.launch`](#launch).
```typescript
export type LaunchOption = {
userUuid: string;
userName: string;
roomUuid: string;
roleType: EduRoleTypeEnum;
roomType: EduRoomTypeEnum;
roomServiceType?: EduRoomServiceTypeEnum;
roomName: string;
listener: ListenerCallback;
pretest: boolean;
rtmToken: string;
language: LanguageEnum;
startTime?: number;
duration: number;
courseWareList: CourseWareList;
recordUrl?: string;
widgets?: {[key: string]: AgoraWidgetBase};
userFlexProperties?: {[key: string]: any};
mediaOptions?: MediaOptions;
latencyLevel?: 1 | 2;
platform?: Platform;
virtualBackgroundImages?: string[];
webrtcExtensionBaseUrl?: string;
rtcCloudProxyType?: AgoraCloudProxyType;
rtmCloudProxyEnabled? boolean;
};
```
| Parameter | Description |
| :------------------------ | :----------------------------------------------------------------------------------------------------------------------------------------------------------------------------------------------------------------------------------------------------------------------------------------------------------------------------------------------------------------------------------------------------------------------------------------------------------------------------------------------------------------------------------------------------------------------------------- |
| `rtmToken` | (Required) The Signaling token used for authentication. For details, see [Secure authentication with tokens](/en/realtime-media/flexible-classroom/build/set-up-your-account-and-authentication/authentication-workflow). |
| `userUuid` | The user ID. This is the globally unique identifier of a user. **Must be the same as the User ID that you use for generating a Signaling token**. The string length must be less than 64 bytes. Supported character scopes are:- All lowercase English letters: a to z.All numeric characters.- 0-9
- The space character.
- "!", "#", "$", "%", "&", "(", ")", "+", "-", ":", ";", "\<", "=", ".", ">", "?", "@", "\[", "]", "^", "\_", " {", "}", "\|", "\~", "," |
| `userName` | (Required) The user name for display in the classroom. The string length must be less than 64 bytes. |
| `roomUuid` | (Required) The room ID. This is the globally unique identifier of a classroom. The string length must be less than 64 bytes. Supported character scopes are:- All lowercase English letters: a to z.All numeric characters.- 0-9
- The space character.
- "!", "#", "$", "%", "&", "(", ")", "+", "-", ":", ";", "\<", "=", ".", ">", "?", "@", "\[", "]", "^", "\_", " {", "}", "\|", "\~", "," |
| `roomName` | (Required) The room name for display in the classroom. The string length must be less than 64 bytes. |
| `roleType` | (Required) The role of the user in the classroom. See [`EduRoleTypeEnum`](#eduroletypeenum). |
| `roomType` | (Required) The classroom type. See [`EduRoomTypeEnum`](#eduroomtypeenum). |
| `roomServiceType` | (Optional) The service type of big classrooms. See [EduRoomServiceTypeEnum](#eduroomservicetypeenum). |
| `listener` | (Required) Classroom event callback, please refer to the event type for details. |
| `pretest` | (Required) Whether to enable the pre-class device test:- `true`: Enable the pre-class device test. After this function is enabled, end users can see a page for the device test before entering the classroom. They can check whether their camera, microphone, and speaker can work properly.
- `false`: Disable the pre-class device test. |
| `language` | (Required) The UI language. See [`LanguageEnum`](#languageenum). |
| `startTime` | (Required) The start time (ms) of the class, determined by the first user joining the classroom. |
| `duration` | (Required) The duration (second) of the class, determined by the first user joining the classroom. |
| `recordUrl` | (Optional) The URL address to be recorded. Developers need to pass in the URL of the web page deployed by themselves for page recording, such as `https://cn.bing.com/recordUrl`. |
| `widgets` | (Optional) Extensive widgets that extend the classroom capabilities. See [Embed a custom plugin](/en/realtime-media/flexible-classroom/build/customize-the-ui-and-plugins/embed-custom-plugin) for details. |
| `courseWareList` | (Optional) The configuration of courseware assigned by the educational institution, which cannot be edited by the client. See [`CourseWareList`](#coursewarelist) for details. After passing this object, the SDK downloads the courseware from the Agora cloud storage component to the local when launching the classroom. |
| `userFlexProperties` | (Optional) User properties customized by the developer. |
| `mediaOptions` | (Optional) Media stream configurations, including the encryption configuration and the encoding configurations of the screen-sharing stream and the video stream captured by the camera. See `MediaOptions` for details. |
| `latencyLevel` | (Optional) The latency level of an audience member in interactive live streaming:- `1`: Low latency. The latency from the sender to the receiver is 1500 ms to 2000 ms.
- (Default) Ultra-low latency. The latency from the sender to the receiver is 400 ms to 800 ms. |
| `virtualBackgroundImages` | (Optional) The URL of the virtual background image. The domain name of the resource should be the same as the domain name where you deployed smart classroom. Supports PNG and JPG format images. |
| `webrtcExtensionBaseUrl` | (Optional) The URL or the `WebRtc` extensions. The default value is `https://solutions-apaas.agora.io/static`. If you want to use the advanced features such as virtual backgrounds, AI noise suppression, and beauty options, you need to implement the `WebRtc` extensions and relevant resources in the Flexible Classroom SDK domain. These are the steps: 1. When you run `yarn build:demo` to complete packaging, the corresponding files are generated in `packages/agora-demo-app/build/extensions`. 2. Implement the directory in the domain of the Flexible Classroom SDK. |
| `rtcCloudProxy` | (Optional) The cloud proxy type for the RTC service: [`AgoraCloudProxyType`](#agoracloudproxytype). |
| `rtmCloudProxyEnabled` | (Optional) Where to enable cloud proxy for the RTM service. |
#### MediaOptions
```typescript
export type MediaOptions = {
cameraEncoderConfiguration?: EduVideoEncoderConfiguration;
screenShareEncoderConfiguration?: EduVideoEncoderConfiguration;
encryptionConfig?: MediaEncryptionConfig;
channelProfile?: ChannelProfile;
web?: {
codec: SDK_CODEC;
mode: SDK_MODE;
};
};
```
Media options.
| Parameter | Description |
| :-------------------------------- | :--------------------------------------------------------------------------------------------------------------------------------------------------------------------------------------------------------------------------------------------------------------------------------------------------------------------------------------------------------------------------------------------------------------------------- |
| `cameraEncoderConfiguration` | The encoding configuration of the video stream captured by the camera. See [EduVideoEncoderConfiguration](#eduvideoencoderconfiguration). |
| `screenShareEncoderConfiguration` | The encoding configuration of the screen-sharing stream. See [EduVideoEncoderConfiguration](#eduvideoencoderconfiguration). |
| `encryptionConfig` | The media stream encryption configuration. See [MediaEncryptionConfig](#mediaencryptionconfig). |
| `channelProfile` | Channel profile configuration. See [ChannelProfile](#channelprofile) for details. |
| `web` | Web configuration for browser codec format and channel mode.- `codec`: Browser codec format. Available values are as follows:
* `"vp9"`: VP9
* `"h264"`: H.264
- `mode`: Channel mode. Available values are as follows:
* `"rtc"`: Communication mode, commonly used for one-to-one or one-to-many classrooms.
* `"live"`: Live-streaming mode. It costs less and has a higher latency than the communication mode. |
#### EduVideoEncoderConfiguration
```typescript
export interface EduVideoEncoderConfiguration {
width: number;
height: number;
frameRate: number;
bitrate: number;
}
```
Video encoder configurations.
| Parameter | Description |
| :---------- | :--------------------------------- |
| `width` | Width (pixel) of the video frame. |
| `height` | Height (pixel) of the video frame. |
| `frameRate` | The frame rate (fps) of the video. |
| `bitrate` | The bitrate (Kbps) of the video. |
#### MediaEncryptionConfig
```typescript
export declare interface MediaEncryptionConfig {
mode: MediaEncryptionMode,
key: string
}
```
The media stream encryption configuration. Used in [MediaOptions](#mediaoptions).
| Parameter | Description |
| :-------- | :------------------------------------------------------------------------------------------------------------------------------------------------------ |
| `mode` | Encryption mode. See [MediaEncryptionMode](#mediaencryptionmode). All users in the same classroom must use the same encryption mode and encryption key. |
| `key` | The encryption key. |
#### MediaEncryptionMode
```swift
export enum MediaEncryptionMode {
AES_128_XTS = 1,
AES_128_ECB = 2,
AES_256_XTS = 3,
AES_128_GCM = 5,
AES_256_GCM = 6
}
```
Encryption modes. Used in [MediaEncryptionConfig](#mediaencryptionconfig).
| Parameter | Description |
| :------------ | :-------------------------------- |
| `AES_128_XTS` | 128-bit AES encryption, XTS mode. |
| `AES_128_ECB` | 128-bit AES encryption, ECB mode. |
| `AES_256_XTS` | 256-bit AES encryption, XTS mode. |
| `AES_128_GCM` | 128-bit AES encryption, GCM mode. |
| `AES_256_GCM` | 256-bit AES encryption, GCM mode. |
#### CourseWareList
The courseware pre-download configuration. Used when calling [`AgoraEduSDK.launch`](#launch).
```typescript
export type CloudDriveResourceConvertProgress = {
totalPageSize: number;
convertedPageSize: number;
convertedPercentage: number;
convertedFileList: {
name: string;
ppt: {
width: number;
height: number;
preview?: string;
src: string;
};
}[];
currentStep: string;
};
export type CourseWareItem = {
resourceName: string;
resourceUuid: string;
ext: string;
url?: string;
size: number;
updateTime: number;
taskUuid: string;
conversion: {
type: string;
preview: boolean;
scale: number;
outputFormat: string;
};
taskProgress?: CloudDriveResourceConvertProgress;
};
export type CourseWareList = CourseWareItem[];
```
`CourseWareList` is an array that consists of `CourseWareItem` objects.
```json
[
{
resourceName: xxxxxxx,
resourceUuid: xxxxxxxxx,
ext: 'pptx',
url: 'https://xxxxxxxxxxxxxx',
size: 0,
updateTime: xxxxxxxx,
taskUuid: 'xxxxxxxxx',
conversion: {
type: 'dynamic',
preview: true,
scale: 2,
outputFormat: 'png',
},
taskProgress: {
totalPageSize: 3,
convertedPageSize: 3,
convertedPercentage: 100,
convertedFileList: [
{
name: '1',
ppt: {
src: 'pptx://convertcdn.netless.link/dynamicConvert/3bxxxxxxx/1.slide',
width: 1280,
height: 720,
preview: 'dddddddddddddddurl',
},
},
...
] as any,
currentStep: '',
},
},
],
```
| Parameter | Description |
| :------------- | :-------------------------------------------------------------------------------------------------------------------------------------------------------------------------------------------------------------------------------------------------------------------------------------------------------------------------------------------------------------------------------------------------------------------------------------------------------------------------------------------------------------------------------------------------------------------------------------------------------------------------------------------------------------------------------------------------------------------------------------------------------------------------------------------------------------------------------------------------------------------------------------------------------------------------------------------------------------------------------------------------------------------------------------------------------------- |
| `resourceName` | The file name for display in the classroom. The string length must be less than 64 bytes. |
| `resourceUuid` | The file ID. This is the unique identifier of a file. The string length must be less than 64 bytes. Supported character scopes are:- All lowercase English letters: a to z.All numeric characters.- 0-9
- The space character.
- "!", "#", "$", "%", "&", "(", ")", "+", "-", ":", ";", "\<", "=", ".", ">", "?", "@", "\[", "]", "^", "\_", " {", "}", "\|", "\~", "," |
| `ext` | The file suffix. |
| `size` | The file size (bytes). |
| `updateTime` | The latest modified time of the file. |
| `taskUuid` | The unique identifier of the file conversion task. |
| `conversion` | * `type`: A string value that idicates the type of file conversion. You can set it as:
* `static`: Convert the PPT, PPTX, DOC, DOCX, or PDF file to a static image in PNG, JPG, JPEG, or WEBP format. The converted file does not retain the animation effects of the original file.
* `dynamic`: Convert the PPTX file (edited with Microsoft Office) to an HTML page. The converted file retains the animation effects of the original file.
* `preview`: A boolean value that indicates whether you need a preview window.
* `scale`: A number value that indicates the conversion scale. If you set it as `1`, it means the file doesn't change the size after conversion. The range is \[0, 3].
* `outputFormat`: A string value that indicates the export format of the images after file conversion. For example, you can set it as `"png"`. |
| `url` | The address of the file. Flexible Classroom clients automatically convert files with the suffixes of `"ppt"`, `"pptx"`, `"doc"`, `"docx"`, and `"pdf"` to formats that can be displayed on the whiteboard in classrooms. If the suffix name is not listed above, you must set `url `and leave `scenes` empty. |
| `taskProgress` | The JSON object, `CloudDriveResourceConvertProgress`, that indicates the progress of the file conversion task. It contains the following fields:* `totalPageSize`: Total page size.
* `convertedPageSize`: The number of converted pages.
* `convertedPercentage`: The progress of the conversion task, expressed as a percentage.
* `convertedFileList`: A list of converted file pages. Each file page represents a record that contains the following fields:
* `name`: The name of the file page.
* `ppt`: Details of the slide included in the file page, which contains the following fields:
* `width`: The width of the slide.
* `height`: The height of the slide.
* `src`: The download URL of the converted page.
* `preview`: The URL of the preview image.
* `currentStep`: The current step of the conversion task. The possible values are `extracting` (extracting the resources), `generatingPreview` (generating the preview image), `mediaTranscode` (transcoding the media file), and `packaging` (packaging the file). |
#### EduRoleTypeEnum
```typescript
export enum EduRoleTypeEnum {
audience = 0,
teacher = 1,
student = 2,
assistant = 3
}
```
The role of the user in the classroom. Set in [`LaunchOption`](#launchoption).
| Parameter | Description |
| :---------- | :----------------------------------------------- |
| `audience` | `0`: Audience, only used for web page recording. |
| `teacher` | `1`: Teacher. |
| `student` | `2`: A student. |
| `assistant` | `3`: Teaching assistant. |
#### EduRoomTypeEnum
```typescript
export enum EduRoomTypeEnum {
Room1v1Class = 0,
RoomBigClass = 2,
RoomSmallClass = 4
}
```
The classroom type. Set in [`LaunchOption`](#launchoption).
| Parameter | Description |
| :--------------- | :--------------------------------------------------------------------------------------------------------------------------------------------------------------------------------------------------------------------------------------------------------------------------------------------------------------------------------------------------------------------------------------------------- |
| `Room1v1Class` | `0`: One-to-one Classroom. An online teacher gives an exclusive lesson to only one student. |
| `RoomBigClass` | `2`: Lecture Hall. A teacher gives an online lesson to multiple students. Students do not send their audio and video by default. There is no upper limit on the number of students. During the class, students can raise their hands to attract the teacher's attention and request to speak up. Once the teacher approves, the student can send their audio and video to interact with the teacher. |
| `RoomSmallClass` | `4`: Small Classroom. A teacher gives an online lesson to multiple students. Students do not send their audio and video by default. The maximum number of users in a classroom is 500. During the class, the teacher can invite students to speak up on stage and have real-time audio and video interactions with the teacher. |
#### EduRoomServiceTypeEnum
```typescript
export enum EduRoomServiceTypeEnum {
LivePremium = 0,
}
```
The service type used in [`LaunchOption`](#launchoption).
| Parameter | Description |
| :------------ | :----------------------------------------------------------------------------------------------------------------------------------------------------- |
| `LivePremium` | The classroom use the RTC service in the channel profile of live-broadcasting, with a latency of 400 ms. It works the same as interactive big classes. |
#### ChannelProfile
```typescript
export enum ChannelProfile {
Communication = 0,
LiveBroadcasting = 1,
}
```
Channel profiles, used in [MediaOptions](#mediaoptions).
| Values | Description |
| :----------------- | :--------------------------------------------------------------------------------------- |
| `Communication` | communication mode, commonly used for one-to-one or one-to-many classrooms. |
| `LiveBroadcasting` | live-streaming mode. It costs less and has a higher latency than the communication mode. |
#### LanguageEnum
```typescript
export type LanguageEnum = "en" | "zh"
```
The language of the user interface. Set in [`LaunchOption`](#launchoption).
| Parameter | Description |
| :-------- | :---------- |
| `"en"` | English. |
| `"zh"` | Chinese. |
#### AgoraCloudProxyType
The cloud proxy type. Set in [`LaunchOptions`](#launchoption).
| Parameter | Description |
| ----------- | --------------------------------------------------------------------------------------------------------------------------------------------------------------------------------------------------------------------------------------------------------------------------------------------------------------------------------------------------------------------------------------------------------------------------------------------------------------------- |
| `Automatic` | `0`: The automatic mode. In this mode, the SDK will first attempt to connect directly to Agora SDRTN. If the attempt fails, the SDK will automatically fall back to sending media over TLS 443. If you are unsure whether the end user's network environment has a firewall, 'Automatic' mode is recommended as best practice. While transmitting media over TLS 443 may not be as fast and efficient as UDP, connections on TLS 443 can pass through most firewalls. |
| `UDP` | `1`: UDP. |
| `TCP` | `2`: TCP. |
#### AgoraEduClassroomEvent
Classroom event listener. Set in [`LaunchOption`](#launchoption).
| Parameter | Description |
| :------------------------------ | :----------------------------------------------------------------------------------------------------------------------------------------------------------------- |
| `Ready` | `1`: Entered the classroom successfully. |
| `Destroyed` | `2`: The classroom has been destroyed. Includes the reason for leaving as a parameter:- `1`: Left the room voluntarily.
- `2`: Have been kicked out of the room. |
| `FailedToJoin` | `3`: Failed to enter the classroom. |
| `KickOut` | `101`: Being kicked out of the room. |
| `TeacherTurnOnMyMic` | `102`: Audio streaming permission is enabled. |
| `TeacherTurnOffMyMic` | `103`: Audio streaming permission is turned off. |
| `UserAcceptToStage` | `106`: Get on the podium. |
| `UserLeaveStage` | `107`: Leave the podium. |
| `RewardReceived` | `108`: Reward received. Includes a list of rewarded users as a parameter. |
| `TeacherTurnOnMyCam` | `109`: The video streaming permission is enabled. |
| `TeacherTurnOffMyCam` | `110`: The video streaming permission has been turned off. |
| `CurrentCamUnplugged` | `111`: The current camera device is unplugged. |
| `CurrentMicUnplugged` | `112`: The current microphone device is unplugged. |
| `CurrentSpeakerUnplugged` | `113`: The current speaker is unplugged. |
| `CaptureScreenPermissionDenied` | `114`: No screen capture permission. |
| `BatchRewardReceived` | `117`: Receive bulk rewards. Includes a list of rewarded users as a parameter. |
| `InvitedToGroup` | `118`: Receive invitation to join group. Includes group information as parameters. |
| `MoveToOtherGroup` | `119`: Moved to other groups. Includes the following parameters:- Previous group
- New group |
| `JoinSubRoom` | `120`: Join a group. |
| `LeaveSubRoom` | `121`: Leave the group. |
| `AcceptedToGroup` | `122`: The user accepts to join the group. Includes the following parameters:- Group ID
- Accepting user |
| `UserJoinGroup` | `123`: Other users join the group. Includes the following parameters:- Group ID
- List of joining users |
| `UserLeaveGroup` | `124`: Other users leave the group. Includes the following parameters:- Group ID
- List of leaving users |
| `RejectedToGroup` | `125`: The user refuses to join the group. Includes the following parameters:- Group ID
- List of refusing users |
| `RTCStateChanged` | `201`: RTC connection status change. Includes the RTC connection status as a parameter:- `0`: Not connected
- `1`: Connecting
- `2`: Connected
- `3`: Reconnecting |
| `ClassStateChanged` | `202`: Classroom status changes. Includes the class status as a parameter:- `0`: Started
- `1`: Not started
- `2`: Dragging
- `3`: Ended |
## Electron
The Electron Classroom SDK uses the same TypeScript API surface as the Web Classroom SDK. See [Web](#web).
# Edu Context/Store API (/en/api-reference/api-ref/flexible-classroom/edu-context-sdk)
Agora Edu Context enables developers to implement the functions in Flexible Classroom. Different contexts represent different function modules in Flexible Classroom. Each context contains methods for the app to call and also reports event callbacks to the app.
* [Edu Context API Reference](https://api-ref.agora.io/en/flexible-classroom-sdk/android/2.x/API/edu_context_api_overview.html)
## Platform-specific versions
- [Android](/en/api-reference/api-ref/flexible-classroom/edu-context-sdk/android.md)
- [iOS](/en/api-reference/api-ref/flexible-classroom/edu-context-sdk/ios.md)
- [Web](/en/api-reference/api-ref/flexible-classroom/edu-context-sdk/web.md)
- [Electron](/en/api-reference/api-ref/flexible-classroom/edu-context-sdk/electron.md)
# Proctor SDK (/en/api-reference/api-ref/flexible-classroom/proctor-sdk)
Agora Proctor SDK is currently not available for Android.
## Platform-specific versions
- [Android](/en/api-reference/api-ref/flexible-classroom/proctor-sdk/android.md)
- [Web](/en/api-reference/api-ref/flexible-classroom/proctor-sdk/web.md)
- [Electron](/en/api-reference/api-ref/flexible-classroom/proctor-sdk/electron.md)
- [iOS](/en/api-reference/api-ref/flexible-classroom/proctor-sdk/ios.md)
# UI Scene SDK (/en/api-reference/api-ref/flexible-classroom/ui-scene)
The UI Scene SDK is currently not available for Android.
## Platform-specific versions
- [Android](/en/api-reference/api-ref/flexible-classroom/ui-scene/android.md)
- [Electron](/en/api-reference/api-ref/flexible-classroom/ui-scene/electron.md)
- [iOS](/en/api-reference/api-ref/flexible-classroom/ui-scene/ios.md)
- [Web](/en/api-reference/api-ref/flexible-classroom/ui-scene/web.md)
# Contact management (/en/api-reference/api-ref/im/contact-management)
Contact management refers to operations such as adding and removing contacts, and adding and removing users from the blocklist.
This page shows how to call the Chat RESTful APIs to create and manage contacts.
Before calling the following methods, make sure you understand the call frequency limit as described in [Limitations](./limitations).
## Common parameters
The following table lists common request and response parameters of the Chat RESTful APIs:
### Request parameters
| Parameter | Type | Description | Required |
| :--------- | :----- | :----------------------------------------------------------------------------------------------------------------------------------------------------------------------------------------------------------------------------------------------------------------------------------------------------------------------------------------------------------------------------------------------------------------------------------------------------------------------------------------------------------------------------------------------------- | :------- |
| `host` | String | The domain name assigned by the Chat service to access RESTful APIs. For how to get the domain name, see [Get the information of your Chat project](/en/realtime-media/im/get-started/enable#get-chat-project-information). | Yes |
| `app_id` | String | The unique identifier automatically assigned to each project by Agora | Yes |
| `username` | String | The unique login account of the user. The user ID must be 64 characters or less and cannot be empty. The following character sets are supported:* 26 lowercase English letters (a-z)
* 10 numbers (0-9)
* "\_", "-", "."
Do not use any of the 26 uppercase English letters (A-Z). Ensure that each `username` under the same App ID is unique. Do not set this parameter as a UUID, email address, phone number, or other sensitive information.
| Yes |
### Response parameters
| Parameter | Type | Description |
| :------------------- | :----- | :---------------------------------------------------------------------------------------------------------------------------------------------------- |
| `action` | String | The request method. |
| `organization` | String | The unique identifier assigned to each company (organization) by the Chat service. |
| `application` | String | A unique internal ID assigned to each app by the Chat service. You can safely ignore this parameter. |
| `applicationName` | String | The unique identifier assigned to each app by the Chat service . |
| `uri` | String | The request URI. |
| `path` | String | The request path, which is part of the request URL. You can safely ignore this parameter. |
| `entities ` | JSON | The response entity. |
| `entities.uuid` | String | The user's UUID. A unique internal identifier generated by the Chat service for the user in this request. This is used for generating the user token. |
| `entities.type` | String | The type of the object. You can safely ignore this parameter. |
| `entities.created` | Number | The Unix timestamp (ms) when the user is registered. |
| `entities.modified` | Number | The Unix timestamp (ms) when the user information is last modified. |
| `entities.username` | String | The username. The unique account the user is logged in with. |
| `entities.activated` | Bool | Whether the user is active: `true`: The user is active. `false`: The user is banned. |
| `timestamp` | Number | The Unix timestamp (ms) of the HTTP response. |
| `duration` | Number | The duration (ms) from when the HTTP request is sent to the time the response is received. |
## Authorization
Chat RESTful APIs require Bearer HTTP authentication. Every time an HTTP request is sent, the following `Authorization` field must be filled in the request header:
```html
Authorization: Bearer ${YourAppToken}
```
In order to improve the security of the project, Agora uses a token (dynamic key) to authenticate users before they log in to the chat system. Chat RESTful APIs only support authenticating users using app tokens. For details, see [Authentication using App Token](/en/realtime-media/im/build/secure-access-and-authentication/authentication).
## Adding a contact
This method adds a user under the same App Key as contacts. The number of contacts supported differs by plan version; the maximum number of contacts supported by the free version is 100. For details, see [Limitations](./limitations).
For each App Key, the call frequency limit of this method is 100 per second.
### HTTP request
```bash
POST https://{host}/app-id/{app_id}/users/{owner_username}/contacts/users/{friend_username}
```
#### Path parameter
| Parameter | Type | Description | Required |
| :---------------- | :----- | :------------------------------------- | :------- |
| `owner_username` | String | The user ID of the current user. | Yes |
| `friend_username` | String | The username to be added as a contact. | Yes |
For other parameters and detailed descriptions, see [Common parameters](#param).
#### Request header
| Parameter | Type | Description | Required |
| :-------------- | :----- | :---------------------------------------------------------------------------------------------------------------------------------------------------------------------------------------------- | :------- |
| `Content-Type` | String | The parameter type. Set it as `application/json`. | Yes |
| `Accept` | String | The parameter type. Set it as `application/json`. | Yes |
| `Authorization` | String | The authentication token of the user or admin, in the format of `Bearer ${YourAppToken}`, where `Bearer` is a fixed character, followed by an English space, and then the obtained token value. | Yes |
### HTTP response
#### Response body
If the returned HTTP status code is 200, the request succeeds. For the fields and descriptions of the response body, see [Common parameters](#param).
If the returned HTTP status code is not 200, the request fails. You can refer to [Status codes](./http-status-codes) for possible causes.
### Example
#### Request example
```bash
curl -X POST -H 'Content-Type: application/json' -H 'Accept: application/json' -H 'Authorization: Bearer {YourAppToken}' 'http://XXXX/app-id/XXXX/users/user1/contacts/users/user2'
```
#### Response example
```json
{
"path": "/users/4759aa70-XXXX-XXXX-925f-6fa0510823ba/contacts",
"uri": "https://XXXX/app-id/XXXX/users/4759aa70-XXXX-XXXX-925f-6fa0510823ba/contacts",
"timestamp": 1542598913819,
"organization": "XXXX",
"application": "8be024f0-XXXX-XXXX-b697-5d598d5f8402",
"entities": [
{
"uuid": "b2aade90-XXXX-XXXX-a974-f3368f82e4f1",
"type": "user",
"created": 1542356523769,
"modified": 1542597334500,
"username": "user2",
"activated": true,
}
],
"action": "post",
"duration": 63,
"applicationName": "XXXX"
}
```
## Removing a contact
This method removes the user from the contact list.
For each App Key, the call frequency limit of this method is 100 per second.
### HTTP request
```bash
DELETE https://{host}/app-id/{app_id}/users/{owner_username}/contacts/users/{friend_username}
```
#### Path parameter
| Parameter | Type | Description | Required |
| :---------------- | :----- | :------------------------------------------------ | :------- |
| `owner_username` | String | The username of the current user. | Yes |
| `friend_username` | String | The username to be removed from the contact list. | Yes |
For other parameters and detailed descriptions, see [Common parameters](#param).
#### Request header
| Parameter | Type | Description | Required |
| :-------------- | :----- | :---------------------------------------------------------------------------------------------------------------------------------------------------------------------------------------------- | :------- |
| `Accept` | String | The parameter type. Set it as `application/json`. | Yes |
| `Authorization` | String | The authentication token of the user or admin, in the format of `Bearer ${YourAppToken}`, where `Bearer` is a fixed character, followed by an English space, and then the obtained token value. | Yes |
### HTTP response
#### Response body
If the returned HTTP status code is 200, the request succeeds. For the fields and descriptions of the response body, see [Common parameters](#param).
If the returned HTTP status code is not 200, the request fails. You can refer to [Status codes](./http-status-codes) for possible causes.
### Example
#### Request example
```bash
curl -X DELETE -H 'Accept: application/json' -H 'Authorization: Bearer {YourAppToken}' 'http://XXXX/app-id/XXXX/users/user1/contacts/users/user2'
```
#### Response example
```json
{
"path": "/users/4759aa70-XXXX-XXXX-925f-6fa0510823ba/contacts",
"uri": "https://XXXX/app-id/XXXX/users/4759aa70-XXXX-XXXX-925f-6fa0510823ba/contacts",
"timestamp": 1542599266616,
"organization": "XXXX",
"application": "8be024f0-XXXX-XXXX-b697-5d598d5f8402",
"entities": [
{
"uuid": "b2aade90-XXXX-XXXX-a974-f3368f82e4f1",
"type": "user",
"created": 1542356523769,
"modified": 1542597334500,
"username": "user2",
"activated": true,
}
],
"action": "delete",
"duration": 350,
"applicationName": "XXXX"
}
```
## Retrieving the contact list
This method retrieves the local user's contact list.
For each App Key, the call frequency limit of this method is 100 per second.
### HTTP request
```bash
GET https://{host}/app-id/{app_id}/users/{owner_username}/contacts/users
```
#### Path parameter
| Parameter | Type | Description | Required |
| :--------------- | :----- | :-------------------------------- | :------- |
| `owner_username` | String | The username of the current user. | Yes |
For other fields and descriptions, see [Common parameters](#param).
#### Request header
| Parameter | Type | Description | Required |
| :-------------- | :----- | :---------------------------------------------------------------------------------------------------------------------------------------------------------------------------------------------- | :------- |
| `Accept` | String | The parameter type. Set it as `application/json`. | Yes |
| `Authorization` | String | The authentication token of the user or admin, in the format of `Bearer ${YourAppToken}`, where `Bearer` is a fixed character, followed by an English space, and then the obtained token value. | Yes |
### HTTP response
#### Response body
If the returned HTTP status code is 200, the request succeeds, and the response body contains the following fields:
| Parameter | Type | Description |
| :-------- | :----- | :---------------------- |
| `data` | Array | The contact list data. |
| `count` | Number | The number of contacts. |
For other fields and descriptions, see [Common parameters](#param).
If the returned HTTP status code is not 200, the request fails. You can refer to [Status codes](./http-status-codes) for possible causes.
### Example
#### Request example
```bash
curl -X GET -H 'Accept: application/json' -H 'Authorization: Bearer {YourAppToken}' 'http://XXXX/app-id/XXXX/users/user1/contacts/users'
```
#### Response example
```json
{
"uri": "http://XXXX/app-id/XXXX/users/user1/contacts/users",
"timestamp": 1543819826513,
"entities": [],
"count": 2,
"action": "get",
"data": [
"user3",
"user2"
],
"duration": 12
}
```
## Retrieving the contact list with pagination
Retrieves the contact list with pagination.
For each App Key, the call frequency limit of this method is 100 per second.
### HTTP request
```bash
GET https://{host}/app-id/{app_id}/user/{username}/contacts?limit={N}&cursor={cursor}&needReturnRemark={true/false}
```
#### Path parameter
| Parameter | Type | Description | Required |
| :--------- | :----- | :------------------------------- | :------- |
| `username` | String | The user ID of the current user. | Yes |
For other parameters and detailed descriptions, see [Common Parameters](#param).
#### Query parameter
| Parameter | Type | Description | Required |
| :----------------- | :------ | :--------------------------------------------------------------------------------------------------------------------------------------------------------------------------------------------------------------------------------------------------------------------------------------------------------------------------------------------------------------------------------------------------------------------------------------------------------------------- | :------- |
| `limit` | Number | The number of contacts that you expect to retrieve each time. The value range is \[1,50] and the default value is `10`. This parameter is required only for paginated queries. | No |
| `cursor` | String | The starting position for data query. This parameter is required only for paginated queries. For the first query, you do not need to set `cursor` and the server returns contacts of the number specified with `limit` in the descending order of their addition. You can get the cursor from the response body and pass it in the URL of the next query request. If there is no longer a `cursor` field in the response body, all contacts in the app are retrieved. | No |
| `needReturnRemark` | Boolean | Whether to return contact remarks: `true`: Return;(Default) `false`: Not return. | No |
#### Request header
| Parameter | Type | Description | Required |
| :-------------- | :----- | :---------------------------------------------------------------------------------------------------------------------------------------------------------------------------------------------- | :------- |
| `Content-Type` | String | The parameter type. Set it as `application/json`. | Yes |
| `Accept` | String | The parameter type. Set it as `application/json`. | Yes |
| `Authorization` | String | The authentication token of the user or admin, in the format of `Bearer ${YourAppToken}`, where `Bearer` is a fixed character, followed by an English space, and then the obtained token value. | Yes |
### HTTP response
#### Response body
If the returned HTTP status code is `200`, the request succeeds, and the response body contains the following parameters:
| Parameter | Type | Description |
| :----------------------- | :----- | :------------------------------------------ |
| `count` | Number | The number of contacts on the current page. |
| `data` | Object | The contact list object that is returned. |
| `data.contacts` | Array | The contact list data that is returned. |
| `data.contacts.remark` | String | The contact remarks. |
| `data.contacts.username` | String | The user ID of a contact. |
For other fields and descriptions, see [Common parameters](#param).
If the returned HTTP status code is not `200`, the request fails. You can refer to [Status code](#code) table for possible causes.
### Example
#### Request example
```bash
# Replace {YourAppToken} with the app token generated in your server.
curl --location 'https://{host}/app-id/{app_id}/user/{username}/contacts?limit=10&needReturnRemark=true' \
-H 'Content-Type: application/json' \
-H 'Accept: application/json' \
-H 'Authorization: Bearer '
```
#### Response example
```json
{
"uri": "http://{host}/app-id/{app_id}/users/{username}/rostersByPage",
"timestamp": 1706238297509,
"entities": [],
"count": 1,
"action": "get",
"data": {
"contacts": [
{
"remark": null,
"username": "username"
}
]
},
"duration": 27
}
```
## Add user to blacklist
Adds the specified user or users to the blocklist. Once you add a user to the blocklist, you can no longer receive messages from that user. The maximum number of users in the blocklist for each user is 500.
For each App Key, the call frequency limit of this method is 50 per second.
### HTTP request
```bash
POST https://{host}/app-id/{app_id}/users/{owner_username}/blocks/users
```
#### Path parameter
For the descriptions of the path parameters of this method, see [Common parameters](#param).
#### Request header
| Parameter | Type | Description | Required |
| :-------------- | :----- | :---------------------------------------------------------------------------------------------------------------------------------------------------------------------------------------------- | :------- |
| `Content-Type` | String | The parameter type. Set it as `application/json`. | Yes |
| `Accept` | String | The parameter type. Set it as `application/json`. | Yes |
| `Authorization` | String | The authentication token of the user or admin, in the format of `Bearer ${YourAppToken}`, where `Bearer` is a fixed character, followed by an English space, and then the obtained token value. | Yes |
#### Request body
The request body is a JSON object, which contains the following fields:
| Field | Type | Description | Required |
| :---------- | :-------------------- | :--------------------------------------------------------------------------------------------------------------------------- | :------- |
| `usernames` | An array of usernames | The usernames to be added to the blocklist, such as \["user1", "user2"]. You can pass in a maximum of 50 user IDs each time. | Yes |
### HTTP response
#### Response body
If the returned HTTP status code is 200, the request succeeds, and the response body contains the following fields:
| Parameter | Type | Description |
| :-------- | :---- | :--------------------------------------------- |
| `data` | Array | An array of usernames to add to the blocklist. |
For other fields and descriptions, see [Common parameters](#param).
If the returned HTTP status code is not 200, the request fails. You can refer to [Status codes](./http-status-codes) for possible causes.
### Example
#### Request example
```bash
curl -X POST -H 'Content-Type: application/json' -H 'Accept: application/json' -H 'Authorization: Bearer ' -d '{ "usernames": [ "user2" ] }' 'http://XXXX/app-id/XXXX/users/user1/blocks/users'
```
#### Response example
```json
{
"uri": "https://XXXX/app-id/XXXX",
"timestamp": 1542600372046,
"organization": "XXXX",
"application": "8be024f0-XXXX-XXXX-b697-5d598d5f8402",
"entities": [],
"action": "post",
"data": [
"user2"
],
"duration": 110,
"applicationName": "XXXX"
}
```
## Retrieving the blocklist
This method retrieves the current user's blocklist.
For each App Key, the call frequency limit of this method is 50 per second.
### HTTP request
```bash
GET https://{host}/app-id/{app_id}/users/{owner_username}/blocks/users?pageSize={N}&cursor={cursor}
```
#### Path parameter
| Parameter | Type | Description | Required |
| ---------------- | ------ | ---------------- | -------- |
| `owner_username` | String | current user id. | Yes |
For other parameters and detailed descriptions, see [Common parameters](#param).
#### Query parameter
| Parameter | Type | Description | Required |
| ---------- | ------ | ---------------------------------------------------------------------------------------------------------- | -------- |
| `pageSize` | Number | The number of users on the blocklist that you expect to retrieve on each page. The value range is \[1,50]. | No |
| `cursor` | String | Where to start getting data. | No |
If neither `pageSize` nor `cursor` is specified, the server returns the blocklist of up to 500 users that are added most recently. If `pageSize` is specified and `cursor` is ignored, the server returns the blocklist of up to 50 users are added most recently.
#### Request header
| Parameter | Type | Description | Required |
| :-------------- | :----- | :------------------------------------------------------------------------------------------------------------------------------------------------------------------------------------------ | :------- |
| `Accept` | String | The parameter type. Set it as `application/json`. | Yes |
| `Authorization` | String | The authentication token of the app admin, in the format of `Bearer ${YourAppToken}`, where `Bearer` is a fixed character, followed by an English space, and then the obtained token value. | Yes |
### HTTP response
#### Response body
If the returned HTTP status code is 200, the request succeeds, and the response body contains the following fields:
| Parameter | Type | Description |
| :-------- | :----- | :---------------------------------------------- |
| `data` | Array | An array of usernames in the blocklist. |
| `count` | Number | The number of retrieved users on the blocklist. |
For other fields and descriptions, see [Common parameters](#param).
If the returned HTTP status code is not 200, the request fails. You can refer to [Status codes](./http-status-codes) for possible causes.
### Example
#### Request example
```bash
curl -X GET -H 'Accept: application/json' -H 'Authorization: Bearer {YourAppToken}' 'https://XXXX/app-id/XXXX/users/user1/blocks/users?pageSize=2'
```
#### Response example
```json
{
"uri": "http://XXXX/app-id/XXXX/users/user1/blocks/users",
"timestamp": 1542599978751,
"entities": [],
"count": 2,
"action": "get",
"data": [
"tst05",
"tst04"
],
"duration": 4
}
```
## Removing a user from the blocklist
Removes the specified user from the blocklist. After removing a user from the blocklist, that user resumes their previous relationship with the current user, as one of the following:
* A contact who can send and receive messages with the current user.
* a stranger who has not been added as contact.
For each App Key, the call frequency limit of this method is 50 per second.
### HTTP request
```bash
DELETE https://{host}/app-id/{app_id}/users/{owner_username}/blocks/users/{blocked_username}
```
#### Path parameter
| Parameter | Type | Description | Required |
| :----------------- | :----- | :--------------------------------------------- | :------- |
| `owner_username` | String | The user ID of the current user. | Yes |
| `blocked_username` | String | The username to be removed from the blocklist. | Yes |
For other parameters and detailed descriptions, see [Common parameters](#param).
#### Request header
| Parameter | Type | Description | Required |
| :-------------- | :----- | :---------------------------------------------------------------------------------------------------------------------------------------------------------------------------------------------- | :------- |
| `Accept` | String | The parameter type. Set it as `application/json`. | Yes |
| `Authorization` | String | The authentication token of the user or admin, in the format of `Bearer ${YourAppToken}`, where `Bearer` is a fixed character, followed by an English space, and then the obtained token value. | Yes |
### HTTP response
#### Response body
If the returned HTTP status code is 200, the request is successful. For fields and descriptions of the response body, see [Common parameter](#param).
If the returned HTTP status code is not 200, the request fails. You can refer to [Status codes](./http-status-codes)(#code) for possible causes.
### Example
#### Request example
```bash
curl -X DELETE -H 'Accept: application/json' -H 'Authorization: Bearer {YourAppToken}' 'http://XXXX/app-id/XXXX/users/user1/blocks/users/user2'
```
#### Response example
```json
{
"path": "/users/4759aa70-XXXX-XXXX-925f-6fa0510823ba/blocks",
"uri": "https://XXXX/app-id/XXXX/users/4759aa70-XXXX-XXXX-925f-6fa0510823ba/blocks",
"timestamp": 1542600712985,
"organization": "XXXX",
"application": "8be024f0-XXXX-XXXX-b697-5d598d5f8402",
"entities": [
{
"uuid": "b2aade90-XXXX-XXXX-a974-f3368f82e4f1",
"type": "user",
"created": 1542356523769,
"modified": 1542597334500,
"username": "user2",
"activated": true,
}
],
"action": "delete",
"duration": 20,
"applicationName": "XXXX"
}
```
## Status codes
For details, see [HTTP Status Codes](./http-status-codes).
# Global mute (/en/api-reference/api-ref/im/global-mute)
With increasingly strict rules and regulations on app compliance, content supervision has become a crucial part of the app lifecycle. To meet this need, Chat provides the global-mute feature, which enables you to mute any user ID in one-to-one chats, chat groups, or chat rooms, preventing these users from sending messages to other chat users, chat groups, or chat rooms. When global-mute expires, the chat server automatically unmutes the user ID, and this user resumes the privilege of sending messages.
This feature can be widely applied in apps that power real-time engagements. For example, if a user frequently sends illegitimate advertisements to multiple chat rooms, you can use global-mute to prevent this user from sending chat room messages for 15 days; if a user makes improper statements concerning politics, global-mute can permanently prevent this user from sending any messages in one-to-one chats, chat groups, or chat rooms.
Before calling the following methods, make sure you understand the call frequency limit of the Chat RESTful APIs as described in [Limitations](./limitations#call-limit-of-server-sides).
## Common parameters
The following table lists common request and response parameters of the Chat RESTful APIs:
### Request parameters
| Parameter | Type | Description | Required |
| :--------- | :----- | :----------------------------------------------------------------------------------------------------------------------------------------------------------------------------------------------------------------------------------------------------------------------------------------------------------------------------------------------------------------------------------------------------------------------------------------------------------------------------------------------------------------------------------------------------- | :------- |
| `host` | String | The domain name assigned by the Chat service to access RESTful APIs. For how to get the domain name, see [Get the information of your project](/en/realtime-media/im/get-started/enable#get-chat-project-information). | Yes |
| `app_id` | String | The unique identifier automatically assigned to each project by Agora | Yes |
| `username` | String | The unique login account of the user. The user ID must be 64 characters or less and cannot be empty. The following character sets are supported:* 26 lowercase English letters (a-z)
* 10 numbers (0-9)
* "\_", "-", "."
Do not use any of the 26 uppercase English letters (A-Z). Ensure that each `username` under the same App ID is unique. Do not set this parameter as a UUID, email address, phone number, or other sensitive information.
| Yes |
### Response parameters
| Parameter | Type | Description |
| :---------------- | :----- | :--------------------------------------------------------------------------------------------------- |
| `action` | String | The request method. |
| `organization` | String | The unique identifier assigned to each company (organization) by the Chat service. |
| `application` | String | A unique internal ID assigned to each app by the Chat service. You can safely ignore this parameter. |
| `applicationName` | String | The unique identifier assigned to each app by the Chat service. |
| `uri` | String | The request URI. |
| `path` | String | The request path, which is part of the request URL. You can safely ignore this parameter. |
| `data` | JSON | The response details. |
| `timestamp` | Number | The Unix timestamp (ms) of the HTTP response. |
| `duration` | Number | The duration (ms) from when the HTTP request is sent to the time the response is received. |
## Authorization
Chat RESTful APIs require Bearer HTTP authentication. Every time an HTTP request is sent, the following `Authorization` field must be filled in the request header:
```html
Authorization: Bearer ${YourAppToken}
```
In order to improve the security of the project, Agora uses a token (dynamic key) to authenticate users before they log in to the chat system. Chat RESTful APIs only support authenticating users using app tokens. For details, see [Authentication using App Token](/en/realtime-media/im/build/secure-access-and-authentication/authentication).
## Globally mute a specified user
This method mutes a specified user in one-to-one chats, chat groups, or chat rooms. After a successful method call, this user can no longer send messages in one-to-one chats, chat groups, or chat rooms, depending on your settings in the request parameter.
For each App Key, the call frequency limit of this method is 100 per second.
### HTTP request
```html
POST https://{host}/app-id/{app_id}/mutes
```
#### Path parameter
For parameters and the detailed descriptions, see [Common parameters](#param).
#### Request parameter
| Parameter | Type | Required | Description |
| ----------- | ------ | -------- | ------------------------------------------------------------------------------------------------------------------------------------------------------------------------------------------------------------------------------------------------------------------------------------------------------------------------------------------------------------- |
| `username` | String | Yes | The user ID that you want to globally mute. |
| `chat` | Number | No | The amount of time to mute this user ID in one-to-one chats, in seconds. The maximum value is 2,147,483,647.> 0: The amount of time to mute the user in one-to-one chats.0: Unmutes the user in one-to-one chats.-1: Permanently mutes the user in one-to-one chats.If you set this parameter as any other negative values, the setting does not take effect. |
| `groupchat` | Number | No | The amount of time to mute this user in chat groups, in seconds. The maximum value is 2,147,483,647.> 0: The amount of time to mute the user in chat groups.0: Unmutes the user in chat groups.-1: Permanently mutes the user in chat groups.If you set this parameter as any other negative values, the setting does not take effect. |
| `chatroom` | Number | No | The amount of time to mute this user in chat rooms, in seconds. The maximum value is 2,147,483,647.> 0: The amount of time to mute the user in chat rooms.0: Unmutes the user in chat rooms.-1: Permanently mutes the user in chat rooms.If you set this parameter as any other negative values, the setting does not take effect. |
#### Request header
| Parameter | Type | Description |
| --------------- | ------ | ----------------------------------------------------------------------------------------------------------------------------------------------------------------------------------------------- |
| `Content-Type` | String | The content type. Set it to `application/json`. |
| `Authorization` | String | The authentication token of the user or admin, in the format of `Bearer ${YourAppToken}`, where `Bearer` is a fixed character, followed by an English space, and then the obtained token value. |
### HTTP response
If the returned HTTP status code is `200`, the request succeeds, and the response body contains the following fields:
| Parameter | Type | Description |
| --------- | ------ | ------------------------------------------------------------------------------------ |
| `result` | String | The result of this method call. `ok` means that global-mute is successfully enabled. |
For other fields and detailed descriptions, see [Common parameters](#param).
If the returned HTTP status code is not `200`, the request fails. You can refer to [Status codes](./http-status-codes) for possible reasons.
### Example
#### Request example
```bash
curl -L -X POST 'https://XXXX/app-id/XXXX/mutes' \
-H 'Authorization: Bearer {YourAppToken}' \
-H 'Content-Type: application/json' \
--data-raw '{
"username": "XXXX",
"chat": 100,
"groupchat": 100,
"chatroom": 100
}'
```
#### Response example
```json
{
"path": "/mutes",
"uri": "https://XXXX/app-id/XXXX/mutes",
"timestamp": 1631609754727,
"organization": "XXXX",
"application": "XXXX",
"action": "post",
"data": {
"result": "ok"
},
"duration": 74,
"applicationName": "XXXX"
}
```
## Query the detailed information of global-mute
This method queries the detailed information of the global-mute settings of the specified user in one-to-one chats, chat groups, or chat rooms.
For each App Key, the call frequency limit of this method is 100 per second.
### HTTP request
```html
GET https://{host}/app-id/{app_id}/mutes/{username}
```
#### Path parameter
| Parameter | Type | Required | Description |
| ---------- | ------ | -------- | --------------------------------------------------------- |
| `username` | String | Yes | The user ID whose global-mute settings you want to query. |
For other parameters and the detailed descriptions, see [Common parameters](#param).
#### Request header
| Parameter | Type | Description |
| --------------- | ------ | ----------------------------------------------------------------------------------------------------------------------------------------------------------------------------------------------- |
| `Content-Type` | String | The content type. Set it to `application/json`. |
| `Authorization` | String | The authentication token of the user or admin, in the format of `Bearer ${YourAppToken}`, where `Bearer` is a fixed character, followed by an English space, and then the obtained token value. |
### HTTP response
If the returned HTTP status code is `200`, the request succeeds, and the response body contains the following fields:
| Parameter | Type | Description |
| ----------- | ------ | -------------------------------------------------------------------------------------------------------------------------------------------------------------------------------------------------------------------------------------------------------------------------------------- |
| `userid` | String | The user ID whose global-mute settings you want to query. |
| `chat` | Number | The remaining time that this user is muted in one-to-one chats, in seconds. The maximum value is 2,147,483,647.> 0: The remaining time that this user is muted in one-to-one chats.0: This user is unmuted in one-to-one chats.-1: This user is permanently muted in one-to-one chats. |
| `groupchat` | Number | The remaining time that this user is muted in chat groups, in seconds. The maximum value is 2,147,483,647.> 0: The remaining time that this user is muted in chat groups.0: This user is unmuted in chat groups.-1: This user is permanently muted in chat groups. |
| `chatroom` | Number | The remaining time that this user is muted in chat rooms, in seconds. The maximum value is 2,147,483,647.> 0: The remaining time that this user is muted in chat rooms.0: This user is unmuted in chat rooms.-1: This user is permanently muted in chat rooms. |
| `unixtime` | Number | The Unix timestamp of the current operation. |
For other fields and detailed descriptions, see [Common parameters](#param).
If the returned HTTP status code is not `200`, the request fails. You can refer to [Status codes](./http-status-codes) for possible reasons.
### Example
#### Request example
```bash
curl -L -X GET 'https://XXXX/app-id/XXXX/mutes/{username}' \
-H 'Authorization: Bearer {YourAppToken}' \
-H 'Content-Type: application/json'
```
#### Response example
```json
{
"path": "/mutes",
"uri": "https://XXXX/app-id/XXXX/mutes",
"timestamp": 1631609831800,
"organization": "XXXX",
"application": "XXXX",
"action": "get",
"data": {
"userid": "XXXX",
"chat": 96,
"groupchat": 96,
"chatroom": 96,
"unixtime": 1631609831
},
"duration": 13,
"applicationName": "XXXX"
}
```
## Retrieve all globally muted users
This method retrieves all the users that have been globally muted in the app, and returns the remaining time that each user is muted for each type of chat.
For each App Key, the call frequency limit of this method is 100 per second.
### HTTP request
```html
GET https://{host}/app-id/{app_id}/mutes
```
#### Path parameter
For parameters and the detailed descriptions, see [Common parameters](#param).
#### Request header
| Parameter | Type | Description |
| --------------- | ------ | ----------------------------------------------------------------------------------------------------------------------------------------------------------------------------------------------- |
| `Content-Type` | String | The content type. Set it to `application/json`. |
| `Authorization` | String | The authentication token of the user or admin, in the format of `Bearer ${YourAppToken}`, where `Bearer` is a fixed character, followed by an English space, and then the obtained token value. |
#### Query parameter
| Parameter | Type | Required | Description |
| ---------- | ------ | -------- | --------------------------------------------------------------------- |
| `pageNum` | Number | No | The number of pages for querying the globally muted users in the app. |
| `pageSize` | Number | No | The number of data entries on each page. The value range is \[1,50]. |
### HTTP response
If the returned HTTP status code is `200`, the request succeeds, and the response body contains the following fields:
| Parameter | Type | Description |
| ----------- | ------ | -------------------------------------------------------------------------------------------------------------------------------------------------------------------------------------------------------------------------------------------------------------------------------------- |
| `username` | String | The user ID whose global-mute settings you want to query. |
| `chat` | Number | The remaining time that this user is muted in one-to-one chats, in seconds. The maximum value is 2,147,483,647.> 0: The remaining time that this user is muted in one-to-one chats.0: This user is unmuted in one-to-one chats.-1: This user is permanently muted in one-to-one chats. |
| `groupchat` | Number | The remaining time that this user is muted in chat groups, in seconds. The maximum value is 2,147,483,647.> 0: The remaining time that this user is muted in chat groups.0: This user is unmuted in chat groups.-1: This user is permanently muted in chat groups. |
| `chatroom` | Number | The remaining time that this user is muted in chat rooms, in seconds. The maximum value is 2,147,483,647.> 0: The remaining time that this user is muted in chat rooms.0: This user is unmuted in chat rooms.-1: This user is permanently muted in chat rooms. |
| `unixtime` | Number | The Unix timestamp of the current operation. |
For other fields and detailed descriptions, see [Common parameters](#param).
If the returned HTTP status code is not `200`, the request fails. You can refer to [Status codes](./http-status-codes) for possible reasons.
### Example
#### Request example
```bash
curl -L -X GET 'https://XXXX/app-id/XXXX/mutes?pageNum=1&pageSize=10' \
-H 'Authorization: Bearer {YourAppToken}' \
-H 'Content-Type: application/json'
```
#### Response example
```json
{
"path": "/mutes",
"uri": "https://XXXX/app-id/XXXX/mutes",
"timestamp": 1631609858771,
"organization": "XXXX",
"application": "XXXX",
"action": "get",
"data": {
"data": [
{
"username": "XXXX",
"chatroom": 0
},
{
"username": "XXXX",
"groupchat": 69
},
{
"username": "XXXX",
"chat": 69
},
{
"username": "XXXX",
"chatroom": 69
},
{
"username": "XXXX",
"chatroom": 0
},
{
"username": "XXXX",
"groupchat": 0
},
{
"username": "XXXX",
"chat": 0
}
],
"unixtime": 1631609858
},
"duration": 17,
"applicationName": "XXXX"
}
```
## Status codes
For details, see [HTTP Status Codes](./http-status-codes).
# HTTP status codes (/en/api-reference/api-ref/im/http-status-codes)
This page describes the frequently returned HTTP status codes for the Chat RESTful API.
## `200` - Success
The API request succeeds.
## `4xx` - Client error
The API request fails due to a client error. Troubleshoot based on the returned `error` code and retry the request.
### 400 Bad Request
Indicates that the API request could not be understood by the server because of malformed syntax.
| Status code | Error code | Error message | Description | Fix |
| :---------- | :------------------------------------ | :----------------------------------------------------------------------------------------------------------------- | :------------------------------------------------------------------------------------------------------------------------------------------------------------------------------------------------------------------- | :------------------------------------------------------------------------------------------------------------------------------------------------------------------------------------------------------------------------------------------------------------------------------------------------------------------------------------------------------------------------------------------------------------------------------------------------- |
| `400` | `json_parse` | "Unexpected character." | The request body does not conform to the standard JSON format, so the server cannot parse it properly. | Use tools to check and ensure that the JSON format is correct. |
| `400` | `illegal_argument` | "Entity 'user' requires a property named username." | The username is not specified when registering a user. | Pass the `username` parameter when registering a user. |
| `400` | `illegal_argument` | "This is an invalid request." | The request URL, header, or body is invalid. | Check that the request URL, header, and body are correct. |
| `400` | `illegal_argument` | "'From' can't be empty." | The sender is not specified when sending a message. | When sending a message, pass the `from` field. |
| `400` | `illegal_argument` | "'Target\_type' can only be 'users', 'chatgroups', or 'chatrooms'." | A value other than `users`, `chatgroups`, or `chatrooms` is passed to `target_type` when sending a message. | The `target_type` parameter must be `users`, `chatgroups`, or `chatrooms`. |
| `400` | `illegal_argument` | "`{username}` is not legal." | The specified username is invalid when registering a user. For details, see [Registering a user](/en/api-reference/api-ref/im/user-system-registration#registering-a-user). | When registering a user, pass a valid user ID `username`. |
| `400` | `illegal_argument` | "message is too large" | The body or extension information of the message exceeds the allowed size. | Limit the content of the `body` and `ext` fields to no more than 5 KB. |
| `400` | `illegal_argument` | "This `chatmessage` request is not supported." | The specified time format is incorrect when querying chat history. The correct format is `yyyyMMddHH`. | Format the `time` parameter as `yyyyMMddHH`. |
| `400` | `illegal_argument` | "Illegal arguments: appkey: `{app_key}`, time: `{yyyymmddhh}`, maybe chat message history is expired or unstored." | The chat history for the queried time period has expired or has not been generated. For details, see [Retrieving historical messages](/en/api-reference/api-ref/im/message-management#retrieve-historical-messages). | When retrieving chat history, note the following restrictions:A single request retrieves message history for one hour starting from the specified time.You can retrieve historical messages for up to the past 3 days. To extend this limit, contact [support@agora.io](mailto\:support@agora.io).When platform message volume is high, generating historical records may take time. For time-sensitive requirements, pull records after 24 hours. |
| `400` | `invalid_parameter` | "Some of `{group_id}` are not valid fields." | The specified name, description, or size of the group is invalid when creating a group. | [Create a group](/en/api-reference/api-ref/im/chat-group-management/create-delete-retrieve-groups#creating-a-group). Enter a valid group name, description, and maximum number of members. |
| `400` | `duplicate_unique` `_property_exists` | "Application null Entity user requires that property named `username` be unique, value of `{username}` exists." | The specified `username` already exists when registering a user. | User IDs must be unique within the app. When [registering a user](/en/api-reference/api-ref/im/user-system-registration#registering-a-user), pass a unique user ID. |
| `400` | N/A | "set presence failed" | The request to set the presence status failed. | Reset the user's presence status and ensure that the correct parameters are passed. |
| `400` | N/A | "ext is too big" | The custom presence status exceeds the allowed length. | Limit the online status extension message to no more than 1024 bytes. |
| `400` | N/A | "resource not exist" | The specified device resource does not exist. | Pass the correct device resource ID. The ID is a unique identifier assigned by the server in the format `{device type}_{resource ID}`, where `device type` can be `android`, `ios`, or `web`, and `resource ID` is assigned by the SDK. For example, `android_123423453246`. |
| `400` | N/A | "you can't sub yourself" | Subscribing to your own presence status is not allowed. | Remove yourself from the list of users you subscribe to. |
| `400` | N/A | "too many sub presence" | The number of presence subscriptions exceeds the limit. | You can subscribe to the presence status of up to 100 user IDs at a time. |
| `400` | N/A | "too many get presences" | The number of presence statuses you are trying to retrieve exceeds the limit. | You can retrieve the presence status of up to 100 user IDs at a time. |
| `400` | N/A | "too many unsub presences" | The number of users you are trying to unsubscribe from exceeds the limit. | You can unsubscribe from the presence status of up to 100 user IDs at a time. |
| `400` | N/A | "too many queries" | The call frequency exceeds the limit. | Reduce the frequency of your API calls. |
### 401 Unauthorized
Indicates that the authentication process could not be implemented due to invalid tokens.
| Status code | Error code | Error message | Description | Fix |
| :---------- | :---------------------- | :-------------------------------------------------------- | :--------------------------------------------------------------------------------------------------------------------------------------------------------------------------------------------------------------------------------------------------------------------------------------------------- | :---------------------------------------------------- |
| `401` | `unauthorized` | "Registration is not open, please contact the app admin." | The app token is missing, incorrect, expired, or in an invalid format when calling [Registering a user](/en/api-reference/api-ref/im/user-system-registration#registering-a-user) or [Registering multiple users](/en/api-reference/api-ref/im/user-system-registration#registering-multiple-users). | Pass a valid app token. |
| `401` | `unauthorized` | "Unable to authenticate due to expired access token." | The app token is missing or expired when calling any RESTful API other than the user registration APIs. | Pass a valid app token. |
| `401` | `auth_bad_access_token` | "Unable to authenticate due to corrupt access token." | The app token is in an invalid format when calling any RESTful API other than the user registration APIs. | Pass a valid app token. |
| `401` | `auth_bad_access_token` | "Unable to authenticate." | The app token format is correct but was not generated by the server that receives the request. This happens when calling any RESTful API other than the user registration APIs. | Pass a valid app token generated by the Agora server. |
### 403 Forbidden
Indicates that the API request is rejected by the server due to forbidden operations.
| Status code | Error code | Error message | Description | Fix |
| :---------- | :------------- | :---------------------------------------------------------------------------------------- | :-------------------------------------------------------------------------------- | :------------------------------------------------------------------------ |
| `403` | `forbidden_op` | "Can not join this group, reason: user: `{username}` already in group: `{group_id}`." | The user is already a member of the group. | Do not add duplicate users to the group. |
| `403` | `forbidden_op` | "Users `{username}` are not members of this group!" | The user to be removed is not a member of the group. | Only remove users who are members of the group. |
| `403` | `forbidden_op` | "User: `{username}` doesn't exist in group: `{group_id}`." | The user to be assigned ownership is not a member of the group. | Transfer ownership only to members within the group. |
| `403` | `forbidden_op` | "New owner and old owner are the same." | The new owner is the same as the current owner. | Transfer ownership to a different member. |
| `403` | `forbidden_op` | "Forbidden operation on group owner!" | The operation is not allowed on the group owner, such as blocking the owner. | Do not perform restricted actions on the group owner. |
| `403` | `forbidden_op` | "Can not join this group, reason:user: `{username}` has joined too many groups/chatroom!" | The user has joined the maximum number of groups or chat rooms. | Users cannot join more than the allowed number of groups or chat rooms. |
| `403` | `forbidden_op` | "This appKey has created too many groups/chatrooms!" | The App Key has reached the limit for creating groups or chat rooms. | Users cannot create more than the allowed number of groups or chat rooms. |
| `403` | `exceed_limit` | "Invitee's contact max count" | The user receiving the friend request has reached the maximum number of contacts. | The maximum number of contacts for a user has been reached. |
| `403` | `exceed_limit` | "Inviter's contact max count" | The user sending the friend request has reached the maximum number of contacts. | The maximum number of contacts for a user has been reached. |
### 404 Not Found
Indicates that the specified resources of the API request could not be found by the server.
| Status code | Error code | Error message | Description | Fix |
| :---------- | :----------------------------------- | :------------------------------------------------------------------------------------------------ | :-------------------------------------------------------------------------------------------------------------------------------- | :------------------------------------------------------------------------------------------------------------------------------ |
| `404` | `organization_application_not_found` | "Could not find application for `{org_url}` from URI: `{app_url}`/token." | The specified organization or application does not exist. | Pass the correct `app_id` when calling the RESTful API. |
| `404` | `service_resource_not_found` | "Service resource not found." | The specified user, group, or chat room does not exist when calling user-, group-, or chat room–related APIs. | Pass the correct User ID, Group ID, or Chat Room ID when calling the RESTful API. |
| `404` | `resource_not_found` | "username XXXX doesn't exist" | The specified user does not exist. For example, the invited user during group creation does not exist. | Pass the correct User ID when calling the RESTful API. |
| `404` | `service_resource_not_found` | "Service resource not found." | The specified user does not exist, or dirty data blocks the operation. Delete the user by UUID and re-register the same username. | Pass the UUID to delete the user, then register the username again. |
| `404` | `storage_object_not_found` | "Failed to find chat message history download URL for appkey: `{app_key}`, time: `{yyyymmddhh}`." | No chat history exists within the queried time period. | [Submit a ticket](https://agora-ticket.agora.io/) to Agora Support. |
| `404` | `file_expired` | "file xxxxx is expired" | The file has expired. | By default, message attachments are stored for 7 days. To extend storage, contact [support@agora.io](mailto\:support@agora.io). |
### 405 Method Not Allowed
Indicates that the API request method is not supported by the server.
**Fix:** Follow the RESTful API documentation and use the correct request methods: `GET`, `POST`, `PUT`, and `DELETE`.
### 408 Request Timeout
Indicates that the server did not receive the API request within the allotted time.
**Fix:** Resend the request.
### 413 Payload Too Large
Indicates that the API request is larger than the maximum server can process.
| Status code | Error code | Error message | Description | Fix |
| :---------- | :----------------------------- | :----------------------------------------- | :------------------------------------------------------------------------------------------------------------------------------------------------------------------- | :-------------------------------------------------------------------------------------------------------------------- |
| `413` | `file exceeding maximum limit` | "the file size exceeds the maximum limit." | The size of the message attachment uploaded using the [message upload API](/en/api-reference/api-ref/im/message-management#upload-a-file) exceeds the allowed limit. | For more information about the size limit of message attachments, see [Message Length](./limitations#message-length). |
### 415 Unsupported Media Type
Indicates that the format of the API request is not supported by the server.
| Status code | Error code | Error message | Description | Fix |
| :---------- | :---------------- | :------------------------ | :--------------------------------------------------------------------------------------------------------------------------------------------------------------------------------------------------------------------------------------------------- | :-------------------------------------------------------------------------------------------------------------------------------------------------------------------------------------------------------------- |
| `415` | `web_application` | "Unsupported Media Type." | The format of the client request is not supported by the server. For example, the request header includes extra parameters, does not include `"Content-Type": "application/json"`, or the request body does not conform to the standard JSON format. | Ensure that the request format meets the server’s requirements. For example, include `"Content-Type": "application/json"` in the request header and ensure that the request body uses the standard JSON format. |
### 429 Too Many Requests
Indicates that the API request exceeds the allowed call limit.
| Status code | Error code | Error message | Description | Fix |
| :---------- | :----------------- | :----------------------------------------------------------------------------------------------- | :--------------------------------------------------------------- | :------------------------------------------------------------------------------------------------------------------------------------------------------------------------------------------------------------------------------------------- |
| `429` | `resource_limited` | "You have exceeded the limit of the `{pricing_plan}` edition. Please upgrade to higher edition." | The usage of Chat exceeds the limit of the current pricing plan. | For usage limits, see [Pricing](/en/realtime-media/im/reference/pricing). To upgrade your pricing plan, contact [support@agora.io](mailto\:support@agora.io). |
| `429` | `reach_limit` | "This request has reached API limit." | The calling frequency of the Chat API exceeds the allowed limit. | You cannot exceed the call frequency limit for RESTful APIs. For details, see [RESTful API Call Frequency Limit](/en/api-reference/api-ref/im#features). To upgrade your pricing plan, contact [support@agora.io](mailto\:support@agora.io). |
## `5xx` - Server error
These HTTP status codes indicate that the API request failed due to a server error. If the request continues to fail after retries, [submit a ticket](https://agoraio.zendesk.com/hc/en-us) to Agora Support and provide your system logs.
If you encounter a 5xx error, [contact Agora technical support](https://agoraio.zendesk.com/hc/en-us).
### 500 Internal Server Error
Indicates that the server encountered an unexpected condition that prevents it from fulfilling the request.
| Status code | Error code | Error message | Description |
| :---------- | :------------------------------ | :---------------------------------------------------------------------------------------------------------------------------- | :--------------------------------------------------------------------------------------------------------------- |
| `500` | `no_full_text_index` | "Entity 'user' with property named 'username' is not full text indexed. You cannot use the 'contains' operand on this field." | The `contains` operand cannot be used on the `username` property because it does not support full-text indexing. |
| `500` | `unsupported_service_operation` | "Service operation not supported." | The request method is not supported by the request URL. |
| `500` | `web_application` | "javax.ws.rs.WebApplicationException" | The request URL is invalid. |
### 501 Not Implemented
The server cannot recognize or implement the API request.
### 502 Bad Gateway
The server, while acting as a gateway or proxy, received an invalid response from the upstream server.
### 503 Service Unavailable
The server is unavailable to handle the request.
### 504 Gateway Timeout
The server, while acting as a gateway or proxy, did not receive a timely response from the upstream server.
# Chat Overview (/en/api-reference/api-ref/im)
Chat provides RESTful APIs through the REST platform. You can send HTTP requests to the Agora server through your business server to realize real-time communication on the server side.
## REST Platform Architecture
The Chat REST platform provides a multi-tenant architecture to manage resources in the form of a Collection. A Collection contains the following:
* Database
* Organizations (orgs)
* Apps (apps)
* Users (users)
* Chat groups (chatgroups)
* Chat messages (chatmessages)
* Chat files (chatfiles)
The user data of different orgs is isolated from each other. Under the same org, the user data of different apps is also isolated from each other. The data structure of an org is as follows:
Data structure of an org
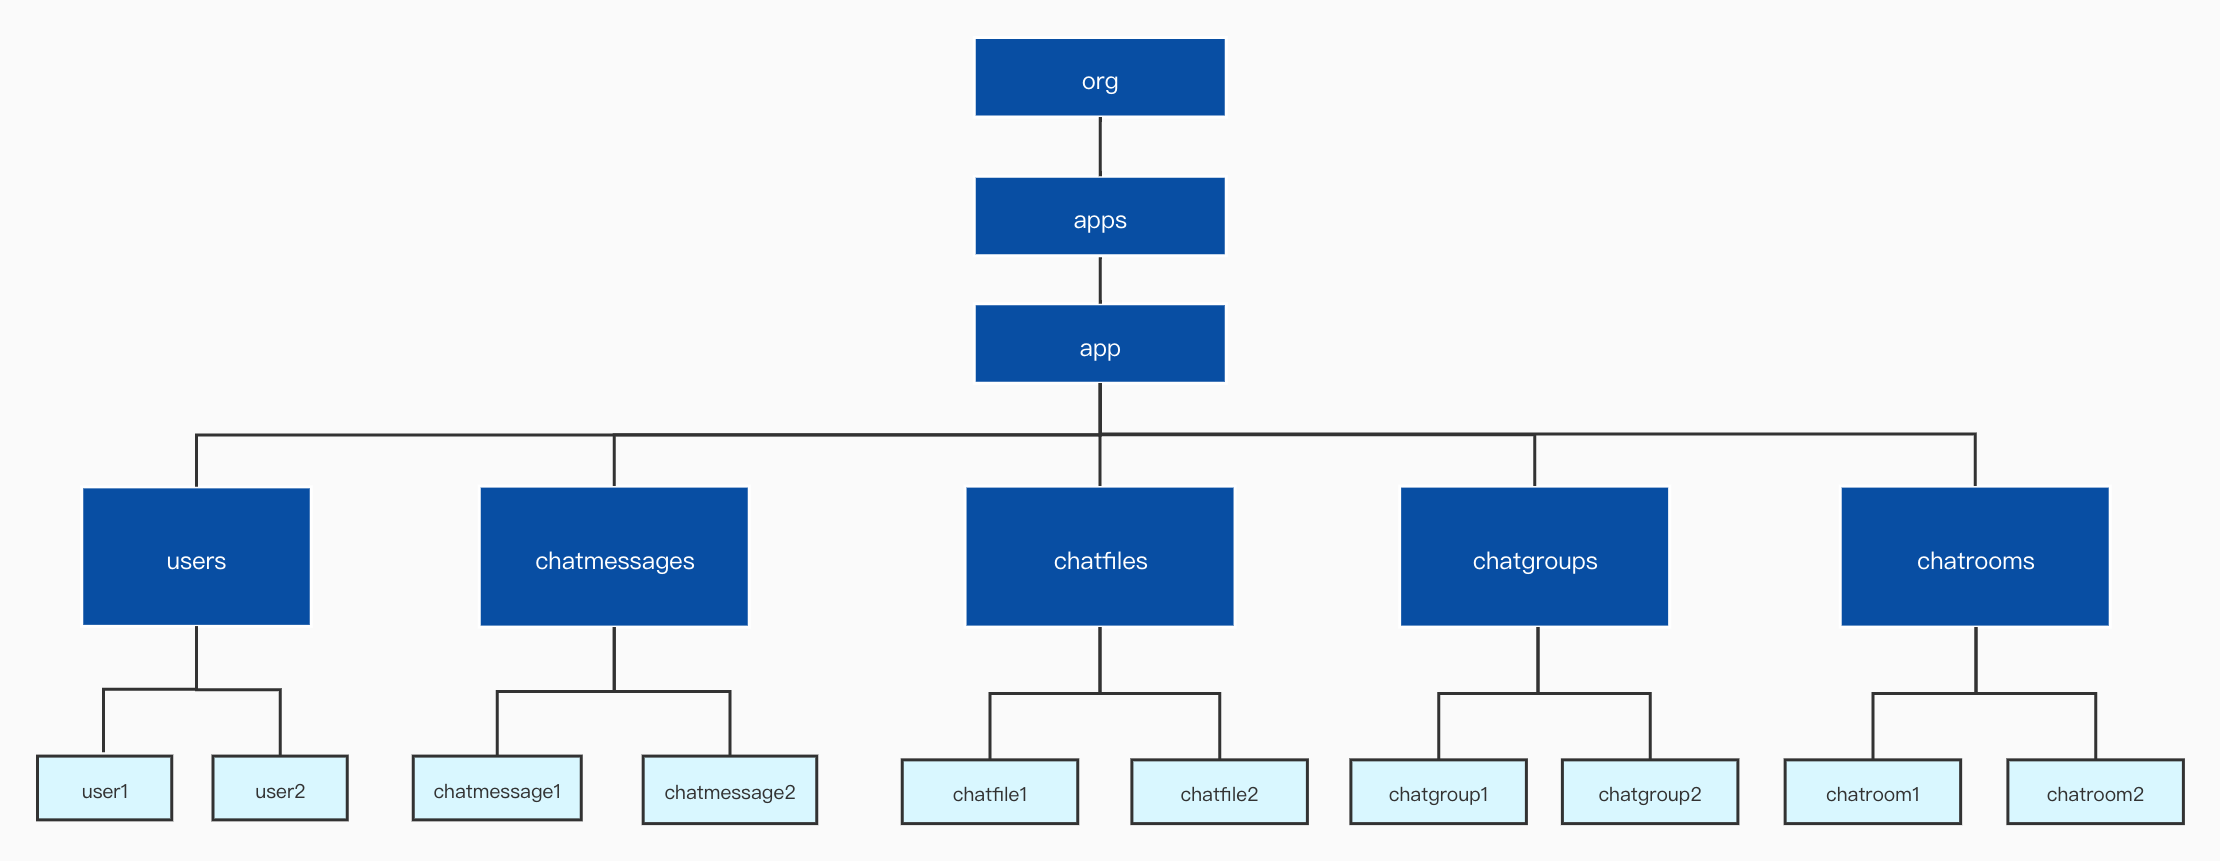
## Prerequisites
Ensure that you meet the following requirements before calling the Chat RESTful APIs:
* You have [enabled and configured Chat in the Console](/en/realtime-media/im/get-started/enable).
* You have retrieved an app token from the app server. For details, see [Authentication with App Token](/en/realtime-media/im/build/secure-access-and-authentication/authentication).
## Features
### User system integration
This group of methods enable you to implement user system management, including user registration, retrieving users, modifying user attributes, and deleting users.
| Name | Method | Request | Description | Rate Limits |
| :------------------------------------------------ | :----- | :-------------------------------------------------------------- | :------------------------------------------------- | :---------- |
| Registering a user | POST | `/app-id/{app_id}/users` | Creates a user account. | 100/second |
| Registering multiple users | POST | `/app-id/{app_id}/users` | Creates multiple user accounts. | 100/second |
| Retrieving a user | GET | `/app-id/{app_id}/users/{username}` | Retrieves the information of the specified user. | 100/second |
| Retrieving multiple users. | GET | `/app-id/{app_id}/users` | Retrieves the information of the specified users. | 100/second |
| Deleting a user | DELETE | `/app-id/{app_id}/users/{username}` | Deletes the specified user. | 100/second |
| Deleting multiple users | DELETE | `/app-id/{app_id}/users` | Deletes all the users in the app. | 30/second |
| Banning a user | POST | `/app-id/{app_id}/users/{username}/deactivate` | Bans a user. | 100/second |
| Unbanning a user | POST | `/app-id/{app_id}/users/{username}/activate` | Unbans a user. | 100/second |
| Forcing a user offline | POST | `/app-id/{app_id}/users/{username}/disconnect` | Forcibly moves a user offline. | 100/second |
| Querying the online state | GET | `/app-id/{app_id}/users/{username}/status` | Queries whether a user is online. | 100/second |
| Querying the online state of multiple users | POST | `/app-id/{app_id}/users/batch/status` | Queries whether multiple users are online. | 50/second |
| Querying the number of offline messages | GET | `/app-id/{app_id}/users/{owner_username}/offline_msg_count` | Queries the number of offline messages a user has. | 100/second |
| Querying the delivery state of an offline message | GET | `/app-id/{app_id}/users/{username}/offline_msg_status/{msg_id}` | Queries the delivery state of an offline message. | 100/second |
### Push
This group of methods enables you to set the push message display mode, display nickname, and do-not-disturb mode.
| Name | Method | Request | Description | Rate Limits |
| :---------------------------------------------------- | :----- | :---------------------------------- | :--------------------------------------------------------------------------------------------------------- | :----------------------------------------------------------------------------------- |
| Setting the display nickname | PUT | `/app-id/{app_id}/users/{username}` | Sets the display nickname of the push message. | 100/second |
| Setting the display options | PUT | `/app-id/{app_id}/users/{username}` | Sets whether the push messages are displayed as notifications only or details are visible. | 100/second |
| Setting do-not-disturb (DND) | PUT | `/app-id/{app_id}/users/{username}` | Sets whether to enable DND, and the time to enable and disable DND. | 100/second |
| Sending push notifications to users | POST | `/app-id/{app_id}/push/single` | Sends push notifications to one or more users by specifying user IDs. | 1200/minute |
| Sending push notifications by labels | POST | `/app-id/{app_id}/push/list/label` | Sends push notifications to all users under one label, or the intersection of users under multiple labels. | 1200/minute, the number of concurrent ongoing tasks cannot exceed 3 |
| Sending push notifications to all users under the app | POST | `/app-id/{app_id}/push/task` | Sends push notifications to all users under the app. | 5/minute & 100 times per day, the number of concurrent ongoing tasks cannot exceed 3 |
#### Push label
The total rate limit of the following methods is 100/second.
| Name | Method | Request | Description |
| :-------------------------------------------------------------------------------- | :----- | :------------------------------------------------------ | :----------------------------------------------------------------------------------------------------------- |
| Creating a push label | POST | `/app-id/{app_id}/push/label` | Sets a push label to group targeting users, to implement a bespoke push. |
| Querying the detailed information of the specified push label. | GET | `/app-id/{app_id}/push/label/{labelname}` | Retrieves the detailed information of the specified push label. |
| Querying the detailed information of push labels by page | GET | `/app-id/{app_id}/push/label` | Retrieves the detailed information of multiple push labels by page. |
| Deleting a push label | DELETE | `/app-id/{app_id}/push/label/{labelname}` | Deletes the specified push label. You can delete one push label at each call. |
| Adding users to a push label | POST | `/app-id/{app_id}/push/label/{labelname}/user` | Adds one or more users to the specified push label. You can add a maximum of 100 users at each call. |
| Querying the specified user under the specified push label | GET | `/app-id/{app_id}/push/label/{labelname}/user/{member}` | Retrieves the detailed information of the specified user under the specified push label. |
| Querying the detailed information of users under the specified push label by page | GET | `/app-id/{app_id}/push/label/{labelname}/user` | Retrieves the detailed information of one or more users under the specified push label by page. |
| Removing users from a push label | DELETE | `/app-id/{app_id}/push/label/{labelname}/user` | Removes one or more users from the specified push label. You can remove a maximum of 100 users at each call. |
### Sending messages and uploading/downloading files
This group of methods enables you to send text, image, voice, video, CMD, extension, file, custom, and other types of messages, as well as uploading and downloading files from the server.
| Name | Method | Request | Description | Rate Limits |
| :------------------------------------- | :----- | :----------------------------------------------- | :---------------------------------------------------------------------------------------------------------------------------------------------------------------- | :---------- |
| Sending a message | POST | `/app-id/{app_id}/messages` | App admins use this method to send messages to users, groups, and chat rooms. This method supports sending text, image, voice, video, command, and file messages. | 100/second |
| Uploading files | POST | `/app-id/{app_id}/chatfiles` | Uploads voice and image files. | 100/second |
| Downloading files | POST | `/app-id/{app_id}/chatfiles/{file_uuid}` | Downloads voice and image files. | 100/second |
| Retrieving historical messages | GET | `/app-id/{app_id}/chatmessages/${time}` | Retrieves chat historical messages | 10/minute |
| Modify a text or custom message | PUT | `/app-id/{app_id}/messages/rewrite/{msg_id}` | Modifies a text message or custom message. | 100/second |
| Recalling a message | POST | `app-id/{app_id}/messages/recall` | Recalls a message within two minutes after it is sent. | 100/second |
| Deleting conversations from the server | DELETE | `/app-id/{app_id}/users/{userName}/user_channel` | Deletes the conversation from the server. | 100/second |
### User attributes
This group of methods enables you to set, retrieve, and delete user attributes.
| Name | Method | Request | Description | Rate Limits |
| :----------------------------------------------- | :----- | :------------------------------------------ | :--------------------------------------------------------------------------------------------- | :---------- |
| Setting user attributes | PUT | `/app-id/{app_id}/metadata/user/{username}` | Sets the user attributes for the specified user. | 100/second |
| Retrieving user attributes | GET | `/app-id/{app_id}/metadata/user/{username}` | Retrieves all the user attributes of the specified user. | 100/second |
| Retrieving the user attributes of multiple users | POST | `/app-id/{app_id}/metadata/user/get` | Retrieves multiple users' attributes by specifying the user name list and user attribute list. | 100/second |
| Deleting user attributes | DELETE | `/app-id/{app_id}/metadata/user/{username}` | Deletes all the user attributes for the specified user. | 100/second |
| Retrieving the total size of user attributes | GET | `/app-id/{app_id}/metadata/user/capacity` | Gets the total size of user attributes for all the users in the app. | 100/second |
### Contact management
This group of methods enables you to manage the user's contact list and block list.
| Name | Method | Request | Description | Rate Limits |
| :---------------------------- | :----- | :------------------------------------------------------------------------- | :------------------------------------------------ | :---------- |
| Adding a contact | POST | `/app-id/{app_id}/users/{owner_username}/contacts/users/{friend_username}` | Adds the specified user as a contact. | 100/second |
| Removing a contact | DELETE | `/app-id/{app_id}/users/{owner_username}/contacts/users/{friend_username}` | Removes the specified user from the contact list. | 100/second |
| Retrieving a contact list | GET | `/app-id/{app_id}/users/{owner_username}/contacts/users` | Retrieves the contact list. | 100/second |
| Retrieving a block list | GET | `/app-id/{app_id}/users/{owner_username}/blocks/users` | Retrieves the block list. | 50/second |
| Adding user to block list | POST | `/app-id/{app_id}/users/{owner_username}/blocks/users` | Add the specified user to the block list. | 50/second |
| Removing user from block list | DELETE | `/app-id/{app_id}/users/{owner_username}/blocks/users/{blocked_username}` | Removes the specified user from the block list. | 50/second |
### Chat group management
This group of methods enables you to create, retrieve, modify, and delete chat rooms.
| Name | Method | Request | Description | Rate Limits |
| :--------------------------------------- | :----- | :------------------------------------------------------ | :------------------------------------------------------------------------------------------------------------------ | :---------- |
| Retrieving all groups in the app by page | GET | `/app-id/{app_id}/chatgroups?limit={N}&cursor={cursor}` | Retrieves the information of all the groups in the app by page. | 100/second |
| Retrieving all the groups the user joins | GET | `/app-id/{app_id}/users/{username}/joined_chatgroups` | Retrieves all the groups the user joins by specifying the user name. | 100/second |
| Retrieving group details | GET | `/app-id/{app_id}/chatgroups/{group_ids}` | Retrieves group details by specifying the group ID. | 100/second |
| Creating a group | POST | `/app-id/{app_id}/chatgroups` | Creates a group. | 100/second |
| Banning a group | POST | `/app-id/{app_id}/chatgroups/{group_id}/disable` | Bans the specified group. Groups are typically banned when too many users or messages violate community guidelines. | 100/second |
| Unbanning a group | POST | `/app-id/{app_id}/chatgroups/{group_id}/enable` | Lifts a ban on the specified group. | 100/second |
| Modifying group information | PUT | `/app-id/{app_id}/chatgroups/{group_id}` | Modifies the group information. | 100/second |
| Deleting a group | DELETE | `/app-id/{app_id}/chatgroups/{group_id}` | Deletes a group. | 100/second |
### Chat group member management
This group of methods enables you to manage group members, including adding and removing group members, transferring group ownership, and retrieving lists of group admins and members.
| Name | Method | Request | Description | Rate Limits |
| :---------------------------------------- | :----- | :--------------------------------------------------------- | :------------------------------------------------------ | :---------- |
| Retrieving group member list (Pagination) | GET | `/app-id/{app_id}/chatgroups/{group_id}/users` | Retrieves the member list of the group by pagination. | 100/second |
| Adding a group member | POST | `/app-id/{app_id}/chatgroups/{group_id}/users/{username}` | Adds a user to the group member list. | 100/second |
| Adding multiple group members | POST | `/app-id/{app_id}/chatgroups/{chatgroupid}/users` | Adds multiple users to the group member list. | 100/second |
| Removing a group member | DELETE | `/app-id/{app_id}/chatgroups/{group_id}/users/{username}` | Removes the specified user from the group member list. | 100/second |
| Removing multiple group members | DELETE | `/app-id/{app_id}/chatgroups/{group_id}/users/{usernames}` | Removes the specified users from the group member list. | 100/second |
| Retrieving group admin list | GET | `/app-id/{app_id}/chatgroups/{group_id}/admin` | Retrieves the group admin list. | 100/second |
| Adding a group admin | POST | `/app-id/{app_id}/chatgroups/{group_id}/admin` | Adds the specified user to the group admin list. | 100/second |
| Removing a group admin | DELETE | `/app-id/{app_id}/chatgroups/{group_id}/admin/{oldadmin}` | Removes the specified user from the group admin list. | 100/second |
| Transferring group ownership | PUT | `/app-id/{app_id}/chatgroups/{groupid}` | Transfers the group owner privileges. | 100/second |
### Chat room management
This group of methods enables you to create, retrieve, modify, and delete chat rooms.
| Name | Method | Request | Description | Rate Limits |
| :---------------------------------- | :----- | :------------------------------------------------------------------------ | :--------------------------------------------------------------------------------------------------------------------------------------------------------------------------------- | :---------- |
| Retrieving all chat rooms by page | GET | `/app-id/{app_id}/chatrooms?limit={N}&cursor={cursor}` | Retrieves the information of all the chat rooms in the app by page. | 50/second |
| Retrieving chat rooms a user joins | GET | `/app-id/{app_id}/users/{username}/joined_chatrooms` | Retrieves the chat rooms that a user joins by specifying the username. | 50/second |
| Retrieving chat room details | GET | `/app-id/{app_id}/chatrooms/{chatroom_id}` | Retrieves the details of the chat room by specifying the chat room ID. | 100/second |
| Creating a chat room | POST | `/app-id/{app_id}/chatrooms` | Creates a new chat room. | 50/second |
| Modifying chat room information | PUT | `/app-id/{app_id}/chatrooms/{chatroom_id}` | Modifies the chat room information. | 100/second |
| Deleting a chat room | DELETE | `/app-id/{app_id}/chatrooms/{chatroom_id}` | Deletes a chat room. | 100/second |
| Setting custom attributes | PUT | `/app-id/{app_id}/metadata/chatroom/{chatroom_id}/user/{username}` | Adds new custom chat room attributes or modifies existing ones set by the current user. | 100/second |
| Retrieving custom attributes | POST | `/app-id/{app_id}/metadata/chatroom/{chatroom_id}` | Retrieves the specified custom attributes of a chat room. | 100/second |
| Forcibly setting custom attributes | PUT | `/app-id/{app_id}/metadata/chatroom/{chatroom_id}/user/{username}/forced` | In addition to adding new custom attributes or modifying the existing ones set by the current user, this method can also be used to overwrite the custom attributes set by others. | 100/second |
| Removing custom attributes | DELETE | `/app-id/{app_id}/metadata/chatroom/{chatroom_id}/user/{username}` | Removes custom attributes set by the current user. This method is only used to remove the key-value pairs set by the current user. | 100/second |
| Forcibly removing custom attributes | DELETE | `/app-id/{app_id}/metadata/chatroom/{chatroom_id}/user/{username}/forced` | In addition to removing the custom attributes set by the current user, this method can also be used to remove custom attributes set by others. | 100/second |
### Chat room member management
This group of methods enables you to add, retrieve, modify, and delete members from the chat room.
| Name | Method | Request | Description | Rate Limits |
| :-------------------------------------------- | :----- | :---------------------------------------------------------- | :---------------------------------------------------------- | :---------- |
| Retrieving chat room member list (Pagination) | GET | `/app-id/{app_id}/chatrooms/{chatroom_id}/users` | Retrieves the member list of the chat room by pagination. | 100/second |
| Adding a chat room member | POST | `/app-id/{app_id}/chatrooms/{chatroomid}/users/{username}` | Adds the specified user to the chat room member list. | 100/second |
| Adding multiple chat room members | POST | `/app-id/{app_id}/chatrooms/{chatroomid}/users` | Adds multiple specified users to the chat room member list. | 100/second |
| Removing a chat room member | DELETE | `/app-id/{app_id}/chatrooms/{chatroomid}/users/{username}` | Removes the specified user from the chat room member list. | 100/second |
| Removing multiple chat room members | DELETE | `/app-id/{app_id}/chatrooms/{chatroomid}/users/{usernames}` | Removes the specified users from the chat room member list. | 100/second |
| Retrieving chat room admin list | GET | `/app-id/{app_id}/chatrooms/{chatroom_id}/admin` | Retrieves the chat room admin list. | 100/second |
| Adding a chat room admin | POST | `/app-id/{app_id}/chatrooms/{chatroom_id}/admin` | Adds the specified user to the chat room admin list. | 100/second |
| Removing a chat room admin | DELETE | `/app-id/{app_id}/chatrooms/{chatroom_id}/admin/{oldadmin}` | Removes the specified user from the chat room admin list. | 100/second |
### Global mute
This group of methods enables you to mute any user ID in one-to-one chats, chat groups, or chat rooms, preventing these users from sending messages to other chat users, chat groups, or chat rooms.
| Name | Method | Request | Description | Rate Limits |
| --------------------------------------------- | ------ | --------------------------------- | ----------------------------------------------------------------------------------------------------------------------------------- | ----------- |
| Globally mute a specified user | POST | `/app-id/{app_id}/mutes` | Mutes a specified user in one-to-one chats, chat groups, or chat rooms. | 100/second |
| Query the detailed information of global-mute | GET | `/app-id/{app_id}/mutes/username` | Queries the detailed information of the global-mute settings of the specified user in one-to-one chats, chat groups, or chat rooms. | 100/second |
| Retrieve all globally muted users | GET | `/app-id/{app_id}/mutes` | Retrieves all the users that have been globally muted in the app. | 100/second |
### Presence
This group of methods enable you to set the presence of a user, subscribe to the presence of multiple users, retrieve the presence status of multiple users, and retrieve the subscriptions of a user.
| Name | Method | Request | Description | Rate Limits |
| :------------------------------------------------------- | :----- | :-------------------------------------------------------------------------- | :------------------------------------------------------- | :---------- |
| Setting the presence status of a user | POST | `/app-id/{app_id}/users/{username}/presence/{resource}/{status}` | Sets the presence status of a user by user ID. | 50/second |
| Subscribing to the presence status of multiple users | POST | `/app-id/{app_id}/users/{username}/presence/{expiry}` | Subscribes to the presence status of multiple users. | 50/second |
| Retrieving the presence status of multiple users | POST | `/app-id/{app_id}/users/{username}/presence` | Retrieves the presence status of multiple users. | 50/second |
| Unsubscribing from the presence status of multiple users | DELETE | `/app-id/{app_id}/users/{username}/presence` | Unsubscribes from the presence status of multiple users. | 50/second |
| Retrieving the subscriptions of a user | GET | `/app-id/{app_id}/users/{username}/presence/sublist?pageNum=1&pageSize=100` | Retrieves the subscriptions of a user. | 50/second |
### Reaction
This group of methods enable your chat users to reply the message with emojis.
| Name | Method | Request | Description | Rate Limits |
| ------------------------------------------------- | ------ | ------------------------------------------------ | ------------------------------------------------------------------------------------------------ | ----------- |
| Create a reaction | POST | `/app-id/{app_id}/reaction/user/{userId}` | Creates or adds a reaction to a specified message. | 100/second |
| Retrieve reactions with message IDs | GET | `/app-id/{app_id}/reaction/user/{userId}` | Retrieves the information of the reaction according to the message ID. | 100/second |
| Delete a reaction | DELETE | `/app-id/{app_id}/reaction/user/{userId}` | Deletes a reaction. | 100/second |
| Retrieve the detailed information of the reaction | GET | `/app-id/{app_id}/reaction/user/{userId}/detail` | Retrieves the detailed information of the reaction by specifying the message ID and reaction ID. | 100/second |
### Thread management
This group of methods enable you to create a thread, modify a thread, delete a thread, and retrieve threads.
| Name | Method | Request | Description | Rate Limits |
| :---------------------------------------------------- | :----- | :--------------------------------------------------------------------------------------------------------- | :-------------------------------------------------------------- | :---------- |
| Creating a thread | POST | `/app-id/{app_id}/thread` | Creates a thread. | 100/second |
| Modifying a thread | PUT | `/app-id/{app_id}/thread/{thread_id}` | Modifies a thread. | 100/second |
| Deleting a thread | DELETE | `/app-id/{app_id}/thread/{thread_id}` | Deletes a thread. | 100/second |
| Retrieving all the threads under the app | GET | `/app-id/{app_id}/thread?limit={limit}&cursor={cursor}&sort={sort}` | Retrieves all the threads under the app | 100/second |
| Retrieving all the threads a user joins under the app | GET | `/app-id/{app_id}/threads/user/{username}?limit={limit}&cursor={cursor}&sort={sort}` | Retrieves all the threads a user joins under the app | 100/second |
| Retrieving all the threads a user joins under a group | GET | `/app-id/{app_id}/threads/chatgroups/{group_id}/user/{username}?limit={limit}&cursor={cursor}&sort={sort}` | Retrieves all the threads a user joins by user ID and group ID. | 100/second |
### Thread member management
This group of methods enable you to join a thread and remove members from the thread.
| Name | Method | Request | Description | Rate Limits |
| :-------------------------------- | :----- | :-------------------------------------------------------------------- | :------------------------------------------------- | :---------- |
| Retrieving thread members | GET | `/app-id/{app_id}/thread/{thread_id}/users?limit={N}&cursor={cursor}` | Retrieves all the members in the specified thread. | 100/second |
| Adding multiple users to a thread | POST | `/app-id/{app_id}/thread/{thread_id}/users` | Adds multiple users to the specified thread. | 100/second |
| Removing multiple thread members | DELETE | `/app-id/{app_id}/threads/{thread_id}/users` | Removes multiple users from the specified thread. | 100/second |
## Request structure
### Authorization
The Chat RESTful APIs require Bearer HTTP authentication. Every time an HTTP request is sent, the following `Authorization` field must be filled in the request header:
```text
Authorization: Bearer ${token}
```
In order to improve the security of the project, Agora uses a token (dynamic key) to authenticate users before they log in to the chat system. The Chat RESTful APIs only supports authenticating users using app tokens. For details, see [Authentication using App Token](/en/realtime-media/im/build/secure-access-and-authentication/authentication).
### Server address
Under the same project, all requests are sent to the same domain name. For how to get the domain name, see [Get the information of the Chat project](/en/realtime-media/im/get-started/enable#get-chat-project-information).
### Protocol
To ensure communication security, the Chat RESTful APIs only support the HTTPS protocol.
### Data Format
* Request: See the sample code of each API for the data format of the request.
* Response: The format of the response is JSON.
> All request URLs and request bodies are case sensitive.
# Limitations (/en/api-reference/api-ref/im/limitations)
This page introduces the usage limits of Chat, including limits to the user, the message, the group, the chatroom and the call limit of the server APIs.
### User attributes
The user attributes [UserInfo](https://hyphenateinc.github.io/android_reference/classio_1_1agora_1_1chat_1_1_user_info.html) include the user avatar, nickname, email address, and so on. The total length of the user information for one user must be 2 KB or less, and the total length for all users under an app must be within 10 GB or less.
### Message length
The length limits of the different types of messages are as follows:
| **Message type** | **Length limit** | **Related API** |
| -------------------------------- | ------------------------------------------------------------------------------ | ------------------------------------------------------------------------------------------------------------------------------------------------------------------------------------------------------------------------------------------------------------------------------------------------------------------------------------------------------------------------------------------------------------------------------------------------------------------------------------------------------ |
| Text message | 5 KB | [createTxtSendMessage](https://api-ref.agora.io/en/chat-sdk/android/1.x/classio_1_1agora_1_1chat_1_1_chat_message.html#af6312e5ea0ca70b36d22c5e0bdfc288f) |
| Image message | 10 MB (default) to 200 MB. Set via [Agora Console](https://console.agora.io/). | [createImageSendMessage\[1/2\]](https://api-ref.agora.io/en/chat-sdk/android/1.x/classio_1_1agora_1_1chat_1_1_chat_message.html#af8d0cd1cfc67aa8deb50386ff4dac2cd)[createImageSendMessage\[2/2\]](https://api-ref.agora.io/en/chat-sdk/android/1.x/classio_1_1agora_1_1chat_1_1_chat_message.html#a1207ebdd9c5ee4abd78ca1e49de6c7e1) |
| Voice message | 10 MB (default) to 200 MB. Set via [Agora Console](https://console.agora.io/). | [createVoiceSendMessage\[1/2\]](https://api-ref.agora.io/en/chat-sdk/android/1.x/classio_1_1agora_1_1chat_1_1_chat_message.html#afff9282db0b4fe2086a7afc70dc092f8)[createVoiceSendMessage\[2/2\]](https://api-ref.agora.io/en/chat-sdk/android/1.x/classio_1_1agora_1_1chat_1_1_chat_message.html#a5935e8c3e8ed4069b01ca38b1f1a6ab9) |
| Video message | 10 MB (default) to 200 MB. Set via [Agora Console](https://console.agora.io/). | [createVideoSendMessage\[1/3\]](https://api-ref.agora.io/en/chat-sdk/android/1.x/classio_1_1agora_1_1chat_1_1_chat_message.html#ac78142ff1dfe3fa07d63027978a9ef84)[createVideoSendMessage\[2/3\]](https://api-ref.agora.io/en/chat-sdk/android/1.x/classio_1_1agora_1_1chat_1_1_chat_message.html#a487c212c323a110d1d5ca6406903e11f)[createVideoSendMessage\[3/3\]](https://api-ref.agora.io/en/chat-sdk/android/1.x/classio_1_1agora_1_1chat_1_1_chat_message.html#aae1215a31dad2f68bcad9a321defe3fd) |
| File message | 10 MB (default) to 200 MB. Set via [Agora Console](https://console.agora.io/). | [createFileSendMessage\[1/2\]](https://api-ref.agora.io/en/chat-sdk/android/1.x/classio_1_1agora_1_1chat_1_1_chat_message.html#a7b0d8a9c7edb6a7ed02a02a9d67d65f7)[createFileSendMessage\[2/2\]](https://api-ref.agora.io/en/chat-sdk/android/1.x/classio_1_1agora_1_1chat_1_1_chat_message.html#acbab1df477a2b8a5aaf7053e27fc9232) |
| Transparent transmission message | 5 KB | [createSendMessage](https://api-ref.agora.io/en/chat-sdk/android/1.x/classio_1_1agora_1_1chat_1_1_chat_message.html#a1c26e1f6420a89921bae7eb9ea362506) |
| Customized extended message | The size of the extended message must not exceed that of the original message. | [createSendMessage](https://api-ref.agora.io/en/chat-sdk/android/1.x/classio_1_1agora_1_1chat_1_1_chat_message.html#a1c26e1f6420a89921bae7eb9ea362506) |
| Customized message | 5 KB | [createSendMessage](https://api-ref.agora.io/en/chat-sdk/android/1.x/classio_1_1agora_1_1chat_1_1_chat_message.html#a1c26e1f6420a89921bae7eb9ea362506) |
Starting from v1.3, you can slice an image, voice, video, and file message into chunks and upload them in sequence.
Note that exceeding the free quota for file storage or download traffic in your package will lead to an overage charge. See Agora Console for pricing details.
### Group-related limitations
**Group attributes**
When a group [createGroup](https://api-ref.agora.io/en/chat-sdk/android/1.x/classio_1_1agora_1_1chat_1_1_group_manager.html#a57cfa23aae3b00d282b75023fc43899c) is created, the length limits of the group information are as follows:
* Group name: 128 characters or less
* Group description: 512 characters or less
* Group extension information: 1024 characters or less
**Group member attributes**
* Key: Of string type, 16 bytes or less, only supports English uppercase and lowercase letters, numbers, and underscores
* Value: 512 bytes or less
* The total size of key-value pairs of a group member: 4KB or less
### Chatroom-related limitations
**PCU per chatroom**
The limit of Peak Concurrent Users per chatroom is 10,000. To extend this limit, contact [support@agora.io](mailto\:support@agora.io).
**Chatroom attributes**
When a chatroom [createChatRoom](https://hyphenateinc.github.io/android_reference/classio_1_1agora_1_1chat_1_1_chat_room_manager.html#a6ea3f7131041f844e710f00996091cab) is created, the length limits of the chatroom information are as follows:
* Chatroom name: 128 characters or less
* Chatroom description: 512 characters or less
Each chatroom can have up to 100 custom attributes, and the total size of custom attributes of each app cannot exceed 10 GB. The custom attributes are of a key-value pair structure. A single key cannot exceed 128 characters and a room attribute value cannot exceed 4096 characters. Attribute keys support the following character sets:
* 26 lowercase English letters a-z;
* 26 uppercase English letters A-Z;
* 10 numbers 0-9;
* "\_", "-", ".".
### Multiple messages forwarding limitations
* The forwarding multiple messages capability is available only in client APIs and not RESTful APIs.
* End users can only forward up to 300 messages at a time.
* The content of the forwarded messages can't be searched.
* When forwarding multiple messages in a combined form, the title and preview of the combined message is displayed. The content of the message preview can't exceed 5KB.
* Applications developed with Chat SDK versions prior to `1.2.x` will not support display of forwarded messages.
### Sent message modification limitations
This feature has the following limitations:
* For a group, regular group members can only edit messages sent by themselves, but the group owner and admins can also edit messages sent by regular group members. The message sender remains unchanged regardless of the message edit operator.
* Supported message types: text only.
* Supported use case: One-on-one chat. Chatroom is not supported.
* End users can recall and modify messages that were sent up to 7 days ago.
* Agora supports editing the same message up to 10 times.
### Storage limitations
* The Agora Chat server stores up to 100 conversations per end user.
### RESTful API Call limit of server-side
The RESTful API call frequency limit of each method varies. For details about each method, see [**Chat RESTful API Reference**](/en/api-reference/api-ref/im).
If the provided call frequency limit cannot meet your business requirements, contact [support@agora.io](mailto\:support@agora.io).
### Presence limitations
The presence status of each user can be subscribed by up to 3000 users.
### Contact limitations
Each user can have a block list that can contain a maximum of 500 users.
# Message management (/en/api-reference/api-ref/im/message-management)
This page shows how to call Chat RESTful APIs to send different types of messages, upload and download files, and retrieve historical messages.
Before calling the following methods, make sure you understand the call frequency limit of the Chat RESTful APIs as described in [Limitations](./limitations#call-limit-of-server-sides).
## Common parameters
The following table lists common request and response parameters of the Chat RESTful APIs:
### Request parameters
| Parameter | Type | Description | Required |
| :--------- | :----- | :----------------------------------------------------------------------------------------------------------------------------------------------------------------------------------------------------------------------------------------------------------------------------------------------------------------------------------------------------------------------------------------------------------------------------------------------------------------------------------------------------------------------------------------------------- | :------- |
| `host` | String | The domain name assigned by the Chat service to access RESTful APIs. For how to get the domain name, see [Get the information of your project](/en/realtime-media/im/get-started/enable#get-chat-project-information). | Yes |
| `app_id` | String | The unique identifier automatically assigned to each project by Agora | Yes |
| `username` | String | The unique login account of the user. The user ID must be 64 characters or less and cannot be empty. The following character sets are supported:* 26 lowercase English letters (a-z)
* 10 numbers (0-9)
* "\_", "-", "."
Do not use any of the 26 uppercase English letters (A-Z). Ensure that each `username` under the same App ID is unique. Do not set this parameter as a UUID, email address, phone number, or other sensitive information.
| Yes |
### Response parameters
| Parameter | Type | Description |
| :---------------- | :----- | :--------------------------------------------------------------------------------------------------- |
| `action` | String | The request method. |
| `organization` | String | The unique identifier assigned to each company (organization) by the Chat service. |
| `application` | String | A unique internal ID assigned to each app by the Chat service. You can safely ignore this parameter. |
| `applicationName` | String | The unique identifier assigned to each app by the Chat service . |
| `uri` | String | The request URI. |
| `path` | String | The request path, which is part of the request URL. You can safely ignore this parameter. |
| `entities ` | JSON | The response entity. |
| `timestamp` | Number | The Unix timestamp (ms) of the HTTP response. |
| `duration` | Number | The duration (ms) from when the HTTP request is sent to the time the response is received. |
## Authorization
Chat RESTful APIs require Bearer HTTP authentication. Every time an HTTP request is sent, the following `Authorization` field must be filled in the request header:
```html
Authorization: Bearer ${YourAppToken}
```
In order to improve the security of the project, Agora uses a token (dynamic key) to authenticate users before they log in to the chat system. Chat RESTful APIs only support authenticating users using app tokens. For details, see [Authentication using App Token](/en/realtime-media/im/build/secure-access-and-authentication/authentication).
## Send a message
This group of methods enable you to send and receive peer-to-peer and group messages. Message types include text, image, voice, video, command, extension, file, and custom messages.
For each App Key, the call frequency limit of this method is 100 per second.
Follow the instructions below to implement sending messages:
* For text, command, and custom messages: Call the send-message method, and pass in the message content in the request body.
* For image, voice, video, and file messages:
1. Call the [upload-file](#upload) method to upload images, voice messages, videos, or other types of files, and get the file `file_uuid` from the response body.
2. Call the send-message method, and pass the `file_uuid` in the request body.
When calling the RESTful APIs to send a message, you can use the `from` field to specify the message sender.
The maximum data length of the request body and extension fields is 5 KB, or the error 413 will be returned.
### Send a one-to-one message
This method sends a message to a peer user.
#### HTTP request
```html
POST https://{host}/app-id/{app_id}/messages/users
```
##### Path parameter
For the descriptions of the path parameter, see [Common Parameters](#param).
##### Request header
| Parameter | Type | Description | Required |
| :-------------- | :----- | :----------------------------------------------------------------------------------------------------------------------------------------------------------------------------------------------- | :------- |
| `Content-Type` | String | The content type. Set it to `application/json`. | Yes |
| `Accept` | String | The content type. Set it to `application/json`. | Yes |
| `Authorization` | String | The authentication token of the user or administrator, in the format of `Bearer ${token}`, where `Bearer` is a fixed character, followed by an English space, and then the obtained token value. | Yes |
##### Request body
The request body is a JSON object, which contains the following parameters:
| Parameter | Type | Description | Required |
| ---------------------------- | ------ | ------------------------------------------------------------------------------------------------------------------------------------------------------------------------------------------------------------------------------------------------------------------------------------------------------------------------------------------------------------------------------------------------------------------------------------------------------------------------------------------------------------------------------------------------------------------------------- | --------------------------------------------------------------------------------------------------------------------------------- |
| `from` | String | The username of the message sender. If you do not set this field, the Chat server takes the `admin` as the sender. If you set it as the empty string "", this request fails. | No |
| `to` | Array | An array of the usernames of the message recipients. For each request, you can send a message to a maximum of 600 users. Within one minute, you can send messages to a maximum of 6,000 users. | Yes |
| `type` | String | The message type: `txt`: Text message. `img`: Image message. `audio`: Voice message. `video`: Video message. `file`: File message. `loc`: Location message. `cmd`: Command message. `custom`: Custom message | Yes |
| `body` | JSON | The message content. For different message types, this parameter contains different fields. For details, see [Body of different message types](#body). | Yes |
| `roam_ignore_users` | List | No | Which users cannot obtain such message when they pull messages from the server. A maximum of 20 users can be passed in each time. |
| `sync_device` | Bool | Whether to synchronize the message to the message sender. `true`: Yes. `false`: No. | No |
| `routetype` | String | Whether the message is delivered only when the recipient(s) is/are online: If this parameter is set to `ROUTE_TYPE`, the message is delivered only when the recipient(s) is/are online. In this case, the message is discarded if the recipient is offline.If you do not set this parameter, the message is delivered whether the recipients are online or not. If the recipient(s) is/are offline, the message will not be delivered until they get online. | No |
| `ext` | JSON | The extension field of the message. It cannot be `null`. | No |
| `ext.em_ignore_notification` | Bool | Whether to send a silent message: `true`: Yes (Default). `false`: No. Sending silent messages means that when the user is offline, Agora Chat will not push message notifications to the user's device through a third-party message push service. Therefore, users will not receive push notifications for messages. When the user goes online again, all messages sent from the offline period will be received. Unlike the Do Not Disturb mode which is set by the recipient to prevent notifications during a certain period, sending silent messages is set by the sender. | No |
**Body of different message types**
* Text message
| Parameter | Type | Description | Required |
| --------- | ------ | -------------------- | -------- |
| `msg` | String | The message content. | Yes |
* Image message
| Parameter | Type | Description | Required |
| ---------- | ------ | ----------------------------------------------------------------------------------------------------------------------------------------------------------------------------------------------------------------------------------------------------------------------------------------------------------------- | -------- |
| `filename` | String | The name of the image file. You are advised to pass in this parameter, or there is no image name displayed on the client that receives the message. | No |
| `secret` | String | The secret for accessing the image file. You can obtain the value of `secret` from the `share-secret` parameter in the response body of the [upload](#upload) method. If you set `restrict-access` as `true` in the request header of `upload` when uploading the image file, ensure that you set this parameter. | No |
| `size` | JSON | The size of the image (in pixels). This parameter contains two fields\:height: The image height.width: The image width. | No |
| `url` | String | The URL address of the image file, in the format of `https://{host}/app-id/{app_id}/chatfiles/{file_uuid}`, in which `file_uuid` can be obtained from the response body of `upload` after you upload the file to the server. | Yes |
* Voice message
| Parameter | Type | Description | Required |
| ---------- | ------ | ----------------------------------------------------------------------------------------------------------------------------------------------------------------------------------------------------------------------------------------------------------------------------------------------------------------- | -------- |
| `filename` | String | The name of the audio file. You are advised to pass in this parameter, or there is no voice file name displayed on the client that receives the message. | No |
| `secret` | String | The secret for accessing the audio file. You can obtain the value of `secret` from the `share-secret` parameter in the response body of the [upload](#upload) method. If you set `restrict-access` as `true` in the request header of `upload` when uploading the audio file, ensure that you set this parameter. | No |
| `length` | Int | The length of the audio file (in seconds). | No |
| `url` | String | The URL address of the audio file, in the format of `https://{host}/app-id/{app_id}/chatfiles/{file_uuid}`, in which `file_uuid` can be obtained from the response body of `upload` after you upload the file to the server. | Yes |
* Video message
| Parameter | Type | Description | Required |
| -------------- | ------ | --------------------------------------------------------------------------------------------------------------------------------------------------------------------------------------------------------------------------------------------------------------------------------------------------------------------------- | -------- |
| `filename` | String | The name of the video file. You are advised to pass in this parameter, or there is no video file name displayed on the client that receives the message. | No |
| `thumb` | String | The URL address of the video thumbnail, in the format of `https://{host}/app-id/{app_id}/chatfiles/{file_uuid}`, in which `file_uuid` can be obtained from the response body of `upload` after you upload the file to the server. | No |
| `length` | Int | The length of the video file (in seconds). | No |
| `secret` | String | The secret for accessing the video file. You can obtain the value of `secret` from the `share-secret` parameter in the response body of the [upload](#upload) method. If you set `restrict-access` as `true` in the request header of `upload` when uploading the video file, ensure that you set this parameter. | No |
| `file_length` | Long | The data length of the video file (in bytes). | No |
| `thumb_secret` | String | The secret for accessing the video thumbnail. You can obtain the value of `thumb_secret` from the `share-secret` parameter in the response body of the [upload](#upload) method. If you set `restrict-access` as `true` in the request header of `upload` when uploading the thumbnail, ensure that you set this parameter. | No |
| `url` | String | The URL address of the video file, in the format of `https://{host}/app-id/{app_id}/chatfiles/{file_uuid}`, in which `file_uuid` can be obtained from the response body of `upload` after you upload the file to the server. | Yes |
* File message
| Parameter | Type | Description | Required |
| ---------- | ------ | ------------------------------------------------------------------------------------------------------------------------------------------------------------------------------------------------------------------------------------------------------------------------------------------------- | -------- |
| `filename` | String | The name of the file. You are advised to pass in this parameter, or there is no file name displayed on the client that receives the message. | Yes |
| `secret` | String | The secret for accessing the file. You can obtain the value of `secret` from the `share-secret` parameter in the response body of the [upload](#upload) method. If you set `restrict-access` as `true` in the request header of `upload` when uploading file, ensure that you set this parameter. | No |
| `url` | String | The URL address of the file, in the format of `https://{host}/app-id/{app_id}/chatfiles/{file_uuid}`, in which `file_uuid` can be obtained from the response body of `upload` after you upload the file to the server. | Yes |
* Location message
| Parameter | Type | Description | Required |
| --------- | ------ | ------------------------------------------- | -------- |
| `lat` | String | The latitude of the location (in degrees). | Yes |
| `lng` | String | The longitude of the location (in degrees). | Yes |
| `addr` | String | The address of the location. | Yes |
* CMD message
| Parameter | Type | Description | Required |
| --------- | ------ | --------------------------- | -------- |
| `action` | String | The content of the command. | Yes |
* Custom message
| Parameter | Type | Description | Required |
| ------------- | ------ | ---------------------------------------------------------------------------------------------------------------------------------------------------------------------- | -------- |
| `customEvent` | String | The event type customized by the user. The value of this parameter should meet the restrictions placed by a regular expression, for example, `[a-zA-Z0-9-_/\.]{1,32}`. | No |
| `customExts` | JSON | The event attribute customized by the user. The data type is `Map`. You can set a maximum of 16 elements. | No |
#### HTTP response
##### Response body
If the returned HTTP status code is `200`, the request succeeds, and the response body contains the following parameters:
| Parameter | Type | Description |
| :-------- | :--- | :-------------------------------------------------------------------------------------------------------------------------------------------------------------------------------------------------------------------------------------------------------------------------------------------------------------------------------- |
| `data` | JSON | The detailed content of the response. The value of this parameter includes a key-value pair where key represents the username of the message recipient and value the message ID. For example, if the returned data is `"user2":"1029457500870543736"`, it means that user2 has sent a message with the ID of 1029457500870543736. |
For the other parameters and descriptions, see [Common parameters](#param).
If the returned HTTP status code is not `200`, the request fails. You can refer to [Status codes](./http-status-codes) for possible causes.
#### Example
##### Request example
* Send a text message to the specified user without synchronizing the message with the sender
```bash
# Replace {YourToken} with the app token generated on your server
curl -X POST -i 'http://XXXX/app-id/XXXX/messages/users' -H 'Content-Type: application/json' -H 'Accept: application/json' -H 'Authorization: Bearer {YourToken}' -d '{"from": "user1","to": ["user2"],"type": "txt","body": {"msg": "testmessages"},"roam_ignore_users": [],"ext": {"em_ignore_notification": true}}'
```
* Send a text message to the online user while synchronizing the message with the sender
````bash
# Replace {YourToken} with the app token generated on your server
curl -X POST -i 'http://XXXX/app-id/XXXX/messages/users' -H 'Content-Type: application/json' -H 'Accept: application/json' -H 'Authorization: Bearer {YourToken}' -d '{"from": "user1","to": ["user2"],"type": "txt","body": {"msg": "testmessages"},"ext": {"em_ignore_notification": true},"routetype":"ROUTE_ONLINE", "sync_device":true}' ```
````
* Send an image message
```bash
# Replace {YourToken} with the app token generated on your server
curl -X POST -i 'https://XXXX/app-id/XXXX/messages/users' -H 'Content-Type: application/json' -H 'Accept: application/json' -H 'Authorization: Bearer {YourToken}' -d '{"from": "user1","to": ["user2"],"type": "img","body": {"filename":"testimg.jpg","secret":"VfXXXXNb_","url":"https://XXXX/app-id/XXXX/chatfiles/55f12940-XXXX-XXXX-8a5b-ff2336f03252","size":{"width":480,"height":720}}}'
```
* Send a voice message
```bash
# Replace {YourToken} with the app token generated on your server
curl -X POST -i 'https://XXXX/app-id/XXXX/messages/users' -H 'Content-Type: application/json' -H 'Accept: application/json' -H 'Authorization: Bearer {YourToken}' -d '{"from": "user1","to": ["user2"],"type": "audio","body": {"url": "https://XXXX/app-id/XXXX/chatfiles/1dfc7f50-XXXX-XXXX-8a07-7d75b8fb3d42","filename": "testaudio.amr","length": 10,"secret": "HfXXXXCjM"}}'
```
* Send a video message
```bash
# Replace {YourToken} with the app token generated on your server
curl -X POST -i 'https://XXXX/app-id/XXXX/messages/users' -H 'Content-Type: application/json' -H 'Accept: application/json' -H 'Authorization: Bearer {YourToken}' -d '{"from": "user1","to": ["user2"],"type": "video","body": {"filename":"testvideo.avi","thumb" : "https://XXXX/app-id/XXXX/chatfiles/67279b20-7f69-11e4-8eee-21d3334b3a97","length" : 0,"secret":"VfXXXXNb_","file_length" : 58103,"thumb_secret" : "ZyXXXX2I","url" : "https://XXXX/app-id/XXXX/chatfiles/671dfe30-XXXX-XXXX-ba67-8fef0d502f46"}}'
```
* Send a file message
```bash
# Replace {YourToken} with the app token generated on your server
curl -X POST -i 'https://XXXX/app-id/XXXX/messages/users' -H 'Content-Type: application/json' -H 'Accept: application/json' -H 'Authorization: Bearer {YourToken}' -d '{"from": "user1","to": ["user2"],"type": "file","body": {"filename":"test.txt","secret":"1-g0XXXXua","url":"https://XXXX/app-id/XXXX/chatfiles/d7eXXXX7444"}}'
```
* Send a location message
```bash
# Replace {YourToken} with the app token generated on your server
curl -X POST -i "https://XXXX/app-id/XXXX/messages/users" -H 'Content-Type: application/json' -H 'Accept: application/json' -H 'Authorization: Bearer {YourToken}' -d '{"from": "user1","to": ["user2"],"type": "loc","body":{"lat": "39.966","lng":"116.322","addr":"North America"}}'
```
* Send a CMD message
```bash
# Replace {YourToken} with the app token generated on your server
curl -X POST -i "https://XXXX/app-id/XXXX/messages/users" -H 'Content-Type: application/json' -H 'Accept: application/json' -H "Authorization:Bearer {YourToken}" -d '{"from": "user1","to": ["user2"],"type": "cmd","body":{"action":"action1"}}'
```
* Send a custom message
```bash
# Replace {YourToken} with the app token generated on your server
curl -X POST -i "https://XXXX/app-id/XXXX/messages/users" \
-H 'Content-Type: application/json' \
-H 'Accept: application/json' \
-H "Authorization:Bearer " \
-d '{
"from": "user1",
"to": ["user2"],
"type": "custom",
"body": {
"customEvent": "custom_event",
"customExts":{
"ext_key1":"ext_value1"
}
}
}'
```
##### Response example
* Send a text message
```json
{
"path": "/messages/users",
"uri": "https://XXXX/app-id/XXXX/messages/users",
"timestamp": 1657254052191,
"organization": "XXXX",
"application": "e82bcc5f-XXXX-XXXX-a7c1-92de917ea2b0",
"action": "post",
"data": {
"user2": "1029457500870543736"
},
"duration": 0,
"applicationName": "XXXX"
}
```
* Send an image message
```json
{
"path": "/messages/users",
"uri": "https://XXXX/app-id/XXXX/messages/users",
"timestamp": 1657254052191,
"organization": "XXXX",
"application": "e82bcc5f-XXXX-XXXX-a7c1-92de917ea2b0",
"action": "post",
"data": {
"user2": "1029457500870543736"
},
"duration": 0,
"applicationName": "XXXX"
}
```
* Send a voice message
```json
{
"path": "/messages/users",
"uri": "https://XXXX/app-id/XXXX/messages/users",
"timestamp": 1657254052191,
"organization": "XXXX",
"application": "e82bcc5f-XXXX-XXXX-a7c1-92de917ea2b0",
"action": "post",
"data": {
"user2": "1029457500870543736"
},
"duration": 0,
"applicationName": "XXXX"
}
```
* Send a video message
```json
{
"path": "/messages/users",
"uri": "https://XXXX/app-id/XXXX/messages/users",
"timestamp": 1657254052191,
"organization": "XXXX",
"application": "e82bcc5f-XXXX-XXXX-a7c1-92de917ea2b0",
"action": "post",
"data": {
"user2": "1029457500870543736"
},
"duration": 0,
"applicationName": "XXXX"
}
```
* Send a file message
```json
{
"path": "/messages/users",
"uri": "https://XXXX/app-id/XXXX/messages/users",
"timestamp": 1657254052191,
"organization": "XXXX",
"application": "e82bcc5f-XXXX-XXXX-a7c1-92de917ea2b0",
"action": "post",
"data": {
"user2": "1029457500870543736"
},
"duration": 0,
"applicationName": "XXXX"
}
```
* Send a location message
```json
{
"path": "/messages/users",
"uri": "https://XXXX/app-id/XXXX/messages/users",
"timestamp": 1657254052191,
"organization": "XXXX",
"application": "e82bcc5f-XXXX-XXXX-a7c1-92de917ea2b0",
"action": "post",
"data": {
"user2": "1029457500870543736"
},
"duration": 0,
"applicationName": "XXXX"
}
```
* Send a CMD message
```json
{
"path": "/messages/users",
"uri": "https://XXXX/app-id/XXXX/messages/users",
"timestamp": 1657254052191,
"organization": "XXXX",
"application": "e82bcc5f-XXXX-XXXX-a7c1-92de917ea2b0",
"action": "post",
"data": {
"user2": "1029457500870543736"
},
"duration": 0,
"applicationName": "XXXX"
}
```
* Send a custom message
```json
{
"path": "/messages/users",
"uri": "https://XXXX/app-id/XXXX/messages/users",
"timestamp": 1657254052191,
"organization": "XXXX",
"application": "e82bcc5f-XXXX-XXXX-a7c1-92de917ea2b0",
"action": "post",
"data": {
"user2": "1029457500870543736"
},
"duration": 0,
"applicationName": "XXXX"
}
```
### Send a group message
#### HTTP request
```html
POST https://{host}/app-id/{app_id}/messages/chatgroups
```
##### Path parameter
For the descriptions of the path parameter, see [Common Parameters](#param).
##### Request header
| Parameter | Type | Description | Required |
| :-------------- | :----- | :----------------------------------------------------------------------------------------------------------------------------------------------------------------------------------------------- | :------- |
| `Content-Type` | String | The content type. Set it to `application/json`. | Yes |
| `Accept` | String | The content type. Set it to `application/json`. | Yes |
| `Authorization` | String | The authentication token of the user or administrator, in the format of `Bearer ${token}`, where `Bearer` is a fixed character, followed by an English space, and then the obtained token value. | Yes |
##### Request body
The request body is a JSON object, which contains the following parameters:
| Parameter | Type | Required | Description |
| ---------------- | ------- | --------------------------------------------------------------------------------------------------------------------------------------------------------------------------------------------------------- | ----------- |
| `to` | Array | An array of the group IDs that receives the message. Within one second, you can send a maximum of 20 messages to a chat group, and for each request, you can send messages to a maximum of 3 chat groups. | Yes |
| `need_group_ack` | Boolean | Whether read receipts are required after the message is sent: `true`: Yes.`false: No.` | No |
The other parameters and descriptions are the same with those of [Sending a one-to-one message method](#request).
#### HTTP response
##### Response body
If the returned HTTP status code is `200`, the request succeeds, and the response body contains the following parameters:
| Parameter | Type | Description |
| :-------- | :--- | :------------------------------------------------------------------------------------------------------------------------------------------------------------------------------------------------------------------------------------------------------------------------------------------------------------------------------------------------------------------- |
| `data` | JSON | The detailed content of the response. The value of this parameter includes a key-value pair where key represents the group ID that receives the message and value the message ID. For example, if the returned data is `"184524748161025": "1029544257947437432"`, it means that a message with the ID of 1029544257947437432 is sent in chat group 184524748161025. |
For the other parameters and descriptions, see [Common parameters](#param).
If the returned HTTP status code is not `200`, the request fails. You can refer to [Status codes](./http-status-codes) for possible causes.
#### Example
##### Request example
* Send a text message to all members in a chat group whether they are online or not
```bash
# Replace {YourAppToken} with the app token generated on your server
curl -X POST -i 'https://XXXX/app-id/XXXX/messages/chatgroups'
-H 'Content-Type: application/json'
-H 'Accept: application/json'
-H 'Authorization: Bearer '
-d '{
"from": "user1",
"to": ["184524748161025"],
"type": "txt",
"need_group_ack": false,
"body": {
"msg": "testmessages"
},
"roam_ignore_users": [],
"ext": {
"em_ignore_notification": true
},
"routetype":"ROUTE_ONLINE"
}'
```
* Send a text message to online users in a chat group by setting `routetype` to `ROUTE_ONLINE`.
```bash
# Replace {YourToken} with the app token generated on your server
curl -X POST -i 'https://XXXX/app-id/XXXX/messages/chatgroups'
-H 'Content-Type: application/json'
-H 'Accept: application/json'
-H 'Authorization: Bearer '
-d '{
"from": "user1",
"to": ["184524748161025"],
"type": "txt",
"need_group_ack": false,
"body": {
"msg": "testmessages"
},
"ext": {
"em_ignore_notification": true
},
"routetype":"ROUTE_ONLINE"
}'
```
* Send an image message
```bash
# Replace {YourToken} with the app token generated on your server
curl -X POST -i 'https://XXXX/app-id/XXXX/messages/chatgroups' -H 'Content-Type: application/json' -H 'Accept: application/json' -H 'Authorization: Bearer {YourToken}' -d '{"from": "user1","to": ["184524748161025"],"type": "img","body": {"filename":"testimg.jpg","secret":"VfXXXXNb_","url":"https://XXXX/app-id/XXXX/chatfiles/55f12940-XXXX-XXXX-8a5b-ff2336f03252","size":{"width":480,"height":720}}}'
```
* Send a voice message
```bash
# Replace {YourToken} with the app token generated on your server
curl -X POST -i 'https://XXXX/app-id/XXXX/messages/chatgroups' -H 'Content-Type: application/json' -H 'Accept: application/json' -H 'Authorization: Bearer {YourToken}' -d '{"from": "user1","to": ["184524748161025"],"type": "audio","body": {"url": "https://XXXX/app-id/XXXX/chatfiles/1dfc7f50-XXXX-XXXX-8a07-7d75b8fb3d42","filename": "testaudio.amr","length": 10,"secret": "HfXXXXCjM"}}'
```
* Send a video message
```bash
# Replace {YourToken} with the app token generated on your server
curl -X POST -i 'https://XXXX/app-id/XXXX/messages/chatgroups' -H 'Content-Type: application/json' -H 'Accept: application/json' -H 'Authorization: Bearer {YourToken}' -d '{"from": "user1","to": ["184524748161025"],"type": "video","body": {"filename" : "testvideo.avi","thumb" : "https://XXXX/app-id/XXXX/chatfiles/67279b20-7f69-11e4-8eee-21d3334b3a97","length" : 0,"secret":"VfXXXXNb_","file_length" : 58103,"thumb_secret" : "ZyXXXX2I","url" : "https://XXXX/app-id/XXXX/chatfiles/671dfe30-XXXX-XXXX-ba67-8fef0d502f46"}}'
```
* Send a file message
```bash
# Replace {YourToken} with the app token generated on your server
curl -X POST -i 'https://XXXX/app-id/XXXX/messages/chatgroups' -H 'Content-Type: application/json' -H 'Accept: application/json' -H 'Authorization: Bearer {YourToken}' -d '{"from": "user1","to": ["184524748161025"],"type": "file","body": {"filename":"test.txt","secret":"1-g0XXXXua","url":"https://XXXX/app-id/XXXX/chatfiles/d7eXXXX7444"}}'
```
* Send a location message
```bash
# Replace {YourToken} with the app token generated on your server
curl -X POST -i "https://XXXX/app-id/XXXX/messages/chatgroups" -H 'Content-Type: application/json' -H 'Accept: application/json' -H 'Authorization: Bearer {YourToken}' -d '{"from": "user1","to": ["184524748161025"],"type": "loc","body":{"lat": "39.966","lng":"116.322","addr":"North America"}}'
```
* Send a CMD message
```bash
# Replace {YourToken} with the app token generated on your server
curl -X POST -i "https://XXXX/app-id/XXXX/messages/chatgroups" -H 'Content-Type: application/json' -H 'Accept: application/json' -H "Authorization:Bearer {YourToken}" -d '{"from": "user1","to": ["184524748161025"],"type": "cmd","body":{"action":"action1"}}'
```
* Send a Custom message
```bash
# Replace {YourToken} with the app token generated on your server
curl -X POST -i "https://XXXX/app-id/XXXX/messages/chatgroups" \
-H 'Content-Type: application/json' \
-H 'Accept: application/json' \
-H "Authorization:Bearer " \
-d '{
"from": "user1",
"to": ["184524748161025"],
"type": "custom",
"body": {
"customEvent": "custom_event",
"customExts":{
"ext_key1":"ext_value1"
}
}
}'
```
##### Response example
* Send a text message
```json
{
"path": "/messages/chatgroups",
"uri": "https://XXXX/app-id/XXXX/messages/chatgroups",
"timestamp": 1657254052191,
"organization": "XXXX",
"application": "e82bcc5f-XXXX-XXXX-a7c1-92de917ea2b0",
"action": "post",
"data": {
"184524748161025": "1029544257947437432"
},
"duration": 0,
"applicationName": "XXXX"
}
```
* Send an image message
```json
{
"path": "/messages/chatgroups",
"uri": "https://XXXX/app-id/XXXX/messages/chatgroups",
"timestamp": 1657254052191,
"organization": "XXXX",
"application": "e82bcc5f-XXXX-XXXX-a7c1-92de917ea2b0",
"action": "post",
"data": {
"184524748161025": "1029544257947437432"
},
"duration": 0,
"applicationName": "XXXX"
}
```
* Send a voice message
```bash
{
"path": "/messages/chatgroups",
"uri": "https://XXXX/app-id/XXXX/messages/chatgroups",
"timestamp": 1657254052191,
"organization": "XXXX",
"application": "e82bcc5f-XXXX-XXXX-a7c1-92de917ea2b0",
"action": "post",
"data": {
"184524748161025": "1029544257947437432"
},
"duration": 0,
"applicationName": "XXXX"
}
```
* Send a video message
```bash
{
"path": "/messages/chatgroups",
"uri": "https://XXXX/app-id/XXXX/messages/chatgroups",
"timestamp": 1657254052191,
"organization": "XXXX",
"application": "e82bcc5f-XXXX-XXXX-a7c1-92de917ea2b0",
"action": "post",
"data": {
"184524748161025": "1029544257947437432"
},
"duration": 0,
"applicationName": "XXXX"
}
```
* Send a file message
```bash
{
"path": "/messages/chatgroups",
"uri": "https://XXXX/app-id/XXXX/messages/chatgroups",
"timestamp": 1657254052191,
"organization": "XXXX",
"application": "e82bcc5f-XXXX-XXXX-a7c1-92de917ea2b0",
"action": "post",
"data": {
"184524748161025": "1029544257947437432"
},
"duration": 0,
"applicationName": "XXXX"
}
```
* Send a location message
```bash
{
"path": "/messages/chatgroups",
"uri": "https://XXXX/app-id/XXXX/messages/chatgroups",
"timestamp": 1657254052191,
"organization": "XXXX",
"application": "e82bcc5f-XXXX-XXXX-a7c1-92de917ea2b0",
"action": "post",
"data": {
"184524748161025": "1029544257947437432"
},
"duration": 0,
"applicationName": "XXXX"
}
```
* Send a CMD message
```bash
{
"path": "/messages/chatgroups",
"uri": "https://XXXX/app-id/XXXX/messages/chatgroups",
"timestamp": 1657254052191,
"organization": "XXXX",
"application": "e82bcc5f-XXXX-XXXX-a7c1-92de917ea2b0",
"action": "post",
"data": {
"184524748161025": "1029544257947437432"
},
"duration": 0,
"applicationName": "XXXX"
}
```
* Send a custom message
```bash
{
"path": "/messages/chatgroups",
"uri": "https://XXXX/app-id/XXXX/messages/chatgroups",
"timestamp": 1657254052191,
"organization": "XXXX",
"application": "e82bcc5f-XXXX-XXXX-a7c1-92de917ea2b0",
"action": "post",
"data": {
"184524748161025": "1029544257947437432"
},
"duration": 0,
"applicationName": "XXXX"
}
```
### Send a chat room message
This RESTful API allows you to send a maximum of 100 messages to 10 chat rooms in total on each call. Assuming that you send two messages to 10 chat rooms, the server counts it as 20 messages.
You can set the priority of a certain message type or chat room member to high, normal, or low. In this case, when the server is overloaded, low-priority messages
can be dropped to reserve resources for the high-priority ones. This ensures that high-priority messages are sent first.
Note that this feature can increase the delivery reliability of high-priority messages, but cannot guarantee the deliveries.
Even high-priorities messages can be dropped when the server load goes too high.
#### HTTP request
```html
POST https://{host}/app-id/{app_id}/messages/chatrooms
```
##### Path parameter
For the descriptions of the path parameter, see [Common Parameters](#param).
##### Request header
| Parameter | Type | Description | Required |
| :-------------- | :----- | :----------------------------------------------------------------------------------------------------------------------------------------------------------------------------------------------- | :------- |
| `Content-Type` | String | The content type. Set it to `application/json`. | Yes |
| `Accept` | String | The content type. Set it to `application/json`. | Yes |
| `Authorization` | String | The authentication token of the user or administrator, in the format of `Bearer ${token}`, where `Bearer` is a fixed character, followed by an English space, and then the obtained token value. | Yes |
##### Request body
The request body is a JSON object, which contains the following parameters:
| Parameter | Type | Description | Required |
| -------------------- | ------ | ------------------------------------------------------------------------------------------------------------------------------------------------------------------------------------------------------------ | -------- |
| `to` | Array | An array of the chat room IDs that receives the message. Within one second, you can send messages to a maximum of 100 chat rooms, and for each request, you can send messages to a maximum of 10 chat rooms. | Yes |
| `chatroom_msg_level` | String | The chat room message priority: `high` (default), `normal`, or `low`. | No |
The other parameters and descriptions are the same with those of [Sending a one-to-one message method](#request).
#### HTTP response
##### Response body
If the returned HTTP status code is `200`, the request succeeds, and the response body contains the following parameters:
| Parameter | Type | Description |
| :-------- | :--- | :---------------------------------------------------------------------------------------------------------------------------------------------------------------------------------------------------------------------------------------------------------------------------------------------------------------------------------------------------------------------- |
| `data` | JSON | The detailed content of the response. The value of this parameter includes a key-value pair where key represents the chat room ID that receives the message and value the message ID. For example, if the returned data is `"185145305923585": "1029545553039460728"`, it means that a message with the ID of 1029545553039460728 is sent in chat room 185145305923585. |
For the other parameters and descriptions, see [Common parameters](#param).
If the returned HTTP status code is not `200`, the request fails. You can refer to [Status codes](./http-status-codes) for possible causes.
#### Example
##### Request example
* Send a text message to members in a chat room
```bash
# Replace {YourToken} with the app token generated on your server
curl -X POST -i 'http://XXXX/app-id/XXXX/messages/chatrooms' -H 'Content-Type: application/json' -H 'Accept: application/json' -H 'Authorization: Bearer {YourToken}' -d '{"from": "user1","to": ["185145305923585"],"type": "txt","body": {"msg": "testmessages"},"roam_ignore_users": []}'
```
* Send an image message
```bash
# Replace {YourToken} with the app token generated on your server
curl -X POST -i 'https://XXXX/app-id/XXXX/messages/chatrooms' -H 'Content-Type: application/json' -H 'Accept: application/json' -H 'Authorization: Bearer {YourToken}' -d '{"from": "user1","to": ["185145305923585"],"type": "img","body": {"filename":"testimg.jpg","secret":"VfXXXXNb_","url":"https://XXXX/app-id/XXXX/chatfiles/55f12940-XXXX-XXXX-8a5b-ff2336f03252","size":{"width":480,"height":720}}}'
```
* Send a voice message
```bash
# Replace {YourToken} with the app token generated on your server
curl -X POST -i 'https://XXXX/app-id/XXXX/messages/chatrooms' -H 'Content-Type: application/json' -H 'Accept: application/json' -H 'Authorization: Bearer {YourToken}' -d '{"from": "user1","to": ["185145305923585"],"type": "audio","body": {"url": "https://XXXX/app-id/XXXX/chatfiles/1dfc7f50-XXXX-XXXX-8a07-7d75b8fb3d42","filename": "testaudio.amr","length": 10,"secret": "HfXXXXCjM"}}'
```
* Send a video message
```bash
# Replace {YourToken} with the app token generated on your server
curl -X POST -i 'https://XXXX/app-id/XXXX/messages/chatrooms' -H 'Content-Type: application/json' -H 'Accept: application/json' -H 'Authorization: Bearer {YourToken}' -d '{"from": "user1","to": ["185145305923585"],"type": "video","body": {"filename":"testvideo.avi","thumb" : "https://XXXX/app-id/XXXX/chatfiles/67279b20-7f69-11e4-8eee-21d3334b3a97","length" : 0,"secret":"VfXXXXNb_","file_length" : 58103,"thumb_secret" : "ZyXXXX2I","url" : "https://XXXX/app-id/XXXX/chatfiles/671dfe30-XXXX-XXXX-ba67-8fef0d502f46"}}'
```
* Send a file message
```bash
# Replace {YourToken} with the app token generated on your server
curl -X POST -i 'https://XXXX/app-id/XXXX/messages/chatrooms' -H 'Content-Type: application/json' -H 'Accept: application/json' -H 'Authorization: Bearer {YourToken}' -d '{"from": "user1","to": ["185145305923585"],"type": "file","body": {"filename":"test.txt","secret":"1-g0XXXXua","url":"https://XXXX/app-id/XXXX/chatfiles/d7eXXXX7444"}}'
```
* Send a location message
```bash
# Replace {YourToken} with the app token generated on your server
curl -X POST -i "https://XXXX/app-id/XXXX/messages/chatrooms" -H 'Content-Type: application/json' -H 'Accept: application/json' -H 'Authorization: Bearer {YourToken}' -d '{"from": "user1","to": ["185145305923585"],"type": "loc","body":{"lat": "39.966","lng":"116.322","addr":"North America"}}'
```
* Send a CMD message
```bash
# Replace {YourToken} with the app token generated on your server
curl -X POST -i "https://XXXX/app-id/XXXX/messages/chatrooms" -H 'Content-Type: application/json' -H 'Accept: application/json' -H "Authorization:Bearer {YourToken}" -d '{"from": "user1","to": ["185145305923585"],"type": "cmd","body":{"action":"action1"}}'
```
* Send a custom message
```bash
# Replace {YourToken} with the app token generated on your server
curl -X POST -i "https://XXXX/app-id/XXXX/messages/chatrooms" \
-H 'Content-Type: application/json' \
-H 'Accept: application/json' \
-H "Authorization:Bearer " \
-d '{
"from": "user1",
"to": ["185145305923585"],
"type": "custom",
"body": {
"customEvent": "custom_event",
"customExts":{
"ext_key1":"ext_value1"
}
}
}'
```
##### Response example
* Send a text message
```json
{
"path": "/messages/chatrooms",
"uri": "https://XXXX/app-id/XXXX/messages/chatrooms",
"timestamp": 1657254052191,
"organization": "XXXX",
"application": "e82bcc5f-XXXX-XXXX-a7c1-92de917ea2b0",
"action": "post",
"data": {
"185145305923585": "1029545553039460728"
},
"duration": 0,
"applicationName": "XXXX"
}
```
* Send an image message
```json
{
"path": "/messages/chatrooms",
"uri": "https://XXXX/app-id/XXXX/messages/chatrooms",
"timestamp": 1657254052191,
"organization": "XXXX",
"application": "e82bcc5f-XXXX-XXXX-a7c1-92de917ea2b0",
"action": "post",
"data": {
"185145305923585": "1029545553039460728"
},
"duration": 0,
"applicationName": "XXXX"
}
```
* Send a voice message
```json
{
"path": "/messages/chatrooms",
"uri": "https://XXXX/app-id/XXXX/messages/chatrooms",
"timestamp": 1657254052191,
"organization": "XXXX",
"application": "e82bcc5f-XXXX-XXXX-a7c1-92de917ea2b0",
"action": "post",
"data": {
"185145305923585": "1029545553039460728"
},
"duration": 0,
"applicationName": "XXXX"
}
```
* Send a video message
```json
{
"path": "/messages/chatrooms",
"uri": "https://XXXX/app-id/XXXX/messages/chatrooms",
"timestamp": 1657254052191,
"organization": "XXXX",
"application": "e82bcc5f-XXXX-XXXX-a7c1-92de917ea2b0",
"action": "post",
"data": {
"185145305923585": "1029545553039460728"
},
"duration": 0,
"applicationName": "XXXX"
}
```
* Send a file message
```json
{
"path": "/messages/chatrooms",
"uri": "https://XXXX/app-id/XXXX/messages/chatrooms",
"timestamp": 1657254052191,
"organization": "XXXX",
"application": "e82bcc5f-XXXX-XXXX-a7c1-92de917ea2b0",
"action": "post",
"data": {
"185145305923585": "1029545553039460728"
},
"duration": 0,
"applicationName": "XXXX"
}
```
* Send a location message
```json
{
"path": "/messages/chatrooms",
"uri": "https://XXXX/app-id/XXXX/messages/chatrooms",
"timestamp": 1657254052191,
"organization": "XXXX",
"application": "e82bcc5f-XXXX-XXXX-a7c1-92de917ea2b0",
"action": "post",
"data": {
"185145305923585": "1029545553039460728"
},
"duration": 0,
"applicationName": "XXXX"
}
```
* Send a CMD message
```json
{
"path": "/messages/chatrooms",
"uri": "https://XXXX/app-id/XXXX/messages/chatrooms",
"timestamp": 1657254052191,
"organization": "XXXX",
"application": "e82bcc5f-XXXX-XXXX-a7c1-92de917ea2b0",
"action": "post",
"data": {
"185145305923585": "1029545553039460728"
},
"duration": 0,
"applicationName": "XXXX"
}
```
* Send a custom message
```json
{
"path": "/messages/chatrooms",
"uri": "https://XXXX/app-id/XXXX/messages/chatrooms",
"timestamp": 1657254052191,
"organization": "XXXX",
"application": "e82bcc5f-XXXX-XXXX-a7c1-92de917ea2b0",
"action": "post",
"data": {
"185145305923585": "1029545553039460728"
},
"duration": 0,
"applicationName": "XXXX"
}
```
### Send a broadcast message to all chat rooms under an app
This API sends a broadcast message to all active chat rooms under an app. Here, *active* indicates those that contain at least one member and in which at least one message is sent. This API can send all types of message to active chat rooms.
This API is available only to Pro and Enterprise plans.
For each App Key, the call frequency limit of this method is 10 per minute and 100 per day.
#### HTTP request
```html
POST https://{host}/app-id/{app_id}/messages/chatrooms/broadcast
```
##### Path parameter
For the descriptions of path parameters, see [Common Parameters](#param).
##### Request header
| Parameter | Type | Description | Required |
| :-------------- | :----- | :------------------------------------------------------------------------------------------------------------------------------------------------------------------------------------------- | :------- |
| `Content-Type` | String | The content type. Set it to `application/json`. | Yes |
| `Authorization` | String | The authentication token of the app administrator, in the format of `Bearer ${token}`, where `Bearer` is a fixed character, followed by an English space, and then the obtained token value. | Yes |
##### Request body
The request body is a JSON object, which contains the following parameters:
| Parameter | Type | Description | Required |
| -------------------- | ------ | ----------------------------------------------------------------------------------------------------------------------------------------------------------------------------------------------------------------------------------------------------------------------------------------- | -------- |
| `from` | String | The user ID of the message sender. If you do not set this field, the Chat server takes the `admin` as the sender. If you set it as the empty string "", this request fails. | No |
| `chatroom_msg_level` | String | The chat room message priority: `high` (default), `normal`, or `low`. | No |
| `msg` | String | The message body. | Yes |
| `msg.type` | String | The broadcast message type: `txt`: Text message`img`: Image message`audio`: Audio message`video`: Video message`file`: File message`loc`: Location message`cmd`: Command message`custom`: Custom message | Yes |
| `msg.msg` | String | The message content. For different message types, this parameter contains different fields. For details, see [Body of different message types](#body). | Yes |
| `ext` | JSON | The extension filed of the message. It cannot be `null`. Also, the offline push notification can contain custom extension fields. For details, see [custom displays](/en/realtime-media/im/build/notifications-and-event-handling/offline-push/overview#custom-displays) of offline push. | No |
For the request body, different types of message only differ in fields in `msg`. Except `type`, fields in `msg` in this request have the same meanings as those in `body` in the request body of an HTTP request of [sending a one-to-one message](#send-a-one-to-one-message).
#### HTTP response
##### Response body
For various types of broadcast messages, the HTTP responses contain the same fields.
If the returned HTTP status code is `200`, the request succeeds, and the response body contains the following parameters:
| Parameter | Type | Description |
| :-------- | :--- | :---------------- |
| `data.id` | JSON | The broadcast ID. |
For the other parameters and descriptions, see [Common parameters](#param).
If the returned HTTP status code is not 200, the request fails. You can refer to [Status codes](./http-status-codes) for possible causes.
#### Example
##### Request example
* Send a text broadcast message
```bash
# Replace {YourAppToken} with the app token generated in your server.
curl -L 'https://XXXX/app-id/XXXX/messages/chatrooms/broadcast' \
-H 'Content-Type: application/json' \
-H 'Authorization: Bearer ' \
-d '{
"msg": {
"type": "txt",
"msg": "send broadcast to all chatroom"
},
"from": "admin",
"ext": {
"extKey": "extValue"
},
"chatroom_msg_level": "low"
}'
```
* Send an image broadcast message
```bash
# Replace {YourAppToken} with the app token generated in your server.
curl -L 'https://XXXX/app-id/XXXX/messages/chatrooms/broadcast' \
-H 'Content-Type: application/json' \
-H 'Authorization: Bearer ' \
-d '{
"msg": {
"type": "img",
"filename":"testimg.jpg",
"secret":"VfXXXXNb_",
"url":"https://XXXX/app-id/XXXX/chatfiles/55f12940-XXXX-XXXX-8a5b-ff2336f03252",
"size":{
"width":480,
"height":720
}
},
"from": "admin",
"ext": {
"extKey": "extValue"
},
"chatroom_msg_level": "low"
}'
```
* Send a voice broadcast message
```bash
# Replace {YourAppToken} with the app token generated in your server.
curl -L 'https://XXXX/app-id/XXXX/messages/chatrooms/broadcast' \
-H 'Content-Type: application/json' \
-H 'Authorization: Bearer ' \
-d '{
"msg": {
"type": "audio",
"url": "https://XXXX/app-id/XXXX/chatfiles/1dfc7f50-XXXX-XXXX-8a07-7d75b8fb3d42",
"filename": "testaudio.amr",
"length": 10,
"secret": "HfXXXXCjM"
},
"from": "admin",
"ext": {
"extKey": "extValue"
},
"chatroom_msg_level": "low"
}'
```
* Send a video broadcast message
```bash
# Replace {YourAppToken} with the app token generated in your server.
curl -L 'https://XXXX/app-id/XXXX/messages/chatrooms/broadcast' \
-H 'Content-Type: application/json' \
-H 'Authorization: Bearer ' \
-d '{
"msg": {
"type": "video",
"thumb" : "https://XXXX/app-id/XXXX/chatfiles/67279b20-7f69-11e4-8eee-21d3334b3a97",
"length" : 0,
"secret":"VfXXXXNb_",
"file_length" : 58103,
"thumb_secret" : "ZyXXXX2I",
"url" : "https://XXXX/app-id/XXXX/chatfiles/671dfe30-XXXX-XXXX-ba67-8fef0d502f46"
},
"from": "admin",
"ext": {
"extKey": "extValue"
},
"chatroom_msg_level": "low"
}'
```
* Send a file broadcast message
```bash
# Replace {YourAppToken} with the app token generated in your server.
curl -L 'https://XXXX/app-id/XXXX/messages/chatrooms/broadcast' \
-H 'Content-Type: application/json' \
-H 'Authorization: Bearer ' \
-d '{
"msg": {
"type": "file",
"filename":"test.txt",
"secret":"1-g0XXXXua",
"url":"https://XXXX/app-id/XXXX/chatfiles/d7eXXXX7444"
},
"from": "admin",
"ext": {
"extKey": "extValue"
},
"chatroom_msg_level": "low"
}'
```
* Send a location broadcast message
```bash
# Replace {YourAppToken} with the app token generated in your server.
curl -L 'https://XXXX/app-id/XXXX/messages/chatrooms/broadcast' \
-H 'Content-Type: application/json' \
-H 'Authorization: Bearer ' \
-d '{
"msg": {
"type": "loc",
"lat": "39.966",
"lng":"116.322",
"addr":"California"
},
"from": "admin",
"ext": {
"extKey": "extValue"
},
"chatroom_msg_level": "low"
}'
```
* Send a transparent broadcast message
```bash
# Replace {YourAppToken} with the app token generated in your server.
curl -L 'https://XXXX/app-id/XXXX/messages/chatrooms/broadcast' \
-H 'Content-Type: application/json' \
-H 'Authorization: Bearer ' \
-d '{
"msg": {
"type": "cmd",
"action":"action1"
},
"from": "admin",
"ext": {
"extKey": "extValue"
},
"chatroom_msg_level": "low"
}'
```
* Send a custom broadcast message
```bash
# Replace {YourAppToken} with the app token generated in your server.
curl -L 'https://XXXX/app-id/XXXX/messages/chatrooms/broadcast' \
-H 'Content-Type: application/json' \
-H 'Authorization: Bearer ' \
-d '{
"msg": {
"type": "custom",
"customEvent": "custom_event",
},
"from": "admin",
"ext": {
"extKey": "extValue"
},
"chatroom_msg_level": "low"
}'
```
##### Response example
```json
{
"path": "/messages/chatrooms/broadcast",
"uri": "https://XXXX/app-id/XXXX/messages/chatrooms/broadcast",
"timestamp": 1699944653964,
"organization": "XXXX",
"application": "331d42e6-ad85-460f-b6b0-d1fb6fef9f12",
"action": "post",
"data": {
"id": 1173998498812376874
},
"duration": 1,
"applicationName": "wang"
}
```
## Upload a file
This method enables you to upload images, audios, videos, or other types of files. For images and videos that have thumbnails, note the following:
* Images: After uploading an image, the Agora server automatically generates the thumbnail of the image.
* Videos: The Agora server does not generate thumbnails for videos automatically. After uploading a video, you must recall this method to upload the thumbnail for the video yourself.
```
File sizeThumbnail size
≤10 MBThe size of the thumbnail remains the same as that of the original file.
10 MBA thumbnail is generated based on the specified `thumbnail-height` and `thumbnail-width` parameters.
If you leave `thumbnail-height` and `thumbnail-width` empty, the height and width of the thumbnail is 170 × 170 pixels by default.
```
Take note of the following considerations before calling this method:
* You cannot upload a file larger than 10 MB.
* You can restrict access to the uploaded file by requiring users to provide an access key before they can download the file. The format of the key is `{{url}}?share-secret={{secret}}`.
For each App Key, the call frequency limit of this method is 100 per second.
### HTTP request
```html
POST https://{host}/app-id/{app_id}/chatfiles
```
#### Path parameter
For the parameters and detailed descriptions, see [Common parameters](#param).
#### Request header
| Parameter | Type | Description | Required |
| :----------------- | :----- | :------------------------------------------------------------------------------------------------------------------------------------------------------------------------------------------------------------------------------------------------------------------------------------------------ | :------- |
| `Content-Type` | String | The content type. Pass `multipart/form-data` | Yes |
| `Authorization` | String | The authentication token of the user or admin, in the format of `Bearer ${YourAppToken}`, where `Bearer` is a fixed character, followed by an English space, and then the obtained token value. | Yes |
| `restrict-access` | Bool | Whether to restrict access to this file.`true`: Restrict access to the file. The user needs to provide a file access key (`share-secret`) to download the file. You can obtain the access key from the response body.`false`: The access is not restricted. Users can download the file directly. | No |
| `thumbnail-height` | Number | The height of the image thumbnail, in pixels. This parameter is valid only if the size of the uploaded image exceeds 10 KB. If you leave this parameter empty, the height is 170 pixels by default. | No |
| `thumbnail-width` | Number | The width of the image thumbnail, in pixels. This parameter is valid only if the size of the uploaded image exceeds 10 KB. If you leave this parameter empty, the width is 170 pixels by default. | No |
#### Request body
The request body is in the form-data format and contains the following fields:
| Field | Type | Description | Required |
| :----- | :----- | :----------------------------------------- | :------- |
| `file` | String | The local path of the file to be uploaded. | Yes |
### HTTP response
#### Response body
If the returned HTTP status code is `200`, the request succeeds, and the response body contains the following fields:
| Field | Type | Description |
| :---------------------- | :----- | :----------------------------------------------------------------------------------------------------------------------------------------------------------------------------------- |
| `entities.uuid` | String | The file ID, a unique ID assigned to the file by the Chat service. You need to save this `uuid` yourself, and provide it when calling the [Send-file-messages](#sendmessage) method. |
| `entities.type` | String | File type: `chatfile`. |
| `entities.share-secret` | String | The file access key. You need to save the `share-secret` yourself for use when [downloading the file](#download). |
For other fields and detailed descriptions, see [Common parameters](#param).
If the returned HTTP status code is not `200`, the request fails. You can refer to [Status codes](./http-status-codes) for possible reasons.
### Example
#### Request example
```bash
# Replace {YourAppToken} with the app token generated on your server, and the path of file with the local full path where the file to be uploaded is located
curl -X POST 'https://XXXX/app-id/XXXX/chatfiles' -H 'Authorization: Bearer ' -H 'Content-Type: multipart/form-data; boundary=---WebKitFormBoundary7MA4YWxkTrZu0gW' -H 'restrict-access: true' -H 'thumbnail-height: 180' -H 'thumbnail-width: 180' -F 'file="@/Users/test/9.2/agora/image/IMG_2953.JPG"'
```
#### Response example
```json
{
"action": "post",
"application": "8be024f0-XXXX-XXXX-b697-5d598d5f8402",
"path": "/chatfiles",
"uri": "https://XXXX/app-id/XXXX/chatfiles",
"entities": [
{
"uuid": "5fd74830-XXXX-XXXX-822a-81ea50bb049d",
"type": "chatfile",
"share-secret": "X9dXXXX7Yc"
}
],
"timestamp": 1554371126338,
"duration": 0,
"organization": "XXXX",
"applicationName": "XXXX"
}
```
## Download a file
This method downloads images, audio, video, or other types of files.
For each App Key, the call frequency limit of this method is 100 per second.
### HTTP request
```html
GET https://{host}/app-id/{app_id}/chatfiles/{file_uuid}
```
#### Path parameter
| Parameter | Type | Required | Description |
| :---------- | :----- | :------- | :------------------------------------- |
| `file_uuid` | String | Yes | The UUID of the file to be downloaded. |
For the other parameters and detailed descriptions, see [Common parameters](#param).
#### Request header
| Parameter | Type | Description | Required |
| :-------------- | :----- | :--------------------------------------------------------------------------------------------------------------------------------------------------------------------------------------------------- | :-------------------------------------------------------------------------------------- |
| `Accept` | String | The content type. Set it to`application/octet-stream`, which means to download files in binary data stream format. | Yes |
| `Authorization` | String | The authentication token of the user or administrator, in the format of `Bearer ${token}`, where `Bearer` is a fixed character, followed by an English space, and then the obtained token value. | Yes |
| `share-secret` | String | The file access key for downloading the file. After the file is uploaded successfully using the [Upload the file](#upload) method, you can obtain the access key from the response body of `upload`. | This field is mandatory if you set `restrict-access` to `true` when uploading the file. |
### HTTP response
#### Response body
If the returned HTTP status code is `200`, the request succeeds. You can refer to [Common parameters](#param) for the parameters and detailed description.
If the returned HTTP status code is not `200`, the request fails. You can refer to [Status codes](./http-status-codes) for possible reasons.
### Example
#### Request example
```bash
# Replace {YourToken} with the app token generated on your server, and the path of file with the local full path where the file to be downloaded is located
curl -X GET -H 'Accept: application/octet-stream' -H 'Authorization: Bearer {YourToken}' -H 'share-secret: f0Vr-uyyEeiHpHmsu53XXXXXXXXZYgyLkdfsZ4xo2Z0cSBnB' 'http://XXXX/app-id/XXXX/chatfiles/7f456bf0-XXXX-XXXX-b630-777db304f26c'-o /Users/test/chat/image/image.JPG
```
#### Response example
```json
{
// The content of the voice/image file
}
```
## Download a thumbnail
When uploading an image or video file, the Chat server can create a thumbnail for the file. This method has an extra `thumbnail` field in the request header compared with [downloading a file](#download).
For each App Key, the call frequency limit of this method is 100 per second.
### HTTP request
```html
GET https://{host}/app-id/{app_id}/chatfiles/{file_uuid}
```
#### Path parameter
| Parameter | Type | Required | Description |
| :---------- | :----- | :------- | :---------------------------------------------------- |
| `file_uuid` | String | Yes | The UUID that the server generates for the thumbnail. |
For the other parameters and detailed descriptions, see [Common parameters](#param).
#### Request header
| Parameter | Type | Description | Required |
| :-------------- | :----- | :------------------------------------------------------------------------------------------------------------------------------------ | :------- |
| `Accept` | String | `application/octet-stream`, which means to download files in binary data stream format. | Yes |
| `Authorization` | String | `Bearer ${YourAppToken}` | Yes |
| `thumbnail` | Bool | Whether to download the thumbnail of the image or video file. `true`: Yes. `false`: (Default) No. Download the original file instead. | No |
### HTTP response
#### Response body
If the returned HTTP status code is `200`, the request succeeds. You can refer to [Common parameters](#param) for the parameters and detailed description.
If the returned HTTP status code is not `200`, the request fails. You can refer to [Status codes](./http-status-codes) for possible reasons.
### Example
#### Request example
```bash
# Replace {YourToken} with the app token generated on your server
curl -X GET -H 'Accept: application/octet-stream' -H 'Authorization: Bearer {YourToken}' -H 'share-secret: f0Vr-uyyEeiHpHmsu53XXXXXXXXZYgyLkdfsZ4xo2Z0cSBnB' -H 'thumbnail: true' 'http://XXXX/app-id/XXXX/chatfiles/7f456bf0-ecb2-11e8-b630-777db304f26c'
```
#### Response example
```json
{
// The content of the thumbnail
}
```
## Retrieve historical messages
This method retrieves historical messages sent and received by the user.
* For each request, you can retrieve all the historical messages sent and received within one hour from the specified time.
* Messages cannot be retrieved in real time. For example, at 9 a.m., you can retrieve messages that are sent or received at 8 a.m.
* The default storage time of historical messages differs by plan version. For details, see [package details](./pricing-plan-details).
For each App Key, the call frequency limit of this method is 10 per minute.
### HTTP request
```html
GET https://{host}/app-id/{app_id}/chatmessages/${time}
```
#### Path parameter
| Parameter | Type | Description | Required |
| :-------- | :----- | :----------------------------------------------------------------------------------------------------------------------------------------------------------------------------------------------------------------------------------------------------------------- | :------- |
| `time` | String | The start time of the historical messages to query. UTC time, using the ISO8601 standard, in the format `yyyyMMddHH`. For example, if `time` is` 2018112717`, it means to query historical messages from 17:00 on November 27, 2018 to 18:00 on November 27, 2018. | Yes |
For other parameters and detailed descriptions, see [Common parameters](#param).
#### Request header
| Parameter | Description | Required |
| :-------------- | :---------------------------------------------------------------------------------------------------------------------------------------------------------------------------------------------- | :------- |
| `Accept` | The content type. Set it to `application/json`. | Yes |
| `Authorization` | The authentication token of the user or admin, in the format of `Bearer ${YourAppToken}`, where `Bearer` is a fixed character, followed by an English space, and then the obtained token value. | Yes |
### HTTP response
#### Response body
If the returned HTTP status code is `200`, the request succeeds, and the response body contains the following fields:
| Parameter | Type | Description |
| :-------- | :----- | :-------------------------------------------------------------------------------------------------------------------------------------------------------------------------------------------------------------------------------------------------- |
| `url` | String | The download address of the historical message file. This parameter is valid within a limited time duration. The `Expires` field indicates when the returned URL is valid. Once the URL expires, you need to call this method to get the URL again. |
For other fields and detailed descriptions, see [Common parameters](#param).
If the returned HTTP status code is not `200`, the request fails. You can refer to [Status codes](./http-status-codes) for possible reasons.
### Example
#### Request example
```bash
# Replace {YourToken} with the app token generated on your server.
curl -X GET -H 'Accept: application/json' -H 'Authorization: Bearer {YourToken}' 'http://XXXX/app-id/XXXX/chatmessages/2018112717'
```
#### Response example
```json
{
"action": "get",
"application": "8be024f0-XXXX-XXXX-b697-5d598d5f8402",
"uri": "'http://XXXX/app-id/XXXX/chatmessages/2018112717",
"data": [
{
"url": "http://XXXX?Expires=1543316122&OSSAccessKeyId=XXXX&Signature=XXXX"
}
],
"timestamp": 1543314322601,
"duration": 0,
"organization": "XXXX",
"applicationName": "testapp"
}
```
### Content of historical messages
After successfully querying historical messages, you can visit the URL to download the historical message file and view the specific content of the historical message.
Historical messages contain the following parameters in JSON format:
| Parameter | Type | Description |
| ----------- | ------ | --------------------------------------------------------------------------------------------------------------------------------------------------------------------------- |
| `msg_id` | String | The message ID. |
| `timestamp` | Long | The UTC Unix timestamp when the message is sent, in miliseconds. |
| `from` | String | The username that sends the message. |
| `to` | String | The message recipient.For a one-to-one chat, this parameter indicates the peer user that receives the message.For a group chat, this parameter indicates the chat group ID. |
| `chat_type` | String | The chat type:`chat`: One-to-one chat.`groupchat`: Group chat.`chatroom`: Chat room. |
| `payload` | JSON | The content of the message, including message extensions and customzied message attributes. |
```json
{
"msg_id": "5I02W-XX-8278a",
"timestamp": 1403099033211,
"direction":"outgoing",
"to": "XXXX",
"from": "XXXX",
"chat_type": "chat",
"payload":
{
"bodies": [
{
// For different message types, the parameters differ
}
],
"ext":
{
"key1": "value1", ...
},
"from":"XXXX",
"to":"XXXX"
}
}
```
The fields of `bodies` for different message types vary:
* Text messages
| Field | Type | Description |
| :----- | :----- | :---------------------------------------------------- |
| `msg` | String | The message content. |
| `type` | String | The message type. For text messages, set it as `txt`. |
Example:
```json
{
"bodies": [
{
"msg": "welcome to Agora!",
"type": "txt"
}
]
}
```
* Image messages
| Field | Type | Description |
| :------------ | :----- | :----------------------------------------------------------------------------------------------------------------------------- |
| `file_length` | Number | The size of the image attachment, in bytes. |
| `file_name` | String | The name of the image file. |
| `secret` | String | The image file access key. This field exists if you set the access restriction when calling the [upload-file](#upload) method. |
| `size` | Number | The size of the image, in pixels.`height`: The image height`width`: The image width |
| `type` | String | The message type. For image messages, set it as `img`. |
| `url` | String | The URL address of the image. |
Example:
```json
{
"bodies": [
{
"file_length": 128827,
"filename": "test1.jpg",
"secret": "DRGM8OZrEeO1vaXXXXXXXXHBeKlIhDp0GCnFu54xOF3M6KLr",
"size": {
"height": 1325,
"width": 746
},
"type": "img",
"url": "https://a1.agora.com/agora-demo/chatdemoui/chatfiles/65e54a4a-XXXX-XXXX-b821-ebde7b50cc4b"
}
]
}
```
* Location messages
| Field | Type | Description |
| :----- | :----- | :-------------------------------------------------------- |
| `addr` | String | The descriptions of the location. |
| `lat` | Number | The latitude of the location. |
| `lng` | Number | The longitude of the location. |
| `type` | String | The message type. For location messages, set it as `loc`. |
Example:
```json
{
"bodies": [
{
"addr": "test",
"lat": 39.9053,
"lng": 116.36302,
"type": "loc"
}
]
}
```
* Voice messages
| Field | Type | Description |
| :------------ | :----- | :----------------------------------------------------------------------------------------------------------------------------- |
| `file_length` | Number | The size of the audio file, in bytes. |
| `filename` | String | The audio file name, including a suffix that indicates the audio file format. |
| `secret` | String | The audio file access key. This field exists if you set the access restriction when calling the [upload-file](#upload) method. |
| `length` | Number | The duration of the audio file, in seconds. |
| `type` | String | The message type. For voice messages, set it as `audio`. |
| `url` | String | The URL address of the audio file. |
Example:
```json
{
"bodies": [
{
"file_length": 6630,
"filename": "test1.amr",
"length": 10,
"secret": "DRGM8OZrEeO1vafuJSo2IjHBeKlIhDp0GCnFu54xOF3M6KLr",
"type": "audio",
"url": "https://a1.agora.com/agora-demo/chatdemoui/chatfiles/0637e55a-XXXX-XXXX-ba23-51f25fd1215b"
}
]
}
```
* Video messages
| Field | Type | Description |
| :------------- | :----- | :--------------------------------------------------------------------------------------------------------------------------------- |
| `file_length` | Number | The size of the video file, in bytes. |
| `filename` | String | The video file name, including a suffix that indicates the video file format. |
| `secret` | String | The video file access key. This field exists if you set the access restriction when calling the [upload-file](#upload) method. |
| `length` | Number | The video duration, in seconds. |
| `size` | Number | The video thumbnail size, in pixels.`width`: The width of the video thumbnail`height`: The height of the video thumbnail |
| `thumb` | String | The URL address of the video thumbnail. |
| `thumb_secret` | String | The thumbnail file access key. This field exists if you set the access restriction when calling the [upload-file](#upload) method. |
| `type` | String | The message type. For video messages, set it as `video`. |
| `url` | String | The URL address of the video file. You can visit this URL to download video files. |
Example:
```json
{
"bodies": [
{
"file_length": 58103,
"filename": "1418105136313.mp4",
"length": 10,
"secret": "VfEpSmSvEeS7yU8dwa9rAQc-DIL2HhmpujTNfSTsrDt6eNb_",
"size": {
"height": 480,
"width": 360
},
"thumb": "https://a1.agora.com/agora-demo/chatdemoui/chatfiles/67279b20-XXXX-XXXX-8eee-21d3334b3a97",
"thumb_secret": "ZyebKn9pEeSSfY03ROk7ND24zUf74s7HpPN1oMV-1JxN2O2I",
"type": "video",
"url": "https://a1.agora.com/agora-demo/chatdemoui/chatfiles/671dfe30-XXXX-XXXX-ba67-8fef0d502f46"
}
]
}
```
* File messages
| Field | Type | Descriptions |
| :------------ | :----- | :----------------------------------------------------------------------------------------------------------------------- |
| `file_length` | Number | The file size, in bytes. |
| `filename` | String | The file name, including a suffix that indicates the file format. |
| `secret` | String | The file access key. This field exists if you set the access restriction when calling the [upload-file](#upload) method. |
| `type` | String | The message type. For file messages, set it as `file`. |
| `url` | String | The URL address of the file. You can visit this URL to download video files. |
Example:
```json
{
"bodies": [
{
"file_length": 3279,
"filename": "record.md",
"secret": "2RNXCgeeEeeXXXX-XXXXbtZXJH4cgr2admVXn560He2PD3RX",
"type": "file",
"url": "https://XXXX/app-id/XXXX/chatfiles/d9135700-XXXX-XXXX-b000-a7039876610f"
}
]
}
```
* CMD messages
| Field | Type | Description |
| :------- | :----- | :------------------------------------------------------- |
| `action` | String | The request method. |
| `type` | String | The message type. For command messages, set it as `cmd`. |
Example:
```json
{
"bodies": [
{
"action": "run",
"type": "cmd"
}
]
}
```
* Custom messages
| Field | Type | Description |
| :------------ | :----- | :-------------------------------------------------------------------------------------------- |
| `customExts` | JSON | The custom extension properties. You can set the fields in the extension properties yourself. |
| `customEvent` | String | The custom event type. |
| `type` | String | The message type. For custom messages, set it as `custom`. |
Example:
```json
{
"bodies": [
{
"customExts": {
"name": "flower",
"size": "16",
"price": "100"
},
"customEvent": "gift_1",
"type": "custom"
}
]
}
```
## Modify a text or custom message
You can call the RESTful API to edit a text or custom message that is successfully sent.
For each App Key, the call frequency limit of this method is 100 per second.
### HTTP request
```bash
PUT https://{host}/app-id/{app_id}/messages/rewrite/{msg_id}
```
#### Path parameter
| Parameter | Type | Description | Required |
| :-------- | :----- | :------------------------------------ | :------- |
| `msg_id` | String | The ID of the message to be modified. | Yes |
For the other parameters and detailed descriptions, see [Common parameters](#param).
#### Request header
| Parameter | Type | Description | Required |
| :-------------- | :----- | :---------------------------------------------------------------------------------------------------------------------------------------------------------------------------------------------- | :------- |
| `Content-Type` | String | The parameter type. Set it as `application/json`. | Yes |
| `Accept` | String | The parameter type. Set it as `application/json`. | Yes |
| `Authorization` | String | The authentication token of the user or admin, in the format of `Bearer ${YourAppToken}`, where `Bearer` is a fixed character, followed by an English space, and then the obtained token value. | Yes |
#### Request body
| Parameter | Type | Description | Required |
| :-------------------- | :------ | :---------------------------------------------------------------------------------------------------------------------------------------------------------------------------------------------------------------------------------------------------------------------------------- | :------- |
| `user` | String | The user that modifies the message. | No |
| `new_msg` | JSON | The modified message. | Yes |
| `new_msg.type` | String | The type of message to modify: `txt`: The text message; `custom`: The custom message. | Yes |
| `new_msg.msg` | String | The modified message content. **This parameter is valid only for text messages.** | Yes |
| `new_msg.customEvent` | String | The event type customized by the user. The value of this parameter should meet restrictions placed by a regular expression, for example, \[a-zA-Z0-9-\_/.]\{1,32}. This parameter value can contain up to 32 characters. **This parameter is valid only for custom messages.** | No |
| `new_msg.customExts` | JSON | The event attribute customized by the user. The data type is `Map`. You can set a maximum of 16 elements. **This parameter is valid only for custom messages.** | No |
| `new_ext` | JSON | The modified message extension information. This parameter is valid only for custom messages. | No |
| `is_combine_ext` | Boolean | Whether the modified message extension information is merged with or replaces the original information:(Default)`true`: Merge; `false`: Replace. | No |
### HTTP response
#### Response body
If the returned HTTP status code is 200, the request succeeds, and the response body contains the following fields:
| Parameter | Type | Description |
| :-------- | :----- | :----------------------------------------------------------------------- |
| `data` | String | The value `success` indicates that the message is successfully modified. |
For other fields and detailed descriptions, see [Common parameters](#param).
If the returned HTTP status code is not `200`, the request fails. Common errors are shown in the following table:
| Error | HTTP status code | Code explanation | Error description |
| :------------------------------------- | :--------------- | :------------------------------------------------------------------------- | :--------------------------------------------------------------------------------------------------------------------------------------------------------- |
| `UnsupportedMessageTypeException` | `400` | The message is of a type that is currently not supported for modification. | This type of message cannot be modified. Currently, only text messages and custom messages that are successful sent can be modified. |
| `InvalidMessageIdException` | `400` | The provided message ID is not a valid number. | The message ID can only contain digits. |
| `RewriteMessageNotAuthorizedException` | `401` | You are not authorized to edit this message. | The ID of the message to be modified does not belong to the current app. |
| `EditLimitExceededException` | `403` | The message has reached its edit limit and cannot be modified further. | The number of times the message is modified has reached the upper limit which is 10. |
| `EditFeatureNotEnabledException` | `403` | The edit message feature is not enabled for this user or system. | The message modification feature is not enabled. Before using this feature, you need to contact [support@agora.io](mailto\:support@agora.io) to enable it. |
| `MessageUnavailableException` | `404` | The message is unavailable or has expired. | The message to be modified does not exist or has been removed due to expiration. |
| `RewriteMessageInternalErrorException` | `500` | An unknown error occurred while processing the request. | The message modification fails due to an internal error. |
### Example
#### Request example
* Modify a sent text message:
```bash
# Replace {YourAppToken} with the app token generated in your server.
curl -X PUT -i 'https://XXXX/app-id/XXXX/messages/rewrite/1235807318835202004' \
-H 'Content-Type: application/json' \
-H 'Accept: application/json' \
-H 'Authorization: Bearer ' \
-d '{
"user": "user1",
"new_msg": {
"type": "txt",
"msg": "update message content"
},
}'
```
* Modify a sent custom message:
```bash
# Replace {YourAppToken} with the app token generated in your server.
curl -X PUT -i 'https://XXXX/app-id/XXXX/messages/rewrite/1235807318835202004' \
-H 'Content-Type: application/json' \
-H 'Accept: application/json' \
-H 'Authorization: Bearer ' \
-d '{
"user": "user1",
"new_msg": {
"type": "custom",
"customEvent": "custom_event",
"customExts":{
"ext_key1":"ext_value1"
}
},
"new_ext": {
"key": "value",
"old_key": "new_value"
},
"is_combine_ext": true
}'
```
#### Response example
```json
{
"path": "/messages/rewrite/1235807318835202004",
"uri": "https://XXXX/app-id/XXXX/messages/rewrite/1235807318835202004",
"timestamp": 1705372388118,
"organization": "XXXX",
"application": "ff678832-XXXX-XXXX-8130-58ac38cb6c15",
"action": "put",
"data": "success",
"duration": 49,
"applicationName": "XXXX"
}
```
## Recall a message
Once a message is sent, you can call this API to recall it. This API recalls a message that is saved both locally and on the server, whether it is a historical message, offline message or a roaming message on the server, or a message in the memory or local database of the message sender or recipient. If an attachment message, like an image, voice, video, or file message, is recalled, the attachment of the message is also deleted.
The default time limit for recalling a message is two minutes. You can extend this time frame to up to 7 days in Agora Console. To do so, select a project that enables Agora Chat, then click **Configure** > **Features** > **Message recall**.
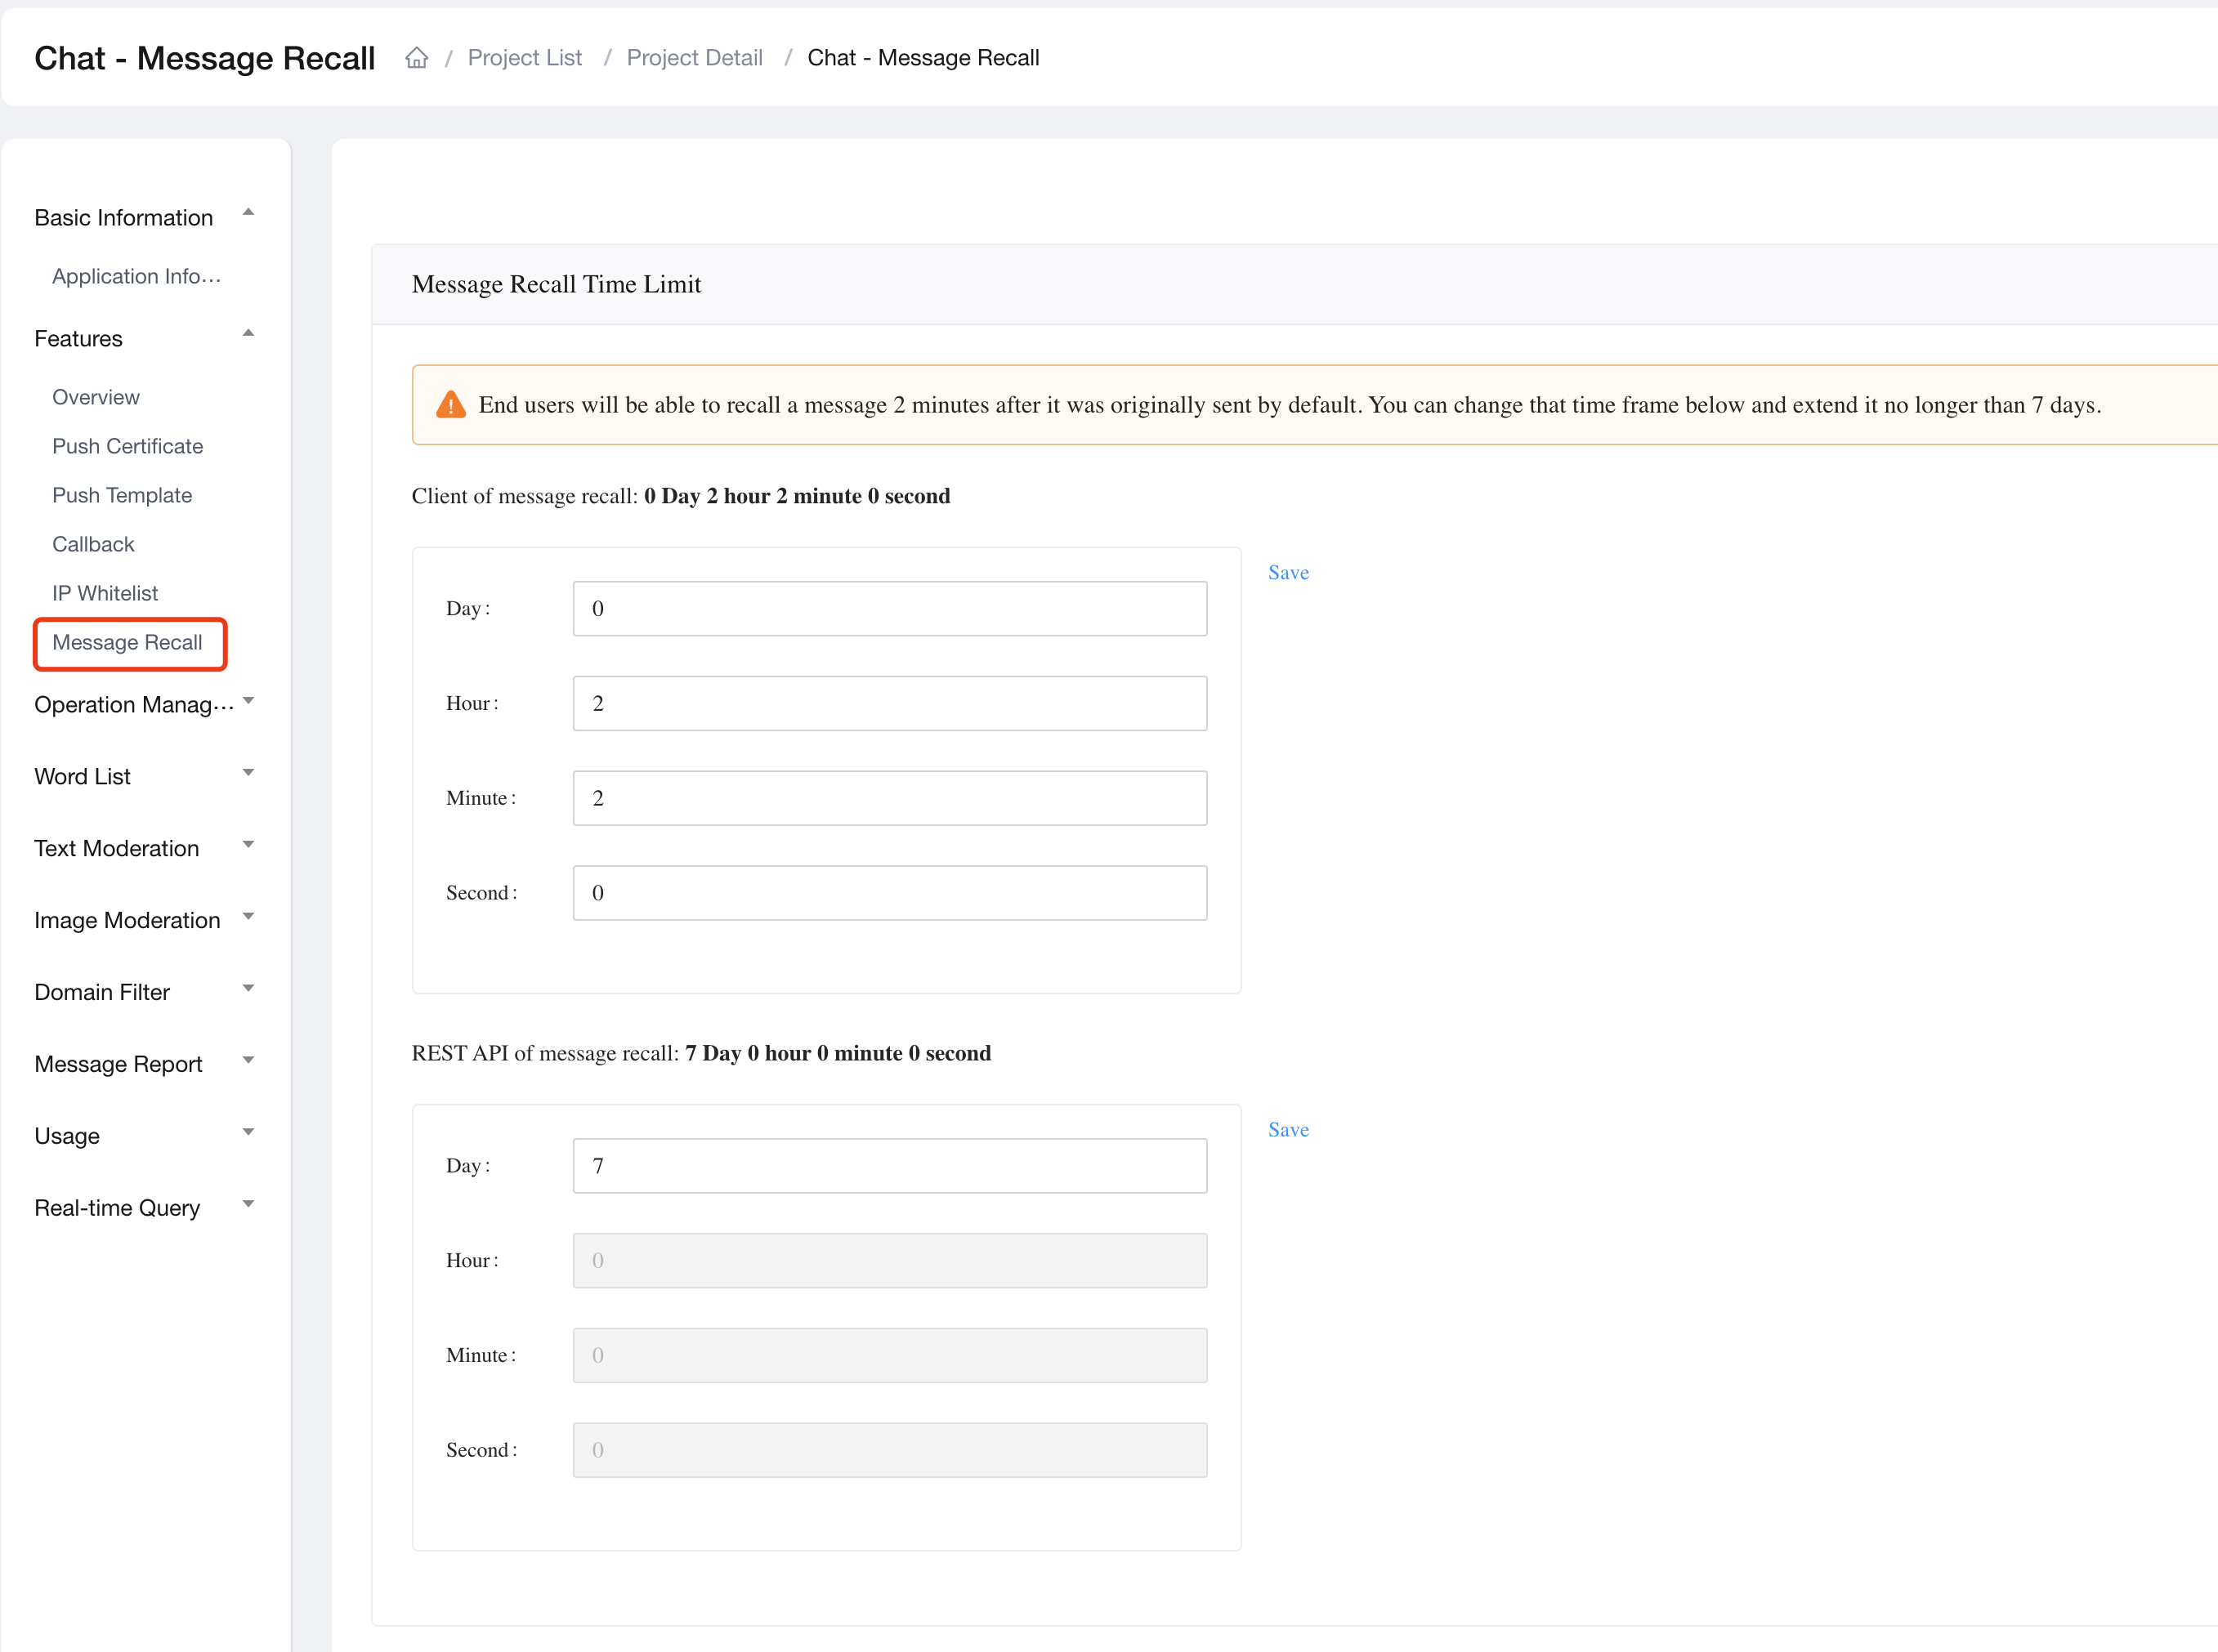
For each App Key, the call frequency limit of this method is 100 per second.
```html
POST https://{host}/app-id/{app_id}/messages/msg_recall
```
#### Path parameter
For the parameters and detailed descriptions, see [Common parameters](#param).
#### Request header
### HTTP request
| Parameter | Type | Required | Description |
| :-------------- | :----- | :---------------------------------------------- | :---------------------------------------------------------------------------------------------------------------------------------------------------------------------------------------------- |
| `Accept` | String | The content type. Set it to `application/json`. | Yes |
| `Authorization` | String | Yes | The authentication token of the user or admin, in the format of `Bearer ${YourAppToken}`, where `Bearer` is a fixed character, followed by an English space, and then the obtained token value. |
#### Request body
| Parameter | Type | Required | Description |
| :------------ | :----- | :------- | :------------------------------------------------------------------------------------------------------------------------------------------------------------------------------------------------------------------------------------------------------------------------------------------------------------------------------------------------------------------------------------------------------ |
| `msg_id` | String | Yes | The ID of the message to recall. As only one message can be recalled each time, you can pass in only one message ID. |
| `to` | String | Yes | The user, chat group, or chat room that receives the message to recall. You can specify a user ID, a chat group ID, or a chat room ID.
Note
If the message to recall no longer exists on the server, only the message on the recipient client is recalled.
|
| `chat_type` | String | Yes | The type of the chat where the message to recall is sent. `chat`: A one-on-one chat. `groupchat`: A chat group. `chatroom`: A chat room. |
| `from` | String | No | The user who recalls the message. By default, the recaller is the app admin. You can also specify another user as the recaller. |
| `sync_device` | Bool | No | Whether to synchronize the recall of a one-to-one message to all online devices of the message sender. (Default):* `true`: Yes
* `false`: No
When `force` is set to `true`, to recall a message that expires, you need to set `from` to the sender of the message.
|
| `force` | Bool | No | Whether to allow to recall messages forcibly: `true`: Yes. In this case, you can recall messages whether they expire. To recall the expired messages, you must set `force` to `true`. (Default) `false`: No. In this case, you can only recall messages that still exist on the server within the recall duration. |
### HTTP response
#### Response body
If the returned HTTP status code is `200`, the request succeeds, and the response body contains the following fields:
| Parameter | Type | Description |
| :--------- | :----- | :------------------------------------------------------------------------------------------------------------------------------------------ |
| `msg_id` | String | The ID of the recalled message. |
| `recalled` | String | Returns `yes` if the request is successful. |
| `from` | String | The user who recalls the message. By default, the recaller is the app admin. |
| `to` | String | The user, chat group, or chat room that receives the recalled message. |
| `chattype` | String | The type of the chat where the recalled message is located. `chat`: A one-on-one chat. `group_chat`: A chat group. `chatroom`: A chat room. |
For other fields and detailed descriptions, see [Common parameters](#param).
If the request fails, refer to [Status codes](./http-status-codes) for possible reasons.
### Example
#### Request example
```bash
# Replace {YourToken} with the app token generated on your server
curl -i -X POST -H 'Content-Type: application/json' -H 'Accept: application/json' -H "Authorization: Bearer {YourToken}"
"http://XXXX/app-id/XXXX/messages/msg_recall"
-d '{
"msg_id": "1028442084794698104",
"to": "user2",
"from": "user1",
"chat_type": "chat",
"force": true
}'
```
#### Response example
* If the message is recalled:
```json
{
"path": "/messages/msg_recall",
"uri": "https://XXXX/app-id/XXXX/messages/msg_recall",
"timestamp": 1657529588473,
"organization": "XXXX",
"application": "09ebbf8b-XXXX-XXXX-XXXX-d47c3b38e434",
"action": "post",
"data": {
"recalled": "yes",
"chattype": "chat",
"from": "XXXX",
"to": "XXXX",
"msg_id": "1028442084794698104"
},
"duration": 8,
"applicationName": "XXXX"
}
```
* If the message fails to be recalled:
```json
{
"msgs":
[
{ "msg_id":"673296835082717140",
"recalled":"not_found msg"
}
]
}
```
Possible causes for failing to recall the message include the following:
* `"can't find message to"`: The recipient of the message to recall is not found.
* `"exceed call time limit"`: The time limit for recalling a message is exceeded.
* `"not_found msg"`: The message is already recalled or no longer exists because its storage period expires.
* `"internal error"`: An internal error occurs with the back-end service.
## Delete conversations one way from the server
This method enables the chat user to delete conversations one way from the server. Once the conversation is deleted, this chat user can no longer retrieve the conversation from the server. Other chat users can still get the conversation from the server.
For each App Key, the call frequency limit of this method is 100 per second.
### HTTP request
```html
DELETE https://{host}/app-id/{app_id}/users/{userName}/user_channel
```
#### Path parameter
| Parameter | Type | Description | Required |
| ---------- | ------ | ------------------------------------------------- | -------- |
| `userName` | String | The username whose conversation is to be deleted. | Yes |
For the other parameters and detailed descriptions, see [Common parameters](#param).
#### Request header
| Parameter | Type | Required | Description |
| :-------------- | :----- | :------- | :---------------------------------------------------------------------------------------------------------------------------------------------------------------------------------------------- |
| `Authorization` | String | Yes | The authentication token of the user or admin, in the format of `Bearer ${YourAppToken}`, where `Bearer` is a fixed character, followed by an English space, and then the obtained token value. |
#### Request body
| Parameter | Type | Required | Description |
| :------------ | :----- | :------- | :------------------------------------------------------------------------ |
| `channel` | String | Yes | The ID of the conversation that you want to delete. |
| `type` | String | Yes | The type of the chat.`chat`: A one-on-one chat.`groupchat`: A group chat. |
| `delete_roam` | Bool | Yes | Whether to delete the chat from the server:`true`: Yes. `false`: No. |
### HTTP response
#### Response body
If the returned HTTP status code is `200`, the request succeeds. The response body contains the following fields:
| Parameter | Description |
| :-------- | :----------------------------------------- |
| `result` | Returns `ok` if the request is successful. |
If the returned HTTP status code is not `200`, the request fails. You can refer to [Status codes](./http-status-codes) for possible reasons.
### Example
#### Request example
```bash
curl -L -X DELETE 'https://XXXX/app-id/XXXX/users/u1/user_channel'
-H 'Authorization: Bearer ' \
-H 'Content-Type: application/json' \
-H 'Accept: application/json' \
-d '
{ "channel": "u2", "type": "chat", "delete_roam": true }
'
```
#### Response example
```json
{
"path": "/users/user_channel",
"uri": "https://a1.agora.com/agora-demo/test-app/users/u1/user_channel",
"timestamp": 1638440544078,
"organization": "agora-demo",
"application": "c3624975-3d51-4b0a-9da2-ee91ed4c5a76",
"entities": [],
"action": "delete",
"data": {
"result": "ok"
},
"duration": 3,
"applicationName": "test-app"
}
```
## Modify a text or custom message
You can call the RESTful API to modify a text or custom message that was successfully sent. For each App Key, the call frequency limit of this method is 100 per second.
### HTTP request
```html
PUT https://{host}/app-id/{app_id}/messages/rewrite/{msg_id}
```
#### Path parameter
| Parameter | Type | Description | Required |
| :-------- | :----- | :------------------------------------ | :------- |
| `msg_id` | String | The ID of the message to be modified. | Yes |
For the other parameters and detailed descriptions, see [Common parameters](#param).
#### Request header
| Parameter | Type | Description | Required |
| :-------------- | :----- | :---------------------------------------------------------------------------------------------------------------------------------------------------------------------------------------------- | :------- |
| `Content-Type` | String | The parameter type. Set it as `application/json`. | Yes |
| `Accept` | String | The parameter type. Set it as `application/json`. | Yes |
| `Authorization` | String | The authentication token of the user or admin, in the format of `Bearer ${YourAppToken}`, where `Bearer` is a fixed character, followed by an English space, and then the obtained token value. | Yes |
#### Request body
| Parameter | Type | Description | Required |
| :-------------------- | :------ | :--------------------------------------------------------------------------------------------------------------------------------------------------------------------------------------------------------------------------------------------------------- | :------- |
| `user` | String | The user that modifies the message. | No |
| `new_msg` | JSON | The modified message. | Yes |
| `new_msg.type` | String | The type of message to modify: `txt`: The text message. `custom`: The custom message. | Yes |
| `new_msg.msg` | String | The modified message content. **This parameter is valid only for text messages.** | Yes |
| `new_msg.customEvent` | String | The event type customized by the user. The value of this parameter should be a regular expression, for example, `[a-zA-Z0-9-_/\.]{1,32}`. This parameter value can contain up to 32 characters. **This parameter is valid only for custom messages.** | No |
| `new_msg.customExts` | JSON | The event attribute customized by the user. The data type is `Map`. You can set a maximum of 16 elements. **This parameter is valid only for custom messages.** | No |
| `new_ext` | JSON | The modified message extension information. This parameter is valid only for custom messages. | No |
| `is_combine_ext` | Boolean | Whether the modified message extension information is merged with or replaces the original information:(Default)`true`: Merge. `false`: Replace. | No |
### HTTP response
#### Response body
If the returned HTTP status code is 200, the request succeeds, and the response body contains the following fields:
| Parameter | Type | Description |
| :-------- | :----- | :----------------------------------------------------------------------- |
| `data` | String | The value `success` indicates that the message is successfully modified. |
For other fields and detailed descriptions, see [Common parameters](#param).
If the returned HTTP status code is not `200`, the request fails. Common errors are shown in the following table:
| Error | HTTP Status Code | Code Information | Error Description |
| :------------------------------------- | :--------------- | :------------------------------------------------------------------------- | :--------------------------------------------------------------------------------------------------------------------------------------------------------- |
| `UnsupportedMessageTypeException` | 400 | The message is of a type that is currently not supported for modification. | This type of message cannot be modified. Currently, only text messages and custom messages that are successful sent can be modified. |
| `InvalidMessageIdException` | 400 | The provided message ID is not a valid number. | The message ID can only contain digits. |
| `RewriteMessageNotAuthorizedException` | 401 | You are not authorized to edit this message. | The ID of the message to be modified does not belong to the current app. |
| `EditLimitExceededException` | 403 | The message has reached its edit limit and cannot be modified further. | The number of times the message is modified has reached the upper limit which is 10. |
| `EditFeatureNotEnabledException` | 403 | The edit message feature is not enabled for this user or system. | The message modification feature is not enabled. Before using this feature, you need to contact [support@agora.io](mailto\:support@agora.io) to enable it. |
| `MessageUnavailableException` | 404 | The message is unavailable or has expired. | The message to be modified does not exist or has been removed due to expiration. |
| `RewriteMessageInternalErrorException` | 500 | An unknown error occurred while processing the request. | The message modification fails due to an internal error. |
For other exceptions, you can refer to [Status codes](./http-status-codes) for possible causes.
### Example
#### Request example
* Modify a sent text message:
```bash
# Replace {YourAppToken} with the app token generated in your server.
curl -X PUT -i 'https://XXXX/app-id/XXXX/messages/rewrite/1235807318835202004' \
-H 'Content-Type: application/json' \
-H 'Accept: application/json' \
-H 'Authorization: Bearer ' \
-d '{
"user": "user1",
"new_msg": {
"type": "txt",
"msg": "update message content"
},
}'
```
* Modify a sent custom message:
```bash
# Replace {YourAppToken} with the app token generated in your server.
curl -X PUT -i 'https://XXXX/app-id/XXXX/messages/rewrite/1235807318835202004' \
-H 'Content-Type: application/json' \
-H 'Accept: application/json' \
-H 'Authorization: Bearer ' \
-d '{
"user": "user1",
"new_msg": {
"type": "custom",
"customEvent": "custom_event",
"customExts":{
"ext_key1":"ext_value1"
}
},
"new_ext": {
"key": "value",
"old_key": "new_value"
},
"is_combine_ext": true
}'
```
#### Response example
```json
{
"path": "/messages/rewrite/1235807318835202004",
"uri": "https://XXXX/app-id/XXXX/messages/rewrite/1235807318835202004",
"timestamp": 1705372388118,
"organization": "XXXX",
"application": "ff678832-XXXX-XXXX-8130-58ac38cb6c15",
"action": "put",
"data": "success",
"duration": 49,
"applicationName": "XXXX"
}
```
## Import a one-to-one chat message
This method imports a one-to-one message. You can import only one message each time.
### HTTP request
```html
POST https://{host}/app-id/{app_id}/messages/users/import
```
#### Request header
| Parameter | Type | Required | Description |
| :-------------- | :----- | :------- | :---------------------------------------------------------------------------------------------------------------------------------------------------------------------------------------------- |
| `Authorization` | String | Yes | The authentication token of the user or admin, in the format of `Bearer ${YourAppToken}`, where `Bearer` is a fixed character, followed by an English space, and then the obtained token value. |
#### Request body
| Parameter | Type | Description | Required |
| --------------- | ------ | ---------------------------------------------------------------------------------------------------------------------------------------------------------------------------------------------- | -------- |
| `from` | String | The username of the message sender. | Yes |
| `target` | String | The username of the message recipient. | Yes |
| `type` | String | The message type: `txt`: Text message`img`: Image message`audio`: Voice message`video`: Video message`file`: File message`loc`: Location message`cmd`: Command message`custom`: Custom message | Yes |
| `body` | JSON | The message content. For different message types, this parameter contains different fields. For details, see [Body of different message types](#body). | Yes |
| `ext` | JSON | The message extension field that allows you to add custom information in the format of key-value pairs. | No |
| `is_ack_read` | Bool | Whether to set the message as read. `true`: Yes.`false`: No. | No |
| `msg_timestamp` | Long | The timestamp for importing the messages, in milliseconds. If you leave this parameter empty, the server automatically sets it as the current time. | No |
| `need_download` | Bool | Whether to download the attachment and upload it to the server:`true`: Yes. In this case, you need to make sure that the attachment URL is publicly accessible. `false`: (Default) No. | No |
### HTTP Response
#### Response body
If the returned HTTP status code is `200`, the request succeeds, and the response body contains the following fields:
| Parameter | Description |
| :-------- | :------------------------------- |
| `msg_id` | The ID of the imported messages. |
For other fields and detailed descriptions, see [Common parameters](#param).
If the request fails, refer to [Status codes](./http-status-codes) for possible reasons.
### Example
#### Request example
* Import a text message
```bash
# Replace {YourToken} with the app token generated on your server
curl -X POST -H "Authorization: Bearer {YourToken}" "https://XXXX/app-id/XXXX/messages/users/import" -d '{
"target": "username2",
"type": "txt",
"body": {
"msg": "import message."
},
"ext": {
"key1": "value1"
},
"from": "username1",
"is_ack_read": true,
"msg_timestamp": 1656906628428
}'
```
* Import an image message
```bash
# Replace {YourToken} with token generated on your server
curl -X POST -H "Authorization: Bearer {YourToken}" "https://XXXX/app-id/XXXX/messages/users/import" -d '{
"target": "username2",
"type": "img",
"body": {
"url": "",
"filename": "",
"size": {
"width": 1080,
"height": 1920
}
},
"ext": {
"key1": "value1"
},
"from": "username1",
"is_ack_read": true,
"msg_timestamp": 1656906628428,
"need_download": true
}'
```
#### Response example
```json
{
"path": "/messages/users/import",
"uri": "https://XXXX/app-id/XXXX/messages/users/import",
"timestamp": 1638440544078,
"organization": "XXXX",
"application": "c3624975-XXXX-XXXX-9da2-ee91ed4c5a76",
"entities": [],
"action": "post",
"data": {
"msg_id": "10212123848595"
},
"duration": 3,
"applicationName": "XXXX"
}
```
## Import a chat group message
This method imports a chat group message. You can import only one message each time.
### HTTP request
```html
POST https://{host}/app-id/{app_id}/messages/chatgroups/import
```
#### Request header
| Parameter | Type | Required | Description |
| :-------------- | :----- | :------- | :---------------------------------------------------------------------------------------------------------------------------------------------------------------------------------------------- |
| `Authorization` | String | Yes | The authentication token of the user or admin, in the format of `Bearer ${YourAppToken}`, where `Bearer` is a fixed character, followed by an English space, and then the obtained token value. |
#### Request body
| Parameter | Type | Description | Required |
| --------------- | ------ | ---------------------------------------------------------------------------------------------------------------------------------------------------------------------------------------------- | -------- |
| `from` | String | The username of the message sender. | Yes |
| `target` | String | The chat group ID that receives the message. | Yes |
| `type` | String | The message type: `txt`: Text message`img`: Image message`audio`: Voice message`video`: Video message`file`: File message`loc`: Location message`cmd`: Command message`custom`: Custom message | Yes |
| `body` | JSON | The message content. For different message types, this parameter contains different fields. For details, see [Body of different message types](#body). | Yes |
| `ext` | JSON | The message extension field that allows you to add custom information in the format of key-value pairs. | No |
| `is_ack_read` | Bool | Whether to set the message as read. `true`: Yes.`false`: No. | No |
| `msg_timestamp` | Long | The timestamp for importing the messages, in milliseconds. If you leave this parameter empty, the server automatically sets it as the current time. | No |
| `need_download` | Bool | Whether to download the attachment and upload it to the server:`true`: Yes. In this case, you need to make sure that the attachment URL is publicly accessible.`false`: (Default) No. | No |
### HTTP Response
#### Response body
If the returned HTTP status code is `200`, the request succeeds, and the response body contains the following fields:
| Parameter | Description |
| :-------- | :------------------------------- |
| `msg_id` | The ID of the imported messages. |
For other fields and detailed descriptions, see [Common parameters](#param).
If the request fails, refer to [Status codes](./http-status-codes) for possible reasons.
### Example
#### Request example
* Import a text message
```bash
# Replace {YourAppToken} with the app token generated on your server
curl -X POST -H "Authorization: Bearer " "https://XXXX/app-id/XXXX/messages/chatgroups/import" -d '{
"target": "1123376564212",
"type": "txt",
"body": {
"msg": "import message."
},
"ext": {
"key1": "value1"
},
"from": "username1",
"is_ack_read": true,
"msg_timestamp": 1656906628428
}'
```
* Import an image message
```bash
# Replace {YourAppToken} with the app token generated on your server
curl -X POST -H "Authorization: Bearer {YourToken}" "https://XXXX/app-id/XXXX/messages/chatgroups/import" -d '{
"target": "1123376564212",
"type": "img",
"body": {
"url": "",
"filename": "",
"size": {
"width": 1080,
"height": 1920
}
},
"ext": {
"key1": "value1"
},
"from": "username1",
"is_ack_read": true,
"msg_timestamp": 1656906628428,
"need_download": true
}'
```
#### Response example
```json
{
"path": "/messages/users/import",
"uri": "https://XXXX/app-id/XXXX/messages/chatgroups/import",
"timestamp": 1638440544078,
"organization": "XXXX",
"application": "c3624975-XXXX-XXXX-9da2-ee91ed4c5a76",
"entities": [],
"action": "post",
"data": {
"msg_id": "10212123848595"
},
"duration": 3,
"applicationName": "XXXX"
}
```
## Status codes
For details, see [HTTP Status Codes](./http-status-codes).
# Presence (/en/api-reference/api-ref/im/presence)
The presence feature enables users to publicly display their online presence status and quickly determine the status of others. Users can customize their presence status; using more specific terms such as "busy", "away", or "in a call" can add fun and diversity to real-time chatting.
This page shows how to use the Chat RESTful APIs to implement presence in your project. Before calling the following methods, ensure that you meet the following:
* You understand the call frequency limit of the Chat RESTful APIs as described in [Limitations](./limitations#call-limit-of-server-sides).
* You have activated the presence feature in [Agora Console](https://console.agora.io/).
## Common parameters
| Parameter | Type | Description | Required |
| :-------- | :----- | :--------------------------------------------------------------------------------------------------------------------------------------------------------------------------------------------------------------------- | :------- |
| `host` | String | The domain name assigned by the Chat service to access RESTful APIs. For how to get the domain name, see [Get the information of your project](/en/realtime-media/im/get-started/enable#get-chat-project-information). | Yes |
| `app_id` | String | The unique identifier automatically assigned to each project by Agora | Yes |
| `uid` | String | The unique login account of the user. | Yes |
## Authorization
Chat RESTful APIs require Bearer HTTP authentication. Every time an HTTP request is sent, the following `Authorization` field must be filled in the request header:
```html
Authorization: Bearer ${YourAppToken}
```
In order to improve the security of the project, Agora uses a token (dynamic key) to authenticate users before they log in to the chat system. Chat RESTful APIs only support authenticating users using app tokens. For details, see [Authentication using App Token](/en/realtime-media/im/build/secure-access-and-authentication/authentication).
## Set the presence status of a user
Sets the user's presence status on a specific device.
For each App Key, the call frequency limit of this method is 50 per second.
### HTTP request
```html
POST https://{host}/app-id/{app_id}/users/{uid}/presence/{resource}/{status}
```
#### Path parameter
| Parameter | Type | Description | Required |
| :--------- | :----- | :---------------------------------------------------------------------------------------------------------------------------------------------------------------------------------------------------------------------------------------------------------------------------------------------------------------------------------------------------------------------------------------- | :------- |
| `uid` | String | The user ID of user whose presence status is to be set. | Required |
| `resource` | String | The ID of the user's device for which the presence status is set. This device ID is the unique identifier assigned to each device resource in the format `{Device Platform}_{Resource ID}`, where the device platform can be `android`, `ios`, or `webim`, followed by an underscore plus a resource ID assigned by the SDK. For example, `android_34f0bbf7-8eab-46db-b572-b56b02405690`. | Yes |
| `status` | String | The presence status defined by the user: `0`: Offline. `1`: Online. Other numeric strings: Custom status. | Yes |
For the descriptions of the other path parameters, see [Common Parameters](#param).
#### Request header
| Parameter | Type | Description | Required |
| :-------------- | :----- | :----------------------------------------------------------------------------------------------------------------------------------------------------------------------------------------------- | :------- |
| `Content-Type` | String | The content type. Set it to `application/json`. | Yes |
| `Authorization` | String | The authentication token of the user or administrator, in the format of `Bearer ${token}`, where `Bearer` is a fixed character, followed by an English space, and then the obtained token value. | Yes |
#### Request body
| Parameter | Type | Description | Required |
| :-------- | :----- | :---------------------------------------------------------------------------------------------------------------- | :------- |
| `ext` | String | The extension information of the presence status. The size of the extension field can be a maximum of 1024 bytes. | Yes |
### HTTP response
#### Response body
If the returned HTTP status code is `200`, the request succeeds, and the data field in the response body contains the following parameters:
| Parameter | Type | Description |
| :-------- | :----- | :-------------------------------------------------------------------------------------------------------------------------------------------------------------------- |
| `result` | String | Whether the setting of the presence status succeeds. `ok` indicates the presence setting succeeds; otherwise, you can troubleshoot according to the returned reasons. |
If the returned HTTP status code is not `200`, the request fails. You can refer to [Status codes](#status-codes) for possible causes.
### Example
#### Request example
```json
curl -X POST 'http://XXXX/app-id/XXXX/users/c1/presence/android_123423453246/0' \
-H 'Authorization: Bearer ' \
-H 'Content-Type: application/json' \
-d '{"ext":"123"}'
```
#### Response example
```json
{"result":"ok"}
```
## Subscribe to the presence status of multiple users
Subscribes to the presence status of multiple users.
For each App Key, the call frequency limit of this method is 50 per second.
### HTTP request
```html
POST https://{host}/app-id/{app_id}/users/{uid}/presence/{expiry}
```
#### Path parameter
| Parameter | Type | Description | Required |
| :-------- | :----- | :------------------------------------------------------------------------------------------ | :------- |
| `uid` | String | The user ID of user for which the presence status is subscribed. | Required |
| `expiry` | String | The subscription duration in seconds. The maximum value is 2,592,000, which equals 30 days. | Yes |
For the descriptions of the other path parameters, see [Common Parameters](#param).
#### Request header
| Parameter | Type | Description | Required |
| :-------------- | :----- | :----------------------------------------------------------------------------------------------------------------------------------------------------------------------------------------------- | :------- |
| `Content-Type` | String | The content type. Set it to `application/json`. | Yes |
| `Authorization` | String | The authentication token of the user or administrator, in the format of `Bearer ${token}`, where `Bearer` is a fixed character, followed by an English space, and then the obtained token value. | Yes |
#### Request body
| Parameter | Type | Description | Required |
| :---------- | :--------- | :---------------------------------------------------------------------------------------------------------------------------- | :------- |
| `usernames` | JSON Array | The list of users to whom you subscribe, for example, `[“user1”, “user2”]`. This list can contain a maximum of 100 usernames. | Yes |
### HTTP response
#### Response body
If the returned HTTP status code is `200`, the request succeeds, and the data field in the response body contains the following parameters:
| Parameter | Type | Description |
| :---------- | :----- | :-------------------------------------------------------------------------------------------------------------------------------------------------------------- |
| `result` | JSON | Whether the subscription succeeds. If successful, the presence statuses of the users return; otherwise, you can troubleshoot according to the returned reasons. |
| `uid` | String | The unique login account of the user. |
| `last_time` | Number | The Unix timestamp when the user was last online, in seconds. |
| `expiry` | Number | The Unix timestamp when the subscription expires, in seconds. |
| `ext` | String | The extension information of the presence status. |
| `status` | JSON | The presence statuses on multiple devices of the user. `0`: Offline. `1`: Online.Other strings: User-defined custom presence status. |
If the returned HTTP status code is not `200`, the request fails. You can refer to [Status codes](#status-codes) for possible causes.
### Example
#### Request example
```json
curl -X POST 'http://XXXX/app-id/XXXX/users/wzy/presence/1000' \
-H 'Authorization: Bearer ' \
-H 'Content-Type: application/json' \
-d '{"usernames":["c2","c3"]}'
```
#### Response example
```json
{"result":[{"uid":"","last_time":"1644466063","expiry":"1645500371","ext":"123","status":{"android":"1","android_6b5610ac-4e11-4661-82b3-dee17bc7b2cc":"0"}},{"uid":"c3","last_time":"1645183991","expiry":"1645500371","ext":"","status":{"android":"0","android_6b5610ac-4e11-4661-82b3-dee17bc7b2cc":"0"}}]}
```
## Retrieve the presence status of multiple users
Retrieves the presence status of multiple users.
By default, if a user logs in and out several times in one second, the Chat server sends the presence status change notification to the SDK only after the last login or logout of the user.
For each App Key, the call frequency limit of this method is 50 per second.
### HTTP request
```html
POST https://{host}/app-id/{app_id}/users/{uid}/presence
```
#### Path parameter
| Parameter | Type | Description | Required |
| :-------- | :----- | :------------------------------------------------------------------------------------------------------------------------------------------------------------------------------------------------- | :------- |
| `uid` | String | The user whose subscribed presence statuses are retrieved. If the user ID you passed does not exist or the user does not subscribe to the presence status of any users, an empty list is returned. | Yes |
For other parameters and descriptions, see [Common Parameters](#param).
#### Request header
| Parameter | Type | Description | Required |
| :-------------- | :----- | :----------------------------------------------------------------------------------------------------------------------------------------------------------------------------------------------- | :------- |
| `Content-Type` | String | The content type. Set it to `application/json`. | Yes |
| `Authorization` | String | The authentication token of the user or administrator, in the format of `Bearer ${token}`, where `Bearer` is a fixed character, followed by an English space, and then the obtained token value. | Yes |
#### Request body
| Parameter | Type | Description | Required |
| :---------- | :--------- | :------------------------------------------------------------------------------------------------------------------------------------------------------ | :------- |
| `usernames` | JSON Array | The list of users whose presence statuses you attempt to retrieve, for example, `[“user1”, “user2”]`. This list can contain a maximum of 100 usernames. | Yes |
### HTTP response
#### Response body
If the returned HTTP status code is `200`, the request succeeds, and the data field in the response body contains the following parameters:
| Parameter | Type | Description |
| :---------- | :----- | :---------------------------------------------------------------------------------------------------------------------------------------------------------------------- |
| `result` | JSON | Whether the retrieving operation succeeds. If successful, the presence statuses of the users return; otherwise, you can troubleshoot according to the returned reasons. |
| `uid` | String | The unique login account of the user. |
| `last_time` | Number | The Unix timestamp when the user was last online, in seconds. |
| `ext` | String | The extension information of the presence status. |
| `status` | JSON | The presence statuses on multiple devices of the user. `0`: Offline. `1`: Online.Other strings: User-defined custom presence status. |
If the returned HTTP status code is not `200`, the request fails. You can refer to [Status codes](#status-codes) for possible causes.
### Example
#### Request example
```json
curl -X POST 'http://XXXX/app-id/XXXX/users/wzy/presence' \
-H 'Authorization: Bearer ' \
-H 'Content-Type: application/json' \
-d '{"usernames":["c2","c3"]}'
```
#### Response example
```json
{
"result":[
{"uid":"c2",
"last_time":"1644466063",
"ext":"",
"status":{"android":"0"}
},
{"uid":"c3",
"last_time":"1644475330",
"ext":"",
"status":{
"android":"0",
"android":"0"}
}]
}
```
## Unsubscribe from the presence status of multiple users
Unsubscribes from the presence status of multiple users.
For each App Key, the call frequency limit of this method is 50 per second.
### HTTP request
```html
DELETE https://{host}/app-id/{app_id}/users/{uid}/presence
```
#### Path parameter
| Parameter | Type | Description | Required |
| :-------- | :----- | :----------------------------------------------------------------- | :------- |
| `uid` | String | The user whose subscribed presence statuses are unsubscribed from. | Yes |
For other parameters and descriptions, see [Common Parameters](#param).
#### Request header
| Parameter | Type | Description | Required |
| :-------------- | :----- | :----------------------------------------------------------------------------------------------------------------------------------------------------------------------------------------------- | :------- |
| `Content-Type` | String | The content type. Set it to `application/json`. | Yes |
| `Authorization` | String | The authentication token of the user or administrator, in the format of `Bearer ${token}`, where `Bearer` is a fixed character, followed by an English space, and then the obtained token value. | Yes |
#### Request body
| Parameter | Type | Description | Required |
| :-------- | :--------- | :-------------------------------------------------------------------------------------------------------------------------------- | :------- |
| `users` | JSON Array | The list of users from whom you unsubscribe, for example, `[“user1”, “user2”]`. This list can contain a maximum of 100 usernames. | Yes |
### HTTP response
#### Response body
If the returned HTTP status code is `200`, the request succeeds, and the data field in the response body contains the following parameters:
| Parameter | Type | Description |
| :-------- | :----- | :------------------------------------------------------------------------------------------------------------------------------------------------------------------------ |
| `result` | String | Whether the subscription cancellation succeeds. `ok` indicates the subscription cancellation succeeds; otherwise, you can troubleshoot according to the returned reasons. |
If the returned HTTP status code is not `200`, the request fails. You can refer to [Status codes](#status-codes) for possible causes.
### Example
#### Request example
```json
curl -X DELETE 'http://XXXX/app-id/XXXX/users/wzy/presence' \
-H 'Authorization: Bearer ' \
-H 'Content-Type: application/json' \
-d '["c1"]'
```
#### Response example
```json
{"result":"ok"}
```
## Retrieve the subscriptions of a user
Retrieves the subscriptions of a user in a paginated list.
For each App Key, the call frequency limit of this method is 50 per second.
### HTTP request
```html
GET https://{host}/app-id/{app_id}/users/{uid}/presence/sublist?pageNum=1&pageSize=100
```
#### Path parameter
| Parameter | Type | Description | Required |
| :-------- | :----- | :-------------------------------------------------- | :------- |
| `uid` | String | The user for which the subscriptions are retrieved. | Yes |
For other parameters and descriptions, see [Common Parameters](#param).
#### Query parameter
| Parameter | Type | Description | Required |
| :--------- | :--- | :------------------------------------------------------------------------------------------------------------------------ | :------- |
| `pageNum` | Int | The page from which to start retrieving subscriptions. The parameter value must be no smaller than the default value `1`. | Yes |
| `pageSize` | Int | The maximum number of subscriptions to retrieve per page. The value range is \[1,500] with `1` as the default. | Yes |
#### Request header
| Parameter | Type | Description | Required |
| :-------------- | :----- | :----------------------------------------------------------------------------------------------------------------------------------------------------------------------------------------------- | :------- |
| `Content-Type` | String | The content type. Set it to `application/json`. | Yes |
| `Authorization` | String | The authentication token of the user or administrator, in the format of `Bearer ${token}`, where `Bearer` is a fixed character, followed by an English space, and then the obtained token value. | Yes |
### HTTP response
#### Response body
If the returned HTTP status code is `200`, the request succeeds, and the data field in the response body contains the following parameters:
| Parameter | Type | Description |
| :--------- | :----- | :----------------------------------------------------------------------------------------------------------------------------------------------------------------- |
| `result` | String | Whether the retrieving operation succeeds. If successful, the subscription information returns; otherwise, you can troubleshoot according to the returned reasons. |
| `totalnum` | String | The total number of the users you subscribe to. |
| `sublist` | Object | The list of subscriptions. Each object in the list contains the `uid` and `expiry` fields. |
| `uid` | String | The unique login account of the user. |
| `expiry` | String | The Unix timestamp when the subscription expires, in seconds |
If the returned HTTP status code is not `200`, the request fails. You can refer to [Status codes](#status-codes) for possible causes.
### Example
#### Request example
```json
curl -X GET 'http://XXXX/app-id/XXXX/users/wzy/presence/sublist?pageNum=1&pageSize=100' \
-H 'Authorization: Bearer ' \
-H 'Content-Type: application/json'
```
#### Response example
```json
{"result":{"totalnum":"2","sublist":[{"uid":"lxml2","expiry":"1645822322"},{"uid":"lxml1","expiry":"1645822322"}]}}%
```
## Status codes
For details, see [HTTP Status Codes](./http-status-codes).
# Notification management (/en/api-reference/api-ref/im/push-notification-management)
Push notifications allow you to broadcast app-wide announcements to all or selected users.
This page explains how to use Chat RESTful APIs to send and configure push notifications.
## Authorization
Chat RESTful APIs require Bearer HTTP authentication. Every time an HTTP request is sent, the following `Authorization` field must be filled in the request header:
```html
Authorization: Bearer ${YourAppToken}
```
In order to improve the security of the project, Agora uses a token (dynamic key) to authenticate users before they log in to the chat system. Chat RESTful APIs only support authenticating users using app tokens. For details, see [Authentication using App Token](/en/realtime-media/im/build/secure-access-and-authentication/authentication).
## Send push notifications
### Common parameters
The following table lists common request and response parameters of the Chat RESTful APIs:
#### Request parameters
| Parameter | Type | Description | Required |
| :--------- | :----- | :--------------------------------------------------------------------------------------------------------------------------------------------------------------------------------------------------------------------- | :------- |
| `host` | String | The domain name assigned by the Chat service to access RESTful APIs. For how to get the domain name, see [Get the information of your project](/en/realtime-media/im/get-started/enable#get-chat-project-information). | Yes |
| `app_id` | String | The unique identifier automatically assigned to each project by Agora | Yes |
| `username` | String | The unique login account of the user. | Yes |
#### Response parameters
| Parameter | Type | Description |
| :---------- | :----- | :----------------------------------------------------------------------------------------- |
| `timestamp` | Number | The Unix timestamp (ms) of the HTTP response. |
| `duration` | Number | The duration (ms) from when the HTTP request is sent to the time the response is received. |
### Send a push notification in a synchronous way
Sends a push notification to a user in a synchronous way. After sending a push notification, Agora server returns the push status in the HTTP response. If a third-party push service is used, the third-party push server will send the push result to the Agora server which will determine the push status based on the received push result.
For each App Key, the total call frequency limit of this method is 1 per second.
### HTTP request
```html
POST https://{host}/app-id/{app_id}/push/sync/{target}
```
#### Path parameters
| Parameter | Type | Description | Required |
| :-------- | :----- | :-------------------------------------------------------------------------------- | :------- |
| `target` | String | The user ID of the push notification recipient. You can pass in only one user ID. | Yes |
For the descriptions of other path parameters, see [Common parameters](#param).
#### Request header
| Parameter | Type | Description | Required |
| :-------------- | :----- | :---------------------------------------------------------------------------------------------------------------------------------------------------------------------------------------------------- | :------- |
| `Content-Type` | String | The content type. Set it as application/json. | Yes |
| `Authorization` | String | The authentication token of the user or administrator, in the format of Bearer `${YourAppToken}`, where Bearer is a fixed character, followed by an English space, and then the obtained token value. | Yes |
#### Request body
| Parameter | Type | Description | Required |
| :------------ | :----- | :----------------------------------------------------------------------------------------------------------------------------------------------------------------------------------------------------------------------------------------------------------------------------------------------------------------------------------------------------------------------------------------------------------------------------------------------------------------------------------------------------------------------------------------------------------------------------------------------------------------------------------------------------------------------------------------------------------------------------------------------------------------------------------------------------------------------------------------------------------------------------------------------------------------------------------------------------------------------------------------------------------------------------------------------------------------------------------------------------------------------------------------------------------------------------------------------------------------------------------------------------------------------------------------------------------------------- | :------- |
| `strategy` | Number | The push strategy: `0`: Use the third-party push service first. If the push attempt fails, use the Agora push service instead. `1`: Use Agora push service only. If the target user is online, Agora server sends the push message. If the user is offline, Agora retains the push message for a certain period (depending on the Chat package to which you subscribe) and will send it to the user as soon as he or she gets online. If the user remains offline until the retention period expires, the push message is dropped and the push attempt fails. `2`: (Default) Use the third-party push service only. If the target user is offline, whether to retain the push message and how long the message can be retained depend on the setting of the third-party service. If the push attempt fails, the message is discarded. `3`: Use the Agora push service first. If the user is online, Agora server sends the notification. If the user is offline, the notification is delivered via a third-party push service. If the offline push attempt fails, the notification is sent via Agora server once the user gets online. `4`: Only use online push via Agora server. Push notifications are sent only via Agora server for the online user. If the user is offline, the push notifications are discarded. | No |
| `pushMessage` | JSON | The push notification. For details, see [Configure push notifications](#configure-push-notifications). | Yes |
### HTTP response
#### Response body
If the returned HTTP status code is `200`, the request succeeds, and the response body contains the following fields:
| Parameter | Type | Description |
| :---------------- | :----- | :------------------------------------------------------------------------------------------------------------------------------------------------------------------------------------------------------------------------------------------------------------------------------------------------------------------------------------------------------------------------------------------------ |
| `data` | Object | The push result. The server determines the push status based on the push result. |
| `data.pushStatus` | String | The push status: - `SUCCESS`: The push succeeds. - `FAIL`: The push fails due to an error that is not caused by the server, like `bad device token`, indicating that the mobile device delivers an incorrect device token to the server and the server does not accept it. - `ERROR`: The push exception occurs due to a server error, for example, connection timeout or read or write timeout. |
| `data.data` | Object | The push result data returned by the push service used by the push notification recipient. |
| `data.desc` | String | The description for the push failure. |
For other fields and detailed descriptions, see [Common parameters](#param).
If the returned HTTP status code is not `200`, the request fails. You can refer to [Status codes](#status-codes) for possible reasons.
### Example
#### Request example
```bash
# Replace {YourAppToken} with the app token generated in your server.
curl -X POST 'http://XXXX/app-id/XXXX/push/sync/test1' \
-H 'Authorization: Bearer ' \
-H 'Content-Type: application/json' \
-d '{
"strategy": 3,
"pushMessage": {
"title": "Agora push",
"content": "Hello and welcome",
"sub_title": "Agora"
}
}'
```
#### Response example
1. The push succeeds:
```json
{
"timestamp": 1689154498019,
"data": [
{
"pushStatus": "SUCCESS",
"data": {
"code": 200,
"data": {
"expireTokens": [],
"sendResult": true,
"requestId": "104410638-fd96648b6bb4344bc4f5e29b158fdb07",
"failTokens": [],
"msgCode": 200
},
"message": "Success"
}
}
],
"duration": 2
}
```
2. When a third-party push service is used, the push fails because the push-related information (like the push token or certificate) is not bound with the device:
```json
{
"timestamp": 1689154624797,
"data": [
{
"pushStatus": "FAIL",
"desc": "no push binding"
}
],
"duration": 0
}
```
3. When a third-party push service is used, the push fails because the user ID of the push notification recipient does not exist:
```json
{
"timestamp": 1689154534352,
"data": [
{
"pushStatus": "FAIL",
"desc": "appUser not exists"
}
],
"duration": 0
}
```
## Send a push notification to users in an asynchronous way
Sends a push notification to one or more users in an asynchronous way.
#### HTTP request
```html
POST https://{host}/app-id/{app_id}/push/single
```
##### Path parameters
For the descriptions of path parameters, see [Common parameters](#param).
##### Request header
| Parameter | Type | Description | Required |
| :-------------- | :----- | :------------------------------------------------------------------------------------------------------------------------------------------------------------------------------------------------------ | :------- |
| `Content-Type` | String | The content type. Set it as `application/json`. | Yes |
| `Authorization` | String | The authentication token of the user or administrator, in the format of `Bearer ${YourAppToken}`, where `Bearer` is a fixed character, followed by an English space, and then the obtained token value. | Yes |
##### Request body
| Parameter | Type | Description | Required |
| :------------ | :----- | :----------------------------------------------------------------------------------------------------------------------------------------------------------------------------------------------------------------------------------------------------------------------------------------------------------------------------------------------------------------------------------------------------------------------------------------------------------------------------------------------------------------------------------------------------------------------------------------------------------------------------------------------------------------------------------------------------------------------------------------------------------------------------------------------------------------------------------------------------------------------------------------------------------------------------------------------------------------------------------------------------------------------------------------------------------------------------------------------------------------------------------------------------------------------------------------------------------------------------------------------------------------------------------------------------------------------- | :------- |
| `targets` | List | The user IDs of push notification recipients. You can pass in up to 100 user IDs each time. | Yes |
| `strategy` | Number | The push strategy: `0`: Use the third-party push service first. If the push attempt fails, use the Agora push service instead. `1`: Use Agora push service only. If the target user is online, Agora server sends the push message. If the user is offline, Agora retains the push message for a certain period (depending on the Chat package to which you subscribe) and will send it to the user as soon as he or she gets online. If the user remains offline until the retention period expires, the push message is dropped and the push attempt fails. `2`: (Default) Use the third-party push service only. If the target user is offline, whether to retain the push message and how long the message can be retained depend on the setting of the third-party service. If the push attempt fails, the message is discarded. `3`: Use the Agora push service first. If the user is online, Agora server sends the notification. If the user is offline, the notification is delivered via a third-party push service. If the offline push attempt fails, the notification is sent via Agora server once the user gets online. `4`: Only use online push via Agora server. Push notifications are sent only via Agora server for the online user. If the user is offline, the push notifications are discarded. | No |
| `pushMessage` | JSON | The push message. See [Configure push notifications](#configure-push-notifications) for details. | Yes |
#### HTTP response
##### Response body
If the returned HTTP status code is `200`, the request succeeds, and the response body contains the following fields:
| Parameter | Type | Description |
| :----------- | :----- | :-------------------------------------------------------------------------------------------------------------------------------------------------------------------------------------------------------------------------------------------------------------------------- |
| `data` | JSON | The push result. |
| `id` | String | The user IDs of push notification recipients. |
| `pushStatus` | String | The push status: `SUCCESS`: The push succeeds. `FAIL`: The push fails due to non-server errors. For example, an invalid token is passed. `ERROR`: The push fails due to server errors. For example, the request times out. `ASYNC_SUCCESS`: The asynchronous push succeeds. |
| `desc` | String | The result description. |
For other fields and detailed descriptions, see [Common parameters](#param).
If the returned HTTP status code is not `200`, the request fails. You can refer to [Status codes](#status-codes) for possible reasons.
#### Example
##### Request example
```bash
curl -X POST "http://XXXX/app-id/XXXX/push/single" -H "Authorization: Bearer " -H "Content-Type: application/json" --data-raw "{
"targets": [
"test2"
],
"pushMessage": {
"title": "Hello",
"subTitle": "Hello",
"content": "Hello",
"vivo": {
}
}
}"
```
##### Response example
```json
{
"timestamp": 1619506344007,
"data": [
{
"id": "test2",
"pushStatus": "ASYNC_SUCCESS",
"desc": "async success."
}
],
"duration": 14
}
```
### Send a push notification by label
Sends a push notification to all users under one label, or the intersection of users under multiple labels.
A push task is automatically created per request, and the ID of the push task is returned for data statistics. A maximum of three push tasks can be executed at the same time.
See [Set push labels](./push-notification-management) for configuring labels.
#### HTTP request
```html
POST https://{host}/app-id/{app_id}/push/list/label
```
##### Path parameter
For the descriptions of path parameters, see [Common parameters](#param).
##### Request header
| Parameter | Type | Description | Required |
| :-------------- | :----- | :------------------------------------------------------------------------------------------------------------------------------------------------------------------------------------------------------ | :------- |
| `Content-Type` | String | The content type. Set it as `application/json`. | Yes |
| `Authorization` | String | The authentication token of the user or administrator, in the format of `Bearer ${YourAppToken}`, where `Bearer` is a fixed character, followed by an English space, and then the obtained token value. | Yes |
##### Request body
| Parameter | Type | Description | Required |
| :------------ | :----- | :----------------------------------------------------------------------------------------------------------------------------------------------------------------------------------------------------------------------------------------------------------------------------------------------------------------------------------------------------------------------------------------------------------------------------------------------------------------------------------------------------------------------------------------------------------------------------------------------------------------------------------------------------------------------------------------------------------------------------------------------------------------------------------------------------------------------------------------------------------------------------------------------------------------------------------------------------------------------------------------------------------------------------------------------------------------------------------------------------------------------------------------------------------------------------------------------------------------------------------------------------------------------------------------------------------------------- | :------- |
| `targets` | List | The targeting label names. You can either pass one label to send the push notification to all users under the label, or pass a maximum of five labels to send the push notification to the intersection of users under these labels. | Yes |
| `startDate` | String | The start date of the push task. Use the `yyyy-MM-dd HH:mm:ss` format, for example, `2024-01-01 12:00:00`. | No |
| `strategy` | Number | The push strategy: `0`: Use the third-party push service first. If the push attempt fails, use the Agora push service instead. `1`: Use Agora push service only. If the target user is online, Agora server sends the push message. If the user is offline, Agora retains the push message for a certain period (depending on the Chat package to which you subscribe) and will send it to the user as soon as he or she gets online. If the user remains offline until the retention period expires, the push message is dropped and the push attempt fails. `2`: (Default) Use the third-party push service only. If the target user is offline, whether to retain the push message and how long the message can be retained depend on the setting of the third-party service. If the push attempt fails, the message is discarded. `3`: Use the Agora push service first. If the user is online, Agora server sends the notification. If the user is offline, the notification is delivered via a third-party push service. If the offline push attempt fails, the notification is sent via Agora server once the user gets online. `4`: Only use online push via Agora server. Push notifications are sent only via Agora server for the online user. If the user is offline, the push notifications are discarded. | No |
| `pushMessage` | JSON | The push messages. See [Configure push notifications](#configure-push-notifications) for details. | Yes |
The scheduled time must be at least one hour later than the current time and no more than 30 days from the current time. By default, the scheduled time is in the time zone where the server resides. If you want to use a time in a different time zone, you must calculate that time according to your time zone.
#### HTTP response
##### Response body
If the returned HTTP status code is `200`, the request succeeds, and the response body contains the following fields:
| Parameter | Type | Description |
| :-------- | :----- | :----------------------------------------- |
| `data` | JSON | The detailed information of the push task. |
| `taskId` | Number | The ID of the push task. |
For other fields and detailed descriptions, see [Common parameters](#param).
If the returned HTTP status code is not `200`, the request fails. You can refer to [Status codes](#status-codes) for possible reasons.
#### Example
##### Request example
```bash
curl -L -X POST 'http://XXXX/app-id/XXXX/push/list/label' \
-H 'Authorization: Bearer ' \
-H 'Content-Type: application/json' \
--data-raw '{
"targets": [
"post-90s"
],
"strategy": 2,
"pushMessage": {
"title": "Agora PUSH",
"content": "Welcome to Agora Push Service",
"sub_title": "Agora"
}
}'
```
##### Response example
```json
{
"timestamp": 1650859482843,
"data": {
"taskId": 968120369184112182
},
"duration": 0
}
```
### Send a push notification to all users under the app
Sends a push notification to all users under the app.
A push task is automatically created per request, and the ID of the push task is returned for data statistics. A maximum of three push tasks can be executed at the same time.
#### HTTP request
```html
POST https://{host}/app-id/{app_id}/push/task
```
##### Path parameter
For the descriptions of path parameters, see [Common parameters](#param).
##### Request header
| Parameter | Type | Description | Required |
| :-------------- | :----- | :------------------------------------------------------------------------------------------------------------------------------------------------------------------------------------------------------ | :------- |
| `Content-Type` | String | The content type. Set it as `application/json`. | Yes |
| `Authorization` | String | The authentication token of the user or administrator, in the format of `Bearer ${YourAppToken}`, where `Bearer` is a fixed character, followed by an English space, and then the obtained token value. | Yes |
##### Request body
| Parameter | Type | Description | Required |
| :------------ | :----- | :----------------------------------------------------------------------------------------------------------------------------------------------------------------------------------------------------------------------------------------------------------------------------------------------------------------------------------------------------------------------------------------------------------------------------------------------------------------------------------------------------------------------------------------------------------------------------------------------------------------------------------------------------------------------------------------------------------------------------------------------------------------------------------------------------------------------------------------------------------------------------------------------------------------------------------------------------------------------------------------------------------------------------------------------------------------------------------------------------------------------------------------------------------------------------------------------------------------------------------------------------------------------------------------------------------------------- | :------- |
| `startDate` | String | The start date of the push task. Use the `yyyy-MM-dd HH:mm:ss` format, for example, `2024-01-01 12:00:00`. | No |
| `strategy` | Number | The push strategy: `0`: Use the third-party push service first. If the push attempt fails, use the Agora push service instead. `1`: Use Agora push service only. If the target user is online, Agora server sends the push message. If the user is offline, Agora retains the push message for a certain period (depending on the Chat package to which you subscribe) and will send it to the user as soon as he or she gets online. If the user remains offline until the retention period expires, the push message is dropped and the push attempt fails. `2`: (Default) Use the third-party push service only. If the target user is offline, whether to retain the push message and how long the message can be retained depend on the setting of the third-party service. If the push attempt fails, the message is discarded. `3`: Use the Agora push service first. If the user is online, Agora server sends the notification. If the user is offline, the notification is delivered via a third-party push service. If the offline push attempt fails, the notification is sent via Agora server once the user gets online. `4`: Only use online push via Agora server. Push notifications are sent only via Agora server for the online user. If the user is offline, the push notifications are discarded. | No |
| `pushMessage` | JSON | The push messages. See [Configure push notifications](#configure-push-notifications) for details. | Yes |
The scheduled time must be at least one hour later than the current time and no more than 30 days from the current time. By default, the scheduled time is in the time zone where the server resides. If you want to use a time in a different time zone, you must calculate that time according to your time zone.
#### HTTP response
##### Response body
If the returned HTTP status code is `200`, the request succeeds, and the response body contains the following fields:
| Parameter | Type | Description |
| :-------- | :----- | :----------------------- |
| `data` | Number | The ID of the push task. |
For other fields and detailed descriptions, see [Common parameters](#param).
If the returned HTTP status code is not `200`, the request fails. You can refer to [Status codes](#status-codes) for possible reasons.
#### Example
##### Request example
```bash
curl -X POST "http://XXXX/app-id/XXXX/push/task" -H "Content-Type: application/json" --data-raw "{
"pushMessage": {
"title": "Hello1234",
"subTitle": "Hello",
"content": "Hello",
"vivo": {}
}
}"
```
##### Response example
```json
{
"timestamp": 1618817591755,
"data": 968120369184112182,
"duration": 1
}
```
### Status codes
For details, see [HTTP Status Codes](./http-status-codes).
## Configure push notifications
Chat not only provides basic configurations that are adaptive to all, but also supports advanced configurations varied by service providers.
You can choose the service provider and configure the notification fields based on your business requirements.
A push notification example is as follows:
```json
{
// Basic configurations available to all
"title": "You have a message",
"subTitle": "",
"content": "Check the message",
"ext": {},
"config": {
"clickAction": {
"url":"",
"action":"",
"activity":""
},
"badge": {
"addNum": 0,
"setNum": 0
}
},
// Advanced configurations varied by service providers
"agora":{},
"apns": {},
"fcm": {}
}
```
### Basic configurations
The following table lists basic configuration fields available to all:
| Field | Type | Description | Supported platforms | Required |
| :------------------- | :----- | :------------------------------------------------------------------------------------------------------------------------------------------------------------------------------------------------------------------------------------------------------------------------------------------------------------------------------------------------------------------------------------ | :------------------ | :------- |
| `title` | String | The title of the notification. The value of this field is "You have a message" by default. The length of this field cannot exceed 32 characters. | Android & iOS | Yes |
| `subTitle` | String | The subtitle of the notification that provides additional information. The length of this field cannot exceed 10 characters. | iOS | No |
| `content` | String | The body text of the notification. The value of this field is "Check the message" by default. The length of this field cannot exceed 100 characters. | Android & iOS | Yes |
| `ext` | JSON | The custom extension of the notification stored in key-value pairs. The number of key-value pairs can be a maximum of 10, and the total length of key-value pairs can be 1024 characters at most. | Android & iOS | No |
| `config` | JSON | The configuration of click action and badge value in the notifications center. | Android & iOS | No |
| `config.clickAction` | JSON | The action triggered by a user click on the notification, which contains the following fields: `url`: Direct to a URL. Specify a custom URL; otherwise, the user click on notifications cannot work as expected. `action`: Open a specific page in the app. Specify the address of an in-app page. Open a package or an Activity component. Specify a package name or component path. | Android | No |
| `config.badge` | JSON | The value of the badge displayed on the app's icon, which contains the following fields (Int): `addNum`: The new notification adds on the badge number. `setNum`: The new notification resets the badge number. | iOS & Android | No |
### Advanced configurations
If the basic configuration fields stated above cannot meet your business requirements, Chat allows you to implement advanced configurations provided by the following push services. All messages can be pushed via the three channels, regardless of whether users are online or offline. For how to choose to use the three push services, see the `strategy` parameter in [Send push notifications](send-push-notifications#request-body).
| Field | Type | Description | Required |
| :------ | :--- | :-------------------------------------- | :------- |
| `agora` | JSON | The Agora push service. | No |
| `apns` | JSON | Apple Push Notification service (APNs). | No |
| `fcm` | JSON | Firebase Cloud Messaging (FCM). | No |
> Advanced configurations overwrite the basic ones by default.
#### Agora push service
An Agora push notification example is as follows:
```json
{
"title": "The title of the notification",
"content": "The body text of the notification",
"subTitle": "The subtitle of the notification",
"iconUrl": "https://web-cdn.agora.io/docs-files/1676966850073",
"needNotification": true,
"badge": {
"setNum": 0,
"addNum": 1,
"activity": "com.hyphenate.chat.section.me.activity.AboutHxActivity"
},
"operation": {
"type": "2",
"openUrl": "https://www.baidu.com/",
"openAction": "com.hyphenate.chat.section.me.activity.OfflinePushSettingsActivity"
},
"channelId": "chat",
"channelName": "message",
"channelLevel": 3,
"autoCancel": 1,
"expiresTime": 3600000,
"sound": 0,
"vibrate": 0,
"style": 2,
"bigTxt": "Big text content",
"bigPicture": "https://web-cdn.agora.io/docs-files/1676966850073",
"id": 056734579
}
```
The following table lists advanced configuration fields provided by Agora:
| Field | Type | Description | Supported platforms |
| :----------------- | :------ | :---------------------------------------------------------------------------------------------------------------------------------------------------------------------------------------------------------------------------------------------------------------------------------------------------------------------------------------------------------------------------------------------------------------------------------------- | :------------------ |
| `title` | String | The title of the notification. | iOS & Android |
| `content` | String | The body text of the notification. | iOS & Android |
| `subTitle` | String | The subtitle of the notification that provides additional information. | iOS |
| `iconUrl` | String | The URL of the app icon. | iOS & Android |
| `needNotification` | Boolean | Whether a notification pops out: `true`: (Default) Yes. `false`: No. | iOS & Android |
| `badge` | JSON | The value of the badge displayed on the app's icon, which contains the following fields: `addNum`: The new notification adds on the badge number. `setNum`: The new notification resets the badge number. | iOS & Android |
| `operation` | JSON | The action triggered by a user click on the notification. | iOS & Android |
| `operation.type` | Number | The type of the action. `0`: (Default) Launch the app. `1`: Direct to a URL. Set `operation.openUrl` to a custom URL; otherwise, the user click on notifications cannot work as expected. `2`: Open a specific page in the app. Set `operation.openAction` to the address of the in-app page, and set `operation.openActivity` to the package name or component path; otherwise, the user click on notifications cannot work as expected. | iOS & Android |
| `channelId` | String | The channel ID of the notification. The default value is `chat`. If this parameter is not specified or does not exist, a channel ID is automatically created using `channelName` and `channelLevel`. | Android |
| `channelName` | String | The name of the channel. The default value is `message`. This parameter is used to generate the channel ID. | Android |
| `channelLevel` | Number | The level of the channel. `0`: Low. `3`: (Default) Medium. `4`: High. This parameter is used to generate the channel ID. | Android |
| `autoCancel` | Number | Whether the notification center is automatically closed after the user clicks notifications. `0`: No. `1`: (Default) Yes | Android |
| `expiresTime` | Number | The Unix timestamp (ms) when the notification expires and disappears from the notification center. For example, `1650859482843` indicates 2022-04-25 12:04:42. The timestamp is the current timestamp plus how long the notification stays open. | iOS & Android |
| `sound` | Number | Whether a sound plays when the device receives notifications. `0`: (Default) No. `1`: Yes | iOS & Android |
| `vibrate` | Number | Whether a vibration occurs when the device receives notifications. `0`: (Default) No. `1`: Yes | iOS & Android |
| `style` | Number | The style of the notification. `0`: (Default) Normal style. `1`: Big text style. `2`: Big image style. | iOS & Android |
| `bigTxt` | String | The text content. This field is required when `style` is set to `1`. | iOS & Android |
| `bigPicture` | String | The image URL. This field is required when `style` is set to `2`. | Android |
| `id` | Number | The ID of the notification. A random number assigned by the Chat service. Chat automatically assigns a random number for each notification by default. If you manually specify this parameter to a value same as a previous ID, the previous notification is overwritten by the new one. | iOS & Android |
#### APNs
The mapping of field names between Chat and APNs is as follows:
| Chat | APNs |
| :------------------ | :------------------- |
| `invalidationTime` | `apns-expiration` |
| `priority` | `apns-priority` |
| `pushType` | `apns-push-type` |
| `collapseId` | `apns-collapse-id` |
| `apnsId` | `apns-id` |
| `badge` | `badge` |
| `sound` | `sound` |
| `mutableContent` | `mutable-content` |
| `contentAvailable` | `content-available` |
| `categoryName` | `category` |
| `threadId` | `thread-id` |
| `title` | `title` |
| `subTitle` | `subtitle` |
| `content` | `body` |
| `titleLocKey` | `title-loc-key` |
| `titleLocArgs` | `title-loc-args` |
| `subTitleLocKey` | `subtitle-loc-key` |
| `subTitleLocArgs` | `subtitle-loc-args` |
| `bodyLocKey` | `localizedAlertKey` |
| `bodyLocArgs` | `loc-key` |
| `ext` | `loc-args` |
| `launchImage` | `launch-image` |
| `interruptionLevel` | `interruption-level` |
| `liveActivityEvent` | `event` |
| `timestamp` | `timestamp` |
| `dismissalDate` | `dismissal-date` |
| `staleDate` | `stale-date` |
| `attributesType` | `attributes-type` |
| `attributes` | `attributes ` |
| `contentState` | `content-state` |
For descriptions of these fields, see APNs official documentation below:
* [Generating a remote notification](https://developer.apple.com/documentation/usernotifications/setting_up_a_remote_notification_server/generating_a_remote_notification)
* [Sending Notification Requests to APNs](https://developer.apple.com/documentation/usernotifications/setting_up_a_remote_notification_server/sending_notification_requests_to_apns)
#### FCM
The mapping of field names between Chat and FCM is as follows:
| Chat | FCM |
| :------------------------------ | :-------------------------------- |
| `condition` | `condition` |
| `collapseKey` | `collapse_key` |
| `priority` | `priority` |
| `timeToLive` | `time_to_live` |
| `dryRun` | `dry_run` |
| `restrictedPackageName` | `restricted_package_name` |
| `data` | `data` |
| `notification` | `notification` |
| `notification.title` | `notification.title` |
| `notification.body` | `notification.body` |
| `notification.androidChannelId` | `notification.android_channel_id` |
| `notification.sound` | `notification.sound` |
| `notification.tag` | `notification.tag` |
| `notification.color` | `notification.color` |
| `notification.clickAction` | `notification.click_action` |
| `notification.titleLocKey` | `notification.title_loc_key` |
| `notification.titleLocArgs` | `notification.title_loc_args` |
| `notification.bodyLocKey` | `notification.body_loc_key` |
| `notification.bodyLocArgs` | `notification.body_loc_args` |
For descriptions of these fields, see FCM official documentation: [Firebase Cloud Messaging HTTP protocol](https://firebase.google.com/docs/cloud-messaging/http-server-ref).
## Set push labels
The push service allows you to group targeting users by configuring labels. Each label marks a user group that has similar habits, hobbies, or characteristics. When sending notifications, you can implement a bespoke push by specifying relevant labels, and the messages can then be sent to the users under the labels. For example, you can label a group of users as *fashion trendsetters*, and push related information about domestic and foreign trend brands to that user group on a regular basis.
You can manage the labels through RESTful API. The relationship between users and labels is many to many, that is, one user can have multiple labels and one label can also have multiple users. You can update the labels without any delay and change user labels by
first removing users from their current label and then adding them to a new one.
Before calling the following methods, ensure that you understand the call frequency limit of the Chat RESTful APIs as described in [Limitations](./limitations#call-limit-of-server-sides).
### Common parameters
The following table lists common request and response parameters of the Chat RESTful APIs:
#### Request parameters
| Parameter | Type | Description | Required |
| :--------- | :----- | :--------------------------------------------------------------------------------------------------------------------------------------------------------------------------------------------------------------------- | :------- |
| `host` | String | The domain name assigned by the Chat service to access RESTful APIs. For how to get the domain name, see [Get the information of your project](/en/realtime-media/im/get-started/enable#get-chat-project-information). | Yes |
| `app_id` | String | The unique identifier automatically assigned to each project by Agora | Yes |
| `username` | String | The unique login account of the user. | Yes |
#### Response parameters
| Parameter | Type | Description |
| :---------- | :----- | :----------------------------------------------------------------------------------------- |
| `timestamp` | Number | The Unix timestamp (ms) of the HTTP response. |
| `duration` | Number | The duration (ms) from when the HTTP request is sent to the time the response is received. |
### Create a push label
Creates a push label.
You can create a maximum of 100 push labels. To lift the upper limit, contact [support@agora.io](mailto\:support@agora.io).
#### HTTP request
```html
POST https://{host}/app-id/{app_id}/push/label
```
##### Path parameter
For the descriptions of path parameters, see [Common parameters](#param).
##### Request header
| Parameter | Type | Description | Required |
| :-------------- | :----- | :------------------------------------------------------------------------------------------------------------------------------------------------------------------------------------------------------ | :------- |
| `Content-Type` | String | The content type. Set it as `application/json`. | Yes |
| `Authorization` | String | The authentication token of the user or administrator, in the format of `Bearer ${YourAppToken}`, where `Bearer` is a fixed character, followed by an English space, and then the obtained token value. | Yes |
##### Request body
| Parameter | Type | Description | Required |
| :------------ | :----- | :--------------------------------------------------------------------------------------------------- | :------- |
| `name` | String | The name of the push label. | Yes |
| `description` | String | The description of the push label. The length of the label description cannot exceed 255 characters. | No |
The length of each label name cannot exceed 64 characters. It supports the following character sets:
* 26 lowercase English letters (a-z)
* 26 uppercase English letters (A-Z)
* 10 numbers (0-9)
* `_`, `-`, and `.`
The label name is case insensitive, so `Aa` and `aa` are the same label. Ensure that each label name under the same App ID is unique.
#### HTTP response
##### Response body
If the returned HTTP status code is `200`, the request succeeds, and the response body contains the following fields:
| Parameter | Type | Description |
| :------------ | :----- | :------------------------------------------------------- |
| `data` | JSON | The detailed information of the push label. |
| `name` | String | The label name. |
| `description` | String | The label description. |
| `createdAt` | Number | The Unix timestamp (ms) when the push label was created. |
If the returned HTTP status code is not `200`, the request fails. You can refer to [Status codes](#status-codes) for possible reasons.
#### Example
##### Request example
```bash
curl -L -X POST 'http://XXXX/app-id/XXXX/push/label' \
-H 'Authorization: Bearer ' \
-H 'Content-Type: application/json' \
--data-raw '{
"name":"post-90s",
"description":"hah"
}'
```
##### Response example
```json
{
"timestamp": 1648720341157,
"data": {
"name": "post-90s",
"description": "hah",
"createdAt": 1648720341118
},
"duration": 13
}
```
### Query the detailed information of a push label
Retrieves the detailed information of the specified push label.
#### HTTP request
```html
GET https://{host}/app-id/{app_id}/push/label/{labelname}
```
##### Path parameter
| Parameter | Type | Description | Required |
| :---------- | :----- | :-------------------------- | :------- |
| `labelname` | String | The name of the push label. | Yes |
For the descriptions of other path parameters, see [Common parameters](#param).
##### Request header
| Parameter | Type | Description | Required |
| :-------------- | :----- | :------------------------------------------------------------------------------------------------------------------------------------------------------------------------------------------------------ | :------- |
| `Authorization` | String | The authentication token of the user or administrator, in the format of `Bearer ${YourAppToken}`, where `Bearer` is a fixed character, followed by an English space, and then the obtained token value. | Yes |
#### HTTP response
##### Response body
If the returned HTTP status code is `200`, the request succeeds, and the response body contains the following fields:
| Parameter | Type | Description |
| :------------ | :----- | :------------------------------------------------------- |
| `data` | JSON | The detailed information of the push label. |
| `name` | String | The label name. |
| `description` | String | The label description. |
| `count` | Number | The number of the users added to the push label. |
| `createdAt` | Number | The Unix timestamp (ms) when the push label was created. |
For other fields and detailed descriptions, see [Common parameters](#param).
If the returned HTTP status code is not `200`, the request fails. You can refer to [Status codes](#status-codes) for possible reasons.
#### Example
##### Request example
```bash
curl -L -X GET 'http://XXXX/app-id/XXXX/push/label/90' \
-H 'Authorization: Bearer '
```
##### Response example
```json
{
"timestamp": 1648720562644,
"data": {
"name": "90",
"description": "hah",
"count": 0,
"createdAt": 1648720341118
},
"duration": 0
}
```
### Query the detailed information of push labels by page
Retrieves the detailed information of multiple push labels by page.
#### HTTP request
```html
GET https://{host}/app-id/{app_id}/push/label
```
##### Path parameter
For the descriptions of the other path parameters, see [Common parameters](#param).
##### Query parameters
| Parameter | Type | Description | Required |
| :-------- | :----- | :----------------------------------------------------------------------------------------------- | :------- |
| `limit` | Number | The number of push labels displayed per page. The range is \[1,100]. The default value is `100`. | No |
| `cursor` | String | The start position for the next query. | No |
##### Request header
| Parameter | Type | Description | Required |
| :-------------- | :----- | :------------------------------------------------------------------------------------------------------------------------------------------------------------------------------------------------------ | :------- |
| `Authorization` | String | The authentication token of the user or administrator, in the format of `Bearer ${YourAppToken}`, where `Bearer` is a fixed character, followed by an English space, and then the obtained token value. | Yes |
#### HTTP response
##### Response body
If the returned HTTP status code is `200`, the request succeeds, and the response body contains the following fields:
| Parameter | Type | Description |
| :------------ | :--------- | :------------------------------------------------------- |
| `data` | JSON Array | The detailed information of the push label. |
| `name` | String | The label name. |
| `description` | String | The label description. |
| `count` | Number | The number of the users added to the push label. |
| `createdAt` | Number | The Unix timestamp (ms) when the push label was created. |
For other fields and detailed descriptions, see [Common parameters](#param).
If the returned HTTP status code is not `200`, the request fails. You can refer to [Status codes](#status-codes) for possible reasons.
#### Example
##### Request example
```bash
curl -L -X GET 'localhost/hx/hxdemo/push/label' \
-H 'Authorization: Bearer YWMt5lyAUJnNEeyHUS2MdMYkPAAAAAAAAAAAAAAAAAAAAAEHMpqy501HZr2ms92z-Hz9AQMAAAF_SGRs1QBPGgBOIAaoCYWXntKF-h0vuvlyUCNB-IXTM4eEpSVqIdei9A'
```
##### Response example
```json
{
"timestamp": 1648720425599,
"data": [
{
"name": "post-90s",
"description": "hah",
"count": 0,
"createdAt": 1648720341118
},
{
"name": "post-80s",
"description": "post-80s generation",
"count": 0,
"createdAt": 1647512525642
}
],
"duration": 1
}
```
### Delete a push label
Deletes the specified push label. You can delete one push label at each call.
#### HTTP request
```html
DELETE https://{host}/app-id/{app_id}/push/label/{labelname}
```
##### Path parameter
| Parameter | Type | Description | Required |
| :---------- | :----- | :-------------------------- | :------- |
| `labelname` | String | The name of the push label. | Yes |
For the descriptions of the other path parameters, see [Common parameters](#param).
##### Request header
| Parameter | Type | Description | Required |
| :-------------- | :----- | :------------------------------------------------------------------------------------------------------------------------------------------------------------------------------------------------------ | :------- |
| `Authorization` | String | The authentication token of the user or administrator, in the format of `Bearer ${YourAppToken}`, where `Bearer` is a fixed character, followed by an English space, and then the obtained token value. | Yes |
#### HTTP response
##### Response body
If the returned HTTP status code is `200`, the request succeeds, and the response body contains the following fields:
| Parameter | Type | Description |
| :-------- | :----- | :----------------------------------------------------------------------------------- |
| `data` | String | The request result. `success` indicates that the delete operation proceeds properly. |
For other fields and detailed descriptions, see [Common parameters](#param).
If the returned HTTP status code is not `200`, the request fails. You can refer to [Status codes](#status-codes) for possible reasons.
#### Example
##### Request example
```bash
curl -L -X DELETE 'http://XXXX/app-id/XXXX/push/label/post-90s' \
-H 'Authorization: Bearer '
```
##### Response example
```json
{
"timestamp": 1648721097405,
"data": "success",
"duration": 0
}
```
### Add users to a push label
Adds one or more users to the specified push label. A maximum of 20,000 users can be added to a push label. To lift the upper limit, contact [support@agora.io](mailto\:support@agora.io).
You can add a maximum of 100 users at each call.
#### HTTP request
```html
POST https://{host}/app-id/{app_id}/push/label/{labelname}/user
```
##### Path parameter
| Parameter | Type | Description | Required |
| :---------- | :----- | :-------------------------- | :------- |
| `labelname` | String | The name of the push label. | Yes |
For the descriptions of the other path parameters, see [Common parameters](#param).
##### Request header
| Parameter | Type | Description | Required |
| :-------------- | :----- | :------------------------------------------------------------------------------------------------------------------------------------------------------------------------------------------------------ | :------- |
| `Content-Type` | String | The content type. Set it as `application/json`. | Yes |
| `Authorization` | String | The authentication token of the user or administrator, in the format of `Bearer ${YourAppToken}`, where `Bearer` is a fixed character, followed by an English space, and then the obtained token value. | Yes |
##### Request body
| Parameter | Type | Description | Required |
| :---------- | :--- | :------------------------------------------------------------------------------------------------------- | :------- |
| `usernames` | List | The IDs of the users to be added to the push label. You can pass in a maximum of 100 user IDs each time. | Yes |
#### HTTP response
##### Response body
If the returned HTTP status code is `200`, the request succeeds, and the response body contains the following fields:
| Parameter | Type | Description |
| :-------- | :--- | :----------------------------------------------------------------------------------------------------------------------------- |
| `data` | JSON | The request result. |
| `success` | List | The user IDs properly added to the push label. |
| `fail` | JSON | If add operations fail, the user IDs failed to be added and the corresponding failure reasons are returned in key-value pairs. |
For other fields and detailed descriptions, see [Common parameters](#param).
If the returned HTTP status code is not `200`, the request fails. You can refer to [Status codes](#status-codes) for possible reasons.
#### Example
##### Request example
```bash
curl -L -X POST 'http://XXXX/app-id/XXXX/push/label/post-90s/user' \
-H 'Authorization: Bearer ' \
-H 'Content-Type: application/json' \
--data-raw '{
"usernames":["hx1","hx2"]
}'
```
##### Response example
```json
{
"timestamp": 1648721496345,
"data": {
"success": [
"hx1",
"hx2"
],
"fail": {}
},
"duration": 18
}
```
### Query the specified user under the specified push label
Retrieves the detailed information of the specified user under the specified push label.
#### HTTP request
```html
GET https://{host}/app-id/{app_id}/push/label/{labelname}/user/{member}
```
##### Path parameter
| Parameter | Type | Description | Required |
| :---------- | :----- | :-------------------------- | :------- |
| `labelname` | String | The name of the push label. | Yes |
| `member` | String | The ID of the user. | Yes |
For the descriptions of the other path parameters, see [Common parameters](#param).
##### Request header
| Parameter | Type | Description | Required |
| :-------------- | :----- | :------------------------------------------------------------------------------------------------------------------------------------------------------------------------------------------------------ | :------- |
| `Authorization` | String | The authentication token of the user or administrator, in the format of `Bearer ${YourAppToken}`, where `Bearer` is a fixed character, followed by an English space, and then the obtained token value. | Yes |
#### HTTP response
##### Response body
If the returned HTTP status code is `200`, the request succeeds, and the response body contains the following fields:
| Parameter | Type | Description |
| :--------- | :----- | :----------------------------------------------------------------- |
| `data` | JSON | The detailed information of the user. |
| `username` | String | The user ID. |
| `created` | Number | The Unix timestamp (ms) when the user was added to the push label. |
For other fields and detailed descriptions, see [Common parameters](#param).
If the returned HTTP status code is not `200`, the request fails. You can refer to [Status codes](#status-codes) for possible reasons.
#### Example
##### Request example
```bash
curl -L -X GET 'http://XXXX/app-id/XXXX/push/label/post-90s/user/hx1' \
-H 'Authorization: Bearer '
```
##### Response example
```json
{
"timestamp": 1648721589676,
"data": {
"username": "hx1",
"created": 1648721496324
},
"duration": 1
}
```
### Query the detailed information of users under the specified push label by page
Retrieves the detailed information of one or more users under the specified push label by page.
#### HTTP request
```html
GET https://{host}/app-id/{app_id}/push/label/{labelname}/user
```
##### Path parameter
| Parameter | Type | Description | Required |
| :---------- | :----- | :-------------------------- | :------- |
| `labelname` | String | The name of the push label. | Yes |
For the descriptions of the other path parameters, see [Common parameters](#param).
##### Query parameters
| Parameter | Type | Description | Required |
| :-------- | :----- | :--------------------------------------------------------------------------------------------- | :------- |
| `limit` | String | The number of the users displayed per page. The range is \[1,100]. The default value is `100`. | No |
| `cursor` | String | The start position for the next query. | No |
##### Request header
| Parameter | Type | Description | Required |
| :-------------- | :----- | :------------------------------------------------------------------------------------------------------------------------------------------------------------------------------------------------------ | :------- |
| `Authorization` | String | The authentication token of the user or administrator, in the format of `Bearer ${YourAppToken}`, where `Bearer` is a fixed character, followed by an English space, and then the obtained token value. | Yes |
#### HTTP response
##### Response body
If the returned HTTP status code is `200`, the request succeeds, and the response body contains the following fields:
| Parameter | Type | Description |
| :--------- | :--------- | :----------------------------------------------------------------- |
| `cursor` | String | The start position for the next query. |
| `data` | JSON Array | The detailed information of the users. |
| `username` | String | The user ID. |
| `created` | Number | The Unix timestamp (ms) when the user was added to the push label. |
If the returned HTTP status code is not `200`, the request fails. You can refer to [Status codes](#status-codes) for possible reasons.
#### Example
##### Request example
```bash
curl -L -X GET 'http://XXXX/app-id/XXXX/push/label/post-90s/user?limit=1' \
-H 'Authorization: Bearer '
```
##### Response example
```json
{
"timestamp": 1648721736670,
"cursor": "ZWFzZW1vYjpwdXNoOmxhYmVsOmN1cnNvcjo5NTkxNTMwMDM4ODQxMzgwMjc",
"data": [
{
"username": "hx1",
"created": 1648721496324
}
],
"duration": 1
}
```
### Remove users from a push label
Removes one or more users from the specified push label. You can remove a maximum of 100 users at each call.
#### HTTP request
```html
DELETE https://{host}/app-id/{app_id}/push/label/{labelname}/user
```
##### Path parameter
| Parameter | Type | Description | Required |
| :---------- | :----- | :-------------------------- | :------- |
| `labelname` | String | The name of the push label. | Yes |
For the descriptions of the other path parameters, see [Common parameters](#param).
##### Request header
| Parameter | Type | Description | Required |
| :-------------- | :----- | :------------------------------------------------------------------------------------------------------------------------------------------------------------------------------------------------------ | :------- |
| `Content-Type` | String | The content type. Set it as `application/json`. | Yes |
| `Authorization` | String | The authentication token of the user or administrator, in the format of `Bearer ${YourAppToken}`, where `Bearer` is a fixed character, followed by an English space, and then the obtained token value. | Yes |
##### Request body
| Parameter | Type | Description | Required |
| :---------- | :--- | :------------------------------------------------------------------------------------------------------------ | :------- |
| `usernames` | List | The IDs of the users to be removed from the push label. You can pass a maximum of 100 users for each request. | Yes |
#### HTTP response
##### Response body
If the returned HTTP status code is `200`, the request succeeds, and the response body contains the following fields:
| Parameter | Type | Description |
| :-------- | :--- | :---------------------------------------------------------------------------------------------------------------------------------- |
| `data` | JSON | The request result. |
| `success` | List | The user IDs properly removed from the push label. |
| `fail` | JSON | If remove operations fail, the user IDs failed to be removed and the corresponding failure reasons are returned in key-value pairs. |
For other fields and detailed descriptions, see [Common parameters](#param).
If the returned HTTP status code is not `200`, the request fails. You can refer to [Status codes](#status-codes) for possible reasons.
#### Example
##### Request example
```bash
curl -L -X DELETE 'http://XXXX/app-id/XXXX/push/label/post-90s/user' \
-H 'Authorization: Bearer ' \
-H 'Content-Type: application/json' \
--data-raw '{
"usernames":["hx1","hx2"]
}'
```
##### Response example
```json
{
"timestamp": 1648722018636,
"data": {
"success": [
"hx1",
"hx2"
],
"fail": {}
},
"duration": 1
}
```
### Status codes
For details, see [HTTP Status Codes](./http-status-codes).
## Platform-specific versions
- [Web](/en/api-reference/api-ref/im/push-notification-management/web.md)
- [Android](/en/api-reference/api-ref/im/push-notification-management/android.md)
- [iOS](/en/api-reference/api-ref/im/push-notification-management/ios.md)
- [Flutter](/en/api-reference/api-ref/im/push-notification-management/flutter.md)
- [React Native](/en/api-reference/api-ref/im/push-notification-management/react-native.md)
- [Windows](/en/api-reference/api-ref/im/push-notification-management/windows.md)
- [Unity](/en/api-reference/api-ref/im/push-notification-management/unity.md)
# Reaction (/en/api-reference/api-ref/im/reaction)
During one-to-one chats and group chats, users can reply to a message with emojis, which adds fun and diversity to real-time chatting. In Agora Chat, this feature is known as reaction. For a message, one emoji is counted as one reaction even if it is added repeatedly. A maximum of 20 reactions can be added for one message. To increase the upper limit, contact [support@agora.io](mailto\:support@agora.io).
This page shows how to use the Agora Chat RESTful API to implement reaction in your project.
Before calling the following methods, make sure you understand the call frequency limit of the Chat RESTful APIs as described in [Limitations](./limitations#call-limit-of-server-sides).
## Common parameters
The following table lists common request and response parameters of the Chat RESTful APIs:
### Request parameters
| Parameter | Type | Description | Required |
| :--------- | :----- | :---------------------------------------------------------------------------------------------------------------------------------------------------------------------------------------------------------------------------------------------------------------------------------------------------------------------------------------------------------------------------------------------------------------------------------------------------------------------------------------------------------------------------------------------------------------------------------------------------- | :------- |
| `host` | String | The domain name assigned by the Chat service to access RESTful APIs. For how to get the domain name, see [Get the information of your project](/en/realtime-media/im/get-started/enable#get-chat-project-information). | Yes |
| `app_id` | String | The unique identifier automatically assigned to each project by Agora | Yes |
| `username` | String | The unique login account of the user. The user ID must be 64 characters or less and cannot be empty. The following character sets are supported:* 26 lowercase English letters (a-z)
* 10 numbers (0-9)
* "\_", "-", "."
Do not use any of the 26 uppercase English letters (A-Z). Ensure that each `username` under the same App ID is unique. Do not set this parameter as a [UUID](https://www.rfc-editor.org/rfc/rfc9562.html), email address, phone number, or other sensitive information.
| Yes |
### Response parameters
| Parameter | Type | Description |
| :---------- | :----- | :-------------------------------------------- |
| `data` | JSON | The response details. |
| `timestamp` | Number | The Unix timestamp (ms) of the HTTP response. |
| `username` | String | The user ID. |
| `groupname` | String | The chat group name. |
## Authorization
Chat RESTful APIs require Bearer HTTP authentication. Every time an HTTP request is sent, the following `Authorization` field must be filled in the request header:
```html
Authorization: Bearer ${YourAppToken}
```
In order to improve the security of the project, Agora uses a token (dynamic key) to authenticate users before they log in to the chat system. Chat RESTful APIs only support authenticating users using app tokens. For details, see [Authentication using App Token](/en/realtime-media/im/build/secure-access-and-authentication/authentication).
## Create/Add a reaction
This method creates or adds a reaction to a specified message in one-to-one chats or chat groups. A maximum of 20 reactions can be added for one message. For one message, if many users add the same reaction, these reactions are counted as one reaction. A message can have a maximum of 20 reactions. To raise the limit, contact [support@agora.io](mailto\:support@agora.io).
### HTTP request
```html
POST https://{host}/app-id/{app_id}/reaction/user/{userId}
```
#### Path parameter
| Parameter | Type | Description | Required |
| :-------- | :----- | :------------------------------- | :------- |
| `userId` | String | The user ID of the current user. | Yes |
For other parameters and the detailed descriptions, see [Common parameters](#param).
#### Request header
| Parameter | Type | Description | Required |
| :-------------- | :----- | :---------------------------------------------------------------------------------------------------------------------------------------------------------------------------------------------- | :------- |
| `Content-Type` | String | `application/json` | Yes |
| `Authorization` | String | The authentication token of the user or admin, in the format of `Bearer ${YourAppToken}`, where `Bearer` is a fixed character, followed by an English space, and then the obtained token value. | Yes |
#### Request body
| Parameter | Type | Description |
| :-------- | :----- | :------------------------------------------------------------------------------------- |
| `msg_Id` | String | The message ID to which you want to add the reaction. |
| `message` | String | The ID of the emoji, same as that on the client. The maximum length is 128 characters. |
### HTTP Response
#### Response body
If the returned HTTP status code is `200`, the request succeeds, and the `data` in the response contains the following fields:
| Parameter | Type | Description |
| ------------------- | ------- | --------------------------------------------------------------------------------- |
| `requestStatusCode` | String | The status code of this request. `ok` means that the request succeeds. |
| `id` | String | The reaction ID. |
| `msgId` | String | The message ID. |
| `msgType` | String | The message type: `chat`: One-to-one chat. `groupchat`: Group chat. |
| `groupId` | String | The group ID. If the message type is `chat`, the server returns null. |
| `reaction` | String | The ID of the emoji added as the reaction, same as `message` in the request body. |
| `createAt` | Instant | The time when the reaction is created. |
| `updateAt` | Instant | The time when the reaction is updated. |
For other fields and the detailed descriptions, see [Public parameters](#param).
If the returned HTTP status code is not `200`, the request fails. You can refer to [Status codes](./http-status-codes) for possible reasons.
### Example
#### Request example
```bash
curl -g -X POST 'http://XXXX/app-id/XXXX/reaction/user/e1' -H 'Authorization: Bearer {YourAppToken}' -H 'Content-Type: application/json' --data-raw '{
"msgId":"997625372793113144",
"message":"emoji_40"
}'
```
#### Response example
```json
{
"requestStatusCode": "ok",
"timestamp": 1645774821181,
"data": {
"id": "946481033434607420",
"msgId": "msg3333",
"msgType": "chat",
"groupId": null,
"reaction": "emoji_40",
"createdAt": "2022-02-24T10:57:43.138934Z",
"updatedAt": "2022-02-24T10:57:43.138939Z"
}
}
```
## Retrieve reactions with message IDs
This method retrieves the information of the reaction according to the message ID, including the reaction ID, emoji ID, and the user IDs that have used this reaction. This method only returns the first three chat users that added this reaction.
For each method call, you can retrieve reactions in either one-to-one chats or group chats, but not in both of them.
### HTTP request
```bash
GET https://{host}/app-id/{app_id}/reaction/user/{userId}?msgIdList={N,M}&msgType={msgType}&groupId={groupId}
```
#### Path parameter
| Parameter | Type | Description | Required |
| :-------- | :----- | :------------------------------- | :------- |
| `userId` | String | The user ID of the current user. | Yes |
For other parameters and the detailed descriptions, see [Common parameters](#param).
#### Query parameter
| Parameter | Type | Description | Required |
| :---------- | :----- | :-------------------------------------------------------------------------------------------------------- | :------- |
| `msgIdList` | Array | The ID of the message from which you attempt to retrieve reactions. You can pass in up to 20 message IDs. | Yes |
| `msgType` | String | The chat type: `chat`: One-to-one chat. `groupchat`: Group chat. | Yes |
| `groupId` | String | The ID of the group. This parameter is only required if you set `msgType` to `groupchat`. | No |
#### Request header
| Parameter | Type | Description | Required |
| :-------------- | :----- | :---------------------------------------------------------------------------------------------------------------------------------------------------------------------------------------------- | :------- |
| `Content-Type` | String | `application/x-www-form-urlencoded` | Yes |
| `Authorization` | String | The authentication token of the user or admin, in the format of `Bearer ${YourAppToken}`, where `Bearer` is a fixed character, followed by an English space, and then the obtained token value. | Yes |
### HTTP response
#### Response body
If the returned HTTP status code is `200`, the request succeeds, and the `data` in the response contains the following fields:
| Parameter | Type | Description |
| ------------------- | ------ | ------------------------------------------------------------------------------------------------------------------------- |
| `requestStatusCode` | String | The status code of this request. `ok` means that the request succeeds. |
| `msgId` | String | The message ID. |
| `reactionId` | String | The reaction ID returned in the response body of [Create a reaction](#create). |
| `reaction` | String | The emoji ID that is the same as the `message` parameter specified in the request body when [adding a reaction](#create). |
| `count` | Number | The number of users that have added this reaction to the message. |
| `state` | Bool | Whether the user sending this request has added a reaction to this message: `true`: Yes. `false`: No. |
| `userList` | Array | The list of user IDs that have added this reaction. It contains a maximum of three users that first added this reaction. |
If the returned HTTP status code is not `200`, the request fails. You can refer to [Status codes](./http-status-codes) for possible reasons.
### Example
#### Request example
```bash
curl -g -X GET 'http://XXXX/app-id/XXXX/reaction/user/{{userId}}?msgIdList=msgId1&msgType=chat' -H 'Authorization: Bearer {YourAppToken}'
```
#### Response example
```json
{
"requestStatusCode": "ok",
"timestamp": 1645774821181,
"data": [
{
"msgId": "msg123",
"reactionList": [
{
"reactionId": "944330310986837168",
"reaction": "message123456",
"count": 3,
"state": false,
"userList": [
"test123",
"test456",
"test1"
]
}
]
},
{
"msgId": "msg1234",
"reactionList": [
{
"reactionId": "945272584050659838",
"reaction": "message123456",
"count": 1,
"state": false,
"userList": [
"test5"
]
}
]
}
]
}
```
## Delete a reaction
This method deletes a reaction.
### HTTP request
```bash
DELETE https://{host}/app-id/{app_id}/reaction/user/{userId}
```
#### Path parameter
| Parameter | Type | Description | Required |
| :-------- | :----- | :------------------------------- | :------- |
| `userId` | String | The user ID of the current user. | Yes |
For other parameters and the detailed descriptions, see [Common parameters](#param).
#### Request header
| Parameter | Type | Description | Required |
| :-------------- | :----- | :---------------------------------------------------------------------------------------------------------------------------------------------------------------------------------------------- | :------- |
| `Content-Type` | String | `application/x-www-form-urlencoded` | Yes |
| `Authorization` | String | The authentication token of the user or admin, in the format of `Bearer ${YourAppToken}`, where `Bearer` is a fixed character, followed by an English space, and then the obtained token value. | Yes |
#### Query parameters
| Parameter | Type | Description | Required |
| --------- | ------ | -------------------------------------------------- | -------- |
| `msgId` | String | The message ID. | Yes |
| `message` | String | The ID of the emoji that is added as the reaction. | Yes |
### HTTP Response
#### Response body
If the returned HTTP status code is `200`, the request succeeds, and the `data` in the response contains the following fields:
| Parameter | Type | Description |
| ------------------- | ------ | ---------------------------------------------------------------------- |
| `requestStatusCode` | String | The status code of this request. `ok` means that the request succeeds. |
| `timestamp` | Long | The Unix timestamp of this response, in milliseconds. |
For other fields and the detailed descriptions, see [Common parameters](#param).
If the returned HTTP status code is not `200`, the request fails. You can refer to [Status codes](./http-status-codes) for possible reasons.
### Example
#### Request example
```bash
curl -g -X DELETE 'http://XXXX/app-id/XXXX/reaction/user/wz?msgId=997625372793113144&message=emoji_40' -H 'Authorization: Bearer {YourAppToken}'
```
#### Response example
```json
{
"requestStatusCode": "ok",
"timestamp": 1645774821181
}
```
## Retrieve the detailed information of the reaction
This method retrieves the detailed information of the reaction by specifying the message ID and reaction ID.
### HTTP request
```bash
https://{host}/app-id/{app_id}/reaction/user/{userId}/detail?msgId={msgId}&message={message}&limit={limit}&cursor={cursor}
```
#### Path parameter
| Parameter | Type | Description | Required |
| :-------- | :----- | :------------------------------- | :------- |
| `userId` | String | The user ID of the current user. | Yes |
For other parameters and the detailed descriptions, see [Common parameters](#param).
#### Query parameter
| Parameter | Type | Description | Required |
| --------- | ------ | ---------------------------------------------------------------------------------------------------------------------------------------------------------- | -------- |
| `msgId` | String | The message ID. | Yes |
| `message` | String | The ID of the emoji that is added as the reaction. | Yes |
| `limit` | Number | The number of users that added the reaction on each page when you retrieve the users with pagination. The value range is \[1,50]. The default value is 50. | No |
| `cursor` | String | The cursor for specifying where to retrieve data if you retrieve the users with pagination. | No |
If the pagination parameters are specified, the server returns the users that added the reaction in the ascending order of when reactions are added. If the pagination parameters are not specified, the server returns the first 50 users that added the reaction.
#### Request header
| Parameter | Type | Description | Required |
| :-------------- | :----- | :---------------------------------------------------------------------------------------------------------------------------------------------------------------------------------------------- | :------- |
| `Content-Type` | String | `application/x-www-form-urlencoded` | Yes |
| `Authorization` | String | The authentication token of the user or admin, in the format of `Bearer ${YourAppToken}`, where `Bearer` is a fixed character, followed by an English space, and then the obtained token value. | Yes |
### HTTP response
#### Response body
If the returned HTTP status code is `200`, the request succeeds, and the `data` in the response contains the following fields:
| Parameter | Type | Description |
| ------------------- | ------ | --------------------------------------------------------------------------------------------------------------------------- |
| `requestStatusCode` | String | The status code of this request. `ok` means that the request succeeds. |
| `reactionId` | String | The reaction ID. |
| `reaction` | String | The emoji ID that is the same as the `message` parameter specified in the request body when [adding a reaction](#create). |
| `count` | Number | The number of users that have added the reaction. |
| `state` | Bool | Whether the user sending this request has added a reaction to this message: `true`: Yes. `false`: No. |
| `userList` | Array | The list of the users that have added this reaction. Users are listed in the ascending order of the reaction addition time. |
| `cursor` | String | The cursor that indicates that starting position of the next query. |
For other fields and the detailed descriptions, see [Common parameters](#param).
If the returned HTTP status code is not `200`, the request fails. You can refer to [Status codes](./http-status-codes) for possible reasons.
### Example
#### Request example
```bash
// Starts querying from the first page
curl -g -X GET 'http://XXXX/app-id/XXXX/reaction/user/wz/detail?msgId=997627787730750008&message=emoji_40&limit=50' -H 'Authorization: Bearer {YourAppToken}'
// Starts querying from the second page
curl -g -X GET 'http://XXXX/app-id/XXXX/reaction/user/wz/detail?msgId=997627787730750008&message=emoji_40&cursor=944330529971449164&limit=50' -H 'Authorization: Authorization: Bearer {YourAppToken}'
```
#### Response example
```json
{
"requestStatusCode": "ok",
"timestamp": 1645776986146,
"data": {
"reactionId": "946463470818405943",
"reaction": "message123456",
"userCount": 1,
"state": true,
"userList": [
"wz1"
],
"cursor": "946463471296555192"
}
}
```
## Status codes
For details, see [HTTP Status Codes](./http-status-codes).
# User attributes management (/en/api-reference/api-ref/im/user-attributes-management)
User attributes refers to the label information added for the user, including key-value pairs.
This page shows how to call Chat RESTful APIs to manage user attributes, including adding, deleting, modifying, and retrieving user attributes.
Before calling the following methods, make sure you understand the call frequency limit of the Chat RESTful APIs as described in [Limitations](./limitations#call-limit-of-server-sides).
## Common parameters
The following table lists common request and response parameters of the Chat RESTful APIs:
### Request parameters
| Parameter | Type | Description | Required |
| :--------- | :----- | :----------------------------------------------------------------------------------------------------------------------------------------------------------------------------------------------------------------------------------------------------------------------------------------------------------------------------------------------------------------------------------------------------------------------------------------------------------------------------------------------------------------------------------------------------- | :------- |
| `host` | String | The domain name assigned by the Chat service to access RESTful APIs. For how to get the domain name, see [Get the information of your project](/en/realtime-media/im/get-started/enable#get-chat-project-information). | Yes |
| `app_id` | String | The unique identifier automatically assigned to each project by Agora | Yes |
| `username` | String | The unique login account of the user. The user ID must be 64 characters or less and cannot be empty. The following character sets are supported:* 26 lowercase English letters (a-z)
* 10 numbers (0-9)
* "\_", "-", "."
Do not use any of the 26 uppercase English letters (A-Z). Ensure that each `username` under the same App ID is unique. Do not set this parameter as a UUID, email address, phone number, or other sensitive information.
| Yes |
### Response parameters
| Parameter | Type | Description |
| :---------------- | :----- | :--------------------------------------------------------------------------------------------------- |
| `action` | String | The request method. |
| `organization` | String | The unique identifier assigned to each company (organization) by the Chat service. |
| `application` | String | A unique internal ID assigned to each app by the Chat service. You can safely ignore this parameter. |
| `applicationName` | String | The unique identifier assigned to each app by the Chat service . |
| `uri` | String | The request URI. |
| `entities ` | JSON | The response entity. |
| `timestamp` | Number | The Unix timestamp (ms) of the HTTP response. |
| `duration` | Number | The duration (ms) from when the HTTP request is sent to the time the response is received. |
## Authorization
Chat RESTful APIs require Bearer HTTP authentication. Every time an HTTP request is sent, the following `Authorization` field must be filled in the request header:
```html
Authorization: Bearer ${YourAppToken}
```
In order to improve the security of the project, Agora uses a token (dynamic key) to authenticate users before they log in to the chat system. Chat RESTful APIs only support authenticating users using app tokens. For details, see [Authentication using App Token](/en/realtime-media/im/build/secure-access-and-authentication/authentication).
## Setting user attributes
Sets user attributes for a user. User attributes are composed of multiple key-value pairs of attribute names and attribute values, and each attribute name has one corresponding attribute value.
For each App Key, the call frequency limit of this method is 100 per second.
> The total length of attributes for one user cannot exceed 2 KB, and the total length of attributes for all users under an app cannot exceed 10 GB.
### HTTP request
```html
PUT https://{host}/app-id/{app_id}/metadata/user/{username}
```
#### Path parameter
For the parameters and detailed descriptions, see [Common parameters](#param).
#### Request header
| Parameter | Type | Description | Required |
| :-------------- | :----- | :---------------------------------------------------------------------------------------------------------------------------------------------------------------------------------------------- | :------- |
| `Content-Type` | String | `application/x-www-form-urlencoded` | Yes |
| `Authorization` | String | The authentication token of the user or admin, in the format of `Bearer ${YourAppToken}`, where `Bearer` is a fixed character, followed by an English space, and then the obtained token value. | Yes |
#### Request body
The request body is in the format of JSON String. The request body contains the following fields:
| Field | Type | Description | Required |
| :------ | :----- | :-------------- | :------- |
| `Key` | String | Attribute name | Yes |
| `Value` | String | Attribute value | Yes |
Keys listed in the following table are used by default when user attributes are set on the client side, including the nickname, avatar URL, contact information, email address, gender, signature, birthday and extension fields. When you call this RESTful API to set these user attributes, you must pass in the following keys to make sure that the client can obtain the settings from the server.
| Field | Type | Description |
| :---------- | :----- | :----------------------------------------------------------------- |
| `nickname` | String | The user nickname, which can contain at most 64 characters. |
| `avatarurl` | String | The user avatar URL, which can contain at most 256 characters. |
| `phone` | String | The user's phone number, which can contain at most 32 characters. |
| `mail` | String | The user's email address, which can contain at most 64 characters. |
| `gender` | Number | The user gender: `1`: Male; `2`: Female; `0`: Unknown. |
| `sign` | String | The user's signature, which can contain at most 256 characters. |
| `birth` | String | The user's birthday, which can contain at most 64 characters. |
| `ext` | String | The extension fields. |
### HTTP response
#### Response body
If the returned HTTP status code is `200`, the request succeeds, and the response body contains the following fields:
| Parameter | Type | Description |
| :-------- | :--- | :-------------------------------------------------------------------------------------------------- |
| `data` | JSON | The details of the response. It contains the user attribute key-value pair you set in this request. |
For other fields and detailed descriptions, see [Common parameters](#param).
If the returned HTTP status code is not `200`, the request fails. You can refer to [Status codes](./http-status-codes) for possible reasons.
### Example
The user attributes used in this example are named `ext`, `nickname`, and `avatar`. You can customize user attributes according to actual business use-cases.
#### Request example
```bash
# Replace {YourAppToken} with the app token generated in your server.
curl -X PUT -H 'Content-Type: application/x-www-form-urlencoded' -H 'Authorization: Bearer {YourAppToken}' -d 'avatarurl=http://www.agorachat.com/avatar.png&ext=ext&nickname=nickname' 'http://XXXX/app-id/XXXX/metadata/user/XXXX'
```
#### Response example
```json
{
"timestamp": 1620445147011,
"data": {
"ext": "ext",
"nickname": "nickname",
"avatarurl": "http://XXXX.png"
},
"duration": 166
}
```
## Retrieving user attributes
Retrieves the user attributes of the specified user.
For each App Key, the call frequency limit of this method is 100 per second.
### HTTP request
```html
GET https://{host}/app-id/{app_id}/metadata/user/{username}
```
#### Path parameter
For the parameters and detailed descriptions, see [Common parameters](#param).
#### Request header
| Parameter | Type | Description | Required |
| :-------------- | :----- | :---------------------------------------------------------------------------------------------------------------------------------------------------------------------------------------------- | :------- |
| `Content-Type` | String | `application/json` | Yes |
| `Authorization` | String | The authentication token of the user or admin, in the format of `Bearer ${YourAppToken}`, where `Bearer` is a fixed character, followed by an English space, and then the obtained token value. | Yes |
### HTTP response
#### Response body
If the returned HTTP status code is `200`, the request succeeds, and the response body contains the following fields:
| Parameter | Type | Description |
| :-------- | :--- | :------------------------------------------------------------------------------------------------------------------------------------------------------------------------------------------ |
| `data` | JSON | The details of the response. It contains all user attribute key-value pairs for this user. If `data` is empty, ensure that the username exists or the user has at least one user attribute. |
For other fields and detailed descriptions, see [Common parameters](#param).
If the returned HTTP status code is not `200`, the request fails. You can refer to [Status codes](./http-status-codes) for possible reasons.
### Example
#### Request example
```bash
# Replace {YourAppToken} with the app token generated in your server.
curl -X GET -H 'Authorization: Bearer {YourAppToken}' -H 'Content-Type: application/json''http://XXXX/app-id/XXXX/metadata/user/XXXX'
```
#### Response example
```json
{
"timestamp": 1620445147011,
"data": {
"ext": "ext",
"nickname": "nickname",
"avatar": "http://XXXX.png"
},
"duration": 166
}
```
## Retrieving the user attributes of multiple users
Retrieves the user attributes of multiple users by specifying the user name list and user attribute list.
For each App Key, the call frequency limit of this method is 100 per second.
### HTTP request
```html
POST https://{host}/app-id/{app_id}/metadata/user/get
```
#### Path parameter
For the parameters and detailed descriptions, see [Common parameters](#param).
#### Request header
| Parameter | Type | Description | Required |
| :-------------- | :----- | :---------------------------------------------------------------------------------------------------------------------------------------------------------------------------------------------- | :------- |
| `Content-Type` | String | `application/json` | Yes |
| `Authorization` | String | The authentication token of the user or admin, in the format of `Bearer ${YourAppToken}`, where `Bearer` is a fixed character, followed by an English space, and then the obtained token value. | Yes |
#### Request body
The request body is a JSON object with the following fields:
| Parameter | Type | Description | Required |
| :----------- | :-------- | :----------------------------------------------------------------- | :------- |
| `targets` | JSONArray | A list of usernames to be queried, containing up to 100 usernames. | Yes |
| `properties` | JSONArray | A list of attribute names to be queried. | Yes |
### HTTP response
#### Response body
If the returned HTTP status code is `200`, the request succeeds, and the response body contains the following fields:
| Parameter | Type | Description |
| :-------- | :--- | :------------------------------------------------------------------------------------------------------------------------------------------------------------------------------------------ |
| `data` | JSON | The details of the response. It contains all user attribute key-value pairs for this user. If `data` is empty, ensure that the username exists or the user has at least one user attribute. |
For other fields and detailed descriptions, see [Common parameters](#param).
If the returned HTTP status code is not `200`, the request fails. You can refer to [Status codes](./http-status-codes) for possible reasons.
### Example
#### Request example
```bash
# Replace {YourAppToken} with the app token generated in your server.
curl -X POST -H 'Authorization: Bearer {YourAppToken}' -H 'Content-Type: application/json' -d '{
"properties": [
"avatar",
"ext",
"nickname"
],
"targets": [
"user1",
"user2",
"user3"
]
}' 'http://XXXX/app-id/XXXX/metadata/user/get'
```
#### Response example
```json
{
"timestamp": 1620448826647,
"data": {
"user1": {
"ext": "ext",
"nickname": "nickname",
"avatar": "http://XXXX.png"
},
"user2": {
"ext": "ext",
"nickname": "nickname",
"avatar": "http://XXXX.png"
},
"user3": {
"ext": "ext",
"nickname": "nickname",
"avatar": "http://XXXX.png"
}
},
"duration": 3
}
```
## Retrieving the total size of user attributes in the app
Retrieves the total size of user attributes under the app.
For each App Key, the call frequency limit of this method is 100 per second.
### HTTP request
```html
GET https://{host}/app-id/{app_id}/metadata/user/capacity
```
#### Path parameter
For the parameters and detailed descriptions, see [Common parameters](#param).
#### Request header
| Parameter | Type | Description | Required |
| :-------------- | :----- | :---------------------------------------------------------------------------------------------------------------------------------------------------------------------------------------------- | :------- |
| `Authorization` | String | The authentication token of the user or admin, in the format of `Bearer ${YourAppToken}`, where `Bearer` is a fixed character, followed by an English space, and then the obtained token value. | Yes |
### HTTP response
#### Response body
If the returned HTTP status code is `200`, the request is successful, and the response body contains the following fields:
| Parameter | Type | Description |
| :-------- | :----- | :--------------------------------------------------------------- |
| `data` | Number | The total length of the user attributes under the app, in bytes. |
For other fields and detailed descriptions, see [Common parameters](#param).
If the returned HTTP status code is not `200`, the request fails. You can refer to [Status codes](./http-status-codes) for possible reasons.
### Example
#### Request example
```bash
curl -X GET -H 'Authorization: Bearer {YourAppToken}''http://XXXX/app-id/XXXX/metadata/user/capacity'
```
#### Response example
```json
{
"timestamp": 1620447051368,
"data": 1673,
"duration": 55
}
```
## Deleting user attributes
Deletes all the user attributes of the specified user.
For each App Key, the call frequency limit of this method is 100 per second.
### HTTP request
```html
DELETE https://{host}/app-id/{app_id}/metadata/user/{username}
```
#### Path parameter
For the parameters and detailed descriptions, see [Common parameters](#param).
#### Request header
| Parameter | Type | Description | Required |
| :-------------- | :----- | :---------------------------------------------------------------------------------------------------------------------------------------------------------------------------------------------- | :------- |
| `Authorization` | String | The authentication token of the user or admin, in the format of `Bearer ${YourAppToken}`, where `Bearer` is a fixed character, followed by an English space, and then the obtained token value. | Yes |
### HTTP response
#### Response body
If the returned HTTP status code is `200`, the request succeeds, and the response body contains the following fields:
| Parameter | Type | Description |
| :-------- | :--- | :----------------------------------------------------------------------------------------------------------------------------------------------------------------------------------------------------------------------------------------------------- |
| `data` | Bool | Whether the user attribute is deleted successfully. If `data` is `true`, the user attribute is deleted. If the specified user does not exist, or the user attribute of the specified user does not exist, the deletion is still considered successful. |
For other fields and detailed descriptions, see [Common parameters](#param).
If the returned HTTP status code is not `200`, the request fails. You can refer to [Status codes](./http-status-codes) for possible reasons.
### Example
#### Request example
```bash
curl -X DELETE -H 'Authorization: Bearer {YourAppToken}' 'http://XXXX/app-id/XXXX/metadata/user/XXXX'
```
#### Response example
```json
{
"timestamp": 1616573382270,
"duration": 10,
"data": true
}
```
## Status codes
For details, see [HTTP Status Codes](./http-status-codes).
# User system registration (/en/api-reference/api-ref/im/user-system-registration)
This page shows how to call Chat RESTful APIs to create and manage the user system, including how to register, modify, delete, ban, and unban a user, get user information, and force a user to log out.
Before calling the following methods, make sure you understand the call frequency limit of the Chat RESTful APIs as described in [Limitations](./limitations#call-limit-of-server-sides).
## Common parameters
The following table lists common request and response parameters of the Chat RESTful APIs:
### Request parameters
| Parameter | Type | Description | Required |
| :--------- | :----- | :----------------------------------------------------------------------------------------------------------------------------------------------------------------------------------------------------------------------------------------------------------------------------------------------------------------------------------------------------------------------------------------------------------------------------------------------------------------------------------------------------------------------------------------------------- | :------- |
| `host` | String | The domain name assigned by the Chat service to access RESTful APIs. For how to get the domain name, see [Get the information of your project](/en/realtime-media/im/get-started/enable#get-chat-project-information). | Yes |
| `app_id` | String | The unique identifier automatically assigned to each project by Agora | Yes |
| `username` | String | The unique login account of the user. The user ID must be 64 characters or less and cannot be empty. The following character sets are supported:* 26 lowercase English letters (a-z)
* 10 numbers (0-9)
* "\_", "-", "."
Do not use any of the 26 uppercase English letters (A-Z). Ensure that each `username` under the same App ID is unique. Do not set this parameter as a UUID, email address, phone number, or other sensitive information.
| Yes |
### Response parameters
| Parameter | Type | Description |
| :------------------- | :--------- | :---------------------------------------------------------------------------------------------------------------------------------------------------------------------------------------- |
| `action` | String | The request method. |
| `organization` | String | The unique identifier assigned to each company (organization) by the Chat service. |
| `application` | String | A unique internal ID assigned to each app by the Chat service. You can safely ignore this parameter. |
| `applicationName` | String | The unique identifier assigned to each app by the Chat service . |
| `uri` | String | The request URI. |
| `path` | String | The request path, which is part of the request URL. You can safely ignore this parameter. |
| `entities ` | JSON Array | The response entity. |
| `entities.uuid` | String | The user's UUID. A unique internal identifier generated by the Chat service for the user in this request. This is used for generating the user token. |
| `entities.type` | String | The type of the object. You can safely ignore this parameter. |
| `entities.created` | Number | The Unix timestamp (ms) when the user is registered. |
| `entities.modified` | Number | The Unix timestamp (ms) when the user information is last modified. |
| `entities.username` | String | The username. The unique account the user is logged in with. |
| `entities.activated` | Bool | Whether the user is active: `true`: The user is active. `false`: The user is banned. To use a banned user account, you need to call the [unban-user](#unban) method to unban the account. |
| `timestamp` | Number | The Unix timestamp (ms) of the HTTP response. |
| `duration` | Number | The duration (ms) from when the HTTP request is sent to the time the response is received. |
## Authorization
Chat RESTful APIs require Bearer HTTP authentication. Every time an HTTP request is sent, the following `Authorization` field must be filled in the request header:
```html
Authorization: Bearer ${YourAppToken}
```
In order to improve the security of the project, Agora uses a token (dynamic key) to authenticate users before they log in to the chat system. Chat RESTful APIs only support authenticating users using app tokens. For details, see [Authentication using App Token](/en/realtime-media/im/build/secure-access-and-authentication/authentication).
## Registering a user
This method creates a user account.
For each App Key, the call frequency limit of this method is 100 per second.
### HTTP request
```html
POST https://{host}/app-id/{app_id}/users
```
#### Path parameter
For the parameters and detailed descriptions, see [Common parameters](#param).
#### Request header
| Parameter | Type | Description | Required |
| :-------------- | :----- | :---------------------------------------------------------------------------------------------------------------------------------------------------------------------------------------------- | :------- |
| `Content-Type` | String | `application/json` | Yes |
| `Authorization` | String | The authentication token of the user or admin, in the format of `Bearer ${YourAppToken}`, where `Bearer` is a fixed character, followed by an English space, and then the obtained token value. | Yes |
#### Request body
The request body is a JSON object, which contains the following fields:
| Field | Type | Description | Required |
| :--------- | :----- | :----------------------------------------------------------------------------------------------- | :------- |
| `username` | String | The unique login account of the user. The username must be 64 bytes or less and cannot be empty. | Yes |
### HTTP response
#### Response body
If the returned HTTP status code is `200`, the request succeeds. For fields and detailed descriptions, see [Common parameters](#param).
If the returned HTTP status code is not `200`, the request fails. You can refer to [Status codes](./http-status-codes) for possible reasons.
### Example
#### Request example
```bash
# Replace {YourAppToken} with the app token generated in your server.
curl -X POST -H 'Content-Type: application/json' -H 'Accept: application/json' -H 'Authorization:Bearer {YourAppToken}' -i "https://XXXX/app-id/XXXX/users" -d '
{
"username": "user1"
}'
```
#### Response example
```json
{
"action": "post",
"application": "8be024f0-XXXX-XXXX-b697-5d598d5f8402",
"path": "/users",
"uri": "https://a1.agora.com/XXXX/XXXX/users",
"entities": [
{
"uuid": "0ffe2d80-XXXX-XXXX-8d66-279e3e1c214b",
"type": "user",
"created": 1542795196504,
"modified": 1542795196504,
"username": "user1",
"activated": true,
}
],
"timestamp": 1542795196515,
"duration": 0,
"organization": "XXXX",
"applicationName": "XXXX"
}
```
## Registering multiple users
This method registers multiple users within one request. You can pass a maximum of 60 user IDs in a single request.
For each App Key, the call frequency limit of this method is 100 per second.
### HTTP request
```html
POST https://{host}/app-id/{app_id}/users
```
#### Path parameter
For the parameters and detailed descriptions, see [Common parameters ](#param).
#### Request header
| Parameter | Type | Description |
| :-------------- | :----- | :---------------------------------------------------------------------------------------------------------------------------------------------------------------------------------------------- |
| `Content-Type` | String | `application/json` |
| `Authorization` | String | The authentication token of the user or admin, in the format of `Bearer ${YourAppToken}`, where `Bearer` is a fixed character, followed by an English space, and then the obtained token value. |
#### Request body
The request body is a JSONArray object, which contains the following fields:
| Field | Type | Description | Required |
| :--------- | :----- | :---------------------------------------------------------------------------------------------------------------------------------- | :------- |
| `username` | String | The unique user ID of the user. The user ID must be 64 characters or less and cannot be empty. You can pass in at most 60 user IDs. | Yes |
### HTTP response
#### Response body
If the returned HTTP status code is `200`, the request succeeds, and the response body contains the following fields:
| Field | Type | Description |
| :----- | :-------- | :--------------------------------------------------------------------------------------------------------------------- |
| `data` | JSONArray | The details of the response. In this `data` array, the username and reason for the registration failure are displayed. |
For other fields and detailed descriptions, see [Common parameters](#param).
If the returned HTTP status code is not `200`, the request fails. You can refer to [Status codes](./http-status-codes) for possible reasons.
### Example
#### Request example 1
Registering 2 users:
```bash
# Replace {YourAppToken} with the app token generated in your server.
curl -X POST -H 'Content-Type: application/json' -H 'Authorization:Bearer {YourAppToken}' -i "https://XXXX/app-id/XXXX/users" -d '[
{
"username":"user1"
},
{
"username":"user2"
}
]'
```
#### Response example 1
```json
{
"action": "post",
"application": "22bcffa0-XXXX-XXXX-9df8-516f6df68c6d",
"path": "/users",
"uri": "https://XXXX/app-id/XXXX/users",
"entities": [
{
"uuid": "278b5e60-XXXX-XXXX-8f9b-d5d83ebec806",
"type": "user",
"created": 1541587920710,
"modified": 1541587920710,
"username": "user1",
"activated": true,
},
{
"uuid": "278bac80-XXXX-XXXX-b192-73e4cd5078a5",
"type": "user",
"created": 1541587920712,
"modified": 1541587920712,
"username": "user2",
"activated": true,
}
],
"timestamp": 1541587920714,
"data": [],
"duration": 0,
"organization": "XXXX",
"applicationName": "XXXX"
}
```
#### Request example 2
If the request body contains a user3 that has previously been registered, the registration of user3 fails while those of user1 and user2 succeed. The failure is reported in the `data` array of the response body.
```bash
# Replace {YourAppToken} with the app token generated in your server.
curl -X POST -H 'Content-Type: application/json' -H 'Authorization:Bearer {YourAppToken}' -i "https://XXXX/app-id/XXXX/users" -d '[
{
"username":"user1"
},
{
"username":"user2"
},
{
"username":"user3"
}
]'
```
#### Response example 2
```json
{
"action": "post",
"application": "22bcffa0-XXXX-XXXX-9df8-516f6df68c6d",
"path": "/users",
"uri": "https://XXXX/app-id/XXXX/users",
"entities": [
{
"uuid": "278b5e60-XXXX-XXXX-8f9b-d5d83ebec806",
"type": "user",
"created": 1541587920710,
"modified": 1541587920710,
"username": "user1",
"activated": true,
},
{
"uuid": "278bac80-XXXX-XXXX-b192-73e4cd5078a5",
"type": "user",
"created": 1541587920712,
"modified": 1541587920712,
"username": "user2",
"activated": true,
}
],
"timestamp": 1541587920714,
"data": [
{
"username": "user3",
"registerUserFailReason": "the user3 already exists"
}
],
"duration": 0,
"organization": "XXXX",
"applicationName": "XXXX"
}
```
## Querying a user
This method queries the detailed information of the specified user.
For each App Key, the call frequency limit of this method is 100 per second.
### HTTP request
```html
GET https://{host}/app-id/{app_id}/users/{username}
```
#### Path parameter
For the parameters and detailed descriptions, see [Common parameters](#param).
#### Request header
| Parameter | Type | Description | Required |
| :-------------- | :----- | :---------------------------------------------------------------------------------------------------------------------------------------------------------------------------------------------- | :------- |
| `Accept` | String | `application/json` | Yes |
| `Authorization` | String | The authentication token of the user or admin, in the format of `Bearer ${YourAppToken}`, where `Bearer` is a fixed character, followed by an English space, and then the obtained token value. | Yes |
### HTTP response
#### Response body
If the returned HTTP status code is `200`, the request succeeds, and the response body contains the following fields:
| Field | Type | Description |
| :------ | :----- | :------------------- |
| `count` | Number | The number of users. |
For other fields and detailed descriptions, see [Common parameters](#param).
If the returned HTTP status code is not `200`, the request fails. You can refer to [Status codes](./http-status-codes) for possible reasons.
### Example
#### Request example
```bash
# Replace {YourAppToken} with the app token generated in your server.
curl -X GET -H 'Accept: application/json' -H 'Authorization: Bearer {YourAppToken}' 'http://XXXX/app-id/XXXX/users/XXXX'
```
#### Response example
```json
{
"action": "get",
"path": "/users",
"uri": "http://XXXX/app-id/XXXX/users/XXXX",
"entities": [
{
"uuid": "0ffe2d80-XXXX-XXXX-8d66-279e3e1c214b",
"type": "user",
"created": 1542795196504,
"modified": 1542795196504,
"username": "XXXX",
"activated": true,
"nickname": "testuser"
}
],
"timestamp": 1542798985011,
"duration": 1,
"count": 1
}
```
## Querying multiple users
This method queries the information of multiple users in ascending order of their registration time.
For each App Key, the call frequency limit of this method is 100 per second.
### HTTP request
```html
GET https://{host}/app-id/{app_id}/users?limit={N}&{cursor}
```
#### Path parameter
For the parameters and detailed descriptions, see [Common parameters](#param).
#### Query parameters
| Parameter | Type | Description | Required |
| :-------- | :----- | :------------------------------------------------------------------------------------------------------------------------------------------------------------------------------------------------------------------------------------------------------------------------------------------------------------------------------------------------------------------------------------------------------------------- | :------- |
| `limit` | Number | The number of users whose information you want to query. The default value is `10`, and the value range is \[1,100]. The user list is displayed in ascending order of their registration time by default. | No |
| `cursor` | String | The cursor used for paginating the user lists. You do not need to set `cursor` at the first query. When the request succeeds, you can get the user list on the first page. You can also get the `cursor` from the response body, and pass the `cursor` in the URL of the next request, until there is no longer a `cursor` field in the response body, which means that all the users in the app have been queried. | No |
#### Request header
| Parameter | Type | Description | Required |
| :-------------- | :----- | :---------------------------------------------------------------------------------------------------------------------------------------------------------------------------------------------- | :------- |
| `Accept` | String | `application/json` | Yes |
| `Authorization` | String | The authentication token of the user or admin, in the format of `Bearer ${YourAppToken}`, where `Bearer` is a fixed character, followed by an English space, and then the obtained token value. | Yes |
### HTTP response
#### Response body
If the returned HTTP status code is `200`, the request succeeds, and the response body contains the following fields:
| Parameter | Type | Description |
| :-------- | :----- | :------------------------------------------------------------------------------------------------------------------------------------------------------------------------------------------------------------------------------------------------------------------------------------------------------------------------------------------------------------------- |
| `cursor` | String | The cursor used for paginating the user lists. You do not need to set `cursor` at the first query. When the request succeeds, you can get the `cursor` from the response body, and pass this `cursor` in the URL of the next query, until there is no longer a `cursor` field in the response body, which indicates that all the users in the app have been queried. |
| `count` | Number | The number of users. |
For other fields and detailed descriptions, see [Common parameters](#param).
If the returned HTTP status code is not 200, the request fails. You can refer to [Status codes](./http-status-codes) for possible reasons.
### Example
#### Request example 1
Querying the information list of two users in ascending order of their registration time:
```bash
# Replace {YourAppToken} with the app token generated in your server.
curl -X GET -H 'Accept: application/json' -H 'Authorization: Bearer {YourAppToken}' 'http://XXXX/app-id/XXXX/users?limit=2'
```
#### Response example 1
Return the information list of the 2 users:
```json
{
"action": "get",
"params": {
"limit": ["2"]
},
"path": "/users",
"uri": "http://XXXX/app-id/XXXX/users",
"entities": [
{
"uuid": "ab90eff0-XXXX-XXXX-9174-8f161649a182",
"type": "user",
"created": 1542356511855,
"modified": 1542356511855,
"username": "XXXX",
"activated": true,
"nickname": "testuser1"
},
{
"uuid": "b2aade90-XXXX-XXXX-a974-f3368f82e4f1",
"type": "user",
"created": 1542356523769,
"modified": 1542356523769,
"username": "user2",
"activated": true,
"nickname": "testuser2"
}
],
"timestamp": 1542558467056,
"duration": 1,
"cursor": "LTgzNDAxMjM3OToxTEFnNE9sNEVlaVQ0UEdhdmJNR2tB",
"count": 2
}
```
#### Request example 2
Use the `cursor` in response example 1 to query the user list on the next page in ascending order of their registration time. The number of users on this page is two:
```bash
# Replace {YourAppToken} with the app token generated in your server.
curl -X GET -H 'Accept: application/json' -H 'Authorization: Bearer {YourAppToken}' 'http://XXXX/app-id/XXXX/users?limit=2&cursor=LTgzNDAxMjM3OToxTEFnNE9sNEVlaVQ0UEdhdmJNR2tB'
```
#### Response example 2
Continue to return a list of information for two users:
```json
{
"action": "get",
"params": {
"cursor": ["LTgzNDAxMjM3OToxTEFnNE9sNEVlaVQ0UEdhdmJNR2tB"],
"limit": ["2"]
},
"path": "/users",
"uri": "http://XXXX/app-id/XXXX/users",
"entities": [
{
"uuid": "fef7f250-XXXX-XXXX-ba39-0fed7dcc3cdd",
"type": "user",
"created": 1542361376245,
"modified": 1542361376245,
"username": "XXXX",
"activated": true,
"nickname": "testuser3"
},
{
"uuid": "gufhj730-XXXX-XXXX-bc68-d8ij7dc3uyac",
"type": "user",
"created": 1542361376978,
"modified": 1542361376978,
"username": "XXXX",
"activated": true,
"nickname": "testuser4"
}
],
"timestamp": 1542559337702,
"duration": 2,
"count": 2
}
```
## Deleting a user
This method deletes the specified user. If the deleted user is the admin of a group or chat room, the group or chat room they manage is also deleted.
For each App Key, the call frequency limit of this method is 100 per second.
### HTTP request
```html
DELETE https://{host}/app-id/{app_id}/users/{username}
```
#### Path parameter
For the parameters and detailed descriptions, see [Common parameters](#param).
#### Request header
| Parameter | Type | Description | Required |
| :-------------- | :----- | :---------------------------------------------------------------------------------------------------------------------------------------------------------------------------------------------- | :------- |
| `Accept` | String | `application/json` | Yes |
| `Authorization` | String | The authentication token of the user or admin, in the format of `Bearer ${YourAppToken}`, where `Bearer` is a fixed character, followed by an English space, and then the obtained token value. | Yes |
### HTTP response
#### Response body
If the returned HTTP status code is `200`, the request succeeds. For fields and descriptions of the response body, see [Common parameters](#param).
If the returned HTTP status code is not `200`, the request fails. You can refer to [Status codes](./http-status-codes) for possible reasons.
### Example
#### Request example
```bash
# Replace {YourAppToken} with the app token generated in your server.
curl -X DELETE -H 'Accept: application/json' -H 'Authorization: Bearer {YourAppToken}' 'http://XXXX/app-id/XXXX/users/user1'
```
#### Response example
```json
{
"action": "delete",
"applicationName": "XXXX"
"path": "/users",
"uri": "https://XXXX/app-id/XXXX/users",
"entities": [
{
"uuid": "ab90eff0-XXXX-XXXX-9174-8f161649a182",
"type": "user",
"created": 1542356511855,
"modified": 1542356511855,
"username": "XXXX",
"activated": true,
"nickname": "user1"
}
],
"timestamp": 1542559539776,
"duration": 39,
"organization": "XXXX",
"applicationName": "XXXX"
}
```
## Deleting multiple users
This method deletes multiple users in the app in the chronological order of their creation. For the first request, the API deletes users, starting from the first created one. A maximum of 100 users can be deleted each time. It should be noted that this method specifies the number of users to delete, instead of which users to delete.
If the deleted users include group or chat room admins, the groups and chat rooms managed by those users are also deleted.
For each App Key, the call frequency limit of this method is 30 per second.
### HTTP request
```html
DELETE https://{host}/app-id/{app_id}/users?limit={N}&cursor={cursor}
```
#### Path parameter
For the parameters and detailed descriptions, see [Common parameters](#param).
#### Query parameter
| Parameter | Type | Description | Required |
| :-------- | :----- | :----------------------------------------------------------------------------------------------------------------------------------------------------------------------------------------------------------------------------------------------------------- | :------- |
| `limit` | Number | The number of users to delete. The value range is \[1,100] with `10` as the default. | No |
| `cursor` | String | The position where to start deleting users. No cursor is required for the first request. For each subsequent request, the cursor is obtained from the body of response to the previous request. If the cursor is no longer returned, all users are deleted. | No |
#### Request header
| Parameter | Type | Description | Required |
| :-------------- | :----- | :---------------------------------------------------------------------------------------------------------------------------------------------------------------------------------------------- | :------- |
| `Accept` | String | `application/json` | Yes |
| `Authorization` | String | The authentication token of the user or admin, in the format of `Bearer ${YourAppToken}`, where `Bearer` is a fixed character, followed by an English space, and then the obtained token value. | Yes |
### HTTP response
#### Response body
If the returned HTTP status code is `200`, the request is successful. For fields and descriptions of the response body, see [Public parameter](#param).
If the returned HTTP status code is not `200`, the request fails. You can refer to the [Status code](#code) for possible reasons.
### Example
#### Request example
```bash
# Replace {YourAppToken} with the app token generated in your server.
curl -X DELETE -H 'Accept: application/json' -H 'Authorization: Bearer ' 'https://XXXX/app-id/XXXX/users?limit=2'
```
#### Response example
```json
{
"action": "delete",
"application": "8be024f0-XXXX-XXXX-b697-5d598d5f8402",
"params": {
"limit": ["2"]
},
"path": "/users",
"uri": "https://XXXX/XXXX/testapp/users",
"entities": [
{
"uuid": "b2aade90-XXXX-XXXX-a974-f3368f82e4f1",
"type": "user",
"created": 1542356523769,
"modified": 1542597334500,
"username": "user2",
"activated": true,
"nickname": "testuser"
},
{
"uuid": "b98ad170-XXXX-XXXX-XXXX-7f76daa76557",
"type": "user",
"created": 1542356535303,
"modified": 1542356535303,
"username": "user3",
"activated": true,
"nickname": "user3"
}
],
"timestamp": 1542867197779,
"duration": 504,
"organization": "XXXX",
"applicationName": "testapp",
"cursor": "LTgXXXXDNR"
}
```
## Modifying the password
This method modifies the user password. You do not need to provide the original password.
For each App Key, the call frequency limit of this method is 100 per second.
### HTTP request
```html
PUT https://{host}/app-id/{app_id}/users/{username}/password
```
#### Path parameter
For the parameters and detailed descriptions, see [Common parameters](#param).
#### Request header
| Parameter | Type | Description | Required |
| :-------------- | :----- | :---------------------------------------------------------------------------------------------------------------------------------------------------------------------------------------------- | :------- |
| `Content-Type` | String | `application/json` | Yes |
| `Accept` | String | `application/json` | Yes |
| `Authorization` | String | The authentication token of the user or admin, in the format of `Bearer ${YourAppToken}`, where `Bearer` is a fixed character, followed by an English space, and then the obtained token value. | Yes |
#### Request body
The request body is a JSON object, which contains the following fields:
| Field | Type | Description | Required |
| :------------ | :----- | :-------------------------------------------------------------- | :------- |
| `newpassword` | String | The new user login password. The length cannot exceed 64 bytes. | Yes |
For other fields and detailed descriptions, see [Common parameters](#param).
### HTTP response
#### Response body
If the returned HTTP status code is `200`, the request succeeds. For fields and descriptions of the response body, see [Common parametes](#param).
If the returned HTTP status code is not `200`, the request fails. You can refer to [Status codes](./http-status-codes) for possible reasons.
### Example
#### Request example
```bash
# Replace {YourAppToken} with the app token you generated on the server, and {YourPassword} with the new password you set
curl -X PUT -H 'Content-Type: application/json' -H 'Accept: application/json' -H 'Authorization: Bearer {YourAppToken}' -d '{ "newpassword": "{YourPassword}" }' ' http://XXXX/app-id/XXXX/users/user1/password'
```
#### Response example
```json
{
"action": "set user password",
"timestamp": 1542595598924,
"duration": 8
}
```
## Banning a user
This method disables a user account. The user goes offline immediately and is not able to log in until the ban is lifted.
For each App Key, the call frequency limit of this method is 100 per second.
### HTTP request
```html
POST https://{host}/app-id/{app_id}/users/{username}/deactivate
```
#### Path parameter
For the parameters and detailed descriptions, see [Common parameters](#param).
#### Request header
| Parameter | Type | Description | Required |
| :-------------- | :----- | :---------------------------------------------------------------------------------------------------------------------------------------------------------------------------------------------- | :------- |
| `Content-Type` | String | `application/json` | Yes |
| `Accept` | String | `application/json` | Yes |
| `Authorization` | String | The authentication token of the user or admin, in the format of `Bearer ${YourAppToken}`, where `Bearer` is a fixed character, followed by an English space, and then the obtained token value. | Yes |
### HTTP response
#### Response body
If the returned HTTP status code is `200`, the request is succeeds and the response body contains the following fields:
For fields and detailed descriptions, see [Common parameters](#param).
If the returned HTTP status code is not `200`, the request fails. You can refer to [Status codes](./http-status-codes) for possible reasons.
### Example
#### Request example
```bash
# Replace {YourAppToken} with the app token generated in your server.
curl -X POST -H 'Content-Type: application/json' -H 'Accept: application/json' -H 'Authorization: Bearer {YourAppToken}' 'http://XXXX/app-id/XXXX/users/user1/deactivate'
```
#### Response example
```json
{
"action": "Deactivate user",
"entities": [
{
"uuid": "4759aa70-XXXX-XXXX-925f-6fa0510823ba",
"type": "user",
"created": 1542595573399,
"modified": 1542597578147,
"username": "XXXX",
"activated": false,
"nickname": "user"
}
],
"timestamp": 1542602157258,
"duration": 12
}
```
## Unbanning a user
This method unbans a deactivated user account. After the ban is lifted, the user can log in to Chat.
For each App Key, the call frequency limit of this method is 100 per second.
### HTTP request
```html
POST https://{host}/app-id/{app_id}/users/{username}/activate
```
#### Path parameter
For the parameters and detailed descriptions, see [Common parameters](#param).
#### Request header
| Parameter | Type | Description | Required |
| :-------------- | :----- | :---------------------------------------------------------------------------------------------------------------------------------------------------------------------------------------------- | :------- |
| `Content-Type` | String | `application/json` | Yes |
| `Accept` | String | `application/json` | Yes |
| `Authorization` | String | The authentication token of the user or admin, in the format of `Bearer ${YourAppToken}`, where `Bearer` is a fixed character, followed by an English space, and then the obtained token value. | Yes |
### HTTP response
#### Response body
If the returned HTTP status code is `200`, the request succeeds, and the response body contains the following fields:
For fields and detailed descriptions, see [Common parameters](#param).
For other fields and detailed descriptions, see [Common parameters](#param).
If the returned HTTP status code is not `200`, the request fails. You can refer to [Status codes](./http-status-codes) for possible reasons.
### Example
#### Request example
```bash
# Replace {YourAppToken} with the app token generated in your server.
curl -X POST -H 'Content-Type: application/json' -H 'Accept: application/json' -H 'Authorization: Bearer {YourAppToken}' 'http://XXXX/app-id/XXXX/users/user1/activate'
```
#### Response example
```json
{
"action": "activate user",
"timestamp": 1542602404132,
"duration": 9
}
```
## Forcing a user offline
This method forcibly moves a user offline. The offline user must log in again to use the Chat service.
For each App Key, the call frequency limit of this method is 100 per second.
### HTTP request
```html
GET https://{host}/app-id/{app_id}/users/{username}/disconnect
```
#### Path parameter
For the parameters and detailed descriptions, see [Common parameters](#param).
#### Request header
| Parameter | Type | Description | Required |
| :-------------- | :----- | :---------------------------------------------------------------------------------------------------------------------------------------------------------------------------------------------- | :------- |
| `Content-Type` | String | `application/json` | Yes |
| `Accept` | String | `application/json` | Yes |
| `Authorization` | String | The authentication token of the user or admin, in the format of `Bearer ${YourAppToken}`, where `Bearer` is a fixed character, followed by an English space, and then the obtained token value. | Yes |
### HTTP response
#### Response body
If the returned HTTP status code is `200`, the request succeeds, and the response body contains the following fields:
| Field | Type | Description |
| :------------ | :--- | :-------------------------------------------------------------------------------------------------- |
| `data` | JSON | The details of the response. |
| `data.result` | Bool | The logout result, only displayed as `true`, which indicates that the user has been forced offline. |
For other fields and detailed descriptions, see [Common parameters](#param).
If the returned HTTP status code is not `200`, the request fails. You can refer to [Status codes](./http-status-codes) for possible reasons.
### Example
#### Request example
```bash
# Replace {YourAppToken} with the app token generated in your server.
curl -X GET -H 'Accept: application/json' -H 'Authorization: Bearer {YourAppToken}' 'http://XXXX/app-id/XXXX/users/XXXX/disconnect'
```
#### Response example
```json
{
"uri": "http://XXXX/app-id/XXXX/users/XXXX/disconnect",
"timestamp": 1642053735842,
"organization": "1122161011178276",
"application": "22bcffa0-XXXX-XXXX-9df8-516f6df68c6d",
"entities": [],
"action": "get",
"data": {
"result": true
},
"duration": 0,
"applicationName": "XXXX"
}
```
## Querying the online state of a user
This method queries whether a user is online.
For each App Key, the call frequency limit of this method is 100 per second.
### HTTP request
```html
GET https://{host}/app-id/{app_id}/users/{username}/status
```
#### Path parameter
For the parameters and detailed descriptions, see [Common parameters](#param).
#### Request header
| Parameter | Type | Description | Required |
| :-------------- | :----- | :---------------------------------------------------------------------------------------------------------------------------------------------------------------------------------------------- | :------- |
| `Content-Type` | String | `application/json` | Yes |
| `Authorization` | String | The authentication token of the user or admin, in the format of `Bearer ${YourAppToken}`, where `Bearer` is a fixed character, followed by an English space, and then the obtained token value. | Yes |
### HTTP response
#### Response body
If the returned HTTP status code is `200`, the request succeeds, and the response body contains the following fields:
| Parameter | Type | Description |
| :-------- | :--- | :-------------------------------------------------------------------------------------------------------------------------------------------------------------------------------- |
| `data` | JSON | The online state of a user, in the format of `"username": "online state"`. For example, if user1 is online, returns `"user1": "online"`; otherwise, returns `"user1": "offline"`. |
For the parameters and detailed descriptions, see [Common parameters](#param).
If the returned HTTP status code is not `200`, the request fails. You can refer to [Status codes](./http-status-codes) for possible reasons.
### Example
#### Request example
```bash
# Replace {YourAppToken} with the app token generated in your server.
curl -X GET -H 'Accept: application/json' -H 'Authorization: Bearer {YourAppToken}' 'http://XXXX/app-id/XXXX/users/user1/status'
```
#### Response example
```json
{
"action": "get",
"uri": "http://XXXX/app-id/XXXX/users/user1/status",
"entities": [],
"data": {
"user1": "offline"
},
"timestamp": 1542601284531,
"duration": 4,
"count": 0
}
```
## Querying the online state of multiple users
This method queries whether multiple users are online.
For each App Key, the call frequency limit of this method is 50 per second.
### HTTP request
```html
POST https://{host}/app-id/{app_id}/users/batch/status
```
#### Path parameter
For the parameters and detailed descriptions, see [Common parameters](#param).
#### Request header
| Parameter | Type | Description | Required |
| :-------------- | :----- | :---------------------------------------------------------------------------------------------------------------------------------------------------------------------------------------------- | :------- |
| `Content-Type` | String | `application/json` | Yes |
| `Authorization` | String | The authentication token of the user or admin, in the format of `Bearer ${YourAppToken}`, where `Bearer` is a fixed character, followed by an English space, and then the obtained token value. | Yes |
#### Request body
| Parameter | Type | Description |
| :---------- | :---- | :----------------------------------------------------------------------------------------------------------- |
| `usernames` | Array | The users whose online state you want to query. You can specify a maximum of 100 usernames at the same time. |
### HTTP response
#### Response body
If the returned HTTP status code is `200`, the request succeeds, and the response body contains the following fields:
| Parameter | Type | Description |
| :-------- | :--- | :-------------------------------------------------------------------------------------------------------------------------------------------------------------------------------- |
| `data` | JSON | The online state of a user, in the format of `"username": "online state"`. For example, if user1 is online, returns `"user1": "online"`; otherwise, returns `"user1": "offline"`. |
If the returned HTTP status code is not `200`, the request fails. You can refer to [Status codes](./http-status-codes) for possible reasons.
### Example
#### Request example
```bash
# Replace {YourAppToken} with the app token generated in your server.
curl -X POST http://XXXX/app-id/XXXX/users/batch/status -H 'Authorization: Bearer {YourAppToken}' -H 'Content-Type: application/json' -d '{"usernames":["user1","user2"]}'
```
#### Response example
This API does not check whether the specified usernames are valid. If the specified username does not exist, the state of this user is reported as offline.
```json
{
"action": "get batch user status",
"data": [
{
"user1": "offline"
},
{
"user2": "offline"
}
],
"timestamp": 1552280231926,
"duration": 4
}
```
## Querying the number of offline messages
This method queries the number of offline messages a user has, and whether or not they have been delivered.
For each App Key, the call frequency limit of this method is 100 per second.
### HTTP request
```html
GET https://{host}/app-id/{app_id}/users/{owner_username}/offline_msg_count
```
#### Path parameter
| Parameter | Type | Required | Description |
| :--------------: | :----- | :------- | ------------------------------------------------------------- |
| `owner_username` | String | Yes | The users whose number of offline messages you want to query. |
For the parameters and detailed descriptions, see [Common parameters](#param).
#### Request header
| Parameter | Type | Description | Required |
| :-------------- | :----- | :---------------------------------------------------------------------------------------------------------------------------------------------------------------------------------------------- | :------- |
| `Content-Type` | String | `application/json` | Yes |
| `Authorization` | String | The authentication token of the user or admin, in the format of `Bearer ${YourAppToken}`, where `Bearer` is a fixed character, followed by an English space, and then the obtained token value. | Yes |
### HTTP response
#### Request body
If the returned HTTP status code is `200`, the request succeeds, and the response body contains the following fields:
| Parameter | Type | Description |
| :-------- | :--- | :---------------------------------------------------------------------------------------------------------------------------------------------------------------------------------------------------------------------- |
| `data` | JSON | The number of offline messages a user has, regardless of the delivery state, in the format of `"username": "number of offline messages"`. For example, if user1 does not have offline messages, returns `"user1": "0"`. |
If the returned HTTP status code is not `200`, the request fails. You can refer to [Status codes](./http-status-codes) for possible reasons.
### Example
#### Request example
```bash
# Replace {YourAppToken} with the app token generated in your server.
curl -X GET -H 'Accept: application/json' -H 'Authorization: Bearer {YourAppToken}' 'http://XXXX/app-id/XXXX/users/user1/offline_msg_count'
```
#### Response example
```json
{
"action": "get",
"uri": "http://XXXX/XXX/XXXX/users/XXX/offline_msg_count",
"entities": [],
"data": {
"user1": 0
},
"timestamp": 1542601518137,
"duration": 3,
"count": 0
}
```
## Querying the delivery state of an offline message
This method queries the delivery state of an offline message.
For each App Key, the call frequency limit of this method is 100 per second.
### HTTP request
```html
GET https://{host}/app-id/{app_id}/users/{username}/offline_msg_status/{msg_id}
```
#### Path parameter
| Parameter | Type | Required | Description |
| :--------: | :----- | :------- | ------------------------------------------------------------------- |
| `username` | String | Yes | The user whose offline message's delivery states you want to query. |
| `msg_id` | String | Yes | The message of which you want to query the delivery state. |
For the parameters and detailed descriptions, see [Common parameters](#param).
#### Request header
| Parameter | Type | Description | Required |
| :-------------- | :----- | :---------------------------------------------------------------------------------------------------------------------------------------------------------------------------------------------- | :------- |
| `Content-Type` | String | `application/json` | Yes |
| `Authorization` | String | The authentication token of the user or admin, in the format of `Bearer ${YourAppToken}`, where `Bearer` is a fixed character, followed by an English space, and then the obtained token value. | Yes |
### HTTP response
#### Response body
If the returned HTTP status code is `200`, the request succeeds, and the response body contains the following fields:
| Parameter | Type | Description |
| :-------- | :--- | :--------------------------------------------------------------------------------------------------------------------------------------------------------------------------------------------------------------------------------------------------------------------------------------------------------------------------- |
| `data` | JSON | The delivery state of an offline message, in the format of `"message id": "delivery state"`. The delivery state: `delivered`: The offline message has been delivered to the user. `undelivered`: The offline message is temporarily stored at the server and has not been pulled from the server and delivered to the user. |
If the returned HTTP status code is not `200`, the request fails. You can refer to [Status codes](./http-status-codes) for possible reasons.
### Example
#### Request example
```bash
# Replace {YourAppToken} with the app token generated in your server.
curl -X GET -H 'Accept: application/json' -H 'Authorization: Bearer {YourAppToken}' 'http://XXXX/app-id/XXXX/users/user1/offline_msg_status/123'
```
#### Response example
```json
{
"action": "get",
"uri": "http://XXXX/app-id/XXXX/users/user1/offline_msg_status/123",
"entities": [],
"data": {
"123": "delivered"
},
"timestamp": 1542601830084,
"duration": 5,
"count": 0
}
```
## Status codes
For details, see [HTTP Status Codes](./http-status-codes).
# Media Pull Overview (/en/api-reference/api-ref/media-pull)
**The RESTful API for Media Pull** enables you to inject an online media stream into the Agora channel as a live video source. After the injection succeeds, the online media stream automatically plays in the Agora channel, and remote users can see the content of the media stream.
## Working principle
Injecting an online media stream into the Agora channel creates a Media Pull task (shown as "cloud player" in the rest of the article) in the Agora channel. You can control the cloud player through the RESTful API and accomplish the following functions for Media Pull:
* `Create`: Creates a cloud player in the project.
* `Delete`: Destroys the cloud player in the project.
* `List`: Queries and lists all the cloud players in the project.
Media Pull supports the following formats:
* Video codec formats: H.264, H.265, and VP9
* Audio codec formats: AAC and OPUS
* Protocols: HTTPS and RTMP
* Container formats: FLV, MP4, MPEG-TS, Matroska (MKV), and HLS
## Authentication
The RESTful APIs require basic HTTP authentication. You need to set the `Authorization` parameter in every HTTP request header. For how to get the value for Authorization, see [RESTful API authentication](./restful-authentication).
## Create API
This API creates a cloud player in the project.
### HTTP request
```bash
POST https://api.agora.io/{region}/v1/projects/{appId}/cloud-player/players
```
The Agora RESTful API only supports HTTPS with TLS 1.0, 1.1, or 1.2 for encrypted communication. Requests over plain HTTP are not supported and will fail to connect.
#### Path parameters
* `appId`: (Required) String. Agora provides the [App ID](/en/realtime-media/media-pull/reference/glossary#app-id) when you create a **project** in Agora Console. The App ID identifies each project.
* `region`: (Required) String. The region that the cloud player was created in. Agora supports the creation of cloud players in different regions. Currently, it supports four regions:
* `cn`: China Mainland
* `ap`: Asia Pacific
* `na`: North America
* `eu`: Europe
Please ensure that the region you set is the same region as where your media stream originates is located.
#### Query parameters
A sample request URL when using query parameters:
```bash
https://api.agora.io/{region}/v1/projects/{appId}/cloud-player/players?streamIp={streamIp}
```
`streamIp`: (Optional) String. The IP address of the media stream's origin server. Must be a valid IPv4 address. Use this parameter to ensure the transmission quality of the media stream when the media stream is only available in some regions. Otherwise, ignore this parameter.
#### Request header
The request header contains the following fields:
* `Content-Type`: `application/json`
* `Authorization`: See [Authentication instructions](./restful-authentication).
* `X-Request-ID`: UUID (Universally Unique Identifier) to identify this request. After passing in the field, the Agora SDRTN® returns it in the response header.
Best practice is to use this field. If you do not pass in any value, the Agora SDRTN® automatically generates a UUID to pass in.
#### Request body
If the status code is 2XX, the request succeeds.
* You must set the cloud player's username, which can be a Number or String. Otherwise, the cloud player cannot be created, and Agora's server returns the `400 (Bad Request)` status code. Ensure that you have read [How can I use a username in string type?](/en/api-reference/faq/integration/string_uid) when using a username in String type.
* To avoid failed requests, do not pass `null` or `""` in the required fields.
The response body is a JSON Object called `player`, containing the following fields:
* `audioOptions`: (Optional) JSON Object. The audio transcoding configuration of the cloud player. Setting this field to empty or not set means that the audio is not transcoded.
* `Profile`:Number. Audio profile. Sets the audio profile sample rate, bitrate, encoding mode, and the number of channels.
* `0`: Default audio profile.
* In the communication profile, the default audio profile represents a sample rate of 32 kHz, audio encoding, mono, and a bitrate of up to 18 Kbps.
* In the live broadcasting profile, the default audio profile represents a sample rate of 48 kHz, music encoding, mono, and a bitrate of up to 64 Kbps.
* `1`: SPEECH\_STANDARD. A sample rate of 32 kHz, audio encoding, mono, and a bitrate of up to 18 Kbps.
* `2`: MUSIC\_STANDARD. A sample rate of 48 kHz, music encoding, mono, and a bitrate of up to 64 Kbps.
* `3`: MUSIC\_STANDARD\_STEREO. A sample rate of 48 kHz, music encoding, stereo, and a bitrate of up to 80 Kbps.
* `4`: MUSIC\_HIGH\_QUALITY. A sample rate of 48 kHz, music encoding, mono, and a bitrate of up to 96 Kbps.
* `5`: MUSIC\_HIGH\_QUALITY\_STEREO. A sample rate of 48 kHz, music encoding, stereo, and a bitrate of up to 128 Kbps.
* `videoOptions`: (Optional) JSON Object. The video transcoding configuration of the cloud player. Setting this field to empty or not set means that the video is not transcoded.
* `width`: Number. The width (px) of the output video. The value range is \[66,1920].
* `height`: Number. The height (px) of the output video. The value range is \[66,1080].
* `widthHeightAdaption`: Bool. Whether to enable horizontal and vertical screen adaptive mode:
* `true`: Enable portrait and landscape adaptive mode. After you enable the adaptive mode, if the source media stream is in landscape mode, the output video width and height are 1280 × 720; if the source media stream is in portrait mode, the output video width and height are 720 × 1280.
* `false`: (Default) Do not enable portrait and landscape adaptive mode.
* `frameRate`: The frameRate (fps) of the output video. The value range is \[1,30]. The default value is 15. For details, see [Video profile table](/en/realtime-media/cloud-recording/build/customize-the-recording/recording-video-profile#video-profile-table).
* `bitrate`: Number. The bitrate (Kbps) of the output video. The value range is \[1,10000]. For details, see [Video profile table](/en/realtime-media/cloud-recording/build/customize-the-recording/recording-video-profile#video-profile-table).
* `codec`: String type. The encoding format of the output video. The following settings are supported:
* VP9: Standard VP9.
* H.264: (Default) Standard H.264.
If set to other value, the default is H.264 video encoding format.
* `fillMode`: String. The fill mode of the output video:
* `fit`: (Default) Scales the video proportionally until it is fully displayed in the viewport.
* `fill`: Scales the video proportionally until it fills the viewport.
* `streamUrl`: (Required) String. The RTMP/HTTPS URL of the online media stream. The maximum length of this field is 1024 bytes.
To inject an image to the Agora channel, set `streamUrl` to the URL of the image you want to inject, and the cloud player will convert the image to a video and inject it to the Agora channel. Images in JPEG and PNG formats are currently supported. You can set video transcoding parameters through `videoOptions`.
* `channelName`: (Required) String. The channel name. The maximum length of this field is 64 bytes. Supported character scopes are:
* All lowercase English letters: a to z.
* All uppercase English letters: A to Z.
* All numeric characters: 0 to 9.
* The space character.
* Punctuation characters and other symbols, including: "!", "#", "$", "%", "&", "(", ")", "+", "-", ":", ";", "\<", "=", ".", ">", "?", "@", "\[", "]", "^", "\_", " \{", "}", "|", "\~", ",".
* `uid`: (Optional) Number. The User ID of the cloud player in the channel. The value ranges from 0 to (232-1). When you pass in `0`, Agora automatically assigns a User ID to the player.
All UIDs within a channel must be unique. Ensure no other user or service bot is using this UID in the same channel.
* `account`: (Optional) String. The User Account of the cloud player in the channel. The maximum length of this field is 255 bytes. Ensure that you set this parameter and do not set it as null. Supported character scopes are:
* All lowercase English letters: a to z.
* All uppercase English letters: A to Z.
* All numeric characters: 0 to 9.
* The space character.
* Punctuation characters and other symbols, including: "!", "#", "$", "%", "&", "(", ")", "+", "-", ":", ";", "\<", "=", ".", ">", "?", "@", "\[", "]", "^", "\_", " \{", "}", "|", "\~", ",".
Ensure that the value is different from User Accounts of other users and players in the channel.
* `token`: (Optional) String. The authentication token used by the cloud player in the channel. If you do not enable the App Certificate in Agora Console, ignore this field. If you enable the App Certificate in Agora Console, you must pass a value in this field:
* For low-security requirements: Use the temporary token generated in Agora Console. For details, see [Generate an RTC temporary token](/en/introduction/account#generate-temporary-tokens).
* For high-security requirements: Use the token generated at your server. For details, see [Secure authentication with tokens](/en/realtime-media/rtc/build/authenticate-users/deploy-token-server).
When generating a token at your server, the value of `uid` or `account` must be the same as the User ID or User Account of the cloud player, and `privilegeExpiredTs` is recommended to be `0` to ensure that the token is valid for 24 hours at most.
* `idleTimeout`: (Optional) Number. The maximum length of time (in seconds) that the cloud player is idle. The "idle" state means that the media stream is not playing. When the idle state exceeds `idleTimeout`, the cloud player is automatically destroyed. The value ranges from 5 to 600. The default value is 300. If the value is less than 5, Agora's server automatically adjusts it to 5; if the value is greater than 600, Agora's server automatically adjusts it to 600.
* `playTs`: (Optional) Number. The Unix timestamp (in seconds) when the cloud player starts playing the online media stream. The value range of playTs is \[`createTs`-86400, `createTs`+300]. The default value is 0, which means the cloud player starts playing the online media stream when the cloud player is successfully created. If the value of `playTs` is not `0`, the following behavior occurs:
* `playTs` > `createTs`: The cloud player starts playing the online media stream when the time is `playTs`. This is suitable for timing playback with other elements.
* `playTs` \< `createTs`: If the online media stream is a live stream, the cloud player starts playing the live stream when the cloud player is successfully created. If the online media stream is an on-demand stream, the cloud player starts playing the online media stream at the specified time in the stream prior to the creation of the cloud player. This is suitable for error recovery. For example, if the cloud player experiences an error during operation, you can create a new cloud player and set the `playTs` field of new cloud player to the unix timestamp when the old cloud player started to play the online media stream.
* `name`: (Optional) String. The name of the cloud player. The maximum length of this parameter is 64 bytes. Supported character scopes are:
* All lowercase English letters: a to z.
* All uppercase English letters: A to Z.
* All numeric characters: 0 to 9.
* "-", "\_".
`name` is null if you do not pass any value. Multiple cloud players using null name parameters can exist in one project at the same time; multiple cloud players with the same name cannot exist in one project at the same time. When trying to create a cloud player with the same name as an existing cloud player in the project, you will receive the `409(Conflict)` status code.
To avoid creating multiple cloud players that inject the same online media stream into the same channel, use the `name` parameter to manage all the cloud players in your specified project. Agora recommends that you pass a value in `name` using a combination of the channel name (`channelName`) and the username (`uid` or `account`) of the cloud player, such as `class32_101` and `class33_teacher101` in the sample code.
* `encryptMode`: (Optional) String. Encryption mode. Agora recommends using either the `aes-128-gcm2` or `aes-256-gcm2` encryption mode, both of which support adding a salt and are more secure.
* `aes-128-xts`: 128-bit AES encryption, XTS mode.
* `aes-256-xts`: 256-bit AES encryption, XTS mode.
* `aes-128-ecb`: 128-bit AES encryption, ECB mode.
* `sm4-128-ecb`: 128-bit SM4 encryption, ECB mode.
* `aes-128-gcm`: 128-bit AES encryption, GCM mode.
* `aes-256-gcm`: 256-bit AES encryption, GCM mode.
* `aes-128-gcm2`: 128-bit AES encryption, GCM mode. Compared to `aes-128-gcm` encryption mode, `aes-128-gcm2` encryption mode is more secure and requires you to set the salt (`encryptKdfSalt`).
* `aes-256-gcm2`: 256-bit AES encryption, GCM mode. Compared to `aes-256-gcm` encryption mode, `aes-256-gcm2` encryption mode is more secure and requires you to set the salt (`encryptKdfSalt`).
* `encryptKey`: (Optional) String. The encryption key with unlimited length. Agora recommends using a 32-byte key.
If you do not set an encryption key or set it to null, built-in encryption is disabled.
* `encryptKdfSalt`: (Optional) String. A 32-byte salt. Agora recommends using OpenSSL to generate this salt on your server. For details, see [Secure channel encryption](/en/realtime-media/rtc/build/secure-and-protect-channels/media-stream-encryption).
This parameter is only valid when the encryption mode is set to `aes-128-gcm2` or `aes-256-gcm2`. In this case, ensure that it is not `0`.
* `repeatTime`: (Optional) Int. Number of media streams played. This parameter applies only to on-demand streams. It can be set to:
* `1`: (Default) Plays a media resource once.
* `-1`: Plays media resources in a loop.
* `N`: User-defined number of media resources to be played. It is an integer and cannot be set to `0`.
* `seekPosition`: (Optional) Number. Specifies the playback position (seconds) of the on-demand file. The default value is 0, which means play from the beginning of the on-demand file. It must be less than the media resource duration.
* dataStreamOptions: (Optional) JSON Object. The data stream configuration, which is used to set the SEI information carried by the video frame. This parameter applies only to on-demand streams.
* `enable`: Set whether to inject the SEI information of Agora DataStream type.
* `true`: Inject the SEI information of Agora DataStream type.
* `false`: (Default) Do not inject the SEI information of Agora DataStream type.
Agora DataStream is a data stream format of JSON type, the example is as follows:
```json
message PositionData {
# The length of the on-demand file
int32 duration = 1;
# The playback position of the on-demand file
int32 position = 2;
# The user ID of the host playing the on-demand file
int32 uid = 3;
}
```
### HTTP response
For all possible response status codes, see [Status codes](#code).
#### Response header
The response header contains the following fields:
* `X-Request-ID`: UUID (Universally Unique Identifier) to identify this request. It is the same as the `X-Request-ID` field in the request header. If the request fails, print out this value in the log for troubleshooting.
If you receive the `401(Unauthorized)` status code for this request, the response header does not contain the field.
* `X-Resource-ID`: UUID (Universally Unique Identifier) to identify the cloud player created by this request:
* When the status code is 2XX, this value is the ID of the cloud player created by this request.
* When the status code is `409(Conflict)`, the name of the cloud player created by this request is duplicate with the name of other existing players in the project. This value is the ID of that existing player. Please check and modify the name of the cloud player created by this request.
* When the status code is another value, this field is null and this request fails.
#### Response body
If the status code is 2XX, the request succeeds. The response body contains the following fields:
* `player`: JSON Object. Contains the following fields:
* `uid`: Number. The User ID of the cloud player in the channel.
* `account`: String. The User Account of the cloud player in the channel.
* `id`: String. The ID of the cloud player. It is a UUID (Universally Unique Identifier) generated by Agora's server to identify the ID of the cloud player created.
* `createTs`: Number. The Unix timestamp (in seconds) when creating the cloud player.
* `status`: String. The state of the cloud player at runtime:
* `"idle"`: The playback is not started.
* `"connecting"`: Agora's server is connecting to the address of the media stream or detecting the audio and video data.
* `"running"`: Playing.
* `"failed"`: Agora's server cannot connect to the address of the media stream, or the media stream cannot be played.
* `fields`: String. The field mask to represent a set of symbolic field paths. The field mask is encoded as a single string where paths are separated by a comma. It specifies a subset of fields that should be returned by this request. In the sample code using `uid`, `fields` specifies that Agora's server returns the `uid`, `id`, `createTs`, and `status` fields. For details, see [Google protobuf FieldMask](https://googleapis.dev/nodejs/pubsub/latest/google.protobuf.html#.FieldMask).
If the status code is not 2XX, the request fails. The response body contains the `message` field, which describes the detailed reason for the failure.
### Request example
**Media Pull without transcoding**
```json
{
"player": {
"streamUrl": "rtmp://example.agora.io/live/class32/101",
"channelName": "class32",
"token": "2a784467d6",
"uid": 101,
"idleTimeout": 300,
"playTs": 1575508644,
"name": "test"
}
}
```
**Media Pull with transcoding**
```json
{
"player": {
"audioOptions": {
"profile": 1
},
"videoOptions": {
"width": 1920,
"height": 1080,
"frameRate": 15,
"bitrate": 400,
"codec": "VP9",
"gop": 30,
"fillMode": "fill"
},
"streamUrl": "rtmp://example.agora.io/live/class32/101",
"channelName": "class32",
"token": "2a784467d6",
"uid": 101,
"idleTimeout": 300,
"playTs": 1575508644,
"name": "test"
}
}
```
### Response example
```json
{
"player": {
"uid": 101,
"id": "2a784467d647bb87b60b719f6fa56317",
"createTs": 1575508644,
"status": "running"
},
"fields": "player.uid,player.id,player.createTs,player.status"
}
```
## Delete API
This API destroys the cloud player in the project.
### HTTP request
```bash
DELETE https://api.agora.io/{region}/v1/projects/{appId}/cloud-player/players/{id}
```
#### Path parameters
* `appId`: (Required) String. Agora provides the [App ID](/en/realtime-media/media-pull/reference/glossary#app-id) when you create a **project** in Agora Console. The App ID identifies each project.
* `id`: (Required) String. The ID of the cloud player.
* `region`: (Required) String. The `region` where the Player is created in.
#### Request header
* `Authorization`: See [Authentication](#authentication).
* `X-Request-ID`: UUID (Universally Unique Identifier) to identify this request. After passing in the field, Agora's server returns it in the response header.
Agora recommends using this field. If you do not pass in any value, Agora's server automatically generates a UUID to pass in.
### HTTP response
For all possible response status codes, see [Status codes](#code).
#### Response header
The response header contains the following fields:
* `X-Request-ID`: UUID (Universally Unique Identifier) to identify this request. It is the same as the `X-Request-ID` field in the request header. If the request fails, print out this value in the log for troubleshooting.
If you receive the `401(Unauthorized)` status code for this request, the response header does not contain the field.
* `X-Resource-ID`: UUID (Universally Unique Identifier) to identify the ID of the cloud player created by this request. The UUID is the same as the value in the `id` path parameter.
#### Response body
* If the status code is 2XX, the request succeeds. The response body is empty.
* If the status code is not 2XX, the request fails. The response body contains the `message` field, which describes the detailed reason for the failure.
## List API
This API queries and lists all the cloud players in the project.
### HTTP request
```bash
GET https://api.agora.io/v1/projects/{appId}/cloud-player/players
```
#### Path parameters
`appId`: (Required) String. Agora provides the [App ID](/en/realtime-media/media-pull/reference/glossary#app-id) when you create a **project** in Agora Console. The App ID identifies each project.
#### Query parameters
A sample request URL when using query parameters:
```bash
https://api.agora.io/v1/projects/{appId}/cloud-player/players?filter={filter}&pageSize={pageSize}&pageToken={pageToken}
```
* `filter`: (Optional) String. The filter. Agora's server only lists the cloud players that meet the filter criteria in the project. The current filter is the value of `channelName` when creating the cloud player.
Assuming the channel name is `class32`, replace `filter={filter}` in the sample request URL with `filter=channelName eq class32`; Assuming the channel name is `bigclass`, replace `filter={filter}` in the sample request URL with `filter=channelName eq bigclass`.
Spaces exist before and after `eq` and require URL encoding.
* `pageSize`: (Optional) Number. The maximum number of cloud players to return on one page. The value ranges from 1 to 500. The default value is 200, which means that for a single page, Agora's server lists up to 200 cloud players if you do not pass in any value.
* `pageToken`: (Optional) String. The page number to indicate the order of the pages. If you do not pass in any value, Agora's server returns to the first page.
Recommended usage: When using the `List` API for the first time, do not pass any value in the `pageToken` query parameter. You can get the query results of the first page and the value of the `nextPageToken` field. The next time you use the `List` API, pass this value in the `pageToken` query parameter to query the cloud players on the next page.
After using the above parameters, Agora's server queries and lists the cloud players according to the following steps:
1. Query the cloud players that meet the filter criteria in the specified project.
2. Set the space size of each page.
3. List the cloud players in the specified page.
Agora's server lists the cloud players in ascending order by `createTs`.
#### Request header
The request header contains the following fields:
* `Authorization`: See [Authentication](./restful-authentication).
* `X-Request-ID`: UUID (Universally Unique Identifier) to identify this request. After passing in the field, Agora's server returns it in the response header.
Agora recommends using this field. If you do not pass in any value, Agora's server automatically generates a UUID to pass in.
### HTTP response
For all possible response status codes, see [Status codes](#code).
#### Response header
* `X-Request-ID`: UUID (Universally Unique Identifier) to identify this request. It is the same as the `X-Request-ID` field in the request header. If the request fails, print out this value in the log for troubleshooting.
If you receive the `401(Unauthorized)` status code for this request, the response header does not contain the field.
#### Response body
If the status code is 2XX, the request succeeds. The response body contains the following fields:
* `totalSize`: Number. The number of cloud players that meet the filter criteria.
* `players`: JSON Array. Contains the following fields:
* `name`: String. The name of the cloud player.
* `streamUrl`: String. The RTMP/HTTPS URL of the online media stream.
* `channelName`: String. The name of the Agora channel.
* `uid`: Number. The User ID of the cloud player in the Agora channel.
* `account`: String. The User Account of the cloud player in the Agora channel.
* `id`: String. UUID (Universally Unique Identifier) to identify the cloud player created. It is the ID of the cloud player.
* `createTs`: Number. The Unix timestamp (in seconds) when creating the cloud player.
* `status`: String. The state of the cloud player at runtime:
* `"idle"`: The playback is not started.
* `"connecting"`: Agora's server is connecting to the address of the media stream or detecting the audio and video data.
* `"running"`: Playing.
* `"failed"`: Agora's server cannot connect to the address of the media stream, or the media stream cannot be played.
* `fields`: String. The field mask to represent a set of symbolic field paths. The field mask is encoded as a single string where paths are separated by a comma. It specifies that Agora's server returns a subset of fields in each player in the `players` array. In the sample code using `uid`, `fields` specifies that Agora's server returns the `name`, `streamUrl`, `channelName`, `uid`, `id`, `createTs`, and `status` fields in each player in the `players` array.
* `nextPageToken`: String. The next page number of `pageToken`. You can pass the value of the `nextPageToken` field in the `pageToken` query parameter when using the `List` API next time. When `nextPageToken` is an empty string, there are no more players that match the request.
If the status code is not 2XX, the request fails. The response body contains the `message` field, which describes the detailed reason for the failure.
### Response example
```json
{
"totalSize": 10,
"players": [{
"name": "class32_101",
"streamUrl": "rtmp://example.agora.io/live/class32/101",
"channelName": "class32",
"uid": 101,
"id": "2a784467d647bb87b60b719f6fa56317",
"createTs": 1575508644,
"status": "running"
}, {
"name": "class68_422",
"streamUrl": "rtmp://example.agora.io/live/class68/422",
"channelName": "class68",
"uid": 422,
"id": "0b719f6fa563172a784467d647bb87b6",
"createTs": 1575588644,
"status": "connecting"
}],
"fields": "player.name,player.streamUrl,player.channelName,player.uid,player.id,player.createTs,player.status",
"nextPageToken": "7b60b719f"
}
```
## Update API
Update the cloud player you specified in the project.
### HTTP request
```bash
PATCH https://api.agora.io/{region}/v1/projects/{appId}/cloud-player/players/{id}
```
#### Path parameters
* `appId`: (Required) String. Agora provides the [App ID](/en/realtime-media/media-pull/reference/glossary#app-id) when you create a **project** in Agora Console. The App ID identifies each project.
* `id`: (Required) String. The ID of the cloud player.
* `region`: (Required) String. The `region` where the Player is created in.
#### Query parameters
`sequence`: (Required) Number. The sequence number of the `Update` request. The parameter needs to be greater than or equal to 0. Ensure that the sequence number of the subsequent `Update` request is greater than the sequence number of the previous `Update` request. The serial number ensures that the Agora server updates Converter with the latest configuration you specified.
Best practice is to fill `sequence` with `0` when calling `Update` for the first time. When calling `Update` for the second time, fill `sequence` with `1`. When calling `Update` for the third time, fill `sequence` with `2`. And so on. The Agora server updates cloud player according to the latest `Update` request (that is, the highest serial number).
```bash
PATCH https://api.agora.io/{region}/v1/projects/{appId}/cloud-player/{playerid}?sequence={sequence}
```
#### Request header
* `Authorization`: See [Authentication instructions](./restful-authentication).
* `X-Request-ID`: UUID (Universally Unique Identifier) to identify this request. After passing in the field, Agora's server returns it in the response header.
Agora recommends using this field. If you do not pass in any value, Agora's server automatically generates a UUID to pass in.
#### Request body
You can update the following fields at the same time:
* `streamUrl`
* `audioOptions`
* `audioOptions.volume`
* `seekPosition`
* `isPause`: Bool. Whether to pause the playback of the media stream source file:
* `true`: Pauses playback of the media stream source file.
* `false`:(Default) Plays the media stream source file.
* `audioOptions.volume`: Int. The volume of the cloud player. The value range is \[0,200]. The default value is 100, which represents the original volume.
For the details of other fields, see [Create request body](#create).
### HTTP response
For all possible response status codes, see [Status codes](#code).
#### Response header
* `X-Request-ID`: UUID (Universally Unique Identifier) to identify this request. It is the same as the `X-Request-ID` field in the request header. If the request fails, print out this value in the log for troubleshooting.
If the status code is not 2XX, the response header does not contain the field.
* `X-Resource-ID`: UUID (Universally Unique Identifier) to identify the ID of the cloud player created by this request. The UUID is the same as the value in the `id` path parameter.
#### Response body
* If the status code is 2XX, the request succeeds. The response body is empty.
* If the status code is not 2XX, the request fails. The response body contains the `message` field, which describes the detailed reason for the failure.
### Request example
```json
"player": {
"audioOptions": {
"volume": 10
},
"isPause": false,
"streamUrl": "http://XXXX",
"seekPosition": 40
}
```
## Rate limits
Do not exceed the API rate limits, otherwise you receive the `429(Too Many Requests)` status code.
| API | Rate limit |
| :------- | :----------------------------------------------------------------------------------------------------------------------------------------------------------------------------------------------------------------------------------------------------------------------------------- |
| `Create` | * In a project, when creating cloud players with `name`, the maximum rate of creating each cloud player with a different name is 2 times per second.
* In a project, the maximum rate of creating a cloud player without `name` is 50 times per second. |
| `Delete` | In a project, the maximum rate of destroying a cloud player is 100 times per second. |
| `List` | - In a project, the maximum rate of querying a cloud player with `filter`(`channelName`) is 2 times per second and 15 times per minute.
- In a project, the maximum rate of querying a cloud player without `filter`(`channelName`) is 10 times per second and 20 times per minute. |
## Status codes
* If the status code is 2XX, the request succeeds.
* If the status code is not 2XX, the request fails. Use the `message` field in the response body for troubleshooting.
| Status code | Possible message field |
| ----------------------- | ----------------------------------------------------------------------------------------------------------------------------------------------------------------------- |
| 200 OK | / |
| 400 Bad Request | - Parameter 'streamUrl' is invalid formatted.
- Parameter channelName is invalid. Fix it in your request and retry. |
| 401 Unauthorized | Invalid authentication credentials. |
| 403 Forbidden | * This project has not enabled Cloud Player product yet. Contact us to enable it.
* This project's permission to use Cloud Player was revoked. Contact us for details. |
| 404 Not Found | Resource is not found and destroyed. |
| 409 Conflict | Resource with the same name already exists. |
| 429 Too Many Requests | - Request rate limit exceeded.
- Resources quota limit exceeded.
- no available resources |
| 500 Unknown | Some internal error happened. Contact us to help fix it. |
| 503 Service Unavailable | * Service overload. Retry with back off strategy, and contact us to help fix it.
* Service unavailable temporarily. Retry with back off strategy. |
| 504 Gateway Timeout | Gateway timeout. Query to check whether the player has been created, or to create another one instead. |
## RESTful API callback service
After using these RESTful APIs, Agora's notification server sends the callback notification to your server through an HTTP request.
For details, see [Message Notification Service](../../api-reference/ncs-events).
## Considerations
This section summarizes some important considerations when using the Media Pull RESTful API.
| Item | Impact |
| ------------------------------------------------------------------------------------------------------------------------------------------------------------------------------------------------------------------------------------------------------------------------ | ------ |
| Ensure that the channel profile is set as `LIVE_BROADCASTING`. | ★★★☆☆ |
| If the channel needs only one cloud player, ensure that you have set the `name` parameter. For details, see the description of `name`. | ★★★☆☆ |
| If the channel needs more than one cloud player, ensure that each player has a unique user ID/account. For details, see the description of `uid` and `account`. | ★★★★★ |
| Please ensure that the region you set is the same region as where your media stream originates is located. For details, see the description of `region`. | ★★★★★ |
| The cloud player may be deleted automatically due to server errors. Agora recommends that you enable the Message Notification Service to listen for events of Media Pull. For details, see the [Media Pull Message Notification Server](../../api-reference/enable-ncs). | ★★★★★ |
| When using the `List` API, the `players` field in the response body might only include `id`, `name`, and `CreateTs`. Ensure that your app logic can handle this situation. | ★★★★★ |
| If using the `Create` or `Delete` API results in a status code of `504 Gateway Timeout`, call the `List` API to query the actual state of the cloud player to make sure an unmanaged cloud player does not exist. | ★★★☆☆ |
| If your request fails, ensure that you print out the `X-Request-ID` and `X-Resource-ID` fields in the response header in the log for later use in troubleshooting. | ★★★☆☆ |
| After creating a cloud player and receiving a response message, you need to wait about 10 seconds before using the `List` method to query, otherwise you may not get any information. | ★★★☆☆ |
| The default maximum number of concurrent tasks is 20, which means that a maximum of 20 Media Pull tasks are allowed to run simultaneously for each project. You can contact [support@agora.io](mailto\:support@agora.io) to get a higher quota. | ★★★★☆ |
# RESTful authentication (/en/api-reference/api-ref/media-pull/restful-authentication)
Media Pull RESTful API requires REST authentication.
The following REST authentication methods are available:
* **Basic HTTP authentication**
Generate a Base64-encoded credential with the [customer ID and customer secret](#generate-customer-id-and-customer-secret) provided by Agora and pass the credential with the `Authorization` parameter in the request header.
Implement authentication on the server to mitigate the risk of data leakage.
## Implement basic HTTP authentication
### Generate Customer ID and Customer Secret
To generate a Customer ID and Customer Secret, do the following:
1. In [Agora Console](https://console.agora.io), click the username at the bottom of the navigation sidebar to open the account menu, then select **RESTful API Keys**.

2. Select **Create API Key**. A Customer ID and Customer Secret are generated.
3. Select **Download** and save the file somewhere secure — you can download it only once. In the file, **Key** is your Customer ID and **Secret** is your Customer Secret.
4. Use the Customer ID (**Key**) and Customer Secret (**Secret**) to generate a Base64-encoded credential, and pass it to the `Authorization` parameter in the HTTP request header.
### Generate an authorization header using a third-party tool
For testing and debugging, you can use a [third-party online tool](https://www.debugbear.com/basic-auth-header-generator) to quickly generate your Authorization header. Enter your Customer ID as the Username and your Customer Secret as the Password. Your generated header should look like this::
```text
Authorization: Basic NDI1OTQ3N2I4MzYy...YwZjA=a
```
### Basic authentication sample code
The following sample code implements basic HTTP authentication and sends a RESTful API request to get the basic information of all your current Agora projects.
The Agora RESTful API only supports HTTPS with TLS 1.0, 1.1, or 1.2 for encrypted communication. Requests over plain HTTP are not supported and will fail to connect.
```go
package main
import (
"fmt"
"strings"
"net/http"
"io/ioutil"
"encoding/base64"
)
// HTTPS basic authentication example in Golang using the RTC SDK Server RESTful API
func main() {
// Customer ID
customerKey := "Your customer ID"
// Customer secret
customerSecret := "Your customer secret"
// Concatenate customer key and customer secret and use base64 to encode the concatenated string
plainCredentials := customerKey + ":" + customerSecret
base64Credentials := base64.StdEncoding.EncodeToString([]byte(plainCredentials))
url := "https://api.agora.io/dev/v1/projects"
method := "GET"
payload := strings.NewReader(``)
client := &http.Client {
}
req, err := http.NewRequest(method, url, payload)
if err != nil {
fmt.Println(err)
return
}
// Add Authorization header
req.Header.Add("Authorization", "Basic " + base64Credentials)
req.Header.Add("Content-Type", "application/json")
// Send HTTP request
res, err := client.Do(req)
if err != nil {
fmt.Println(err)
return
}
defer res.Body.Close()
body, err := ioutil.ReadAll(res.Body)
if err != nil {
fmt.Println(err)
return
}
fmt.Println(string(body))
}
```
```js
// HTTP basic authentication example in node.js using the RTC SDK Server RESTful API
const https = require('https')
// Customer ID
const customerKey = "Your customer ID"
// Customer secret
const customerSecret = "Your customer secret"
// Concatenate customer key and customer secret and use base64 to encode the concatenated string
const plainCredential = customerKey + ":" + customerSecret
// Encode with base64
encodedCredential = Buffer.from(plainCredential).toString('base64')
authorizationField = "Basic " + encodedCredential
// Set request parameters
const options = {
hostname: 'api.agora.io',
port: 443,
path: '/dev/v1/projects',
method: 'GET',
headers: {
'Authorization':authorizationField,
'Content-Type': 'application/json'
}
}
// Create request object and send request
const req = https.request(options, res => {
console.log(`Status code: ${res.statusCode}`)
res.on('data', d => {
process.stdout.write(d)
})
})
req.on('error', error => {
console.error(error)
})
req.end()
```
```php
'https://api.agora.io/dev/v1/projects',
CURLOPT_RETURNTRANSFER => true,
CURLOPT_ENCODING => '',
CURLOPT_MAXREDIRS => 10,
CURLOPT_TIMEOUT => 0,
CURLOPT_FOLLOWLOCATION => true,
CURLOPT_HTTP_VERSION => CURL_HTTP_VERSION_1_1,
CURLOPT_CUSTOMREQUEST => 'GET',
CURLOPT_HTTPHEADER => [
$authHeader,
'Content-Type: application/json',
],
]);
// Execute cURL request
$response = curl_exec($curl);
// Check for cURL errors
if ($response === false) {
echo "Error in cURL: " . curl_error($curl);
} else {
// Output the response
echo $response;
}
// Close cURL session
curl_close($curl);
?>
```
```python
# -- coding utf-8 --
# Python 3
# HTTP basic authentication example in python using the RTC SDK Server RESTful API
import base64
import http.client
# Customer ID
customer_key = "Your customer ID"
# Customer secret
customer_secret = "Your customer secret"
# Concatenate customer key and customer secret and use base64 to encode the concatenated string
credentials = customer_key + ":" + customer_secret
# Encode with base64
base64_credentials = base64.b64encode(credentials.encode("utf8"))
credential = base64_credentials.decode("utf8")
# Create connection object with basic URL
conn = http.client.HTTPSConnection("api.agora.io")
payload = ""
# Create Header object
headers = {}
# Add Authorization field
headers['Authorization'] = 'basic ' + credential
headers['Content-Type'] = 'application/json'
# Send request
conn.request("GET", "/dev/v1/projects", payload, headers)
res = conn.getresponse()
data = res.read()
print(data.decode("utf-8"))
```
```java
import java.io.IOException;
import java.net.URI;
import java.net.http.HttpClient;
import java.net.http.HttpRequest;
import java.net.http.HttpResponse;
import java.util.Base64;
// HTTP basic authentication example in Java using the RTC SDK Server RESTful API
public class Base64Encoding {
public static void main(String[] args) throws IOException, InterruptedException {
// Customer ID
final String customerKey = "Your customer ID";
// Customer secret
final String customerSecret = "Your customer secret";
// Concatenate customer key and customer secret and use base64 to encode the concatenated string
String plainCredentials = customerKey + ":" + customerSecret;
String base64Credentials = new String(Base64.getEncoder().encode(plainCredentials.getBytes()));
// Create authorization header
String authorizationHeader = "Basic " + base64Credentials;
HttpClient client = HttpClient.newHttpClient();
// Create HTTP request object
HttpRequest request = HttpRequest.newBuilder()
.uri(URI.create("https://api.agora.io/dev/v1/projects"))
.GET()
.header("Authorization", authorizationHeader)
.header("Content-Type", "application/json")
.build();
// Send HTTP request
HttpResponse response = client.send(request,
HttpResponse.BodyHandlers.ofString());
System.out.println(response.body());
}
}
```
```csharp
using System;
using System.IO;
using System.Net;
using System.Text;
// HTTP basic authentication example in C# using the RTC SDK Server RESTful API
namespace Examples.System.Net
{
public class WebRequestPostExample
{
public static void Main()
{
// Customer ID
string customerKey = "Your customer ID";
// Customer secret
string customerSecret = "Your customer secret";
// Concatenate customer key and customer secret and use base64 to encode the concatenated string
string plainCredential = customerKey + ":" + customerSecret;
// Encode with base64
var plainTextBytes = Encoding.UTF8.GetBytes(plainCredential);
string encodedCredential = Convert.ToBase64String(plainTextBytes);
// Create authorization header
string authorizationHeader = "Authorization: Basic " + encodedCredential;
// Create request object
WebRequest request = WebRequest.Create("https://api.agora.io/dev/v1/projects");
request.Method = "GET";
// Add authorization header
request.Headers.Add(authorizationHeader);
request.ContentType = "application/json";
WebResponse response = request.GetResponse();
Console.WriteLine(((HttpWebResponse)response).StatusDescription);
using (Stream dataStream = response.GetResponseStream())
{
StreamReader reader = new StreamReader(dataStream);
string responseFromServer = reader.ReadToEnd();
Console.WriteLine(responseFromServer);
}
response.Close();
}
}
}
```
# Media Push Overview (/en/api-reference/api-ref/media-push)
This article contains detailed help for the Media Push RESTful APIs.
## Authentication
The RESTful APIs require basic HTTP authentication. You need to set the `Authorization` parameter in every HTTP request header. For how to get the value for Authorization, see [RESTful API authentication](./restful-authentication).
## Understand the tech
You can implement different types of Media Push depending on the live streaming use-case requires transcoded or non-transcoded streaming. Transcoding is essentially an encoding and decoding function used to mix multiple audio and video streams into one audio and video stream, which can guarantee the synchronization of multiple hosts' live streams seen by the audience. Therefore, generally speaking, in the case of multiple-hosts live streaming, you need to enable transcoding when pushing streams to CDN; in the case of single-host live streaming, only one media stream is pushed to the CDN, so you do not need to enable transcoding.
Processing the media streams and pushing it to the CDN creates a Media Push task (shown as "Converter" in the rest of the article) in the Agora channel. You can control a Converter through the following methods:
* `Create`: Create a Converter for your project, and set up the relevant configuration of transcoded or non-transcoded streaming. The media stream in the channel is processed by the Converter according to this configuration and then pushed to the CDN.
* `Delete`: Destroy the specified Converter. The user's media stream in this channel will no longer be processed by the Converter or pushed to the CDN after you destroy the Converter.
* `Update`: Update the specified Converter configuration.
* `Get`: Get the streaming status of the specified Converter.
## Create: Create a Converter
### HTTP request
```html
POST https://api.agora.io/{region}/v1/projects/{appId}/rtmp-converters
```
The Agora RESTful API only supports HTTPS with TLS 1.0, 1.1, or 1.2 for encrypted communication. Requests over plain HTTP are not supported and will fail to connect.
#### Path parameter
* `appId`: (Required) String. The **App ID** provided by Agora. You can get an App ID after creating a project in the Agora console. An App ID is the unique identification of a project.
* `region`: (Required) String. The region that the Converter was created in. Agora supports the creation of Converters in different regions. Currently, four regions are supported:
* `cn`: China Mainland
* `ap`: Asia, excluding Mainland China
* `na`: North America
* `eu`: Europe
- Please ensure that the region you set is the same region as where your CDN originates is located.
- Please make sure the value of `region` is lowercase.
#### Query parameters
`regionHintIp`: (Optional) String. The IP address of the CDN source station. It must be a valid IPv4 address. This parameter can help ensure the stability of the RTMP stream.
```html
POST https://api.agora.io/{region}/v1/projects/{appId}/rtmp-converters?regionHintIp={regionHintIp}
```
#### Request header
* `Content-Type`: `application/json`
* `Authorization`: The value of this field must refer to the [Authentication instructions](./restful-authentication).
* `X-Request-ID`: The UUID (Universal Unique Identifier) that identifies this **request**. Agora server generates a UUID to pass in and returns `X-Request-ID` field in the response header.
> Agora recommends that you assign a value to `X-Request-ID`. Agora server returns an `X-Custom-Request-ID` field in the response header for trouble shooting.
#### Request body
You can implement different types of Media Push depending on the live streaming use-case requires transcoded or non-transcoded streaming. Generally speaking, in the case of multiple-hosts live streaming, you need to enable transcoding when using Media Push RESTful APIs; in the case of single-host live streaming, only one media stream is pushed to the CDN, so you do not need to enable transcoding. For details, see [Media Push Features](/en/realtime-media/media-push#key-features).
**Media Push with transcoding**
The request Body is the `converter` field of JSON Object type. The field structure is shown in the following figure:
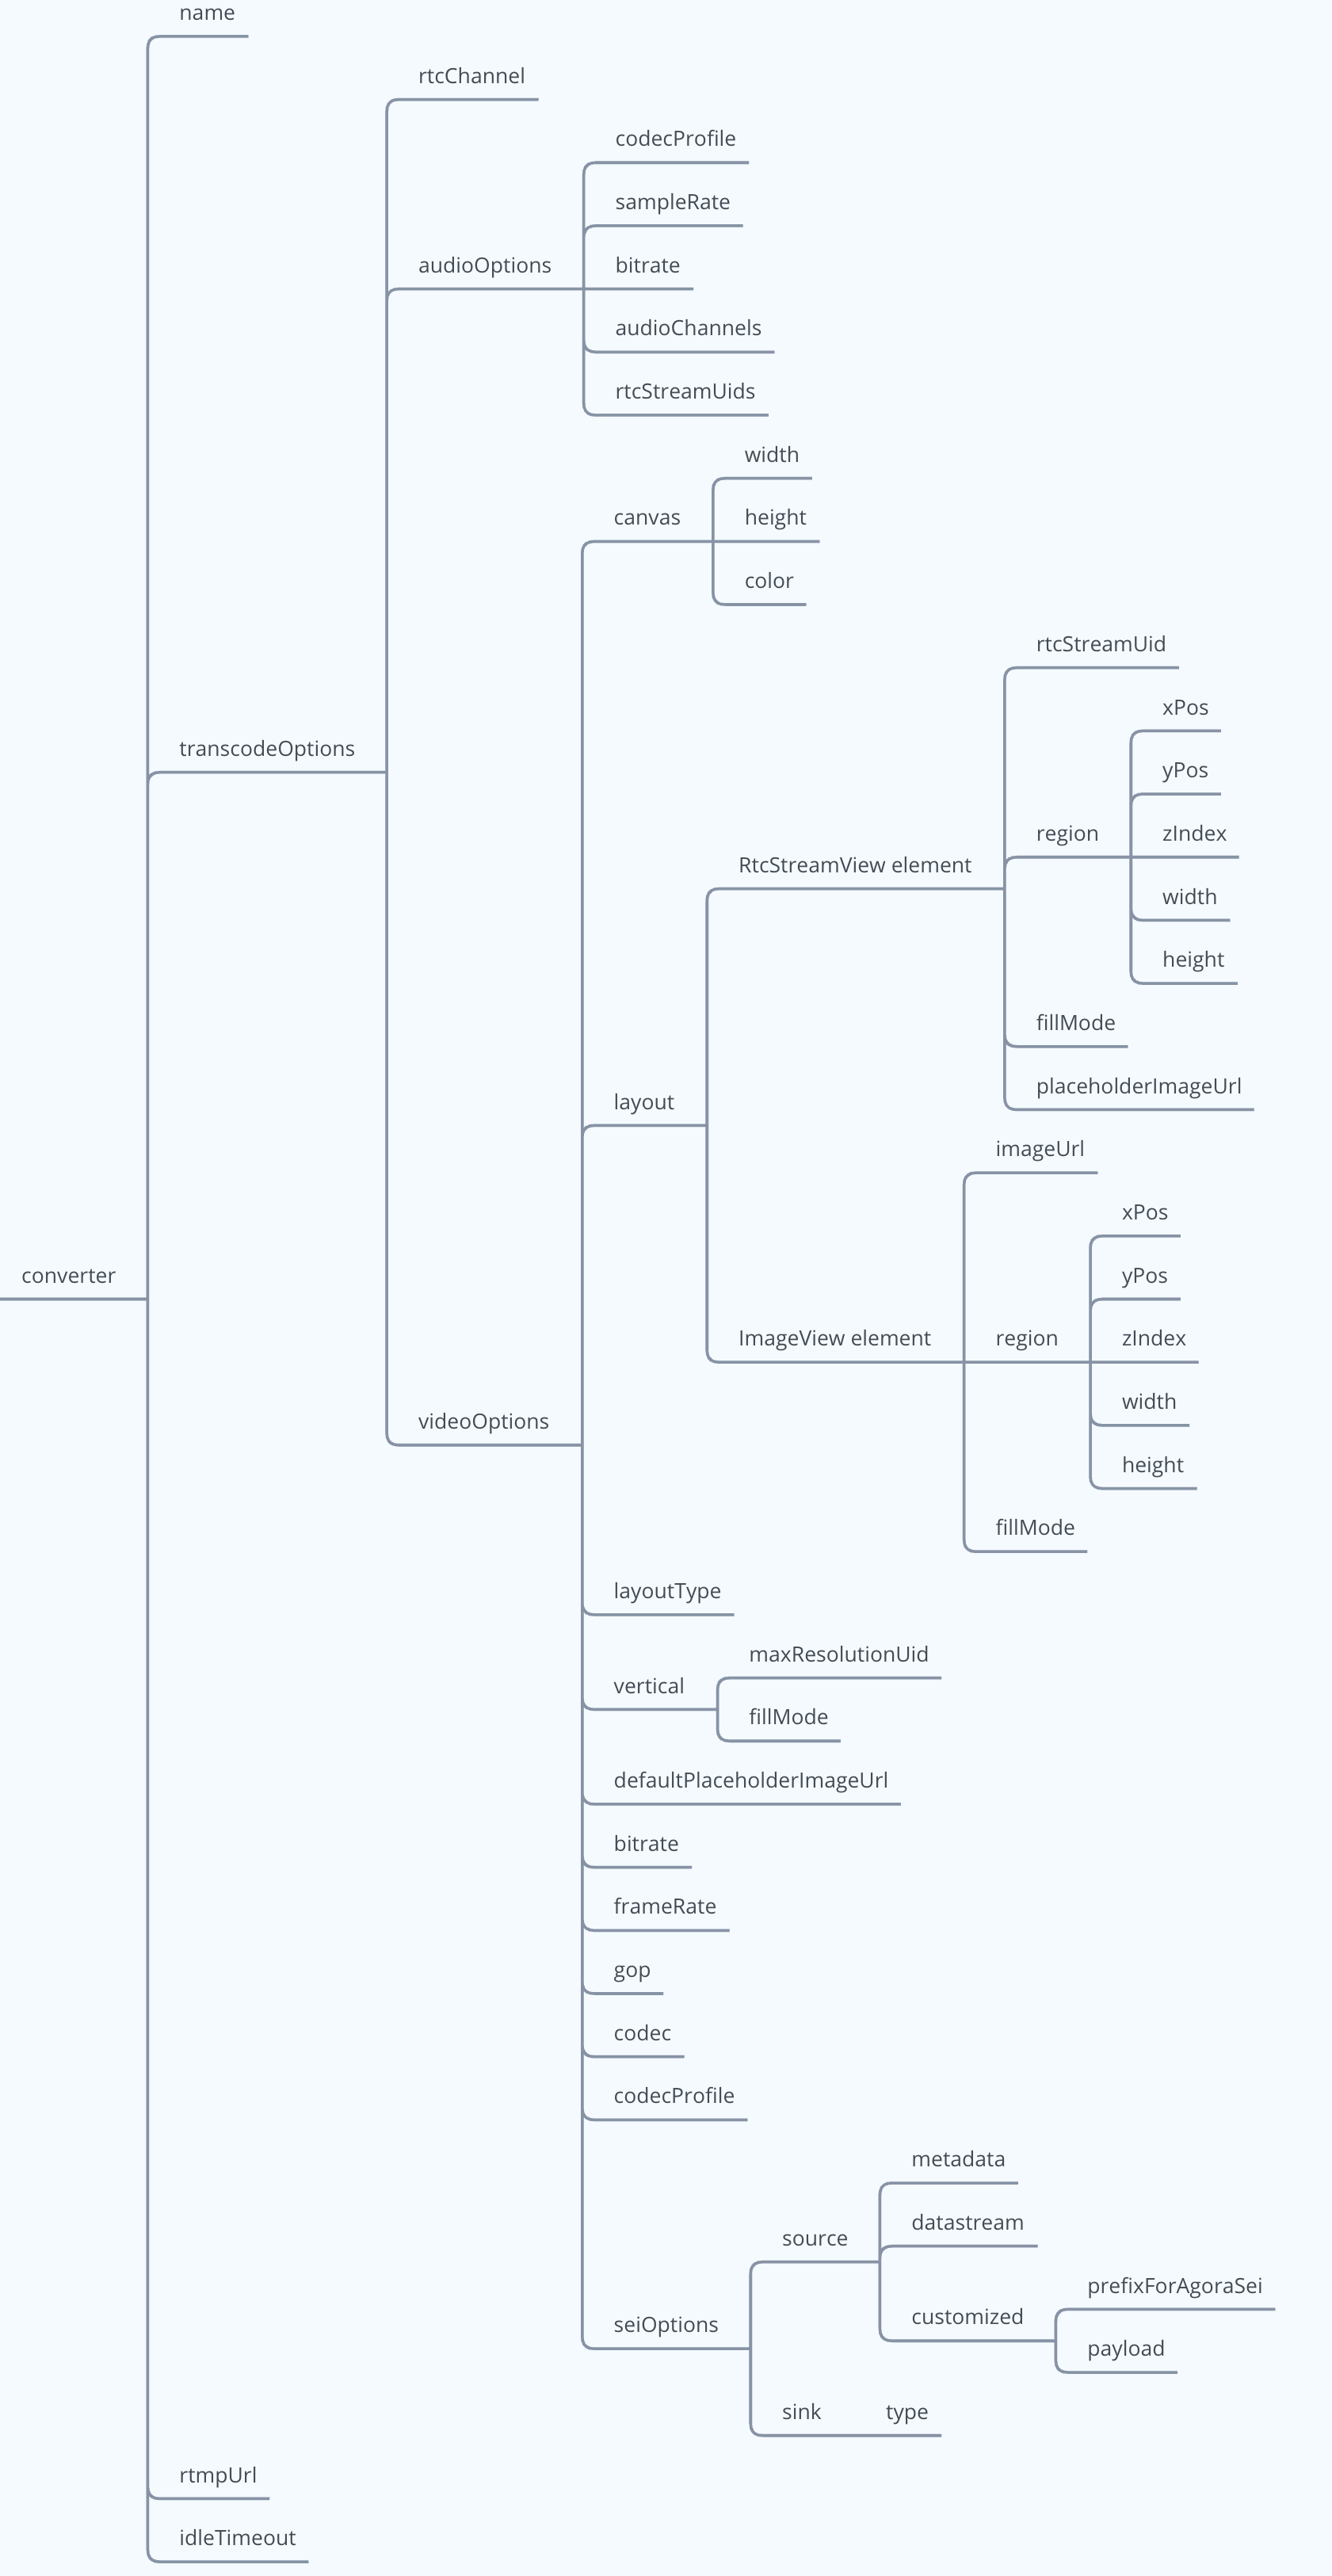
Details for these fields are shown in the following table:
| Field | Type | Descriptions |
| :--------------------------------------------------------- | :--------------------- | :-------------------------------------------------------------------------------------------------------------------------------------------------------------------------------------------------------------------------------------------------------------------------------------------------------------------------------------------------------------------------------------------------------------------------------------------------------------------------------------------------------------------------------------------------------------------------------------------------------------------------------------------------------------------------------------------------------------------------------------------------------------------------------------------------------------------------------------------------------------------------------------------------------------------------------------------------------------------------------------------------------------------------------------------------------------------------------------------------------------------------------------------- |
| name | (Optional) String | The name of the Converter. The maximum length is 64 characters. The supported character set range is:- All lowercase English letters (a-z)
- All uppercase English letters (A-Z)
- Numbers 0-9
- "-", "\_"The field is empty when no value is passed. Multiple converters with an empty name field can be created under a project. Two converters cannot have the same name, however; you will receive a response status code of `409` (Conflict) if you try to create a converter with the same name as one that already exists under that project.
To avoid repeatedly creating multiple Converters and repetitively pushing streams, please use the `name` field to manage the Converters under the specified project. Agora recommends that you combine "channel name (`rtcChannel`)" and "Converter feature" to assign a value to the `name`. For example, `show68_horizontal` and `show68_vertical` would represent converters for the user screen created in channel `show68` with horizontal and vertical layouts, respectively.
|
| transcodeOptions | (Required) JSON Object | The Converter’s transcoding configuration.- When the `audioOptions` and `videoOptions` fields in `converter.transcodeOptions` are not defined, the converter will output a video stream only (without audio).
- When there is no `rtcStreamUids` field in the `converter.transcodeOptions.audioOptions` field, Agora will mix the audio streams of all users in the channel and output the mixed audio stream through the Converter.
- When there is an `rtcStreamUids` field in the `converter.transcodeOptions.audioOptions` field, Agora will mix the audio stream of the specified user and output the mixed audio stream through the Converter. |
| transcodeOptions.rtcChannel | (Required) String | The Agora channel name. This is the channel to which the stream processed by the Converter belongs. The maximum length of the string is 64 characters, and the following character sets (89 characters in total) are supported:- All lowercase English letters (a-z)
- All uppercase English letters (A-Z)
- Numbers 0-9
- The space character "!", "#", "$", "%", "&", "(", ")", "+", "-", ":", ";", "\<", "=", ".", ">", "?", "@", "\[", "]", "^", "\_", " \{", "}", "\|", "\~", "," |
| transcodeOptions.audioOptions | (Optional) JSON Object | The audio transcoding configuration of the Converter. See [audioOptions](./restful-type-definition#audiooptions) for details.
* There is no need to set `audioOptions` and related fields in a video stream only (without audio) use-case.
* In an audio & video use-case, `audioOptions` is a required field. If there is no field setting requirement, you can set `audioOptions` to empty, for example: "audioOptions":\{}.
|
| transcodeOptions.videoOptions | (Optional) JSON Object | The video transcoding configuration of the Converter.
* There is no need to set `videoOptions` and related fields in an audio stream only (without video) use-case.
* In an audio & video use-case, `videoOptions` is a required field and cannot be empty.
|
| transcodeOptions.videoOptions.canvas | (Required) JSON Object | The video canvas. See [canvas](./restful-type-definition#canvas) for details. |
| transcodeOptions.videoOptions.layoutType | (Optional) Number | The screen layout type of the output video:- `0` or empty: (Default) Custom layout, which is set through the`transcodeOptions.videoOptions.layout` parameter.
- `1`: Vertical layout. Specify one user to display in the large window on the left side of the screen, while the other users are vertically arranged in the small windows on the right side of the screen. For details, see [Set Vertical Layout](/en/realtime-media/media-push/reference/set-vertical-layout). |
| transcodeOptions.videoOptions.layout | (Optional) JSON Array | The content description of the video screen on the canvas. Two elements are supported: RtcStreamView and ImageView.
If `layoutType` is 0 or empty, this field is required.
|
| transcodeOptions.videoOptions.layout.RtcStreamView element | None | The video screen of each user on the canvas. See [RtcStreamView](./restful-type-definition#layout) for details. |
| transcodeOptions.videoOptions.layout.ImageView element | None | The video image on the canvas, which can be used as a watermark. See [ImageView](./restful-type-definition#layoutimageview) for details. |
| transcodeOptions.videoOptions.vertical | (Optional) JSON Object | Vertical layout. This parameter must be set when `layoutType` is 1. See [vertical](./restful-type-definition#vertical) for details. |
| transcodeOptions.videoOptions.defaultPlaceholderImageUrl | (Optional) String | The default user screen background image URL address. Supports images in JPG, PNG and GIF formats. This controls what happens when a user in a channel stops publishing their video stream:- If this field is set, the user's window switches to this background image.
- If this field is not set, the user's window initially displays the last frame of the user's video. Once the layout refreshes, the window displays the background color of the canvas. |
| transcodeOptions.videoOptions.bitrate | (Required) Number | The encoding bitrate (Kbps) of the video. The value range is \[1,10000]. |
| transcodeOptions.videoOptions.gop | (Optional) Number | The GOP of the video. The default value is the value of `frameRate` \* 2. |
| transcodeOptions.videoOptions.frameRate | (Optional) Number | The encoding frame rate (fps) of the video. The value range is \[1,30]. The default value is 15. |
| transcodeOptions.videoOptions.codec | (Optional) String | The video codec type of the output video stream. The following values are supported:- (Default) H.264
- H.265 |
| transcodeOptions.videoOptions.codecProfile | (Optional) String | The encoding specification of the video. The following values are supported:* `high` (Default): High video codec profile, generally used for high-resolution broadcasts or television.
* `baseline`: Baseline video codec profile, generally used for video calls on mobile phones.
* `main`: Main video codec profile, generally used for mainstream electronics, such as MP4 players, portable video players, PSPs, and iPads.
If `codec` is set to `H.256`, `codecProfile` is automatically set to `main`.
|
| transcodeOptions.videoOptions.seiOptions | JSON Object | Sets the user SEI information carried in the output video stream. The default is empty. If it is not set, it means that no SEI information is output. See [seiOptions](./restful-type-definition#seioptions) for details. |
| rtmpUrl | (Required) String | The address of Media Push. It must be a valid RTMP address with a length of 1,024 characters or less. |
| idleTimeOut | (Optional) Number | The maximum time (seconds) that the Converter is idle. Idle means that all users corresponding to the media stream processed by the Converter have left the channel. After the idle state exceeds the set `idleTimeOut`, the Converter will be destroyed automatically. |
| jitterBufferSizeMs | (Optional) Int | Network delay (ms) from the receiver to the jitter buffer. The default value is 1000. The value range is \[0, 1000].- The Media Push service rounds up to the nearest 100 multiples with the value you set.
- If the value is set to 0, jitter buffer delay does not take effect. Agora recommends that you do not set the `jitterBufferSizeMs` to 0 because poor network may cause low audio quality. |
**Media Push without transcoding**
The request body is the `converter` field of JSON Object type. The field structure is shown in the following figure:
Details for these fields are shown in the following table:
| Field | Category | Description |
| :---------------------- | :-------------------- | :------------------------------------------------------------------------------------------------------------------------------------------------------------------------------------------------------------------------------------------------------------------------------------------------------------------------------------------------------------------------------------------------------ |
| name | String | The name of the Converter. |
| rawOptions | (Required)JSON Object | Media Push configuration for the Converter. |
| rawOptions.rtcChannel | String | The Agora channel name. The channel to which the stream processed by the Converter belongs. |
| rawOptions.rtcStreamUid | Number | The UID of the user to which the media stream belongs. |
| rtmpUrl | (Required)String | The CDN streaming address. |
| idleTimeOut | Number | The maximum time (s) that the Converter is idle. Idle means that all users of the corresponding media streams processed by the Converter have left the channel. When the Converter is in the idle state for longer than `idleTimeout`, the Converter is automatically destroyed and the streaming stops. |
| jitterBufferSizeMs | (Optional) Int | Network delay (ms) from the receiver to the jitter buffer. The default value is 1000. The value range is \[0, 1000].- The Media Push service rounds up to the nearest 100 multiples with the value you set.
- If the value is set to 0, jitter buffer delay does not take effect. Agora recommends that you do not set the `jitterBufferSizeMs` to 0 because poor network may cause low audio quality. |
### HTTP response
All possible response status codes. See [Status codes](#status-codes) for details.
#### Response header
* `X-Request-ID`: The UUID (Universal Unique Identifier) that identifies this **request**. This value is the same as the `X-Request-ID` in the header of this request. If there is an error in the request, please print out the value in the log to troubleshoot the problem.
> If the response status code of this request is not 2XX, this field may be missing from the response header.
* `X-Resource-ID`: The UUID (Universal Unique Identifier) that identifies the **ID** of the Converter updated in this request.
#### Response body
If the status code is 2XX, the request is successful. The field structure is shown in the following figure:
Details for these fields are shown in the following table:
| Field | Type | Descriptions |
| :--------- | :----- | :---------------------------------------------------------------------------------------------------------------------------------------------------------------------------------------------------------------------------------------------------------------------------------------------------------------------------------------------------------------------------------------------------------------------------------------- |
| `id` | String | The ID of the Converter. This is a UUID (Universal Unique Identifier) generated by the Agora server to identify a created Converter. |
| `createTs` | Number | The Unix timestamp(seconds) when the Converter was created. |
| `updateTs` | Number | The Unix timestamp(seconds) when the Converter configuration was last updated. |
| `state` | String | The running status of the Converter:- `connecting`: Connecting to the Agora streaming server and the CDN server.
- `running`: The Agora streaming server is pushing the streams.
- `failed`: The Media Push fails. |
| `fields` | String | The field mask of the converter JSON Object. See [Google protobuf FieldMask Document](https://developers.google.com/protocol-buffers/docs/reference/google.protobuf#fieldmask) for details. This is used to describe the set of fields contained in the returned `converter`. In this example, `fields` specifies that the Agora server returns a subset of the `id`, `createTs`, `updateTs` and `state` fields in the `converter` field. |
If the status code is not 2XX, the request fails. The body contains a String type `message` field that describes the specific reason for the failure.
```json
{
"message": "Invalid authentication credentials."
}
```
### Request example
**Custom layout for Media Push with transcoding**
This example shows that the video of the two specified users in the `show68` channel are mixed with a custom layout and pushed to the CDN. The audio of all users in the channel is also mixed.
```json
{
"converter": {
"name": "show68_vertical",
"transcodeOptions": {
"rtcChannel": "show68",
"audioOptions": {
"codecProfile": "LC-AAC",
"sampleRate": 48000,
"bitrate": 48,
"audioChannels": 1
},
"videoOptions": {
"canvas": {
"width": 360,
"height": 640
},
"layout": [
{
"rtcStreamUid": 201,
"region": {
"xPos": 0,
"yPos": 0,
"zIndex": 1,
"width": 360,
"height": 320
},
"fillMode": "fill",
"placeholderImageUrl": "http://example.agora.io/user_placeholder.jpg"
},
{
"rtcStreamUid": 202,
"region": {
"xPos": 0,
"yPos": 320,
"zIndex": 1,
"width": 360,
"height": 320
}
}
],
"codecProfile": "High",
"frameRate": 15,
"gop": 30,
"bitrate": 400,
"seiOptions": {}
}
},
"rtmpUrl": "rtmp://example/live/show68"
}
}
```
The sample code for setting SEI information (`seiOptions`) is as follows:
```json
{
"converter": {
"transcodeOptions": {
"videoOptions": {
"seiOptions": {
"source": {
"metadata": true,
"datastream": true,
"customized": {
"payload": "example"
}
},
"sink": {
"type": 100
}
}
}
}
}
}
```
**Vertical layout for Media Push with transcoding**
This example shows that the video of the two specified users in the `show68` channel are mixed with a vertical layout and pushed to the CDN. The audio of two specified users in the channel are mixed.
```json
{
"converter": {
"name": "show68_vertical",
"transcodeOptions": {
"rtcChannel": "show68",
"audioOptions": {
"codecProfile": "HE-AAC",
"sampleRate": 48000,
"bitrate": 128,
"audioChannels": 1,
"rtcStreamUids": [
201,
202
]
},
"videoOptions": {
"canvas": {
"width": 360,
"height": 640,
"color": 0
},
"layout": [
{
"rtcStreamUid": 201,
"region": {
"xPos": 0,
"yPos": 0,
"zIndex": 1,
"width": 360,
"height": 640
},
"fillMode": "fill",
"placeholderImageUrl": "http://example/host_placeholder.jpg"
},
{
"rtcStreamUid": 202,
"region": {
"xPos": 0,
"yPos": 320,
"zIndex": 1,
"width": 360,
"height": 320
}
}
],
"codec": "H.264",
"codecProfile": "high",
"frameRate": 15,
"gop": 30,
"bitrate": 400,
"layoutType": 1,
"vertical": {
"maxResolutionUid": 201,
"fillMode": "fill",
"refreshIntervalSec": 4
},
"defaultPlaceholderImageUrl": "http://example/host_placeholder.jpg",
"seiOptions": {
"source": {
"metadata": true,
"datastream": true,
"customized": {
"payload": "example"
}
},
"sink": {
"type": 100
}
}
}
},
"rtmpUrl": "rtmp://example/live/show68",
"idleTimeout": 300
}
}
```
**Media Push without transcoding**
This example shows that the media stream of the specified user in the `show68` channel is pushed to the CDN.
```json
{
"converter": {
"name": "show68_vertical",
"rawOptions": {
"rtcChannel": "show68",
"rtcStreamUid": 201
},
"rtmpUrl": "rtmp://example/live/global"
}
}
```
### Response example
```json
{
"converter": {
"id": "4c014467d647bb87b60b719f6fa57686",
"createTs": 1591786766,
"updateTs": 1591786766,
"state": "connecting"
},
"fields": "id,createTs,updateTs,state"
}
```
## Delete: Destroy the Converter
### HTTP request
```html
DELETE https://api.agora.io/{region}/v1/projects/{appId}/rtmp-converters/{converterId}
```
#### Path parameter
* `region`: (Required) String. The region where the Converter is created in, which must be the same as the `region` set when creating Converter.
* `appId`: (Required) String type parameter. The **App ID** provided by Agora. You can get an App ID after creating a project in the Agora console. An App ID is the unique identification of a project.
* `converterId`: (Required) String type parameter. The **ID** of the Converter.
#### Request header
* `Authorization`: The value of this field must refer to the [Authentication instructions](./restful-authentication).
* `X-Request-ID`: The UUID (Universal Unique Identifier) that identifies this **request**. Agora server generates a UUID to pass in and returns `X-Request-ID` field in the response header.
> Agora recommends that you assign a value to `X-Request-ID`. Agora server returns an `X-Custom-Request-ID` field in the response header for trouble shooting.
### HTTP response
All possible response status codes. See [Status codes](#status-codes) for details.
#### Response header
* `X-Request-ID`: The UUID (Universal Unique Identifier) that identifies this **request**. This value is the same as the `X-Request-ID` in the header of this request. If there is an error in the request, please print out the value in the log to troubleshoot the problem.
> If the response status code of this request is not 2XX, this field may be missing from the response header.
* `X-Resource-ID`: The UUID (Universal Unique Identifier) that identifies the **ID** of the Converter created in this request.
#### Response body
* If the status code is 2XX, the request is successful. The body is empty.
* If the status code is not 2XX, the request fails. The body contains a String type `message` field that describes the specific reason for the failure.
## Update: Update the Converter
### HTTP request
```html
PATCH https://api.agora.io/{region}/v1/projects/{appId}/rtmp-converters/{converterId}
```
#### Path parameter
* `region`: (Required) String. The region where the Converter is created in, which must be the same as the `region` set when creating Converter.
* `appId`: (Required) String type parameter. The **App ID** provided by Agora. You can get an App ID after creating a project in the Agora console. An App ID is the unique identification of a project.
* `converterId`: (Required) String type parameter. The **ID** of the Converter.
#### Query Parameters
`sequence`: (Required) Number type parameter. The serial number of the `Update` request. The value must be greater than or equal to 0. Please make sure that the serial number of the next `Update` request is greater than the serial number of the previous `Update` request. The serial number can ensure that the Agora server updates the Converter according to the latest configuration you specify.
> Agora recommends that you fill in `sequence` sequentially, using 0 when calling Update for the first time, 1 for the second time, 2 for the third time, and so on. The Agora server will update the Converter according to the latest Update request (the largest serial number).
```html
PATCH https://api.agora.io/v1/projects//rtmp-converters/?sequence={sequence}
```
#### Request header
* `Content-Type`: `application/json`
* `Authorization`: The value of this field must refer to the [Authentication instructions](./restful-authentication).
* `X-Request-ID`: The UUID (Universal Unique Identifier) that identifies this **request**. Agora server generates a UUID to pass in and returns `X-Request-ID` field in the response header.
> Agora recommends that you assign a value to `X-Request-ID`. Agora server returns an `X-Custom-Request-ID` field in the response header for trouble shooting.
#### Request body
For details about the fields, see the [Create request body](#request-body).
> `Update` method does not support updating the following configurations of a Converter:
>
> * `name`
> * `idleTimeOut`
> * `transcodeOptions.rtcChannel`
> * `transcodeOptions.audioOptions`
> * `transcodeOptions.audioOptions.codecProfile`
> * `transcodeOptions.audioOptions.sampleRate`
> * `transcodeOptions.audioOptions.bitrate`
> * `transcodeOptions.audioOptions.audioChannels`
> * `transcodeOptions.videoOptions.codec`
> * `transcodeOptions.videoOptions.codecProfile`
* After calling the `Create` method to create a Converter that outputs video stream only or audio stream only, you cannot update it to a Converter that outputs audio stream only or video stream only through the `Update` method.
* When using Media Push with vertical layout (`layoutType` is `1`), you can only update the `rtmpUrl` field.
### HTTP response
All possible response status codes. See [Status codes](#status-codes) for details.
#### Response header
* `X-Request-ID`:The UUID (Universal Unique Identifier) that identifies this **request**. This value is the same as the `X-Request-ID` in the header of this request. If there is an error in the request, please print out the value in the log to troubleshoot the problem.
> If the response status code of this request is not 2XX, this field may be missing from the response header.
* `X-Resource-ID`: The UUID (Universal Unique Identifier) that identifies the **ID** of the Converter updated in this request.
#### Response body
If the status code is 2XX, the request is successful. The field structure is shown in the following figure:

Details of these fields are shown in the following table:
| Field | Type | Descriptions |
| :--------- | :----- | :---------------------------------------------------------------------------------------------------------------------------------------------------------------------------------------------------------------------------------------------------------------------------------------------------------------------------------------------------------------------------------------------------------------------------------------------- |
| `id` | String | The ID of the Converter. This is a UUID (Universal Unique Identifier) generated by the Agora server to identify a created Converter. |
| `createTs` | Number | The Unix timestamp(seconds) when the Converter was created. |
| `updateTs` | Number | The Unix timestamp(seconds) when the Converter configuration was last updated. |
| `state` | String | The running status of the Converter:- `connecting`: Connecting to the Agora streaming server and the CDN server.
- `running`: The Agora streaming server is pushing the streams.
- `failed`: The Media Push Fails. |
| `fields` | String | The field mask of the converter JSON Object. See [Google protobuf FieldMask Document](https://developers.google.com/protocol-buffers/docs/reference/google.protobuf#fieldmask) for details. This is used to describe the set of fields contained in the returned `converter`. In this example, `fields` specifies that the Agora server returns a subset of the `id`, `createTs`, `updateTs`, and `state` fields in the `converter` field. |
If the status code is not 2XX, the request fails. The body contains a String type `message` field that describes the specific reason for the failure.
### Request example
You can update multiple fields at the same time, such as updating `transcodeOptions.videoOptions.canvas` and `converter.transcodeOptions.videoOptions.layout`. Refer to the following sample code:
```json
{
"converter": {
"transcodeOptions": {
"videoOptions": {
"canvas": {
"width": 360,
"height": 640,
"color": 0
},
"layout": [
{
"rtcStreamUid": 201,
"region": {
"xPos": 0,
"yPos": 0,
"zIndex": 1,
"width": 360,
"height": 320
},
"fillMode": "fill",
"placeholderImageUrl": "http://example/host_placeholder.jpg"
}
]
}
}
},
"fields": "transcodeOptions.videoOptions.canvas,transcodeOptions.videoOptions.layout"
}
```
### Response example
```json
{
"converter": {
"id": "4c014467d647bb87b60b719f6fa57686",
"createTs": 1591786766,
"updateTs": 1591788746,
"state": "running"
},
"fields": "id,createTs,updateTs,state"
}
```
## Get: Get the streaming status of the Converter
### HTTP request
```html
GET https://api.agora.io/{region}/v1/projects/{appId}/rtmp-converters/{converterId}
```
#### Path parameter
* `region`: (Required) String. The region where the Converter is created in, which must be the same as the `region` set when creating Converter.
* `appId`: (Required) String type parameter. The **App ID** provided by Agora. You can get an App ID after creating a project in the Agora console. An App ID is the unique identification of a project.
* `converterId`: (Required) String type parameter. The **ID** of the Converter.
#### Request header
* `Content-Type`: `application/json`
* `Authorization`: The value of this field must refer to the [Authentication instructions](./restful-authentication).
* `X-Request-ID`: The UUID (Universal Unique Identifier) that identifies this **request**. Agora server generates a UUID to pass in and returns `X-Request-ID` field in the response header.
> Agora recommends that you assign a value to `X-Request-ID`. Agora server returns an `X-Custom-Request-ID` field in the response header for trouble shooting.
### HTTP response
All possible response status codes. See [Status codes](#status-codes) for details.
#### Response header
* `X-Request-ID`: The UUID (Universal Unique Identifier) that identifies this **request**. This value is the same as the `X-Request-ID` in the header of this request. If there is an error in the request, please print out the value in the log to troubleshoot the problem.
> If the response status code of this request is not 2XX, this field may be missing from the response header.
* `X-Resource-ID`: The UUID (Universal Unique Identifier) that identifies the **ID** of the Converter created in this request.
#### Response body
If the status code is 2XX, the request is successful. The field structure is shown in the following figure:
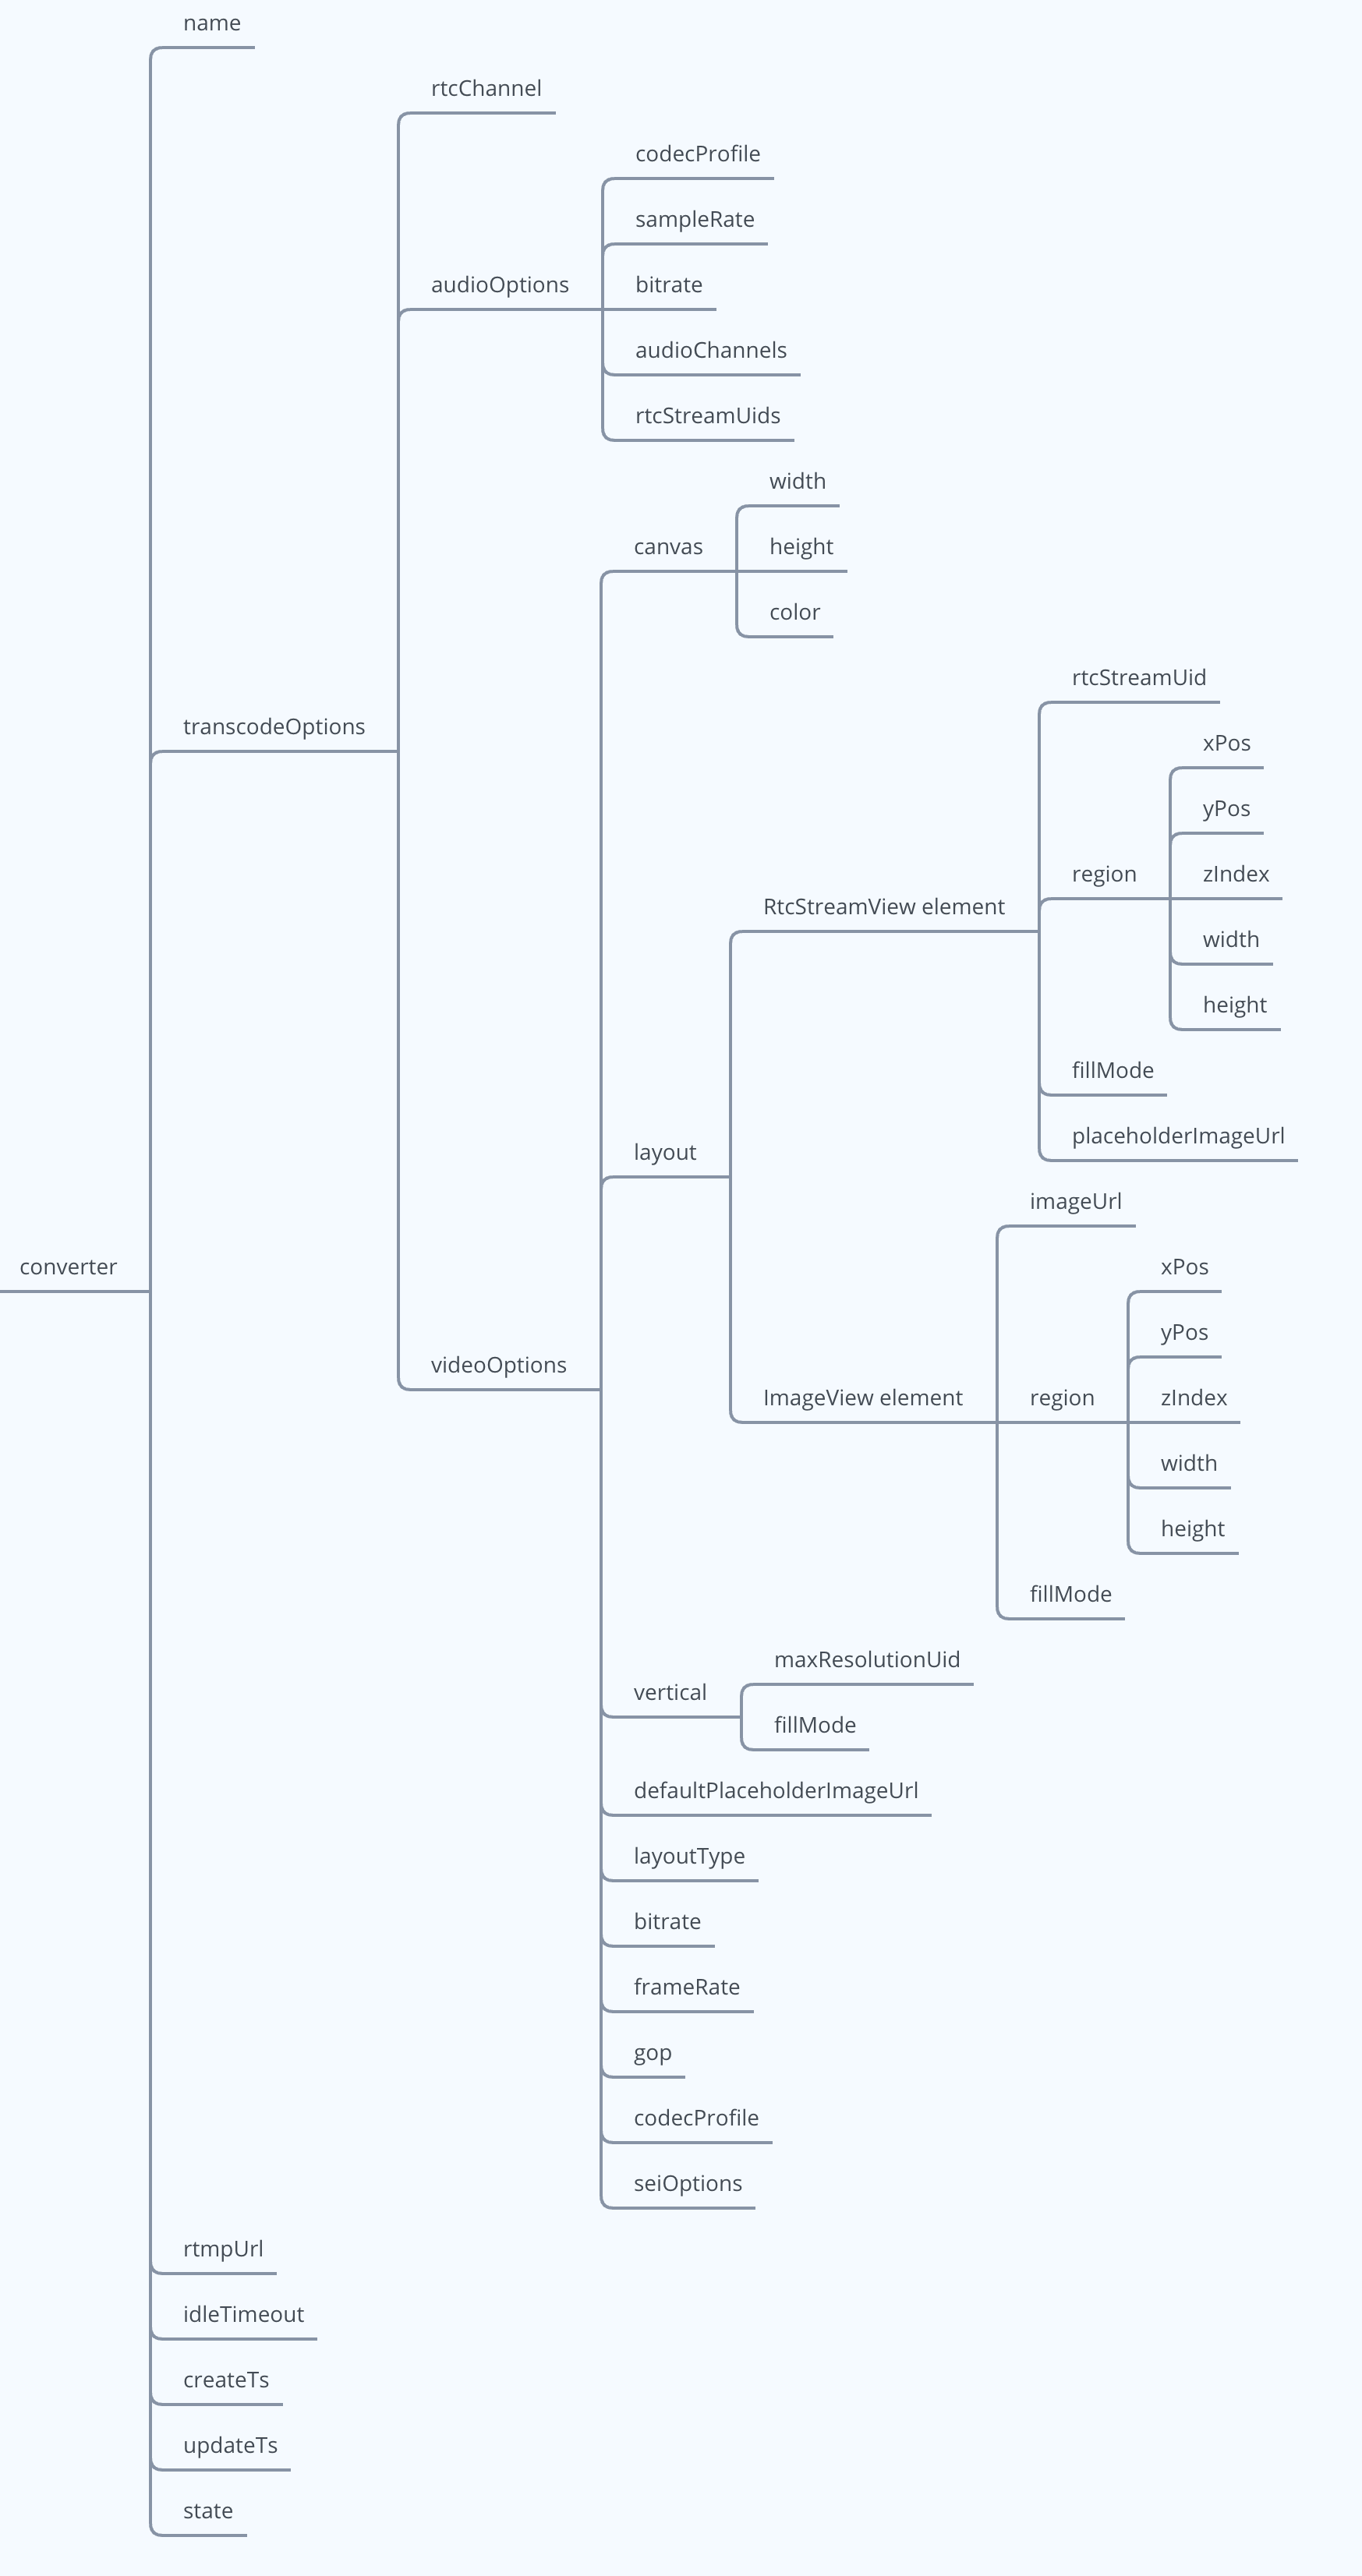
Details of these fields are shown in the following table:
| Field | Type | Descriptions |
| :--------------------------------------------------------- | :---------- | :----------------------------------------------------------------------------------------------------------------------------------------------------------------------------------------- |
| name | String | The name of the Converter. |
| transcodeOptions | JSON Object | The transcoding configuration of the Converter. |
| transcodeOptions.rtcChannel | String | The Agora channel name. |
| transcodeOptions.audioOptions | JSON Object | The audio transcoding configuration of the Converter. See [audioOptions](./restful-type-definition#audiooptions) for details. |
| transcodeOptions.videoOptions | JSON Object | The video transcoding configuration of the Converter. |
| transcodeOptions.videoOptions.canvas | JSON Object | The video canvas. See [canvas](./restful-type-definition#canvas) for details. |
| transcodeOptions.videoOptions.layout | JSON Array | The content description of the video screen on the canvas. Two elements are supported: RtcStreamView and ImageView. |
| transcodeOptions.videoOptions.layout.RtcStreamView element | NA | The video screen of each user on the canvas. See [RtcStreamView](./restful-type-definition#layout) for details. |
| transcodeOptions.videoOptions.layout.ImageView element | NA | The video image on the canvas, which can be used as a watermark. See [ImageView](./restful-type-definition#layoutimageview) for details. |
| transcodeOptions.videoOptions.bitrate | Number | The encoding bitrate (Kbps) of the video. |
| transcodeOptions.videoOptions.frameRate | Number | The encoding frame rate (fps) of the video. |
| transcodeOptions.videoOptions.codec | String | The video codec type of the output video stream. |
| transcodeOptions.videoOptions.codecProfile | String | The encoding specification of the video. |
| transcodeOptions.videoOptions.seiOptions | JSON Object | The user SEI information carried in the output video stream. See [seiOptions](./restful-type-definition#seioptions) for details. |
| rtmpUrl | String | The address of Media Push. |
| idleTimeout | Number | The maximum time (seconds) that the Converter is idle. Idle means that all users corresponding to the media stream processed by the Converter have left the channel. |
| createTs | Number | The Unix timestamp(seconds) when the Converter was created. |
| state | String | The running status of the Converter:- `connecting`: Connecting to the Agora streaming server and the CDN server.
- `running`: Pushing the stream.
- `failed`: Failed to push the stream. |
If the status code is not 2XX, the request fails. The body contains a String type `message` field that describes the specific reason for the failed.
```json
{
"reason": "Resource is not found and destroyed."
}
```
**Media Push without transcoding**
If the status code is 2XX, the request is successful. The field structure is shown in the following figure:
Details of these fields are shown in the following table:
| Field name | Category | Description |
| :---------------------- | :---------- | :------------------------------------------------------------------------------------------------------------------------------------------------------------------------------------------------------------------------------------------------------------------------------------------------------- |
| name | String | The name of the Converter. |
| rawOptions | JSON Object | Media Push configuration for the Converter. |
| rawOptions.rtcChannel | String | The Agora channel name. The channel to which the stream processed by the Converter belongs. |
| rawOptions.rtcStreamUid | Number | The UID of the user to which the media stream belongs. |
| rtmpUrl | String | The CDN streaming address. |
| idleTimeOut | Number | The maximum time (s) that the Converter is idle. Idle means that all users of the corresponding media streams processed by the Converter have left the channel. When the Converter is in the idle state for longer than `idleTimeout`, the Converter is automatically destroyed and the streaming stops. |
### Response example
**Custom layout for Media Push with transcoding**
If the status code is 2XX, the request is successful.
```json
{
"name": "show68_vertical",
"transcodeOptions": {
"rtcChannel": "show68",
"audioOptions": {
"codecProfile": "HE-AAC",
"sampleRate": 48000,
"bitrate": 128,
"audioChannels": 1,
"rtcStreamUids": [
201
]
},
"videoOptions": {
"canvas": {
"width": 360,
"height": 640,
"color": 0
},
"layout": [
{
"rtcStreamUid": 201,
"region": {
"xPos": 0,
"yPos": 0,
"zIndex": 1,
"width": 360,
"height": 320
},
"fillMode": "fill",
"placeholderImageUrl": "http://example.agora.io/host_placeholder.jpg"
},
{
"rtcStreamUid": 202,
"region": {
"xPos": 0,
"yPos": 320,
"zIndex": 1,
"width": 360,
"height": 320
}
},
{
"imageUrl": "http://example.agora.io/watchmark.jpg",
"region": {
"xPos": 0,
"yPos": 0,
"zIndex": 2,
"width": 36,
"height": 64
},
"fillMode": "fit"
}
],
"codec": "H.264",
"codecProfile": "High",
"frameRate": 15,
"gop": 30,
"bitrate": 400,
"seiOptions": {}
}
},
"rtmpUrl": "rtmp://example.agora.io/live/show68",
"idleTimeout": 300,
"createTs": 1616946970,
"updateTs": 1783656785,
"state": "running"
}
```
**Vertical layout for Media Push with transcoding**
If the status code is 2XX, the request is successful.
```json
{
"name": "show68_vertical",
"transcodeOptions": {
"rtcChannel": "show68",
"audioOptions": {
"codecProfile": "HE-AAC",
"sampleRate": 48000,
"bitrate": 128,
"audioChannels": 1,
"rtcStreamUids": [
201
]
},
"videoOptions": {
"canvas": {
"width": 360,
"height": 640,
"color": 0
},
"layout": [
{
"rtcStreamUid": 201,
"region": {
"xPos": 0,
"yPos": 0,
"zIndex": 1,
"width": 360,
"height": 640
},
"fillMode": "fill",
"placeholderImageUrl": "http://example.agora.io/host_placeholder.jpg"
}
],
"codec": "H.264",
"codecProfile": "high",
"frameRate": 15,
"gop": 30,
"bitrate": 400,
"layoutType": 1,
"vertical": {
"maxResolutionUid": 201,
"fillMode": "fill",
"refreshIntervalSec": 4
},
"defaultPlaceholderImageUrl": "http://example.agora.io/host_placeholder.jpg",
"seiOptions": {
"source": {
"metadata": true,
"datastream": true,
"customized": {
"payload": "example"
}
},
"sink": {
"type": 100
}
}
}
},
"rtmpUrl": "rtmp://example.agora.io/live/show68",
"idleTimeout": 300
}
```
**Media Push without transcoding**
```json
{
"converter": {
"name": "wX8210Ce1VWVyGVHyaHA0W",
"rawOptions": {
"rtcChannel": "example",
"rtcStreamUid": XXXX
},
"rtmpUrl": "rtmp://vid-218.push.chinanetcenter.broadcastapp.agora.io/live/global",
"idleTimeout": 120
}
}
```
## List: Query the Converters of all or specified channels under a project
### HTTP request
* Query all Converters under a project: `GET https://api.agora.io/v1/projects/{appId}/rtmp-converters`
* Query the Converter of a specified channel under a project: `GET https://api.agora.io/v1/projects/{appId}/channels/{cname}/rtmp-converters`
#### Path parameter
* `appId`: (Required) String. The App ID provided by Agora. You can get an App ID after creating a project in the Agora console. An App ID is the unique identification of a project.
* `cname`: (Required) String. The Agora channel name. This is the channel to which the stream processed by the Converter belongs. The maximum length of the string is 64 characters, and the following character sets (89 characters in total) are supported:
* All lowercase English letters (a-z)
* All uppercase English letters (A-Z)
* Numbers 0-9 and the space character
* "!", "#", "$", "%", "&", "(", ")", "+", "-", ":", ";", "\<", "=", ".", ">", "?", "@", "\[", "]", "^", "\_", " \{", "}", "|", "\~", ","
#### Query Parameters
`cursor`: (Optional) String. Cursor for paging query Converters. The value must be greater than or equal to 0.
> * You do not need to set the cursor when you initiate a `List` request for the first time. After the request is successful, the list of Converters on the first page return.
> * Each request returns information about a maximum of 500 Converters. If the number of Converters under the project exceeds 500, get the `cursor` from the response body, and pass the `cursor` in the URL of the next request. Until the value of the `cursor` field in the response body is `0`, it means that all Converters under the project or the specified channel have been queried.
The HTTPS URL using Query Parameters is as follows:
* Query all Converters under a project: `GET https://api.agora.io/v1/projects/{appId}/rtmp-converters?cursor={cursor}`
* Query the Converter of a specified channel under a project: `GET https://api.agora.io/v1/projects/{appId}/channels/{cname}/rtmp-converters?cursor={cursor}`
#### Request header
* `Content-Type`: `application/json`
* `Authorization`: The value of this field must refer to the [Authentication instructions](./restful-authentication).
* `X-Request-ID`: The UUID (Universal Unique Identifier) that identifies this **request**. Agora server generates a UUID to pass in and returns `X-Request-ID` field in the response header.
> Agora recommends that you assign a value to `X-Request-ID`. Agora server returns an `X-Custom-Request-ID` field in the response header for troubleshooting.
### HTTP response
All possible response status codes. See [Status codes](#status-codes) for details.
#### Response header
`X-Request-ID`: The UUID (Universal Unique Identifier) that identifies this request. This value is the same as the X-Request-ID in the header of this request. If there is an error in the request, print out the value in the log to troubleshoot the problem.
> If the response status code of this request is not 2XX, this field may be missing from the response header.
#### Response body
If the status code is 2XX, the request is successful. The field structure is shown in the following figure:
Details for these fields are shown in the following table:
| Field | Type | Descriptions |
| :--------------------------- | :---------- | :--------------------------------------------------------------------------------------------------------------------------------------------------------------------------------------------------------------- |
| `success` | Bool | The request was successful. |
| `data` | JSON Object | Returns data details. |
| `data.total_count` | String | The number of all Converters under the queried project or channel. |
| `data.cursor` | JSON | Cursor for paging query Converter information list. If the cursor is `0`, it means that all Converters under the project or the specified channel have been queried; otherwise, the query needs to be continued. |
| `data.members.rtcChannel` | String | The Agora channel name. This is the channel to which the stream processed by the Converter belongs. |
| `data.members.converterName` | String | The name of the Converter. |
| `data.members.updateTs` | Number | The Unix timestamp(seconds) when the Converter configuration was last updated. |
| `data.members.appId` | String | The **App ID** provided by Agora. You can get an App ID after creating a project in the Agora console. An App ID is the unique identification of a project. |
| `data.members.rtmpUrl` | String | The CDN streaming address. |
| `data.members.converterId` | String | The **ID** of the Converter. The unique identifier for the Converter. |
| `data.members.create` | Number | The Unix timestamp(seconds) when the Converter was created. |
| `data.members.idleTimeout` | Number | The maximum time (seconds) that the Converter is idle. Idle means that all users corresponding to the media stream processed by the Converter have left the channel. |
| `data.members.state` | String | The running status of the Converter:- `connecting`: Connecting to the Agora streaming server and the CDN server.
- `running`: Pushing the stream.
- `failed`: Failed to push the stream. |
### Response example
```json
{
"success": true,
"data": {
"total_count": 1,
"cursor": 0,
"members": [
{
"rtcChannel": "testchannel",
"status": "200",
"converterName": "wX8210XXXXWVyGVHyaHA0W",
"updateTs": "1641267823",
"appId": "abc123xxxxxxxxxxxxxxxxxxxxxxxxx",
"rtmpUrl": "rtmp://example/live/areu",
"ip": "183.131.160.244",
"converterId": "889B6D4BEC4XXXXE68CCDA978BF21350",
"create": "1641267818",
"idleTimeout": "120",
"state": "running"
}
]
}
}
```
## API call rate limits
The Agora server limits the call rate for the Media Push API by method. When a call rate exceeds its limit, the status code `429 (Too Many Requests)` is returned. If you need a higher call rate, please contact technical support.
| API | Rate limits |
| :------- | :--------------------------------------------------------------------------------------------------------------- |
| `Create` | In a project, the rate limit for the rate of creating a Converter is 50 times per second. |
| `Delete` | In a project, the rate limit for the converter destruction is 50 times per second. |
| `Update` | In a project, the rate limit for the rate of updating a specified Converter is 2 times per second. |
| `Get` | In a project, the rate limit for the rate of getting the status of a specified Converter is 50 times per second. |
## Status codes
* If the status code is 2XX, the request is successful.
* If the status code is not 2XX, the request fails. Please troubleshoot the problem based on the content of the `message` field in the corresponding response message Body.
| Status codes | Possible message field content |
| :---------------------- | :---------------------------------------------------------------------------------------------------------------------------------------------------------------------------------------- |
| 200 OK | / |
| 400 Bad Request | - Invalid parameter: rtmpUrl. Replace it, and retry.
- Invalid parameter: idleTimeout. Replace it, and retry. |
| 401 Unauthorized | Invalid authentication credentials. |
| 403 Forbidden | The project lacks permission to use this function. Contact [Agora technical support](mailto\:support@agora.io). |
| 404 Not Found | Resource cannot be found/has been destroyed. |
| 409 Conflict | Resource with the same name already exists. Use the existing resource; otherwise, delete it, and create a new resource. |
| 429 Too Many Requests | Request rate limit exceeded.Resource quota limit exceeded.No available resources. |
| 500 Unknown | Internal errors. Contact Agora for assistance with troubleshooting. |
| 501 Not Implemented | The method requested has not been implemented. |
| 503 Service Unavailable | The server is temporarily overloading. Retry with a backoff strategy and contact Agora for assistance with troubleshooting.The server is temporarily down. Retry with a backoff strategy. |
| 504 Gateway Timeout | Gateway timeout. Check whether the resource is created; if not, re-create a new resource. |
## Consideration
This section summarizes the basic considerations for using the Media Push RESTful API:
* Please make sure that the Agora channel profile is live broadcasting.
* In case of request errors, make sure to print the values of the `X-Request-ID` and `X-Resource-ID` fields in the response header for troubleshooting.
* As explained in the name description, you should use the name parameter if only one Converter is needed in a channel.
* Set the `region` parameter to the region associated with the CDN source, as explained in the `region` parameter description.
* If the Converter is automatically destroyed due to a service failure or other reasons, Agora recommends that you create a new Converter.
* If the CDN side's pulling stream is abnormal after creating a Converter, Agora recommends that you delete the Converter and create a new one.
* When updating the same Converter multiple times, ensure that the `sequence` value is incremented, as explained in the `sequence` parameter description.
* Agora does not support performing both transcoding and non-transcoding live streaming in the same Converter. To use a different streaming mode, create a new Converter and configure it accordingly.
* In non-transcoding mode, the Converter can only forward video streams with RTMP, not transcode video streams. To ensure that CDN audiences can watch the video, use video codec formats that comply with the RTMP standard protocol, such as H.264 or H.265. If the video codec format at the streaming end is VP8, use the Converter's transcoding mode.
For more integration recommendations, see [Integration Best Practices](./integration-best-practices).
## Commonly used video profile
Agora recommends that you use the default values when setting the video resolution, frame rate, and bitrate of the output transcoded stream. You can also refer to the following table to set the values. If you set a bitrate beyond a reasonable range, the Agora server automatically adjusts the bitrate to stay within a reasonable range.
| Resolution | Frame rate (fps) | Bitrate (Kbps) |
| :--------- | :--------------- | :------------- |
| 160 × 120 | 15 | 130 |
| 120 × 120 | 15 | 100 |
| 320 × 180 | 15 | 280 |
| 180 × 180 | 15 | 200 |
| 240 × 180 | 15 | 240 |
| 320 × 240 | 15 | 400 |
| 240 × 240 | 15 | 280 |
| 424 × 240 | 15 | 440 |
| 640 × 360 | 15 | 800 |
| 360 × 360 | 15 | 520 |
| 640 × 360 | 30 | 1200 |
| 360 × 360 | 30 | 800 |
| 480 × 360 | 15 | 640 |
| 480 × 360 | 30 | 980 |
| 640 × 480 | 15 | 1000 |
| 480 × 480 | 15 | 800 |
| 640 × 480 | 30 | 1500 |
| 480 × 480 | 30 | 1200 |
| 848 × 480 | 15 | 1220 |
| 848 × 480 | 30 | 1860 |
| 640 × 480 | 10 | 800 |
| 1280 × 720 | 15 | 2260 |
| 1280 × 720 | 30 | 3420 |
| 960 × 720 | 15 | 1820 |
| 960 × 720 | 30 | 2760 |
# RESTful authentication (/en/api-reference/api-ref/media-push/restful-authentication)
Media Push RESTful API requires REST authentication.
The following REST authentication methods are available:
* **Basic HTTP authentication**
Generate a Base64-encoded credential with the [customer ID and customer secret](#generate-customer-id-and-customer-secret) provided by Agora and pass the credential with the `Authorization` parameter in the request header.
Implement authentication on the server to mitigate the risk of data leakage.
## Implement basic HTTP authentication
### Generate Customer ID and Customer Secret
To generate a Customer ID and Customer Secret, do the following:
1. In [Agora Console](https://console.agora.io), click the username at the bottom of the navigation sidebar to open the account menu, then select **RESTful API Keys**.

2. Select **Create API Key**. A Customer ID and Customer Secret are generated.
3. Select **Download** and save the file somewhere secure — you can download it only once. In the file, **Key** is your Customer ID and **Secret** is your Customer Secret.
4. Use the Customer ID (**Key**) and Customer Secret (**Secret**) to generate a Base64-encoded credential, and pass it to the `Authorization` parameter in the HTTP request header.
### Generate an authorization header using a third-party tool
For testing and debugging, you can use a [third-party online tool](https://www.debugbear.com/basic-auth-header-generator) to quickly generate your Authorization header. Enter your Customer ID as the Username and your Customer Secret as the Password. Your generated header should look like this::
```text
Authorization: Basic NDI1OTQ3N2I4MzYy...YwZjA=a
```
### Basic authentication sample code
The following sample code implements basic HTTP authentication and sends a RESTful API request to get the basic information of all your current Agora projects.
The Agora RESTful API only supports HTTPS with TLS 1.0, 1.1, or 1.2 for encrypted communication. Requests over plain HTTP are not supported and will fail to connect.
```go
package main
import (
"fmt"
"strings"
"net/http"
"io/ioutil"
"encoding/base64"
)
// HTTPS basic authentication example in Golang using the RTC SDK Server RESTful API
func main() {
// Customer ID
customerKey := "Your customer ID"
// Customer secret
customerSecret := "Your customer secret"
// Concatenate customer key and customer secret and use base64 to encode the concatenated string
plainCredentials := customerKey + ":" + customerSecret
base64Credentials := base64.StdEncoding.EncodeToString([]byte(plainCredentials))
url := "https://api.agora.io/dev/v1/projects"
method := "GET"
payload := strings.NewReader(``)
client := &http.Client {
}
req, err := http.NewRequest(method, url, payload)
if err != nil {
fmt.Println(err)
return
}
// Add Authorization header
req.Header.Add("Authorization", "Basic " + base64Credentials)
req.Header.Add("Content-Type", "application/json")
// Send HTTP request
res, err := client.Do(req)
if err != nil {
fmt.Println(err)
return
}
defer res.Body.Close()
body, err := ioutil.ReadAll(res.Body)
if err != nil {
fmt.Println(err)
return
}
fmt.Println(string(body))
}
```
```js
// HTTP basic authentication example in node.js using the RTC SDK Server RESTful API
const https = require('https')
// Customer ID
const customerKey = "Your customer ID"
// Customer secret
const customerSecret = "Your customer secret"
// Concatenate customer key and customer secret and use base64 to encode the concatenated string
const plainCredential = customerKey + ":" + customerSecret
// Encode with base64
encodedCredential = Buffer.from(plainCredential).toString('base64')
authorizationField = "Basic " + encodedCredential
// Set request parameters
const options = {
hostname: 'api.agora.io',
port: 443,
path: '/dev/v1/projects',
method: 'GET',
headers: {
'Authorization':authorizationField,
'Content-Type': 'application/json'
}
}
// Create request object and send request
const req = https.request(options, res => {
console.log(`Status code: ${res.statusCode}`)
res.on('data', d => {
process.stdout.write(d)
})
})
req.on('error', error => {
console.error(error)
})
req.end()
```
```php
'https://api.agora.io/dev/v1/projects',
CURLOPT_RETURNTRANSFER => true,
CURLOPT_ENCODING => '',
CURLOPT_MAXREDIRS => 10,
CURLOPT_TIMEOUT => 0,
CURLOPT_FOLLOWLOCATION => true,
CURLOPT_HTTP_VERSION => CURL_HTTP_VERSION_1_1,
CURLOPT_CUSTOMREQUEST => 'GET',
CURLOPT_HTTPHEADER => [
$authHeader,
'Content-Type: application/json',
],
]);
// Execute cURL request
$response = curl_exec($curl);
// Check for cURL errors
if ($response === false) {
echo "Error in cURL: " . curl_error($curl);
} else {
// Output the response
echo $response;
}
// Close cURL session
curl_close($curl);
?>
```
```python
# -- coding utf-8 --
# Python 3
# HTTP basic authentication example in python using the RTC SDK Server RESTful API
import base64
import http.client
# Customer ID
customer_key = "Your customer ID"
# Customer secret
customer_secret = "Your customer secret"
# Concatenate customer key and customer secret and use base64 to encode the concatenated string
credentials = customer_key + ":" + customer_secret
# Encode with base64
base64_credentials = base64.b64encode(credentials.encode("utf8"))
credential = base64_credentials.decode("utf8")
# Create connection object with basic URL
conn = http.client.HTTPSConnection("api.agora.io")
payload = ""
# Create Header object
headers = {}
# Add Authorization field
headers['Authorization'] = 'basic ' + credential
headers['Content-Type'] = 'application/json'
# Send request
conn.request("GET", "/dev/v1/projects", payload, headers)
res = conn.getresponse()
data = res.read()
print(data.decode("utf-8"))
```
```java
import java.io.IOException;
import java.net.URI;
import java.net.http.HttpClient;
import java.net.http.HttpRequest;
import java.net.http.HttpResponse;
import java.util.Base64;
// HTTP basic authentication example in Java using the RTC SDK Server RESTful API
public class Base64Encoding {
public static void main(String[] args) throws IOException, InterruptedException {
// Customer ID
final String customerKey = "Your customer ID";
// Customer secret
final String customerSecret = "Your customer secret";
// Concatenate customer key and customer secret and use base64 to encode the concatenated string
String plainCredentials = customerKey + ":" + customerSecret;
String base64Credentials = new String(Base64.getEncoder().encode(plainCredentials.getBytes()));
// Create authorization header
String authorizationHeader = "Basic " + base64Credentials;
HttpClient client = HttpClient.newHttpClient();
// Create HTTP request object
HttpRequest request = HttpRequest.newBuilder()
.uri(URI.create("https://api.agora.io/dev/v1/projects"))
.GET()
.header("Authorization", authorizationHeader)
.header("Content-Type", "application/json")
.build();
// Send HTTP request
HttpResponse response = client.send(request,
HttpResponse.BodyHandlers.ofString());
System.out.println(response.body());
}
}
```
```csharp
using System;
using System.IO;
using System.Net;
using System.Text;
// HTTP basic authentication example in C# using the RTC SDK Server RESTful API
namespace Examples.System.Net
{
public class WebRequestPostExample
{
public static void Main()
{
// Customer ID
string customerKey = "Your customer ID";
// Customer secret
string customerSecret = "Your customer secret";
// Concatenate customer key and customer secret and use base64 to encode the concatenated string
string plainCredential = customerKey + ":" + customerSecret;
// Encode with base64
var plainTextBytes = Encoding.UTF8.GetBytes(plainCredential);
string encodedCredential = Convert.ToBase64String(plainTextBytes);
// Create authorization header
string authorizationHeader = "Authorization: Basic " + encodedCredential;
// Create request object
WebRequest request = WebRequest.Create("https://api.agora.io/dev/v1/projects");
request.Method = "GET";
// Add authorization header
request.Headers.Add(authorizationHeader);
request.ContentType = "application/json";
WebResponse response = request.GetResponse();
Console.WriteLine(((HttpWebResponse)response).StatusDescription);
using (Stream dataStream = response.GetResponseStream())
{
StreamReader reader = new StreamReader(dataStream);
string responseFromServer = reader.ReadToEnd();
Console.WriteLine(responseFromServer);
}
response.Close();
}
}
}
```
# RESTful API type definition (/en/api-reference/api-ref/media-push/restful-type-definition)
This page lists all the type definitions of the Media Push RESTful API.
## audioOptions
The audio transcoding configuration of the Converter.
| Field | Type | Descriptions |
| :--------------------- | :------------------------------- | :------------------------------------------------------------------------------------------------------------------------------------------------------------------------------------------------------------------------------------------------------------------------------------------------------------------------------------------------------------------------------------------------ |
| `codecProfile` | (Optional) String | The audio codec output by the Converter. The following values are supported:- `LC-AAC` (Default): MPEG-4 AAC LC
- `HE-AAC`: High-Efficiency AAC |
| `sampleRate` | (Optional) Number | The audio coding sampling rate (Hz) output by the Converter, which can be `32000`, `44100,` or `48000 `(Default value). |
| `bitrate` | (Optional) Number | The audio encoding bit rate (Kbps) output by the Converter. The value range is \[32,128]. The default value is 48. If the audio codec is LC-AAC, the recommended audio code rate range is \[32,112]. If the audio codec is HE-AAC, the recommended audio code rate range is \[40,96]. |
| `audioChannels` | (Optional) Number | The number of audio channels output by the Converter, which can be `1` (Default) or `2`. |
| `rtcStreamUids` | (Optional) JSON Array of Numbers | The user IDs of the users participating in the mixing.- The default value is user IDs of all users in the channel, which means that Agora mixes all users's audio streams in the channel.
- An empty array means that Agora does not mix any user's audio streams. |
| `volumes` | (Optional) JSON Array | Set the volume of users participating in the mixing.- This field takes effect only when mixing user IDs are specified (set `rtcStreamUids`).
- You can call the [`Update`](./index#update-update-the-converter) method to adjust the volume of the specified user. Each time the `Update` request is successful, the volume of other users in the mixing is reseted to the default value (`100`). |
| `volumes.rtcStreamUid` | Number | The user IDs of the mixing users to set the volume.
`volumes.rtcStreamUid` needs to exist in the `rtcStreamUids` array, otherwise the request `fails` with a response status code of `400`.
|
| `volumes.volume` | Number | The volume of the specified mix user. The default value is `100`, and the value range is \[0, 200]. |
## videoOptions
The video transcoding configuration of the Converter.
### canvas
The video canvas.
| Field | Type | Descriptions |
| :------- | :---------------- | :--------------------------------------------------------------------------------------------------------------------------------------------------------------------------------------------------------- |
| `width` | (Required) Number | The width of the canvas (pixels). The value range is \[66,1920]. |
| `height` | (Required) Number | The height of the canvas (pixels). The value range is \[66,1920]. |
| `color` | (Optional) Number | The background color of the canvas. This is an RGB color value, expressed as a decimal number. For example, 255 represents blue. The value range is \[0,16777215]. The default value is 0, which is black. |
### layout
The content description of the video screen on the canvas.
#### layout.RtcStreamView
The video screen of each user on the canvas.
| Field | Type | Descriptions |
| :-------------------- | :--------------------- | :------------------------------------------------------------------------------------------------------------------------------------------------------------------------------------------------------------------------------------------------------------------------------------------------------------------------------------------------------------------------------------------------------ |
| `rtcStreamUid` | (Required) Number | The user ID of the user to which the video stream belongs. |
| `region` | (Required) JSON Object | The display area of the user's video screen on the canvas. If the video screen dimensions exceed the canvas, the screen will be cropped, and the excess image will not be displayed. |
| `region.xPos` | (Required) Number | The x coordinate (pixels) of the screen on the canvas. This is the lateral displacement relative to the origin, where the upper left corner of the canvas is the origin, and the x coordinate is the upper left corner of the screen. |
| `region.yPos` | (Required) Number | The y coordinate (pixels) of the screen on the canvas. This is the longitudinal displacement relative to the origin, where the upper left corner of the canvas is the origin, and the y coordinate is the upper left corner of the screen. |
| `region.zIndex` | (Required) Number | The layer number of the screen. The value range is \[0,100]. `0` represents the lowest layer. `100` represents the top layer. |
| `region.width` | (Required) Number | The width of the screen (pixels). |
| `region.height` | (Required) Number | The height of the screen (pixels). |
| `fillMode` | (Optional) String | The display types of the screen.- `fill`: (Default) Under the premise of maintaining the aspect ratio, zoom the screen to fill the container. 
- `fit`: Zoom the screen while maintaining the aspect ratio so that the screen is in the container Full display.  |
| `placeholderImageUrl` | (Required) String | The HTTP(S) URL of the substitute image. Images in JPG, PNG and GIF formats are supported. When the user in the channel does not publish the video stream, if this field is set, this substitute image will replace the user's video screen; otherwise, the last frame of the user's video will be displayed. |
#### layout.ImageView
The video image on the canvas, which can be used as a watermark.
| Field | Type | Descriptions |
| :-------------- | :--------------------- | :------------------------------------------------------------------------------------------------------------------------------------------------------------------------------------------------------------------------------------------------------------------------------------------------------------------------------------------------------------------------------------------- |
| `imageUrl` | (Required) String | The HTTP(S) URL of the image. Images in JPG, PNG and GIF formats are supported. |
| `region` | (Required) JSON Object | The display area of the image on the canvas. If the video screen dimensions exceed the canvas, the screen will be cropped, and the excess image will not be displayed. |
| `region.xPos` | (Required) Number | The x coordinate (pixels) of the image on the canvas. This is the lateral displacement relative to the origin, where the upper left corner of the canvas is the origin, and the x coordinate is the upper left corner of the screen. |
| `region.yPos` | (Required) Number | The y coordinate (pixels) of the picture on the canvas. This is the longitudinal displacement relative to the origin, where the upper left corner of the canvas is the origin and the y coordinate is the upper left corner of the screen. |
| `region.zIndex` | (Required) Number | The layer number of the image. The value range is \[0,100]. `0` represents the lowest layer. `100` represents the top layer. |
| `region.width` | (Required) Number | The width of the image (pixels). |
| `region.height` | (Required) Number | The height of the image (pixels). |
| `fillMode` | (Optional) String | The display types of the image.- `fill`: Under the premise of maintaining the aspect ratio, zoom the image so that the image fills the container. 
- `fit`: zoom the image while maintaining the aspect ratio so that the image is in the container Full display.  |
### vertical
Vertical layout. The field is optional.
See [Set Vertical Layout](./set-vertical-layout).
| Field | Type | Descriptions |
| :----------------- | :----- | :-------------------------------------------------------------------------------------------------------------------------------------------------------------------------------------------------------------------------------------------------------------------------------------------------------------------------------------------------------------------------------------------------------------------------------------------------------------------------------------------------------- |
| `maxResolutionUid` | Number | The user ID of the user who is displayed in the large window. If `maxResolutionUid` is not set, the user with the loudest volume when the layout refreshes is displayed in the large window.- By default, the screen layout is refreshed every 3 seconds. Contact [support@agora.io](mailto\:support@agora.io) if you need to adjust the refresh interval.
- Not setting `maxResolutionUid` may cause the screen layout to change every 3 seconds. If the layout needs to be stable, set this parameter. |
| `fillMode` | String | The display options of the screen:- `fill`: (Default) Zoom the image to fill the window completely while maintaining the aspect ratio of the image.
- `fit`: Zoom the image only until it fills the window vertically or horizontally, displaying the entire image while possibly leaving some of the window blank.  |
### seiOptions
The user SEI information carried in the output video stream. The field is optional.
| Field | Type | Descriptions |
| :------------------------------------ | :---------- | :------------------------------------------------------------------------------------------------------------------------------------------------------------------------------------------------------------------------------------------------------------ |
| `source` | JSON Object | Set the data source of SEI information. The default value is empty. |
| `source.metadata` | Bool | Set whether to pass in metadata-type SEI information.- `true`: Metadata-type SEI information is passed in.
- (Default) `false`: Metadata-type SEI information is not passed in. |
| `source.datastream` | Bool | Set whether to pass in Agora Datastream-type SEI information type.- true: Agora Datastream-type SEI information is passed in.
- (Default) false: Agora Datastream-type SEI information is not passed in. |
| `source.customized` | JSON Object | Custom SEI information. Custom SEI information is converted into [Agora SEI information](./sei-information). The default value is empty. |
| `source.customized.prefixForAgoraSei` | String | Set the payload prefix of SEI information. The maximum length is 32 characters, and the default value is blank. |
| `source.customized.payload` | String | Set the payload of the SEI information. The maximum length is 4096 characters, and the default value is blank. When the SEI information is converted into [Agora SEI information](./sei-information), the payload is corresponds to the app\_data of the SEI. |
| `sink` | JSON Object | Set the attributes of the output SEI information. The default value is empty. |
| `sink.type` | Int | Set the payload type of the output SEI information. The default value is 100. |
# On-Premise Recording Overview (/en/api-reference/api-ref/on-premise-recording)
The detailed On-Premise Recording SDK API reference is published as hosted references.
Use the reference entry points here:
* [On-Premise Recording SDK API reference (Linux C++)](https://api-ref.agora.io/en/on-premise-recording-sdk/linux-cpp/3.x/index.html)
* [On-Premise Recording SDK API reference (Linux Java)](https://api-ref.agora.io/en/on-premise-recording-sdk/linux-java/3.x/index.html)
# API sunset notice (/en/api-reference/api-ref/rtc/api-sunset)
See the [API Sunset Notice](https://api-ref.agora.io/en/video-sdk/android/4.x/API/rtc_api_sunset.html) page in the Android API reference.
## Platform-specific versions
- [Android](/en/api-reference/api-ref/rtc/api-sunset/android.md)
- [iOS](/en/api-reference/api-ref/rtc/api-sunset/ios.md)
- [macOS](/en/api-reference/api-ref/rtc/api-sunset/macos.md)
# RESTful authentication (/en/api-reference/api-ref/rtc/authentication)
RTC REST APIs require Basic HTTP authentication. Generate a Base64-encoded credential with the customer ID and customer secret provided by Agora, then pass the credential in the `Authorization` request header.
Implement authentication on your server to reduce the risk of credential leakage.
## Generate a customer ID and customer secret
1. In [Agora Console](https://console.agora.io), click the username at the bottom of the navigation sidebar to open the account menu, then select **RESTful API Keys**.

2. Select **Create API Key**. Agora generates a customer ID and customer secret.
3. Select **Download** and save the file somewhere secure — you can download it only once. In the file, **Key** is your customer ID and **Secret** is your customer secret.
4. Use the customer ID (**Key**) and customer secret (**Secret**) to generate a Base64-encoded credential, then pass it to the `Authorization` request header.
## Authorization header
Concatenate the customer ID and customer secret with a colon, encode the result with Base64, then prefix it with `Basic`.
```text
Authorization: Basic
```
For testing and debugging, you can use a Basic Auth header generator. Enter the customer ID as the username and the customer secret as the password.
## Basic authentication examples
The following examples send a request to get all projects under your Agora account.
cURL
Node.js
Python
```bash
customer_key="Your customer ID"
customer_secret="Your customer secret"
authorization=$(printf "%s:%s" "$customer_key" "$customer_secret" | base64)
curl --request GET 'https://api.agora.io/dev/v1/projects' \
--header "Authorization: Basic $authorization" \
--header 'Content-Type: application/json'
```
```js
const https = require('https');
const customerKey = 'Your customer ID';
const customerSecret = 'Your customer secret';
const encodedCredential = Buffer.from(
`${customerKey}:${customerSecret}`,
).toString('base64');
const req = https.request(
{
hostname: 'api.agora.io',
port: 443,
path: '/dev/v1/projects',
method: 'GET',
headers: {
Authorization: `Basic ${encodedCredential}`,
'Content-Type': 'application/json',
},
},
(res) => {
console.log(`Status code: ${res.statusCode}`);
res.on('data', (chunk) => process.stdout.write(chunk));
},
);
req.on('error', console.error);
req.end();
```
```python
import base64
import http.client
customer_key = "Your customer ID"
customer_secret = "Your customer secret"
credential = base64.b64encode(
f"{customer_key}:{customer_secret}".encode("utf-8")
).decode("utf-8")
conn = http.client.HTTPSConnection("api.agora.io")
headers = {
"Authorization": f"Basic {credential}",
"Content-Type": "application/json",
}
conn.request("GET", "/dev/v1/projects", "", headers)
res = conn.getresponse()
print(res.read().decode("utf-8"))
```
# Ban user privileges best practices (/en/api-reference/api-ref/rtc/ban-user-privileges-best-practices)
This page describes how to use the privilege banning APIs, including usage principles, applicable use cases, inapplicable use cases, and exception handling best practices.
For endpoint details, see [Create a banning rule](create-ban-rule).
## Usage principles
Follow these principles when using privilege banning APIs:
* Do not make core business flows depend heavily on the privilege banning APIs.
* Do not let a REST API call failure affect core business flows.
## Applicable use cases
### Ban violating users
Revoke a user's right to join channels based on UID. Set `privileges` to `join_channel`, fill in `uid`, leave `cname` and `ip` empty, and set `time` to a value other than `0`.
For example, when you cannot completely ban a violating user through your business signaling, you can ban the user by UID.
The banning API can be used as a fallback for your business signaling system, but consider whether unbanning is required. Unbanning users is usually not integrated into the main service process, to prevent possible call failures from affecting service operation.
* Correct usage: A user files a complaint and their account is manually unbanned.
* Incorrect usage: A user is automatically unbanned the next time they join the channel. If the API call fails, the user might be unable to join.
### Ban user audio and video privileges
Ban a user's audio or video publishing privilege based on UID. Set `privileges` to `publish_audio` or `publish_video`, fill in `uid`, leave `cname` and `ip` empty, and set `time` to a value other than `0`.
For example, you can prevent a microphone from being used after it is left unattended by the streaming user.
Banning publishing privileges through this API is a sensitive operation. Use it as a backup measure after the user has been notified of a failure to disconnect. Consider the impact that a delayed or failed unban might have on the user's ability to use the microphone again, and set the ban time as short as possible.
### Kick a user out of a channel
Kick a user out of a channel based on channel name and UID. This takes the user offline, after which they can log in again. Set `privileges` to `join_channel`, fill in `cname` and `uid`, leave `ip` empty, and set `time` to `0`.
For example, if a host logs in from two devices simultaneously, both devices stream with the same `uid`, causing an exception. You can use this API to kick both devices offline, after which one device can reconnect.
A one-time kick with `time` set to `0` is a safer way to use this API. When the kick request reaches the edge node, if the SDK is disconnected from the edge node, the one-time kick fails. If the SDK reconnects to the edge node after you kick the user, call this API again.
### Disband a channel
When streaming ends, kick all users out of the channel by channel name. Set `privileges` to `join_channel`, fill in `cname`, leave `uid` and `ip` empty, and set `time` to `0`.
Using `cname` for a banning rule is equivalent to destroying a channel. Make sure this behavior meets your business requirements.
In this use case, use your own signaling to notify SDK clients to leave the channel after streaming ends. If business signaling cannot meet your needs, forced disbanding can be used as a fallback.
If the channel will not be reused, you can set a longer ban duration. If the channel will be reused after a certain period, make sure the channel ban ends before the next channel creation time. If the channel reuse time is unknown, kick users from the channel or set the ban time to 1 minute.
It is not recommended to set a long ban and call the unban API when the channel starts. If unbanning fails, users cannot join the channel.
### Ban illegal IPs
Prevent users from joining channels based on IP address. Set `privileges` to `join_channel`, fill in `ip`, leave `cname` and `uid` empty, and set `time` to a value other than `0`.
For example, when a service is attacked and you identify the source IP, you can use the `ip` field to ban it.
Using an IP address as a banning rule can affect other users accidentally, such as when multiple users share the same IP address.
## Inapplicable use cases
| Use case | Details | Reason |
| ---------------------------------------------------------- | ------------------------------------------------------------------------------------------------------ | -------------------------------------------------------------------------------------------------------------------------------------------------------------- |
| Use the banning API for user microphone management | Ban streaming privilege when the user is off the microphone, then restore it when the user is back on. | Real-time communication logic depends on the banning API. If unbanning fails, the user cannot send streams. |
| Use the banning API for user channel permission management | Ban the user's privilege to join when the user leaves, then restore it when they rejoin. | Real-time communication logic depends on the banning API. If unbanning fails, the user cannot join. Use a one-time kick to ensure the user leaves the channel. |
To better manage microphone seats and channel state, use RTC REST APIs together with Notifications. See [Channel event types](channel-event-types).
## Best practices for call exceptions
* **Timeout settings**: Set the client request timeout to more than 20 seconds. The minimum recommended timeout is 5 seconds. When retrying a timed-out request, increase the timeout to improve the success rate.
* **Retry the request**: Decide whether to retry after failure and determine the number of retries based on your business logic. When a request returns an error code greater than or equal to `500`, or the request times out, retry with gradually increasing wait intervals.
# Channel event types (/en/api-reference/api-ref/rtc/channel-event-types)
After you enable Agora Notifications, Agora sends channel event notification callbacks to your server using HTTPS `POST` requests. The data format is JSON, the character encoding is UTF-8, and the signature algorithm is HMAC/SHA1 or HMAC/SHA256.
This page describes the event types and payloads returned in channel event callbacks.
## Request parameters
### Request header
| Field | Description |
| -------------------- | ---------------------------------------------------------------------------------------------------------------------------------------------------------- |
| `Content-Type` | `application/json` |
| `Agora-Signature` | The signature value generated by Agora using the customer key and the HMAC/SHA1 algorithm. Use the customer key and HMAC/SHA1 to verify the signature. |
| `Agora-Signature-V2` | The signature value generated by Agora using the customer key and the HMAC/SHA256 algorithm. Use the customer key and HMAC/SHA256 to verify the signature. |
### Request body
| Field | Type | Description |
| ----------- | ----------- | -------------------------------------------------------------------------------------------------------------------------------------- |
| `noticeId` | String | Notification ID that identifies an event notification from the Agora service. |
| `productId` | Number | Business ID that identifies the real-time communication service. |
| `eventType` | Number | Event type. See [Channel event types](#channel-event-types). |
| `notifyMs` | Number | Unix timestamp in milliseconds when Agora sends the notification to your server. The value is updated when the notification is resent. |
| `sid` | String | Session ID. |
| `payload` | JSON Object | Event details. See [Channel event types](#channel-event-types). |
## Request example
```json
{
"noticeId": "2000001428:4330:107",
"productId": 1,
"eventType": 101,
"notifyMs": 1611566412672,
"payload": {}
}
```
## Channel event types
| Type | Name | Description |
| ----- | -------------------------------------------- | ------------------------------------------------------------------------ |
| `101` | `channel create` | Creates a channel. |
| `102` | `channel destroy` | Destroys a channel. |
| `103` | `broadcaster join channel` | In the live broadcasting profile, the host joins the channel. |
| `104` | `broadcaster leave channel` | In the live broadcasting profile, the host leaves the channel. |
| `105` | `audience join channel` | In the live broadcasting profile, an audience member joins the channel. |
| `106` | `audience leave channel` | In the live broadcasting profile, an audience member leaves the channel. |
| `107` | `user join channel with communication mode` | In the communication profile, a user joins the channel. |
| `108` | `user leave channel with communication mode` | In the communication profile, a user leaves the channel. |
| `111` | `client role change to broadcaster` | An audience member switches roles to become a host. |
| `112` | `client role change to audience` | A host switches roles to become an audience member. |
### `channel create`
The channel is created when the first user joins. The payload contains:
| Field | Type | Description |
| ------------- | ------ | -------------------------------------------------- |
| `channelName` | String | The channel name. |
| `ts` | Number | Unix timestamp in seconds when the event occurred. |
```json
{
"channelName": "test_webhook",
"ts": 1560396834
}
```
### `channel destroy`
The channel is destroyed when the last user leaves. The payload contains:
| Field | Type | Description |
| ------------- | ------ | ------------------------------------------------------------------------------------------------------------------------------------------------ |
| `channelName` | String | The channel name. |
| `ts` | Number | Unix timestamp in seconds when the event occurred. |
| `lastUid` | Number | The ID of the last user to leave the channel. If multiple users leave at the same time, Agora Notifications may return several `lastUid` values. |
```json
{
"channelName": "test_webhook",
"ts": 1560399999,
"lastUid": 12121212
}
```
### Join events
The following event types indicate that a user joined the channel:
* `103`: `broadcaster join channel`
* `105`: `audience join channel`
* `107`: `user join channel with communication mode`
Join event payloads can contain the following fields:
| Field | Type | Description |
| ------------- | ------ | ------------------------------------------------------------------------------------------------------------------------------ |
| `channelName` | String | The channel name. |
| `uid` | Number | The user ID in the channel. |
| `platform` | Number | Device platform: `1` Android, `2` iOS, `5` Windows, `6` Linux, `7` Web, `8` macOS, `0` Other platforms. |
| `clientType` | Number | Returned only when `platform` is `6`. Common values include `3` Local Server Recording, `8` applets, and `10` Cloud Recording. |
| `clientSeq` | Number | Serial number identifying the event order on the app client. |
| `ts` | Number | Unix timestamp in seconds when the event occurred. |
| `account` | String | The user ID. |
```json
{
"channelName": "test_webhook",
"uid": 12121212,
"platform": 1,
"clientSeq": 1625051030746,
"ts": 1560396843,
"account": "test"
}
```
### Leave events
The following event types indicate that a user left the channel:
* `104`: `broadcaster leave channel`
* `106`: `audience leave channel`
* `108`: `user leave channel with communication mode`
Leave event payloads can contain the following fields:
| Field | Type | Description |
| ------------- | ------ | ------------------------------------------------------------------------------------------------------- |
| `channelName` | String | The channel name. |
| `uid` | Number | The user ID in the channel. |
| `platform` | Number | Device platform: `1` Android, `2` iOS, `5` Windows, `6` Linux, `7` Web, `8` macOS, `0` Other platforms. |
| `clientType` | Number | Returned only when `platform` is `6`. |
| `clientSeq` | Number | Serial number identifying the event order on the app client. |
| `reason` | Number | Leave reason. See the reason table below. |
| `ts` | Number | Unix timestamp in seconds when the event occurred. |
| `duration` | Number | Time that the user stayed in the channel. |
| `account` | String | The user ID. |
| Reason | Description |
| ------ | ---------------------------------------------------------------------------------------------------------------------------------------------------------------------------- |
| `1` | The user left the channel normally. |
| `2` | The connection between the client and Agora timed out. |
| `3` | Permission issue. For example, the user was kicked out through REST APIs. |
| `4` | Internal reason on the Agora service. |
| `5` | The user switched to a new device, forcing the old device to leave. |
| `9` | The client has multiple IP addresses, so the SDK actively disconnects and reconnects. |
| `10` | Network connection issue, such as a socket connection error. |
| `12` | Token error or expired token. |
| `99` | Unknown network problem. |
| `999` | Abnormal user activity, such as frequent login and logout. Your app server should call [Create a banning rule](create-ban-rule) to remove the user from the current channel. |
| `0` | Other reasons. |
```json
{
"channelName": "test_webhook",
"uid": 12121212,
"platform": 1,
"clientSeq": 1625051030789,
"reason": 1,
"ts": 1560396943,
"duration": 600,
"account": "test"
}
```
### Client role change events
The following event types indicate that a user's live broadcasting role changed:
* `111`: `client role change to broadcaster`
* `112`: `client role change to audience`
Payloads contain:
| Field | Type | Description |
| ------------- | ------ | ------------------------------------------------------------ |
| `channelName` | String | The channel name. |
| `uid` | Number | The user ID in the channel. |
| `clientSeq` | Number | Serial number identifying the event order on the app client. |
| `ts` | Number | Unix timestamp in seconds when the event occurred. |
| `account` | String | The user ID. |
```json
{
"channelName": "test_webhook",
"uid": 12121212,
"clientSeq": 1625051035469,
"ts": 1560396834,
"account": "test"
}
```
# Ensure service reliability (/en/api-reference/api-ref/rtc/ensure-service-reliability)
To ensure high availability of REST services, Agora enables you to switch domain names when you experience service outage due to regional network failures.
## Switch the domain name
1. Set the primary domain name based on the location of your service server:
* If the DNS address of the service server is located outside mainland China, set the primary domain name to `api.agora.io`.
* If the DNS address of the service server is in mainland China, set the primary domain name to `api.sd-rtn.com`.
2. If your attempt to initiate a REST API request using the primary domain fails, use the following retry strategy:
* **Primary domain retry**: Retry using the same primary domain name.
* **Alternate domain retry**: If the current primary domain name is `api.sd-rtn.com`, use `api.agora.io` as the alternate domain name. If the current primary domain name is `api.agora.io`, use `api.sd-rtn.com` as the alternate domain name.
* **Adjacent domain retry**: If alternate domain retry fails, retry using a regional domain name adjacent to the current region.
For example, suppose your business server is located in Europe. You set the primary domain name to `api.agora.io`, and the business server resolves the primary domain to Germany. Germany is in Central Europe, corresponding to `api-eu-central-1.agora.io`. The adjacent region is Western Europe, so you can retry using `api-eu-west-1.agora.io` or `api-eu-west-1.sd-rtn.com`.
## Call frequency limit
For each Agora account, not each App ID, the maximum call frequency is:
* 20 times per second for each API that queries online channel information.
* 10 times per second for each other API.
If your call frequency exceeds this limit, see [How can I avoid being frequency limited when calling Agora Server RESTful APIs?](/en/api-reference/faq/integration/restful_api_call_frequency) to optimize your call frequency.
## Precautions
* To avoid exceeding the call frequency limit with retry requests, use a backoff strategy. For example, wait 1 second before the first retry, 3 seconds before the second retry, and 6 seconds before the third retry.
* If the request fails because of a network problem rather than DNS resolution, skip alternate domain retry and proceed to adjacent domain retry.
* Before switching to a regional domain name, make sure the REST service you call, such as Channel Management, is deployed in that region.
## Domain name table
| Primary domain name | Region domain name | Region |
| ------------------- | ------------------------------- | ---------------------- |
| `api.sd-rtn.com` | `api-us-west-1.sd-rtn.com` | Western United States |
| `api.sd-rtn.com` | `api-us-east-1.sd-rtn.com` | Eastern United States |
| `api.sd-rtn.com` | `api-ap-southeast-1.sd-rtn.com` | Southeast Asia Pacific |
| `api.sd-rtn.com` | `api-ap-northeast-1.sd-rtn.com` | Northeast Asia Pacific |
| `api.sd-rtn.com` | `api-eu-west-1.sd-rtn.com` | Western Europe |
| `api.sd-rtn.com` | `api-eu-central-1.sd-rtn.com` | Central Europe |
| `api.sd-rtn.com` | `api-cn-east-1.sd-rtn.com` | East China |
| `api.sd-rtn.com` | `api-cn-north-1.sd-rtn.com` | North China |
| `api.agora.io` | `api-us-west-1.agora.io` | Western United States |
| `api.agora.io` | `api-us-east-1.agora.io` | Eastern United States |
| `api.agora.io` | `api-ap-southeast-1.agora.io` | Southeast Asia Pacific |
| `api.agora.io` | `api-ap-northeast-1.agora.io` | Northeast Asia Pacific |
| `api.agora.io` | `api-eu-west-1.agora.io` | Western Europe |
| `api.agora.io` | `api-eu-central-1.agora.io` | Central Europe |
| `api.agora.io` | `api-cn-east-1.agora.io` | East China |
| `api.agora.io` | `api-cn-north-1.agora.io` | North China |
# How to call RESTful APIs (/en/api-reference/api-ref/rtc/how-to-call-api)
This page explains the structure of RTC REST API requests and how to call them correctly.
## Prerequisites
Before calling an API, make sure you have:
* An Agora App ID
* A customer ID
* A customer secret
## Request URL
The following is a sample request URL:
```text
https://api.agora.io/dev/v1/kicking-rule
```
* `https`: Agora uses HTTPS.
* `api.agora.io`: The Agora REST API host.
* `dev/v1/kicking-rule`: The resource path, including the API version and resource name.
The example is for reference only. Use the method and request URL documented on each endpoint page. Request URLs are case-sensitive.
## Request structure
A request consists of a request header and, when required, a request body.
The following example creates a banning rule by sending a `POST` request with the App ID, channel name, user ID, IP address, ban duration, and privilege list:
```bash
curl --location --request POST 'https://api.agora.io/dev/v1/kicking-rule' \
--header 'Content-Type: application/json' \
--header 'Accept: application/json' \
--header 'Authorization: ' \
--data '{
"appid": "4855xxxxxxxxxxxxxxxxxxxxxxxxeae2",
"cname": "channel1",
"uid": 589517928,
"ip": "123",
"time": 60,
"privileges": [
"join_channel"
]
}'
```
### Request header
The request header contains the following information:
* `Accept`: The response type the client can handle, such as `application/json`.
* `Authorization`: The Agora REST API requires HTTP authentication. Every request must include the `Authorization` field. See [RESTful authentication](authentication).
* `Content-Type`: The request body type, such as `application/json`.
### Request body
The request body contains the information sent to the server. For example, to create a banning rule, include the App ID, channel name, user ID, user IP, ban duration, and banned privileges. Request bodies are case-sensitive.
## Response
After you send the request, Agora returns a response status code and a response body. The Channel Management REST APIs do not define response headers.
### Response status code
The HTTP response status code can be one of the following:
* `200`: The request is successful.
* Other status codes: See [Response status codes](response-status-codes) to troubleshoot the problem.
### Response body
The response body contains the information returned by the server. For example, the response body for creating a banning rule includes the request status and rule ID:
```json
{
"status": "success",
"id": 1953
}
```
## Error handling
If a request fails, inspect the request and response with developer tools and troubleshoot based on the response status code. If the problem persists, contact [Agora technical support](mailto\:support@agora.io).
# Voice & Video Calling Management Overview (/en/api-reference/api-ref/rtc)
In addition to the SDK that you integrate into the app client, Agora provides server-side RESTful APIs to manage real-time audio and video channels.
This RTC REST API reference is the authoritative source for Channel Management REST APIs shared by Voice Calling, Video Calling, Broadcast Streaming, and Interactive Live Streaming. Product pages provide entry points and usage context; endpoint definitions live here.
## Key features and use cases
| Key feature | Description | Typical use cases |
| ------------------------------ | -------------------------------------------------------------------------------------------------- | ------------------------------------------------------------------------------------------------------------------------------------------------------------------ |
| Manage user privileges | Remove specified users from channels and prevent users from sending audio and video streams. | Unauthorized users appear in a live broadcast, users disrupt a room, signaling messages are hijacked, or abnormal offline states interfere with user list updates. |
| Query channel information | Query online channels, users in a channel, hosts in a channel, and the status of a specified user. | Sync channel status when the number of concurrent channels is limited, or query user lists and user status when real-time sync performance is not required. |
| Query notification service IPs | Retrieve Agora Notifications service IP addresses. | Maintain firewall allowlists for message notification callbacks. |
## API basics
All requests are sent to the host `api.agora.io`.
* **Authentication**: All APIs require [Basic Auth](authentication).
* **Request**: Request bodies use JSON.
* **Response**: Response bodies use JSON.
* **Base URL**: `https://api.agora.io`
All request URLs and request bodies are case-sensitive. Use HTTPS for every request.
## REST APIs
**Channel information**
* [Query the channel list](query-channel-list): Get the list of all channels under a specified project.
* [Query the user list](query-user-list): Get the users in a specified channel.
* [Query the host list](query-host-list): Get the hosts in a live-broadcasting channel.
* [Query the user status](query-user-status): Check whether a specified user is in a channel.
**User privilege banning**
* [Create a banning rule](create-ban-rule): Ban a user from joining a channel or publishing audio and video.
* [Delete a banning rule](delete-ban-rule): Delete a specified banning rule.
* [Get the banning rule list](get-ban-rule-list): Get all banning rules for a project.
* [Update the banning rule expiration](update-ban-expiration): Update the expiration time of a banning rule.
**Message notification service**
* [Query the IP address](query-ip-address): Retrieve the IP addresses of the Agora Notifications service.
## Supporting topics
* [How to call RESTful APIs](how-to-call-api)
* [RESTful authentication](authentication)
* [Response status codes](response-status-codes)
* [Channel event types](channel-event-types)
* [Ban user privileges best practices](ban-user-privileges-best-practices)
* [Ensure service reliability](ensure-service-reliability)
# Response status codes (/en/api-reference/api-ref/rtc/response-status-codes)
This page describes the response status codes returned by the RTC REST APIs.
If the status code is `200`, the request is successful. If not, troubleshoot the problem based on the `message` and `reason` fields that may appear in the response body.
For example, when a request fails, you might receive the following response:
```json
{
"message": "invalid appid"
}
```
## Status codes
| Response status code | Description | Recommended action |
| -------------------- | ------------------------------------------ | ----------------------------------------------------------------------------------------------------------------------------------------------------------- |
| `200` | The operation is successful. | No troubleshooting required. |
| `400` | Bad request. | Troubleshoot based on the `message` field in the response body. |
| `401` | Unauthorized. | Check that the authentication information is correct. Possible causes include an App ID that does not exist, or a customer ID and secret that do not match. |
| `403` | Access is forbidden. | The authorization information is incorrect. Contact [Agora technical support](mailto\:support@agora.io). |
| `404` | The requested resource could not be found. | Confirm that the requested URL and resource are correct. |
| `415` | Unsupported media type. | Make sure the `Content-Type` request header is set to `application/json`. |
| `429` | Too many requests. | Wait and retry. |
| `500` | Internal server error. | Use a backoff strategy for query requests, or contact [Agora technical support](mailto\:support@agora.io). |
If the problem is not solved after taking the recommended action, print the `X-Request-ID` and `X-Resource-ID` response header values and contact [Agora technical support](mailto\:support@agora.io).
## Troubleshooting example
A call to create a privilege banning rule returns `400 Bad Request`, and the `message` field is `invalid appid`.
This means that the App ID is invalid and rule creation failed. Get the App ID in [Agora Console](https://console.agora.io) and call the API again.
# RESTful authentication (/en/api-reference/api-ref/rtmp-gateway/authentication)
Media Gateway RESTful APIs require server-side authentication. Use the same
authentication scheme described in the product reference and pass the generated
`Authorization` header with each request.
## HTTP Basic authentication
Every time you send an HTTP request, pass a credential in the `Authorization`
request header.
Basic authentication is an HTTP authentication scheme. To use it, send requests
with an `Authorization` header that contains `Basic`, followed by a space and a
base64-encoded `username:password` string.
```text
Authorization: Basic ZGVtbzpwQDU1dzByZA==
```
## HTTP HMAC authentication
Every time you send an HTTP request, pass an API key in the `Authorization`
request header.
```text
Authorization: 123
```
## Related pages
* [Overview](index.mdx)
* [Create streaming key](create-streaming-key)
* [Query streaming list](query-streaming-list)
* [Create or reset template](create-reset-template)
# Media Gateway Overview (/en/api-reference/api-ref/rtmp-gateway)
The Media Gateway RESTful APIs provide server-side control over ingress
streaming keys, online stream sessions, flow configuration templates, and
notification service IP ranges.
## API basics
All requests are sent to the host `api.agora.io`.
* **Authentication**: Media Gateway REST APIs require
[RESTful authentication](authentication) for authentication.
* **Request**: Refer to the respective API examples.
* **Response**: The response content is in JSON format.
* **Base URL**: `https://api.agora.io/{region}/v1/projects/{appId}`
- All request URLs and request bodies are case-sensitive.
- Keep Media Gateway REST calls on the server side.
## REST APIs
**Streaming key APIs**
* [Create streaming key](create-streaming-key): Create a new streaming key for a channel and host UID.
* [Query streaming key](query-streaming-key): Get metadata for a streaming key.
* [Delete streaming key](delete-streaming-key): Revoke a streaming key.
**Online stream APIs**
* [Query streaming list](query-streaming-list): List current ingress streams.
* [Query streaming information](query-streaming-information): Query a stream by SID.
* [Force disconnect](force-disconnection): Disconnect an online stream by SID.
* [Mute or unmute streaming](mute-streaming): Toggle audio or video mute state.
**Template and notification APIs**
* [Create or reset template](create-reset-template): Create or reset a flow configuration template.
* [Update template](update-template): Update a flow configuration template.
* [Delete template](delete-template): Delete a flow configuration template.
* [Set global template](set-global-template): Set the default template for an app ID.
* [Query notification service IP address](query-ip-address): Retrieve callback IP ranges.
# Limitations (/en/api-reference/api-ref/rtmp-gateway/limitations)
This page describes the limitations applied to the Media Gateway service.
## API call limits
Agora servers limit the call rate of Media Gateway APIs and return `429 Too Many Requests` when the limit is exceeded. If you need higher call rates, contact [Agora technical support](mailto\:support@agora.io).
| API | Calling rate limit per project |
| :------- | :----------------------------- |
| `Create` | 50 per second. |
| `Delete` | 50 per second. |
| `Query` | 100 per second. |
| `Update` | 50 per second. |
## Maximum number of concurrent tasks
The concurrent stream limits are:
| Stream type | Limit |
| :----------------------------- | :---- |
| Streams with video transcoding | 10 |
| Streams without transcoding | 50 |
For higher quotas, contact [Agora technical support](mailto\:support@agora.io).
# Media Gateway event types (/en/api-reference/api-ref/rtmp-gateway/media-gateway-event-types)
After you enable the Agora message notification service, Agora sends channel event notifications to your server through HTTPS `POST` callbacks. When the callback request body contains `product_id: 10`, the event belongs to Media Gateway.
This page describes the Media Gateway event types returned in channel event callbacks.
## `live_stream_connected`
The gateway has received the RTMP or SRT stream and successfully entered the channel.
```json
{
"sid": "55df7402-8778-11ee-92ed-07ec2e86c928",
"region": "na",
"domain": "rtls-ingress-prod-na.agoramdn.com",
"streamKey": "7B***Qbs",
"rtcInfo": {
"channel": "123",
"uid": "1234"
},
"transcoding": {
"audio": {
"enabled": true,
"profile": 5
},
"video": {
"enabled": true,
"bitrate": 3800,
"fps": 30,
"height": 1080,
"width": 1920
}
},
"beginAt": "2023-11-21T02:27:31Z"
}
```
| Field | Type | Description |
| :------------ | :----- | :------------------------------------------------------------------------------------------------------------------------------------------------------------------------ |
| `sid` | String | The unique ID of each streaming session. |
| `region` | String | The server area that has received the pushed stream. |
| `streamKey` | String | The streaming key used by the stream. |
| `rtcInfo` | Object | RTC information, including `channel` and `uid`. When `channel` or `uid` is empty or `0` in the streaming key, this field stores the generated value used for this stream. |
| `transcoding` | Object | Transcoding configuration information used for streaming. |
| `beginAt` | String | The streaming start time in RFC 3339 format. |
This event is followed by a corresponding `live_stream_disconnected` event.
## `live_stream_disconnected`
The gateway has actively or passively disconnected and left the channel.
```json
{
"sid": "55df7402-8778-11ee-92ed-07ec2e86c928",
"region": "na",
"streamKey": "7B***Qbs",
"domain": "rtls-ingress-prod-na.agoramdn.com:1935",
"rtcInfo": {
"channel": "123",
"uid": "1234"
},
"streamStats": {
"inputAudioBytes": 281799,
"inputVideoBytes": 9244544,
"outputAudioBytes": 130000,
"outputVideoBytes": 6656704
},
"beginAt": "2023-11-21T02:27:31Z",
"endAt": "2023-11-21T03:27:31Z"
}
```
| Field | Type | Description |
| :------------ | :----- | :------------------------------------------------------------------------------------------------------------- |
| `sid` | String | The unique ID of each streaming session. |
| `region` | String | The server area that has received the pushed stream. |
| `streamKey` | String | The streaming key used by the stream. |
| `rtcInfo` | Object | RTC information, including `channel` and `uid`. |
| `streamStats` | Object | Stream statistics, including `inputAudioBytes`, `inputVideoBytes`, `outputAudioBytes`, and `outputVideoBytes`. |
| `beginAt` | String | The streaming start time in RFC 3339 format. |
| `endAt` | String | The streaming end time in RFC 3339 format. |
## `live_stream_aborted`
The gateway has received an RTMP or SRT stream but terminated it for some reason. This event may be sent individually or between `live_stream_connected` and `live_stream_disconnected`.
```json
{
"sid": "55df7402-8778-11ee-92ed-07ec2e86c928",
"region": "na",
"domain": "rtls-ingress-prod-na.agoramdn.com",
"streamKey": "7B***Qbs",
"rtcInfo": {
"channel": "123",
"uid": "1234"
},
"beginAt": "2023-11-21T02:27:31Z",
"errorCode": 100,
"reason": "invalid"
}
```
| Field | Type | Description |
| :---------- | :----- | :--------------------------------------------------- |
| `sid` | String | The unique ID of each streaming session. |
| `region` | String | The server area that has received the pushed stream. |
| `domain` | String | The domain used for streaming. |
| `streamKey` | String | The streaming key used by the stream. |
| `rtcInfo` | Object | RTC information, including `channel` and `uid`. |
| `beginAt` | String | The streaming start time in RFC 3339 format. |
| `errorCode` | Number | The stream termination error code. |
| `reason` | String | The error message. |
| `errorCode` | Description | Recommended action |
| :---------- | :------------------------------------------------------------------------------------------------- | :------------------------------------------------------------------------------------------------------------------------------------------------------ |
| `1` | Illegal `streamKey`, for example an empty `channelName` or unsupported characters. | Check the `streamKey` format, especially for locally generated keys. |
| `2` | Invalid `streamKey`, such as an expired or deleted key. | Create a new `streamKey` and try again. |
| `3` | No permission to use this `streamKey`, for example when the custom domain and app ID do not match. | Check whether the `streamKey` matches the domain name used for the push. |
| `4` | Number of concurrent streams exceeds the limit. | Wait and retry. |
| `5` | Conflict detected, for example pushing to the same channel at the same time. | If the streams are not being pushed at the same time, try again after 5 to 10 seconds. |
| `6` | Stream attribute exceeds the limit. Currently, this applies to bitrate only. | Check the streaming software configuration and lower the target bitrate. |
| `7` | Streaming without audio or video data for more than 10 seconds. | Check whether the last push exited abnormally, and then try again. |
| `8` | Failed to join the channel. | The `reason` field provides the specific error reason, for example `connect to rtc failed, reason:$N`. |
| `9` | Disconnected from the main network. | Try again several times. If the problem persists, contact technical support to confirm whether the app certificate provided during activation is valid. |
| `10` | Unknown internal service error. | Try again several times. If the problem persists, contact technical support. |
## `live_profile_updated`
Stream properties have been updated. For example, the first audio or video frame has been received, or the audio or video profile has changed.
```json
{
"sid": "55df7402-8778-11ee-92ed-07ec2e86c928",
"region": "na",
"domain": "rtls-ingress-prod-na.agoramdn.com",
"streamKey": "7B***Qbs",
"rtcInfo": {
"channel": "123",
"uid": "1234"
},
"videoProfile": {
"codec": "H.264",
"width": 1920,
"height": 1080,
"gop": 2000
},
"audioProfile": {
"sampleRate": 48000,
"channels": 2
},
"beginAt": "2023-11-21T02:27:31Z"
}
```
| Field | Type | Description |
| :------------- | :----- | :------------------------------------------------------------------------------------------------------- |
| `sid` | String | The unique ID of each streaming session. |
| `region` | String | The server area that has received the pushed stream. |
| `streamKey` | String | The streaming key used by the stream. |
| `rtcInfo` | Object | RTC information, including `channel` and `uid`. |
| `videoProfile` | Object | Video properties. Not applicable for audio-only streams. Includes `codec`, `width`, `height`, and `gop`. |
| `audioProfile` | Object | Audio properties, including `sampleRate` and `channels`. |
| `beginAt` | String | The streaming start time in RFC 3339 format. |
# Response status codes (/en/api-reference/api-ref/rtmp-gateway/response-status-codes)
After sending an HTTP request, the server returns a status code. Use the status code to determine whether the request succeeded and why a request might have failed.
* If the status code is `2XX`, the request was successful.
* If the status code is not `2XX`, the request failed. Troubleshoot the problem based on the `message` field in the response body.
## Streaming key
| Status code | Message example | Reason | Solution |
| :------------------------ | :------------------------------------------------------------------------------------------------------------------------------------------------------- | :-------------------------------------------------------------------------------------------------------------------------- | :------------------------------------------------------------------------------------------------------ |
| `200 OK` | `/` | Request successful. | `/` |
| `400 Bad Request` | `Invalid settings.` `Invalid 'channel' format.` `Streaming key exists in region:na.` | Request parameter error. | Troubleshoot based on the specific content of the `message` field. |
| `401 Unauthorized` | `Invalid authentication credentials.` | RESTful API authentication failed. | Retry [HTTP Basic or HMAC authentication](authentication). |
| `403 Forbidden` | `Media Gateway is not enabled for this project. Contact us to enable.` `Stream does not belong to this app ID.` | The Media Gateway service has not been activated, or the queried streaming key does not belong to the corresponding app ID. | Contact technical support to activate the service, or check whether the streaming key and app ID match. |
| `404 Not Found` | `Resource not found and destroyed.` | The requested resource does not exist. | Check whether the streaming key is correct. |
| `409 Conflict` | `Resource with the same name already exists.` | Too many concurrent requests. | Use a backoff strategy and try again. |
| `429 Too Many Requests` | `Request rate limit exceeded.` `Resources quota limit exceeded.` `No available resources.` | Request rate or resource quota exceeded. | Use a backoff strategy and try again. |
| `500 Unknown` | `Internal error. Contact us to help fix it.` | Internal server error. | Use a backoff strategy and try again. |
| `503 Service Unavailable` | `Service overload. Retry with the back-off strategy and contact us to fix it.` `Service unavailable temporarily. Retry with the back-off strategy.` | Internal server error. | Use a backoff strategy and try again. |
| `504 Gateway Timeout` | `Gateway timeout. Query to check whether the player has been created, or to create another one instead.` | Internal server error. | Use a backoff strategy and try again. |
## Flow configuration template
| Status code | Message example | Reason | Solution |
| :------------------------ | :------------------------------------------------------------------------------------------------------------------------------------------------------- | :---------------------------------------------------------------------------------------------- | :------------------------------------------------------------------------------- |
| `200 OK` | `/` | Request successful. | `/` |
| `400 Bad Request` | `Invalid settings.` `Invalid template ID.` `Missing field: "transcoding.video.enabled"` `Unsupported codec: "AV1".` | Request parameter error. | Troubleshoot based on the `message` field in the response body. |
| `401 Unauthorized` | `Invalid authentication credentials.` | RESTful API authentication failed. | Retry [HTTP Basic or HMAC authentication](authentication). |
| `403 Forbidden` | `Media Gateway is not enabled for this project. Contact us to enable.` `Too many templates have been created.` | The service has not been activated, or too many flow configuration templates have been created. | Contact technical support to activate Media Gateway, or delete unused templates. |
| `404 Not Found` | `Stream template not found.` | The requested resource does not exist. | Check whether `templateId` is correct. |
| `429 Too Many Requests` | `Request rate limit exceeded.` `Resources quota limit exceeded.` `No available resources.` | Too many concurrent requests. | Use a backoff strategy and try again. |
| `500 Unknown` | `Internal error. Contact us to fix it.` | Internal server error. | Use a backoff strategy and try again. |
| `502 Bad Gateway` | `Internal errors. Contact us to troubleshoot.` | Internal server error. | Use a backoff strategy and try again. |
| `503 Service Unavailable` | `Service overload. Retry with the back-off strategy and contact us to fix it.` `Service unavailable temporarily. Retry with the back-off strategy.` | Internal server error. | Use a backoff strategy and try again. |
| `504 Gateway Timeout` | `Gateway timeout. Query to check whether the task has been created, or to create another one instead.` | Internal server error. | Use a backoff strategy and try again. |
## Information query
| Status code | Message example | Reason | Solution |
| :------------------------ | :------------------------------------------------------------------------------------------------------------------------------------------------------- | :------------------------------------- | :-------------------------------------------------------------- |
| `200 OK` | `/` | Request successful. | `/` |
| `400 Bad Request` | `Invalid body.` `Invalid app ID.` `SID is missing.` | Request parameter error. | Troubleshoot based on the `message` field in the response body. |
| `401 Unauthorized` | `Invalid authentication credentials.` | RESTful API authentication failed. | Retry [HTTP Basic or HMAC authentication](authentication). |
| `403 Forbidden` | `Media Gateway is not enabled for this project. Contact us to enable.` | The service has not been activated. | Contact technical support to activate Media Gateway. |
| `404 Not Found` | `/` | The requested resource does not exist. | Check whether the SID is correct. |
| `429 Too Many Requests` | `Request rate limit exceeded.` `Resources quota limit exceeded.` `No available resources.` | Too many concurrent requests. | Use a backoff strategy and try again. |
| `500 Unknown` | `Some internal error happened. Contact us to help fix it.` | Internal server error. | Use a backoff strategy and try again. |
| `502 Bad Gateway` | `Internal errors. Contact us for troubleshooting.` | Internal server error. | Use a backoff strategy and try again. |
| `503 Service Unavailable` | `Service overload. Retry with a back-off strategy, and contact us to help fix it.` `Service unavailable temporarily. Retry with back off strategy.` | Internal server error. | Use a backoff strategy and try again. |
| `504 Gateway Timeout` | `Gateway timeout. Query to check whether the task has been created, or to create another one instead.` | Internal server error. | Use a backoff strategy and try again. |
# RESTful authentication (/en/api-reference/api-ref/rtmp-gateway/restful-authentication)
Media Gateway RESTful API requires REST authentication.
The following REST authentication methods are available:
* **Basic HTTP authentication**
Generate a Base64-encoded credential with the [customer ID and customer secret](#generate-customer-id-and-customer-secret) provided by Agora and pass the credential with the `Authorization` parameter in the request header.
* **HMAC HTTP authentication**
You need to generate a signature through the HMAC-SHA256 algorithm and pass the signature and related information to the `Authorization` parameter in the request header. This option is recommended since it has a higher security level.
Implement authentication on the server to mitigate the risk of data leakage.
## Implement basic HTTP authentication
### Generate Customer ID and Customer Secret
To generate a Customer ID and Customer Secret, do the following:
1. In [Agora Console](https://console.agora.io), click the username at the bottom of the navigation sidebar to open the account menu, then select **RESTful API Keys**.

2. Select **Create API Key**. A Customer ID and Customer Secret are generated.
3. Select **Download** and save the file somewhere secure — you can download it only once. In the file, **Key** is your Customer ID and **Secret** is your Customer Secret.
4. Use the Customer ID (**Key**) and Customer Secret (**Secret**) to generate a Base64-encoded credential, and pass it to the `Authorization` parameter in the HTTP request header.
### Generate an authorization header using a third-party tool
For testing and debugging, you can use a [third-party online tool](https://www.debugbear.com/basic-auth-header-generator) to quickly generate your Authorization header. Enter your Customer ID as the Username and your Customer Secret as the Password. Your generated header should look like this::
```text
Authorization: Basic NDI1OTQ3N2I4MzYy...YwZjA=a
```
### Basic authentication sample code
The following sample code implements basic HTTP authentication and sends a RESTful API request to get the basic information of all your current Agora projects.
The Agora RESTful API only supports HTTPS with TLS 1.0, 1.1, or 1.2 for encrypted communication. Requests over plain HTTP are not supported and will fail to connect.
```go
package main
import (
"fmt"
"strings"
"net/http"
"io/ioutil"
"encoding/base64"
)
// HTTPS basic authentication example in Golang using the RTC SDK Server RESTful API
func main() {
// Customer ID
customerKey := "Your customer ID"
// Customer secret
customerSecret := "Your customer secret"
// Concatenate customer key and customer secret and use base64 to encode the concatenated string
plainCredentials := customerKey + ":" + customerSecret
base64Credentials := base64.StdEncoding.EncodeToString([]byte(plainCredentials))
url := "https://api.agora.io/dev/v1/projects"
method := "GET"
payload := strings.NewReader(``)
client := &http.Client {
}
req, err := http.NewRequest(method, url, payload)
if err != nil {
fmt.Println(err)
return
}
// Add Authorization header
req.Header.Add("Authorization", "Basic " + base64Credentials)
req.Header.Add("Content-Type", "application/json")
// Send HTTP request
res, err := client.Do(req)
if err != nil {
fmt.Println(err)
return
}
defer res.Body.Close()
body, err := ioutil.ReadAll(res.Body)
if err != nil {
fmt.Println(err)
return
}
fmt.Println(string(body))
}
```
```js
// HTTP basic authentication example in node.js using the RTC SDK Server RESTful API
const https = require('https')
// Customer ID
const customerKey = "Your customer ID"
// Customer secret
const customerSecret = "Your customer secret"
// Concatenate customer key and customer secret and use base64 to encode the concatenated string
const plainCredential = customerKey + ":" + customerSecret
// Encode with base64
encodedCredential = Buffer.from(plainCredential).toString('base64')
authorizationField = "Basic " + encodedCredential
// Set request parameters
const options = {
hostname: 'api.agora.io',
port: 443,
path: '/dev/v1/projects',
method: 'GET',
headers: {
'Authorization':authorizationField,
'Content-Type': 'application/json'
}
}
// Create request object and send request
const req = https.request(options, res => {
console.log(`Status code: ${res.statusCode}`)
res.on('data', d => {
process.stdout.write(d)
})
})
req.on('error', error => {
console.error(error)
})
req.end()
```
```php
'https://api.agora.io/dev/v1/projects',
CURLOPT_RETURNTRANSFER => true,
CURLOPT_ENCODING => '',
CURLOPT_MAXREDIRS => 10,
CURLOPT_TIMEOUT => 0,
CURLOPT_FOLLOWLOCATION => true,
CURLOPT_HTTP_VERSION => CURL_HTTP_VERSION_1_1,
CURLOPT_CUSTOMREQUEST => 'GET',
CURLOPT_HTTPHEADER => [
$authHeader,
'Content-Type: application/json',
],
]);
// Execute cURL request
$response = curl_exec($curl);
// Check for cURL errors
if ($response === false) {
echo "Error in cURL: " . curl_error($curl);
} else {
// Output the response
echo $response;
}
// Close cURL session
curl_close($curl);
?>
```
```python
# -- coding utf-8 --
# Python 3
# HTTP basic authentication example in python using the RTC SDK Server RESTful API
import base64
import http.client
# Customer ID
customer_key = "Your customer ID"
# Customer secret
customer_secret = "Your customer secret"
# Concatenate customer key and customer secret and use base64 to encode the concatenated string
credentials = customer_key + ":" + customer_secret
# Encode with base64
base64_credentials = base64.b64encode(credentials.encode("utf8"))
credential = base64_credentials.decode("utf8")
# Create connection object with basic URL
conn = http.client.HTTPSConnection("api.agora.io")
payload = ""
# Create Header object
headers = {}
# Add Authorization field
headers['Authorization'] = 'basic ' + credential
headers['Content-Type'] = 'application/json'
# Send request
conn.request("GET", "/dev/v1/projects", payload, headers)
res = conn.getresponse()
data = res.read()
print(data.decode("utf-8"))
```
```java
import java.io.IOException;
import java.net.URI;
import java.net.http.HttpClient;
import java.net.http.HttpRequest;
import java.net.http.HttpResponse;
import java.util.Base64;
// HTTP basic authentication example in Java using the RTC SDK Server RESTful API
public class Base64Encoding {
public static void main(String[] args) throws IOException, InterruptedException {
// Customer ID
final String customerKey = "Your customer ID";
// Customer secret
final String customerSecret = "Your customer secret";
// Concatenate customer key and customer secret and use base64 to encode the concatenated string
String plainCredentials = customerKey + ":" + customerSecret;
String base64Credentials = new String(Base64.getEncoder().encode(plainCredentials.getBytes()));
// Create authorization header
String authorizationHeader = "Basic " + base64Credentials;
HttpClient client = HttpClient.newHttpClient();
// Create HTTP request object
HttpRequest request = HttpRequest.newBuilder()
.uri(URI.create("https://api.agora.io/dev/v1/projects"))
.GET()
.header("Authorization", authorizationHeader)
.header("Content-Type", "application/json")
.build();
// Send HTTP request
HttpResponse response = client.send(request,
HttpResponse.BodyHandlers.ofString());
System.out.println(response.body());
}
}
```
```csharp
using System;
using System.IO;
using System.Net;
using System.Text;
// HTTP basic authentication example in C# using the RTC SDK Server RESTful API
namespace Examples.System.Net
{
public class WebRequestPostExample
{
public static void Main()
{
// Customer ID
string customerKey = "Your customer ID";
// Customer secret
string customerSecret = "Your customer secret";
// Concatenate customer key and customer secret and use base64 to encode the concatenated string
string plainCredential = customerKey + ":" + customerSecret;
// Encode with base64
var plainTextBytes = Encoding.UTF8.GetBytes(plainCredential);
string encodedCredential = Convert.ToBase64String(plainTextBytes);
// Create authorization header
string authorizationHeader = "Authorization: Basic " + encodedCredential;
// Create request object
WebRequest request = WebRequest.Create("https://api.agora.io/dev/v1/projects");
request.Method = "GET";
// Add authorization header
request.Headers.Add(authorizationHeader);
request.ContentType = "application/json";
WebResponse response = request.GetResponse();
Console.WriteLine(((HttpWebResponse)response).StatusDescription);
using (Stream dataStream = response.GetResponseStream())
{
StreamReader reader = new StreamReader(dataStream);
string responseFromServer = reader.ReadToEnd();
Console.WriteLine(responseFromServer);
}
response.Close();
}
}
}
```
## Implement HMAC HTTP authentication
To implement HMAC HTTP authentication, you need the following information:
* App ID
* Customer ID and customer secret
### HMAC authentication sample code
The following sample code demonstrates how to generate the value of the `Authorization` field:
```javascript
const crypto = require('crypto');
const http = require('http');
// The app ID of your Agora project
appid = ""
// The customer ID obtained from the RESTful API of the Agora Console
customer_username = ""
// The customer secret obtained from the RESTful API of the Agora Console
customer_secret = ""
// Request package body
data = ""
function hashData(data) {
const hash = crypto.createHash('sha256');
hash.update(data);
return hash.digest('base64');
}
function signData(data) {
const hmac = crypto.createHmac('sha256', customer_secret);
hmac.update(data);
return hmac.digest('base64');
}
date = (new Date()).toUTCString();
reqpath = `/dev/v2/projects/${appid}/rtls/ingress/appconfig`;
reqline = `GET ${reqpath} HTTP/1.1`;
// Calculate the SHA-256 hash
bodySign = hashData(args.data);
digest = `SHA-256=${bodySign}`;
// Generate signature
signingStr = `host: ${host}\ndate: ${date}\n${reqline}\ndigest: ${digest}`;
sign = signData(signingStr);
auth = `hmac username="${customer_username}", `
auth += `algorithm="hmac-sha256", `
auth += `headers="host date request-line digest", `
auth += `signature="${sign}"`;
console.log(`Authorization: ${auth}`);
```
# Go (/en/api-reference/api-ref/server-sdk/go)
Full API reference for the Agora Conversational AI Go SDK.
## client.NewClient
The entry point for the SDK. Creates a new API client with the given request options. All sub-clients share the same configuration.
```go
import (
"github.com/AgoraIO/agora-agents-go/v2/client"
"github.com/AgoraIO/agora-agents-go/v2/option"
)
```
### Constructor
```go
func NewClient(opts ...option.RequestOption) *Client
```
Creates a new API client. All sub-clients share the same configuration.
```go
import (
"github.com/AgoraIO/agora-agents-go/v2/agentkit"
"github.com/AgoraIO/agora-agents-go/v2/option"
)
c := agentkit.NewAgoraClient(agentkit.AgoraClientOptions{
Area: option.AreaUS,
AppID: "your-app-id",
AppCertificate: "your-app-certificate",
})
```
### Request options
Request options configure transport, retries, and advanced authentication behavior. For new session integrations, prefer `agentkit.NewAgoraClient` with `AppID` and `AppCertificate`; AgentKit mints ConvoAI REST auth and RTC join tokens when session methods run.
#### `option.WithArea`
```go
func WithArea(area core.Area) *core.AreaRequestOption
```
Enables regional routing with automatic DNS-based domain selection.
```go
c := client.NewClient(
option.WithArea(option.AreaUS),
)
```
#### `option.WithBaseURL`
```go
func WithBaseURL(baseURL string) *core.BaseURLOption
```
Overrides the default API endpoint. Useful for testing.
```go
import Agora "github.com/AgoraIO/agora-agents-go/v2"
c := client.NewClient(
option.WithBaseURL(Agora.Environments.Default),
)
```
#### `option.WithHTTPClient`
```go
func WithHTTPClient(httpClient core.HTTPClient) *core.HTTPClientOption
```
Provides a custom `*http.Client`. Recommended for production to set timeouts.
```go
c := client.NewClient(
option.WithHTTPClient(&http.Client{
Timeout: 10 * time.Second,
}),
)
```
#### `option.WithMaxAttempts`
```go
func WithMaxAttempts(attempts uint) *core.MaxAttemptsOption
```
Sets the maximum number of retry attempts. Default: `2`. Retries use exponential backoff for status codes 408, 429, and 5xx.
```go
c := client.NewClient(
option.WithMaxAttempts(3),
)
```
#### `option.WithHTTPHeader`
```go
func WithHTTPHeader(httpHeader http.Header) *core.HTTPHeaderOption
```
Adds custom HTTP headers to every request.
#### `option.WithBodyProperties`
```go
func WithBodyProperties(bodyProperties map[string]interface{}) *core.BodyPropertiesOption
```
Adds extra properties to the JSON request body.
#### `option.WithQueryParameters`
```go
func WithQueryParameters(queryParameters url.Values) *core.QueryParametersOption
```
Adds query parameters to the request URL.
#### `option.WithPool`
```go
func WithPool(pool *core.Pool) *core.AreaRequestOption
```
Uses a pre-configured `Pool` for regional routing.
### Sub-clients
`client.NewClient` exposes Fern-generated sub-clients for direct REST API access. You typically do not need these when using the [agentkit layer](#agentkitnewagent).
| Field | Type | Description |
| ------------------- | ------------------------- | ---------------------------------------------------------------------------------- |
| `c.Agents` | `*agents.Client` | Agent lifecycle (start, stop, speak, interrupt, update, get, getHistory, getTurns) |
| `c.AgentManagement` | `*agentmanagement.Client` | Management actions: `agent-think` |
| `c.Telephony` | `*telephony.Client` | Telephony operations (call, hangup) |
| `c.PhoneNumbers` | `*phonenumbers.Client` | Phone number management |
All sub-client methods take `context.Context` as their first argument. See the [generated reference](https://github.com/AgoraIO/agora-agents-go/blob/HEAD/./reference.md) for full method signatures.
### Environments
The root `Agora` package exposes the default API endpoint:
```go
import Agora "github.com/AgoraIO/agora-agents-go/v2"
Agora.Environments.Default
// "https://api.agora.io/api/conversational-ai-agent"
```
### Pointer helpers
The root `Agora` package provides helper functions for creating pointers to literal values. These are required for optional fields in Fern-generated request structs, which use pointer types to distinguish between "not set" and "set to zero value".
```go
import Agora "github.com/AgoraIO/agora-agents-go/v2"
```
| Function | Signature | Example |
| ----------------------- | ---------------------------- | ------------------------------- |
| `Agora.Bool` | `func(bool) *bool` | `Enable: Agora.Bool(true)` |
| `Agora.Int` | `func(int) *int` | `IdleTimeout: Agora.Int(120)` |
| `Agora.String` | `func(string) *string` | `APIKey: Agora.String("")` |
| `Agora.Float64` | `func(float64) *float64` | `Threshold: Agora.Float64(0.5)` |
| `Agora.Float32` | `func(float32) *float32` | — |
| `Agora.Int8/16/32/64` | `func(intN) *intN` | — |
| `Agora.Uint/8/16/32/64` | `func(uintN) *uintN` | — |
| `Agora.UUID` | `func(uuid.UUID) *uuid.UUID` | — |
| `Agora.Time` | `func(time.Time) *time.Time` | — |
## agentkit.NewAgent
`Agent` is an immutable configuration object. Each vendor chaining method returns a new `*Agent` — the original is never modified. Define one agent at startup and create sessions from it for each user conversation.
```go
import (
"github.com/AgoraIO-Conversational-AI/agent-server-sdk-go/agentkit"
"github.com/AgoraIO-Conversational-AI/agent-server-sdk-go/agentkit/vendors"
)
```
### Constructor
```go
func NewAgent(opts ...AgentOption) *Agent
```
Pass `AgentOption` functions to configure the agent's name, instructions, greeting, and other properties.
```go
agent := agentkit.NewAgent(
agentkit.WithName("support-assistant"),
agentkit.WithInstructions("You are a helpful voice assistant."), // LLM system prompt
agentkit.WithGreeting("Hello! How can I help you today?"), // first words spoken on session start
agentkit.WithMaxHistory(10),
)
```
### AgentOption functions
`AgentOption` functions are passed to `NewAgent`. Each function has the signature `func(*Agent)`.
| Function | Parameter type | Description |
| -------------------------------------- | ------------------------- | --------------------------------------------------------------------------------------------------------------------------------------------------------------------------------------------------------------------------------- |
| `WithName(name)` | `string` | Agent name identifier |
| `WithInstructions(instructions)` | `string` | LLM system prompt |
| `WithGreeting(greeting)` | `string` | First message the agent speaks |
| `WithFailureMessage(msg)` | `string` | Message spoken when the LLM fails |
| `WithMaxHistory(n)` | `int` | Maximum conversation turns to retain |
| `WithTurnDetectionConfig(td)` | `*TurnDetectionConfig` | Cascading-flow turn detection configuration. Use `Config.StartOfSpeech` and `Config.EndOfSpeech` for SOS/EOS detection. Use interruption config for interruption behavior and MLLM vendor `TurnDetection` for MLLM turn detection |
| `WithInterruptionConfig(interruption)` | `*InterruptionConfig` | Unified interruption control using the top-level `interruption` object |
| `WithGreetingConfigs(configs)` | `*LlmGreetingConfigs` | Sets `llm.greeting_configs`, including v2.7 `interruptable` |
| `WithSalConfig(sal)` | `*SalConfig` | Speech analytics configuration |
| `WithAdvancedFeatures(af)` | `*AdvancedFeatures` | Advanced feature flags, for example `EnableMllm`, `EnableAivad` |
| `WithTools(enabled)` | `bool` | Enable or disable MCP tool invocation |
| `WithParameters(params)` | `*SessionParams` | Additional session parameters |
| `WithAudioScenario(audioScenario)` | `ParametersAudioScenario` | Sets `parameters.audio_scenario` (`default`, `chorus`, or `aiserver`) |
| `WithGeofence(gf)` | `*GeofenceConfig` | Regional access restriction |
| `WithLabels(labels)` | `map[string]string` | Custom key-value labels returned in notification callbacks |
| `WithRtc(rtc)` | `*RtcConfig` | RTC media encryption |
| `WithFillerWords(fw)` | `*FillerWordsConfig` | Filler words played while waiting for the LLM response |
### Vendor chaining methods
Vendor methods are called on the `*Agent` returned by `NewAgent`. Each method returns a **new** `*Agent` — the original is never modified.
#### `WithLlm(vendor)`
Sets the LLM vendor. Pass an instance of [`NewOpenAI`](#newopenai), [`NewAzureOpenAI`](#newazureopenai), [`NewAnthropic`](#newanthropic), or [`NewGemini`](#newgemini).
```go
func (a *Agent) WithLlm(vendor vendors.LLM) *Agent
```
#### `WithTts(vendor)`
Sets the TTS vendor. Captures the vendor's sample rate for [avatar](#avatar-vendors) validation.
```go
func (a *Agent) WithTts(vendor vendors.TTS) *Agent
```
#### `WithStt(vendor)`
Sets the STT vendor. Pass an instance of any [STT vendor constructor](#stt-vendors).
```go
func (a *Agent) WithStt(vendor vendors.STT) *Agent
```
#### `WithMllm(vendor)`
Sets the MLLM vendor for multimodal mode. Pass [`NewOpenAIRealtime`](#newopenairealtime), [`NewGeminiLive`](#newgeminilive), or [`NewVertexAI`](#newvertexai). Requires `AdvancedFeatures.EnableMllm = true`.
```go
func (a *Agent) WithMllm(vendor vendors.MLLM) *Agent
```
#### `WithAvatar(vendor)`
Sets the avatar vendor. **Panics** if TTS is already configured with a sample rate that does not match the avatar's required rate.
```go
func (a *Agent) WithAvatar(vendor vendors.Avatar) *Agent
```
#### `WithTurnDetection(config)`
Configures cascading-flow turn detection. Use `Config.StartOfSpeech` and `Config.EndOfSpeech` for SOS/EOS detection. Use interruption config for interruption behavior and MLLM vendor `TurnDetection` for MLLM turn detection.
```go
func (a *Agent) WithTurnDetection(td *TurnDetectionConfig) *Agent
```
### Other builder methods
The following methods follow the same pattern — each returns a new `*Agent` with the updated configuration.
| Method | Parameter type | Description |
| -------------------------------- | -------------------- | ------------------------------------------- |
| `WithInstructions(instructions)` | `string` | Override the LLM system prompt |
| `WithGreeting(greeting)` | `string` | Override the greeting message |
| `WithName(name)` | `string` | Override the agent name |
| `WithSal(sal)` | `*SalConfig` | Set SAL configuration |
| `WithAdvancedFeatures(af)` | `*AdvancedFeatures` | Set advanced features |
| `WithTools(enabled)` | `bool` | Enable or disable MCP tool invocation |
| `WithParameters(params)` | `*SessionParams` | Set session parameters |
| `WithFailureMessage(msg)` | `string` | Set the failure message |
| `WithMaxHistory(n)` | `int` | Set the maximum conversation history length |
| `WithGeofence(gf)` | `*GeofenceConfig` | Set geofence configuration |
| `WithLabels(labels)` | `map[string]string` | Set custom labels |
| `WithRtc(rtc)` | `*RtcConfig` | Set RTC configuration |
| `WithFillerWords(fw)` | `*FillerWordsConfig` | Set filler words configuration |
### `ToProperties()`
Converts the agent configuration to a `*Agora.StartAgentsRequestProperties` for direct use with the low-level client. Called internally by `AgentSession.Start()`. Use this directly when building custom request bodies.
```go
func (a *Agent) ToProperties(opts ToPropertiesOptions) (*Agora.StartAgentsRequestProperties, error)
```
**Returns an error if:**
* Neither `Token` nor `AppID` + `AppCertificate` is provided
* In cascading mode: LLM or TTS is not configured
* Config marshaling fails
#### ToPropertiesOptions
```go
type ToPropertiesOptions struct {
Channel string
AgentUID string
RemoteUIDs []string
Token string
AppID string
AppCertificate string
ExpiresIn int
IdleTimeout *int
EnableStringUID *bool
SkipVendorValidation bool
Warn func(string)
}
```
| Field | Type | Required | Description |
| ---------------------- | -------------- | ----------- | ------------------------------------------------------------------- |
| `Channel` | `string` | Yes | Agora channel name |
| `AgentUID` | `string` | Yes | Agent's UID in the channel |
| `RemoteUIDs` | `[]string` | Yes | Remote participant UIDs |
| `Token` | `string` | Conditional | Pre-generated RTC+RTM token. Skips generation if set |
| `AppID` | `string` | Conditional | Agora App ID. Required if `Token` is not set |
| `AppCertificate` | `string` | Conditional | Agora App Certificate. Required if `Token` is not set |
| `ExpiresIn` | `int` | No | Token lifetime in seconds. Default: `86400`. Valid range: 1–86400 |
| `IdleTimeout` | `*int` | No | Session idle timeout in seconds |
| `EnableStringUID` | `*bool` | No | Enable string UID mode |
| `SkipVendorValidation` | `bool` | No | Advanced option for pipeline-backed starts without explicit LLM/TTS |
| `Warn` | `func(string)` | No | Warning sink for recoverable config issues |
### Getters
### Getters
Read-only methods available on any `*Agent` instance.
| Method | Return type | Description |
| ---------------------------- | ------------------------ | ----------------------------------- |
| `Name()` | `string` | Agent name |
| `Instructions()` | `string` | LLM system prompt |
| `Greeting()` | `string` | Greeting message |
| `FailureMessage()` | `string` | Message spoken when LLM fails |
| `MaxHistory()` | `*int` | Maximum conversation history length |
| `LlmConfig()` | `map[string]interface{}` | LLM configuration |
| `TtsConfig()` | `map[string]interface{}` | TTS configuration |
| `SttConfig()` | `map[string]interface{}` | STT configuration |
| `MllmConfig()` | `map[string]interface{}` | MLLM configuration |
| `TtsSampleRate()` | `*vendors.SampleRate` | TTS sample rate |
| `AvatarRequiredSampleRate()` | `*vendors.SampleRate` | Avatar required sample rate |
| `Avatar()` | `map[string]interface{}` | Avatar configuration |
| `TurnDetection()` | `*TurnDetectionConfig` | Turn detection configuration |
| `Interruption()` | `*InterruptionConfig` | Interruption configuration |
| `GreetingConfigs()` | `*LlmGreetingConfigs` | Greeting playback configuration |
| `Sal()` | `*SalConfig` | SAL configuration |
| `AdvancedFeatures()` | `*AdvancedFeatures` | Advanced features |
| `Parameters()` | `*SessionParams` | Session parameters |
| `Geofence()` | `*GeofenceConfig` | Geofence configuration |
| `Labels()` | `map[string]string` | Custom labels |
| `Rtc()` | `*RtcConfig` | RTC configuration |
| `FillerWords()` | `*FillerWordsConfig` | Filler words configuration |
## agentkit.NewAgentSession
`AgentSession` manages the full lifecycle of a running agent. Create a session with `NewAgentSession` and call `Start()` to join the agent to the channel.
```go
import "github.com/AgoraIO-Conversational-AI/agent-server-sdk-go/agentkit"
```
### Constructor
```go
func NewAgentSession(opts AgentSessionOptions) *AgentSession
```
If `Name` is empty, defaults to `agent-`. The session starts in `StatusIdle`.
#### AgentSessionOptions
```go
type AgentSessionOptions struct {
Client *agents.Client
Agent *Agent
AppID string
AppCertificate string
Name string
Channel string
Token string
AgentUID string
RemoteUIDs []string
IdleTimeout *int
EnableStringUID *bool
ExpiresIn int
UseAppCredentialsForREST bool
Preset []string
PipelineID string
Debug bool
Warn func(string)
}
```
| Field | Type | Required | Description |
| -------------------------- | ---------------- | ----------- | ---------------------------------------------------------------------------------------- |
| `Client` | `*agents.Client` | Yes | Fern-generated agents sub-client (from `c.Agents`) |
| `Agent` | `*Agent` | Yes | Agent configuration built with `NewAgent` |
| `AppID` | `string` | Yes | Agora App ID |
| `AppCertificate` | `string` | Conditional | Required if `Token` is not set |
| `Name` | `string` | No | Session name. Default: `agent-` |
| `Channel` | `string` | Yes | Agora channel name |
| `Token` | `string` | Conditional | Pre-generated RTC+RTM token. Skips auto-generation if set |
| `AgentUID` | `string` | Yes | Agent's UID in the channel |
| `RemoteUIDs` | `[]string` | Yes | Remote participant UIDs |
| `IdleTimeout` | `*int` | No | Idle timeout in seconds |
| `EnableStringUID` | `*bool` | No | Enable string UID mode |
| `ExpiresIn` | `int` | No | Auto-generated token lifetime in seconds |
| `UseAppCredentialsForREST` | `bool` | No | Generate ConvoAI REST auth headers per request |
| `Preset` | `[]string` | No | Advanced preset value for project-specific routing. Do not set for normal builder usage. |
| `PipelineID` | `string` | No | Published pipeline ID to send on session start |
| `Debug` | `bool` | No | Enable debug logging of the start request |
| `Warn` | `func(string)` | No | Custom warning sink; defaults to logger |
`PipelineID` is sent as the top-level `/join` field `pipeline_id`, not inside `properties`. If not set, `AgentSession.Start()` uses the agent-level value from `WithPipelineID`.
### State machine
A session progresses through the following states:
```text
Start() API success
┌──────┐ ┌──────────┐ ┌─────────┐
│ idle │─────>│ starting │─────>│ running │
└──┬───┘ └────┬─────┘ └────┬────┘
│ │ │
│ │ error │ Stop()
│ ▼ ▼
│ ┌─────────┐ ┌──────────┐
│ │ error │ │ stopping │
│ └────┬────┘ └────┬─────┘
│ │ │
│ │ │ success
│ ▼ ▼
│ ┌──────────┐ ┌─────────┐
└─────────>│ (restart)│ │ stopped │
└──────────┘ └─────────┘
```
| Transition | Trigger |
| -------------------- | ---------------------------------------------------- |
| `idle → starting` | `Start()` called |
| `starting → running` | API responds with agent ID |
| `starting → error` | API request fails |
| `running → stopping` | `Stop()` called |
| `stopping → stopped` | API confirms agent stopped |
| `stopping → error` | Stop request fails and agent was not already stopped |
| `running → error` | Unrecoverable error during interaction |
`Start()` can also be called from `stopped` or `error` state to restart the session.
### Methods
All methods take `context.Context` as the first argument. Register event handlers **before** calling `Start()` to avoid missing the `started` event.
#### `Start(ctx)`
Starts the agent session. Validates avatar/TTS configuration, generates a token if not provided, and calls the Agora API. Returns the agent ID.
```go
func (s *AgentSession) Start(ctx context.Context) (string, error)
```
* Valid from: `idle`, `stopped`, `error`
* Transitions to: `starting` → `running` on success, `error` on failure
* Emits: `"started"` on success, `"error"` on failure
* Validates avatar config and avatar/TTS sample rate match before making the API call
```go
agentID, err := session.Start(ctx)
if err != nil {
log.Fatalf("Failed to start session: %v", err)
}
```
#### `Stop(ctx)`
Stops the running agent and removes it from the channel.
```go
func (s *AgentSession) Stop(ctx context.Context) error
```
* Valid from: `running`
* Transitions to: `stopping` → `stopped` on success, `error` on failure
* Emits: `"stopped"` on success, `"error"` on failure
```go
err := session.Stop(ctx)
if err != nil {
log.Fatalf("Failed to stop session: %v", err)
}
```
#### `Say(ctx, text, priority, interruptable)`
Instructs the agent to speak the given text.
```go
func (s *AgentSession) Say(ctx context.Context, text string, priority *Agora.SpeakAgentsRequestPriority, interruptable *bool) error
```
* Valid from: `running`
* Pass `nil` for `priority` or `interruptable` to use defaults
| Parameter | Type | Description |
| --------------- | ----------------------------------- | ----------------------------------------------------------------------------------------------------------------------------------------------------------------------------------------------------------------------------------- |
| `text` | `string` | The text for the agent to speak |
| `priority` | `*Agora.SpeakAgentsRequestPriority` | Optional priority level. Pass `nil` for default. Use `agentkit.SpeakPriorityInterrupt.Ptr()`, `agentkit.SpeakPriorityAppend.Ptr()`, or `agentkit.SpeakPriorityIgnore.Ptr()` convenience constants instead of the raw generated enum |
| `interruptable` | `*bool` | Whether this message can be interrupted. Pass `nil` for default |
```go
err := session.Say(ctx, "One moment while I look that up.", nil, nil)
```
#### `Interrupt(ctx)`
Interrupts the agent's current speech.
```go
func (s *AgentSession) Interrupt(ctx context.Context) error
```
* Valid from: `running`
#### `Update(ctx, properties)`
Updates the agent's properties mid-session without restarting. Accepts a typed properties struct in REST API format.
```go
func (s *AgentSession) Update(ctx context.Context, properties *Agora.UpdateAgentsRequestProperties) error
```
* Valid from: `running`
#### `GetHistory(ctx)`
Retrieves the conversation history. Requires a valid agent ID — `Start()` must have been called successfully.
```go
func (s *AgentSession) GetHistory(ctx context.Context) (*Agora.GetHistoryAgentsResponse, error)
```
#### `GetTurns(ctx)` / `GetAllTurns(ctx)`
Retrieves turn-by-turn analytics for the session. Requires a valid agent ID — `Start()` must have been called successfully.
```go
func (s *AgentSession) GetTurns(ctx context.Context, opts ...GetTurnsOptions) (*Agora.GetTurnsAgentsResponse, error)
func (s *AgentSession) GetAllTurns(ctx context.Context, opts ...GetAllTurnsOptions) (*Agora.GetTurnsAgentsResponse, error)
type GetTurnsOptions struct {
PageIndex *int
PageSize *int
}
type GetAllTurnsOptions struct {
PageSize *int
}
```
`PageIndex` starts at 1. Use `GetAllTurns` to iterate through every page with a default page size of 50 and return the final response with aggregated `Turns`.
* **Requires:** Valid agent ID
When you consume server notifications, event `112` means all turns for the session have finished and are ready to query.
#### `GetInfo(ctx)`
Gets the current agent status from the API. Requires a valid agent ID.
```go
func (s *AgentSession) GetInfo(ctx context.Context) (*Agora.GetAgentsResponse, error)
```
#### `Think(ctx)`
Injects a thought or instruction into a running agent. In v2.7, omitting `on_listening_action` uses the server default `interrupt`. Set `agentkit.ThinkOnListeningActionInject.Ptr()` if you need legacy inject behavior. AgentKit also exposes `ThinkOnThinkingActionInterrupt`, `ThinkOnThinkingActionIgnore`, `ThinkOnSpeakingActionInterrupt`, and `ThinkOnSpeakingActionIgnore` convenience constants.
```go
func (s *AgentSession) Think(ctx context.Context, text string, onListeningAction *Agora.AgentThinkAgentManagementRequestOnListeningAction, onThinkingAction *Agora.AgentThinkAgentManagementRequestOnThinkingAction, onSpeakingAction *Agora.AgentThinkAgentManagementRequestOnSpeakingAction, interruptable *bool, metadata map[string]string) (*Agora.AgentThinkAgentManagementResponse, error)
func (s *AgentSession) ThinkWithOptions(ctx context.Context, text string, opts *ThinkOptions) (*Agora.AgentThinkAgentManagementResponse, error)
```
* **Valid from:** `running`
#### `On(event, handler)`
Registers an event handler. Multiple handlers can be registered for the same event. Handlers run synchronously; panics in handlers are recovered and reported through the session warning sink.
```go
func (s *AgentSession) On(event string, handler EventHandler)
```
```go
session.On("started", func(data interface{}) {
info := data.(map[string]string)
fmt.Println("Agent is live:", info["agent_id"])
})
session.On("stopped", func(data interface{}) {
fmt.Println("Agent has left")
})
session.On("error", func(data interface{}) {
log.Println("Session error:", data)
})
```
#### `Off(event, handler)`
Unregisters a previously registered event handler.
```go
func (s *AgentSession) Off(event string, handler EventHandler)
```
### Events
| Event | Data type | Description |
| ----------- | -------------------------------------- | ------------------------------------- |
| `"started"` | `map[string]string{"agent_id": "..."}` | Agent successfully joined the channel |
| `"stopped"` | `map[string]string{"agent_id": "..."}` | Agent left the channel |
| `"error"` | `error` | An unrecoverable error occurred |
### Getters
Read-only methods available on any `*AgentSession` instance.
| Method | Return type | Description |
| ---------- | ---------------- | ------------------------------------------------------------------------- |
| `ID()` | `string` | Agent ID. Empty string before `Start()` succeeds |
| `Status()` | `SessionStatus` | Current session state |
| `Agent()` | `*Agent` | The agent configuration |
| `AppID()` | `string` | The Agora App ID |
| `Raw()` | `*agents.Client` | Direct access to the Fern-generated agents client for advanced operations |
#### Using `session.Raw()`
Use `session.Raw()` to call REST API endpoints not yet exposed by the agentkit layer.
```go
response, err := session.Raw().List(ctx, &Agora.ListAgentsRequest{
Appid: session.AppID(),
})
```
### Thread safety
All state access is protected by `sync.RWMutex`. The session is safe for concurrent use across go routines.
## Vendors
All vendor constructors are in the `agentkit/vendors` package. **Constructors panic if required fields are empty** — this is Go-idiomatic behavior for programmer configuration errors.
```go
import "github.com/AgoraIO-Conversational-AI/agent-server-sdk-go/agentkit/vendors"
```
### Interfaces
```go
type LLM interface {
ToConfig() map[string]interface{}
}
type TTS interface {
ToConfig() map[string]interface{}
GetSampleRate() *SampleRate
}
type STT interface {
ToConfig() map[string]interface{}
}
type MLLM interface {
ToConfig() map[string]interface{}
}
type Avatar interface {
ToConfig() map[string]interface{}
RequiredSampleRate() SampleRate
}
```
### LLM vendors
Use with [`WithLlm()`](#withllmvendor).
#### `NewOpenAI`
```go
func NewOpenAI(opts OpenAIOptions) *OpenAI
```
Panics if `Model` is empty. Panics if `APIKey` is empty unless `Model` is one of the supported Agora-managed OpenAI models (`gpt-4o-mini`, `gpt-4.1-mini`, `gpt-5-nano`, `gpt-5-mini`) and `BaseURL` / `Vendor` are not set.
| Field | Type | Required | Default | Description |
| ------------------- | -------------------------- | --------- | ---------- | ------------------------------------------------------------------- |
| `APIKey` | `string` | BYOK only | — | OpenAI API key. Optional for supported Agora-managed OpenAI models. |
| `Model` | `string` | Yes | — | Model identifier |
| `BaseURL` | `string` | BYOK only | — | API endpoint. Required when `APIKey` is set. |
| `Temperature` | `*float64` | No | — | Sampling temperature |
| `TopP` | `*float64` | No | — | Nucleus sampling |
| `MaxTokens` | `*int` | No | — | Maximum tokens in response |
| `SystemMessages` | `[]map[string]interface{}` | No | — | System messages |
| `GreetingMessage` | `string` | No | — | Agent greeting message |
| `FailureMessage` | `string` | No | — | Message spoken when LLM fails |
| `InputModalities` | `[]string` | No | `["text"]` | Input modalities |
| `OutputModalities` | `[]string` | No | — | Output modalities |
| `Params` | `map[string]interface{}` | No | — | Additional model parameters |
| `Headers` | `map[string]string` | No | — | Custom HTTP headers forwarded to the LLM provider |
| `GreetingConfigs` | `map[string]interface{}` | No | — | Greeting playback configuration |
| `TemplateVariables` | `map[string]string` | No | — | Template variables for messages |
| `MaxHistory` | `*int` | No | — | Maximum number of conversation history messages to cache |
| `Vendor` | `string` | No | — | Vendor override |
| `McpServers` | `[]map[string]interface{}` | No | — | MCP server connections |
#### `NewAzureOpenAI`
```go
func NewAzureOpenAI(opts AzureOpenAIOptions) *AzureOpenAI
```
Panics if `APIKey`, `Model`, `Endpoint`, or `DeploymentName` is empty.
| Field | Type | Required | Default | Description |
| ------------------- | -------------------------- | -------- | ---------------------- | -------------------------------------------------------------------------------------------------------------- |
| `APIKey` | `string` | Yes | — | Azure OpenAI API key |
| `Endpoint` | `string` | Yes | — | Azure endpoint URL |
| `DeploymentName` | `string` | Yes | — | Azure deployment name |
| `Model` | `string` | Yes | — | Deployment's base model name (e.g., `"gpt-4o"`). Emitted as `params.model` for parity with the TypeScript SDK. |
| `APIVersion` | `string` | No | `"2024-08-01-preview"` | API version |
| `Temperature` | `*float64` | No | — | Sampling temperature |
| `TopP` | `*float64` | No | — | Nucleus sampling |
| `MaxTokens` | `*int` | No | — | Maximum tokens |
| `SystemMessages` | `[]map[string]interface{}` | No | — | System messages |
| `GreetingMessage` | `string` | No | — | Agent greeting message |
| `FailureMessage` | `string` | No | — | Message spoken when LLM fails |
| `InputModalities` | `[]string` | No | `["text"]` | Input modalities |
| `OutputModalities` | `[]string` | No | — | Output modalities |
| `Params` | `map[string]interface{}` | No | — | Additional model parameters |
| `Headers` | `map[string]string` | No | — | Custom HTTP headers forwarded to the LLM provider |
| `GreetingConfigs` | `map[string]interface{}` | No | — | Greeting playback configuration |
| `TemplateVariables` | `map[string]string` | No | — | Template variables for messages |
| `MaxHistory` | `*int` | No | — | Maximum number of conversation history messages to cache |
| `Vendor` | `string` | No | — | Vendor override |
| `McpServers` | `[]map[string]interface{}` | No | — | MCP server connections |
#### `NewAnthropic`
```go
func NewAnthropic(opts AnthropicOptions) *Anthropic
```
Panics if `APIKey`, `Model`, `URL`, `Headers`, or `MaxTokens` is empty.
| Field | Type | Required | Default | Description |
| ------------------- | -------------------------- | -------- | ---------- | -------------------------------------------------------- |
| `APIKey` | `string` | Yes | — | Anthropic API key |
| `Model` | `string` | Yes | — | Model identifier |
| `URL` | `string` | Yes | — | Anthropic messages endpoint URL |
| `Headers` | `map[string]string` | Yes | — | Request headers, including Anthropic API version |
| `MaxTokens` | `*int` | Yes | — | Max tokens |
| `Temperature` | `*float64` | No | — | Sampling temperature |
| `TopP` | `*float64` | No | — | Nucleus sampling |
| `SystemMessages` | `[]map[string]interface{}` | No | — | System messages |
| `GreetingMessage` | `string` | No | — | Agent greeting message |
| `FailureMessage` | `string` | No | — | Message spoken when LLM fails |
| `InputModalities` | `[]string` | No | `["text"]` | Input modalities |
| `OutputModalities` | `[]string` | No | — | Output modalities |
| `Params` | `map[string]interface{}` | No | — | Additional model parameters |
| `GreetingConfigs` | `map[string]interface{}` | No | — | Greeting playback configuration |
| `TemplateVariables` | `map[string]string` | No | — | Template variables for messages |
| `MaxHistory` | `*int` | No | — | Maximum number of conversation history messages to cache |
| `Vendor` | `string` | No | — | Vendor override |
| `McpServers` | `[]map[string]interface{}` | No | — | MCP server connections |
#### `NewGemini`
```go
func NewGemini(opts GeminiOptions) *Gemini
```
Panics if `APIKey` or `Model` is empty.
| Field | Type | Required | Default | Description |
| ------------------- | -------------------------- | -------- | ---------- | -------------------------------------------------------- |
| `APIKey` | `string` | Yes | — | Google AI API key |
| `Model` | `string` | Yes | — | Model identifier |
| `URL` | `string` | No | — | Custom API endpoint URL |
| `Temperature` | `*float64` | No | — | Sampling temperature |
| `TopP` | `*float64` | No | — | Nucleus sampling |
| `TopK` | `*int` | No | — | Top-K sampling |
| `MaxOutputTokens` | `*int` | No | — | Maximum output tokens |
| `SystemMessages` | `[]map[string]interface{}` | No | — | System messages |
| `GreetingMessage` | `string` | No | — | Agent greeting message |
| `FailureMessage` | `string` | No | — | Message spoken when LLM fails |
| `InputModalities` | `[]string` | No | `["text"]` | Input modalities |
| `OutputModalities` | `[]string` | No | — | Output modalities |
| `Params` | `map[string]interface{}` | No | — | Additional model parameters |
| `Headers` | `map[string]string` | No | — | Custom HTTP headers forwarded to the LLM provider |
| `GreetingConfigs` | `map[string]interface{}` | No | — | Greeting playback configuration |
| `TemplateVariables` | `map[string]string` | No | — | Template variables for messages |
| `MaxHistory` | `*int` | No | — | Maximum number of conversation history messages to cache |
| `Vendor` | `string` | No | — | Vendor override |
| `McpServers` | `[]map[string]interface{}` | No | — | MCP server connections |
### Other LLM vendors
The SDK also includes named helpers for the remaining Agora-supported LLM providers. These helpers choose the correct request format internally.
| Constructor | Options Struct | Required Fields |
| ------------------ | ---------------------- | ------------------------------------------- |
| `NewGroq` | `GroqOptions` | `APIKey`, `Model`, `BaseURL` |
| `NewVertexAILLM` | `VertexAILLMOptions` | `APIKey`, `Model`, `ProjectID`, `Location` |
| `NewAmazonBedrock` | `AmazonBedrockOptions` | `AccessKey`, `SecretKey`, `Region`, `Model` |
| `NewDify` | `DifyOptions` | `APIKey`, `URL`, `Model` |
| `NewCustomLLM` | `CustomLLMOptions` | `APIKey`, `BaseURL`, `Model` |
### TTS vendors
Use with [`WithTts()`](#withttsvendor). The `SampleRate` field determines avatar compatibility — see [`WithAvatar()`](#withavatarvendor). Use [`SampleRate` constants](#samplerate) for the `SampleRate` field.
#### `NewElevenLabsTTS`
```go
func NewElevenLabsTTS(opts ElevenLabsTTSOptions) *ElevenLabsTTS
```
Panics if `Key`, `ModelID`, `VoiceID`, or `BaseURL` is empty.
| Field | Type | Required | Description |
| -------------------------- | ------------- | -------- | --------------------------------------------------- |
| `Key` | `string` | Yes | ElevenLabs API key |
| `ModelID` | `string` | Yes | Model identifier, for example `"eleven_flash_v2_5"` |
| `VoiceID` | `string` | Yes | Voice identifier |
| `BaseURL` | `string` | Yes | WebSocket base URL |
| `SampleRate` | `*SampleRate` | No | Output sample rate |
| `OptimizeStreamingLatency` | `*int` | No | Latency optimization level (0–4) |
| `Stability` | `*float64` | No | Voice stability (0.0–1.0) |
| `SimilarityBoost` | `*float64` | No | Voice similarity boost (0.0–1.0) |
| `Style` | `*float64` | No | Voice style exaggeration (0.0–1.0) |
| `UseSpeakerBoost` | `*bool` | No | Enable speaker boost |
| `SkipPatterns` | `[]int` | No | Patterns to skip in TTS output |
#### `NewMicrosoftTTS`
```go
func NewMicrosoftTTS(opts MicrosoftTTSOptions) *MicrosoftTTS
```
Panics if `Key`, `Region`, or `VoiceName` is empty.
| Field | Type | Required | Description |
| -------------- | ------------- | -------- | --------------------------------------------- |
| `Key` | `string` | Yes | Azure Speech Services key |
| `Region` | `string` | Yes | Azure region, for example `"eastus"` |
| `VoiceName` | `string` | Yes | Voice name, for example `"en-US-JennyNeural"` |
| `SampleRate` | `*SampleRate` | No | Output sample rate |
| `Speed` | `*float64` | No | Speaking rate multiplier |
| `Volume` | `*float64` | No | Audio volume |
| `SkipPatterns` | `[]int` | No | Patterns to skip |
#### `NewOpenAITTS`
Fixed sample rate: `SampleRate24kHz`.
```go
func NewOpenAITTS(opts OpenAITTSOptions) *OpenAITTS
```
Panics if `Voice` is empty. `APIKey`, `Model`, and `BaseURL` are required together for BYOK. `APIKey` is optional for the Agora-managed `tts-1` path. Always returns `SampleRate24kHz` from `GetSampleRate()`.
| Field | Type | Required | Description |
| -------------- | ---------- | --------- | ------------------------------------------------------------------------------ |
| `APIKey` | `string` | BYOK only | OpenAI API key. Optional for the Agora-managed `tts-1` path. |
| `Voice` | `string` | Yes | Voice name: `"alloy"`, `"echo"`, `"fable"`, `"onyx"`, `"nova"`, or `"shimmer"` |
| `Model` | `string` | BYOK only | Model identifier |
| `BaseURL` | `string` | BYOK only | OpenAI TTS endpoint URL |
| `Instructions` | `string` | No | Custom instructions for voice style, accent, pace, and tone |
| `Speed` | `*float64` | No | Speech speed multiplier |
| `SkipPatterns` | `[]int` | No | Patterns to skip |
#### `NewCartesiaTTS`
```go
func NewCartesiaTTS(opts CartesiaTTSOptions) *CartesiaTTS
```
Panics if `APIKey`, `VoiceID`, or `ModelID` is empty.
| Field | Type | Required | Description |
| -------------- | ------------- | -------- | ----------------------------------------------------------- |
| `APIKey` | `string` | Yes | Cartesia API key |
| `VoiceID` | `string` | Yes | Voice identifier (serialized as `{"mode":"id","id":"..."}`) |
| `ModelID` | `string` | Yes | Model identifier |
| `BaseURL` | `string` | No | WebSocket URL for the Cartesia streaming API |
| `Language` | `string` | No | Target language for speech synthesis |
| `SampleRate` | `*SampleRate` | No | Output sample rate |
| `SkipPatterns` | `[]int` | No | Patterns to skip |
#### `NewGoogleTTS`
```go
func NewGoogleTTS(opts GoogleTTSOptions) *GoogleTTS
```
Panics if `Key` or `VoiceName` is empty.
| Field | Type | Required | Description |
| -------------- | ------------- | -------- | -------------------- |
| `Key` | `string` | Yes | Google Cloud API key |
| `VoiceName` | `string` | Yes | Voice name |
| `LanguageCode` | `string` | No | Language code |
| `SampleRate` | `*SampleRate` | No | Output sample rate |
| `SkipPatterns` | `[]int` | No | Patterns to skip |
#### `NewAmazonTTS`
```go
func NewAmazonTTS(opts AmazonTTSOptions) *AmazonTTS
```
Panics if `AccessKey`, `SecretKey`, `Region`, `VoiceID`, or `Engine` is empty.
| Field | Type | Required | Description |
| -------------- | -------- | -------- | --------------------- |
| `AccessKey` | `string` | Yes | AWS access key |
| `SecretKey` | `string` | Yes | AWS secret key |
| `Region` | `string` | Yes | AWS region |
| `VoiceID` | `string` | Yes | Amazon Polly voice ID |
| `Engine` | `string` | Yes | Polly engine type |
| `SkipPatterns` | `[]int` | No | Patterns to skip |
#### `NewDeepgramTTS`
```go
func NewDeepgramTTS(opts DeepgramTTSOptions) *DeepgramTTS
```
Panics if `APIKey` or `Model` is empty.
| Field | Type | Required | Description |
| ------------------ | ------------------------ | -------- | ----------------------------------------------------------------------------- |
| `APIKey` | `string` | Yes | Deepgram API key |
| `Model` | `string` | Yes | Deepgram TTS model, for example `"aura-2-thalia-en"` |
| `BaseURL` | `string` | No | WebSocket endpoint. Defaults server-side to `wss://api.deepgram.com/v1/speak` |
| `SampleRate` | `*SampleRate` | No | Output sample rate |
| `AdditionalParams` | `map[string]interface{}` | No | Additional Deepgram TTS parameters, flattened into `params` |
| `SkipPatterns` | `[]int` | No | Patterns to skip |
#### `NewHumeAITTS`
```go
func NewHumeAITTS(opts HumeAITTSOptions) *HumeAITTS
```
Panics if `Key`, `VoiceID`, or `Provider` is empty.
| Field | Type | Required | Description |
| ----------------- | ---------- | -------- | -------------------------------------------------------- |
| `Key` | `string` | Yes | Hume AI API key |
| `VoiceID` | `string` | Yes | Hume AI voice ID |
| `Provider` | `string` | Yes | Voice provider type, such as `CUSTOM_VOICE` or `HUME_AI` |
| `ConfigID` | `string` | No | Configuration ID |
| `BaseURL` | `string` | No | Base URL |
| `Speed` | `*float64` | No | Playback speed |
| `TrailingSilence` | `*float64` | No | Trailing silence in seconds |
| `SkipPatterns` | `[]int` | No | Patterns to skip |
#### `NewRimeTTS`
```go
func NewRimeTTS(opts RimeTTSOptions) *RimeTTS
```
Panics if `Key`, `Speaker`, or `ModelID` is empty.
| Field | Type | Required | Description |
| -------------- | -------- | -------- | ------------------ |
| `Key` | `string` | Yes | Rime API key |
| `Speaker` | `string` | Yes | Speaker identifier |
| `ModelID` | `string` | Yes | Model identifier |
| `BaseURL` | `string` | No | WebSocket URL |
| `SkipPatterns` | `[]int` | No | Patterns to skip |
#### `NewFishAudioTTS`
```go
func NewFishAudioTTS(opts FishAudioTTSOptions) *FishAudioTTS
```
Panics if `Key`, `ReferenceID`, or `Backend` is empty.
| Field | Type | Required | Description |
| -------------- | -------- | -------- | --------------------- |
| `Key` | `string` | Yes | Fish Audio API key |
| `ReferenceID` | `string` | Yes | Reference audio ID |
| `Backend` | `string` | Yes | Backend model version |
| `SkipPatterns` | `[]int` | No | Patterns to skip |
#### `NewMiniMaxTTS`
```go
func NewMiniMaxTTS(opts MiniMaxTTSOptions) *MiniMaxTTS
```
Panics if `Model` is empty. `Key` is optional for supported preset-backed MiniMax models (`speech-2.6-turbo`, `speech_2_6_turbo`, `speech-2.8-turbo`, `speech_2_8_turbo`). BYOK still requires `Key` and `GroupID`, and preset-backed mode must not set `GroupID`, `VoiceID`, or `URL`.
| Field | Type | Required | Description |
| ------------------ | ------------------------ | -------- | -------------------------------------------------------------------- |
| `Key` | `string` | No | MiniMax API key. Optional for supported preset-backed MiniMax models |
| `GroupID` | `string` | No | MiniMax group ID. Required for BYOK |
| `Model` | `string` | Yes | Model name, for example `"speech-02-turbo"` |
| `VoiceID` | `string` | No | Voice style identifier. BYOK only |
| `URL` | `string` | No | WebSocket endpoint. BYOK only |
| `AdditionalParams` | `map[string]interface{}` | No | Additional MiniMax parameters, flattened into `params` |
| `SkipPatterns` | `[]int` | No | Patterns to skip |
#### `NewMurfTTS`
```go
func NewMurfTTS(opts MurfTTSOptions) *MurfTTS
```
Panics if `Key` is empty.
| Field | Type | Required | Description |
| -------------- | ---------- | -------- | ----------------------------------------------- |
| `Key` | `string` | Yes | Murf API key |
| `VoiceID` | `string` | No | Voice ID, for example `"Ariana"` or `"Natalie"` |
| `BaseURL` | `string` | No | WebSocket endpoint |
| `Locale` | `string` | No | Voice locale |
| `Rate` | `*float64` | No | Speech rate |
| `Pitch` | `*float64` | No | Pitch adjustment |
| `Model` | `string` | No | TTS model |
| `SampleRate` | `*int` | No | Audio sample rate |
| `SkipPatterns` | `[]int` | No | Patterns to skip |
#### `NewSarvamTTS`
```go
func NewSarvamTTS(opts SarvamTTSOptions) *SarvamTTS
```
Panics if `Key`, `Speaker`, or `TargetLanguageCode` is empty.
| Field | Type | Required | Description |
| -------------------- | ---------- | -------- | -------------------- |
| `Key` | `string` | Yes | Sarvam API key |
| `Speaker` | `string` | Yes | Speaker name |
| `TargetLanguageCode` | `string` | Yes | Target language code |
| `Pitch` | `*float64` | No | Pitch adjustment |
| `Pace` | `*float64` | No | Speed of speech |
| `Loudness` | `*float64` | No | Volume level |
| `SampleRate` | `*int` | No | Audio sample rate |
| `SkipPatterns` | `[]int` | No | Patterns to skip |
#### `NewTypecastTTS`
```go
func NewTypecastTTS(opts TypecastTTSOptions) *TypecastTTS
```
Panics if `APIKey`, `VoiceID`, or `Model` is empty.
| Field | Type | Required | Description |
| ------------------ | ------------------------ | -------- | ------------------------------------------------- |
| `APIKey` | `string` | Yes | Typecast API key |
| `VoiceID` | `string` | Yes | Typecast voice identifier |
| `Model` | `string` | Yes | Typecast TTS model name, for example `"ssfm-v30"` |
| `AdditionalParams` | `map[string]interface{}` | No | Additional Typecast parameters |
| `SkipPatterns` | `[]int` | No | Patterns to skip |
#### `NewGradiumTTS`
```go
func NewGradiumTTS(opts GradiumTTSOptions) *GradiumTTS
```
Panics if `APIKey` is empty.
| Field | Type | Required | Description |
| ------------------ | ------------------------ | -------- | ---------------------------------------------------------- |
| `APIKey` | `string` | Yes | Gradium API key |
| `URL` | `string` | No | WebSocket endpoint for streaming TTS output |
| `ModelName` | `string` | No | Gradium TTS model name |
| `VoiceID` | `string` | No | Gradium voice identifier |
| `SampleRate` | `*SampleRate` | No | Output sample rate |
| `AdditionalParams` | `map[string]interface{}` | No | Additional Gradium TTS parameters, flattened into `params` |
| `SkipPatterns` | `[]int` | No | Patterns to skip |
#### `NewMistralTTS`
```go
func NewMistralTTS(opts MistralTTSOptions) *MistralTTS
```
Panics if `APIKey` is empty.
| Field | Type | Required | Description |
| ------------------ | ------------------------ | -------- | ---------------------------------------------------------- |
| `APIKey` | `string` | Yes | Mistral API key |
| `Model` | `string` | No | Mistral TTS model name |
| `Voice` | `string` | No | Mistral voice identifier |
| `AdditionalParams` | `map[string]interface{}` | No | Additional Mistral TTS parameters, flattened into `params` |
| `SkipPatterns` | `[]int` | No | Patterns to skip |
#### `NewGenericTTS`
```go
func NewGenericTTS(opts GenericTTSOptions) *GenericTTS
```
Custom OpenAI-compatible HTTP TTS. `URL` is required and must be an absolute HTTP or HTTPS address that includes a host — this panics if `URL` is missing, badly formatted, or uses a non-HTTP(S) scheme such as `ws`, `wss`, or `ftp`. A valid URL is serialized as `tts.vendor = "generic_http"`.
| Field | Type | Required | Description |
| ------------------ | ------------------------ | -------- | --------------------------------------------------------------------------------------------------------------------------------------------------------------------- |
| `URL` | `string` | Yes | The HTTP(S) endpoint of your custom TTS service |
| `Headers` | `map[string]string` | No | Custom HTTP headers to forward to the TTS service. Omitted from the request if not set |
| `APIKey` | `string` | No | The API key used to authenticate with the TTS service |
| `Model` | `string` | No | The TTS model name |
| `Voice` | `string` | No | The voice name |
| `Speed` | `*float64` | No | The speech rate |
| `SampleRate` | `*SampleRate` | No | The sample rate, in Hz, of the output audio. If your TTS service doesn't support multiple sample rates, make sure the returned audio's sample rate matches this value |
| `ResponseFormat` | `string` | No | The output audio format. Conversational AI Engine currently supports `pcm` |
| `Instruction` | `string` | No | Instructions for voice style, emotion, or other playback directives |
| `AdditionalParams` | `map[string]interface{}` | No | Additional parameters passed through to the TTS service. Explicit fields with the same name take precedence |
| `SkipPatterns` | `[]int` | No | Patterns to skip |
#### `NewXaiTTS`
```go
func NewXaiTTS(opts XaiTTSOptions) *XaiTTS
```
Panics if `APIKey` or `Language` is empty.
| Field | Type | Required | Description |
| -------------- | ------------- | -------- | ----------------------------------------- |
| `APIKey` | `string` | Yes | xAI API key |
| `Language` | `string` | Yes | BCP-47 language code for speech synthesis |
| `VoiceID` | `string` | No | xAI voice identifier |
| `SampleRate` | `*SampleRate` | No | Audio sample rate |
| `SkipPatterns` | `[]int` | No | Patterns to skip |
### STT vendors
Use with [`WithStt()`](#withsttvendor).
#### `NewDeepgramSTT`
```go
func NewDeepgramSTT(opts DeepgramSTTOptions) *DeepgramSTT
```
Panics if `APIKey` is empty unless `Model` is one of the supported Agora-managed Deepgram models (`nova-2`, `nova-3`).
| Field | Type | Required | Description |
| ------------------ | ------------------------ | --------- | ------------------------------------------------------------------------ |
| `APIKey` | `string` | BYOK only | Deepgram API key. Optional only for Agora-managed `nova-2` and `nova-3`. |
| `Model` | `string` | No | Model, for example `"nova-2"` |
| `Language` | `string` | No | Language code, for example `"en-US"` |
| `Keyterm` | `string` | No | Key term to boost recognition (serialized as `keyterm`) |
| `SmartFormat` | `*bool` | No | Enable smart formatting |
| `Punctuation` | `*bool` | No | Enable punctuation |
| `AdditionalParams` | `map[string]interface{}` | No | Additional vendor parameters |
#### `NewSpeechmaticsSTT`
```go
func NewSpeechmaticsSTT(opts SpeechmaticsSTTOptions) *SpeechmaticsSTT
```
Panics if `APIKey` or `Language` is empty.
| Field | Type | Required | Description |
| ------------------ | ------------------------ | -------- | ------------------------------------ |
| `APIKey` | `string` | Yes | Speechmatics API key |
| `Language` | `string` | Yes | Language code |
| `URI` | `string` | No | Speechmatics streaming WebSocket URL |
| `AdditionalParams` | `map[string]interface{}` | No | Additional vendor params |
| `Model` | `string` | No | Model identifier |
#### `NewMicrosoftSTT`
```go
func NewMicrosoftSTT(opts MicrosoftSTTOptions) *MicrosoftSTT
```
Panics if `Key`, `Region`, or `Language` is empty.
| Field | Type | Required | Description |
| ------------------ | ------------------------ | -------- | ------------------------- |
| `Key` | `string` | Yes | Azure Speech Services key |
| `Region` | `string` | Yes | Azure region |
| `Language` | `string` | Yes | Language code |
| `AdditionalParams` | `map[string]interface{}` | No | Additional vendor params |
#### `NewOpenAISTT`
```go
func NewOpenAISTT(opts OpenAISTTOptions) *OpenAISTT
```
Panics if `APIKey` is empty. The serialized configuration also requires a transcription `prompt` and `language` — provide them through the `Prompt` and `Language` fields or within `InputAudioTranscription`. `model` defaults to `gpt-4o-mini-transcribe`.
| Field | Type | Required | Description |
| ------------------------- | ------------------------ | -------- | ---------------------------------------------------------- |
| `APIKey` | `string` | Yes | OpenAI API key |
| `Model` | `string` | No | Transcription model. Defaults to `gpt-4o-mini-transcribe`. |
| `Language` | `string` | No | Language code |
| `Prompt` | `string` | No | Prompt for OpenAI transcription |
| `InputAudioTranscription` | `map[string]interface{}` | No | OpenAI transcription settings |
| `AdditionalParams` | `map[string]interface{}` | No | Additional vendor params |
#### `NewGoogleSTT`
```go
func NewGoogleSTT(opts GoogleSTTOptions) *GoogleSTT
```
Panics if `ProjectID`, `Location`, `ADCCredentialsString`, or `Language` is empty.
| Field | Type | Required | Description |
| ---------------------- | ------------------------ | -------- | ---------------------------------------------- |
| `ProjectID` | `string` | Yes | Google Cloud project ID |
| `Location` | `string` | Yes | Google Cloud region |
| `ADCCredentialsString` | `string` | Yes | Google service account credentials JSON string |
| `Language` | `string` | Yes | Google recognition language |
| `Model` | `string` | No | Model identifier |
| `AdditionalParams` | `map[string]interface{}` | No | Additional vendor params |
#### `NewAmazonSTT`
```go
func NewAmazonSTT(opts AmazonSTTOptions) *AmazonSTT
```
Panics if `AccessKey`, `SecretKey`, `Region`, or `Language` is empty.
| Field | Type | Required | Description |
| ------------------ | ------------------------ | -------- | ------------------------ |
| `AccessKey` | `string` | Yes | AWS access key |
| `SecretKey` | `string` | Yes | AWS secret key |
| `Region` | `string` | Yes | AWS region |
| `Language` | `string` | Yes | Language code |
| `AdditionalParams` | `map[string]interface{}` | No | Additional vendor params |
#### `NewAssemblyAISTT`
```go
func NewAssemblyAISTT(opts AssemblyAISTTOptions) *AssemblyAISTT
```
Panics if `APIKey` or `Language` is empty.
| Field | Type | Required | Description |
| ------------------ | ------------------------ | -------- | ---------------------------------- |
| `APIKey` | `string` | Yes | AssemblyAI API key |
| `Language` | `string` | Yes | AssemblyAI language code |
| `URI` | `string` | No | AssemblyAI streaming WebSocket URL |
| `AdditionalParams` | `map[string]interface{}` | No | Additional vendor params |
#### `NewAresSTT`
```go
func NewAresSTT(options ...AresSTTOptions) *AresSTT
```
Agora-managed global ASR provider. `options` is variadic so callers can select Ares without configuring keyword hints; panics if more than one options value is passed.
| Field | Type | Required | Description |
| ------------------ | ------------------------ | -------- | ---------------------------------- |
| `Keywords` | `[]string` | No | Keywords that improve ASR accuracy |
| `AdditionalParams` | `map[string]interface{}` | No | Additional vendor params |
#### `NewSarvamSTT`
```go
func NewSarvamSTT(opts SarvamSTTOptions) *SarvamSTT
```
Panics if `APIKey` or `Language` is empty.
| Field | Type | Required | Description |
| ------------------ | ------------------------ | -------- | ------------------------ |
| `APIKey` | `string` | Yes | Sarvam API key |
| `Language` | `string` | Yes | Language code |
| `Model` | `string` | No | Model identifier |
| `AdditionalParams` | `map[string]interface{}` | No | Additional vendor params |
### MLLM vendors
Use with [`WithMllm()`](#withmllmvendor) for multimodal end-to-end audio processing without separate STT, LLM, or TTS steps. `WithMllm()` automatically sets `mllm.enable = true`; you do not need to set the deprecated `AdvancedFeatures.EnableMllm` flag.
#### `NewOpenAIRealtime`
```go
func NewOpenAIRealtime(opts OpenAIRealtimeOptions) *OpenAIRealtime
```
Panics if `APIKey` is empty.
| Field | Type | Required | Default | Description |
| ------------------------- | -------------------------- | -------- | --------------------------- | --------------------------------------------------------------------- |
| `APIKey` | `string` | Yes | — | OpenAI API key |
| `Model` | `string` | No | `"gpt-4o-realtime-preview"` | Model identifier |
| `Voice` | `string` | No | — | Voice name |
| `Instructions` | `string` | No | — | System instructions |
| `InputAudioTranscription` | `map[string]interface{}` | No | — | Input audio transcription settings |
| `URL` | `string` | No | — | Custom WebSocket URL |
| `GreetingMessage` | `string` | No | — | Agent greeting message |
| `FailureMessage` | `string` | No | — | Message played when the model call fails |
| `InputModalities` | `[]string` | No | — | Input modalities |
| `OutputModalities` | `[]string` | No | — | Output modalities |
| `Messages` | `[]map[string]interface{}` | No | — | Conversation messages for short-term memory |
| `Params` | `map[string]interface{}` | No | — | Additional parameters |
| `TurnDetection` | `*Agora.MllmTurnDetection` | No | — | MLLM turn detection configuration; overrides top-level turn detection |
#### `NewAzureOpenAIRealtime`
```go
func NewAzureOpenAIRealtime(opts AzureOpenAIRealtimeOptions) *AzureOpenAIRealtime
```
Panics if `APIKey`, `URL`, or `TurnDetection` is empty.
| Field | Type | Required | Default | Description |
| ------------------ | -------------------------- | -------- | ------- | --------------------------------------------------------------------- |
| `APIKey` | `string` | Yes | — | Azure OpenAI API key |
| `URL` | `string` | Yes | — | Azure OpenAI Realtime WebSocket URL |
| `TurnDetection` | `*Agora.MllmTurnDetection` | Yes | — | MLLM turn detection configuration; overrides top-level turn detection |
| `Model` | `string` | No | — | Azure OpenAI Realtime model or deployment name |
| `Voice` | `string` | No | — | Voice identifier |
| `Instructions` | `string` | No | — | System instructions |
| `MaxHistory` | `*int` | No | — | Number of conversation history messages to cache |
| `GreetingMessage` | `string` | No | — | Agent greeting message |
| `OutputModalities` | `[]string` | No | — | Output modalities |
| `Messages` | `[]map[string]interface{}` | No | — | Conversation messages for short-term memory |
#### `NewGeminiLive`
```go
func NewGeminiLive(opts GeminiLiveOptions) *GeminiLive
```
Panics if `APIKey` or `Model` is empty.
| Field | Type | Required | Default | Description |
| ------------------ | -------------------------- | -------- | ------- | ------------------------------------------------------------------------------------------------------------------- |
| `APIKey` | `string` | Yes | — | Google AI API key |
| `Model` | `string` | Yes | — | Gemini Live model identifier |
| `ThinkingLevel` | `string` | No | — | Reasoning budget (`"low"`, `"medium"`, or `"high"`), supported only by `"models/gemini-3.8-live-extended-thinking"` |
| `URL` | `string` | No | — | Custom WebSocket URL |
| `Instructions` | `string` | No | — | System instruction |
| `Voice` | `string` | No | — | Voice name |
| `AffectiveDialog` | `*bool` | No | — | Enable affective (emotion-aware) dialog |
| `ProactiveAudio` | `*bool` | No | — | Enable proactive audio |
| `TranscribeAgent` | `*bool` | No | — | Enable transcription of agent audio |
| `TranscribeUser` | `*bool` | No | — | Enable transcription of user audio |
| `HttpOptions` | `map[string]interface{}` | No | — | Custom HTTP client options |
| `GreetingMessage` | `string` | No | — | Agent greeting message |
| `FailureMessage` | `string` | No | — | Message played when the model call fails |
| `InputModalities` | `[]string` | No | — | Input modalities |
| `OutputModalities` | `[]string` | No | — | Output modalities |
| `Messages` | `[]map[string]interface{}` | No | — | Conversation messages for short-term memory |
| `AdditionalParams` | `map[string]interface{}` | No | — | Additional parameters |
| `TurnDetection` | `*Agora.MllmTurnDetection` | No | — | MLLM turn detection configuration; overrides top-level turn detection |
#### `NewVertexAI`
```go
func NewVertexAI(opts VertexAIOptions) *VertexAI
```
Panics if `ProjectID` or `ADCredentialsString` is empty.
| Field | Type | Required | Default | Description |
| --------------------- | -------------------------- | -------- | ------------------------ | --------------------------------------------------------------------- |
| `ProjectID` | `string` | Yes | — | Google Cloud project ID |
| `ADCredentialsString` | `string` | Yes | — | Application Default Credentials JSON string |
| `Location` | `string` | No | `"us-central1"` | Google Cloud region |
| `Model` | `string` | No | `"gemini-2.0-flash-exp"` | Model identifier |
| `URL` | `string` | No | — | Custom WebSocket URL |
| `Voice` | `string` | No | — | Voice name |
| `Instructions` | `string` | No | — | System instruction |
| `AffectiveDialog` | `*bool` | No | — | Enable affective (emotion-aware) dialog |
| `ProactiveAudio` | `*bool` | No | — | Enable proactive audio |
| `TranscribeAgent` | `*bool` | No | — | Enable transcription of agent audio |
| `TranscribeUser` | `*bool` | No | — | Enable transcription of user audio |
| `HttpOptions` | `map[string]interface{}` | No | — | Custom HTTP client options |
| `GreetingMessage` | `string` | No | — | Agent greeting message |
| `FailureMessage` | `string` | No | — | Message played when the model call fails |
| `InputModalities` | `[]string` | No | — | Input modalities |
| `OutputModalities` | `[]string` | No | — | Output modalities |
| `Messages` | `[]map[string]interface{}` | No | — | Conversation messages for short-term memory |
| `AdditionalParams` | `map[string]interface{}` | No | — | Additional parameters |
| `TurnDetection` | `*Agora.MllmTurnDetection` | No | — | MLLM turn detection configuration; overrides top-level turn detection |
#### `NewXaiGrok`
```go
func NewXaiGrok(opts XaiGrokOptions) *XaiGrok
```
xAI Grok MLLM vendor (`mllm.vendor`: `"xai"`). Panics if `APIKey` is empty. Defaults `URL` to `wss://api.x.ai/v1/realtime`.
`NewXAIGrok` / `XAIGrokOptions` are deprecated aliases.
##### XaiGrokOptions
Same fields as `XAIGrokOptions` below.
#### `NewXAIGrok` (deprecated)
```go
func NewXAIGrok(opts XAIGrokOptions) *XAIGrok
```
**Deprecated. Use `NewXaiGrok` instead.**
##### XAIGrokOptions
| Field | Type | Required | Default | Description |
| ------------------ | -------------------------- | -------- | ------------------------------ | ------------------------------------------- |
| `APIKey` | `string` | Yes | — | xAI API key |
| `URL` | `string` | No | `"wss://api.x.ai/v1/realtime"` | xAI Realtime WebSocket URL |
| `Voice` | `string` | No | — | Voice identifier |
| `Language` | `string` | No | — | Language code |
| `SampleRate` | `*int` | No | — | Audio sample rate in Hz |
| `GreetingMessage` | `string` | No | — | Agent greeting message |
| `FailureMessage` | `string` | No | — | Message played when the model call fails |
| `InputModalities` | `[]string` | No | — | Input modalities |
| `OutputModalities` | `[]string` | No | — | Output modalities |
| `Messages` | `[]map[string]interface{}` | No | — | Conversation messages for short-term memory |
| `Params` | `map[string]interface{}` | No | — | Additional xAI parameters |
| `TurnDetection` | `*Agora.MllmTurnDetection` | No | — | `agora_vad` / `server_vad` turn detection |
### Avatar vendors
Use with [`WithAvatar()`](#withavatarvendor). Each avatar vendor requires a specific TTS sample rate — the constructor panics if the sample rate does not match.
#### `NewLiveAvatarAvatar`
Requires TTS at **24,000 Hz** (`SampleRate24kHz`).
```go
func NewLiveAvatarAvatar(opts LiveAvatarAvatarOptions) *LiveAvatarAvatar
```
Panics if `APIKey` or `AgoraUID` is empty, or if `Quality` is not `"low"`, `"medium"`, or `"high"`.
| Field | Type | Required | Description |
| --------------------- | ------------------------ | -------- | ----------------------------------------------- |
| `APIKey` | `string` | Yes | LiveAvatar API key |
| `Quality` | `string` | Yes | Video quality: `"low"`, `"medium"`, or `"high"` |
| `AgoraUID` | `string` | Yes | UID for the avatar's video stream |
| `AgoraToken` | `string` | No | RTC token for avatar authentication |
| `AvatarID` | `string` | No | LiveAvatar avatar ID |
| `Enable` | `*bool` | No | Enable or disable the avatar. Default: `true` |
| `DisableIdleTimeout` | `*bool` | No | Disable the idle timeout |
| `ActivityIdleTimeout` | `*int` | No | Idle timeout in seconds |
| `AdditionalParams` | `map[string]interface{}` | No | Additional vendor params |
#### `NewAkoolAvatar`
Requires TTS at **16,000 Hz** (`SampleRate16kHz`).
```go
func NewAkoolAvatar(opts AkoolAvatarOptions) *AkoolAvatar
```
Panics if `APIKey` is empty.
| Field | Type | Required | Description |
| ------------------ | ------------------------ | -------- | ---------------------------- |
| `APIKey` | `string` | Yes | Akool API key |
| `AvatarID` | `string` | No | Avatar ID |
| `Enable` | `*bool` | No | Enable or disable the avatar |
| `AdditionalParams` | `map[string]interface{}` | No | Additional vendor parameters |
#### `NewAnamAvatar`
Anam avatars do not enforce a fixed TTS sample rate.
```go
func NewAnamAvatar(opts AnamAvatarOptions) *AnamAvatar
```
Panics if `APIKey` is empty.
| Field | Type | Required | Description |
| ------------------ | ------------------------ | -------- | ---------------------------------------------------- |
| `APIKey` | `string` | Yes | Anam API key |
| `PersonaID` | `string` | No | Anam persona identifier (serialized as `persona_id`) |
| `Enable` | `*bool` | No | Enable or disable the avatar |
| `AdditionalParams` | `map[string]interface{}` | No | Additional vendor params |
#### `NewGenericAvatar`
```go
func NewGenericAvatar(opts GenericAvatarOptions) *GenericAvatar
```
Panics if `APIKey`, `APIBaseURL`, `AvatarID`, or `AgoraUID` is empty. `AgoraAppID`, `AgoraChannel`, and `AgoraToken` are optional; AgentKit fills them from the session on `Start()` when omitted.
Generic avatars do not enforce a fixed TTS sample rate. Use the sample rate required by your avatar provider.
| Field | Type | Required | Description |
| ------------------ | ------------------------ | -------- | ------------------------------------------------------------------------------------ |
| `APIKey` | `string` | Yes | Generic avatar vendor API key |
| `APIBaseURL` | `string` | Yes | Generic avatar API endpoint |
| `AvatarID` | `string` | Yes | Avatar identifier |
| `AgoraUID` | `string` | Yes | UID for avatar video stream; use a different UID from `AgentUID` |
| `AgoraToken` | `string` | No | Avatar token; auto-generated with the same token format as agent tokens when omitted |
| `AgoraAppID` | `string` | No | Overrides session App ID |
| `AgoraChannel` | `string` | No | Overrides session channel |
| `Enable` | `*bool` | No | Enable or disable the avatar |
| `AdditionalParams` | `map[string]interface{}` | No | Additional vendor params |
#### `NewHeyGenAvatar` (deprecated)
Requires TTS at **24,000 Hz** (`SampleRate24kHz`).
```go
func NewHeyGenAvatar(opts HeyGenAvatarOptions) *HeyGenAvatar
```
`NewHeyGenAvatar` and `HeyGenAvatarOptions` are deprecated. Use [`NewLiveAvatarAvatar`](#newliveavataravatar) instead. `HeyGenAvatarOptions` is an alias of `LiveAvatarAvatarOptions` and the fields are identical; the emitted `vendor` remains `"heygen"`.
Panics if `APIKey` or `AgoraUID` is empty, or if `Quality` is not `"low"`, `"medium"`, or `"high"`.
## Token utilities
Helper functions for generating and managing tokens.
```go
import "github.com/AgoraIO-Conversational-AI/agent-server-sdk-go/agentkit"
```
```go
func GenerateRtcToken(opts GenerateTokenOptions) (string, error)
func GenerateRtcTokenWithAccount(opts GenerateRtcTokenWithAccountOptions) (string, error)
func GenerateConvoAIToken(opts GenerateConvoAITokenOptions) (string, error)
```
### `GenerateConvoAIToken()`
Generates a combined RTC+RTM Conversational AI token. This is the same token the SDK generates automatically when `AppID` and `AppCertificate` are provided on `AgentSessionOptions`.
```go
func GenerateConvoAIToken(opts GenerateConvoAITokenOptions) (string, error)
```
| Field | Type | Required | Description |
| ---------------- | -------- | -------- | ----------------------------------------------------------------- |
| `AppID` | `string` | Yes | Agora App ID |
| `AppCertificate` | `string` | Yes | Agora App Certificate |
| `ChannelName` | `string` | Yes | The channel the token grants access to |
| `Account` | `string` | Yes | The UID this token is issued for, as a string |
| `TokenExpire` | `int` | No | Token lifetime in seconds. Default: `86400`. Valid range: 1–86400 |
```go
token, err := agentkit.GenerateConvoAIToken(agentkit.GenerateConvoAITokenOptions{
AppID: os.Getenv("AGORA_APP_ID"),
AppCertificate: os.Getenv("AGORA_APP_CERT"),
ChannelName: "support-room-123",
Account: "1",
TokenExpire: agentkit.ExpiresInHours(12),
})
```
### `GenerateRtcTokenWithAccount()`
Generates an RTC token for a string account (user ID). Use `GenerateConvoAIToken()` instead for most Conversational AI use cases.
```go
func GenerateRtcTokenWithAccount(opts GenerateRtcTokenWithAccountOptions) (string, error)
```
| Field | Type | Required | Description |
| ---------------- | -------- | -------- | ------------------------------------------------------------------------------- |
| `AppID` | `string` | Yes | Agora App ID |
| `AppCertificate` | `string` | Yes | Agora App Certificate |
| `Channel` | `string` | Yes | Channel name |
| `Account` | `string` | Yes | String user account |
| `Role` | `int` | No | RTC role: `RolePublisher` (1) or `RoleSubscriber` (2). Default: `RolePublisher` |
| `ExpirySeconds` | `int` | No | Token lifetime in seconds. Default: `DefaultExpirySeconds` (86400) |
### `GenerateRtcToken()`
Generates an RTC-only token. Use `GenerateConvoAIToken()` instead for most Conversational AI use cases.
```go
func GenerateRtcToken(opts GenerateTokenOptions) (string, error)
```
| Field | Type | Required | Description |
| ---------------- | -------- | -------- | ------------------------------------------------------------------------------- |
| `AppID` | `string` | Yes | Agora App ID |
| `AppCertificate` | `string` | Yes | Agora App Certificate |
| `Channel` | `string` | Yes | Channel name |
| `UID` | `uint32` | Yes | User ID. Use `0` for any user |
| `Role` | `int` | No | RTC role: `RolePublisher` (1) or `RoleSubscriber` (2). Default: `RolePublisher` |
| `ExpirySeconds` | `int` | No | Token lifetime in seconds. Default: `DefaultExpirySeconds` (3600) |
### `ExpiresInHours()` / `ExpiresInMinutes()`
Helper functions for specifying token lifetimes. Use with `AgentSessionOptions.ExpiresIn` or token generation functions. Returns an error if the value is ≤ 0; warns and caps at 86400 if the result exceeds 24 hours.
```go
func ExpiresInHours(hours int) (int, error)
func ExpiresInMinutes(minutes int) (int, error)
```
```go
expiresIn, err := agentkit.ExpiresInHours(12)
if err != nil {
log.Fatalf("Invalid expiry: %v", err)
}
session := agentkit.NewAgentSession(agentkit.AgentSessionOptions{
// ...
ExpiresIn: expiresIn,
})
```
## Types and constants
Shared types, constants, and enums used across the SDK.
### `SessionStatus`
Typed string constants representing the session lifecycle states. Read via `session.Status()`.
```go
type SessionStatus string
const (
StatusIdle SessionStatus = "idle"
StatusStarting SessionStatus = "starting"
StatusRunning SessionStatus = "running"
StatusStopping SessionStatus = "stopping"
StatusStopped SessionStatus = "stopped"
StatusError SessionStatus = "error"
)
```
### `SampleRate`
Typed integer constants for audio sample rates. Use with TTS vendor `SampleRate` fields and avatar sample rate validation.
```go
type SampleRate int
const (
SampleRate8kHz SampleRate = 8000
SampleRate16kHz SampleRate = 16000
SampleRate22kHz SampleRate = 22050
SampleRate24kHz SampleRate = 24000
SampleRate44kHz SampleRate = 44100
SampleRate48kHz SampleRate = 48000
)
```
Convenience constants for avatar sample rate requirements:
```go
const (
LiveAvatarRequiredSampleRate = SampleRate24kHz
AkoolRequiredSampleRate = SampleRate16kHz // 16000 Hz
)
```
### `EventHandler`
The function signature for session event handlers. Pass implementations to [`session.On()`](#onevent-handler).
```go
type EventHandler func(data interface{})
```
| Event | `data` type | Cast example |
| ----------- | ------------------- | -------------------------------------- |
| `"started"` | `map[string]string` | `data.(map[string]string)["agent_id"]` |
| `"stopped"` | `map[string]string` | `data.(map[string]string)["agent_id"]` |
| `"error"` | `error` | `data.(error)` |
### Area constants
Used with `option.WithArea()` to select the regional API endpoint.
```go
option.AreaUS // United States (west + east)
option.AreaEU // Europe (west + central)
option.AreaAP // Asia-Pacific (southeast + northeast)
option.AreaCN // Chinese Mainland (east + north)
option.AreaUnknown // Default
```
### Type aliases
The `agentkit` package defines type aliases for common Fern-generated types. Use these in place of the full `Agora.StartAgentsRequestProperties*` names when building configuration objects.
| Alias | Underlying type |
| --------------------- | ---------------------------------------------------- |
| `TurnDetectionConfig` | `Agora.StartAgentsRequestPropertiesTurnDetection` |
| `SalConfig` | `Agora.StartAgentsRequestPropertiesSal` |
| `AdvancedFeatures` | `Agora.StartAgentsRequestPropertiesAdvancedFeatures` |
| `SessionParams` | `Agora.StartAgentsRequestPropertiesParameters` |
| `GeofenceConfig` | `Agora.StartAgentsRequestPropertiesGeofence` |
| `RtcConfig` | `Agora.StartAgentsRequestPropertiesRtc` |
| `FillerWordsConfig` | `Agora.StartAgentsRequestPropertiesFillerWords` |
| `LlmConfig` | `Agora.StartAgentsRequestPropertiesLlm` |
| `MllmConfig` | `Agora.StartAgentsRequestPropertiesMllm` |
| `AsrConfig` | `Agora.StartAgentsRequestPropertiesAsr` |
| `TtsConfig` | `Agora.Tts` |
| `AvatarConfig` | `Agora.StartAgentsRequestPropertiesAvatar` |
| `SttConfig` | `AsrConfig` |
| `LlmStyle` | `Agora.StartAgentsRequestPropertiesLlmStyle` |
| `SessionInfo` | `Agora.GetAgentsResponse` |
| `ThinkResponse` | `Agora.AgentThinkAgentManagementResponse` |
Additional SOS/EOS turn detection aliases: `TurnDetectionNestedConfig`, `StartOfSpeechConfig`, `EndOfSpeechConfig`, and related sub-types. Session/conversation aliases: `SessionListResponse`, `ConversationHistory`, `ConversationTurns`, etc. Think type aliases: `ThinkOnListeningAction`, `ThinkOnThinkingAction`, `ThinkOnSpeakingAction`.
### `AgoraError`
The Fern-generated error type returned when the API responds with a 4xx or 5xx status code. Use `errors.As` to inspect the error.
```go
import "github.com/AgoraIO-Conversational-AI/agent-server-sdk-go/core"
_, err := session.Start(ctx)
if err != nil {
var apiError *core.APIError
if errors.As(err, &apiError) {
log.Printf("Status: %d", apiError.StatusCode)
log.Printf("Body: %s", apiError.Body)
}
return err
}
```
| Field | Type | Description |
| ------------ | -------- | ------------------------------------ |
| `StatusCode` | `int` | HTTP status code returned by the API |
| `Body` | `string` | Raw response body from the API |
# Python (/en/api-reference/api-ref/server-sdk/python)
Full API reference for the Agora Conversational AI Python SDK.
## Agora / AsyncAgora Client
`Agora` (sync) and `AsyncAgora` (async) extend the Fern-generated base client with regional domain pool support and three authentication modes. Use `Agora` for synchronous applications and `AsyncAgora` for asyncio-based applications.
```python
from agora_agent import Agora, Area
client = Agora(
area=Area.US,
app_id='your-app-id',
app_certificate='your-app-certificate',
)
```
See [Sync vs. Async](#sync-vs-async) to choose the right client for your application.
### Constructor
```python
Agora(
area: Area,
app_id: str = None,
app_certificate: str = None,
username: str = None,
password: str = None,
auth_token: str = None,
headers: Dict[str, str] = None,
timeout: float = 60,
follow_redirects: bool = True,
httpx_client: httpx.Client = None,
)
```
Provide either `app_id` + `app_certificate` for app-credentials mode, or `username` + `password` for Basic Auth.
| Parameter | Type | Required | Default | Description |
| ------------------ | ---------------- | -------- | ------- | ---------------------------------------------------------------------------------------------- |
| `area` | [`Area`](#area) | Yes | — | Region for API routing |
| `app_id` | `str` | Yes\* | — | Agora App ID |
| `app_certificate` | `str` | Yes\* | — | Agora App Certificate (app-credentials mode). Keep this secret and never expose it client-side |
| `username` | `str` | Yes\* | — | Customer ID (Basic Auth mode) |
| `password` | `str` | Yes\* | — | Customer Secret (Basic Auth mode) |
| `auth_token` | `str` | No | — | Pre-built `agora token=` string |
| `headers` | `Dict[str, str]` | No | `None` | Additional headers sent with every request |
| `timeout` | `float` | No | `60` | Request timeout in seconds |
| `follow_redirects` | `bool` | No | `True` | Whether to follow HTTP redirects |
| `httpx_client` | `httpx.Client` | No | `None` | Custom httpx client instance |
\* Provide either `app_id` + `app_certificate`, or `username` + `password`.
Authentication mode is resolved from the parameters you provide:
| Parameters provided | Resolved mode |
| ---------------------------- | ------------------- |
| `app_id` + `app_certificate` | `"app-credentials"` |
| `auth_token` | `"token"` |
| `username` + `password` | `"basic"` |
`AsyncAgora` has the same constructor signature, except `httpx_client` accepts `httpx.AsyncClient` instead of `httpx.Client`.
```python
from agora_agent import AsyncAgora, Area
client = AsyncAgora(
area=Area.US,
app_id='your-app-id',
app_certificate='your-app-certificate',
)
```
See [Authentication](/en/api-reference/api-ref/conversational-ai/authentication) for details on each mode.
### Properties
#### `pool`
Access the underlying `Pool` object for advanced domain management.
```python
pool = client.pool
pool.get_area() # Area.US
```
* **Returns:** `Pool`
### Methods
The following methods are available in addition to the Fern-generated sub-client methods.
#### `next_region()`
Cycles to the next region prefix in the domain pool. Call this after a request failure to try a different regional endpoint. Synchronous on both `Agora` and `AsyncAgora`.
```python
client.next_region()
```
#### `select_best_domain()`
Triggers DNS-based domain selection to find the fastest-responding domain suffix. Results are cached for 30 seconds.
```python
# Sync (Agora)
client.select_best_domain()
# Async (AsyncAgora) — requires await
await client.select_best_domain()
```
#### `get_current_url()`
Returns the full API URL currently in use as a `str`. Synchronous on both `Agora` and `AsyncAgora`.
```python
url = client.get_current_url()
# Example: 'https://api-us-west-1.agora.io/api/conversational-ai-agent'
```
### Sub-clients
Both `Agora` and `AsyncAgora` expose Fern-generated sub-clients for direct REST API access. You typically do not need these when using the [agentkit layer](#agent).
| Property | Sync type | Async type | Description |
| ---------------------- | -------------------- | ------------------------- | -------------------------------- |
| `client.agents` | `AgentsClient` | `AsyncAgentsClient` | Start, stop, list, update agents |
| `client.telephony` | `TelephonyClient` | `AsyncTelephonyClient` | Telephony operations |
| `client.phone_numbers` | `PhoneNumbersClient` | `AsyncPhoneNumbersClient` | Phone number management |
Sub-clients are lazily initialized on first access. For most use cases, prefer the [`AgentSession`](#agentsession-asyncagentsession) API over calling `client.agents` directly.
For full method signatures and request parameters, see the [REST API reference](/en/api-reference/api-ref/conversational-ai/join).
## Agent
`Agent` is an immutable configuration object. Each builder method returns a new `Agent` instance — the original is never modified. Define one `Agent` at startup and call `create_session()` on it for each user conversation.
```python
from agora_agent import Agent
```
### Constructor
```python
Agent(
name: Optional[str] = None,
instructions: Optional[str] = None,
turn_detection: Optional[TurnDetectionConfig] = None,
interruption: Optional[InterruptionConfig] = None,
sal: Optional[SalConfig] = None,
advanced_features: Optional[Dict[str, Any]] = None,
parameters: Optional[SessionParams] = None,
greeting: Optional[str] = None,
failure_message: Optional[str] = None,
max_history: Optional[int] = None,
geofence: Optional[GeofenceConfig] = None,
labels: Optional[Dict[str, str]] = None,
rtc: Optional[RtcConfig] = None,
filler_words: Optional[FillerWordsConfig] = None,
)
```
All parameters are optional. Use the [builder methods](#builder-methods-1) to set vendor configuration after construction.
| Parameter | Type | Default | Description |
| ------------------- | ------------------------------- | ------- | ---------------------------------------------------------- |
| `name` | `Optional[str]` | `None` | Agent name, used as the default session name |
| `instructions` | `Optional[str]` | `None` | LLM system prompt |
| `turn_detection` | `Optional[TurnDetectionConfig]` | `None` | Voice activity detection settings |
| `interruption` | `Optional[InterruptionConfig]` | `None` | Unified interruption control configuration |
| `sal` | `Optional[SalConfig]` | `None` | Selective Attention Locking configuration |
| `advanced_features` | `Optional[Dict[str, Any]]` | `None` | Advanced features, for example `{'enable_rtm': True}` |
| `parameters` | `Optional[SessionParams]` | `None` | Additional session parameters |
| `greeting` | `Optional[str]` | `None` | Auto-spoken greeting when agent joins |
| `failure_message` | `Optional[str]` | `None` | Message spoken when an LLM call fails |
| `max_history` | `Optional[int]` | `None` | Maximum conversation turns kept in LLM context |
| `geofence` | `Optional[GeofenceConfig]` | `None` | Regional access restriction |
| `labels` | `Optional[Dict[str, str]]` | `None` | Custom key-value labels returned in notification callbacks |
| `rtc` | `Optional[RtcConfig]` | `None` | RTC media encryption |
| `filler_words` | `Optional[FillerWordsConfig]` | `None` | Filler words played while waiting for the LLM response |
### Builder methods
All builder methods return a **new** `Agent` instance. The original is never modified.
#### `with_llm(vendor)`
Sets the LLM vendor for the cascading flow. Pass an instance of [`OpenAI`](#openai-1), [`AzureOpenAI`](#azureopenai-1), [`Anthropic`](#anthropic-1), or [`Gemini`](#gemini-1).
```python
with_llm(vendor: BaseLLM) -> Agent
```
#### `with_tts(vendor)`
Sets the TTS vendor. Records the vendor's `sample_rate` for [avatar](#avatar-vendors-1) validation.
```python
with_tts(vendor: BaseTTS) -> Agent
```
#### `with_stt(vendor)`
Sets the STT vendor. Pass an instance of any [STT vendor class](#stt-vendors-1).
```python
with_stt(vendor: BaseSTT) -> Agent
```
#### `with_mllm(vendor)`
Sets the MLLM vendor for multimodal flow. Calling `with_mllm()` automatically sets `mllm.enable = True`. MLLM sessions do not require TTS, STT, or LLM vendors.
```python
with_mllm(vendor: BaseMLLM) -> Agent
```
#### `with_avatar(vendor)`
Sets the avatar vendor. Raises `ValueError` if the TTS sample rate does not match the avatar's required rate.
```python
with_avatar(vendor: BaseAvatar) -> Agent
```
**Raises:** `ValueError` — if TTS sample rate does not match the avatar's `required_sample_rate`.
#### `with_turn_detection(config)`
Configures cascading-flow SOS/EOS voice activity detection. Use `config.start_of_speech` and `config.end_of_speech` for SOS/EOS detection. Use `with_interruption()` for interruption behavior and MLLM vendor `turn_detection` for MLLM turn detection.
```python
with_turn_detection(config: TurnDetectionConfig) -> Agent
```
#### `with_interruption(config)`
Configures unified interruption behavior using the top-level `interruption` object. Use this for `start_of_speech` and `keywords` interruption modes.
```python
with_interruption(config: InterruptionConfig) -> Agent
```
#### `with_instructions(instructions)`
Overrides the LLM system prompt on a new `Agent` instance.
```python
with_instructions(instructions: str) -> Agent
```
#### `with_greeting(greeting)`
Overrides the greeting message on a new `Agent` instance.
```python
with_greeting(greeting: str) -> Agent
```
#### `with_name(name)`
Overrides the agent name on a new `Agent` instance.
```python
with_name(name: str) -> Agent
```
#### Other builder methods
The following methods follow the same pattern — each returns a new `Agent` instance with the updated configuration.
| Method | Parameter type | Description |
| ---------------------------------- | ------------------- | --------------------------------------------- |
| `with_sal(config)` | `SalConfig` | Set Selective Attention Locking configuration |
| `with_advanced_features(features)` | `Dict[str, Any]` | Set advanced features |
| `with_tools(enabled)` | `bool` | Enable or disable MCP tool invocation |
| `with_parameters(parameters)` | `SessionParams` | Set session parameters |
| `with_failure_message(message)` | `str` | Set the message spoken when the LLM fails |
| `with_max_history(n)` | `int` | Set the maximum conversation history length |
| `with_geofence(geofence)` | `GeofenceConfig` | Set geofence configuration |
| `with_labels(labels)` | `Dict[str, str]` | Set custom labels |
| `with_rtc(rtc)` | `RtcConfig` | Set RTC configuration |
| `with_filler_words(filler_words)` | `FillerWordsConfig` | Set filler words configuration |
### `create_session()`
Creates an [`AgentSession`](#agentsession-asyncagentsession) bound to a specific client and channel. Does not start the agent — call [`session.start()`](#start-1) to join the channel.
```python
create_session(
client: Agora | AsyncAgora,
channel: str,
agent_uid: str,
remote_uids: List[str],
name: Optional[str] = None,
token: Optional[str] = None,
idle_timeout: Optional[int] = None,
enable_string_uid: Optional[bool] = None,
expires_in: Optional[int] = None,
) -> AgentSession
```
`create_session()` fields:
| Parameter | Type | Required | Description |
| ------------------- | ----------------------- | -------- | ---------------------------------------------------------------------------------------------------------------------------------------------------------------------------- |
| `client` | `Agora` or `AsyncAgora` | Yes | Authenticated client |
| `channel` | `str` | Yes | Channel name to join |
| `agent_uid` | `str` | Yes | The agent's RTC UID |
| `remote_uids` | `List[str]` | Yes | Remote user UIDs the agent listens and responds to |
| `name` | `Optional[str]` | No | Session name. Defaults to agent name |
| `token` | `Optional[str]` | No | Pre-built RTC+RTM token. Omit to auto-generate from app credentials |
| `expires_in` | `Optional[int]` | No | Token lifetime in seconds. Only applies when the token is auto-generated. Valid range: 1–86400. Use [`expires_in_hours()`](#expires_in_hours-expires_in_minutes) for clarity |
| `idle_timeout` | `Optional[int]` | No | Seconds before the agent auto-exits when no audio is detected |
| `enable_string_uid` | `Optional[bool]` | No | Use string UIDs instead of numeric UIDs |
### `to_properties()`
Converts the agent configuration into a `StartAgentsRequestProperties` object for the Agora API. Called internally by `AgentSession.start()`.
```python
to_properties(
channel: str,
agent_uid: str,
remote_uids: List[str],
idle_timeout: Optional[int] = None,
enable_string_uid: Optional[bool] = None,
token: Optional[str] = None,
app_id: Optional[str] = None,
app_certificate: Optional[str] = None,
expires_in: Optional[int] = None,
) -> StartAgentsRequestProperties
```
**Raises:** `ValueError` if neither `token` nor `app_id`+`app_certificate` is provided, or if required vendors (LLM, TTS) are missing in cascading mode.
### Properties
Read-only properties available on any `Agent` instance.
| Property | Type | Description |
| ------------------- | ------------------------------- | ------------------------------------------ |
| `name` | `Optional[str]` | Agent name |
| `instructions` | `Optional[str]` | LLM system prompt |
| `greeting` | `Optional[str]` | Greeting message |
| `failure_message` | `Optional[str]` | Message spoken when LLM fails |
| `max_history` | `Optional[int]` | Maximum conversation history length |
| `llm` | `Optional[Dict[str, Any]]` | LLM config dict (from `to_config()`) |
| `tts` | `Optional[Dict[str, Any]]` | TTS config dict |
| `stt` | `Optional[Dict[str, Any]]` | STT config dict |
| `mllm` | `Optional[Dict[str, Any]]` | MLLM config dict |
| `avatar` | `Optional[Dict[str, Any]]` | Avatar config dict |
| `turn_detection` | `Optional[TurnDetectionConfig]` | Turn detection configuration |
| `interruption` | `Optional[InterruptionConfig]` | Unified interruption control configuration |
| `sal` | `Optional[SalConfig]` | SAL configuration |
| `advanced_features` | `Optional[Dict[str, Any]]` | Advanced features |
| `parameters` | `Optional[SessionParams]` | Session parameters |
| `geofence` | `Optional[GeofenceConfig]` | Geofence configuration |
| `labels` | `Optional[Dict[str, str]]` | Custom labels |
| `rtc` | `Optional[RtcConfig]` | RTC configuration |
| `filler_words` | `Optional[FillerWordsConfig]` | Filler words configuration |
| `config` | `Dict[str, Any]` | Full configuration snapshot |
### Type aliases
Public aliases over Fern-generated types: `LlmConfig`, `SttConfig`, `AsrConfig` (= `SttConfig`), `MllmConfig`, `AvatarConfig`, session/conversation types, and think types (`ThinkOnListeningAction`, etc.).
Think value constants: `ThinkOnListeningActionInject`, `ThinkOnListeningActionInterrupt`, `ThinkOnListeningActionIgnore`, `ThinkOnThinkingActionInterrupt`, `ThinkOnThinkingActionIgnore`, `ThinkOnSpeakingActionInterrupt`, `ThinkOnSpeakingActionIgnore`.
## AgentSession / AsyncAgentSession
`AgentSession` (sync) and `AsyncAgentSession` (async) manage the full lifecycle of a running agent. Obtain a session by calling [`agent.create_session()`](#create_session) — direct construction is available for advanced use cases.
```python
from agora_agent import AgentSession
from agora_agent import AsyncAgentSession
# or from top-level:
from agora_agent import AgentSession, AsyncAgentSession
```
### Constructor
Sessions are normally created via `Agent.create_session()`. Direct construction is available for advanced use:
```python
AgentSession(
client: Any,
agent: Agent,
app_id: str,
name: str,
channel: str,
agent_uid: str,
remote_uids: List[str],
app_certificate: Optional[str] = None,
token: Optional[str] = None,
idle_timeout: Optional[int] = None,
enable_string_uid: Optional[bool] = None,
)
```
`AsyncAgentSession` has the same constructor signature.
| Parameter | Type | Required | Description |
| ------------------- | ----------------------- | -------- | ------------------------------------------- |
| `client` | `Agora` or `AsyncAgora` | Yes | Authenticated client |
| `agent` | `Agent` | Yes | Agent configuration |
| `app_id` | `str` | Yes | Agora App ID |
| `name` | `str` | Yes | Session name |
| `channel` | `str` | Yes | Channel name |
| `agent_uid` | `str` | Yes | UID for the agent |
| `remote_uids` | `List[str]` | Yes | UIDs of remote participants |
| `app_certificate` | `Optional[str]` | No | App Certificate (for auto token generation) |
| `token` | `Optional[str]` | No | Pre-built RTC token |
| `idle_timeout` | `Optional[int]` | No | Idle timeout in seconds |
| `enable_string_uid` | `Optional[bool]` | No | Enable string UIDs |
### Methods
The following methods are available on both `AgentSession` and `AsyncAgentSession`. Methods that make API calls require `await` on `AsyncAgentSession`.
#### `start()`
Starts the agent session. Generates an RTC token if not provided, validates avatar/TTS config for cascading sessions, and calls the Agora API. MLLM sessions do not require TTS; an enabled avatar is rejected when MLLM is configured (a disabled avatar is allowed).
| | Sync (`AgentSession`) | Async (`AsyncAgentSession`) |
| ------------- | -------------------------------------------------------------------------------------- | --------------------------- |
| **Signature** | `start() -> str` | `async start() -> str` |
| **Returns** | Agent ID | Agent ID |
| **Raises** | `RuntimeError` if not in `idle`, `stopped`, or `error` state | Same |
| **Raises** | `ValueError` if avatar/TTS sample rate mismatch or an enabled avatar is used with MLLM | Same |
```python
# Sync
agent_id = session.start()
# Async
agent_id = await session.start()
```
#### `stop()`
Stops the agent session and removes the agent from the channel. If the agent has already stopped (404 from API), transitions to `stopped` without raising.
| | Sync | Async |
| ------------- | ---------------------------------------- | ---------------------- |
| **Signature** | `stop() -> None` | `async stop() -> None` |
| **Raises** | `RuntimeError` if not in `running` state | Same |
```python
# Sync
session.stop()
# Async
await session.stop()
```
#### `say(text, priority=None, interruptable=None)`
Instructs the agent to speak the given text.
| | Sync | Async |
| ------------- | ---------------------------------------------------------------------------------------------- | ----------------- |
| **Signature** | `say(text: str, priority: Optional[str] = None, interruptable: Optional[bool] = None) -> None` | Same with `async` |
| **Raises** | `RuntimeError` if not in `running` state | Same |
| Parameter | Type | Required | Description |
| --------------- | ------ | -------- | -------------------------------------- |
| `text` | `str` | Yes | Text to speak |
| `priority` | `str` | No | `INTERRUPT`, `APPEND`, or `IGNORE` |
| `interruptable` | `bool` | No | Whether the message can be interrupted |
```python
# Sync
session.say('One moment while I look that up.', priority='INTERRUPT', interruptable=False)
# Async
await session.say('One moment while I look that up.', priority='INTERRUPT', interruptable=False)
```
#### `interrupt()`
Interrupts the agent while speaking or thinking.
| | Sync | Async |
| ------------- | ---------------------------------------- | --------------------------- |
| **Signature** | `interrupt() -> None` | `async interrupt() -> None` |
| **Raises** | `RuntimeError` if not in `running` state | Same |
```python
# Sync
session.interrupt()
# Async
await session.interrupt()
```
#### `update(properties)`
Updates the agent configuration mid-session without restarting. Accepts a partial properties object in REST API format.
| | Sync | Async |
| ------------- | ---------------------------------------- | --------------------------------------- |
| **Signature** | `update(properties: Any) -> None` | `async update(properties: Any) -> None` |
| **Raises** | `RuntimeError` if not in `running` state | Same |
```python
from agora_agent.agents.types import UpdateAgentsRequestProperties
# Sync
session.update(properties)
# Async
await session.update(properties)
```
### `think(text, ...)`
Injects a custom text instruction into the running agent.
In API v2.7, omitting `on_listening_action` uses the server default `interrupt`. Pass `on_listening_action='inject'` explicitly to preserve the pre-v2.7 behavior.
```python
session.think('Summarize the last answer', on_listening_action='inject')
```
#### `get_history()`
Fetches the conversation history for this session. Requires a valid agent ID — `start()` must have been called successfully.
| | Sync | Async |
| ------------- | ----------------------------- | ---------------------------- |
| **Signature** | `get_history() -> Any` | `async get_history() -> Any` |
| **Raises** | `RuntimeError` if no agent ID | Same |
```python
# Sync
history = session.get_history()
# Async
history = await session.get_history()
```
### `get_turns(page_index=None, page_size=None)`
Retrieves paginated turn analytics for a completed or running session. In v2.7, the API defaults to page 1 and up to 50 turns per page. Responses include `agent_id`, `name`, `channel`, `total_turn_count`, `pagination`, and `turns`.
```python
page = session.get_turns(page_index=1, page_size=50)
```
### `get_all_turns(page_size=None)`
Fetches all turn pages and returns a single `GetTurnsAgentsResponse` with the combined `turns` list.
```python
all_turns = session.get_all_turns(page_size=50)
```
#### `get_info()`
Fetches current agent metadata from the API. Requires a valid agent ID.
| | Sync | Async |
| ------------- | ----------------------------- | ------------------------- |
| **Signature** | `get_info() -> Any` | `async get_info() -> Any` |
| **Raises** | `RuntimeError` if no agent ID | Same |
```python
# Sync
info = session.get_info()
# Async
info = await session.get_info()
```
#### `on(event, handler)`
Registers an event handler. Synchronous on both `AgentSession` and `AsyncAgentSession`. Register handlers **before** calling `start()` to avoid missing the `started` event.
```python
session.on('started', lambda data: print(f'Started: {data}'))
```
| Parameter | Type | Description |
| --------- | --------------------- | -------------------------------------------- |
| `event` | `str` | Event type: `started`, `stopped`, or `error` |
| `handler` | `Callable[..., None]` | Callback function |
#### `off(event, handler)`
Removes a previously registered event handler. Synchronous on both `AgentSession` and `AsyncAgentSession`.
```python
session.off('started', my_handler)
```
### Properties
The following read-only properties are available on both `AgentSession` and `AsyncAgentSession` instances.
| Property | Type | Description |
| -------- | ------------------------------------- | ------------------------------------------------------------------------------------------------ |
| `id` | `Optional[str]` | Agent ID, populated after `start()` resolves |
| `status` | `str` | Current session state: `'idle'`, `'starting'`, `'running'`, `'stopping'`, `'stopped'`, `'error'` |
| `agent` | `Agent` | The agent configuration this session was created from |
| `app_id` | `str` | The Agora App ID for this session |
| `raw` | `AgentsClient` or `AsyncAgentsClient` | Direct access to the Fern-generated agents client for advanced operations |
### State transitions
| Current state | Allowed actions |
| ------------- | --------------------------------------------------------------------------- |
| `idle` | `start()` |
| `starting` | (waiting for API) |
| `running` | `stop()`, `say()`, `interrupt()`, `update()`, `get_history()`, `get_info()` |
| `stopping` | (waiting for API) |
| `stopped` | `start()` (restart) |
| `error` | `start()` (retry) |
## Vendors
All vendor classes are imported from `agora_agent.agentkit.vendors`.
```python
from agora_agent import OpenAI, ElevenLabsTTS, DeepgramTTS, DeepgramSTT, OpenAIRealtime, XaiGrok, GenericAvatar
```
### LLM vendors
Use with [`with_llm()`](#with_llmvendor).
`greeting_configs` accepts either a dict or `LlmGreetingConfigs`. In v2.7, `greeting_configs.interruptable=False` makes the greeting uninterruptible; `True` follows the global `interruption` settings.
#### OpenAI
```python
from agora_agent import OpenAI
llm = OpenAI(api_key='your-key', model='gpt-4o-mini', temperature=0.7)
```
| Parameter | Type | Required | Default | Description |
| -------------------- | ---------------- | -------- | ------- | -------------------------------------------------------------------------- |
| `api_key` | `str` | No | `None` | OpenAI API key. Omit to use Agora-managed credentials for supported models |
| `model` | `str` | Yes | — | Model name |
| `base_url` | `str` | No | `None` | Custom base URL. Only valid when `api_key` is set |
| `temperature` | `float` | No | `None` | Sampling temperature (0.0–2.0) |
| `top_p` | `float` | No | `None` | Nucleus sampling (0.0–1.0) |
| `max_tokens` | `int` | No | `None` | Maximum tokens to generate |
| `system_messages` | `List[Dict]` | No | `None` | Additional system messages |
| `greeting_message` | `str` | No | `None` | Agent greeting message |
| `failure_message` | `str` | No | `None` | Message spoken when the LLM call fails |
| `max_history` | `int` | No | `None` | Maximum number of conversation history messages to cache |
| `input_modalities` | `List[str]` | No | `None` | Input modalities |
| `output_modalities` | `List[str]` | No | `None` | Output modalities |
| `greeting_configs` | `Dict[str, Any]` | No | `None` | Greeting configuration |
| `template_variables` | `Dict[str, str]` | No | `None` | Template variables for system prompt interpolation |
| `headers` | `Dict[str, str]` | No | `None` | Custom HTTP headers forwarded to the LLM provider |
| `params` | `Dict[str, Any]` | No | `None` | Additional model parameters |
| `vendor` | `str` | No | `None` | Vendor override |
| `mcp_servers` | `List[Dict]` | No | `None` | MCP server connections |
#### AzureOpenAI
```python
from agora_agent import AzureOpenAI
llm = AzureOpenAI(
api_key='your-azure-key',
model='gpt-4o-mini',
endpoint='https://your-resource.openai.azure.com',
deployment_name='gpt-4o-mini',
)
```
| Parameter | Type | Required | Default | Description |
| -------------------- | ---------------- | -------- | ---------------------- | -------------------------------------------------------- |
| `api_key` | `str` | Yes | — | Azure OpenAI API key |
| `model` | `str` | Yes | — | Azure deployment model name |
| `endpoint` | `str` | Yes | — | Azure endpoint URL |
| `deployment_name` | `str` | Yes | — | Azure deployment name |
| `api_version` | `str` | No | `'2024-08-01-preview'` | Azure API version |
| `temperature` | `float` | No | `None` | Sampling temperature (0.0–2.0) |
| `top_p` | `float` | No | `None` | Nucleus sampling (0.0–1.0) |
| `max_tokens` | `int` | No | `None` | Maximum tokens to generate |
| `system_messages` | `List[Dict]` | No | `None` | Additional system messages |
| `greeting_message` | `str` | No | `None` | Agent greeting message |
| `failure_message` | `str` | No | `None` | Message spoken when the LLM call fails |
| `max_history` | `int` | No | `None` | Maximum number of conversation history messages to cache |
| `input_modalities` | `List[str]` | No | `None` | Input modalities |
| `output_modalities` | `List[str]` | No | `None` | Output modalities |
| `params` | `Dict[str, Any]` | No | `None` | Additional model parameters |
| `headers` | `Dict[str, str]` | No | `None` | Custom HTTP headers forwarded to the LLM provider |
| `greeting_configs` | `Dict[str, Any]` | No | `None` | Greeting configuration |
| `template_variables` | `Dict[str, str]` | No | `None` | Template variables for system prompt interpolation |
| `vendor` | `str` | No | `None` | Vendor override |
| `mcp_servers` | `List[Dict]` | No | `None` | MCP server connections |
#### Anthropic
```python
from agora_agent import Anthropic
llm = Anthropic(
api_key='your-anthropic-key',
url='https://api.anthropic.com/v1/messages',
model='claude-opus-4-8',
max_tokens=1024,
headers={'anthropic-version': '2023-06-01'},
)
```
| Parameter | Type | Required | Default | Description |
| -------------------- | ---------------- | -------- | ------- | -------------------------------------------------------- |
| `api_key` | `str` | Yes | — | Anthropic API key |
| `model` | `str` | Yes | — | Model name |
| `url` | `str` | Yes | — | Anthropic messages endpoint URL |
| `max_tokens` | `int` | Yes | — | Maximum tokens to generate |
| `headers` | `Dict[str, str]` | Yes | — | Request headers, including `anthropic-version` |
| `temperature` | `float` | No | `None` | Sampling temperature (0.0–1.0) |
| `top_p` | `float` | No | `None` | Nucleus sampling (0.0–1.0) |
| `system_messages` | `List[Dict]` | No | `None` | Additional system messages |
| `greeting_message` | `str` | No | `None` | Agent greeting message |
| `failure_message` | `str` | No | `None` | Message spoken when the LLM call fails |
| `max_history` | `int` | No | `None` | Maximum number of conversation history messages to cache |
| `input_modalities` | `List[str]` | No | `None` | Input modalities |
| `output_modalities` | `List[str]` | No | `None` | Output modalities |
| `params` | `Dict[str, Any]` | No | `None` | Additional model parameters |
| `greeting_configs` | `Dict[str, Any]` | No | `None` | Greeting configuration |
| `template_variables` | `Dict[str, str]` | No | `None` | Template variables for system prompt interpolation |
| `vendor` | `str` | No | `None` | Vendor override |
| `mcp_servers` | `List[Dict]` | No | `None` | MCP server connections |
#### Gemini
```python
from agora_agent import Gemini
llm = Gemini(api_key='your-google-key', model='gemini-2.0-flash-exp')
```
| Parameter | Type | Required | Default | Description |
| -------------------- | ---------------- | -------- | ------- | -------------------------------------------------------- |
| `api_key` | `str` | Yes | — | Google AI API key |
| `model` | `str` | Yes | — | Model name |
| `url` | `str` | No | `None` | Custom API endpoint URL |
| `temperature` | `float` | No | `None` | Sampling temperature (0.0–2.0) |
| `top_p` | `float` | No | `None` | Nucleus sampling (0.0–1.0) |
| `top_k` | `int` | No | `None` | Top-k sampling |
| `max_output_tokens` | `int` | No | `None` | Maximum output tokens |
| `system_messages` | `List[Dict]` | No | `None` | Additional system messages |
| `greeting_message` | `str` | No | `None` | Agent greeting message |
| `failure_message` | `str` | No | `None` | Message spoken when the LLM call fails |
| `max_history` | `int` | No | `None` | Maximum number of conversation history messages to cache |
| `input_modalities` | `List[str]` | No | `None` | Input modalities |
| `output_modalities` | `List[str]` | No | `None` | Output modalities |
| `params` | `Dict[str, Any]` | No | `None` | Additional model parameters |
| `headers` | `Dict[str, str]` | No | `None` | Custom HTTP headers forwarded to the LLM provider |
| `greeting_configs` | `Dict[str, Any]` | No | `None` | Greeting configuration |
| `template_variables` | `Dict[str, str]` | No | `None` | Template variables for system prompt interpolation |
| `vendor` | `str` | No | `None` | Vendor override |
| `mcp_servers` | `List[Dict]` | No | `None` | MCP server connections |
#### Other LLM vendors
The SDK also includes named helpers for the remaining Agora-supported LLM providers. These helpers choose the correct request format internally.
| Class | Provider | Key parameters |
| --------------- | --------------------- | ------------------------------------------------------ |
| `Groq` | Groq | `api_key`, `model`, `base_url` |
| `VertexAILLM` | Google Vertex AI | `api_key`, `model`, `project_id`, `location`, `url?` |
| `AmazonBedrock` | Amazon Bedrock | `access_key`, `secret_key`, `region`, `model`, `url?` |
| `Dify` | Dify | `api_key`, `url`, `model`, `user?`, `conversation_id?` |
| `CustomLLM` | OpenAI-compatible LLM | `api_key`, `base_url`, `model` |
These helpers also accept the common LLM fields (`system_messages`, `greeting_message`, `failure_message`, `max_history`, `params`, `headers`, etc.). `Groq` and `CustomLLM` extend `OpenAI`; `VertexAILLM` extends `Gemini`.
### TTS vendors
Use with [`with_tts()`](#with_ttsvendor). The `sample_rate` option determines avatar compatibility — see [`with_avatar()`](#with_avatarvendor).
#### ElevenLabsTTS
```python
from agora_agent.agentkit.vendors import ElevenLabsTTS
```
| Parameter | Type | Required | Default | Description |
| ---------------------------- | ----------- | -------- | ------- | ------------------------------------------------ |
| `key` | `str` | Yes | — | ElevenLabs API key |
| `model_id` | `str` | Yes | — | Model ID, for example `'eleven_flash_v2_5'` |
| `voice_id` | `str` | Yes | — | Voice ID |
| `base_url` | `str` | Yes | — | WebSocket base URL |
| `sample_rate` | `int` | No | `None` | Sample rate in Hz: 16000, 22050, 24000, or 44100 |
| `skip_patterns` | `List[int]` | No | `None` | Skip patterns for bracketed content |
| `optimize_streaming_latency` | `int` | No | `None` | Latency optimization level (0–4) |
| `stability` | `float` | No | `None` | Voice stability (0.0–1.0) |
| `similarity_boost` | `float` | No | `None` | Similarity boost (0.0–1.0) |
| `style` | `float` | No | `None` | Style exaggeration (0.0–1.0) |
| `use_speaker_boost` | `bool` | No | `None` | Enable speaker boost |
#### MicrosoftTTS
```python
from agora_agent.agentkit.vendors import MicrosoftTTS
```
| Parameter | Type | Required | Default | Description |
| ------------------- | ---------------- | -------- | ------- | ----------------------------------------------- |
| `key` | `str` | Yes | — | Azure subscription key |
| `region` | `str` | Yes | — | Azure region, for example `'eastus'` |
| `voice_name` | `str` | Yes | — | Voice name, for example `'en-US-JennyNeural'` |
| `sample_rate` | `int` | No | `None` | Sample rate in Hz: 8000, 16000, 24000, or 48000 |
| `speed` | `float` | No | `None` | Speaking rate multiplier |
| `volume` | `float` | No | `None` | Audio volume |
| `additional_params` | `Dict[str, Any]` | No | `None` | Additional Microsoft TTS parameters |
| `skip_patterns` | `List[int]` | No | `None` | Skip patterns for bracketed content |
#### OpenAITTS
Fixed sample rate: 24000 Hz.
```python
from agora_agent.agentkit.vendors import OpenAITTS
```
| Parameter | Type | Required | Default | Description |
| --------------- | ----------- | -------- | ------- | ------------------------------------------------------------------------------------------- |
| `api_key` | `str` | No | `None` | OpenAI API key. Omit to use Agora-managed credentials for [supported models](/en/ai/models) |
| `voice` | `str` | Yes | — | Voice name: `'alloy'`, `'echo'`, `'fable'`, `'onyx'`, `'nova'`, or `'shimmer'` |
| `model` | `str` | No | `None` | Model name. Required (with `api_key` and `base_url`) for BYOK |
| `base_url` | `str` | No | `None` | Endpoint URL. Required (with `api_key` and `model`) for BYOK |
| `instructions` | `str` | No | `None` | Custom voice instructions |
| `speed` | `float` | No | `None` | Speech speed multiplier |
| `skip_patterns` | `List[int]` | No | `None` | Skip patterns for bracketed content |
#### CartesiaTTS
```python
from agora_agent.agentkit.vendors import CartesiaTTS
```
| Parameter | Type | Required | Default | Description |
| --------------- | ----------- | -------- | ------- | -------------------------------------------------------- |
| `api_key` | `str` | Yes | — | Cartesia API key |
| `voice_id` | `str` | Yes | — | Voice ID (serialized to the `voice` `{mode, id}` object) |
| `model_id` | `str` | Yes | — | Model ID |
| `base_url` | `str` | No | `None` | WebSocket URL |
| `language` | `str` | No | `None` | Target language |
| `sample_rate` | `int` | No | `None` | Sample rate in Hz: 8000–48000 |
| `skip_patterns` | `List[int]` | No | `None` | Skip patterns for bracketed content |
#### GoogleTTS
```python
from agora_agent.agentkit.vendors import GoogleTTS
```
| Parameter | Type | Required | Default | Description |
| ------------------- | ----------- | -------- | ------- | ---------------------------------------------------------------------------------- |
| `key` | `str` | Yes | — | Google Cloud service account credentials JSON string (serialized to `credentials`) |
| `voice_name` | `str` | Yes | — | Voice name |
| `language_code` | `str` | No | `None` | Language code, for example `'en-US'` |
| `sample_rate_hertz` | `int` | No | `None` | Sample rate in Hz |
| `skip_patterns` | `List[int]` | No | `None` | Skip patterns for bracketed content |
#### AmazonTTS
```python
from agora_agent.agentkit.vendors import AmazonTTS
```
| Parameter | Type | Required | Default | Description |
| --------------- | ----------- | -------- | ------- | ---------------------------------------------------------------- |
| `access_key` | `str` | Yes | — | AWS access key |
| `secret_key` | `str` | Yes | — | AWS secret key |
| `region` | `str` | Yes | — | AWS region, for example `'us-east-1'` |
| `voice_id` | `str` | Yes | — | Amazon Polly voice ID |
| `engine` | `str` | Yes | — | Polly engine: `standard`, `neural`, `long-form`, or `generative` |
| `skip_patterns` | `List[int]` | No | `None` | Skip patterns for bracketed content |
#### HumeAITTS
```python
from agora_agent.agentkit.vendors import HumeAITTS
```
| Parameter | Type | Required | Default | Description |
| ------------------ | ----------- | -------- | ------- | ------------------------------------------------ |
| `key` | `str` | Yes | — | Hume AI API key |
| `voice_id` | `str` | Yes | — | Hume AI voice ID |
| `provider` | `str` | Yes | — | Voice provider type: `HUME_AI` or `CUSTOM_VOICE` |
| `config_id` | `str` | No | `None` | Configuration ID |
| `base_url` | `str` | No | `None` | Base URL |
| `speed` | `float` | No | `None` | Playback speed |
| `trailing_silence` | `float` | No | `None` | Trailing silence in seconds |
| `skip_patterns` | `List[int]` | No | `None` | Skip patterns for bracketed content |
#### RimeTTS
```python
from agora_agent.agentkit.vendors import RimeTTS
```
| Parameter | Type | Required | Default | Description |
| --------------- | ----------- | -------- | ------- | ----------------------------------- |
| `key` | `str` | Yes | — | Rime API key |
| `speaker` | `str` | Yes | — | Speaker ID |
| `model_id` | `str` | Yes | — | Model ID |
| `base_url` | `str` | No | `None` | WebSocket URL |
| `skip_patterns` | `List[int]` | No | `None` | Skip patterns for bracketed content |
#### FishAudioTTS
```python
from agora_agent.agentkit.vendors import FishAudioTTS
```
| Parameter | Type | Required | Default | Description |
| --------------- | ----------- | -------- | ------- | ------------------------------------------------- |
| `key` | `str` | Yes | — | Fish Audio API key |
| `reference_id` | `str` | Yes | — | Reference ID |
| `backend` | `str` | Yes | — | Backend model version, for example `'speech-1.5'` |
| `skip_patterns` | `List[int]` | No | `None` | Skip patterns for bracketed content |
#### MiniMaxTTS
```python
from agora_agent.agentkit.vendors import MiniMaxTTS
```
| Parameter | Type | Required | Default | Description |
| ------------------- | ---------------- | -------- | ------- | ----------------------------------------------------------------- |
| `model` | `str` | Yes | — | Model name, for example `'speech-02-turbo'` |
| `key` | `str` | No | `None` | MiniMax API key. Required for BYOK; omit for preset-backed models |
| `group_id` | `str` | No | `None` | MiniMax group ID. Required for BYOK |
| `voice_id` | `str` | No | `None` | Voice style identifier (provide `voice_id` or `timber_weights`) |
| `url` | `str` | No | `None` | WebSocket endpoint (BYOK) |
| `speed` | `float` | No | `None` | Speaking speed |
| `vol` | `float` | No | `None` | Volume gain |
| `pitch` | `float` | No | `None` | Pitch adjustment |
| `emotion` | `str` | No | `None` | Emotion style |
| `sample_rate` | `int` | No | `None` | Output sample rate in Hz |
| `language_boost` | `str` | No | `None` | Language boost strategy |
| `timber_weights` | `List[Dict]` | No | `None` | Alternative timbre mix config |
| `additional_params` | `Dict[str, Any]` | No | `None` | Additional MiniMax TTS parameters |
| `skip_patterns` | `List[int]` | No | `None` | Skip patterns for bracketed content |
#### DeepgramTTS
```python
from agora_agent.agentkit.vendors import DeepgramTTS
```
| Parameter | Type | Required | Default | Description |
| ------------------- | ---------------- | -------- | ------- | ----------------------------------------------------------------------------- |
| `api_key` | `str` | Yes | — | Deepgram API key |
| `model` | `str` | Yes | — | Model name, for example `'aura-2-thalia-en'` |
| `base_url` | `str` | No | `None` | WebSocket endpoint. Defaults server-side to `wss://api.deepgram.com/v1/speak` |
| `sample_rate` | `int` | No | `None` | Sample rate in Hz |
| `additional_params` | `Dict[str, Any]` | No | `None` | Additional Deepgram TTS parameters |
| `skip_patterns` | `List[int]` | No | `None` | Skip patterns for bracketed content |
#### MurfTTS
```python
from agora_agent.agentkit.vendors import MurfTTS
```
| Parameter | Type | Required | Default | Description |
| --------------- | ----------- | -------- | ------- | ----------------------------------------------- |
| `key` | `str` | Yes | — | Murf API key |
| `voice_id` | `str` | No | `None` | Voice ID, for example `'Ariana'` or `'Natalie'` |
| `base_url` | `str` | No | `None` | WebSocket endpoint |
| `locale` | `str` | No | `None` | Voice locale |
| `rate` | `float` | No | `None` | Speech rate |
| `pitch` | `float` | No | `None` | Pitch adjustment |
| `model` | `str` | No | `None` | TTS model |
| `sample_rate` | `int` | No | `None` | Audio sample rate |
| `skip_patterns` | `List[int]` | No | `None` | Skip patterns for bracketed content |
#### SarvamTTS
```python
from agora_agent.agentkit.vendors import SarvamTTS
```
| Parameter | Type | Required | Default | Description |
| ---------------------- | ----------- | -------- | ------- | ----------------------------------- |
| `key` | `str` | Yes | — | Sarvam API key |
| `speaker` | `str` | Yes | — | Speaker name |
| `target_language_code` | `str` | Yes | — | Target language code |
| `pitch` | `float` | No | `None` | Pitch adjustment |
| `pace` | `float` | No | `None` | Speed of speech |
| `loudness` | `float` | No | `None` | Volume level |
| `sample_rate` | `int` | No | `None` | Audio sample rate in Hz |
| `skip_patterns` | `List[int]` | No | `None` | Skip patterns for bracketed content |
#### TypecastTTS
```python
from agora_agent.agentkit.vendors import TypecastTTS
```
| Parameter | Type | Required | Default | Description |
| ------------------- | ---------------- | -------- | ------- | ------------------------------------------------- |
| `api_key` | `str` | Yes | — | Typecast API key |
| `voice_id` | `str` | Yes | — | Typecast voice identifier |
| `model` | `str` | Yes | — | Typecast TTS model name, for example `'ssfm-v30'` |
| `additional_params` | `Dict[str, Any]` | No | `None` | Additional Typecast parameters |
| `skip_patterns` | `List[int]` | No | `None` | Skip patterns for bracketed content |
#### GradiumTTS
```python
from agora_agent.agentkit.vendors import GradiumTTS
```
| Parameter | Type | Required | Default | Description |
| ------------------- | ---------------- | -------- | ------- | ------------------------------------------- |
| `api_key` | `str` | Yes | — | Gradium API key |
| `url` | `str` | No | `None` | WebSocket endpoint for streaming TTS output |
| `model_name` | `str` | No | `None` | Gradium TTS model name |
| `voice_id` | `str` | No | `None` | Gradium voice identifier |
| `sample_rate` | `int` | No | `None` | Audio sample rate in Hz |
| `additional_params` | `Dict[str, Any]` | No | `None` | Additional Gradium TTS parameters |
| `skip_patterns` | `List[int]` | No | `None` | Skip patterns for bracketed content |
#### MistralTTS
```python
from agora_agent.agentkit.vendors import MistralTTS
```
| Parameter | Type | Required | Default | Description |
| ------------------- | ---------------- | -------- | ------- | ----------------------------------- |
| `api_key` | `str` | Yes | — | Mistral API key |
| `model` | `str` | No | `None` | Mistral TTS model name |
| `voice` | `str` | No | `None` | Mistral voice identifier |
| `additional_params` | `Dict[str, Any]` | No | `None` | Additional Mistral TTS parameters |
| `skip_patterns` | `List[int]` | No | `None` | Skip patterns for bracketed content |
#### GenericTTS
Custom OpenAI-compatible HTTP TTS. `url` is required and must be an HTTP or HTTPS endpoint that includes a host. An invalid URL format, or a non-HTTP(S) scheme such as `ws` or `wss`, raises a `ValueError`. A valid URL is serialized as `tts.vendor = "generic_http"`.
```python
from agora_agent import GenericTTS
```
| Parameter | Type | Required | Default | Description |
| ------------------- | ---------------- | -------- | ------- | --------------------------------------------------------------------------------------------------------------------------------------------------------------------- |
| `url` | `str` | Yes | — | The HTTP(S) endpoint of your custom TTS service |
| `headers` | `Dict[str, str]` | No | `None` | Custom HTTP headers to forward to the TTS service. Omitted from the request if not set |
| `api_key` | `str` | No | `None` | The API key used to authenticate with the TTS service |
| `model` | `str` | No | `None` | The TTS model name |
| `voice` | `str` | No | `None` | The voice name |
| `speed` | `float` | No | `None` | The speech rate |
| `sample_rate` | `int` | No | `None` | The sample rate, in Hz, of the output audio. If your TTS service doesn't support multiple sample rates, make sure the returned audio's sample rate matches this value |
| `response_format` | `str` | No | `None` | The output audio format. Conversational AI Engine currently supports `pcm` |
| `instruction` | `str` | No | `None` | Instructions for voice style, emotion, or other playback directives |
| `additional_params` | `Dict[str, Any]` | No | `None` | Additional parameters passed through to the TTS service. Explicit fields with the same name take precedence |
| `skip_patterns` | `List[int]` | No | `None` | Skip patterns for bracketed content |
#### XaiTTS
```python
from agora_agent.agentkit.vendors import XaiTTS
```
| Parameter | Type | Required | Default | Description |
| ------------------- | ---------------- | -------- | ------- | ----------------------------------------- |
| `api_key` | `str` | Yes | — | xAI API key |
| `language` | `str` | Yes | — | BCP-47 language code for speech synthesis |
| `voice_id` | `str` | No | `None` | xAI voice identifier |
| `sample_rate` | `int` | No | `None` | Audio sample rate in Hz |
| `additional_params` | `Dict[str, Any]` | No | `None` | Additional xAI TTS parameters |
| `skip_patterns` | `List[int]` | No | `None` | Skip patterns for bracketed content |
### STT vendors
Use with [`with_stt()`](#with_sttvendor).
#### DeepgramSTT
All parameters are optional.
```python
from agora_agent.agentkit.vendors import DeepgramSTT
```
| Parameter | Type | Required | Default | Description |
| ------------------- | ---------------- | -------- | ------- | --------------------------------------------------------------------------------------------- |
| `api_key` | `str` | No | `None` | Deepgram API key. Omit to use Agora-managed credentials for [supported models](/en/ai/models) |
| `model` | `str` | No | `None` | Model name, for example `'nova-2'` |
| `language` | `str` | No | `None` | Language code, for example `'en-US'` |
| `keyterm` | `str` | No | `None` | Boost specialized terms and brands |
| `smart_format` | `bool` | No | `None` | Enable smart formatting |
| `punctuation` | `bool` | No | `None` | Enable punctuation |
| `additional_params` | `Dict[str, Any]` | No | `None` | Additional vendor parameters |
#### SpeechmaticsSTT
```python
from agora_agent.agentkit.vendors import SpeechmaticsSTT
```
| Parameter | Type | Required | Default | Description |
| ------------------- | ---------------- | -------- | ------- | ------------------------------------ |
| `api_key` | `str` | Yes | — | Speechmatics API key |
| `language` | `str` | Yes | — | Language code, for example `'en'` |
| `model` | `str` | No | `None` | Model name |
| `uri` | `str` | No | `None` | Speechmatics streaming WebSocket URL |
| `additional_params` | `Dict[str, Any]` | No | `None` | Additional parameters |
#### MicrosoftSTT
```python
from agora_agent.agentkit.vendors import MicrosoftSTT
```
| Parameter | Type | Required | Default | Description |
| ------------------- | ---------------- | -------- | ------- | ------------------------------------ |
| `key` | `str` | Yes | — | Azure subscription key |
| `region` | `str` | Yes | — | Azure region, for example `'eastus'` |
| `language` | `str` | Yes | — | Language code, for example `'en-US'` |
| `additional_params` | `Dict[str, Any]` | No | `None` | Additional parameters |
#### OpenAISTT
```python
from agora_agent.agentkit.vendors import OpenAISTT
```
| Parameter | Type | Required | Default | Description |
| --------------------------- | ---------------- | -------- | ------- | ------------------------------------------------------------- |
| `api_key` | `str` | Yes | — | OpenAI API key |
| `model` | `str` | No | `None` | Transcription model. Default: `'gpt-4o-mini-transcribe'` |
| `language` | `str` | No | `None` | Language code |
| `prompt` | `str` | No | `None` | Prompt that guides transcription |
| `input_audio_transcription` | `Dict[str, Any]` | No | `None` | OpenAI transcription settings (`model`, `prompt`, `language`) |
| `additional_params` | `Dict[str, Any]` | No | `None` | Additional parameters |
The serialized configuration requires a transcription `prompt` and `language` — provide them through the `prompt` and `language` parameters or within `input_audio_transcription`. `model` defaults to `gpt-4o-mini-transcribe`.
#### GoogleSTT
```python
from agora_agent.agentkit.vendors import GoogleSTT
```
| Parameter | Type | Required | Default | Description |
| ------------------------ | ---------------- | -------- | ------- | ---------------------------------------------- |
| `project_id` | `str` | Yes | — | Google Cloud project ID |
| `location` | `str` | Yes | — | Google Cloud region |
| `adc_credentials_string` | `str` | Yes | — | Google service account credentials JSON string |
| `language` | `str` | Yes | — | Language code, for example `'en-US'` |
| `model` | `str` | No | `None` | Recognition model |
| `additional_params` | `Dict[str, Any]` | No | `None` | Additional parameters |
#### AmazonSTT
```python
from agora_agent.agentkit.vendors import AmazonSTT
```
| Parameter | Type | Required | Default | Description |
| ------------------- | ---------------- | -------- | ------- | ------------------------------------- |
| `access_key` | `str` | Yes | — | AWS access key ID |
| `secret_key` | `str` | Yes | — | AWS secret access key |
| `region` | `str` | Yes | — | AWS region, for example `'us-east-1'` |
| `language` | `str` | Yes | — | Language code |
| `additional_params` | `Dict[str, Any]` | No | `None` | Additional parameters |
#### AssemblyAISTT
```python
from agora_agent.agentkit.vendors import AssemblyAISTT
```
| Parameter | Type | Required | Default | Description |
| ------------------- | ---------------- | -------- | ------- | ---------------------------------- |
| `api_key` | `str` | Yes | — | AssemblyAI API key |
| `language` | `str` | Yes | — | Language code |
| `uri` | `str` | No | `None` | AssemblyAI streaming WebSocket URL |
| `additional_params` | `Dict[str, Any]` | No | `None` | Additional parameters |
#### AresSTT
```python
from agora_agent.agentkit.vendors import AresSTT
```
| Parameter | Type | Required | Default | Description |
| ------------------- | ---------------- | -------- | ------- | ---------------------------------- |
| `keywords` | `List[str]` | No | `None` | Keywords that improve ASR accuracy |
| `additional_params` | `Dict[str, Any]` | No | `None` | Additional parameters |
#### SarvamSTT
```python
from agora_agent.agentkit.vendors import SarvamSTT
```
| Parameter | Type | Required | Default | Description |
| ------------------- | ---------------- | -------- | ------- | ------------------------------------------- |
| `api_key` | `str` | Yes | — | Sarvam API key |
| `language` | `str` | Yes | — | Language code, for example `'en'` or `'hi'` |
| `model` | `str` | No | `None` | Model name |
| `additional_params` | `Dict[str, Any]` | No | `None` | Additional parameters |
### MLLM vendors
Use with [`with_mllm()`](#with_mllmvendor) for multimodal end-to-end audio processing without separate STT or TTS steps. Calling `with_mllm()` automatically enables the MLLM module (sets `mllm.enable=true`); the older `advanced_features.enable_mllm` flag is deprecated.
#### OpenAIRealtime
```python
from agora_agent.agentkit.vendors import OpenAIRealtime
```
| Parameter | Type | Required | Default | Description |
| --------------------------- | ------------------------- | -------- | ------- | ----------------------------------------------------------------------- |
| `api_key` | `str` | Yes | — | OpenAI API key |
| `model` | `str` | No | `None` | Model name, for example `'gpt-4o-realtime-preview'` |
| `voice` | `str` | No | `None` | Voice identifier |
| `instructions` | `str` | No | `None` | System instructions |
| `input_audio_transcription` | `Dict[str, Any]` | No | `None` | Audio transcription settings |
| `url` | `str` | No | `None` | Custom WebSocket URL |
| `greeting_message` | `str` | No | `None` | Agent greeting message |
| `failure_message` | `str` | No | `None` | Message played when the model call fails |
| `input_modalities` | `List[str]` | No | `None` | Input modalities, for example `['audio']` |
| `output_modalities` | `List[str]` | No | `None` | Output modalities, for example `['text', 'audio']` |
| `messages` | `List[Dict]` | No | `None` | Conversation messages for short-term memory |
| `params` | `Dict[str, Any]` | No | `None` | Additional parameters |
| `turn_detection` | `MllmTurnDetectionConfig` | No | `None` | MLLM turn detection configuration; overrides top-level `turn_detection` |
#### AzureOpenAIRealtime
```python
from agora_agent.agentkit.vendors import AzureOpenAIRealtime
```
| Parameter | Type | Required | Default | Description |
| --------------------------- | ------------------------- | -------- | ------- | ----------------------------------------------------------------------- |
| `api_key` | `str` | Yes | — | Azure OpenAI API key |
| `url` | `str` | Yes | — | Azure OpenAI Realtime WebSocket URL |
| `turn_detection` | `MllmTurnDetectionConfig` | Yes | — | MLLM turn detection configuration; overrides top-level `turn_detection` |
| `model` | `str` | No | `None` | Azure OpenAI Realtime model or deployment name |
| `voice` | `str` | No | `None` | Voice identifier |
| `instructions` | `str` | No | `None` | System instructions |
| `input_audio_transcription` | `Dict[str, Any]` | No | `None` | Audio transcription settings |
| `max_history` | `int` | No | `None` | Number of conversation history messages to cache |
| `greeting_message` | `str` | No | `None` | Agent greeting message |
| `failure_message` | `str` | No | `None` | Message played when the model call fails |
| `output_modalities` | `List[str]` | No | `None` | Output modalities, for example `['text', 'audio']` |
| `messages` | `List[Dict]` | No | `None` | Conversation messages for short-term memory |
| `params` | `Dict[str, Any]` | No | `None` | Additional Azure OpenAI parameters |
#### GeminiLive
```python
from agora_agent.agentkit.vendors import GeminiLive
```
| Parameter | Type | Required | Default | Description |
| ------------------- | ------------------------- | -------- | ------- | ------------------------------------------------------------------------------------------------------------------- |
| `api_key` | `str` | Yes | — | Google Gemini API key |
| `model` | `str` | Yes | — | Gemini Live model name |
| `thinking_level` | `str` | No | `None` | Reasoning budget (`'low'`, `'medium'`, or `'high'`), supported only by `'models/gemini-3.8-live-extended-thinking'` |
| `url` | `str` | No | `None` | Custom WebSocket URL |
| `instructions` | `str` | No | `None` | System instructions |
| `voice` | `str` | No | `None` | Voice name |
| `affective_dialog` | `bool` | No | `None` | Enable affective dialog |
| `proactive_audio` | `bool` | No | `None` | Enable proactive audio |
| `transcribe_agent` | `bool` | No | `None` | Transcribe agent speech |
| `transcribe_user` | `bool` | No | `None` | Transcribe user speech |
| `http_options` | `Dict[str, Any]` | No | `None` | HTTP options |
| `greeting_message` | `str` | No | `None` | Agent greeting message |
| `failure_message` | `str` | No | `None` | Message played when the model call fails |
| `input_modalities` | `List[str]` | No | `None` | Input modalities |
| `output_modalities` | `List[str]` | No | `None` | Output modalities |
| `messages` | `List[Dict]` | No | `None` | Conversation messages for short-term memory |
| `additional_params` | `Dict[str, Any]` | No | `None` | Additional parameters |
| `turn_detection` | `MllmTurnDetectionConfig` | No | `None` | MLLM turn detection configuration; overrides top-level `turn_detection` |
#### VertexAI
```python
from agora_agent.agentkit.vendors import VertexAI
```
| Parameter | Type | Required | Default | Description |
| ------------------------ | ------------------------- | -------- | ------- | ----------------------------------------------------------------------- |
| `model` | `str` | Yes | — | Model name, for example `'gemini-2.0-flash-exp'` |
| `project_id` | `str` | Yes | — | Google Cloud project ID |
| `location` | `str` | Yes | — | Google Cloud location, for example `'us-central1'` |
| `adc_credentials_string` | `str` | Yes | — | Application Default Credentials JSON string |
| `url` | `str` | No | `None` | Custom WebSocket URL |
| `instructions` | `str` | No | `None` | System instructions for the model |
| `voice` | `str` | No | `None` | Voice name, for example `'Aoede'` or `'Charon'` |
| `affective_dialog` | `bool` | No | `None` | Enable affective dialog |
| `proactive_audio` | `bool` | No | `None` | Enable proactive audio |
| `transcribe_agent` | `bool` | No | `None` | Transcribe agent speech |
| `transcribe_user` | `bool` | No | `None` | Transcribe user speech |
| `http_options` | `Dict[str, Any]` | No | `None` | HTTP options |
| `greeting_message` | `str` | No | `None` | Agent greeting message |
| `failure_message` | `str` | No | `None` | Message played when the model call fails |
| `input_modalities` | `List[str]` | No | `None` | Input modalities |
| `output_modalities` | `List[str]` | No | `None` | Output modalities |
| `messages` | `List[Dict]` | No | `None` | Conversation messages for short-term memory |
| `additional_params` | `Dict[str, Any]` | No | `None` | Additional parameters |
| `turn_detection` | `MllmTurnDetectionConfig` | No | `None` | MLLM turn detection configuration; overrides top-level `turn_detection` |
#### XaiGrok
[xAI Grok](/en/ai/models/mllm/xai) MLLM vendor (`mllm.vendor`: `"xai"`).
| Parameter | Type | Required | Default | Description |
| ------------------- | ------------------------- | -------- | ---------------------------- | --------------------------------------------- |
| `api_key` | `str` | Yes | — | xAI API key |
| `url` | `str` | No | `wss://api.x.ai/v1/realtime` | xAI Realtime WebSocket URL |
| `voice` | `str` | No | `None` | Voice identifier, for example `eve` or `rex` |
| `language` | `str` | No | `None` | Language code, for example `en` |
| `sample_rate` | `int` | No | `None` | Audio sample rate in Hz |
| `greeting_message` | `str` | No | `None` | Greeting message |
| `failure_message` | `str` | No | `None` | Message played when the model call fails |
| `input_modalities` | `List[str]` | No | `None` | Input modalities |
| `output_modalities` | `List[str]` | No | `None` | Output modalities |
| `messages` | `List[Dict]` | No | `None` | Conversation messages |
| `params` | `Dict[str, Any]` | No | `None` | Additional xAI parameters |
| `turn_detection` | `MllmTurnDetectionConfig` | No | `None` | Supports `agora_vad` and `server_vad` for xAI |
### Avatar vendors
Use with [`with_avatar()`](#with_avatarvendor). Each avatar vendor requires a specific TTS sample rate enforced at runtime.
#### HeyGenAvatar
**Deprecated — renamed to [`LiveAvatarAvatar`](#liveavataravatar).** `HeyGenAvatar` still works (serializes `vendor: "heygen"`) but emits a deprecation warning. Use `LiveAvatarAvatar` for new code.
Requires TTS at **24,000 Hz**.
```python
from agora_agent.agentkit.vendors import HeyGenAvatar
```
| Parameter | Type | Required | Default | Description |
| ----------------------- | ------ | -------- | ------- | ------------------------------------------------------------------------------------------------------------------------ |
| `api_key` | `str` | Yes | — | HeyGen API key |
| `quality` | `str` | Yes | — | Video quality: `'low'`, `'medium'`, or `'high'` |
| `agora_uid` | `str` | Yes | — | Agora UID for the avatar video stream |
| `agora_token` | `str` | No | `None` | Avatar token. When omitted, `AgentSession.start()` generates one for `agora_uid` using the same token path as the agent. |
| `avatar_id` | `str` | No | `None` | HeyGen avatar ID |
| `enable` | `bool` | No | `True` | Enable or disable the avatar |
| `disable_idle_timeout` | `bool` | No | `None` | Disable the idle timeout |
| `activity_idle_timeout` | `int` | No | `None` | Idle timeout in seconds. Default: 120 |
#### AkoolAvatar
Requires TTS at **16,000 Hz**.
```python
from agora_agent.agentkit.vendors import AkoolAvatar
```
| Parameter | Type | Required | Default | Description |
| ----------- | ------ | -------- | ------- | ---------------------------- |
| `api_key` | `str` | Yes | — | Akool API key |
| `avatar_id` | `str` | No | `None` | Avatar ID |
| `enable` | `bool` | No | `True` | Enable or disable the avatar |
#### LiveAvatarAvatar
Required TTS sample rate: **24000 Hz**
Same options as [`HeyGenAvatar`](#heygenavatar), but serializes `vendor: "liveavatar"`. `agora_token` is optional and generated by `AgentSession.start()` when omitted.
#### AnamAvatar
```python
from agora_agent.agentkit.vendors import AnamAvatar
```
| Parameter | Type | Required | Default | Description |
| ------------ | ------ | -------- | ------- | ---------------------------- |
| `api_key` | `str` | Yes | — | Anam API key |
| `persona_id` | `str` | No | `None` | Persona ID |
| `enable` | `bool` | No | `True` | Enable or disable the avatar |
#### GenericAvatar
```python
from agora_agent.agentkit.vendors import GenericAvatar
```
| Parameter | Type | Required | Default | Description |
| --------------- | ------ | -------- | ------- | ------------------------------------------------------------------------ |
| `api_key` | `str` | Yes | — | Generic avatar provider API key |
| `agora_uid` | `str` | Yes | — | Avatar RTC UID. Must differ from the agent UID. |
| `api_base_url` | `str` | Yes | — | Avatar provider API base URL |
| `avatar_id` | `str` | Yes | — | Avatar ID |
| `agora_token` | `str` | No | `None` | Optional avatar token. Generated by `AgentSession.start()` when omitted. |
| `agora_appid` | `str` | No | `None` | Optional; filled from the session App ID when omitted. |
| `agora_channel` | `str` | No | `None` | Optional; filled from the session channel when omitted. |
| `enable` | `bool` | No | `True` | Enable or disable the avatar |
Avatar tokens are separate from the agent join token but generated with the same `generate_convo_ai_token` path, using the avatar's `agora_uid` as `uid`.
## Token utilities
Helper functions for generating and managing tokens. Use these when you need control over token lifetime or when generating tokens outside of a session.
```python
from agora_agent.agentkit.token import generate_convo_ai_token, generate_rtc_token
from agora_agent.agentkit import expires_in_hours, expires_in_minutes
```
### `generate_convo_ai_token()`
Generates a Conversational AI token combining RTC and RTM privileges. This is the same token the SDK generates automatically in app-credentials mode. Use this when passing a pre-built token to [`create_session()`](#create_session).
```python
generate_convo_ai_token(
app_id: str,
app_certificate: str,
channel_name: str,
account: str,
token_expire: int = 86400,
privilege_expire: int = 0,
) -> str
```
| Parameter | Type | Required | Default | Description |
| ------------------ | ----- | -------- | ------- | ----------------------------------------------------------------- |
| `app_id` | `str` | Yes | — | Agora App ID |
| `app_certificate` | `str` | Yes | — | Agora App Certificate |
| `channel_name` | `str` | Yes | — | The channel the token grants access to |
| `account` | `str` | Yes | — | The UID this token is issued for, as a string |
| `token_expire` | `int` | No | `86400` | Token lifetime in seconds. Valid range: 1–86400 |
| `privilege_expire` | `int` | No | `0` | Seconds until privileges expire. `0` means same as `token_expire` |
**Returns:** `str` — the generated token.
```python
from agora_agent.agentkit.token import generate_convo_ai_token
from agora_agent.agentkit import expires_in_hours
token = generate_convo_ai_token(
app_id='your-app-id',
app_certificate='your-app-certificate',
channel_name='support-room-123',
account='1',
token_expire=expires_in_hours(12),
)
```
### `generate_rtc_token()`
Generates an RTC-only token for channel join. Use `generate_convo_ai_token()` instead for most Conversational AI use cases.
```python
generate_rtc_token(
app_id: str,
app_certificate: str,
channel: str,
uid: int,
role: int = 1,
expiry_seconds: int = 86400,
) -> str
```
| Parameter | Type | Required | Default | Description |
| ----------------- | ----- | -------- | ------- | ----------------------------------------------- |
| `app_id` | `str` | Yes | — | Agora App ID |
| `app_certificate` | `str` | Yes | — | Agora App Certificate |
| `channel` | `str` | Yes | — | Channel name |
| `uid` | `int` | Yes | — | User ID. Use `0` for any user |
| `role` | `int` | No | `1` | RTC role: `1` for publisher, `2` for subscriber |
| `expiry_seconds` | `int` | No | `86400` | Token lifetime in seconds. Valid range: 1–86400 |
**Returns:** `str` — the generated token.
### `expires_in_hours()` / `expires_in_minutes()`
Helper functions for specifying token lifetimes. Use with [`create_session()`](#create_session) or token generation functions. Values are validated and capped at the Agora maximum of 86400 seconds (24 hours).
```python
expires_in_hours(hours: int) -> int
expires_in_minutes(minutes: int) -> int
```
| Function | Returns | Behavior |
| ----------------------- | --------------- | ------------------------------------------------------------------------------ |
| `expires_in_hours(n)` | `int` — seconds | Raises `ValueError` if `n` ≤ 0. Warns and caps at 86400 if result exceeds 24 h |
| `expires_in_minutes(n)` | `int` — seconds | Raises `ValueError` if `n` ≤ 0. Warns and caps at 86400 if result exceeds 24 h |
```python
from agora_agent.agentkit import expires_in_hours, expires_in_minutes
session = agent.create_session(
client,
channel='support-room-123',
agent_uid='1',
remote_uids=['100'],
expires_in=expires_in_hours(12),
)
```
## Types and enums
Shared types and enums used across `Agora`, `AsyncAgora`, `Agent`, `AgentSession`, and vendor classes.
### `Area`
Region used for API routing. Pass to `Agora` or `AsyncAgora` via the `area` parameter.
```python
from agora_agent import Area
```
| Value | Region |
| --------- | -------------- |
| `Area.US` | United States |
| `Area.EU` | Europe |
| `Area.AP` | Asia-Pacific |
| `Area.CN` | China mainland |
### `AgentSessionEvent`
Valid event names for `session.on()` and `session.off()`.
```python
'started' | 'stopped' | 'error'
```
| Value | Payload | Description |
| ----------- | --------------------------- | ------------------------------------- |
| `'started'` | `dict` with `agent_id: str` | Agent successfully joined the channel |
| `'stopped'` | `dict` with `agent_id: str` | Agent left the channel |
| `'error'` | `Exception` | An unrecoverable error occurred |
### `SpeakPriority`
Controls how the agent handles a [`say()`](#saytext-prioritynone-interruptablenone) call relative to its current activity. Pass as a string to `session.say()`.
| Value | Description |
| ------------- | --------------------------------------------------------------- |
| `'INTERRUPT'` | Agent immediately stops current speech and delivers the message |
| `'APPEND'` | Message is queued and delivered after current speech ends |
| `'IGNORE'` | Message is discarded if the agent is currently speaking |
### `ApiError`
Raised when the API returns a 4xx or 5xx response. Catch this to inspect the status code and response body.
```python
from agora_agent.core.api_error import ApiError
try:
agent_id = session.start()
except ApiError as e:
print(e.status_code)
print(e.body)
```
| Property | Type | Description |
| ------------- | ----- | ------------------------------------ |
| `status_code` | `int` | HTTP status code returned by the API |
| `body` | `Any` | Raw response body from the API |
## Sync vs. Async
The Python SDK provides two parallel client and session hierarchies — synchronous and asynchronous. Choose based on your application's runtime model.
| | Sync | Async |
| ------------ | -------------- | ------------------- |
| Client | `Agora` | `AsyncAgora` |
| Session | `AgentSession` | `AsyncAgentSession` |
| HTTP backend | `httpx.Client` | `httpx.AsyncClient` |
**Use `Agora` (sync) when:**
* You are writing scripts, CLI tools, or batch jobs
* Your web framework is synchronous, for example Flask or Django without async views
* You want the simplest possible code
**Use `AsyncAgora` (async) when:**
* Your application uses `asyncio`, for example FastAPI, Starlette, or aiohttp
* You need to manage multiple concurrent agent sessions efficiently
* You want non-blocking I/O
The `Agent` builder class is the same for both — it does not make HTTP calls, so it has no async variant. Pass an `AsyncAgora` client to `agent.create_session()` to receive an `AsyncAgentSession`.
# TypeScript (/en/api-reference/api-ref/server-sdk/typescript)
Full API reference for the Agora Conversational AI TypeScript SDK.
## AgoraClient
`AgoraClient` extends the Fern-generated base client with domain pool support for regional URL cycling and three authentication modes. Pass `appId` and `appCertificate` only for the recommended app-credentials mode. The SDK mints fresh REST tokens per request and generates RTC join tokens at session start.
```typescript
import { AgoraClient, Area } from 'agora-agents';
```
### Constructor
```typescript
const client = new AgoraClient(options: AgoraClient.Options);
```
The authentication mode is resolved automatically from the options you provide.
| Option | Type | Required | Description |
| ---------------- | --------------- | -------- | ----------------------------------------------------------------------- |
| `area` | [`Area`](#area) | Yes | Region for API routing (`Area.US`, `Area.EU`, `Area.AP`, `Area.CN`) |
| `appId` | `string` | Yes | Agora App ID |
| `appCertificate` | `string` | Yes | Agora App Certificate. Keep this secret and never expose it client-side |
| `customerId` | `string` | No | Customer ID for Basic Auth |
| `customerSecret` | `string` | No | Customer Secret for Basic Auth |
| `authToken` | `string` | No | Pre-built `agora token=` string |
| `timeout` | `number` | No | Request timeout in milliseconds |
| `maxRetries` | `number` | No | Maximum retry attempts |
| `fetch` | `typeof fetch` | No | Custom fetch implementation for unsupported runtimes |
Authentication mode is resolved from the options you provide:
| Options provided | Resolved [`authMode`](#agoraauthmode) |
| ------------------------------- | ------------------------------------- |
| `customerId` + `customerSecret` | `"basic"` |
| `authToken` | `"token"` |
| Neither | `"app-credentials"` |
See [Authentication](/en/api-reference/api-ref/conversational-ai/authentication) for details on each mode.
### Properties
The following read-only properties are available on any `AgoraClient` instance.
| Property | Type | Description |
| ---------------- | --------------------------------- | ------------------------------------------------------------- |
| `appId` | `string` | The Agora App ID |
| `appCertificate` | `string` | The Agora App Certificate |
| `authMode` | [`AgoraAuthMode`](#agoraauthmode) | The resolved authentication mode |
| `pool` | `Pool` | The underlying domain pool instance used for regional routing |
### Methods
The following methods are available in addition to the Fern-generated sub-client methods.
#### `nextRegion()`
Cycles to the next region prefix in the domain pool. Call this after a request failure to try a different regional endpoint.
```typescript
client.nextRegion();
```
#### `selectBestDomain(signal?)`
Trigger a manual DNS resolution check to select the best domain suffix. This runs automatically every 30 seconds, but you can call it manually.
```typescript
await client.selectBestDomain();
```
| Parameter | Type | Description |
| --------- | ------------- | --------------------------------------------- |
| `signal` | `AbortSignal` | Optional abort signal to cancel the DNS check |
#### `getCurrentURL()`
Returns the full API URL currently in use as a `string`.
```typescript
const url = client.getCurrentURL();
// Example: 'https://api-us-west-1.agora.io/api/conversational-ai-agent'
```
### Sub-clients
`AgoraClient` exposes Fern-generated sub-clients for direct REST API access. You typically do not need these when using the [agentkit layer](#agent).
| Property | Description |
| --------------------- | --------------------------------------------------------------- |
| `client.agents` | Start, stop, update, speak, interrupt, get history, list agents |
| `client.telephony` | Telephony operations |
| `client.phoneNumbers` | Phone number management |
For full method signatures and request parameters, see the [REST API reference](/en/api-reference/api-ref/conversational-ai/join).
## Agent
`Agent` is an immutable configuration object. Each builder method returns a new `Agent` instance — the original is never modified. Define one `Agent` at startup and call `createSession()` on it for each user conversation.
```typescript
import { Agent } from 'agora-agent-sdk';
```
### Constructor
```typescript
new Agent(options?: AgentOptions)
```
All options are optional. Use the [builder methods](#builder-methods) to set vendor configuration after construction.
| Option | Type | Default | Description |
| ------------------ | --------------------- | ----------- | ---------------------------------------------------------- |
| `name` | `string` | `undefined` | Agent name, used as the default session name |
| `instructions` | `string` | `undefined` | LLM system prompt |
| `greeting` | `string` | `undefined` | First message spoken when the session starts |
| `failureMessage` | `string` | `undefined` | Message spoken when an LLM call fails |
| `maxHistory` | `number` | `undefined` | Maximum conversation turns kept in LLM context |
| `turnDetection` | `TurnDetectionConfig` | `undefined` | Voice activity detection settings |
| `interruption` | `InterruptionConfig` | `undefined` | Unified interruption control settings |
| `sal` | `SalConfig` | `undefined` | Selective Attention Locking configuration |
| `avatar` | `AvatarConfig` | `undefined` | Avatar configuration |
| `advancedFeatures` | `AdvancedFeatures` | `undefined` | Enable MLLM mode, AI-VAD, and other advanced features |
| `parameters` | `SessionParams` | `undefined` | Session parameters including silence and farewell config |
| `geofence` | `GeofenceConfig` | `undefined` | Regional access restriction |
| `labels` | `Labels` | `undefined` | Custom key-value labels returned in notification callbacks |
| `rtc` | `RtcConfig` | `undefined` | RTC media encryption |
| `fillerWords` | `FillerWordsConfig` | `undefined` | Filler words played while waiting for the LLM response |
### Builder methods
All builder methods return a **new** `Agent` instance. The original is never modified.
#### `withLlm(vendor)`
Sets the LLM vendor. Pass an instance of [`OpenAI`](#openai), [`AzureOpenAI`](#azureopenai), [`Anthropic`](#anthropic), or [`Gemini`](#gemini).
```typescript
withLlm(vendor: BaseLLM): Agent
```
#### `withTts(vendor)`
Sets the TTS vendor. The sample rate type is captured and tracked for [avatar](#avatar-vendors) compatibility.
```typescript
withTts(vendor: BaseTTS): Agent
```
#### `withStt(vendor)`
Sets the STT vendor. Pass an instance of any [STT vendor class](#stt-vendors).
```typescript
withStt(vendor: BaseSTT): Agent
```
#### `withMllm(vendor)`
Sets the MLLM vendor for multimodal mode. Pass [`OpenAIRealtime`](#openairealtime), [`GeminiLive`](#geminilive), [`VertexAI`](#vertexai), or [`XaiGrok`](#xaigrok). Calling `withMllm()` automatically sets `mllm.enable = true`. MLLM mode does not require `withTts()` / `withLlm()` / `withStt()`.
Avatars are only supported with the cascading ASR + LLM + TTS pipeline. If you combine `withMllm()` with `withAvatar()`, the SDK throws an error when `toProperties()` or `session.start()` is called.
```typescript
withMllm(vendor: BaseMLLM): Agent
```
#### `withAvatar(vendor)`
Sets the avatar vendor. The `this` constraint enforces at compile time that the agent's TTS sample rate matches the avatar's required rate.
Requires the cascading ASR + LLM + TTS pipeline. If you combine `withAvatar()` with `withMllm()`, the SDK throws an error when `toProperties()` or `session.start()` is called.
```typescript
withAvatar(
this: Agent,
vendor: BaseAvatar
): Agent
```
#### `withTurnDetection(config)`
Configures cascading-flow turn detection. Use `config.start_of_speech` and `config.end_of_speech` for SOS/EOS detection. Use `withInterruption()` for interruption behavior and MLLM vendor `turnDetection` for MLLM turn detection.
```typescript
withTurnDetection(config: TurnDetectionConfig): Agent
```
#### `withInterruption(config)`
Configures unified interruption behavior using the top-level `interruption` object. Use this for `start_of_speech` and `keywords` interruption modes.
```typescript
withInterruption(config: InterruptionConfig): Agent
```
#### `withInstructions(text)`
Overrides the LLM system prompt on a new `Agent` instance.
```typescript
withInstructions(instructions: string): Agent
```
#### `withGreeting(text)`
Overrides the greeting message on a new `Agent` instance.
```typescript
withGreeting(greeting: string): Agent
```
#### `withName(name)`
Overrides the agent name on a new `Agent` instance.
```typescript
withName(name: string): Agent
```
#### Other builder methods
The following methods follow the same pattern — each returns a new `Agent` instance with the updated configuration.
| Method | Parameter type | Description |
| ---------------------------------- | ------------------------- | -------------------------------------------------------------------------------------------------------------------------------------------------------------- |
| `withSal(config)` | `SalConfig` | Set Selective Attention Locking configuration |
| `withAdvancedFeatures(features)` | `AdvancedFeatures` | Set advanced features |
| `withTools(enabled)` | `boolean` | Enable or disable MCP tool invocation |
| `withParameters(parameters)` | `SessionParams` | Set session parameters |
| `withAudioScenario(audioScenario)` | `ParametersAudioScenario` | Set `parameters.audio_scenario`. Use the exported `AudioScenario` constants for discoverability, for example `agent.withAudioScenario(AudioScenario.Aiserver)` |
| `withFailureMessage(message)` | `string` | Set the message spoken when the LLM fails |
| `withMaxHistory(n)` | `number` | Set the maximum conversation history length for the standard LLM pipeline. The v2.7 MLLM core schema does not expose a `max_history` field |
| `withGeofence(geofence)` | `GeofenceConfig` | Set geofence configuration |
| `withLabels(labels)` | `Labels` | Set custom labels |
| `withRtc(rtc)` | `RtcConfig` | Set RTC configuration |
| `withFillerWords(fillerWords)` | `FillerWordsConfig` | Set filler words configuration |
### `createSession(client, options)`
Creates an [`AgentSession`](#agentsession) bound to a specific client and channel. Does not start the agent — call [`session.start()`](#start) to join the channel.
```typescript
createSession(
client: AgoraClient,
options: SessionOptions,
): AgentSession
```
`SessionOptions` fields:
| Option | Type | Required | Description |
| ----------------- | --------------------------- | -------- | -------------------------------------------------------------------------------------------------------------------------------------------------- |
| `channel` | `string` | Yes | Channel name to join |
| `agentUid` | `string` | Yes | The agent's RTC UID |
| `remoteUids` | `string[]` | Yes | Remote user UIDs the agent listens and responds to |
| `name` | `string` | No | Session name. Defaults to agent name or `agent-{timestamp}` |
| `token` | `string` | No | Pre-built RTC+RTM token. Omit to auto-generate from app credentials |
| `expiresIn` | `number` | No | Token lifetime in seconds. Only applies when the token is auto-generated. Valid range: 1–86400. Use [`ExpiresIn`](#expiresin) helpers for clarity |
| `idleTimeout` | `number` | No | Seconds before the agent auto-exits when no audio is detected. `0` disables the timeout |
| `enableStringUid` | `boolean` | No | Use string UIDs instead of numeric UIDs |
| `preset` | `string \| AgentPreset[]` | No | Advanced project-specific presets. Use only when Agora provides a specific preset ID for your project. Most applications should not set this field |
| `pipelineId` | `string` | No | Published AI Studio pipeline ID to use as the base configuration |
| `debug` | `boolean` | No | Log API requests to the console |
| `warn` | `(message: string) => void` | No | Custom warning logger; pass a no-op to silence warnings |
`preset` is session-scoped because the underlying Agora start/join API applies presets per session, not per reusable `Agent` definition.
When you omit credentials for supported reseller-backed vendor models, AgentKit infers the matching session preset automatically:
* Deepgram STT: `nova-2`, `nova-3`
* OpenAI LLM: `gpt-4o-mini`, `gpt-4.1-mini`, `gpt-5-nano`, `gpt-5-mini`
* OpenAI TTS: `tts-1`
* MiniMax TTS: `speech-2.6-turbo`, `speech-2.8-turbo`
If you provide your own vendor API key for those same models, AgentKit keeps the request in BYOK mode and does not infer a preset.
### Properties
Read-only properties available on any `Agent` instance.
| Property | Type | Description |
| ------------------ | ---------------------------------- | ------------------------------------- |
| `name` | `string \| undefined` | Agent name |
| `instructions` | `string \| undefined` | LLM system prompt |
| `greeting` | `string \| undefined` | Greeting message |
| `failureMessage` | `string \| undefined` | Message spoken when LLM fails |
| `maxHistory` | `number \| undefined` | Maximum conversation history length |
| `llm` | `LlmConfig \| undefined` | LLM configuration |
| `tts` | `TtsConfig \| undefined` | TTS configuration |
| `stt` | `SttConfig \| undefined` | STT configuration |
| `mllm` | `MllmConfig \| undefined` | MLLM configuration |
| `avatar` | `AvatarConfig \| undefined` | Avatar configuration |
| `turnDetection` | `TurnDetectionConfig \| undefined` | Turn detection configuration |
| `interruption` | `InterruptionConfig \| undefined` | Interruption configuration |
| `sal` | `SalConfig \| undefined` | SAL configuration |
| `advancedFeatures` | `AdvancedFeatures \| undefined` | Advanced features |
| `parameters` | `SessionParams \| undefined` | Session parameters |
| `geofence` | `GeofenceConfig \| undefined` | Geofence configuration |
| `labels` | `Labels \| undefined` | Custom labels |
| `rtc` | `RtcConfig \| undefined` | RTC configuration |
| `fillerWords` | `FillerWordsConfig \| undefined` | Filler words configuration |
| `config` | `AgentOptions` | Full read-only configuration snapshot |
### `toProperties(opts)`
Low-level method to convert the agent configuration to the Fern request format. Used internally by `AgentSession.start()`. You typically do not need to call this directly unless building custom request bodies.
```typescript
toProperties(opts): StartAgentsRequest.Properties
```
### Type aliases
Public aliases over Fern-generated types include `LlmConfig`, `SttConfig`, `AsrConfig` (= `SttConfig`), `MllmConfig`, `AvatarConfig`, session/conversation types, and think types (`ThinkOnListeningAction`, etc.).
Think value constants: `ThinkOnListeningActionInject`, `ThinkOnListeningActionInterrupt`, `ThinkOnListeningActionIgnore`, `ThinkOnThinkingActionInterrupt`, `ThinkOnThinkingActionIgnore`, `ThinkOnSpeakingActionInterrupt`, `ThinkOnSpeakingActionIgnore`.
## AgentSession
`AgentSession` manages the full lifecycle of a running agent. Create sessions using [`agent.createSession()`](#createsessionclient-options); do not call the constructor directly.
```typescript
import { AgentSession } from 'agora-agents';
```
### State machine
A session progresses through the following states:
```text
idle ──► starting ──► running ──► stopping ──► stopped
│
▼
error
```
| Transition | Trigger |
| -------------------- | ---------------------------------------------------- |
| `idle → starting` | `start()` called |
| `starting → running` | API responds with agent ID |
| `starting → error` | API request fails |
| `running → stopping` | `stop()` called |
| `stopping → stopped` | API confirms agent stopped |
| `stopping → error` | Stop request fails and agent was not already stopped |
| `running → error` | Unrecoverable error during interaction |
`start()` can also be called from `stopped` or `error` state to restart the session.
### Methods
The following methods are available on an `AgentSession` instance.
#### `start()`
Starts the agent session. Generates tokens if not provided, sends the start request, and returns the agent ID. Resolves explicit `preset` values and also infers reseller presets from supported vendor configs when credentials are omitted.
```typescript
start(): Promise
```
* Transitions: `idle` / `stopped` / `error` → `starting` → `running`
* Throws if called in `starting`, `running`, or `stopping` state
* Throws if avatar config is invalid (wrong TTS sample rate)
* Throws if MLLM is enabled together with an enabled avatar — avatars are only supported with the cascading ASR + LLM + TTS pipeline
* Applies explicit `preset` values when provided and sends Agora-managed configuration when supported vendor credentials are omitted
* Fills generic avatar `agora_appid` and `agora_channel` from the session when omitted
* Generates avatar `agora_token` for `HeyGenAvatar`, `LiveAvatarAvatar`, and `GenericAvatar` when `agoraToken` is omitted and the client has an `appCertificate`. Other vendors (`AkoolAvatar`, `AnamAvatar`) never receive an auto-generated token.
#### `stop()`
Stops the agent session and removes the agent from the channel. If the agent has already stopped — for example due to idle timeout — resolves silently rather than throwing a 404 error.
```typescript
stop(): Promise
```
* Transitions: `running` → `stopping` → `stopped`
* Throws if called outside `running` state
#### `say(text, options?)`
Instructs the agent to speak the given text.
```typescript
say(text: string, options?: SayOptions): Promise
```
| Parameter | Type | Required | Description |
| ----------------------- | --------------------------------- | -------- | --------------------------------------------------- |
| `text` | `string` | Yes | The text for the agent to speak |
| `options.priority` | [`SpeakPriority`](#speakpriority) | No | Message priority |
| `options.interruptable` | `boolean` | No | Whether this message can be interrupted by the user |
* Only valid in `running` state
#### `interrupt()`
Interrupts the agent's current speech.
```typescript
interrupt(): Promise
```
* Only valid in `running` state
#### `update(config)`
Updates the agent configuration mid-session without restarting. Accepts a partial configuration object in REST API format.
```typescript
update(config: AgentConfigUpdate): Promise
```
* Only valid in `running` state
#### `getHistory()`
Fetches the conversation history for this session. Requires a valid agent ID — `start()` must have been called successfully.
```typescript
getHistory(): Promise
```
#### `getTurns(options?)`
Fetches turn-by-turn analytics for this session, including start/end events and latency metrics. Requires a valid agent ID and `start()` must have been called successfully.
```typescript
getTurns(options?: GetTurnsOptions): Promise
```
* `options.page_index`: page number, starting from `1`
* `options.page_size`: number of turns per page
#### `getAllTurns(options?)`
Fetches all turn analytics pages and merges the `turns` array. Requires a valid agent ID and `start()` must have been called successfully.
```typescript
getAllTurns(options?: Omit): Promise
```
* Requires a valid `agentId`
* For very long sessions, prefer processing pages with `getTurns()` to avoid holding all turns in memory
#### `getInfo()`
Fetches current agent metadata from the API. Requires a valid agent ID.
```typescript
getInfo(): Promise
```
#### `on(event, handler)`
Subscribes to a session event. Register handlers **before** calling `start()` to avoid missing the `started` event.
```typescript
on(event: AgentSessionEvent, handler: AgentSessionEventHandler): void
```
#### `off(event, handler)`
Unsubscribes a previously registered event handler.
```typescript
off(event: AgentSessionEvent, handler: AgentSessionEventHandler): void
```
### Events
The session emits the following events. See [`AgentSessionEvent`](#agentsessionevent) and [`AgentSessionEventHandler`](#agentsessioneventhandler) for type details.
| Event | Payload type | Description |
| ----------- | --------------------- | ------------------------------------- |
| `"started"` | `{ agentId: string }` | Agent successfully joined the channel |
| `"stopped"` | `{ agentId: string }` | Agent left the channel |
| `"error"` | `Error` | An unrecoverable error occurred |
### Properties
The following read-only properties are available on any `AgentSession` instance.
| Property | Type | Description |
| -------- | ---------------- | ------------------------------------------------------------------------------------------------------- |
| `status` | `string` | Current session state. One of `"idle"`, `"starting"`, `"running"`, `"stopping"`, `"stopped"`, `"error"` |
| `id` | `string \| null` | Agent ID, populated after `start()` resolves |
| `agent` | `Agent` | The agent configuration this session was created from |
| `appId` | `string` | The Agora App ID for this session |
| `raw` | `AgentsClient` | Direct access to the Fern-generated `AgentsClient` for advanced operations |
#### Using `session.raw`
Access the generated REST client to call endpoints not yet wrapped:
```typescript
await session.raw.someNewEndpoint({
appid: session.appId,
agentId: session.id!,
});
```
You must pass `appid` and `agentId` manually when using raw methods.
### Presets and BYOK
Prefer configuring vendors on the `Agent` builder. When you omit credentials for supported Agora-managed models, AgentKit sends the matching Agora-managed configuration at session start.
`preset` is an advanced session option for project-specific settings, not for selecting Agora-managed models. Most applications should use the builder instead.
* Omit vendor credentials on the builder for supported Agora-managed models.
* Provide vendor API keys when you want BYOK.
* Pass `preset` on `agent.createSession(...)` only when you need to access specific project-specific settings.
Supported Agora-managed models:
* Deepgram STT: `nova-2`, `nova-3`
* OpenAI LLM: `gpt-4o-mini`, `gpt-4.1-mini`, `gpt-5-nano`, `gpt-5-mini`
* OpenAI TTS: `tts-1`
* MiniMax TTS: `speech-2.6-turbo`, `speech-2.8-turbo`
## Vendors
All vendor classes are imported from `agora-agent-sdk`. Pass vendor instances to the [Agent builder methods](#builder-methods).
### LLM vendors
Use with [`withLlm()`](#withllmvendor).
#### OpenAI
```typescript
new OpenAI(options: OpenAIOptions)
```
| Option | Type | Required | Description |
| ------------------- | --------------------------- | ----------- | ------------------------------------------------------------------------------------------------------------ |
| `apiKey` | `string` | Usually | OpenAI API key. Optional for Agora-managed preset models |
| `model` | `string` | Yes | Model name, for example `'gpt-4o-mini'` |
| `url` | `string` | Conditional | API endpoint URL. Required when `apiKey` is set (BYOK); default `https://api.openai.com/v1/chat/completions` |
| `maxHistory` | `number` | No | Maximum conversation history to cache |
| `temperature` | `number` | No | Sampling temperature (0.0–2.0) |
| `topP` | `number` | No | Nucleus sampling (0.0–1.0) |
| `maxTokens` | `number` | No | Maximum tokens to generate |
| `systemMessages` | `Record[]` | No | Additional system messages |
| `greetingMessage` | `string` | No | Agent greeting message |
| `failureMessage` | `string` | No | Message spoken when the LLM call fails |
| `inputModalities` | `string[]` | No | Input modalities. Default: `["text"]` |
| `outputModalities` | `string[]` | No | Output modalities |
| `params` | `Record` | No | Additional LLM parameters passed to the model |
| `headers` | `Record` | No | Custom HTTP headers forwarded to the LLM provider |
| `vendor` | `string` | No | Vendor override |
| `mcpServers` | `Record[]` | No | MCP server connections |
| `greetingConfigs` | `LlmGreetingConfigs` | No | Greeting playback configuration |
| `templateVariables` | `Record` | No | Template variables for messages |
`apiKey` is optional for the following reseller preset models: `gpt-4o-mini`, `gpt-4.1-mini`, `gpt-5-nano`, `gpt-5-mini`. If `apiKey` is omitted for one of those models, AgentKit infers the matching session preset. This no-key branch is only available with the default OpenAI endpoint and without a custom vendor hint. If `apiKey` is provided, AgentKit uses standard BYOK behavior instead.
#### AzureOpenAI
```typescript
new AzureOpenAI(options: AzureOpenAIOptions)
```
| Option | Type | Required | Description |
| ------------------- | --------------------------- | ----------- | ------------------------------------------------------------------------------------------------ |
| `apiKey` | `string` | Yes | Azure OpenAI API key |
| `model` | `string` | Yes | Model or deployment name |
| `resourceName` | `string` | Conditional | Azure resource name. Required unless `endpoint` is set |
| `endpoint` | `string` | Conditional | Full Azure base URL. Takes precedence over `resourceName`; required unless `resourceName` is set |
| `deploymentName` | `string` | Yes | Deployment name in Azure |
| `apiVersion` | `string` | No | Azure API version. Default: `'2024-08-01-preview'` |
| `maxHistory` | `number` | No | Maximum conversation history to cache |
| `temperature` | `number` | No | Sampling temperature (0.0–2.0) |
| `topP` | `number` | No | Nucleus sampling (0.0–1.0) |
| `maxTokens` | `number` | No | Maximum tokens to generate |
| `systemMessages` | `Record[]` | No | Additional system messages |
| `greetingMessage` | `string` | No | Agent greeting message |
| `failureMessage` | `string` | No | Message spoken when the LLM call fails |
| `inputModalities` | `string[]` | No | Input modalities. Default: `["text"]` |
| `outputModalities` | `string[]` | No | Output modalities |
| `params` | `Record` | No | Additional LLM parameters |
| `headers` | `Record` | No | Custom HTTP headers forwarded to the LLM provider |
| `vendor` | `string` | No | Vendor override. Defaults to `azure` |
| `mcpServers` | `Record[]` | No | MCP server connections |
| `greetingConfigs` | `LlmGreetingConfigs` | No | Greeting playback configuration |
| `templateVariables` | `Record` | No | Template variables for messages |
#### Anthropic
```typescript
new Anthropic(options: AnthropicOptions)
```
| Option | Type | Required | Description |
| ------------------- | --------------------------- | -------- | ---------------------------------------------- |
| `apiKey` | `string` | Yes | Anthropic API key |
| `model` | `string` | Yes | Model name |
| `url` | `string` | Yes | Anthropic messages endpoint URL |
| `maxTokens` | `number` | Yes | Maximum tokens to generate |
| `headers` | `Record` | Yes | Request headers, including `anthropic-version` |
| `maxHistory` | `number` | No | Maximum conversation history to cache |
| `temperature` | `number` | No | Sampling temperature (0.0–1.0) |
| `topP` | `number` | No | Nucleus sampling (0.0–1.0) |
| `systemMessages` | `Record[]` | No | Additional system messages |
| `greetingMessage` | `string` | No | Agent greeting message |
| `failureMessage` | `string` | No | Message spoken when the LLM call fails |
| `inputModalities` | `string[]` | No | Input modalities. Default: `["text"]` |
| `outputModalities` | `string[]` | No | Output modalities |
| `params` | `Record` | No | Additional LLM parameters |
| `vendor` | `string` | No | Vendor override |
| `mcpServers` | `Record[]` | No | MCP server connections |
| `greetingConfigs` | `LlmGreetingConfigs` | No | Greeting playback configuration |
| `templateVariables` | `Record` | No | Template variables for messages |
#### Gemini
```typescript
new Gemini(options: GeminiOptions)
```
| Option | Type | Required | Description |
| ------------------- | --------------------------- | -------- | ------------------------------------------------------------------------------------ |
| `apiKey` | `string` | Yes | Google API key |
| `model` | `string` | Yes | Model name, for example `'gemini-pro'` |
| `url` | `string` | No | API endpoint URL. Default: `https://generativelanguage.googleapis.com/v1beta/models` |
| `maxHistory` | `number` | No | Maximum conversation history to cache |
| `temperature` | `number` | No | Sampling temperature (0.0–2.0) |
| `topP` | `number` | No | Nucleus sampling (0.0–1.0) |
| `topK` | `number` | No | Top-k sampling |
| `maxOutputTokens` | `number` | No | Maximum output tokens to generate |
| `systemMessages` | `Record[]` | No | Additional system messages |
| `greetingMessage` | `string` | No | Agent greeting message |
| `failureMessage` | `string` | No | Message spoken when the LLM call fails |
| `inputModalities` | `string[]` | No | Input modalities. Default: `["text"]` |
| `outputModalities` | `string[]` | No | Output modalities |
| `params` | `Record` | No | Additional LLM parameters |
| `headers` | `Record` | No | Custom HTTP headers forwarded to the LLM provider |
| `vendor` | `string` | No | Vendor override |
| `mcpServers` | `Record[]` | No | MCP server connections |
| `greetingConfigs` | `LlmGreetingConfigs` | No | Greeting playback configuration |
| `templateVariables` | `Record` | No | Template variables for messages |
### Other LLM vendors
| Class | Provider | Key options |
| --------------- | --------------------- | ---------------------------------------------------- |
| `Groq` | Groq | `apiKey`, `model`, `url` |
| `VertexAILLM` | Google Vertex AI | `apiKey`, `model`, `projectId`, `location`, `url?` |
| `AmazonBedrock` | Amazon Bedrock | `accessKey`, `secretKey`, `region`, `model` |
| `Dify` | Dify | `apiKey`, `url`, `model`, `user?`, `conversationId?` |
| `CustomLLM` | OpenAI-compatible LLM | `apiKey`, `model`, `url` |
`Groq` and `CustomLLM` share `OpenAI`'s option shape; `VertexAILLM` mirrors `Gemini`. All accept the common LLM fields (`systemMessages`, `greetingMessage`, `failureMessage`, `maxHistory`, `params`, `headers`, etc.).
### TTS vendors
Use with [`withTts()`](#withttsvendor). The `sampleRate` option determines avatar compatibility — see [`withAvatar()`](#withavatarvendor).
#### ElevenLabsTTS
```typescript
new ElevenLabsTTS(options: ElevenLabsTTSOptions)
```
| Option | Type | Required | Description |
| -------------------------- | ---------------------------------- | -------- | ------------------------------------------- |
| `key` | `string` | Yes | ElevenLabs API key |
| `modelId` | `string` | Yes | Model ID, for example `'eleven_flash_v2_5'` |
| `voiceId` | `string` | Yes | Voice ID |
| `baseUrl` | `string` | Yes | WebSocket base URL |
| `sampleRate` | `16000 \| 22050 \| 24000 \| 44100` | No | Audio sample rate in Hz |
| `optimizeStreamingLatency` | `number` | No | Latency optimization level (0–4) |
| `stability` | `number` | No | Voice stability (0.0–1.0) |
| `similarityBoost` | `number` | No | Voice similarity boost (0.0–1.0) |
| `style` | `number` | No | Voice style exaggeration (0.0–1.0) |
| `useSpeakerBoost` | `boolean` | No | Enable speaker boost |
| `skipPatterns` | `number[]` | No | Skip patterns for bracketed content |
#### MicrosoftTTS
```typescript
new MicrosoftTTS(options: MicrosoftTTSOptions)
```
| Option | Type | Required | Description |
| -------------- | ------------------------- | -------- | --------------------------------------------- |
| `key` | `string` | Yes | Azure Speech API key |
| `region` | `string` | Yes | Azure region, for example `'eastus'` |
| `voiceName` | `string` | Yes | Voice name, for example `'en-US-JennyNeural'` |
| `sampleRate` | `16000 \| 24000 \| 48000` | No | Audio sample rate in Hz |
| `speed` | `number` | No | Speaking rate multiplier |
| `volume` | `number` | No | Audio volume |
| `skipPatterns` | `number[]` | No | Skip patterns for bracketed content |
#### OpenAITTS
Fixed at 24,000 Hz — no configurable sample rate.
```typescript
new OpenAITTS(options: OpenAITTSOptions)
```
| Option | Type | Required | Description |
| -------------- | ---------- | -------- | ------------------------------------------------------------------------------ |
| `apiKey` | `string` | Usually | OpenAI API key |
| `voice` | `string` | Yes | Voice name: `'alloy'`, `'echo'`, `'fable'`, `'onyx'`, `'nova'`, or `'shimmer'` |
| `model` | `string` | No | Model name. Required (with `apiKey` and `baseUrl`) for BYOK |
| `baseUrl` | `string` | No | Endpoint URL. Required (with `apiKey` and `model`) for BYOK |
| `instructions` | `string` | No | Custom voice instructions |
| `speed` | `number` | No | Speech speed multiplier |
| `skipPatterns` | `number[]` | No | Skip patterns for bracketed content |
`apiKey` is optional only for the reseller-backed `tts-1` preset path. If omitted with `model: 'tts-1'` or no explicit model, AgentKit infers `openai_tts_1`. If provided, the request stays in BYOK mode.
#### CartesiaTTS
```typescript
new CartesiaTTS(options: CartesiaTTSOptions)
```
| Option | Type | Required | Description |
| -------------- | --------------------------------------------------- | -------- | ------------------------------------------------------ |
| `apiKey` | `string` | Yes | Cartesia API key |
| `voiceId` | `string` | Yes | Voice ID (serialized as `{"mode": "id", "id": "..."}`) |
| `modelId` | `string` | Yes | Model ID |
| `baseUrl` | `string` | No | WebSocket URL |
| `language` | `string` | No | Target language |
| `sampleRate` | `8000 \| 16000 \| 22050 \| 24000 \| 44100 \| 48000` | No | Audio sample rate in Hz |
| `skipPatterns` | `number[]` | No | Skip patterns for bracketed content |
#### Other TTS vendors
| Class | Key parameters |
| -------------- | ------------------------------------------------------------------------------------- |
| `GoogleTTS` | `key`, `voiceName`, `languageCode?`, `sampleRate?` |
| `AmazonTTS` | `accessKey`, `secretKey`, `region`, `voiceId`, `engine` |
| `DeepgramTTS` | `apiKey`, `model`, `baseUrl?`, `sampleRate?`, `additionalParams?` |
| `HumeAITTS` | `key`, `voiceId`, `provider`, `configId?`, `baseUrl?`, `speed?`, `trailingSilence?` |
| `RimeTTS` | `key`, `speaker`, `modelId`, `baseUrl?` |
| `FishAudioTTS` | `key`, `referenceId`, `backend` |
| `MiniMaxTTS` | `key?`, `groupId?`, `model`, `voiceId?`, `url?` |
| `MurfTTS` | `key`, `voiceId?`, `baseUrl?`, `locale?`, `rate?`, `pitch?`, `model?`, `sampleRate?` |
| `SarvamTTS` | `key`, `speaker`, `targetLanguageCode`, `pitch?`, `pace?`, `loudness?`, `sampleRate?` |
| `GradiumTTS` | `apiKey`, `url?`, `modelName?`, `voiceId?`, `sampleRate?`, `additionalParams?` |
| `MistralTTS` | `apiKey`, `model?`, `voice?`, `additionalParams?` |
| `TypecastTTS` | `apiKey`, `voiceId`, `model`, `additionalParams?` |
| `XAiTTS` | `apiKey`, `language`, `voiceId?`, `sampleRate?`, `additionalParams?` |
For `MiniMaxTTS`, `key` is optional only for reseller-backed models: `speech-2.6-turbo`, `speech-2.8-turbo`. If `key` is omitted for one of those models, AgentKit infers the matching session preset. In that preset-backed path, `groupId`, `voiceId`, and `url` are optional overrides rather than required fields. If `key` is provided, AgentKit uses BYOK.
#### GenericTTS
Custom OpenAI-compatible HTTP TTS. `url` is required and must be an absolute HTTP or HTTPS address — the constructor throws if `url` is missing, badly formatted, or uses a non-HTTP(S) scheme such as `ws:` or `wss:`. A valid URL is serialized as `tts.vendor = "generic_http"`.
```typescript
new GenericTTS(options: GenericTTSOptions)
```
| Option | Type | Required | Description |
| ------------------ | ------------------------- | -------- | --------------------------------------------------------------------------------------------------------------------------------------------------------------------- |
| `url` | `string` | Yes | The HTTP(S) endpoint of your custom TTS service |
| `headers` | `Record` | No | Custom HTTP headers to forward to the TTS service. Omitted from the request if not set |
| `apiKey` | `string` | No | The API key used to authenticate with the TTS service |
| `model` | `string` | No | The TTS model name |
| `voice` | `string` | No | The voice name |
| `speed` | `number` | No | The speech rate |
| `sampleRate` | `number` | No | The sample rate, in Hz, of the output audio. If your TTS service doesn't support multiple sample rates, make sure the returned audio's sample rate matches this value |
| `responseFormat` | `"pcm"` | No | The output audio format. Conversational AI Engine currently supports `pcm` |
| `instruction` | `string` | No | Instructions for voice style, emotion, or other playback directives |
| `additionalParams` | `Record` | No | Additional parameters passed through to the TTS service. Explicit fields with the same name take precedence |
| `skipPatterns` | `number[]` | No | Skip patterns for bracketed content |
### STT vendors
Use with [`withStt()`](#withsttvendor).
#### DeepgramSTT
```typescript
new DeepgramSTT(options?: DeepgramSTTOptions)
```
All options are optional.
| Option | Type | Required | Description |
| ------------------ | ------------------------- | -------- | -------------------------------------------------------------------------- |
| `apiKey` | `string` | No | Deepgram API key. Optional for `nova-2` and `nova-3` reseller preset usage |
| `model` | `string` | No | Model name, for example `'nova-2'` or `'enhanced'` |
| `language` | `string` | No | Language code, for example `'en-US'` |
| `keyterm` | `string` | No | Boost specialized terms and brands |
| `smartFormat` | `boolean` | No | Enable smart formatting |
| `punctuation` | `boolean` | No | Enable punctuation |
| `additionalParams` | `Record` | No | Additional vendor parameters |
For `nova-2` and `nova-3`, omit `apiKey` to use Agora-managed credentials. For all other Deepgram models, `apiKey` is required.
#### Other STT vendors
| Class | Key parameters |
| ----------------- | ---------------------------------------------------------------------- |
| `SpeechmaticsSTT` | `apiKey`, `language`, `model?`, `uri?` |
| `MicrosoftSTT` | `key`, `region`, `language` |
| `OpenAISTT` | `apiKey`, `model?`, `language?`, `prompt?`, `inputAudioTranscription?` |
| `GoogleSTT` | `projectId`, `location`, `adcCredentialsString`, `language`, `model?` |
| `AmazonSTT` | `accessKey`, `secretKey`, `region`, `language` |
| `AssemblyAISTT` | `apiKey`, `language`, `uri?` |
| `AresSTT` | `keywords?`, `additionalParams?` |
| `SarvamSTT` | `apiKey`, `language`, `model?` |
For `OpenAISTT`, the serialized configuration requires a transcription `prompt` and `language` — provide them through the `prompt` and `language` options or within `inputAudioTranscription`. `model` defaults to `gpt-4o-mini-transcribe`.
### MLLM vendors
Use with [`withMllm()`](#withmllmvendor) for multimodal end-to-end audio processing without separate STT or TTS steps. Calling `withMllm()` automatically enables the MLLM module (sets `mllm.enable = true`); the older `advancedFeatures.enable_mllm` flag is deprecated.
#### OpenAIRealtime
```typescript
new OpenAIRealtime(options: OpenAIRealtimeOptions)
```
| Option | Type | Required | Description |
| ------------------------- | --------------------------- | -------- | ---------------------------------------------------------------------- |
| `apiKey` | `string` | Yes | OpenAI API key |
| `model` | `string` | No | Model name, for example `'gpt-4o-realtime-preview'` |
| `voice` | `string` | No | Voice identifier |
| `instructions` | `string` | No | System instructions |
| `inputAudioTranscription` | `Record` | No | Audio transcription settings |
| `url` | `string` | No | WebSocket URL |
| `greetingMessage` | `string` | No | Agent greeting message |
| `failureMessage` | `string` | No | Message played when the model call fails |
| `inputModalities` | `string[]` | No | Input modalities, for example `['audio']` |
| `outputModalities` | `string[]` | No | Output modalities, for example `['text', 'audio']` |
| `messages` | `Record[]` | No | Conversation messages for short-term memory |
| `params` | `Record` | No | Additional MLLM parameters |
| `turnDetection` | `MllmTurnDetectionConfig` | No | MLLM turn detection configuration; overrides top-level `turnDetection` |
#### AzureOpenAIRealtime
```typescript
new AzureOpenAIRealtime(options: AzureOpenAIRealtimeOptions)
```
| Option | Type | Required | Description |
| ------------------ | --------------------------- | -------- | ---------------------------------------------------------------------- |
| `apiKey` | `string` | Yes | Azure OpenAI API key |
| `url` | `string` | Yes | Azure OpenAI Realtime WebSocket URL |
| `turnDetection` | `MllmTurnDetectionConfig` | Yes | MLLM turn detection configuration; overrides top-level `turnDetection` |
| `model` | `string` | No | Azure OpenAI Realtime model or deployment name |
| `voice` | `string` | No | Voice identifier |
| `instructions` | `string` | No | System instructions |
| `maxHistory` | `number` | No | Number of conversation history messages to cache |
| `greetingMessage` | `string` | No | Agent greeting message |
| `outputModalities` | `string[]` | No | Output modalities, for example `['text', 'audio']` |
| `messages` | `Record[]` | No | Conversation messages for short-term memory |
| `params` | `AzureOpenAIRealtimeParams` | No | Additional Azure OpenAI parameters |
#### GeminiLive
```typescript
new GeminiLive(options: GeminiLiveOptions)
```
| Option | Type | Required | Description |
| ------------------ | --------------------------- | -------- | ------------------------------------------------------------------------------------------------------------------- |
| `apiKey` | `string` | Yes | Google API key |
| `model` | `string` | Yes | Model name, for example `'models/gemini-3.8-live-extended-thinking'` |
| `thinkingLevel` | `GeminiThinkingLevel` | No | Reasoning budget (`'low'`, `'medium'`, or `'high'`), supported only by `'models/gemini-3.8-live-extended-thinking'` |
| `url` | `string` | No | WebSocket URL |
| `instructions` | `string` | No | System instructions for the model |
| `voice` | `string` | No | Voice name, for example `'Aoede'` or `'Charon'` |
| `affectiveDialog` | `boolean` | No | Enable affective dialog |
| `proactiveAudio` | `boolean` | No | Enable proactive audio |
| `transcribeAgent` | `boolean` | No | Transcribe agent speech |
| `transcribeUser` | `boolean` | No | Transcribe user speech |
| `httpOptions` | `Record` | No | HTTP options |
| `greetingMessage` | `string` | No | Agent greeting message |
| `failureMessage` | `string` | No | Message played when the model call fails |
| `inputModalities` | `string[]` | No | Input modalities |
| `outputModalities` | `string[]` | No | Output modalities |
| `messages` | `Record[]` | No | Conversation messages for short-term memory |
| `additionalParams` | `Record` | No | Additional parameters |
| `turnDetection` | `MllmTurnDetectionConfig` | No | MLLM turn detection configuration; overrides top-level `turnDetection` |
#### VertexAI
```typescript
new VertexAI(options: VertexAIOptions)
```
| Option | Type | Required | Description |
| ---------------------- | --------------------------- | -------- | ------------------------------------------------------------------------------ |
| `model` | `string` | Yes | Model name, for example `'gemini-live-2.5-flash-preview-native-audio-09-2025'` |
| `projectId` | `string` | Yes | Google Cloud project ID |
| `location` | `string` | Yes | Google Cloud location or region |
| `adcCredentialsString` | `string` | Yes | Application Default Credentials JSON string |
| `url` | `string` | No | WebSocket URL |
| `instructions` | `string` | No | System instructions for the model |
| `voice` | `string` | No | Voice name, for example `'Aoede'` or `'Charon'` |
| `affectiveDialog` | `boolean` | No | Enable affective dialog |
| `proactiveAudio` | `boolean` | No | Enable proactive audio |
| `transcribeAgent` | `boolean` | No | Transcribe agent speech |
| `transcribeUser` | `boolean` | No | Transcribe user speech |
| `httpOptions` | `Record` | No | HTTP options |
| `greetingMessage` | `string` | No | Agent greeting message |
| `failureMessage` | `string` | No | Message played when the model call fails |
| `inputModalities` | `string[]` | No | Input modalities |
| `outputModalities` | `string[]` | No | Output modalities |
| `messages` | `Record[]` | No | Conversation messages for short-term memory |
| `additionalParams` | `Record` | No | Additional parameters |
| `turnDetection` | `MllmTurnDetectionConfig` | No | MLLM turn detection configuration; overrides top-level `turnDetection` |
#### XaiGrok
```typescript
new XaiGrok(options: XaiGrokOptions)
```
| Option | Type | Required | Description |
| ------------------ | --------------------------- | -------- | ---------------------------------------------------------------------- |
| `apiKey` | `string` | Yes | xAI API key |
| `url` | `string` | No | WebSocket URL (defaults to xAI Realtime API) |
| `voice` | `string` | No | Voice identifier, for example `'eve'` |
| `language` | `string` | No | Language code |
| `sampleRate` | `number` | No | Audio sample rate in Hz |
| `greetingMessage` | `string` | No | Agent greeting message |
| `failureMessage` | `string` | No | Message played when the model call fails |
| `inputModalities` | `string[]` | No | Input modalities |
| `outputModalities` | `string[]` | No | Output modalities |
| `messages` | `Record[]` | No | Conversation messages for short-term memory |
| `params` | `Record` | No | Additional xAI parameters |
| `turnDetection` | `MllmTurnDetectionConfig` | No | MLLM turn detection configuration; overrides top-level `turnDetection` |
### Avatar vendors
Use with [`withAvatar()`](#withavatarvendor). Each avatar vendor requires a specific TTS sample rate enforced at compile time and runtime.
#### HeyGenAvatar
Deprecated. Use [`LiveAvatarAvatar`](#liveavataravatar) for new integrations. `HeyGenAvatar` still works (serializes `vendor: "heygen"`) but emits a deprecation warning. Requires TTS at **24,000 Hz**.
```typescript
new HeyGenAvatar(options: HeyGenAvatarOptions)
```
| Option | Type | Required | Description |
| --------------------- | ----------------------------- | -------- | --------------------------------------------- |
| `apiKey` | `string` | Yes | HeyGen API key |
| `quality` | `'low' \| 'medium' \| 'high'` | Yes | Video quality: 360p, 480p, or 720p |
| `agoraUid` | `string` | Yes | RTC UID for the avatar stream |
| `agoraToken` | `string` | No | RTC token for avatar authentication |
| `avatarId` | `string` | No | HeyGen avatar ID |
| `disableIdleTimeout` | `boolean` | No | Disable idle timeout. Default: `false` |
| `activityIdleTimeout` | `number` | No | Idle timeout in seconds. Default: `120` |
| `enable` | `boolean` | No | Enable or disable the avatar. Default: `true` |
#### AkoolAvatar
Requires TTS at **16,000 Hz**.
```typescript
new AkoolAvatar(options: AkoolAvatarOptions)
```
| Option | Type | Required | Description |
| ---------- | --------- | -------- | --------------------------------------------- |
| `apiKey` | `string` | Yes | Akool API key |
| `avatarId` | `string` | No | Akool avatar ID |
| `enable` | `boolean` | No | Enable or disable the avatar. Default: `true` |
#### LiveAvatarAvatar
Requires TTS at **24,000 Hz**.
```typescript
new LiveAvatarAvatar(options: LiveAvatarAvatarOptions)
```
| Option | Type | Required | Description |
| --------------------- | ----------------------------- | -------- | --------------------------------------------- |
| `apiKey` | `string` | Yes | LiveAvatar API key |
| `quality` | `'low' \| 'medium' \| 'high'` | Yes | Video quality |
| `agoraUid` | `string` | Yes | RTC UID for the avatar stream |
| `agoraToken` | `string` | No | Avatar token override |
| `avatarId` | `string` | No | Avatar ID |
| `disableIdleTimeout` | `boolean` | No | Disable idle timeout |
| `activityIdleTimeout` | `number` | No | Idle timeout in seconds |
| `enable` | `boolean` | No | Enable or disable the avatar. Default: `true` |
#### AnamAvatar
```typescript
new AnamAvatar(options: AnamAvatarOptions)
```
| Option | Type | Required | Description |
| ----------- | --------- | -------- | --------------------------------------------- |
| `apiKey` | `string` | Yes | Anam API key |
| `personaId` | `string` | No | Anam persona ID |
| `enable` | `boolean` | No | Enable or disable the avatar. Default: `true` |
#### GenericAvatar
Generic avatars can omit `agoraAppId`, `agoraChannel`, and `agoraToken`. AgentKit fills them from the session at `start()`.
```typescript
new GenericAvatar(options: GenericAvatarOptions)
```
| Option | Type | Required | Description |
| -------------- | --------- | -------- | --------------------------------------------- |
| `apiKey` | `string` | Yes | Custom avatar provider API key |
| `apiBaseUrl` | `string` | Yes | Avatar provider API base URL |
| `avatarId` | `string` | Yes | Avatar ID |
| `agoraUid` | `string` | Yes | RTC UID for the avatar stream |
| `agoraAppId` | `string` | No | Agora App ID override |
| `agoraChannel` | `string` | No | Agora channel override |
| `agoraToken` | `string` | No | Avatar token override |
| `enable` | `boolean` | No | Enable or disable the avatar. Default: `true` |
## Token utilities
Helper functions and classes for generating and managing tokens. Use these when you need control over token lifetime, or when generating tokens outside of a session.
```typescript
import { generateConvoAIToken, ExpiresIn } from 'agora-agent-sdk';
```
### `generateConvoAIToken(options)`
Generates a Conversational AI token combining RTC and RTM privileges. This is the same token the SDK generates automatically in app-credentials mode. Use this when you need a token outside of a session, or when passing a pre-built token to [`SessionOptions.token`](#createsessionclient-options).
```typescript
generateConvoAIToken(options: GenerateConvoAITokenOptions): string
```
| Option | Type | Required | Description |
| ---------------- | -------- | -------- | ----------------------------------------------------------------- |
| `appId` | `string` | Yes | Agora App ID |
| `appCertificate` | `string` | Yes | Agora App Certificate |
| `channelName` | `string` | Yes | The channel the token grants access to |
| `account` | `string` | Yes | The UID this token is issued for, as a string |
| `tokenExpire` | `number` | No | Token lifetime in seconds. Default: `86400`. Valid range: 1–86400 |
**Returns:** `string` — the generated token.
```typescript
const token = generateConvoAIToken({
appId: 'your-app-id',
appCertificate: 'your-app-certificate',
channelName: 'support-room-123',
account: '1',
tokenExpire: ExpiresIn.hours(12),
});
```
### `ExpiresIn`
Helper for specifying token lifetimes. Use with [`SessionOptions.expiresIn`](#createsessionclient-options) or [`generateConvoAIToken`](#generateconvoaitokenoptions). Values are validated and capped at the Agora maximum of 86400 seconds (24 hours).
| Value or method | Returns | Description |
| ---------------------- | -------- | ---------------------------------------------------------------------- |
| `ExpiresIn.DAY` | `86400` | 24 hours — the Agora maximum and default |
| `ExpiresIn.hours(n)` | `number` | `n` hours in seconds. Throws if `n` ≤ 0, caps at 24 h with a warning |
| `ExpiresIn.minutes(n)` | `number` | `n` minutes in seconds. Throws if `n` ≤ 0, caps at 24 h with a warning |
## Types and enums
Shared types and enums used across `AgoraClient`, `Agent`, `AgentSession`, and vendor classes.
### `Area`
Region used for API routing. Pass to `AgoraClient` via the `area` option.
```typescript
import { Area } from 'agora-agent-sdk';
```
| Value | Region |
| --------- | -------------- |
| `Area.US` | United States |
| `Area.EU` | Europe |
| `Area.AP` | Asia-Pacific |
| `Area.CN` | China mainland |
### `AgoraAuthMode`
The resolved authentication mode on an `AgoraClient` instance. Read via `client.authMode`.
```typescript
type AgoraAuthMode = "app-credentials" | "token" | "basic";
```
| Value | Description |
| ------------------- | -------------------------------------------------------------- |
| `"app-credentials"` | App ID and App Certificate provided. SDK auto-generates tokens |
| `"token"` | Pre-built `authToken` provided |
| `"basic"` | `customerId` and `customerSecret` provided |
### `AgentSessionEvent`
Union type of all valid event names for `session.on()` and `session.off()`.
```typescript
type AgentSessionEvent = "started" | "stopped" | "error";
```
### `AgentSessionEventHandler`
Generic handler type for session event callbacks.
```typescript
type AgentSessionEventHandler = (data: T) => void;
```
| Event | `T` |
| ----------- | --------------------- |
| `"started"` | `{ agentId: string }` |
| `"stopped"` | `{ agentId: string }` |
| `"error"` | `Error` |
### `SpeakPriority`
Controls how the agent handles a [`say()`](#saytext-options) call relative to its current activity.
```typescript
type SpeakPriority = "INTERRUPT" | "APPEND" | "IGNORE";
```
| Value | Description |
| ------------- | --------------------------------------------------------------- |
| `"INTERRUPT"` | Agent immediately stops current speech and delivers the message |
| `"APPEND"` | Message is queued and delivered after current speech ends |
| `"IGNORE"` | Message is discarded if the agent is currently speaking |
### `AgoraError`
Thrown when the API returns a 4xx or 5xx response. Catch this to inspect the status code and response body.
```typescript
import { AgoraError } from 'agora-agent-sdk';
try {
const agentId = await session.start();
} catch (err) {
if (err instanceof AgoraError) {
console.error('Status:', err.statusCode);
console.error('Message:', err.message);
console.error('Body:', err.body);
}
}
```
| Property | Type | Description |
| ------------- | ---------- | ------------------------------------ |
| `statusCode` | `number` | HTTP status code returned by the API |
| `message` | `string` | Human-readable error message |
| `body` | `unknown` | Raw response body from the API |
| `rawResponse` | `Response` | The full HTTP response object |
# API callback service (/en/api-reference/api-ref/speech-to-text/api-callback-service)
Agora provides the Notifications service (NCS), which sends notifications about Agora Real-Time STT events. You can set up an HTTPS server to receive these notifications. When an event occurs, the Real-Time STT service notifies the Notifications service, which then sends an HTTPS request to your server.
## Callback information
After you enable Notifications, when a specified event occurs, the Notifications server sends an HTTP/HTTPS request as a callback. The request body provides the main information of the callback in a JSON object. The JSON object contains different fields for different events.
The structure of the message notification callback in version 7.x differs from that in versions 5.x and 6.x. Refer to the relevant section based on your implementation.
## v7.x
This section explains the structure of the message notification callback for version 7.x.
### Request body
The message notification callback request body includes the following fields:
| Field | Type | Description |
| ----------- | ----------- | ------------------------------------------------------------------------------------------------------------------------- |
| `sid` | String | The agent ID. |
| `noticeId` | String | The notification ID. Uniquely identifies an event notification from the Agora service. |
| `productId` | Number | The service ID. `20` indicates speech-to-text service. |
| `eventType` | Number | The type of event. See [Event types](#event-types) for details. |
| `notifyMs` | Number | The Unix timestamp (in milliseconds) when the Agora messaging server sends the notification. |
| `payload` | JSON object | Event-specific data. The structure of `payload` depends on the `eventType`. For details, see [Event types](#event-types). |
**Example**:
```json
{
"sid": "agent_id",
"noticeId": "e94f5b6fd69446ea9d75da90a59ca8a2",
"productId": 20,
"eventType": 101,
"notifyMs": 1750235972193,
"payload": {...}
}
```
### Event types
The Agora message notification service supports the following events for the speech-to-text service:
| `eventType` | `event_name` | Description |
| ----------- | --------------------------- | ------------------------------------------------------------------------------------------------------------------------------------- |
| `101` | `agent joined` | The agent joins the channel. |
| `102` | `agent left` | The agent leaves the channel. |
| `104` | `token will expire` | The RTC Token used by the agent is about to expire. |
| `200` | `M3U8 file upload succeed` | A single M3U8 index file is created and uploaded successfully. If multiple M3U8 files are uploaded, this event is sent once per file. |
| `201` | `transcript upload succeed` | All M3U8 and VTT files finish uploading successfully. |
| `202` | `transcript upload failed` | M3U8 or VTT file uploads finish, but some or all files fail to upload. |
#### Event 101: Agent joined
The `eventType` value `101` indicates that an agent has joined a channel. The `payload` contains the following fields:
| Field | Type | Description |
| ---------- | -------- | ------------------------------------------------------ |
| `agent_id` | `String` | The task ID associated with the agent. |
| `start_ts` | `Number` | The timestamp (in milliseconds) when the task started. |
| `channel` | `String` | The name of the channel the agent joined. |
**Example**:
```json
{
"agent_id": "agent_id",
"channel": "stt_ncs93369",
"start_ts": 1750235971
}
```
#### Event 102: Agent left
The `eventType` value `102` indicates that an agent left the channel. The `payload` includes the following fields:
| Field | Type | Description |
| ---------- | -------- | -------------------------------------------------------------------------------------------------------------------------------------------------------------------------------------------------------------------------------------------------------------------------------------------------------------------------------------------------------------------------------------------------------------------------------------------------------------------------------------------------- |
| `agent_id` | `String` | The task ID associated with the agent. |
| `start_ts` | `Number` | The timestamp (in milliseconds) when the task started. |
| `stop_ts` | `Number` | The timestamp (in milliseconds) when the task ended. |
| `channel` | `String` | The name of the channel the agent was in. |
| `status` | `String` | The status of the task: = `STOPPED`: The task ended normally or due to idle timeout. - `FAILED`: The task failed. |
| `message` | `String` | The reason the agent exited the channel: - `OK`: The agent exited normally. - `Idle for too long`: The task timed out due to inactivity. - `Task exceeded maximum lifetime`: The task ended because it reached the maximum task lifetime. - `RTC connection error`: The agent exited due to a connection error. - `Fatal ASR error`: The task exited because of an ASR module error. - `Fatal Translation error`: The task exited due to a translation module error. |
**Example**:
```json
{
"agent_id": "agent_id",
"channel": "stt_ncs93369",
"message": "OK",
"start_ts": 1750235971,
"status": "STOPPED",
"stop_ts": 1750235984
}
```
```json
{
"agent_id": "agent_id",
"channel": "stt_ncs93369",
"message": "Idle for too long",
"start_ts": 1750235971,
"status": "STOPPED",
"stop_ts": 1750235984
}
```
```json
{
"agent_id": "agent_id",
"channel": "stt_ncs93369",
"message": "Task exceeded maximum lifetime",
"start_ts": 1750235971,
"status": "STOPPED",
"stop_ts": 1750495171
}
```
```json
{
"agent_id": "agent_id",
"channel": "stt_ncs93369",
"message": "RTC connection error",
"start_ts": 1750235971,
"status": "FAILED",
"stop_ts": 1750235984
}
```
```json
{
"agent_id": "agent_id",
"channel": "stt_ncs93369",
"message": "Fatal ASR error",
"start_ts": 1750235971,
"status": "FAILED",
"stop_ts": 1750235984
}
```
```json
{
"agent_id": "agent_id",
"channel": "stt_ncs93369",
"message": "Fatal Translation error",
"start_ts": 1750235971,
"status": "FAILED",
"stop_ts": 1750235984
}
```
#### Event 104: Token will expire
The `eventType` value `104` indicates that the RTC Token used by the Real-Time STT engine is about to expire. The Notifications service sends this event to your server when the RTC Token has 30 seconds remaining before it expires. If the RTC Token's validity period is 30 seconds or less, the platform does not send this event. The `payload` contains the following fields:
| Field | Type | Description |
| ---------- | -------- | ------------------------------------------------------------------------------------ |
| `agent_id` | `String` | The task ID associated with the agent. |
| `name` | `String` | The unique service identifier passed in when the task was created. |
| `start_ts` | `Number` | The timestamp (in seconds) when the task was created. |
| `channel` | `String` | The name of the channel. |
| `message` | `String` | A reminder that the RTC Token is about to expire. Fixed value: `token will expire!`. |
**Example**:
```json
{
"agent_id": "agent_id",
"name": "agora-test",
"start_ts": 1750235971,
"channel": "stt_ncs93369",
"message": "token will expire!"
}
```
Event `104` is for advance notification only. It does not end the task, change the task's final status, or replace the existing RTC connection error handling flow.
#### Event 200: M3U8 file upload succeeded
The `eventType` value `200` indicates that Agora has successfully uploaded a single M3U8 playlist file. Agora sends this event after each M3U8 index file is created and uploaded. If multiple M3U8 files are uploaded, this event is sent once per file. The `payload` contains the following fields:
| Field | Type | Description |
| :----------------- | :----- | :---------------------------------------------------------------------------------------------------------------------------------------------- |
| `agent_id` | String | The task ID associated with the agent. |
| `channel` | String | The name of the channel. |
| `file_name` | String | The name of the M3U8 file. |
| `file_creation_ts` | Int64 | The Unix timestamp (in milliseconds) when the M3U8 file was created. |
| `message` | String | `A STT transcript m3u8 file was successfully generated & uploaded`. Indicates that Agora has successfully generated and uploaded the M3U8 file. |
**Example**:
```json
{
"agent_id": "agent_id",
"channel": "stt_ncs93369",
"file_name": "prefix/1NT29X0TOHQVO6JL1HJE118VBLXNS4SD_agora_rtc_test.m3u8",
"file_creation_ts": 1234567891000,
"message": "A STT transcript m3u8 file was successfully generated & uploaded"
}
```
#### Event 201: Transcript upload succeeded
The `eventType` value `201` indicates that Agora has successfully uploaded all M3U8 and VTT files. Agora sends this event after all M3U8 and VTT files finish uploading. The `payload` contains the following fields:
| Field | Type | Description |
| :----------------- | :----- | :-------------------------------------------------------------------------------------------------------- |
| `agent_id` | String | The task ID associated with the agent. |
| `channel` | String | The name of the channel. |
| `file_name` | String | The name of the M3U8 file. |
| `file_creation_ts` | Int64 | The Unix timestamp (in milliseconds) when the M3U8 file was created. |
| `message` | String | `STT transcript upload succeeded.` Indicates that Agora has successfully uploaded all M3U8 and VTT files. |
**Example**:
```json
{
"agent_id": "agent_id",
"channel": "stt_ncs93369",
"file_name": "prefix/1NT29X0TOHQVO6JL1HJE118VBLXNS4SD_agora_rtc_test.m3u8",
"file_creation_ts": 1234567891000,
"message": "STT transcript upload succeeded."
}
```
#### Event 202: Transcript upload failed
The `eventType` value `202` indicates that one or more M3U8 or VTT files have failed to upload. Agora sends this event when M3U8 or VTT file uploads finish, but some or all files fail to upload. The `payload` contains the following fields:
| Field | Type | Description |
| :------------------ | :------------- | :------------------------------------------------------------------------------------------------------------------------------------------------------------------------------------------------------------------------------------------- |
| `agent_id` | String | The task ID associated with the agent. |
| `channel` | String | The name of the channel. |
| `succeed_file_list` | Array\
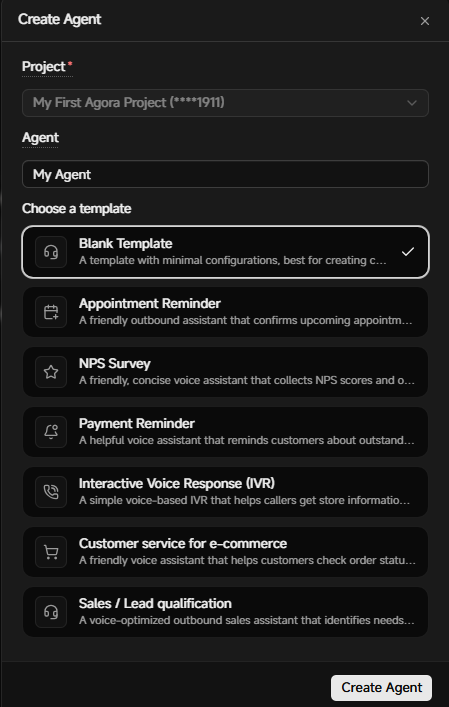 5. Enter a name for your agent.
6. Under **Choose a template**, select the **Blank Template**.
7. Select **Create Agent**.
The agent editor opens with a system prompt and pre-configured model settings.

## Configure your agent
The agent editor is organized into multiple tabs. For the quickstart, you only need to review the **Prompt** tab and the **Models** tab.
### Review the prompt
The agent editor opens with the following prompts:
* **System prompt**: The base instructions that shape how your agent thinks, speaks, and escalates.
* **Greeting**: The first assistant message before the live exchange starts. Type in a greeting such as `Hello, how can I help you today?`
* **Failure message**: The fallback message used when the agent needs a moment or cannot proceed.
### Review selected models
Models determine which ASR, LLM, and TTS services your agent uses to process speech, generate responses, and synthesize voice output.
1. Select the **Models** tab.

2. Review the pre-selected models for **Automatic Speech Recognition (ASR)**, **Large Language Model (LLM)**, and **Text-to-Speech (TTS)**. Use the default values to create your first agent.
The default models support **Agora Managed Key**. When you use a managed key, Agora provides the API credentials for your selected vendor. You do not need to obtain an API key directly from the vendor. See [Pricing](../reference/pricing) for details. To use your own API key or use a vendor that does not support a managed key, see [Customize your agent](build/customize-agent).
## Test the agent
1. Select the **Test** tab in the right panel.
2. Select **Start Call** to start a test call.
3. Allow microphone access when prompted.
4. Speak to the agent to verify it responds correctly.
For guidance on what to test and how to troubleshoot issues, see [Test your agent](build/test-agent).
## Next steps
You now have a working voice agent. From here you can:
* [Customize your agent](build/customize-agent): Fully configure models, prompts, and advanced settings for your use case
* [Manage integrations](build/integrations): Manage API credentials, knowledge bases, MCPs, custom tools, and connectors for reuse across agents
# TEN Framework core concepts (/en/ai/ten-agent/core-concepts)
## TEN runtime
The TEN runtime is an execution environment designed for running applications within the TEN Framework. It provides a flexible architecture that supports extensions developed in multiple programming languages and handles various types of data streams. By managing the lifecycle of extensions, data flows, and threads, the TEN runtime offers developers a powerful tool for building a wide range of applications and services.

## App
An app in the TEN Framework can operate as a standalone process or as a thread within an existing process. This flexibility allows for versatile deployment options depending on the needs of the application.
## Extension group
An extension group is a mechanism that designates a specific thread for execution. All extensions within a given group are executed on the same thread, ensuring consistent and synchronized processing.
## Extension
An extension is the fundamental building block of the TEN Framework. Developers can create extensions in various programming languages and combine them to build different applications and scenarios. The framework's design supports cross-language collaboration, enabling extensions written in different languages to work together seamlessly within the same application or service.
For example, a developer might use C++ to create an extension for real-time communication (RTC) due to its performance benefits in handling audio and video data, while developing an AI extension in Python to take advantage of its robust libraries for data analysis and machine learning. These extensions can then be integrated into a single application, leveraging the strengths of each language.
## Graph
A graph in the TEN Framework describes the data flow between extensions. It orchestrates how data moves from one extension to another, defining the participants and the flow of data between them. For example, you can route the output of a speech-to-text (STT) extension to a large language model (LLM) extension for further processing.
The TEN Framework supports four main types of data flows between extensions:
* Command
* Data
* Video frame
* Audio frame
By defining these data flows within a graph, you can create inter-extension communication and unidirectional data streams, particularly useful for handling audio and video data.
## Component hierarchy
The TEN Framework uses a nested structure where apps contain graphs, graphs contain extension groups, and extension groups contain extensions. Understanding this hierarchy is essential for building and configuring TEN applications.

* **App**:
An app can execute multiple graphs, which can be either statically predefined or dynamically assembled.
* **Graph**:
A graph is formed by multiple extensions working together to create a meaningful scenario. Each graph instance operates as a session within the app.
* **Extension group**:
The concept of an extension group is analogous to a thread. Extensions written in the same language and within the same extension group run on the same thread during runtime. You do not need to manage threads directly; simply declare the group to which each extension belongs.
* **Extension**:
Each extension within the framework is assigned a unique ID, structured as: `app-uri/graph-name/group-name/extension-name`
## TEN cloud store
The TEN cloud store functions similarly to Google Play Store or Apple's App Store, providing a marketplace for extensions. You can share your own extensions or download those created by others. Integrate these extensions into TEN apps to facilitate development and expand functionality.

## TEN manager
The TEN manager is a tool that simplifies the management of extensions. It handles tasks such as uploading, sharing, and installing extensions, automatically managing dependencies between them and their environment. This makes the installation and publication of extensions convenient and efficient, and streamlines the development process within the TEN Framework.
# TEN Framework overview (/en/ai/ten-agent/framework-overview)
The TEN Framework, or Transformative Extensions Network, is an open-source framework for building real-time multimodal AI agents. It helps you create applications that process voice, video, data streams, images, and text at the same time.
TEN is designed for agents that need to think, listen, see, and respond in real time. It provides a graph-based runtime, reusable extensions, and multi-language development support so you can assemble complex AI systems without rebuilding every capability from scratch.
## What you can build
Use the TEN Framework to build real-time AI applications such as:
* Voice and video AI agents
* Simultaneous interpretation systems
* Speech-to-text and text-to-speech pipelines
* Multilingual communication experiences
* Audio-visual assistants and virtual companions
* AI-generated meeting minutes
* Language tutoring and coaching applications
## Key capabilities
### Real-time multimodal interactions
TEN optimizes interaction between extensions to support low-latency AI applications. A graph can process multiple data types, including audio, video, commands, structured data, images, and text.
### Multi-language and cross-platform development
You can build modular extensions in C++, Go, and Python. TEN applications can run across Windows, macOS, Linux, and mobile environments, which gives you flexibility when choosing where each capability should execute.
### Modular extension architecture
TEN applications are composed from extensions. Each extension owns a focused capability, such as audio capture, ASR, LLM processing, TTS, tool calling, or output rendering. This modular architecture makes it easier to prototype, replace providers, and add new capabilities over time.
### Edge-cloud integration
TEN supports applications that combine edge and cloud components. You can run latency-sensitive or privacy-sensitive work near the user while using cloud-based models for heavier reasoning or generation tasks.
### Flexible orchestration beyond model limits
TEN lets you combine AI models with databases, retrieval systems, monitoring tools, and external services. Instead of depending on one model to handle the whole workflow, you can orchestrate multiple specialized components through the graph.
### Real-time agent state management
TEN graphs can manage changing agent state so applications can adapt behavior during a session. This is useful for interactive agents that need to respond to user context, media state, or tool results while the conversation is still running.
## How it relates to TEN Agent
TEN Agent is built on the TEN Framework. The framework provides the runtime, graph model, extension system, schema system, and package mechanics. TEN Agent applies those framework capabilities to conversational AI workflows.
Start with [Project overview](./project-overview) when you want to understand the TEN Agent repository layout, runtime configuration, extension folders, and local server API.
For implementation details, see:
* [Subgraphs](./architecture/subgraphs)
* [Schema system](./architecture/schema-system)
* [Type system](./architecture/type-system)
* [Development workflow](./develop/development-workflow)
## Samples
Explore TEN Framework examples in the [TEN Framework repository](https://github.com/TEN-framework/ten-framework/tree/main/ai_agents/agents/examples).
# Project overview (/en/ai/ten-agent/project-overview)
The TEN Agent project is built on the TEN Framework and follows a modular architecture. This page describes the project structure, configuration system, and web server API.
TEN Agent uses a graph-based configuration system built on TEN Framework concepts. The project organizes code into modular extensions that can be orchestrated through configuration files without modifying source code.
The folder structure follows this pattern:
```text
├── agents/
│ └── ten_packages/
│ ├── extension/
│ │ ├── openai_chatgpt_python/
│ │ │ ├── extension.py
│ │ │ ├── ..
│ │ │ └── requirements.txt
│ │ ├── elevenlabs_tts
│ │ └── ..
│ └── property.json
├── playground
├── demo
└── server
```
It contains the following important folders and files:
* `property.json`: This file contains the orchestration of extensions. It is the main runtime configuration file.
* `ten_packages/extension`: This folder contains the extension modules. Each extension module is a separate Python/Golang/C++ package.
* `server`: This folder contains the web server code. It is responsible for handling the incoming requests and start/stop of agent processes.
* `playground`: This folder contains the UI code for the playground. It is a web-based interface to interact with the agent.
## Runtime configuration
The main runtime configuration file is `property.json`. It contains the orchestration of extensions. The file is structured as follows:
```json
"predefined_graphs": [
{
"name": "va_openai_azure_fashionai",
"auto_start": false,
"connections": [
// ...
],
"nodes": [
// ...
]
},
// ...
]
```
The file contains the following orchestration info:
* **Graphs**: Collections of nodes and connections that determine agent behavior
* **Nodes**: Individual extension instances with specific configurations
* **Connections**: Data flow paths between nodes
```json
{
"predefined_graphs": [
{
"name": "va_openai_azure_fashionai",
"auto_start": false,
"connections": [...],
"nodes": [...]
}
]
}
```
### Graphs
The `predefined_graphs` property contains a list of available graphs. Each graph defines how the agent behaves in a specific scenario. Each graph contains:
* `name`: Unique identifier for the graph
* `auto_start`: Whether to start this graph automatically
* `nodes`: List of extension instances
* `connections`: Data routing between nodes
### Nodes
The `nodes` section contains the list of extensions that are part of the graph. Each node includes the following:
* `name`: Unique identifier of a node within the graph
* `addon`: Specifies the extension module to use. You can create multiple instances of the same extension within a graph. For example, you might include several `chatgpt_openai_python` nodes, each using the same `addon` property but with unique `name` properties. This allows you to run parallel instances of an extension with different configurations or behaviors.
* `property`: Extension-specific configuration
```json
{
"name": "chatgpt_openai_python",
"addon": "chatgpt_openai_python",
"property": {
"api_key": "${env:OPENAI_API_KEY|}",
"model": "gpt-3.5-turbo",
"temperature": 0.5,
"max_tokens": 100,
"prompt": "You are a helpful assistant"
}
}
```
#### Node properties
The `property` section of a node configures the extension's behavior. Each extension defines its available properties in the `manifest.json` file within its folder. You can customize an extension by setting these runtime properties.
#### Read environment variables
Many extensions require API keys to function. Instead of hardcoding sensitive keys in `property.json`, use environment variables with the syntax `${env:
5. Enter a name for your agent.
6. Under **Choose a template**, select the **Blank Template**.
7. Select **Create Agent**.
The agent editor opens with a system prompt and pre-configured model settings.

## Configure your agent
The agent editor is organized into multiple tabs. For the quickstart, you only need to review the **Prompt** tab and the **Models** tab.
### Review the prompt
The agent editor opens with the following prompts:
* **System prompt**: The base instructions that shape how your agent thinks, speaks, and escalates.
* **Greeting**: The first assistant message before the live exchange starts. Type in a greeting such as `Hello, how can I help you today?`
* **Failure message**: The fallback message used when the agent needs a moment or cannot proceed.
### Review selected models
Models determine which ASR, LLM, and TTS services your agent uses to process speech, generate responses, and synthesize voice output.
1. Select the **Models** tab.

2. Review the pre-selected models for **Automatic Speech Recognition (ASR)**, **Large Language Model (LLM)**, and **Text-to-Speech (TTS)**. Use the default values to create your first agent.
The default models support **Agora Managed Key**. When you use a managed key, Agora provides the API credentials for your selected vendor. You do not need to obtain an API key directly from the vendor. See [Pricing](../reference/pricing) for details. To use your own API key or use a vendor that does not support a managed key, see [Customize your agent](build/customize-agent).
## Test the agent
1. Select the **Test** tab in the right panel.
2. Select **Start Call** to start a test call.
3. Allow microphone access when prompted.
4. Speak to the agent to verify it responds correctly.
For guidance on what to test and how to troubleshoot issues, see [Test your agent](build/test-agent).
## Next steps
You now have a working voice agent. From here you can:
* [Customize your agent](build/customize-agent): Fully configure models, prompts, and advanced settings for your use case
* [Manage integrations](build/integrations): Manage API credentials, knowledge bases, MCPs, custom tools, and connectors for reuse across agents
# TEN Framework core concepts (/en/ai/ten-agent/core-concepts)
## TEN runtime
The TEN runtime is an execution environment designed for running applications within the TEN Framework. It provides a flexible architecture that supports extensions developed in multiple programming languages and handles various types of data streams. By managing the lifecycle of extensions, data flows, and threads, the TEN runtime offers developers a powerful tool for building a wide range of applications and services.

## App
An app in the TEN Framework can operate as a standalone process or as a thread within an existing process. This flexibility allows for versatile deployment options depending on the needs of the application.
## Extension group
An extension group is a mechanism that designates a specific thread for execution. All extensions within a given group are executed on the same thread, ensuring consistent and synchronized processing.
## Extension
An extension is the fundamental building block of the TEN Framework. Developers can create extensions in various programming languages and combine them to build different applications and scenarios. The framework's design supports cross-language collaboration, enabling extensions written in different languages to work together seamlessly within the same application or service.
For example, a developer might use C++ to create an extension for real-time communication (RTC) due to its performance benefits in handling audio and video data, while developing an AI extension in Python to take advantage of its robust libraries for data analysis and machine learning. These extensions can then be integrated into a single application, leveraging the strengths of each language.
## Graph
A graph in the TEN Framework describes the data flow between extensions. It orchestrates how data moves from one extension to another, defining the participants and the flow of data between them. For example, you can route the output of a speech-to-text (STT) extension to a large language model (LLM) extension for further processing.
The TEN Framework supports four main types of data flows between extensions:
* Command
* Data
* Video frame
* Audio frame
By defining these data flows within a graph, you can create inter-extension communication and unidirectional data streams, particularly useful for handling audio and video data.
## Component hierarchy
The TEN Framework uses a nested structure where apps contain graphs, graphs contain extension groups, and extension groups contain extensions. Understanding this hierarchy is essential for building and configuring TEN applications.

* **App**:
An app can execute multiple graphs, which can be either statically predefined or dynamically assembled.
* **Graph**:
A graph is formed by multiple extensions working together to create a meaningful scenario. Each graph instance operates as a session within the app.
* **Extension group**:
The concept of an extension group is analogous to a thread. Extensions written in the same language and within the same extension group run on the same thread during runtime. You do not need to manage threads directly; simply declare the group to which each extension belongs.
* **Extension**:
Each extension within the framework is assigned a unique ID, structured as: `app-uri/graph-name/group-name/extension-name`
## TEN cloud store
The TEN cloud store functions similarly to Google Play Store or Apple's App Store, providing a marketplace for extensions. You can share your own extensions or download those created by others. Integrate these extensions into TEN apps to facilitate development and expand functionality.

## TEN manager
The TEN manager is a tool that simplifies the management of extensions. It handles tasks such as uploading, sharing, and installing extensions, automatically managing dependencies between them and their environment. This makes the installation and publication of extensions convenient and efficient, and streamlines the development process within the TEN Framework.
# TEN Framework overview (/en/ai/ten-agent/framework-overview)
The TEN Framework, or Transformative Extensions Network, is an open-source framework for building real-time multimodal AI agents. It helps you create applications that process voice, video, data streams, images, and text at the same time.
TEN is designed for agents that need to think, listen, see, and respond in real time. It provides a graph-based runtime, reusable extensions, and multi-language development support so you can assemble complex AI systems without rebuilding every capability from scratch.
## What you can build
Use the TEN Framework to build real-time AI applications such as:
* Voice and video AI agents
* Simultaneous interpretation systems
* Speech-to-text and text-to-speech pipelines
* Multilingual communication experiences
* Audio-visual assistants and virtual companions
* AI-generated meeting minutes
* Language tutoring and coaching applications
## Key capabilities
### Real-time multimodal interactions
TEN optimizes interaction between extensions to support low-latency AI applications. A graph can process multiple data types, including audio, video, commands, structured data, images, and text.
### Multi-language and cross-platform development
You can build modular extensions in C++, Go, and Python. TEN applications can run across Windows, macOS, Linux, and mobile environments, which gives you flexibility when choosing where each capability should execute.
### Modular extension architecture
TEN applications are composed from extensions. Each extension owns a focused capability, such as audio capture, ASR, LLM processing, TTS, tool calling, or output rendering. This modular architecture makes it easier to prototype, replace providers, and add new capabilities over time.
### Edge-cloud integration
TEN supports applications that combine edge and cloud components. You can run latency-sensitive or privacy-sensitive work near the user while using cloud-based models for heavier reasoning or generation tasks.
### Flexible orchestration beyond model limits
TEN lets you combine AI models with databases, retrieval systems, monitoring tools, and external services. Instead of depending on one model to handle the whole workflow, you can orchestrate multiple specialized components through the graph.
### Real-time agent state management
TEN graphs can manage changing agent state so applications can adapt behavior during a session. This is useful for interactive agents that need to respond to user context, media state, or tool results while the conversation is still running.
## How it relates to TEN Agent
TEN Agent is built on the TEN Framework. The framework provides the runtime, graph model, extension system, schema system, and package mechanics. TEN Agent applies those framework capabilities to conversational AI workflows.
Start with [Project overview](./project-overview) when you want to understand the TEN Agent repository layout, runtime configuration, extension folders, and local server API.
For implementation details, see:
* [Subgraphs](./architecture/subgraphs)
* [Schema system](./architecture/schema-system)
* [Type system](./architecture/type-system)
* [Development workflow](./develop/development-workflow)
## Samples
Explore TEN Framework examples in the [TEN Framework repository](https://github.com/TEN-framework/ten-framework/tree/main/ai_agents/agents/examples).
# Project overview (/en/ai/ten-agent/project-overview)
The TEN Agent project is built on the TEN Framework and follows a modular architecture. This page describes the project structure, configuration system, and web server API.
TEN Agent uses a graph-based configuration system built on TEN Framework concepts. The project organizes code into modular extensions that can be orchestrated through configuration files without modifying source code.
The folder structure follows this pattern:
```text
├── agents/
│ └── ten_packages/
│ ├── extension/
│ │ ├── openai_chatgpt_python/
│ │ │ ├── extension.py
│ │ │ ├── ..
│ │ │ └── requirements.txt
│ │ ├── elevenlabs_tts
│ │ └── ..
│ └── property.json
├── playground
├── demo
└── server
```
It contains the following important folders and files:
* `property.json`: This file contains the orchestration of extensions. It is the main runtime configuration file.
* `ten_packages/extension`: This folder contains the extension modules. Each extension module is a separate Python/Golang/C++ package.
* `server`: This folder contains the web server code. It is responsible for handling the incoming requests and start/stop of agent processes.
* `playground`: This folder contains the UI code for the playground. It is a web-based interface to interact with the agent.
## Runtime configuration
The main runtime configuration file is `property.json`. It contains the orchestration of extensions. The file is structured as follows:
```json
"predefined_graphs": [
{
"name": "va_openai_azure_fashionai",
"auto_start": false,
"connections": [
// ...
],
"nodes": [
// ...
]
},
// ...
]
```
The file contains the following orchestration info:
* **Graphs**: Collections of nodes and connections that determine agent behavior
* **Nodes**: Individual extension instances with specific configurations
* **Connections**: Data flow paths between nodes
```json
{
"predefined_graphs": [
{
"name": "va_openai_azure_fashionai",
"auto_start": false,
"connections": [...],
"nodes": [...]
}
]
}
```
### Graphs
The `predefined_graphs` property contains a list of available graphs. Each graph defines how the agent behaves in a specific scenario. Each graph contains:
* `name`: Unique identifier for the graph
* `auto_start`: Whether to start this graph automatically
* `nodes`: List of extension instances
* `connections`: Data routing between nodes
### Nodes
The `nodes` section contains the list of extensions that are part of the graph. Each node includes the following:
* `name`: Unique identifier of a node within the graph
* `addon`: Specifies the extension module to use. You can create multiple instances of the same extension within a graph. For example, you might include several `chatgpt_openai_python` nodes, each using the same `addon` property but with unique `name` properties. This allows you to run parallel instances of an extension with different configurations or behaviors.
* `property`: Extension-specific configuration
```json
{
"name": "chatgpt_openai_python",
"addon": "chatgpt_openai_python",
"property": {
"api_key": "${env:OPENAI_API_KEY|}",
"model": "gpt-3.5-turbo",
"temperature": 0.5,
"max_tokens": 100,
"prompt": "You are a helpful assistant"
}
}
```
#### Node properties
The `property` section of a node configures the extension's behavior. Each extension defines its available properties in the `manifest.json` file within its folder. You can customize an extension by setting these runtime properties.
#### Read environment variables
Many extensions require API keys to function. Instead of hardcoding sensitive keys in `property.json`, use environment variables with the syntax `${env: or add it manually with the following JSON:
```json
{
"mcpServers": {
"agora-docs": {
"url": "https://mcp.agora.io"
}
}
}
```
or add it manually with the following JSON:
```json
{
"mcpServers": {
"agora-docs": {
"url": "https://mcp.agora.io"
}
}
}
```