# Quickstart (/en/realtime-media/voice/quickstart)
> For AI agents: see the complete documentation index at [llms.txt](/llms.txt).
<_PlatformTabsGroup groupMode="structured" canonicalPlatform="web" platforms="["android","ios","macos","web","windows","electron","flutter","react-native","javascript","unity","unreal","blueprint","python"]" showTabs="true">
<_PlatformPanel platform="android">
<_PlatformProcessedMarker groupMode="structured" canonicalPlatform="web" platform="android" />
This Android quickstart shows you how to create a basic Voice Calling app using the Agora Voice SDK. Switch to the [iOS](/en/realtime-media/voice/quickstart/ios) or [Web](/en/realtime-media/voice/quickstart/web) quickstart, or choose another platform from the selector.
## Understand the tech [#understand-the-tech]
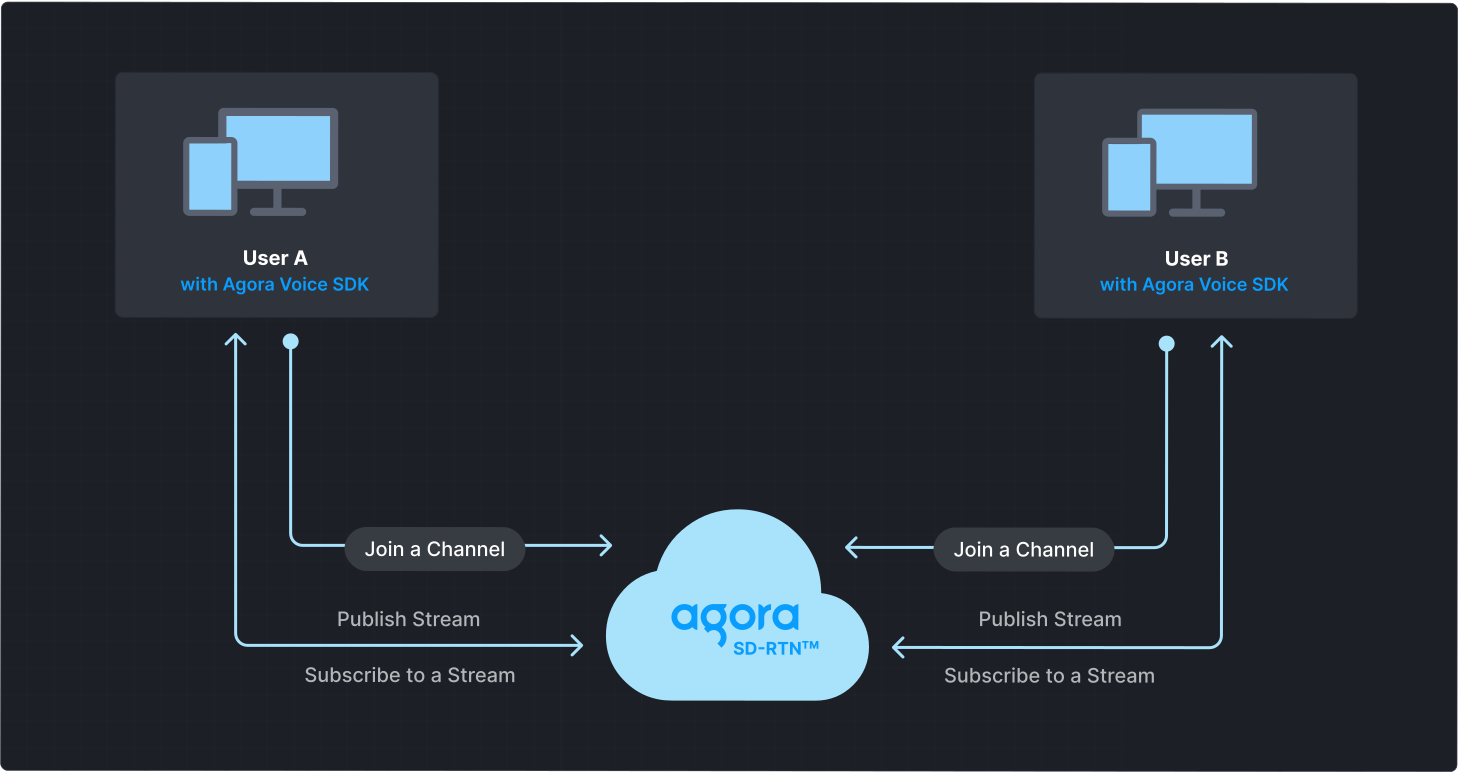
To start a Voice Calling session, implement the following steps in your app:
* **Initialize the Agora Engine**: Before calling other APIs, create and initialize an Agora Engine instance.
* **Join a channel**: Call methods to create and join a channel.
* **Send and receive audio**: All users can publish streams to the channel and subscribe to audio streams published by other users in the channel.
## Prerequisites [#prerequisites]
* [Android Studio](https://developer.android.com/studio) 4.2 or higher.
* Android SDK API Level 21 or higher.
* Two mobile devices running Android 5.0 or higher.
* A microphone
* A valid Agora account and project. Please refer to [Agora account management](manage-agora-account.md) for details.
## Set up your project [#set-up-your-project]
This section shows you how to set up your Android project and install the Agora Voice SDK.
Create a new project
Add to an existing project
1. Create a [new project](https://developer.android.com/studio/projects/create-project).
1. Open Android Studio and select **File > New > New Project...**.
2. Select **Phone and Tablet** > **Empty Activity** and click **Next**.
3. Set the project name and storage path.
4. Select **Java** or **Kotlin** as the language, and click **Finish** to create the Android project.
After you create a project, Android Studio automatically starts gradle sync. Ensure that the synchronization is successful before proceeding to the next step.
1. Add a new activity to your project.
1. Open your project in Android Studio.
2. Right-click on the `app/src/main/java/` folder.
3. Select **New → Activity → Empty Activity**.
4. Enter an activity name and click **Finish**.
This guide uses `MainActivity` as the activity name in the sample code. Replace it with your activity name where required.
2. Add a layout file for your activity.
Set up a basic layout for your activity. Refer to [Create a user interface](#create-a-user-interface) to get a bare bones sample layout.
### Install the SDK [#install-the-sdk]
Use either of the following methods to add Voice SDK to your project.
Maven Central
Manual integration
1. Open the `settings.gradle` file in the project's root directory and add the Maven Central dependency, if it doesn't already exist:
```text
repositories {
mavenCentral()
}
```
If your Android project uses dependencyResolutionManagement, the method of adding the Maven Central dependency may differ.
1. To integrate the Voice SDK into your Android project, add the following to the `dependencies` block in your project module `build.gradle` file:
* Groovy `build.gradle`
```json
implementation 'io.agora.rtc:voice-sdk:x.y.z'
```
* Kotlin `build.gradle.kts`
```kotlin
implementation("io.agora.rtc:voice-sdk:x.y.z")
```
Replace `x.y.z` with the specific SDK version number, such as `4.5.0`.
To get the latest version number, check the [Release notes](reference/release-notes.mdx). To integrate the Lite SDK, use `io.agora.rtc:lite-sdk` instead.
1. Prevent code obfuscation
Open the `/app/proguard-rules.pro` file and add the following lines to prevent the Voice SDK code from being obfuscated:
```java
-keep class io.agora.** { *; }
-dontwarn io.agora.**
```
1. Download the latest version of Voice SDK from the [SDKs](/en/api-reference/sdks?product=voice\&platform=android) page and unzip it.
2. Open the unzipped file and copy the following files or subfolders to your project path.
| File or folder | Project path |
| :----------------------------------- | :----------------------- |
| `agora-rtc-sdk.jar` file | `/app/libs/` |
| `arm64-v8a` folder | `/app/src/main/jniLibs/` |
| `armeabi-v7a` folder | `/app/src/main/jniLibs/` |
| `x86` folder | `/app/src/main/jniLibs/` |
| `x86_64` folder | `/app/src/main/jniLibs/` |
| `high_level_api` in `include` folder | `/app/src/main/jniLibs/` |
1. Select the file `/app/libs/agora-rtc-sdk.jar` in the left navigation bar of Android Studio project files, right-click, and select **add as a library** from the drop-down menu.
2. Prevent code obfuscation
Open the `/app/proguard-rules.pro` file and add the following lines to prevent the Voice SDK code from being obfuscated:
```java
-keep class io.agora.** { *; }
-dontwarn io.agora.**
```
## Implement Voice Calling [#implement-voice-calling]
This section guides you through the implementation of basic real-time audio interaction in your app.
The following figure illustrates the essential steps:
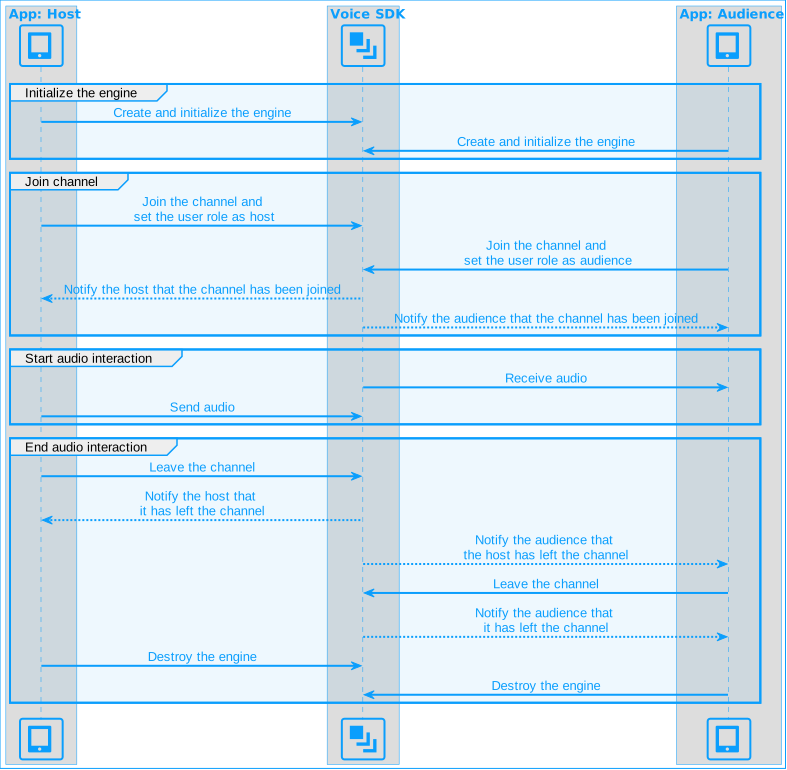
This guide includes [complete sample code](#complete-sample-code) that demonstrates implementing basic real-time interaction. To understand the core API calls in the sample code, review the following implementation steps and use the code in your `MainActivity` file.
### Import Agora classes [#import-agora-classes]
Import the relevant Agora classes and interfaces:
Java
Kotlin
```java
import io.agora.rtc2.Constants;
import io.agora.rtc2.IRtcEngineEventHandler;
import io.agora.rtc2.RtcEngine;
import io.agora.rtc2.RtcEngineConfig;
import io.agora.rtc2.ChannelMediaOptions;
```
```kotlin
import io.agora.rtc2.ChannelMediaOptions
import io.agora.rtc2.Constants
import io.agora.rtc2.IRtcEngineEventHandler
import io.agora.rtc2.RtcEngine
import io.agora.rtc2.RtcEngineConfig
```
### Initialize the engine [#initialize-the-engine]
For real-time communication, initialize an `RtcEngine` instance and set up event handlers to manage user interactions within the channel. Use `RtcEngineConfig` to specify the application context, [App ID](manage-agora-account.md), and custom [event handler](#subscribe-to-voice-sdk-events), then call `RtcEngine.create(config)` to initialize the engine, enabling further channel operations. In your `MainActivity` file, add the following code:
Java
Kotlin
```java
// Fill in the app ID from Agora Console
private String myAppId = "";
private RtcEngine mRtcEngine;
private void initializeAgoraVoiceSDK() {
try {
RtcEngineConfig config = new RtcEngineConfig();
config.mContext = getBaseContext();
config.mAppId = myAppId;
config.mEventHandler = mRtcEventHandler;
mRtcEngine = RtcEngine.create(config);
} catch (Exception e) {
throw new RuntimeException("Error initializing RTC engine: " + e.getMessage());
}
}
```
```kotlin
// Fill in the App ID obtained from the Agora Console
private val myAppId = ""
private var mRtcEngine: RtcEngine? = null
private fun initializeAgoraVoiceSDK() {
try {
val config = RtcEngineConfig().apply {
mContext = baseContext
mAppId = myAppId
mEventHandler = mRtcEventHandler
}
mRtcEngine = RtcEngine.create(config)
} catch (e: Exception) {
throw RuntimeException("Error initializing RTC engine: ${e.message}")
}
}
```
### Join a channel [#join-a-channel]
To join a channel, call `joinChannel` with the following parameters:
* **Channel name**: The name of the channel to join. Clients that pass the same channel name join the same channel. If a channel with the specified name does not exist, it is created when the first user joins.
* **Authentication token**: A dynamic key that authenticates a user when the client joins a channel. In a production environment, you obtain a token from a [token server](build/set-up-token-authentication/deploy-token-server.mdx) in your security infrastructure. For the purpose of this guide [Generate a temporary token](manage-agora-account.md).
* **User ID**: A 32-bit signed integer that identifies a user in the channel. You can specify a unique user ID for each user yourself. If you set the user ID to `0` when joining a channel, the SDK generates a random number for the user ID and returns the value in the `onJoinChannelSuccess` callback.
* **Channel media options**: Configure `ChannelMediaOptions` to define publishing and subscription settings, optimize performance for your specific use-case, and set optional parameters.
For Voice Calling, set the `channelProfile` to `CHANNEL_PROFILE_COMMUNICATION` and the user role to `CLIENT_ROLE_BROADCASTER`.
Java
Kotlin
```java
// Fill in the channel name
private String channelName = "";
// Fill in the temporary token generated from Agora Console
private String token = "";
private void joinChannel() {
ChannelMediaOptions options = new ChannelMediaOptions();
options.clientRoleType = Constants.CLIENT_ROLE_BROADCASTER;
options.channelProfile = Constants.CHANNEL_PROFILE_COMMUNICATION;
options.publishCameraTrack = true;
mRtcEngine.joinChannel(token, channelName, 0, options);
}
```
```kotlin
// Fill in the channel name
private val channelName = ""
// Fill in the temporary token generated from Agora Console
private val token = ""
private fun joinChannel() {
val options = ChannelMediaOptions().apply {
clientRoleType = Constants.CLIENT_ROLE_BROADCASTER
channelProfile = Constants.CHANNEL_PROFILE_COMMUNICATION
publishMicrophoneTrack = true;
}
mRtcEngine?.joinChannel(token, channelName, 0, options)
}
```
### Subscribe to Voice SDK events [#subscribe-to-voice-sdk-events]
The Voice SDK provides an interface for subscribing to channel events. To use it, create an instance of `IRtcEngineEventHandler` and implement the event methods you want to handle.
To ensure that you receive all Voice SDK events, set the Agora Engine event handler before joining a channel.
Java
Kotlin
```java
private final IRtcEngineEventHandler mRtcEventHandler = new IRtcEngineEventHandler() {
// Callback when successfully joining the channel
@Override
public void onJoinChannelSuccess(String channel, int uid, int elapsed) {
super.onJoinChannelSuccess(channel, uid, elapsed);
showToast("Joined channel " + channel);
}
// Callback when a remote user or host joins the current channel
@Override
public void onUserJoined(int uid, int elapsed) {
super.onUserJoined(uid, elapsed);
runOnUiThread(() -> {
showToast("User joined: " + uid); // Show toast for user joining
});
}
// Callback when a remote user or host leaves the current channel
@Override
public void onUserOffline(int uid, int reason) {
super.onUserOffline(uid, reason);
runOnUiThread(() -> {
showToast("User offline: " + uid); // Show toast for user going offline
});
}
};
```
```kotlin
private val mRtcEventHandler = object : IRtcEngineEventHandler() {
override fun onJoinChannelSuccess(channel: String?, uid: Int, elapsed: Int) {
super.onJoinChannelSuccess(channel, uid, elapsed)
runOnUiThread {
showToast("Joined channel $channel")
}
}
override fun onUserJoined(uid: Int, elapsed: Int) {
runOnUiThread {
showToast("User joined: $uid")
}
}
override fun onUserOffline(uid: Int, reason: Int) {
super.onUserOffline(uid, reason)
runOnUiThread {
showToast("User offline: $uid")
}
}
}
```
### Handle permissions [#handle-permissions]
To access the microphone on Android devices, declare the necessary permissions in the app's manifest and ensure that the user grants these permissions when the app starts.
1. Open your project's `AndroidManifest.xml` file and add the following permissions before ``:
```xml
```
2. Use the following code to handle runtime permissions in your Android app. The logic ensures that the necessary permissions are granted before starting Voice Calling. In your `MainActivity` file, add the following code:
Java
Kotlin
```java
private static final int PERMISSION_REQ_ID = 22;
private boolean checkPermissions() {
for (String permission : getRequiredPermissions()) {
if (ContextCompat.checkSelfPermission(this, permission) != PackageManager.PERMISSION_GRANTED) {
return false;
}
}
return true;
}
private void requestPermissions() {
ActivityCompat.requestPermissions(this, getRequiredPermissions(), PERMISSION_REQ_ID);
}
private String[] getRequiredPermissions() {
if (Build.VERSION.SDK_INT >= Build.VERSION_CODES.S) {
return new String[]{
Manifest.permission.RECORD_AUDIO,
Manifest.permission.READ_PHONE_STATE,
Manifest.permission.BLUETOOTH_CONNECT
};
} else {
return new String[]{Manifest.permission.RECORD_AUDIO};
}
}
@Override
public void onRequestPermissionsResult(int requestCode, @NonNull String[] permissions, @NonNull int[] grantResults) {
super.onRequestPermissionsResult(requestCode, permissions, grantResults);
if (checkPermissions()) {
startVoiceCalling();
}
}
```
```kotlin
private val permissionReqId = 22
private fun checkPermissions(): Boolean {
for (permission in getRequiredPermissions()) {
if (ContextCompat.checkSelfPermission(this, permission) != PackageManager.PERMISSION_GRANTED) {
return false
}
}
return true
}
private fun requestPermissions() {
ActivityCompat.requestPermissions(this, getRequiredPermissions(), PERMISSION_REQ_ID)
}
private fun getRequiredPermissions(): Array {
return if (Build.VERSION.SDK_INT >= Build.VERSION_CODES.S) {
arrayOf(
Manifest.permission.RECORD_AUDIO,
Manifest.permission.READ_PHONE_STATE,
Manifest.permission.BLUETOOTH_CONNECT
)
} else {
arrayOf(Manifest.permission.RECORD_AUDIO)
}
}
override fun onRequestPermissionsResult(requestCode: Int, permissions: Array, grantResults: IntArray) {
super.onRequestPermissionsResult(requestCode, permissions, grantResults)
if (checkPermissions()) {
startVoiceCalling()
}
}
```
### Start and close the app [#start-and-close-the-app]
When a user launches your app, start real-time interaction. When a user closes the app, stop the interaction.
1. In the `onCreate` callback, check whether the app has been granted the required permissions. If the permissions have not been granted, request the required permissions from the user. If permissions are granted, initialize `RtcEngine` and join a channel.
Java
Kotlin
```java
@Override
protected void onCreate(Bundle savedInstanceState) {
super.onCreate(savedInstanceState);
setContentView(R.layout.activity_main);
if (checkPermissions()) {
startVoiceCalling();
} else {
requestPermissions();
}
}
```
```kotlin
override fun onCreate(savedInstanceState: Bundle?) {
super.onCreate(savedInstanceState)
setContentView(R.layout.activity_main)
if (checkPermissions()) {
startVoiceCalling()
} else {
requestPermissions()
}
}
```
2. When a user closes the app, or switches the app to the background, call `leaveChannel` to leave the current channel and release all session-related resources.
Java
Kotlin
```java
private void cleanupAgoraEngine() {
if (mRtcEngine != null) {
mRtcEngine.leaveChannel();
mRtcEngine = null;
}
}
```
```kotlin
private fun cleanupAgoraEngine() {
mRtcEngine?.apply {
leaveChannel()
}
mRtcEngine = null
}
```
### Complete sample code [#complete-sample-code]
A complete code sample demonstrating the basic process of real-time interaction is provided for your reference. To use the sample code, copy the following lines into the `MainActivity` file in your project. Then, replace `` in package `com.example.` with your project's name.
Java
Kotlin
```java
package com.example.;
import android.Manifest;
import android.content.pm.PackageManager;
import android.os.Build;
import android.os.Bundle;
import android.widget.Toast;
import androidx.annotation.NonNull;
import androidx.appcompat.app.AppCompatActivity;
import androidx.core.app.ActivityCompat;
import androidx.core.content.ContextCompat;
import io.agora.rtc2.ChannelMediaOptions;
import io.agora.rtc2.Constants;
import io.agora.rtc2.IRtcEngineEventHandler;
import io.agora.rtc2.RtcEngine;
import io.agora.rtc2.RtcEngineConfig;
public class MainActivity extends AppCompatActivity {
private static final int PERMISSION_REQ_ID = 22;
private final String myAppId = "";
private final String channelName = "";
private final String token = "";
private RtcEngine mRtcEngine;
private final IRtcEngineEventHandler mRtcEventHandler = new IRtcEngineEventHandler() {
// Callback when successfully joining the channel
@Override
public void onJoinChannelSuccess(String channel, int uid, int elapsed) {
super.onJoinChannelSuccess(channel, uid, elapsed);
showToast("Joined channel " + channel);
}
// Callback when a remote user or host joins the current channel
@Override
public void onUserJoined(int uid, int elapsed) {
super.onUserJoined(uid, elapsed);
runOnUiThread(() -> {
showToast("User joined: " + uid); // Show toast for user joining
});
}
// Callback when a remote user or host leaves the current channel
@Override
public void onUserOffline(int uid, int reason) {
super.onUserOffline(uid, reason);
runOnUiThread(() -> {
showToast("User offline: " + uid); // Show toast for user going offline
});
}
};
@Override
protected void onCreate(Bundle savedInstanceState) {
super.onCreate(savedInstanceState);
setContentView(R.layout.activity_main);
if (checkPermissions()) {
startVoiceCalling();
} else {
requestPermissions();
}
}
private boolean checkPermissions() {
for (String permission : getRequiredPermissions()) {
if (ContextCompat.checkSelfPermission(this, permission) != PackageManager.PERMISSION_GRANTED) {
return false;
}
}
return true;
}
private void requestPermissions() {
ActivityCompat.requestPermissions(this, getRequiredPermissions(), PERMISSION_REQ_ID);
}
private String[] getRequiredPermissions() {
if (Build.VERSION.SDK_INT >= Build.VERSION_CODES.S) {
return new String[]{
Manifest.permission.RECORD_AUDIO,
Manifest.permission.READ_PHONE_STATE,
Manifest.permission.BLUETOOTH_CONNECT
};
} else {
return new String[]{Manifest.permission.RECORD_AUDIO};
}
}
@Override
public void onRequestPermissionsResult(int requestCode, @NonNull String[] permissions, @NonNull int[] grantResults) {
super.onRequestPermissionsResult(requestCode, permissions, grantResults);
if (checkPermissions()) {
startVoiceCalling();
}
}
private void startVoiceCalling() {
initializeAgoraVoiceSDK();
joinChannel();
}
private void initializeAgoraVoiceSDK() {
try {
RtcEngineConfig config = new RtcEngineConfig();
config.mContext = getApplicationContext();
config.mAppId = myAppId;
config.mEventHandler = mRtcEventHandler;
mRtcEngine = RtcEngine.create(config);
} catch (Exception e) {
throw new RuntimeException("Error initializing RTC engine: " + e.getMessage());
}
}
private void joinChannel() {
ChannelMediaOptions options = new ChannelMediaOptions();
options.clientRoleType = Constants.CLIENT_ROLE_BROADCASTER;
options.channelProfile = Constants.CHANNEL_PROFILE_COMMUNICATION;
options.publishMicrophoneTrack = true;
mRtcEngine.joinChannel(token, channelName, 0, options);
}
@Override
protected void onDestroy() {
super.onDestroy();
cleanupAgoraEngine();
}
private void cleanupAgoraEngine() {
if (mRtcEngine != null) {
mRtcEngine.leaveChannel();
mRtcEngine = null;
}
}
private void showToast(String message) {
runOnUiThread(() -> Toast.makeText(MainActivity.this, message, Toast.LENGTH_SHORT).show());
}
}
```
```kotlin
package com.example.
import android.Manifest
import android.content.pm.PackageManager
import android.os.Build
import android.os.Bundle
import android.widget.Toast
import androidx.appcompat.app.AppCompatActivity
import androidx.core.app.ActivityCompat
import androidx.core.content.ContextCompat
import io.agora.rtc2.ChannelMediaOptions
import io.agora.rtc2.Constants
import io.agora.rtc2.IRtcEngineEventHandler
import io.agora.rtc2.RtcEngine
import io.agora.rtc2.RtcEngineConfig
class MainActivity : AppCompatActivity() {
private val PERMISSION_REQ_ID = 22
private val myAppId = ""
private val channelName = ""
private val token = ""
private var mRtcEngine: RtcEngine? = null
private val mRtcEventHandler = object : IRtcEngineEventHandler() {
override fun onJoinChannelSuccess(channel: String?, uid: Int, elapsed: Int) {
super.onJoinChannelSuccess(channel, uid, elapsed)
runOnUiThread {
showToast("Joined channel $channel")
}
}
override fun onUserJoined(uid: Int, elapsed: Int) {
runOnUiThread {
showToast("A user joined")
}
}
override fun onUserOffline(uid: Int, reason: Int) {
super.onUserOffline(uid, reason)
runOnUiThread {
showToast("User offline: $uid")
}
}
}
override fun onCreate(savedInstanceState: Bundle?) {
super.onCreate(savedInstanceState)
setContentView(R.layout.activity_main)
if (checkPermissions()) {
startVoiceCalling()
} else {
requestPermissions()
}
}
private fun checkPermissions(): Boolean {
for (permission in getRequiredPermissions()) {
if (ContextCompat.checkSelfPermission(this, permission) != PackageManager.PERMISSION_GRANTED) {
return false
}
}
return true
}
private fun requestPermissions() {
ActivityCompat.requestPermissions(this, getRequiredPermissions(), PERMISSION_REQ_ID)
}
private fun getRequiredPermissions(): Array {
return if (Build.VERSION.SDK_INT >= Build.VERSION_CODES.S) {
arrayOf(
Manifest.permission.RECORD_AUDIO,
Manifest.permission.READ_PHONE_STATE,
Manifest.permission.BLUETOOTH_CONNECT
)
} else {
arrayOf(Manifest.permission.RECORD_AUDIO)
}
}
override fun onRequestPermissionsResult(requestCode: Int, permissions: Array, grantResults: IntArray) {
super.onRequestPermissionsResult(requestCode, permissions, grantResults)
if (checkPermissions()) {
startVoiceCalling()
}
}
private fun startVoiceCalling() {
initializeAgoraVoiceSDK()
joinChannel()
}
private fun initializeAgoraVoiceSDK() {
try {
val config = RtcEngineConfig().apply {
mContext = baseContext
mAppId = myAppId
mEventHandler = mRtcEventHandler
}
mRtcEngine = RtcEngine.create(config)
} catch (e: Exception) {
throw RuntimeException("Error initializing RTC engine: ${e.message}")
}
}
private fun joinChannel() {
val options = ChannelMediaOptions().apply {
clientRoleType = Constants.CLIENT_ROLE_BROADCASTER
channelProfile = Constants.CHANNEL_PROFILE_COMMUNICATION
publishMicrophoneTrack = true
}
mRtcEngine?.joinChannel(token, channelName, 0, options)
}
override fun onDestroy() {
super.onDestroy()
cleanupAgoraEngine()
}
private fun cleanupAgoraEngine() {
mRtcEngine?.apply {
stopPreview()
leaveChannel()
}
mRtcEngine = null
}
private fun showToast(message: String) {
runOnUiThread {
Toast.makeText(this@MainActivity, message, Toast.LENGTH_SHORT).show()
}
}
}
```
For the `myAppId` and `token` variables, replace the placeholders with the values you obtained from Agora Console. Ensure you enter the same `channelName` you used when generating the temporary token.
### Create a user interface [#create-a-user-interface]
Use the following code to generate a basic user interface. Paste the code into the `/app/src/main/res/layout/activity_main.xml` file, replacing the existing content.
**Sample code to create the user interface**
```xml
```
## Test the sample code [#test-the-sample-code]
Take the following steps to test the sample code:
1. In `MainActivity` update the values for `myAppId`, and `token` with values from Agora Console. Fill in the same `channelName` you used to generate the token.
2. Enable developer options on your Android test device. Turn on USB debugging, connect the Android device to your development machine through a USB cable, and check that your device appears in the Android device options.
3. In Android Studio, click  **Sync Project with Gradle Files** to resolve project dependencies and update the configuration.
4. After synchronization is successful, click  **Run app**. Android Studio starts compilation. After a few moments, the app is installed on your Android device.
5. Launch the App, grant the recording permission.
6. On a second Android device, repeat the previous steps to install and launch the app. Alternatively, use the [Web demo](https://webdemo.agora.io/basicVideoCall/index.html) to join the same channel and test the following use-cases:
* If users on both devices join the channel as hosts, they can hear each other.
* If one user joins as host and the other as audience, the audience can hear the host.
## Reference [#reference]
This section contains content that completes the information on this page, or points you to documentation that explains other aspects to this product.
* If a firewall is deployed in your network environment, refer to [Connect with Cloud Proxy](build/manage-connection-and-quality/cloud-proxy.mdx) to use Agora services normally.
### Next steps [#next-steps]
After implementing the quickstart sample, read the following documents to learn more:
* To ensure communication security in a test or production environment, best practice is to obtain and use a token from an authentication server. For details, see [Secure authentication with tokens](build/set-up-token-authentication/use-tokens.mdx).
### Sample project [#sample-project]
Agora provides open source sample projects on [GitHub](https://github.com/AgoraIO/API-Examples) for your reference. Download or view the [JoinChannelAudio](https://github.com/AgoraIO/API-Examples/blob/main/Android/APIExample/app/src/main/java/io/agora/api/example/examples/basic/JoinChannelAudio.java) project for a more detailed example.
### API reference [#api-reference]
* [`RtcEngineConfig`](https://api-ref.agora.io/en/voice-sdk/android/4.x/API/class_rtcengineconfig.html)
* [`create`](https://api-ref.agora.io/en/voice-sdk/android/4.x/API/class_irtcengine.html#api_irtcengine_create)
* [`ChannelMediaOptions`](https://api-ref.agora.io/en/voice-sdk/android/4.x/API/class_channelmediaoptions.html)
* [`joinChannel`](https://api-ref.agora.io/en/voice-sdk/android/4.x/API/class_irtcengine.html#api_irtcengine_joinchannel2)
* [`leaveChannel`](https://api-ref.agora.io/en/voice-sdk/android/4.x/API/class_irtcengine.html#api_irtcengine_leavechannel)
* [`IRtcEngineEventHandler`](https://api-ref.agora.io/en/voice-sdk/android/4.x/API/class_irtcengineeventhandler.html#class_irtcengineeventhandler)
### Frequently asked questions [#frequently-asked-questions]
* [How can I listen for audience joining or leaving a channel?](/en/api-reference/faq/integration/audience_event)
* [How can I solve channel-related issues?](/en/api-reference/faq/integration/channel)
* [How can I set the log file?](/en/api-reference/faq/integration/set_log_file)
* [Why do apps on some Android versions fail to capture audio and video after screen locking or switching to the background?](/en/api-reference/faq/quality/android_background)
### See also [#see-also]
* [Error codes](reference/error-codes.mdx)
* [Connection status management](build/manage-connection-and-quality/connection-status-management.mdx)
<_PlatformProcessedMarker close="true" />
<_PlatformPanel platform="ios">
<_PlatformProcessedMarker groupMode="structured" canonicalPlatform="web" platform="ios" />
This iOS quickstart shows you how to create a basic Voice Calling app using the Agora Voice SDK.
## Understand the tech [#understand-the-tech-1]
To start a Voice Calling session, implement the following steps in your app:
* **Initialize the Agora Engine**: Before calling other APIs, create and initialize an Agora Engine instance.
* **Join a channel**: Call methods to create and join a channel.
* **Send and receive audio**: All users can publish streams to the channel and subscribe to audio streams published by other users in the channel.

## Prerequisites [#prerequisites-1]
* Xcode 13.0 or higher.
* An Apple developer account.
* If you need to use CocoaPods integrated SDK, make sure [CocoaPods is installed](https://guides.cocoapods.org/using/getting-started.html#getting-started).
* Two devices running iOS 14.0 or higher.
* A microphone
* A valid Agora account and project. Please refer to [Agora account management](manage-agora-account.md) for details.
## Set up your project [#set-up-your-project-1]
This section shows you how to set up your iOS project and install the Agora Voice SDK.
Create a new project
Add to an existing project
Follow these steps to create a project in Xcode:
1. Refer to [Create a project](https://help.apple.com/xcode/mac/current/#/dev07db0e578). Under **Application** select **App**. Use **Storyboard** for the user interface and choose **Swift** as the programming language.
If you have not added the development team information, you see the **Add account...** button. Click the button and follow the on-screen prompts to log in to your Apple ID. Once login is complete, click **Next**, and choose your Apple account as the development team.
2. [Set up automatic signing](https://help.apple.com/xcode/mac/current/#/dev23aab79b4) for your projects.
3. [Set the target devices](https://help.apple.com/xcode/mac/current/#/deve69552ee5) where your app will be deployed.
4. Create a user interface for your app. Refer to [Create a user interface](#create-a-user-interface) to create a bare bones UI.
Follow these steps to add Voice Calling to your Xcode project:
1. Open your project in Xcode.
2. [Set the target devices](https://help.apple.com/xcode/mac/current/#/deve69552ee5) where your app will be deployed.
3. Create a user interface for your app. Refer to [Create a user interface](#create-a-user-interface) to create a bare bones UI.
### Install the SDK [#install-the-sdk-1]
Use one of the following methods to install Voice SDK.
Swift Package Manager
CocoaPods
Manual integration
1. In Xcode, go to **File** > **Add Package Dependencies**.
2. In the search bar, past the following URL:
```json
{`https://github.com/AgoraIO/AgoraRtcEngine_iOS.git`}
```
3. Click **Add Package**, select the latest version, and click **Next**.
4. For basic Voice Calling, select **RtcBasic**.
If needed, also select:
* **`SpatialAudio`** for spatial audio effects.
* **`VirtualBackground`** for virtual background.
5. Under **Add to Target**, select your project and click **Add Package**.
For further information, refer to [Apple's official documentation](https://help.apple.com/xcode/mac/current/#/devb83d64851).
1. Go to the project root directory in the terminal and run the `pod init` command. A text file named `Podfile` is generated in the project folder.
2. Open `Podfile` and modify the content as follows. Replace `Your App` with your target name.
```ruby
platform :ios, '9.0'
target 'Your App' do
# For x.y.z fill in the specific SDK version number, such as 4.4.0.
pod 'AgoraAudio_iOS', 'x.y.z'
end
```
Obtain the latest version number from the [release notes](reference/release-notes.mdx).
3. Run the `pod install` command in the terminal to install the Voice SDK. After successful installation, the terminal shows **Pod installation complete!**.
4. After successful installation, a file with the suffix `.xcworkspace` is generated in the project folder. Open the file through Xcode for subsequent operations.
1. Download the latest version of the SDK from [SDKs download](/en/api-reference/sdks?product=voice\&platform=ios) and extract the contents.
2. Copy the files in the `libs` folder of the SDK package to your project directory.
3. Open Xcode and [add the corresponding dynamic library](https://help.apple.com/xcode/mac/current/#/dev51a648b07). Make sure the **Embed** property of the added dynamic library is set to **Embed & Sign**.
Agora SDK uses `libc++` (LLVM) by default. If you need to use `libstdc++` (GNU), please contact [support@agora.io](mailto\:support@agora.io). The library provided by the SDK is a FAT Image, which includes 32/64-bit simulator and 32/64-bit real machine versions.
The [privacy updates for App Store submissions](https://developer.apple.com/news/?id=r1henawx) released by Apple, require developers to declare approved reasons for using a set of APIs in their app’s privacy manifest. Agora provides a [`PrivacyInfo.xcprivacy`](https://download.agora.io/sdk/release/PrivacyInfo.xcprivacy) file that you can include in your project.
## Implement Voice Calling [#implement-voice-calling-1]
This section guides you through the implementation of basic real-time audio interaction in your app.
The following figure illustrates the essential steps:

This guide includes [complete sample code](#complete-sample-code) that demonstrates implementing basic real-time interaction. To understand the core API calls in the sample code, review the following implementation steps.
### Import Agora framework [#import-agora-framework]
Add the following import to your swift file:
```swift
import AgoraRtcKit
```
### Initialize the engine [#initialize-the-engine-1]
Call `sharedEngine(withAppId:delegate:)` to create and initialize an `AgoraRtcEngineKit` instance. Provide your [App ID](manage-agora-account.md) and an `AgoraRtcEngineDelegate` implementation to [handle SDK events](#subscribe-to-voice-sdk-events).
```swift
var agoraKit: AgoraRtcEngineKit!
let appId = "YOUR_AGORA_APP_ID"
// Initialize the Agora engine
func initializeAgoraVoiceSDK() {
agoraKit = AgoraRtcEngineKit.sharedEngine(withAppId: appId, delegate: self)
}
```
### Join a channel [#join-a-channel-1]
To join a channel, call `joinChannel` with the following parameters:
* **Channel name**: The name of the channel to join. Clients that pass the same channel name join the same channel. If a channel with the specified name does not exist, it is created when the first user joins.
* **Authentication token**: A dynamic key that authenticates a user when the client joins a channel. In a production environment, you obtain a token from a [token server](build/set-up-token-authentication/deploy-token-server.mdx) in your security infrastructure. For the purpose of this guide [Generate a temporary token](manage-agora-account.md).
* **User ID**: A 32-bit signed integer that identifies a user in the channel. You can specify a unique user ID for each user yourself. If you set the user ID to `0` when joining a channel, the SDK generates a random number for the user ID and returns the value in the `didJoinChannel` callback.
* **Channel media options**: Configure `AgoraRtcChannelMediaOptions` to define publishing and subscription settings, optimize performance for your specific use-case, and set optional parameters.
For Voice Calling, set the `channelProfile` to `.communication` and the `clientRoleType` to `.broadcaster`.
```swift
let channelName = "demo" // Replace with your actual channel name
let token = "" // Replace with your token
func joinChannel() {
let options = AgoraRtcChannelMediaOptions()
options.channelProfile = .communication
// Set user role to broadcaster; to set user role to audience, keep the default value
options.clientRoleType = .broadcaster
// Publish microphone audio
options.publishMicrophoneTrack = true
// Automatically subscribe to all audio streams
options.autoSubscribeAudio = true
// Join the channel using a temporary token and channel name
agoraKit.joinChannel(
byToken: token,
channelId: channelName,
uid: 0,
mediaOptions: options
)
}
```
### Subscribe to Voice SDK events [#subscribe-to-voice-sdk-events-1]
The Voice SDK provides a delegate for handling channel events. To use it, conform to the `AgoraRtcEngineDelegate` protocol in your class and implement the event methods you want to handle. The following code implements the `didJoinChannel`, `didOfflineOfUid`, and `didJoinedOfUid` callbacks:
To ensure that you receive all Voice SDK events, set the Agora Engine event handler before joining a channel.
```swift
// Extension for handling Agora SDK callbacks
extension ViewController: AgoraRtcEngineDelegate {
// Triggered when the local user successfully joins a channel
func rtcEngine(_ engine: AgoraRtcEngineKit, didJoinChannel channel: String, withUid uid: UInt, elapsed: Int) {
print("Successfully joined channel: \(channel) with UID: \(uid)")
}
// Triggered when a remote user joins the channel
func rtcEngine(_ engine: AgoraRtcEngineKit, didJoinedOfUid uid: UInt, elapsed: Int) {
print("User \(uid) joined after \(elapsed) milliseconds")
}
// Triggered when a remote user leaves the channel
func rtcEngine(_ engine: AgoraRtcEngineKit, didOfflineOfUid uid: UInt, reason: AgoraUserOfflineReason) {
print("User \(uid) left: Reason -> \(reason)")
}
}
```
To learn about the other SDK events, see [`AgoraRtcEngineDelegate`](https://api-ref.agora.io/en/video-sdk/ios/4.x/documentation/agorartckit/agorartcenginedelegate).
### Display the local video [#display-the-local-video]
Call `setupLocalVideo` to initialize the local view and set the local video display properties.
```swift
// Configures and starts displaying the local video feed
func setupLocalVideo() {
let videoCanvas = AgoraRtcVideoCanvas()
videoCanvas.view = localView
videoCanvas.uid = 0 // UID 0 is assigned to the local user
videoCanvas.renderMode = .hidden
agoraKit.setupLocalVideo(videoCanvas)
}
```
### Display remote video [#display-remote-video]
To initialize the remote user view, call `setupRemoteVideo` and set the local display properties for the remote user. Use the `didJoinedOfUid` callback to get the UID of the remote user.
```swift
func setupRemoteVideo(uid: UInt, view: UIView?) {
let videoCanvas = AgoraRtcVideoCanvas()
videoCanvas.uid = uid
videoCanvas.view = view // Assign view for joining, set to nil for leaving
videoCanvas.renderMode = .hidden
agoraKit.setupRemoteVideo(videoCanvas)
}
```
### Handle permissions [#handle-permissions-1]
To access the camera and microphone on iOS devices, add the required permissions for real-time interaction. Open the `info.plist` file from the project navigation bar, [edit the property list](https://help.apple.com/xcode/mac/current/#/dev3f399a2a6), to add the required permissions. These permissions are optional. However, if you do not add these permissions, you will not be able to use the corresponding devices.
| Key | Type | Value |
| :------------------------------------- | :----- | :------------------------------------------------------------------------------------------------------ |
| Privacy - Microphone Usage Description | String | For the purpose of using the microphone. For example, for a call or live interactive streaming session. |
* If your project depends on third-party plugins or libraries, such as a third-party camera library, and the signature of the plug-in or library is inconsistent with the signature of the project, check the **Hardened Runtime** settings. Specifically, review and potentially disable **Runtime Exceptions** and **Library Validation** in the project configuration.
* For further information, refer to [Preparing your app for distribution](https://developer.apple.com/documentation/xcode/preparing_your_app_for_distribution).
### Start and close the app [#start-and-close-the-app-1]
When the user launches the app, it joins the channel and starts Voice Calling. When the user closes the app, it leaves the channel and ends Voice Calling.
1. To start Voice Calling, call the following methods:
```swift
// Initialize the Agora engine
initializeAgoraVoiceSDK()
// Join the channel
joinChannel()
```
2. To leave the channel and release SDK resources when the app is closed, call the following methods:
```swift
// Leave the channel and release session-related resources
agoraKit.leaveChannel(nil)
// Release all resources used by the Agora SDK
AgoraRtcEngineKit.destroy()
```
After destroying the engine, you can no longer use SDK methods and callbacks. To use the real-time interaction functions again, create a new engine. See [Initialize the engine](#initialize-the-engine) for details.
### Complete sample code [#complete-sample-code-1]
A complete code sample demonstrating the basic process of real-time interaction is provided for your reference. Copy the following code into your `ViewController.swift` file:
```swift
import UIKit
import AgoraRtcKit
class ViewController: UIViewController {
let appId = "" // Replace with your actual App ID
let channelName = "demo" // Replace with your actual channel name
let token = "" // Replace with your token
var statusLabel: UILabel!
// Instance of the Agora RTC engine
var agoraKit: AgoraRtcEngineKit!
override func viewDidLoad() {
super.viewDidLoad()
// Initialize the Agora engine
initializeAgoraVoiceSDK()
// Set up user interface
setupUI();
// Join an Agora channel
joinChannel()
}
func setupUI() {
let mainView = UIView(frame: view.bounds)
mainView.backgroundColor = .black
statusLabel = UILabel(frame: mainView.bounds)
statusLabel.text = "Waiting for other user"
statusLabel.textColor = .white
statusLabel.textAlignment = .center
statusLabel.autoresizingMask = [.flexibleWidth, .flexibleHeight]
mainView.addSubview(statusLabel)
view.addSubview(mainView)
}
// Clean up resources when the view controller is deallocated
deinit {
agoraKit.leaveChannel(nil)
AgoraRtcEngineKit.destroy()
}
// Initializes the Voice SDK instance
func initializeAgoraVoiceSDK() {
// Create an instance of AgoraRtcEngineKit and set the delegate
agoraKit = AgoraRtcEngineKit.sharedEngine(withAppId: appId, delegate: self)
}
// Join the channel with specified options
func joinChannel() {
let options = AgoraRtcChannelMediaOptions()
// In voice calling, set the channel use-case to communication
options.channelProfile = .communication
// Set the user role as broadcaster (default is audience)
options.clientRoleType = .broadcaster
// Publish audio captured by microphone
options.publishMicrophoneTrack = true
// Auto subscribe to all audio streams
options.autoSubscribeAudio = true
// Use a temporary token to join the channel
// If you set uid=0, the engine generates a uid internally; on success, it triggers didJoinChannel callback
agoraKit.joinChannel(
byToken: token,
channelId: channelName,
uid: 0,
mediaOptions: options
)
}
}
// Extension for handling Agora SDK callbacks
extension ViewController: AgoraRtcEngineDelegate {
// Triggered when the local user successfully joins a channel
func rtcEngine(_ engine: AgoraRtcEngineKit, didJoinChannel channel: String, withUid uid: UInt, elapsed: Int) {
print("Successfully joined channel: \(channel) with UID: \(uid)")
statusLabel.text = "You Successfully joined. Waiting for other users"
}
// Triggered when a remote user joins the channel
func rtcEngine(_ engine: AgoraRtcEngineKit, didJoinedOfUid uid: UInt, elapsed: Int) {
print("User \(uid) joined after \(elapsed) milliseconds")
statusLabel.text = "User \(uid) joined"
}
// Triggered when a remote user leaves the channel
func rtcEngine(_ engine: AgoraRtcEngineKit, didOfflineOfUid uid: UInt, reason: AgoraUserOfflineReason) {
print("User \(uid) left: Reason -> \(reason)")
statusLabel.text = "User \(uid) left"
}
}
```
### Create a user interface [#create-a-user-interface-1]
Based on your use-case, create a user interface for your project.
The following example uses a `UILabel` to display the current app status. To use this interface, replace the contents of the `ViewController.swift` file with the following code:
**Sample code to create the user interface**
```swift
import UIKit
class ViewController: UIViewController {
var statusLabel: UILabel!
override func viewDidLoad() {
super.viewDidLoad()
// Set up user interface
setupUI();
}
func setupUI() {
let mainView = UIView(frame: view.bounds)
mainView.backgroundColor = .black
statusLabel = UILabel(frame: mainView.bounds)
statusLabel.text = "Waiting for other user"
statusLabel.textColor = .white
statusLabel.textAlignment = .center
statusLabel.autoresizingMask = [.flexibleWidth, .flexibleHeight]
mainView.addSubview(statusLabel)
view.addSubview(mainView)
}
}
```
## Test the sample code [#test-the-sample-code-1]
Take the following steps to test the sample code:
1. In your code update the `appId` and `token`, with the app ID and temporary token you obtained from Agora Console. Use the same `channelName` you filled in when generating the temporary token.
2. Connect your iOS device to your computer.
3. Click **Build** to run your project and wait a few seconds for the app installation to complete.
4. Allow the app to access the device's microphone.
5. If an untrusted developer prompt pops up on the device, click **Cancel** to close the prompt, then open **Settings > General > VPN and Device Management** on the iOS device, and choose to trust the developer in the **Developer APP**.
6. On a second iOS device, repeat the previous steps to install and launch the app. Alternatively, use the [Web demo](https://webdemo.agora.io/basicVideoCall/index.html) to join the same channel and test the following use-cases:
* If users on both devices join the channel as hosts, they can hear each other.
* If one user joins as host and the other as audience, the audience can hear the host.
## Reference [#reference-1]
This section contains content that completes the information on this page, or points you to documentation that explains other aspects to this product.
* If a firewall is deployed in your network environment, refer to [Connect with Cloud Proxy](build/manage-connection-and-quality/cloud-proxy.mdx) to use Agora services normally.
### Next steps [#next-steps-1]
After implementing the quickstart sample, read the following documents to learn more:
* To ensure communication security in a test or production environment, best practice is to obtain and use a token from an authentication server. For details, see [Secure authentication with tokens](build/set-up-token-authentication/use-tokens.mdx).
### Sample project [#sample-project-1]
Agora provides open source sample projects on [GitHub](https://github.com/AgoraIO/API-Examples) for your reference. Download or view the [JoinChannelAudio](https://github.com/AgoraIO/API-Examples/tree/main/iOS/APIExample/APIExample/Examples/Basic/JoinChannelAudio) project for a more detailed example.
### Add a privacy manifest file [#add-a-privacy-manifest-file]
The Agora Voice SDK for iOS provides the `PrivacyInfo.xcprivacy` file that contains the required reasons for the APIs used by the SDK. To add the privacy manifest to your app in Xcode, follow these steps:
1. Create a privacy manifest in your app project:
1. Choose **File > New File**.
2. Scroll down to the **Resource** section and select **App Privacy File** type.
3. Click **Next**.
4. Check your app in the **Targets** list.
5. Click **Create**.
The default file name is `PrivacyInfo.xcprivacy` which is also the required file name for bundled privacy manifests.
2. Add the items in `PrivacyInfo.xcprivacy` file of the Voice SDK to `PrivacyInfo.xcprivacy` of the app using the following source code:
```xml
NSPrivacyTrackingNSPrivacyCollectedDataTypesNSPrivacyAccessedAPITypesNSPrivacyAccessedAPITypeNSPrivacyAccessedAPICategorySystemBootTimeNSPrivacyAccessedAPITypeReasons35F9.1NSPrivacyAccessedAPITypeNSPrivacyAccessedAPICategoryFileTimestampNSPrivacyAccessedAPITypeReasonsDDA9.1NSPrivacyAccessedAPITypeNSPrivacyAccessedAPICategoryDiskSpaceNSPrivacyAccessedAPITypeReasonsE174.1
```
### API reference [#api-reference-1]
* [`sharedEngine`](https://api-ref.agora.io/en/voice-sdk/ios/4.x/documentation/agorartckit/agorartcenginekit/sharedengine\(withappid\:delegate:\))
* [`joinChannel`](https://api-ref.agora.io/en/voice-sdk/ios/4.x/documentation/agorartckit/agorartcenginekit/joinchannel\(bytoken\:channelid\:info\:uid\:joinsuccess:\))
* [`leaveChannel`](https://api-ref.agora.io/en/voice-sdk/ios/4.x/documentation/agorartckit/agorartcenginekit/leavechannel\(_:\))
* [`AgoraRtcEngineDelegate`](https://api-ref.agora.io/en/video-sdk/ios/4.x/documentation/agorartckit/agorartcenginedelegate)
### Frequently asked questions [#frequently-asked-questions-1]
* [How can I listen for audience joining or leaving a channel?](/en/api-reference/faq/integration/audience_event)
* [How can I solve channel-related issues?](/en/api-reference/faq/integration/channel)
* [How can I set the log file?](/en/api-reference/faq/integration/set_log_file)
* [How can I troubleshoot the issue of no sound?](/en/api-reference/faq/quality/audio_noaudio)
* [What can I do if I get a pop-up warning saying 'the framework cannot be opened' when compiling an Xcode project?](/en/api-reference/faq/integration/framework_cannot_be_opened)
* [How can I add a privacy manifest to my iOS app?](/en/api-reference/faq/other/ios_privacy_manifest)
### See also [#see-also-1]
* [Error codes](reference/error-codes.mdx)
* [Connection status management](build/manage-connection-and-quality/connection-status-management.mdx)
<_PlatformProcessedMarker close="true" />
<_PlatformPanel platform="macos">
<_PlatformProcessedMarker groupMode="structured" canonicalPlatform="web" platform="macos" />
This macOS quickstart shows you how to create a basic Voice Calling app using the Agora Voice SDK.
## Understand the tech [#understand-the-tech-2]
To start a Voice Calling session, implement the following steps in your app:
* **Initialize the Agora Engine**: Before calling other APIs, create and initialize an Agora Engine instance.
* **Join a channel**: Call methods to create and join a channel.
* **Send and receive audio**: All users can publish streams to the channel and subscribe to audio streams published by other users in the channel.

## Prerequisites [#prerequisites-2]
* Xcode 13.0 or higher.
* An Apple developer account.
* If you need to use CocoaPods integrated SDK, make sure [CocoaPods is installed](https://guides.cocoapods.org/using/getting-started.html#getting-started).
* Two devices running macOS 10.10 or higher.
* A microphone
* A valid Agora account and project. Please refer to [Agora account management](manage-agora-account.md) for details.
## Set up your project [#set-up-your-project-2]
This section shows you how to set up your macOS project and install the Agora Voice SDK.
Create a new project
Add to an existing project
Follow these steps to create a project in Xcode:
1. Refer to [Create a project](https://help.apple.com/xcode/mac/current/#/dev07db0e578). Under **Application** select **App**. Use **Storyboard** for the user interface and choose **Swift** as the programming language.
If you have not added the development team information, you see the **Add account...** button. Click the button and follow the on-screen prompts to log in to your Apple ID. Once login is complete, click **Next**, and choose your Apple account as the development team.
2. [Set up automatic signing](https://help.apple.com/xcode/mac/current/#/dev23aab79b4) for your projects.
3. [Set the target devices](https://help.apple.com/xcode/mac/current/#/deve69552ee5) where your app will be deployed.
4. Create a user interface for your app. Refer to [Create a user interface](#create-a-user-interface) to create a bare bones UI.
Follow these steps to add Voice Calling to your Xcode project:
1. Open your project in Xcode.
2. [Set the target devices](https://help.apple.com/xcode/mac/current/#/deve69552ee5) where your app will be deployed.
3. Create a user interface for your app. Refer to [Create a user interface](#create-a-user-interface) to create a bare bones UI.
### Install the SDK [#install-the-sdk-2]
Use one of the following methods to install Voice SDK.
Swift Package Manager
CocoaPods
Manual integration
1. In Xcode, go to **File** > **Add Package Dependencies**.
2. In the search bar, past the following URL:
```json
{`https://github.com/AgoraIO/AgoraRtcEngine_macOS.git`}
```
3. Click **Add Package**, select the latest version, and click **Next**.
4. For basic Voice Calling, select **RtcBasic**.
If needed, also select:
* **`SpatialAudio`** for spatial audio effects.
* **`VirtualBackground`** for virtual background.
5. Under **Add to Target**, select your project and click **Add Package**.
For further information, refer to [Apple's official documentation](https://help.apple.com/xcode/mac/current/#/devb83d64851).
1. Go to the project root directory in the terminal and run the `pod init` command. A text file named `Podfile` is generated in the project folder.
2. Open `Podfile` and modify the content as follows. Replace `Your App` with your target name.
```ruby
platform :macos, '10.11'
target 'Your App' do
# For x.y.z fill in the specific SDK version number, such as 4.4.0.
pod 'AgoraRtcEngine_macOS', 'x.y.z'
end
```
Obtain the latest version number from the [release notes](reference/release-notes.mdx).
3. Run the `pod install` command in the terminal to install the Voice SDK. After successful installation, the terminal shows **Pod installation complete!**.
4. After successful installation, a file with the suffix `.xcworkspace` is generated in the project folder. Open the file through Xcode for subsequent operations.
1. Download the latest version of the SDK from [SDKs download](/en/api-reference/sdks?product=voice\&platform=macos) and extract the contents.
2. Copy the files in the `libs` folder of the SDK package to your project directory.
3. Open Xcode and [add the corresponding dynamic library](https://help.apple.com/xcode/mac/current/#/dev51a648b07). Make sure the **Embed** property of the added dynamic library is set to **Embed & Sign**.
Agora SDK uses `libc++` (LLVM) by default. If you need to use `libstdc++` (GNU), please contact [support@agora.io](mailto\:support@agora.io). The library provided by the SDK is a FAT Image, which includes 32/64-bit simulator and 32/64-bit real machine versions.
The [privacy updates for App Store submissions](https://developer.apple.com/news/?id=r1henawx) released by Apple, require developers to declare approved reasons for using a set of APIs in their app’s privacy manifest. Agora provides a [`PrivacyInfo.xcprivacy`](https://download.agora.io/sdk/release/PrivacyInfo.xcprivacy) file that you can include in your project.
## Implement Voice Calling [#implement-voice-calling-2]
This section guides you through the implementation of basic real-time audio interaction in your app.
The following figure illustrates the essential steps:

This guide includes [complete sample code](#complete-sample-code) that demonstrates implementing basic real-time interaction. To understand the core API calls in the sample code, review the following implementation steps.
### Import Agora framework [#import-agora-framework-1]
Add the following import to your swift file:
```swift
import AgoraRtcKit
```
### Initialize the engine [#initialize-the-engine-2]
Call `sharedEngine(withAppId:delegate:)` to create and initialize an `AgoraRtcEngineKit` instance. Provide your [App ID](manage-agora-account.md) and an `AgoraRtcEngineDelegate` implementation to [handle SDK events](#subscribe-to-voice-sdk-events).
```swift
var agoraKit: AgoraRtcEngineKit!
let appId = "YOUR_AGORA_APP_ID"
// Initialize the Agora engine
func initializeAgoraVoiceSDK() {
agoraKit = AgoraRtcEngineKit.sharedEngine(withAppId: appId, delegate: self)
}
```
### Join a channel [#join-a-channel-2]
To join a channel, call `joinChannel` with the following parameters:
* **Channel name**: The name of the channel to join. Clients that pass the same channel name join the same channel. If a channel with the specified name does not exist, it is created when the first user joins.
* **Authentication token**: A dynamic key that authenticates a user when the client joins a channel. In a production environment, you obtain a token from a [token server](build/set-up-token-authentication/deploy-token-server.mdx) in your security infrastructure. For the purpose of this guide [Generate a temporary token](manage-agora-account.md).
* **User ID**: A 32-bit signed integer that identifies a user in the channel. You can specify a unique user ID for each user yourself. If you set the user ID to `0` when joining a channel, the SDK generates a random number for the user ID and returns the value in the `didJoinChannel` callback.
* **Channel media options**: Configure `AgoraRtcChannelMediaOptions` to define publishing and subscription settings, optimize performance for your specific use-case, and set optional parameters.
For Voice Calling, set the `channelProfile` to `.communication` and the `clientRoleType` to `.broadcaster`.
```swift
let channelName = "demo" // Replace with your actual channel name
let token = "" // Replace with your token
func joinChannel() {
let options = AgoraRtcChannelMediaOptions()
options.channelProfile = .communication
// Set user role to broadcaster; to set user role to audience, keep the default value
options.clientRoleType = .broadcaster
// Publish microphone audio
options.publishMicrophoneTrack = true
// Automatically subscribe to all audio streams
options.autoSubscribeAudio = true
// Join the channel using a temporary token and channel name
agoraKit.joinChannel(
byToken: token,
channelId: channelName,
uid: 0,
mediaOptions: options
)
}
```
### Subscribe to Voice SDK events [#subscribe-to-voice-sdk-events-2]
The Voice SDK provides a delegate for handling channel events. To use it, conform to the `AgoraRtcEngineDelegate` protocol in your class and implement the event methods you want to handle. The following code implements the `didJoinChannel`, `didOfflineOfUid`, and `didJoinedOfUid` callbacks:
To ensure that you receive all Voice SDK events, set the Agora Engine event handler before joining a channel.
```swift
// Extension for handling Agora SDK callbacks
extension ViewController: AgoraRtcEngineDelegate {
// Triggered when the local user successfully joins a channel
func rtcEngine(_ engine: AgoraRtcEngineKit, didJoinChannel channel: String, withUid uid: UInt, elapsed: Int) {
print("Successfully joined channel: \(channel) with UID: \(uid)")
}
// Triggered when a remote user joins the channel
func rtcEngine(_ engine: AgoraRtcEngineKit, didJoinedOfUid uid: UInt, elapsed: Int) {
print("User \(uid) joined after \(elapsed) milliseconds")
}
// Triggered when a remote user leaves the channel
func rtcEngine(_ engine: AgoraRtcEngineKit, didOfflineOfUid uid: UInt, reason: AgoraUserOfflineReason) {
print("User \(uid) left: Reason -> \(reason)")
}
}
```
To learn about the other SDK events, see [`AgoraRtcEngineDelegate`](https://api-ref.agora.io/en/video-sdk/ios/4.x/documentation/agorartckit/agorartcenginedelegate).
### Display the local video [#display-the-local-video-1]
Call `setupLocalVideo` to initialize the local view and set the local video display properties.
```swift
// Configures and starts displaying the local video feed
func setupLocalVideo() {
let videoCanvas = AgoraRtcVideoCanvas()
videoCanvas.view = localView
videoCanvas.uid = 0 // UID 0 is assigned to the local user
videoCanvas.renderMode = .hidden
agoraKit.setupLocalVideo(videoCanvas)
}
```
### Display remote video [#display-remote-video-1]
To initialize the remote user view, call `setupRemoteVideo` and set the local display properties for the remote user. Use the `didJoinedOfUid` callback to get the UID of the remote user.
```swift
func setupRemoteVideo(uid: UInt, view: UIView?) {
let videoCanvas = AgoraRtcVideoCanvas()
videoCanvas.uid = uid
videoCanvas.view = view // Assign view for joining, set to nil for leaving
videoCanvas.renderMode = .hidden
agoraKit.setupRemoteVideo(videoCanvas)
}
```
### Handle permissions [#handle-permissions-2]
To access the camera and microphone on macOS devices, add the required permissions for real-time interaction. Open the `info.plist` file from the project navigation bar, [edit the property list](https://help.apple.com/xcode/mac/current/#/dev3f399a2a6), to add the required permissions. These permissions are optional. However, if you do not add these permissions, you will not be able to use the corresponding devices.
| Key | Type | Value |
| :------------------------------------- | :----- | :------------------------------------------------------------------------------------------------------ |
| Privacy - Microphone Usage Description | String | For the purpose of using the microphone. For example, for a call or live interactive streaming session. |
* If your project depends on third-party plugins or libraries, such as a third-party camera library, and the signature of the plug-in or library is inconsistent with the signature of the project, check the **Hardened Runtime** settings. Specifically, review and potentially disable **Runtime Exceptions** and **Library Validation** in the project configuration.
* For further information, refer to [Preparing your app for distribution](https://developer.apple.com/documentation/xcode/preparing_your_app_for_distribution).
Configure your macOS project settings by navigating to **TARGETS > Project Name > Signing & Capabilities**. Enable **App Sandbox and Hardened Runtime**, and add the necessary permissions as follows:
| Capability | Category | Permission |
| :--------------- | :-------------- | :-------------------------------------------------------------- |
| App Sandbox | Network | * Incoming Connections (Server)
* Outgoing Connections (Client) |
| App Sandbox | Hardware | - Camera
- Audio Input |
| Hardened Runtime | Resource Access | * Camera
* Audio Input |
### Start and close the app [#start-and-close-the-app-2]
When the user launches the app, it joins the channel and starts Voice Calling. When the user closes the app, it leaves the channel and ends Voice Calling.
1. To start Voice Calling, call the following methods:
```swift
// Initialize the Agora engine
initializeAgoraVoiceSDK()
// Join the channel
joinChannel()
```
2. To leave the channel and release SDK resources when the app is closed, call the following methods:
```swift
// Leave the channel and release session-related resources
agoraKit.leaveChannel(nil)
// Release all resources used by the Agora SDK
AgoraRtcEngineKit.destroy()
```
After destroying the engine, you can no longer use SDK methods and callbacks. To use the real-time interaction functions again, create a new engine. See [Initialize the engine](#initialize-the-engine) for details.
### Complete sample code [#complete-sample-code-2]
A complete code sample demonstrating the basic process of real-time interaction is provided for your reference. Copy the following code into your `ViewController.swift` file:
```swift
// ViewController.swift
import Cocoa
import AgoraRtcKit
class ViewController: NSViewController {
private var statusLabel: NSTextField!
let appId = "" // Replace with your actual App ID
let channelName = "demo" // Replace with your actual channel name
let token = "" // Replace with your token
var agoraKit: AgoraRtcEngineKit!
override func viewDidLoad() {
super.viewDidLoad()
// Initialize the Agora engine
initializeAgoraVoiceSDK()
// Set up the user interface
setupUI()
// Join an Agora channel
joinChannel()
}
func setupUI(){
let mainView = NSView(frame: view.bounds)
mainView.wantsLayer = true
statusLabel = NSTextField(labelWithString: "Waiting for other user")
statusLabel.alignment = .center
statusLabel.font = .systemFont(ofSize: 20)
statusLabel.translatesAutoresizingMaskIntoConstraints = false
mainView.addSubview(statusLabel)
view.addSubview(mainView)
NSLayoutConstraint.activate([
statusLabel.centerXAnchor.constraint(equalTo: mainView.centerXAnchor),
statusLabel.centerYAnchor.constraint(equalTo: mainView.centerYAnchor)
])
}
// Initializes the Voice SDK instance
func initializeAgoraVoiceSDK() {
// Create an instance of AgoraRtcEngineKit and set the delegate
agoraKit = AgoraRtcEngineKit.sharedEngine(withAppId: appId, delegate: self)
}
// Join the channel with specified options
func joinChannel() {
let options = AgoraRtcChannelMediaOptions()
// In voice calling, set the channel use-case to communication
options.channelProfile = .communication
// Set the user role as broadcaster (default is audience)
options.clientRoleType = .broadcaster
// Publish audio captured by microphone
options.publishMicrophoneTrack = true
// Auto subscribe to all audio streams
options.autoSubscribeAudio = true
// If you set uid=0, the engine generates a uid internally; on success, it triggers didJoinChannel callback
// Join the channel with a temporary token
agoraKit.joinChannel(
byToken: token,
channelId: channelName,
uid: 0,
mediaOptions: options
)
}
}
// Extension for handling Agora SDK callbacks
extension ViewController: AgoraRtcEngineDelegate {
// Triggered when the local user successfully joins a channel
func rtcEngine(_ engine: AgoraRtcEngineKit, didJoinChannel channel: String, withUid uid: UInt, elapsed: Int) {
print("Successfully joined channel: \(channel) with UID: \(uid)")
statusLabel.stringValue = "You Successfully joined. Waiting for other users"
}
// Triggered when a remote user joins the channel
func rtcEngine(_ engine: AgoraRtcEngineKit, didJoinedOfUid uid: UInt, elapsed: Int) {
print("User \(uid) joined after \(elapsed) milliseconds")
statusLabel.stringValue = "User \(uid) joined"
}
// Triggered when a remote user leaves the channel
func rtcEngine(_ engine: AgoraRtcEngineKit, didOfflineOfUid uid: UInt, reason: AgoraUserOfflineReason) {
print("User \(uid) left: Reason -> \(reason)")
statusLabel.stringValue = "User \(uid) left"
}
}
```
### Create a user interface [#create-a-user-interface-2]
Based on your use-case, create a user interface for your project.
The following example uses a `UILabel` to display the current app status. To use this interface, replace the contents of the `ViewController.swift` file with the following code:
**Sample code to create the user interface**
```swift
import UIKit
class ViewController: UIViewController {
var statusLabel: UILabel!
override func viewDidLoad() {
super.viewDidLoad()
// Set up user interface
setupUI();
}
func setupUI() {
let mainView = UIView(frame: view.bounds)
mainView.backgroundColor = .black
statusLabel = UILabel(frame: mainView.bounds)
statusLabel.text = "Waiting for other user"
statusLabel.textColor = .white
statusLabel.textAlignment = .center
statusLabel.autoresizingMask = [.flexibleWidth, .flexibleHeight]
mainView.addSubview(statusLabel)
view.addSubview(mainView)
}
}
```
## Test the sample code [#test-the-sample-code-2]
Take the following steps to test the sample code:
1. In your code update the `appId` and `token`, with the app ID and temporary token you obtained from Agora Console. Use the same `channelName` you filled in when generating the temporary token.
2. Click **Build** to run your project and wait a few seconds for the app installation to complete.
3. Allow the app to access the device's microphone.
4. On a second macOS device, repeat the previous steps to install and launch the app. Alternatively, use the [Web demo](https://webdemo.agora.io/basicVideoCall/index.html) to join the same channel and test the following use-cases:
* If users on both devices join the channel as hosts, they can hear each other.
* If one user joins as host and the other as audience, the audience can hear the host.
## Reference [#reference-2]
This section contains content that completes the information on this page, or points you to documentation that explains other aspects to this product.
* If a firewall is deployed in your network environment, refer to [Connect with Cloud Proxy](build/manage-connection-and-quality/cloud-proxy.mdx) to use Agora services normally.
### Next steps [#next-steps-2]
After implementing the quickstart sample, read the following documents to learn more:
* To ensure communication security in a test or production environment, best practice is to obtain and use a token from an authentication server. For details, see [Secure authentication with tokens](build/set-up-token-authentication/use-tokens.mdx).
### Sample project [#sample-project-2]
Agora provides open source sample projects on [GitHub](https://github.com/AgoraIO/API-Examples) for your reference. Download or view the [JoinChannelAudio](https://github.com/AgoraIO/API-Examples/blob/main/macOS/APIExample/Examples/Basic/JoinChannelAudio) project for a more detailed example.
### API reference [#api-reference-2]
* [`sharedEngine`](https://api-ref.agora.io/en/video-sdk/macos/4.x/documentation/agorartckit/agorartcenginekit/sharedengine\(withappid\:delegate:\))
* [`joinChannel`](https://api-ref.agora.io/en/video-sdk/macos/4.x/documentation/agorartckit/agorartcenginekit/joinchannel\(bytoken\:channelid\:info\:uid\:joinsuccess:\))
* [`leaveChannel`](https://api-ref.agora.io/en/video-sdk/macos/4.x/documentation/agorartckit/agorartcenginekit/leavechannel\(_:\))
* [`AgoraRtcEngineDelegate`](https://api-ref.agora.io/en/video-sdk/macos/4.x/documentation/agorartckit/agorartcenginedelegate)
### See also [#see-also-2]
* [Error codes](reference/error-codes.mdx)
* [Connection status management](build/manage-connection-and-quality/connection-status-management.mdx)
<_PlatformProcessedMarker close="true" />
<_PlatformPanel platform="web">
<_PlatformProcessedMarker groupMode="structured" canonicalPlatform="web" platform="web" />
This Web quickstart shows you how to create a basic Voice Calling app using the Agora Voice SDK. Switch to the [Android](/en/realtime-media/voice/quickstart/android) or [iOS](/en/realtime-media/voice/quickstart/ios) quickstart, or choose another platform from the selector.
* [RTC SDK API examples](https://github.com/AgoraIO/API-Examples-Web): Sample projects for the Agora RTC Web SDK 4.x, covering basic, advanced examples for Vue and React.
## Understand the tech [#understand-the-tech-3]
To start a Voice Calling session, implement the following steps in your app:
* **Initialize the Agora Engine**: Before calling other APIs, create and initialize an Agora Engine instance.
* **Join a channel**: Call methods to create and join a channel.
* **Send and receive audio**: All users can publish streams to the channel and subscribe to audio streams published by other users in the channel.

## Prerequisites [#prerequisites-3]
* A [supported browser](reference/supported-platforms.md).
Agora strongly recommends using the latest stable version of Google Chrome.
* [Node.js and npm](https://docs.npmjs.com/downloading-and-installing-node-js-and-npm)
* A microphone
* A valid Agora account and project. Please refer to [Agora account management](manage-agora-account.md) for details.
## Set up your project [#set-up-your-project-3]
This section shows you how to set up your Web project and install the Agora Voice SDK.
Create a new project
Add to an existing project
To initialize a new Vite project, take the following steps:
1. Open a terminal and run the following command:
```bash
npm create vite@latest agora_web_quickstart -- --template vanilla
```
This creates a new folder named `agora_web_quickstart` and initializes a Vite project inside it using the `vanilla` JavaScript template.
2. Navigate to the newly created folder. Download and set up dependencies for your project:
```bash
cd agora_web_quickstart
npm install
```
3. Create a user interface for your project. The UI consists of buttons to join and leave a channel. Refer to [Create a user interface](#create-a-user-interface) to get a bare bones html layout.
To add Voice Calling to your existing project, take the following steps:
1. Create a JavaScript file in your project's `src` folder to add `AgoraRTCClient` code that implements specific application logic.
2. Add an HTML file to your project to create a user interface. The UI consists of buttons to join and leave a channel. Refer to [Create a user interface](#create-a-user-interface) to get a bare bones HTML layout.
3. Include the JavaScript file in your HTML file.
```html
```
### Install the SDK [#install-the-sdk-3]
Add the Voice SDK to your project:
```bash
npm install agora-rtc-sdk-ng
```
## Implement Voice Calling [#implement-voice-calling-3]
This section guides you through the implementation of basic real-time audio interaction in your app.
The following figure illustrates the essential steps:

This guide includes [complete sample code](#complete-sample-code) that demonstrates implementing basic real-time interaction. To understand the core API calls in the sample code, review the following implementation steps.
### Import the `AgoraRTC` SDK [#import-the-agorartc-sdk]
```js
import AgoraRTC from "agora-rtc-sdk-ng";
```
### Initialize an instance of `AgoraRTCClient` [#initialize-an-instance-of-agorartcclient]
Call [`createClient`](https://api-ref.agora.io/en/video-sdk/web/4.x/interfaces/iagorartc.html#createclient) to initialize an `AgoraRTCClient` object. Set the [Channel mode](#channel-modes) based on your use case.
For Voice Calling Set `mode` to `rtc`.
```javascript
// RTC client instance
let client = null;
// Initialize the AgoraRTC client
function initializeClient() {
client = AgoraRTC.createClient({ mode: "rtc", codec: "vp8" });
setupEventListeners();
}
```
### Join a channel [#join-a-channel-3]
To join a channel, call `join` with the following parameters:
* **App ID**: The [App ID](manage-agora-account.md) for your project.
* **Channel name**: The name of the channel to join. Clients that pass the same channel name join the same channel. If a channel with the specified name does not exist, it is created when the first user joins.
* **Authentication token**: A dynamic key that authenticates a user when the client joins a channel. In a production environment, you obtain a token from a [token server](build/set-up-token-authentication/deploy-token-server.mdx) in your security infrastructure. For the purpose of this guide [Generate a temporary token](manage-agora-account.md).
* **User ID**: A 32-bit signed integer that identifies a user in the channel. You can specify a unique user ID for each user yourself. If you set the user ID to `0` when joining a channel, the SDK generates a random number for the user ID.
```javascript
// Join the channel and publish local audio
async function joinChannel() {
await client.join(appId, channel, token, uid);
await createMicrophoneAudioTrack();
await publishMicrophoneAudioTrack();
}
```
### Create a local audio track [#create-a-local-audio-track]
Use `createMicrophoneAudioTrack` to create a local audio track.
```javascript
let localAudioTrack;
async function createMicrophoneAudioTrack() {
// Create a local audio track
localAudioTrack = await AgoraRTC.createMicrophoneAudioTrack();
}
```
### Publish local media tracks [#publish-local-media-tracks]
To make the created audio tracks available for other users in the channel, use the `publish` method.
```javascript
async function publishMicrophoneAudioTrack() {
await client.publish([localAudioTrack]);
}
```
See [Local audio tracks](#local-audio-tracks) to learn more about local tracks.
### Set up event listeners [#set-up-event-listeners]
Use the `on` method to register event listeners for SDK events. The SDK triggers the `user-published` event when a user publishes an audio track in the channel. Similarly, it triggers the `user-unpublished` event when a user leaves the channel, goes offline, or unpublishes a media track.
```javascript
// Handle client events
function setupEventListeners() {
// Set up event listeners for remote tracks
client.on("user-published", async (user, mediaType) => {
// Subscribe to the remote user when the SDK triggers the "user-published" event
await client.subscribe(user, mediaType);
// If the remote user publishes an audio track
if (mediaType === "audio") {
// Get the RemoteAudioTrack object in the AgoraRTCRemoteUser object
const remoteAudioTrack = user.audioTrack;
// Play the remote audio track
remoteAudioTrack.play();
}
});
// Handle the "user-unpublished" event to unsubscribe from the user's media tracks
client.on("user-unpublished", async (user) => {
// Remote user unpublished
});
}
```
To ensure that you receive all Voice SDK events, set up event listeners before joining a channel.
For more information about other `AgoraRTCClient` events, refer to the [API reference](https://api-ref.agora.io/en/video-sdk/web/4.x/interfaces/iagorartcclient.html#event_channel_media_relay_event).
### Leave the channel [#leave-the-channel]
To exit the channel, close the local audio track and call the `leave` method.
```javascript
// Leave the channel and clean up
async function leaveChannel() {
// Stop the local audio track and release the microphone
if (localAudioTrack) {
localAudioTrack.close(); // Stop local audio
localAudioTrack = null; // Clean up the track reference
}
// Leave the channel
await client.leave();
}
```
### Complete sample code [#complete-sample-code-3]
A complete code sample demonstrating the basic process of real-time interaction is provided here for your reference. To use the sample, copy the following code to the JavaScript file in the project's `src` folder.
```js
import AgoraRTC from "agora-rtc-sdk-ng";
// RTC client instance
let client = null;
// Local audio track
let localAudioTrack = null;
// Connection parameters
let appId = "<-- Insert app ID -->";
let channel = "<-- Insert channel name -->";
let token = "<-- Insert token -->";
let uid = 0; // User ID
// Initialize the AgoraRTC client
function initializeClient() {
client = AgoraRTC.createClient({ mode: "rtc", codec: "vp8" });
setupEventListeners();
}
// Handle client events
function setupEventListeners() {
// Set up event listeners for remote tracks
client.on("user-published", async (user, mediaType) => {
// Subscribe to the remote user when the SDK triggers the "user-published" event
await client.subscribe(user, mediaType);
console.log("subscribe success");
// If the remote user publishes an audio track.
if (mediaType === "audio") {
// Get the RemoteAudioTrack object in the AgoraRTCRemoteUser object.
const remoteAudioTrack = user.audioTrack;
// Play the remote audio track.
remoteAudioTrack.play();
}
});
// Listen for the "user-unpublished" event
client.on("user-unpublished", async (user) => {
// Remote user unpublished
});
}
// Create a local audio track
async function createLocalAudioTrack() {
localAudioTrack = await AgoraRTC.createMicrophoneAudioTrack();
}
// Join the channel and publish local audio
async function joinChannel() {
await client.join(appId, channel, token, uid);
await createLocalAudioTrack();
await publishLocalAudio();
console.log("Publish success!");
}
// Publish local audio track
async function publishLocalAudio() {
await client.publish([localAudioTrack]);
}
// Leave the channel and clean up
async function leaveChannel() {
localAudioTrack.close(); // Stop local audio
await client.leave(); // Leave the channel
console.log("Left the channel.");
}
// Set up button click handlers
function setupButtonHandlers() {
document.getElementById("join").onclick = joinChannel;
document.getElementById("leave").onclick = leaveChannel;
}
// Start the basic call process
function startBasicCall() {
initializeClient();
window.onload = setupButtonHandlers;
}
startBasicCall();
```
### Create a user interface [#create-a-user-interface-3]
Open `index.html` in the project's root folder and replace the contents with the following code to implement a basic client user interface:
**Sample code to create the user interface**
```html
Agora Web SDK Quickstart
Agora Web SDK Quickstart
```
## Test the sample code [#test-the-sample-code-3]
Take the following steps to run and test the sample code:
1. In your `.js` file, update the values for `appId`, and `token` with values from Agora Console. Use the same `channel` name you used to generate the token.
2. To start the development server, use the following command:
```bash
npm run dev
```
3. Open your browser and navigate to the URL displayed in your terminal, for example, `http://localhost:5173`.
You see the following page:
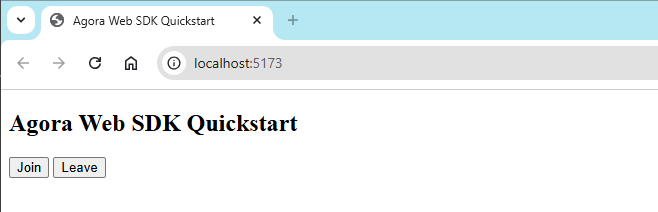
4. On a second device, repeat the previous steps to install and launch the app. Alternatively, use the [Web demo](https://webdemo.agora.io/basicVideoCall/index.html) or clone the [sample project on Github](https://github.com/AgoraIO/API-Examples-Web) to join the same channel and test the following use-cases:
1. Click **Join** to join the channel.
2. Enter the same app ID, channel name, and temporary token.
Once your friend joins the channel, you can hear each other.
* Run the web app on a local server (localhost) for testing purposes only. When deploying to a production environment, use the HTTPS protocol.
* Due to browser security policies that restrict HTTP addresses to 127.0.0.1, the Agora Web SDK only supports HTTPS protocol and `http://localhost` (`http://127.0.0.1`). Please do not use the HTTP protocol to access your project, except for `http://localhost` (`http://127.0.0.1`).
## Reference [#reference-3]
This section contains content that completes the information on this page, or points you to documentation that explains other aspects to this product.
* If a firewall is deployed in your network environment, refer to [Connect with Cloud Proxy](build/manage-connection-and-quality/cloud-proxy.mdx) to use Agora services normally.
### Next steps [#next-steps-3]
After implementing the quickstart sample, read the following documents to learn more:
* To ensure communication security in a test or production environment, best practice is to obtain and use a token from an authentication server. For details, see [Secure authentication with tokens](build/set-up-token-authentication/use-tokens.mdx).
### Sample project [#sample-project-3]
Agora provides open source sample projects on [GitHub](https://github.com/AgoraIO/API-Examples-Web) for your reference. Download or view the [basicVoiceCall](https://github.com/AgoraIO/API-Examples-Web/tree/main/src/example/basic/basicVoiceCall) project for a more detailed example.
### API reference [#api-reference-3]
* [`AgoraRTC.createClient`](https://api-ref.agora.io/en/voice-sdk/web/4.x/interfaces/iagorartc.html#createclient)
* [`IAgoraRTCRemoteUser`](https://api-ref.agora.io/en/voice-sdk/web/4.x/interfaces/iagorartcremoteuser.html)
* [`play`](https://api-ref.agora.io/en/voice-sdk/web/4.x/interfaces/iremoteaudiotrack.html#play)
* [`join`](https://api-ref.agora.io/en/voice-sdk/web/4.x/interfaces/iagorartcclient.html#join)
* [`createMicrophoneAudioTrack`](https://api-ref.agora.io/en/voice-sdk/web/4.x/interfaces/iagorartc.html#createmicrophoneaudiotrack)
* [`publish`](https://api-ref.agora.io/en/voice-sdk/web/4.x/interfaces/iagorartcclient.html#publish)
* [AgoraRTCClient events](https://api-ref.agora.io/en/voice-sdk/web/4.x/interfaces/iagorartcclient.html#event_channel_media_relay_event)
### Channel modes [#channel-modes]
The Voice SDK supports the following channel modes:
* `rtc`: Communication use-case
* `live`: Live broadcast use-case
#### Communication use-case [#communication-use-case]
It is suitable for use-cases where all users in the channel need to communicate with each other and the total number of users is not too large, such as multi-person conferences and online chats.
#### Live broadcast use-case [#live-broadcast-use-case]
It is suitable for use-cases where there are few publishers but many subscribers. In this use-case, the SDK defines two user roles: audience (default) and host. Hosts can send and receive audio, but audience cannot send and may only receive audio. You can specify user roles by setting the parameters `createClient` of role, or you can call `setClientRole` to dynamically modify user roles.
### Local audio tracks [#local-audio-tracks]
The SDK uses a hierarchy where all local track objects derive from the `LocalTrack` base class. This class defines the common behavior for all local tracks. Specific track types, such as `LocalAudioTrack` inherit from `LocalTrack` and extend its functionality.
To publish a local track, you call the `publish` method of the client with the `LocalTrack` object as an input parameter. This approach makes publishing a track independent of how you create your local track.
Each type of `LocalTrack` comes with its own set of tools. For example, `LocalAudioTrack` lets you control the volume.
The SDK includes more specific classes based on `LocalAudioTrack`. For example, the `MicrophoneAudioTrack`, is a type of `LocalAudioTrack` that you can use to publish audio from your microphone. It comes with extra features for controlling the microphone and adjusting audio quality.
### Other integration methods [#other-integration-methods]
When you use `npm` to install the Web SDK, you can enable tree shaking to reduce the size of the app after integration. For details, see [Using tree shaking](build/optimize-and-operate/app-size-optimization.mdx).
In addition to using `npm` to install the Web SDK, you can also use the following methods:
* In the project HTML file, add the following tag to obtain the SDK from CDN:
```html
```
* Download the Voice SDK package locally, save the `.js` files in the SDK package to the project directory, and then add the following tag to the project HTML file:
```html
```
Visit the [Download](/en/api-reference/sdks?product=voice\&platform=web) page to obtain the link for the latest SDK version.
### Frequently asked questions [#frequently-asked-questions-2]
**Why do I get a `digital envelope routines::unsupported` error when running the quickstart project locally?**
This issue arises in projects configured with `webpack` for local execution due to changes in Node.js 16 and above. The modifications in Node.js, particularly its dependency on OpenSSL (detailed in the [node issue](https://github.com/nodejs/node/issues/29817)), impact the local development environment dependencies of the project. Refer to the [webpack issue](https://github.com/webpack/webpack/issues/14532) for details.
Use one of the following solutions to resolve the issue:
* Run the following command to set a temporary environment variable (Recommended):
```bash
export NODE_OPTIONS=--openssl-legacy-provider
```
* Temporarily switch to a lower version of Node.js.
### See also [#see-also-3]
* [Error codes](reference/error-codes.mdx)
* [Connection status management](build/manage-connection-and-quality/connection-status-management.mdx)
<_PlatformProcessedMarker close="true" />
<_PlatformPanel platform="windows">
<_PlatformProcessedMarker groupMode="structured" canonicalPlatform="web" platform="windows" />
This Windows quickstart shows you how to create a basic Voice Calling app using the Agora Voice SDK.
## Understand the tech [#understand-the-tech-4]
To start a Voice Calling session, implement the following steps in your app:
* **Initialize the Agora Engine**: Before calling other APIs, create and initialize an Agora Engine instance.
* **Join a channel**: Call methods to create and join a channel.
* **Send and receive audio**: All users can publish streams to the channel and subscribe to audio streams published by other users in the channel.

## Prerequisites [#prerequisites-4]
* A device running Windows 7 or higher.
* Microsoft Visual Studio 2017 or higher with [C++ desktop development](https://devblogs.microsoft.com/cppblog/windows-desktop-development-with-c-in-visual-studio/) support. C++ 11 or above.
* If you use C# for development, you also need the [.NET framework](https://learn.microsoft.com/en-us/dotnet/framework/install/guide-for-developers).
* A microphone
* A valid Agora account and project. Please refer to [Agora account management](manage-agora-account.md) for details.
## Set up your project [#set-up-your-project-4]
This section shows you how to set up your Windows project and install the Agora Voice SDK.
Create a new project
Add to an existing project
The following steps outline the process to set up a new Visual Studio 2022 project on Windows 11 for implementing real-time audio and video interaction functions.
1. In Visual Studio, select **File > New > Project** to create a new project. In the pop-up window, select **MFC application** as the project template, click **Next**, update the project name to `AgoraQuickStart`, set the project storage location, and then click **Create**.
2. In the pop-up MFC application window, set the application type to **Dialog-based** , and set **Use MFC** to **Use MFC in a shared DLL**. Enter the generated class, set the generated class to **Dlg**, set the base class to **CDialog**, and click **Finish**.
To integrate real-time audio interaction into your project:
1. Launch Visual Studio 2022 and open your existing project by selecting **File > Open > Project/Solution**.
2. Navigate to your project directory and open the `.sln` file.
3. Create a user-interface for your app based on your application use-case.
A basic UI consists of the following controls:
* Join channel button
* Leave channel button
* An Edit Control for entering a channel name
Refer to [Create a user interface](#create-a-user-interface) to get a bare bones sample layout.
### Install the SDK [#install-the-sdk-4]
Install the Agora Voice SDK:
1. Download the latest Windows [SDK](/en/api-reference/sdks?product=voice\&platform=windows).
2. Unzip and open the downloaded SDK. Copy all subfolders in `sdk/` to your solution folder. Make sure these subfolders are in the same directory as your `.sln` file.
#### Configure the project [#configure-the-project]
In the Solution Explorer window, right-click the project name and click **Properties** to configure the following:
1. Go to the **C/C++ > General > Additional Include Directory** menu, click **Edit**, and in the pop-up window enter `$(SolutionDir)sdk\high_level_api\include`.
2. Go to the **Linker > General > Additional Library Directory** menu, click **Edit**, and in the pop-up window:
* for 64 bit Windows, enter `$(SolutionDir)sdk\x86_64`.
* for x86 Windows, enter `$(SolutionDir)sdk\x86`.
3. Go to the **Linker > Input > Additional Dependencies** menu, click **Edit**, and in the pop-up window:
* for 64 bit Windows, enter `$(SolutionDir)sdk\x86_64\agora_rtc_sdk.dll.lib`.
* for x86 Windows, enter `$(SolutionDir)sdk\x86\agora_rtc_sdk.dll.lib`.
4. Enter the **Advanced** menu, and in **Advanced Properties**, set **Copy contents to OutDir** and **Copy C++ runtime to output directory** to `Yes`.
5. Go to the **Build Events > Post-Build Events > Command Line** menu and enter `copy $(SolutionDir)sdk\x86_64\*.dll $(SolutionDir)$(Platform)\$(Configuration)`.
6. Click **Apply** to save the configuration.
## Implement Voice Calling [#implement-voice-calling-4]
This section guides you through the implementation of basic real-time audio interaction in your app.
The following figure illustrates the essential steps:

This guide includes [complete sample code](#complete-sample-code) that demonstrates implementing basic real-time interaction. To understand the core API calls in the sample code, review the following implementation steps.
### Initialize the engine [#initialize-the-engine-3]
For real-time communication, initialize an `IRtcEngine` instance and set up event handlers to manage user interactions within the channel. Use `RtcEngineContext` to specify the [App ID](manage-agora-account.md), and custom [event handler](#subscribe-to-voice-sdk-events), then call `initialize` to initialize the engine, enabling further channel operations. Add the following code to your header and `.cpp` files:
```cpp
// Declare the required variables
IRtcEngine* m_rtcEngine = nullptr; // RTC engine instance
CAgoraQuickStartRtcEngineEventHandler m_eventHandler; // IRtcEngineEventHandler
```
```cpp
void CAgoraQuickStartDlg::initializeAgoraEngine() {
// Create IRtcEngine object
m_rtcEngine = createAgoraRtcEngine();
// Create IRtcEngine context object
RtcEngineContext context;
// Input your App ID. You can obtain your project's App ID from the Agora Console
context.appId = APP_ID;
// Add event handler for callbacks and events
context.eventHandler = &m_eventHandler;
// Initialize
int ret = m_rtcEngine->initialize(context);
m_initialize = (ret == 0);
if (!m_initialize) {
AfxMessageBox(_T("Failed to initialize Agora RTC engine"));
}
}
```
### Join a channel [#join-a-channel-4]
To join a channel, call `joinChannel`\[2/2] with the following parameters:
* **Channel name**: The name of the channel to join. Clients that pass the same channel name join the same channel. If a channel with the specified name does not exist, it is created when the first user joins.
* **Authentication token**: A dynamic key that authenticates a user when the client joins a channel. In a production environment, you obtain a token from a [token server](build/set-up-token-authentication/deploy-token-server.mdx) in your security infrastructure. For the purpose of this guide [Generate a temporary token](manage-agora-account.md).
* **User ID**: A 32-bit signed integer that identifies a user in the channel. You can specify a unique user ID for each user yourself. If you set the user ID to `0` when joining a channel, the SDK generates a random number for the user ID and returns the value in the `onJoinChannelSuccess` callback.
* **Channel media options**: Configure `ChannelMediaOptions` to define publishing and subscription settings, optimize performance for your specific use-case, and set optional parameters.
For Voice Calling, set the `channelProfile` to `CHANNEL_PROFILE_COMMUNICATION` and the user role to `CLIENT_ROLE_BROADCASTER`.
```cpp
void CAgoraQuickStartDlg::joinChannel(const char* token, const char* channelName) {
ChannelMediaOptions options;
// Set channel profile to live broadcasting
options.channelProfile = CHANNEL_PROFILE_COMMUNICATION;
// Set user role to broadcaster; keep default value if setting user role to audience
options.clientRoleType = CLIENT_ROLE_BROADCASTER;
// Publish the audio stream captured by the microphone
options.publishMicrophoneTrack = true;
// Automatically subscribe to all audio streams
options.autoSubscribeAudio = true;
// Join the channel using the token and channel name (both are const char*)
m_rtcEngine->joinChannel(token, channelName, 0, options);
}
```
### Subscribe to Voice SDK events [#subscribe-to-voice-sdk-events-3]
The Voice SDK provides an interface for subscribing to channel events. To use it, create a custom event handler class by inheriting from `IRtcEngineEventHandler` and override its methods to handle real-time interaction events. Add callbacks to receive notification of users joining and leaving the channel.
To ensure that you receive all Voice SDK events, set the Agora Engine event handler before joining a channel.
```cpp
// Define the CAgoraQuickStartRtcEngineEventHandler class to handle callback events such as users joining and leaving the channel
class CAgoraQuickStartRtcEngineEventHandler
: public IRtcEngineEventHandler {
public:
CAgoraQuickStartRtcEngineEventHandler()
: m_hMsgHandler(nullptr) {
}
// Set the handle of the message receiving window
void SetMsgReceiver(HWND hWnd) {
m_hMsgHandler = hWnd;
}
// Register onJoinChannelSuccess callback
// This callback is triggered when a local user successfully joins a channel
virtual void onJoinChannelSuccess(const char* channel, uid_t uid, int elapsed) {
if (m_hMsgHandler) {
::PostMessage(m_hMsgHandler, WM_MSGID(EID_JOIN_CHANNEL_SUCCESS), uid, 0);
}
}
// Register onUserJoined callback
// This callback is triggered when the remote host successfully joins the channel
virtual void onUserJoined(uid_t uid, int elapsed) {
if (m_hMsgHandler) {
::PostMessage(m_hMsgHandler, WM_MSGID(EID_USER_JOINED), uid, 0);
}
}
// Register onUserOffline callback
// This callback is triggered when the remote host leaves the channel or is offline
virtual void onUserOffline(uid_t uid, USER_OFFLINE_REASON_TYPE reason) {
if (m_hMsgHandler) {
::PostMessage(m_hMsgHandler, WM_MSGID(EID_USER_OFFLINE), uid, 0);
}
}
private:
HWND m_hMsgHandler;
};
```
Implement the callback functions.
```cpp
LRESULT CAgoraQuickStartDlg::OnEIDJoinChannelSuccess(WPARAM wParam, LPARAM lParam) {
// Join channel success callback
uid_t localUid = wParam;
return 0;
}
LRESULT CAgoraQuickStartDlg::OnEIDUserJoined(WPARAM wParam, LPARAM lParam) {
// Remote user joined callback
return 0;
}
LRESULT CAgoraQuickStartDlg::OnEIDUserOffline(WPARAM wParam, LPARAM lParam) {
// Remote user left callback
return 0;
}
```
### Leave the channel [#leave-the-channel-1]
When a user ends a call, or closes the app call `leaveChannel` to exit the current channel.
```cpp
// Leave the channel
m_rtcEngine->leaveChannel();
```
### Release resources [#release-resources]
To destroy the engine instance, call `release` :
```cpp
// Release resources when the object is destroyed
m_rtcEngine->release(true);
m_rtcEngine = NULL;
```
After you call `Dispose`, you can no longer use any SDK methods or callbacks. To use real-time Voice Calling again, you must create a new engine. For more information, see [Initialize the Engine](#initialize-the-engine).
### Complete sample code [#complete-sample-code-4]
A complete code sample that implements the basic process of real-time interaction is presented here for your reference. Copy the sample code into your project to quickly implement the basic functions of real-time interaction.
**AgoraQuickStartDlg.h**
```cpp
#pragma once
#include
// Import related header files
#include
using namespace now;
using namespace agora::rtc;
using namespace agora::media;
using namespace agora::media::base;
// Define the message ID
#define WM_MSGID(code) (WM_USER+0x200+code)
#define EID_JOIN_CHANNEL_SUCCESS 0x00000002
#define EID_USER_JOINED 0x00000004
#define EID_USER_OFFLINE 0x00000004
// Define the CAgoraQuickStartRtcEngineEventHandler class to handle callback events such as users joining and leaving the channel
class CAgoraQuickStartRtcEngineEventHandler
: public IRtcEngineEventHandler {
public:
CAgoraQuickStartRtcEngineEventHandler()
: m_hMsgHandler(nullptr) {
}
// Set the handle of the message receiving window
void SetMsgReceiver(HWND hWnd) {
m_hMsgHandler = hWnd;
}
// Register onJoinChannelSuccess callback
// This callback is triggered when a local user successfully joins a channel
virtual void onJoinChannelSuccess(const char* channel, uid_t uid, int elapsed) {
if (m_hMsgHandler) {
::PostMessage(m_hMsgHandler, WM_MSGID(EID_JOIN_CHANNEL_SUCCESS), uid, 0);
}
}
// Register onUserJoined callback
// This callback is triggered when the remote host successfully joins the channel
virtual void onUserJoined(uid_t uid, int elapsed) {
if (m_hMsgHandler) {
::PostMessage(m_hMsgHandler, WM_MSGID(EID_USER_JOINED), uid, 0);
}
}
// Register onUserOffline callback
// This callback is triggered when the remote host leaves the channel or is offline
virtual void onUserOffline(uid_t uid, USER_OFFLINE_REASON_TYPE reason) {
if (m_hMsgHandler) {
::PostMessage(m_hMsgHandler, WM_MSGID(EID_USER_OFFLINE), uid, 0);
}
}
private:
HWND m_hMsgHandler;
};
// CAgoraQuickStartDlg dialog box
class CAgoraQuickStartDlg : public CDialog
{
// Construction
public:
CAgoraQuickStartDlg(CWnd* pParent = nullptr); // Standard constructor
virtual ~CAgoraQuickStartDlg();
// Dialog box data
#ifdef AFX_DESIGN_TIME
enum { IDD = IDD_AGORAQUICKSTART_DIALOG };
#endif
// Handle the join/leave button click event
afx_msg void OnBnClickedBtnJoin();
afx_msg void OnBnClickedBtnLeave();
// Handle callback events such as user joining/user leaving
afx_msg LRESULT OnEIDJoinChannelSuccess(WPARAM wParam, LPARAM lParam);
afx_msg LRESULT OnEIDUserJoined(WPARAM wParam, LPARAM lParam);
afx_msg LRESULT OnEIDUserOffline(WPARAM wParam, LPARAM lParam);
protected:
HICON m_hIcon;
CEdit m_edtChannelName;
// DDX/DDV support
virtual void DoDataExchange(CDataExchange* pDX);
virtual BOOL OnInitDialog();
afx_msg void OnSysCommand(UINT nID, LPARAM lParam);
afx_msg void OnPaint();
afx_msg HCURSOR OnQueryDragIcon();
DECLARE_MESSAGE_MAP()
std::string cs2utf8(CString str);
private:
IRtcEngine* m_rtcEngine = nullptr;
CAgoraQuickStartRtcEngineEventHandler m_eventHandler;
bool m_initialize = false;
bool m_remoteRender = false;
};
```
**AgoraQuickStartDlg.cpp**
```cpp
// AgoraQuickStartDlg.cpp: implementation file
#include "pch.h"
#include "framework.h"
#include "AgoraQuickStart.h"
#include "AgoraQuickStartDlg.h"
#include "afxdialogex.h"
#ifdef _DEBUG
#define new DEBUG_NEW
#endif
// CAboutDlg dialog box for the application's "About" menu item
class CAboutDlg : public CDialogEx {
public:
CAboutDlg();
// Dialog box data
#ifdef AFX_DESIGN_TIME
enum { IDD = IDD_ABOUTBOX };
#endif
protected:
virtual void DoDataExchange(CDataExchange* pDX); // DDX/DDV support
// Implementation
protected:
DECLARE_MESSAGE_MAP()
};
CAboutDlg::CAboutDlg() : CDialogEx(IDD_ABOUTBOX) {
}
void CAboutDlg::DoDataExchange(CDataExchange* pDX) {
CDialogEx::DoDataExchange(pDX);
}
BEGIN_MESSAGE_MAP(CAboutDlg, CDialogEx)
END_MESSAGE_MAP()
// CAgoraQuickStartDlg dialog box
CAgoraQuickStartDlg::CAgoraQuickStartDlg(CWnd* pParent /*=nullptr*/)
: CDialog(IDD_AGORAQUICKSTART_DIALOG, pParent) {
m_hIcon = AfxGetApp()->LoadIcon(IDR_MAINFRAME);
}
CAgoraQuickStartDlg::~CAgoraQuickStartDlg() {
CDialog::~CDialog();
// Release the engine and related resources when deleting the CAgoraQuickStartDlg object
if (m_rtcEngine) {
m_rtcEngine->release(true);
m_rtcEngine = NULL;
}
}
void CAgoraQuickStartDlg::DoDataExchange(CDataExchange* pDX) {
CDialog::DoDataExchange(pDX);
// Associate the control with the variable
DDX_Control(pDX, IDC_EDIT_CHANNEL, m_edtChannelName);
}
BEGIN_MESSAGE_MAP(CAgoraQuickStartDlg, CDialog)
ON_WM_SYSCOMMAND()
ON_WM_PAINT()
ON_WM_QUERYDRAGICON()
ON_BN_CLICKED(ID_BTN_JOIN, &CAgoraQuickStartDlg::OnBnClickedBtnJoin)
ON_BN_CLICKED(ID_BTN_LEAVE, &CAgoraQuickStartDlg::OnBnClickedBtnLeave)
ON_MESSAGE(WM_MSGID(EID_JOIN_CHANNEL_SUCCESS), &CAgoraQuickStartDlg::OnEIDJoinChannelSuccess)
ON_MESSAGE(WM_MSGID(EID_USER_JOINED), &CAgoraQuickStartDlg::OnEIDUserJoined)
ON_MESSAGE(WM_MSGID(EID_USER_OFFLINE), &CAgoraQuickStartDlg::OnEIDUserOffline)
END_MESSAGE_MAP()
// Application constants
#define APP_ID ""
#define token ""
void CAgoraQuickStartDlg::initializeAgoraEngine() {
m_rtcEngine = createAgoraRtcEngine();
RtcEngineContext context;
context.appId = APP_ID;
context.eventHandler = &m_eventHandler;
int ret = m_rtcEngine->initialize(context);
m_initialize = (ret == 0);
if (!m_initialize) {
AfxMessageBox(_T("Failed to initialize Agora RTC engine"));
}
}
BOOL CAgoraQuickStartDlg::OnInitDialog() {
CDialog::OnInitDialog();
// Add "About..." menu item to the system menu
CMenu* pSysMenu = GetSystemMenu(FALSE);
if (pSysMenu != nullptr) {
CString strAboutMenu;
strAboutMenu.LoadString(IDS_ABOUTBOX);
if (!strAboutMenu.IsEmpty()) {
pSysMenu->AppendMenu(MF_SEPARATOR);
pSysMenu->AppendMenu(MF_STRING, IDM_ABOUTBOX, strAboutMenu);
}
}
// Set the dialog icons
SetIcon(m_hIcon, TRUE); // Set big icon
SetIcon(m_hIcon, FALSE); // Set small icon
// Set the message receiver
m_eventHandler.SetMsgReceiver(m_hWnd);
// Initialize Agora engine
initializeAgoraEngine();
return TRUE; // Unless focus is set to a control, return TRUE
}
void CAgoraQuickStartDlg::OnSysCommand(UINT nID, LPARAM lParam) {
if ((nID & 0xFFF0) == IDM_ABOUTBOX) {
CAboutDlg dlgAbout;
dlgAbout.DoModal();
} else {
CDialog::OnSysCommand(nID, lParam);
}
}
void CAgoraQuickStartDlg::OnPaint() {
if (IsIconic()) {
CPaintDC dc(this); // Device context for drawing
SendMessage(WM_ICONERASEBKGND, reinterpret_cast(dc.GetSafeHdc()), 0);
int cxIcon = GetSystemMetrics(SM_CXICON);
int cyIcon = GetSystemMetrics(SM_CYICON);
CRect rect;
GetClientRect(&rect);
int x = (rect.Width() - cxIcon + 1) / 2;
int y = (rect.Height() - cyIcon + 1) / 2;
dc.DrawIcon(x, y, m_hIcon);
} else {
CDialog::OnPaint();
}
}
HCURSOR CAgoraQuickStartDlg::OnQueryDragIcon() {
return static_cast(m_hIcon);
}
std::string CAgoraQuickStartDlg::cs2utf8(CString str) {
char szBuf[2 * MAX_PATH] = { 0 };
WideCharToMultiByte(CP_UTF8, 0, str.GetBuffer(0), str.GetLength(), szBuf, 2 * MAX_PATH, NULL, NULL);
return szBuf;
}
void CAgoraQuickStartDlg::joinChannel(const char* token, const char* channelName) {
ChannelMediaOptions options;
options.channelProfile = CHANNEL_PROFILE_LIVE_BROADCASTING;
options.clientRoleType = CLIENT_ROLE_BROADCASTER;
options.publishMicrophoneTrack = true;
options.autoSubscribeAudio = true;
m_rtcEngine->joinChannel(token, channelName, 0, options);
}
void CAgoraQuickStartDlg::OnBnClickedBtnJoin() {
CString strChannelName;
m_edtChannelName.GetWindowText(strChannelName);
if (strChannelName.IsEmpty()) {
AfxMessageBox(_T("Fill channel name first"));
return;
}
joinChannel(token, CW2A(strChannelName));
}
void CAgoraQuickStartDlg::OnBnClickedBtnLeave() {
m_rtcEngine->leaveChannel();
}
LRESULT CAgoraQuickStartDlg::OnEIDJoinChannelSuccess(WPARAM wParam, LPARAM lParam) {
uid_t localUid = static_cast(wParam);
return 0;
}
LRESULT CAgoraQuickStartDlg::OnEIDUserJoined(WPARAM wParam, LPARAM lParam) {
uid_t remoteUid = static_cast(wParam);
return 0;
}
LRESULT CAgoraQuickStartDlg::OnEIDUserOffline(WPARAM wParam, LPARAM lParam) {
uid_t remoteUid = static_cast(wParam);
return 0;
}
```
### Create a user interface [#create-a-user-interface-4]
Follow these steps to create a bare-bones UI for your project.
**Steps to create a minimalistic UI**
1. In the right menu bar, switch the project to resource view, then open the `.Dialog` file.
2. Add an input box for the channel name:
1. Go to **View** > **Toolbox** and select **Add Static Text** control.
2. Change the description text to `Channel name` in the properties.
3. Add an **Edit Control** as an input box.
4. In **Properties** > **Miscellaneous**, set the control's ID to `IDC_EDIT_CHANNEL`.
3. Add join and leave channel buttons:
1. In **View** > **Toolbox**, add two `Button` controls.
2. In **Properties** > **Miscellaneous**, set the IDs of the controls to `ID_BTN_JOIN` and `ID_BTN_LEAVE`.
3. Set the description text to `Join` and `Leave` respectively.
Your interface looks similar to the following:
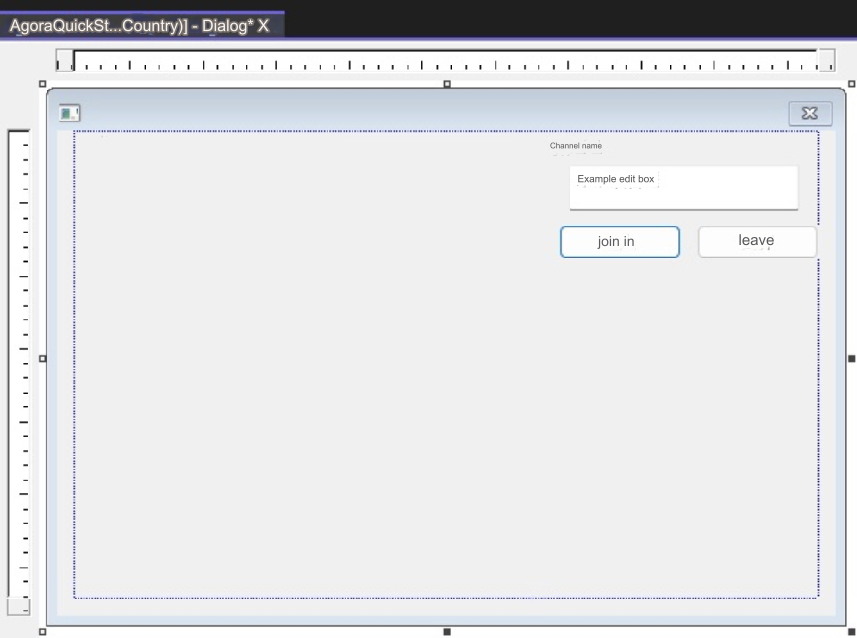
## Test the sample code [#test-the-sample-code-4]
To test your app, follow these steps:
1. In Visual Studio, select local Windows debugger to start compiling the application.
2. Enter the name of the channel you want to join in the input box and click the **Join** button to join the channel.
3. Use the [Web demo](https://webdemo.agora.io/basicVideoCall/index.html) to join the same channel and test the following use-cases:
* If users on both devices join the channel as hosts, they can hear each other.
* If one user joins as host and the other as audience, the audience can hear the host.
## Reference [#reference-4]
This section contains content that completes the information on this page, or points you to documentation that explains other aspects to this product.
* If a firewall is deployed in your network environment, refer to [Connect with Cloud Proxy](build/manage-connection-and-quality/cloud-proxy.mdx) to use Agora services normally.
### Next steps [#next-steps-4]
After implementing the quickstart sample, read the following documents to learn more:
* To ensure communication security in a test or production environment, best practice is to obtain and use a token from an authentication server. For details, see [Secure authentication with tokens](build/set-up-token-authentication/use-tokens.mdx).
### Sample project [#sample-project-4]
Agora provides open source sample projects on [GitHub](https://github.com/AgoraIO/API-Examples/tree/main/windows/APIExample/) for your reference.
* Download or view the [sample project](https://github.com/AgoraIO/API-Examples/tree/main/windows/APIExample/APIExample/Basic/LiveBroadcasting) for a more detailed example.
* For a Windows C# implementation, see [this sample project](https://github.com/AgoraIO-Extensions/Agora-C_Sharp-SDK/tree/master/APIExample/src/Basic/JoinChannelVideo).
### API Reference [#api-reference-4]
* [`createAgoraRtcEngine`](https://api-ref.agora.io/en/voice-sdk/cpp/4.x/API/class_irtcengine.html#api_createagorartcengine)
* [`joinChannel`](https://api-ref.agora.io/en/voice-sdk/cpp/4.x/API/class_irtcengine.html#api_irtcengine_joinchannel2)
* [`IRtcEngineEventHandler`](https://api-ref.agora.io/en/voice-sdk/cpp/4.x/API/class_irtcengineeventhandler.html#class_irtcengineeventhandler)
* [`leaveChannel`](https://api-ref.agora.io/en/voice-sdk/cpp/4.x/API/class_irtcengine.html#api_irtcengine_leavechannel)
* [`release`](https://api-ref.agora.io/en/voice-sdk/cpp/4.x/API/class_irtcengine.html#api_irtcengine_release)
### Frequently asked questions [#frequently-asked-questions-3]
* [How can I listen for audience joining or leaving a channel?](/en/api-reference/faq/integration/audience_event)
* [How can I solve channel-related issues?](/en/api-reference/faq/integration/channel)
* [How can I set the log file?](/en/api-reference/faq/integration/set_log_file)
### See also [#see-also-4]
* [Error codes](reference/error-codes.mdx)
* [Connection status management](build/manage-connection-and-quality/connection-status-management.mdx)
<_PlatformProcessedMarker close="true" />
<_PlatformPanel platform="electron">
<_PlatformProcessedMarker groupMode="structured" canonicalPlatform="web" platform="electron" />
This Electron quickstart shows you how to create a basic Voice Calling app using the Agora Voice SDK.
## Understand the tech [#understand-the-tech-5]
To start a Voice Calling session, implement the following steps in your app:
* **Initialize the Agora Engine**: Before calling other APIs, create and initialize an Agora Engine instance.
* **Join a channel**: Call methods to create and join a channel.
* **Send and receive audio**: All users can publish streams to the channel and subscribe to audio streams published by other users in the channel.

## Prerequisites [#prerequisites-5]
* [Node.js](https://nodejs.org/en/download/) 14 or higher.
* A microphone
* A valid Agora account and project. Please refer to [Agora account management](manage-agora-account.md) for details.
## Set up your project [#set-up-your-project-5]
This section shows you how to set up your Electron project and install the Agora Voice SDK.
1. Create a new directory for your Electron project in a local folder. Add the following files to the root of the project directory:
* `package.json`: Manages project dependencies and scripts.
* `index.html`: Defines the app's user interface.
* `main.js`: The main process entry point.
* `renderer.js`: The renderer process script, responsible for interacting with the Agora Electron SDK.
2. Create a user interface for your app based on your use-case.
Refer to [Create a user interface](#create-a-user-interface) to get a bare bones sample layout.
### Install the SDK [#install-the-sdk-5]
npm integration
Add the Voice SDK to your project using `npm`:
1. Configure `package.json`
* macOS
```json
{
"name": "electron-demo-app",
"version": "0.1.0",
"author": "your name",
"description": "My Electron app",
"main": "main.js",
"scripts": {
"start": "electron ."
},
"agora_electron": {
"platform": "darwin",
"prebuilt": true
},
"dependencies": {
"agora-electron-sdk": "latest"
},
"devDependencies": {
"electron": "latest"
}
}
```
* Windows
```json
{
"name": "electron-demo-app",
"version": "0.1.0",
"author": "your name",
"description": "My Electron app",
"main": "main.js",
"scripts": {
"start": "electron ."
},
"agora_electron": {
"platform": "win32",
"prebuilt": true,
"arch": "ia32"
},
"dependencies": { "agora-electron-sdk": "latest" },
"devDependencies": {"electron": "latest" }
}
```
**Configuration parameters**
* `agora-electron-sdk`: Version number of the Agora Electron SDK. Set to latest for the most recent version, or specify a version number. See [`agora-electron-sdk`](https://www.npmjs.com/package/agora-electron-sdk) on npm for available versions.
* `electron`: Electron version number. Versions 5.0.0 and above are supported. For macOS devices with M1 chips, use version 11.0.0 or higher.
* `platform` (Optional): Target platform. Set to `darwin` for macOS or `win32` for Windows.
* `prebuilt` (Optional): Set to `true` by default to prevent compatibility issues between Electron, Node.js, and the SDK.
* `arch` (Optional): Target architecture. Defaults to your system architecture.
Different versions of Electron have different environment requirements. If you see errors due to a mismatched environment when running the project, refer to the official [Electron documentation](https://releases.electronjs.org/releases/stable) to choose the appropriate Electron and Node.js versions.
2. To install the dependencies, open a terminal in your project root directory and run the following commands::
* macOS
```bash
npm install
```
* Windows
```bash
npm install -D --arch=ia32 electron
npm install
```
* On Windows, you must first install the 32-bit version of Electron by running `npm install -D --arch=ia32 electron`, and then run `npm install`. Otherwise, you may encounter the error: “Not a valid Win32 application.”
* If a `node_modules` folder exists in the project root directory, delete it before running `npm install` to avoid potential errors.
**Manual Integration**
Compile the latest SDK from the [Electron SDK repository](https://github.com/AgoraIO-Extensions/Electron-SDK/tree/main/) and integrate it into your application.
## Implement Voice Calling [#implement-voice-calling-5]
This section guides you through the implementation of basic real-time audio interaction in your app.
The following figure illustrates the essential steps:

This guide includes [complete sample code](#complete-sample-code) that demonstrates implementing basic real-time interaction. To understand the core API calls in the sample code, review the following implementation steps.
### Set up the main process [#set-up-the-main-process]
The `main.js` file is the entry point for your Electron application. It defines the main process, which is responsible for creating and managing browser windows. This script initializes the app, loads the UI from `index.html`, and ensures proper behavior across platforms.
```js
const { app, BrowserWindow } = require("electron");
const path = require("path");
// If using Electron 9.x or later, set allowRendererProcessReuse to false
app.allowRendererProcessReuse = false;
function createWindow() {
// Create the browser window
const mainWindow = new BrowserWindow({
width: 800,
height: 600,
webPreferences: {
// preload: path.join(__dirname, "renderer.js"),
// Enable Node integration and disable context isolation
nodeIntegration: true,
contextIsolation: false,
},
});
// Load the contents of the index.html file
mainWindow.loadFile("./index.html");
// Open the Developer Tools
mainWindow.webContents.openDevTools();
}
// Manage the browser window for the Electron app
app.whenReady().then(() => {
createWindow();
// On macOS, create a new window if none are open
app.on("activate", function () {
if (BrowserWindow.getAllWindows().length === 0) {
createWindow();
}
});
});
// Quit the Electron app when all windows are closed (except on macOS)
app.on("window-all-closed", function () {
if (process.platform !== "darwin") app.quit();
});
```
### Handle permissions [#handle-permissions-3]
Perform this step only when the target platform is macOS. Starting with macOS v10.14, you must check and obtain permission before accessing the microphone. Use Electron’s `askForMediaAccess` method to request the permission from the user.
Add the following code to the `main.js` file:
```js
// Check and request microphone permission
async function checkAndApplyDeviceAccessPrivilege() {
const micPrivilege = systemPreferences.getMediaAccessStatus('microphone');
console.log(`Microphone privilege before applying: ${micPrivilege}`);
if (micPrivilege !== 'granted') {
await systemPreferences.askForMediaAccess('microphone');
console.log('Requested microphone access from user');
}
}
checkAndApplyDeviceAccessPrivilege();
```
### Import dependencies [#import-dependencies]
Import the modules and functions required to build the app using Voice SDK. Add the following code to `renderer.js`:
```js
const {
createAgoraRtcEngine,
ChannelProfileType,
ClientRoleType,
} = require("agora-electron-sdk");
```
### Specify connection parameters [#specify-connection-parameters]
Provide the App ID, temporary token, and the channel name you used when generating the token. The engine uses these values to initialize and join the channel.
```json
// Enter your App ID
const APPID = "<-- Insert App Id -->";
// Enter your temporary token
let token = "<-- Insert Token -->";
// Enter the channel name used when generating the token
const channel = "<-- Insert Channel Name -->";
// Specify a unique user ID for this session
let uid = 123;
```
### Initialize the engine [#initialize-the-engine-4]
For real-time communication, create an `IRtcEngine` object by calling `createAgoraRtcEngine` and then call `initialize` with `RtcEngineContext` to specify the [App ID](manage-agora-account.md). Call `registerEventHandler` to register a custom [event handler](#subscribe-to-voice-sdk-events) for managing user interactions within the channel.
```js
let rtcEngine;
const os = require("os");
const path = require("path");
const sdkLogPath = path.resolve(os.homedir(), "./test.log");
// Create RtcEngine instance
rtcEngine = createAgoraRtcEngine();
// Initialize RtcEngine instance
rtcEngine.initialize({
appId: APPID,
logConfig: { filePath: sdkLogPath }
});
```
### Join a channel [#join-a-channel-5]
To join a channel, call `joinChannel` with the following parameters:
* **Channel name**: The name of the channel to join. Clients that pass the same channel name join the same channel. If a channel with the specified name does not exist, it is created when the first user joins.
* **Authentication token**: A dynamic key that authenticates a user when the client joins a channel. In a production environment, you obtain a token from a [token server](build/set-up-token-authentication/deploy-token-server.mdx) in your security infrastructure. For the purpose of this guide [Generate a temporary token](manage-agora-account.md).
* **User ID**: A 32-bit signed integer that identifies a user in the channel. You can specify a unique user ID for each user yourself. If you set the user ID to `0` when joining a channel, the SDK generates a random number for the user ID and returns the value in the `onJoinChannelSuccess` callback.
* **Channel media options**: Configure `ChannelMediaOptions` to define publishing and subscription settings, optimize performance for your specific use-case, and set optional parameters.
For Voice Calling, set the `channelProfile` to `ChannelProfileCommunication` and the `clientRoleType` to `ClientRoleBroadcaster`.
```js
// Join the channel using a temporary token
rtcEngine.joinChannel(token, channel, uid, {
// Set the channel profile to communication
channelProfile: ChannelProfileType.ChannelProfileCommunication,
// Set the user role to broadcaster; keep the default value for audience role
clientRoleType: ClientRoleType.ClientRoleBroadcaster,
// Publish audio collected from the microphone
publishMicrophoneTrack: true,
// Automatically subscribe to all audio streams
autoSubscribeAudio: true,
});
```
### Register event handlers [#register-event-handlers]
Call the `registerEventHandler` method to register the following callback events:
* `onJoinChannelSuccess`: Triggered when the local user successfully joins a channel.
* `onUserJoined`: Triggered when a remote user joins the current channel.
* `onUserOffline`: Triggered when a remote user leaves the current channel.
```js
const EventHandles = {
// Listen for the local user joining the channel
onJoinChannelSuccess: ({ channelId, localUid }, elapsed) => {
console.log('Successfully joined channel: ' + channelId);
},
// Listen for remote users joining the channel
onUserJoined: ({ channelId, localUid }, remoteUid, elapsed) => {
console.log('Remote user ' + remoteUid + ' joined');
},
// Listen for users leaving the channel
onUserOffline: ( { channelId, localUid }, remoteUid, reason ) => {
console.log('Remote user ' + remoteUid + ' left the channel');
},
};
// Register the event handler
rtcEngine.registerEventHandler(EventHandles);
```
To ensure that you receive all Voice SDK events, set the Agora Engine event handler before joining a channel.
### Start and close the app [#start-and-close-the-app-3]
When a user launches your app, start Voice Calling. When a user closes the app, stop Voice Calling and release resources.
1. To start Voice Calling, [initialize the engine](#initialize-the-engine) and [join a channel](#join-a-channel).
2. When Voice Calling ends, leave the channel and clean up resources:
```javascript
// Leave the channel
rtcEngine.leaveChannel();
```
When you no longer need to interact, unregister the event handler and call `release` to release engine resources.
```javascript
// Unregister the event handler
rtcEngine.unregisterEventHandler(EventHandles);
// Release the engine
rtcEngine.release();
```
After destroying the engine, you can no longer use SDK methods and callbacks. To use the real-time interaction functions again, create a new engine instance. See [Initialize the engine](#initialize-the-engine) for details.
### Complete sample code [#complete-sample-code-5]
A complete code sample demonstrating the basic process of real-time interaction is provided for your reference. Replace the entire contents of the `main.js` and `renderer.js` with the following code samples:
**`main.js`**
```js
const { app, BrowserWindow, systemPreferences } = require("electron");
const path = require("path");
// If using Electron 9.x or later, set allowRendererProcessReuse to false
app.allowRendererProcessReuse = false;
// Check and request device permissions (macOS only)
async function checkAndApplyDeviceAccessPrivilege() {
if (process.platform === "darwin") {
// Check and request microphone permission
const micPrivilege = systemPreferences.getMediaAccessStatus('microphone');
console.log(`Microphone privilege before applying: \${micPrivilege}`);
if (micPrivilege !== 'granted') {
await systemPreferences.askForMediaAccess('microphone');
console.log('Requested microphone access from user');
}
}
}
function createWindow() {
// Create a browser window
const mainWindow = new BrowserWindow({
width: 800,
height: 600,
webPreferences: {
// preload: path.join(__dirname, "renderer.js"),
// Set nodeIntegration to true and contextIsolation to false
nodeIntegration: true,
contextIsolation: false,
},
});
// Load the content of the index.html file
mainWindow.loadFile("./index.html");
// Open Developer Tools
mainWindow.webContents.openDevTools();
}
// Manage the browser window for the Electron app
app.whenReady().then(async () => {
await checkAndApplyDeviceAccessPrivilege();
createWindow();
// Create a new window if none are open (macOS specific)
app.on("activate", function () {
if (BrowserWindow.getAllWindows().length === 0) {
createWindow();
}
});
});
// Quit the Electron app when all windows are closed (Windows specific)
app.on("window-all-closed", function () {
if (process.platform !== "darwin") app.quit();
});
```
**`renderer.js`**
```js
const {
createAgoraRtcEngine,
ChannelProfileType,
ClientRoleType,
} = require("agora-electron-sdk");
let rtcEngine;
// Enter your App ID
const APPID = "<-- Insert App Id -->";
// Enter your temporary token
let token = "<-- Insert Token -->";
// Enter the channel name used when generating the token
const channel = "<-- Insert Channel Name -->";
// User ID, must be unique within the channel
let uid = 123;
const EventHandles = {
// Listen for the local user joining the channel
onJoinChannelSuccess: ({ channelId, localUid }, elapsed) => {
console.log('Successfully joined channel: ' + channelId);
},
// Listen for remote users joining the channel
onUserJoined: ({ channelId, localUid }, remoteUid, elapsed) => {
console.log('Remote user ' + remoteUid + ' joined');
},
// Listen for users leaving the channel
onUserOffline: ( { channelId, localUid }, remoteUid, reason ) => {
console.log('Remote user ' + remoteUid + ' left the channel');
},
};
window.onload = () => {
const os = require("os");
const path = require("path");
const sdkLogPath = path.resolve(os.homedir(), "./test.log");
// Create an instance of RtcEngine
rtcEngine = createAgoraRtcEngine();
// Initialize the RtcEngine instance
rtcEngine.initialize({
appId: APPID,
logConfig: { filePath: sdkLogPath }
});
// Register the event callbacks
rtcEngine.registerEventHandler(EventHandles);
// Join the channel using a temporary token
rtcEngine.joinChannel(token, channel, uid, {
// Set the channel profile to communication
channelProfile: ChannelProfileType.ChannelProfileCommunication,
// Set the user role to broadcaster; keep default for audience
clientRoleType: ClientRoleType.ClientRoleBroadcaster,
// Publish audio captured by the microphone
publishMicrophoneTrack: true,
// Automatically subscribe to all audio streams
autoSubscribeAudio: true,
});
};
```
* In `renderer.js`, replace the values for `APPID`, `token`, and `channel` with your App ID, the temporary token from Agora Console, and the channel name you used to generate the token.
* If you're targeting macOS v10.14 or later, add the device permission code to `main.js`. For more details, see [Get device permissions](#set-up-the-main-process).
To test the complete code, see [Test the sample code](#test-the-sample-code).
### Create a user interface [#create-a-user-interface-5]
To create a minimal interface, add the following code to `index.html`:
**Sample code to create the user interface**
```html
Electron Voice Quickstart
Electron Voice Quickstart
```
## Test the sample code [#test-the-sample-code-5]
Take the following steps to test the sample code:
1. Update the `APPID`, `token`, and `channel` parameter values in your code.
2. To run the app, execute the following command in the project root directory:
```bash
npm start
```
3. Invite a friend to run the demo app on a second device. Alternatively, use the [Web demo](https://webdemo.agora.io/basicVideoCall/index.html) to join the same channel.
* If users on both devices join the channel as hosts, they can hear each other.
* If one user joins as host and the other as audience, the audience can hear the host.
## Reference [#reference-5]
This section contains content that completes the information on this page, or points you to documentation that explains other aspects to this product.
* If a firewall is deployed in your network environment, refer to [Connect with Cloud Proxy](build/manage-connection-and-quality/cloud-proxy.mdx) to use Agora services normally.
### Next steps [#next-steps-5]
After implementing the quickstart sample, read the following documents to learn more:
* To ensure communication security in a test or production environment, best practice is to obtain and use a token from an authentication server. For details, see [Secure authentication with tokens](build/set-up-token-authentication/use-tokens.mdx).
### Sample project [#sample-project-5]
Agora provides open source sample projects on [GitHub](https://github.com/AgoraIO-Extensions/Electron-SDK/tree/main/example/src/renderer/examples) for your reference. Download or view the [JoinChannelAudio](https://github.com/AgoraIO-Extensions/Electron-SDK/blob/main/example/src/renderer/examples/basic/JoinChannelAudio/JoinChannelAudio.tsx) project for a more detailed example.
### API Reference [#api-reference-5]
* [`createAgoraRtcEngine`](https://api-ref.agora.io/en/voice-sdk/electron/4.x/API/class_irtcengine.html#api_createagorartcengine)
* [`joinChannel`](https://api-ref.agora.io/en/voice-sdk/electron/4.x/API/class_irtcengine.html#api_irtcengine_joinchannel2)
* [`IRtcEngineEventHandler`](https://api-ref.agora.io/en/voice-sdk/electron/4.x/API/class_irtcengineeventhandler.html#class_irtcengineeventhandler)
* [`leaveChannel`](https://api-ref.agora.io/en/voice-sdk/electron/4.x/API/class_irtcengine.html#api_irtcengine_leavechannel2)
* [`release`](https://api-ref.agora.io/en/voice-sdk/electron/4.x/API/class_irtcengine.html#api_irtcengine_release)
### Frequently asked questions [#frequently-asked-questions-4]
* [How can I listen for audience joining or leaving a channel?](/en/api-reference/faq/integration/audience_event)
* [How can I solve channel-related issues?](/en/api-reference/faq/integration/channel)
* [How can I set the log file?](/en/api-reference/faq/integration/set_log_file)
### See also [#see-also-5]
* [Error codes](reference/error-codes.mdx)
* [Connection status management](build/manage-connection-and-quality/connection-status-management.mdx)
<_PlatformProcessedMarker close="true" />
<_PlatformPanel platform="flutter">
<_PlatformProcessedMarker groupMode="structured" canonicalPlatform="web" platform="flutter" />
This Flutter quickstart shows you how to create a basic Voice Calling app using the Agora Voice SDK.
## Understand the tech [#understand-the-tech-6]
To start a Voice Calling session, implement the following steps in your app:
* **Initialize the Agora Engine**: Before calling other APIs, create and initialize an Agora Engine instance.
* **Join a channel**: Call methods to create and join a channel.
* **Send and receive audio**: All users can publish streams to the channel and subscribe to audio streams published by other users in the channel.

## Prerequisites [#prerequisites-6]
* [Flutter](https://docs.flutter.dev/get-started/install) 2.10.5 or higher with Dart 2.14.0 or higher.
* [Android Studio](https://developer.android.com/studio), IntelliJ, VS Code, or any other IDE that supports Flutter. See [Set up an editor](https://docs.flutter.dev/get-started/editor).
* Prepare your development and testing environment according to your [target platform](reference/supported-platforms.md).
Run the `flutter doctor` command to confirm that your development environment is set up correctly for Flutter development.
* A microphone
* A valid Agora account and project. Please refer to [Agora account management](manage-agora-account.md) for details.
## Set up your project [#set-up-your-project-6]
This section shows you how to set up your Flutter project and install the Agora Voice SDK.
Create a new project
Add to an existing project
From the Terminal, run the following commands to create a new project named `agora_project`, or follow the [steps for your IDE](https://docs.flutter.dev/get-started/test-drive?tab=vscode#choose-your-ide):
```bash
flutter create agora_project
cd agora_project
```
To add Voice Calling to your existing project:
1. Open your Flutter project and navigate to the `lib` folder.
2. Add a new file to the `lib` folder and name it `agora_logic.dart`.
### Install the SDK [#install-the-sdk-6]
Install the Agora Voice SDK and other dependencies.
1. Add the [latest version](https://pub.dev/packages/agora_rtc_engine) of Agora Voice SDK to your Flutter project:
```bash
flutter pub add agora_rtc_engine
```
2. Add the permission processing package:
```bash
flutter pub add permission_handler
```
The `dependencies` in your `pubspec.yaml` file should look like the following:
```yaml
dependencies:
flutter:
sdk: flutter
agora_rtc_engine: ^6.5.0 # Agora Flutter SDK, please use the latest version
permission_handler: ^11.3.1 # Package for managing runtime permissions
cupertino_icons: ^1.0.8
```
3. Install the dependencies.
Execute the following command in the project path:
```bash
flutter pub get
```
## Implement Voice Calling [#implement-voice-calling-6]
This section guides you through the implementation of basic real-time audio interaction in your app.
The following figure illustrates the essential steps:

This guide includes [complete sample code](#complete-sample-code) that demonstrates implementing basic real-time interaction. To understand the core API calls in the sample code, review the following implementation steps.
### Import packages [#import-packages]
Import the following packages in your dart file.
```dart
import 'dart:async';
import 'package:agora_rtc_engine/agora_rtc_engine.dart';
import 'package:flutter/material.dart';
import 'package:permission_handler/permission_handler.dart';
```
### Initialize the engine [#initialize-the-engine-5]
For real-time communication, initialize an `RtcEngine` instance. Use `RtcEngineContext` to specify the [App ID](manage-agora-account.md), and other configuration parameters. In your dart file, add the following code:
```dart
// Set up the Agora RTC engine instance
Future _initializeAgoraVoiceSDK() async {
_engine = createAgoraRtcEngine();
await _engine.initialize(const RtcEngineContext(
appId: "<-- Insert app Id -->",
channelProfile: ChannelProfileType.channelProfileCommunication,
));
}
```
### Join a channel [#join-a-channel-6]
To join a channel, call `joinChannel` with the following parameters:
* **Channel name**: The name of the channel to join. Clients that pass the same channel name join the same channel. If a channel with the specified name does not exist, it is created when the first user joins.
* **Authentication token**: A dynamic key that authenticates a user when the client joins a channel. In a production environment, you obtain a token from a [token server](build/set-up-token-authentication/deploy-token-server.mdx) in your security infrastructure. For the purpose of this guide [Generate a temporary token](manage-agora-account.md).
* **User ID**: A 32-bit signed integer that identifies a user in the channel. You can specify a unique user ID for each user yourself. If you set the user ID to `0` when joining a channel, the SDK generates a random number for the user ID and returns the value in the `onJoinChannelSuccess` callback.
* **Channel media options**: Configure `ChannelMediaOptions` to define publishing and subscription settings, optimize performance for your specific use-case, and set optional parameters.
For Voice Calling, set the `clientRoleType` to `clientRoleBroadcaster`.
```dart
// Join a channel
Future _joinChannel() async {
await _engine.joinChannel(
token: token,
channelId: channel,
options: const ChannelMediaOptions(
autoSubscribeAudio: true, // Automatically subscribe to all audio streams
publishMicrophoneTrack: true, // Publish microphone-captured audio
// Use clientRoleBroadcaster to act as a host or clientRoleAudience for audience
clientRoleType: ClientRoleType.clientRoleBroadcaster,
),
uid: 0,
);
}
```
### Subscribe to Voice SDK events [#subscribe-to-voice-sdk-events-4]
The SDK provides the `RtcEngineEventHandler` for subscribing to channel events. To use it, pass an instance of `RtcEngineEventHandler` to `registerEventHandler` and implement the event methods you want to handle.
Call `registerEventHandler` to bind the event handler to the SDK.
```dart
// Register an event handler for Agora RTC
void _setupEventHandlers() {
_engine.registerEventHandler(
RtcEngineEventHandler(
onJoinChannelSuccess: (RtcConnection connection, int elapsed) {
debugPrint("Local user ${connection.localUid} joined");
},
onUserJoined: (RtcConnection connection, int remoteUid, int elapsed) {
debugPrint("Remote user $remoteUid joined");
setState(() {
_remoteUid = remoteUid; // Store remote user ID
});
},
onUserOffline: (RtcConnection connection, int remoteUid, UserOfflineReasonType reason) {
debugPrint("Remote user $remoteUid left");
setState(() {
_remoteUid = null; // Remove remote user ID
});
},
),
);
}
```
To ensure that you receive all Voice SDK events, register the event handler before joining a channel.
### Handle permissions [#handle-permissions-4]
Request the microphone permission for Voice Calling.
```dart
// Requests microphone permission
Future _requestPermissions() async {
await [Permission.microphone].request();
}
```
If your target platform is iOS or macOS, add the microphone permission declaration required for real-time interaction to [`Info.plist`](https://help.apple.com/xcode/mac/current/#/dev3f399a2a6).
* Microphone: Set the `key` to `Privacy - Microphone Usage Description` and the `value` to the purpose of use, such as `for audio calls`.
### Start and close the app [#start-and-close-the-app-4]
To start Voice Calling, request microphone permission, initialize the Agora SDK instance, set up an event handler, and join a channel.
```dart
await _requestPermissions();
await _initializeAgoraVoiceSDK();
_setupEventHandlers();
await _joinChannel();
```
To stop Voice Calling, leave the channel and release the engine instance.
```dart
// Leaves the channel and releases resources
Future _cleanupAgoraEngine() async {
await _engine.leaveChannel();
await _engine.release();
}
```
After you call `release`, you no longer have access to the methods and callbacks of the SDK. To use Voice Calling features again, create a new engine instance.
### Complete sample code [#complete-sample-code-6]
A complete code sample demonstrating the basic process of real-time interaction is provided for your reference. To use the sample code, copy the following code to replace the entire contents of the `.dart` file in your project.
```dart
import 'dart:async';
import 'package:agora_rtc_engine/agora_rtc_engine.dart';
import 'package:flutter/material.dart';
import 'package:permission_handler/permission_handler.dart';
void main() => runApp(const MyApp());
// Fill in the app ID obtained from Agora Console
const appId = "<-- Insert app Id -->";
// Fill in the temporary token generated from Agora Console
const token = "<-- Insert token -->";
// Fill in the channel name you used to generate the token
const channel = "<-- Insert channel name -->";
// Main App Widget
class MyApp extends StatelessWidget {
const MyApp({Key? key}) : super(key: key);
@override
Widget build(BuildContext context) {
return const MaterialApp(
home: _MainScreen(),
);
}
}
// Voice call Screen Widget
class _MainScreen extends StatefulWidget {
const _MainScreen({Key? key}) : super(key: key);
@override
_MainScreenScreenState createState() => _MainScreenScreenState();
}
class _MainScreenScreenState extends State<_MainScreen> {
late RtcEngine _engine; // Stores Agora RTC Engine instance
int? _remoteUid; // Stores the remote user's UID
@override
void initState() {
super.initState();
_startVoiceCalling();
}
// Initializes Agora SDK
Future _startVoiceCalling() async {
await _requestPermissions();
await _initializeAgoraVoiceSDK();
_setupEventHandlers();
await _joinChannel();
}
// Requests microphone permission
Future _requestPermissions() async {
await [Permission.microphone].request();
}
// Set up the Agora RTC engine instance
Future _initializeAgoraVoiceSDK() async {
_engine = createAgoraRtcEngine();
await _engine.initialize(const RtcEngineContext(
appId: appId,
channelProfile: ChannelProfileType.channelProfileLiveBroadcasting,
));
}
// Register an event handler for Agora RTC
void _setupEventHandlers() {
_engine.registerEventHandler(
RtcEngineEventHandler(
onJoinChannelSuccess: (RtcConnection connection, int elapsed) {
debugPrint("Local user \${connection.localUid} joined");
},
onUserJoined: (RtcConnection connection, int remoteUid, int elapsed) {
debugPrint("Remote user \$remoteUid joined");
setState(() {
_remoteUid = remoteUid; // Store remote user ID
});
},
onUserOffline: (RtcConnection connection, int remoteUid, UserOfflineReasonType reason) {
debugPrint("Remote user \$remoteUid left");
setState(() {
_remoteUid = null; // Remove remote user ID
});
},
),
);
}
// Join a channel
Future _joinChannel() async {
await _engine.joinChannel(
token: token,
channelId: channel,
options: const ChannelMediaOptions(
autoSubscribeAudio: true,
publishMicrophoneTrack: true,
clientRoleType: ClientRoleType.clientRoleBroadcaster,
),
uid: 0,
);
}
@override
void dispose() {
_cleanupAgoraEngine();
super.dispose();
}
// Leaves the channel and releases resources
Future _cleanupAgoraEngine() async {
await _engine.leaveChannel();
await _engine.release();
}
@override
Widget build(BuildContext context) {
return MaterialApp(
title: 'Agora Voice Call',
home: Scaffold(
appBar: AppBar(
title: const Text('Agora Voice Call'),
),
body: Center(
child: Text(
_remoteUid != null
? "Remote user $_remoteUid joined"
: "No remote user in the channel", // Show appropriate message
style: const TextStyle(fontSize: 18),
),
),
),
);
}
}
```
In the `appId` and `token` fields, enter the corresponding values you obtained from Agora Console. Use the same `channel` name you filled in when generating the temporary token.
### Create a user interface [#create-a-user-interface-6]
To connect the sample code to your existing UI, ensure that your widget tree includes the `_remoteVideo` and `_localVideo` widgets used to [Display the local video](#display-the-local-video) and [Display remote video](#display-remote-video).
Alternatively, use the following sample code to generate a basic user interface:
**Sample code to create the user interface**
Use the following code sample to build a basic user interface:
```dart
// Build UI
@override
Widget build(BuildContext context) {
return MaterialApp(
title: 'Agora Voice Call',
home: Scaffold(
appBar: AppBar(
title: const Text('Agora Voice Call'),
),
body: Center(
child: Text(
_remoteUid != null
? "Remote user $_remoteUid joined"
: "No remote user in the channel", // Show appropriate message
style: const TextStyle(fontSize: 18),
),
),
),
);
}
```
## Test the sample code [#test-the-sample-code-6]
Take the following steps to test the sample code:
1. In `main.dart` update the values for `appId`, and `token` with values from Agora Console. Fill in the same `channel` name you used to generate the token.
2. Connect a target device to your development computer.
3. Open Terminal and execute the following command in the project folder to run the sample project:
```bash
flutter run
```
4. Launch the App, grant microphone permission.
5. On a second target device, repeat the previous steps to install and launch the app. Test the following use-cases:
* If users on both devices join the channel as hosts, they can hear each other.
* If one user joins as host and the other as audience, the audience can hear the host.
## Reference [#reference-6]
This section contains content that completes the information on this page, or points you to documentation that explains other aspects to this product.
* If a firewall is deployed in your network environment, refer to [Connect with Cloud Proxy](build/manage-connection-and-quality/cloud-proxy.mdx) to use Agora services normally.
### Next steps [#next-steps-6]
After implementing the quickstart sample, read the following documents to learn more:
* To ensure communication security in a test or production environment, best practice is to obtain and use a token from an authentication server. For details, see [Secure authentication with tokens](build/set-up-token-authentication/use-tokens.mdx).
### Sample project [#sample-project-6]
Agora provides open source sample projects on [GitHub](https://github.com/AgoraIO-Extensions/Agora-Flutter-SDK/tree/main/example/lib/examples) for your reference. Download or view [join\_channel\_audio.dart](https://github.com/AgoraIO-Extensions/Agora-Flutter-SDK/tree/main/example/lib/examples/basic/join_channel_audio) for a more detailed example.
### API reference [#api-reference-6]
* [`registerEventHandler`](https://api-ref.agora.io/en/voice-sdk/flutter/6.x/API/class_irtcengine.html#api_irtcengine_addhandler)
* [`setClientRole`](https://api-ref.agora.io/en/voice-sdk/flutter/6.x/API/class_irtcengine.html#api_irtcengine_setclientrole2)
* [`setChannelProfile`](https://api-ref.agora.io/en/voice-sdk/flutter/6.x/API/class_irtcengine.html#api_irtcengine_setchannelprofile)
* [`joinChannel`](https://api-ref.agora.io/en/voice-sdk/flutter/6.x/API/class_irtcengine.html#api_irtcengine_joinchannel2)
* [`leaveChannel`](https://api-ref.agora.io/en/voice-sdk/flutter/6.x/API/class_irtcengine.html#api_irtcengine_leavechannel2)
### Frequently asked questions [#frequently-asked-questions-5]
* [How can I listen for audience joining or leaving a channel?](/en/api-reference/faq/integration/audience_event)
* [How can I solve channel-related issues?](/en/api-reference/faq/integration/channel)
* [How can I set the log file?](/en/api-reference/faq/integration/set_log_file)
### See also [#see-also-6]
* [Error codes](reference/error-codes.mdx)
* [Connection status management](build/manage-connection-and-quality/connection-status-management.mdx)
<_PlatformProcessedMarker close="true" />
<_PlatformPanel platform="react-native">
<_PlatformProcessedMarker groupMode="structured" canonicalPlatform="web" platform="react-native" />
This React Native quickstart shows you how to create a basic Voice Calling app using the Agora Voice SDK.
## Understand the tech [#understand-the-tech-7]
To start a Voice Calling session, implement the following steps in your app:
* **Initialize the Agora Engine**: Before calling other APIs, create and initialize an Agora Engine instance.
* **Join a channel**: Call methods to create and join a channel.
* **Send and receive audio**: All users can publish streams to the channel and subscribe to audio streams published by other users in the channel.

## Prerequisites [#prerequisites-7]
* React Native 0.60 or later. For more information, see [Get Started with React Native](https://reactnative.dev/docs/environment-setup).
* Node 16 or later
For your target platform, prepare the following:
Android
iOS
* A machine running macOS, Windows, or Linux
* [Java Development Kit (JDK) 11](https://openjdk.org/projects/jdk/11/) or later
* Latest version of Android Studio
* A physical or virtual mobile device running Android 5.0 or later
* A machine running macOS
* Xcode 10 or later
* CocoaPods
* A physical or virtual mobile device running iOS 9.0 or later.
If you use React Native 0.63 or later, ensure your iOS version is 10.0 or later.
* A microphone
* A valid Agora account and project. Please refer to [Agora account management](manage-agora-account.md) for details.
## Set up your project [#set-up-your-project-7]
This section shows you how to set up your React Native project and install the Agora Voice SDK.
### Create a project [#create-a-project]
To create a new application using [React Native Community CLI](https://github.com/react-native-community/cli), see [Get Started Without a Framework](https://reactnative.dev/docs/getting-started-without-a-framework).
### Install the SDK [#install-the-sdk-7]
Download and add the Agora Voice SDK to your React Native project. Choose either of the following methods:
npm
yarn
In your project folder, execute the following command:
```bash
npm i --save react-native-agora
```
In your project folder, execute the following commands:
```bash
# Install yarn
npm install -g yarn
# Use yarn to download Agora React Native SDK
yarn add react-native-agora
```
React Native 0.60.0 and later support automatic linking of native modules. Manual linking is not recommended. See [Autolinking](https://github.com/react-native-community/cli/blob/master/docs/autolinking.md) for details
## Implement Voice Calling [#implement-voice-calling-7]
This section guides you through the implementation of basic real-time audio interaction in your app.
The following figure illustrates the essential steps:

This guide includes [complete sample code](#complete-sample-code) that demonstrates implementing basic real-time interaction. To understand the core API calls in the sample code, review the following implementation steps and use the code in your `App.tsx` file.
### Import dependencies [#import-dependencies-1]
Add the required Agora dependencies to your app.
```tsx
import {
createAgoraRtcEngine,
ChannelProfileType,
ClientRoleType,
IRtcEngine,
RtcConnection,
IRtcEngineEventHandler,
} from 'react-native-agora';
```
### Initialize the engine [#initialize-the-engine-6]
For real-time communication, call `createAgoraRtcEngine` to create an `RtcEngine` instance, and then `initialize` the engine using `RtcEngineContext` to specify the [App ID](manage-agora-account.md).
```tsx
const appId = '<-- Insert app ID -->';
const setupVoiceSDKEngine = async () => {
if (Platform.OS === 'android') { await getPermission(); }
agoraEngineRef.current = createAgoraRtcEngine();
const agoraEngine = agoraEngineRef.current;
await agoraEngine.initialize({ appId: appId });
};
```
### Join a channel [#join-a-channel-7]
To join a channel, call `joinChannel` with the following parameters:
* **Channel name**: The name of the channel to join. Clients that pass the same channel name join the same channel. If a channel with the specified name does not exist, it is created when the first user joins.
* **Authentication token**: A dynamic key that authenticates a user when the client joins a channel. In a production environment, you obtain a token from a [token server](build/set-up-token-authentication/deploy-token-server.mdx) in your security infrastructure. For the purpose of this guide [Generate a temporary token](manage-agora-account.md).
* **User ID**: A 32-bit signed integer that identifies a user in the channel. You can specify a unique user ID for each user yourself. If you set the user ID to `0` when joining a channel, the SDK generates a random number for the user ID and returns the value in the `onJoinChannelSuccess` callback.
* **Channel media options**: Configure `ChannelMediaOptions` to define publishing and subscription settings, optimize performance for your specific use-case, and set optional parameters.
For Voice Calling, set the `channelProfile` to `ChannelProfileCommunication` and the `clientRoleType` to `ClientRoleBroadcaster`.
```tsx
const token = '<-- Insert token -->';
const channelName = '<-- Insert channel name -->';
const localUid = 0; // Local user UID, no need to modify
// Define the join method called after clicking the join channel button
const join = async () => {
if (isJoined) {
return;
}
// Join the channel as a broadcaster
agoraEngineRef.current?.joinChannel(token, channelName, localUid, {
// Set channel profile to live broadcast
channelProfile: ChannelProfileType.ChannelProfileCommunication,
// Set user role to broadcaster
clientRoleType: ClientRoleType.ClientRoleBroadcaster,
// Publish audio collected by the microphone
publishMicrophoneTrack: true,
// Automatically subscribe to all audio streams
autoSubscribeAudio: true,
});
};
```
Since the Agora Engine runs locally, reloading the app using the Metro bundler may cause the engine reference to be lost, preventing channel joining. To resolve this issue, restart the app.
### Subscribe to Voice SDK events [#subscribe-to-voice-sdk-events-5]
The Voice SDK provides an interface for subscribing to channel events. To use it, create an instance of `IRtcEngineEventHandler` and implement the event methods you want to handle. Call `registerEventHandler` to register your custom event handler.
```tsx
const [remoteUid, setRsemoteUid] = useState(0); // Uid of the remote user
const setupEventHandler = () => {
eventHandler.current = {
// Triggered when the local user successfully joins a channel
onJoinChannelSuccess: () => {
setMessage('Successfully joined channel: ' + channelName);
setIsJoined(true);
},
// Triggered when a remote user joins the channel
onUserJoined: (_connection: RtcConnection, uid: number) => {
setMessage('Remote user ' + uid + ' joined');
setRemoteUid(uid);
},
// Triggered when a remote user leaves the channel
onUserOffline: (_connection: RtcConnection, uid: number) => {
setMessage('Remote user ' + uid + ' left the channel');
setRemoteUid(uid);
},
};
// Register the event handler
agoraEngineRef.current?.registerEventHandler(eventHandler.current);
};
```
To ensure that you receive all Voice SDK events, register the event handler before joining a channel.
### Handle permissions [#handle-permissions-5]
To access the microphone, ensure that the user grants the necessary permissions when the app starts.
Android
iOS
On Android devices, pop up a prompt box to obtain permission to use the microphone.
```tsx
// Import components related to Android device permissions
import {PermissionsAndroid, Platform} from 'react-native';
const getPermission = async () => {
if (Platform.OS === 'android') {
await PermissionsAndroid.requestMultiple([
PermissionsAndroid.PERMISSIONS.RECORD_AUDIO,
]);
}
};
```
In Xcode, open the `info.plist` file and add the following content to the list on the right to obtain the corresponding device permissions:
| Key | Type | Value |
| -------------------------------------- | ------ | ------------------------------------------------------------------------------------------- |
| Privacy - Microphone Usage Description | String | The purpose of using the microphone, for example, for a call or live interactive streaming. |
### Leave the channel [#leave-the-channel-2]
To exit a Voice Calling channel, call `leaveChannel`.
```tsx
const leave = () => {
// Leave the channel
agoraEngineRef.current?.leaveChannel();
setIsJoined(false);
};
```
### Clean up resources [#clean-up-resources]
Before closing your app, unregister the event handler and call `release` to free up resources.
```tsx
const cleanupAgoraEngine = () => {
return () => {
agoraEngineRef.current?.unregisterEventHandler(eventHandler.current!);
agoraEngineRef.current?.release();
};
};
```
After calling `release,` methods and callbacks of the SDK are no longer available. To use the SDK functions again, create a new engine instance.
### Complete sample code [#complete-sample-code-7]
A complete code sample demonstrating the basic process of real-time interaction is provided for your reference. To use the sample code, copy the code into `ProjectName/App.tsx` to quickly implement the basic functionality.
```tsx
// Import React Hooks
import React, { useRef, useState, useEffect } from 'react';
// Import user interface elements
import {
SafeAreaView,
StyleSheet,
Text,
View,
} from 'react-native';
// Import components related to obtaining Android device permissions
import { PermissionsAndroid, Platform } from 'react-native';
// Import Agora SDK
import {
createAgoraRtcEngine,
ChannelProfileType,
ClientRoleType,
IRtcEngine,
RtcConnection,
IRtcEngineEventHandler,
} from 'react-native-agora';
// Define basic information
const appId = '<-- Insert App ID -->';
const token = '<-- Insert Token -->';
const channelName = '<-- Insert Channel Name -->';
const localUid = 0; // Local user Uid, no need to modify
const App = () => {
const agoraEngineRef = useRef(); // IRtcEngine instance
const [isJoined, setIsJoined] = useState(false); // Whether the local user has joined the channel
const [remoteUid, setRemoteUid] = useState(0); // Uid of the remote user
const [message, setMessage] = useState(''); // User prompt message
const eventHandler = useRef(); // Implement callback functions
useEffect(() => {
const init = async () => {
await setupVoiceSDKEngine();
setupEventHandler();
};
init();
return () => {
cleanupAgoraEngine(); // Ensure this is synchronous
};
}, []); // Empty dependency array ensures it runs only once
const setupEventHandler = () => {
eventHandler.current = {
onJoinChannelSuccess: () => {
setMessage('Successfully joined channel: ' + channelName);
setIsJoined(true);
},
onUserJoined: (_connection: RtcConnection, uid: number) => {
setMessage('Remote user ' + uid + ' joined');
setRemoteUid(uid);
},
onUserOffline: (_connection: RtcConnection, uid: number) => {
setMessage('Remote user ' + uid + ' left the channel');
setRemoteUid(uid);
},
};
agoraEngineRef.current?.registerEventHandler(eventHandler.current);
};
const setupVoiceSDKEngine = async () => {
try {
if (Platform.OS === 'android') { await getPermission(); }
agoraEngineRef.current = createAgoraRtcEngine();
const agoraEngine = agoraEngineRef.current;
await agoraEngine.initialize({ appId: appId });
} catch (e) {
console.error(e);
}
};
// Define the join method called after clicking the join channel button
const join = async () => {
if (isJoined) {
return;
}
try {
// Join the channel as a broadcaster
agoraEngineRef.current?.joinChannel(token, channelName, localUid, {
// Set channel profile to live broadcast
channelProfile: ChannelProfileType.ChannelProfileCommunication,
// Set user role to broadcaster
clientRoleType: ClientRoleType.ClientRoleBroadcaster,
// Publish audio collected by the microphone
publishMicrophoneTrack: true,
// Automatically subscribe to all audio streams
autoSubscribeAudio: true,
});
} catch (e) {
console.log(e);
}
};
// Define the leave method called after clicking the leave channel button
const leave = () => {
try {
// Call leaveChannel method to leave the channel
agoraEngineRef.current?.leaveChannel();
setRemoteUid(0);
setIsJoined(false);
showMessage('Left the channel');
} catch (e) {
console.log(e);
}
};
const cleanupAgoraEngine = () => {
return () => {
agoraEngineRef.current?.unregisterEventHandler(eventHandler.current!);
agoraEngineRef.current?.release();
};
};
// Render user interface
return (
Agora Voice SDK Quickstart
Join Channel
Leave Channel
{isJoined ? (
You joined
) : (
Join a channel
)}
{isJoined && remoteUid !== 0 ? (
{remoteUid} joined
) : (
{isJoined ? 'Waiting for remote user to join' : ''}
)}
{message}
);
// Display information
function showMessage(msg: string) {
setMessage(msg);
}
};
const styles = StyleSheet.create({
button: {
paddingHorizontal: 25,
paddingVertical: 4,
fontWeight: 'bold',
color: '#ffffff',
backgroundColor: '#0055cc',
margin: 5,
},
main: {
flex: 1,
alignItems: 'center',
},
btnContainer: {
flexDirection: 'row',
justifyContent: 'center',
},
head: {
fontSize: 20,
},
messageContainer: {
position: 'absolute',
bottom: 20,
left: 0,
right: 0,
alignItems: 'center',
},
info: {
backgroundColor: '#ffffe0',
paddingHorizontal: 8,
paddingVertical: 4,
color: '#0000ff',
textAlign: 'center',
},
});
const getPermission = async () => {
if (Platform.OS === 'android') {
await PermissionsAndroid.requestMultiple([
PermissionsAndroid.PERMISSIONS.RECORD_AUDIO,
]);
}
};
export default App;
```
### Create a user interface [#create-a-user-interface-7]
Design a user interface for your project based on your application use-case. Add **Join channel** and **Leave channel** buttons to enable the user to join and leave a channel. To create such an interface, refer to the following code:
**Sample code to create the user interface**
```swift
// Import React Hooks
import React, { useState } from 'react';
// Import user interface elements
import {
SafeAreaView,
StyleSheet,
Text,
View,
} from 'react-native';
const localUid = 0; // Local user Uid, no need to modify
const App = () => {
const [isJoined, setIsJoined] = useState(false); // Whether the local user has joined the channel
const [remoteUid, setRemoteUid] = useState(0); // Uid of the remote user
const [message, setMessage] = useState(''); // User prompt message
// Render user interface
return (
Agora Voice SDK Quickstart
Join Channel
Leave Channel
{isJoined ? (
You joined
) : (
Join a channel
)}
{isJoined && remoteUid !== 0 ? (
{remoteUid} joined
) : (
{isJoined ? 'Waiting for remote user to join' : ''}
)}
{message}
);
};
const styles = StyleSheet.create({
button: {
paddingHorizontal: 25,
paddingVertical: 4,
fontWeight: 'bold',
color: '#ffffff',
backgroundColor: '#0055cc',
margin: 5,
},
main: {
flex: 1,
alignItems: 'center',
},
btnContainer: {
flexDirection: 'row',
justifyContent: 'center',
},
head: {
fontSize: 20,
},
messageContainer: {
position: 'absolute',
bottom: 20,
left: 0,
right: 0,
alignItems: 'center',
},
info: {
backgroundColor: '#ffffe0',
paddingHorizontal: 8,
paddingVertical: 4,
color: '#0000ff',
textAlign: 'center',
},
});
export default App;
```
## Test the sample code [#test-the-sample-code-7]
Take the following steps to test the sample code:
1. Update the values for `appId`, `token`, and `channelName` in your code.
2. Run the app.
Some simulators may not support all the functions of this project. Best practice is to run the project on a physical device.
Android
iOS
To run the app on an Android device:
1. Turn on the developer options of the Android device and connect the Android device to the computer through a USB cable.
2. In the project root directory, execute `npx react-native run-android`.
To run on the app on an iOS device:
1. Open the `ProjectName/ios/ProjectName.xcworkspace` folder using Xcode.
2. Connect the iOS device to your computer through a USB cable.
3. In Xcode, click the **Build and Run** button.
For detailed steps on running the app on a real Android or iOS device, please refer to [Running On Device](https://reactnative.dev/docs/running-on-device).
1. Launch the app and click the **Join channel** button to join a channel.
2. Invite a friend to install and run the app on a second device. Alternatively, use the [Web demo](https://webdemo.agora.io/basicVideoCall/index.html) to join the same channel. Once your friend joins the channel, you can talk to each other.
## Reference [#reference-7]
This section contains content that completes the information on this page, or points you to documentation that explains other aspects to this product.
* If a firewall is deployed in your network environment, refer to [Connect with Cloud Proxy](build/manage-connection-and-quality/cloud-proxy.mdx) to use Agora services normally.
### Next steps [#next-steps-7]
After implementing the quickstart sample, read the following documents to learn more:
* To ensure communication security in a test or production environment, best practice is to obtain and use a token from an authentication server. For details, see [Secure authentication with tokens](build/set-up-token-authentication/use-tokens.mdx).
### Sample project [#sample-project-7]
Agora provides open source sample projects on [GitHub](https://github.com/AgoraIO-Extensions/react-native-agora/blob/main/example/src/examples) for your reference. Download or view the [JoinChannelAudio](https://github.com/AgoraIO-Extensions/react-native-agora/tree/main/example/src/examples/basic/JoinChannelAudio) project for a more detailed example.
### API reference [#api-reference-7]
* [`createAgoraRtcEngine`](https://api-ref.agora.io/en/voice-sdk/react-native/4.x/API/class_irtcengine.html#api_createagorartcengine)
* [`initialize`](https://api-ref.agora.io/en/voice-sdk/react-native/4.x/API/class_irtcengine.html#api_irtcengine_initialize)
* [`registerEventHandler`](https://api-ref.agora.io/en/voice-sdk/react-native/4.x/API/class_irtcengine.html#api_irtcengine_addhandler)
* [`setChannelProfile`](https://api-ref.agora.io/en/voice-sdk/react-native/4.x/API/class_irtcengine.html#api_irtcengine_setchannelprofile)
* [`joinChannel`](https://api-ref.agora.io/en/voice-sdk/react-native/4.x/API/class_irtcengine.html#api_irtcengine_joinchannel2)
* [`leaveChannel`](https://api-ref.agora.io/en/voice-sdk/react-native/4.x/API/class_irtcengine.html#api_irtcengine_leavechannel2)
### Frequently asked questions [#frequently-asked-questions-6]
* [How can I listen for audience joining or leaving a channel?](/en/api-reference/faq/integration/audience_event)
* [How can I solve channel-related issues?](/en/api-reference/faq/integration/channel)
* [How can I set the log file?](/en/api-reference/faq/integration/set_log_file)
### See also [#see-also-7]
* [Error codes](reference/error-codes.mdx)
* [Connection status management](build/manage-connection-and-quality/connection-status-management.mdx)
<_PlatformProcessedMarker close="true" />
<_PlatformPanel platform="javascript">
<_PlatformProcessedMarker groupMode="structured" canonicalPlatform="web" platform="javascript" />
This JavaScript quickstart shows you how to create a basic Voice Calling app using the Agora Voice SDK.
## Understand the tech [#understand-the-tech-8]
To start a Voice Calling session, implement the following steps in your app:
* **Initialize the Agora Engine**: Before calling other APIs, create and initialize an Agora Engine instance.
* **Join a channel**: Call methods to create and join a channel.
* **Send and receive audio**: All users can publish streams to the channel and subscribe to audio streams published by other users in the channel.

React SDK and Web SDK relationship
The React SDK is built on Web SDK 4.x and includes its APIs. For example, `useLocalMicrophoneTrack` calls the Web SDK `createMicrophoneAudioTrack` method.
Use the React SDK for basic real-time audio and video features. For advanced or complex scenarios, use the Web SDK. When a feature requires the Web SDK, the React SDK documentation links to the relevant Web SDK API pages.
## Prerequisites [#prerequisites-8]
* A [supported browser](reference/supported-platforms.md).
* A JavaScript package manager such as [npm](https://www.npmjs.com/package/npm).
* A microphone
* A valid Agora account and project. Please refer to [Agora account management](manage-agora-account.md) for details.
## Set up your project [#set-up-your-project-8]
This section shows you how to set up your ReactJS project and install the Agora Voice SDK.
### Create a project [#create-a-project-1]
To create a new ReactJS project with the necessary dependencies:
1. Ensure that you have installed [Node.js LTS](https://nodejs.org/en) and `npm`.
2. Open a terminal and execute:
```bash
npm create vite@latest agora-sdk-quickstart -- --template react-ts
```
This creates a new project folder named `agora-sdk-quickstart`. Open the folder in your preferred IDE.
### Install the SDK [#install-the-sdk-8]
Use one of the following methods to install the project dependencies:
NPM
CDN
Navigate to the project folder and run the following command to install the Voice SDK:
```bash
npm i agora-rtc-react
```
To integrate React JS dependencies and the Agora SDK using CDN, add the following code to your HTML file:
```html
```
## Implement Voice Calling [#implement-voice-calling-8]
This section guides you through the implementation of basic real-time audio interaction in your app.
This guide includes [complete sample code](#complete-sample-code) that demonstrates implementing basic real-time interaction. To understand the core API calls in the sample code, review the following implementation steps.
### Import Agora hooks and components [#import-agora-hooks-and-components]
To use Voice SDK in your component, include the following imports:
```tsx
import {
LocalUser, // Plays the microphone audio track
RemoteUser, // Plays the remote user audio
useIsConnected, // Returns whether the SDK is connected to Agora's server
useJoin, // Automatically join and leave a channel on mount and unmount
useLocalMicrophoneTrack, // Create a local microphone audio track
usePublish, // Publish the local track
useRemoteUsers, // Retrieve the list of remote users
} from "agora-rtc-react";
import { useState } from "react";
import AgoraRTC, { AgoraRTCProvider } from "agora-rtc-react";
```
### Initialize the client [#initialize-the-client]
Use the `createClient` method provided by the SDK to create a client object for the `` component. Wrap the `` component with `` to enable state management and access operation-related hooks.
For Voice Calling, set the `mode` property of `ClientConfig` to `"rtc"`.
```tsx
const client = AgoraRTC.createClient({ mode: "rtc", codec: "vp8" });
return(
);
}
```
### Join a channel [#join-a-channel-8]
To join a channel, use the `useJoin` hook. You can specify the following `joinOptions`:
* **App ID**: [`appid`](manage-agora-account.md) identifies the project you created in Agora Console.
* **Channel name**: The name of the `channel` to join. Clients that pass the same channel name join the same channel. If a channel with the specified name does not exist, it is created when the first user joins.
* **Authentication token**: A `token` is a dynamic key that authenticates a user when the client joins a channel. In a production environment, you obtain a token from a [token server](build/set-up-token-authentication/deploy-token-server.mdx) in your security infrastructure. For the purpose of this guide [Generate a temporary token](manage-agora-account.md).
* **User ID**: `uid` is a 32-bit signed integer that identifies a user in the channel. You can specify a unique user ID for each user yourself. If you do not set a user ID or set it to `0` when joining a channel, the SDK generates a random number for the user ID and returns the value.
Add the following to `Basics`:
```tsx
const [appId, setAppId] = useState("<-- Insert App ID -->");
const [channel, setChannel] = useState("<-- Insert Channel Name -->");
const [token, setToken] = useState("<-- Insert Token -->");
const [calling, setCalling] = useState(false);
useJoin({appid: appId, channel: channel, token: token ? token : null}, calling);
```
### Play remote audio [#play-remote-audio]
To subscribe to remote users in a channel and play their audio tracks, use the `useRemoteUsers` hook along with the `RemoteUser` component. Follow these steps to implement the logic:
1. **Retrieve the list of remote users**
Use the `useRemoteUsers` hook to fetch a list of remote users in the channel:
```tsx
const remoteUsers = useRemoteUsers();
```
2. **Play remote audio tracks**
Loop through the `remoteUsers` list and render the `RemoteUser` component for each user to subscribe and play audio streams:
```tsx
{remoteUsers.map((user) => (
))}
```
### Leave the channel [#leave-the-channel-3]
To leave a channel, destroy the component, close the browser window, or refresh the browser tab. The `useJoin` hook automatically handles the destruction of the React component.
### Complete sample code [#complete-sample-code-8]
A complete code sample demonstrating the basic process of real-time interaction is provided for your reference. To use the complete sample, add the following to your `src/App.tsx` file.
```tsx
import {
LocalUser,
RemoteUser,
useIsConnected,
useJoin,
useLocalMicrophoneTrack,
usePublish,
useRemoteUsers,
} from "agora-rtc-react";
import { useState } from "react";
import AgoraRTC, { AgoraRTCProvider } from "agora-rtc-react";
const client = AgoraRTC.createClient({ mode: "rtc", codec: "vp8" });
return(
);
}
const Basics = () => {
const [calling, setCalling] = useState(false);
const isConnected = useIsConnected(); // Store the user's connection status
const [appId, setAppId] = useState("<-- Insert App ID -->");
const [channel, setChannel] = useState("<-- Insert Channel Name -->");
const [token, setToken] = useState("<-- Insert Token -->");
const [micOn, setMic] = useState(true);
const { localMicrophoneTrack } = useLocalMicrophoneTrack(micOn);
useJoin({appid: appId, channel: channel, token: token ? token : null}, calling);
usePublish([localMicrophoneTrack]);
const remoteUsers = useRemoteUsers();
return (
<>
)}
);
};
export default AgoraVoiceCalling;
```
## Test the sample code [#test-the-sample-code-8]
To run the demo code:
1. Navigate to the project directory and install the dependencies:
```bash
cd agora-sdk-quickstart
npm install
```
2. Start the development server by executing the following command:
```bash
npm run dev
```
3. Open the project in your browser
Launch your browser and navigate to the `localhost` address shown in your terminal.
4. Fill in the app ID and the temporary token you obtained from Agora Console. Use the same channel name you used to generate the token.
5. Click the **Join Channel** button.
6. Ask a friend to run the same demo in their browser and join the channel using the same app ID, channel name, and temporary token as yours. After successfully joining the channel, you can talk to each other.
7. Click the microphone button at the bottom to switch the microphone on or off.
8. Click the hang-up button to end the call.
## Reference [#reference-8]
This section contains content that completes the information on this page, or points you to documentation that explains other aspects to this product.
* If a firewall is deployed in your network environment, refer to [Connect with Cloud Proxy](build/manage-connection-and-quality/cloud-proxy.mdx) to use Agora services normally.
### Next steps [#next-steps-8]
After implementing the quickstart sample, read the following documents to learn more:
* To ensure communication security in a test or production environment, best practice is to obtain and use a token from an authentication server. For details, see [Secure authentication with tokens](build/set-up-token-authentication/use-tokens.mdx).
### Sample project [#sample-project-8]
Agora provides an open source [sample project on GitHub](https://github.com/AgoraIO-Extensions/agora-rtc-react) for your reference. The project demonstrates the use of each component and hook provided by the React SDK, as well as some advanced functions.
### API reference [#api-reference-8]
* [`LocalUser`](https://api-ref.agora.io/en/video-sdk/reactjs/2.x/functions/LocalUser.html)
* [`RemoteUser`](https://api-ref.agora.io/en/video-sdk/reactjs/2.x/functions/RemoteUser.html)
* [`useIsConnected()`](https://api-ref.agora.io/en/video-sdk/reactjs/2.x/functions/useIsConnected.html)
* [`useJoin()`](https://api-ref.agora.io/en/video-sdk/reactjs/2.x/functions/useJoin.html)
* [`useLocalMicrophoneTrack()`](https://api-ref.agora.io/en/video-sdk/reactjs/2.x/functions/useLocalMicrophoneTrack.html)
* [`usePublish()`](https://api-ref.agora.io/en/video-sdk/reactjs/2.x/functions/usePublish.html)
* [`useRemoteUsers()`](https://api-ref.agora.io/en/video-sdk/reactjs/2.x/functions/useRemoteUsers.html)
### See also [#see-also-8]
* [Error codes](reference/error-codes.mdx)
<_PlatformProcessedMarker close="true" />
<_PlatformPanel platform="unity">
<_PlatformProcessedMarker groupMode="structured" canonicalPlatform="web" platform="unity" />
This Unity quickstart shows you how to create a basic Voice Calling app using the Agora Voice SDK.
## Understand the tech [#understand-the-tech-9]
To start a Voice Calling session, implement the following steps in your app:
* **Initialize the Agora Engine**: Before calling other APIs, create and initialize an Agora Engine instance.
* **Join a channel**: Call methods to create and join a channel.
* **Send and receive audio**: All users can publish streams to the channel and subscribe to audio streams published by other users in the channel.

## Prerequisites [#prerequisites-9]
* [Unity Hub](https://unity.com/download) and [Unity Editor](https://unity.com/releases/editor/archive) 2018.4.0 or higher
* A suitable operating system and compiler for your development platform:
| Development platform | Operating system version | Compiler version |
| :------------------- | :----------------------- | :------------------------------------ |
| Android | Android 4.1 or later | Android Studio 4.1 or later |
| iOS | iOS 10.15 or later | Xcode 9.0 or later |
| macOS | macOS 10.15 or later | Xcode 9.0 or later |
| Windows | Windows 7 or later | Microsoft Visual Studio 2017 or later |
* A microphone
* A valid Agora account and project. Please refer to [Agora account management](manage-agora-account.md) for details.
## Set up your project [#set-up-your-project-9]
This section shows you how to set up your Unity project and install the Agora Voice SDK.
Create a new project
Add to an existing project
Refer to the following steps or the [Official Unity documentation](https://docs.unity3d.com/hub/manual/AddProject.html#add-projects) to create a Unity project.
1. Open Unity and click **New**.
2. Enter the following details:
* **Project name** : The name of the project.
* **Location** : Project storage path.
* **Template** : The project type. Select **3D**.
3. Click **Create project**.
To open your existing project:
1. In the **Projects** window, click the **Open** button in the top-right corner.
2. Browse your file manager and select the folder of the project you want to open.
3. Confirm your selection to add the project to the **Projects** window and open it in the Unity Editor.
### Install the SDK [#install-the-sdk-9]
1. Go to the [Download SDKs](/en/api-reference/sdks?product=voice\&platform=unity) page and download the latest version of the Unity SDK.
2. In Unity Editor, navigate to **Assets** > **Import Package** > **Custom Package**, and select the unzipped SDK.
All plugins are selected by default. Deselect any plugins you don't need, then click **Import**.
## Implement Voice Calling [#implement-voice-calling-9]
This section guides you through the implementation of basic real-time audio interaction in your game.
The following figure illustrates the essential steps:

This guide includes [complete sample code](#complete-sample-code) that demonstrates implementing basic real-time interaction. To understand the core API calls in the sample code, review the following implementation steps.
Before proceeding, create and set up a script to implement Voice Calling and bind the script to the canvas.
**Steps to set up a script**
1. Create a new script and import the UI library.
1. In the **Project** tab, navigate to **Assets > Agora-Unity-RTC-SDK > Code > Rtc**, right-click and select **Create > C# Script**. A new file named `NewBehaviourScript.cs` appears in your Assets.
2. Rename the file to `JoinChannel.cs` and open it.
3. Import the Unity namespaces to access UI components by adding the following code at the top of the file:
```csharp
using UnityEngine;
using UnityEngine.UI;
```
2. Bind the script to the canvas.
In `Assets/Agora-Unity-RTC-SDK/Code/Rtc` , select the `JoinChannel.cs` file, and drag it to the Canvas. In the **Inspector** panel, ensure that the file is bound to the Canvas.
### Import Agora classes [#import-agora-classes-1]
Import the `Agora.Rtc` namespace, which contains various classes and interfaces required to implement real-time audio and video functions.
```csharp
using Agora.Rtc;
```
### Initialize the engine [#initialize-the-engine-7]
For real-time communication, create an `IRtcEngine` instance using `RtcEngine.CreateAgoraRtcEngine()`. Then, configure it using `Initialize(context)` with an `RtcEngineContext`, specifying the application context, App ID, and channel profile. In your `JoinChannel.cs` file, add the following code:
```csharp
internal IRtcEngine RtcEngine;
// Fill in your app ID
private string _appID= "";
private void SetupVideoSDKEngine()
{
// Create an IRtcEngine instance
RtcEngine = Agora.Rtc.RtcEngine.CreateAgoraRtcEngine();
RtcEngineContext context = new RtcEngineContext();
context.appId = _appID;
context.channelProfile = CHANNEL_PROFILE_TYPE.CHANNEL_PROFILE_COMMUNICATION;
context.audioScenario = AUDIO_SCENARIO_TYPE.AUDIO_SCENARIO_DEFAULT;
// Initialize the instance
RtcEngine.Initialize(context);
}
```
### Join a channel [#join-a-channel-9]
To join a channel, call `JoinChannel` with the following parameters:
* **Channel name**: The name of the channel to join. Clients that pass the same channel name join the same channel. If a channel with the specified name does not exist, it is created when the first user joins.
* **Authentication token**: A dynamic key that authenticates a user when the client joins a channel. In a production environment, you obtain a token from a [token server](build/set-up-token-authentication/deploy-token-server.mdx) in your security infrastructure. For the purpose of this guide [Generate a temporary token](manage-agora-account.md).
* **User ID**: A 32-bit signed integer that identifies a user in the channel. You can specify a unique user ID for each user yourself. If you set the user ID to `0` when joining a channel, the SDK generates a random number for the user ID and returns the value in the `OnJoinChannelSuccess` callback.
* **Channel media options**: Configure `ChannelMediaOptions` to define publishing and subscription settings, optimize performance for your specific use-case, and set optional parameters.
For Voice Calling, set the `channelProfile` to `CHANNEL_PROFILE_COMMUNICATION` and the `clientRoleType` to `CLIENT_ROLE_BROADCASTER`.
```csharp
// Fill in your channel name
private string _channelName = "";
// Fill in a temporary token
private string _token = "";
public void Join()
{
Debug.Log("Joining _channelName");
// Enable the audio module
RtcEngine.EnableAudio();
// Set channel media options
ChannelMediaOptions options = new ChannelMediaOptions();
// Publish the audio stream captured by the microphone
options.publishMicrophoneTrack.SetValue(true);
// Automatically subscribe to all audio streams
options.autoSubscribeAudio.SetValue(true);
// Set the channel profile to live broadcast
options.channelProfile.SetValue(CHANNEL_PROFILE_TYPE.CHANNEL_PROFILE_COMMUNICATION);
// Set the user role to broadcaster
options.clientRoleType.SetValue(CLIENT_ROLE_TYPE.CLIENT_ROLE_BROADCASTER);
// Join the channel
RtcEngine.JoinChannel(_token, _channelName, 0, options);
}
```
### Subscribe to Voice SDK events [#subscribe-to-voice-sdk-events-6]
Create an instance of the `UserEventHandler` class and set it as the engine event handler. Override the callbacks based on your use-case.
```csharp
// Implement your own callback class by inheriting the IRtcEngineEventHandler interface class
internal class UserEventHandler : IRtcEngineEventHandler
{
private readonly JoinChannelAudio _audioSample;
internal UserEventHandler(JoinChannelAudio audioSample)
{
_audioSample = audioSample;
}
// Triggered when the local user successfully joins a channel
public override void OnJoinChannelSuccess(RtcConnection connection, int elapsed)
{
Debug.Log("OnJoinChannelSuccess _channelName");
}
// Triggered when a remote user successfully joins a channel
public override void OnUserJoined(RtcConnection connection, uint uid, int elapsed)
{
Debug.Log("Remote user joined");
}
// Triggered when a remote user leaves the current channel
public override void OnUserOffline(RtcConnection connection, uint uid, USER_OFFLINE_REASON_TYPE reason) {
}
}
```
Create an instance of the user callback class and call `InitEventHandler` to register the event handler.
```csharp
private void InitEventHandler()
{
UserEventHandler handler = new UserEventHandler(this);
RtcEngine.InitEventHandler(handler);
}
```
To ensure that you receive all Voice SDK events, register the event handler before joining a channel.
### Leave the channel [#leave-the-channel-4]
Call `LeaveChannel` to leave the current channel and `DisableAudio` to turn off the audio module.
```csharp
public void Leave() {
Debug.Log("Leaving " + _channelName);
// Leave the channel
RtcEngine.LeaveChannel();
// Disable the audio module
RtcEngine.DisableAudio();
}
```
### Handle permissions [#handle-permissions-6]
To access the microphone, add device permissions to your project according to your target platform.
**Android**
Since version 2018.3, Unity does not actively obtain device permissions from the user. Call `CheckPermission` to check for and obtain the necessary permissions.
1. Include the `UnityEngine.Android` namespace, which contains Android-specific classes for interacting with Android devices from Unity:
```csharp
#if (UNITY_2018_3_OR_NEWER && UNITY_ANDROID)
using UnityEngine.Android;
#endif
```
2. Create a list of permissions to be obtained.
```csharp
#if (UNITY_2018_3_OR_NEWER && UNITY_ANDROID)
private ArrayList permissionList = new ArrayList() { Permission.Microphone };
#endif
```
3. Check if the required permissions have been granted. If not, prompt the user to grant the necessary permissions.
```csharp
private void CheckPermissions() {
#if (UNITY_2018_3_OR_NEWER && UNITY_ANDROID)
foreach (string permission in permissionList) {
if (!Permission.HasUserAuthorizedPermission(permission)) {
Permission.RequestUserPermission(permission);
}
}
#endif
}
```
**iOS and macOS**
For iOS and macOS platforms, the Voice SDK includes a post-build script named `BL_BuildPostProcess.cs`. When you build and export your Unity project as an iOS project, this script automatically inserts camera and microphone permission entries into the `Info.plist` file, eliminating the need for manual updates.
### Start and stop your game [#start-and-stop-your-game]
1. When the game starts, ensure that device permissions have been granted.
```csharp
void Update() {
CheckPermissions();
}
```
2. To start Voice Calling, initialize the engine and set up the event handler.
```csharp
void Start() {
SetupAudioSDKEngine();
InitEventHandler();
}
```
3. To clean up all session-related resources when a user exits the game, call the `Dispose` method of the `IRtcEngine`.
```csharp
void OnApplicationQuit() {
if (RtcEngine != null) {
Leave();
// Destroy IRtcEngine
RtcEngine.Dispose();
RtcEngine = null;
}
}
```
After calling `Dispose`, you can no longer use any methods or callbacks of the SDK. To use Voice Calling features again, create a new engine instance.
### Complete sample code [#complete-sample-code-9]
A complete code sample demonstrating the basic process of real-time interaction is provided for your reference. To quickly implement the basic functions of real-time Video Calling, copy the following sample code into your project:
**Sample code to implement voice calling in your game**
```csharp
using System.Collections;
using System.Collections.Generic;
using UnityEngine;
using UnityEngine.UI;
using Agora.Rtc;
using Agora_RTC_Plugin.API_Example.Examples.Basic.JoinChannelAudio;
#if (UNITY_2018_3_OR_NEWER && UNITY_ANDROID)
using UnityEngine.Android;
#endif
public class JoinChannelAudio : MonoBehaviour
{
// Fill in your app ID
private string _appID = "";
// Fill in your channel name
private string _channelName = "";
// Fill in a temporary token
private string _token = "";
internal IRtcEngine RtcEngine;
#if (UNITY_2018_3_OR_NEWER && UNITY_ANDROID)
private ArrayList permissionList = new ArrayList() { Permission.Microphone };
#endif
// Start is called before the first frame update
void Start()
{
SetupAudioSDKEngine();
InitEventHandler();
SetupUI();
}
// Update is called once per frame
void Update()
{
CheckPermissions();
}
void OnApplicationQuit()
{
if (RtcEngine != null)
{
Leave();
// Destroy IRtcEngine
RtcEngine.Dispose();
RtcEngine = null;
}
}
private void CheckPermissions()
{
#if (UNITY_2018_3_OR_NEWER && UNITY_ANDROID)
foreach (string permission in permissionList) {
if (!Permission.HasUserAuthorizedPermission(permission)) {
Permission.RequestUserPermission(permission);
}
}
#endif
}
private void SetupUI()
{
GameObject go = GameObject.Find("Leave");
go.GetComponent
### Create a user interface [#create-a-user-interface-8]
Follow these steps to set up a basic UI for your project or to integrate essential UI elements into your existing interface. A basic UI consists of the following components:
* A button to join the channel.
* A button to leave the channel.
**Create a basic UI**
1. Create buttons to join and leave channel
1. In your Unity project, right-click the **Sample Scene** and select **Game Object > UI > Button**. You see a button on the scene canvas.
2. In the **Inspector** panel, rename the button to `Join` and adjust the position coordinates as needed. For example:
* **Pos X**:`-329`
* **Pos Y**: `-172`
1. Select the **Text** control of the **Join** button , and change the text to `Join` in the **Inspector** panel.
2. Repeat the steps to create a **Leave** button, using the following positions:
* **Pos X**:`329`
* **Pos Y**: `-172`
At this point your UI looks similar to the following:
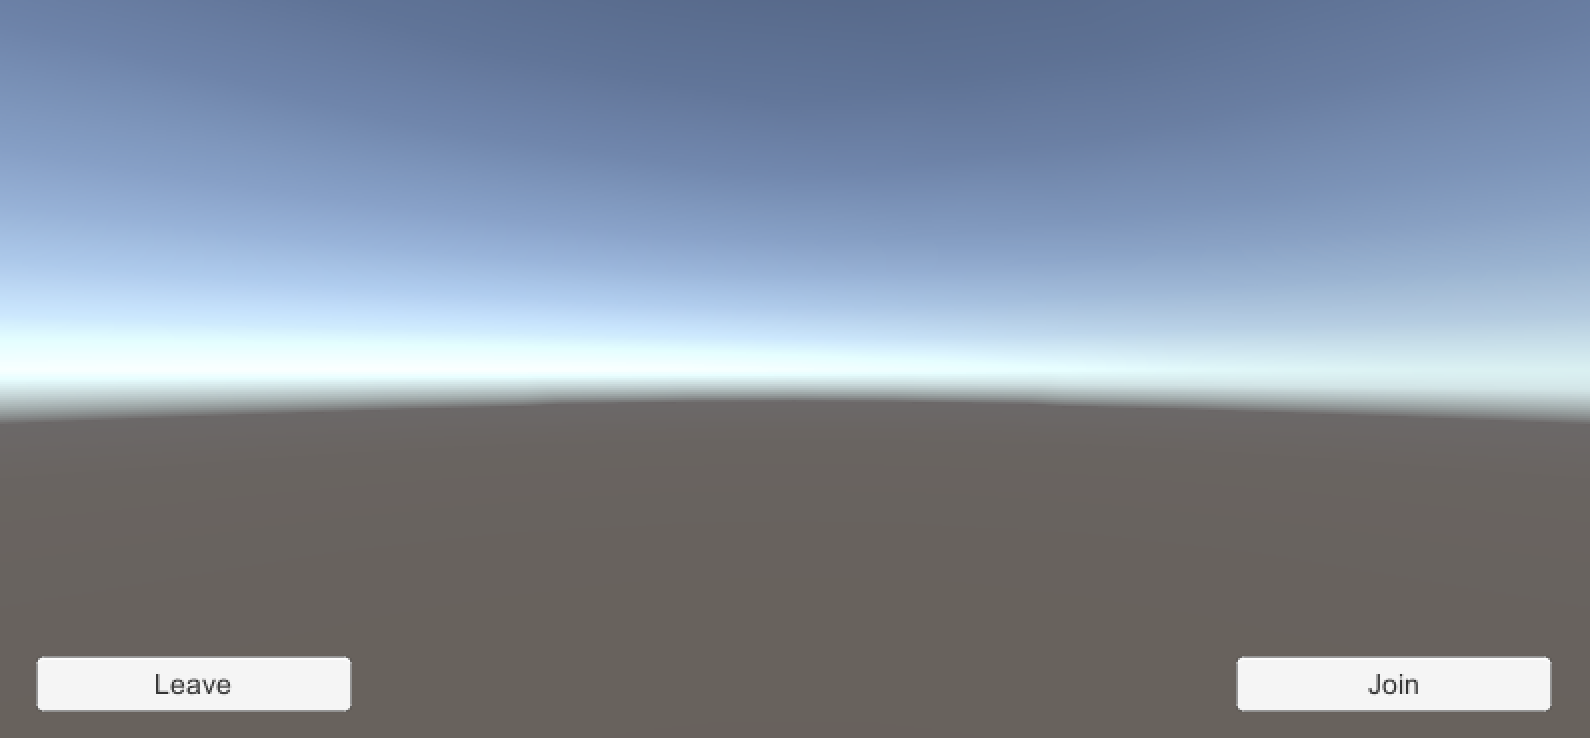
## Test the sample code [#test-the-sample-code-9]
Take the following steps to test the sample code:
1. Obtain a temporary token from Agora Console.
2. In `JoinChannel.cs`, update `_appID`, `_channelName`, and `_token` with the app ID, channel name, and temporary token for your project.
3. In Unity Editor, click **Play** to run your project.
4. Click **Join** to join a channel.
5. Invite a friend to run the demo game on a second device. Use the same `_appID_`, `_token`, and `_channelName` to join. Alternatively, use the [Web demo](https://webdemo.agora.io/basicVideoCall/index.html) to join the same channel.
After your friend joins successfully, you can hear each other.
## Reference [#reference-9]
This section contains content that completes the information on this page, or points you to documentation that explains other aspects to this product.
* If a firewall is deployed in your network environment, refer to [Connect with Cloud Proxy](build/manage-connection-and-quality/cloud-proxy.mdx) to use Agora services normally.
### Next steps [#next-steps-9]
After implementing the quickstart sample, read the following documents to learn more:
* To ensure communication security in a test or production environment, best practice is to obtain and use a token from an authentication server. For details, see [Secure authentication with tokens](build/set-up-token-authentication/use-tokens.mdx).
### Sample project [#sample-project-9]
Agora provides open source sample projects on [GitHub](https://github.com/AgoraIO-Extensions/Agora-Unity-Quickstart/tree/main/API-Example-Unity/Assets/API-Example/Examples) for your reference. Download or view the [JoinChannelAudio](https://github.com/AgoraIO-Extensions/Agora-Unity-Quickstart/tree/main/API-Example-Unity/Assets/API-Example/Examples/Basic/JoinChannelAudio) project for a more detailed example.
### API reference [#api-reference-9]
* [`JoinChannel`](https://api-ref.agora.io/en/voice-sdk/unity/4.x/API/class_irtcengine.html#api_irtcengine_joinchannel)
* [`CreateAgoraRtcEngine`](https://api-ref.agora.io/en/voice-sdk/unity/4.x/API/class_irtcengine.html#api_createagorartcengine)
* [`InitEventHandler`](https://api-ref.agora.io/en/voice-sdk/unity/4.x/API/class_irtcengine.html#api_irtcengine_addhandler)
* [`SetClientRole`](https://api-ref.agora.io/en/voice-sdk/unity/4.x/API/class_irtcengine.html#api_irtcengine_setclientrole)
* [`LeaveChannel`](https://api-ref.agora.io/en/voice-sdk/unity/4.x/API/class_irtcengine.html#api_irtcengine_leavechannel)
### Frequently asked questions [#frequently-asked-questions-7]
* [How can I listen for audience joining or leaving a channel?](/en/api-reference/faq/integration/audience_event)
* [How can I solve channel-related issues?](/en/api-reference/faq/integration/channel)
### See also [#see-also-9]
* [Error codes](reference/error-codes.mdx)
* [Connection status management](build/manage-connection-and-quality/connection-status-management.mdx)
<_PlatformProcessedMarker close="true" />
<_PlatformPanel platform="unreal">
<_PlatformProcessedMarker groupMode="structured" canonicalPlatform="web" platform="unreal" />
This Unreal Engine quickstart shows you how to create a basic Voice Calling app using the Agora Voice SDK.
## Understand the tech [#understand-the-tech-10]
To start a Voice Calling session, implement the following steps in your app:
* **Initialize the Agora Engine**: Before calling other APIs, create and initialize an Agora Engine instance.
* **Join a channel**: Call methods to create and join a channel.
* **Send and receive audio**: All users can publish streams to the channel and subscribe to audio streams published by other users in the channel.

## Prerequisites [#prerequisites-10]
* Unreal Engine 4.27 or higher
* Prepare your development environment according to your target platform and engine version:
| Dev environment requirements | Other requirements |
| :------------------------------------------------------------------------------------------------------------- | :---------------------------------------------------------------------------------------------------------------------------------------------------------------------------------- |
| [Android](https://docs.unrealengine.com/4.27/us-EN/SharingAndReleasing/Mobile/Android/AndroidSDKRequirements/) | - |
| [iOS](https://docs.unrealengine.com/4.27/us-EN/SharingAndReleasing/Mobile/iOS/SDKRequirements/) | A valid Apple developer signature. |
| [macOS](https://docs.unrealengine.com/4.27/us-EN/Basics/InstallingUnrealEngine/RecommendedSpecifications/) | A valid Apple developer signature. |
| [Windows](https://docs.unrealengine.com/4.27/us-EN/Basics/InstallingUnrealEngine/RecommendedSpecifications/) | 32-bit Windows only supports Unreal Engine 4 and below. To use Unreal Engine with 32-bit Windows, uncomment the code relating to `Win32` in the `AgoraPluginLibrary.Build.cs` file. |
* Two physical devices for testing
* A microphone
* A valid Agora account and project. Please refer to [Agora account management](manage-agora-account.md) for details.
## Set up your project [#set-up-your-project-10]
This section shows you how to set up your Unreal Engine project and install the Agora Voice SDK.
Create a new project
Add to an existing project
Refer to the following steps or the [Unreal official guide](https://docs.unrealengine.com/4.27/us-EN/Basics/Projects/Browser/) to create a new project. If you already have an Unreal project, skip to the next section.
1. Open Unreal Engine. Select **Games** under **New Project Categories**, and click **Next**.
2. Configure your project as follows:
* **Template**: Select **Blank**.
* **Project Defaults**:
* **Language**: Select **C++**.
* **Target Platform**: Select **Desktop**.
* **Project Location**: Enter the project files storage path.
* **Project Name**: Type a suitable name for your project.
Click **Create**.
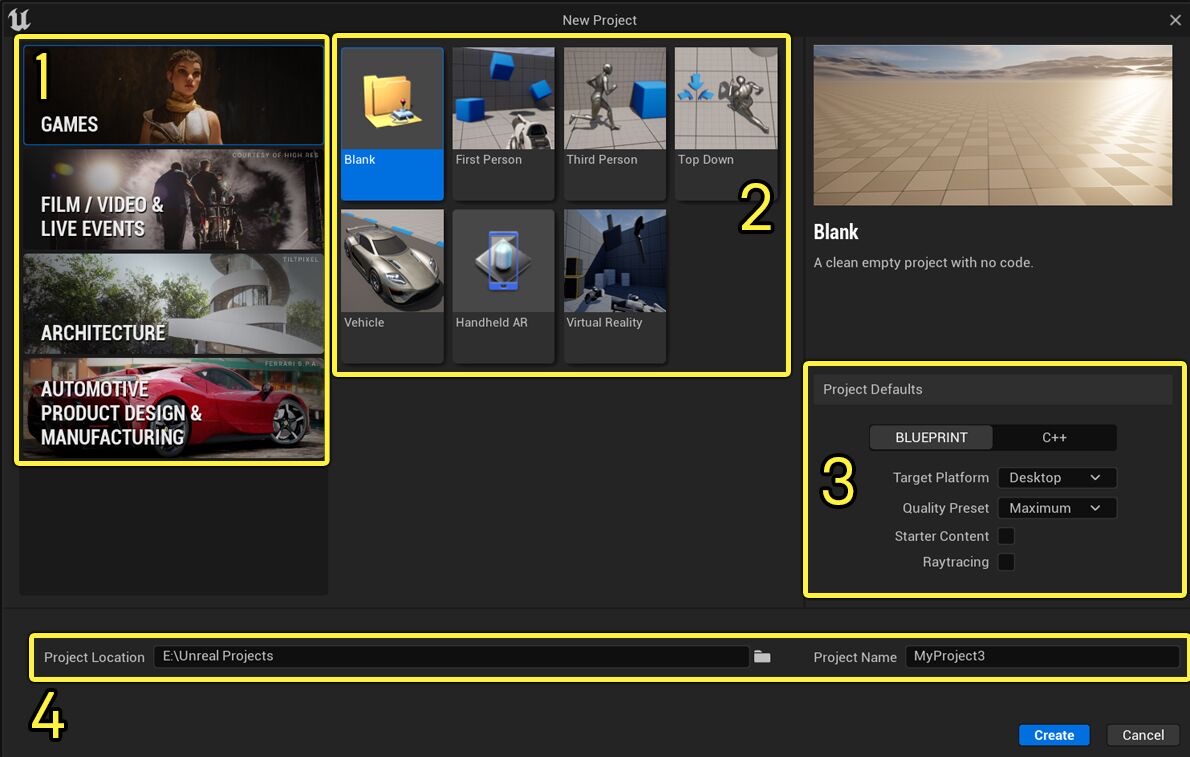
1. In the Unreal Project Browser, click on **Browse** and locate the `.uproject` file.
2. Select the project and click **Open**.
3. Add the Agora dependency library
In `Project/Source/Project/Project.Build.cs`, add the `AgoraPlugin` using `PublicDependencyModuleNames.AddRange()`.
```cpp
// Add the AgoraPlugin library
PublicDependencyModuleNames.AddRange(new string[]
{
"Core",
"CoreUObject",
"Engine",
"InputCore",
"AgoraPlugin"
});
```
4. Create a new C++ class and generate header and library files
In the Unreal Editor, select **Tools > New C++ Class**, then select **All Classes**, find **UserWidget** and name it `AgoraWidget`. Click **Create Class**. A new C++ class is added to your project and you see `AgoraWidget.h` and `AgoraWidget.cpp` files.
5. Initialize custom Widget
Add the following code to your widget header file:
```cpp
protected:
// Initialize custom Widget
void NativeConstruct() override;
```
6. Associate C++ classes and Widgets
In Unreal Editor, click **Content Drawer**, select **Class Settings > Graph**, and set the **Parent Class** under **Class Options** to **AgoraWidget**.
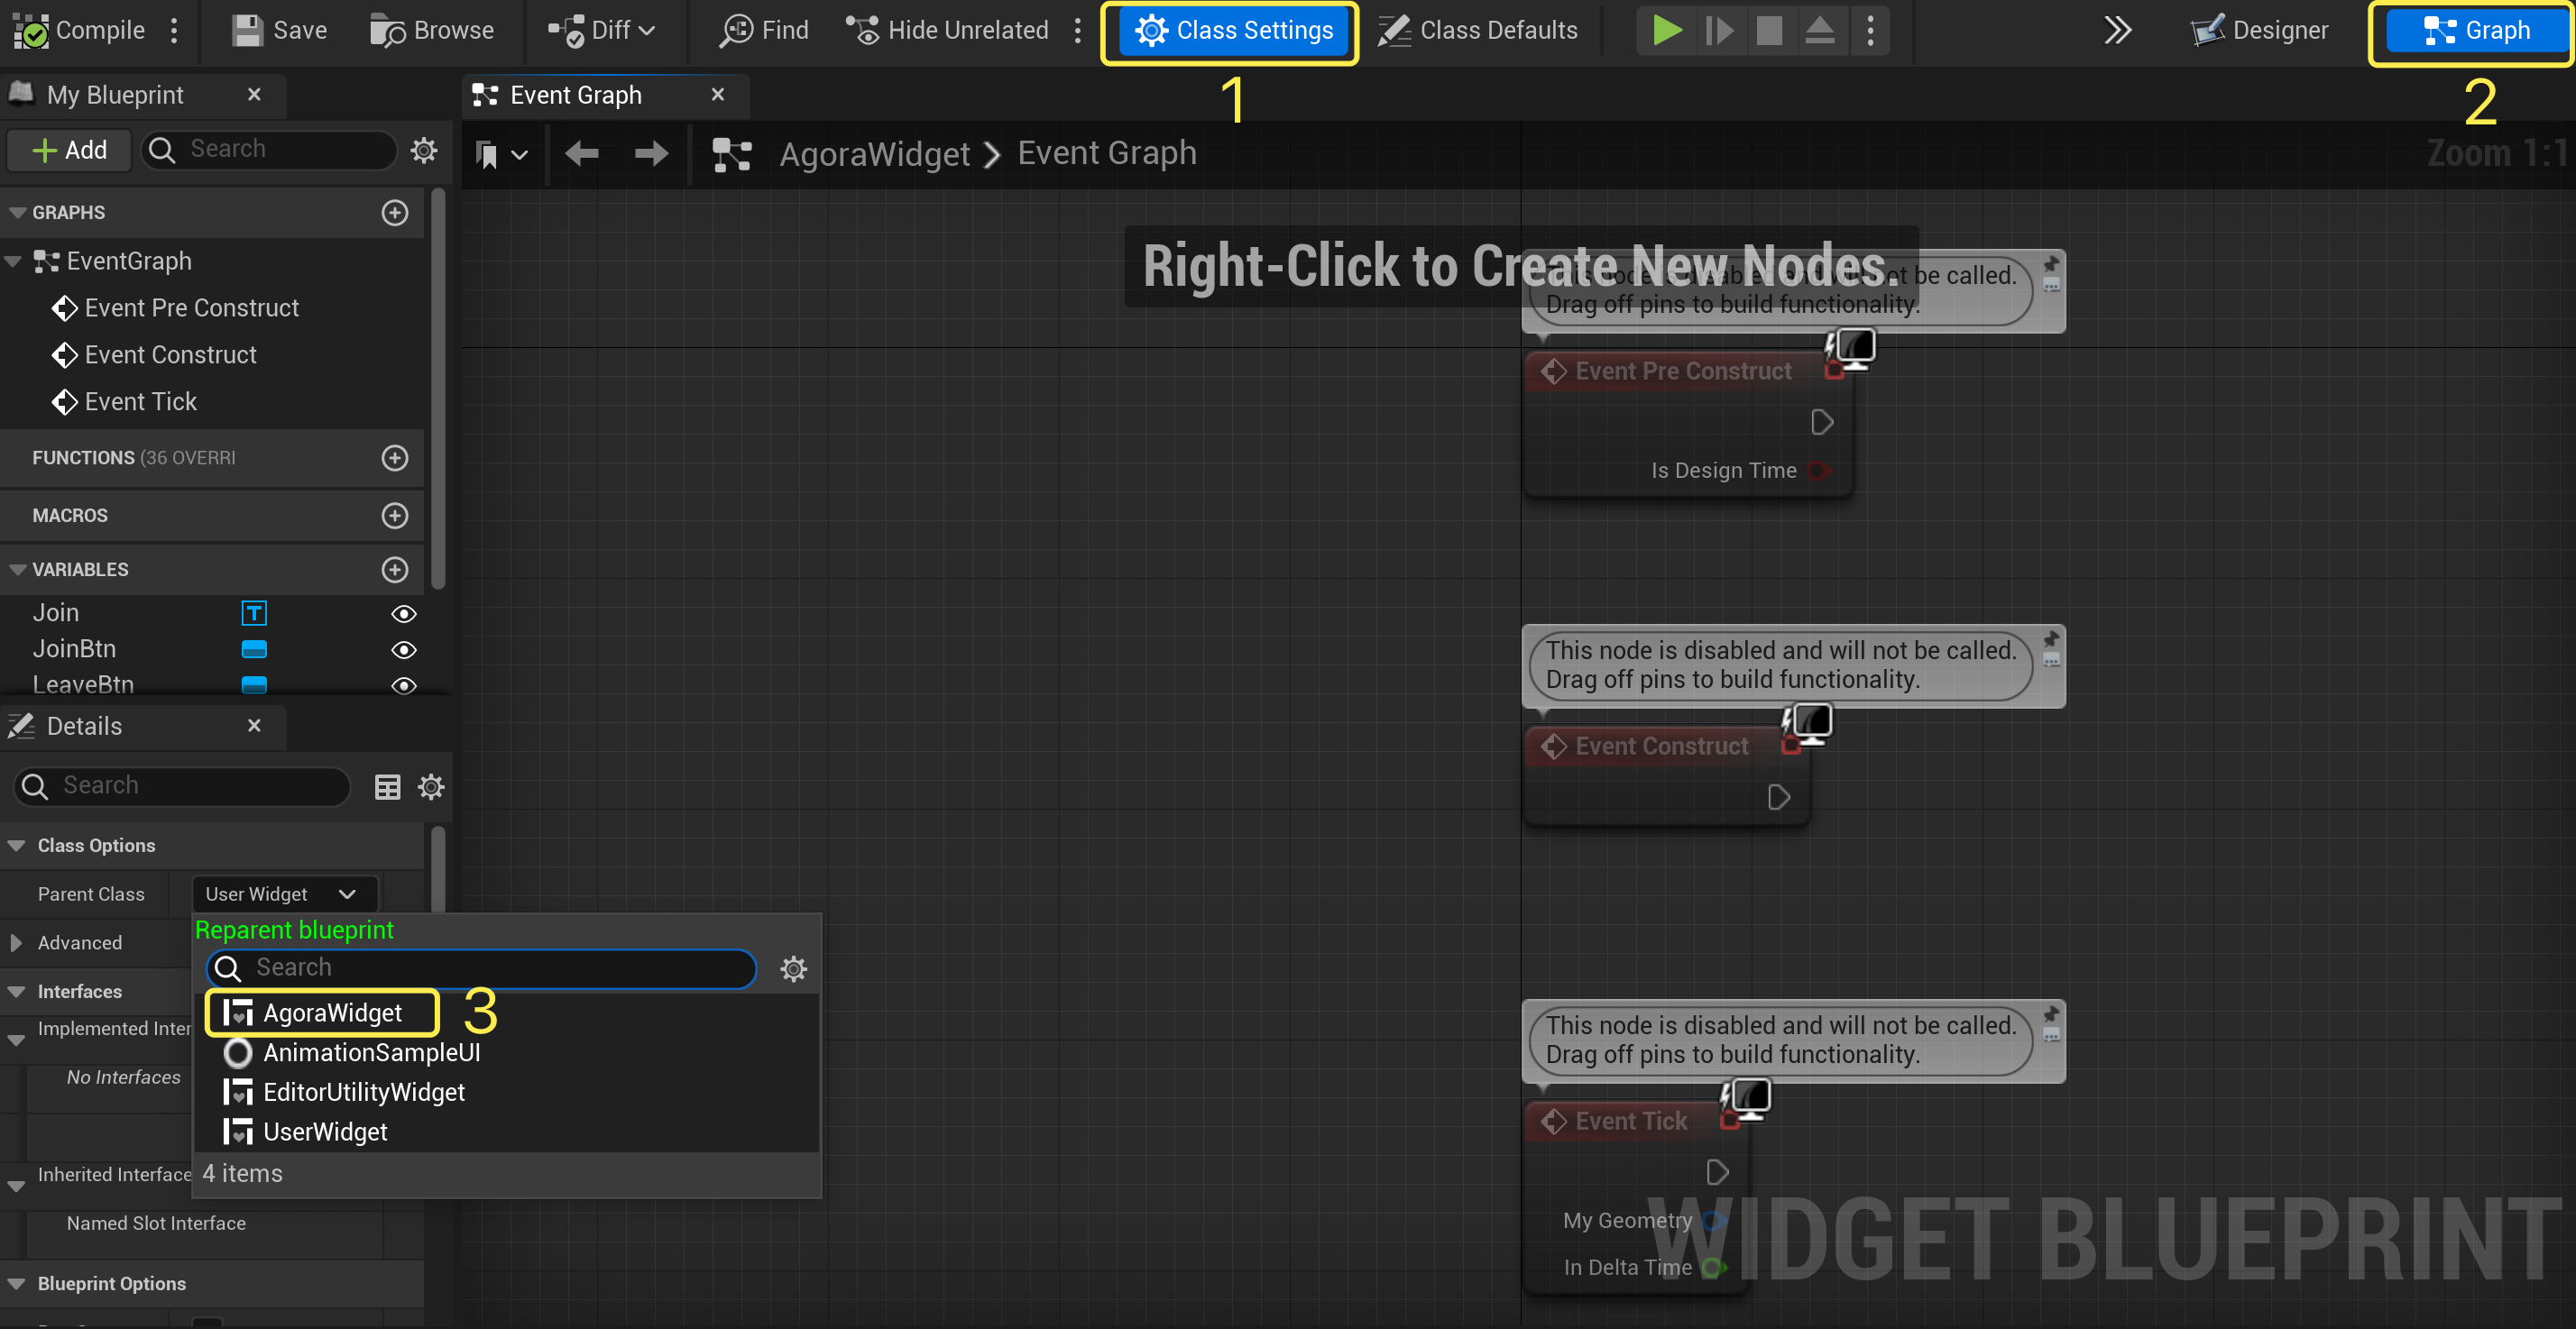
7. Create a user interface for your app. Refer to [Create a user interface](#create-a-user-interface) to create a bare bones UI. A basic user interface consists of the following elements:
* A button to join a channel.
* A button to leave the channel.
### Install the SDK [#install-the-sdk-10]
Take the following steps to add the Unreal Engine Voice SDK to your project:
1. Download the latest version of Agora Unreal Voice SDK from [Download SDKs](/en/api-reference/sdks?product=voice\&platform=unreal-engine) and unzip it.
2. In your project root folder, create a `Plugins` folder.
3. Copy `AgoraPlugin` from the Unreal SDK folder to `Plugins`.
## Implement Voice Calling [#implement-voice-calling-10]
This section guides you through the implementation of basic real-time audio interaction in your game.
The following figure illustrates the essential steps:

This guide includes [complete sample code](#complete-sample-code) that demonstrates implementing basic real-time interaction. To understand the core API calls in the sample code, review the following implementation steps.
### Import Agora libraries [#import-agora-libraries]
To import Agora library, add the following to `AgoraWidget.h`:
```cpp
#include "AgoraPluginInterface.h"
```
### Initialize the engine [#initialize-the-engine-8]
For real-time communication, initialize an `IRtcEngine` instance and set up an event handler to manage user interactions within the channel. Use `RtcEngineContext` to specify [App ID](manage-agora-account.md), and custom [event handler](#subscribe-to-voice-sdk-events), then call `RtcEngineProxy->initialize(RtcEngineContext)` to initialize the engine, enabling further channel operations.
Add the `SetupSDKEngine` method declaration and implementation to the following files:
* `AgoraWidget.h`
```cpp
// Fill in your app ID
FString _appID = "";
// Define a global variable for IRtcEngine
agora::rtc::IRtcEngine* RtcEngineProxy;
private:
// Create and initialize IRtcEngine
void SetupSDKEngine();
```
* `AgoraWidget.cpp`
```cpp
void UAgoraWidget::SetupSDKEngine()
{
agora::rtc::RtcEngineContext RtcEngineContext;
RtcEngineContext.appId = TCHAR_TO_ANSI(*_appID);
RtcEngineContext.eventHandler = this;
// Create IRtcEngine instance
RtcEngineProxy = agora::rtc::ue::createAgoraRtcEngine();
// Initialize IRtcEngine
RtcEngineProxy->initialize(RtcEngineContext);
}
```
### Join a channel [#join-a-channel-10]
To join a channel, call `joinChannel` with the following parameters:
* **Channel name**: The name of the channel to join. Clients that pass the same channel name join the same channel. If a channel with the specified name does not exist, it is created when the first user joins.
* **Authentication token**: A dynamic key that authenticates a user when the client joins a channel. In a production environment, you obtain a token from a [token server](build/set-up-token-authentication/deploy-token-server.mdx) in your security infrastructure. For the purpose of this guide [Generate a temporary token](manage-agora-account.md).
* **User ID**: A 32-bit signed integer that identifies a user in the channel. You can specify a unique user ID for each user yourself. If you set the user ID to `0` when joining a channel, the SDK generates a random number for the user ID and returns the value in the `onJoinChannelSuccess` callback.
* **Channel media options**: Configure `ChannelMediaOptions` to define publishing and subscription settings, optimize performance for your specific use-case, and set optional parameters.
Add the `Join` method declaration and implementation to the following files:
* `AgoraWidget.h`
```cpp
// Fill in your channel name
FString _channelName = "";
// Fill in a valid token
FString _token = "";
UFUNCTION(BlueprintCallable)
void Join();
UFUNCTION(BlueprintCallable)
void Leave();
```
* `AgoraWidget.cpp`
For Voice Calling, set the `channelProfile` to `CHANNEL_PROFILE_COMMUNICATION` and the user role to `CLIENT_ROLE_BROADCASTER`.
```cpp
void UAgoraWidget::Join()
{
// Set channel media options
agora::rtc::ChannelMediaOptions options;
// Automatically subscribe to all audio streams
options.autoSubscribeAudio = true;
// Publish video captured by the camera
options.publishMicrophoneTrack = true;
// Set the channel profile to live broadcasting
options.channelProfile = agora::CHANNEL_PROFILE_TYPE::CHANNEL_PROFILE_COMMUNICATION;
// Set the user role as host or audience
options.clientRoleType = agora::rtc::CLIENT_ROLE_TYPE::CLIENT_ROLE_AUDIENCE;
// Join a channel
RtcEngineProxy->joinChannel(TCHAR_TO_ANSI(*_token), TCHAR_TO_ANSI(*_channelName), 0, options);
}
```
### Subscribe to Voice SDK events [#subscribe-to-voice-sdk-events-7]
The Voice SDK provides an interface for subscribing to channel events. To use it, inherit from the `IRtcEngineEventHandler` class and override the event handler methods for the events you want to process.
* `AgoraWidget.h`
```cpp
// Triggered when the local user leaves a channel
void onLeaveChannel(const agora::rtc::RtcStats& stats) override;
// Triggered when a remote user joins a channel
void onUserJoined(agora::rtc::uid_t uid, int elapsed) override;
// Triggered when a remote user leaves a channel
void onUserOffline(agora::rtc::uid_t uid, agora::rtc::USER_OFFLINE_REASON_TYPE reason) override;
// Triggered when the local user joins a channel
void onJoinChannelSuccess(const char* channel, agora::rtc::uid_t uid, int elapsed) override;
```
* `AgoraWidget.cpp`
```cpp
void UAgoraWidget::onUserJoined(agora::rtc::uid_t uid, int elapsed)
{
// Callback when a remote user joins the channel
agora::rtc::RtcConnection connection;
connection.channelId = TCHAR_TO_ANSI(*_channelName);
}
void UAgoraWidget::onUserOffline(agora::rtc::uid_t uid, agora::rtc::USER_OFFLINE_REASON_TYPE reason)
{
// Callback when a remote user leaves the channel
agora::rtc::RtcConnection connection;
connection.channelId = TCHAR_TO_ANSI(*_channelName);
}
void UAgoraWidget::onJoinChannelSuccess(const char* channel, agora::rtc::uid_t uid, int elapsed)
{
// Callback when the local user successfully joins the channel
AsyncTask(ENamedThreads::GameThread, =
{
UE_LOG(LogTemp, Warning, TEXT("JoinChannelSuccess uid: %u"), uid);
});
}
void UAgoraWidget::onLeaveChannel(const agora::rtc::RtcStats& stats)
{
// Callback when the local user successfully leaves the channel
}
```
### Handle permissions [#handle-permissions-7]
To access the microphone, follow the steps for your target platform:
**Android**
Add the `AndroidPermission` library to obtain device and network permissions:
1. Add the following code to your header file:
```cpp
#if PLATFORM_ANDROID
#include "AndroidPermission/Classes/AndroidPermissionFunctionLibrary.h"
#endif
```
2. Add the `AndroidPermission` library to the `Project/Source/Project/Project.Build.cs` file:
```cpp
if (Target.Platform == UnrealTargetPlatform.Android)
{
PrivateDependencyModuleNames.AddRange(new string[] { "AndroidPermission" });
}
```
3. To check whether Android permissions have been granted, add the `CheckAndroidPermission` method and its implementation to the `AgoraWidget.h` and `AgoraWidget.cpp` files.
* `AgoraWidget.h`
```cpp
private:
// Get Android permissions
void CheckAndroidPermission();
```
* `AgoraWidget.cpp`
```cpp
void UAgoraWidget::CheckAndroidPermission()
{
#if PLATFORM_ANDROID
FString pathfromName = UGameplayStatics::GetPlatformName();
if (pathfromName == "Android")
{
TArray AndroidPermission;
AndroidPermission.Add(FString("android.permission.RECORD_AUDIO"));
AndroidPermission.Add(FString("android.permission.READ_PHONE_STATE"));
AndroidPermission.Add(FString("android.permission.WRITE_EXTERNAL_STORAGE"));
AndroidPermission.Add(FString("android.permission.ACCESS_WIFI_STATE"));
AndroidPermission.Add(FString("android.permission.ACCESS_NETWORK_STATE"));
UAndroidPermissionFunctionLibrary::AcquirePermissions(AndroidPermission);
}
#endif
}
void UAgoraWidget::NativeConstruct()
{
Super::NativeConstruct();
#if PLATFORM_ANDROID
CheckAndroidPermission()
#endif
}
```
**iOS and macOS**
1. Refer to [How to add the permissions required for real-time interaction to an Unreal Engine project?](/en/realtime-media/voice/quickstart)
2. In `Project/Source/Project.Target.cs`, add the following code:
```cpp
public class unrealstartTarget : TargetRules
{
public unrealstartTarget( TargetInfo Target) : base(Target)
{
Type = TargetType.Game;
DefaultBuildSettings = BuildSettingsVersion.V2;
if (Target.Platform == UnrealTargetPlatform.IOS)
{
bOverrideBuildEnvironment = true;
GlobalDefinitions.Add("FORCE_ANSI_ALLOCATOR=1")
}
ExtraModuleNames.AddRange( new string[] { "unrealstart" } );
}
}
```
### Leave a channel [#leave-a-channel]
To leave a channel call `leaveChannel`. Implement the following method:
* `AgoraWidget.h`
```cpp
UFUNCTION(BlueprintCallable)
void Leave();
```
* `AgoraWidget.cpp`
```cpp
void UAgoraWidget::Leave()
{
// Leave the channel
RtcEngineProxy->leaveChannel();
}
```
### Release resources [#release-resources-1]
When the local user leaves the channel, or exits the game, release memory by calling the `release` method of `IRtcEngine`. Override the `NativeDestruct()` method and add its implementation as follows:
* `AgoraWidget.h`
```cpp
void NativeDestruct() override;
```
* `AgoraWidget.cpp`
```cpp
void UAgoraWidget::NativeDestruct()
{
Super::NativeDestruct();
if (RtcEngineProxy != nullptr)
{
RtcEngineProxy->unregisterEventHandler(this);
RtcEngineProxy->release();
delete RtcEngineProxy;
RtcEngineProxy = nullptr;
}
}
```
### Complete sample code [#complete-sample-code-10]
A complete code sample demonstrating the basic process of real-time interaction is provided for your reference. To use the sample code, copy each of the following code blocks and paste it in the corresponding file.
**`Project/Source/Project/AgoraWidget.h`**
```cpp
#pragma once
#include "CoreMinimal.h"
#include "Blueprint/UserWidget.h"
#if PLATFORM_ANDROID
#include "AndroidPermission/Classes/AndroidPermissionFunctionLibrary.h"
#endif
#include "AgoraPluginInterface.h"
#include "Components/Image.h"
#include "Components/Button.h"
#include "AgoraWidget.generated.h"
UCLASS()
class UNREALLEARNING_API UAgoraWidget : public UUserWidget, public agora::rtc::IRtcEngineEventHandler
{
GENERATED_BODY()
public:
// Fill in your App ID
FString _appID = "";
// Fill in your channel name
FString _channelName = "";
// Fill in Token
FString _token = "";
UPROPERTY(VisibleAnywhere, BlueprintReadWrite, meta = (BindWidget))
UButton* JoinBtn = nullptr;
UPROPERTY(VisibleAnywhere, BlueprintReadOnly, meta = (BindWidget))
UButton* LeaveBtn = nullptr;
UFUNCTION(BlueprintCallable)
void Join();
UFUNCTION(BlueprintCallable)
void Leave();
agora::rtc::IRtcEngine* RtcEngineProxy;
// Callback triggered when the local user leaves the channel
void onLeaveChannel(const agora::rtc::RtcStats& stats) override;
// Callback triggered when a remote broadcaster successfully joins the channel
void onUserJoined(agora::rtc::uid_t uid, int elapsed) override;
// Callback triggered when a remote broadcaster leaves the channel
void onUserOffline(agora::rtc::uid_t uid, agora::rtc::USER_OFFLINE_REASON_TYPE reason) override;
// Callback triggered when the local user successfully joins the channel
void onJoinChannelSuccess(const char* channel, agora::rtc::uid_t uid, int elapsed) override;
private:
void CheckAndroidPermission(); // Get Android permissions
void SetupSDKEngine(); // Create and initialize IRtcEngine
void SetupUI(); // Set up UI elements
protected:
void NativeConstruct() override; // Initialize the custom Widget
void NativeDestruct() override; // Clean up all session-related resources
};
```
**`Project/Source/Project/AgoraWidget.cpp`**
```cpp
#include "AgoraWidget.h"
void UAgoraWidget::CheckAndroidPermission()
{
#if PLATFORM_ANDROID
// Get the platform name
FString pathfromName = UGameplayStatics::GetPlatformName();
// Check if the platform is Android
if (pathfromName == "Android")
{
// Array to store Android permissions
TArray AndroidPermission;
// Add required permissions
AndroidPermission.Add(FString("android.permission.RECORD_AUDIO"));
AndroidPermission.Add(FString("android.permission.READ_PHONE_STATE"));
AndroidPermission.Add(FString("android.permission.WRITE_EXTERNAL_STORAGE"));
// Request permissions
UAndroidPermissionFunctionLibrary::AcquirePermissions(AndroidPermission);
}
#endif
}
void UAgoraWidget::SetupSDKEngine()
{
// Create RtcEngineContext
agora::rtc::RtcEngineContext RtcEngineContext;
// Set App ID
RtcEngineContext.appId = TCHAR_TO_ANSI(*_appID);
// Set event handler
RtcEngineContext.eventHandler = this;
// Create and initialize RtcEngineProxy
RtcEngineProxy = agora::rtc::ue::createAgoraRtcEngine();
RtcEngineProxy->initialize(RtcEngineContext);
}
void UAgoraWidget::SetupUI()
{
// Bind event handlers to UI buttons
JoinBtn->OnClicked.AddDynamic(this, &UAgoraWidget::Join);
LeaveBtn->OnClicked.AddDynamic(this, &UAgoraWidget::Leave);
}
void UAgoraWidget::Join()
{
// Set channel media options
agora::rtc::ChannelMediaOptions options;
// Automatically subscribe to all audio streams
options.autoSubscribeAudio = true;
// Publish the audio collected by the microphone
options.publishMicrophoneTrack = true;
// Set channel profile to live broadcasting
options.channelProfile = agora::CHANNEL_PROFILE_TYPE::CHANNEL_PROFILE_COMMUNICATION;
// Set user role to broadcaster
options.clientRoleType = agora::rtc::CLIENT_ROLE_TYPE::CLIENT_ROLE_BROADCASTER;
// Join the channel
RtcEngineProxy->joinChannel(TCHAR_TO_ANSI(_token), TCHAR_TO_ANSI(_channelName), 0 , options);
}
void UAgoraWidget::Leave()
{
// Leave the channel
RtcEngineProxy->leaveChannel();
}
void UAgoraWidget::NativeConstruct()
{
Super::NativeConstruct();
#if PLATFORM_ANDROID
// Check and request Android permissions
CheckAndroidPermission();
#endif
// Setup UI elements
SetupUI();
// Setup Agora SDK engine
SetupSDKEngine();
}
void UAgoraWidget::NativeDestruct()
{
Super::NativeDestruct();
// Clean up resources
if (RtcEngineProxy != nullptr)
{
RtcEngineProxy->unregisterEventHandler(this);
RtcEngineProxy->release();
delete RtcEngineProxy;
RtcEngineProxy = nullptr;
}
}
void UAgoraWidget::onUserJoined(agora::rtc::uid_t uid, int elapsed)
{
// Callback when a remote user joins the channel
agora::rtc::RtcConnection connection;
connection.channelId = TCHAR_TO_ANSI(*_channelName);
}
void UAgoraWidget::onUserOffline(agora::rtc::uid_t uid, agora::rtc::USER_OFFLINE_REASON_TYPE reason)
{
// Callback when a remote user leaves the channel
agora::rtc::RtcConnection connection;
connection.channelId = TCHAR_TO_ANSI(*_channelName);
}
void UAgoraWidget::onJoinChannelSuccess(const char* channel, agora::rtc::uid_t uid, int elapsed)
{
// Callback when the local user successfully joins the channel
AsyncTask(ENamedThreads::GameThread, =
{
UE_LOG(LogTemp, Warning, TEXT("JoinChannelSuccess uid: %u"), uid);
});
}
```
**`Project/Source/Project/Project.Build.cs`**
```csharp
using UnrealBuildTool;
public class UnrealLearning : ModuleRules
{
public UnrealLearning(ReadOnlyTargetRules Target) : base(Target)
{
PCHUsage = PCHUsageMode.UseExplicitOrSharedPCHs;
PublicDependencyModuleNames.AddRange(new string[]
{
"Core",
"CoreUObject",
"Engine",
"InputCore",
"AgoraPlugin"
});
if (Target.Platform == UnrealTargetPlatform.Android)
{
PrivateDependencyModuleNames.AddRange(new string[] { "AndroidPermission" });
}
PrivateDependencyModuleNames.AddRange(new string[] { });
// Uncomment if you are using Slate UI
// PrivateDependencyModuleNames.AddRange(new string[] { "Slate", "SlateCore" });
// Uncomment if you are using online features
// PrivateDependencyModuleNames.Add("OnlineSubsystem");
// To include OnlineSubsystemSteam, add it to the plugins section in your uproject file with the Enabled attribute set to true
}
}
```
### Create a user interface [#create-a-user-interface-9]
Follow these steps to set up a basic UI for your project or to integrate essential UI elements into your existing interface.
**Create a basic UI**
1. Create **Widget Blueprint**
In Unreal Editor, click **Content Drawer > Content**, right-click and select **User Interface > Widget Blueprint**. Name the new Widget Blueprint **AgoraWidget** and double-click it to open.
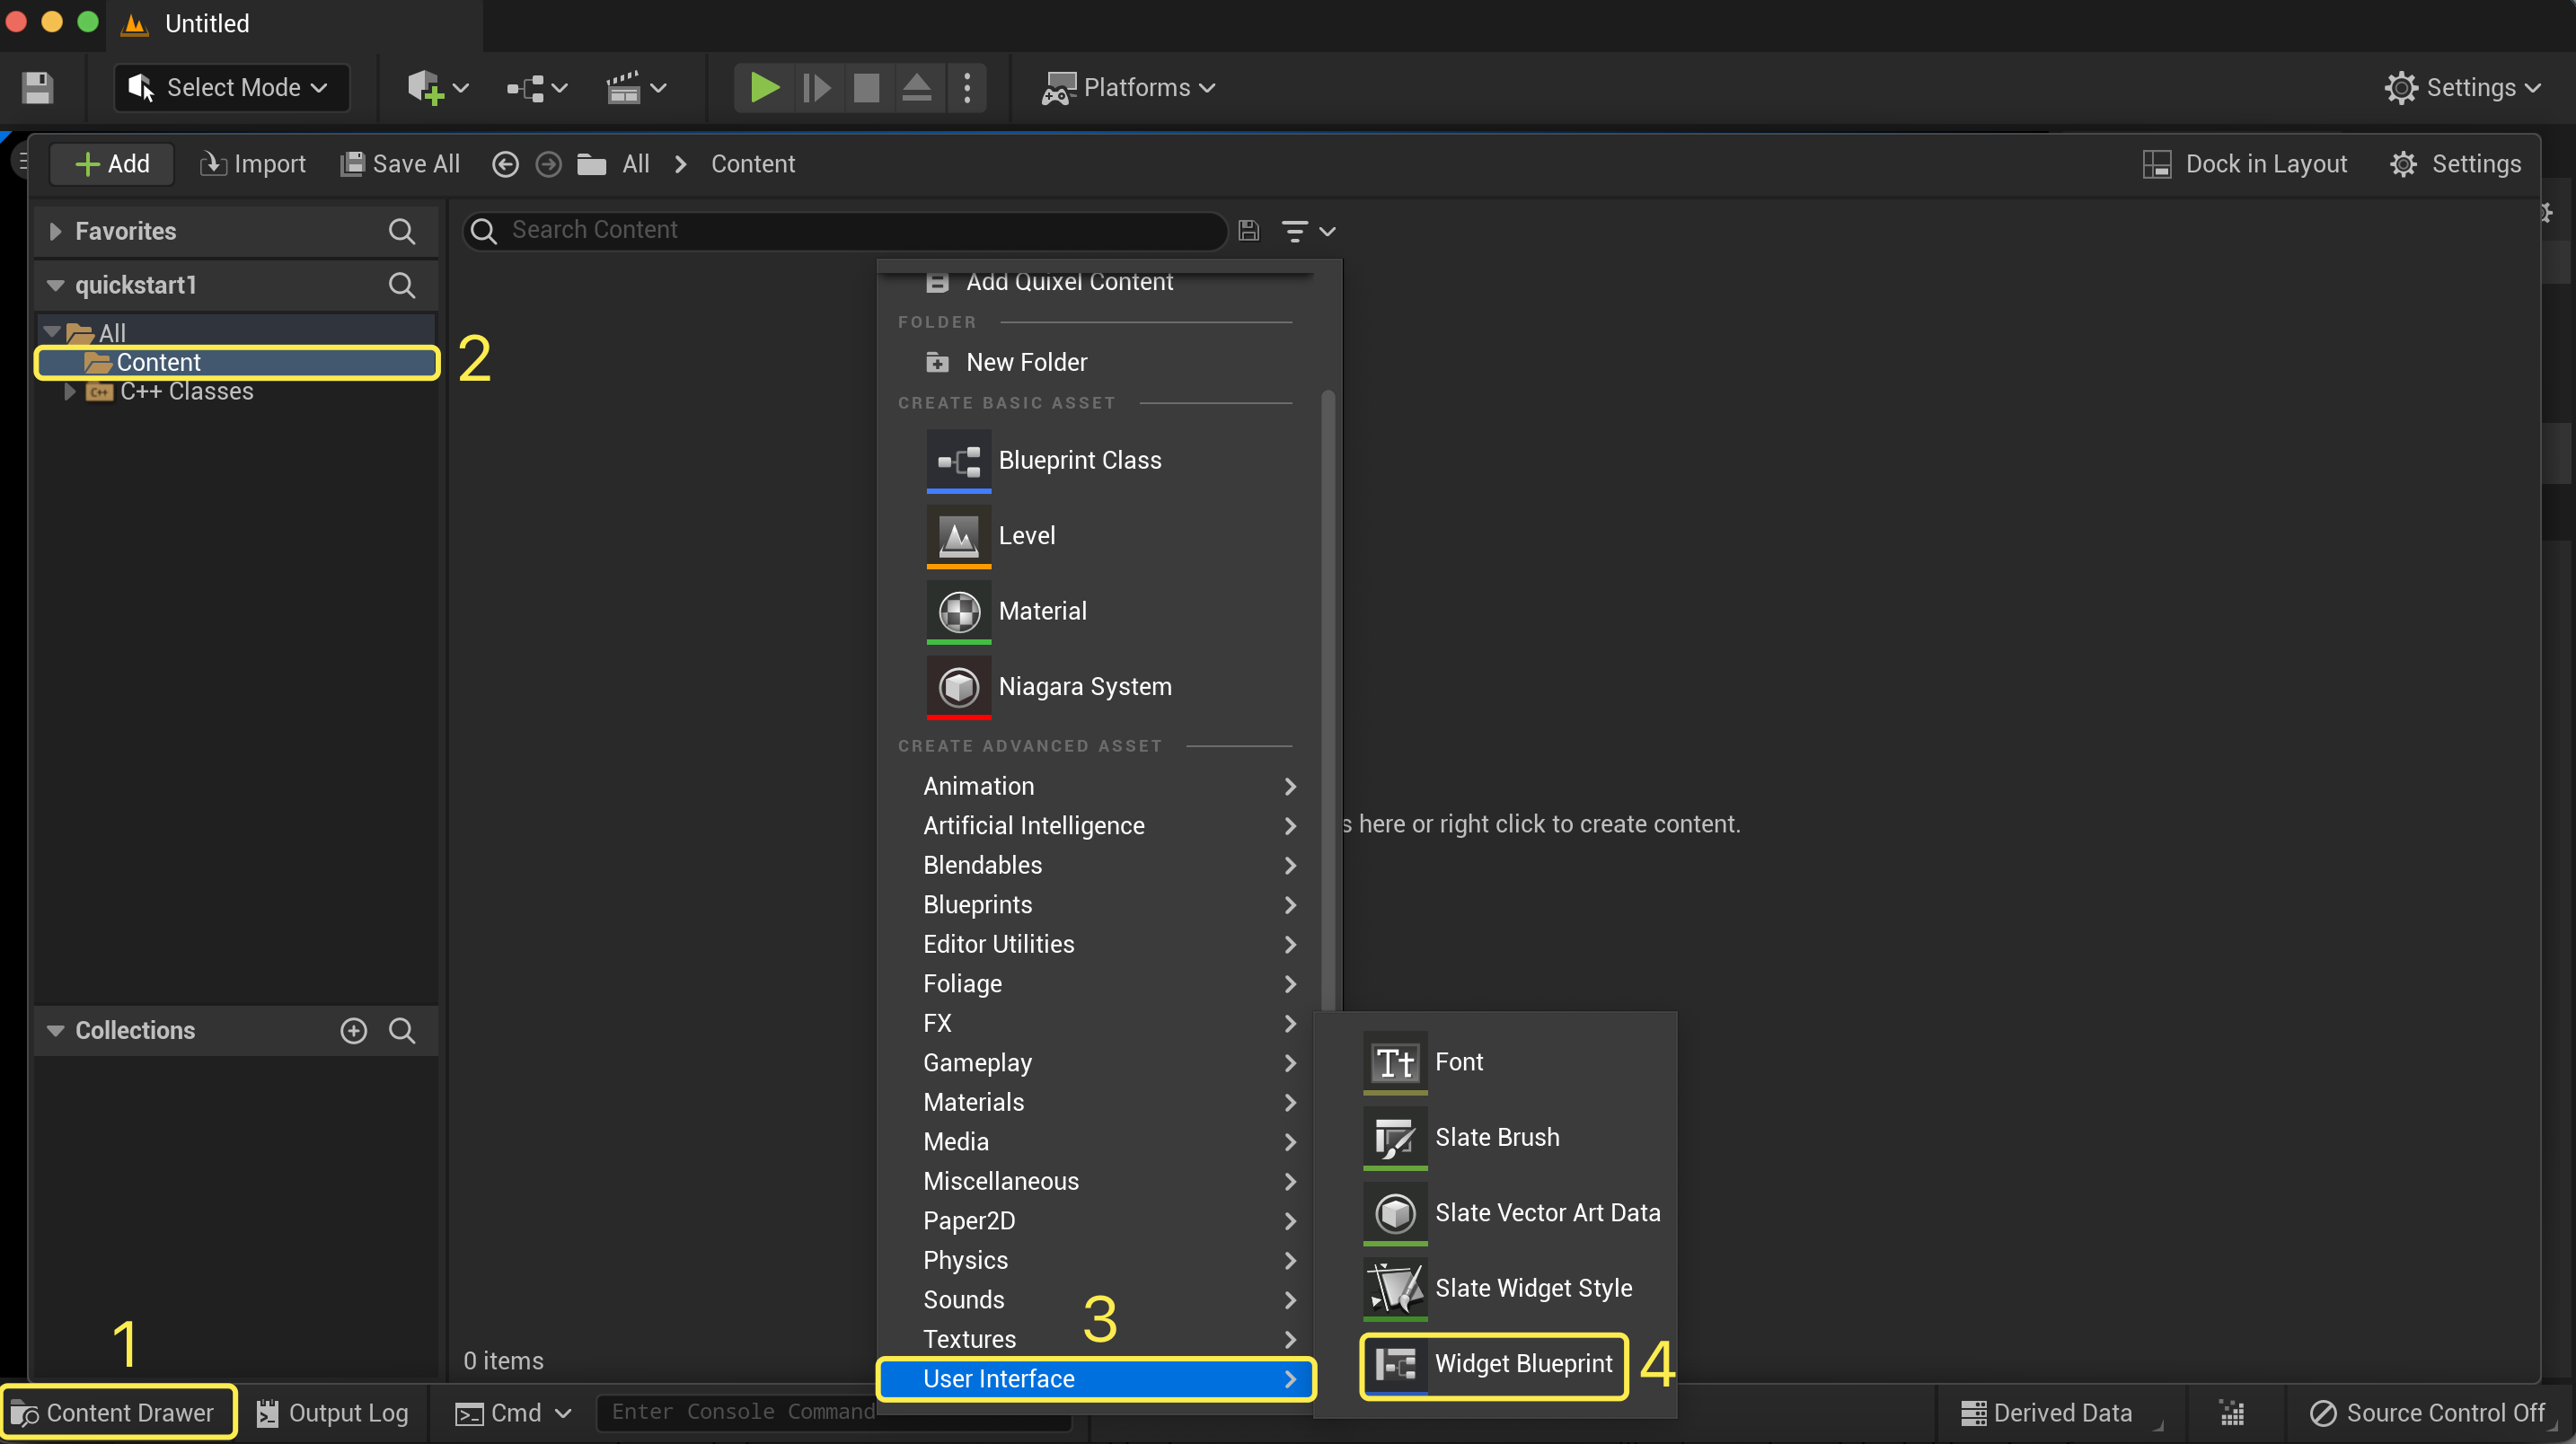
2. Create a view canvas.
Select **Palette > PANEL > Canvas Panel** and drag it to **AgoraWidget**.
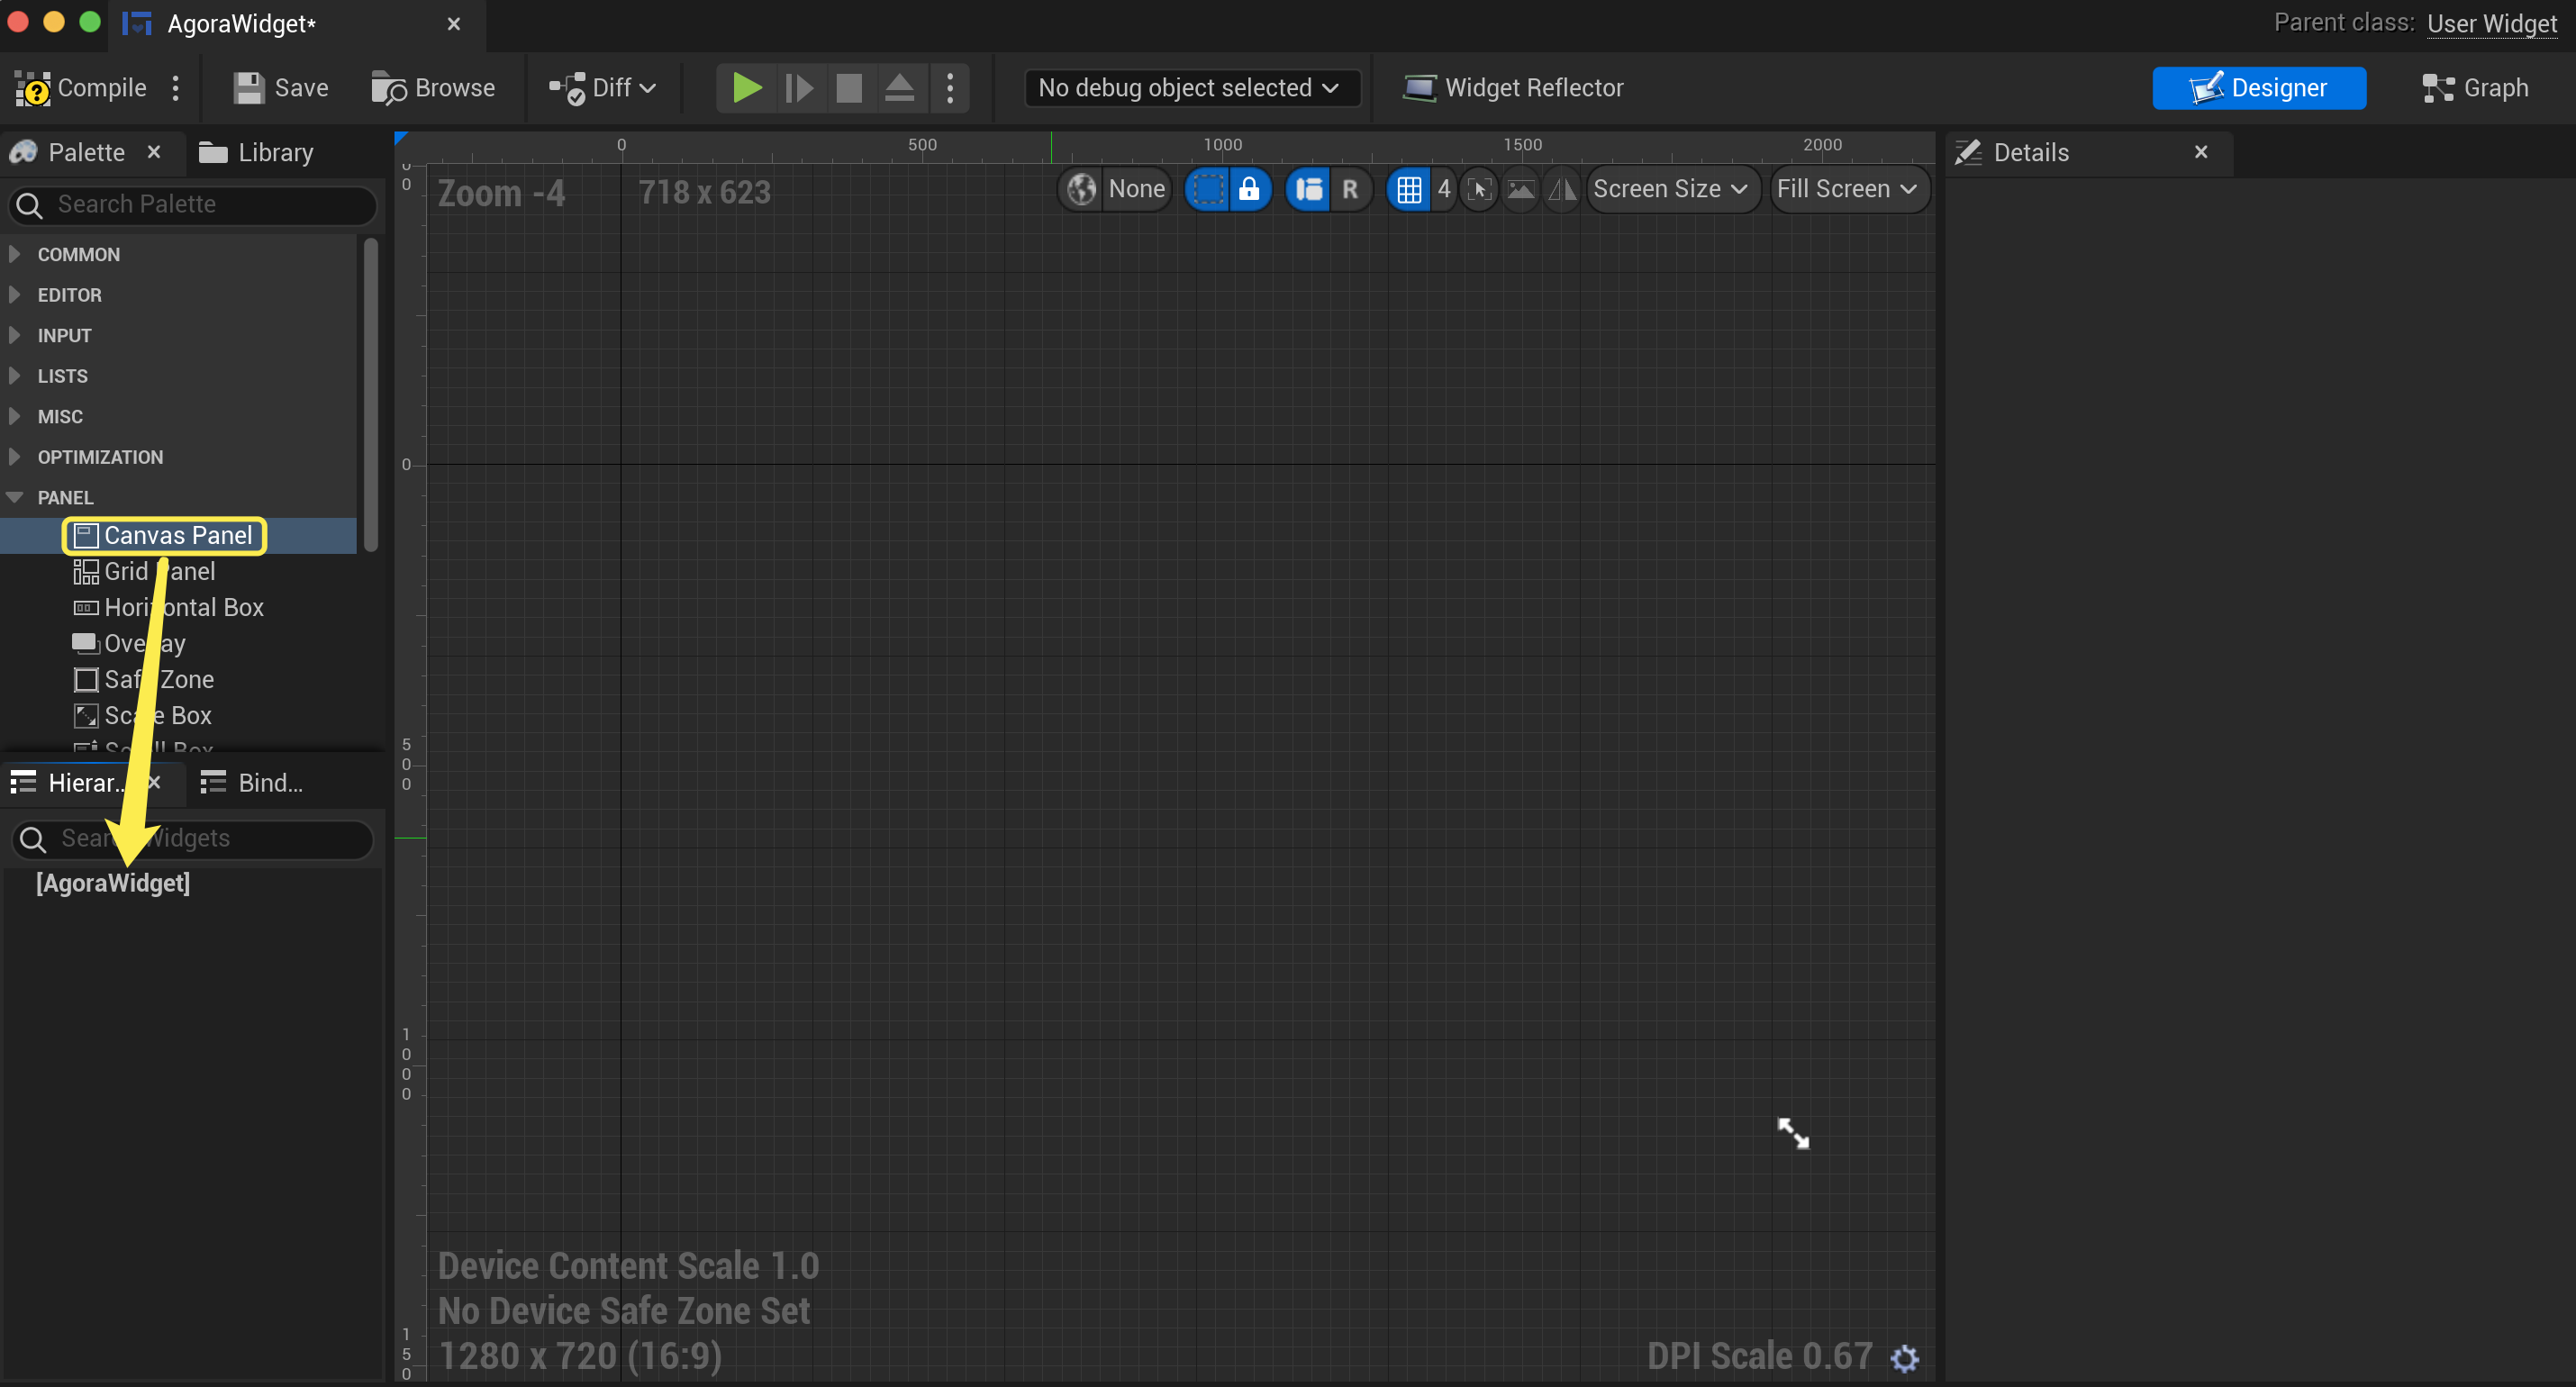
3. Create join and leave channel buttons in Widget Blueprint
1. In **AgoraWidget**, select **COMMON > Button**, drag it to the **Canvas Panel**, and rename it to **JoinBtn**. Adjust the button's size and position on the canvas or use the following sample settings:
* **Position X**:`300`
* **Position Y**: `700`
* **Size X**:`240`
* **Size Y**: `120`
1. Select **COMMON > Text** and drag it to **JoinBtn**. Select the **Text** control of **JoinBtn**, and change the text content of **Text** to **Join** in the **Details** panel.
2. Repeat the above steps to create a **LeaveBtn**. Adjust the button size and position according to your layout design.
4. Save your changes.
5. Create a **Level Blueprint** and associate it with the created **Widget Blueprint**
1. In **Unreal Editor**, click **Content Drawer**, right-click to select **Level**, and name it **agoraLevel**.
2. Double-click to open **agoraLevel** and click **Open Level Blueprint**.
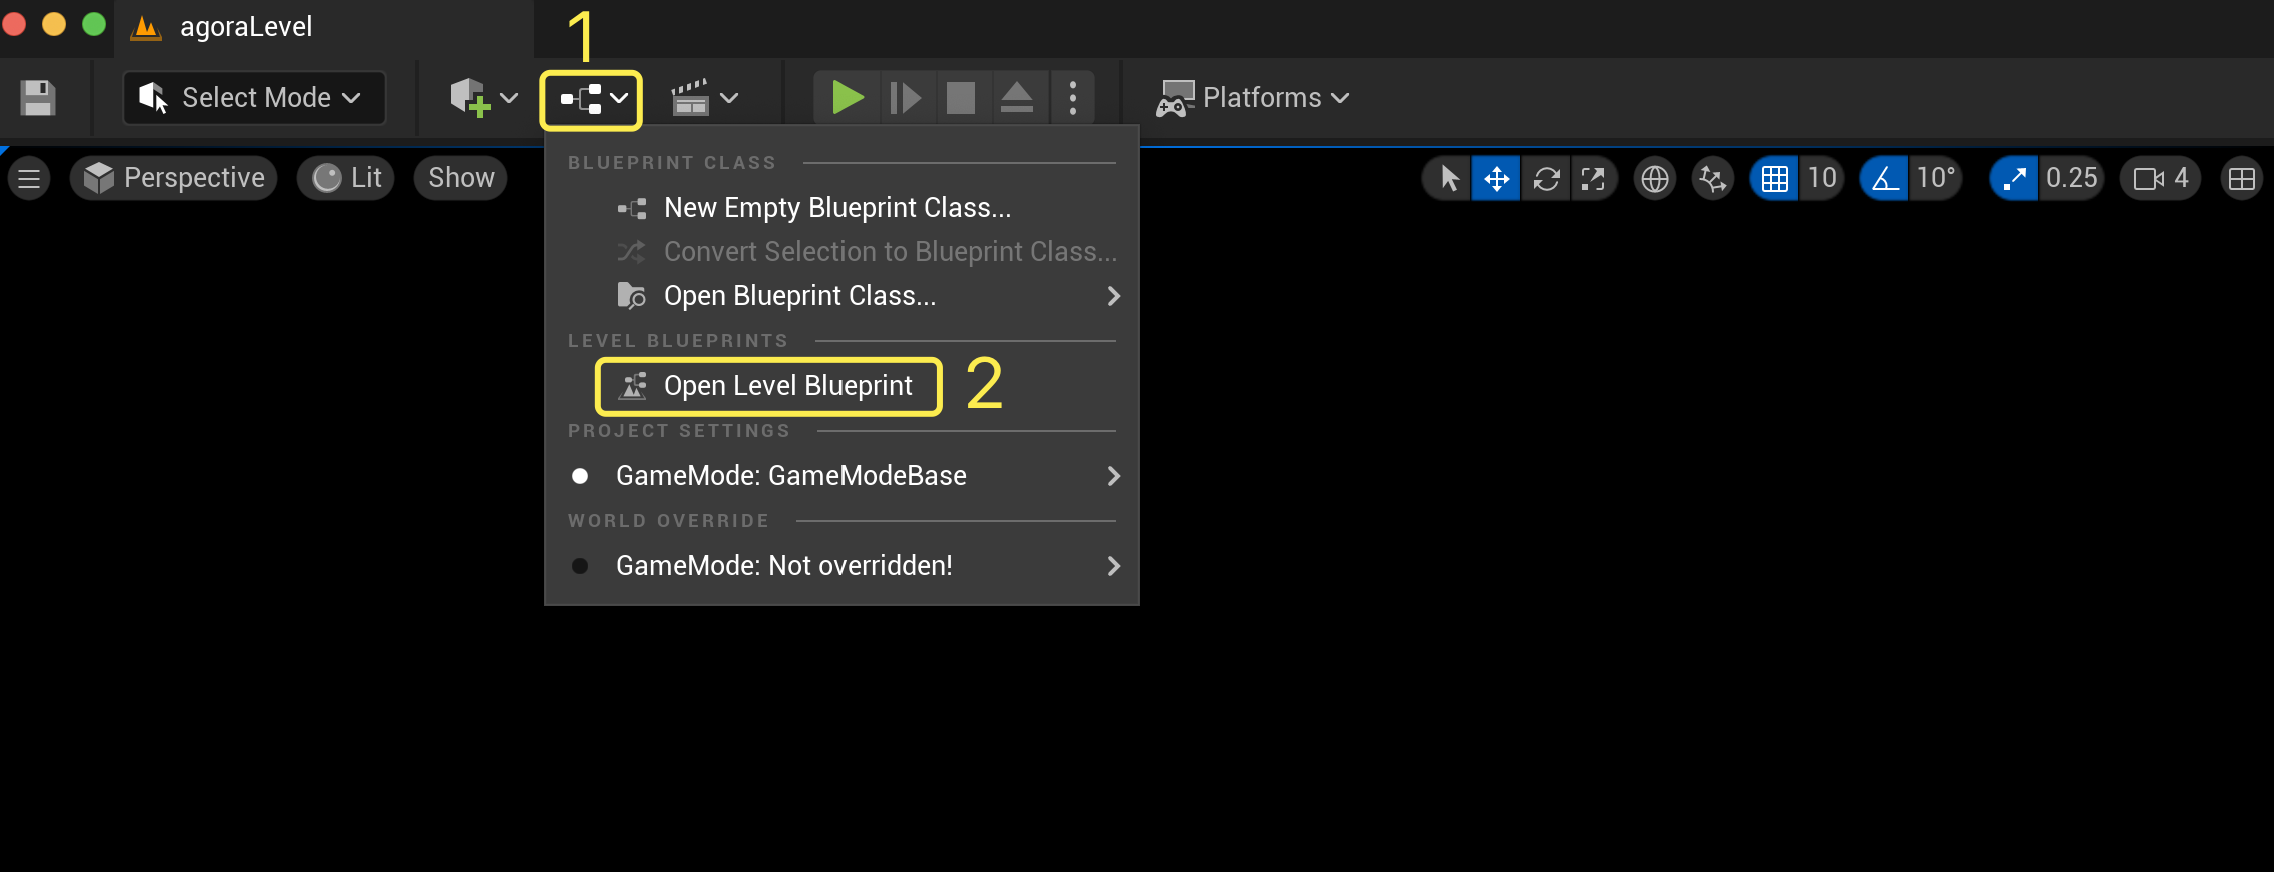
3. Right-click and enter **Create Widget** in the search box. Select the created **AgoraWidget**, create **Event BeginPlay** and **Add to Viewport** in the same way. Connect them as follows:
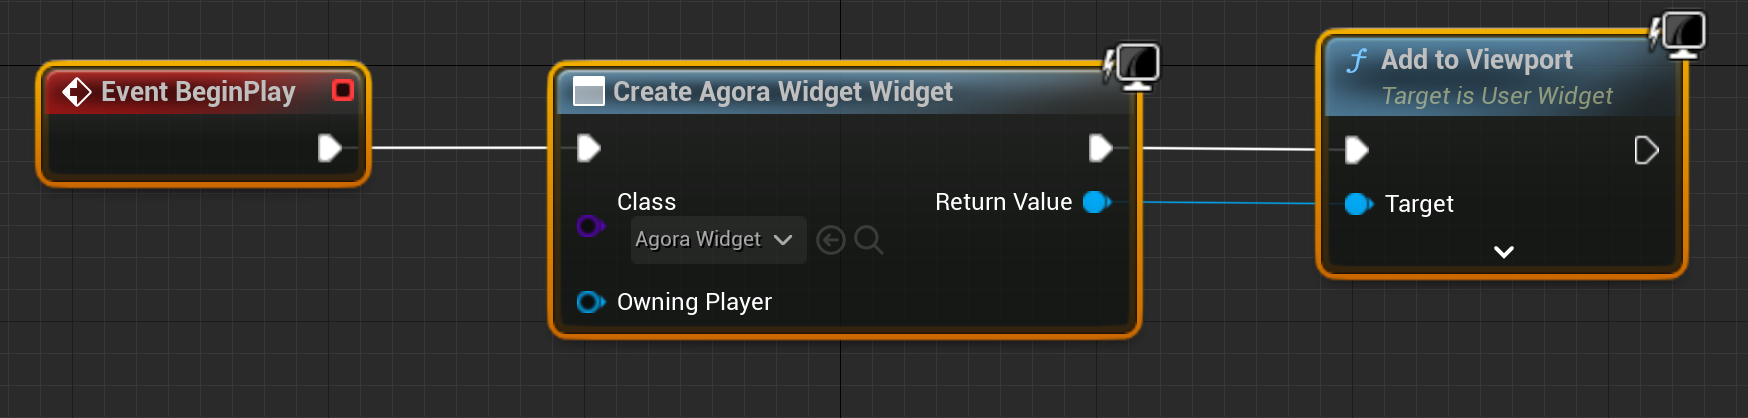
4. Save your changes and run the project.
## Test the sample code [#test-the-sample-code-10]
Take the following steps to test the sample code:
1. Obtain a temporary token from Agora Console.
2. In `AgoraWidget.h`, update `_appID`, `_channelName`, and `_token` with the app ID, channel name, and temporary token for your project.
3. In the Unreal Editor, click the play button to run your project, then click **Join** to join a channel.
4. Invite a friend to run the demo game on a second device. Alternatively, use the [Web demo](https://webdemo.agora.io/basicVideoCall/index.html) to join the same channel.
After your friend joins successfully, you can hear each other.
## Reference [#reference-10]
This section contains content that completes the information on this page, or points you to documentation that explains other aspects to this product.
* If a firewall is deployed in your network environment, refer to [Connect with Cloud Proxy](build/manage-connection-and-quality/cloud-proxy.mdx) to use Agora services normally.
### Next steps [#next-steps-10]
After implementing the quickstart sample, read the following documents to learn more:
* To ensure communication security in a test or production environment, best practice is to obtain and use a token from an authentication server. For details, see [Secure authentication with tokens](build/set-up-token-authentication/use-tokens.mdx).
### Sample project [#sample-project-10]
Agora provides open source sample projects on [GitHub](https://github.com/AgoraIO-Extensions/Agora-Unreal-RTC-SDK/tree/main/Agora-Unreal-SDK-CPP-Example) for your reference. Download or view the [JoinChannelAudio](https://github.com/AgoraIO-Extensions/Agora-Unreal-RTC-SDK/tree/main/Agora-Unreal-SDK-CPP-Example/Source/AgoraExample/Examples/Basic/JoinChannelAudio) project for a more detailed example.
To learn about Agora Unreal Blueprint development, refer to the [Unreal (Blueprint) Quickstart](index.mdx).
### API reference [#api-reference-10]
* [`JoinChannel`](https://api-ref.agora.io/en/voice-sdk/unreal-engine/4.x/API/class_irtcengine.html#api_irtcengine_joinchannel)
* [`CreateAgoraRtcEngine`](https://api-ref.agora.io/en/voice-sdk/unreal-engine/4.x/API/class_irtcengine.html#api_createagorartcengine)
* [`SetClientRole`](https://api-ref.agora.io/en/voice-sdk/unreal-engine/4.x/API/class_irtcengine.html#api_irtcengine_setclientrole)
* [`LeaveChannel`](https://api-ref.agora.io/en/voice-sdk/unreal-engine/4.x/API/class_irtcengine.html#api_irtcengine_leavechannel)
### Frequently asked questions [#frequently-asked-questions-8]
* [How can I listen for audience joining or leaving a channel?](/en/api-reference/faq/integration/audience_event)
* [How can I solve channel-related issues?](/en/api-reference/faq/integration/channel)
* [How can I set the log file?](/en/api-reference/faq/integration/set_log_file)
### See also [#see-also-10]
* [Error codes](reference/error-codes.mdx)
* [Connection status management](build/manage-connection-and-quality/connection-status-management.mdx)
<_PlatformProcessedMarker close="true" />
<_PlatformPanel platform="blueprint">
<_PlatformProcessedMarker groupMode="structured" canonicalPlatform="web" platform="blueprint" />
This Unreal Blueprint quickstart shows you how to create a basic Voice Calling app using the Agora Voice SDK.
## Understand the tech [#understand-the-tech-11]
To start a Voice Calling session, implement the following steps in your app:
* **Initialize the Agora Engine**: Before calling other APIs, create and initialize an Agora Engine instance.
* **Join a channel**: Call methods to create and join a channel.
* **Send and receive audio**: All users can publish streams to the channel and subscribe to audio streams published by other users in the channel.

## Prerequisites [#prerequisites-11]
* Unreal Engine 4.27 or higher
* Prepare your development environment according to your target platform and engine version:
| Dev environment requirements | Other requirements |
| :------------------------------------------------------------------------------------------------------------- | :---------------------------------------------------------------------------------------------------------------------------------------------------------------------------------- |
| [Android](https://docs.unrealengine.com/4.27/us-EN/SharingAndReleasing/Mobile/Android/AndroidSDKRequirements/) | - |
| [iOS](https://docs.unrealengine.com/4.27/us-EN/SharingAndReleasing/Mobile/iOS/SDKRequirements/) | A valid Apple developer signature. |
| [macOS](https://docs.unrealengine.com/4.27/us-EN/Basics/InstallingUnrealEngine/RecommendedSpecifications/) | A valid Apple developer signature. |
| [Windows](https://docs.unrealengine.com/4.27/us-EN/Basics/InstallingUnrealEngine/RecommendedSpecifications/) | 32-bit Windows only supports Unreal Engine 4 and below. To use Unreal Engine with 32-bit Windows, uncomment the code relating to `Win32` in the `AgoraPluginLibrary.Build.cs` file. |
* Two physical devices for testing
* A microphone
* A valid Agora account and project. Please refer to [Agora account management](manage-agora-account.md) for details.
## Set up your project [#set-up-your-project-11]
This section shows you how to set up your Unreal (Blueprint) project and install the Agora Voice SDK.
Create a new project
Add to an existing project
Refer to the following steps or the [Unreal official guide](https://docs.unrealengine.com/4.27/us-EN/Basics/Projects/Browser/) to create a new project. If you already have an Unreal project, skip to the next section.
1. Open Unreal Engine. Select **Games** under **New Project Categories**, and click **Next**.
2. Configure your project as follows:
* **Template**: Select **Blank**.
* **Project Defaults**:
* **Language**: Select **Blueprint**.
* **Target Platform**: Pick **Desktop**.
* **Project Location**: Enter a project files storage path.
* **Project Name**: Type a suitable name for your project.
Click **Create**.

1. In the Unreal Project Browser, click on **Browse** and locate the `.uproject` file.
2. Select the project and click **Open**.
### Install the SDK [#install-the-sdk-11]
Take the following steps to add the Unreal (Blueprint) Voice SDK to your project:
1. Download the latest version of Agora Unreal Voice SDK from [Download SDKs](/en/api-reference/sdks?product=voice\&platform=unreal-engine) and unzip it.
2. In your project root folder, create a `Plugins` folder.
3. Copy `AgoraPlugin` from the Unreal SDK folder to `Plugins`.
## Implement Voice Calling [#implement-voice-calling-11]
This section guides you through the implementation of basic real-time audio interaction in your game.
### Create a level [#create-a-level]
1. In the **Content** folder of the **Content Browser**, right-click and select **Level** to create a **Level Blueprint** and name it **BasicAudioCallScene**.
2. Double-click **BasicAudioCallScene** and click **Blueprints > Open Level Blueprint** above the editor to open the level blueprint.
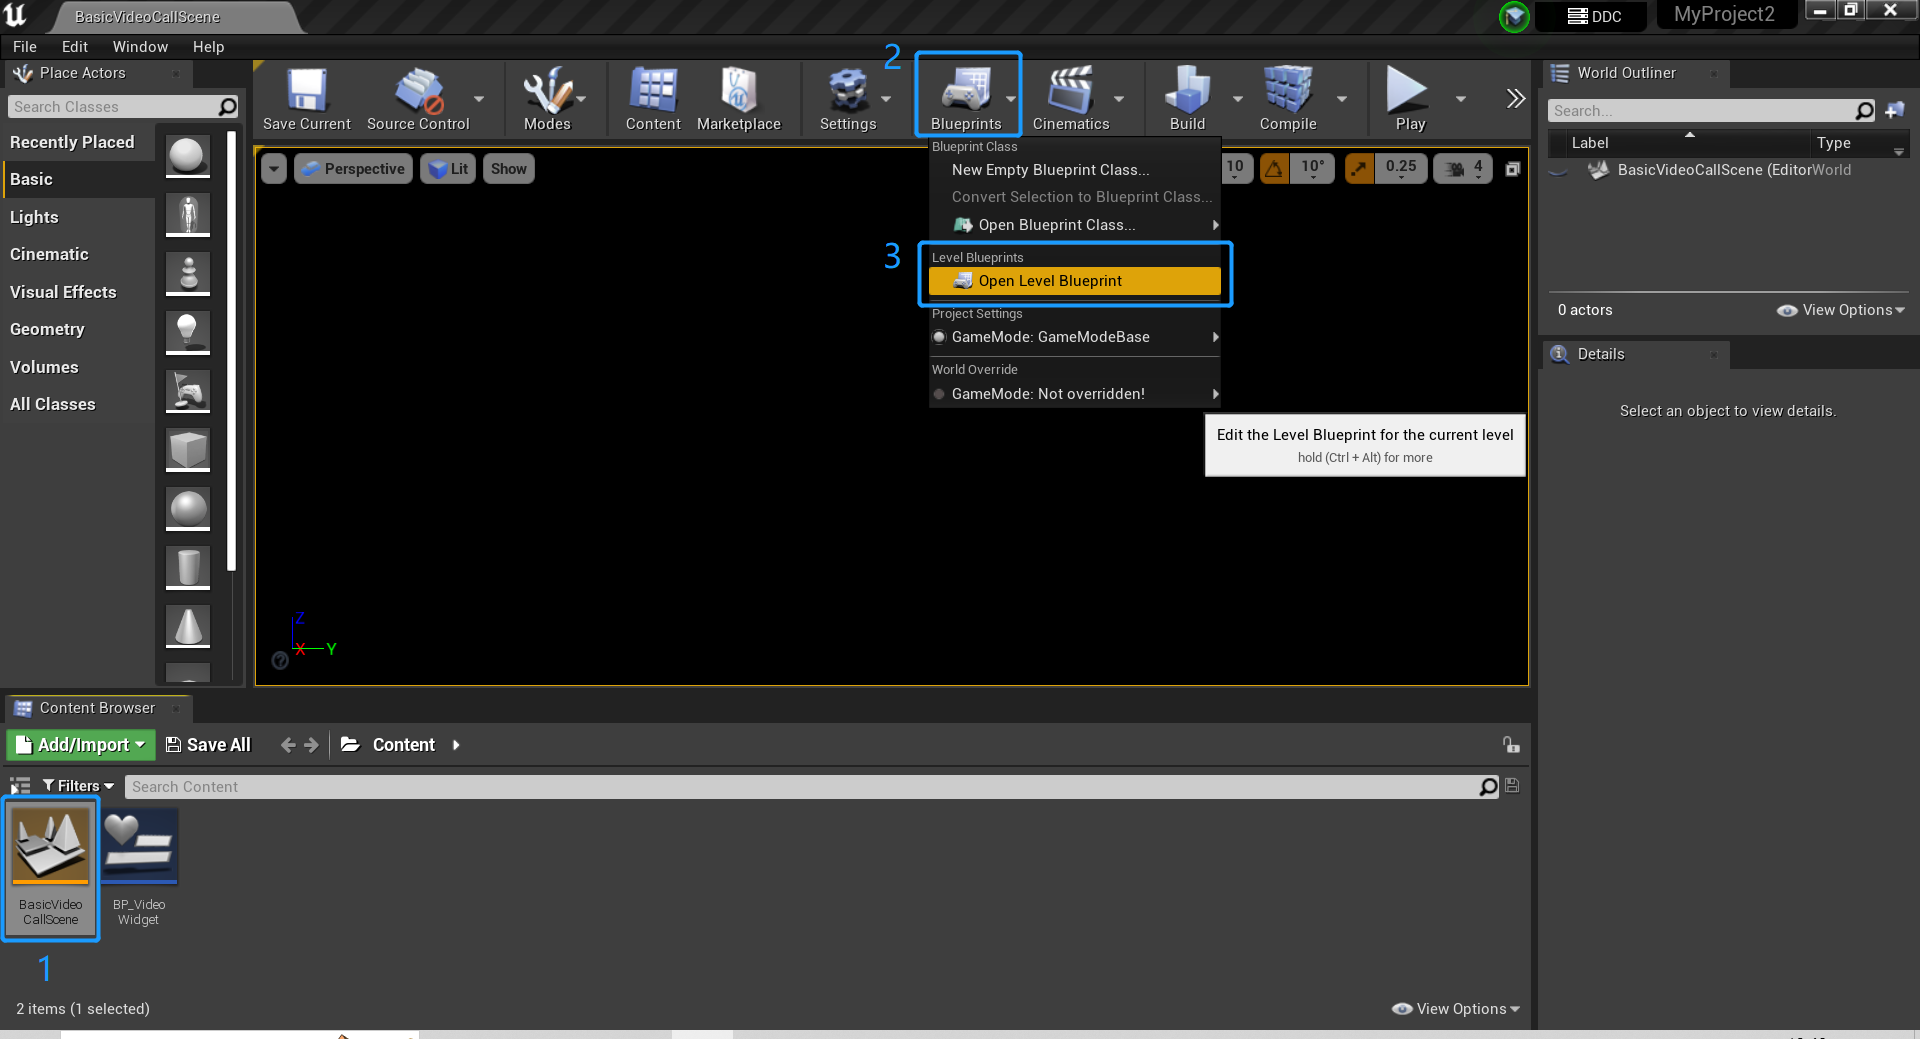
### Implement basic processes [#implement-basic-processes]
In the **My Blueprint** panel, double-click **Graphs > EventGraph** to open the event graph. You see two event nodes: **Event BeginPlay** (game starts) and **Event End Play** (game ends). Create event nodes with the corresponding functions and variables, and connect them as shown in the following figure to implement the Voice Calling logic:
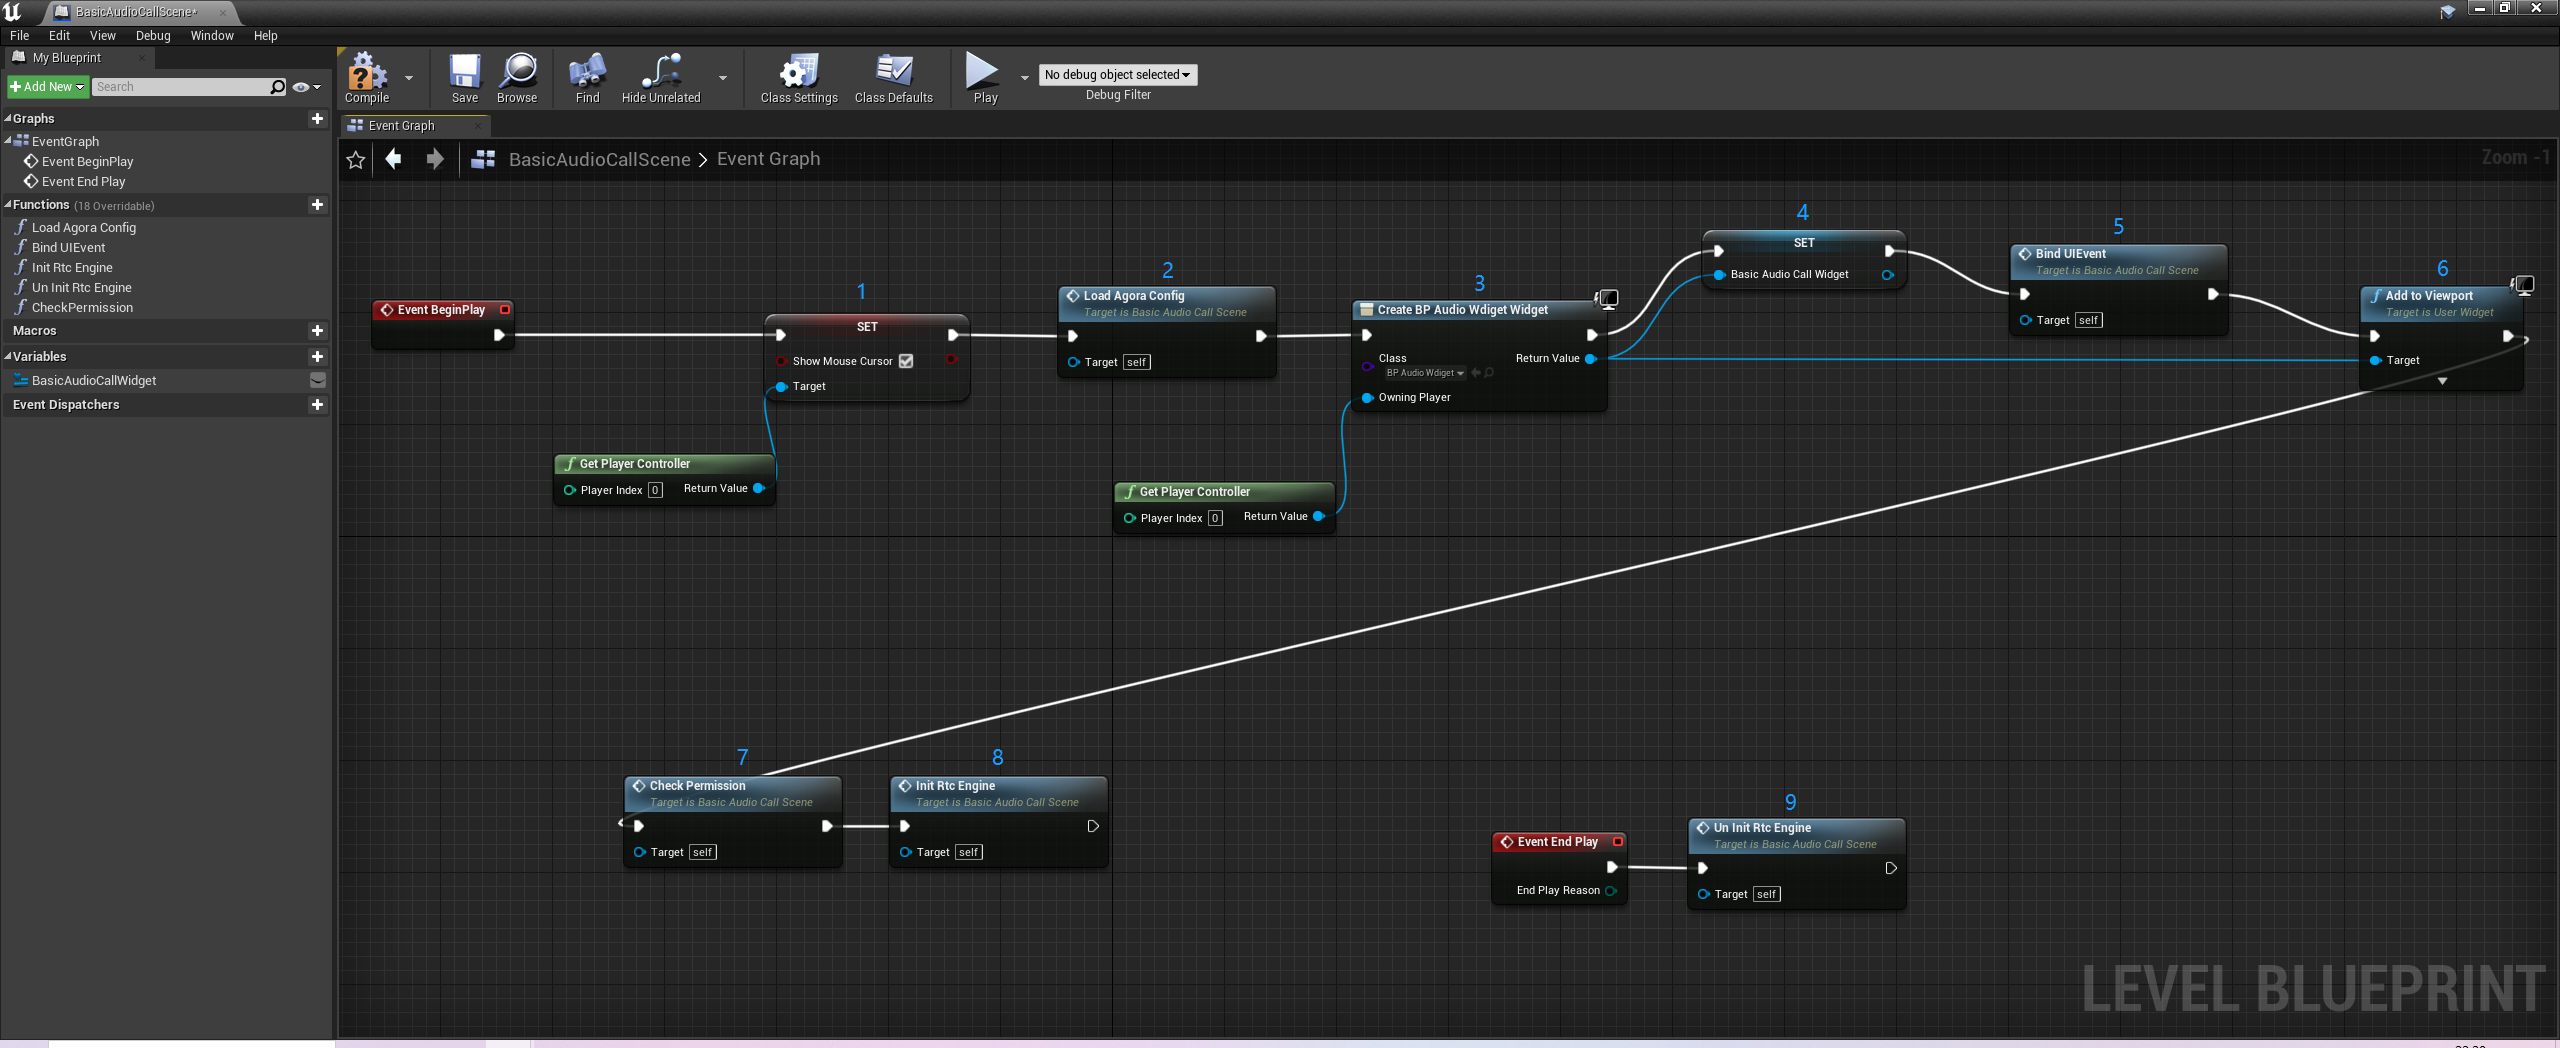
The following table lists the main nodes:
| # | Node | Type | Description |
| :- | :------------------------------ | :--------- | :---------------------------------------------------------------------------------------------------------------------------------------------------------------------------------------------------------------------------------------------------------------------------------------------------------------------------------------------------------------------------------------------------------------------------------------------------------------------------------------------------- |
| 1 | **Set Show Mouse Cursor** | Native\* | (Optional) Set whether to display the mouse cursor. Check to display it. Information: This node is available on Windows and macOS only. If the node is not retrieved at creation time, uncheck **Context Sensitive**.  |
| 2 | **Load Agora Config** | Custom\*\* | Loads Agora configuration. Used to verify user identity when creating and joining channels. |
| 3 | **Create BP Audio Widget** | Native | Create user interface:1) Add **Create Widget** node.
2) Select the node's **Class** as **BP\_AudioWidget** and associate the node with the already created user interface. |
| 4 | **Set Basic Audio Call Widget** | Custom | Set up the user interface:1) Create the **BasicAudioCallWidget** variable and select the **Variable Type** of the variable as **BP\_AudioWidget**, which is the user interface created to store a reference to the user interface in the blueprint.
2) After dragging the created variables to **EventGraph**, two options, **Set BasicAudioCallWidget** and **Get BasicAudioCallWidget**, appear. Select **Set BasicAudioCallWidget** to create a node for accessing and setting the user interface. |
| 5 | **BindUIEvent** | Custom | Use Bind UI events to handle event logic after clicking the **Join Channel** and **Leave Channel** buttons. |
| 6 | **Add to Viewport** | Native | Add user interface to the viewport. |
| 7 | **Check Permission** | Custom | (Optional) Check whether you have obtained the system permissions required for real-time audio and video interaction, such as access to the camera and microphone. Note: If your target platform is Android, create this node to check system permissions. |
| 8 | **Init Rtc Engine** | Custom | Create and initialize the RTC engine. |
| 9 | **Un Init Rtc Engine** | Custom | Leave the channel and release resources. |
\* Native nodes are nodes that come with the blueprint and can be added and called directly.
\*\* Custom nodes are not included in the blueprint. You create a custom function before you can add the corresponding node.
### Add channel-related variables [#add-channel-related-variables]
Add variables to create an engine instance and join a channel.
1. Create three variables:
**Token**, **ChannelId**, and **AppId**. Select the **Variable Type** as **String**.
2. In the **Load Agora Config** function, add the **Sequence** node, and then connect **Set Token**, **Set Channel Id**, and **Set App Id** respectively. Fill in the token, channel name, and app ID values obtained from Agora Console.
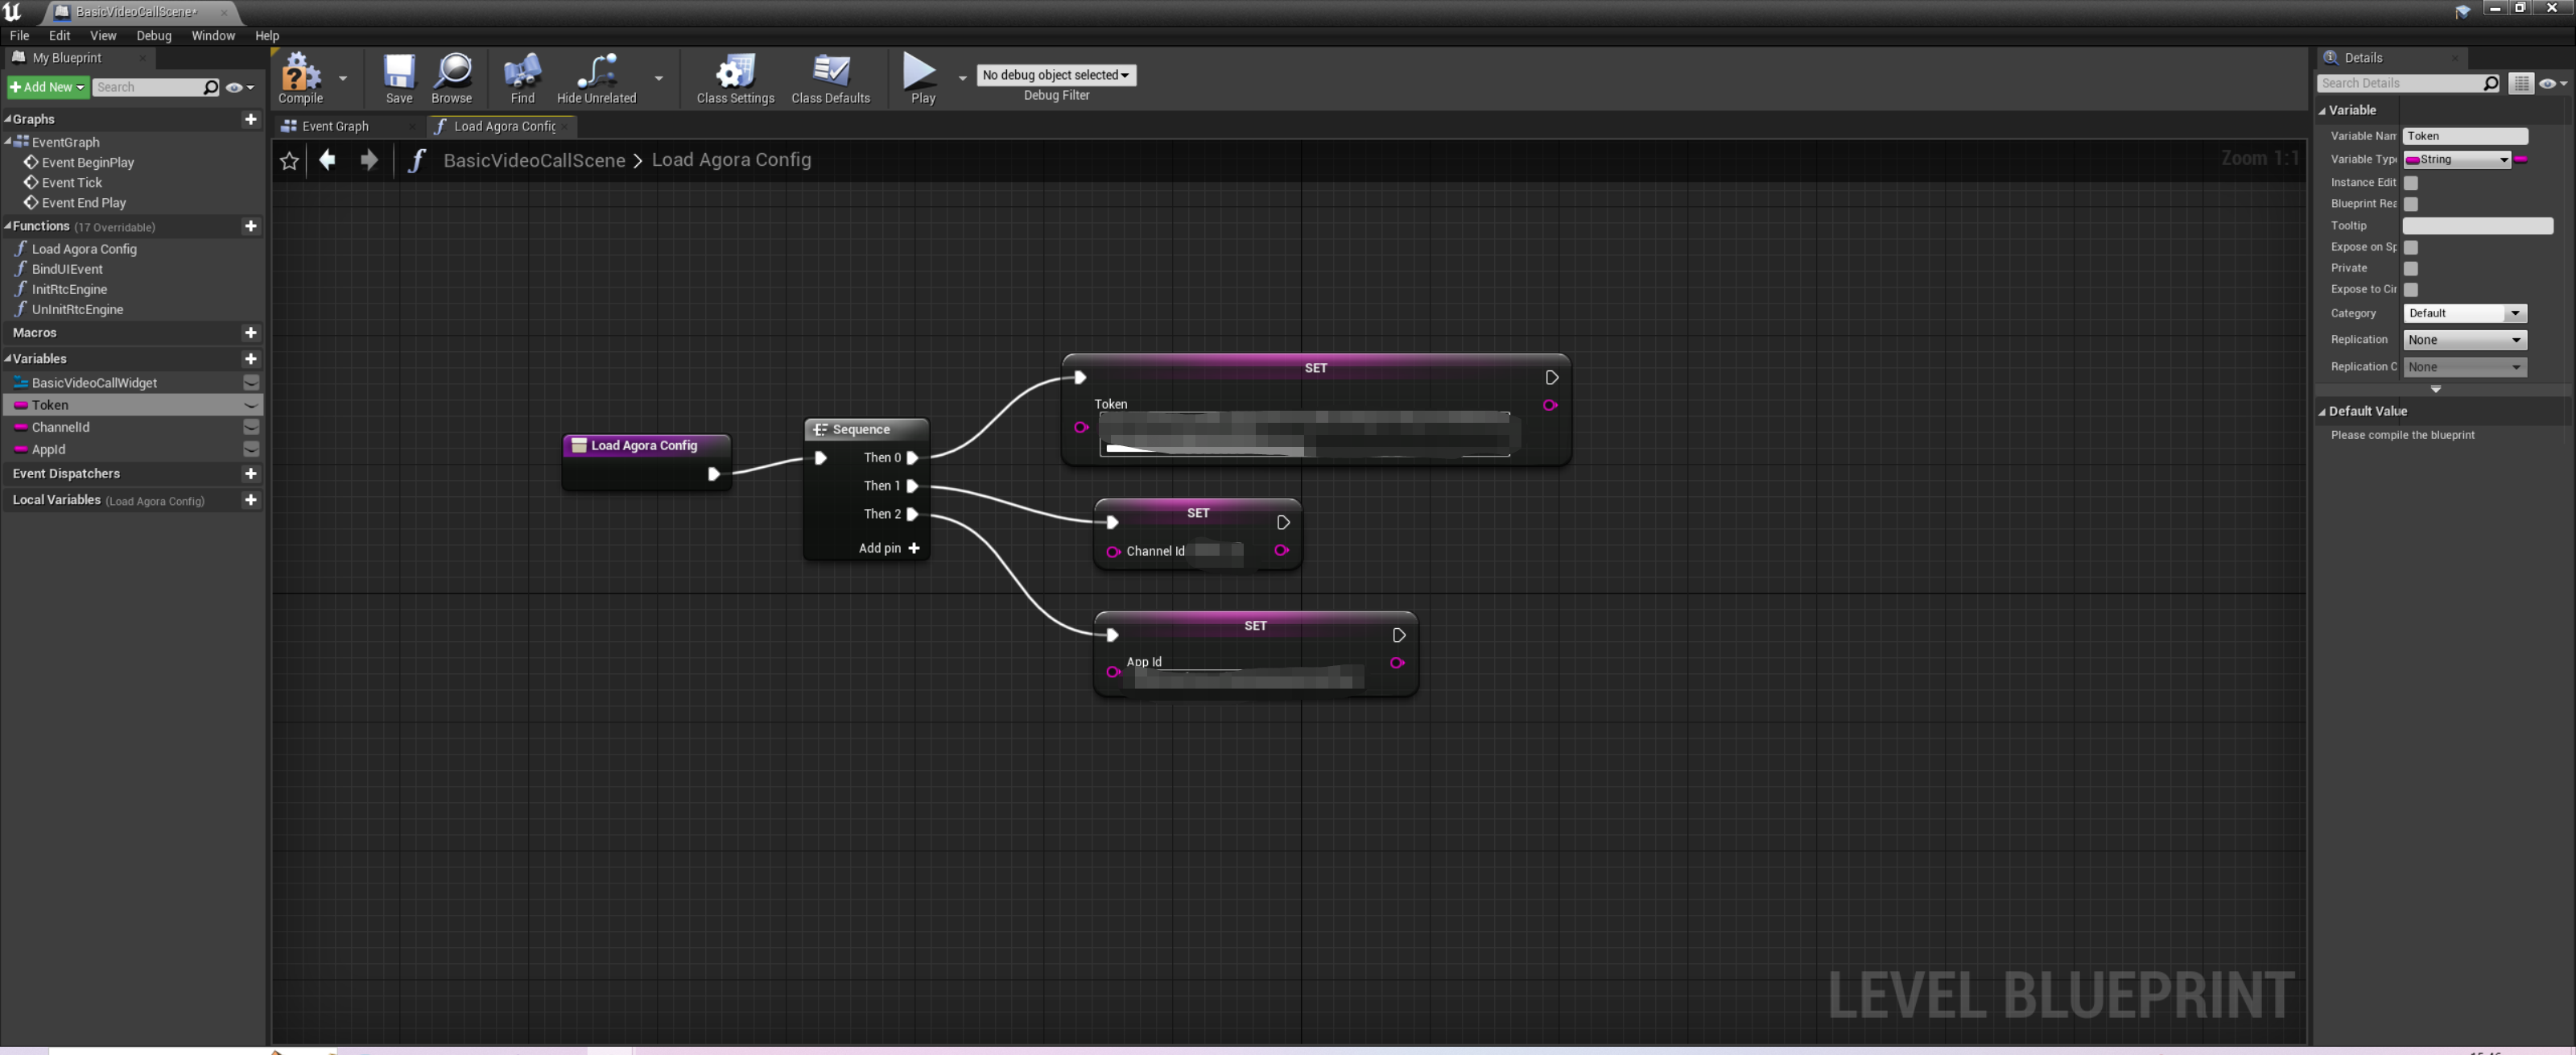
### Initialize RTC engine [#initialize-rtc-engine]
1. If your target platform is Android, check whether system permissions have been granted before initializing the RTC engine. Refer to the following figure to create nodes for adding permissions to access the microphone and camera in the **CheckPermission** function.
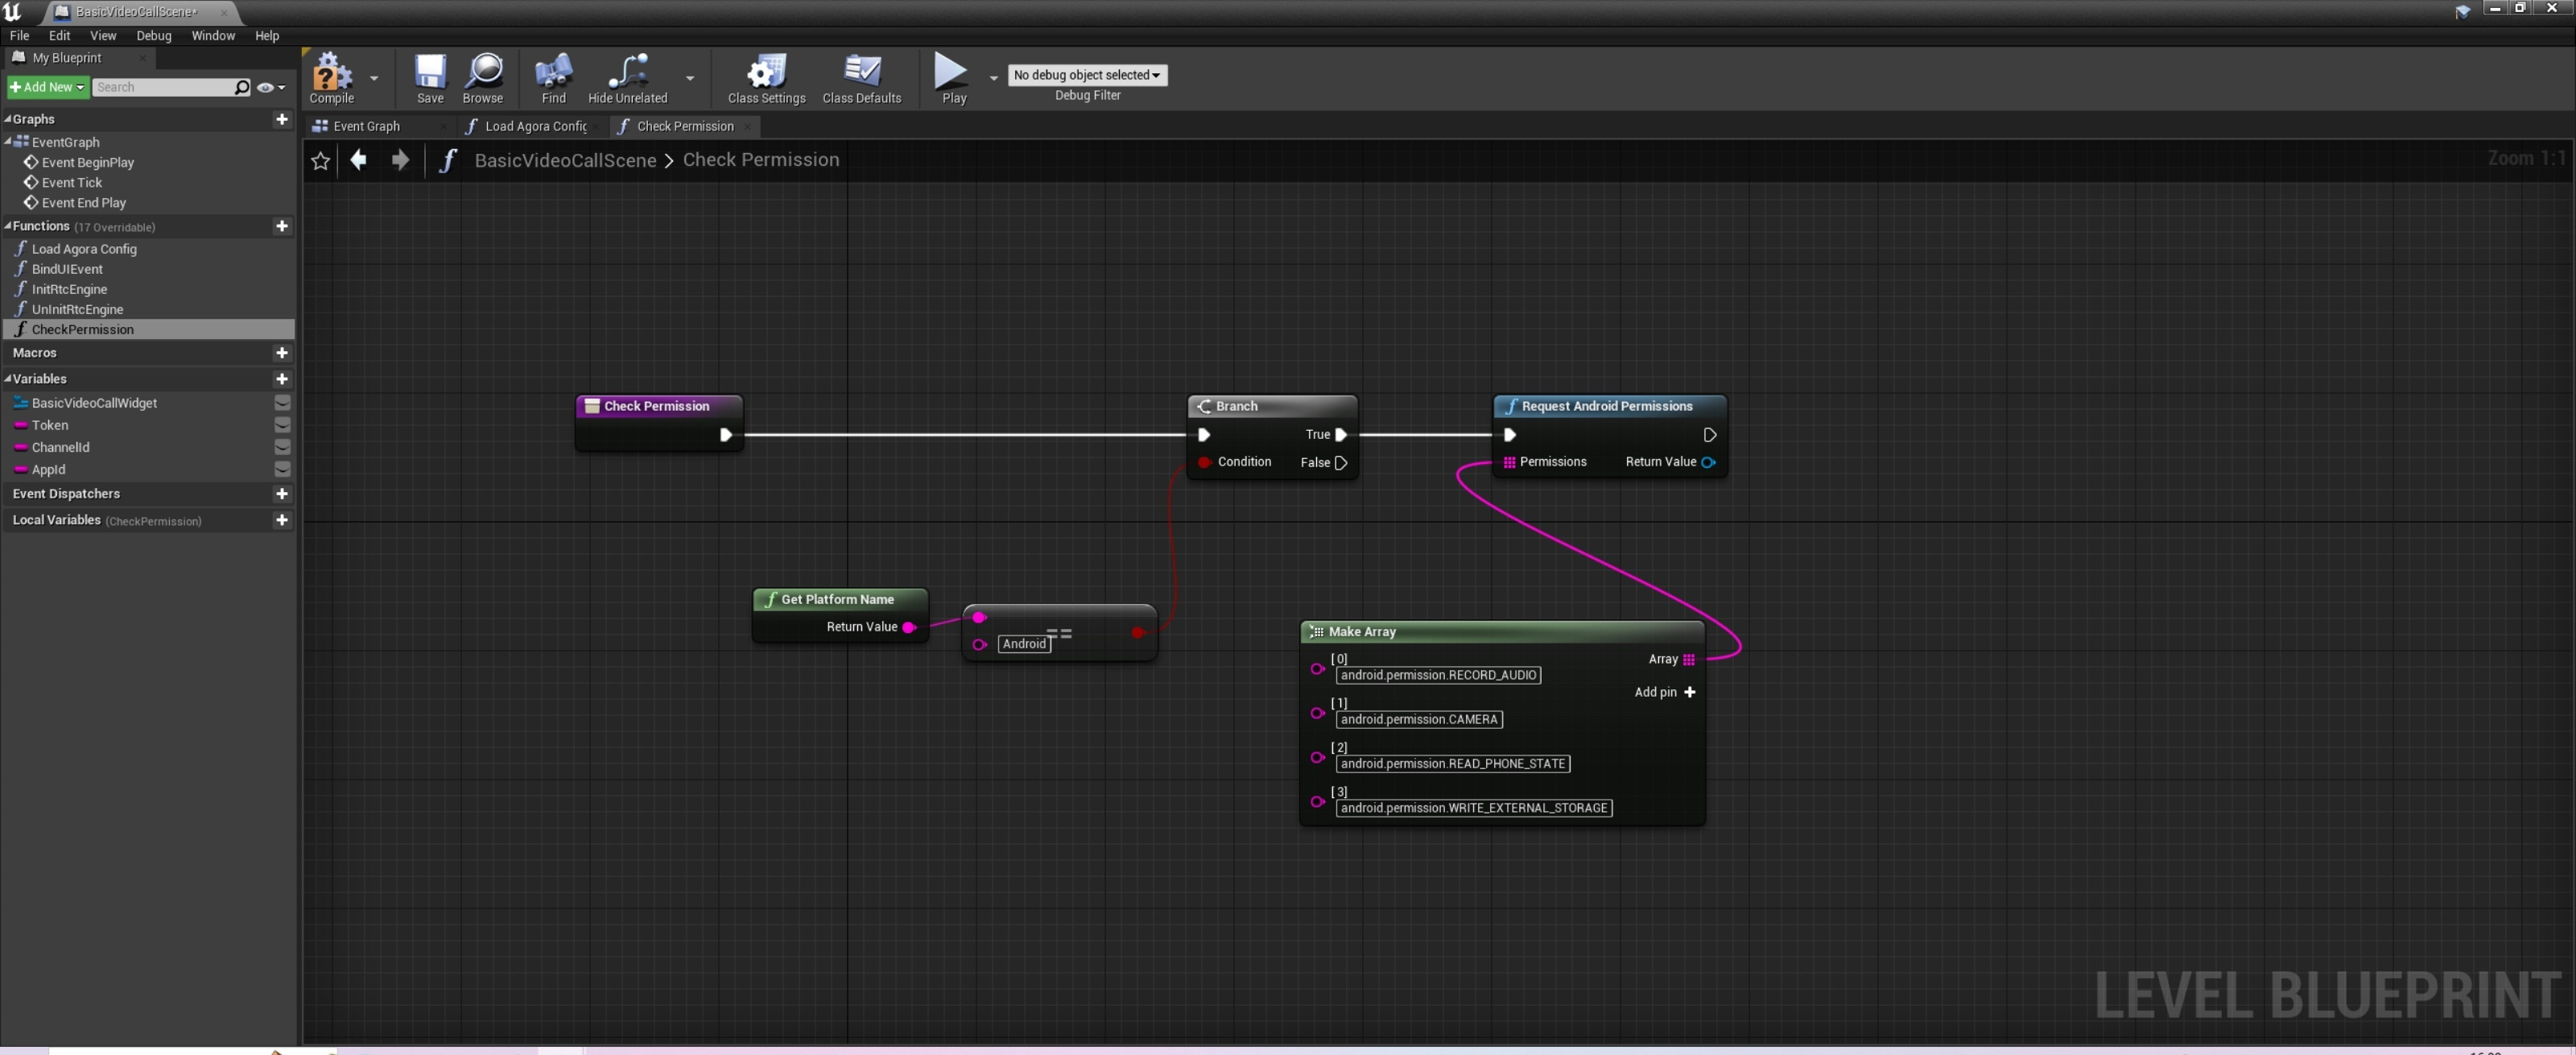
If your target platform is macOS or iOS, please refer to [How do I add the permissions needed for real-time interaction to my Unreal Engine project?](/en/api-reference/faq/integration/unreal_permissions)
1. To initialize the RTC engine, in the **InitRtcEngine** function, create and connect nodes as shown in the following figure:
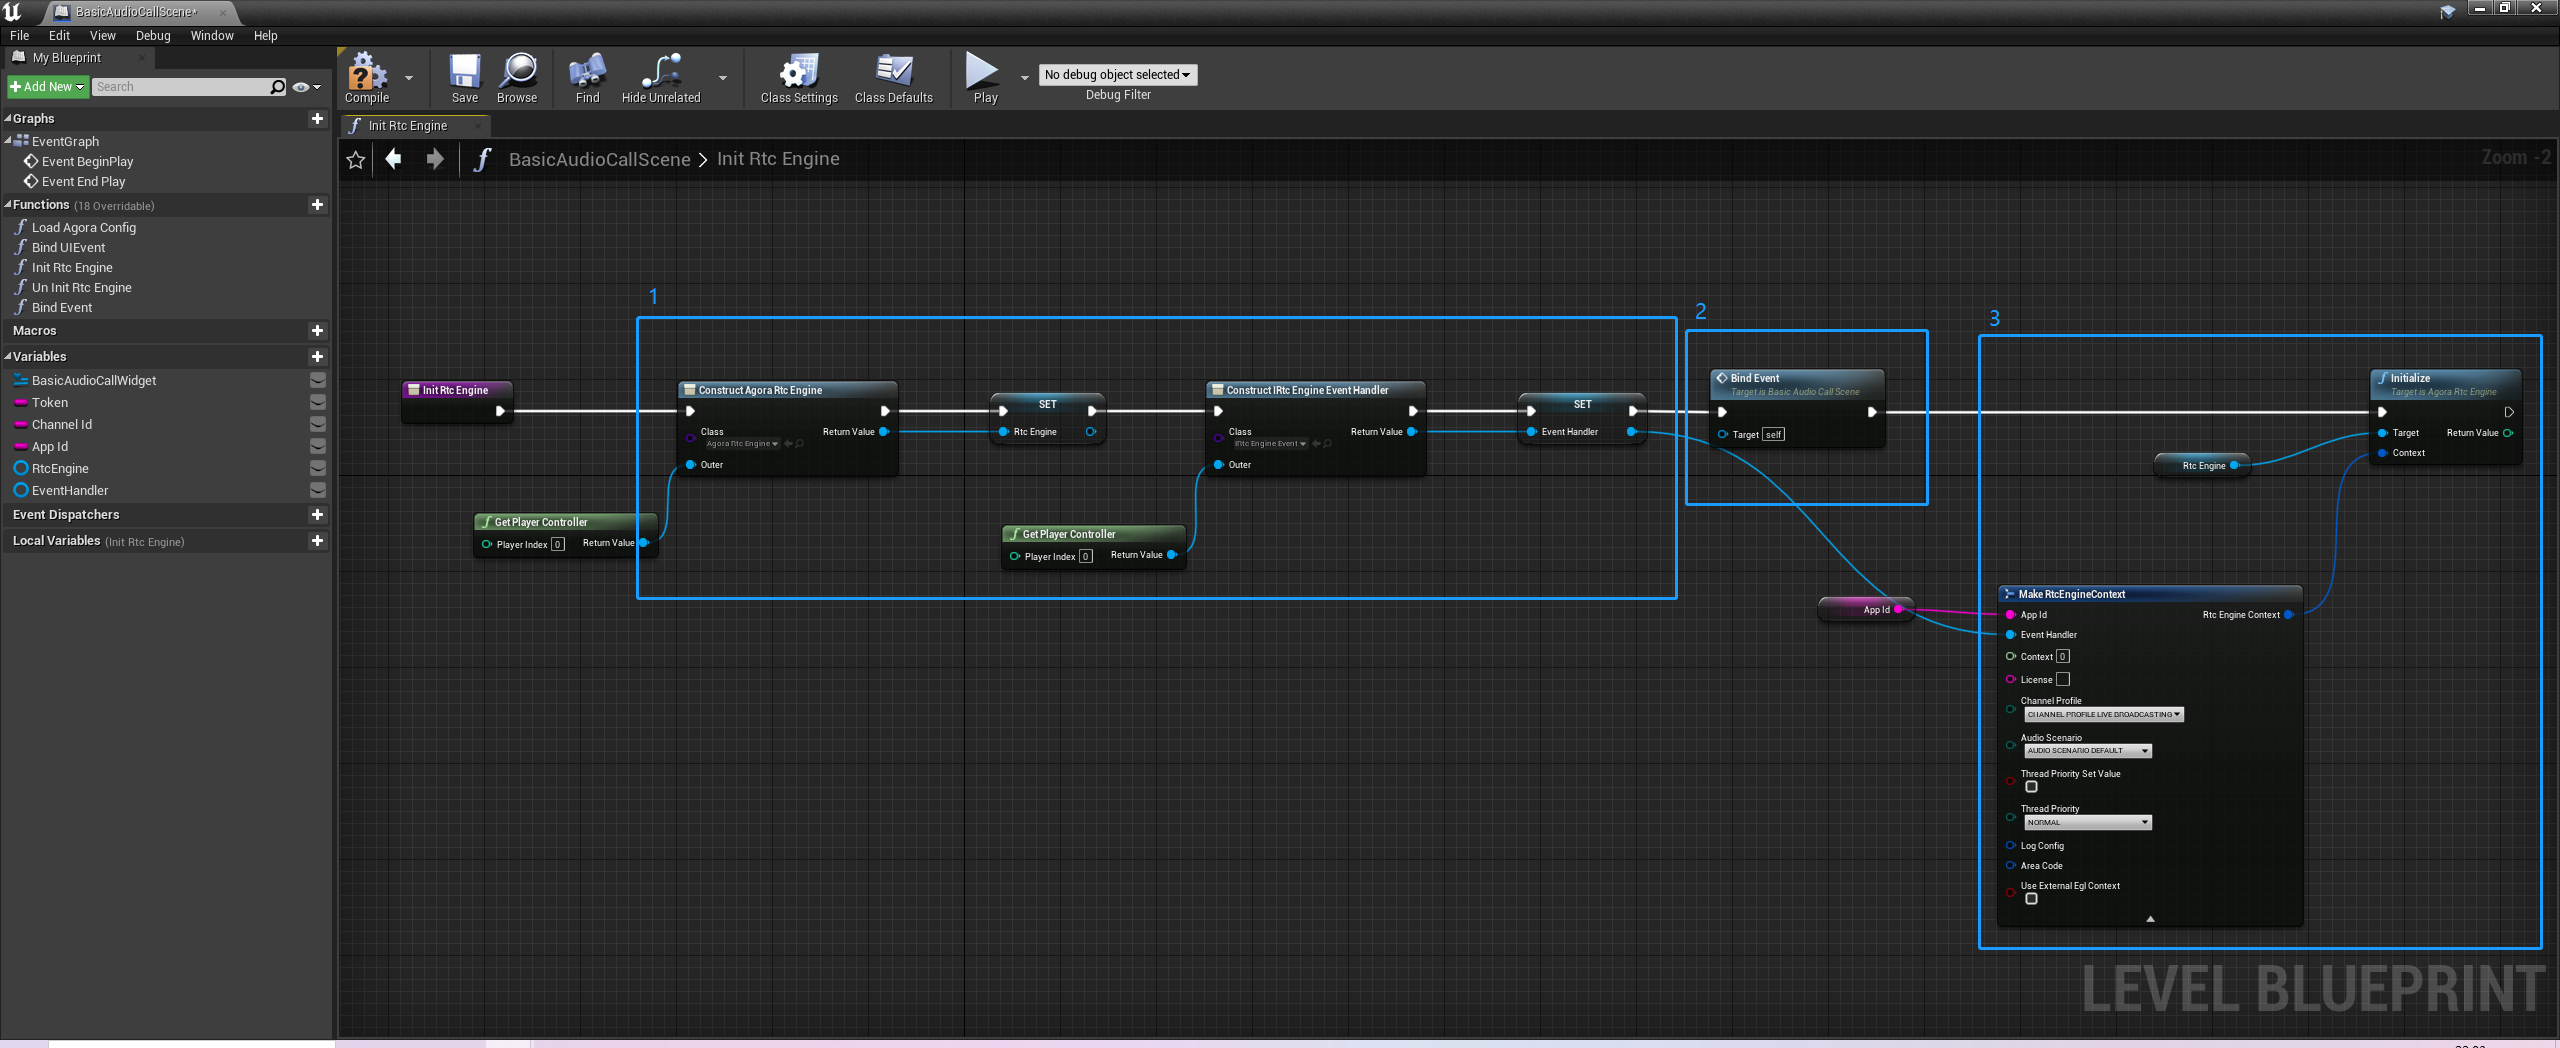
2. Create `IRtcEngine` and `IRtcEngineEventHandler`.
1. To store references to the engine and event-handler interface classes, create `RtcEngine` and `EventHandler` variables, and set the **Variable Type** to **Agora Rtc Engine** and **IRtc Engine Event Handler**, respectively.
2. Add two **Construct Object From Class nodes**, set **Class** to **Agora Rtc Engine** and **IRtc Engine Event Handler** respectively. Connect to **Set Rtc Engine** and **Set Event Handler**, respectively.
3. Bind `IRtcEngineEventHandler` class-related callback functions.
4. Create `onJoinChannelSuccess`, `onLeaveChannel`, `onUserJoined`, and `onUserOffline` callback functions. Refer to the following table to configure the input parameters of the callbacks:
| Callback | Description | Input parameters |
| :---------------------- | :-------------------------------------------- | :-------------------------------------------------------------------------------------------------------------------------------------------------------------------------------------------------------------------------------------- |
| `FOnJoinChannelSuccess` | The local user successfully joined a channel. | * `channel`: (String) Channel name.
* `uid`: (Integer64) The ID of the user joining the channel.
* `elapsed`: (Integer) The time (in milliseconds) that elapsed from the local call to `JoinChannel` till the occurrence of this event. |
| `FOnLeaveChannel` | The local user left the channel. | - `stats`: Call statistics. |
| `FOnUserJoined` | A remote user joined the current channel. | * `uid`: (Integer64) The user ID of the remote user joining the channel.
* `elapsed`: (Integer) The time (in milliseconds) that elapsed from the local call to `JoinChannel` till the occurrence of this event. |
| `FOnUserOffline` | A remote user left the current channel. | - `uid`: (Integer64) The ID of the user going offline.
- `reason`: Offline reason. For details, see `EUSER_OFFLINE_REASON_TYPE`. |
1. Create a **Bind Event** function. In this function, add a **Sequence** node, and then bind the `onJoinChannelSuccess`, `onLeaveChannel`, `onUserJoined`, and `onUserOffline` callback events.
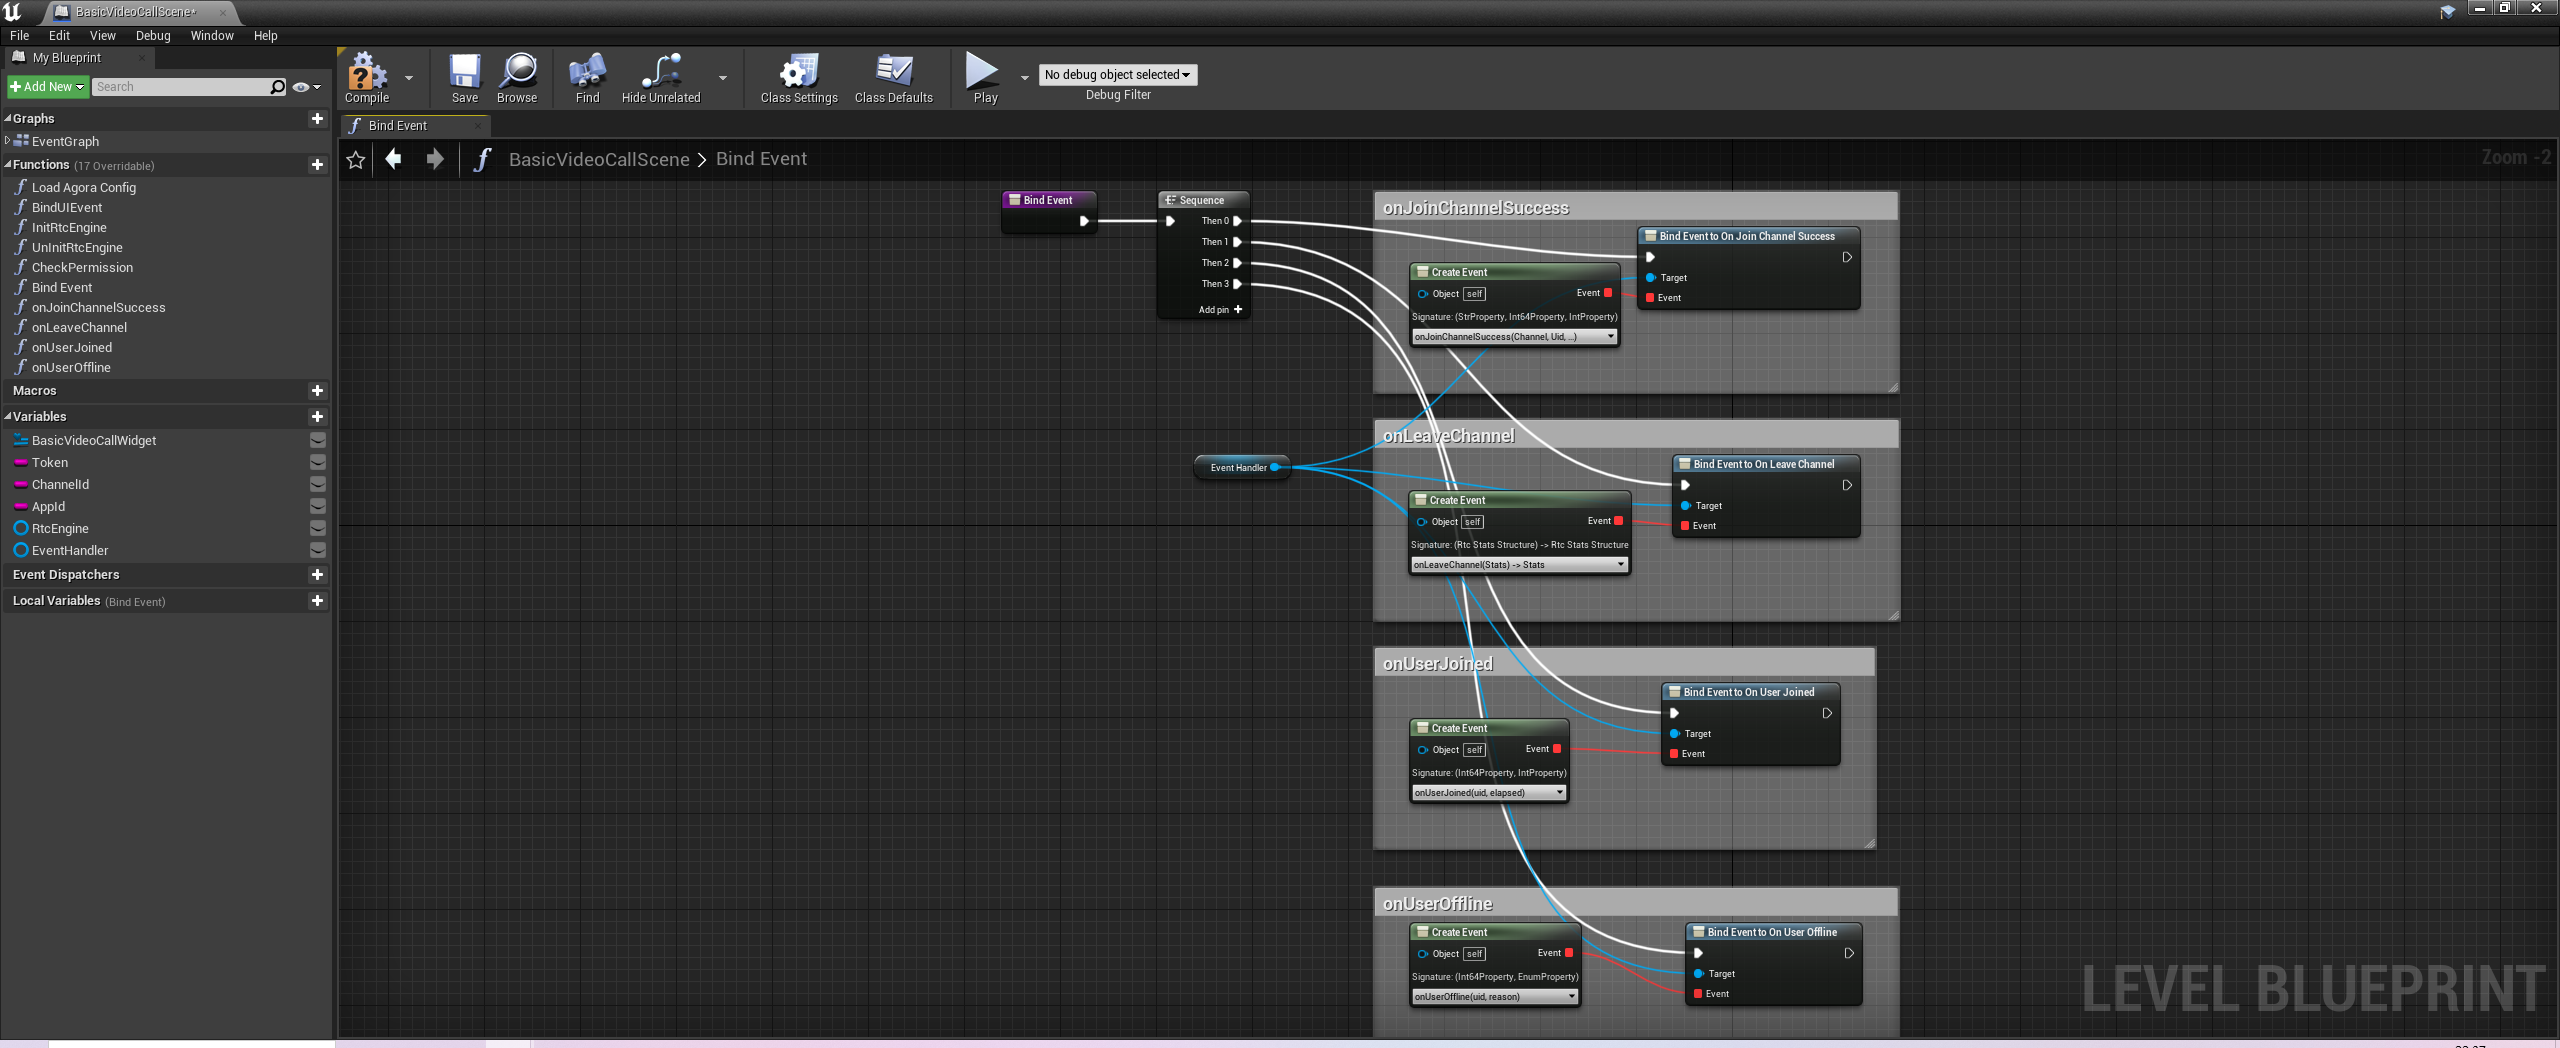
2. `IRtcEngine` initialization
3. Call **Initialize** to initialize the RTC engine.
4. Connect to the **RtcEngineContext** configuration `IRtcEngine` instance and select **Channel Profile** as `CHANNEL_PROFILE_COMMUNICATION`.
### Bind UI events [#bind-ui-events]
To bind UI events:
1. Create and implement the `OnJoinChannelClicked` event callback.
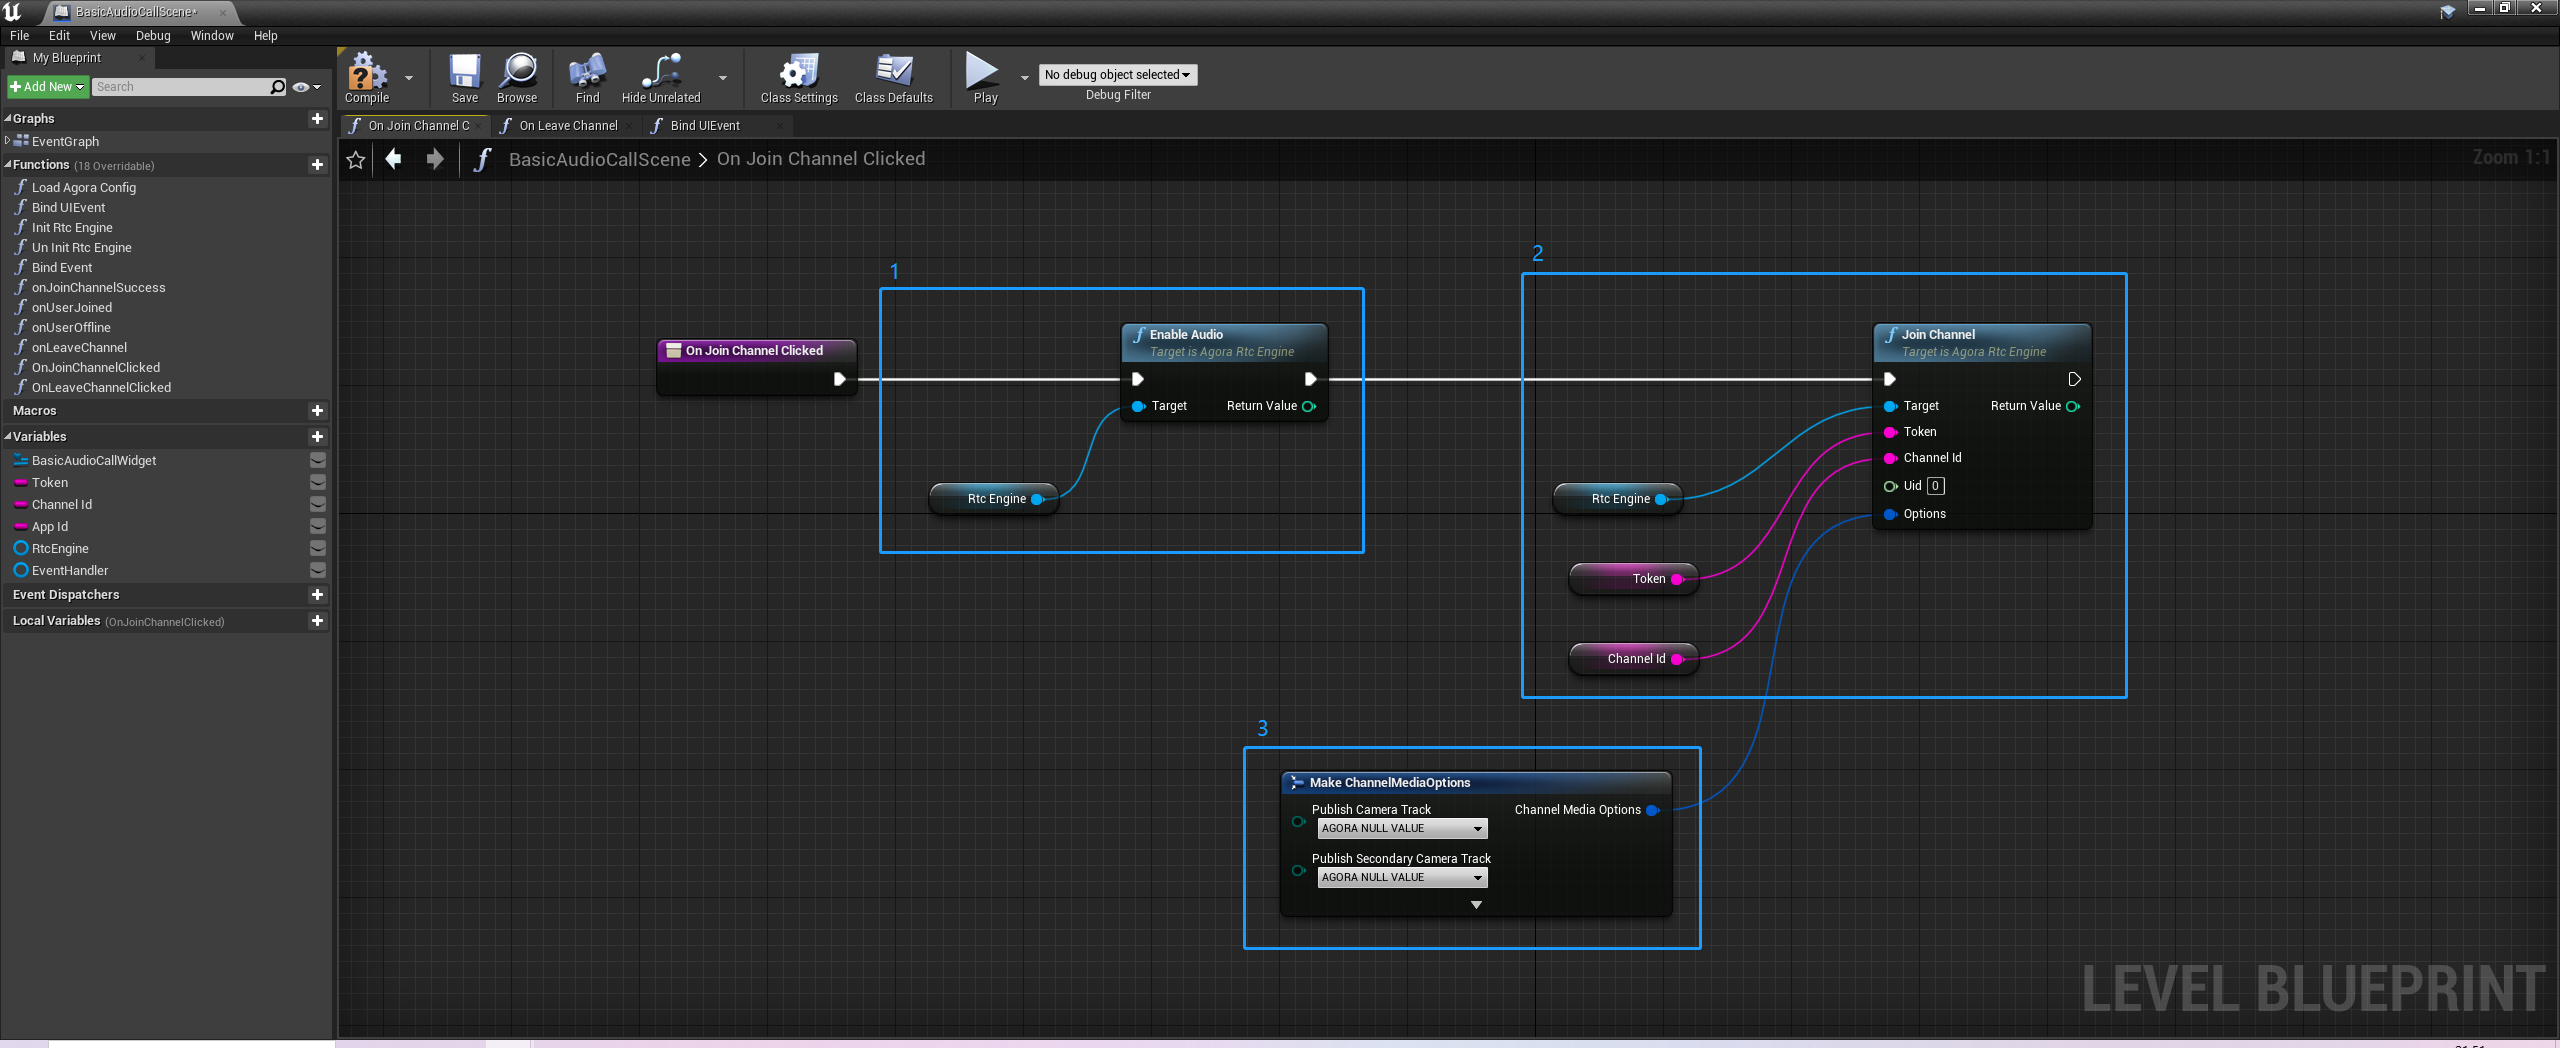
1. Call **Enable Audio** to enable the audio modules.
2. Call **Join Channel** to join the channel.
3. Set the following parameters in **Make ChannelMediaOptions**:
* Set **Publish Microphone Track** to `AGORA TRUE VALUE` to publish the audio stream recorded by the microphone.
* Set **Auto Subscribe Video** to `AGORA TRUE VALUE` to automatically subscribe to all video streams.
* Check **Client Role Type Set Value** and set **Client Role Type** to `CLIENT_ROLE_BROADCASTER` or `CLIENT_ROLE_AUDIENCE`, to set the user role to host or audience.
* Check **Channel Profile Set Value** and set **Channel Profile** to `CHANNEL_PROFILE_COMMUNICATION`.
2. Create and implement the `OnLeaveChannelClicked` event callback. When the event is triggered, call **Leave Channel** to leave the channel.
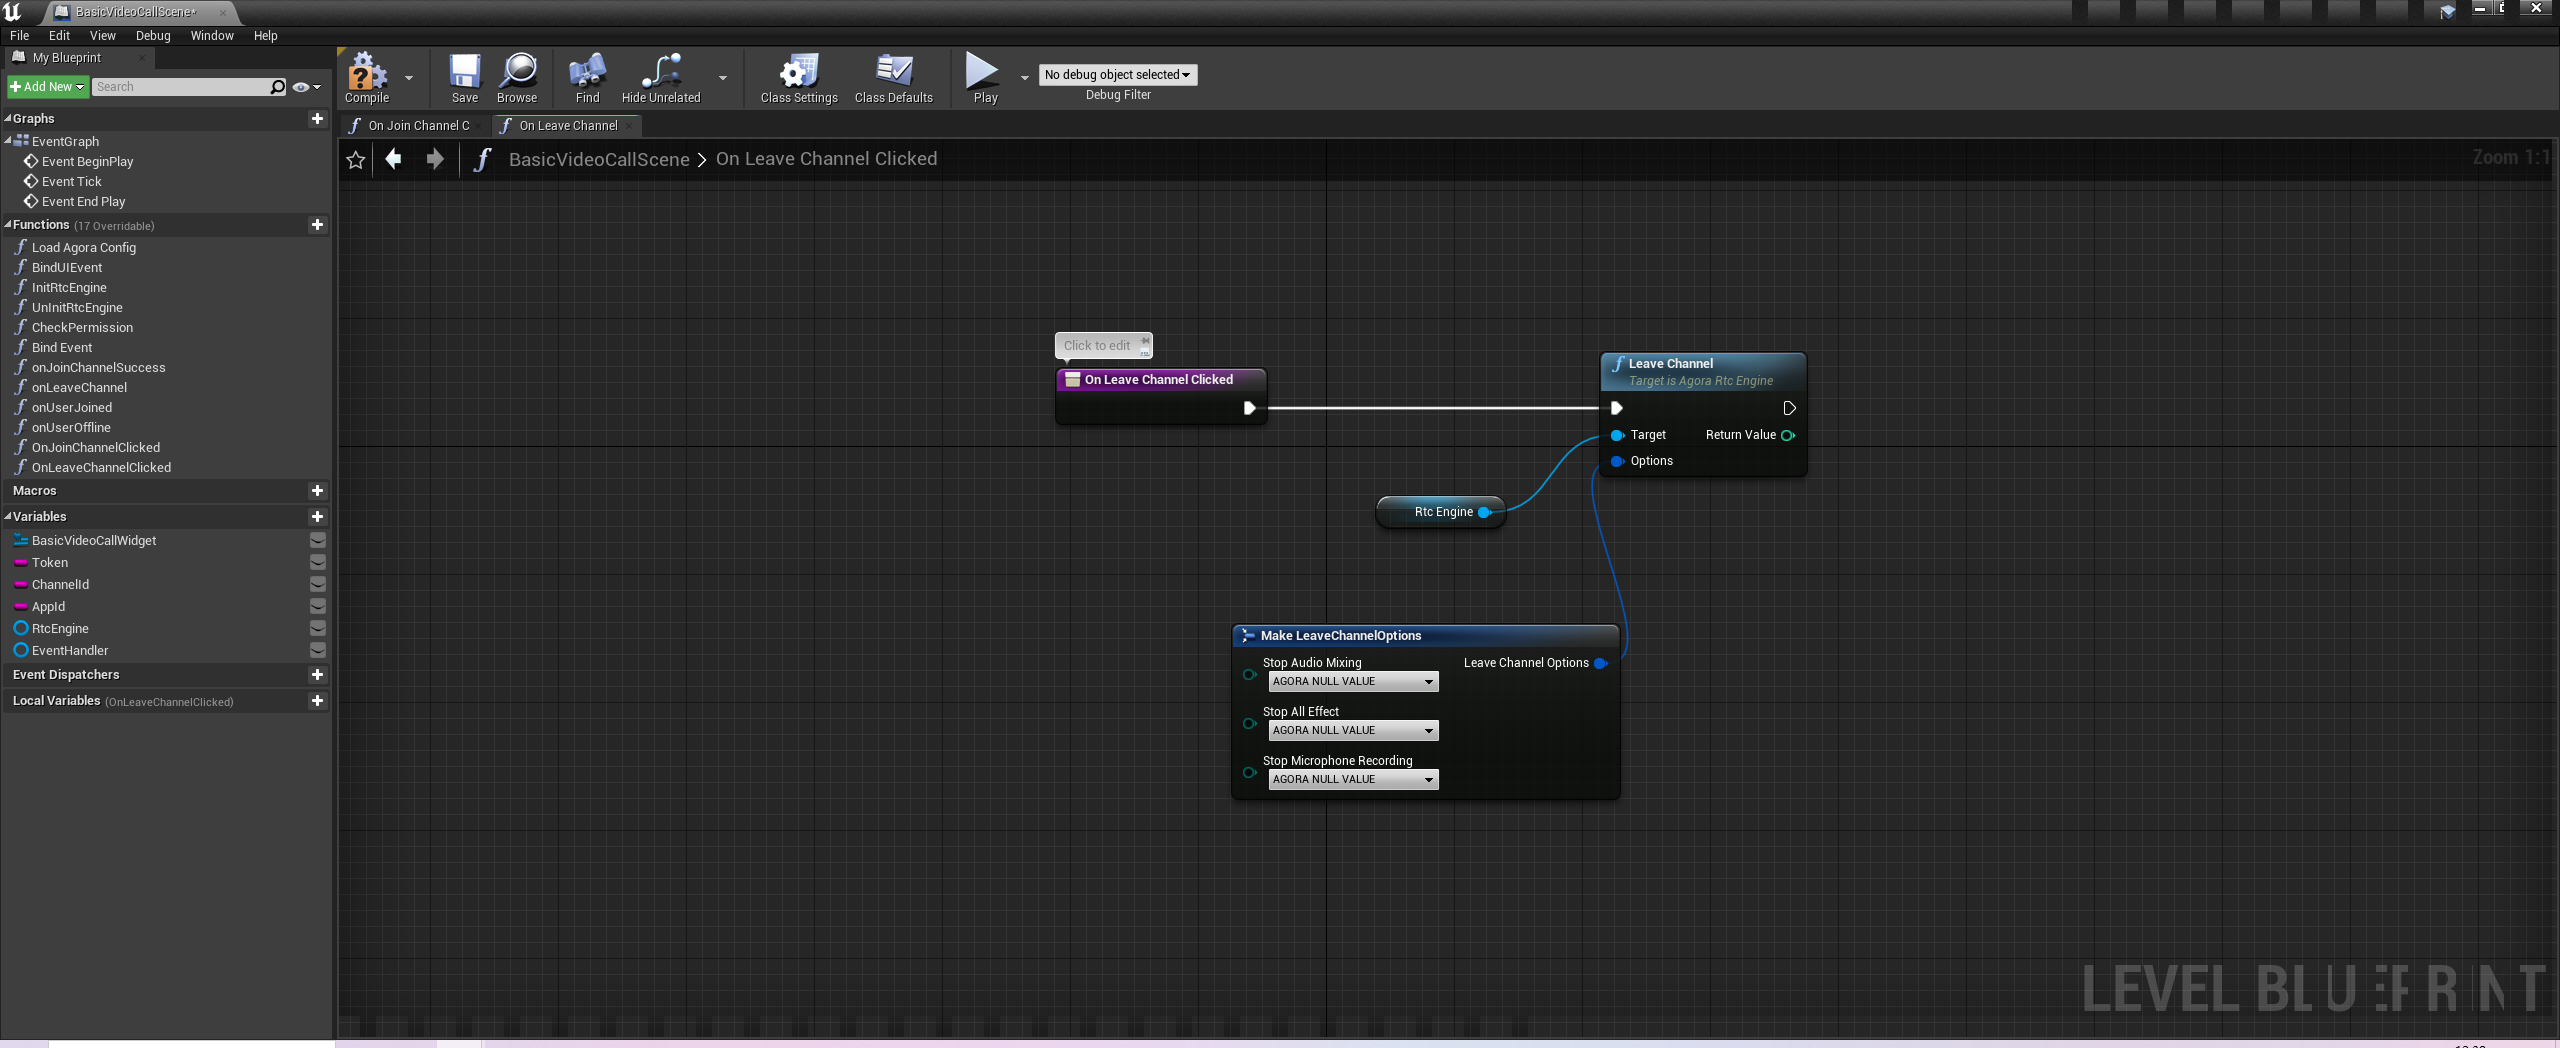
3. In the **Bind UIEvent** function, refer to the figure below to bind the `OnJoinChannelClicked` and `OnLeaveChannelClicked` callback functions to the **Join Channel** and **Leave Channel** buttons respectively. When the button is clicked, the corresponding event callback is triggered.
You can also bind UI events in Unreal Motion Graphics (UMG). This document only shows binding using the **Bind UIEvent Function**.
### Implement callback function [#implement-callback-function]
Configure the previously created `onJoinChannelSuccess`, `onLeaveChannel`, `onUserJoined`, and `onUserOffline` callback functions as follows:
1. After the local user successfully joins the channel, the `onJoinChannelSuccess` callback is triggered and the local view is created. The `uid` is set to `0` by default, but it is assigned a random value by the SDK. The video source type is `VIDEO_SOURCE_CAMERA_PRIMARY` (first camera):
2. After the local user leaves the channel, the `onLeaveChannel` callback is triggered which releases the local view:
3. When a remote user joins the channel, the `onUserJoined` callback is triggeredd to create a remote view. `uid` is the uid sent from the remote end, and the video source type is `VIDEO_SOURCE_REMOTE` (remote video obtained from the network):
4. When a remote user leaves the channel, the `onUserOffline` callback is triggered to release the remote view:
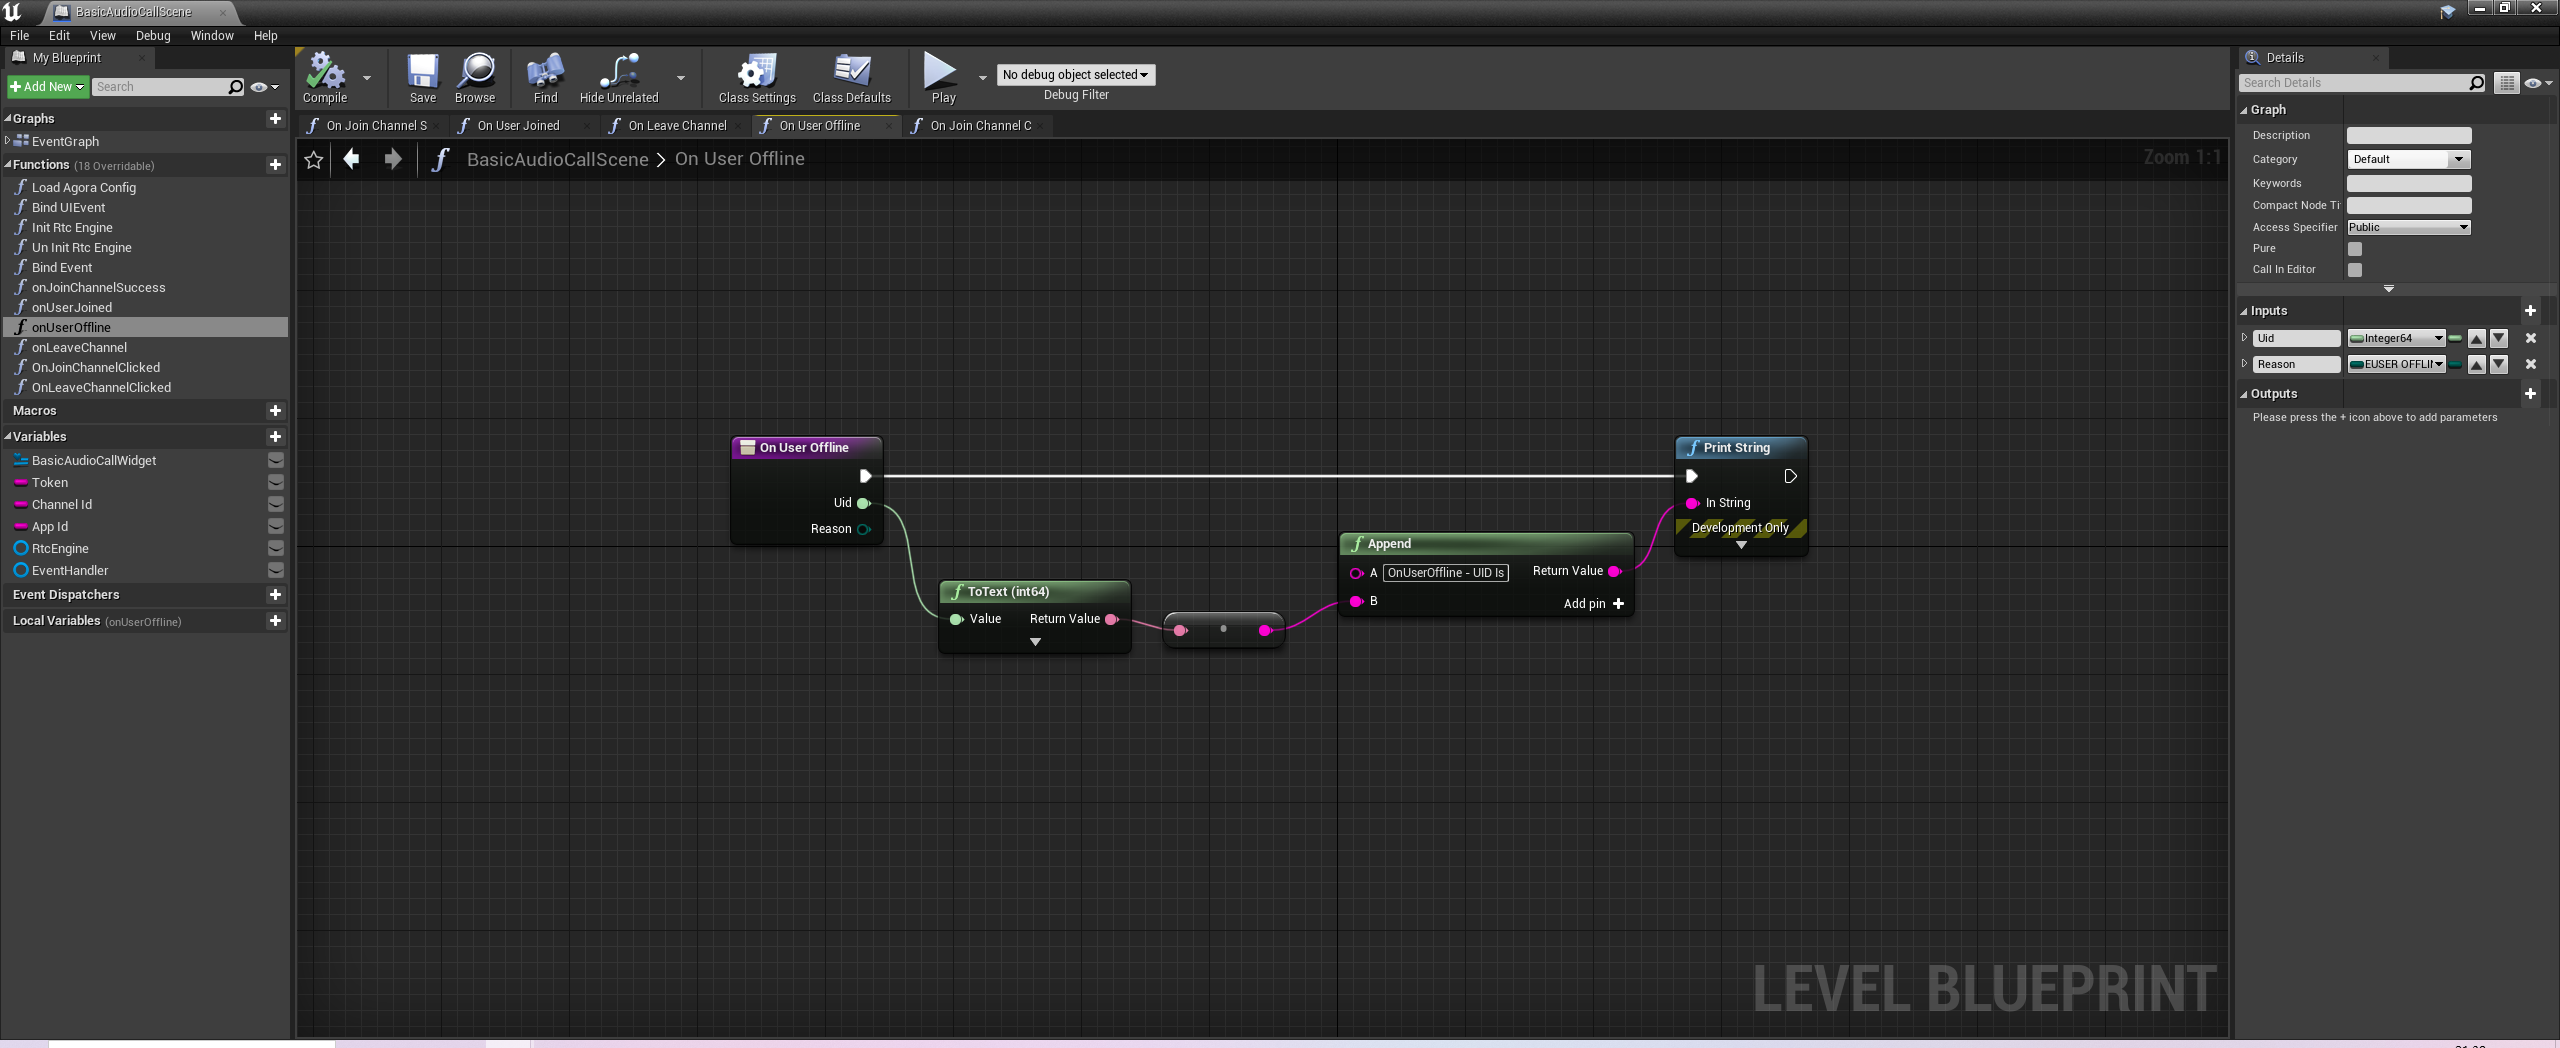
### Leave the channel and release resources [#leave-the-channel-and-release-resources]
To leave the channel, implement the following steps:
1. Leave the channel.
2. Unregister Agora SDRTN® event callback.
3. Destroy `IRtcEngineObject` to release all resources used by Agora SDK.
Refer to the figure below to implement the `UnInitRtcEngine` function:
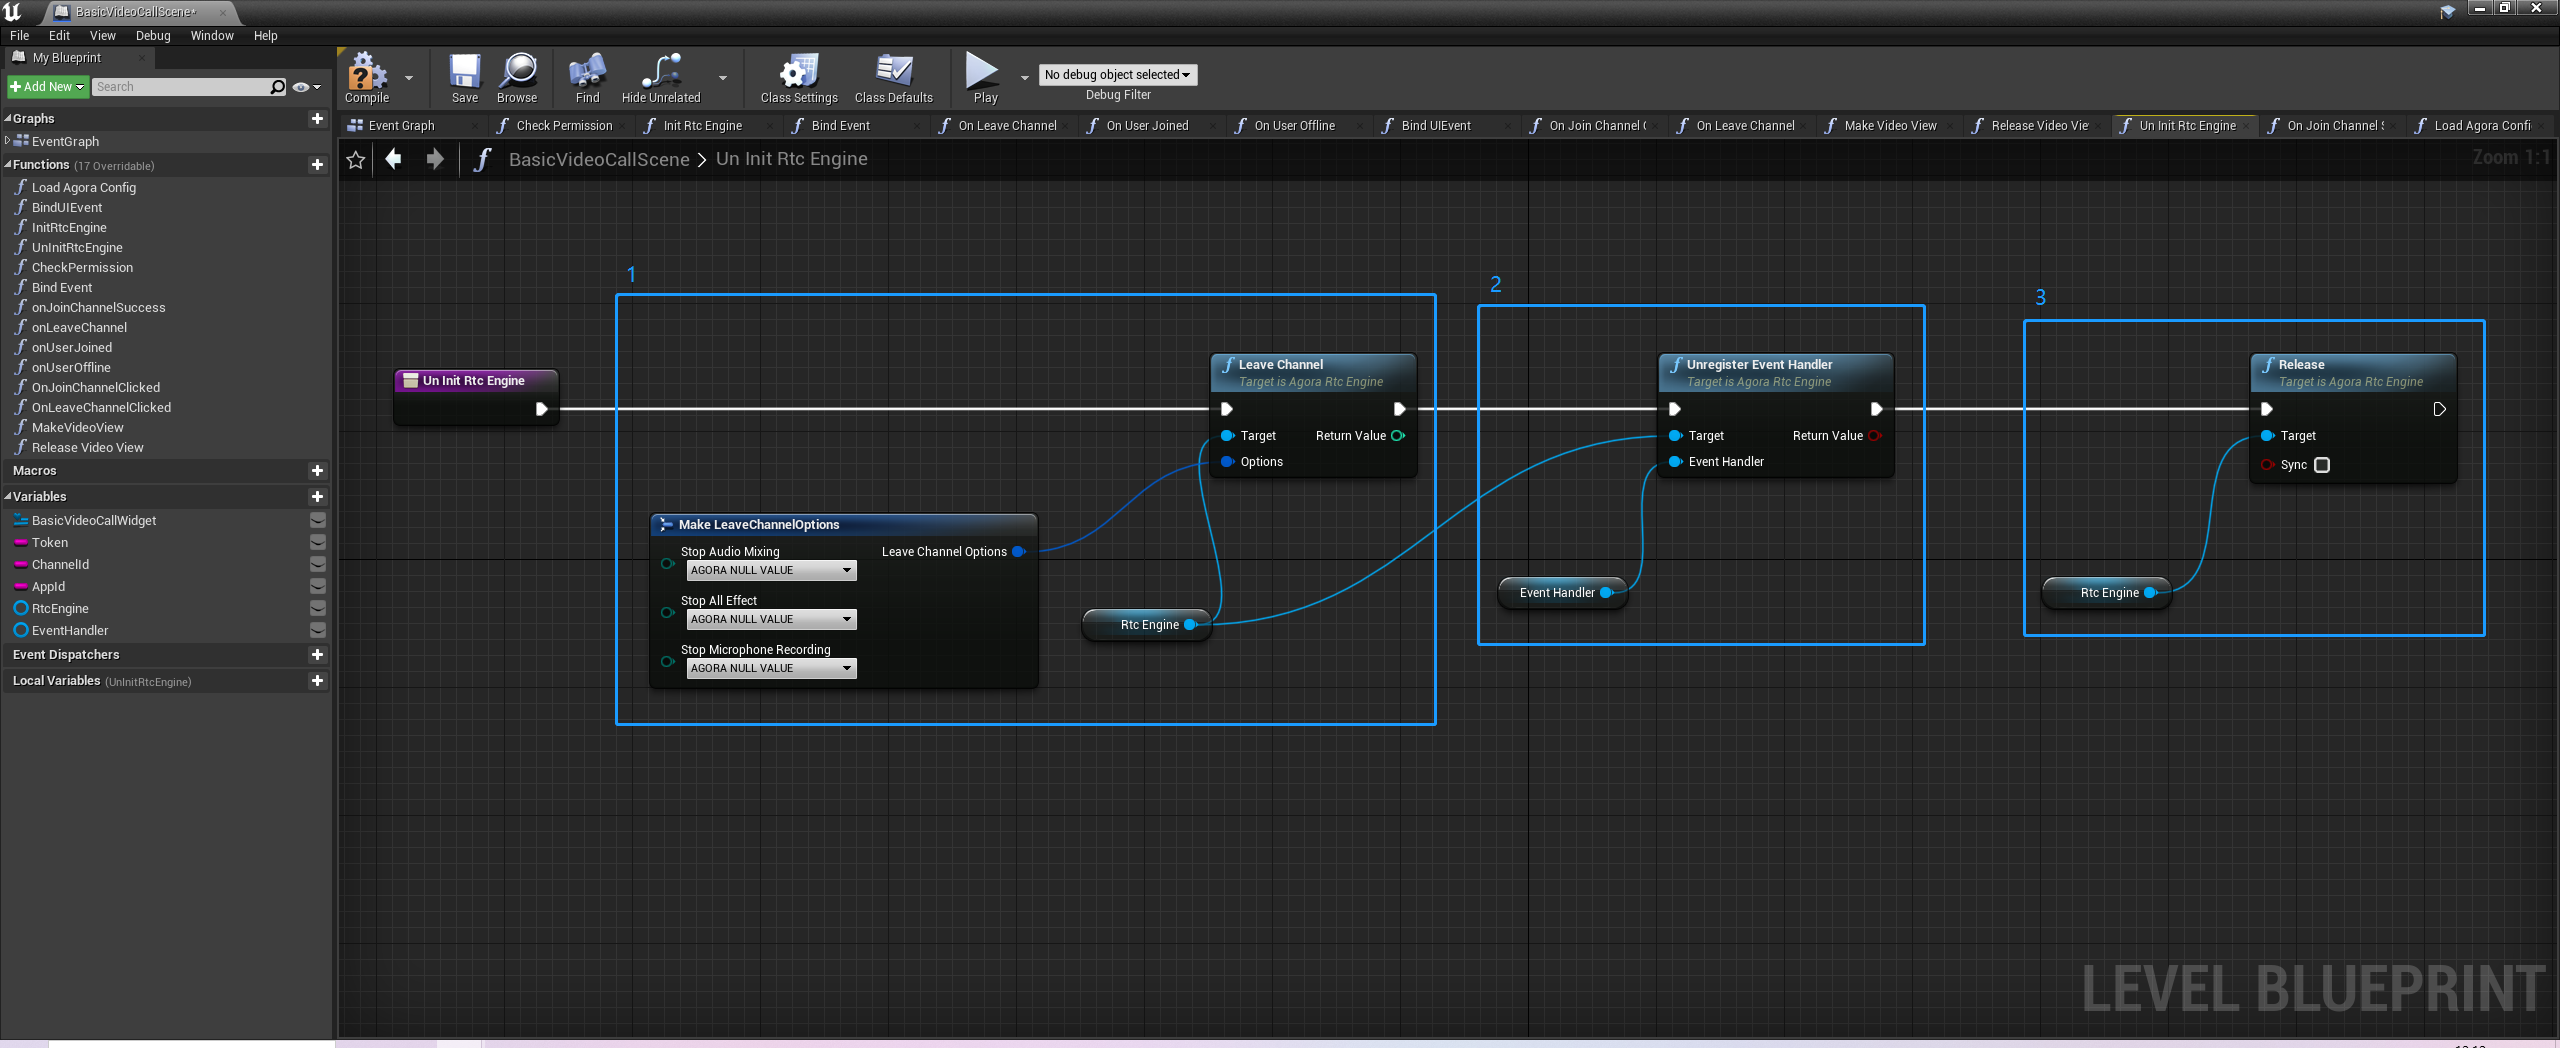
## Test the sample code [#test-the-sample-code-11]
Take the following steps to test the sample code:
1. In the **Load Agora Config** function, fill in the app ID, channel name, and temporary token for your project.
2. In the Unreal Editor, click Play to run your project. Click **JoinChannel** to join a channel.
3. Invite a friend to run the demo game on a second device. Use the same app ID, channel name, and token to join. After your friend joins successfully, you can hear and see each other.
## Reference [#reference-11]
This section contains content that completes the information on this page, or points you to documentation that explains other aspects to this product.
* If a firewall is deployed in your network environment, refer to [Connect with Cloud Proxy](build/manage-connection-and-quality/cloud-proxy.mdx) to use Agora services normally.
### Next steps [#next-steps-11]
After implementing the quickstart sample, read the following documents to learn more:
* To ensure communication security in a test or production environment, best practice is to obtain and use a token from an authentication server. For details, see [Secure authentication with tokens](build/set-up-token-authentication/use-tokens.mdx).
### Sample project [#sample-project-11]
Agora provides open source sample projects on [GitHub](https://github.com/AgoraIO-Extensions/Agora-Unreal-RTC-SDK/tree/main/Agora-Unreal-SDK-Blueprint-Example) for your reference. Download or view the [JoinChannelVideo](https://github.com/AgoraIO-Extensions/Agora-Unreal-RTC-SDK/tree/main/Agora-Unreal-SDK-Blueprint-Example/Content/API-Example/Basic/JoinChannelVideo) project for a more detailed example.
### Frequently asked questions [#frequently-asked-questions-9]
* [How can I listen for audience joining or leaving a channel?](/en/api-reference/faq/integration/audience_event)
* [How can I fix black screen issues?](/en/api-reference/faq/quality/video_blank)
* [Why can't I turn on the camera?](/en/api-reference/faq/quality/video_camera)
* [How can I solve channel-related issues?](/en/api-reference/faq/integration/channel)
* [How can I set the log file?](/en/api-reference/faq/integration/set_log_file)
### See also [#see-also-11]
* [Error codes](reference/error-codes.mdx)
* [Connection status management](build/manage-connection-and-quality/connection-status-management.mdx)
<_PlatformProcessedMarker close="true" />
<_PlatformPanel platform="python">
<_PlatformProcessedMarker groupMode="structured" canonicalPlatform="web" platform="python" />
This Python quickstart shows you how to create a basic Voice Calling app using the Agora Voice SDK.
## Understand the tech [#understand-the-tech-12]
To start a Voice Calling session, implement the following steps in your app:
* **Initialize the Agora Engine**: Before calling other APIs, create and initialize an Agora Engine instance.
* **Join a channel**: Call methods to create and join a channel.
* **Send and receive audio**: All users can publish streams to the channel and subscribe to audio streams published by other users in the channel.

## Prerequisites [#prerequisites-12]
* A microphone
* A valid Agora account and project. Please refer to [Agora account management](manage-agora-account.md) for details.
## Set up your project [#set-up-your-project-12]
This section shows you how to set up your Python project and install the Agora Voice SDK.
1. Install the build tools for compiling the SDK.
```text
sudo apt install build-essential python3-dev
```
2. To implement structured, asynchronous event handling in Python, install the `pyee` library.
```bash
pip3 install pyee
```
3. Install the Agora server side Python SDK.
```bash
pip3 install agora-python-server-sdk
```
The Python SDK is a server side SDK.
## Implement Voice Calling [#implement-voice-calling-12]
This section guides you through the implementation of basic real-time audio interaction in your app.
### Import Agora classes [#import-agora-classes-2]
Import the relevant Agora SDK classes and interfaces:
```python
from agora.rtc.agora_base import (
AudioScenarioType,
ChannelProfileType,
ClientRoleType,
)
from agora.rtc.agora_service import (
AgoraService,
AgoraServiceConfig,
RTCConnConfig,
)
from agora.rtc.audio_frame_observer import AudioFrame, IAudioFrameObserver
from agora.rtc.audio_pcm_data_sender import PcmAudioFrame
from agora.rtc.local_user import LocalUser
from agora.rtc.local_user_observer import IRTCLocalUserObserver
from agora.rtc.rtc_connection import RTCConnection, RTCConnInfo
from agora.rtc.rtc_connection_observer import IRTCConnectionObserver
```
### Initialize the engine [#initialize-the-engine-9]
The following code defines the `RtcEngine` class, which initializes and configures the `AgoraService`. The class constructor takes an `appid` as input, configures the Agora service, and initializes it. You use the `RtcEngine` class to interact with the Agora SDK in this demo.
```python
class RtcEngine:
def __init__(self, appid: str, appcert: str):
self.appid = appid
self.appcert = appcert
if not appid:
raise Exception("App ID is required)")
config = AgoraServiceConfig()
config.audio_scenario = AudioScenarioType.AUDIO_SCENARIO_CHORUS
config.appid = appid
config.log_path = os.path.join(
os.path.dirname(
os.path.dirname(
os.path.dirname(os.path.join(os.path.abspath(__file__)))
)
),
"agorasdk.log",
)
self.agora_service = AgoraService()
self.agora_service.initialize(config)
```
### Join a channel [#join-a-channel-11]
To asynchronously join a channel, implement a `Channel` class. When you create an instance of the class, the initializer sets up the necessary components for joining a channel. It takes an instance of `RtcEngine`, a `channelId`, and a `uid` as parameters. During initialization, the code creates an event emitter, configures the connection for broadcasting, and registers an event observer for channel events. It also sets up the local user’s audio configuration to enable audio streaming.
UIDs in the Python SDK are set using a string value. Agora recommends using only numerical values for UID strings to ensure compatibility with all Agora products and extensions.
```python
class Channel:
def __init__(self, rtc: "RtcEngine", options: RtcOptions) -> None:
self.loop = asyncio.get_event_loop()
# Create the event emitter
self.emitter = AsyncIOEventEmitter(self.loop)
self.connection_state = 0
self.options = options
self.remote_users = dict[int, Any]()
self.rtc = rtc
self.chat = Chat(self)
self.channelId = options.channel_name
self.uid = options.uid
self.enable_pcm_dump = options.enable_pcm_dump
self.token = options.build_token(rtc.appid, rtc.appcert) if rtc.appcert else ""
conn_config = RTCConnConfig(
client_role_type=ClientRoleType.CLIENT_ROLE_BROADCASTER,
channel_profile=ChannelProfileType.CHANNEL_PROFILE_LIVE_BROADCASTING,
)
self.connection = self.rtc.agora_service.create_rtc_connection(conn_config)
self.channel_event_observer = ChannelEventObserver(
self.emitter,
options=options,
)
self.connection.register_observer(self.channel_event_observer)
self.local_user = self.connection.get_local_user()
self.local_user.set_playback_audio_frame_before_mixing_parameters(
options.channels, options.sample_rate
)
self.local_user.register_local_user_observer(self.channel_event_observer)
self.local_user.register_audio_frame_observer(self.channel_event_observer)
# self.local_user.subscribe_all_audio()
self.media_node_factory = self.rtc.agora_service.create_media_node_factory()
self.audio_pcm_data_sender = (
self.media_node_factory.create_audio_pcm_data_sender()
)
self.audio_track = self.rtc.agora_service.create_custom_audio_track_pcm(
self.audio_pcm_data_sender
)
self.audio_track.set_enabled(1)
self.local_user.publish_audio(self.audio_track)
self.stream_id = self.connection.create_data_stream(False, False)
self.received_chunks = {}
self.waiting_message = None
self.msg_id = ""
self.msg_index = ""
self.on(
"user_joined",
lambda agora_rtc_conn, user_id: self.remote_users.update({user_id: True}),
)
self.on(
"user_left",
lambda agora_rtc_conn, user_id, reason: self.remote_users.pop(
user_id, None
),
)
```
The following code uses the `Channel` class to join a channel. It sets up a `future` to handle the connection state and returns a `Channel` object when the connection is successfully established.
```python
async def connect(self) -> None:
"""
Connects to a channel.
Parameters:
channelId: The channel ID.
uid: The user ID.
Returns:
Channel: The connected channel.
"""
if self.connection_state == 3:
return
future = asyncio.Future()
def callback(agora_rtc_conn: RTCConnection, conn_info: RTCConnInfo, reason):
logger.info(f"Connection state changed: {conn_info.state}")
if conn_info.state == 3: # Connection successful
future.set_result(None)
elif conn_info.state == 5: # Connection failed
future.set_exception(
Exception(f"Connection failed with state: {conn_info.state}")
)
self.on("connection_state_changed", callback)
logger.info(f"Connecting to channel {self.channelId} with token {self.token}")
self.connection.connect(self.token, self.channelId, f"{self.uid}")
if self.enable_pcm_dump:
agora_parameter = self.connection.get_agora_parameter()
agora_parameter.set_parameters("{\"che.audio.frame_dump\":{\"location\":\"all\",\"action\":\"start\",\"max_size_bytes\":\"120000000\",\"uuid\":\"123456789\",\"duration\":\"1200000\"}}")
try:
await future
except Exception as e:
raise Exception(
f"Failed to connect to channel {self.channelId}: {str(e)}"
) from e
finally:
self.off("connection_state_changed", callback)
```
### Handle connection and channel events [#handle-connection-and-channel-events]
To listen for channel and connection events, such as users joining or leaving the channel, and connection state changes, implement the `ChannelEventObserver` class. This class enables you to respond to SDK events.
```python
class ChannelEventObserver(
IRTCConnectionObserver, IRTCLocalUserObserver, IAudioFrameObserver
):
def __init__(self, event_emitter: AsyncIOEventEmitter, options: RtcOptions) -> None:
self.loop = asyncio.get_event_loop()
self.emitter = event_emitter
self.audio_streams = dict[int, AudioStream]()
self.options = options
def emit_event(self, event_name: str, *args):
"""Helper function to emit events."""
self.loop.call_soon_threadsafe(self.emitter.emit, event_name, *args)
def on_connected(
self, agora_rtc_conn: RTCConnection, conn_info: RTCConnInfo, reason
):
logger.info(f"Connected to RTC: {agora_rtc_conn} {conn_info} {reason}")
self.emit_event("connection_state_changed", agora_rtc_conn, conn_info, reason)
def on_disconnected(
self, agora_rtc_conn: RTCConnection, conn_info: RTCConnInfo, reason
):
logger.info(f"Disconnected from RTC: {agora_rtc_conn} {conn_info} {reason}")
self.emit_event("connection_state_changed", agora_rtc_conn, conn_info, reason)
def on_connecting(
self, agora_rtc_conn: RTCConnection, conn_info: RTCConnInfo, reason
):
logger.info(f"Connecting to RTC: {agora_rtc_conn} {conn_info} {reason}")
self.emit_event("connection_state_changed", agora_rtc_conn, conn_info, reason)
def on_connection_failure(self, agora_rtc_conn, conn_info, reason):
logger.error(f"Connection failure: {agora_rtc_conn} {conn_info} {reason}")
self.emit_event("connection_state_changed", agora_rtc_conn, conn_info, reason)
def on_user_joined(self, agora_rtc_conn: RTCConnection, user_id):
logger.info(f"User joined: {agora_rtc_conn} {user_id}")
self.emit_event("user_joined", agora_rtc_conn, user_id)
def on_user_left(self, agora_rtc_conn: RTCConnection, user_id, reason):
logger.info(f"User left: {agora_rtc_conn} {user_id} {reason}")
self.emit_event("user_left", agora_rtc_conn, user_id, reason)
def handle_received_chunk(self, json_chunk):
chunk = json.loads(json_chunk)
msg_id = chunk["msg_id"]
part_idx = chunk["part_idx"]
total_parts = chunk["total_parts"]
if msg_id not in self.received_chunks:
self.received_chunks[msg_id] = {"parts": {}, "total_parts": total_parts}
if (
part_idx not in self.received_chunks[msg_id]["parts"]
and 0 <= part_idx < total_parts
):
self.received_chunks[msg_id]["parts"][part_idx] = chunk
if len(self.received_chunks[msg_id]["parts"]) == total_parts:
# all parts received, now recomposing original message and get rid it from dict
sorted_parts = sorted(
self.received_chunks[msg_id]["parts"].values(),
key=lambda c: c["part_idx"],
)
full_message = "".join(part["content"] for part in sorted_parts)
del self.received_chunks[msg_id]
return full_message, msg_id
return (None, None)
def on_stream_message(
self, agora_local_user: LocalUser, user_id, stream_id, data, length
):
# logger.info(f"Stream message", agora_local_user, user_id, stream_id, length)
(reassembled_message, msg_id) = self.handle_received_chunk(data)
if reassembled_message is not None:
logger.info(f"Reassembled message: {msg_id} {reassembled_message}")
def on_audio_subscribe_state_changed(
self,
agora_local_user,
channel,
user_id,
old_state,
new_state,
elapse_since_last_state,
):
logger.info(
f"Audio subscribe state changed: {user_id} {new_state} {elapse_since_last_state}"
)
self.emit_event(
"audio_subscribe_state_changed",
agora_local_user,
channel,
user_id,
old_state,
new_state,
elapse_since_last_state,
)
def on_playback_audio_frame_before_mixing(
self, agora_local_user: LocalUser, channelId, uid, frame: AudioFrame
):
audio_frame = PcmAudioFrame()
audio_frame.samples_per_channel = frame.samples_per_channel
audio_frame.bytes_per_sample = frame.bytes_per_sample
audio_frame.number_of_channels = frame.channels
audio_frame.sample_rate = self.options.sample_rate
audio_frame.data = frame.buffer
self.loop.call_soon_threadsafe(
self.audio_streams[uid].queue.put_nowait, audio_frame
)
return 0
```
### Subscribe to an audio stream [#subscribe-to-an-audio-stream]
To asynchronously subscribe to audio streams for a specific user identified by their `uid`, refer to the following code. The method sets up a callback to monitor changes in the audio subscription state and handles the result based on whether the subscription is successfully established.
```python
async def subscribe_audio(self, uid: int) -> None:
"""
Subscribes to the audio of a user.
Parameters:
uid: The user ID to subscribe to.
"""
future = asyncio.Future()
def callback(
agora_local_user,
channel,
user_id,
old_state,
new_state,
elapse_since_last_state,
):
if new_state == 3: # Successfully subscribed
future.set_result(None)
self.on("audio_subscribe_state_changed", callback)
self.local_user.subscribe_audio(uid)
try:
await future
except Exception as e:
raise Exception(
f"Audio subscription failed for user {uid}: {str(e)}"
) from e
finally:
self.off("audio_subscribe_state_changed", callback)
```
### Unsubscribe from an audio stream [#unsubscribe-from-an-audio-stream]
To unsubscribe from an audio stream, implement an asynchronous method similar to `subscribe_audio` and use the following code to unsubscribe:
```python
self.local_user.unsubscribe_audio(uid)
```
### Disconnect from the service [#disconnect-from-the-service]
To leave a channel, disconnect from Agora SDRTN® and release resources, refer to he following code.
```python
async def disconnect(self) -> None:
"""
Disconnects the channel.
"""
if self.connection_state == 1:
return
disconnected_future = asyncio.Future[None]()
def callback(agora_rtc_conn: RTCConnection, conn_info: RTCConnInfo, reason):
self.off("connection_state_changed", callback)
if conn_info.state == 1:
disconnected_future.set_result(None)
self.on("connection_state_changed", callback)
self.connection.disconnect()
await disconnected_future
```
### Complete code [#complete-code]
The `rtc.py` script integrates the code components presented in this section into reusable Python classes that you can extend for your own applications.
**Complete code for `rtc.py`**
```python
import asyncio
import json
import logging
import os
from typing import Any, AsyncIterator
from agora.rtc.agora_base import (
AudioScenarioType,
ChannelProfileType,
ClientRoleType,
)
from agora.rtc.agora_service import (
AgoraService,
AgoraServiceConfig,
RTCConnConfig,
)
from agora.rtc.audio_frame_observer import AudioFrame, IAudioFrameObserver
from agora.rtc.audio_pcm_data_sender import PcmAudioFrame
from agora.rtc.local_user import LocalUser
from agora.rtc.local_user_observer import IRTCLocalUserObserver
from agora.rtc.rtc_connection import RTCConnection, RTCConnInfo
from agora.rtc.rtc_connection_observer import IRTCConnectionObserver
from pyee.asyncio import AsyncIOEventEmitter
from .logger import setup_logger
from .token_builder.realtimekit_token_builder import RealtimekitTokenBuilder
# Set up the logger with color and timestamp support
logger = setup_logger(name=__name__, log_level=logging.INFO)
class RtcOptions:
def __init__(
self,
*,
channel_name: str = None,
uid: int = 0,
sample_rate: int = 24000,
channels: int = 1,
enable_pcm_dump: bool = False,
):
self.channel_name = channel_name
self.uid = uid
self.sample_rate = sample_rate
self.channels = channels
self.enable_pcm_dump = enable_pcm_dump
def build_token(self, appid: str, appcert: str) -> str:
return RealtimekitTokenBuilder.build_token(
appid, appcert, self.channel_name, self.uid
)
class AudioStream:
def __init__(self) -> None:
self.queue: asyncio.Queue = asyncio.Queue()
def __aiter__(self) -> AsyncIterator[PcmAudioFrame]:
return self
async def __anext__(self) -> PcmAudioFrame:
item = await self.queue.get()
if item is None:
raise StopAsyncIteration
return item
class ChannelEventObserver(
IRTCConnectionObserver, IRTCLocalUserObserver, IAudioFrameObserver
):
def __init__(self, event_emitter: AsyncIOEventEmitter, options: RtcOptions) -> None:
self.loop = asyncio.get_event_loop()
self.emitter = event_emitter
self.audio_streams = dict[int, AudioStream]()
self.options = options
def emit_event(self, event_name: str, *args):
"""Helper function to emit events."""
self.loop.call_soon_threadsafe(self.emitter.emit, event_name, *args)
def on_connected(
self, agora_rtc_conn: RTCConnection, conn_info: RTCConnInfo, reason
):
logger.info(f"Connected to RTC: {agora_rtc_conn} {conn_info} {reason}")
self.emit_event("connection_state_changed", agora_rtc_conn, conn_info, reason)
def on_disconnected(
self, agora_rtc_conn: RTCConnection, conn_info: RTCConnInfo, reason
):
logger.info(f"Disconnected from RTC: {agora_rtc_conn} {conn_info} {reason}")
self.emit_event("connection_state_changed", agora_rtc_conn, conn_info, reason)
def on_connecting(
self, agora_rtc_conn: RTCConnection, conn_info: RTCConnInfo, reason
):
logger.info(f"Connecting to RTC: {agora_rtc_conn} {conn_info} {reason}")
self.emit_event("connection_state_changed", agora_rtc_conn, conn_info, reason)
def on_connection_failure(self, agora_rtc_conn, conn_info, reason):
logger.error(f"Connection failure: {agora_rtc_conn} {conn_info} {reason}")
self.emit_event("connection_state_changed", agora_rtc_conn, conn_info, reason)
def on_user_joined(self, agora_rtc_conn: RTCConnection, user_id):
logger.info(f"User joined: {agora_rtc_conn} {user_id}")
self.emit_event("user_joined", agora_rtc_conn, user_id)
def on_user_left(self, agora_rtc_conn: RTCConnection, user_id, reason):
logger.info(f"User left: {agora_rtc_conn} {user_id} {reason}")
self.emit_event("user_left", agora_rtc_conn, user_id, reason)
def handle_received_chunk(self, json_chunk):
chunk = json.loads(json_chunk)
msg_id = chunk["msg_id"]
part_idx = chunk["part_idx"]
total_parts = chunk["total_parts"]
if msg_id not in self.received_chunks:
self.received_chunks[msg_id] = {"parts": {}, "total_parts": total_parts}
if (
part_idx not in self.received_chunks[msg_id]["parts"]
and 0 <= part_idx < total_parts
):
self.received_chunks[msg_id]["parts"][part_idx] = chunk
if len(self.received_chunks[msg_id]["parts"]) == total_parts:
# all parts received, now recomposing original message and get rid it from dict
sorted_parts = sorted(
self.received_chunks[msg_id]["parts"].values(),
key=lambda c: c["part_idx"],
)
full_message = "".join(part["content"] for part in sorted_parts)
del self.received_chunks[msg_id]
return full_message, msg_id
return (None, None)
def on_stream_message(
self, agora_local_user: LocalUser, user_id, stream_id, data, length
):
# logger.info(f"Stream message", agora_local_user, user_id, stream_id, length)
(reassembled_message, msg_id) = self.handle_received_chunk(data)
if reassembled_message is not None:
logger.info(f"Reassembled message: {msg_id} {reassembled_message}")
def on_audio_subscribe_state_changed(
self,
agora_local_user,
channel,
user_id,
old_state,
new_state,
elapse_since_last_state,
):
logger.info(
f"Audio subscribe state changed: {user_id} {new_state} {elapse_since_last_state}"
)
self.emit_event(
"audio_subscribe_state_changed",
agora_local_user,
channel,
user_id,
old_state,
new_state,
elapse_since_last_state,
)
def on_playback_audio_frame_before_mixing(
self, agora_local_user: LocalUser, channelId, uid, frame: AudioFrame
):
audio_frame = PcmAudioFrame()
audio_frame.samples_per_channel = frame.samples_per_channel
audio_frame.bytes_per_sample = frame.bytes_per_sample
audio_frame.number_of_channels = frame.channels
audio_frame.sample_rate = self.options.sample_rate
audio_frame.data = frame.buffer
# print(
# "on_playback_audio_frame_before_mixing",
# audio_frame.samples_per_channel,
# audio_frame.bytes_per_sample,
# audio_frame.number_of_channels,
# audio_frame.sample_rate,
# len(audio_frame.data),
# )
self.loop.call_soon_threadsafe(
self.audio_streams[uid].queue.put_nowait, audio_frame
)
return 0
class Channel:
def __init__(self, rtc: "RtcEngine", options: RtcOptions) -> None:
self.loop = asyncio.get_event_loop()
# Create the event emitter
self.emitter = AsyncIOEventEmitter(self.loop)
self.connection_state = 0
self.options = options
self.remote_users = dict[int, Any]()
self.rtc = rtc
self.chat = Chat(self)
self.channelId = options.channel_name
self.uid = options.uid
self.enable_pcm_dump = options.enable_pcm_dump
self.token = options.build_token(rtc.appid, rtc.appcert) if rtc.appcert else ""
conn_config = RTCConnConfig(
client_role_type=ClientRoleType.CLIENT_ROLE_BROADCASTER,
channel_profile=ChannelProfileType.CHANNEL_PROFILE_LIVE_BROADCASTING,
)
self.connection = self.rtc.agora_service.create_rtc_connection(conn_config)
self.channel_event_observer = ChannelEventObserver(
self.emitter,
options=options,
)
self.connection.register_observer(self.channel_event_observer)
self.local_user = self.connection.get_local_user()
self.local_user.set_playback_audio_frame_before_mixing_parameters(
options.channels, options.sample_rate
)
self.local_user.register_local_user_observer(self.channel_event_observer)
self.local_user.register_audio_frame_observer(self.channel_event_observer)
# self.local_user.subscribe_all_audio()
self.media_node_factory = self.rtc.agora_service.create_media_node_factory()
self.audio_pcm_data_sender = (
self.media_node_factory.create_audio_pcm_data_sender()
)
self.audio_track = self.rtc.agora_service.create_custom_audio_track_pcm(
self.audio_pcm_data_sender
)
self.audio_track.set_enabled(1)
self.local_user.publish_audio(self.audio_track)
self.stream_id = self.connection.create_data_stream(False, False)
self.received_chunks = {}
self.waiting_message = None
self.msg_id = ""
self.msg_index = ""
self.on(
"user_joined",
lambda agora_rtc_conn, user_id: self.remote_users.update({user_id: True}),
)
self.on(
"user_left",
lambda agora_rtc_conn, user_id, reason: self.remote_users.pop(
user_id, None
),
)
def handle_audio_subscribe_state_changed(
agora_local_user,
channel,
user_id,
old_state,
new_state,
elapse_since_last_state,
):
if new_state == 3: # Successfully subscribed
self.channel_event_observer.audio_streams.update(
{user_id: AudioStream()}
)
elif new_state == 0:
self.channel_event_observer.audio_streams.pop(user_id, None)
self.on("audio_subscribe_state_changed", handle_audio_subscribe_state_changed)
self.on(
"connection_state_changed",
lambda agora_rtc_conn, conn_info, reason: setattr(
self, "connection_state", conn_info.state
),
)
async def connect(self) -> None:
"""
Connects to a channel.
Parameters:
channelId: The channel ID.
uid: The user ID.
Returns:
Channel: The connected channel.
"""
if self.connection_state == 3:
return
future = asyncio.Future()
def callback(agora_rtc_conn: RTCConnection, conn_info: RTCConnInfo, reason):
logger.info(f"Connection state changed: {conn_info.state}")
if conn_info.state == 3: # Connection successful
future.set_result(None)
elif conn_info.state == 5: # Connection failed
future.set_exception(
Exception(f"Connection failed with state: {conn_info.state}")
)
self.on("connection_state_changed", callback)
logger.info(f"Connecting to channel {self.channelId} with token {self.token}")
self.connection.connect(self.token, self.channelId, f"{self.uid}")
if self.enable_pcm_dump:
agora_parameter = self.connection.get_agora_parameter()
agora_parameter.set_parameters("{"che.audio.frame_dump":{"location":"all","action":"start","max_size_bytes":"120000000","uuid":"123456789","duration":"1200000"}}")
try:
await future
except Exception as e:
raise Exception(
f"Failed to connect to channel {self.channelId}: {str(e)}"
) from e
finally:
self.off("connection_state_changed", callback)
async def disconnect(self) -> None:
"""
Disconnects the channel.
"""
if self.connection_state == 1:
return
disconnected_future = asyncio.Future[None]()
def callback(agora_rtc_conn: RTCConnection, conn_info: RTCConnInfo, reason):
self.off("connection_state_changed", callback)
if conn_info.state == 1:
disconnected_future.set_result(None)
self.on("connection_state_changed", callback)
self.connection.disconnect()
await disconnected_future
def get_audio_frames(self, uid: int) -> AudioStream:
"""
Returns the audio frames from the channel.
Returns:
AudioStream: The audio stream.
"""
return self.channel_event_observer.audio_streams[uid]
async def push_audio_frame(self, frame: bytes) -> None:
"""
Pushes an audio frame to the channel.
Parameters:
frame: The audio frame to push.
"""
audio_frame = PcmAudioFrame()
audio_frame.data = bytearray(frame)
audio_frame.timestamp = 0
audio_frame.bytes_per_sample = 2
audio_frame.number_of_channels = self.options.channels
audio_frame.sample_rate = self.options.sample_rate
audio_frame.samples_per_channel = int(
len(frame) / audio_frame.bytes_per_sample / audio_frame.number_of_channels
)
ret = self.audio_pcm_data_sender.send_audio_pcm_data(audio_frame)
logger.info(f"Pushed audio frame: {ret}, audio frame length: {len(frame)}")
if ret < 0:
raise Exception(f"Failed to send audio frame: {ret}, audio frame length: {len(frame)}")
async def clear_sender_audio_buffer(self) -> None:
"""
Clears the audio buffer which is used to send.
"""
self.audio_track.clear_sender_buffer()
async def subscribe_audio(self, uid: int) -> None:
"""
Subscribes to the audio of a user.
Parameters:
uid: The user ID to subscribe to.
"""
future = asyncio.Future()
def callback(
agora_local_user,
channel,
user_id,
old_state,
new_state,
elapse_since_last_state,
):
if new_state == 3: # Successfully subscribed
future.set_result(None)
# elif new_state == 1: # Subscription failed
# future.set_exception(
# Exception(
# f"Failed to subscribe {user_id} audio: state changed from {old_state} to {new_state}"
# )
# )
self.on("audio_subscribe_state_changed", callback)
self.local_user.subscribe_audio(uid)
try:
await future
except Exception as e:
raise Exception(
f"Audio subscription failed for user {uid}: {str(e)}"
) from e
finally:
self.off("audio_subscribe_state_changed", callback)
async def unsubscribe_audio(self, uid: int) -> None:
"""
Unsubscribes from the audio of a user.
Parameters:
uid: The user ID to unsubscribe from.
"""
future = asyncio.Future()
def callback(
agora_local_user,
channel,
user_id,
old_state,
new_state,
elapse_since_last_state,
):
if new_state == 3: # Successfully unsubscribed
future.set_result(None)
else: # Failed to unsubscribe
future.set_exception(
Exception(
f"Failed to unsubscribe {user_id} audio: state changed from {old_state} to {new_state}"
)
)
self.on("audio_subscribe_state_changed", callback)
self.local_user.unsubscribe_audio(uid)
try:
await future
except Exception as e:
raise Exception(
f"Audio unsubscription failed for user {uid}: {str(e)}"
) from e
finally:
self.off("audio_subscribe_state_changed", callback)
def _split_string_into_chunks(
self, long_string, msg_id, chunk_size=300
) -> list[dict[str:Any]]:
"""
Splits a long string into chunks of a given size.
Parameters:
long_string: The string to split.
msg_id: The message ID.
chunk_size: The size of each chunk.
Returns:
list[dict[str: Any]]: The list of chunks.
"""
total_parts = (len(long_string) + chunk_size - 1) // chunk_size
json_chunks = []
for idx in range(total_parts):
start = idx * chunk_size
end = min(start + chunk_size, len(long_string))
chunk = {
"msg_id": msg_id,
"part_idx": idx,
"total_parts": total_parts,
"content": long_string[start:end],
}
json_chunk = json.dumps(chunk, ensure_ascii=False)
json_chunks.append(json_chunk)
return json_chunks
async def send_stream_message(self, data: str, msg_id: str) -> None:
"""
Sends a stream message to the channel.
Parameters:
data: The data to send.
msg_id: The message ID.
"""
chunks = self._split_string_into_chunks(data, msg_id)
for chunk in chunks:
self.connection.send_stream_message(self.stream_id, chunk)
def on(self, event_name: str, callback):
"""
Allows external components to subscribe to events.
Parameters:
event_name: The name of the event to subscribe to.
callback: The callback to call when the event is emitted.
"""
self.emitter.on(event_name, callback)
def once(self, event_name: str, callback):
"""
Allows external components to subscribe to events once.
Parameters:
event_name: The name of the event to subscribe to.
callback: The callback to call when the event is emitted.
"""
self.emitter.once(event_name, callback)
def off(self, event_name: str, callback):
"""
Allows external components to unsubscribe from events.
Parameters:
event_name: The name of the event to unsubscribe from.
callback: The callback to remove from the event.
"""
self.emitter.remove_listener(event_name, callback)
class ChatMessage:
def __init__(self, message: str, msg_id: str) -> None:
self.message = message
self.msg_id = msg_id
class Chat:
def __init__(self, channel: Channel) -> None:
self.channel = channel
self.loop = self.channel.loop
self.queue = asyncio.Queue()
def log_exception(t: asyncio.Task[Any]) -> None:
if not t.cancelled() and t.exception():
logger.error(
"unhandled exception",
exc_info=t.exception(),
)
asyncio.create_task(self._process_message()).add_done_callback(log_exception)
async def send_message(self, item: ChatMessage) -> None:
"""
Sends a message to the channel.
Parameters:
item: The message to send.
"""
await self.queue.put(item)
# await self.queue.put_nowait(item)
async def _process_message(self) -> None:
"""
Processes messages in the queue.
"""
while True:
item: ChatMessage = await self.queue.get()
await self.channel.send_stream_message(item.message, item.msg_id)
self.queue.task_done()
# await asyncio.sleep(0)
class RtcEngine:
def __init__(self, appid: str, appcert: str):
self.appid = appid
self.appcert = appcert
if not appid:
raise Exception("App ID is required)")
config = AgoraServiceConfig()
config.audio_scenario = AudioScenarioType.AUDIO_SCENARIO_CHORUS
config.appid = appid
config.log_path = os.path.join(
os.path.dirname(
os.path.dirname(
os.path.dirname(os.path.join(os.path.abspath(__file__)))
)
),
"agorasdk.log",
)
self.agora_service = AgoraService()
self.agora_service.initialize(config)
def create_channel(self, options: RtcOptions) -> Channel:
"""
Creates a channel.
Parameters:
channelId: The channel ID.
uid: The user ID.
Returns:
Channel: The created channel.
"""
return Channel(self, options)
def destroy(self) -> None:
"""
Destroys the RTC engine.
"""
self.agora_service.release()
```
## Test the sample code [#test-the-sample-code-12]
Follow these steps to test the demo code:
1. Create a file named `rtc.py` and paste the [complete source code](#complete-code) into this file.
2. Create a file named `main.py` in the same folder as `rtc.py` and copy the following code to the file:
```python
import asyncio
from rtc import RtcEngine # Import the RtcEngine class from rtc.py
async def main():
appid = "" # Replace with your Agora App ID
channelId = "demo" # Replace with your desired channel ID
uid = "123" # Replace with your unique user ID
rtc_engine = RtcEngine(appid)
channel = await rtc_engine.connect(channelId, uid)
# Keep the script running to listen for events
await asyncio.Event().wait()
if __name__ == "__main__":
asyncio.run(main())
```
3. To specify the audio parameters, create a folder named `realtimeapi` and add a file `util.py` containing the following code:
```python
# Number of audio channels (1 for mono, 2 for stereo)
CHANNELS = 2
# Sample rate for audio processing (in Hz)
SAMPLE_RATE = 44100 # Common sample rates include 8000, 16000, 44100, 48000
```
4. To run the app, execute the following command in your terminal:
```bash
python3 main.py
```
You see output similar to the following:
```text
Initialization result: 0
LocalUserCB _on_audio_track_publish_start: 123456607304576 123456864576600
```
Congratulations! You have successfully connected to the Agora SDRTN® and joined a channel.
## Reference [#reference-12]
This section contains content that completes the information on this page, or points you to documentation that explains other aspects to this product.
* If a firewall is deployed in your network environment, refer to [Connect with Cloud Proxy](build/manage-connection-and-quality/cloud-proxy.mdx) to use Agora services normally.
### Next steps [#next-steps-12]
After implementing the quickstart sample, read the following documents to learn more:
* To ensure communication security in a test or production environment, best practice is to obtain and use a token from an authentication server. For details, see [Secure authentication with tokens](build/set-up-token-authentication/use-tokens.mdx).
### API reference [#api-reference-11]
* [`rtc.py`](https://api-ref.agora.io/en/voice-sdk/python/rtc-py-api.html)
<_PlatformProcessedMarker close="true" />