# Agora account management (/en/realtime-media/rtm/manage-agora-account)
> For AI agents: see the complete documentation index at [llms.txt](/llms.txt).
This page shows you how to sign up for an Agora account, create a new project, and get the app ID and app certificate to generate a temporary token.
## Get started with Agora [#get-started-with-agora]
To join a Signaling session, you need an Agora App ID. This section shows you how to set up an Agora account, create an Agora project and get the required information from [Agora Console](https://console.agora.io/v2).
### Sign up for an Agora account [#sign-up-for-an-agora-account]
To use Agora products and services, create an Agora account with your email, phone number, or a third-party account.
**Sign up with email**
1. Go to the [signup page](https://sso.agora.io/en/signup).
2. Fill in the required fields.
3. Carefully read the **Terms of Service**, **Privacy Policy**, and **Acceptable Use Policy**, and tick the checkbox.
4. Click **Continue**.
5. Enter your **verification code** and click **Confirm**.
6. Follow the on-screen instructions to provide your name, company name, and phone number, set a password, and click **Continue**.
**Sign up with a third-party account**
1. On the [Agora Console](https://console.agora.io/v2) login page, select the third-party account you want to use.
2. Follow the on-screen instructions to complete verification.
3. Click **Create a new account**.
4. Carefully read the **Terms of Service**, **Privacy Policy**, and **Acceptable Use Policy**, and select the checkbox.
5. Click **Continue**.
Once you sign up successfully, your account is automatically logged in. Follow the on-screen instructions to create your first project and test out real-time communications.
For later visits, log in to [Agora Console](https://console.agora.io/v2) with your phone number, email address, or linked third-party account.
### Create an Agora project [#create-an-agora-project]
To create an Agora project, do the following:
1. In [Agora Console](https://console.agora.io/v2), open the [Projects](https://console.agora.io/v2/project-management) page.
2. Click **Create New**.
3. Follow the on-screen instructions to enter a project name and use case, and check **Secured mode: APP ID + Token (Recommended)** as the authentication mechanism.
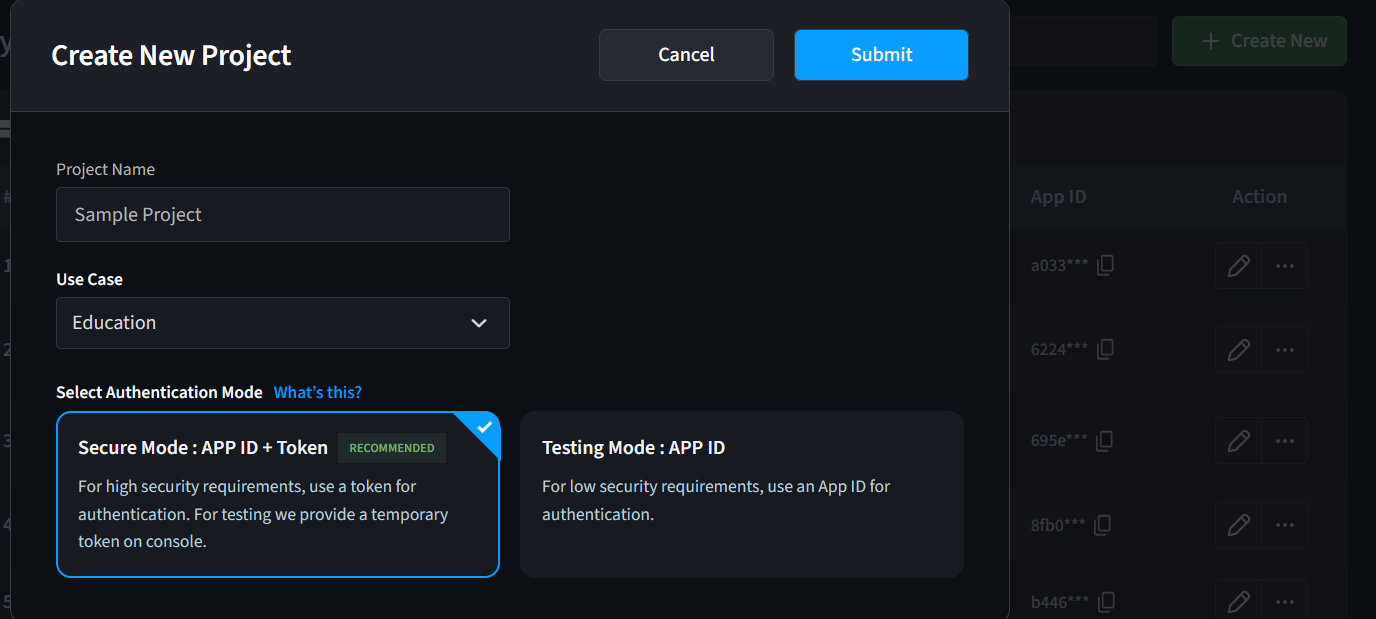
4. Click **Submit**. You see the new project on the **Projects** page.
### Get the App ID [#get-the-app-id]
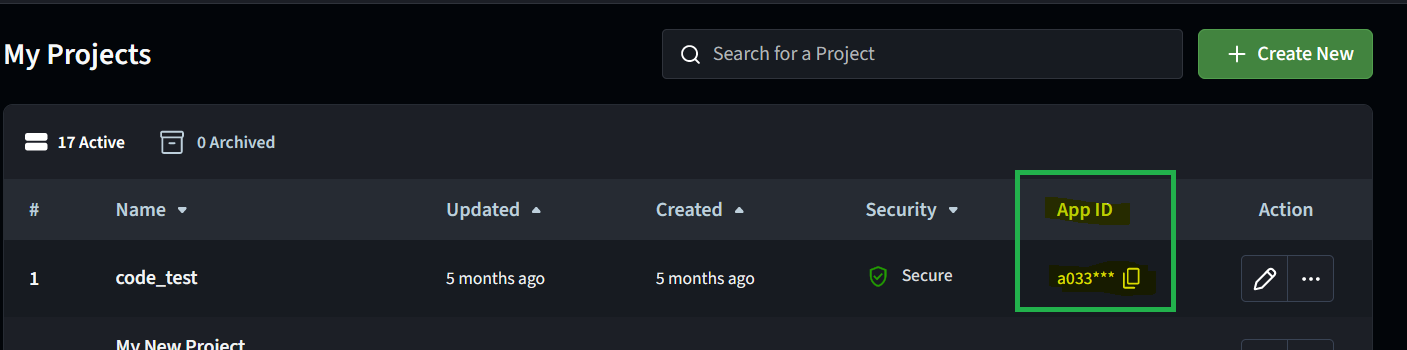
Agora automatically assigns a unique identifier to each project, called an App ID.
To copy this App ID, find your project on the [Projects](https://console.agora.io/v2/project-management) page in Agora Console, and click the copy icon in the **App ID** column.
## Enable and configure Signaling [#enable-and-configure-signaling]
Before using Signaling, you need to enable it for each app ID in Agora Console and configure its main features.
The following steps apply to the new version of Agora Console. If you are using the old one, switch to the new version by clicking **Switch to the new version** at the top of the screen.
### Enable Signaling for your project [#enable-signaling-for-your-project]
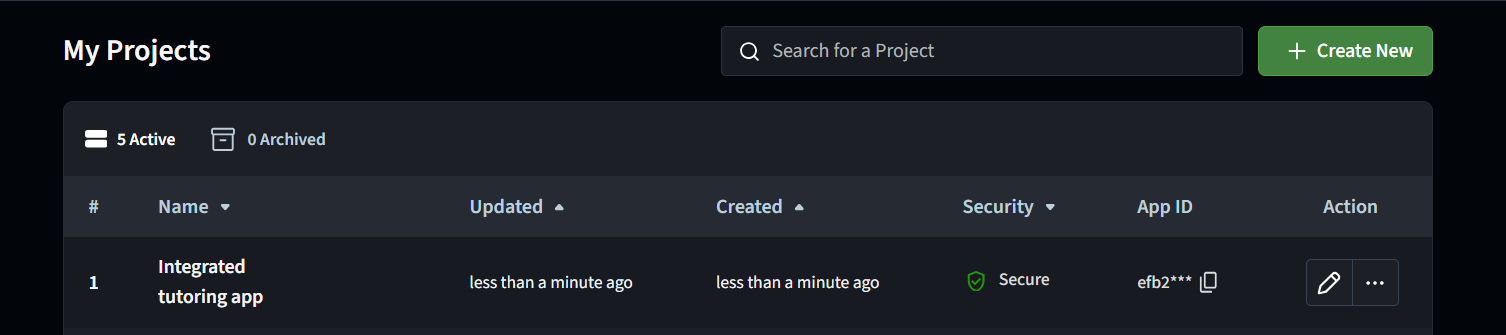
1. Select your project on the [Projects](https://console.agora.io/v2) page and click the corresponding pencil icon to configure it.
2. Go to **All features** > **Signaling** > **Basic information** and select a data center in the dropdown.
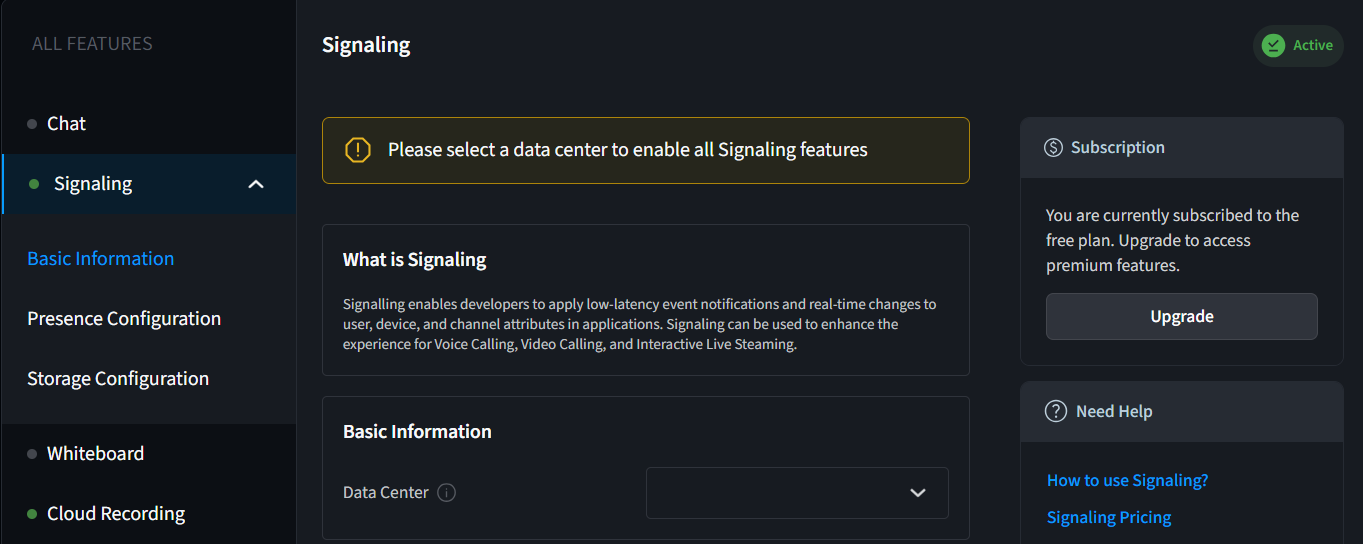
The data center setting determines the storage location for user state data, channel metadata, and user metadata for your application. Once you select a data center, this setting cannot be changed.
1. Go to **Subscriptions** > **Signaling** and subscribe to a plan.
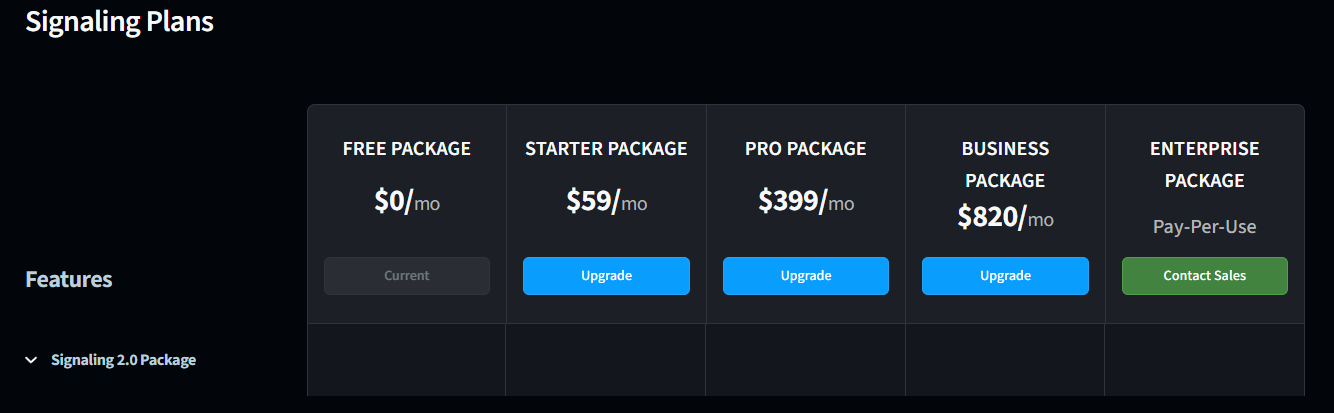
Once subscribed, you will be able to unsubscribe from the same page.
To avoid service disruption, ensure that you are subscribed to either a paid package or the Free Package. Using Signaling without an active subscription will result in account suspension.
### Presence configuration [#presence-configuration]
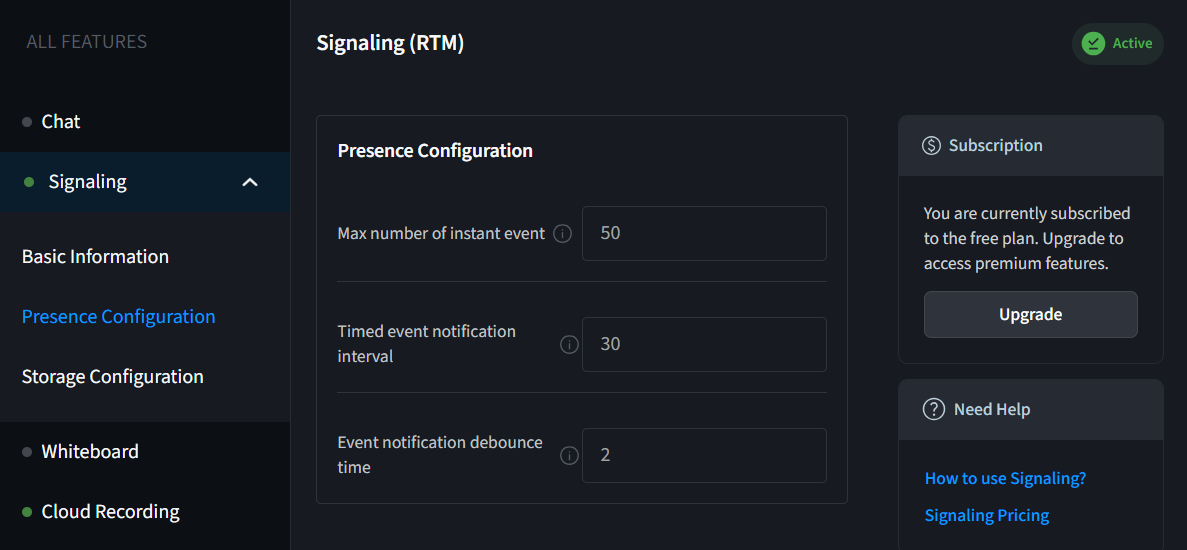
To configure presence, go to **All features** > **Signaling** > **Presence Configuration** in Agora Console and set the following:
* **Max number of instant events**
Sets the maximum number of instant notifications that can be sent. After reaching this limit, Signaling switches to interval mode for sending notifications. The value range is 8–128, with a default value of 50. If your specific requirement is beyond this range, contact [technical support](mailto\:support@agora.io).
* **Timed event notification interval**
Sets how often periodic notifications are sent. The value range is 5–300 seconds, with a default value is 30 seconds.
* **Event notification debounce time**
Specifies the time interval within which no presence event is triggered if a user quickly leaves and re-joins. The default value is 2 seconds.
### Storage configuration [#storage-configuration]
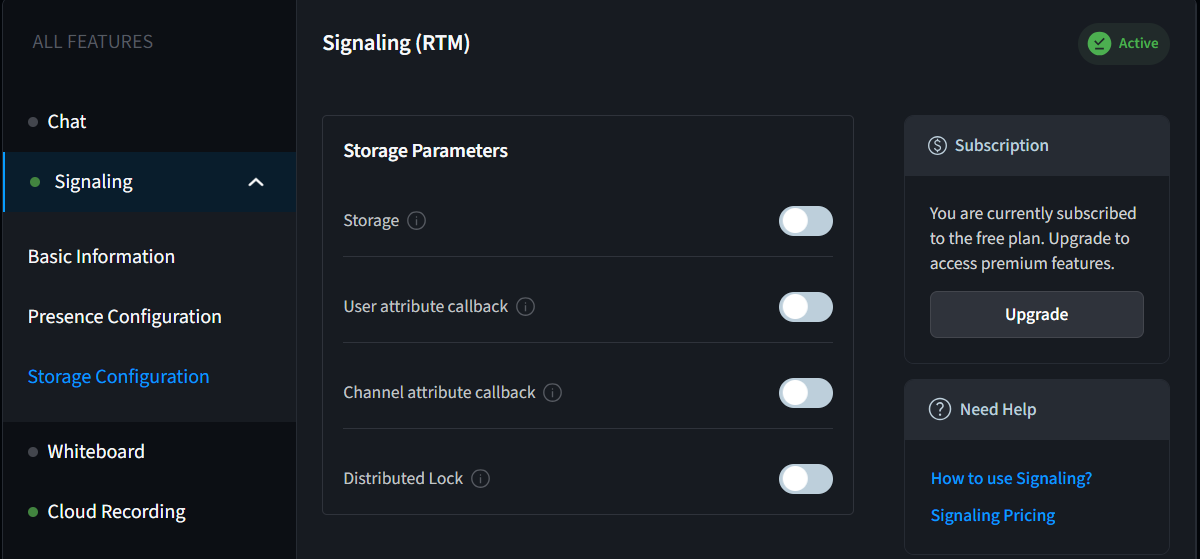
To configure storage, go to **All features** > **Signaling** > **Storage Configuration** in Agora Console and toggle the following:
* **Storage** : Enable/disable storage of user and channel attributes.
* **User attribute callback**: Enable/disable callbacks for user attribute changes.
* **Channel attribute callback**: Enable/disable callbacks for channel attribute changes.
* **Distributed lock**: Enable/disable distributed locks.
### Activate stream channels [#activate-stream-channels]
The activation of Stream Channel functionality in Signaling directly depends on the activation of the 128-host feature in Real-Time Communication (RTC). To ensure proper activation:
1. Submit a formal request to [support@agora.io](mailto\:support@agora.io).
2. Specifically request activation of the 128-host feature.
3. Wait for confirmation before implementing Stream Channel features.
For further assistance or questions regarding this requirement, please contact [Agora Support](mailto\:support@agora.io).
## Security and authentication [#security-and-authentication]
Use the following features from your Agora account to implement security and authentication features in your apps.
### Get the App Certificate [#get-the-app-certificate]
When generating an authentication token on your app server, you need an App Certificate, in addition to the App ID.
To get an App Certificate, do the following:
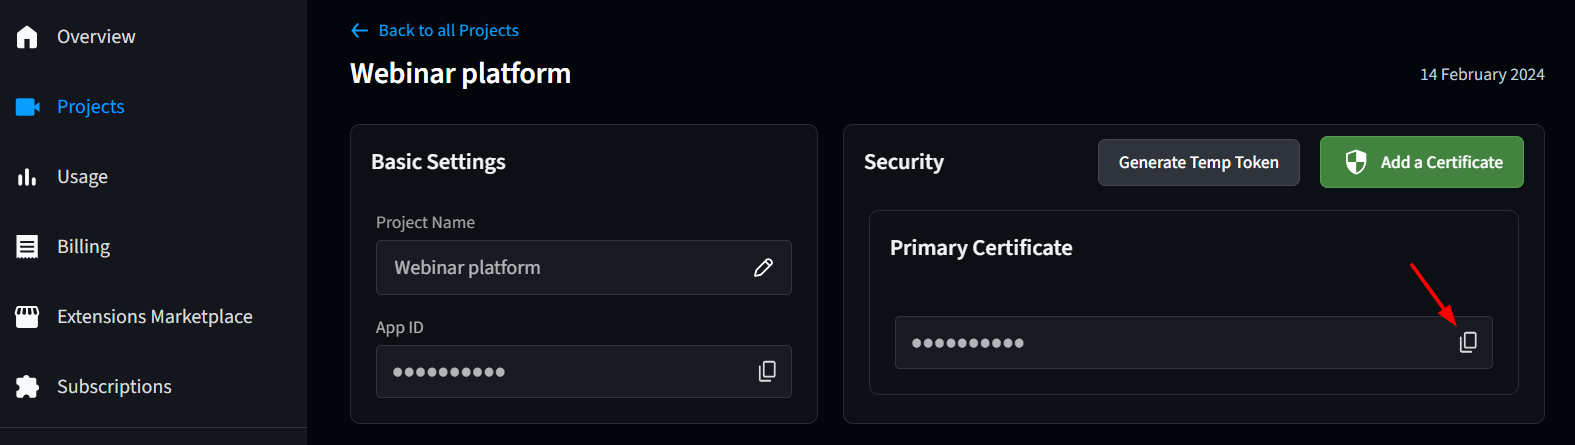
1. On the [Projects](https://console.agora.io/v2/project-management) page, click the pencil icon to edit the project you want to use.
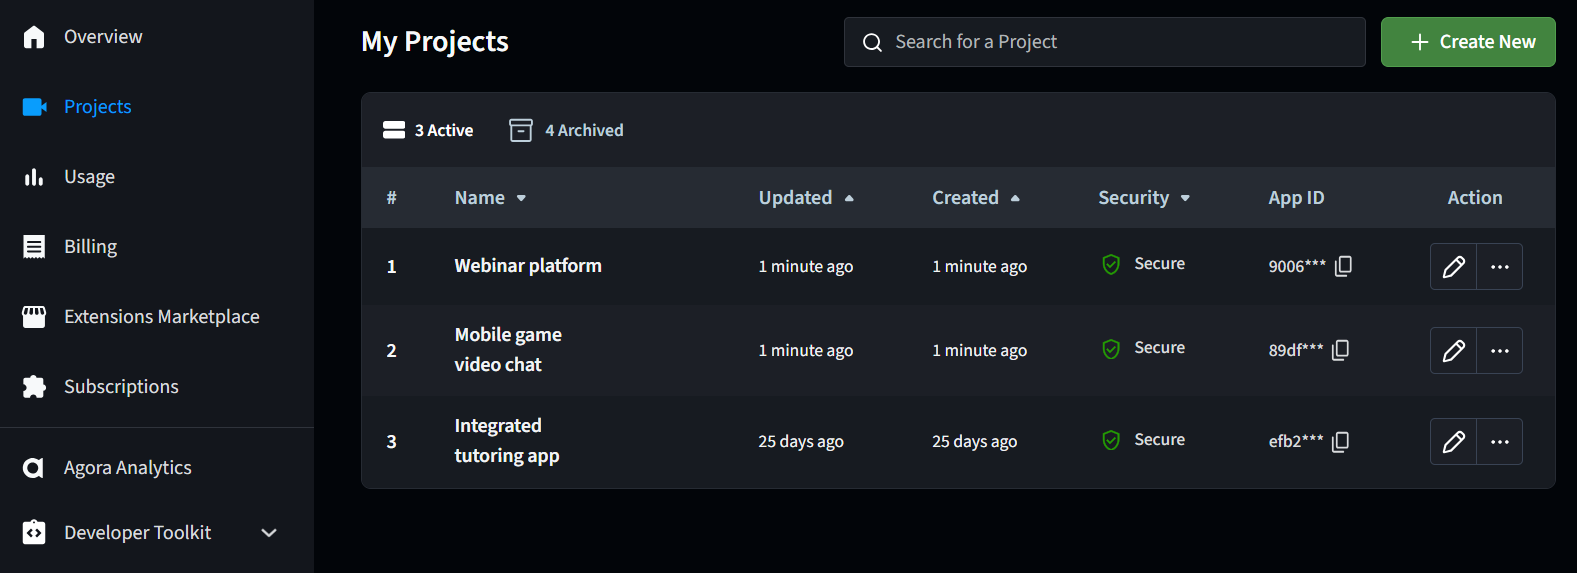
2. Click the copy icon under **Primary Certificate**.
### Generate temporary tokens [#generate-temporary-tokens]
To ensure communication security, best practice is to use tokens to authenticate the users who log in from your app.
To generate a temporary RTC token for use in your Video SDK projects:
1. On the [Projects](https://console.agora.io/v2/project-management) page, click the pencil icon next to your project.
2. On the **Security** panel, click **Generate Temp Token**, enter a channel name in the pop-up box and click **Generate**. Copy the generated RTC token for use in your Signaling projects.
To generate a token for other Agora products:
1. In your browser, navigate to the [Agora token builder](https://agora-token-generator-demo.vercel.app/).
2. Choose the Agora product your user wants to log in to. Fill in **App ID** and **App Certificate** with the
details of your project in Agora Console.
3. Customize the token for each user. The required fields are visible in the Agora token builder.
In Signaling, each authentication token you create is specific for a user ID in your app. You create a token for each user in the channel. When you call `login` using Signaling SDK, ensure that the UID is the same as you used to create the token.
4. Click **Generate Token**.
The token appears in Token Builder.
5. Copy the token and use it in your app.
For more information on managing other aspects of your Agora account, see [Agora console overview](./console-overview.md).