# Use TEN Designer (/en/ai/ten-agent/get-started/use-ten-designer)
> For AI agents: see the complete documentation index at [llms.txt](/llms.txt).
TEN Designer is a browser-based visual development environment that provides the graphical interface for TEN Manager. It simplifies building and debugging applications with the TEN Framework. Instead of working solely with command-line tools and configuration files, TEN Designer provides an intuitive graphical interface for creating, editing, and managing TEN applications and extensions. Following are the key benefits of the TEN Designer:
* **Visual graph editing**: See and modify extension connections through an interactive diagram
* **Simplified dependency management**: Install and manage TEN packages through a user-friendly interface
* **Integrated development workflow**: Build, run, and debug applications without leaving the designer
* **Cloud Store integration**: Browse and install extensions directly from the TEN Cloud Store
* **Cross-platform support**: Works on Windows, Linux, and macOS through your web browser
TEN Designer provides an accessible entry point for developers who prefer visual tools while preserving the full power and flexibility of the TEN Framework.
## Prerequisites [#prerequisites]
Before starting, ensure that you have:
* One of the following operating systems and architectures:
* **Windows**: x86\_64
* **Linux**: x86\_64
* **macOS**: x86\_64, arm64
* A modern web browser to access the TEN Designer interface.
## Install and run [#install-and-run]
Follow these steps to install and run TEN Manager:
1. Open the [TEN Framework releases page](https://github.com/TEN-framework/ten-framework/releases) on GitHub.
2. Find the TEN Manager package for your operating system and architecture. The package uses the naming structure `tman-[OS]-release-[ARCH].zip`.
3. Download the package. For example, to download the Linux x64 package:
```bash
wget https://github.com/TEN-framework/ten-framework/releases/download/0.10.10/tman-linux-release-x64.zip
```
4. Extract the package:
```bash
unzip tman-linux-release-x64.zip
```
5. Optionally copy the binary to a directory in your system `PATH`:
```bash
sudo cp ten_manager/bin/tman /usr/local/bin/
```
6. Verify the installation:
```bash
tman --version
```
7. Start TEN Designer:
```bash
tman designer
```
You see output similar to:
```text
🏆 Starting server at http://0.0.0.0:49483
```
You can run `tman designer` from the root directory of an existing TEN app to automatically load the app in the designer. You can also start TEN Designer from any location and manually load an app later.
8. Open your browser and go to `http://127.0.0.1:49483/` to access the interface.
If TEN Designer is running on a remote machine, replace `127.0.0.1` with the IP address of that machine.
## Interface overview [#interface-overview]
The TEN Designer interface provides easy access to development tools. The upper left corner shows the following dropdown menus:
* **Designer**: Set preferences such as language, theme, and logs
* **App**: Create, load, and manage apps
* **Graph**: Load and manage graphs
* **Extensions**: Install extensions from the extensions store
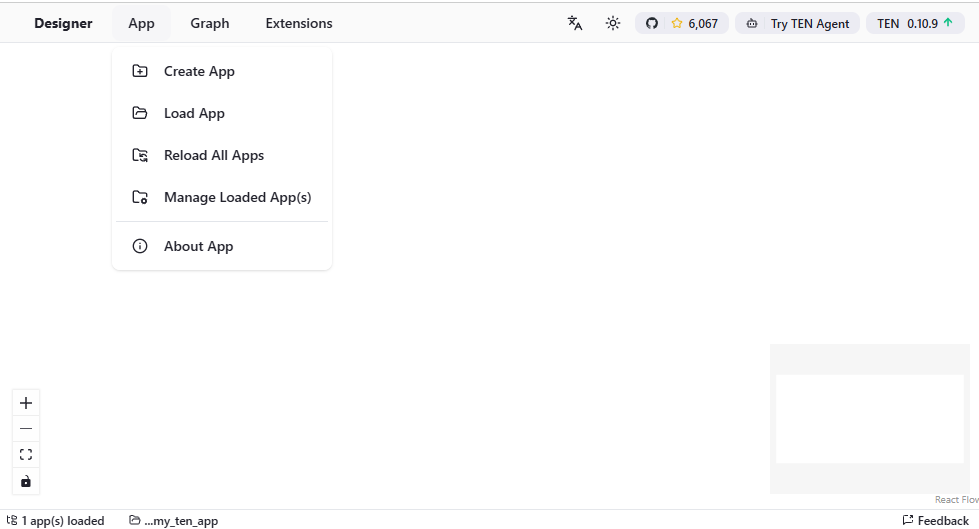
The upper right corner contains the following function buttons:
* **Version button** (rightmost): Displays the current version and automatically checks for updates. When an update is available, an up arrow appears. Click to open the download page.
* **TEN Agent button**: Opens the [TEN Agent](https://agent.theten.ai/) page, which showcases a complete AI agent implementation built with TEN Framework
* **GitHub button**: Links to the [TEN Framework repository](https://github.com/TEN-framework/ten_framework) where you can view source code, documentation, and submit issues
* **Theme and language toggles**: Switch between light and dark modes and select your preferred language
## Working with TEN apps [#working-with-ten-apps]
This section guides you through working with TEN apps in the TEN Designer.
### Load an existing app [#load-an-existing-app]
To load an existing app, use the **Load App** button in the **App** menu. You see the following interface:
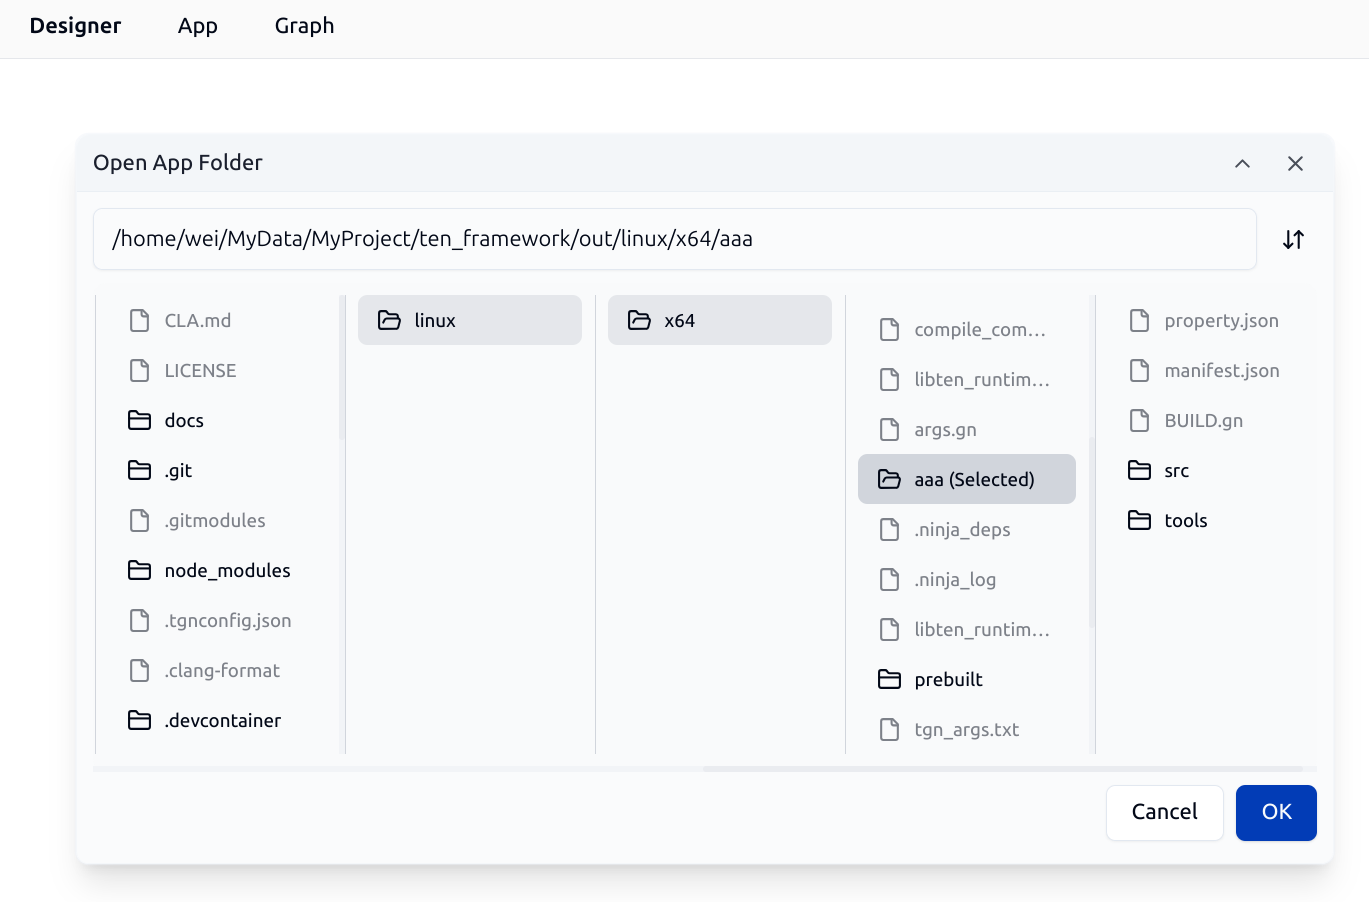
Use the file browser to select the app's root directory. TEN Designer automatically loads the app.
### Manage loaded apps [#manage-loaded-apps]
To manage loaded TEN apps, click the **Manage Loaded App(s)** button in the **App** menu. You see the following **Apps Manager** interface:
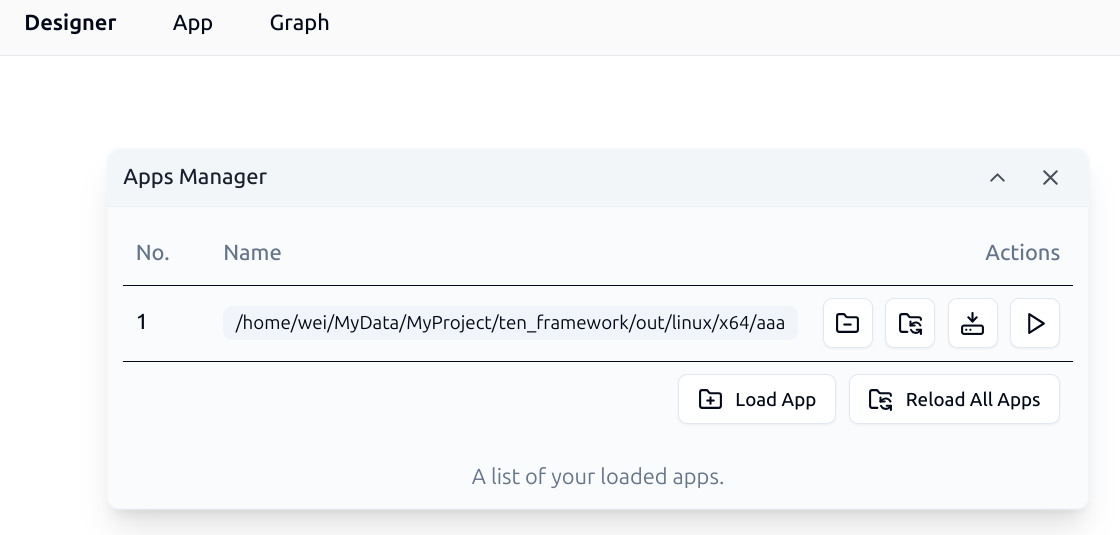
Use the Apps Manager dialog to perform various operations on your loaded applications:
* Unload loaded apps
* Reload specified apps
* Reload all loaded apps
* Install dependencies for specified apps
* Execute predefined scripts for specific apps
### Install app dependencies [#install-app-dependencies]
To install all dependencies for your app using the **Apps Manager**:
1. Open the **Apps Manager** interface in TEN Designer
2. Click **Install All** for your target application
3. Monitor the installation progress in the interface shown below:
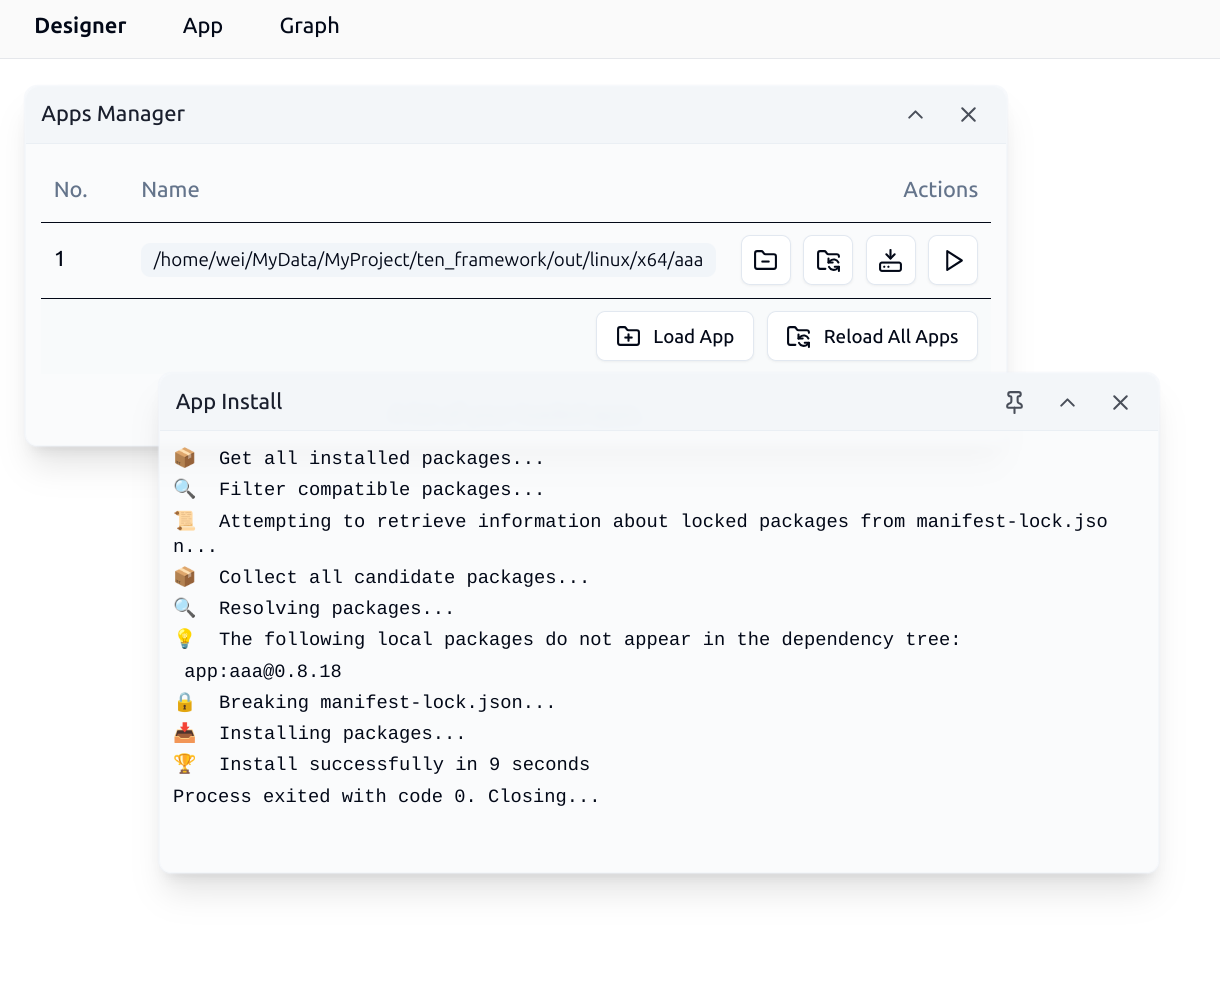
The app's `manifest.json` file defines these dependencies. Following is an example of a `manifest.json` file:
```json
{
"type": "app",
"name": "aaa",
"version": "0.8.18",
"dependencies": [
{
"type": "system",
"name": "ten_runtime",
"version": "0.8.18"
},
{
"type": "extension",
"name": "ffmpeg_muxer",
"version": "^0.1.0"
},
{
"type": "extension",
"name": "ffmpeg_demuxer",
"version": "^0.1.0"
},
{
"type": "extension",
"name": "ffmpeg_client",
"version": "^0.1.0"
},
{
"type": "protocol",
"name": "msgpack",
"version": "^0.8.18"
}
],
"scripts": {
"start": "python3 tools/run_script.py start",
"build": "python3 tools/run_script.py build"
}
}
```
This configuration specifies the following TEN package dependencies:
* `ten_runtime`: The system package of TEN Framework
* `ffmpeg_demuxer`: A TEN Extension package for decoding audio and video
* `ffmpeg_muxer`: A TEN Extension package for encoding audio and video
* `ffmpeg_client`: A TEN Extension package for processing audio and video using the other two ffmpeg extension packages
* `msgpack`: A TEN Protocol package for message serialization and deserialization using the MessagePack protocol
After installing the dependencies, TEN Manager organizes the packages in the following directory structure:
```text
├── ten_packages
│ ├── extension
│ │ ├── ffmpeg_client
│ │ ├── ffmpeg_demuxer
│ │ └── ffmpeg_muxer
│ ├── protocol
│ │ └── msgpack
│ └── system
│ ├── ffmpeg
│ └── ten_runtime
```
Note that the `ffmpeg` system package appears even though it's not listed in `manifest.json`. TEN Manager automatically detects and installs transitive dependencies when `ffmpeg_demuxer` and `ffmpeg_muxer` require the `ffmpeg` package.
### Install TEN extensions [#install-ten-extensions]
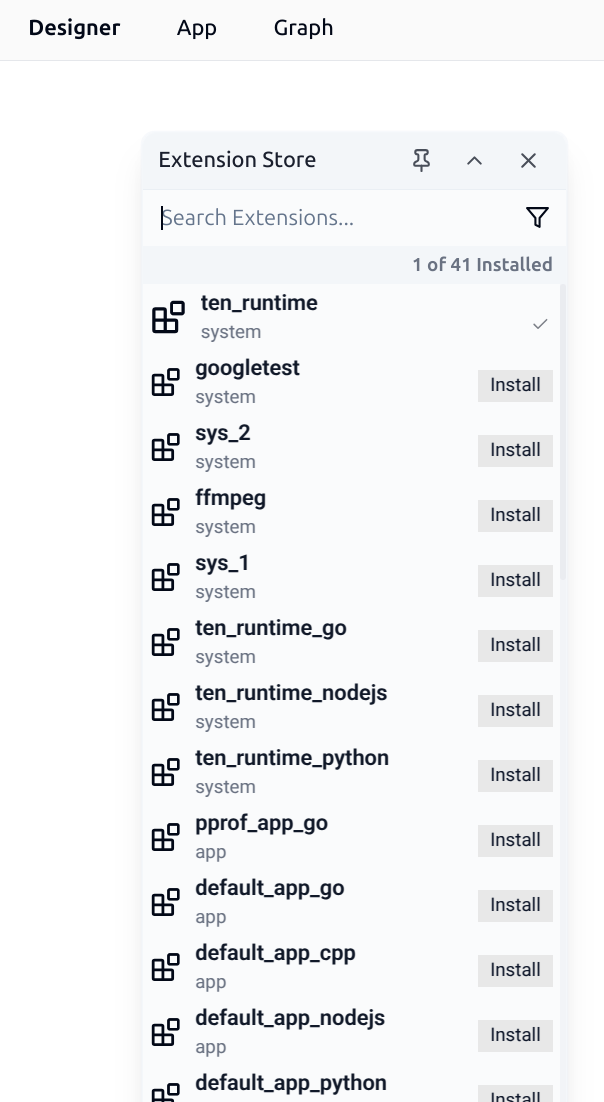
To install extensions from the TEN Cloud Store:
1. Click **Open Extension Store** in the **Extensions** menu
2. Search for the required extension in the store interface
3. Click **Install** to add the extension to your current app
After installation, the new extension appears in your current TEN app and is available for use in your graphs.
### Run a TEN app [#run-a-ten-app]
Use the **Apps Manager** to execute preset runtime operations on the selected app. Click the **Run** button in the **Apps Manager** to open the following interface:
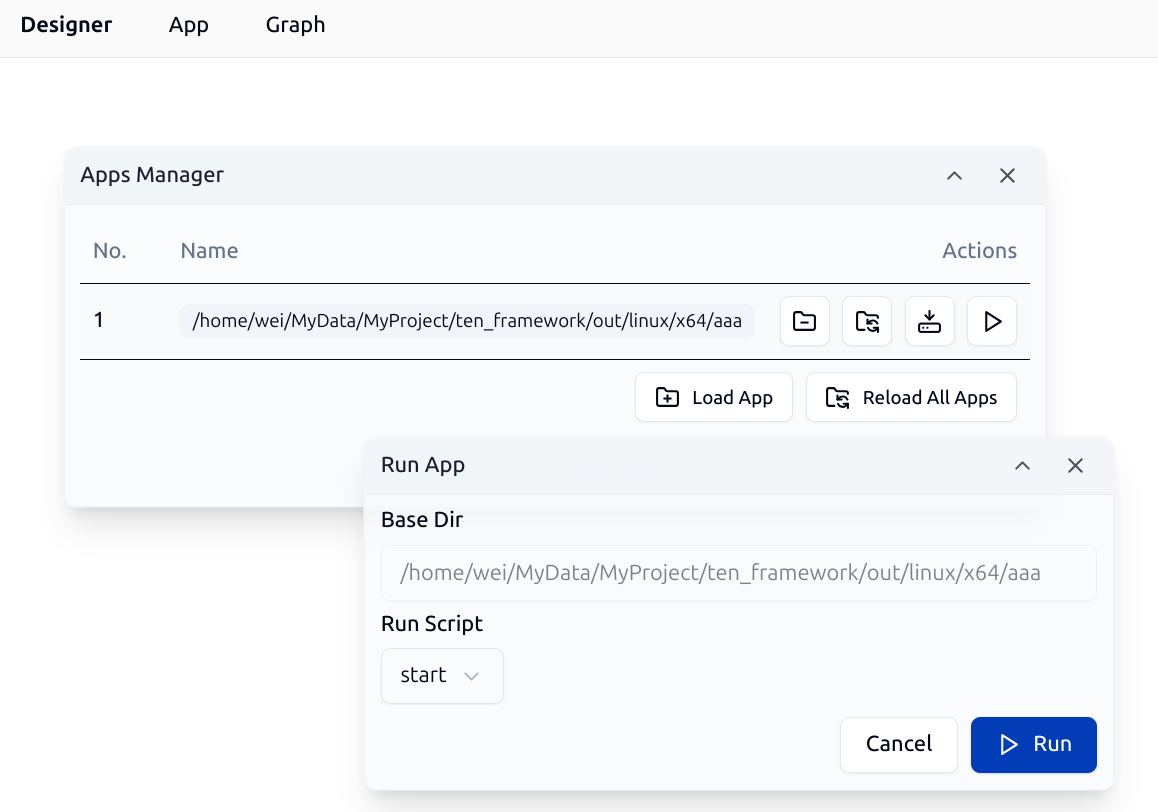
In the dialog, select the preset operation to execute from the dropdown menu. The menu typically includes the following operations:
* **Run App**: Start the app and display output in the TEN Designer message window
* **Build App**: Compile the app, if required. Since TEN Framework supports multiple programming languages, compilation requirements vary by language. For example, C++ apps require compilation, while Python apps run directly without a build step.
Following is the build interface for a TEN app developed in C++:
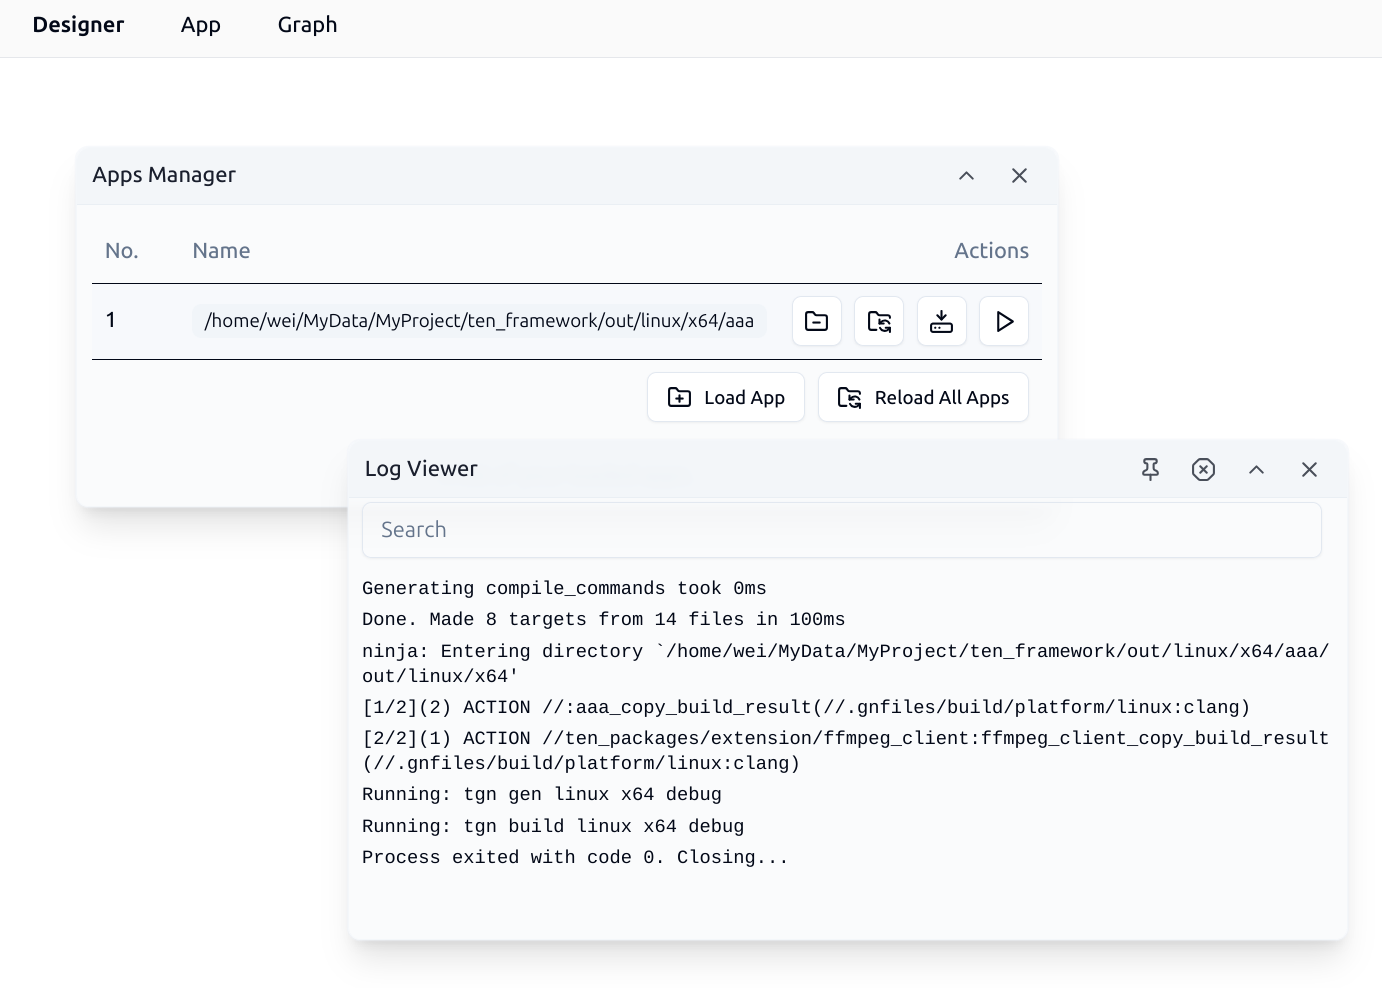
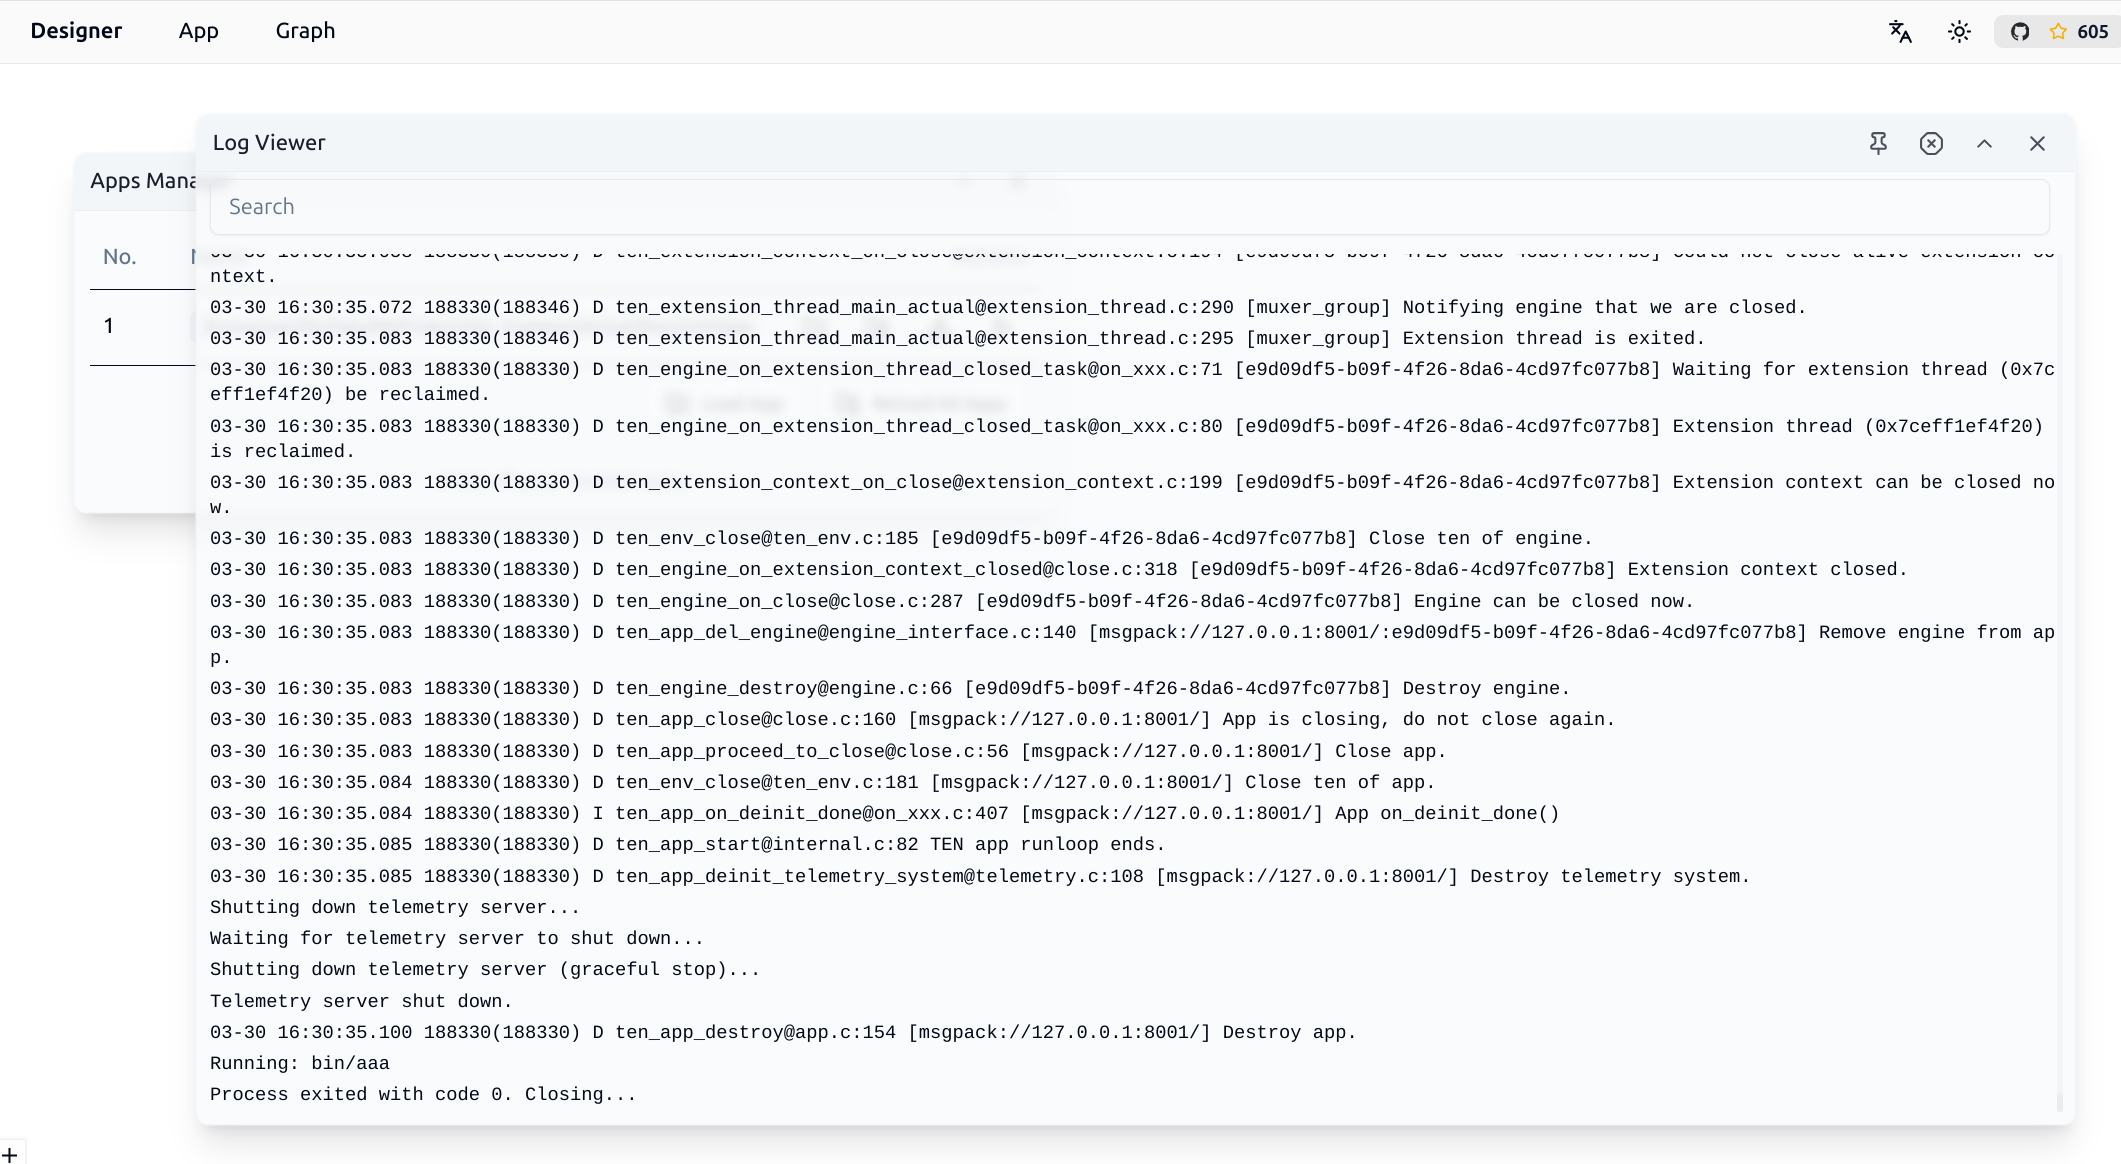
After the build is complete, continue with the startup operation. The system displays a window showing the TEN app's runtime logs in real-time:
## Working with TEN graphs [#working-with-ten-graphs]
TEN graphs define how extensions connect and communicate within your application, providing a visual representation of your app's data flow and processing pipeline.
### Load an existing graph [#load-an-existing-graph]
To load an existing TEN graph, click the **Load Graph** option in the **Graph** menu. After the graph loads, you see an interface similar to the following:
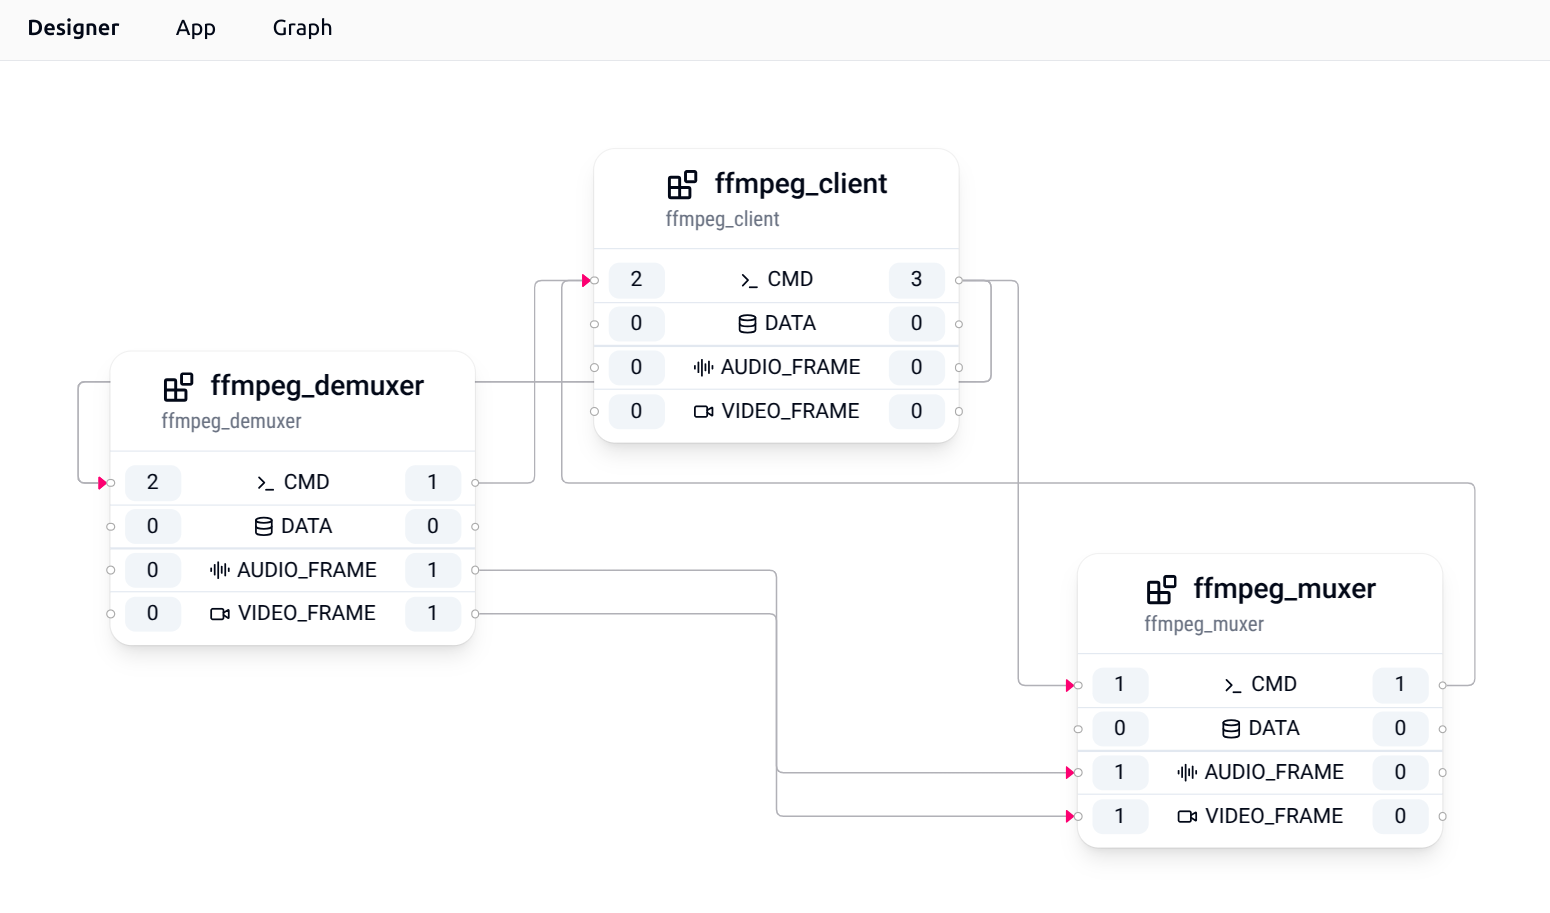
This sample graph contains three TEN extensions:
* **ffmpeg\_demuxer**: Decodes audio and video
* **ffmpeg\_muxer**: Encodes audio and video
* **ffmpeg\_client**: Processes audio and video
Each TEN extension has defined inputs and outputs. For example, the `ffmpeg_demuxer` extension includes:
* 2 command inputs
* 1 command output
* 1 audio frame output
* 1 video frame output
Click the numbered input or output buttons on any extension to open a connection management dialog:
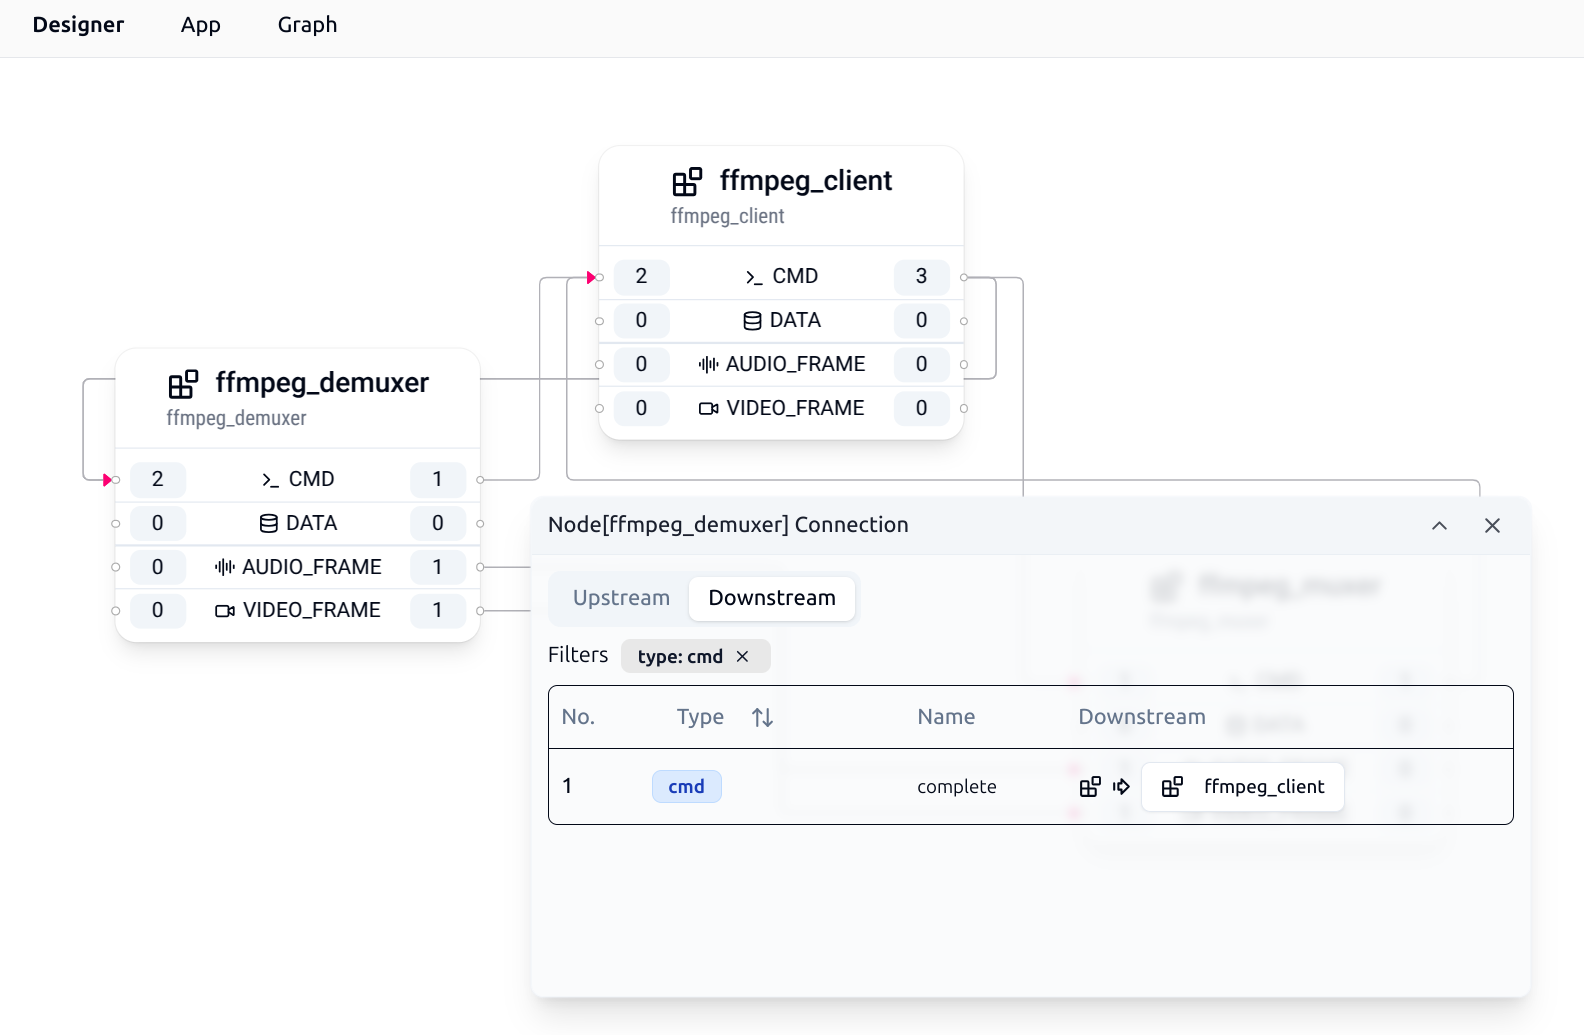
Use this dialog to view and manage connections between extensions in your graph.
### Organize graph layout [#organize-graph-layout]
You can organize your graph layout as follows:
1. **Manual positioning**: Drag extensions to desired locations
2. **Automatic layout**: Click **Auto Layout** in the **Graph** menu to automatically arrange all extensions
The auto-layout feature is particularly helpful when your graph becomes cluttered or after adding multiple new extensions.
### Access extension files and tools [#access-extension-files-and-tools]
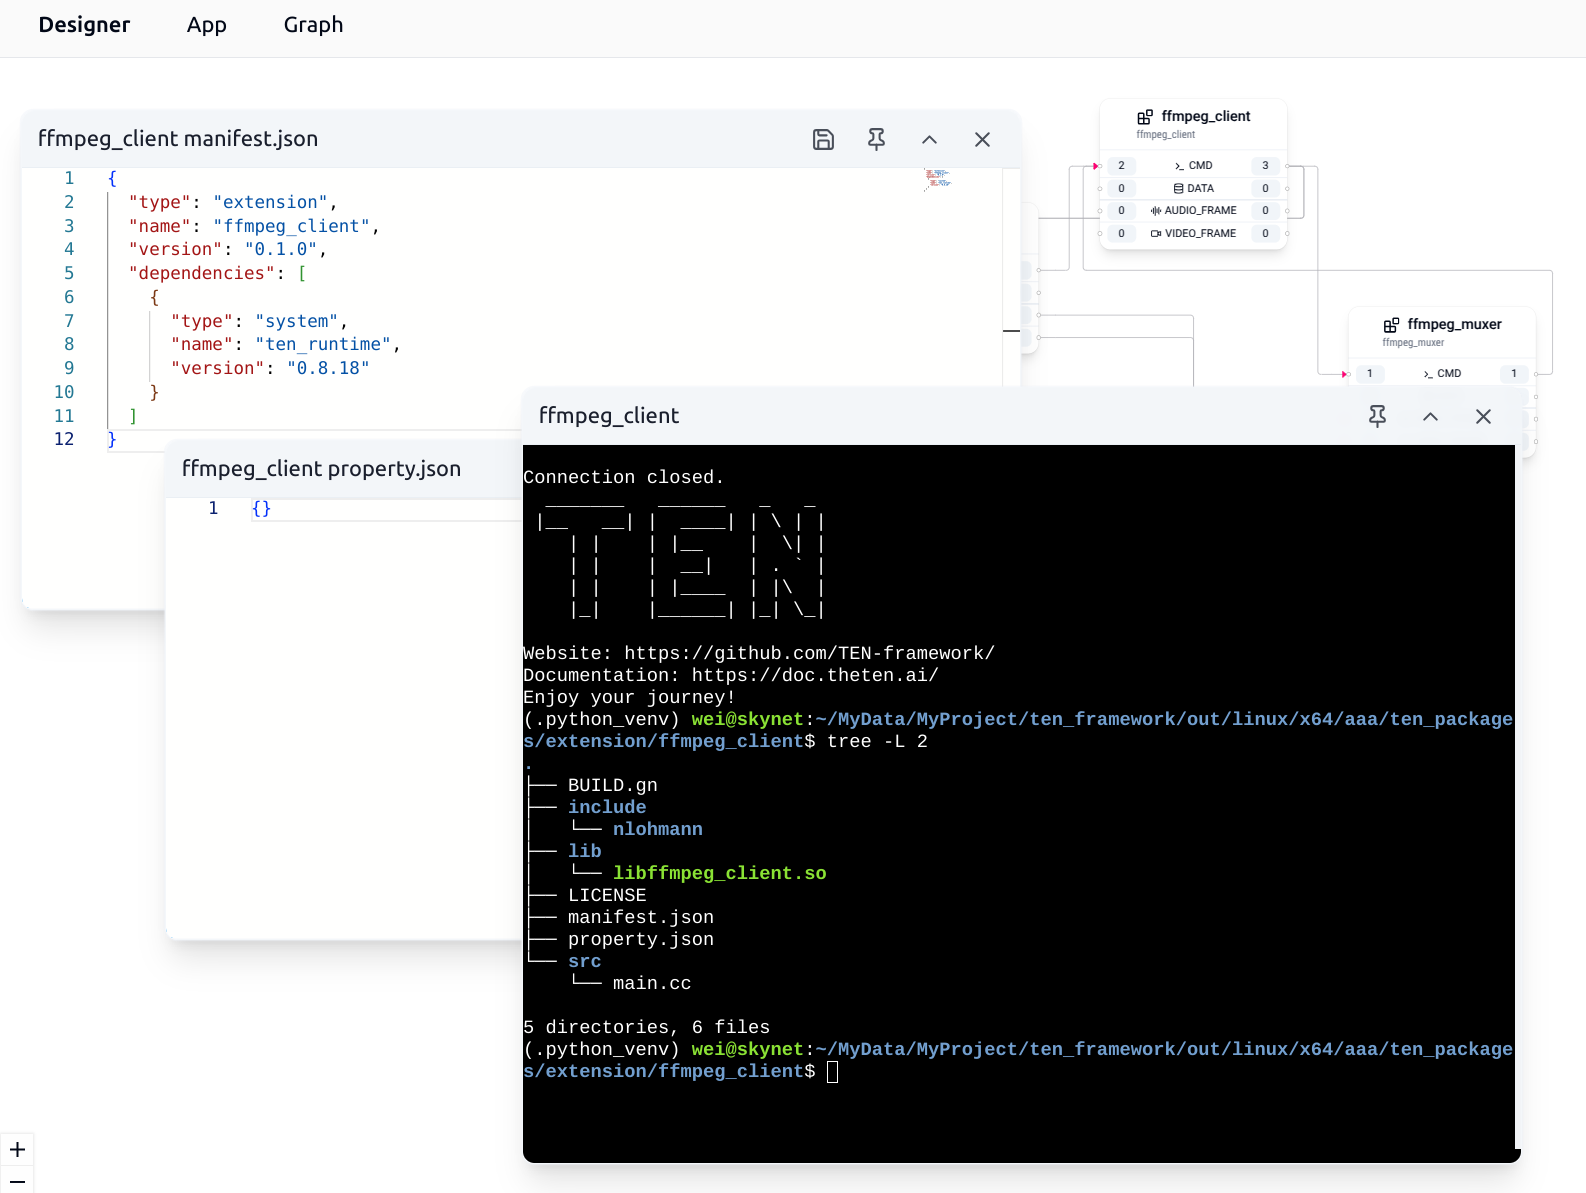
Right-click any extension in the graph to open its context menu:
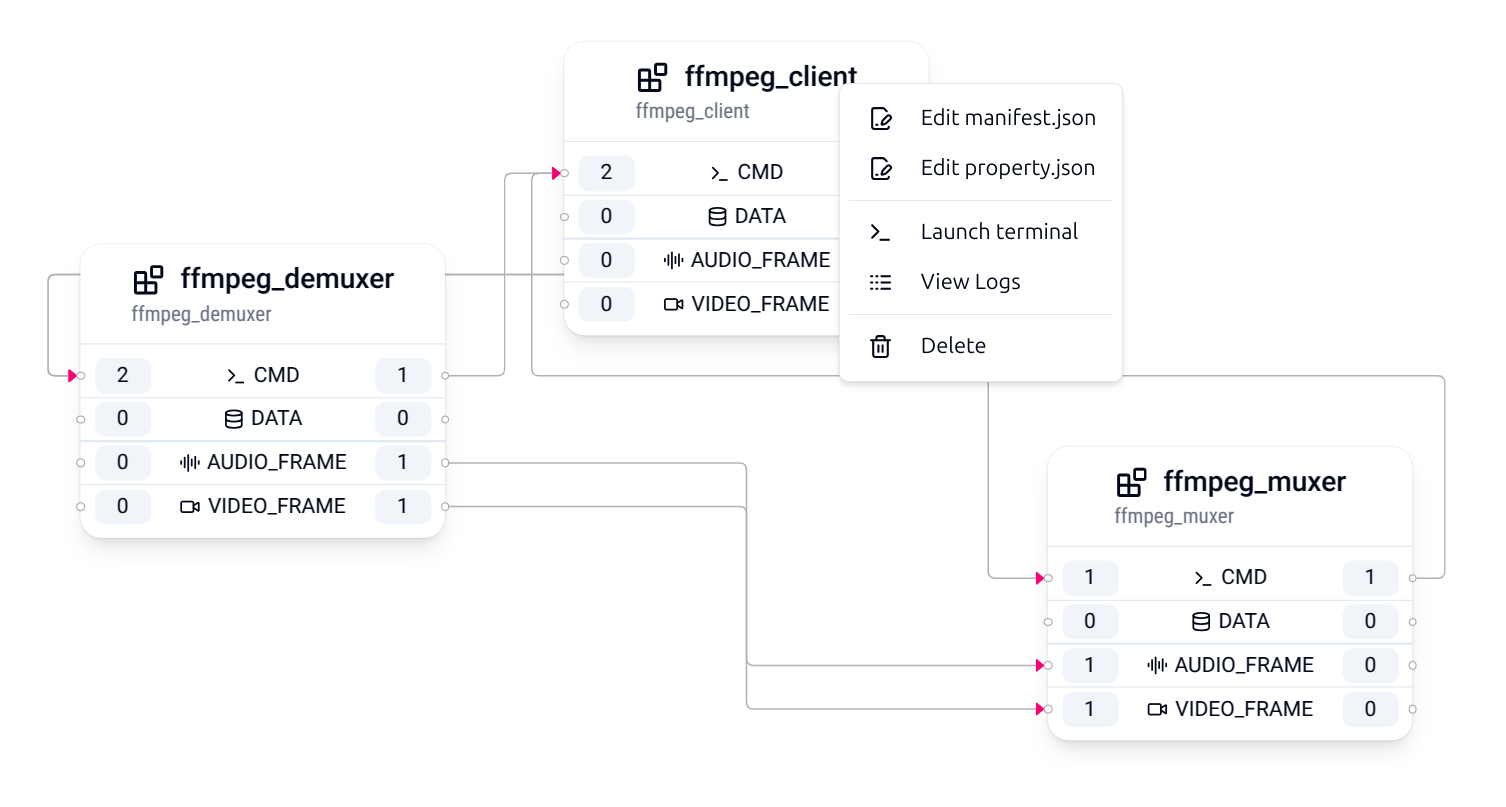
The context menu provides quick access to extension files and tools:
* **Edit manifest.json**: Edit the extension's configuration and API definitions
* **Edit property.json**: Modify the extension's runtime properties
* **Launch terminal**: Launch a terminal in the extension's root directory
* **View logs**: Display the extension's runtime logs and debug information
* **Delete**: Remove the extension from the current graph
## Documentation window [#documentation-window]
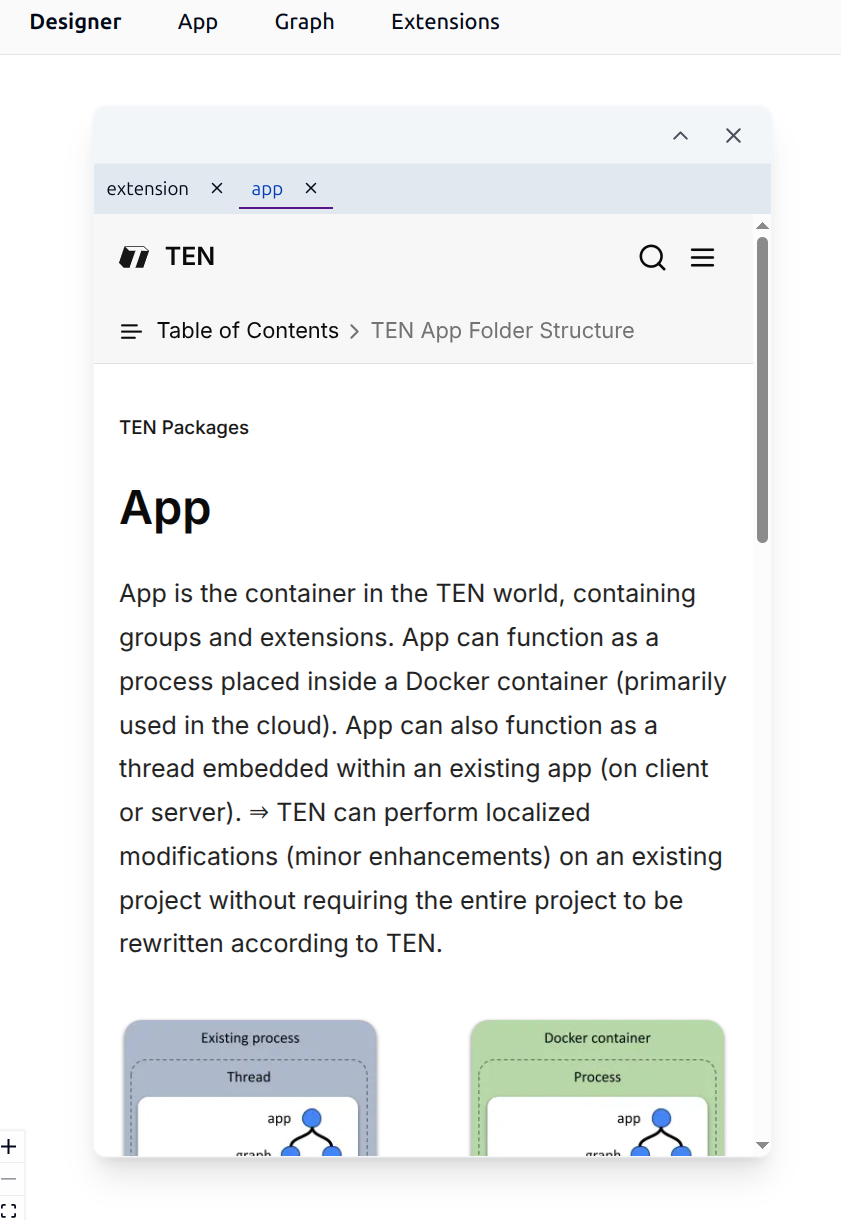
TEN Designer has integrated documentation that allows you to view TEN Framework concepts and terminology. For example, select **About App** from the **App** dropdown menu to open the documentation window and display general information about TEN Apps and their structure.