# Set up a campaign (/en/ai/studio/deploy/campaign)
> For AI agents: see the complete documentation index at [llms.txt](/llms.txt).
Campaigns enable your deployed agents to make outbound calls to a list of contacts. You can use campaigns for sales outreach, customer follow-ups, appointment reminders, surveys, and other automated calling scenarios.
## Before you begin [#before-you-begin]
Before creating a campaign, consider the following:
**What is your goal?** Define the purpose of your campaign, such as appointment confirmations, payment reminders, customer satisfaction surveys, or lead qualification. This determines the agent template and prompt you should use.
**Who are you calling?** Only call contacts who have given consent to be contacted. This includes existing customers with opted-in consent, leads who requested information, or users who have an existing relationship with your business.
**When should you call?** Call during business hours in your customer's time zone. Avoid meal times and respect do-not-call hour restrictions in your region.
## How campaigns work [#how-campaigns-work]
When you create a campaign, you select a deployed agent and provide a contact list. The agent calls each contact in the list using the imported phone number you specify as the caller ID. You can include [template variables](../build/prompt-design#template-variables) in your contact list. The agent references these variables during conversations through the LLM's system prompts and greeting messages.
## Prerequisites [#prerequisites]
* An [imported phone number](import) to use as caller ID. If you are using Twilio, see [Set up SIP trunk](sip-trunk) first.
* A [deployed agent](deploy-agent) configured for your use case
* A contact list in CSV [format](#contact-list-format) with required phone numbers
## Create a campaign [#create-a-campaign]
To create a new campaign:
1. In Agent Studio, select **Campaign** from the sidebar.
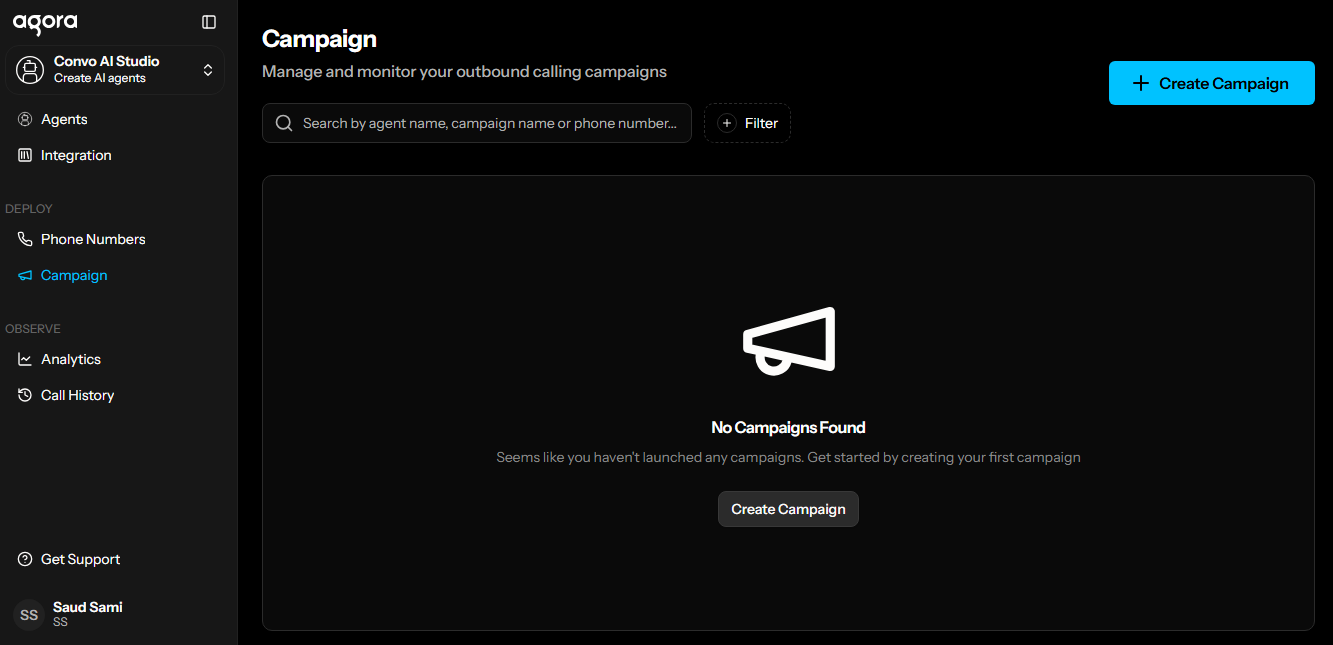
2. Click **Create Campaign**.
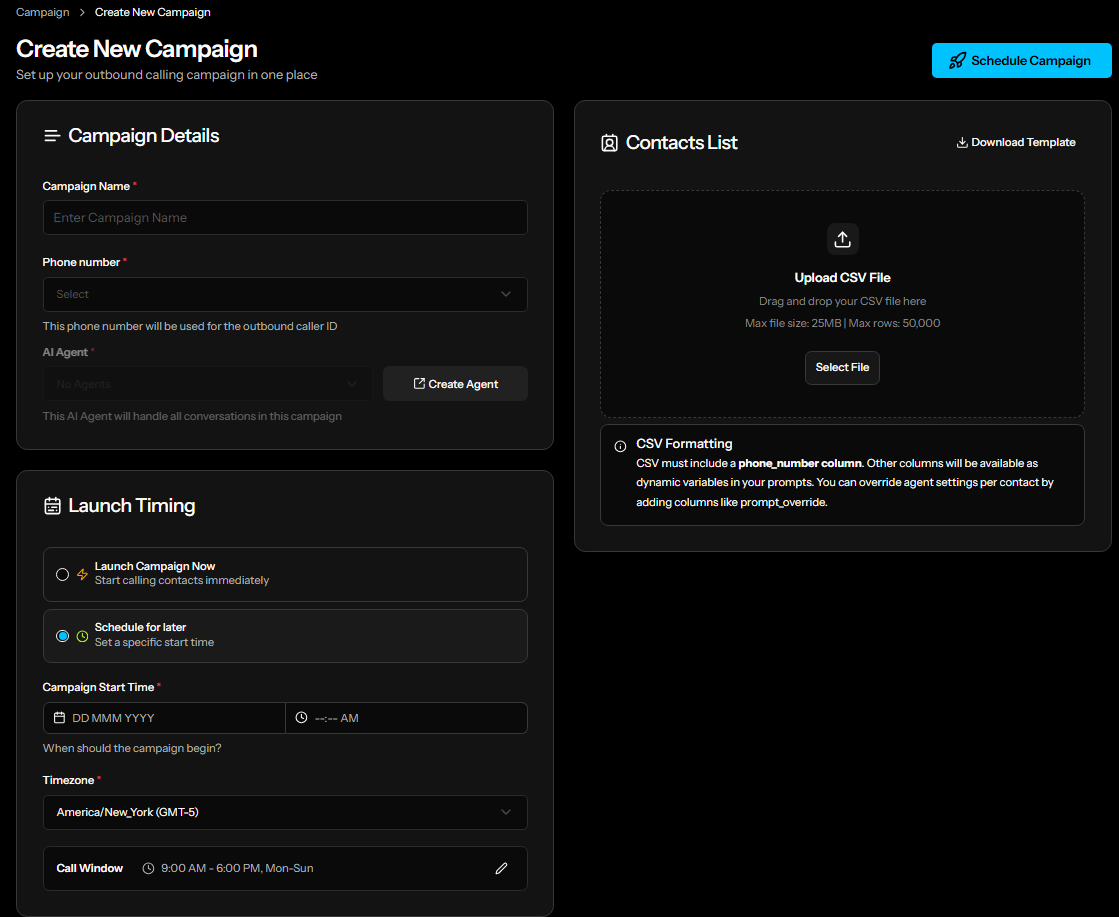
3. Configure the campaign details:
* **Campaign Name**: Enter a descriptive name to identify this campaign.
* **Phone Number**: Select the imported phone number to use as the outbound caller ID.
* **AI Agent**: Select the deployed agent that will handle the calls.
4. Upload your contact list in the **Contacts List** panel. Click **Select File** or drag and drop a CSV file into the upload area. See [Contact list format](#contact-list-format) for requirements.
Info
Maximum file size: 25 MB. Maximum rows: 50,000.
5. Configure launch timing:
* **Launch Campaign Now**: Start calling contacts immediately after creation.
* **Schedule for Later**: Set a specific **Campaign Start Time**, **Timezone**, and **Call Window** to control when calls are made.
6. Configure call settings:
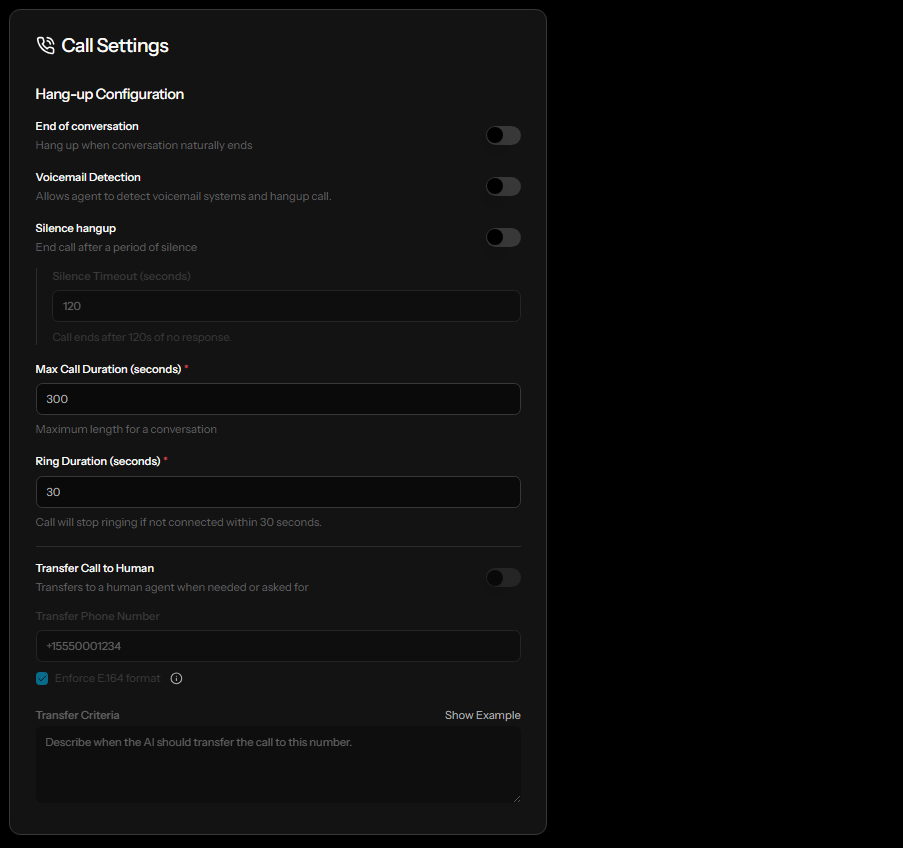
* **Hang-up Configuration**
* **End of conversation**: Hang up when the conversation naturally ends.
* **Voicemail Detection**: Allows the agent to detect voicemail systems and hang up the call.
* **Silence hangup**: End the call after a period of silence.
* **Silence Timeout** (seconds): Duration of silence before ending the call. Default: 120 seconds.
* **Max Call Duration** (seconds): Maximum length for a conversation. Default: 300 seconds.
* **Ring Duration** (seconds): Maximum time to wait for call connection. The call stops ringing if not connected within the specified duration. Default: 30 seconds.
* **Transfer Call to Human**: Transfers the call to a human agent when needed or requested by the caller. When enabled, configure the following:
* **Transfer Phone Number**: The phone number to transfer the call to, in E.164 format.
* **Transfer Criteria**: Describe when the agent should transfer the call to this number.
* **Transcripts & Recording**
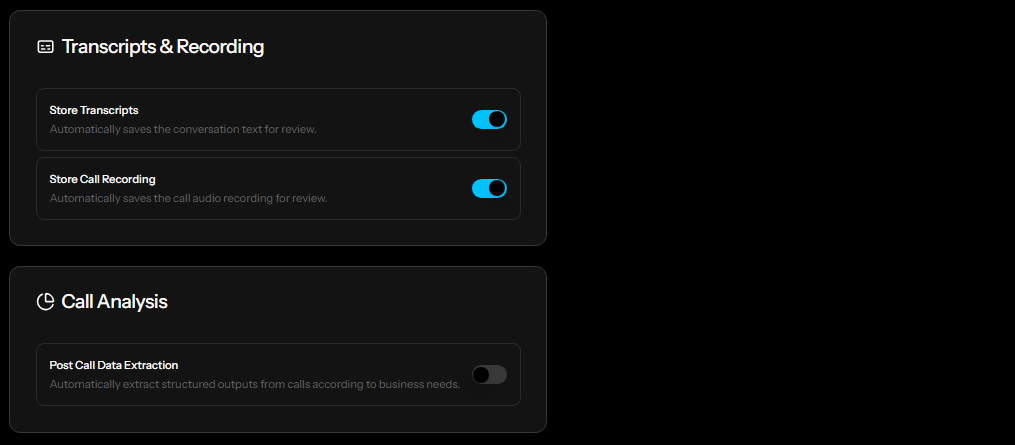
* **Store Transcripts**: Automatically saves the conversation text for review.
* **Store Call Recording**: Automatically saves the call audio recording for review.
* **Call Analysis**
* **Post Call Data Extraction**: Automatically extracts structured outputs from calls according to your business needs.
7. Click **Schedule Campaign** to save your campaign.
Compliance
Outbound calling is subject to legal requirements that vary by region. In the United States, the Telephone Consumer Protection Act (TCPA) requires written consent for marketing calls. Always identify your business name and provide a callback number. Honor do-not-call requests immediately and respect calling hour restrictions (8 AM to 9 PM in the recipient's time zone). Consult your legal team before running large outbound campaigns.
## Contact list format [#contact-list-format]
Your contact list must be a CSV file with the following requirements:
* `phone_number` (required): Phone numbers in E.164 format. For example, `+1234567890`.
* Add columns for variables you want to use in your agent's prompts. Column names become variable names available in your **Prompt** configuration.
* To override agent settings per contact, add columns like `prompt_override`.
You can download a template from the **Contacts List** panel by clicking **Download Template**.
### Sample contact list [#sample-contact-list]
The following is an example of a contact list for appointment confirmation:
```text
phone_number,name,appointment_time,preferred_language
+19168888860,John Doe,2025-01-15 10:00 AM,English
+19168888861,Jane Smith,2025-01-15 11:00 AM,Spanish
```
In this example, the agent can reference `{{name}}`, `{{appointment_time}}`, and `{{preferred_language}}` in its system prompts and greeting messages when calling each contact.
## Manage campaigns [#manage-campaigns]
To view and manage your campaigns:
1. In Agent Studio, select **Campaign** from the sidebar.
2. The Campaign page displays all your campaigns with their current status and progress.
3. Use the **Actions** menu to:
* **Edit**: Modify scheduled campaigns before they start.
* **View Results**: Review completed campaign performance.
* **Delete**: Remove campaigns.
## Next steps [#next-steps]
* [Analytics](../observe/analytics): View performance metrics for your campaigns
* [Call History](../observe/call-history): Review individual call transcripts and outcomes